Part nostalgia-bomb, part note-taking and part FAQ, what started in GameTrailers as a video game blog is now on Blogger. This blog is a look back at video games, both popular and obscure, from the video game industry's infancy all the way to the previous console generation.
All three dungeons are completely identical, although one of the cots has a sheet over it.
Once you're out of the dungeon, go east. Go up the stairs and peer through the keyhole on the upper level door. If you hear voices from the door at the upper level, head into the lone door on the east wall. You'll meet Jollo! He'll tell you Cassima is upstairs, and if you can find something incriminating that can be used against al-Hazred, you could be able to stop him.
Give him the replica of Shamir's lamp you got from the lamp trader. Jollo will tell you it's an exact replica, and that he'll take care of the magic lamp swap.
Leave Jollo's room and head north from there. You'll be in a short hallway with one door. If you use the eye on it, you'll notice the plaque on the door reads "Guard room." If you use the hand on the door twice, you'll be thrown in the dungeon and your game will be finished...almost! Jollo frees you, but tells you to be careful as he may not be able to free you this time...and if you actually do this again, you'll be proven right...almost. Use the Skeleton Key from the Realm of the Dead. If you do it a third time, though, you're screwed.
Head to the Pawn Shop and trade for the painting brush, then head back out. Give the lamp you used for the rain spell to the lamp peddler. You'll then see the lamps that the peddler has. Pick the second one from the right, since it looks exactly like Shamir Shamazel's lamp. The peddler will leave, but not before trying to rub the lamp you gave him to see if there's a genie inside...and finding nothing.
Head back to the castle and walk to the side of it. You've already got the River Styx water and swamp ooze in the teacup. All that's left is to stir it with the black horse feather. The color drains from the feather and the thick water turns into paint. From there, use the paintbrush on the castle wall, and read the Magic Paint spell from the spellbook. The door becomes real, and you'll be able to enter...but once you go in, there's no turning back.
You'll end up in the basement. If you stay in this area long enough, you'll hear the sound of guard dogs opening a door and approaching your position. Head into one of the three dungeon doors to the right, preferably the left or middle. You'll find a ghost of a young boy sobbing. This must be Ali. If you speak to him, he can't find his mother. Use the handkerchief on him, and he'll be able to feel her now. Before he goes, he'll tell you that there is a hidden door behind a "man of steel," or suit of armor. Nobody knows about it but him.
Talk to the gate. After some talk, you'll have to answer a riddle in order to pass.
"My first is foremost legally, my second circles outwardly, my third leads all in victory, my fourth twice ends a nominee, my whole is this gate's only key."
The answer is love, which you've seen from the piece of paper you got from the spider's web on the Isle of Wonder. The gate reluctantly opens up and Alexander walks through.
You'll be in the hall of the Lord of the Dead himself. Talk to one of the guards and you will be escorted to him. The Lord of the Dead is amazed that you have come all the way here. He tells you to kiss his hand and become one of the spirits. If you talk to him twice, you will die at his hand.
Use the gauntlet on the Lord of the Dead. Alexander will challenge Death for the souls of Queen Alloria and King Caliphim. Death challenges you with this task: make him cry, which is something he's never done. Use the Magic Mirror on the Lord of the Dead. He sees what he has become before shedding a single gray tear. He revives Queen Alloria and King Caliphim and lets you leave on his trusty steed. You'll also lose the mirror after you hand it to him, as it breaks once Death drops it. Keep that in mind for later.
You'll land at the Isle of the Crown. King Caliphim and Queen Alloria will gather their allies, and Caliphim asks you to protect Cassima.
After you take the Skeleton Key off of the floor, give the ticket to the ticket man. You'll instantly enter the Land of the Dead. You'll be on a path to the underworld that has the River Styx below. You'll have to click carefully, as you will fall and die instantly if you fall off the edge of the path.
You'll also find the body of a dead knight. This must be the knight that the Archdruid told us about. Examine it with the eye icon, and you'll find a tattered blue ribbon. You won't be able to take it, but you can take take the black gauntlet on his hand. On the gauntlet is a message. "Flesh may cross the portal and seek its master Death. Flesh may go where Death has trod, and challenge like Scheherezade he who reigns beneath the sod, to spare a mortal's breath."
When you get close to the end of the path, you'll meet Charon, the boatman of the River Styx. His boat is waiting. Use the teacup on the River Styx to collect some of the river water, then try to get on the boat. Charon won't let you, and sticks his hand out waiting for some sort of payment. Give him the two old coins from the catacombs. He'll accept the fare and wave you onto the boat.
Once you're on the other side, you'll be standing at Death's door...literally. If you walk straight up to it, the gate turns into a menacing face and eats you, killing you. But if you use the hand icon on it, it will still turn into a face but it will not kill you straight away.
You may have seen two ghosts walking around in circles. If you speak to them, you'll find out they are Queen Alloria and King Caliphim. They were stabbed to death in their beds by the Vizier, and they know Cassima won't be safe for long. Caliphim, whose spirit is broken and has not spoken since, finally speaks, saying he has failed Cassima.
The only person who would be able to help you is the Lord of the Dead...but he shows no mercy. You'll have to do some convincing to get him to change his mind. Alloria gives you a ticket into the Land of the Dead.
Going to the east leads to a narrow path that leads to a strangely familiar cave. You'll find a spirit of a woman crying out for her little boy, Ali. If you speak to her, you'll find out Ali's spirit has been lost in the land of the living, but she cannot leave to show him the way. She hands you a handkerchief, and that if you find him, tell him his mother is waiting and that the handkerchief will help him head to the Realm of the Dead.
We might as well head to that skull. When you get there, you'll find out it's the place you go when you die during the game.
This is a place. We're actually here and we're not dead.
The guy to the left (who usually hands you a ticket when you die) is wearing ceremonial armor and has a horse-like head with a horn. A large bone key ring hangs from his waist. The guy to the right (who takes the ticket) is a uniformed skeleton who waves them on into the underworld. The two naked skeletons are pretty much there for show.
The guy to the left won't give you a ticket, and the guy to the right won't let you get in. If you try to walk past him, he'll pull out a sword, causing Alexander to step back. Thankfully we have a ticket from Queen Alloria.
At the lower-right is a xylophone made of bones. If you use the hand icon on the "sticks," Alexander will play the xylophone and the skeletons will dance, leading to a slightly over-the-top (by King's Quest standards) musical number. The guy with the key ring will lose his key and it will land near Alexander. You'll finally be able to get the skeleton key.
Take the glowing oak embers from the fire. To do that, use the skull on them and you'll fill the skull with them. The skull looks more foreboding with them. Use the rotten egg on the skull to add the sulphur, then use the single strand of Cassima's hair on the skull.
You're done here, so head back to the Isle of the Sacred Mountain.
Head back up the Cliffs of Logic. At least you don't have to deal with four or five screens of careful clicking and climbing. You'll see Nightmare eating berries from the nightshade bush at the top. If you try to use the hand icon on Nightmare, Nightmare will fly away. Instead, use the Charming a Creature of the Night Spell on it. Alexander will be able to ride on to the Realm of the Dead.
If you missed any items from the catacombs, you can go back into them and search for them. This time around, all the traps will be disarmed, so you don't have to worry about dying again. Thankfully, we've found everything at this point.
When you show up at the Realm of the Dead, you'll see two ghosts. You'll also see animated corpses. If they touch you, you'll die, so stay away from them.
Give Rotten Tomato to Bump-on-a-Log. He has arms and hands, and he'll throw Rotten Tomato at Stick-in-the-Mud. He'll respond by throwing swamp ooze at Bump-on-a-Log, and they'll exhaust themselves after throwing swamp ooze at each other...but not before Stick-in-the-Mud apologizes. Go ahead and use the teacup on the swamp ooze that's on Bump-on-a-Log.
Head back to the fountain near the Beast's mansion and use the lamp on the water coming out of it. This will count as your Falling Water. Now get out the spellbook and cast the Make Rain spell. The hunter's lamp will perk up a bit. Now to heat this concoction to the boiling point.
When you're done, head back to the Isle of the Mists. Yeah, we're heading back there.
If you go to the Isle of the Mists a second time without dealing with the Druids, you'll be met by the Druids at the beach and you'll be put in the wooden cage like before. The difference here is that you've got the Make Rain spell activated. You'll also find out the guy with the leapord skin headdress and the wooden cane is the Archdruid.
If you have Beauty's old slave clothes, Alexander will beat out the flames. But without the Make Rain spell, you'll still die after the slave clothes will burn to cinders.
When you're about to die, the Make Rain spell will activate and extinguish the fire below the cage. The Archdruid will think you're a powerful nature wizard and free you.
The Archdruid will tell you the Druids have been inhospitable since the Winged Ones stole their sacred miniature oak tree. He'll tell you that humans have the right to challenge the Lord of the Dead to save their lives or that of another...but the knowledge was lost long ago. A young knight came to these lands long ago, to challenge the Lord of the Dead and save the soul of his dead lover. He did this by taming the Lord's steed...a black-winged demon-hearted horse named Nightingale, who flies to the human world to feed on certain bloods. The knight got on Nightmare's back and flew to the Land of the Dead, but he nor his lover ever returned. Even less is known about the Lord of the Dead. Some think he is Samhain, who was once a man. He angered the gods and was made King of the Underworld as his punishment. He is robbed of movement and companionship, and hates humans for the mortality that he lost. He then wishes you luck.
All right. Back to the pawn shop, where we chose between the short path and the long path.
Look in the spellbook and check out the Make Rain spell. We'll be making it next. First we're going to look for salt water not from the sea. For that, we'll have to head for the Isle of Wonder.
Head back to the garden where the Baby's Tears are. Use the bottle of milk on one of them. The others will cry when they don't get any. Collect their tears with the lamp. Now pour the Sacred Water into the lamp with the Baby's Tears.
Go back to the swamp and use the teacup on the swamp ooze. When you do this, the stick in the mud finally comes alive and yells at you, saying it's swamp slime. The bump on the log (which has a face, if you haven't noticed already) will say he's right, but wishes the stick in the mud was a lot nicer about it. The stick in the mud becomes a jerk.
If you speak to him, he definitely won't help you. Boy, that bump on the log is pretty passive. If you speak to the Bump-on-a-Log, you'll find out he and the stick are brothers, and wishes he could turn the tables on him. Stick-in-the-Mud says his couldn't hit the broad side of a barn even if he had something to throw. Good idea...
Shamir will shoot down the guard dogs, starting with Captain Saladin. Go through the door where al-Hazred escaped through, and go up the stairs. It won't take you too long to catch up. al-Hazred will sic Shamir on you.
If you look at Cassima with the eye icon, you'll find out this tower is where the real Cassima had been held all along.
To deal with Shamir, use the Peppermint leaf on him. He'll fall for it immediately and consume it, becoming drunk on peppermint and unintentionally killing him. al-Hazred will draw his sword. Take the sword mounted on the wall behind Alexander with the hand icon. You'll find out the sword is indeed a ceremonial sword and weighs a ton. Your mouse pointer will become a sword icon. Click on al-Hazred. Alexander will walk up to him, and the fight will begin.
Alexander will soon grow tired due to the weight of the sword. If you didn't give Cassima the dagger, you'll die here...but if you did, Cassima will save you by jamming the dagger into al-Hazred's shoulder. When you see the mouse cursor again, click on al-Hazred to knock him out.
Alexander and Cassima finally reunite and kiss after Alexander pops the big question. The guards show up in the middle of this, and Cassima orders that al-Hazred be locked up in the dungeon as he tries to come to.
A week later, Alexander and Cassima wed. There isn't much of an audience save for Jollo (who gives Cassima away in King Calaphim's memory, as a friend), the two guard dogs, and Captain Saladin (who performs the wedding ceremony). Alexander knows he will miss his family and Daventry, and wishes he could ask for his father's advice. There is also the ferry that needs to be repaired, and it will take time and great diplomacy to stop the fighting between the islands. But it shall be done, as Cassima and Alexander accept becoming the new King and Queen of the Green Isles.
Oh, come on. There were very few guests and the ending was bittersweet. Next time, we're heading towards the better ending.
Head towards the back hallway. You'll hear the muffled sound of someone crying. Unfortunately, the door is locked. Use the speech bubble icon on the door. She tells Alexander to do what he can outside, as she has to find something to defend herself with as only the Vizier is able to get close enough to her and feel safe.
Slip the letter you found in the Vizier's bedroom. She tells you to take the letter and bring it to someone who can help you stop the Vizier. As for that means of defense, slip the dagger you got from Lady Celeste under the door.
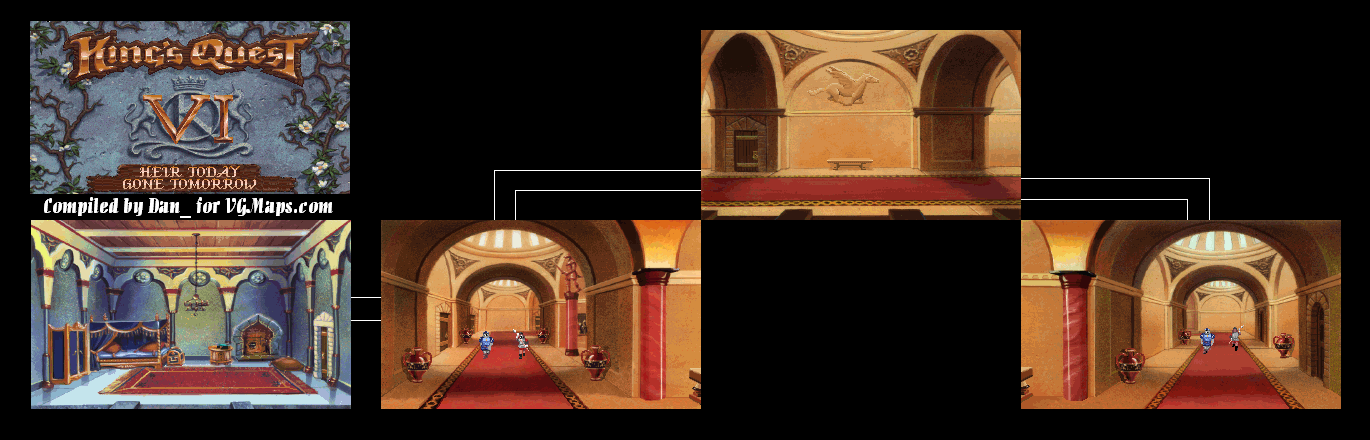
By now, the guards should be going back. Hide in the alcove accordingly. You'll hear the guards speak, then Shamir will show up and tell the guards that the wedding is about to begin. Also, I hope that is Alexander thinking out loud...and not speaking. He would have been caught for sure.
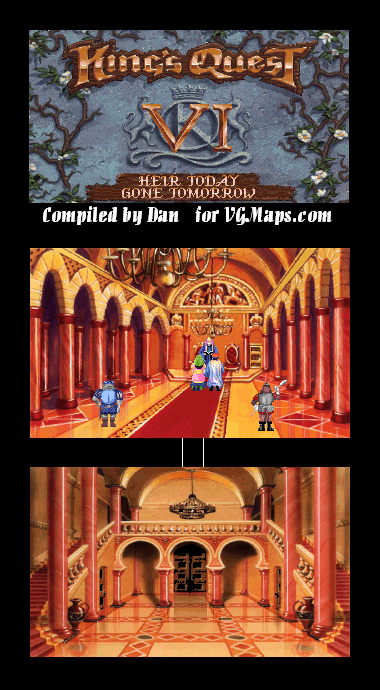
When you hear the guards speak, they'll say that Captain Saladin is a good, honest dog...unlike the Vizier. Anyway, Shamir takes Cassima somewhere...and the guard dogs head to the back hallway. Head towards the downstairs area. You'll find out that the wedding is indeed happening. When you approach the door, you'll come face-to-face with Captain Saladin. Hand him the letter you found in the Vizier's bedroom. He'll lead you to the throne where Cassima and al-Hazred are exchanging vows. Use the speech bubble on Cassima. This triggers a cutscene where Shamir is disguised as Cassima and orders Saladin to kill him. Use the magic mirror on Cassima and you'll reveal Shamir's disguise! Saladin is angry and the guards almost advance on al-Hazred, but al-Hazred escapes. Now you'll have to deal with Shamir...
Wait for the guards to turn their back, then use the mechanical nightingale at the center of the hallway. From there, duck into the alcove to the right and hide behind the column so you don't get spotted. To hide behind the pillar, use the hand icon on the column. The guards will take the mechanical nightingale downstairs to Captain Saladin, believing it might be Sing-Sing. The guards will come back, so you'd better be quick at this point.
If you look at the picture in this alcove, you'll see it's a picture of the King Caliphim and Queen Alloria of the Green Isles. Use the hand icon on the painting and you'll find a nail. Take it.
When you come out of the alcove, the guard dogs will be gone. There will be a door on the left wall. You can look through the keyhole with the eye icon, but it's just an empty bedroom. Thankfully, the bedroom is unlocked.
When you go in, you can easily guess this is Vizier al-Hazred's bedroom. The wardrobe has nothing useful inside, except for some black cloaks you can't grab. I'm guessing these are a reference to the black cloak the Oracle mentioned. The trunk is locked, but if you got the nail earlier, you can open the trunk. Inside are some letters, books and a large perfume bottle. Interestingly, one of the books is the Guidebook to the Green Isles. Use the hand icon on the letter pile. You'll read al-Hazred's most recent letter to the wizard Shadrak. Mordack's death from the last game is mentioned, and Shadrak congratulates al-Hazred as a member of the Black Cloak on his fiendish plans. I think it was pretty easy to figure out that al-Hazred planned all of this all along.
There is a box of ebony on the table near the fireplace. Open the box with the hand icon amd use the eye icon on the piece of paper. You'll notice it has the word "ZEBU" printed on it. (Thanks, text box.) Ironically, this is for the long path. Other than that, there's nothing of use in the box.
Leave the room, go back to the alcove, put the nail back on the wall and put the painting back on the nail. This way, when the guards come back, your tracks will be covered.
Trade in the tinder box for the mechanical nightingale. Then leave the pawn shop and head straight for the castle.
You'll see a group of servant women enter the castle. You have a servant woman's clothes. Use them on Alexander and he'll duck into the small guard hut to put it on. You'll enter the castle.
You'll see a waiter come out of the door to the left telling you there is silver in need of polishing before the wedding. He then takes a plate to the door on the right. Alexander will then take off the servant clothes and place them in an urn. From here on out, you'd better be careful.
You won't be able to enter either door that the waiter used.
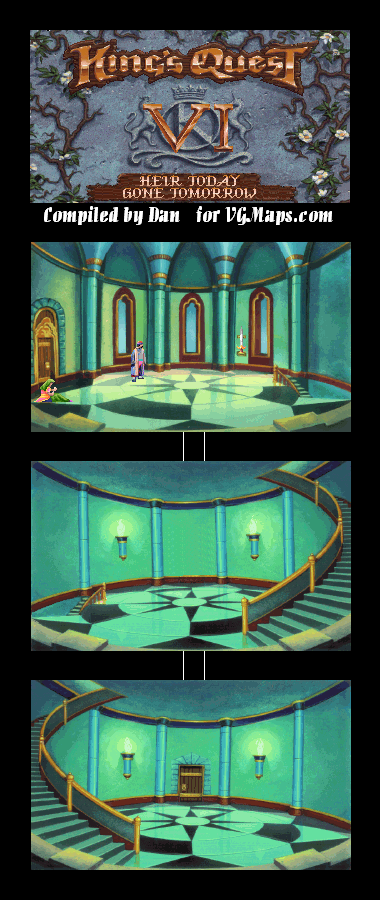
Use the eye on the keyhole of the double doors that lead to the throne room. You'll see two guard dogs. If you go inside the throne room, you'll be locked in a dungeon and your game will end rather terribly.
Take the staircases. That's the only option you got.
You'll come in contact with the guard dog regardless of which staircase you take. But if you take the left path, you'll hear a conversation between the two guard dogs there. It appears they are indeed just following orders and are not inherently evil. They also appear to be looking for Sing-Sing, Cassima's nightingale. Unlike the right side, both guard dogs go in the same direction at the same time. Hmmmm...
Go back to the fork in the road and give the white rose to Sing-Sing. Sing-Sing will take the rose to Cassima, who then tells Sing-Sing to fly elsewhere, and not to take any more tokens of Alexander for fear of never being able to leave the castle again, as Abdul al-Hazred would never let her return her love for him.
Head to the village. You'll find the genie in either the book shelf or the pawn shop. You could give him the peppermint leaf and have him eat it; even though it doesn't make the game unwinnable as you can always get more, the genie will leave. You can still use the "Drink Me" potion in front of the shopkeeper and give him a fright if you get the genie to leave, though. At least we know the pawn shop owner wears red pants. Of course, if you do this, you'll lose the "Drink Me" potion.
Instead, use the "Drink Me" potion. Alexander will pull his best Oscar-caliber work, while Shamir will be overjoyed and break the news of Abdul al-Hazred. Shamir's lamp is a blue bottle, as you can see from the cut-scene. Regardless of where you use it, the shopkeeper will know exactly what's going on concerning the cloaked old man, who is really Shamir Shamazel.
Now that you've tricked the bad guys into think you're dead, there are two paths you can take to the end of the game: the short path or the long path.
You're in speaking range of the poor maiden, so speak to her. When you do, however, she becomes too shy. Give her the white rose. She'll trust you a little. Talk to her, and you'll find out how about her life. Her mother's dead, her father died shortly after remarrying, and her stepmother feels she has no obligation to feed and clothe her. (Jerk.) Looks like we have a Cinderella reference here...kinda.
Give her the Beast's ring. Alexander will tell her about the Isle of the Beast as well as the Beast's plight. You'll win her trust over, and when faced with the decision to leave home to meet the Beast, she makes the decision to do just that. Alexander hands her the ring, and the stepmother tries to command her to come back. Yeah, like that's happening. You'll also find out that the servant woman's name is Beauty, turning the Cinderella reference into a Beauty and the Beast reference and taking this fetch quest full circle.
You'll then go back to the Isle of the Beast with Beauty. Beauty's feelings for the Beast turn him back into a noble prince, freeing Alexander from a similar fate. After the prince shows his feeling for Beauty, her servant rags are transformed into noble clothes to match her noble heart.
As this conversation goes on, you'll see what looks like a tiny brown ferret on the lower-left corner of the screen with gold eyes. It's Shamir Shamazel again, and he's still keeping track of your every move. I bet the Vizier is ticked at this point.
Beauty gives you her old servant clothes, saying they may come in handy later on. The Prince then thanks you, and gives you advice: If you find your true love, protect her with your life, as humans are all beasts without the redeeming humanity of love.
The Prince also gives you his mirror, as his life is no longer hung in false shadows. He tells you to give it to someone with nothing to fear from the truth it reveals. The Prince and Beauty then head to the castle.
When you leave the castle grounds, take another white rose from the hedge to the left of the gazebo. You'll need it later.
When you get past the stone protectors, you'll finally come in contact was a gazebo. Take a white rose from the rose hedges to the left of the gazebo with the hand icon.
When you go north, you'll come across yet another dilemma: the vines move in and block the path! Use the scythe to cut through and continue north.
At the next screen, you'll meet the Beast himself. He figures out that Alexander is a bonafide prince, and tells you that he was once a human until his sense of adventure (and ticking off an old hag) got the best of him. He's been stuck here for 100 years, and says that the Druids stole his heirloom coat of arms.
Alexander also finds out that he only has a few hours of humanity left before he is turned into a beast, due to his breaking through the three enchanted traps of the Isle of the Beast. Unless Alexander can find a maiden for the Beast, Alexander is cursed to become a beast and become the Beast's slave in a few hours - and by a few hours, we mean a few minutes. Yes, you actually turn into a beast if you're not fast enough.
The Beast will give you his ring, the only heirloom he has left, and asks you to give it to a maiden who will accept him of his own free will.
It should be mentioned that Robbie Benson, who voices both Alexander and The Beast, also voiced The Beast in Disney's Beauty and the Beast, which came out at about the same time.
If you went west at the beach, you'll find the Druids' village. Use the hand icon to take a lump of coal from the fire pit. There is also a wooden scythe on the side of one of the houses that you can take as well. Go ahead and take that with you as well.
When you reach the garden, you'll find a bottle on the table that says "Drink me." Take the bottle. If you consume it, you'll see what is probably the weirdest cutscene in the game where the potion makes it so that Alexander's vital signs fade to the point to where he fakes death for some time before he gets right back up.
If you used the bottle in the garden, the doors leading to Chessland disappear and you can see what's behind it. It's a glitch.
You'll also find a tea cup on the chair near the wallflowers. Go ahead and take it.
Head to Chessland. The Red and White Queens will show up again and start arguing again. Hand them the lump of coal. They'll stop arguing and give you a spoiled egg before they leave and argue again, this time over the size of the lump of coal. Alexander shrugs. At least the spoiled egg is useful for one of the spells.
It's time to leave the Isle of the Sacred Mountain and look at our map so we can head to...
What is that?!?
In the lower-left corner of the map, you may have noticed something that looked like an island, but was extremely hard to make out. If you look there now, you'll have a fifth island: the Isle of the Mists.
We won't be going there yet. Instead, we're returning to the Isle of the Crown.
Go to Ali's Books. You'll meet Jollo again. He warns you about Vizier al-Hazred, telling you that the Vizier knows what you're up to and has his guards at the ready in case you crash the wedding. The only way to get Vizier to ease up is to fake your own death somehow.
You'll learn about Shamir Shamazal - the genie's full name. Vizier al-Hazred brought Shamir with him to the Green Isles. Shamir can't inflict harm directly, but he's still dangerous. If you can get your hands on his lamp, you may be able to gain control of him. Genies are never inherently good or evil as they only reflect their owners' hearts. Good luck getting it, though. It's heavily guarded.
The only chance to get Shamir away from al-Hazred is to swap his lamp for an exact replica, but Jollo doesn't really know what the lamp looks like. Jollo then says that this may be the last time you'll both meet, as it is possible that you can both be spied on at any time. Jollo then leaves Ali's Books.
Head back to the mansion between the village and the docks. You'll see the maiden at the roses again, only for the old woman to yell at her and command her to do something else.
Head to the Isle of the Mists with the magic map. You'll hear drums to the northeast. If you head there, you'll meet the Druids...and they won't be happy to see you at all. They've been warned of your presence, and they'll toss you into a wicker cage, and their leader will tell you an ancient Druid proverb "A man who would save others must first save himself." You'll be raised above the fire in the center of the ruins and you'll be destroyed by the fire. At least Alexander passes out before the flames consume him.
Use the hand icon on the tapestry, now that you know how the Minotaur gets in its lair. You'll find a hidden latch behind the tapestry.
In the next room, you'll find the Minotaur tying up Lady Celeste in a sacrificial altar. Use the hand icon on the Minotaur to get his attention. He'll back you into the fiery hole in the ground, but not all the way. Use the red scarf on the Minotaur to get him to charge at you. Like a Spanish matador, Alexander will trick the Minotaur into falling into the fire below. If you use the hand icon on it at this point, you'll get gored.
Lady Celeste will give you her dagger to cut the ropes, and lets you keep the dagger as a gift for saving her life. She doesn't sound very grateful that you saved her life, and she seems a bit arrogant.
You'll come out of a secret exit next to the catacomb entrance. As Lady Celeste insults her guards and calls you a "mere human," a bird is watching. This bird has glowing gold eyes. It's Shamir spying on us again.
You'll meet Lord Azure and Lady Ariel. Lord Azure will give you an audience with the Oracle, and let you leave the island unharmed. He doesn't like al-Hazred, but if dutifully bound to him as long as Princess Cassima trusts him. (If only he knew...)
You'll then meet the Oracle. Alexander asks about Princess Cassima. The Oracle knows that Cassima is surrounded by dark powers that surrounder, and that Alexander is the one to redeem her. The Oracle will tell you that you will have to battle for Cassima, and if you lose, you will die. The ultimate force wears only a black cloak. She also sees a dangerous game of hide-and-seek, and that there is more than one way to end the confrontation.
The Oracle also sees two souls crying out for revenge, crying to be brought back from their spiritual form. If you free them, they will help you. This is but one path, though. She tells you to get counsel from the reclusive, dangerous Druids who might help or harm you. These Druids and their island are both hidden in the mist.
The Oracle gives you her blessing and a vial of water from the Sacred Pool. After this, she sends you off. The guards will then send you to the bottom of the Cliffs of Logic.
Going north after the spike trap room takes you to yet another room that's as non-descript and as unremarkable as all the others...but there's a shield on the west wall. Grab it. You'll need it later. How Alexander carries a shield that's as big as his torso without being impeded is another story.
If you go north and then west from here, you'll reach a dead end. There is something useful in this room: gold coins over the skeleton's eyes. Go ahead and take them.
When you take the proper path, you'll see a bunch of gears on the wall while the visible space where all the action is is shrunk down considerably. Unless you can stop the gears, the castle will crush Alexander and kill him! This is where the brick you found in the Isle of the Beast will come in handy. Use it on the gears, and Alexander will throw it at the gears, gumming up the works and making it safe to pass through.
Do not use the skull on the gears. YOU WILL DIE.
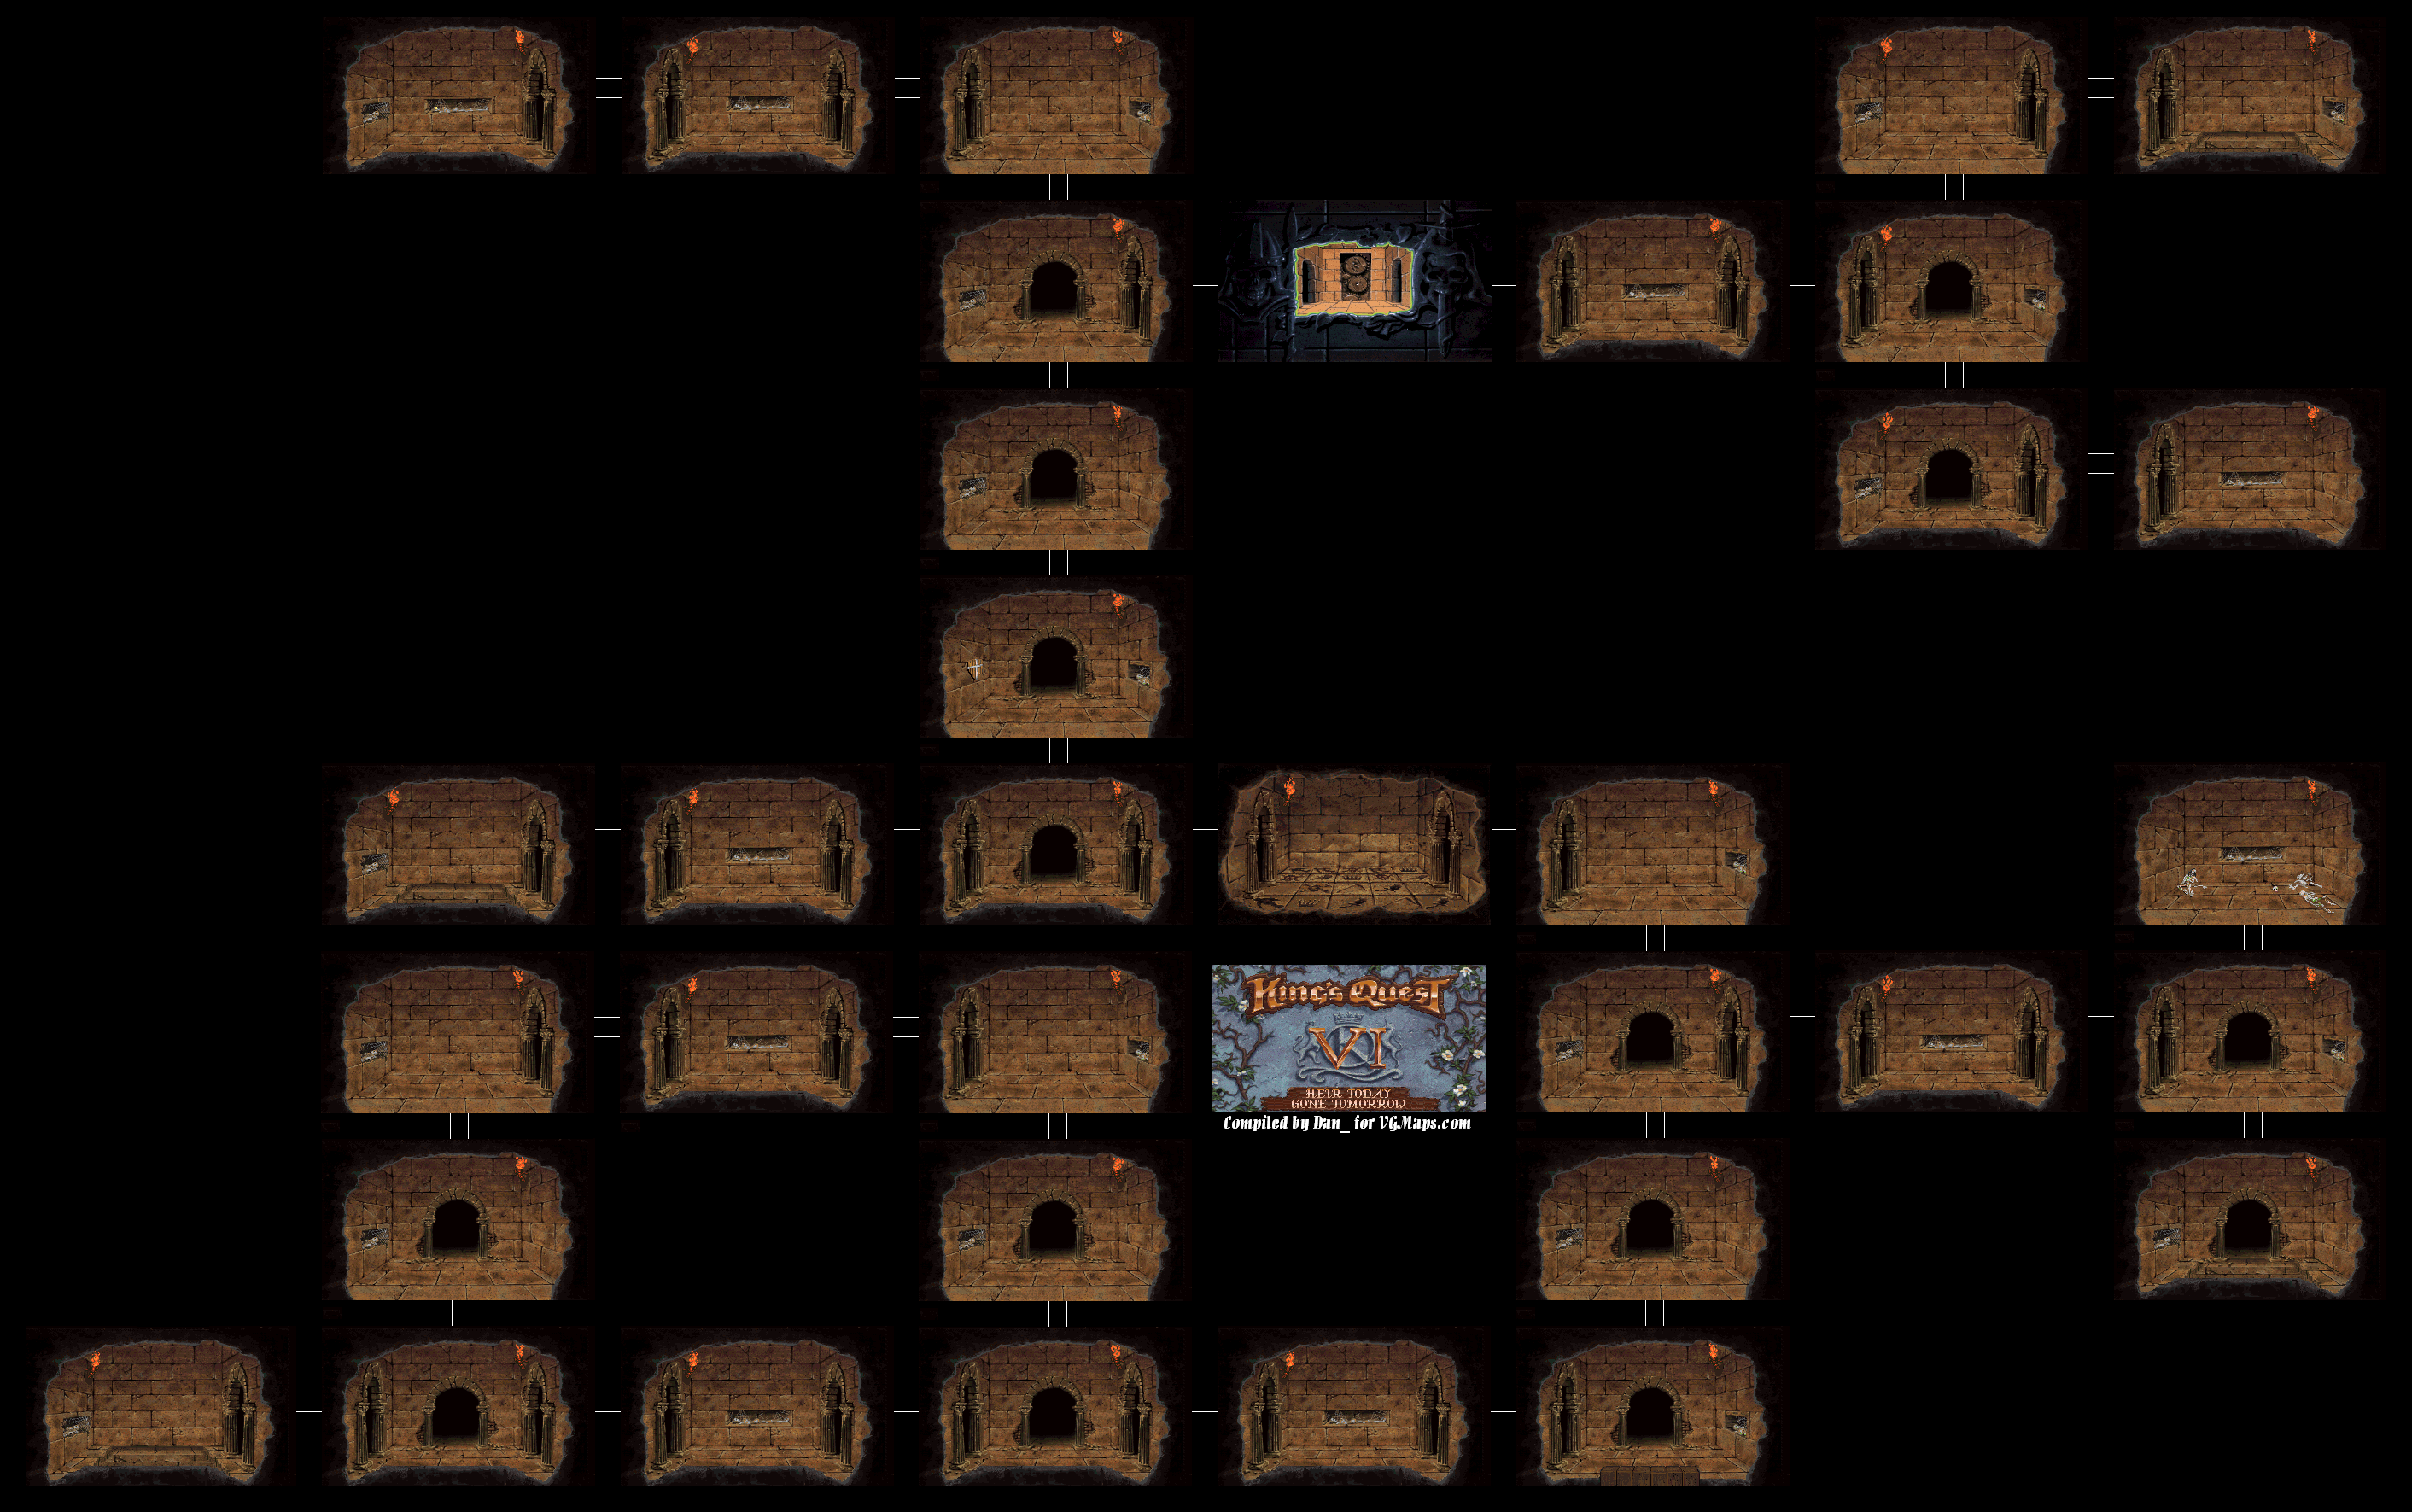
Shortly after you get past this room, you'll come across a pit in the floor that opens when you enter the room. You'll end up in a dark room that is the start of the second half of the catacombs. This is where the tinderbox comes in handy. Use it, and you'll light up the room. If you stand there and wait, the minotaur will show up and rip Alexander in half like a sheet of paper.
Make your way west five screens, south two then east one. Use the hole-in-the-wall on the east wall and look through it with the eye icon. You'll see the minotaur peek through a tapestry, into the entrance to its lair. The hole-in-the-wall in flee in terror, fearing the minotaur. I don't blame it.
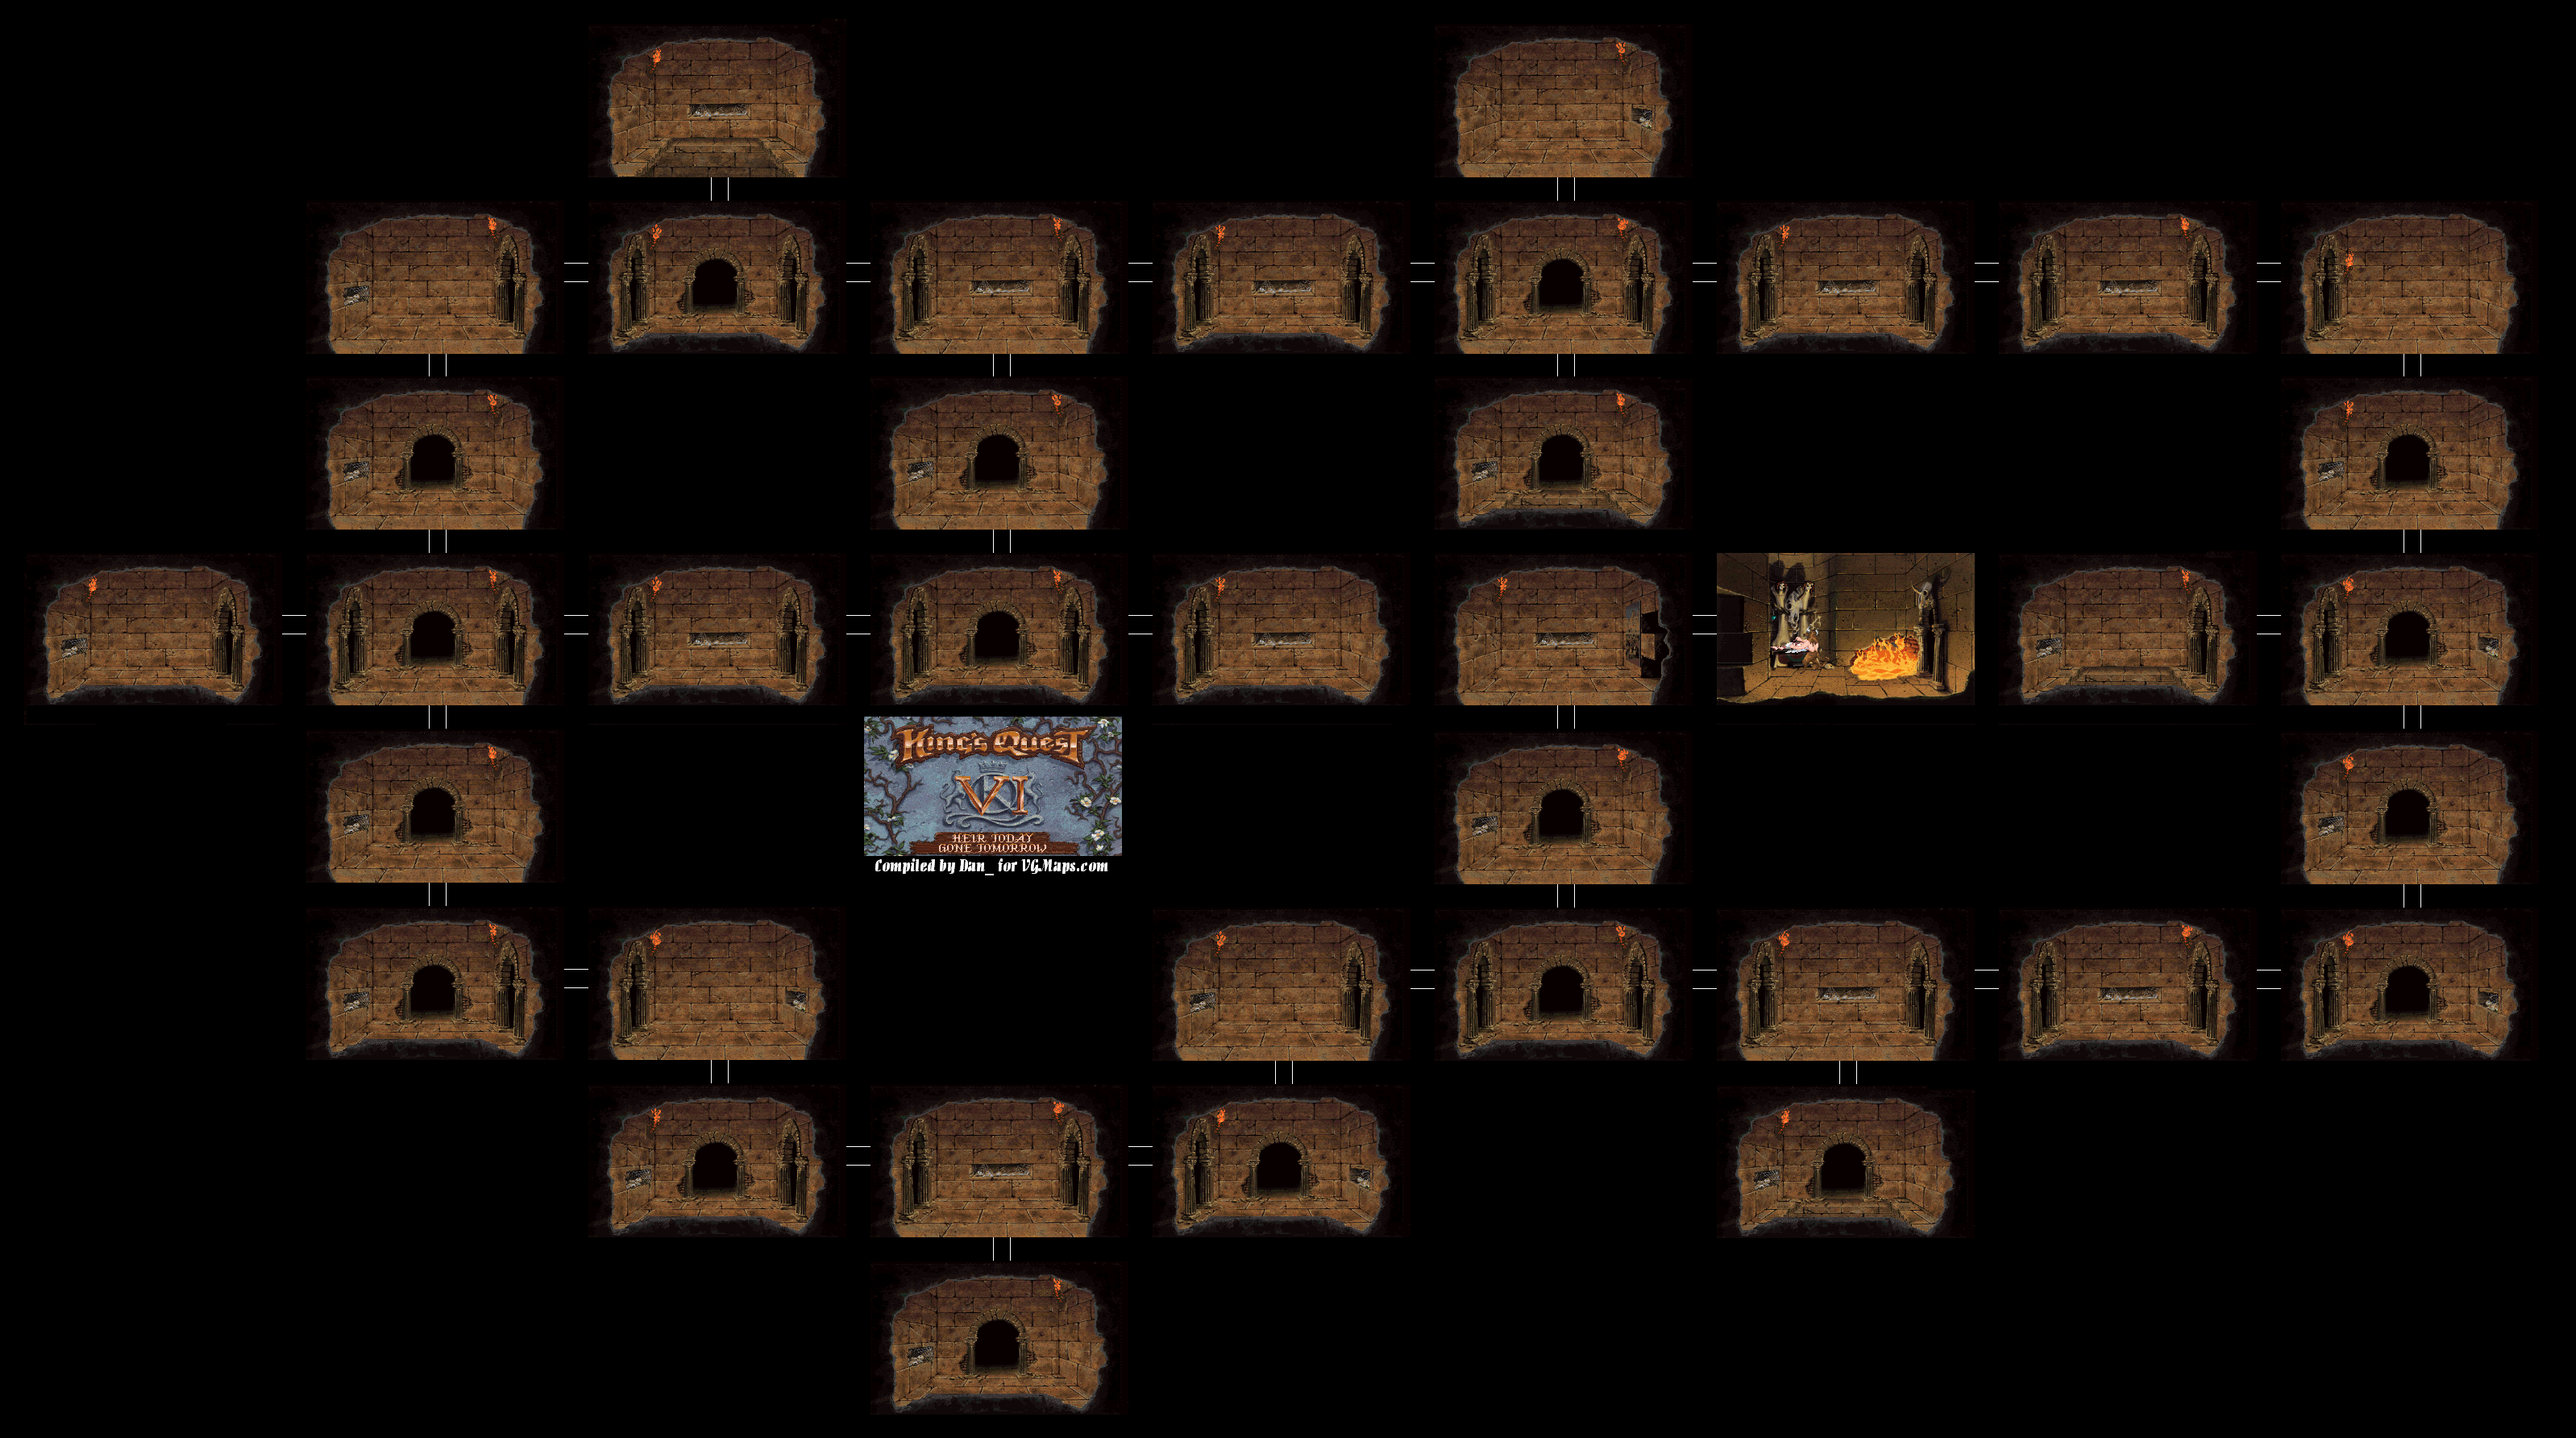
Make your way through the catacombs and look for the room with the tapestry. Thankfully, there isn't anything else worth looking for in this part of the catacombs, so you can just map your way around and or use the one I've added to this entry.
This catacomb can be confusing. You'll hear sounds seemingly of a wild animal, but thankfully nothing will pop out and kill you at random (which I always thought would happen as a kid).
There are some rooms with pit where you will instantly drop into and die in when you enter said rooms. Be sure to map something out.
There is a room with skeletons in it near the start. You'll need a skull for one of the spells, so take the skull on the ground here.
You'll come across a room with tiles. Some tile have roses carved on them, other scythes and crowns. Step on the wrong tile and the pressure-sensitive tiles will cause spikes to shoot from the wall and kill you.
The hint for this is in the Guidebook:
"Three roses laid upon the bower,
A scythe for he who cuts the flower,
A crown, a dove, most noble race!
Thy bones make sacred this dread place."
You'll have to step on three rose tiles, a scythe tile, a crown tile, a dove tile and a skull and crossbones tile to get through. Go up one tile, then down-left for the next two. (These are the roses.) Go up to the scythe tile, then up again to the crown tile. Up and left from here is the dove tile. Down and left is the skull and crossbones. Go down one tile and you're home free with this room.
Something worth noting: when you get off the skull and crossbones tile, don't click on the side of the doorway. Click on the floor tile near the other end of the room itself. Otherwise, you'll trigger the spike trap and die.
In another room, you'll meet a girl who looks like Lady Celeste. She shows up, but if you watch her closely when she comes in, you'll notice her eyes sparkle. It's Shamir, all right. Keep leaving and entering to give Shamir a hard time. Obviously, if you fall this fake Lady Celeste, you'll fall into a pit and die.
Once again, if you ignore the old woman, she'll go away in a puff of smoke.
There are two, huge wooden doors at the top of the mountain. You won't be able to open them.
Near the bush is a small cave. Use the hand on it (be sure to click on the opening itself) and Alexander will crawl in. Use the tinderbox to light your way. Head to the right and you'll find another opening in the wall. Use the hand on it to crawl through. Thankfully, the part of the cave you enter is much more adequately lit, thanks to the window. You'll find a peppermint plant on the window. Use the hand on it to take a few leaves. That's all for this area, so leave the room and head out of the cave. Light the tinderbox again so you can get out.
The path to the north leads to the Winged Ones. They stop you, seeing you as an intruder, and say that the Red and White Queens from Chessland in the Isle of Wonder stole their golden fleece, stopping the flow of visitors to the island.
You'll meet Lord Azure and Lady Ariel. Apparently, you've made part of some prophecy come true. The Vizier has given them orders to dispose of any strangers on the island, but thanks to the prophecy, that's not happening. Since you solved the Cliffs of Logic, you'll be sent down to the Catacombs, which has been violated by the Minotaur who eats the Winged Ones' young in sacrifice. Their daughter, Lady Celeste, is its latest victim.
Since the Catacombs will let the Lord and Lady dispose of you (since the Vizier did not explain how to dispose of any intruders), you'll be heading down there, anyway. The Catacombs are a labyrinth of rooms and a dangerous place. The guards will escort you there, and after some conversation where even your escort think you're committing suicide, you're thrown in the catacombs.
There is something etched into the rock wall. If you look at it with the eye icon, it will say:
IGNORANCE
KILLS
WISDOM
ELEVATES
According to the Guidebook, only those pure of heart will be able to RISE the cliffs of logic." Switch to the hand icon (which you'll need to use to solve all these riddles). Click the "R" in "ignorance," the "I" in "kills," the "S" in "wisdom" and the "E" in "elevates." It does not matter which "E" you click on. This will open up some small stone steps leading up the wall. Be careful when you walk on them, as it is very, very possible to fall off of them and die.
The path ends one screen up, and there is another etching in the stone.
"A master of languages will ____"
There are a bunch of symbols you need to click on before you can continue. A symbol for each letter, it appears. According to the Guidebook, the Ancient Ones were fond of saying that "a master of languages will soar." The symbols are indeed their alphabet.
The first thing to click on is the third symbol in the third row. This is the letter S. The one to the right of that is the letter O. Then, click on the third symbol in the fifth row. This is the letter A. The rightmost symbol on that row is the letter R.
When you go up, the stone steps stop at yet another etching. It consists solely of four circles. These are the Stones of Stealth, and this is the only clue the Guidebook gives you:
"Four men standing in a row,
Third from the left and down you go,
The rest, in order, move you on,
The Youngest, the Oldest, and the Second Son."
If you click on the third circle, the step will disappear and you'll die. Click on the fourth, then the first, then the second.
There will be another puzzle when you go up: "the sacred four." They are the emotion "tranqulity," the color "azure," the creature "catepillar," and the element "air." Of course, four letters of the Ancient One's alphabet all represent these things. Here is what you need to click on:
1. The second-to-bottommost symbol, which is D and represents tranquility. It looks like the top of a castle spire.
2. The fourth symbol on the third row, which is the letter O. This represents the color azure.
3. The fifth symbol on the fourth row (the letter Q). This represents the caterpillar.
4. The sixth symbol on the fourth row (the letter G). This is to the right of the third symbol and represents air.
There is one more riddle when you go up.
"ALL SILENT
CRY THE
NOBLE
BOULDERS"
According to the Guidebook, "Only those of the highest order may ASCEND the cliffs of logic."
Click on the "A" in "all," the "S" in silent" the "C" in "cry," the "E" in "the," the "N" in "noble" and the "D" in "boulders."
When you reach the top, you'll meet a man in a purple and black robe. He'll want you to eat the berries on the nightshade bush so you can fly like the Winged Ones. (Nightshade? Seriously? That stuff killed us in the third game. Come on.) If you do that, you'll die, as the man in the robe has gold eyes. Yep, it's Shamir.
So much for progress. We've got the spellbook and we're able to see more of the Isle of the Beast, but we still can't make it to the end of that island.
Head back to the castle first. You'll see some servant women being granted access to the castle. Guess they're helping with the preparations for the wedding, which is going to happen soon.
Head to the left of the castle and use the Hole in the Wall on the wall. You'll find a hallway, but you won't be able to see much at all...except for a guard dog dressed in red. Click outside the picture of the inside of the castle to get the Hole in the Wall back, then head back to the fork in the road and go to the village.
Go back to Ali's Books and hand Ali the rare book. He'll take it and hand you the book of spells. Go to the inventory and look at the spellbook with the hand and you'll find a few spells. They'll all be useful, but you'll obviously need all the ingredients for one of them to cast the spell they're specific to. You can switch between the eye, the speech bubble (which lets you cast the spell) and the arrow which lets you turn the page.
The first is a magic paint spell. This lets anything you paint come to life. This requires Swamp Ooze, River Styx water and a black horse feather. I guess we already have the feather.
The second is a rain-making spell. It requires a few drops of Salt Water not from the sea, a vial of Sacred Water, and some "falling" water. You'll also need a teapot.
The third is a spell that charms a creature of the night. This requires a skull full of hot oak embers, a bit of sulphur (or brimstone), and a strand of a pure-hearted maiden's hair. Well, we have that strand of Cassima's hair, so at least we have something.
Head back to the pawn shop. Trade in the flute for the tinder box, then head out and go to the Isle of the Sacred Mountain.
Head back to the Bookworm and give him the Dangling Participle. Turns out, the little guy belonged to Bookworm the entire time. He'll keep his end of the bargain and give you a rare book. You can look at it with the eye and read it with the hand. You'll notice that a page is missing if you read it. The missing page has the same pattern as the piece of paper you found on the spider web. The answer is "love." But...what's the question?
Head back to the garden and use the flute on the wallflowers. Alexander will play and the snapdragons and will accompany him as the wallflowers dance. While they're still dancing and snapping, grab the hole in the wall with the hand.
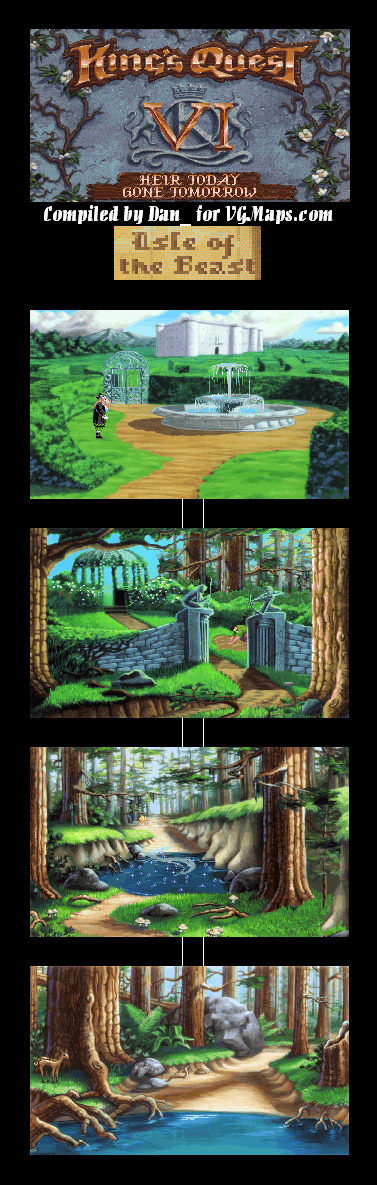
While you're in the garden, grab an iceberg lettuce. From there, go to the beach, pull out the map and return to the Isle of the Beast.
Head back to the boiling pond. From there, throw the iceberg lettuce in to cool it down. It will be much cooler, yet still hot (and a lot less deep). From there, you can grab the hunter's lamp from the tree. If you rub it with the hand in the inventory, nothing happens.
Go north, and you'll come across a garden. There is a gardener at the other end of the stone walls. He wants you to come on over to him. Don't do it, as he has glowing gold eyes. It's Shamir, and if you try to go between the walls, the archer at the top will shoot his arrow at you and kill you. Instead, if you wait, he'll disappear.
There is also a brick on the ground near the stone. Go ahead and pick it up.
You won't be able to go any further on the Isle of the Beast until later.
The most noticeable thing about the first screen is a half-green, half-brown creature hanging on a tree branch. If you talk to it, it actually talks back. He sounds like Yoda. Keep speaking to him, and you'll find out he managed to get far away from its home. It gives you a hint at what his name is: it's a reference to what it does and a reference to how eloquently it speaks. If you couldn't guess, it's Dangling Participle. If you talk to it again, you'll try to take him home only to find he doesn't trust you. Give him the incomplete sentence, and he will finish it. Now he'll join up.
Yes, you can speak to him in the inventory menu.
When you go north, you'll find out you won't be able to go much further. The pond in front of you will be boiling. If you enter this pond, you will die. There is a hunter's lamp hanging off a tree branch above the pond, but you obviously can't get it yet.
There's nothing else you can do here...for now. Head back to the Isle of Wonder.
Head to the pawn shop. You'll see Shamir harass the pawn shop owner about the lack of mints. Getting more is impossible, as the ferry is no longer in service. Shamir leaves.
Give the pearl to the pawn shop owner. It is such a perfect pearl that it is definitely enough to get the ring back. While you're here, exchange the mechanical nightingale for the flute. Alexander, much like Graham and Rosella, is also musically gifted and can play the flute if you use it on him.
Head back to the fork in the road. If you haven't used the mechanical nightingale to get Sing-Sing onto the lower branch of the tree, do so now. Then, give Sing-Sing the ring. She'll take the ring to Cassima (while Shamir watches in snake form, again), and you'll get a ribbon in exchange after Cassima shows delight that you are here. Take it. Examine it in the inventory, and you'll find there's a long, black strand of hair on it. Use the hand from the inventory on the ribbon and you'll be able to separate the hair from the ribbon.
Now you can send the love poem to Cassima via Sing-Sing. This time, when Cassima reads the poem, she knows it's Alexander who sent it, and in exchange you'll get a note. Take it. In the note, Cassima tells Alexander to be careful and not do anything rash, and to watch out for Vizier's evil genie.
The doors to the garden lead to a checkerboard world. At the beginning of the path are two chess knights. If you talk to them, they'll block your path. This is the chess world, home of the red and white queens. They're worried about the cross-island feuding.
You'll then meet the red and white queens. They don't like the Vizier either. As they argue about what nasty gag gift to give to the Vizier and Cassima when they get married, the red queen will mention that a beast stole the Singing Stone. They ask Alexander to settle their squabble, but it doesn't end very well. They leave, and the red queen drops her scarf. Take it. If you give it back to the knights, they'll let you have it as the queen considers dropping red scarves fashionable.
If you try to enter Chessboard Land, you won't be able to enter as it is for chess pieces only.
There's not much left that you can do here, so head back to the Isle of the Crown.
Head back to the town. There's a note near the archway leading to the mansion. If you read it with the eye icon, you'll find out it's a proclamation for the royal wedding of Vizier Adubl al-Hazred and Princess Cassima. Due to security reasons, the wedding will not be open to the public.
Enter Ali's Books. Talk to Jollo. He'll tell you about Abdul al-Hazred, who came to the Land of the Green Isles fifteen years ago and nudged King Caliphim, who wanted to spend more time with his wife and daughter, into trusting him with the smaller affairs of the isles, making him Vizier. Cassima, whom he had her eyes on since she was a young girl (even though Mordack wanted to marry her in the last game) is now the only thing between him and the throne. Thankfully, Cassima distrusts the Vizier, but how long will that last?
If you use the hand icon on the cattails, the cattails will meow at you, causing the dogwood tree to bark back.
You'll find milkweed near the dogwood tree. They're actual bottles of milk. Interestingly, the dogwood tree will bark at you for grabbing one, but that's about it.
Head east to enter a garden. You'll notice a tomato garden (with a rotten tomato on the ground), snapdragons that snap at you, iceberg letters, sour grapes (that are kinda sad), clinging vines, wallflowers, baby's tears and a hole in the wall with arms and legs.
If you look at or talk to the rotten tomato, you'll find out he's well...rotten. What a jerk. Use the hand icon to pick him up. Believe it or not, you can use the speech bubble on it and talk to it some more. Not really useful, but it's there and provides some pretty interesting dialogue nonetheless.
You can take an iceberg lettuce with you. Guess what? It's actually lettuce made of ice. If you carry it around long enough, it will melt into nothingness.
If you look at the hole in the wall with the eye icon, you'll find out that you can see through it. The wallflowers will cluster together and the snapdragons will snap. If you use the hand icon on the hole in the wall, it will hide behind the shy wallflowers, which will cluster together.
If you speak to the clinging walls, they'll say they want to be loved. If you use the hand icon on the vines, they'll crush you to death, so don't do that. You can address the sour grapes, but they won't want you anywhere near them.
Head to the right. You'll see a valley of books. There will be bees flying around (you can examine them with the eye icon, but it's pretty hard to do), as well as a spider's web.
Go up to the leftmost stack of books and use the hand icon on it. You'll meet Mr. Bookworm, who is alarmed that you're trying to take a book. Oxymoron and Dipthong will make jokes as you, before it's pretty clear that you don't have anything. Mr. Bookworm will accept a sentence fragment that you found off the shore. Talk to Mr. Bookworm again by using the hand icon on that same pile, and give him the sentence. He won't take it, though, as it's incomplete, and incomplete sentences are all too common.
Look at the spider web. I swear, that black widow is turning me on, even if she's trying too hard to get foo- er, find a man. Speaking of which, her name actually is Black Widow, and she's wanting another person to be ensnared in her we-er, heart. There's a scrap of paper on the web, but if you grab for it with the hand icon, you'll be bitten and killed by the black widow. However, if you touch the loose thread at the bottom of the web, you'll be able to get the piece of paper as she tries to fix the web. Just be quick. You'll find out it says "Love." before the scrap blows away in the wind.
Leave this area, then head north. This leads to the swamp. If you swim in the swamp, you'll die. You can speak to the dogwood tree, which has a dog's face, There's also a bump on the log and a stick in the mud, which seem to have human characteristics.
Pick up the flower and the feather on the ground. The flower has a really nasty odor, which will prove useful.
Now to head back to the Isle of Wonder. Here's how to get past the five gnomes.
The first is the personification of smell. Use the flower you just found in the Isle of the Sacred Mountain on the first gnome. Apparently, these guys all use one individual sense out of all the five, because he thinks you're a flower!
The second is the personification of hearing. Use the mechanical nightingale on him to get him to think you're a nightingale.
The third is the personification of taste. Use the mint on him and he'll go away.
The fourth is the personification of touch. Use the lucky rabbit's foot on him to get him to think you're a rabbit.
The fifth is the personification of sight! Uh-oh. Use the invisible ink on yourself before he opens his eyes! Congrats, you just got rid of the guards!
Head back to the shore where you woke up and use the map on Alexander.
There are three islands we haven't been to: the Isle of the Sacred Mountain, the Isle of Wonder and the Isle of the Beast. Click on an island with the icon and you'll head over there.
When you reappear, you'll be at the shore of the Isle of Wonder. According to the Guidebook that came with the game, this place is full of puns and was enchanted for fun as such to keep a princess held captive on this island far from alone.
To the west are oyster beds. All the oysters are asleep, save for one.
There is a string of letters floating on the ocean. Use the eye icon on it, and you'll learn it spells out "Where are you going?". Wait for it to come closer to the sandy beach before picking it up.
If you use the eye icon on the awake oyster, it will yawn and Alexander will see a glint of white inside its mouth. A pearl, perhaps? Talk to it, and you'll find out that the oyster has a terrible ache in its mouth, and it's too hard for it to talk. If you try to use a hand on it, it won't let you as it hates dentists. (Huh?) Go to your inventory and use the incredibly boring book on the oyster. As it yawns from the book's boring details, click on the pearl with the hand icon. As the oyster thanks you, it falls asleep.
If you try to leave this screen, you'll meet the five guards of the island. "If man it be, then man it dies." These guys are also the personification of the five sense - sight, touch, taste, smell and hearing. If they can tell you're a man, then you're pretty much dead.
Be sure to take one of the mints out of the blue bowl on the counter.
When you head back to the fork in the road, you'll see a nightingale. This nightingale just might be Sing-Sing. Use the mechanical nightingale on the bird, and the real nightingale will come closer. You could use the love poem on the bird. The bird will take it. It doesn't go as planned, as Cassima thinks that the poem comes Vizier Abdul al-Hazred as soon as she gets it, and tells Sing-Sing to stay away from al-Hazred, proving she doesn't want to marry him after all. Therefore, you don't want to do this just yet. Notice that there is a green snake that will lower down from the tree as you deliver the poem, and that its eyes will glow gold. That is Shamir disguised as a snake, and he appears to be on to you.
To recap: don't send the love poem to Cassima just yet. You need to do something else first.
Head back to the village. The pawn shop owner will dump stuff in a pot. Reach into the pot with the hand icon to find an empty-looking ink bottle. Alexander will take it. If you use the hand icon on the bottle when you look at it in the inventory, you'll hear a faint swishing sound. If you use it on Alexander, you'll find out it's full of invisible ink. This will really come to good use now.
It's now time to visit some of the other islands...
If you use the eye icon on the wall of stuff to the right of the stuffed bear, you'll see items that could have been useful in the previous five King's Quest games. Ditto for the bottles behind the pawn shop owner.
Talk to the pawn shop owner. Alexander will ask about the magic map, and the pawn shop owner will give it to you...for a price. He'll need something in equal value in exchange.
If you give him the coin, you won't get the map, but you will be able to choose between four items in exchange: a mechanical nightingale, a flute, a paintbrush and a tinderbox. All of these items will prove useful, but for now, take the mechanical nightingale. Remember, you can always trade it back in for one of the items on the counter if you need to switch for whatever reason...and you will be doing just that.
As for the magic map itself, the only thing you'll be able to exchange for it is the ring. The pawn shop owner will keep the ring out of sight, and if you can find anything as valuable, you can get the ring back.
The map only works when you are out in the open and near the sea. To use the map, you'll have to head back where you started the game and use it there.
After you get the map, the man in the black cloak with the golden eyes will walk up to the counter, grab a mint from the blue bowl, then turn around and wobble back and forth as he leaves. You'll then get a cutscene where he returns to Vizier al-Hazred and tells him you have the magic map. al-Hazred tells the gold-eyed guy (whose name is Shamir) to head to the islands and...well, he tells him something. It cuts back to the game, but it's pretty obvious that he wants to make the people of the other islands believe Alexander is an enemy and out for their treasure. Something like that.
Head back to Ali's Books in the village. There will be a rather funny-looking man sitting at the chair, reading the book about court entertainers. If you talk to him, he'll tell you that he's too worried about Princess Cassima to talk. Use Alexander's ring on the man, and you'll find out he knows who you are through Cassima. You'll also find out that Cassima's parents, King Caliphim and Queen Alloria, died of heartbreak weeks before Cassima returned. The man then introduces himself as Jollo, royal clown of the court. He also talks very positively of both Cassima and her parents, and still works as royal clown while keeping an ear to the ground. He does not trust Vizier al-Hazred or his plans for the Princess. If he could find Cassima's nightingale, Sing-Sing, he could send her a message, but all he can do is wait. He leaves the bookshop, but promises to return later.
You're done here, so leave the book shop and enter the door to the right of it, which is the pawn shop. If you enter at this point, a man in a black robe with a cane will show up here. He also has glowing yellow eyes, meaning that this is the same strange guy from the castle that we saw in Ali's books.