Showing posts with label part 32. Show all posts

Wednesday, July 29, 2026

PrinceWatercress plays Space Station Silicon Valley - Part 32 of 32


Now that the game's all over with, let's play a mini-game!


For getting all the trophies (with a patch), you can play a space shooter mini-game. You can also press Down, Up, Z, L, Down, Left, Z, Down on the file select screen to unlock it.

A shoots, B turns the ship around in one of two directions, and the Control stick lets you move around. You can go in reverse, complete with a comedic truck reverse beep noise, but it is slower than moving forwards. The red rings will spawn asteroids if you see them. If you see any Power Cells, pick them up, as they power up your shot. You start with a single shot, which can upgrade to a double shot and then a three-way shot. You'll go all the way down to a single shot if you get destroyed.

You also have hit points. You start out as gold, then go down to silver at one hit and bronze after two. Three hits and you're out. Your current score followed by your high score is at the bottom. You also have three lives, and if you lose them all, the game is over. Hits and lives cannot be replenished.

Don't go too fast, and watch your surroundings. The spiked balls will shoot at you, and the spaceships will rocket towards you and hit you if you are not careful. The asteroids that you shoot obviously split into three when you shoot them, so be ready to fire constantly.

With that, that's all there is to say about the mini-game and this game in general.


Monday, February 16, 2026

PrinceWatercress plays Super Mario Odyssey - Part 32 of 92


Fun fact: it took me over two hours and nearly an entire episode of TNA iMPACT! to get this entry done.

Worth it!


The Bound Bowl Grand Prix


Now that we've opened up the area leading to the race track, we can drop down and head to the Snowline Circuit. By talking to the elder and everyone else in the area, you'll find out that everyone needs one more racer. You'll also find out that one racer won't come out of the waiting room, and if you go inside and talk to him, you'll find out that he does not have the stomach for racing. This is where you come in. Throw Cappy at him to possess him and become eligible for the race. Just talk to the elder after you possess the poor guy, and you'll have the option as to whether or not you want to enter the race.

As the Shiverian racer, you can press B to bound. Bounding lets you bounce into the air, and whenever you press the B button again as soon as you land on the ground, you'll bounce a little higher. With practice, you'll get used to the rhythm you'll need to bound endlessly and keep your current height, which you'll definitely need to do during the race. Thankfully, you'll be able to practice before the actual race with the race course you'll be racing on. Stay on the course at all time, as going out of bounds will slow you down quite a bit. Also, hold Up and Left on the left analog stick when you bounce off walls; it will make it easier to stay on the course. Press the + Button to quit the training and enter the race proper.

You'll have three laps to place first in order to win the Power Moon for this race course. Remember to hold Up and Left on the left analog stick when you bounce off the big walls, and at the area with the mini-walls with the snow in the middle, keep your bounds low, but stay on the course. That way, you can maintain control and stay on the course without losing a lot of speed.

After winning the race, there will no longer be a blizzard outside, and you'll be able to explore the rest of the kingdom. You'll also be able to explore the water with the help of the Purple Cheep-Cheeps. While you can dive and surface much like with the red ones, you can also attack by shaking the controller. If you get trapped on land, you'll have only a couple of seconds before you lose your Cheep-Cheep form and turn back into Mario. While on land, you can hop with the B button.

Power Moons

Snow Kingdom


5. The Bound Bowl Grand Prix - Win the Snowline Circuit Class A race after lowering all of the barriers (see above).

6. Entrance to Shiveria - Upon entering Shiveria, you can wall jump up to the top of a stack of boxes near the pipe leading back out to reach this Power Moon.

8. Shining in the Snow in Town - In the entry area of Shiveria, there is a pole you can climb to reach the upper level. After pole jumping across three lamps, there is an area covered in snow. In the corner of that area is a flashing flight that produces a Power Moon when ground pounded.

10. Caught Hopping in the Snow! - Southeast of the Odyssey, there is a rabbit you can chase around near the chilly water. Run into it to get a Power Moon.

11. The Shiverian Treasure Chest - If you keep going from the snowy area where Power Moon #8 is found, you'll reach a dead end with a treasure chest containing this Power Moon.

14. Snow Kingdom Timer Challenge 2 - In the middle of the southeast corner of the kingdom, there is a scarecrow you can throw your cap up. Shake the controller as you climb up the two poles, and get near the top (but not exactly to the top) of the second pole and jump backwards off the pole to get this Power Moon before time runs out.

15. Moon Shards in the Snow - You'll need to find the Moon Shards that are located around the kingdom outside of Shiveria. The five Moon Shards are in the following area: below the Odyssey near the wooden peg in the ground, the sinking ice platform east of the entrance to Shiveria, next to the entrance to Shiveria on an ice block guarded by a Ty-foo, in a circle of coins in the water northeast of the entrance to Shiveria.

16. Snow Path Dash - Northwest of the Above the Ice Well, there is another treble clef you can pick up. Collect all the notes to get this Power Moon. Throwing your hat at the notes will be a big help here.

17. Fishing in the Glacier - Far to the east of the Odyssey, you'll find a Lakitu with a fishing pole near a small pond. Catch the big fish to get this Power Moon.

19. Captain Toad is Chilly! - On the far north side of the kingdom, there is a hole in the wall filled with snow. Clear out the snow with Cappy to find Captain Toad so you can talk to him and get this Power Moon.

22. Walking on Ice - Near the Corner of the Freezing Sea checkpoint, there is a door leading to a Koopa Trace-Walking event. You'll need to walk on ice in a triangular motion to earn at least 80 points. Take it slow, and if you need to, do a short hop and ground pound before turning the corner. (Don't ask me how I got 85 points on the first shot.)

24. Dashing Over Cold Water - In the west side of the kingdom, there is a door hidden by a pile of snow. Behind the door is a course full of cold water and spinning stone columns to run across with the Rocket Flowers. You'll need to run across the ice water, jump over pits, avoid getting hit, and constantly grab Rocket Flowers with your hat to constantly maintain speed, get over the steep hills and collect this Power Moon.

25. Dashing Above and Beyond! - Past the "Dashing Over Cold Water" Power Moon is another steep but short slope leading to another power moon. You'll need to weave around some walls in order to get to the top, but if you do, you'll get another Power Moon. Just keep in mind that you'll need to get from the beginning to the end in one shot.

26. Jump 'n' Swim in the Freezing Water - Just north of the Odyssey is a door you can only open by throwing your hat at the nearby scarecrow. Make your way up with the moving blocks of freezing water - as well as the solid platforms above them - and take out the Goombas. Take the last moving block of freezing water downwards to get this Power Moon. To make it faster, keep ground pounding to get down to the bottom faster.

27. Freezing Water Near the Ceiling - In the area where you'll find "Jump 'n' Swim in the Freezing Water" Power Moon, ride the top of the last moving block of freezing water, then jump to the poles that you see at the top and swing across to get this Power Moon.

28. Blowing and Sliding - There is a block hidden behind a cliff in the east side of the kingdom. Take a Ty-foo there and blow the block away to reveal a door. Open it with your hat, then take control of the Ty-foo to blow the blocks around until you put them in their proper place and reveal a path leading up to this Power Moon.

31. Spinning Above the Clouds - There is a large seed frozen in ice near the Above the Ice Well checkpoint. Take it to the small planter near the Odyssey, then throw it into the dirt in the planter and climb up the vine to reach a Power Moon area in the side. Go to the right after the huge whirlwind to get this Power Moon. 

32. High-Altitude Spinning - In the area with the "Spinning Above the Clouds" Power Moon, go left at the top of the huge whirlwind to get this easy-to-miss Power Moon.

Cascade Kingdom


18. Secret Path to Fossil Falls! - There are two ways to find this Power Moon.

If you visit the Snow Kingdom before the Seaside Kingdom, you'll find the entrance to this Power Moon in a painting on a high cliff leg at the north end of the Snow Kingdom. Use a Ty-foo to push the nearby wooden platform so you can wall jump up to the painting. (This is the route that I took.)

If you visit the Seaside Kingdom before the Snow Kingdom, you'll find the entrance to this Power Moon in a painting inside the Crystal Palace at the center of the Seaside Kingdom.

Regional Coins


Tuesday, December 23, 2025

PrinceWatercress plays Brave Fencer Musashi - Part 32 of 33


For the third section of Soda Fountain, we're going to have to fight our way through if we want to get any closer to the Princess.


I get Ed and Ben confused at the start of the video, because of course I do.

In the third section of Soda Fountain, you'll be aboveground. The brown robots will shoot homing missiles, and the blue one's shoot three-way shots. You can Assimilate their respective abilities and use them whenever necessary.

The Homing ability from the brown armored soldiers will make quick work of the helicopters here. The blue soldiers give you 3-Way, which is a three-way shot that can be blasted at enemies like a machine gun.

The Fuhrer Flatski statues will give you health replenishments if you destroy them. They can shoot lasers at you that are similar to the laser cannons you'll meet fairly soon.

The green robots will drop bombs that will do quite a bit of damage if you step on them. If you assimilate them, you'll get Grenade, which allows you to throw Grenades forward at 50 BP a pop, compared to the 10 BP from Homing or the 3 BP per shot from 3-Way. It's nice, but I'd rather have 3-Way.

Use Homing on the laser cannons at the gates to get rid of them if you need to. From there, keep attacking the gate doors and you'll bust it open. Just step out of the way when the laser guns home in on your position. Destroying the doors first will get rid of the laser turrets next to them. 3-Way is best for destroying the doors as quickly as possible.

The red walkers will shoot a closer-range flamethrower if you're in front of them. Walk circles on them and keep attacking from the side or behind in order to finish them off.

You'll want to be very careful in this section, as there are few opportunities to heal yourself.

You'll then enter a maze. The red robots here have swords. Make quick work of them with the Shish Kebab attack. When you do enough damage to them, they'll drop their sword, allowing you to go after them rather easily due to the fact that they'll run back to their sword and pick it up when disarmed. The bad news about them (and the rest of the robots here) is that they respawn when killed. 

Assimilating the red sword robots give you Fence, which allows you to shoot a crescent beam out of Fusion at 8 BP a pop. It's not very powerful, but it allows you to fight from a distance, at the very least. 

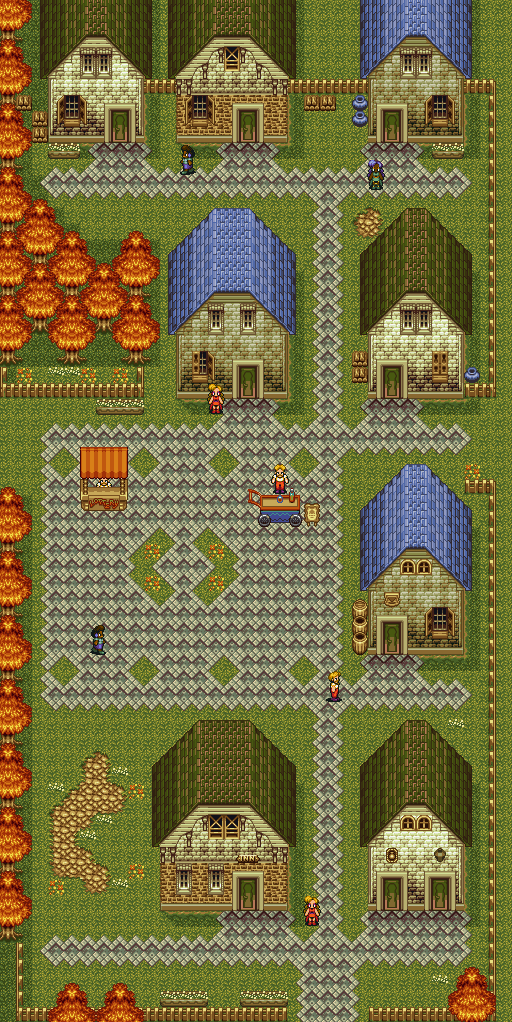
Despite the size of the maze, it is pretty easy to find your way through this maze and just as easy to memorize the twists and turns to the finish as well as where the power-ups are. There is a chest in this maze that you'll want to open that contains an EX-Drink if you want one of the action figures. 

Once you make it out of the maze, the sun will be setting and you'll be meeting the same enemies that you did at the beginning of the section. There's a nice twist here: some of the bushes open up and turn into laser cannons much like the ones near the gates.

The laser generators that move up and down the walls can be destroyed easily, causing the laser that can hurt you to be deactivated.

Believe it or not, you can destroy the fountains if you want. The fountain at the top of the next section will turn into an elevator which sends some blue walkers at you. They're basically the same as the red ones, but they can shoot fire slightly further.

When you're done with the enemies at the end of the garden, take the elevator down. You'll enter the inside of Soda Fountain. Watch out for the steam coming out of the platform when crossing the pit here.

The door at the other end shoots a 7-way shot that moves towards and spreads out. Attack the panels where the cannons are to get some health and BP pick-ups and continue on. Just like the gates from earlier, you can easily lay waste to them with 3-Way.

Destroy the green cryonic tubes to find some power-ups as well as a few enemies. Destroy the computer mainframes if you need even more. After that, you'll be climbing up some stairs taking on flamethrower soldiers and walkers. After that, you'll deal with another door with laser turrets.

The missile silo will shoot at you with lasers and missiles. Jump over the laser when it spins around three times, and watch the shadows to see where the missiles will land. They usually land in a square-shaped formation. Attack the small visor with the eye that the laser comes out of to damage it and ultimately destroy it. Once again, 3-Way saves the day here.

You'll then take a ride on an escalator platform. Watch out for the walker and smash one of the legs in order to destroy them.

After another turret door, it's time to face Topo. Unlike the other two Leader's Force, this is a dance-off. Topo will dance. Watch with buttons she leaps on, then wait for her to start dancing again. You'll have to tap the same buttons to the beat and keep up with her. If you go too early after the example or if you mess up, you'll be knocked to the back of the room into a force field and take damage. After three successful sequences, you'll beat Topo.

When you beat Topo, you'll find out Leader's Force led you on to getting the Five Scrolls so they could their hands on Lumina for Colonel Cappricciola without facing the Crest Guardians. Topo will tell you the Sky Crest is right here in Soda Fountain.

Get on the stage and you'll be able to get out of here. After this, you'll find out that Topo broke her legs after the battle. How this part makes any sense is beyond me.

If you need healing items (and one of the Special action figures) there are two C-Drinks in the next room. You'll be able to save at this point.

Saturday, March 1, 2025

PrinceWatercress plays Wario Land II - Part 32 of 51


Holy cow, compared to the rest of his castle, Wario's cellar is just a deathtrap waiting to happen.


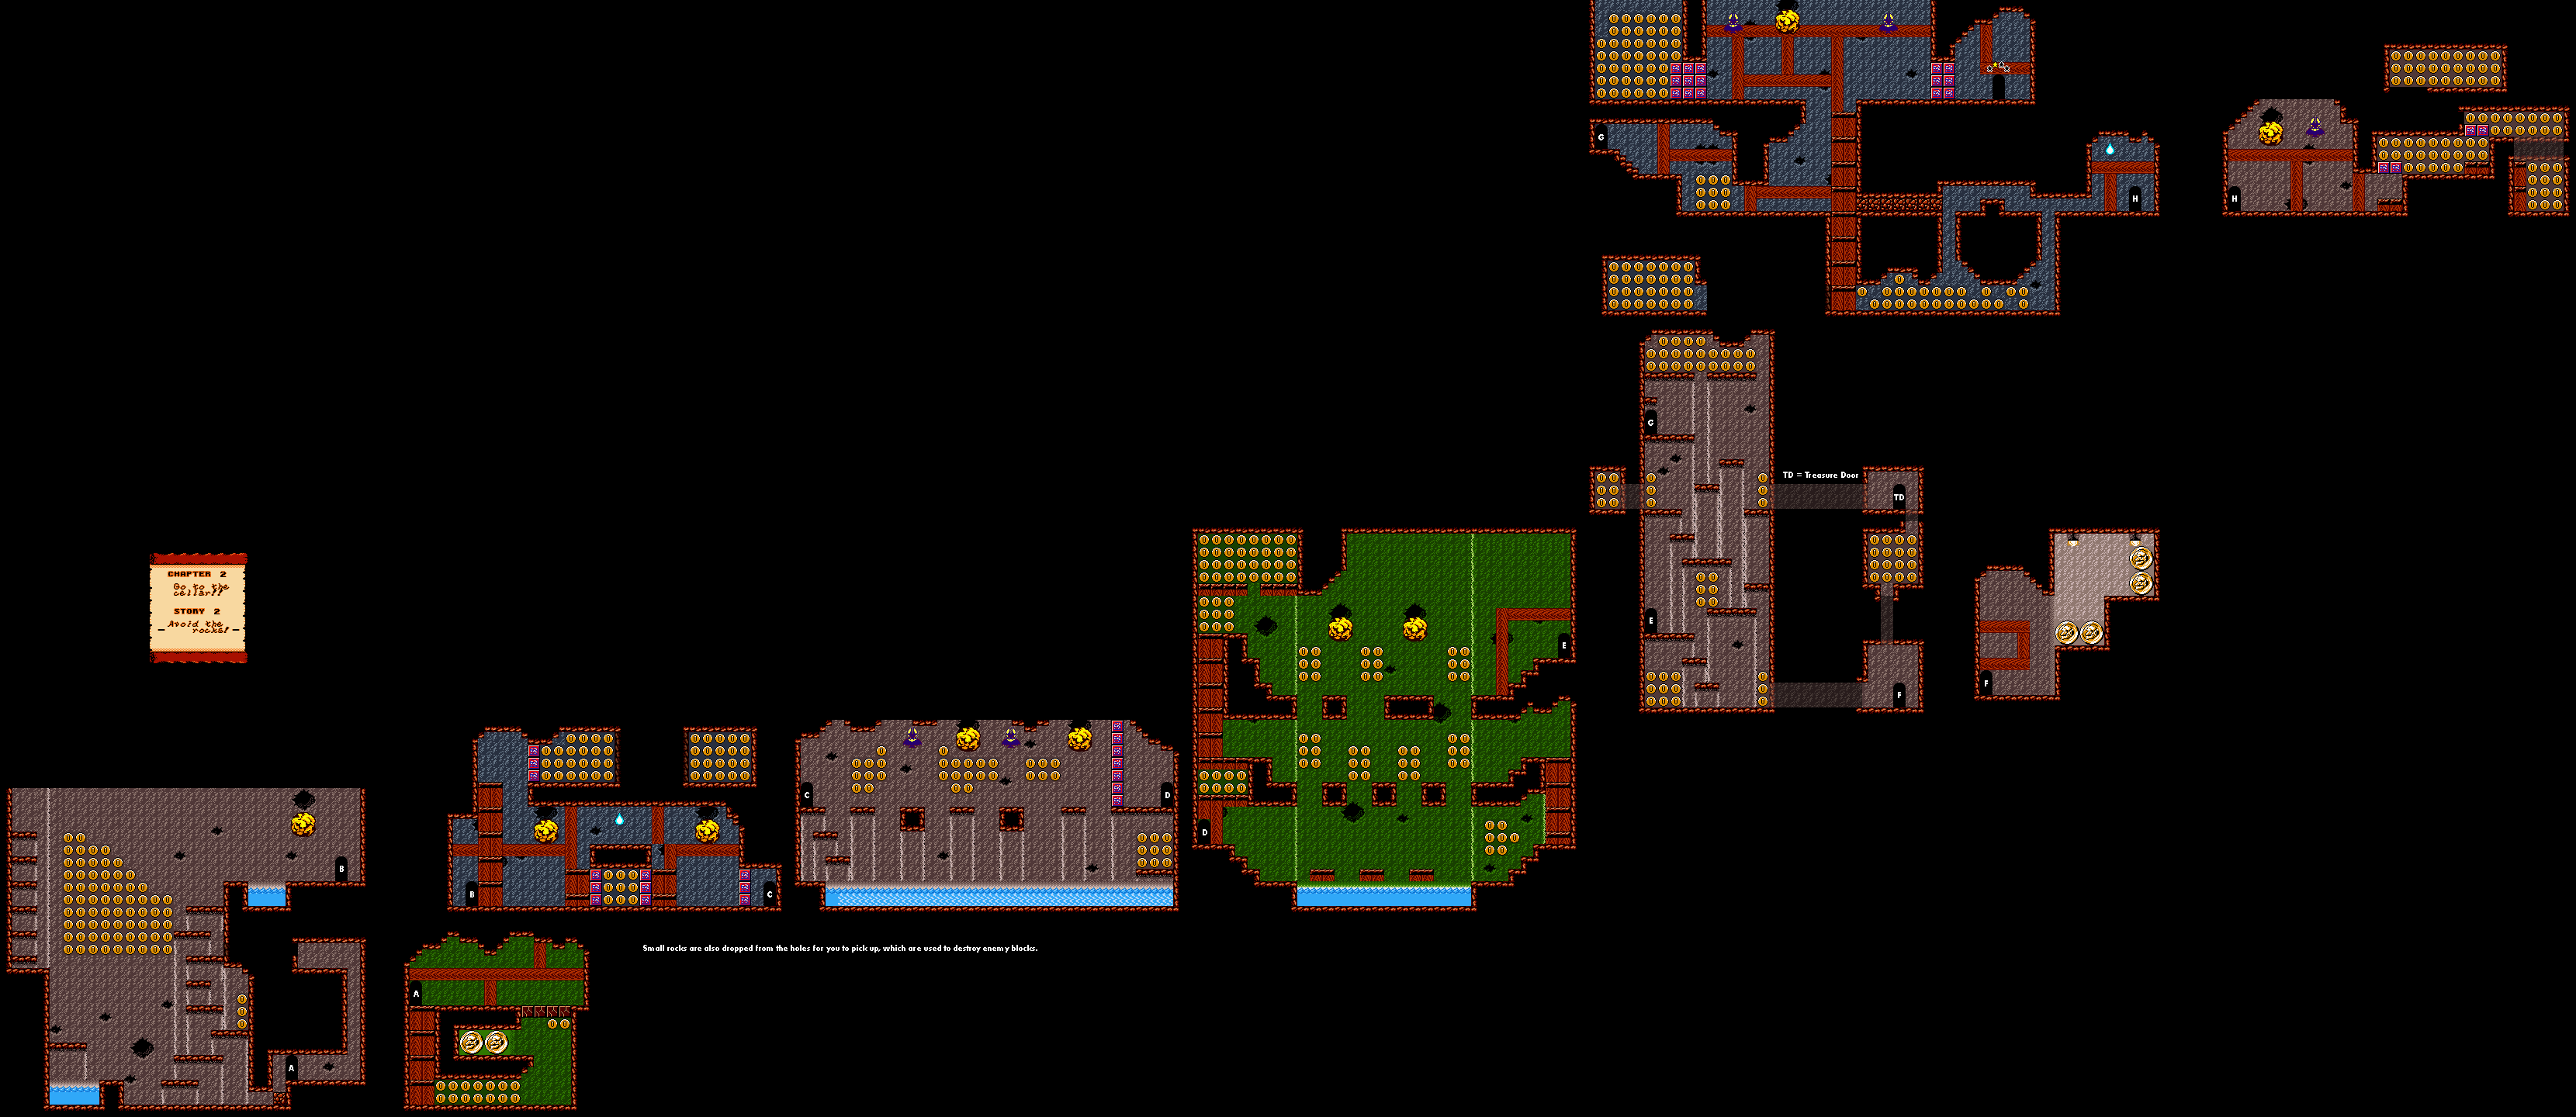
Chapter 2: Go To The Cellar

Story 2: Avoid the rocks!


There are two kinds of falling rocks. The small ones can be grabbed and thrown, but the big ones will flatten you and turn you into Flat Wario, which will allow to float and pick up coins and do thinks that you couldn't earlier. There is a part of the wall to the right at the start that you can tackle for a route to some big coins, and there is a part where you can go as Flat Wario to the left at the top of the starting point for some coins.

The small rocks can be thrown into the enemy blocks just like any other enemy, and it will break those blocks. Waiting for the big rocks is harder, as they always show up randomly. They'll show up, though.

Use a jumping tackle to get rid of the bats in the part where you have to jump over the water. In the big room afterwards, wait until the coast is clear to jump across at the top, as even the small rocks will sabotage your jumps. While you're in that room, you can high jump off Spear Goons to find some hidden coins, especially in the upper-left corner.

After this, tackle your way through the wall on the right, then enter the room you find and use the Spear Goons as trampolines to the big coins. Coins will hint at walls you can tackle for hidden areas during the next upwards climb. One of these hidden areas leads to the treasure room, where you can win a starfish.

In the next room, leave an enemy block on the top-left corner to ensure you get all the coins. The top-right corner leads to the exit. Use the slope to roll your way through all the rocks for another area with coins. 

Monday, September 30, 2024

PrinceWatercress plays Chrono Trigger (Super NES) - Part 32 of 70


In this entry, we rescue Melchior and head out towards the Ocean Palace.


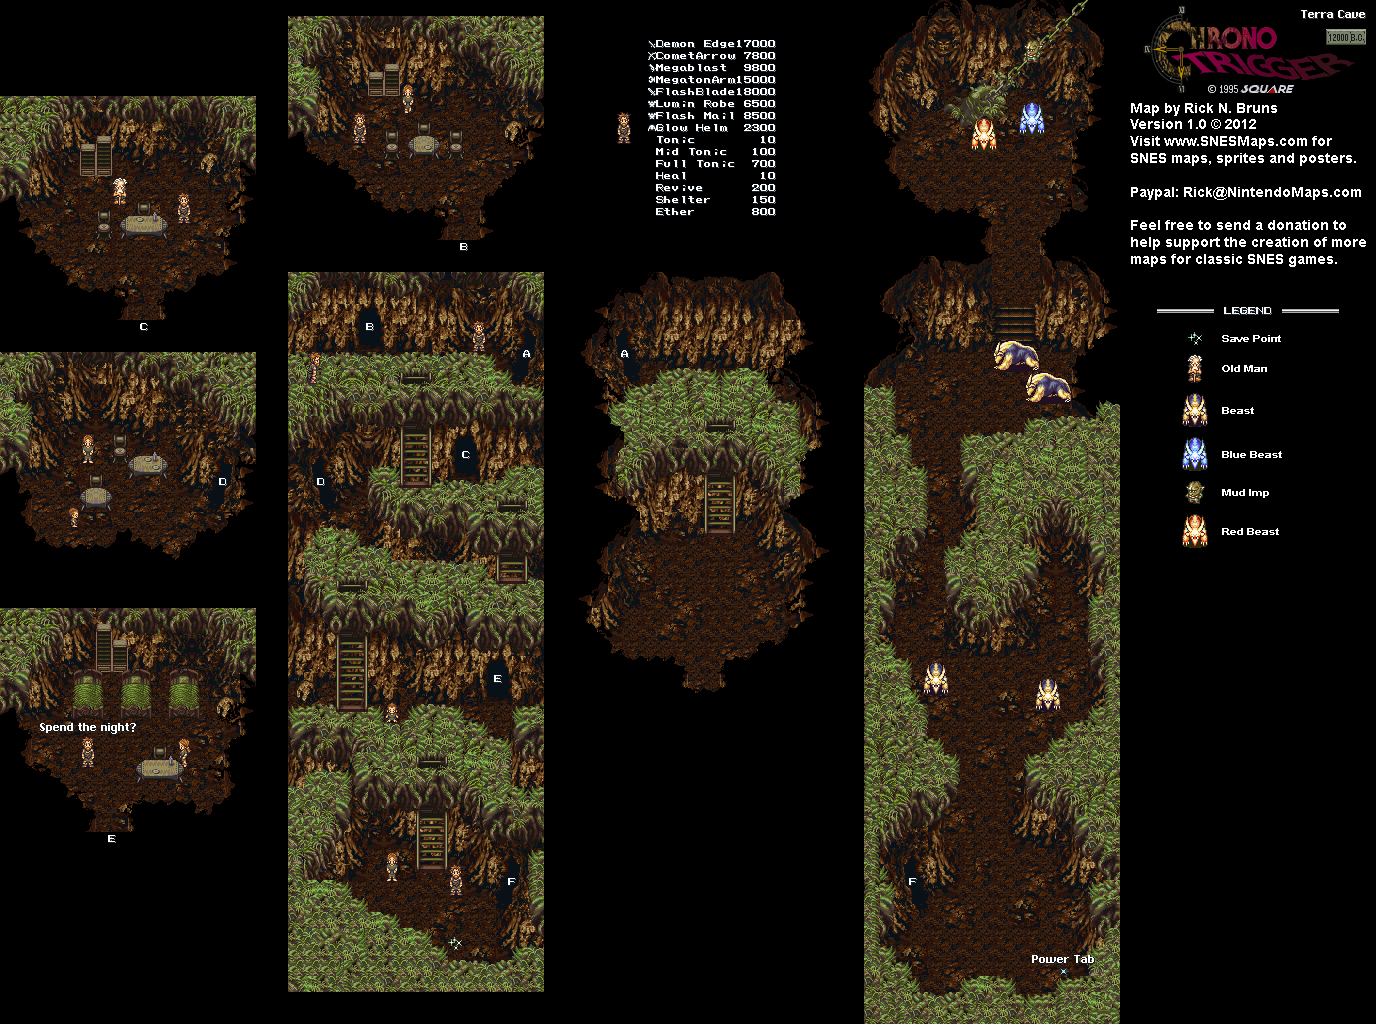
When you reach the save point on Mt. Woe, you're nearly at the top. When you climb up the chain in the next room, the sky will get dark. You'll then reach the summit, where Melchior is trapped inside a barrier. When you approach the barrier, the barrier will disappear, and Giga Gaia will show up from out of the ground.

You'll want to get rid of the fists first, as they can perform an electric-based and a fire-based double team attack that can do damage to your party. (Good thing we had those R'Bow Helms equipped!) Once again, bringing Ayla here to take them both out with Falcon Hit works wonders. The hands can be revived, but they will revive at half their original HP, making them easy to take out with one Falcon Hit instead of two. Once you take out the hands the first time, you can work on Giga Gaia's head and do damage to it. When the hands revive, you'll want to get rid of them again.

Speaking of Ayla, if you Charm Giga Gaia's head, you'll get a Speed Tab.

When you beat Giga Gaia, you'll free Melchoir, who will have no idea of who you are or even reforging the Masamune, as you are meeting him in a time before he ended up in 1000 A.D. You'll then return back to the Elder's room in the Terra Cave.


Back at the Terra Cave, Melchior will tell you what Lavos is doing deep beneath the Earth, which is stuff you already know, and that Lavos must be stopped before it is too late. Suddenly, Schala and Janus will show up. She will mention that the Ocean Palace is now operational, then tells you that she has kept the Skyway open and asks you to stop her mother. Dalton will then show up and attacks Melchior, Janus and the elder before taking Schala hostage. He then teleports away with Schala and Janus.

Once you have control again, talk to Melchior. After he says that the world is doomed thanks to Queen Zeal, Crono steps up to challenge the queen. In a gesture of thanks, Melchior will give you the Ruby Knife, which you'll need to stop the Mammon Machine, which is now in the Ocean Palace. Your next stop is Zeal Palace, and thanks to Schala, we can finally go up to the floating continent with the Skyways again.

Before we go there, we handle a few things.


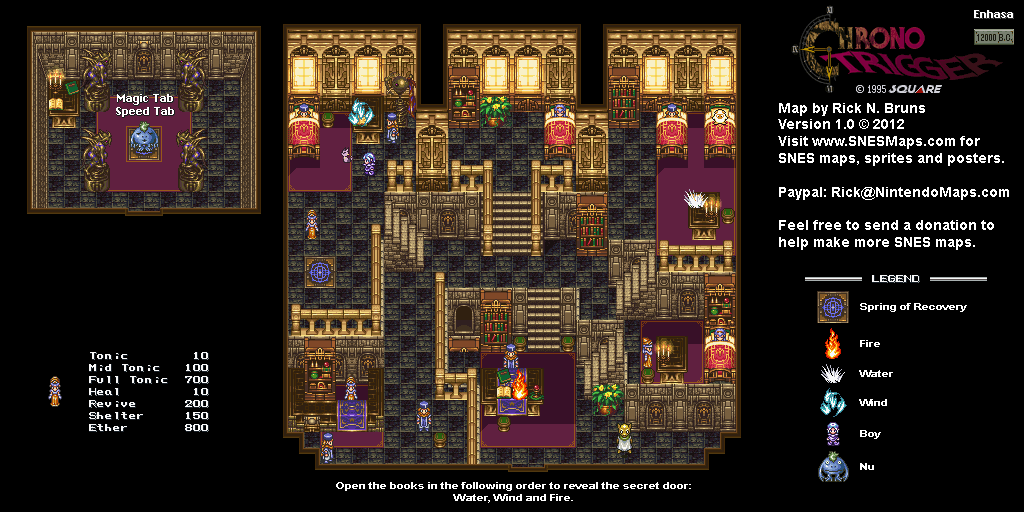
Believe it or not, there is a Speed Tab at the southeast corner near the door in that area. You'll see it in the previous room if you're in the northwest corner and you see the sparkle there. You'll have to go behind that wall to pick it up. (This is a copy-paste from Part 28, I know, but I finally get it here.)

Also, the store here sells Lode Armor and Lode Helms. When the Nu shopkeeper asks if you have Schala's pendant, say no. He will then sell to you. Buy the Lode Armor for your party, as the Lode Helms are useless thanks to the R'Bow Helms. (If you say Yes, the Nu says "I hate liars." You'll then have to exit and re-enter Enhasa to try again.)


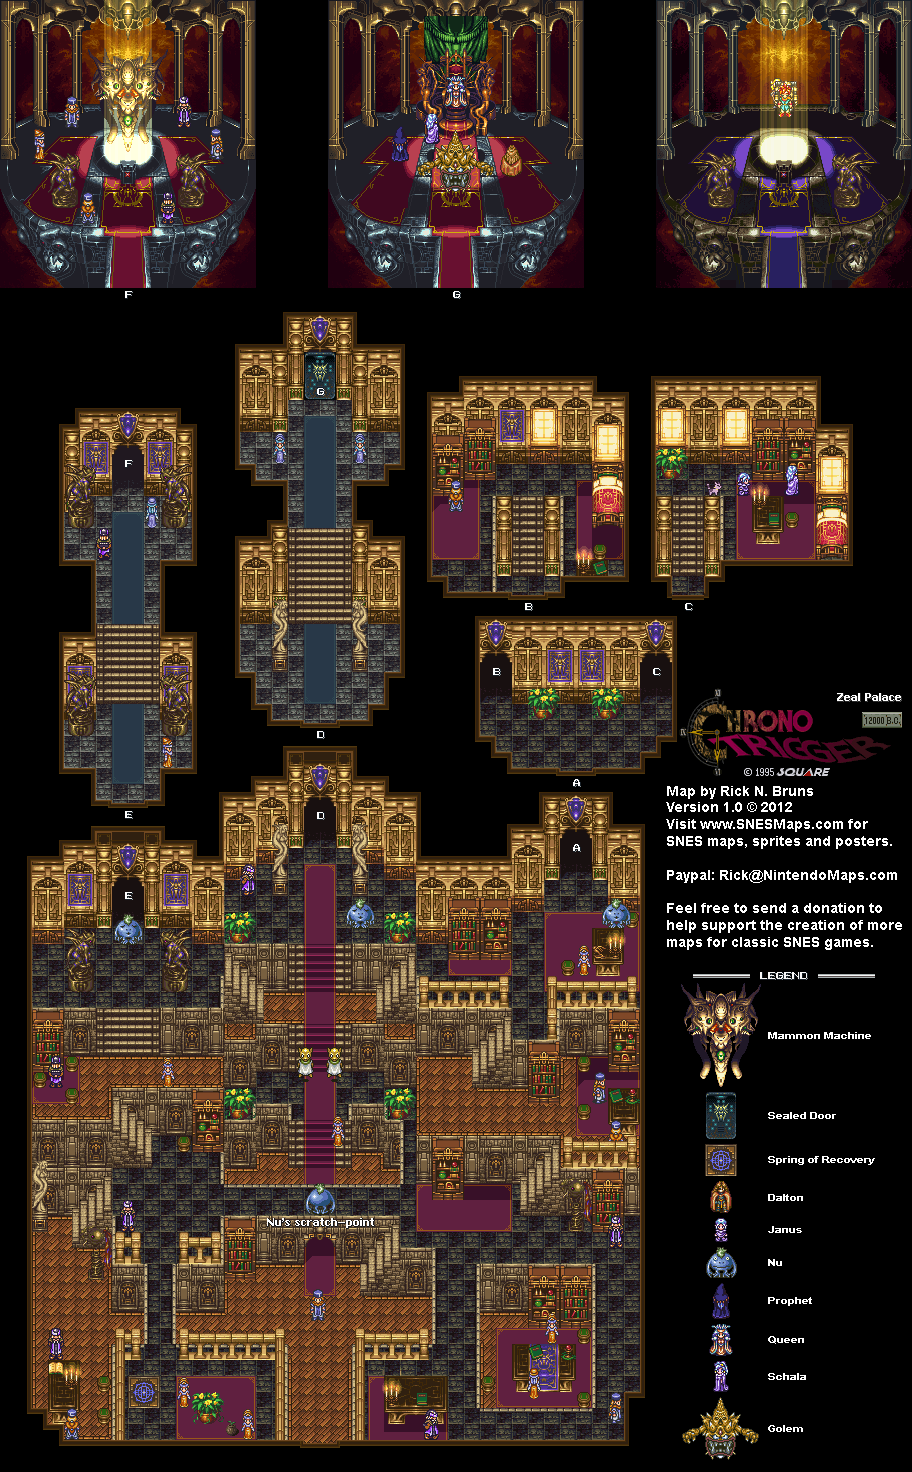
Back at Zeal Palace, it's a straight shot to the throne room thanks to Masa and Mune no longer being in the way. 

If you go to where the Mammon Machine used to be, you'll find out that it is gone and has been moved to the Ocean Palace.

When you get to the throne room, you'll face Dalton. Dalton attacks much like the Golems with Iron Orb on counterattack, but not much else. Using Delta Force with Crono, Lucca and Marle whenever possible really tears into his HP. Just be ready to heal your party with Aura Whirl often.

If you have Ayla in your party, you can Charm Dalton and get a Power Meal. This item just cures the "Lock" status and does nothing else, and is only worth 1G if you try to sell it.

When you beat Dalton, he will flee to the Ocean Palace, and a Gate leading to the inside of the Palace will form.

Monday, June 24, 2024

PrinceWatercress plays Ratchet and Clank: Going Commando - Part 32 of 54


Now that we're free, it's time to head back to Joba and complete some challenges for some more bolts.

First | Previous | Next | End

4:38 - We can now buy the Zodiac, which is a rather powerful weapon. We can also buy the Shield Charger, which acts as a temporary personal shield.

5:29 - The Damage Avoidance Challenge. As it says on the tin, you can't get hit, or the challenge is over.

During this challenge, the Synthenoids turn into the Killenoids, which last longer and do more damage. 

9:45 - The Hazard Cage Challenge. Once again, let the lava rocks do some of the work for you as you fight enemies on the walls.

During this challenge, the Bouncer becomes the Heavy Bouncer, which shoots out even bigger projectiles that cause even bigger, more devastating explosions.

11:27 - The timed challenge is back, and now that we've gotten some things evolved, we can do a lot more damage in less time. We just need to be efficient if we want to destroy 90 enemies in 90 seconds.

15:42 - The Megapede Challenge. Bust out the Megaturret Glove, Killenoids and HK22 for this one, and let the Megaturret Glove shot do some of the work while you avoid the orbs that track you and fire off shots with the HK22. As you whittle the Megapede down, it will get smaller and smaller, and you'll eventually defeat it.

18:03 - The Limited Weapon Challenge. This time around, you can only use the wrench. Remember that jumping and striking with the wrench does double damage, and that single strikes that are not part of a combo work best against the spiders and the spheres of doom.

20:35 - This time around, we're defeating the Megapede again, this time in three minutes or less. Our tactics from last time will tear this thing apart in less than two minutes.

Controls:


As Ratchet:

Control Pad/Left Analog Stick: move
Right analog stick: move camera

X:
  • Jump and double jump (hold button after double jump to use Heli-Pack or Thruster Pack)
  • Wall jump (near certain walls)
Square: strike with wrench
Circle: pull out/shoot currently equipped gun
Triangle: 
  • quick select (hold and use in conjunction with Control Pad or left stick to switch guns; menu can be customized in Quick Select on the pause menu
  • double tap to switch between two most recently equipped weapons/items
  • interrupt on-screen messages

Select: open map
Start: Pause menu
  • Control Pad: select option
  • X: confirm option choice

L1:
  • center camera behind Ratchet (tap button to center)
  • first-person view (hold button and use left stick or D-Pad to look around; let go of L1 to move camera back behind Ratchet)
  • Square: wrench boomerang
  • Circle: fire gun
  • R1/R2: zoom in and out (Pulse Rifle only)
L2/R2: strafe (hold while moving)
L3: see health and Bolt totals
R1/R2: crouch (hold down)
  • Square: wrench boomerang
  • X: high jump
    • long jump (hold crouch button and jump while running to perform)
R3: open map

In water:
  • Square: dive and descend
  • X: surface and ascend
  • R1: accelerate with Hydro-Pack

As Clank:

Control Pad/Left Analog Stick: move
Right analog stick: move camera

When hanging off platforms:
  • Control Pad/Left Analog Stick: move
  • Forward+X: vault up
  • Back+X: drop down

Square: punch
X: Jump (press and hold in the middle of a jump to glide with Heli-Pack)
Triangle: command menu (hold and use in conjunction with Control Pad or left analog stick to choose commands)

Saturday, May 25, 2024

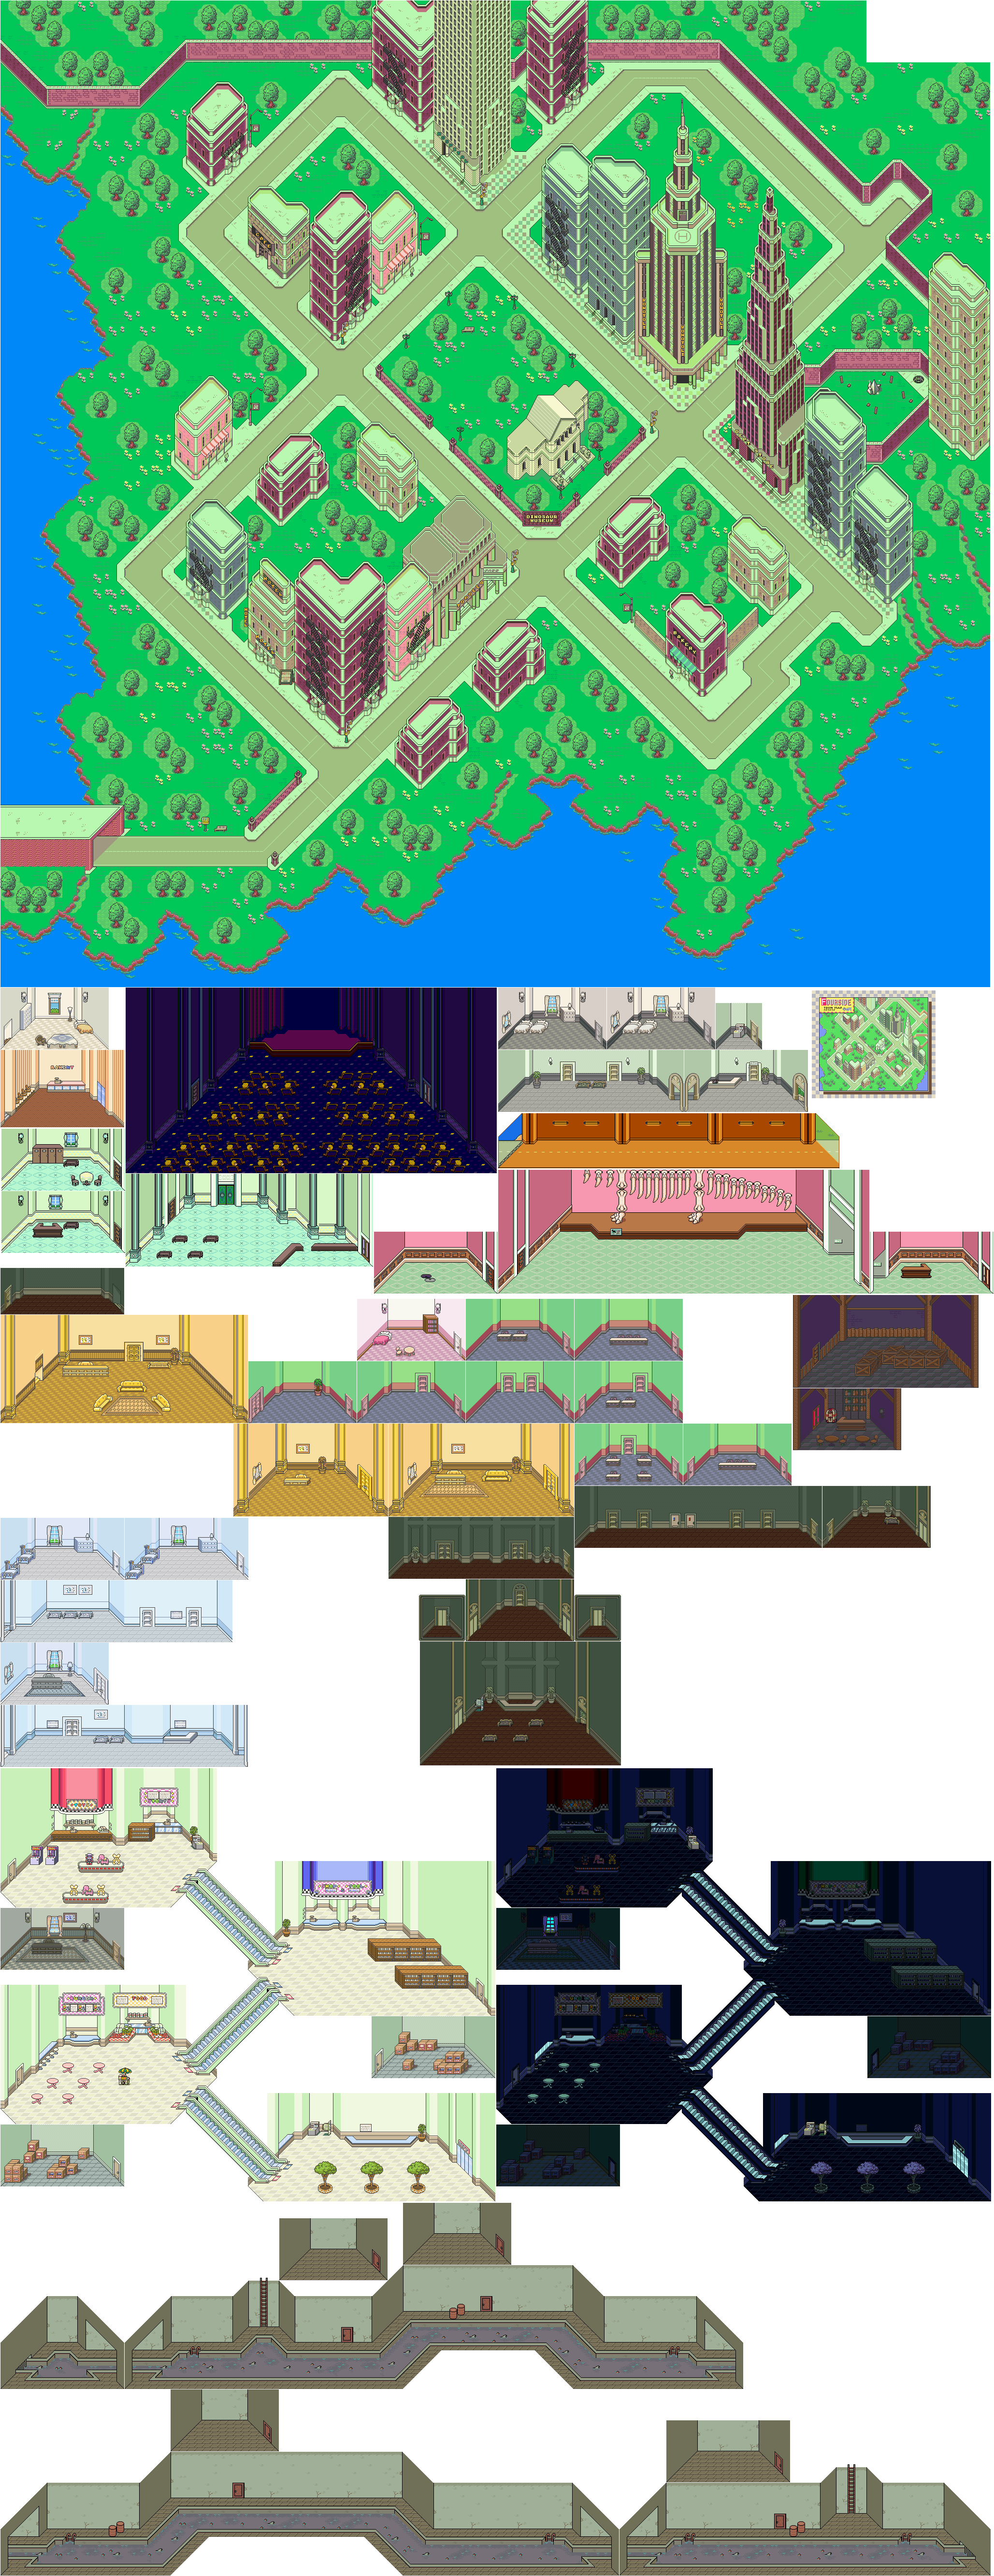
DeceasedCrab plays Earthbound - Part 32 of 53


More trudging through the sewers in this entry...


The Filthy Attack Roach is another roach enemy stronger than the ones from before.

Poo learns PSI Magnet Omega at Level 27.

The Broken Bazooka becomes the Heavy Bazooka when fixed. It can do a lot of damage.

You'll eventually come across the fifth Your Sanctuary Location, where you'll face the Plague Rat of Doom. You'll want to bring Bottle Rockets and Big Bottle Rockets to this battle, and you'll also want to cast Freeze Beta on it whenever possible to freeze it. If you run out of Bottle Rockets of any kind, use powerful spells. On the other side is Magnet Hill, and a chest containing a Carrot Key. You'll need this for Dalaam.

If you leave through the Dinosaur Museum, the photographer will show up.

Tuesday, October 31, 2023

Jerry Martin plays Strong Bad's Cool Game For Attractive People - Part 32 of 53


...and Episode Three comes to a close. Stay tuned for Episode Four!


In Limozeen: Hot Babelian Odyssey, you'll be shooting down enemies while saving hot alien babes with your tractor beam. Up and Down move, Right fires, Left shoots out a bomb that destroys all the bad stuff on the screen, and Ctrl shoots out the tractor beam.

Shoot down the Nebulons, use the tractor beam when directly above someone you can rescue to save them, take out Mitch Overlord's blimp before it takes you down, and make sure the Nebulons don't carry the hot babes off. You'll start out having to save three babes in the first level, but as you go through the game and reach higher levels, you'll have to rescue more people to get to the next level. The most you have to rescue in any level is twenty. You'll also get faster and faster, too, so pay attention to what you're doing.

If you can reach 45,000 points, you'll get an in-game achievement for it. Shooting down enemies and rescuing hot alien babes will get you points, but if enemies carry anyone off, you'll lose 200 points for every time that happens.

The green things that spin around are mines shaped like Gibson Flying V guitars. You can shoot them down, but they award no points. It is best to avoid them if you can.

When you get everything in the episode, you'll get the Limozeen Shirt.

OUTFITS:
- Sloshy Shirt: Use mic in downstairs laundry room.
- Leopard Print Pants: Examine couch in downstairs TV room.
- Head Band: Use mic near brick wall to the right of Bubs.
- Hollywood Boulevard Boots: Use the Black Metal Detector near the picket fence.
NEW! Limozeen Shirt: Automatically given to you when you get 100%

STRONG BAD ABUSE:
- Examine the microwave in the kitchen.
- Examine the Lappy Plug in Strong Bad's computer room.
- Use the fake sword on Marzipan.
- Use the bleach on the pond at the Two-o-Duo stage.
- Talk to Strong Sad at the Pomstar stage.

LIMOZEEN SHOT GLASSES:
- Larry Shot Glass: Examine Luxa-Lounger.
- Perry Shot Glass: Use mic near Strong Bad's mailbox.
- Gary Shot Glass: Use the Black Metal Detector next to Marzipan's Zen Garden.
- Mary Shot Glass: Examine the dead fish at the Two-O-Duo stage after using the bleach on the lake.

LIMOZEEN MANUAL PAGES:
- Cover: Use the Ordinary Light Switch in Strong Bad's computer room.
- Dedication Page: Use the Black Metal Detector in front of the Two-o-Duo Stage.
- Lyrics Sheet: Use the Mic in front of the Cool Tapes stage.
- Back Cover: Use "Doin' The Wigglie" on the turntable at Club TC. (Extended Play)

RARE BAND POSTERS:
- Two-o-Duo: Use the Black Metal Detector on the right side of Bubs' Concession Stand.
- Cool Tapes: Check the first locker on the left in the Locker Room.
- Pom Pom: Use the microphone at Club Technochocolate.
- DOI: Use the Black Metal Detector in front of the DOI stage.

EXPRESSION OF AFFECTION:
- Talk to Strong Sad about bats twice.
- Talk to Bubs about the Fun Machine.
- Talk to Coach Z about Marzipan twice (before he leaves Locker Room).
- Use Cool Tapes Photo on Marzipan and make out to Strong Bad.
- Use Cool Tapes Photo on Marzipan and make out to Coach Z.
- Talk to Coach Z about Poetry at Marzipan's House.
- Talk to Limozeen about Two-o-Duo at the Two-o-Duo stage.
- Talk to Coach Z at Pomstar (after breaking up Two-O-Duo and before sabotaging Pomstar).
- Talk to the Whale at the Pomstar stage twice.
- Give both of the photos (whale and pond) to Marzipan and take the coloring book, then turn hints up to high and walk around the Two-O-Duo Stage (before coloring the coloring book and before playing the Teen Girl Squad ).

MUSICAL MOMENTS:
- Offer The Cheat an entry form.
- Offer The Cheat an entry form twice.
- Offer Strong Mad an entry form.
- Talk to Coach Z about the Boom Box at Marzipan's House.
- Talk to Strong Sad at Strong Badia. (Extended Play)
- Use "Doin' The Wigglie" on the turntable at Club Technochocolate twice. (Extended Play)
- Use "Slide To The Right Y'all Bridesmaids" on the turntable at Club Technochocolate. (Extended Play)

NEW! Score 45,000 points or more on Limozeeen: Hot Babelian Odyssey. (Extended Play)

Tuesday, April 25, 2023

PrinceWatercress plays Sly Cooper: Thieves In Time - Part 32 of 48


In this entry, we find the last of the treasures in Episode 2. Next time, we'll take a break from the treasure hunting for another Trophy.


The treasures in this game work much like they do in Sly 2: they will be in certain locations in the episodes, and you'll have to go out of your way to find them, interact with them to grab them, and bring them back to the hideout without getting hurt by the enemies. Sadly, there is no way to get them show up on the Select screen map. Unlike that game, where some items were on timers and others were not, all of the treasures are on timers and you'll have a certain amount of time to get a treasure back to the hideout. The amount of time that you get depends on the treasure.

Each episode - not counting the Paris prologue and epilogue - has 12 treasures in all, leading to a total of 60. There are also a few Trophies for going for all the treasures along the way.

I also create some rules of my own for the treasure collection videos as well.

1. There are no practice runs. Everything that is done is done on the fly.

2. You will need all of the costumes before even attempting to get all of these.

3. There is a total of twenty (20) minutes to collect treasures per video. Whether any more time is needed to get one more treasure is a matter of discretion.

4. The timer only starts after exiting the hideout and gameplay begins.

5. In case a return to the hideout is needed to get away from enemies or to switch episodes, the timer is suspended. The timer is only restarted once the hideout is exited again and gameplay begins again.

6. After the twenty (20) minutes are up, we get to read the treasure descriptions and rotate the treasures.

GamesRadar made for some pretty good notes on how to find everything; you can find them here.

9. Steer Horns


There is a pipe leading up to some platforms in the scorpion shoot-out area. You'll need to jump to it with the Sabertooth Costume, then use the Jailbird Costume to get past the laser fields. Once you get back on the railroad tracks, move away from the area like you were taking a round trip around the area. You'll get to the hideout faster.

10. Temporal Flux Driver


There is a pair of outhouses on the northern part of the train route. You'll find this between them. Thankfully, getting to the hideout is done the same way as with the Steer Horns.

11. Street Sign


Remember where you found Toothpick's lollipop? You'll find it at the the top of that blue building. Thankfully, getting to the hideout is a bit of a snap, as you can use the power lines to get to it.

12. Bottle of Sarsaparilla


This treasure is far to the north on a rock ledge. As for delivering it, you'll need to stay on the ground on the way to the hideout and go to rooftop level halfway through.

Episode 3: Clan of the Cave Raccoon


1. Ruby Crystal


This treasure is located behind some trees south of the hideout. You'll need to jump off a nearby mushroom close to the hideout to make delivering this thing possible.

Controls:


Left analog stick: move
Right analog stick: move camera
X: Jump and double jump (hold X on second jump for hover jets as Bentley)
Square: attack
Circle: 
  • interact (usually with anything that has sparkles) (Sly)
  • steal from enemies (from behind) (Sly, Bentley, any of Sly's ancestors)
Triangle:
  • knock enemies upwards (from behind; press Square to slam enemies down for stealth slam) (Sly, any of Sly's ancestors)
    • press Circle after knocking enemy upward to perform Silent Obliteration (Sly; replaces Stealth Slam; must buy on ThiefNet)
    • press Square for Stealth Slam (any of Sly's ancestors)
  • spin attack (hold to charge) (Sly)
  • throw bombs (Bentley)
  • Thunder Flop (in mid-air) (Murray)
  • spin attack (hold to perform) (Murray)
    • control with left stick (must buy on ThiefNet)
  • Raging Inferno Flop (in air; Murray; must be bought on ThiefNet)

L1: 
  • bomb aim (Bentley)
  • smoke bomb/flash bomb (Sly; must buy on ThiefNet)
  • aim/strafe mode (Carmelita; must hold button down)
    • left analog stick: move
    • R1: shoot (can only shoot in strafe mode)
L2:
  • hold for costume select menu (Sly)
    • hold down to stay in menu; use D-Pad or left stick to make selection
  • hold for weapon select menu (Bentley)
    • hold down to stay in menu; use D-Pad or left stick to make selection
  • hold for fist select menu (Murray)
    • hold down to stay in menu; use D-Pad or left stick to make selection
  • hold for shot select menu (Carmelita)
    • hold down to stay in menu; use D-Pad or left stick to make selection

L3: activate compass
R1: run (hold while moving to perform)
  • Paraglide (Sly; in air; must buy on ThiefNet)
    • Square: Paraglide Dive Attack (during Paraglide; must buy on ThiefNet)
  • Adrenaline Burst (Bentley; double tap to activate; must buy on ThiefNet)
  • Clothesline (Murray; double tap and steer with left stick; must buy on ThiefNet)
  • Cane Push (Sly; double tap; must buy on ThiefNet)
R2:
  • Trigger Bomb (Bentley; must have bomb on field to detonate manually; must buy on ThiefNet)
  • Super Jump (Carmelita; hold and press X to perform; must buy on ThiefNet)
R3: Binocucom
  • Right analog stick: move
  • Left analog stick: zoom in and out
  • R1: take picture (when applicable) (Sly, Bentley)

Start: pause menu
Select: map
  • Left analog stick: zoom in and out, switch between map and status
  • Right analog stick: move map
  • Circle: back

Monday, March 6, 2023

PrinceWatercress plays Blood Omen: Legacy of Kain - Part 32 of 41


On the way to Willendorf, we find a few secrets.


1:03 - Here's a long overdue secret. There is a big rock here that needs to be pushed. Once you get past it, you'll trigger a secret (see below) that leads to eight Hearts of Darkness a rune triangle and a blood vial.

3:54 - This cave behind a big rock leads to a spell that improves your disguise.

4:49 - While in this mine shaft, you can push the mine carts. Thankfully, the path here is pretty straightforward, and the enemies here are easy to fight. You can hit the stalagmites here with the mace, but you won't find anything. You'll also find a rune triangle and a blood vial along the way.

11:12 - The blood fountain here improves your disguise. If you use the disguise form, however, the game will lock up. From here, head south and follow the path to get out of his cave. Don't forget to save!

13:47 - Welcome to Willendorf. We're not exploring this place...yet.

15:01 - Instead, let's go further south. Past the rocks to the east is a dead end, but south...

16:37 - ...leads here. Jumping across the mountains with the werewolf form leads to scarecrows you can easily destroy with flays. There is a Heart of Darkness by itself, which we'll return to later. There is also a cave on the way down.

18:37 - The cave leads to a blood fountain that gives you even quick magic regeneration.

19:49 - The watery path leads to magic regeneration as well as an Energy Bank and a Pentalich of Tarot. Going further south leads to a full moon cave and a beacon. Activate the beacon.

22:04 - The cave to the right of the two spires is Secret #89. Keep going north to get credit for it (see below). If you can push all the rocks correctly, you can kill all the enemies and get everything here.

Secrets

88. - Here's a long overdue secret. There is a big rock here that needs to be pushed. Once you get past it, you'll trigger a secret that leads to eight Hearts of Darkness a rune triangle and a blood vial.

89. - The cave to the right of the two spires is Secret #89. Keep going north to get credit for it (see below). If you can push all the rocks correctly, you can kill all the enemies and get everything here.

Wednesday, December 22, 2021

HCBailly and JB play Secret of Mana - Part 32 of 41


We try to stop the Emperor in this entry, but unfortunately, the Emperor gets his wish.


Tree Palace

If you tried to enter this palace before this point in the game, a magic barrier would have pushed you back, but you can now enter at this point.

When you do, you'll meet Emperor Vandole and his two henchmen The Emperor has broken all the seals, then says you won't be around for the last seal to be broken. Sheex will volunteer to defeat you, then turn into another boss: the Aegagropilon. You'll also find out that Sheex was the Dark Stalker to tried to attack Tasnica earlier, and that the Empire has signed a contract with the underworld to take over this one with the Mana Fortess.

To beat the Aegagropilon - who can cast Burst and Sleep Flower on your party and Wall on itself, use Popoie's Earth Slide, and cast Lucid Barrier on your party. Don't forget to cast Moon Energy for big hits.

When the Aegagropilon jump sinto the air and lands, watch the shadow and smack it with physical attacks before it bounces around.

When you beat the Aegagropilon, you'll get the Spear's Orb. The Gigasa Lance increases Strength by two points. You'll also beat Sheex for good. From here you can go to the left and take the stairs to the Mana Seed.

When you do, you'll find out that the seal has been broken, and that your Mana Power has been reduced to zero. Dryad, the tree spirit, will show up and tell you to get out before the hidden continent rises. Popoie and Purim convince Dryad to help, and Dryad will join your party as the last element, even though their Mana Magic is sealed, leaving you with two spells for each characters.

Purim's Dryad spells are as follows:

Revivifier: Revives a character much like the Cup of Wishes. You'll definitely want to get Dryad's levels up for this one, if not for Wall. (10 MP)

Wall: Like Lucid Barrier, but is green and reflects magic attacks back on the enemy. (6 MP)

Popoie's Dryad spells are as follows:

Sleep Flower: Puts the enemy to sleep. (2 MP)

Burst: Hits the enemy with a powerful explosion. (4 MP)

After Dryad joins, you'll be on Flammie, helpless to watch as the sunken continent rises. The music for when you fly around also changes. Land on the continent and start fighting.


When you land, you'll be at the top of the now-risen Tree Palace, where you can talk to Jema. He will tell you to get into the ancient city underneath the palace. Make your way downstairs into the watery area, then find some stairs to the left and go down them.

The Metal Crawlers can cast Wall on themselves, and they can Poison and Engulf you, making them very dangerous to deal with.


The Steelpions can cast Defender on themselves much like the Sand Stingers, but they can also use Gem Missile against you and they can Poison you. 

The tiny spikes can be broken with the axe, and the waterfalls will push you back if you stand on them. At the beginning of this area is a chest with the Boomerang's Orb. The Frizbar is effective against slimes and lizards.

Don't touch the floor switch in the second room. It resets all the spikes.

The Kimono Wizard spawns Metal Crawlers, and can cast Freeze and Energy Absorb on your party.

The Basilisks can Petrify your party if they get too close, and they can also spawn Eggatrices. They can cast Defender, but it's really weak.

At the waterfall in the second room, go all the way to the west, keep moving north and strike the switch to the west with a weapon when you see it. This will remove the waterfall. For the waterfall near the end, stay near the east wall and strike the switch.

You'll soon face the Hydra, a re-color of the Jabberwocky. It attacks much like that boss did, too, but it can also hit you with the Current attack. Use Moon Energy and Lucid Barrier to make fighting this thing up close easier. 

Beating the Hydra will give you the Whip's Orb. The Hammer Flail will slow enemies it hits down.

After beating the Hydra, you'll meet Emperor Vandole, Fanha and a soldier, but they leave after Emperor Vandole tells Fanha to let the Mana Fortress deal with your party and Fanha blinds everyone in the room with a bright light.

Tuesday, November 30, 2021

PrinceWatercress plays Sly 3: Honor Among Thieves - Part 32 of 42


We've made it to the Cooper Vault with a full house, and we'll need them to beat Dr. M at his own game. But first, we need to get Sly's cane back...


Episode 6: Honor Among Thieves

The episode picks up where "The Beginning of the End" left off, with Sly having flashed back to the events of the beginning of the game before wishing he could have seen what was in the Cooper Vault, wondering if his late father would be proud of him, and wishing he could have started a real relationship with Carmelita Fox and told her how he felt about her.

Unlike other episodes of the game, you'll have to do job after job until you reach the final battle with Dr. M. There is no exploration or coin collecting like in the other episodes. This episode gets down to business and does so pretty quickly.

Carmelita To The Rescue

We see where Sly's cane lands, then we see Carmelita and her mercenary forces prepare to fight the hulking chimera of a monster that is holding Sly in its grasp. From here, you'll have control of Carmelita. Stay in combat mode and focus all your offense on the huge monster ahead, and as you do so, you'll need to avoid the mercenaries as they get thrown back onto the boat you're standing on with a thud.

Once some platforms open up to the right after dealing enough damage, get out of combat mode and start making your way up the platforms until you reach the ropes suspended above. Shoot at the monster again, and kick the minions that zipline over to you when they land on the ground. They will land in the water when you do.

After dealing enough damage, you'll need to mega jump to one more platform. Here, you'll fight this monster up close. When it raises its fist, use the mega jump to avoid the fist attacks and keep shooting. After this, Carmelita is confronted by Dr. M, who fruitlessly defends himself before siccing the monster on Carmelita.

Meanwhile, Sly is on the ground, the monster having let go of him during the battle with Carmelita. Amazingly, he is still alive, albeit concussed, and the gang gets him back on the ship.

A Deadly Bite

In order to get Sly's cane back, we'll need to find a way to get it unstuck from the electromagnetic buoy where it landed. Since The Guru does not carry metal equipment, he is the only candidate for getting the cane back at the moment, and to do that, he will have to use his mind control abilities to convince some sharks in the oceans to join him in an attack.

Jump on the shark and possess it like you would any other enemies, and use the L3 button to look for sharks to possess and buoys where you can possess other sharks. Make it a habit to use L3 to find other sharks and buoys to land on. When you find other sharks, be sure to possess all the sharks you find. As you head to the first buoy, you'll need to watch out for spiked metal balls with ropes between them; if you run into them or the ropes, you're going to get hit.

When you land at a buoy, press Circle at the valve to turn it, then possess the shark that the waypoint marker tells you to possess and use L3 to find other sharks and the next buoy. As you turn valves, you'll get more sharks in your shark army. Be careful when landing on a buoy so you don't accidentally fall into the water and get forced to do the segment of the job you just completed over again.

Electric rods will pop up and shoot electricity when the electricity makes its way to the water on the wya to the third buoy; you'll want to be in the air when the charge of electricity hits the bottom of the rod to avoid being shocked. On the way to the fourth, missiles will be shot at you; you'll want to jump clean over the row of missiles that get sent your way. Once you activate the fourth buoy, you'll free the cane, but it will fall into the ocean. It'll be up to Dimitri to get the cane now.

Controls:

D-Pad/left analog stick: Move
X: jump/double jump
Square: attack
Circle: use to interact with sparkles, steal from enemies (from behind; with Sly), grab objects and stunned enemies (with Murray; press Circle afterwards to grab enemy out of air and press again to shake them, or press Square to throw them)
Triangle:
  • charge up cane, knock enemies into the air (from behind; with Sly, use Square afterwards to slam enemy down/use Silent Obliteration)
  • drop bombs (Bentley)
  • uppercut (Murray; press Circle afterwards to grab enemy out of air and press again while holding enemy to shake them, or press Square afterwards to knock enemy out while in mid-air)

Select: access Gadget Grid
  • D-Pad/Left analog stick: select gadget/ability
  • L1, L2, and R2 buttons: assign gadget to button pressed; gadget can then be used with that button

Start: Pause/unpause
  • D-Pad/left analog stick: choose options
  • X: confirm choice
  • Triangle: back out of choice

L3: bring up waypoint

R3: use Binocucom
  • Left analog stick/D-Pad: look around
  • Right analog stick: move in and out
  • R1: take picture

R1: run (hold down)
  • use Paraglide (as Sly; hold down to use, must purchase first)

Right analog stick: move camera

As Carmelita:

  • Left analog stick/D-Pad: move
  • Right analog stick/D-Pad: move camera/aim
  • Triangle: toggle between strafe mode and free movement
  • Square: kick
  • Circle: mega jump
  • X: jump and double jump
  • R1: shoot

As The Guru:

  • L1 (hold): transform
  • Circle (in mid-air, behind an enemy): mind control
    • Left analog stick/D-Pad: steer enemy
    • X: jump off enemy and launch enemy forward
    • Square: attack

Grapple cam controls:

  • D-Pad/Left Analog Stick: aim camera
  • X: shoot/grapple with hook
  • Circle: distract enemies
  • Square: self-destruct (hold down)
  • R1: Fire turret

Hacking mini-game controls:

  • Left analog stick: move
  • Right analog stick: aim and fire gun

As The Panda King:

  • Square: flame chop
  • L1: hold to load fireworks, release to attack with stored fireworks
    • Right analog stick: sweep over multiple targets

Sunday, October 31, 2021

HCBailly plays Final Fantasy II AGAIN - Part 32 of 65


This is actually the second version of the video that is here, as the first one is deleted due to HCBailly accidentally selling the UnicornHorn. As a result, I will mention things mentioned in the second video, but also the first one.


When you reach the room with the Black Mask, you'll face BigHorn, the BlackMask's guardian.

If you've powered up Toad or Mini (which you probably will have if you go here when you're told to come back for the BlackMask), use it on BigHorn. You'll have a good sporting chance of taking him out in an instant. If not, just get your best equipment on and pound him with spells. He's not really that hard if you know what you're doing. BigHorn only has physical attacks, but BigHorn isn't tough despite being a Rank 4 enemy.

When you beat Big Horn, you'll be able to get the BlackMask. You'll then be able to teleport out of the cave in the back of the room. From here, HCBailly goes back to Bafsk, sells some stuff, buys some Ethers and goes to the inn before heading back.

The Bucaneers (Buccaneers) can be fought if you're on the ship in the ocean near the Cave of Deist. They are Rank 2, and there is nothing particularly interesting about these enemies.

The HillGigas can show up here as a regular enemy.

If a character reaches 99% Evasion, they will have around a 10% chance of gaining a point of agility from any battle.

The Y. Souls (Yellow Souls) are Rank 4 Magic Beast and Spellcaster-type enemies (making the Wing Sword and the Demon Spear very effective weapons against them) and can cast Fire on your entire party. They can also absorb your elemental spells. They do not have a lot of HP, however. Think of them as a weaker version of the Red Souls.

Saturday, July 24, 2021

PrinceWatercress plays Bio Menace - Part 32 of 37


I wish I didn't lose all those lives that I lost here. Would have made getting through Episode Three easier.

Mutants Attack

Guess what? You'll have both the roly-poly furballs and the spitting cobras from City Park showing up again, as well as the South Side slimes. Also, while the land mines are good to have to take care of the slimes with, there are a few points where having the land mines does more harm than good and the cobras can get you from a good distance away. I ended up losing more lives than I wanted to, and I actually started to worry if I would get through Episode Three alive.

You'll have to watch out for spikes, both of the underground variety that pop in and out and the rolling spike bridge in the second half of the stage. The fact that there is only one health refill here does not make things any better.

Saturday, June 19, 2021

PrinceWatercress plays Ratchet and Clank - Part 32 of 38


We have yet another new planet to go to if we want to get the Hologuise. Before we can do that, we get to deal with bounty hunters, meet the voice of the game's hint system, and try to race through another rail grind section without getting hit.

Gadgetron Site - Kalebo III

When you head to Kalebo III, Drek sends his elite troops to Kalebo III to destroy Ratchet and Clank, and says that he does not care if Gadgetron's HQ is destroyed in the process.

The conveyor belts in the middle of the floor always move in the direction you want to go. If you go to one end of the belt, it will always take you to the other, and if you make it to the other, the conveyor belt will immediately switch directions.

Along the way, ships will show up and bounty hunters will come out of them. Take them out from a distance with the Devastator.

The circular robots from Gaspar that close to you and self-destruct are back. As before, take them out with the Walloper.

To the left of the Gadgetron Vendor is an elevator that takes you to a rail grind section. If you can get from beginning to end without taking any damage, you'll get a Skill Point. Much like the rail grind section in Eudora, this one will take plenty of tries to successfully pull off. Aside from mines as well as small mines and rings to jump over, there are also train cars that will move towards you.

There are also two switches in the rail grind section that you will have to hit with your wrench. If you can hit them, you'll be able to open up an alternate path leading to a Gold Bolt. On this path, be ready to swing your wrench at the robots that will get in your way so you don't run into them.

At the end of the rail grind section, you'll meet the robot who is the voice for all the hints and information from Gadgetron that you've been hearing all throughout the game. She will secret hand you a Map-O-Matic. With this item, you'll be able to find secret areas on planets where you have yet to find them all. Any secret areas you have yet to find will be in highlighted in green on the map of the current planet you are on. You can use this to find all the Gold Bolts.

Below the entrance to the Gadgetron office is a teleporter. If you step on it, you'll find the Gadgetron break room, which is full of chickens and contains a Gold Bolt. Not surprisingly, if you access the map as soon as you get the Map-O-Matic, you'll find it.

Controls

As Ratchet: 

Control Pad/Left Analog Stick: move
Right analog stick: move camera

When hanging off platforms:
  • Control Pad/Left Analog Stick: move
  • Forward+X: vault up
  • Back+X: drop down

X: Jump and double jump
  • R1: stomp (must have Thruster-Pack)
Square: strike with wrench
Circle: pull out/shoot currently equipped gun/use gadget
Triangle:
  • quick select (hold and use in conjunction with Control Pad or left stick to switch guns; menu can be customized in Quick Select on the pause menu
  • double tap to switch between two most recently used Circle button weapons/gadgets

Select: Map
  • Left stick/D-Pad: move map
  • Right stick: Zoom in/out
  • X: view missions
  • Circle: play Infobot for planet
  • L1: previous map
  • R1: next map
  • Triangle: Exit
Start: Pause menu
  • Control Pad: select option
  • X: confirm option choice

L1: tap to quickly center camera; hold for first-person view (hold button and use left stick or D-Pad to look around; let go of L1 to move camera back behind Ratchet)
  • Square: wrench boomerang
  • Circle: fire gun
L3: see health and Bolt totals
R1/R2: crouch (hold down)
  • Square: wrench boomerang
  • Left+X or Right+X: side somersault
  • Down+X: backflip
  • X (while running): long jump (must have Heli-Pack/Thruster-Pack)
  • X: high jump (must have Heli-Pack/Thruster-Pack)
  • Double tap: hover (must have Thruster-Pack equipped)
    • L2: strafe left (while hovering)
    • R2: strafe right (while hovering)
    • X: exit hover mode (while hovering)

In water:
  • Square: dive and descend
  • X: surface and ascend
  • R1: turbojets (must have Hydro-Pack)

Trespasser:
D-Pad or Left Analog Stick:
  • Up and Down: switch rings
  • Left and Right: rotate rings
Triangle: leave Invinco-Lock screen

As Clank:

Control Pad/Left Analog Stick: move
Right analog stick: move camera

When hanging off platforms:
  • Control Pad/Left Analog Stick: move
  • Forward+X: vault up
  • Back+X: drop down

Square: punch
X: Jump (press and hold in the middle of a jump to glide with Heli-Pack)
Triangle: command menu (hold and use in conjunction with Control Pad or left analog stick to choose commands)

Wednesday, March 31, 2021

PrinceWatercress plays Gex 3: Deep Cover Gecko - Part 32 of 32


We fight Rez for the third and final time, then we show off some vault codes. See you next Let's Play.


At the beginning, avoid the missile and its explosion. You will need to hit the monitor and eat the fly that comes out to get a projectile for fifteen seconds. You will need to hit the target on Rez's chest and deplete his life bar, and even though you may have eight hit points, it won't be enough if you're not quick enough to dodge Rez's attacks. At least you'll come back to the start of this battle if you die.

Jump over the left arm when he swipes with it, and duck under the right. Jump into the air when Rez is about to smack the floor. When Rez's chest cavity opens, you'll need to go to one of the platforms on the side, hit the monitor, eat the fly, aim with Triangle and spit your shot at the target on Rez's chest. You'll then have to make your way back to Rez - while the bridge collapses - and avoid his attacks again until the bridges to the islands open back up.  If you know what you're doing, you can kick the missile and destroy it without hurting yourself with the long jump. Thankfully, this is the only phase that the battle has. After five hits, Rez is dead.

5:11 - The true ending for getting everything. The game has Gex call Rez "Dad," as it is revealed that Rez is Gex's father if you don't get everything. (Since there was no fourth Gex game, this was never followed up on.) If you did get everything, however, you get this ending as well as some staff pics before you get the credits.

But hey, you just completed Gex 3! Enjoy the vault codes and videos tacked onto the end!

Thursday, February 4, 2021

PrinceWatercress plays Sly 2: Band of Thieves - Part 32 of 49


Unlike past episodes, I have almost no problem finding the clue bottles here, mostly because the weather got colder as I recorded this Let's Play. Because of that, I could hear the note bottles a lot better and I didn't have any sort of air conditioning running that kept me from hearing the bottles as they made that "tink" noise.

Episode 6: He Who Tames The Iron Horse

The trail of spice shipments takes the Cooper Gang to the lair of Sir Jean Bison, a prospector from the 1850s who was buried alive and frozen for the next 150 years. Now he clear cuts forests in the name of progress and is part of the Klaww Gang's spice enterprise. He also has a few of the Clockwerk Parts, but why?

Silent Obliteration replaces Sly's stealth move. Knock an enemy up from behind with Triangle, then press Square to wipe them out. This renders the old one not only obsolete, but also unusable, so get used to executing this move quickly. It also takes out the enemies silently, unlike your old move, so you won't attract the attention of anybody else when you use it.

The duck enemies will hit rocks at you with their shovels...and those rocks can take off half of a full health bar. Unless you really need to, don't mess with them.

At the higher elevations, watch for birds. That way, the Canadian Eagles don't swoop down on you.

Some of the snowy arears have moles that will pop out of the ground and hit you with a spin attack. Thankfully, you can watch the ground in these areas and see where they are as they move.

The orange tanks spawn enemies if their searchlights spot you. Don't let that happen.

Treasure Of The Video

Crystal Bell - At the tallest peak lies a transmitter...and the Crystal Bell. Thankfully, there is no timer and you can safely paraglide as close as you can to the safe house. Just don't get by any Canadian Eagles up there.

Anyway, here's the clue bottles.

1 | 2 | 3 | 4 | 5 | 6 | 7 | 8 | 9 | 10 | 11 | 12 | 13 | 14 | 15 | 16 | 17 | 18 | 19 | 20 | 21 | 22 | 23 | 24 | 25 | 26 | 27 | 28 | 29 | 30

Controls

D-Pad/Left Analog Stick: move
Right Analog Stick: move camera
X: jump and double jump
Square: Horizontal Attack
  • horizontal attack (as Sly)
  • slam enemies launched into the air from behind (as Sly)
  • hook punches (as Murray)
  • Thunderflop (as Murray; in mid-air only)
  • crossbow swipe (as Bentley)
Triangle: Vertical Attack
  • vertical attack (as Sly; used to knock enemies into the air)
  • downward dive (as Sly; in mid-air only)
  • uppercut (as Murray)
  • drop bomb (as Bentley)
Circle: Action button (near blue/green/purple sparkles and character icons)
  • pickpocket (as Sly)
  • stomp (as Murray; use Square to throw object/enemy)
R1: hold to run

Select: Gadget Grid
  • Control Pad: highlight gadget
  • X button: confirm gadget
  • L1, L2, R2: assign gadget to button pressed

L1, L2, R2: use gadgets assigned to button pressed

Start: pause menu
  • Control Pad: select menu choice
  • X button: confirm choice
  • Start: un-pause game

L3 (press the left analog stick): locate beacons for mission objectives

R3 (press the right analog stick): Enter and exit Binocucom for first-person view
  • Left analog stick: look around
  • Right analog stick: zoom in and out (with up and down on right stick)
R1: 
    • take pictures with spy camera (as Sly; when applicable)
    • shoot sleep dart (as Bentley)

Hacking mini-game controls:
  • Left analog stick: move
  • Right analog stick: aim and fire gun

Monday, July 6, 2020

PrinceWatercress plays Terranigma - Part 32 of 50


In this entry, Freedom gets expanded and we make our way out west.

Nirlake


I head here to do two things.

One is to save outside of Freedom, because as long as my last save location is there, the town won't expand. I also use the camera here. Also, some people now say different things now that I helped Mick make the burger.


There are trees near the Colorado River (which is supposed to be the Mississippi). Walk into them and you'll find the river crossing. The guy near the river will tell you that he needs better lumber that is more resistant to water, and the only place to find it is the forest northwest of Nirlake. This is how you're supposed to figure out that you're supposed to go into that forest area near Nirlake to get the Logs.

Since we have nine of them, equip the Logs and talk to the man again. You must have nine or he won't be able to build the bridge. When he asks for them, let him have them. Keep letting him have them until you've given him all nine. Leave the area.

Freedom


I also go back to Freedom to talk to everyone who I have to do things with in order to evolve the town. Once I do that, I go back to Nirlake, leave, and come back to Freedom to have it expand.

Freedom


When you head back to Freedom, congratulations! The town has been expanded, and if you talk to the young lady near the entrance, you'll learn that it is because shipping routes have been opened, and there will be people here from all over the world sooner or later.

The inn has changed, and Keinz will be on the second floor. If you go to the upper story room next to Keinz, you'll meet a guitar player and a dancer who have come to Freedom to make their musical dreams come true.

If you talk to Keinz, you'll find out that the new people will help the town grow. The economic growth of the town will be at 40 percent.

The room to the left houses a man who studies animals. He will tell you about a curious breed of penguins in Greenland who are able to build homes and fish like humans. He'll also say that one was carefully guarding a shining stone, but he doesn't know what's going on with the stone. Remember that for later.

The house to the right of the entrance is the Store and Magishop. Because you've expanded the town, you can get more items, such as the Serum which can cure Deadly Poison. Downstars from the Store is the Weapons shop, followed by the Armor shop, followed by the Black Market behind the door in the Armor shop. If you go all the way to the left, you'll find out that the Kingbird has been kidnapped and placed into a cage. If you talk to the guy next to the cage, he'll sell him to you for 5000 Gems. If you have money, Ark will tell him to set the Kingbird free. Since the guy only cares about money, he agrees without a second thought and tells you that he will free the bird later on. You'll want to do this as soon as you can.

The pub is behind the store, and it's changed, too. If you talk to the guy at the counter who doesn't see what's wrong with getting drunk at lunch, you'll find out the woman who carried him out was his mom.

You can still get the plant sap drink and the lottery items in the town square. Thanks to the town expansion, there's a new item. If you can get #1, you'll get the grand prize, you'll get the Thunder Spear. It's pretty powerful and is Thunder elemental. You'll want it, especially at this point in the game.

There are three more buildings past the town square. The one to the left is the tourism office. The guy at the posters will mention Hedyn if you talk to him. As for the girl at the counter, choose "Inform" for every picture of every town that you show her. You'll also want to share your Camera photos with the tourism offices that pop up in other parts of the world as well.

Next to the tourism office is Stoma. If you go to his bedroom, you'll find Magirock #57.

To the right of Stoma's house is the 3 Girls' house. The new bedroom houses the guy who does all the chores for them.

There are three more houses at the rear of the town. Bell's house is in the upper-right corner. Talk to Bell, and he will tell you his invention is now finished. He'll tell you to go to the back room and use the machine. The machine will work properly. Talk to Bell. The telephone has been invented.

To the left of Bell's house is Eddy's house. He has one more experiment to run, and when he asks if you want to help, say yes. He'll tell you to toggle the switch at the left side of the machine at the same time he toggles the switch on his. He'll give you a signal. Press the button when he says three, and you'll be able to create light from electricity. Electricity has been invented. Talk to him one more time, then leave.

To the left of Eddy's house is Kidsgart.

Go back to the Colorado River, and you'll not only get a completed bridge, but also Magirock #58! You can finally travel west!