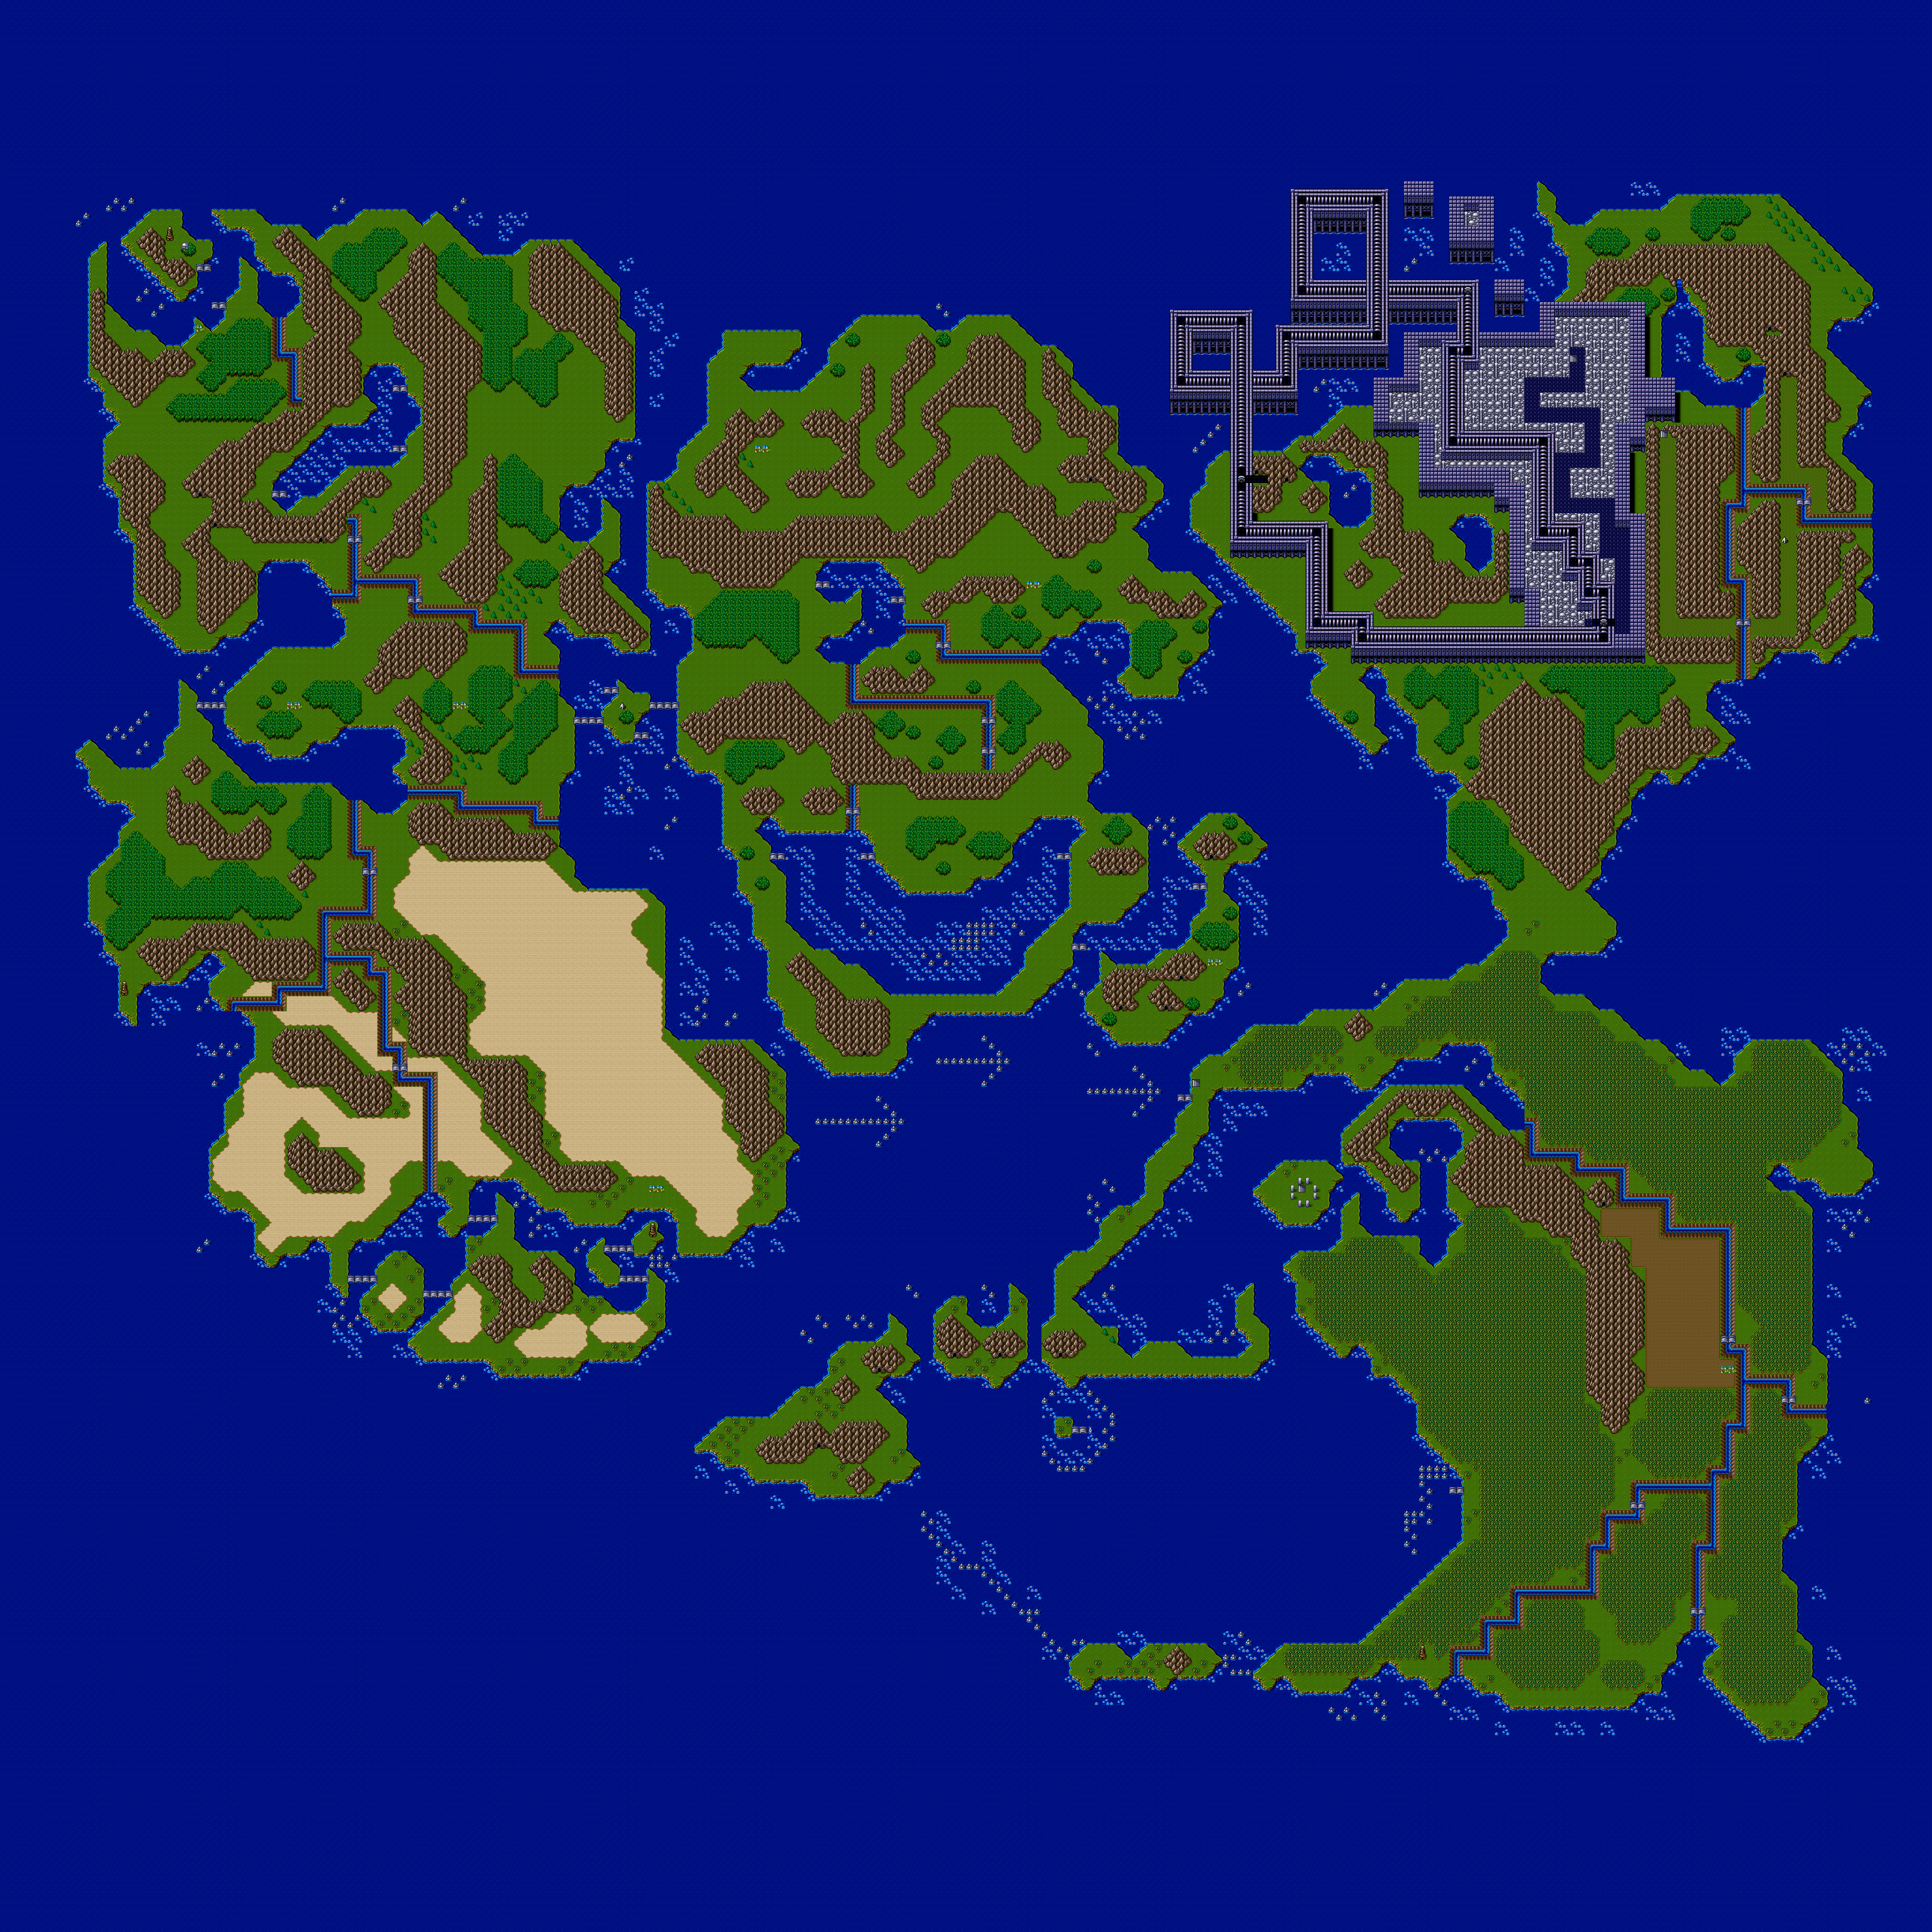
All maps by zagato blackfist.
1-Player mode will let you only play as Jack. A second player can play as Ryu, but Ryu is only available on 2-player mode.
You can choose between easy, normal and hard difficulty if you choose a new game. You can also put in a password to start from where you last left off.
The story is pretty simple. Joyful people are living happily in Chinaland. One day, trouble arose in the peaceful country. A mysterious space ship fleet covered the sky of Chinaland. Suddenly, a 3D image appeared in the sky.
"Hello, people of Chinaland. Please don't be scared. We are on a universal peace mission. I am the leader, Rub-a-Doc. We are travelling the universe to promote peace. People in Chinaland, let's work together for universal peace."
A universal peace conference was held between Rub-A-Doc and the Emperor Chin of Chinaland. Rub-A-Doc became very popular. He travelled all over Chinaland to promote peace. A Rub-A-Doc boom was on!
A few months later, the spaceship fleet and the Rub-A-Doc boom left Chinaland. A quietness returned.
We then hear from Jack and Ryu. Jack tells Ryu that some troubles have happened in the capital city of Yokan. Ryu finds it strange that there are troubles shortly after the Rub-A-Doc boom, and agrees that it looks like a job for the both of them (well, for Jack, because this is a 1-player Let's Play).
Yokan is directly north of where you start the game, so go ahead and go over there.
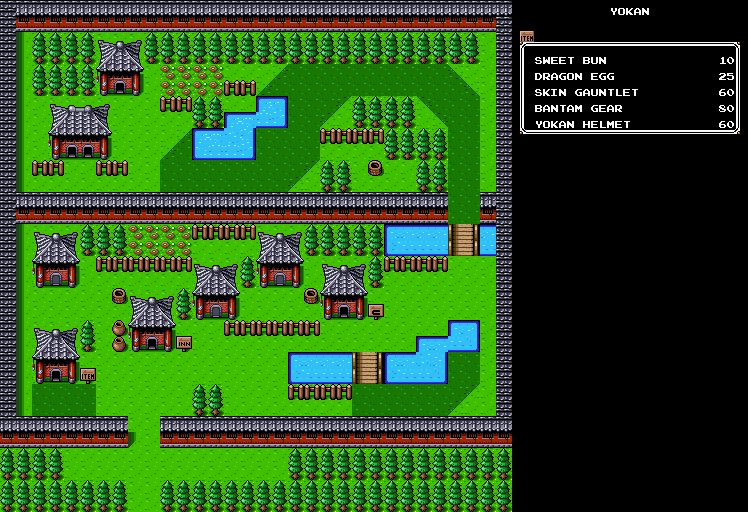
Yokan
Pressing Start allows you to access the menu. There you can see what items, magic and equipment you have in your possession, your current stats, money and medals, the treasure that you have and a password that you can write down in case you turn the Super Nintendo off and you want to start back where you left off.
Money (known in-game as Sen) is used to buy goods and services, while medals are used as currency for mini-games you'll be playing later on.
Most of the townspeople don't really say anything important, though the man by the bridge tells you that most of the men in the town were kidnapped by thieves who reside in Mt. Sampin. The two women on the northern half will tell you about Dragon Eggs and Convenience Stores.
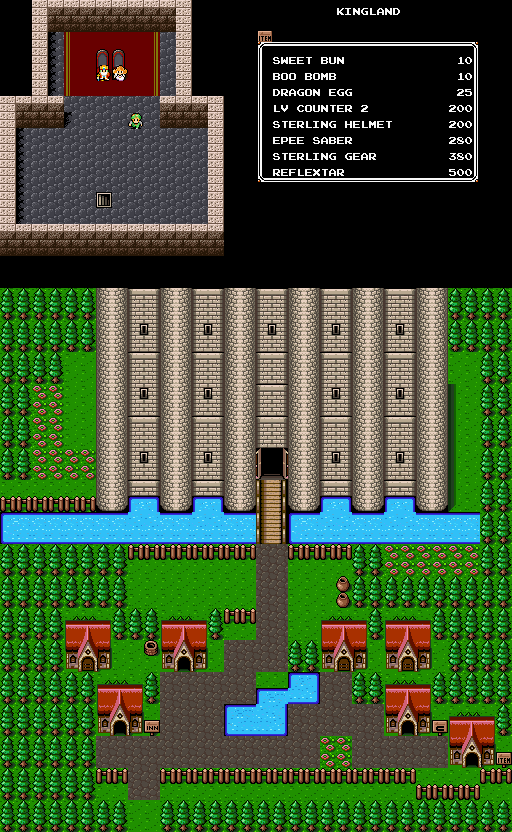
At the item shop, you can buy Sweet Buns, Dragon Eggs, Skin Gauntlets, Bantam Gear and Yokan Helmets. The latter three are equipment that you can buy for your character so you can increase your stats (attack for the Skin Gauntlets, defense for the Bantam Gear and Yokan Helmet). Sweet Buns restore some of your HP, while Dragon Eggs let you restart a stage and save you from falling down a hole.
If you buy equipment and it is better than what you have equipped, the game will automatically equip it for you, and you'll also be able to sell your old equipment for ease the cost of upgrading to better stuff. If not, the game warns you and doesn't let you buy it.
The building with the sign with the "C" next to it is the Convenience Store. Whenever you enter, you'll be told by the shopkeeper how much experience you have until you reach the next level. You'll also set up that convenience store as a respawn point, so when you die you'll end up back at that convenience store and you won't be forced to restart the game from the very beginning. Be sure to enter a Convenience Store when you enter a new town.
At the Convenience Store, you'll be able to revive your ally in a two-player mode, change a game from a 1-player game to a 2-player game and vice versa, and get a password so you can come back to your game when you turn off the Super Nintendo (though you can do on the pause menu, it is thoughtful of Culture Brain to make this so).
The Inn allows you to restore all your health.
The building with the two doors is the palace. This is where you want to go when you enter Yokan at the beginning of the game. Here, you will talk with Emperor Chin, who will tell you about thieves from Mt. Sampin who came to the town, stole jewelry and kidnapped workers. Naturally, Jack and Ryu volunteer to get them back. Emperor Chin will then tell you to see a prophet at the back of the palace.
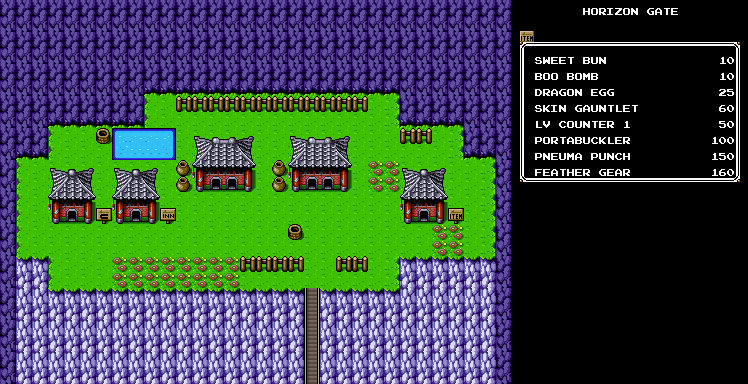
From there, go to the building behind the palace. You'll meet Notruedamas, who is obviously a reference to the supposed real-life prophet Nostradamus and is the palace fortune teller. He will tell you to go north to the cave in the mountain to Horizon Gate, and to look for Rick. He will also give you an Escape Leaf, a magic spell that will allow you to escape battle and action scenes. This is the first magic spell that you will learn in the game.
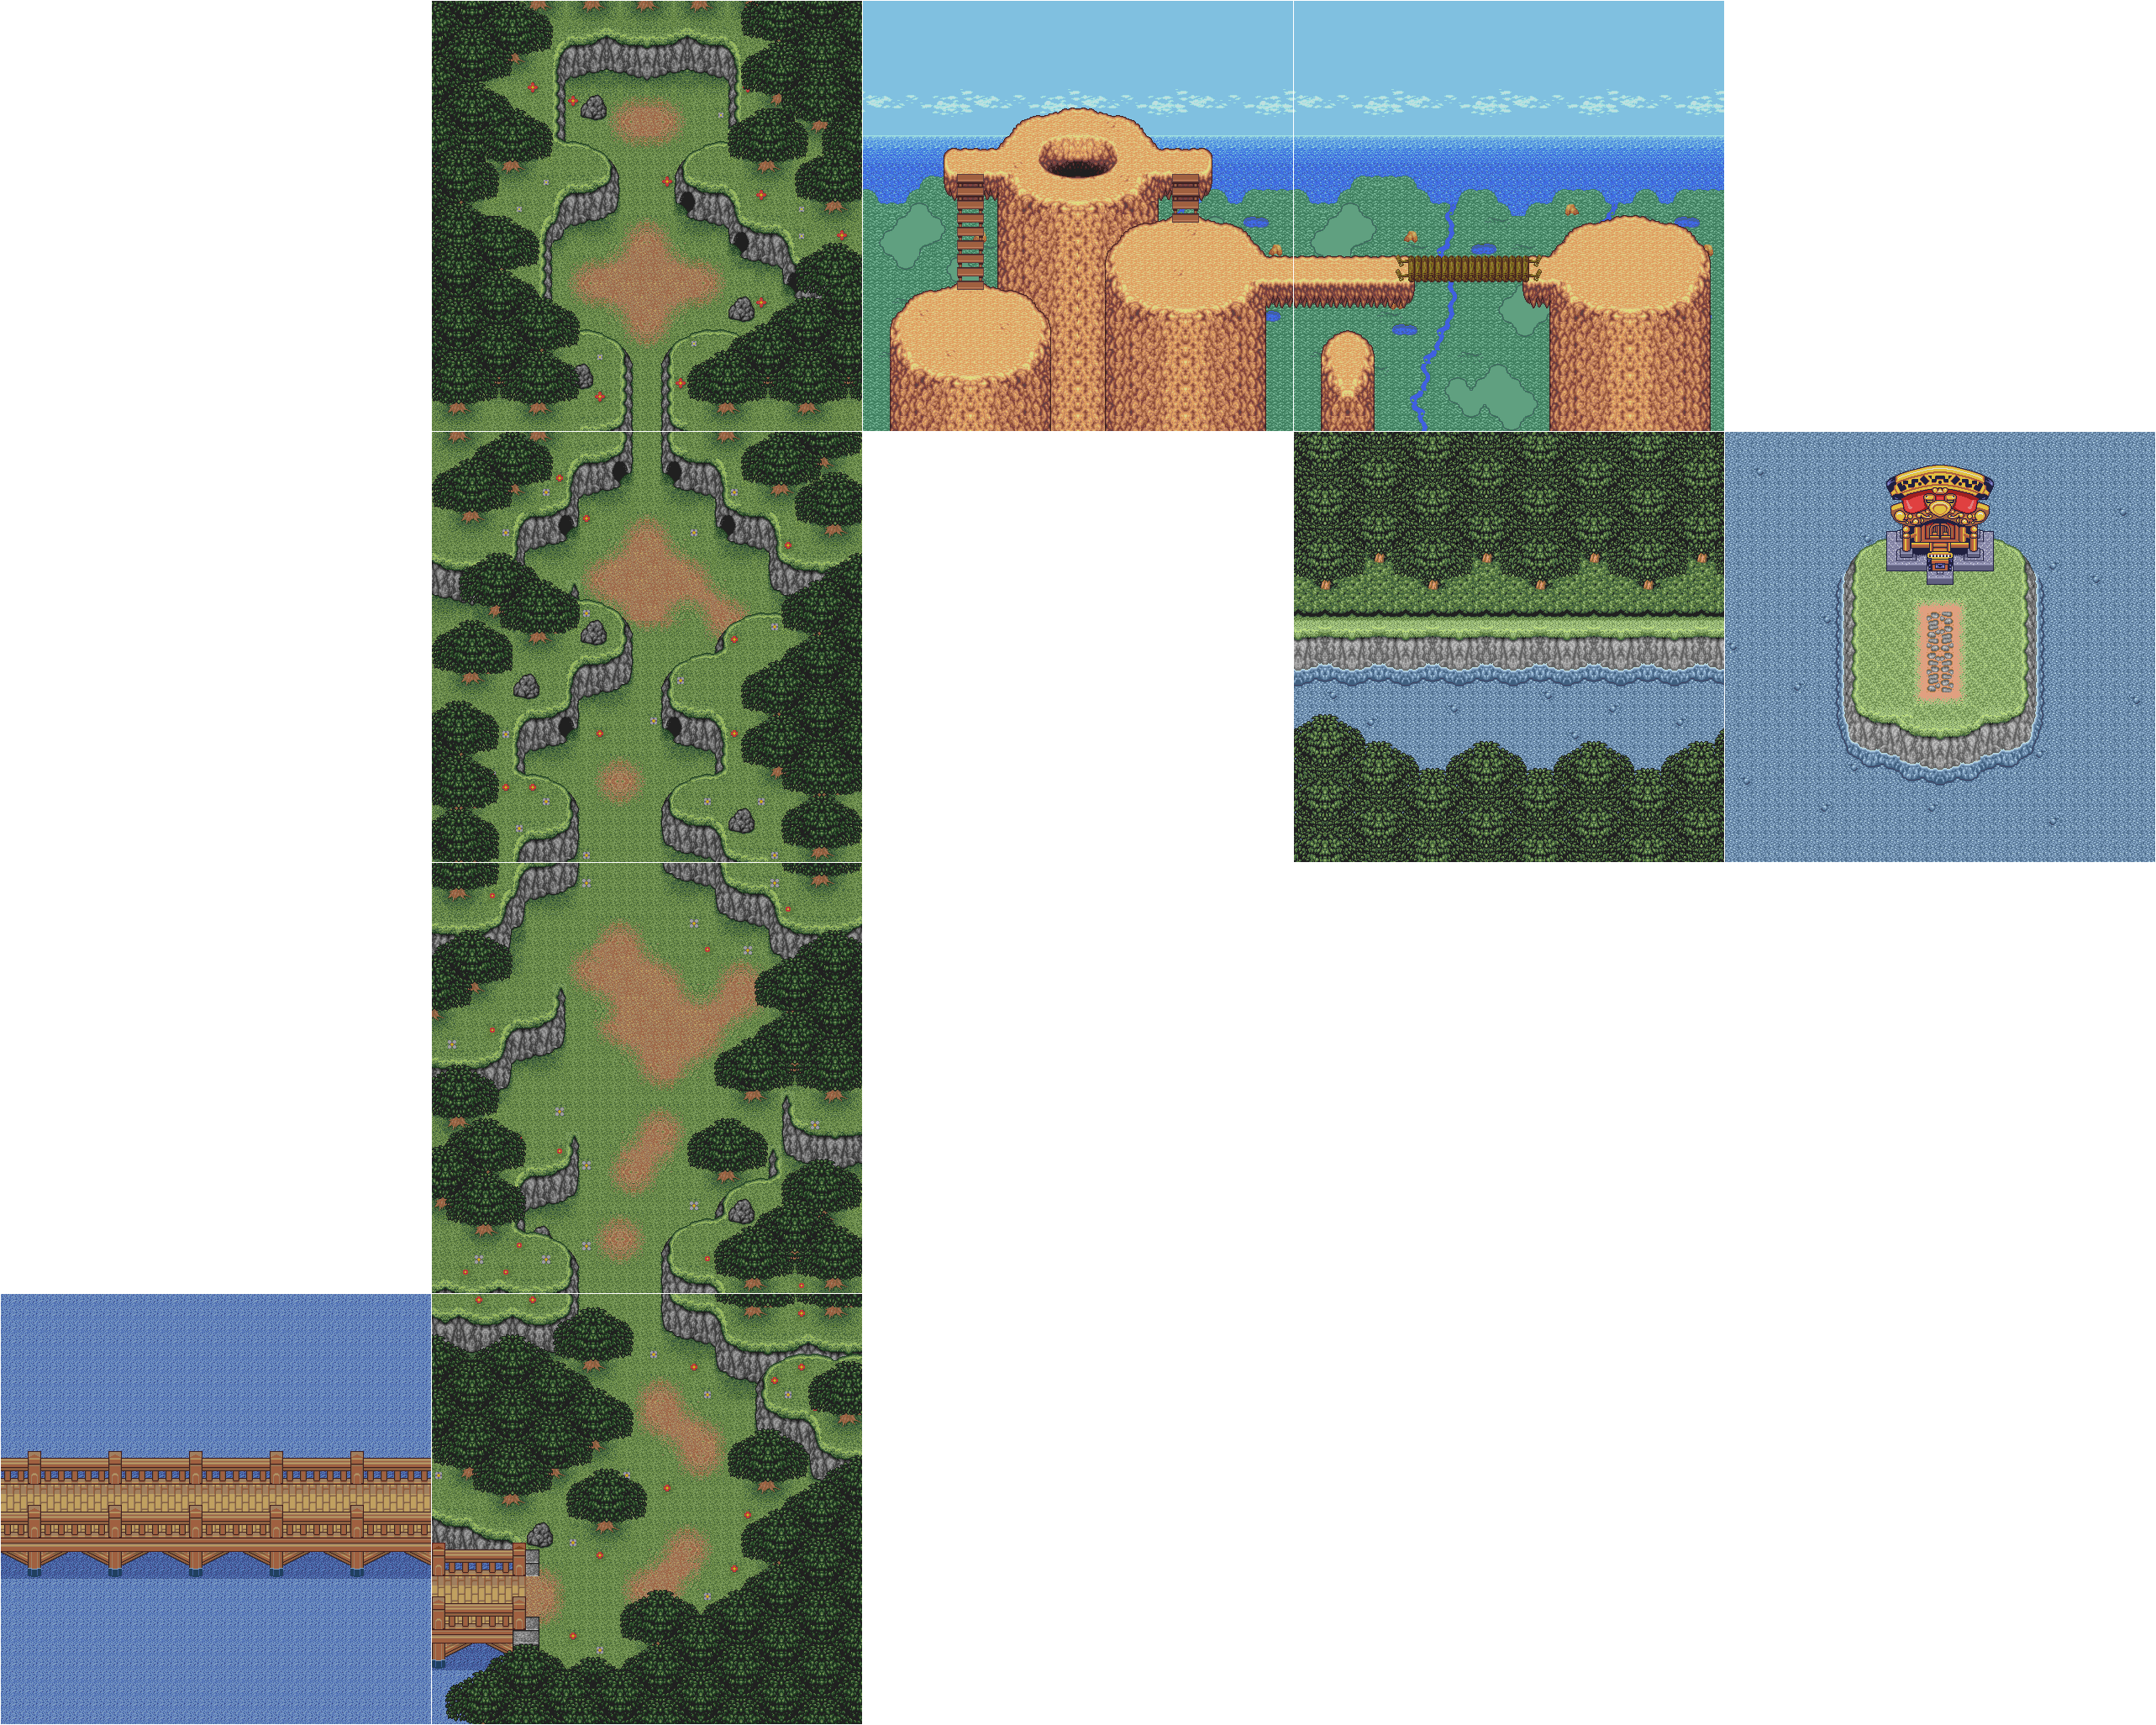
The Adventure Begins
Now that you've done all you can do in Yokan, it's time to leave. Leave through the exit at the southern half of town, then go east and then go north to the nearby cave.
Before doing that, though, you can move around near the village to level up a bit. I go ahead and level up to Level 2 before going to the northern cave.
The monsters you'll meet here include tigers that look like Japanese pellet drums, grey-and-purple colored guys who look like robots who can do somersaults, kappas and bird enemies who wear gold helmets and can also somersault. The bird enemies can also do somersaults and have a little range to their attacks.
Pressing Y repeatedly lets you punch and perform a combo, while holding Y and moving allows you to run. B lets you jump. If an enemy is knocked down, you can press Y to pick them up and throw them.
Battles happen at random, and you can choose whether or not you want to take part in the battle. You can select "run," but you won't always be able to run away. At the very beginning of the game, you'll want to make sure you take part in and win every battle, as you will need the money and experience. As you'll soon learn, the encounter rate in this game can be strangely and insanely high, and it is not unusual to make it to Level 10 early on in the game. The battle scenes are like beat-'em-up games (think Final Fight or Streets of Rage, but simpler), and you can only attack to the left or right, much like your enemies.
Battles end when you defeat enough enemies. The number of enemies you have to defeat is pretty small early on, though it gets a little higher as you move on.
There are pits, but if you're paying attention, you should be able to avoid them. Be sure you do so, as dropping into pits will kill you.
The blocks marked with a "P" contain power-ups. Punch the "?" and you'll get what's inside. Power-ups you can collect include swords that you can use as weapons in battle for increased strength, "M" icons that give you energy for using special abilities, and skulls that will decrease the amount of "M" icons you have by one. Enemies will sometimes drop weapons for you to use in battle, too, such as nunchaku. The "$" icons give you more money when you win the battle.
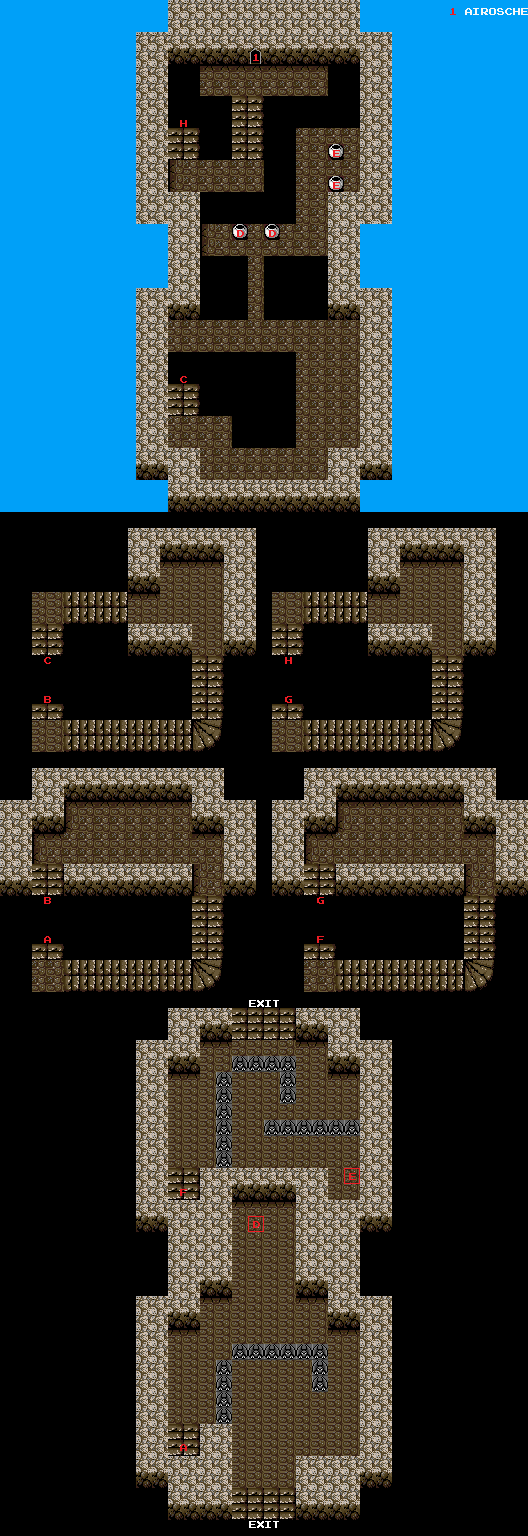
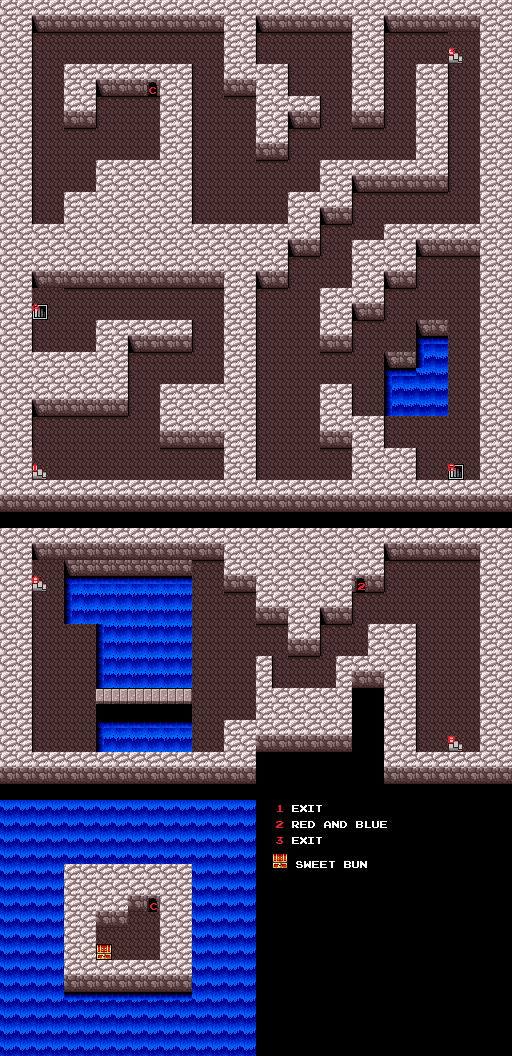
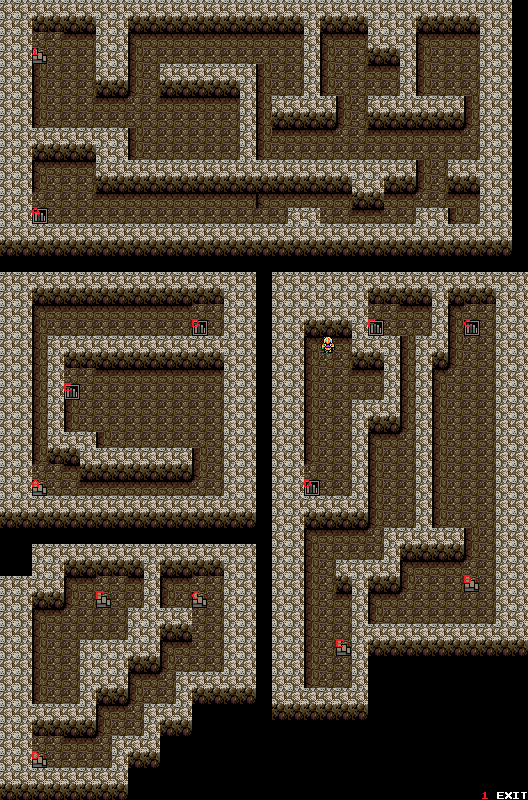
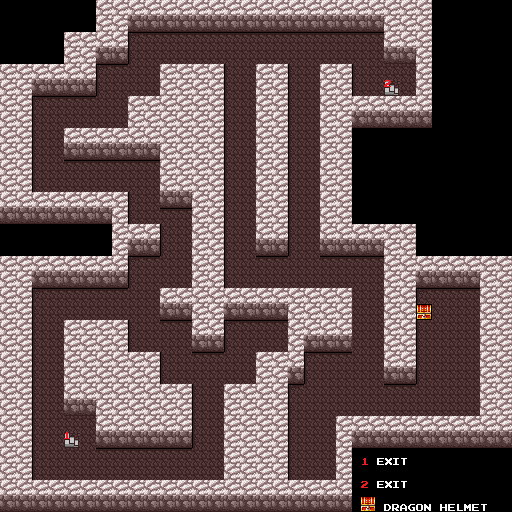
Yokan Tunnel
The Yokan Tunnel looks like a very simple tunnel despite its dead ends, but you will be running into your first monsters here.
If you make your way to the other side of the tunnel and make your way south to the chest, you will be able to obtain a free Dragon Helmet, so you'll be able to save some money.
From the exit, head to the west. You'll eventually make it to Horizon Gate.

