Showing posts with label part 4. Show all posts

Monday, September 21, 2026

PrinceWatercress plays Punky Skunk - Part 4 of 8


In this entry, we have even more digging to do before continuing into Jubilee Town.


Pathgrinder III


Yep, it's time for more digging. Grab the diggers, wreck the enemies, avoid the spikes, and take detours into dead ends for pick-ups. You'll be able to see pick-ups in the sand if you're paying attention. You'll also want to destroy the drill tank spawners as quickly as possible, especially in the second section, because the spawners and the drill tanks are not going to be kind.

There is a colored icon instead of a monochrome icon in one of the walls at the beginning of the second section, and if you walk into it, you'll find out that it's indicating that the wall is a false one. Keep heading left and jumping over the spikes, then destroy the candle to warp to a mini-game. It's another pedal mini-game. You should know what to do by now.

At the start of the second section, quickly attack the drill tank spawners from above. Your claw will somehow hit them, and you can take out the tanks before they become a problem. 

Castle Hassle


Get the skates at the beginning. You'll need them to jump across the conveyor belt platforms. Make sure that when you transform and take the skates on or off, you do it in mid-air so you aren't whisked off the platform when you regain control of Punky.

The robot hands shooting yo-yos can easily be attacked.

The enemies that drop down on the ropes return from the beginning of the rope, and they can't touch you while you're on the conveyor belt platforms in the second section as long as you don't jump into them.

Volley Boss


It's time to take on Commander Chew again, and this time, it's in a game of volleyball.

Press Square to hit the volleyball the moment it is above you to send it back...not a second sooner, not a second later. The moment you start the ball hitting animation is when you will hit the ball. You'll score a point when you hit the ball so that it lands on the floor. If it goes out of bounds, the other person scores a point. Not surprisingly, Chew kept hitting it out of bounds during the battle. The first person to score eight points wins. 

Jubilee Town

Chew Ninjas


Grab the paraglider and use it to ride with the currents while bouncing off the enemies.

Be careful with the cloud platforms; while you can stand on them, you'll want to jump into the air when they start producing electricity so you don't get hit and potentially knocked off. They will turn blue before they shock you.

At the upper-right corner of the first section, there is a candle to destroy for a mini-game. Guess what? It's the slot machine mini-game again. This time, I managed to luck out and get four Punkys on the first try, so that's another red crystal in the collection.

The second section brings out the titular ninjas. They hide in the background, come out to throw a shuriken, then hide again. You can only attack them when they're attacking. Also, the spikes in this section are transparent and can be a little difficult to notice at times, so stay away from the walls in the more narrow parts of the section.

Rainbow Dome


Grab the skysurfer and use it to go up and down the slopes, mowing down the enemies as you go. Some of the enemies will run after you and constantly roll snowballs at you, but you can destroy the snowballs in addition to the enemies themselves.

There is a mini-game if you take the low road after the huge slope leading downwards instead of riding the yellow platform. It leads to a matching mini-game, which is much easier than the slot machine. (You can tell I hate the slot machine.)

The second section has a lot more ground to walk on and is therefore more straightforward than the first one.

Saturday, September 5, 2026

PrinceWatercress plays Toy Story 2: Buzz Lightyear to the Rescue (PS1) - Part 4 of 16


In this video, we start tackling a more interesting level and exploring it for Pizza Planet tokens: the Construction Yard.


Level 4: Construction Yard


You'll be able to get your hands on the green laser immediately at the start. Use this to take care of any enemies, including the new flying ones that will drop bombs if you get close enough to them.

Exploring the ground level is essential at the beginning of the level, as you'll find quite a few coins for Hamm here as well as most of the missions. The construction foreman near the start will ask you to find his fiving missing Little Tikes workers and return to him for a Pizza Planet token, Hamm will be at the top of the tractor near the wheelbarrow,

One of the Little Tike workers will be on a wheelbarrow that you can access by pushing a cinderblock towards it. You can reach Hamm from here. 

At the bottom of the building that is under construction. The bottom level is a sand pit, and you can sink through it and take damage. I jump across it just to make sure that I don't sink. There is also a metal platform in one corner, and as you go up the building, the platform will act as an elevator that takes you all the way up to the highest point that you've taken during your stay in the level. In case you fall all the way down, just come all the way back to this corner and wait for the platform to lower so you can double jump onto it and take a big shortcut back.

Rex will be in one corner at ground level, and he will tell you where all the token are, as always.

The wooden ramp at ground level leads to the trailer, and here, you'll have to mix paint in order to get a Pizza Planet token. Avoid the green ooze and jump on the dry areas, then jump onto the chair and then the table. Climb up the pole, then jump to the top of the filing cabinets. Some of the drawers open and close, and I end up using only one of those drawers to get to a second Little Tikes worker before getting to the paint mixing station.

Here, you can stomp on the buttons to pour the paint into the bucket that you need to move into the white circles on the counter. The circle indicate not only where you need to put them to pour specific colors, but also to put certain colors when you're done making them. You have red, blue and yellow paint to work with, and you can make all three colors the game asks of you - purple, orange and green - with just two colors each. Red and blue combine to make purple, red and yellow combine to make orange, and blue and yellow combine to make green. When you're done making purple paint, move it to the picture of the purple paint can; the same goes for orange and green. When you create all three colors of paint, you'll get a Pizza Planet token.

The bulldozer will be your means of getting up the girders of the unfinished building. Not only will you find the third Little Tike worker inside, but you'll also find a switch that lowers the shovel. You'll need to stand on the shovel to get on the lowest level of girders. Once you're on the girders, avoid crushing pistons as well as falling nails, and pay attention to any mesh in the corners to see where you can get past walls. You'll find the fourth Little Tikes worker on the lowest level of the girders.

If you see any wall switches while on the girders, stomp them when you see them. This will allow the elevator platform in the corner of the unfinished building to move to that level in case you take a big tumble. At least there's no fall damage in this game.

Your main mode of going from one level of girders to the next is the yellow and black "caution" girders that move up and down. They will tilt as you move from one end to the other.

Mr. Potato Head's ear will be on the third level of the girders. When you return it to Mr. Potato Head near the paint mixing trailer, you'll get the Disk Launcher. The Disc Launcher is a homing weapon, and you can carry up to thirty shots. You get ten whenever you pick it up, and it will replace the green laser if you have it. If you stay where you picked up the Disk Launcher ammo, you can get up to thirty if you wait around long enough. When you fire a disk, it will home in on any nearby enemy and hit them, including those nasty bomb-dropping robots that float around in the air. You don't have to go into first-person mode and use the lock-on ability unless you need to; if you're near the enemy, it's getting nailed.

I end up getting the Hamm token before getting the Disk Launcher, so there's that.

After three levels of girders, you'll find a wooden ramp that takes you to the top level. Not only will you find the fifth Little Tike worker off to the side from the red girder platforms, but you'll find the boss. I will mention how to fight the boss in the next video. As for this one, I close it out with the Little Tikes token. Next time, we'll get the boss token and the challenge token.

Friday, August 28, 2026

PrinceWatercress plays Astyanax - Part 4 of 6


If you can persevere through the swamp, you'll make it into enemy territory. Onwards!

First | Previous | Next | End

Round 4-1: Marshy


To take care of the enemies that hide in the water below, let them come to you, then strike them on their way up and again on their way down, assuming that you have enough power to do it. If they land, they will follow you around and spit projectiles. If you can, move far enough away so that you can off-screen them out of existence. You'll want to do the same for the ones that leap in and out of the water between smaller platforms, who can also throw spears in mid-air.

The piranhas bounce around. You'll want to move a little further to keep them from re-spawning, then hit them when they're at the right height when they're in front of you. You may have to move yourself into position in order to make that happen without getting hit.

A plant will spawn to the left of one of the power-up statues; you'll need to be on the edge and crouch strike it repeatedly to get rid of it.

If you find Cutie inside of a power-up statue, jump up to her to talk to her. Press Down if you want to change your weapon or Up if you want to refill your magic. Good thing I needed the magic.

The mid-boss is a gold skeleton. He just fights like the rest of the skeletons in the game and just takes a lot more damage than the rest of them. That's it.

Round 4-2: Grave


The butterflies are just like the floating blobs; the only thing different about them is their appearance.

The skeletons can also perform a huge flying leap in addition to attacking and throwing out projectiles, but it won't exactly save them from getting smashed.

There are a couple of plants in this level. I hit the first one with magic, but the other ones can easily be taken care of with your weapon.

The mini-boss is a purple wraith who can freeze you in place for a few seconds in addition to tossing projectiles. You'll want to move back and forth to avoid the mini-boss teleporting on top of you, then get right up to it and hit it with powerful weapon strikes. This will help off-set any times that the mini-boss is able to freeze you in place.

You'll then fight the boss: a tree beast that moves back and forth and throw out green seed projectiles that roll forward and turn into plants while also stopping to hit you with some sort of vine tongue. Keep jumping up and hitting him in the face with powerful strikes, and take out those green seeds before they become a problem.

You'll then arrive at Blackhorn's lair in Thelenea. The end of the game is in sight...

Friday, August 14, 2026

PrinceWatercress plays Alisia Dragoon - Part 4 of 8


This stage is even faster than the last one if you know what to do.


Stage 4


Go to the left at the start for some power-ups, including a blue fairy. Get ready to attack a worm that jumps in and out of the ground when you do, though. The head is the weak point. There's more if you stay at the bottom and go all the way to the right. When you go as far right as you can, go up and to the left. You'll find another health extension.

Other enemies include rocks rolling down the slopes, birds dropping said rocks, insects that fly at you, brown flea-like enemies that hop around after rising out of the ground. Take your time, and unleash a full-power attack when enemies start showing up in droves.

When you reach the top, you'll fight what looks like a slightly muscular but also slightly skeletal pterodactyl. You can only attack the head when the mouth is open. When the pterodactyl backs up and then darts right at you, stay on the lower level and duck. Stay on the lower level and be ready to duck and/or jump as the boss spits the big fireballs. When it starts spitting the smaller fireballs, you'll want to unless a full-power attack if you can and attack as many as possible; otherwise, stay in the center and duck.

After this, the boss will back up and then dive at you multiple times. Stay close and keep moving back and forth with it, and fire your thunder magic as you're moving back. After one big dive that you can avoid by staying on the move, the pattern repeats. As for companions to bring in, any of them will do, but the raven and the will-o'-the-wisp are best. Once you beat the boss, head further to the right and take out the rocks along the way to enter the next stage.

Saturday, August 8, 2026

PrinceWatercress plays Power Blade II - Part 4 of 6


In this entry, we take on the fourth and last of the selectable stages.


Stage 4


After dealing with the big round robots and the jetpack cyborgs in Area 1, Area 2 has you going underwater. Make sure your power meter is as high as possible before you attack or else your attack range will be seriously reduced.

Use the Wet Suit in Area 3. This will keep you from jumping into the ceiling spikes. As for Area 4, you'll want to be in normal mode for the start, then you'll want to use the Wet Suit to grab all the good stuff in addition to getting around. As for the rest of Area 4, the water will push you back, but you can get around slightly more quickly by jumping your way forward.

There will be double doors in Area 5. The dragon mini-boss here bounces around just like the dragons in the last two stages, but this time, you'll have water rushing across the floor that acts like a conveyor belt that constantly pushes you to the right. Keep that in mind while fighting the dragon mini-boss. Beating this battle will net you the Patriot Suit, which is much like the Newt Suit but has two protective satellites that reduce the damage you take in addition to tracking enemies and destroying them.

The rest of Area 5 has water continuing to push you to the right as you deal with slimes that hop around and stick to ceilings that split into two much smaller slimes when you hit them.

Area 6 has the disc-throwing cyborgs and the jetpack cyborgs. Use the Rocket Suit to get to the door at the bottom.

Area 7 has a floor that slowly rises and falls. Wait for the floor to move down before sliding down narrow corridors or you will get stuck, crushed and killed.

To beat the twin cyborgs in this stage's boss battle, come in with the Newt or Patriot Suit, then slide to the right and stay close to the twin on the right. Keep attacking the twin on the right and keep on moving so that the twin on the right doesn't jump into you. You'll keep hitting the twin on the right, but you'll also hit the twin on the left every so often, too. The twin on the right will go down first, and from there, you can easily destroy the twin on the left. The twin cyborgs only attack when you do, and you'll want to strike when in range and be ready to move. For the left twin, stay on the right and attack from a good distance. The twin on the left can only jump so far to the right before jumping all the way back to the left. Once the twin cyborgs go down, you'll complete the last of the stages and you'll be ready for Stage 5.

Sunday, August 2, 2026

PrinceWatercress plays Daffy Duck in Hollywood (SMS) - Part 4 of 6


Despite being named after the cartoon involving Daffy Duck and martial arts, there aren't really many references to that cartoon in this game...or any of the cartoons the worlds are named after, for that matter.


Assault and Peppered - Scene 1


Unlike the other worlds in the game, you don't attack with your gun in World 4. Instead, you attack with a kick while standing, a karate chop while crouching and a jump kick in mid-air. You also somersault when you jump. Amazingly, all of the power-ups still work the same way. However, you can get your range back. If you pick up a green six-pointed star like you would any of the other power-ups in the game, you'll be able to throw that and get some range back.

The spiky orange turtles cannot be damaged and do not count towards the enemy quota for each section. You're better off avoiding them, anyway. If they see you, they will stop, duck into their shells and quiver. This will make it easier to jump over them.

The red ninjas that climb on the handholds can throw shurikens at you if you get too close. It's best to attack him when he turns his back, especially with the star.

The robots that move back and forth will attack with karate chops that shake the screen. Those karate chops also block the stars, so hit him from a distance if you have them.

The armored guards with the spiky helmets are invincible and do not count towards the enemy quota.

The copper pots serve as the projectile spitters for World 4.

Assault and Peppered - Scene 2


The enemies with the buck teeth and the cone hats stand in place and karate chop. Time your star throws so that they don't bounce off their karate chops.

The wolf martial artists move quickly and turn into a tornado to block attacks, but they stop to look around every once in a while before they start moving again. Use that break as an opportunity to attack.


Assault and Peppered - Scene 3


Go up at the start to get the star; you're going to need it here.

Wednesday, July 1, 2026

PrinceWatercress plays Space Station Silicon Valley - Part 4 of 32


This was the last level I was able to beat as a kid before it became obvious that the game was a puzzle-platformer and part of a genre that I didn't have the patience for back then.


The Battery Farm


In this level, you'll need to raise the bridge sections, grow some carrots for Dan. and turn off another electric fence.

You'll start off as the racing mouse. Focus on lining yourself up the ramps and going up them and over the gaps. Do not use your turbo boost, as you'll make things worse; just go at normal speed and you'll get out of the starting area with no problem. The purple weeds that pop in and out of the ground take off one unit of health if you run into them.

Past the ramps is a barn with four crates' worth of energy as well as a sheep pen. Inside the pen, there are a few sheep as well as a ram. You'll need to use the mouse's tail attack and destroy the ram without getting destroyed yourself. If you need to, use the ramp in the barn to get out and get some energy, then get back in there. Once you beat the ram, you'll be able to take control of it.

With the ram, you can jump with A and perform a headbutt that punches your head slightly forward with B. Unlike the sheep, however, the ram cannot float if you press and hold the A button. As the ram, you'll want to defeat one of the sheep, if one hasn't been beaten down already. You'll need the sheep to jump and float across the nearby bridge so you can get over the water and hit the switch. This will raise the bridge sections in the middle and allow you to cross with another animal.

Once the bridge is up, switch back to the ram and cross the bridge. There will be a racing dog wheeling around, and you'll need to headbutt it repeatedly to neutralize it and take control of it. If you're lucky like I was, you can corner him and you can stand in front of him while holding the B button to defeat it while its homing missiles sail clear over you because you're too close to it.

From there, hit the switch in the barn to activate the crusher, then head to the left to find a sheep. Destroy it, then go to the other side of the barn to find the carrots. Keep hitting the switch on the nearby irrigation machine to make the carrots grow and complete the carrots objective. You're going to need to do this anyway, as the tops of the carrots also double as platforms that you can jump across with the sheep.

Loop around to the left to raise the bridge on the other side. This will complete the bridge sections objective. Go back to being the racing dog and take the bridge to the other side. Destroy the sheep as well as the foxes in the housing area. From there, enter the house as either a dog or a fox and hit the switch to turn off the electric fence and complete all the objectives. (Beware: if you enter the house as a fox and go into the fireplace, you will be stuck, and you'll have no choice but to restart the level.)

From here, play as a sheep and jump onto the hedges. Move onto the roof of the doghouse, then jump to the roof of the farmhouse. This will allow you to get some Power Cells. You'll also need to jump onto the hedges near where the water is, then float to the island where the water valve is. There is an empty garden near the barn with the crushing hay bale, and if you spin the valve, you'll water that garden and grow some crops. Enter that garden and touch one of the plants to get four Power Cells.

The crushing hay bale doubles as a platform that takes you to the loft of the barn. Jump onto the top of it as the sheep to find two more Power Cells and a camera that will give you a quick tour of the level. From where the camera is, you can float to the side to the sides of the barn to get two more Power Cells.

To get to the trophy, you'll need to destroy all the sheep once you've completed all of the objectives for the level. The trophy - a golden carrot - will be in the farmhouse fireplace. Take control of a sheep and go into the fireplace to get the trophy. You can also fall into the fireplace from the chimney on the house's roof

That's everything done. Head into the doghouse to enter the exit teleporter and leave the level.

Ram


Type: Ram
Environment: Europe
Skill A: Jump
Skill B: Head-butt
Water Resistance: OK
Mass: Medium
Armour: Light
Strength: Medium
Traction: Average
Fall Distance: Medium
Production: Medium
Engine: Electric
Intelligence: Low

Racing Dog


Type: Racing Dog
Environment: Europe
Skill A: Speed Boost
Skill B: Missiles
Water Resistance: OK
Mass: Medium
Armour: Light
Strength: Medium
Traction: Average
Fall Distance: Medium
Production: Medium
Engine: 1.6
Intelligence: Low

Power Cells


1 | 2 | 3-4 | 5-6 | 7-10 | 11-12 | 13 | 14 | 15

Wednesday, June 24, 2026

PrinceWatercress plays Donald Duck in Deep Duck Trouble (SMS) - Part 4 of 6


With the four selectable levels cleared, we can enter the final stretch of the game!


The Valley

The quill of the falcon will show you the way.


Scene 1: Valley

You'll be jumping up platforms and avoiding bees at the start. At least you can jump on their heads afterwards.

Updrafts will send you to higher areas, but be careful not to fall into bottomless pits after being carried upwards.

The mountain goats will leap from one platform to another, and can be used to get to other areas.

There are multiple paths to take, and in case you defeat bees en route to a higher one, try looking for a lower one.

The logs that fall down the waterfalls can be used to go upwards as you jump from one to another.

At the top-right corner of the first section, there is a block that unleashes a geyser when kicked. The geyser will take you to another area above the clouds.

Blocks can be kicked upwards to break frozen waterfalls down and use them as platforms to reach new areas. They can also be forced downwards by mountain goats, so be careful. Bringing snow down can reveal some platforms you can use to get to the end, so keep an eye out for bright spots in the walls.

Scene 2: Ice Cavern

At the start, you'll be forced down into an ice cavern. The tiny abominable snowmen can be simply jumped on, but they also like throwing ice, too.

The ground is slippery in this section, and you can slide down quickly on the slopes.

The diamonds just gives you points.

Ice cubes act just like the light brown blocks, and they can sometimes be instantly replaced when used. They can also knock icicles off the ceiling to use as platforms across water. If you fall into the water, it is instant death.

To get past the yellow narwhals, kick an ice cube so it lands on the nose.

Be careful on ice platforms above water, as some segments will be raised from below by narwhals.

In the second section, you'll be riding ice platforms across water. Be ready to duck at times, as there are low spiked ceilings and the ramps will send you and the platform into them.

The third section is vertical. Be careful where you kick an ice cube, as it can send a small snowball tumbling down. Sometimes, you'll want this, as this will allow you to make room for new areas as well as to get out of the cave.

You'll then meet the falcon, who carries you to another area before chasing after you. This time around, the screen scrolls down as well as to the right, and you'll have to jump over bottomless pits as well. Whatever you do, don't let the falcon five into you, as it can grab you and potentially drop you above a pit.

You'll eventually run into a block that causes a geyser to blow the falcon away, allowing you to get the Quill of the Falcon and clear the level.

With all four treasures, Donald will throw the treasures in a sacred lake in the middle of the island to reveal the shrine. Welcome to the final area!

Thursday, June 11, 2026

PrinceWatercress plays Donkey Kong for Game Boy - Part 4 of 11


In this entry, we wrap up the rest of Stage 4.


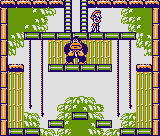
Stage 4-5


The vampire bats will knock you off the vines and stun you if they run into you. This is only if you're on the vines; if you're not, you're losing a life.

Throw the key down once you get it, and pick it up before it disappears.

Stage 4-6


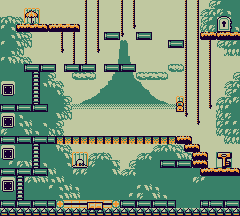
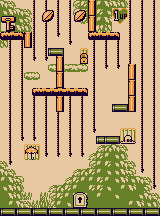
The icons with the black square on them are magical platforms. They're just individual tiles that can be used as platforms. You can use them here on the platform with the spiders to get them away from the ladder, or you can make a well-made shortcut away from them. I use the magical platforms to keep the spiders away.

Stage 4-7


DK Jr. appears again, and once again, he's playing around with the switch that activates all the bridges in the stage just like in 4-4. Getting around is easy, but in case you decide to take a second trip around the level to get the key after getting everything else, don't be afraid to get rid of a few enemies with the hammers.

Stage 4-8


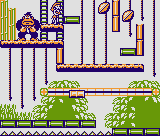
DK will toss Mini Mushrooms at you. If you get hit by one, you'll be shrunk down and all you can do is the standard jump. You won't even be able to grab onto vines or climb them, either. Time your movements and be careful.

The intermission shows off hammer throwing. Just press the B button with a hammer in your hand and you'll throw the hammer upwards in case you want to use it somewhere else or climb a ladder.

Stage 4-9


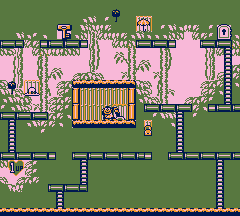
Go up and hit the switch. You'll want one monkey to go to the bridge to the right that you've activated. From there, drop down and trigger the switch below. If the monkey is on the bridge, you'll trigger the bridge as well as the door below (which both switches toggle) and the monkey will fall. Hit the switch again to open the door below and use the monkey's tail to get over the spikes. Getting the key and exiting is easy at this point.

Stage 4-10


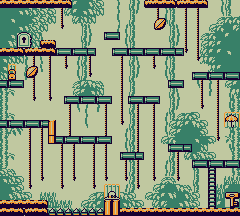
The frogs will jump high whenever you jump onto them, allowing you to reach new platforms. Take advantage of this to get the key to the door.

Stage 4-11


Some of the ladders will slide up and down regularly, so you'll have to wait for the sliding segments to be up before you can climb them.

DK Jr. is now tossing Mini Mushrooms, but they won't be much of a problem here. As a matter of fact, if you're small when you jump on the frogs, the frogs jump higher than they would if you were regular size.

Stage 4-12


Watch out when you throw barrels at DK. When they break, Mini Mushrooms will come out of them.

The intermission here shows off the Super Hammer. Not only does it respawn where you found it, it also can break bricks.

Friday, May 29, 2026

PrinceWatercress plays Donkey Kong Land III: Dixie Kong's Double Trouble - Part 4 of 13


In this video, we complete the second world of the game. 


Black Ice Blitz


In this stage, you'll be riding on a bobsled. You'll need to jump directly on top of enemies in order to defeat them, and you'll also need to watch out for some of the log cabins, as while some of them are in the backgrounds, others are in the direct path, and you'll lose a Kong if you run into them. Just watch the ground; if it disappears in front of a cabin, be ready to jump.

The first bonus area is in a pit to the left of the "no bobsled" sign that makes the bobsled disappear once it moves past. The pit in question is found near where you found the G. This one may take a few tries, as you'll be on the bobsled for this and you'll need to figure out where the stars are and get them all in one shot.

Jumping over the goal allows you to access the second bonus area as well as Koin. For the second bonus area, you'll need to jump to the hill at the end and jump into the lone banana to the left to reach it. Thankfully, this bonus area is a lot easier, as you can just jump on the roofs of the cabins to get to the barrel cannons and the Bonus Coin. As for Koin and the DK Coin, just throw the steel keg over Koin's head and into the wall.

After this level, you'll reach the second Sheepy Shop. Just like last time, beat the matching game to get the DK Coin and the clock, among other things.

Riverbank Riot


The DK coin will be at the start. Grab the steel keg to the left of where you start, then take it to Koin and throw it over his head from the right to get the coin.

The first bonus area is in the first body of water, which is also near the start. Jump in and swim to the left to reach it. Watch out for the Buzzes!

In this stage, you can either go through the water to make progress, or you can jump off the Knick-Knacks to reach the barrel cannons in the area. If you go for the air route, you'll pick up a few things, including a Bear Coin, and you'll avoid the Barboses at the same time.

The second bonus area is in the final body of water in the stage. A pit with two Buzzes and a barrel cannon will hint at this early. If you picked up the G, you went too far; go back to the left and search the water for the bonus area. You'll need to jump on all of the Knick-Knacks in order to get the Bonus Coin. Get the ones on the top on the way to the right first, then take care of the rest on the way back to the left.

Miller Instinct


I see what you did there, Rare.

The DK coin and the first bonus are soon after the start. The steel keg is near the Squawks barrel, so grab that and do the bank shot off the wall like you've been doing to get the DK coin. From there, jump to the right and into the corner in the ceiling to enter the first bonus area. You'll be looking high and low for all the stars - especially at the last rope - to get the Bonus Coin here.

From here, you'll be flying around and spitting eggs as Squawks again. Have fun destroying the enemies; I did.

The second bonus area is after the "maze" area with all the Buzzes. When you have a choice between going left or right; head right, you'll find the bonus area. Here, you'll need to aim the barrel cannons towards the bananas with Left and Right on the D-Pad to get to the Bonus Coin at the end.

Bleak Magic


Head all the way to the right side of the room and jump over any snowballs that Bleak blasts your way. When a barrel shows up, grab it and throw it at Bleak. As you throw barrels at Bleak, he will shoot more snowballs at you. Be ready to jump when you see him bend all the way down, as the snowball he launches from that position will be coming at you. After four barrels, Bleak goes down and you'll get the Bonus Coin and the second world cleared.

Tuesday, May 19, 2026

PrinceWatercress plays Daffy Duck: Fowl Play - Part 4 of 6


This is where the game really takes the kid gloves off.


Stage 4: Forest


Despite the stage name, this feels like more of a jungle due to the enemy choices here.

The soldier ant moves back and forth and will attack you if you get close.

The money will throw a banana peel that you'll need to get rid of before approaching you with alarming speed. For best results, get away from it and drop a stick of dynamite on the ground with Down+B at the right distance so it blows up when the monkey gets close to it.

The giant cat enemies will leap at you if you are close enough. If you can get away, however, you can stand on them and blow them up if you need to. Once they hit the ground, they won't be able to get back up.

The bats can dive at you if you are close enough to them. While you can throw dynamite at them and defeat them, it's best to stay away.

The light blue bird will send a dropping down at you if you get close enough. While this bird appears in other stages, this is where it first appeared for me.

The boss battle for this stage is the hardest yet. Bugs will keep smacking the ground with hammers, which causes the spiders to move up and down. You'll want to move past the spiders when they are all the way up or jump over the spiders when they are all the way down, which is easier said than done. If they hit you, they will follow you relentlessly, and that will be the only time you can hit them with the dynamite. Prepare to lose a life or two before you get to the treasure chest.

Tuesday, May 5, 2026

PrinceWatercress plays Die Hard (PC Engine) - Stage 4 of 10


In this entry, we go down a dark passage and face our first boss. He won't be our last, either.


Be very careful of where you go as you travel through this dark passage, as enemies will come from anywhere. You'll want to take as little damage as possible as you go through this area. Also, you'll want to get the grenade launcher here and preserve your ammo while getting as much ammo as you can.

Just when you think you're done, you'll be facing your first boss: a guy with a baton who will walk across a ceiling and try to smack you with his extending baton while also throwing a five-way knife shot. Jump when you shoot as he strikes with the baton from the sides and center, as this is the only time when he is vulnerable - and stay on the ground when he throws the knife, jumping only when necessary so you can more easily avoid them. The grenade launcher is the easiest weapon to use against this boss, as the explosion will hurt him if the grenade itself does not quite reach him.

When you beat this guy, you'll see a cutscene of John McClane riding on the top of an elevator on his way further up the tower.

Monday, April 27, 2026

PrinceWatercress plays Alice in Wonderland (GBC) - Part 4 of 6


In this entry, we meet the Caterpillar and float around in a bubble to spell our name.


Our next destination is the Caterpillar. Be sure to jump left and hit the Mini Mushroom to get the stars in the lower section at the start. Brambles hurt, so don't land on them.

From here, you'll be taking a ride of the bubbles. Bubbles will pop out of the plants in this area. Jump into a bubble to ride it, then move around with Left and Right. If you hit a ceiling, the bubble will pop. Interestingly, being small makes it a little easier to get enveloped by a bubble so you can ride one. If you need to get out of a bubble early, just jump.

There are two items to look for in the second section: a teapot and the Carpenter's hammer. The hammer will be more to the left, while the teapot will be more to the right.

You can stand on the ladybugs to move across the brambles safely if you see them.

In the third section, you'll meet the Caterpillar. You'll need to spell your name (Alice) on the way to the top, and the lower-right corner will show which letters you've picked up. If you find a Mini Mushroom, be sure to explore the nearby area, as you might be able to find a letter for Alice's name.

Watch out for the mosquitos, as they will pop your bubbles if you run into them as they fly in place. 

Once you fully spell your name, you'll get a Spade Medal, then you'll leave.

We have our second race with the rabbit, since I have enough stars to do this after the Caterpillar. For the maze, it's middle, left, middle, left, and after the winding path, it's right, left after the next winding path, and after the final winding path, keep to the right.

Giving the hammer to the carpenter nets you fresh biscuits for the Mad Hatter.

Speak to the Brush Dog for the next bonus area, you'll have a more linear that goes from left to right. As a result, it's a lot easier to get all of the stars here. You'll find a teapot in plain sight at the end.

Tuesday, April 21, 2026

PrinceWatercress plays Teenage Mutant Ninja Turtles - Part 4 of 6


...and the game gets harder again. This one took a few tries before I could finally get through it without losing a turtle.


Stage 4


Enter the building and prepare to take on the maze.

The fastest path is 1, 2, 4, 5, 7, 9, 12, 15, 17, 18. You can also substitute 5 and 7 with 3 and 6 respectively, then take 8, and head to 9 from there.

If you need to save one of your friends, enter 13, then get your friend and head back from where you came in. You can also exit 13 through the other side, go backwards into 12 and fully refill health for all your turtles. 

The first building you enter has a full health refill right off the bat. You'll also find some tightropes not long afterwards, and you'll need to use them very soon after. Just walk to the post where the rope is used and your Turtle will automatically tether up.

The robots that shoot lasers only attack when you do. 

Section 2 is really easy, just watch out for the lasers.

If you see any purple planes on the map, keep your distance. Those things are Shredder's bombers, and they can nuke you off of the map if you're not careful. It's best to stay away from them.

For Section 3, take short hops to get across the conveyor belts. At least the conveyor belts tell you off the bat where they're going to push you.

Section 4 introduces a new enemy: a humanoid that splits into two. (This assumes you haven't seen it earlier in Stage 3 like I did.) When you hit its smaller counterparts again, you'll get them to split even further. Those miniature clones take multiple hits before they die, which can make them frustratingly annoying.

Section 5 introduces the magnets. When you're in the air, they'll instantly attract your Turtle, which carries the risk of pulling you into the spikes while you're fine-tuning your jump placement. Thankfully, touching the spikes does not cause instant death, but it's still something you should avoid.

The road to the end is really nasty. You'll be dropping down for a few screens, and while they all have the same pattern as the first room, the second one introduces spiked walls of instant death, so you'll have to be fast on the way down. The third room is just like the second, but it has a full pizza that you definitely won't be able to get at all. Thanks, game.

The fire pits are instant death, so you'll want to avoid those. This is especially true near the end of 15, where enemies can push you into the fire pit if you're not careful.

The room at the end is the boss - a giant Mouser. Wait for it to blink its eyes twice before jumping to avoid the laser. After that, it will open its mouth and expose hit its "tongue." Once the mouth opens, you can easily strike the weak point with Donatello. There is a glitch where you can pause and then unpause when the mouth is open so that you can always hit the weak point no matter what, but you can easily beat this boss without it.

Monday, January 19, 2026

PrinceWatercress plays Super Mario Odyssey - Part 4 of 92


Now that we've had our fun in the Sand Kingdom, let's get the plot chugging along.


Atop the Highest Tower


If you press Y in the middle of a ground pound, you can perform a dive. This can let you get some extra distance on some jumps.

In this video, I head into the ruins proper. I make my way past where I picked up a few moons. The sand geysers will act as platforms whenever they spew out of the quicksand (which I thought was lava at first). Just remember that the geysers can disappear for a while, and if that happens, you'll need to wait for them to sprout up again.

While you're in that quicksand, you'll need to keep on jump to avoid sinking into the quicksand.

Even if you're in the 2D sections, you can still use ZL or ZR to crouch at a moment's notice as well as to enter pipes in the ground or any upside-down pipes on the ceiling. (If they're in the air, you'll still have to jump into them while holding Up on the left stick.)

To activate a switch, throw your hat at it.

The green viewport can be used to see things from a great distance. By throwing your hat at one, you can commander one and use the right stick to look around and the Y button to zoom in and out. Pressing R resets everything. Pressing ZR will allow you to go back to exploring.

You'll eventually reach the bottom of the tower, and you'll need to enter the pixelated pipe to enter another 2D section. There are some walls you can pass through to find some secrets, so take a good look around. Just watch out for those Bullet Bills. At the top, you'll find the exit out of this section, and you'll find Power Moon #1: Atop the Highest Tower (see below). As you get it, activate the checkpoint.

Moon Shards in the Sand


You'll then get your next story mission: "Moon Shards in the Sand." The path forward from the tower will be opened up, and you'll be able to use the platforms in front of you to get to the desert island separated from the rest of the kingdom. By throwing your hat at the blue mechanisms, you can extend your throw to get more coins. The black spiked cylinders with the yellow rings in them shoot out circular waves of energy that can be used to break blocks if your hat hits them. You'll need these to get some Regional Coins. Just watch out if you see some of these things close enough together, as they can keep hitting each other with their own energy waves and start a chain reaction that just keeps going.

You'll eventually land on that island and in front of a checkpoint. Hit the checkpoint so you can warp here whenever you need to. You are now in the Moe-Eye Habitat. Pick up the five spinning moon tokens that are scattered throughout the island. You'll be able to get another Power Moon.

You can take control of the Moe-Eyes with your hat, and you'll need to do so in order to see some hidden platforms and paths. While we've seen one in the last video and figured out how it worked when we went into the underground maze, this is where you'll probably first meet the Moe-Eyes. Press Y to put on and take off the shades to see hidden platforms. If your sunglasses are on, you won't be able to move as fast as you would with the sunglasses off, so keep that in mind. To get to the columns, you'll need to find a platform that is moving up and down and get on it with the Moe-Eye.

The Moe-Eye's sunglasses will also show off invisible coins, and not just invisible platforms. Interestingly, you'll also see birds resting on the invisible paths, which can help save a little bit of time.

The five Moon Shards will be here: 1 | 2 | 3 | 4 | 5

Once you get the Power Moon in this area to show up, you can grab it and move on.

Showdown on the Inverted Pyramid


After getting the Power Moon from Moe-Eye Isle, the door to the Inverted Pyramid will open, and the Broodals will show up on their airship.

By pressing Minus, you'll find the Brochure, which takes you to the Map. Pressing Y takes you to the Power Moon list, and you can scroll up and down to see what you've found as well as any Talkatooie hints you have. The checkmarks on the map indicate which Moons you've found, and you can see where and when you found it. Pressing L and R lets you switch between Kingdoms, so you can plan where you want to go next. Speaking of which, you can use the Map to warp to any checkpoint you've already hit, as well as the Odyssey itself.

If you look at the sun in the viewport, Cappy will tell you not to do that, as it hurts your eyes.

Throwing your cap at signs planted in the ground spins them around. It has no effect on the gameplay and has no use, but you can do it anyway.

The Inverted Pyramid will be in the northeast corner of the kingdom, and the door will be at ground level. One of the people will tell you that Bowser and Peach went inside, most likely so that Bowser can steal the Binding Band.

Once you're inside the inverted pyramid, you'll need to use Bullet Bills to rocket past the vast bottomless pits that you see. In the 2D sections, the blue areas will cause you to be right-side up if you jump into them, while the red areas will cause you to be upside-down and walk on the ceiling when you jump into them. 

After the 2D section, use the Bullet Bills that travel out of the 2D section and into the 3D world to break the wall in your way. You can then use another Bullet Bill to get to the exit. This will take you outside. While the Broodals and their airship will be nearby.

You'll face Hariet this time. She will lob blue spiked balls at you, and they wiill explode. She can also spin a larger purple spiked ball around. Throwing your hat at either of them and hitting Hariet will cause her to lose her hat. When that happens, run at her and jump on her head.

When you jump on her head, her hat will act like a UFO that flies around in straight lines and drops blue spiked balls like bombs when it does. Avoid the bombs and the resulting lava pools that show up from the explosions, then repeat the process of knocking her hat off and jumping on her head. If you hit a bomb before it blows up while Hariet is in UFO mode, it will be knocked upwards and hit her. After three hits, she goes down. Beating Hariet will net you "Showdown on the Inverted Pyramid." (See Power Moon #3)

It will then be night time in the desert, and "The Hole in the Desert" will start. This time, the Inverted Pyramid will be floating, and you'll need to head to where it was for your next mission. Mummies will pop up as you explore, and if you destroy them, you'll get coins.

Power Moons


1. Atop the Highest Tower - Reach the tower in the ruins. You'll find the Power Moon in the center.

2. Moon Shards in the Sand - Pick up the five Moon Shards in Moe-Eye Isle. The five Moon Shards will be here: 1 | 2 | 3 | 4 | 5

3. Showdown on the Inverted Pyramid - Defeat Hariet at the top of the Inverted Pyramid.

10. Secret of the Inverted Mural - In the 2D section where there are endless Goombas, there is a hole you can walk through inside the right wall. Going through it reveals some coins and a Power Moon.

12. From a Crate in the Ruins - After the 2D section in the ruins, there is a glowing crate. Breaking the crate reveals a power moon, and you'll need to possess a Bullet Bill to get it easily. 

26. Desert Gardening: Ruins Seed - Hey, remember this? Now that more than 30 minutes have passed, we can get this one at the flower pots in town.

Regional Coins


Sunday, January 11, 2026

PrinceWatercress plays Metal Force - Part 4 of 7


This is probably the most difficult of the stages in the game due to how the boss battle is.


Mission 4: Planet Cave


The walker enemy at the start will turn and jump towards you and then attack whenever you attack. Sometimes, you can avoid a fight with them just by leaving them alone. You'll be avoiding a few enemies just to get through this mission more easily.

The orange humanoid enemies will shoot you when you are lined up with them. There is a delay between when they draw their guns and when they shoot, so you can get your attacks in before they do.

The rock droppers are much like the laser shooters from Mission 1. If you're on a higher platform, walk off the edge and keep walking to get onto the next platform.

To get to the window you can see in the lower-left corner at the start, you'll need to jump into the wall to the left of the rock droppers. You'll then find a ladder leading to a continue.

Avoid the smoke coming out of the pipes, as it will damage you.

The conveyor belts are back and in greater numbers. Pay attention to where they are going as you run across them to get where you need to go. If you need more time to figure out where they are going, pause the game and watch them, as the conveyor belts are still animated when the game is paused.

You'll need to fall into a wall while holding left to get a hidden 1-Up.

You'll be seeing lava near the end, and you'll want to avoid falling into it and losing half of a full health bar.

The boss here is a mech that just walks back and forth briefly before disappearing when the screen shakes. Keep shooting at it, and when the screen rumbles, pay attention to where the mech lands and stay on the opposite end of the room so that you don't get hit, as both conveyor belts in the boss room will push your towards the lava pit in the center. Also, watch for the smoke coming out of the pipes; you don't want to get hit by that and knocked into the lava below. From here, it's on to Mission 5.

Saturday, January 3, 2026

PrinceWatercress plays Power Strike II (Master System) - Part 4 of 8


I found this entry a little easier to write for than I thought I would.


Stage 4


The big gold ship at the start has satellites that will fly around it, but at least it's quick to take down if you concentrate your firepower on it.

Be ready to use the super shot in case you have a ton of enemies firing at yo at one time.

The two floating columns with the satellites to the side can be destroyed really easily if you line yourself up with them. 

The volcanoes can be stopped if you focus enough firepower on them.

When you get to the hanger, you're at the boss. Shoot down the circle-shaped parts at the sides first, and destroy the blue projectiles that come at you if you can, as they can home in on you after they come out.

When those things are gone, you'll want to avoid or shoot down the blue shots that move down to the bottom, as they turn into three-way shots that travel to the top. You'll also want to keep shooting at the boss throughout the battle as well. If you can keep avoiding all of the red projectiles (having Spin Shields helps) and keep the bottom of the screen clear, you can beat this boss.

Sunday, December 28, 2025

PrinceWatercress plays Dragon Fighter - Part 4 of 6


Things get a little more interesting - and a little more difficult - as we enter a more mechanical world halfway through the game.


Stage 4


The tiny robots with the steam coming out of them jump up and down while moving back and forth, and spit out the occasional projectile. Attack it from a distance with charge shots.

You may not get enough energy to fill up the Dragon Meter on this stage, but on the other hand, you might. It depends on how much you luck out and get a dragon head, which will give you extra energy on that meter. I usually don't.

The flying green enemies will spit out spinning projectiles that travel across the ground towards you. Be ready to jump over those things, and hit the flying enemies with charge shots.

The guys riding the spike columns back and forth are vulnerable from behind. Hit them with charge attacks, especially the homing fireball, as it will be your best bet. You'll have to run away from one of them shortly after the start of the stage.

Watch for the blade on the chains that move up and down from the ceiling. You'll need to move past them while they are up to avoid getting him by them.

The platforms above the light blue fires will do one of two things. Sometimes they are stationary and will slowly sink downwards under your weight, causing you to jump on them constantly. Other times, they will move around. Whatever happens, avoid falling into the fire below, and take out enemies with charge attacks.

The "pots" move between the ceiling and the floor and will shoot out five-way shots in-between.

The boss is a mechanical robot of sorts that sends four eyelets after you. The eyelets fly around in 45-degree curves, and you'll need to hit them with charge attacks and sword strikes until they fall to the floor while avoiding any contact damage. They can still damage you even they are down, so you shouldn't touch them after they go down. When you destroy all four, the robot in the center will attract all the eyes to the center, and you'll need to avoid those before attacking the robot while its green eyes is open. When it raises back up with the eyes, the eyes will come back along with the boss, and you'll have to repeat everything you just did to damage the boss again.

If you have enough Dragon Meter energy, you can do damage to the eyes and even do a lot of damage to the robot itself just by getting close enough to the latter. It may not be much, but at least that's one cycle where you won't be taking a lot of damage. Otherwise, be ready to shoot charge attacks and move around a lot.

When you beat the boss, you'll get another wizard's staff and more health, then it's on to Stage 5.

Tuesday, November 25, 2025

PrinceWatercress plays Brave Fencer Musashi - Part 4 of 33


In this entry, we head into the forest and take care of some stuff, and we also take the time to get even stronger for what's up ahead.


It's now time to go to the Somnolent Forest. The path leading to the forest proper has two trees near the road instead of just one.

In case it gets dark, you will have a limited field of vision lit up around you.

South of where you start is an archway, but there's steam shooting out of it. You won't be able to head to the other side of that until later.

The green soldier carries a spear, the little white lump of an enemy tries to eat you and the ghosts will try to shrink you down to fun size (if they aren't teleporting somewhere nearby when they see you, that is).

The green soldier gives you Javelin, which allows you to throw a javelin at enemies. The little white lump with the big teeth gives you Satiate, which increases your BP as time passes for a short time. The ghosts will give you the Shrink ability, which allows you to shrink enemies and them stomp on them to defeat them instantly. Sadly, you don't get any pick-ups out of this.

There is a Water Crest, but you won't be able to us it yet.

Northwest of the Water Crest area is a Bincho Field. Breaking it will rescue Guard Lumpwood, who will allow you to enter Twinpeak Mountain at any time if you talk to him. (Before you find him, Macho will be guarding it and will then head home at 20:00, leaving the path unguarded and giving you the earliest opportunity to sneak over there.)

The flower enemy will give you Hop, which lets you hop around on Lumina and jump over the brambles that will hurt you if you touch them otherwise. The flower enemies are dormant during the day, unless they are attacked, and at night, they will start hopping around if you get close enough to them.

The blue plant enemies spit projectiles at you. They will give you Mint, which leaves you temporarily refreshed with your Tired meter at 0% as long as the light blue burst of light is surrounding you.

Enemies will usually drop things when you defeat them. You can get coins ranging from $10 - $500, hearts (the bigger they are, the more HP they refill), and Bincho (the bigger it is, the more BP it refills). Be sure to grab them when you see them, as you'll need all the pick-ups you can get.

Going southeast from the mint plant takes you to a pipe archway. If you go through it, you'll be on the path leading to Steamwood. The pipes on the northeast wall lead to shortcuts as well as another Bincho Field where you can rescue Musician Pianissimeat. Near him is the Earth Crest, which you won't be able to use for a while. Just watch out for the steam coming out of the pipes.

Another path on the southwest wall leads to another Bincho Field containing Acrobat Sausages, who will be able to do stunts with Clown Weinee. If you go back to the castle and talk to Clown Weinee, however, you'll be told that you need an orange. You won't be able to get one until later.

There is a path on the southwest side that will take you straight back to Grillin' Village. There will be a windmill nearby, but you won't be able to do anything there yet. However, if you knock on the door at night, you'll wake up Wid, who will tell you to get plenty of rest or else you'll get tired in a dangerous place, which is sound advice for this game.

We now have the schedule for all the stores (except the inn, which is always open).

Restaurant: 6 am - 2 pm, closed Sunday
Toy Store: 12 pm - 8 pm, closed Wednesday
Grocery: 10 am to 8 pm daily
Conner's Pawn Shop: 11 am - 4 pm, closed Monday
Jam's Bakery: 7 am - 7 pm, closed Thursday

The church is open at 6 AM, and it closes at 4 PM. You can talk to Father White by knocking on the door during the evening, but if you try to knock late at night, he won't answer.

You can jump into the trees and climb on them with Up and Down, and you can rotate with Left and Right. If you climb up past the top, you'll jump off.

You'll have different ranks depending on your level average. You'll start out as "Little Turd" at Level 1, but become "Apprentice" at Level 3. There are also level caps for each chapter, which keeps you from over-leveling throughout the game, and in order to break the cap, you'll need to complete the current chapter.

The path northeast of the first set of brambles leads to a path full of mushroom enemies. If their powder hits you after you strike them, you'll be put to sleep, and the mushrooms will move in and attack you, which will wake you up. Absorbing them will give you Sleepy, which will make you super tired. The eye on Musashi's portrait will completely shut, which is a bad thing, as his portrait will be able to tell you if you are doing okay or if you're about to get tired.

Past this path leads to several things. You won't be able to get past the rock that looks like a slug blocking the Island of Dragons until later in the game. There is the Meandering Forest, and we'll be heading there shortly.

One side of the village will lead straight back to the castle, while the other leads back to the upward path leading back to the mountain entrance.

When you select "Visit," you can talk to the people that you've rescue. If you see Musashi say "Better go meet them!", then that means you have yet to talk to them. You'll be talking to people more than once sometimes, and doing this can help you finish some sidequests, so return to the castle often.

Musician B is Musician Pianissimeat, and talking to him will add flute to the castle them. Rescue more musicians to get the full song. Acrobat is Acrobat Sausages, who will ask you to talk to Clown Weinee, who in turn will tell you to bring an orange for their stunt, which we won't be able to do until later in the game. Hawker, of course, will be Hawker Steamwood, and he will tell you about the Minku, which will give you the Longevity Berry if you catch one. Guard is Guard Lumpwood, and he'll be at the Twinpeak Mountains entrance, so you obviously won't be able to speak to him at the castle.

If you go to your room and rest, you'll rest for a full eight hours with a full HP and BP restoration. Also, if you buy toys, you can play with them in your room. Just keep in mind that if you buy them, you'll need to open them, and if you open them, you won't be able to sell them back. Thankfully, the game tells you which buttons do what when you play with a toy, and you can use the shoulder buttons and the D-Pad to look at the toys from other angles and press Square and X to perform the two actions that the toys can perform.

Sometimes, there will be a sale at the grocery store. If that happens, you'll be able to get a small percentage off all the items in the store.

Friday, October 24, 2025

PrinceWatercress plays Legacy of Kain: Soul Reaver - Part 4 of 28


In this entry, we take on Melchiah, the first of our three brothers now turned enemy by Kain.


0:29 - There's a switch left of where we start here. Flip it, then go up to the crank and press Square. You'll get the machinery downstairs running and the elevator operational. I then head back to the previous area and press Square at the lever. This lowers the floor, so it's really not an elevator after all. There is a block in the wall, however, and you'll want to pull that out before you go...

3:24 - ...down here. This opening leads down to another area. Move the torches on the trails here to the four support beams so you can burn them down. This brings the floor down to where you are now. 

5:32 - Now you'll need to move the torches into the corners of the center platform. When you hear a click, the torch you're moving is in position. When you've got all four torches in the right spots, you'll bring the floor down yet again!

7:09 - One of the corridors lead to Melchiah, and now that the torches are in position, the gate leading to him opens. Before I do that, I head upstairs and heal up in the spiritual realm after using the block I pulled back to go upwards and absorb some souls. Good thing there's a portal back to the material realm!

10:02 - You'll finally meet Melchiah, who is not only more macabre looking than he used to be, but is more than willing to fight you. 

You'll need to high jump up the wall near one of the two gates, then hold Square at the lever. When Melchiah comes towards you, make sure he is below the gate and let go of Square. If you do it right, he gets stabbed, and you'll do damage. You'll then need to get out of there and get to the lever behind a different gate.

Once you stab him twice, the crank in the room will turn, and you can use it. Get to the crank, then wait for Melchaiah to phase through the cage wall in the center. When he's in the cage, turn the crank with Square. The spikes above will tear him to mincemeat, but not before Melchiah taunts you. You'll then absorb Melchaiah's soul and get a new power: the ability to phase through iron gates much like Melchaiah while in the spectral realm. Just keep holding the D-Pad Up towards an iron gate in the spectral realm, and Raziel will phase through it. This ability does not work in the material realm.