Tuesday, June 30, 2020

PrinceWatercress plays Terranigma - Part 22 of 50


In this entry, we head to Storkolm Forest to find something that will hopefully get Princess Elle to speak again.
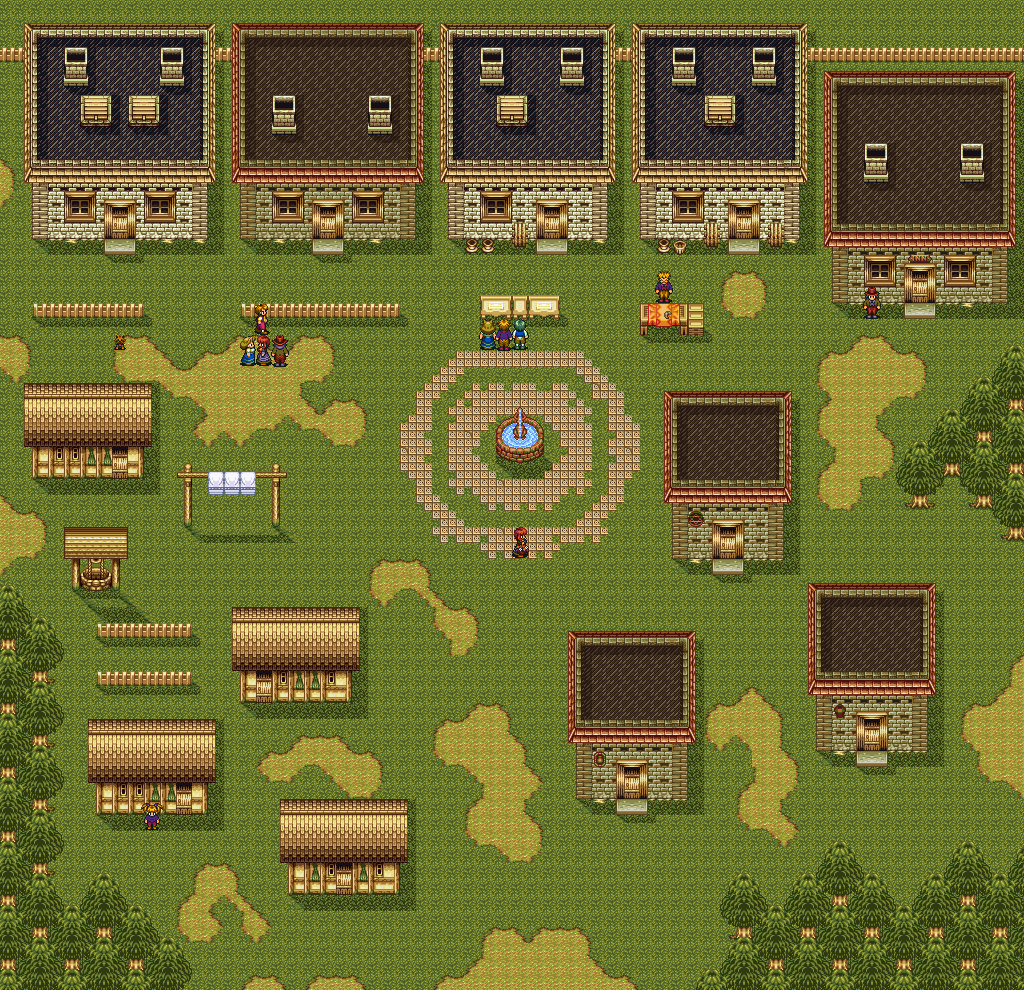
Loire


Head back to the castle and go back to the kitchen. Make sure you have the Sleep Potion equipped and use it in front of the pot by pressing X while at the pot while the girl with the red hair has her back turned. You'll be able to slip the mickey in, then you'll be kicked out of the castle. (If she looks at you when you do it, you'll be kicked out before you can put the Sleep Potion in the food.)

Head back to the castle. If you talk to the guards and find out they're asleep, it worked. Head back to the jail and talk to White Wind. He'll ask you to open the cell with a key the guard has. Say yes, then talk to the guard and get the Jail Key while he's asleep, then equip it and use it to open the cell door to free White Wind. He'll tell you that the King has hidden treasures behind an object in the King's room. Behind that object is the door to the treasury, and he'll let you have them.

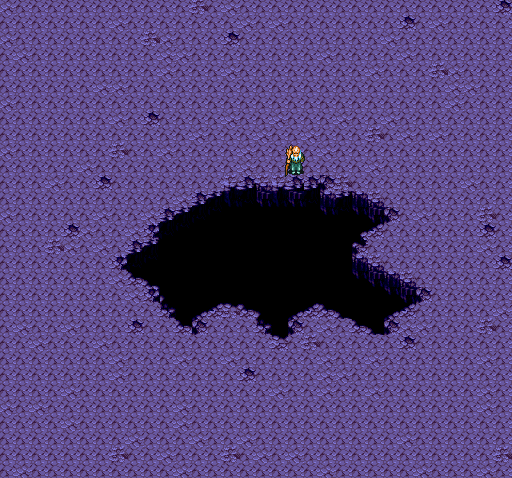
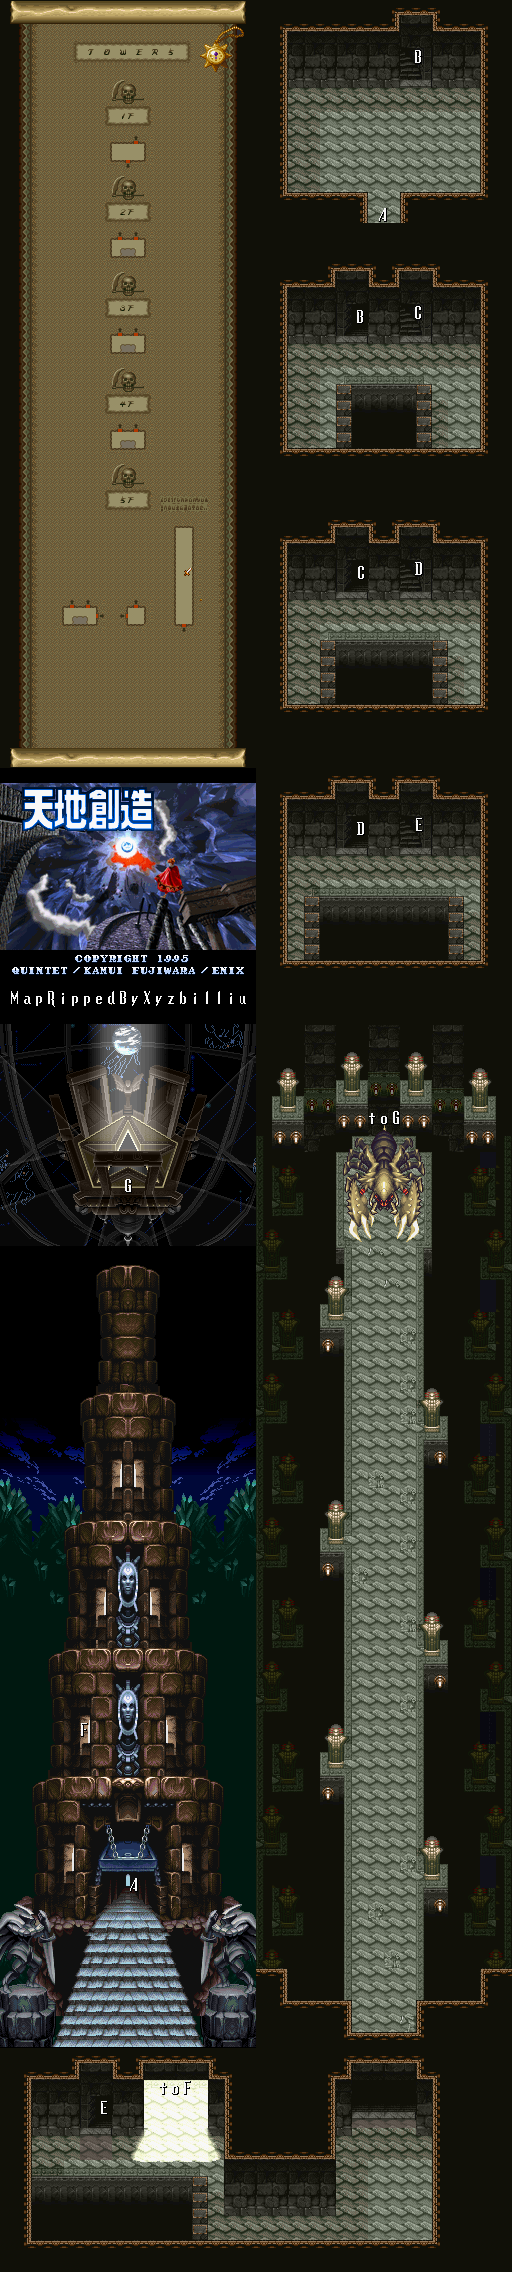
Head to the king's bedroom. Along the way, you'll meet Princess Elle, who isn't asleep. She just ignores you and goes to the right. Yomi will show up and tell you that the Princess doesn't really like you. From here, enter the door to the north. The guard will be in the way until you walk into him to push him out of the way. Enter the door to the right. If you talk to the king, he'll tell you not to touch the statue as he is sleeping. You'll want to push it out of the way and crawl in to the hole in the floor. Go up the tower to find Magirock #44 and the Protect Bell, which you'll need to get through Norfest.

You're done here. Head to Norfest.
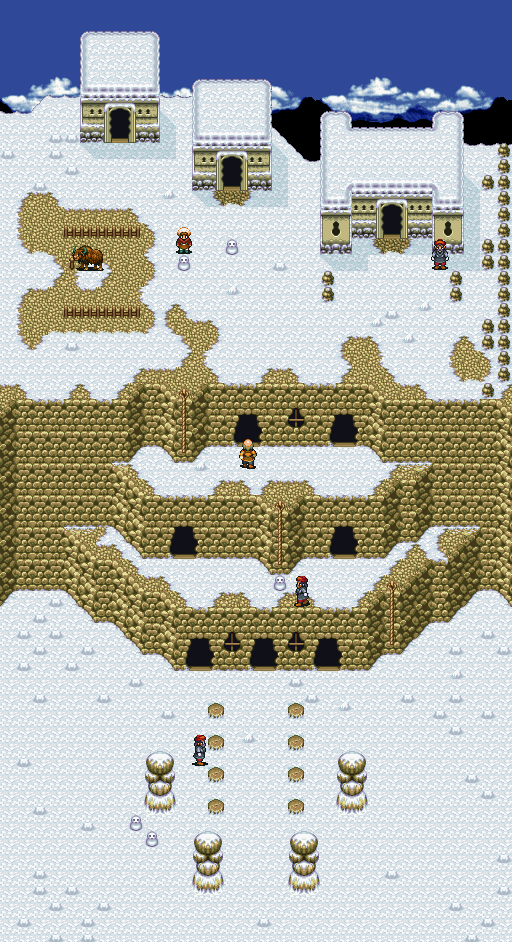
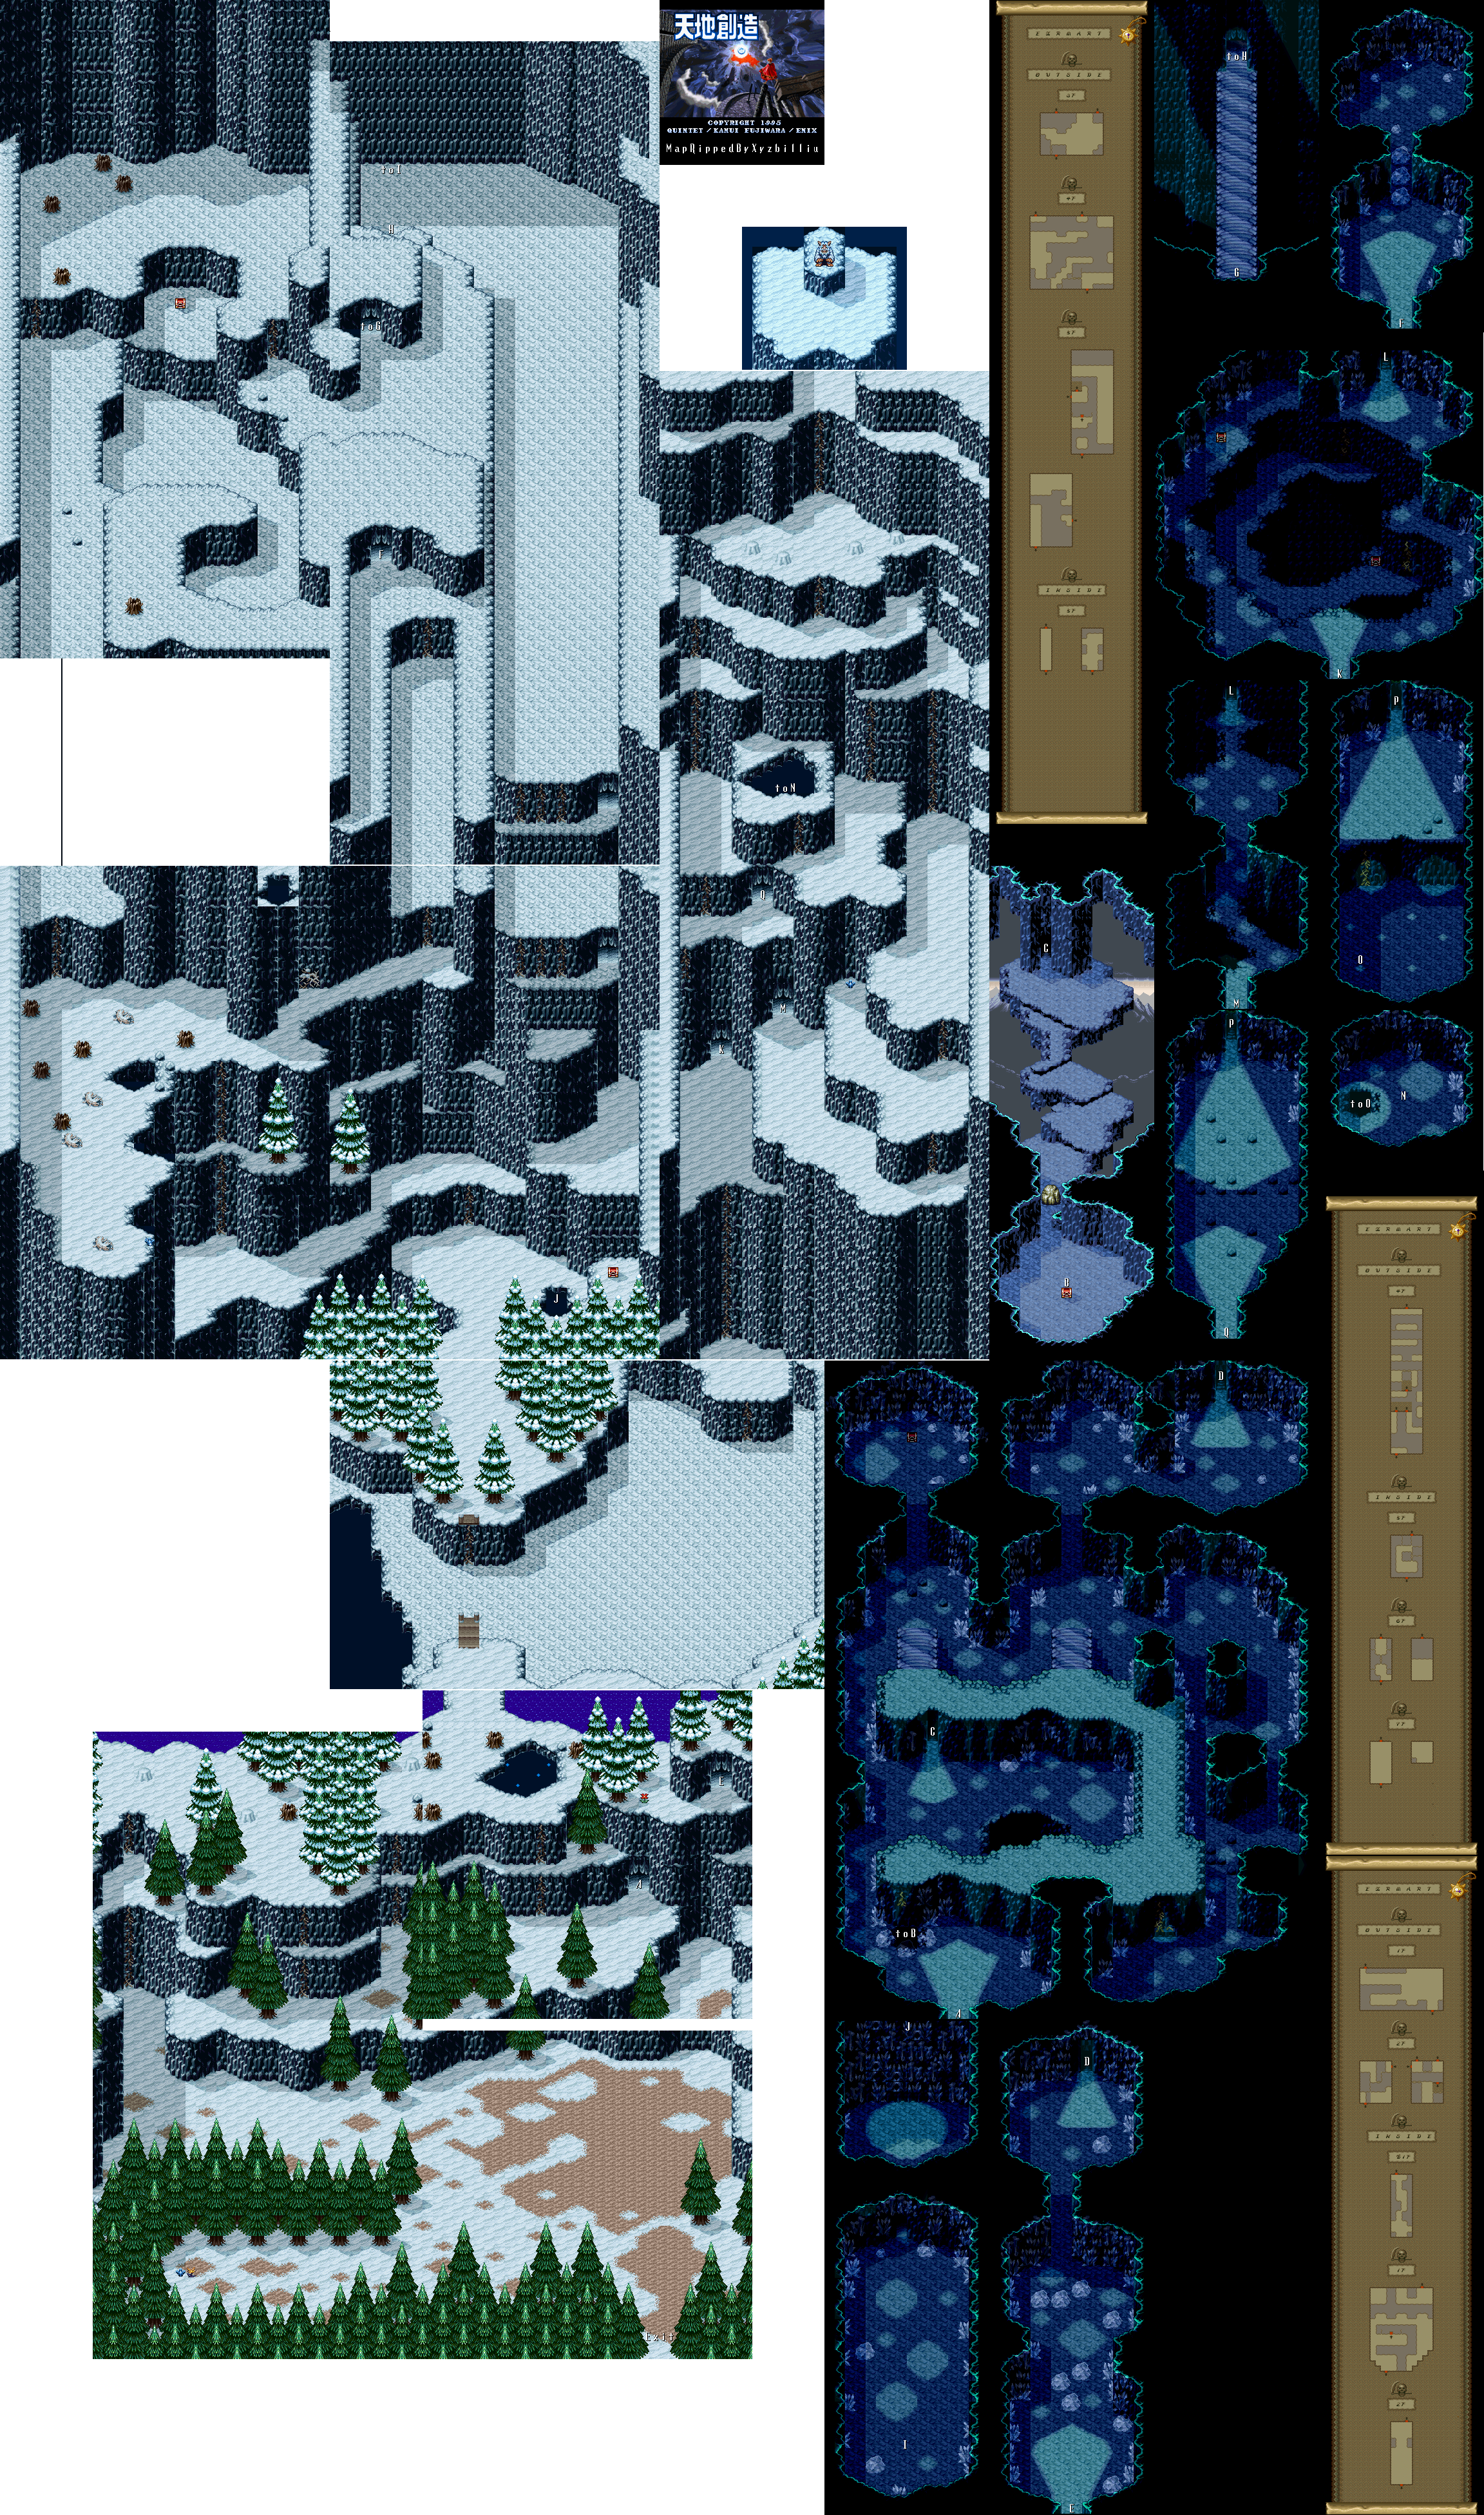

Norfest


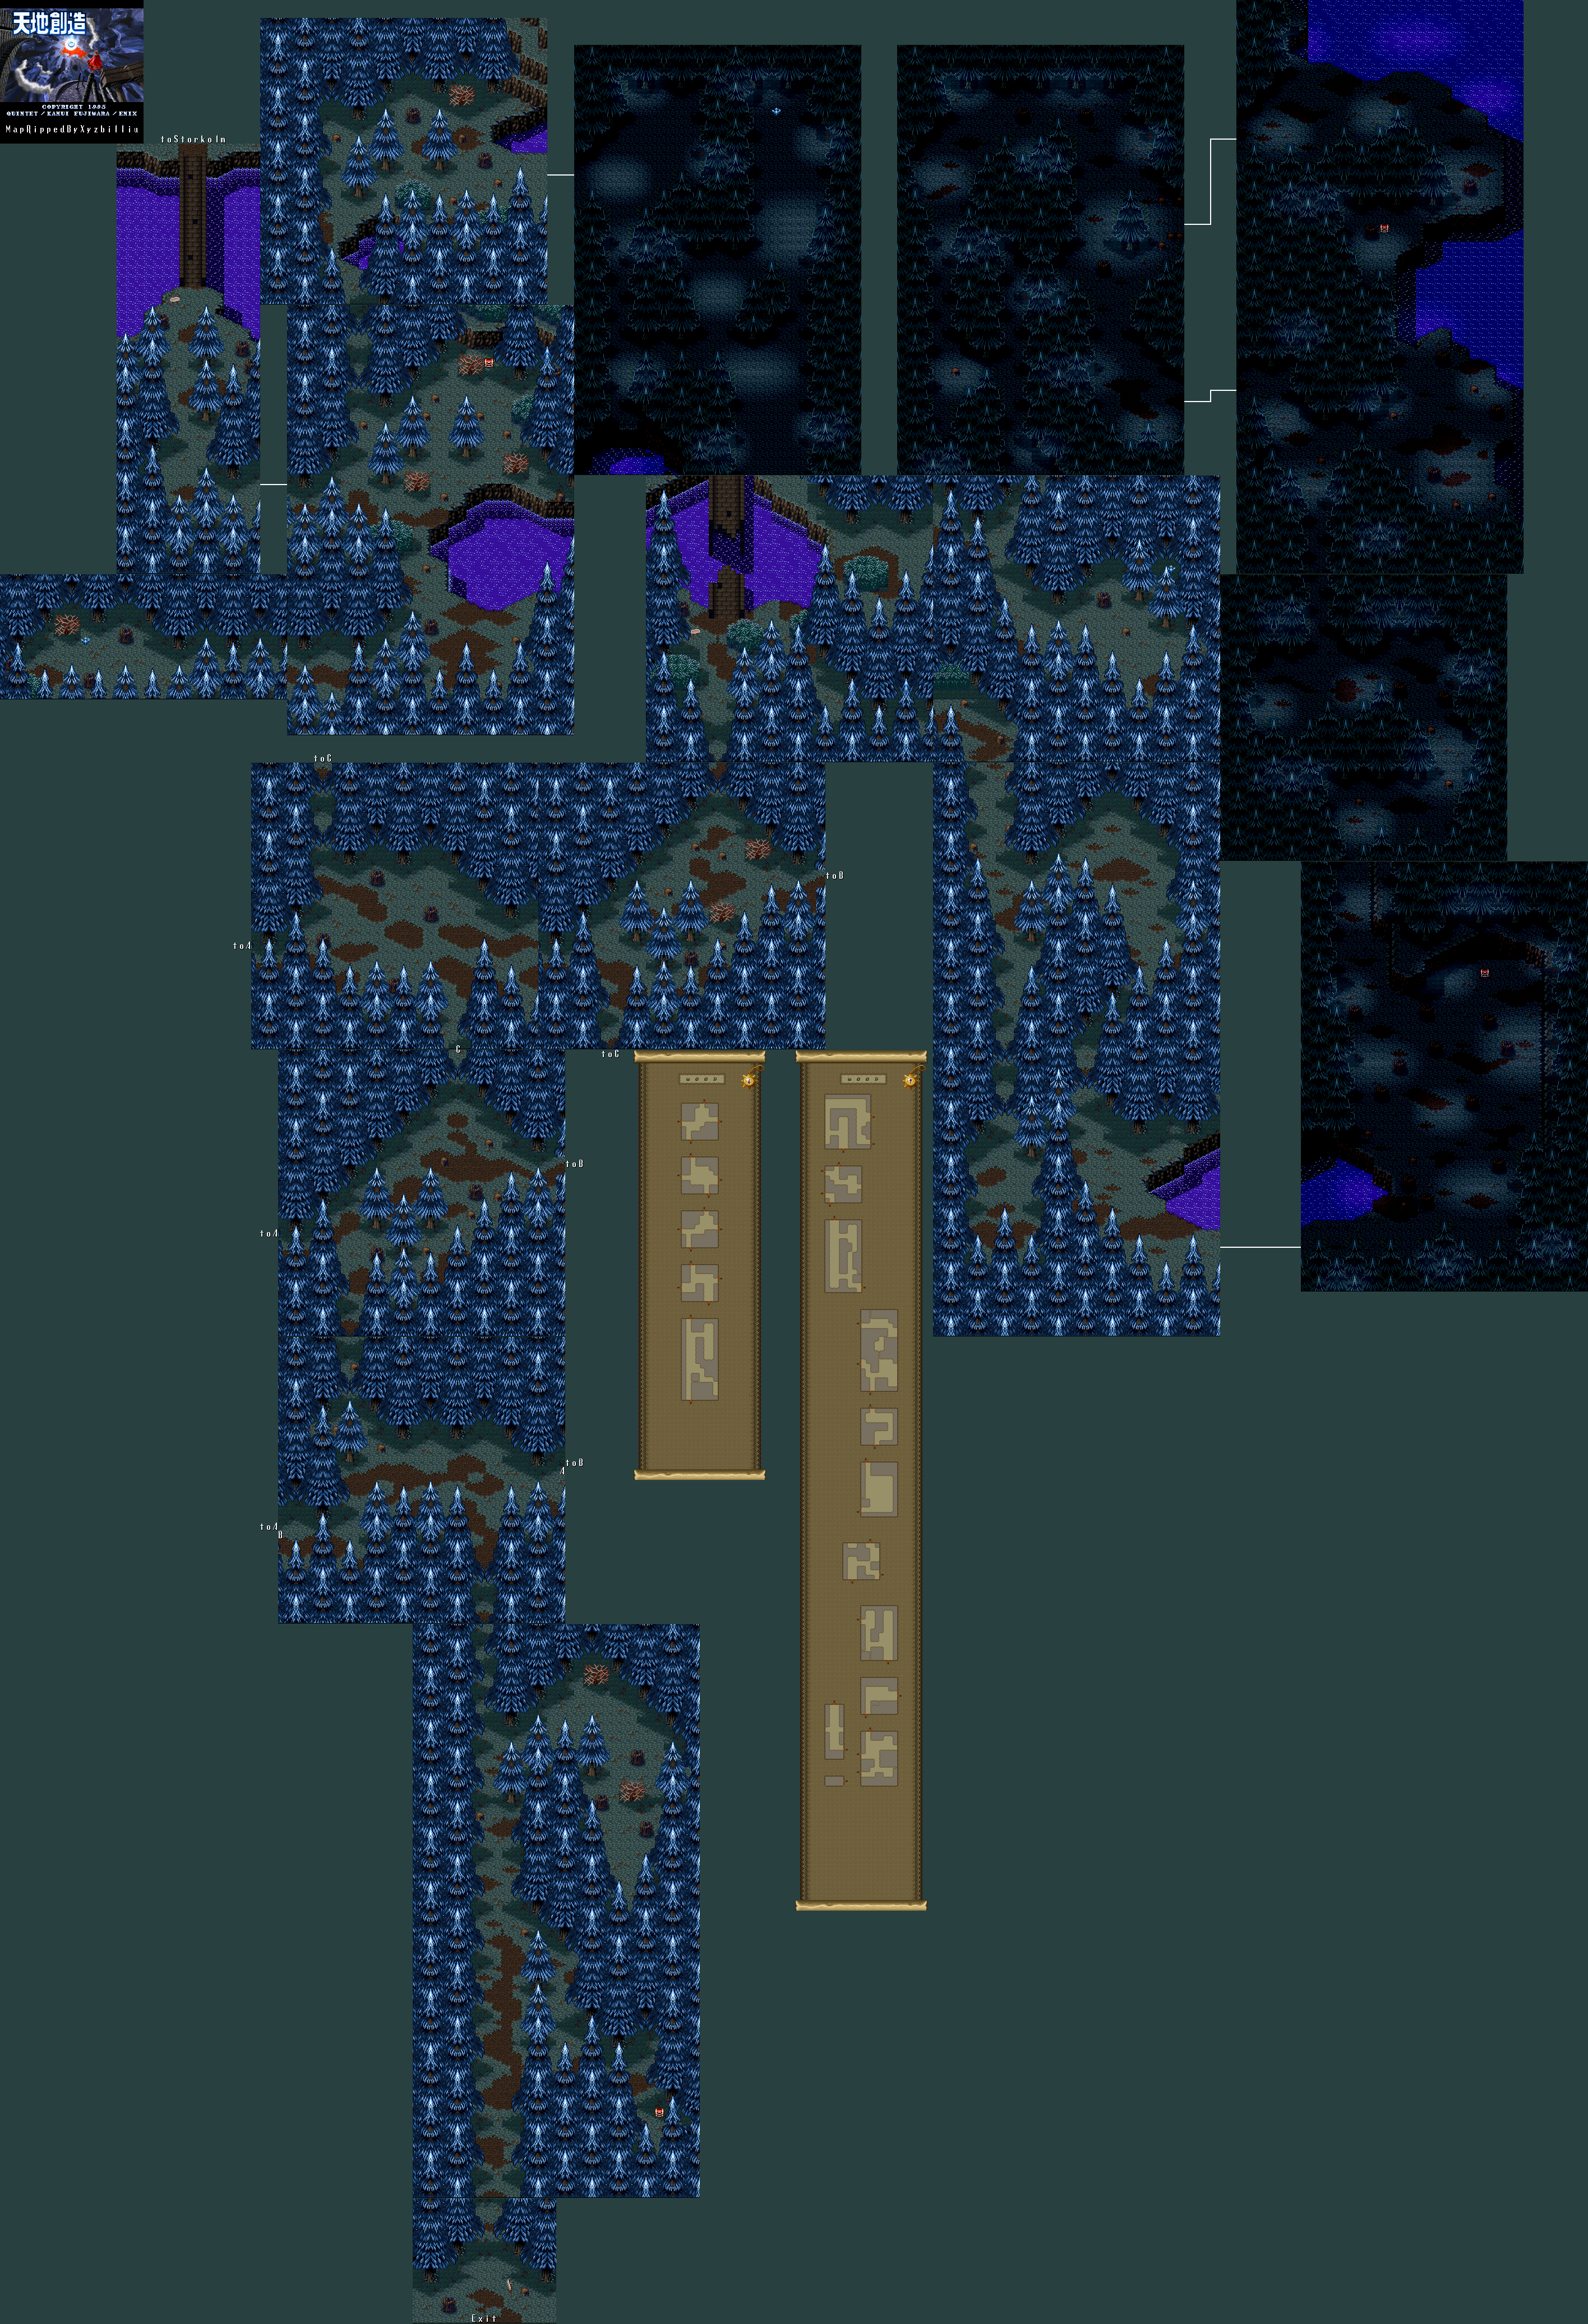
When you reach the entrance, you'll meet Royd again. He says you'll get lost in the forest if you talk to him, but if you go in anyway, he'll tell you to be careful and that not everyone in the forest is a fiend. Be sure to have the Protect Bell equipped.

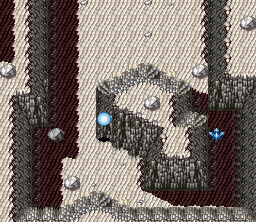
When you enter a screen in the forest, you'll hear a bell sound if you have the Protect Bell equip. Whenever it rings out, it means you're going the right way. Otherwise, turn back.

The bats will briefly paralyze you if they touch you. The Sabredogs can not only call for help and spawn more Sabredogs on-screen, but they can also Poison you.

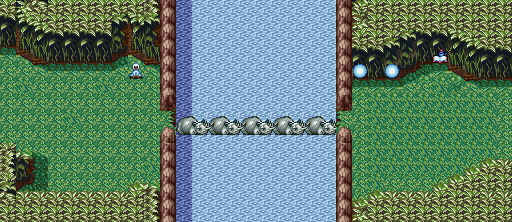
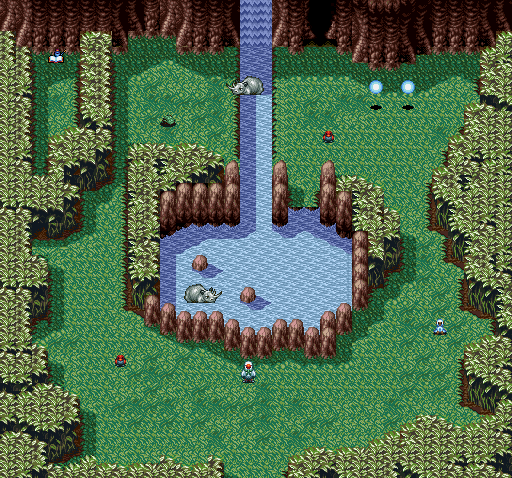
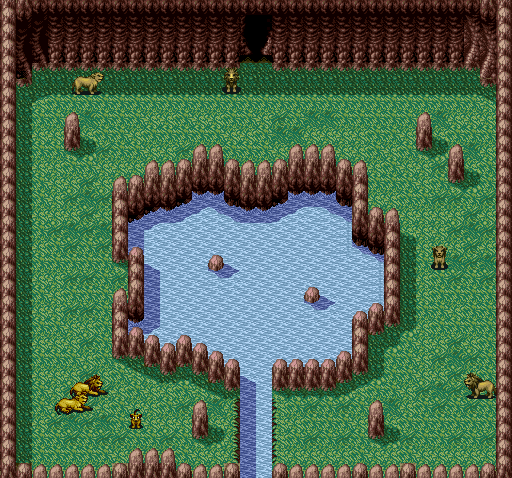
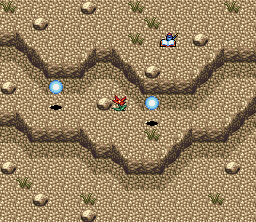
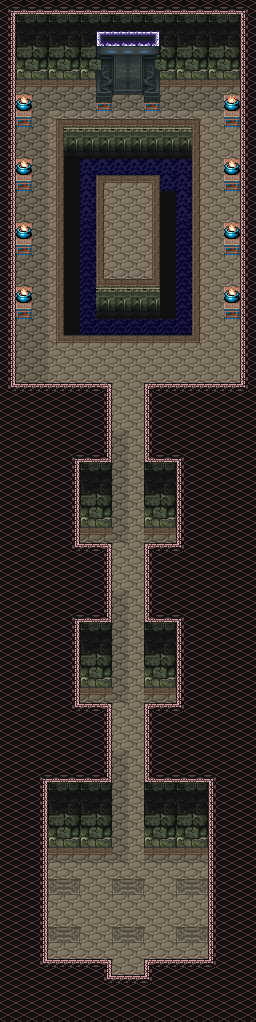
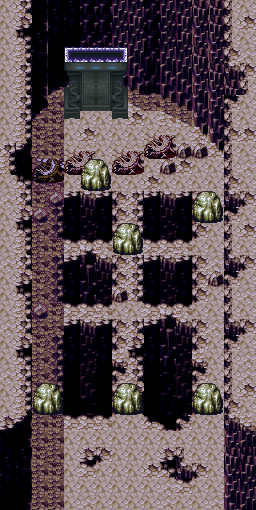
From the first screen, head north. From here, go north again, and fight off the wolves along the way. Go north a third time, then go east. Fight off the enemies, then go north again. You'll make it to the bridge, but the bridge is out. Use the animal trail to the east. From here, the rest of the forest is straightforward. Be sure to explore from here on in to find some chests hidden behind trees and the like. One even contains a Life Potion.

Keep using the dashing stab attack to get past the worms. You'll eventually be followed by somebody, but you won't be able to see who it is...

PrinceWatercress plays Terranigma - Part 21 of 50


In this entry, we check out the castle, meet the king and end up with more questions than answers.

Loire


Head to the door to the north at the inn. Talk to the innkeeper, then enter the door to the right. Be sure to save before you do. Then go into the bed in the room and sleep.

Head back to the entry room of the inn. There will be a man at the table, and if you talk to him, he will tell you that he is looking for a mushroom so he can make Sleeping Potion, and can't find the ingredients he needs to make his medicine. Equip it and talk to him, and give him the mushroom when he asks for it. He will make a sleep potion for you, but you'll have to talk to him later to get it.

Leave town and head to the castle. The guards will now be out of the way. Enter the doorway to the north, then head north again. You are now in the throne room. Go all the way to the north end and enter the left-most door on the north wall. This leads to the library, where you can learn about the tragedy that was only hinted at in the town. The whole town of Storkolm (obviously a reference to Stockholm, considering that Norfest is a reference to Norway and is where Scandinavia is) was executed due to the king not being able to retrieve a certain treasure that was located in the town. You'll also learn about White Wind's capture, and that it is thought he was after the golden statue in the king's bedroom.

Another book will tell you about what happened after the Norfest massacre: the town is now infested by wolves, who were once controlled by dog whistles by the people of Storkolm. You'll also learn that the mayor of Storkolm's daughter has survived, and that she suffers from a strange sickness that makes her unable to speak and causes her to suffer from partial memory loss ever since the Storkolm massacre.

The door to the right of the throne is a guest room. Talk around, and you'll learn that a man with long hair stayed here not too long ago, and that the king discusses something with him.

Leave the throne room, then go all the way to the right and then into the door to the north. This leads to the kitchen. You'll find out how much of a jerk the king is, as he is taking advantage of the princess, then everyone stops talking. One of the women in the kitchen tells you that the princess isn't even the king's daughter and that she is just an orphan.

Be sure to enter the door to the right while you're in the kitchen. This leads to the pantry, which leads you to Magirock #43 in the lower-right corner of the room.

Leave the kitchen, then head back to the first floor lobby and head all the way to the left. Go north from here, and you'll be in the staff quarters. One of the guys will tell you about how he caught White Wind if you talk to him multiple times. The door to the left leads to the jail, and you'll be able to meet White Wind here. He'll be in the second cell, but you won't be able to do anything with him for now.

Leave the quarters, head back to the first floor entry room and enter the left-most or right-most door of the north wall. Both doors loop to the same area: the interview room, which is in the center. Talk to the guard in that room, and he'll tell you to stay in the waiting room on the right. There is a man with blue hair who seems important since he doesn't look like everyone else in the room. He'll tell you that you don't have what it takes to win the princess. His name is Royd, and he isn't interested in the princess, but he does like her wealth. After you talk to him, you'll be asked to enter the chamber to start the interview by a guard who enters the room. Royd tells you to give it your best, even though it will be a wasted effort.

Go left, then go into the room the guard stood in front of. Talking to everyone, and then going north and talking to the princess herself will reveal that her name is Elle, and that she looks just like Elle from Crysta back in your world. This Elle will ignore you, however. Fyda will be standing next to her, and she will ask you to help her if you can.

Talk to the king, and he'll tell you to speak to the butler. The buter stands in front of the stairs leading to the thrones here. He'll tell you that you'll have to get her to speak again in order to marry her, and that you have a limited amount of time to make it happen in.

Head back to Loire and go back to the inn. Talk to the man that you gave the mushroom to and you'll be able to get the Sleep Potion from him. He'll tell you that if it were cooked in a pot, it could put everyone at the castle to sleep. Remember this for later.

Monday, June 29, 2020

I JUST LEARNED FOXY BINGO EXISTED LAST WEEK


I DON'T KNOW HOW TO FEEL ABOUT IT

PrinceWatercress plays Terranigma - Part 20 of 50


Our adventure takes us into the modern world as we visit Europe for the first time.


North of that mountain path is a house known as Molly's. Molly happens to be an old man who knows everything about the forest around here. Going west takes you to the Norfest Forest, and going east takes you to the Mush Forest. You'll want to enter the forest to the east first. Along with some hidden chests (one of which is hidden just behind the tree, just up and a little to the left of the dark green area around it) with a L.Bulb and 500 Gems, you'll find a Mushroom there. Take it. You'll need it for later.

To the west is Norfest forest. Go one screen north, then go east when the area allows. Open the chest to get a RingMail. Equip it, since it's better than what you currently have. Don't go further north yet. You'll get lost.

Go back to where the castle is. You won't be able to go through the tollgate to the west and enter Spain until you have a permit from the King. As for the nearby castle, you won't be able to explore there until later. Instead, head to the nearby town of Loire.

Loire


There will be a flower girl in the center of the town near the well. If you talk to her, you can buy some flowers at 5 gems apiece. She'll tell you that you can make even a girl who doesn't talk or a penguin happy with flowers. Remember that for later and buy nine Pretty Flowers.

Talk around, and you'll find out that they're looking for a groom for the Princess by finding a man who can make the princess speak, a thief named White Wind broke into the castle and got caught, that King Henri XIII is a total tyrant, and that everyone who goes into Norfest Forest goes crazy when they come out due to the ghosts.

To the right of the town square is the fortune teller.

In the lower-right corner of the town is the Magishop. The Ray Ring shoots out a light orb, while the ElecRing shoots out electricity. WindRing counteract status ailments.

Left of the Magishiop is the Merchant. The SlvrPike (Silver Pike) will come in handy for Norfest. Buy and equip one.

There are some houses to the left of the store. You'll learn more about White Wind, and find out he's more like Robin Hood than an actual thief. You'll also meet the town drunk Louis, who used to serve the king until he did something that got some villagers killed, simply because he gave the Protect Bell to the king. He will tell you that the Prtect Bell serves as a guide through Norfest Forest, and that he got the bell from someone in Spain. He says that if he didn't give the bell to the King, the village would never have been attacked. He wonders where the Protect Bell is now.

You'll also meet the artist Matis. Talk to him, and you'll learn about his plight: he's an artist, but he's a prett broke one. Also, he gives you a drink, and it's pretty good. When he asks if you like his paintings, say yes. Afterwards, talk to him again.

Up north, you'll find some houses. The left-most one is home to a family whose grandmother was once a servant to the king and queen. If you talk to her, she'll hint at a tragedy...but what?

To the right of that house is Jean's. He says there will come a time when the masses will run the country, and he studies as he waits for that day.

Next to Jean's is Madame Papilo's house. The seamstresses are sad, as they only make clothes for the rich few and not for everyone. The one in the upper-left is Marily, who knows that Madame Papilo is nasty, rich and takes all the credit for their work.

In front of the fourth house is a guy selling a croissant. For 10 Gems, you can eat a croissant. The fourth house is a winery, who has plenty of alcohol...only for the king to consume all of it. He wishes he could make wine for everyone.

In front of the fifth and last house on the far right is Keinz, an economist who forecasts the growth of all the towns. He will come into play later in the game. For right now, he'll tell you that Loire is in poor shape due to the King running everything, and without a major change in policies, this town is doomed.

If you go into the fifth house, you'll be blackmailed into paying one million Gems for going into the inn. When he threatens to throw you into the labor camp, a knight appears. This is Lady Fyda, and he tells Bounty, the innkeeper, to clean up his act. She apologizes, then says she has the feeling she's met you before. She then leaves.

Sunday, June 28, 2020

PrinceWatercress plays Terranigma - Part 19 of 50


In this episode, we rescue Meilin...and she continues to be a brat. Typical.


From this building, go down the stairway to the right. Once downstairs, go north as soon as you can to get Magirock #38, then go all the way left and crawl underneath the table. You'll see an armored ghost, but it won't hurt you. Go to the path leading north to the left of where you found the Magirock and go up the stairs that you find.

Fight off the Borfs, then go left of where you entered and take the stairs you see there. Fight off the Borfs here and go to the right. Go through the doorway to the south and make your way to the table to the right. Crawl under it and keep going north to find Magirock #39. Leave the building.

From here, go into the small building to the right. Beat up the zombies, crawl under the table, take the Large Bulb (L.Bulb) from the chest and get out. The L.Bulb replenishes 150 HP when used.

Once back outside, enter the building to the immediate south. Take the stairs leading down and go up the stairs to the left and go through the doorway to the south to get a STR Potion. Get back through the building and go to the one south of that. Here, you'll find Magirock #40. But there's more! Leave the building and head west until you see a path leading south. This leads to Magirock #41, but you'll be blocked from the square by a fence. Go back and head straight to the right to enter the cemetery.

If you're above Level 17, use a PyroRing to kill off all the zombies. There are ten of them here, and if you need experience, keep going in and out of this area to farm up. There will be a lone tombstone up and left of all the others. If you talk to it, it will say "Temjin's Grave." If you told Temjin to take his riches with him, you'll get 500 gems for the effort when you examine the gravestone.

In the upper-right corner of the cemetary is a tombstone distanced even more so than the other ones. Here, you'll find Turbo. Equip the Red Scarf and talk to Turbo, and Turbo will be able to recognize and follow Meilin's scent. At this point, he'll follow you. Remember the armored ghost that didn't interact with you. Well, you'll have to go back to it. When you leave the cemetery, Turbo will slowly head to the area where you found that armored ghost.

Once you're in that building and Turbo approaches the ghost, the ghost will turn into Meilin. Meilin blames you for the disappearance of her parents, but her parents will soon speak to her from beyond the grave, telling her not to hurt those around her, and that they're dead and are in the process of being reborn in new bodies. What bodies they have, they will not know. Meilin runs away and acts like a jerk to you, anyway. Gee, how thankful.

When you leave the building, you'll meet up with Master Meihou, who asks you to forgive Meilin. He also wishes to pay you back for helping him out, and does just that by asking you to head to the nomad's camp that you passed by and ask for direction to get through the desert. You'll then be teleported to the square.

If you head south, you'll meet Hedyn again. If you talk to him, he'll tell you that he will write a travel when he returns to Europe. He'll also tell you about the nomads near Taklama, and how he came to the conclusion that excahnges with other countries should be promoted for mutual growth while he was there. He hopes his travels will contribute to Europe's progress.

Go south even further, and you'll leave the town of Louran.


Go north and west, and you'll be at the Nomads' Camp. If you talked to the people here before your whole ordeal in Louran, they would have been distrusting towards you and would have wanted you to leave. Instead, go up to the three men near the fire and talk to the guy on the right. Now that you know Meihou, he'll be more than happy to give you directions on how to get through the nearby desert.

To get through the lost desert, walk west until until you see three boulders in the formation of a triangle. Go south, and look for boulders arranged as a serpentine dragon. Go northwest, and alternate between north and west to ensure you go at a 45 degree angle, and turn north when you come along dragon skulls. The exit is near a giant skull.

If you talk around, you'll learn from the guy north of the fire that Hedyn was here, and everyone is a lot friendlier. Even the girl to the tent in the south believes that you're not a kidnapper (if you hadn't completed Louran yet, she would have). There is also a tent to the east of the guy who gave you directions. The little girl there cannot talk, and when you talk to her mom, her mom wil tell you that she hasn't spoken a word since her parents disappeared. Remember this tent for later.

Head out of the Nomads' Camp and go west. Follow the aforementioned directions. If you didn't have the directions before hand, or if you went the wrong way for too long, you'll pass out in the desert and you'll be kicked back to the world map screen.

Head south and then east out of the mountain path. You're in a whole new world now. Welcome to Europe.

There is a town to the west, but before you go there, go north to a mountain area. There you'll find Magirock #42.

PrinceWatercress plays Terranigma - Part 18 of 50


Now that the place is swarming with zombies, it's time we looked for Meilin and got her out of here.


If you see any enemies underneath the ground outside coming at you, defeat them with a dashing jump attack.

Go back through the chimney and take the door between Temjin and Meilin's homes. Push the table to the south, then talk to Hedyn. Hedyn will tell you he never expected this to happen. Keep heading south until you go outside.

Take out the zombies as you head back to the city square. From the square, head up and to the right, then follow the path and enter the house that you see. Run and jump, then use the dive attack to take out the flying faces known as Chonchons. If you get hit by the Chonchons' glassine dust, you'll be stunned for a few seconds. 

Going north as soon as you enter the house, followed by going east will take you to a chest containing the LightRod. This is Light (Holy) elemental, and is very useful against the zombies that you will be facing here. Go all the way to the other side of this northern area and you'll be able to pick up Magirock #36.

Go back to the square. Of the two houses on the upper-right, the one on the right is a storage area. Destroy the Borfs, then move the boxes to get to the chests. The Rags are absolutely useless. From there, head to the lower-right corner of the square and go right.

There is a narrow area with some fences. Enter the first house you see, then fight off the Borfs and go to the north to find Magirock #37. There's another entrance to the lower-right here. To the right of that is a narrow area with some fences. Go north through it and enter the building at the end. Fight off the Borfs, then go into the door and run to the right, avoiding the armored ghosts. If you attack these monsters, ghosts will pop out and throw you out of the building and back to the town square. From there, go into the door, move some blocks and you'll be back outside. Enter the building to the south.

When you enter, go to the right and jump down the pit. Open the chest to get the Holy Seal, which you'll need to equip to get out of here. It wards off the ghosts that take you back to the square. Push the table to the left out of the way, then make your way to the left and go down the stairs. Enter the fireplace and go down the stairs. You'll find a library, and Hedyn will be there. Talk to him, and you'll learn that monsters destroyed the town of Louran. You can also use the bed to the right to replenish your health.

Head back to the square. Remember where that guy was making a doorway in the wall. Go south into the building there, and you'll enter the building. Crawl into the fireplace and go down the stairs. Be sure to have the Holy Seal equipped, so the ghosts don't throw you back to the town square. Go down the stairs at the end, fight off the Borfs, go to the right and go up the stairs that you see. Follow the path. You'll be on the north side of the town. Go north to the next building to find a whole bunch of Gems, then crawl underneath the table when Yomi tells you to. Two zombies will talk, mention that you beat everyone up when you see them, then leave. Yomi questions if the zombies here even know that they're zombies. Leave the building. Head all the way north, then go east until you find a hole in the wall that leads north. Go north, then enter the nearby building.

Saturday, June 27, 2020

PrinceWatercress plays Terranigma - Part 17 of 50


Our first adventure in the human world takes place in a desert village in the middle of nowhere where friendliness is nothing but a facade.


Drop back down to the entrance, and you'll see an old man. This is Master Meihou. When you talk to him, he heads into the building to speak with Lord Kumari. Follow him back to where Lord Kumari is and you'll learn he is having a difficult time with his granddaughter Meilin, who is spending her time in "a mirage of a town" and is afraid her own power could cause trouble. Talk to Master Meihou, and he'll tell you all about it. Meilin used to live in the town of Louran with her parents, but the town fell in war and she now lives with him. She misses her dead parents, however, and plays in the ruins that were once her old home. You'll have to go through the desert northeast of here to find Louran, but Meihou has never gotten there because Meilin obstructed him.

You're done here. Head out of the village and explore the world map.


You'll want to go north and west. There is a forest that you can enter to find Magirock #34. Just stay near the bottom of the screen and keep going west, and you'll be able to find it and take it. Be sure to grab it before you head into the desert. To the east is a Nomads' camp, but you won't be able to do anything there. For now, explore the nearby Gobi Desert until you enter a gameplay screen. You'll see someone. Follow that person. You'll find the village of Louran. If you talk to the people of Louran, they'll act like nothing has ever happened.

Louran


When you make it to town, be sure to talk to everyone in Louran so you can advance the plot.

The guy in the storage room next to the shop - where you can actually buy things - tells you about enemy alignment and using the best weapon against certain alignments when necessary, such as using the Fire Pike in cold places. You can get the BrnzPike (Bronze Pike) here, but you'll find an even stronger weapon a little later.

Outside of the store is an old man. Ask where Meilin is, and you'll find it's left of the square, in the house behind Temjin's. You'll have to go from house to house to find her.

When you go to the west side of the town, a man will tell you he's making a doorway in the wall he's facing. Remember that for later. Near the man is an inn. You can rest there, but only after you've explored the town and talked to everyone. There is a traveler named Hedyn to the left of the front desk at the inn. Remember him for later as well.

You'll eventually reach Temjin's house from the left of the well in the center. Talk to him, and he'll ask what he should do with his wealth when he dies: take it with him or give it to you. Tell him to take it to his grave, so he won't have to worry about inheritance squabbles. From there, head north, follow the path and enter the door to the left. You'll reach Meilin's house.

When you enter Meilin's house, ask the woman there where Meilin is. She'll tell you to crawl through the chimney. If you talk to her dad, you'll find out that everyone is able to live well despite the lack of crops is due to all the gems here.

If you enter the door near the chimney, you'll be able to get Magirock #35.

Once you climb through the chimney, you'll meet Meilin and her dog. If you talk to Meilin, though, she'll tell you to get out. Talk to the dog, too. You'll find out the dog's name is Turbo: a reference to Soul Blazer that also occurred in Illusion of Gaia.

You're done, so head to the inn and rest. Enter the room on the left and walk into the bed on the right. The screen will fade out then fade back in. When Yomi wakes you up, the place will look disheveled, and Yomi will note the stench of rotting meat in the area. Enter the entrance to the inn, and you'll find out the innkeeper is a zombie. It turns out that the mirage of a happy, clean and well-to-do town is nothing more than a trap to lure the living to their doom.

When you attack the zombies enough, they'll either lose their heads or get cut in half, but they'll still come after you. The little girl zombies are the worst, as they can throw their head at you and then grow a new one if you hit them without killing them. Their heads will explode if they hit the ground. The heads also cannot be blocked, and the only way to avoid them if to run away from the little girl zombies as soon as you do damage, so their heads and the resulting explosions can't hit you. Your best bet to kill them is to hit them while they are headless.

If you go outside, you'll see quite a few zombies and you'll notice that the deserted town is now caught in the middle of a sandstorm. Instead of leaving the inn that way, go to the door behind the table and drop down the hole. Take down the zombies, then go down the stairs. Watch out for the table at the far right end of the room, as it can run into you and do some major damage. Go to the doorway to the north and enter the building that you see. Take out the enemy that comes out of the ground, then enter Meilin's house. Head to her room, and pick up the red cloth on the floor near the bookcase. You'll get the Red Scarf, which happens to be the one that Meilin was wearing. Yomi will appear and tell you that if you only had a dog, you could pick up Meilin's scent and find her. Ark will then remember Turbo. You now know what to do next: find Turbo.

The flashing gray icon means that you have been poisoned. Use a P. Cure to cure Poison.

PrinceWatercress plays Terranigma - Part 16 of 50


In this entry, we battle for the existence of humanity. This is the point where the game starts getting good.

Eklamata


If you try to head back to where the avalanche happened, you won't be able to get back there. Instead, go back to where the yeti tossed you across the bridge. The avalanche will have filled up the lake, and you can now go down to the lower level, and make your way north to a cave.

You'll be able to find a few treasure boxes, one of which contains a Stardew. Make your way to the upper right corner and enter the doorway there. then follow the path. You'll be back outside. Be sure to get Magirock #32 on the way further north. You'll eventually come across a huge hole that you'll have to drop down. Go into the hole on the left, then climb up and go into the doorway to the north, then follow the path and throw some rocks to free up the path. You'll eventually reach the peak of Eklamata. Not much further now.

At the peak of Eklamata, you'll take on the Dark Morph. It first takes the form of a Yeti. Avoid the crystals that the Yeti throws, and stay in the upper-right hand corner so you aren't blown into them. After this, the shadow will show another form: a Cadet.

This Cadet is pretty fast. When he shoots a projectile, hit it back at him with a regular attack. You don't have to be perfectly lined up with him; as long as you're perpendicular with the Cadet, the projectile will bounce back and do some damage. That's pretty much all you have to do. Just watch where the Cadet goes.

When the Cadet dies, switch to the Neo Fang. You'll face the boss' third form. Attack the boss with a dashing attack when it shows up, then stay away from the many bats that it splits into. Go to one of the upper corners and walk around the room, and if you need to avoid the bats, use your dashing attack to pass through them without getting hurt. The Dark Morph will go down in no time.

With the Dark Morph down, you'll finally be able to resurrect humanity, who are considered wonderful creatures yet have no idea how much power they wield. You'll see a cutscene where Ark is lying down only to turn into a flower that is eaten by a yak which is attacked by a bird that gives birth to a baby bird that is killed along with its mother by a Huball that is killed by Ark who lies down again. It's the circle of life, folks!

Chapter 3: Resurrection of the Genius

You thought Chapter 2 was big? Here's Chapter 3.

You'll wake up in a bed in a human town. Even though you're told not to move around, you can do so once the woman leaves.

Lhasa


When you leave the room from the south, you'll find out you're in Lhasa, which isn't part of any country and is lead by Lord Kumari. Before you do that, check out the rest of the house you just left. You'll find out you were out cold for three years and that everyone is glad that you've gotten better. You'll eventually find Lord Kumari on the top floor of this town. Talk to him, and he'll ask you to rest here and that you'll discover what to do in due time. He'll also tell you that you have lost the ability to converse with plants and animals (which really sucks), and hands you a BonePin in case you need to summon him. (This will be Magirock #33.) The BonePin lets you automatically leave the current dungeon you're in. Another monk will then arrive, and announce that Master Meihou has arrived.

Don't know why you'd want to throw the snowmen here, but you can.

You'll be able to find some buildings when you go higher up. One of them will have a Save Book. You'll also learn that reincarnation is a big thing in this world, assuming you haven't already.

You'll also find a shop, where you can buy a MonkRobe. You'll definitely want to buy that for the areas ahead, especially when it deflects the Curse status.

Friday, June 26, 2020

PrinceWatercress plays Terranigma - Part 15 of 50


In this entry, we get caved in and stuck with a mountain goat.

Eklamata


Head back to the hot spring that the Yeti was soaking in, equip the Snowgrass Leaf and use it on the hot spring. The Yeti in the pool will agree to help you, and he will leave the pool and head north. If you talk to the Yeti there, he'll ask if you want to cross. He'll toss you to the other side. Thankfully, there's another yet on the other side if you want to go back.

To get to the chest to the right when you go to the other side, just walk down towards the trees and then move to the right. You can see the north side of the slope, but just barely. As you begin your ascent here, don't forget to explore everywhere to get Magirock #30.

Magirock #31 is straight north from where you entered the mountain area. It's in a dead end in a cave.

Going to the upper-left corner takes you higher up the mountain. You'll eventually find a path into a cave, and you'll go down a huge slide. However, Ark has no choice but to run into the wall, which causes an avalanche. Try as he might, Ark can't outrun it...

Thankfully, Ark comes to in a cave, and wakes up with a mountain goat. After a brief conversation, where the answer to whether or not you can walk doesn't matter, the goat will ask you to come with her. The goat lying on the ground is her husband, and unfortunately, this goat has land awkwardly on his legs, got injured and died.

There's no way out, and soon it will get dark to the point where you can't see anything. You will spend the night with the goat. When you wake up, you and the goat will have breakfast...and the dead husband is on the menu. (Sleeping with a widowed goat and then eating the husband. Yeah, that's totally normal.) If you interact with the dead husband, Ark can't bring himself to eat it, and the widowed wife tells him he must become stronger if he is to continue alone. The goat will then move to the back wall, and if you speak to it, you'll learn that the ice is thin on the back wall. The goat will break it, only to realize that you will be the only one that will be able to continue on, as you're the only one who can climb it. The goat will be able to escape one way or another.

When you climb up the wall, you'll be back at the part just past the bridge.

PrinceWatercress plays Terranigma - Part 14 of 50


Our next task is to bring back humanity, and to do that, we will need to go up the mountains of Eklamata.


Go south from Zue, then head north and east to Arabia. Head back to the river crossing, and you'll learn that the rhinos have made themsleves into a bridge for you to cross to the other side now that you've saved Leim. You'll be able to buy stuff from a Magishop and general store on the other side, and also save your game. The general store has a Fur Coat that you can buy and equip, but you'll find even better armor very soon.

Now that you're on the other side and enter the mountain entrance to the side. This is Eklamata.

Eklemata


The first new enemy you'll meet are the wolves, known as Sabredogs, which will chase after you. They can also call for back-up, but the back-up isn't any more threatening than the initial Sabredogs that you'll run into. You'll also meet crystals with two smaller satellites around them. Use your dashing attack on both of them, especially against the diamonds which have some high defense.

If you go to the left at the entrance, you'll find Magirock #29 next to a flower that will tell you where you are if you talk to it.

Going north from the entrance leads to some Yetis. The Yetis are pretty powerful, and they'll throw your around for some good damage if the close quarter combat gets a little too close. They get faster and angrier if you hit them, too, and the only way to get them back to normal is to have them attack you. They do get stunned for a few seconds if you hit them.

If you talk to the red flower you saw at the beginning of the second section, it will tell you that the Yeti can either be friend or foe. Remember that for later.

Following the path takes you to a Yeti in a hot spring, and if you go north from here, you'll reach a dead end. If you interating with the hot spring, Yomi will tell you what a hot spring is in a brief in-game cutscene.

To the east of the yeti in the hot spring is a cave. Inside, you'll face the Rakshaki, who are somehow immune to your almost all of your attacks except for the dashing slide attack.

You'll want to make your way to the upper level when you first enter this cave, and go down the slides. You can't go up these slippery slopes, only down. You'll need to run down them to not only get an Ice Suit (which you'll want to equip) but also continue to the next area. You won't be able to go anywhere else until you run into a wall, as you have no control over Ark until he does.

If you get the red symbol (and most likely, it will be from a Rakshaki at this point in the game), you'll be Confused. All of your directions will be mixed up every few seconds, and the way they're mixed up changes every few seconds. The only way to cure it is with a Wind Pin or exit the current screen that you're in.

If you drop down into the hole on the lower-left corner, you'll get the Fire Pike. You'll also want to equip this, as it's Fire elemental and is effective against the wolves and crystals that you're fighting here. From there, you can push the block to the north out of the way and head back to the entry level.

The next area has blue Slime enemies that split up if you don't kill them in one shot. At least they're still easy to take care of if they do split. Keep going south to make your way back outside. If you talk to the flower that you see, you'll learn that it is a Snowgrass, and that its leaves are effective against wounds, and your wounds can be cured if you put a leaf in a hot spring and soak in it. You'll get a Snowgrass Leaf from the flower as well.

Thursday, June 25, 2020

PrinceWatercress plays Terrangima - Part 13 of 50


In this entry, we hep Liam pass the test to become a king.


As you take the path to the north, you'll eventually come across a maze. Wait for Liam to stop, then talk to him and he'll follow you through the maze. Take out the enemies, but don't go so far that he has trouble following you. Liam will stop again, and when you talk to him, he asks which direction to go at the fork. Tell him to go right. Once you make it out of the maze, take out the enemies on the way north.

You'll eventually come across an open field. Liam will notice it's full of enemies, and he'll follow you closely as you take them out. To the east will be a stone bridge. You must move across the platforms as Liam does, or else either you or Liam will fall to the ground below. It'll be you if you're too far behind, and Liam if you're too far ahead.

When you make your way east after this, you'll come across a huge chasm that you'll have to go up. Liam will jump from one platform to another, but you'll have to climb up the cliff. Liam will race you, and you're definitely not gonna win this one. Head west from here, and Liam will sense a monster. Go west again, and you'll face another one of those Mud Monsters. Unlike the other ones, this one will shoot at you from across the chasm. Liam will bring you boulders that you have to toss at it. Line yourself up with the Mud Doll, run towards it and throw the boulder at him. Block its projectiles in the meantime.

When you beat the Mud Doll, the mud doll asks for forgiveness and makes a bridge for you. When you cross it, however, you get sent down the chasm. The Mud Doll spares Liam after telling him that he will only face the pain of betrayal as he grows old, but Liam fights the Mud Doll. The Mud Doll tries to feign forgiveness again, but Liam finishes the Mud Doll off. All you can do is just watch and listen until Liam comes back.

When Liam finally comes back, talk to him. He'll you that he beat the Mud Doll by himself. Something will then fall to where you're at. It's a Starstone, and Leim keeps it as a memento of his test. Leim then climbs back up and calls a gull. You'll then be taken back to Safarium.

Safarium


Head back to the lions' den and head back to Neo and his wife. You'll find Leim, who says he'd rather travel with you than become a king. Talk to Neo, and he'll tell you he will inform animals of your coming before giving you Neo's Fang, which is the strongest weapon you'll get thus far. 

Go back to the first screen of Safarium and talk to the little white guy in the lower-right corner of the area. He'll tell you that all forms of life existed here at one point, until the souls of living things were sealed. You'll learn that human souls lie deep under the snow of the mountains in the east. This is you clue as to where you should go next. But to get there, you'll have to cross the river, and you're unable to do that right now.

The Geo Ring stuns enemies, but you won't be able to hit them after using it. Use it if you need to flee for whatever reason.

PrinceWatercress plays Terrangima - Part 12 of 50


In this entry, we bring life back to Zue and the animals return.


When you enter the final Rainfall Altar in the lower-left corner, you'll fight the Pagan God.

The best strategy is to hit him with a dash attack, then run away, then hit him again. This keeps the boss from shielding himself. The boss will throw its scythe-like arms at you, but that's pretty much the worst you can do and you should be able to fully heal yourself by this point.

You'll then fight the boss' second form, the Storm Master, which flies around and spits out green fireballs. Stay at the back unless the boss is spinning at you, as the rocks can't get you from back there. When the boss approaches you, hit the head with the dash attack until it retreats all the way back. It will eventually go down.

When you beat the Storm Master, you'll learn that mammals have been resurrected, but it's still too late to resurrect the world. You must now lead the growth of living things.

You'll then see a cutscene involving cells, followed by a sunrise and the animals returning. You'll then return to Safarium.

Safarium


You'll be able to talk to some animals here. If you talk to the rhino near the waterfall, you'll learn about the Lions' Den in the upper-right corner. The red bird nearby will tell you to stand still and calm your nerves if you want the lions to accept you. There are also two souls that act as the general store and the Magishop here as well.

When you enter the Lions' Den, three lions will want to eat you. However, another lion will command them not to eat you, and will allow you to come into their kingdom. Follow them to the north and follow the path. You'll then enter the Lions' Den for real.

You'll learn about Tera, the monkey scholar, as well as Leim, the king's son who is at the canyon south of here as part of a test to see if he will be the next king. You'll also learn that King Neo is the one who saved you from being devoured. He and his wife are in the lower-left corner. If you talk to the wife, she'll ask you to head to the canyon and see how Leim is doing. It turns out there are strange beasts in the canyon, and Neo does not want to call the test off.

Going into the water and heading south takes you back to Safarium. We're done here.


Head to the south. If you make a U-Turn to the right and then north once you're past the Savannah, you'll see the Indus River, but you won't be able to cross it...yet.

Instead, keep going south past the mountains to find another mountain path. Enter it.

Canyon


Make your way south. If you had come here earlier, the owl here would be blocking your path. But if you come here now, you'll be able to go further.

Climb down the vine and drop all the way to the bottom. When you land, head west. Fight off the birds and you'll save Leim. Now it's time to get him out of here...

Once you've talked to Leim, follow him. You'll have to be slightly ahead of him so that you can destroy the birds that will try to hurt him. He will eventually stop near a boulder. Push it to the right, and Liam will leap onto it before leaping onto higher ground to continue his quest. Climb the nearby wall to catch up with him. 

Liam will then run into the nearby doorway to the right. Follow him in. He'll then be further to the right, but you can defeat the enemies leading north before you talk to him if you want.

Wednesday, June 24, 2020

PrinceWatercress plays Terrangima - Part 11 of 50


You'll be filling Zue up with water to make the place green, but don't forget to explore every square inch before making the rain come.

Zue Map (by xyzbilliu)

Zue Map with grass and water revived (by xyzbilliu)

Hand-made map (by KeyBlade999)

Now that the grass and water are back, you can reach areas that you wouldn't be able to get to before. Also, the two chests east of the Rainfall Altar that were blocked by the tree are now accessible, as the dead tree that blocked your path is no longer there. One of the two chests contains a Sticker, which is a little more powerful than the Roc Spear. Be sure to swim in the water and look for chests you couldn't reach before, as one of them contains a DEF Potion that raises your defense by one point when consumed.

Now that you're able to swim to new areas, your next stop is the upper-right corner of Zue. Once again, you'll be fighting off enemies looking for four souls so you can revive the Rainfall Altar there.

You'll see what look like two huge tree stumps across from each other, separated by a pit signifying the lower level. You won't be able to do anything with them now, but later on...

You'll also see a stange looking wall to the north of those two tree stumps. You can examine it, and Ark will say that it looks flyimsy enough to knock down with a good puff of air. To break it, you'll have to hit one of the two nearby Doumas. When you do, you want to have a Douma face the wall while you face the Douma. Let it hit you with its fast counter-attack. You'll be knocked backwards and you'll be able to hit the wall, breaking it. When you break it, get to the other side, climb the wall and follow the path (don't climb any walls). At the end, you'll find Magirock #26.

At this point, you should have found all four souls, allowing you to bring grass and water back to the upper-left quadrant of the area. When the souls are done working their magic, leave the temple. Go back to those tree stumps, and you'l be able to push them into the water. You'll be able to find a Life Potion in a nearby chest.

You'll also be able to reach the lower-right corner of Zue by going south from that Life Potion. Make your way all the way south to find Magirock #27. IF YOU FLOOD THIS AREA BEFORE YOU PICK IT UP, YOU WON'T BE ABLE TO GET IT.

You'll have to swim through the lower left area in order to get to the third altar. Once you've made it there with four souls, Zue will finally be full of life. You'll be able to get your hands on a Luck Potion, which ups your chance for a critical hit a little bit when consumed.

You'll also be able to go to the lower-left corner and enter the final Rainfall Altar that you couldn't enter before...but before you go to it, go further to the west and explore. You'll find Magirock #28.

[YTP] How It's Made - SoS (by TheSos)


Because I've watched this so many times and I have no idea what to do for an intermission.

Tuesday, June 23, 2020

PrinceWatercress plays Terrangima - Part 10 of 50


In order to bring more life on Earth back, we must head to Zue...and it's the hardest part yet.

When you climb up the wall at Sanctuar, you'll see even more of the mountains, where you'll meet the Kingbirds, who build nests in high locations. You'll learn that the King of All Birds lives at the highest point.

You can also find a Magishop here if you need magical items.

The smaller birds are children.

You'll see three white gulls with green backpacks that are navigators, but until the wind returns and beckons them, they won't be able to fly around. 

The bird behind the rock slab is an item shop. Be sure to buy the BirdSuit for a little extra defense, even though it won't protect you against Poison. Also, you can save near the item shop, if you need to.

The rope leading up the cliff leads to the King of All Birds. He tells you of the cavern known as Windvale, and that the wind from it tells them to fly to new lands. Sadly, the wind hasn't beckoned this year. Go back down and talk to one of the gulls, and say yes if they ask if you want to go to Windvale. He'll take you there. From there, follow the path to the huge pit, and throw the rocks at the sparkle in the pit. You'll awaken someone below, who hears the calling of the birds and senses the smell of spring. This voice learns that the long, hard winter is over, and thanks you for waking them up. They then get to work, and the wind returns to Windvale. Go back out and talk to the navigator again. You'll head back to Sanctuar.

Back at Sanctuar, talk to the King of All Birds. As a token of appreciation, he'll give you the WindPin, which cures any and all status ailments, including Confusion. This also gives you two Magirocks (#24 and #25). From here, you can now go to other lands.

The middle gull is looking for new lands, and has found one in a small, temperate island called Kamiyo. There's nothing there if you go to that place, but there will be later on, so remember this for later. The left gull, on the other hand, is going to Safarium, the paradise of animals. There's something here, and that is where you want to go.

Safarium


Safarium is far off in the African continent, and when you land there, you'll find out that the place is rather deserted compared to back then. The gull rattles off the names of a few animals who were here, such as the simple rhino Simon, Kameski the slow turtle and Neo the lion king, who just had a baby.

You can save your game in the upper-left corner. Just crawl into the corner and you can save.

There are two souls at the upper-right corner. The left soul is the Magishop, and the right is an item shop. The Geo Ring stuns all enemies on screen. The Snow Ring does ice damage on all enemies. Stardew lifts the Curse status.

To the south is the rest of the African continent. To the south of Safarium is Zue, which is in the Savannah. There will be a Canyon further south, but there will be nothing to do over there yet. Go ahead and head to Zue

Zue


The turtles, known as Dunguns, have pretty high defense and will explode when you kill them. Until you hit Level 12, they'll be hard to do a lot of damage to with your physical attacks. Use repeated dash attacks for the best results. They can also slide around, and are resistant to PyroRings. If you can get a few of them on-screen at one time, kill them off with a SnowRing. Also, some of the bushes you can pick up and throw contain bees that will sting you when you get too close.

The maze is pretty easy for the most part. You'll be going from ground level to river bank level and back again as you go through this area.

When you see a message saying that storm clouds are blotting out the sun, the screen will get a little darker. This keeps the Dunguns from exploding.

You'll learn from a nearby fly-trap that the lack of rain around here has led to the land becoming barren, and that natives made altars to hold rain dance ceremonies with.

The lizards with swords that jump around are pretty easy to destroy with dashing attacks, for the most part. The lizards that move around on four legs are pretty easy to destroy as well...just don't let them hit you from a distance with their tails.

You won't be able to access the two chests east of the Rainfall Altar on the upper-left corner of the area immediately. You'll have to do some things before you can open the chests there.

The Doumas will exhale projectiles at you. 

You'll learn from the soul of the first Douma you'll (probably) be able to kill that four Shamans controlled the weather at each of the four Rainfall Altars. This sounds like a clue for getting stuff done around here, I would imagine.

To revive the plants and water for each area, you'll need to find four souls in each area. To do this, you'll need to go everywhere that you can in a barren area and destroy monsters to find these souls. Once you find the four souls for that area, head to the Rainfall Altar for that area and you'll reawaken the plant life there, and even bring the water back so you can head to other areas. By reviving the plants and water, animals will be able to come back as there will be grass to serve as food.

Be careful when you're exploring. There are chests and items in the lower levels that can be made unattainable if you flood them with water before you get to them.

PrinceWatercress plays Terrangima - Part 9 of 50


In this entry, we go all the way up to the top of the cliffs to resurrect the birds. We still have a ways to go...


You'll eventually roll down a steep slope. Keep holding Left on the Control Pad and you'll get to the next area. You'll come across a chest with a S.Bulb as well as another crater with a vine in it. This time, keep holding right.

When you drop down, go to the left and keep going. Enter the cave you'll find, and you'll come across miniature Quakers popping out of holes in the ground. They go down very easily with the Roc Spear and the dash attack. Use a Power Ring if you have to, and get some distance before you strike. Don't forget the Magirock (#21) in the upper-left hand corner!

Once you beat all the mini-Quakers, go up the stairs in the upper-right corner of the room. Follow the path and take down all the Quakers, and enter the door in the lower-left. Go up the mountain from there, and take down all the birds that swarm you. Interact with the sparkle in the Periton's nest nearby, and you'll get the Sharp Claws, which allow you to climb the walls that look like they have craters in them. Just walk into them and you'll climb them with the Control Pad. If you need to jump off at any point, just press B. Climb up from here to find a treasure chest containing an M.Bulb. If you get hit by an enemy while climbing, you'll get knocked down.

From there, go down from where you entered, and head to the right. You'll be at the center of the mountain, and you'll be able to climb walls that you weren't able to before. Go all the way to the right until you see a climbable wall, then go into the nearby door and follow the path. Go down the stairs, then follow the path again. When you're back outside, go to the left first and climb up the wall to find a Magirock (#22) and a chest containing 87 Gems. Watch out for the Borfs!

Climb down and head to the right. Climb down the vine, then hold Right on the Control Pad to get through the slope part to land right next to Magirock #23. From there, fight off the enemies as you head left first. This leads to a small cave with a chest containing a Life Potion. Be sure to use it now. From there, you want to go all the way to the right and climb up the walls. This leads to a boss battle against the Dark Twins...well, one of them, anyway.

To beat the boss, block the talons that the green bird shoots at you as it flies around. When it divebombs, move out of the way, then hit it with your staff. It will also summon a brown twin that will try to attack you with poop after it takes enough damage, hence the name "Dark Twins". If you use a PyroRing, however, you won't have to deal with this boss for very long.

When you beat the Dark Twins, a voice will tell you that the birds that were changed into monsters will now regain their forms, yet it is still too early for the world to be resurrected. You will have to lead the growth of living things before you can do that.

You'll then see a cutscene of an egg cracking, followed by a Mode 7 eagle flying into the sky. The birds will then return. You'll then be back in Sanctuar, only now there will be birds and water. Be sure to talk to the birds. You'll learn that the birds sense the change of season by wind, so they can fly south for the winter. Unfortunately, the signal to fly from Windvale hasn't come yet. You'll also learn to climb up the wall to meet the Kingbird. We'll be doing that next time...

Monday, June 22, 2020

PrinceWatercress plays Terrangima - Part 8 of 50


In this episode, we move across a canyon to North America.

To use magic, equip the Jewel Box, press X, then select what you want to use with the Control Pad and the A button. To back out, press B. To cycle between the three types of magic - normal, multi-damage and summon - use the Jewelry Box as an item and press Down to switch between them.

The cactus in the middle of Guiana will tel you to go north, as something is trying to awaken there.


When you finally enter North America, you'll notice a small patch of trees to the east after you enter. If you go into them, youll enter a secret area where you can find a M.Bulb and 378 gems in a few chests.

From there, head northwest into the nearby mountain range.

Sanctuar


The soul to the left is a Magishop. The PyroRings destroy all on-screen enemies with fire magic, and are stronger than the FireRings. It helps to carry quite a few of these, along with some GrassPins.

The flower will tell you how this area was once a paradise for birds, and tells you about the cries of the birds in the stone mountain in the north.

The soul to the right sells healing items.

You can also save your game here.

To the north and east of Sanctuar is Grecliff.

Grecliff


Here, you'll find a cave with a few golems and some birds that shoot feathers at you like needles. Keep dash attacking and moving away (or use the rapid stab in the corner) to take down the golems from the sides, and use the dashing attack to take down the birds.

The path at the beginning is very straightfoward.

Some of the boulders turn into golems when you run into them.

The mud puddle enemies can be beaten with the slide attack or jump attack when they rise up and try to throw mud at you.

Now that you're outside and a little higher up the Grecliffs, climb up the vine and go into the cave on the right to get a STR Potion. Use this to increase your strength and get stronger.

Go bac to the lower level and take the cave entrance to the far right. Fight off the golems, then take the stairs leading up in the northeast corner. Make your way over to the west and go down the stairs, the continue to follow the path up the two ladders. Watch out for the Quakers, which can drop down from above and stun you temporarily. A dashing attack will take care of them, and you want to destroy them as soon as possible so they don't cause more havoc.

After climbing up the two ladders, go south and head outside. You won't be able to go anywhere if you head west from here, so take the vines to the east and fight off the mud monsters. Head into the cave and follow the path. The boulders here will turn into golems. Take them out and op ent eh chest to get the Roc Spear. A boulder will then drop. Equip the Roc Spear and attack the boulder with it to break the boulder. Also, this is the first weapon with an elemental affinity. The Roc Spear is an Earth elemental weapon, and it will make quick work of the golem enemies as well as the Quakers.

From here, backtrack to the area with the two ladders and go north this time. From here, make a running jump over the nearby pits, then continue south. You'll then want to climb the vines as you make your way east, then keep climbing up. Before you enter the next cave, go north to find a Magirock (#19).

When you enter the cave, break the boulders with the Roc Spear. Once you're back outside, leap up the cliffs to the other side. Watch out for the little guys that cartwheel and roll around, as they're fast and strong. Hit them with dashing attacks. To get the Magirock, go south past the crater with the vine in it and either climb or drop down. You'll find Magirock #20 over there. From there, get in the crater.

PrinceWatercress plays Terrangima - Part 7 of 50


Our adventures in the Ra Tree continue as we try to bring oxygen back to the world and bring it out of a primeval state.

Ra Tree


Head back through the fourth basement floor. After getting past the raised area with the stairs, you want to go right to where the purple water is. There's a door there, and if you enter it, your path will be blocked by blue water. Now that you have the Giant Leaves, you can safely swim across it. Follow the path to the lowest level of the Ra Tree. Talk to the lilly and you'll learn that the surface is so devastated that nothing can survive. You'll also be given the Ra Dewdrop. Remember the room where you were knocked unconscious and tossed out of the room when you entered? Well, this item will put a stop to that. Just equip it and use it like you would a healing item to get into the room.

If you continue to the right of where you got the Ra Dewdrop, you can get the Leaf Suit, which protects you from poison and has slightly better defense than what you have equipped right now. Go ahead and put it on. Also, according to the lilly near the Leaf Suit, the gray things (as well as the red things that spit projectiles at you) are called Abbees.

If the number for your current level is replaced with a flashing blue Japanese symbol, that means you've been poisoned. Use a P.Cure to cure it.

All the way to the right is an orange plant. The orange plant will tell you about Evegreen, where plants once thrived. Also, check behind the nearby waterfall for Magirock #14.

Instead of going back from where you entered, there is a ladder near the Magirock. Use it to make it further up the Ra Tree and close to where you need to be. From there, go north and then east. Go up the stairs, and go west, north and then east to the room that knocked you out. If you used the Ra Dewdrop, the gas here will have no effect. You'll then take on the boss of this dungeon: The Parasite.

Take out the spiky things popping out of the holes at the sides. Avoid or block the projectiles that they shoot at you. When you kill them all, you'll want to kill the eye that pops out of the center. Take out all the spiky things that it spawns, but make the eye your number one priority and attack it when it's open with your multi-stab attack. Be sure to avoid the worm, and when it spits out more of those spiky things, take them all out with your dash attack. Being Level 9 at this point really helps.

After doing enough damage to the eye, you'll destroy the Parasite. You'll learn from the Ra Tree that even plants were changed into monsters due to whatever has happened on the surface world, and now that the Parasite has been destroyed, they will all be able to return to their normal forms. The world will soon be green again, but the world isn't fully resurrected yet, as you must lead the growth of living things.

We then see a cutscene where rain hits the ground and a flower grows. The wind blows, and the petals fly away before the flower pollinates the earth. We seen view a Mode 7 sequence where the world is finally blue and green as a seed flies around. We then appear before Ra Tree, and everything is green again.

Evegreen


Talk to the Ra Tree. You'll learn that living things are locked in sleep, and that you must now bring them back. You'll also receive the GrassPin, which asks as summon magic.

To use summon magic, head to the Jewelry Box. You'll be able to use it from there. The GrassPin will restore all of your HP, which will definitely help later on.

If you look in the Strength Mirror after getting the GrassPin, you'll find out that you have now received four Magirocks from getting the GrassPin. Once you use the GrassPin, you'll be able to use those Magirocks in case you want to buy more of them.

You can talk to the flowers around here. One of them will tell you about the northern continent, which was once the land of birds.

You'll also find an orange plant, and if you speak to her, the background music will change.

You can also buy some items from the soul nearby, including the Ra Armor. You can also save your game here, if you wish.


Now that you're done, head north through the mountains. You'll end up in Guiana. The plant nearby will tell you that the plants will always watch over you, and that the continent of birds to the north is in dire need of your help. This time, you can get around here. Climb up the vine and go west. You'll be over the mountains in no time.

Sunday, June 21, 2020

PrinceWatercress plays Terrangima - Part 6 of 50


Once we fall down the hole to the other side, there's no turning back. Now, the real work begins.

Crysta


If you try to enter Elle's room at the Weavers' house, Elle will tell you not to come in, as she doesn't want to see you off in sadness as she knows you will be going far away, even though she knows you will come back safely.

Hole


Once you choose to enter the hole, you'll go through a portal on the other side and enter the overworld.

Chapter 2: Resurrection of the World

Portal


Ark will wake in to a barren wasteland, and wonders how the Elder expected him to complete his task. Yomi shows up and tells him to think positive and take action.

There is also a diary and ink well to the north if you need to save.

When you head south in the Portal area, you'll enter the World Map...and boy, is it desolate. You'll be in South America in the Amazon Rainforest.

Amazon Ruins


Go to the south from where you started to find an empty spot surrounded by mountains. You'll find Magirock (#12). The soul there is a Magishop.

If you go north from where you began, you'll be in Guiana, but you won't be able to get very far.

There is a small peninsula in the center of the jungle area with a small pool, which is surrounded by water. This is where you want to go.

Evegreen


There was once pools of water and plants and animals here, but now there is nothing but boiling lava and sweltering heat. Go north and you'll get in a conversation with a tree, who tells you that they've waited a long time for you to arrive. This is the Ra Tree. The soul to the left is a store, so if you need healing items, get them here. Get some P.Cure to cure poison in the area ahead. Then, walk up to the hole and press A while walking into it to crawl into the tree.

Ra Tree


The red sac you see here shoots out some sort of purple stuff which can put you out for a little while if you're caught in it. Other red ones that you'll see will shoot projectiles at you that you can guard against, but if you can walk up to them and pick them up, you can throw them to kill them as well as use them as projectiles to throw at other enemies. There is also a diary and ink well here in case you need to save.

The gray sacs that are quivering act as treasure chests, and you can open them up to get useful items such as P.Cures.

The big yellow flowers can be easily destroyed with a dash attack. They can poison you when opened up if you're not careful.

At the start, go down the stairs, then go up and to the right. The yellow demon here - known as a Dignal - will jump around and try to claw at you. If there are two of them on-screen, one of them will throw the other at you. Go down the hole. Beat up all the enemies, then go up the platform and open the gray sac to get the Ra Spear, which is a more powerful weapon than what you have now. Be sure to equip it before you continue.

If you go through the door to the east, you'll be knocked out and tossed out of the room. Go to the stairway to the west instead. This takes you back close to the entrance. Head to the west and use your dash attack to take out the flower enemy now that you have the Ra Spear equipped. 

The Zap Ring will allow you to shoot projectiles from your staff for a short period of time.

From the flower enemy, go south and follow the path, watching out for fish that leap out of the water to flop at you as well as other enemies. 

One of the flower enemies contains a soul that tells you about how plants started from one tree and then slowly grew elsewhere across the land. You'll learn that if you save the Ra Tree, the world can become green again.

When you reach the area with the small boulders, pick up the boulders and do a dash throw to take down the fish swimming up ahead. This will open up a path across the water. You'll be back at the hole, this time on the other side of it. Drop down the hole, then open up any chests that you find and make your way east to the stairs leading down.

From those stairs, head west, then south at the fork in the road. The purple flower enemy is a little tougher than the yellow one, as it can only be attacked when it is open. Nevertheless, it goes down the same way. Leap over the water with a running jump and kill the other enemies for experience if you need it, then go back north and go west and follow the path there. Go down the stairs.

From there, check the gray sacs for a Life Potion, as one of them will carry one. Keep going south, then follow the path.

It's time to make our way to the upper-right hand corner of the fourth basement floor. Kill the flower near the pit, and a soul will pop and tell you to follow it. Dash jump over the pit and then drop into the pit it takes you to.

You'll then be in a place where the water is blue instead of purple. Go south and you'll find a lilly named Lily. Talk to Lily and you'll learn about a nearby plant that acts wonderfully as swim flippers. The plant is just to the left of Lily. Walk up to them and ou'll get the Giant Leaves. You can now swim in water.

Yomi will pop up and have a brief conversation with Ark, then disappear.

To swim, all you need to do is jump in water and use the Control Pad to move around and the B button to dash forward, much like in The Legend of Zelda: A Link to the Past. Go south of where you got the Giant Leaves to find Magirock #13. When you're done here, just go back to the ladder on the wall and climb back up.

PrinceWatercress plays Terranigma - Part 5 of 50


We go through the last tower near Crysta, then we enter the other world. The real journey is about to begin...


South of Tower 4 is another hidden area marked by what looks like two squares. Before you can access more of it, however, you'll have to clear Tower 5 first. Take a bridge over the lava east of those two squares, then make a bee-line south. There's Tower 5. If you need simpler directions, it is due straight east of Crysta.

But before you can go in there, you'll be immobilized by the Guardian and kicked out of the Tower. Go back to Crysta. 

Crysta


Head back to the Weavers' and talk to Elle. If you have the Crystal Thread (go back and get it in Tower 4 if you don't!), you'll give it to her and she'll weave it into a cape. She'll be finished by tomorrow, and asks you to head back to your room at the Elder's and rest. Be sure to save your progress at the nearby ink well and book if you need to.

You'll wake up in the middle of the night. Head to the Weavers' and talk to Elle, though you can talk to the people sleeping at the Elder's place for some humorous dialogue if you want. You'll find Elle working by candlelight, wishing for Ark not to be taken far away from Crysta where they might never meet again. Talk to here, and she'll tell you to get some rest, but not before saying she's afraid that you might go far away. When she asks if you wouldn't do it, it doesn't matter what you answer, but the dialogue depends on what you do pick nevertheless. Head back to your bed at the Elder's and go back to sleep. You'll sleep for real this time, and wake up the next day. Head back to the Weavers' and talk to Elle. She'll give you Elle's Cape, which she says will protect you from adversity. Be sure to equip it before you head to Tower 5. This is one of the four special armors in the game, and you won't be able to get rid of it. You'll need it to enter Tower 5, anyway.

Tower 5


Now that you have Elle's Cape equipped, the Guardian's spell will be reflected. You are now free to move around the tower, and take a simple path up to the top of the tower, taking down monsters you've met in the earlier towers for more experience and money.

If you go into the doorway that the light is emanating from, you'll drop back to the front door. Instead, continue on, and the Guardian will tell you this is your last task. Go through the door behind him, and you'll take on your first boss: the Shadowkeeper. You'll need to destroy its arms first. Attack the arms with the multi-stab, block when the arms retract, multi-stab again, back off and block the projectiles if you need to, then it will run towards you. If you back up too far, the Shadowkeeper will destroy the lamps to your side. You'll then trigger its second form where it unleashes its stinger-like tail. You can either multi-stab the head from the side, or use the dashing attack to go back and forth to take it out much faster. Just position yourself right next to the head, just in front of the legs, and avoid the tail. Have a few Bulbs ready just in case, and you'll eventually destroy it in no time.

After beating the Shadowkeeper, you'll finally enter the last resurrection room, where you'll see day turn into night and back to day again at Ayers Rock. You have finally resurrected Australia and unfrozen the rest of the villagers in Crysta.

Polynese


Remember those buildings to the west of Tower 5? Well, you can do stuff there now. If you enter the black doors, you'll resurrect Polynesia.

If you press Y to dash while carrying something that you can throw, then throw that object, you can throw that item really far.

Mu


For this one, go as far north from Crysta as you can go (in case you don't know where to being your search for this one). If you do it right, you can eventually find two squares that will lead to this area.

Push the rock on the right upwards, then push the rock in the middle to the right. Go north, push the nearby rock to the left, and there you go. Enter the doorway to resurrect Mu.

Crysta


When you talk to people that you've unfrozen after completing Towers, you may get some new dialogue.

From here, head back home to the Elder's room. Talk to the Elder, and you'll find out you're not done. The continents are resurrected, but life is not yet revived. East of the village is a huge hole, and the Elder will ask you to meet him there.

Hole


Take the lava bridge south of Crysta, then go east to reach the hole. Talk to the Elder, and he'll tell you about the above world and how it was once full of life before all life ended. The Elder tasks you with bringing the world back to life, and you can't come back until you're done. If you haven't resurrected Mu and Polynesia yet, do so now, or else you won't be able to do it again.

You'll still be able to use the Crystal Spear you got, but you will no longer be able to regenerate your health with it as you will not be under Crystal Blue.