Showing posts with label part 11. Show all posts

Saturday, September 12, 2026

PrinceWatercress plays Toy Story 2: Buzz Lightyear to the Rescue (PS1) - Part 11 of 16


Now that we're done with backtracking for the moment, let's play more of the game!


Level 11: Al's Penthouse


Rex is near the entrance! He will tell you that:

  • Hamm is in the bathroom, which you can reach through a hidden vent. He will also tell you to look out for locks to shoot.
  • Jess has lost her critters, and is waiting on the kitchen table.
  • Bullseye will have a challenge for you in the entrance hall.
  • You can get to the token on top of the train bed if you can solve the train puzzle and get the train to stop on the dead end track by stomping on the yellow switches.
  • The gunslinger boss will be in the Woody's Roundup set in the trophy room.

The kitchen is next to Rex. You'll meet two new enemies that you'll be encountering for the rest of the game: the evil sheriffs that will shoot you if they see you, and the snakes that will bounce around if you get too close. The lock-on ability will be useful against both of them. Just remember that you can jump while locked-on to avoid the sheriffs' bullets.

There will be a padlock on the refrigerator. Shoot it down, and you'll be able to go inside and climb your way to the countertop. Stomp on the scale, and you can get to the cabinets. There will be a cannon shooting from the corner, but you won't be able to destroy it until you can double jump off some lights hanging off some chains and get to the switch on the other side, stomp it and make the cannon explode. The chains the lights hang off of are slippery, and you will slide down off of them and fall to the floor below until you quickly double jump from one chain to the next.

You'll also see a buzzard, another enemy you'll keep running into until the end of the game. The buzzards will fly at you if you get close enough to them, but once again, locking on and blasting away will be a big help in taking them down. By continuing to run around the room from that switch, you'll be able to double jump off one more chain and pick up the first of five critters. Jessie will be standing on the kitchen island

The stovetop on the kitchen countertops will burn you if you stand on them, so don't do that.

Across from the start is the living room. There is another padlock you can shoot down on the cabinets; doing so will open up a path to the bathroom. We'll leave that alone...for now. In the living room, you can jump from the coffee table to the couch to the side table to the wooden railings. Jump the gap to the second railing, then get on the fireplace, get on top of the cabinets, then double jump to the first light fixture and swing off each one to the switch on the other side. Stomp the switch as soon as you get to it, because there's a cannon on the coffee table and it will fire at you just regularly enough to make things miserable. From the switch, double jump forward to get the second critter. You can only get the second critter with a double jump from the switch, and if you fall down at any point, you're starting all of this over.

The train room has a box that you can push into it. Push the box to the big train and get the third critter. The hint cube here will more or less tell you what Rex has told you already. Keep an eye on the flashing tracks and watch how they move as you stomp the switches while you also follow the train, and watch out from the fire from the cannon in the center of the room. For best results, start from the dead end and work your way backwards, stomping the switches as you go to ensure that you have a path straight to the dead end. Once you've got the train out of the movement loop, you can push the box near the tracks to the huge train in the room, jump up, stomp the switch to destroy the cannon, then grab the Pizza Planet token.

The trophy room is next to the train room. Take out the sheriffs from the table in the center of the room, then push the box along the path. Push the lunch box at the end of the box path all the way forward, then travel along the perimeter of the room. You'll end up in the Woody's Roundup set, and while the switch for the cannon is there, so is the gunslinger boss! Run away from him and lock on to him from a distance, and shoot at him as you jump over the bullets he shoots. The gunslinger boss is a really easy boss, and you'll get a Pizza Planet token for beating him.

Stomp the switch in this area to take out the corner cannon. While getting out of the Woody's Roundup set, you'll be able to find a second switch. Stomp it to destroy the table cannon, then get the fourth critter, which is nearby.

The bathroom is through a hidden path in the living room cabinet. You'll need to stomp the blue switches to raise the water level. The switches will be on each level that the water can rise to, and the bottom-most switch will be in the bathtub, where you can also find Hamm and get a Pizza Planet token if you have enough coins.

The next switch is on the top of the tub, and after that, you'll need to jump from one sponge to another to the countertop, as the water will flood the room at this point. You'll then need to stomp the switch on the counter and jump back on the sponges to get to the switch on the shelf above the door. Stomp on the red switch there to destroy the cannon, then jump to the top of the shower door to stomp the next water switch. You can then jump on the sponges to the top of the cabinet near the cannon and jump to the fifth and final critter. The water is timed, but you can stomp a blue switch on a lower level to bring the water back, so you aren't forced to start all the way over if you make a mistake. Also, if you leave the bathroom, all the water will automatically drain back out before you can get back to the living room.

With all five critters collected, we can finally head back to the top of the kitchen island and talk to Jessie for another Pizza Planet token. 

Wednesday, July 8, 2026

PrinceWatercress plays Space Station Silicon Valley - Part 11 of 32


In this entry, we get a change of pace from the Europe levels and head into the land of ice and snow. Things start off simpler now, but they'll get tougher later.


Snow Joke


Welcome to the ice levels! For your first mission in the cold, you'll be switching on a snow blower to bring the snow back, switching on a big computer thing, and getting a husky for Dan.

You'll start out as EVO's chip and move automatically towards a downed penguin to take control of it. As the penguin, you can jump and throw snowballs with A and B respectively, and if you hold down A, the penguin can float much like the sheep with a tiny parasol over its head.

The other penguin that soon shows up will throw snowballs back at you if you attack it enough, but if you get close enough to the edge of the hill, the husky will come at you. It is possible to trap near the Power Cell at the beginning so that it can't climb up towards you. From there, you can let loose with the snowballs and beat it up until you can take control of the husky, completing one of the mission objectives right out of the gate. The husky can jump and bite with A and B respectively.

Take control of the husky and go down the icy slide. In case you miss the Power Cell here, you'll be able to go back. Chase after the nearby husky from behind and take it down with the bite attack, then explore the nearby area where the pipes are and take out the penguins. 

There is a switch in one of the dead ends that leads to a reflective wall showing off the vast expanse of space; toggling it will switch the time of day from day to night. This will summon up a red platform nearby that you'll need for later. You're done here, so go down the area with the metalllic floor and hit the switch to turn on the snow blower to bring the snow back and give yourself a way out of that area. That's two missions down.

There is a big wall that looks like a switchboard with lights that has a switch on it. Hit the switch to turn on the big computer thingy. It only activates the secondary engines, but you can now get to the exit teleporter in the center of the level. 

Keep exploring and you'll find a snow hare. The snow hare jumps with A, which must be held to ensure movement, and performs a damage-causing, earthquaking stomp with B that hurts anything in front of it. You'll need this snow hare to get the Power Cells as the trophy symbolized by a golden snow machine pipe, as this is the only animal that can do it. To get the trophy, you'll need to jump on the glowing platform that shows up only at night and ride it to the stop of the stage. Hold A to jump onto the slope, then guide yourself with the Control Stick to get on the platforms. If you start falling away from the platforms, hold A and hold the Control Stick towards the platforms to save yourself. You'll find the trophy here. From here, you can hope across some platforms to get to the exit teleporter.

Penguin


Type: Penguin
Environment: Ice
Skill A: Jump
Skill B: Snowball Attack
Water Resistance: Excellent
Mass: Tiny
Armour: Light
Strength: Weak
Traction: Good
Fall Distance: Medium
Production: Very Short
Engine: Electric
Intelligence: Medium

Husky


Type: Husky
Environment: Ice
Skill A: Jump
Skill B: Husky Frenzy
Water Resistance: OK
Mass: Medium
Armour: Light
Strength: Medium
Traction: Average
Fall Distance: Medium
Production: Medium
Engine: Electric
Intelligence: Medium

Rabbit


Type: Rabbit
Environment: Ice
Skill A: Jump
Skill B: Thump Attack
Water Resistance: OK
Mass: Light
Armour: Light
Strength: Medium
Traction: Good
Fall Distance: Medium
Production: Short
Engine: Spring
Intelligence: Medium


Power Cells


1-2 | 3 | 4 | 5 | 6-7 | 8 | 9-10 | 11-12 | 13 | 14 | 15 (and the trophy!)

Thursday, June 18, 2026

PrinceWatercress plays Donkey Kong for Game Boy - Part 11 of 11


In this entry, we beat Donkey Kong once and for all!


Stage 9-8


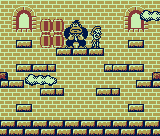
There's wind this high up in the tower, and the barrels drop Mini Mushrooms when you throw them into Donkey Kong. Unless you use the handstand, the barrels will not stop at all.

When you beat DK here, you'll finally be reunited with Pauline.

Stage 9-9


Uh-oh! DK's back, and he's eaten some Mega Mushrooms to get bigger!

When he pounds the floor, you'll want to be out of the way. Some debris will fall, but some of it are barrels. One of them will continue to fall. Stop it with your handstand and throw it at DK's face.

The best place to stand is on DK's nose, since all you'll have to worry about is the debris.

After two hits, DK will smash his knuckles together to try to hit you if you're on his nose. To avoid it, stand on his nose and jump straight up. He'll still cause barrels and debris to rain from the sky, but you've got to be quick with the barrels. If you can't get your hands on one before DK shakes the screen, the barrel on the floor will disintegrate and you'll have to wait to get another one.

If DK lifts his hands up, he's going to do two fist crushes. If his hands slide sideways, he's about to clap his hands together.

After two more hits, DK will hide under the floor and pound at the ground with his fists. Stay at the center, and move away to avoid his fists and the debris. After this, you'll have to deal with the usual tactics from this battle and get two more hits in. Thankfully, these two hits are the last, and once you land them, it's over! You've beaten Donkey Kong for Game Boy!

Friday, June 5, 2026

PrinceWatercress plays Donkey Kong Land III: Dixie Kong's Double Trouble - Part 11 of 13


It's time to tackle the final world in the game!


To enter the Lost World, you'll need to collect all five of the Watches (which I keep calling Clocks) from all five of the Sheepy Shops in the previous worlds as well as all of the DK Coins up until this point. Once you do that, you'll be able to enter The Lost World.

The Lost World

Whiplash Dash


This level is another bobsled level. You'll have to time your jumps to get over all the Buzzes without getting hit as well as jump over those bottomless pits for not one section, but two. Between the two sections, you'll meet Koin and the steel keg. Move post him and the Buzzes, then throw the steel keg to the left, have it take out the Buzzes on the way, then go back, get the steel keg again, and throw it to the left over Koin's head so you can get the DK Coin. If you want to do both things separately, that's fine, too.

The two bonus areas are to the right of the goal. The first one will be in plain sight, and for this one, you'll need to collect the stars will avoiding the bombs being thrown by the Kuchukas. To enter the second bonus area, you'll need to jump over the barrel leading to the first one. You'll enter an invisible barrel that will take you there. You'll be in the sled again; grab all the stars while avoiding the Buzzes.

Kuchuka Karnage


The only Kuchukas in the level are at the beginning. For Pete's sake, game.

The first bonus area will be in the pit after the first Bazuka and just after the second, in the lower-right corner. Here, you'll be collecting the stars as Squawks avoiding barrels blasted out by Bazukas. I didn't know this until I wrote this guide, but if you go up and to the left instead of to the right (which leads to the Bonus Coin), you can get an easy-to-miss extra life.

The second bonus area is to the left of where the N is, and you'll find another barrel cannon that will take you there. Thankfully, you can move the barrel cannon at the fork in the road with the D-Pad in order to get there more easily. Once again, you're collecting stars, but you'll be avoiding barrels and bombs from the side from the sides and fireballs from above as well as another Kuchuka along the way, who is throwing bombs to the right and not the left.

The DK Coin is past the goal, and you'll find the steel keg along the way. Just grab it and move past the goal with the steel keg in your hand, then throw the steel keg over Koin's head to the right to get the DK Coin.

Haunted Hollows


Half of this level is underwater, and the rest of it will be on dry land once you surface.

The first bonus area is upwards after the K, past the Barbos. Here, you'll be playing as Squitter, and you'll have to defeat all of the Buzzes on the way to the other side to get the Bonus Coin to appear.

The DK coin is at the surface of the water, before the O and directly above the nearby DK Barrel. Go all the way to the left before surfacing out of the water to find Koin. Grab the steel keg, then stand on top of him and throw the keg to the left to get the DK Coin.

The second bonus area is after the first Kuchuka. There is a barrel cannon after the Kuchuka and above the enemy after it. Thankfully, you can jump into the barrel from the raised part of the ground. Collect the stars, but watch out for the Kuchukas!

Monday, January 26, 2026

PrinceWatercress plays Super Mario Odyssey - Part 11 of 92


That's it for Sand Kingdom. Next time, we head to the Wooded Kingdom.


There is a slingshot at the hole below where the Inverted Pyramid now. If you throw your hat into it, you'll be able to go through the inner section of the pyramid all over again in case you missed something.

Power Moons


38. Jaxi Reunion - East of the desert oasis, there is a Jaxi statue and an empty pedestal across from it. Ride a Jaxi onto this empty pedestal for a Power Moon.

46. Hidden Room in the Inverted Pyramid - After the 8-bit section of the inside of the Inverted Pyramid, you'll want to possess a Bullet Bill and land at the conveyor belt before the end. You'll be taken to a hidden room with a Power Moon in a chest.

49. Under the Mummy's Curse - At the hole near where the Inverted Pyramid is now, you can take command of a Money Bag enemy for a ton of coins, then shoot down all the mummies in the area where you fought Knucklotec for a Power Moon. One of the many mummies will have the familiar glow of a Power Moon, and you'll need to find and take out that specific one.

53. Dancing with New Friends - For this one, you'll need to wear the Sombrero and the Poncho. There is a locked door in Tostarena Town, and if you talk to the guy next to it wearing these two outfit pieces, you'll open the door. Go inside, then stand in the center of the stage and Mario will play guitar. This will

55. Skull Sign in the Transparent Maze - Back at the invisible maze, throw the hat at the sign in the lava and hold the button to reveal a Power Moon.

Tuesday, December 2, 2025

PrinceWatercress plays Brave Fencer Musashi - Part 11 of 33


In this entry, we get the Mine Key and start looking for Misteria in the Binchotite Mines.


While you wait, head back to the pipe area of the forest, head right and take the straight pipe. You'll find the Earth Crest. Use the Earth Scroll on it and the rock blocking your path up the wall will disappear. If you climb up there at night, you'll find a Wind Crest as well as a Minku up there, and you can get another Longevity Berry. There is an area past this, but we won't be able to go there...yet.

During the early morning, talk to Wid by knocking on the Windmill door. He'll give you the key and tell you that Misteria only blooms between between 3 AM and 7 AM.

If you head to Twinpeak Mountain now, Hotelo will shoo you away.

If you talk to Knitter Lunchetta (Knitter) at the castle, she will tell you that the Legendary Cloth will be in a place with some old ruins. You'll find it eventually.

Now that you have the Mine Key, you can unlock the door to the mine across from the Inn. Smashing the door with Lumina does nothing, and if you have the Mine Key, Musashi will use the key instead, anyway.

Once you enter, you can head left to the Grillin' River, or right to the Binchotite Mine. Take the right path to the Binchotite Mine.

The blue mushroom enemies are just like the brown ones, but they just poison you instead of making you tired if their powder attack connects. Be sure to bring some Antidotes or just avoid them altogether. Absorbing them will give you Toxin, which will poison you temporarily.

Avoid the glowing green blob monsters that will try to steal your BP, and watch out for the falling rocks. Assimilating the glowing blobs will give you the Rip-off ability. It uses 10 BP at the outset, and as long as the balls of light spin around you, you'll have the ability to turn hits into BP gains. Whenever you take damage, the damage is nullified and you regain 10 BP instead. Rip-off disappears when the lights stop flying around you.

You'll need to wait for the fan blades to come to a stop before you can drop down to what is below them. If you need to get back up, you can climb the nearby wall. There is a Memory Box underneath the first fan. From there, head left to the underground lake.

You'll be crossing conveyor belts in the next part of this area. At the fork in the road, take the conveyor belt that leads down. You'll find a Bincho Field, which allows you to free Knight Brisket. He'll tell you to come to the castle later to learn a technique from him. You'll definitely want to do this.

There's another Bincho Field to break near the first one. Get back on the main path and walk upwards on the conveyor belt that leads to the wooden platforms stuck to the wall. (At least you can change the direction you're going in mid-jump.) Breaking the Bincho Field here will allow you to free Carpenter Dicey.

You'll finally enter the underground lake that leads to Misteria. Carefully jump on the platforms that spin around this mini-mountain, and watch out for the fireballs that the black eel in the water spits at you.

If you stick around on the first platform, you'll find an area will a Minku will be. Thankfully, I manage to get to the Misteria area while it's night. You'll also find a Bincho Field containing Chief Gravie, and you'll want to free him. There's also yet another area to jump off to which has a treasure chest containing the OldGlove, which you'll want to appraise.

Don't forget to break the Bincho Field underneath the main path on the way to the Misteria flower. You'll be able to free Cook Mary-Nade.

When you reach the Misteria plant between 3:00 and 7:00 when it is blooming, walk up to it and press Square to get Misteria. You can now head back to the village.

Friday, October 31, 2025

PrinceWatercress plays Legacy of Kain: Soul Reaver - Part 11 of 28


In this video, we beat Zephon, but now we have to find a way to get to the mountains.


Along the path that we opened the way to that had the teleporter room, there is a chamber. Inside the chamber is Zephon, the second of Raziel's brothers. Zephon is stuck to the wall, which almost reminds me of Queen Slug-For-A-Butt from Earthworm Jim, so as a result, he cannot move.

You'll want to destroy the tendrils with the Soul Reaver and do it from a distance. Once they're gone, you'll want to run up to Zephon and attack the cocoon below him. This will cause an egg to come out, and you'll want to take the egg to the flame on the other side of the room and throw it at Zephon. Thankfully, the tendrils don't come back, so you'll just have to worry about throwing three flaming eggs at Zephon before killing him.

Beating Zephon and absorbing his soul will allow you to climb certain walls, but only in the physical realm, as the walls will not be able to hold him in the spiritual realm. You'll know that you can climb a wall when you jump into it and Raziel automatically latches on. 

When you leave Zephon's chamber, The Elder God will tell you that in the mountains beyond the Pillars of Nosgoth, the cataclysms that Nosgoth is undergoing has revealed something, and now that you can climb certain walls, you can get to it. Thanks to all of the teleporters that we have activated, we can head back to the Pillars more easily.

Monday, September 8, 2025

PrinceWatercress plays Woody Woodpecker in Crazy Castle 5 - Part 11 of 18


That's the third world of the game down! But things are about to get harder...


Water Stage 5


The green wasps move back and forth and will try to sting you if you get too close to them. Also, pulling levers and finding the item that lets you pass through metal blocks are both going to be a must. You'll need to go through all of the pipes in order to reach all of the levers and turn off all of the waterfalls.

You cannot use levers while underwater.

Water Stage 6


The boss here is a giant squid which will leap up from the bottom of the stage when you least expect it. Just like with all of the other bosses, you'll want to keep running.

Aside from the spin attack that the squid can hit you with when it leaps out of the water, it can also spit ink on the floor, which can be slippery if you move around on it. If you get hit by the ink projectile yourself, you become slippery yourself when you move. Thankfully, it's only temporary either way.

The two pipes on the sides actually wrap-around, and if you go in on one side, you'll end up on the other, and the game even scrolls seamlessly as you move. That's pretty nice.

As long as you keep moving quickly and have the four or five guns you can find throughout the stage, you'll be able to get the Water Key and move on to Fire World.

Sunday, June 8, 2025

PrinceWatercress plays Math Rescue - Part 11 of 19


Next episode: Episode 2 gets finished, but not before we go all over the place among the last few levels to do as much as we can!


Level 12: Afternoon on Mars


The level makes it feel like I'm jumping from one apartment balcony on a tower to another. The two areas between the lava waterfall are separated by walls, so you'll can't just jump from one half of the level to the other.

Level 13: Pluto - the Cold Planet


After the slope leading downwards into the level, jump into the wall to the left to access the secret area.

Level 14: The Caves of Pluto


Yet another level that has three sets of numbers after having to deal with either one or two! If you want to get them in order, you'll have to go all over the place to do it!

After the first whole set of numbers, you can jump into a wall and find a hidden rope leading downwards inside. There is a number below where that rope is, and it can be easy to miss.

Another hidden wall hides a warp. There will be a number on the other side.

Saturday, May 17, 2025

PrinceWatercress plays The Grinch (PS1) - Part 11 of 22


With Octopus Climbing Device in hand, we head back to Whoforest.


Back at the Whoforest, we can go back to the house with the locked chest back at the beginning, trap the bees blocking the chest with the Slime Launcher, then pancake the chest to get the Cable Car Access Card. This will let us use the cable car and access another area of the Whoforest.

With the Octopus Climbing Device, you can climb up the ice wall. This will allow you to enter the White Mountain Civic Center. The lever will active the bridge, but you will only have a limited time before the bridge goes back down.

There are giftboxes encased in ice. Pancake their icy prisons first, then destroy the giftboxes from there

At one point, you'll need Max to enter a small hole in a door. Max can break giftboxes just by running into them. 

The targets with the fireworks must be shot with the Rotten Egg Launcher, and you'll need to collect the Firework that the targets drop after you hit them. 

The Whos in the green bodysuits shoot at you with ice guns that will freeze you in place, and you'll need to move the D-Pad all over to break free. If you can breathe on them with your bad breath attack, you can get rid of them and also get them to drop a giftbox.

The cave beasts are back, and you'll need to be ready to deal with them. There is a big one that you'll need to tiptoe past, or else you'll get smacked backwards every time you approach it.

The dancing guys have targets on their chest, and you'll need to wait for them to stop moving before you can hit them in the chest with the Rotten Egg Launcher and knock them off the platforms. You can then pancake them to get giftboxes from them, although I don't figure that second part out...yet.

To get rid of the guy blocking the door to the cake, you'll need to hit both sides of the sign above the doorway he is blocking with the Rotten Egg Launcher. When you pull that off, the sign will knock the guy out on the way down, and you can get a giftbox in addition to access to the cake. 

If you can sneak past the bats, you can enter a cave where there are some climbable walls as well as plenty of giftboxes. There is a blueprint piece encased in ice, but you won't be able to pancake it to break it out. You'll need to do something else.

Breakaway bridges can break when you run across them, but will stay intact if you tiptoe across.

You'll need to tiptoe across the log to get to that one firework. Walking across the log will cause you to fall down.

The weird looking part of the wall that looks like you can climb on it actually has a ledge inside of it. You'll need to jump into the ledge with the Rocket Spring to grab it and shimmy across with the D-Pad, although I don't figure that out...yet.


Firework 1 (collected here)


Friday, April 11, 2025

PrinceWatercress plays Kid Icarus - Part 11 of 15


I think it's safe to say I'm going to reach a million points before this is over.


Now that I'm more used to the enemies' movement patterns, I'm able to get a lot more hearts to work with around here, and that allows me to buy multiple Waters of Life to more than adequately buffer myself against what the rest of the game is going to re-throw at me. I almost earned 100,000 points in World 2-1 alone! And I almost did it again in World 2-2!

World 2-1


Compared to what we've experienced so far, this is easier. This time, you'll move from the left end of the stage to the right end, and you won't have to deal with many pits.

The little rock guys (they're called a Rokman) that fall down from the sky will come down from pretty fast. Thankfully, they go down in one hit and drop ten hearts each. They also give you 500 points each.

From here on out, you'll find the occasional hot spring with the orange water. Take advantage of it.

If you see any beetle-like jaws pop out of the ground, stay away from there so you don't get bitten when the bug actually pops out and shoots a projectile at you. Those are Girin, and they can be a bit of an annoyance.

There will be pink, circle-shaped creatures that will pop up from the bottom of the screen after the third door (the one with the flying nose creatures; they're known as Minos). They will soon slowly back down afterwards. Hit them if you can.

The green creatures with the big mouths (Micks) will fly back and forth across the level, and they do it pretty slowly, making them easy pickings. They move more or less like the one-eyed red octopi.

In the treasure pot rooms with the blue backgrounds, the rules change a little bit. This time, you'll want to hit the two pots above the entrance and the second pot from the top on the left side. From here, you're counting mallets again. If you see zero mallets, you'll have to hit the pot on the lower-right corner last. If you see one, it's the second one from the bottom on the left side you'll want to save for last. If you see two, you'll want to save the pot in the center for last. If you see three, you'll want to save the pot in the top-left corner for last. Failure to do so will cause you to see the God of Poverty and lose everything.

The credit card allows you to buy on credit at the black market, allowing you to get an item for free. If you want to use a credit card again, however, you'll have to pay back what you owe, and until then, your heart count will stay at zero (and will basically be in the negatives, as the can't show an integer less than zero) as you keep collecting hearts. If this happens, you'll have to keep collecting hearts until you hearts in the hearts counter again, and the amount of hearts you'll have to collect depends on how much the thing you bought with the credit card was worth.

The green frog-like enemies with wings (Kerons) will leap towards you. They take two hits to kill.

The third arrow upgrade will turn you a purple hue and allow you to do three times the damage that could deal at the beginning. You'll have a shot at getting it around 167,000 points. Keep killing those enemies to get those arrow upgrades!

If you can get 122,300 points, you'll get a fourth bar of energy.

World 2-2


You'll need more than two bars of health to have the fireball activated if you have it. With this, your arrows can go through multiple enemies at once. If you have at least one or two arrow upgrades, this is a treat.

The little guy who hops around at a fast speed with a sack on his back (known as Pluton) must be avoided at all costs, as he can steal one of your upgrades if he runs into you. You can earn them back, but there are only so many rooms in the game where you fight flying tiles.

The guys with the red eyes (Snowmen) move slowly move towards you, and will shoot projectiles.

Whatever you do, don't fall into the water. Falling into it is not good. Take your time with the platforms, and remember not to press Down on the D-Pad while making your way through the very platform-y part of the stage.

If you can get 204,200 points, you'll get a fifth bar of health. This is the most health you can get in the game. If you can get 227,700 points, you can get the fourth strength arrow, the Gold Arrow, in the sacred chamber.

Saturday, February 8, 2025

PrinceWatercress plays Wario Land II - Part 11 of 51


We meet the owl for the first time in this stage. It won't be the last, and once you get used to flying around on the owl, you'll be able to do it in the more difficult stages.


Chapter 3: Maze Woods

Story 1: Get to Maze Woods


It's time to introduce ourselves to our new friend: the owl.

By bumping into the owl from below, we can get him to fly, and if we jump into him from below, we can ride him. You can fly around in four directions - up, down, left and right - and you can tap a button on the D-Pad to move slowly in that direction. Press that same button on the D-Pad again and you'll go a little faster. You won't be able to fly in place while on the owl, so if you want to stay in one place, move back and forth. While you're flying around, you can collect coins, but you'll want to watch out for hazards and enemies. Remember that Wario - not the owl - is the hitbox, and if you don't want Wario to get hurt and knocked off the owl while losing a couple of coins, don't let Wario get hit or touch what he shouldn't. Pressing the B button will allow you to let go and drop down to dry land.

If you notice a coin in the water with a little more detail than usual, it's bait from an enemy using a fishing rod. If you get caught, you'll be pulled upwards, but you won't get hurt. The bait coin will come back, and you'll need to do this to get to the treasure room, which will award you a seed if you win. The fish enemies do not have any coins.

The flying spiked skills are indestructible, and you'll want to keep them away from Wario at all costs. They cannot be defeated in any way; only avoided. Some move back and forth, while others move in circles. You'll want to watch where they go and how quickly they do it in order to avoid them as they pass and keep all your coins while getting from point A to point B in one piece.

Tuesday, November 19, 2024

PrinceWatercress plays Great Greed - Part 11 of 28


In this entry, we finally neutralize the poison at Crater Lake, but we'll have to take on another lieutenant of Bio-Haz if we want to get out of this alive.


Once you enter the forest West of Hothot Village with the password, Sam will automatically recite the password, and you'll be able to go in.


In order to make progress through this forest, you'll have to walk up to baby birds and talk to them. You'll also have to go through the maze in a specific way, and if you go the wrong way, you'll be blocked by one of the Tree Brothers, who will force you onto the right path. 

Flash blinds enemies temporarily when used in battle. It costs 5 MP to use.

The first bird you need to interact with will be east of the chest with the Foil Sword. Be sure to equip the Foil Sword if you need it, then talk to the bird and its mother will carry you off to another point in the maze. From there, head north. The Stamp is a worthless item that can be sold for only 75 Gold. From the Stamp, head west past two intersection and go north on the third. You'll find a Med 3-10 scroll. Med 3 restores 180 HP. Save this for bosses.

From the Med 3 chest, head west and talk to the baby bird to be carried elsewhere. When you get dropped off, don't talk to the baby bird next to you; instead, head east until you find a chest that gives you Regain 2, which recovers 80 MP. From there, go north, then west. You'll find another baby bird, but before you talk to it, go further west to get Repel out of a chest. Repel can be used to decrease the chance of a random enemy encounter in dungeons and in the overworld for a short time, but I personally do not use it much. It costs 10 MP to use.

When you get carried off one more time, head west to get an Ultrahot Flower. From here, head back to Nutmeg Village to the northwest. As it turns out, I forgot a monster near here: Garican. It is weak against Freeze magic and can cast Poison and Sleep. It gives 62 Experience and 182 Gold when defeated, and has a chance of dropping a Chrome Helmet. If one gets dropped, equip it; it will last you for a good while.

Back at Nutmeg Village, go back to Truffle. She will give you the Neutralizer, then tell you to head to Crater Lake. Pappu will try to join you, but he will sprain his ankle after having exercised too much, and you will have to take his place in getting the Neutralizer to the lake. Leave the village and head to the north to Crater Lake.

You'll have the option of nibbling the Ultrahot Flower to double your speed, and you will barely be able to make it. If you eat the flower outright, you'll double your speed twice over, but your HP will be reduced. You only have 12 seconds to get to Crater Lake before getting caught up in the poisonous fog, and thankfully, the game gives you as many tries as you need to get there so you can memorize where the rocks are so you don't run into them and get stunned for a few seconds, which causes you to lose time.

When you get to the lake, Sam will throw the Neutralizer into the lake. A man named Darts, who is a minion of Bio-Haz, will show up and confront you for interrupting his work before deciding to finish you outright. Darts has 850 HP and is weak against Freeze magic, so mix that up with your physical attacks. Be sure to cast Power so you can increase the strength of your physical attacks, too. He can also cast Poison 2, which does even more damage than regular Poison, and he can use Heal 1 when his HP gets low. Darts will give 800 Experience and 2000 Gold when defeated.

When Darts is defeated, he will threaten to throw his own poison into the lake, but Truffle will show up just in time and kill him with the Neutralizer. You'll then get the Power Water for future use against Bio-Haz, then you'll be able to head back to Nutmeg Village.

Back at Nutmeg Village, talk to Pappu. He will thank you, then allow you to take what is in the nearby chest, which is the Escape spell. At the cost of just 1 MP, you can escape a dungeon without having to go back out the long way. Leave the village, then head back to Hothot Village. Their ultrahot will now have subsided, and you can access the stores again. At the armory, get the Copper Armor and equip it. At the magic shop, you can get the Drain Spell, which lowers the enemy's attack power during battle and can be useful against bosses.

When you talk to the man at the bridge, you'll be able to head to Spaghetti, but once you do, you won't be able to come back. Truffle will bid you farewell as she researches the Power Water further, then tells you to find her sister Citrus, who is the strongest of the five princesses, and help her out. She will also give you her brooch, which fits nicely in Calorie's collar. You'll then enter the land of Spaghetti.

Monday, September 9, 2024

PrinceWatercress plays Chrono Trigger (Super NES) - Part 11 of 70


In order to use the Gate at Proto Dome, we'll need to head to the Factory and power up the generator to power the door. Thankfully, we find a new friend who will help us do just that.


Lab 32


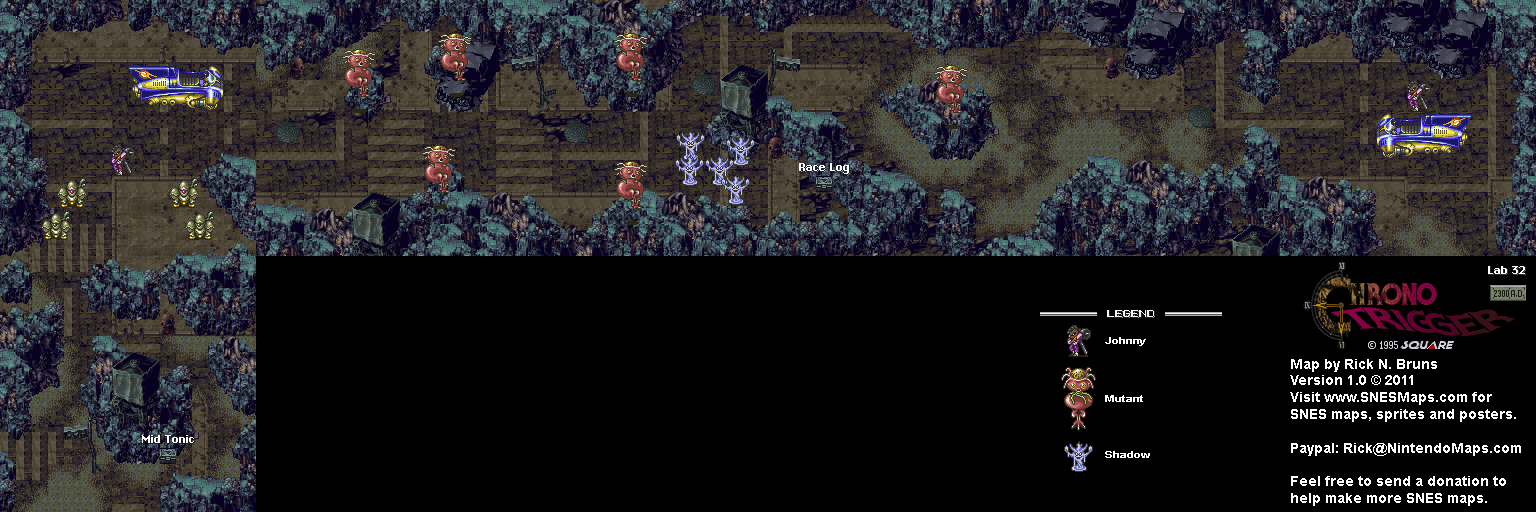
Now that you have the Bike Key, you can use the jetbike that is in Lab 32. When you go up to the jet bike and press A to get the jetbike started, a bunch of Proto 2's will show up, but Johnny will show up before a fight can occur. From here, you'll have to race Johnny to the end of Lab 32 in a side-scrolling Mode 7 duel instead. Up and Down will steer the jet-bike, while B uses one of your three turbo boosts.

As you race, both you and Johnny will move back and forth. There will be a map at the bottom showing how far you are from the finish line, and at the lower-right corner, you'll see how many turbo boosts you have left. When you use a boost to get ahead briefly, you won't be able to use another one until the red gauge feels back up. At the upper-left corner, there is Rest - which shows how far you are from the finish line - and W.P., which is your score for the race. As you move back and forth, you'll gain points while in the lead and lose points while behind Johnny. If you can keep bouncing into Johnny repeatedly as you move backwards, you can keep the lead and keep gaining points.

Near the end of the race, you'll want to use a turbo boost just in time to get to the finish line just before Johnny does. If you can do that, you can win the race every single time. Also, you must win the race this one time in order to reach the end of Lab 32, or else you're starting all over.

Once you make it to the other end, you could leave, but you can also go back and cross by foot. There are Shadows and Mutants that you can fight here, but the Mutants aren't worth the gold and experience even in groups, and the only chest in the area contains the Race Log. If you talk to Johnny with the Race Log in your inventory, a Proto 3 will show up and keep record of your three highest race scores.

There's nothing more to do in Lab 32, so go ahead and head south on the east end to leave.

Proto Dome


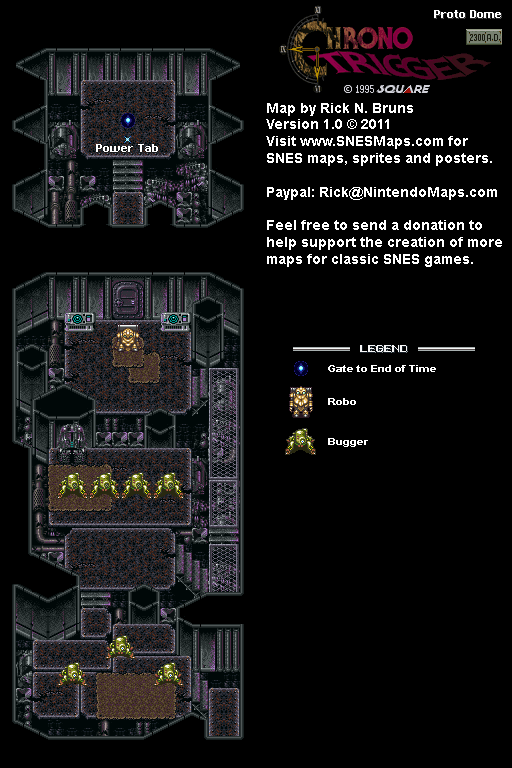
When you enter this place for the first time, you'll have to face a bunch of Buggers. Once you beat them all, you'll find a robot near the door. Interact with it with A, and Lucca will take a look at the robot and realize that she can repair it. As Lucca goes to work, Marle will find out that the door at the north end of the dome will not budge.

Eventually, the robot will be repaired. After some formalities between the robot and Crono's party, it becomes very apparent that the robot - serial number R-66Y - is a very friendly robot, and that he knows how to open the door to the north: enter the factory north of Proto Dome and power up the generator to get the door open. Unfortunately, the generator will run for only a brief time, and the door needs to opened before it stops. Because of this, one party member - Lucca or Marle - will have to stay behind, and you'll have to pick who gets left behind. If you change your mind on who you want to leave behind, talk to the person you left behind and you can make the switch easily.

During this conversation, R-66Y gets the less stuffier and more affectionate name of Robo, which he goes by for the rest of the game.

Factory


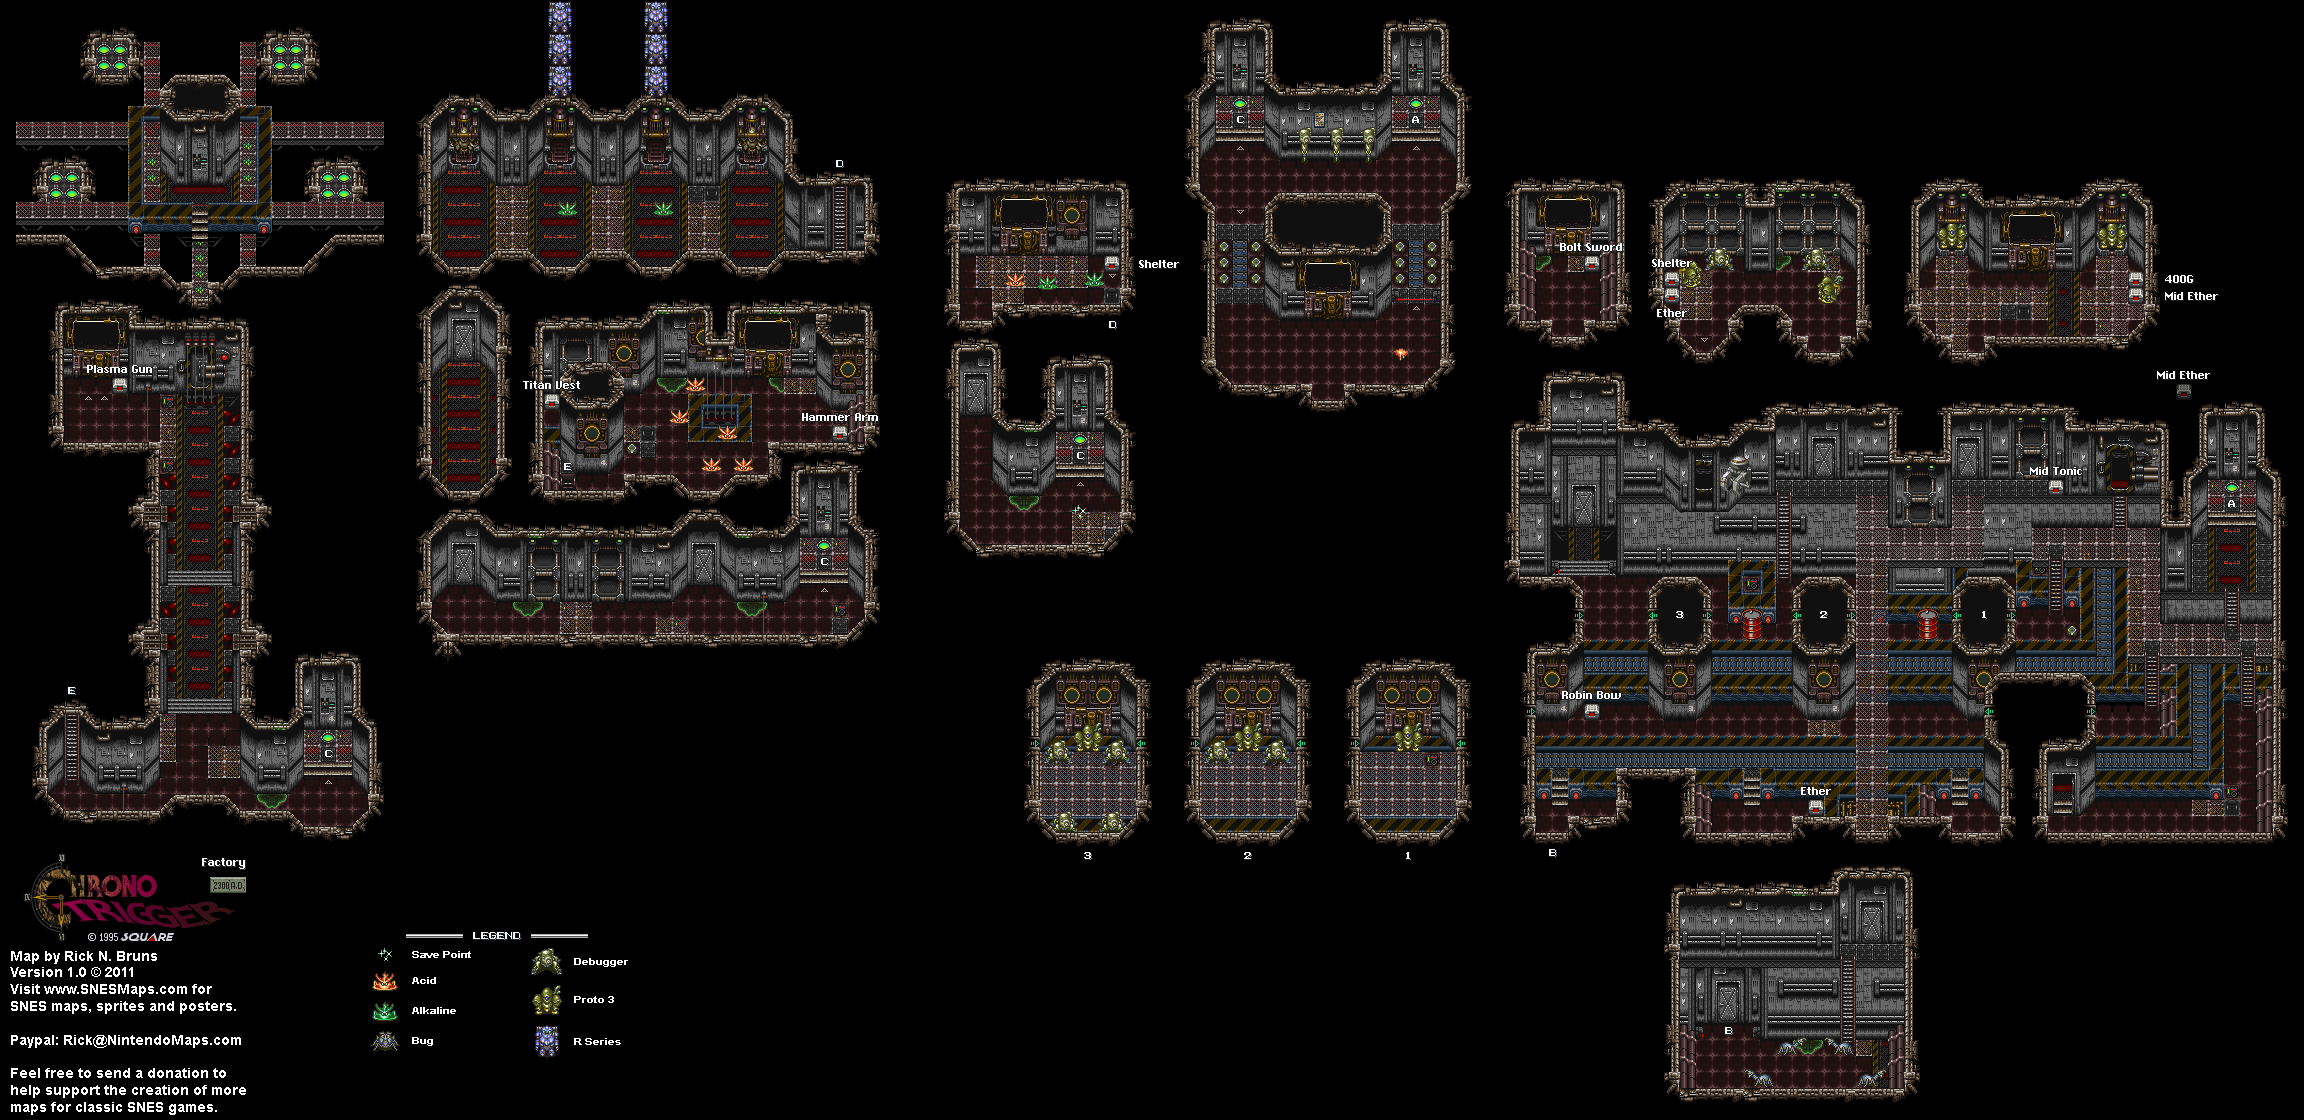
When you enter the factory, go up to the computer and press A. With Robo as a forced member of the party, you'll be able to go up the conveyor belt to the right and explore the factory. You'll also fight a new enemy: Acid. Use Crono's Slash against it, as it has high defense, so you don't have to deal with the Acid's flamethrower attack.

If you fight one battle with both Marle and Robo in the party, you'll get the Cure Beam double tech, which works much like Aura Whirl except it doesn't require Crono.

The Debuggers are much stronger versions of the Buggers. If you can get Robo to learn it here, use Laser Beam against them to damage multiples of them at once. Slash works well against them, too.

You'll have two teleporters that you can take. The west one leads to the generator, but the east one leads to the factory proper. Take the east one first.

In the factory area, you'll want to head south and enter the doorway to the east. You'll be on the conveyor belt, and you'll need to cross the conveyor belt while avoiding touching the robots to get to the treasure chest with the Ether as well as the doorway in the southeast corner. If you touch any robots, you'll be carried off to the conveyor belt on the other end, where you'll have to face some Proto 3's as well as some Debuggers for three battles. The Proto 3's have flamethrowers, so be ready to heal. Once you're done with the three battles, you can then get to the room in the southeast corner.

If you take the stairs west of the ones leading to the conveyor belt you're supposed to cross, you can get the Robin Bow, which is a more powerful weapon for Marle.

In the next room, you'll have to face some Bugs in order to get to the upstairs area. Enter the door on the right first when you go all the way north and use the computer. You'll get two crane control codes: X-A and B-B. Two Proto 3's will run amok, so stay away from them as you get the 400G and the Mid Ether in the chests (unless you want to battle them, in which case, be my guest). After you leave that room, enter the room on the left and get the 400G and the Mid Ether in the two chests while avoiding the Proto 3's (unless you want to battle them, again, be my guest) and get to the crane controls on the other end. Press Down and you'll be asked for a code. Press X then A the first time to move the first of two metal drums, then press Down again and press B twice on the code prompt to move the other metal drum. This will open the way to a doorway where you can get another Bolt Sword for Crono as well as a computer where you can get the last defense lock code named "Zabie," translated XABY. You'll need this later.

If you're playing the PS1 version of the game, you'll need to press the equivalent face buttons for the codes. The crane control codes would be Triangle and Circle followed by X and X, and XABY would be Triangle, Circle, X, Square.

From here, go back to the entry area and take the west teleporter. This will lead to the security area. Head north to the computer to open the hatch, then get ready to fight Acids as well as Alkalines, which are much like the Acids but have an acid bubble attack instead of a flamethrower. Slash works best against both of these enemies. Make sure you finish them off, because if you don't do enough damage to kill and an Acid and an Alkaline are next to each other, they will perform a double tech chemical explosion attack that damages all party members. Don't forget to open the nearby chest containing the Shelter when you're done.

Once you go down the hatch, you'll need to make your way to a door. The path is pretty linear, and you'll have no choice but to enter the door due to a red laser barrier blocking your path to the teleporter. Go inside and use the computer tu turn off the security lasers, then fight the five Acids that drop in. Afterwards, you can either go down the hatch or go down the formerly blocked teleporter to go down to the last defense lock and the generator. Don't forget to open the chests in this area, as you go down. One contains a Hammer Arm for Robo, which is more powerful than the Tin Arm that he starts with, and a Titan Vest for Crono so he can match Robo in defense.

If you need to save before hitting the generator, you can take the teleporter up instead of down. This will take you to the save point in the factory where you can save your progress so you don't have to do all of this again.

Tuesday, August 20, 2024

PrinceWatercress plays Berzerk (Atari 2600) - Part 11 of 13


What's this? The game modes are suddenly getting easier near the end? Well, this is something.


Game 11 is just like Game 10 in which the robots don't shoot at you and you get an extra life every 1,000 points, but this time, Evil Otto can be shot down and taken out temporarily, making this variation easier than Game 10. But the easiest game mode is yet to come...

Monday, June 3, 2024

PrinceWatercress plays Ratchet and Clank: Going Commando - Part 11 of 54


We finally beat the thief at their own game and we're done with this adventure...or so we think.

First | Previous | Next | End

1:21 - Here's Slim Cognito's Ship Shack, where you can pay the Raritanium you got from shooting ships down in outer space to buy upgrades for your ship. This place will come into play in some dire situations as I play through the game.

From here, we head to Siberius.

5:50 - Watch for little doors in the ground. Orbs that sprout spinning blades will pop out and advance towards you, and while your wrench can take care of them, you'll still want to be careful.

6:27 - If you get behind this building, you'll find a snowman with the face of an Insomniac staff member on it. If you destroy it, you'll get a Skill Point.

7:06 - The first batch of robots can take a pounding, and the orange guys that show up afterwards shoot fireballs.

8:09 - Use the Tractor Beam to move this platform back upwards and back to where you fought the robots to get a Platinum Bolt.

9:35 - Forwards, then back.

9:59 - Take out the enemies with the Heavy Lancer, and use the Vaporizer to destroy the ship.

11:33 - Before continuing with the level, I go back to the start and jump off a ledge onto the top of a building. This gets us behind the fence we just saw to get the other Platinum Bolt on the planet. From here, you'll need to go forwards to go back and get inside the truck we just saw earlier to continue with this place.

13:14 - Now this is cool. Use the Swingshot to get from one car to another, and be ready to fight enemies. Use the Walloper to get rid of the orange robots that shoot fireballs.

Use the Heavy Lancer to take out the thief when they fly by, and don't forget to strafe!

16:02 - After fighting off the thief a second time, the truck will tip over. You're continuing on foot from here.

16:47 - Those robots were not quick on the draw.

17:54 - We're getting the Miniturret Glove here. This glove lets you throw out turrets that fire missiles at enemies, but the turrets don't last for long. Best when combined with another weapon like the Heavy Lancer.

18:40 - Your third fight with the thief. Watch for the orange glow, so you can strafe jump when the thief fires. When the back-up shows up, fire at the thief with the Mini-Nuke to finish the thief off quickly. 

You'll then get the experiment back, and Ratchet and Clank will call Mr. Fizzwidget. You'll then get the coordinates to the next rendezvous point, and you'll find out in a video clip that is also a thinly veiled parody of 3M that Megacorp is not a very nice corporation (but then again, when are they ever nice?).

21:43 - You'll then land on Planet Tabora, where Fizzwidget lands on your ship and destroys it before the experiment gets handed off. After a ride on Fizzwidget's ship, Fizzwidget hits the ejector seat switch and maroon Ratchet and Clank in the middle of the desert.

Skill Points:

You Can Break A Snow Dan: Destroy the snowman behind the first garage in the planet, which is near the start. This is most likely named after Dan Johnson, who is credited with working on the game.

Controls:

As Ratchet:

Control Pad/Left Analog Stick: move
Right analog stick: move camera

X:
  • Jump and double jump (hold button after double jump to use Heli-Pack or Thruster Pack)
  • Wall jump (near certain walls)
Square: strike with wrench
Circle: pull out/shoot currently equipped gun
Triangle: 
  • quick select (hold and use in conjunction with Control Pad or left stick to switch guns; menu can be customized in Quick Select on the pause menu
  • double tap to switch between two most recently equipped weapons/items
  • interrupt on-screen messages

Select: open map
Start: Pause menu
  • Control Pad: select option
  • X: confirm option choice

L1:
  • center camera behind Ratchet (tap button to center)
  • first-person view (hold button and use left stick or D-Pad to look around; let go of L1 to move camera back behind Ratchet)
  • Square: wrench boomerang
  • Circle: fire gun
  • R1/R2: zoom in and out (Pulse Rifle only)
L2/R2: strafe (hold while moving)
L3: see health and Bolt totals
R1/R2: crouch (hold down)
  • Square: wrench boomerang
  • X: high jump
    • long jump (hold crouch button and jump while running to perform)
R3: open map

In water:
  • Square: dive and descend
  • X: surface and ascend
  • R1: accelerate with Hydro-Pack

As Clank:

Control Pad/Left Analog Stick: move
Right analog stick: move camera

When hanging off platforms:
  • Control Pad/Left Analog Stick: move
  • Forward+X: vault up
  • Back+X: drop down

Square: punch
X: Jump (press and hold in the middle of a jump to glide with Heli-Pack)
Triangle: command menu (hold and use in conjunction with Control Pad or left analog stick to choose commands)

Tuesday, May 14, 2024

DeceasedCrab plays Earthbound - Part 11 of 53


Now that Happy-Happyism is dead, we can finally take Paula home and do a little bit of backtracking to take care of a few things.


You'll need to backtrack a bit. At the Peaceful Rest Valley, the broken bridge will now be restored by someone who was once a member of Carpainter's dismantled cult.

It is possible to smack your allies if you're Mushroomed, as it also makes you confused in battle. All the more reason to head to the hospital and ask the guy with the blue hair and mustache in Twoson to take the mushroom off your head and get paid $50 for doing it. Speaking of which...

Head back to Polestar in Twoson and talk to Paula's mom after you rescue Paula. You'll get the Hand-Aid, which is a good healing item that can only be used once. You'll also find out Paula's dad suspected Everdred (incorrectly) of kidnapping Paula. Head back up the stairs, and Paula's dad will be glad that Paula is back before saying goodbye. After you leave Polestar, someone will tell you that Everdred is looking for you, then leave. Head back to Everdred's house in Berglin Park, then talk to Everdred to get the Wad of Bills. You'll need this for something you need to do right now. He then mentions looking for the Mani Mani Statue that Lier X. Aggerate found, which you've seen twice already thanks to the Carpainter. 

The Annoying Old Party Man isn't hard to beat, especially at this point in the game.

Near the Chaos Theater, you'll meet two members of the Runaway Five. If you talk to the guy wearing black after rescuing Paula, he will give you the Backstage Pass, which will allow you to go backstage at the nearby theater.

Once you get the Wad of Bills from Everdred, head to the Chaos Theater. After another meeting with the photographer, you'll be able to go in. Use the Backstage Pass on the person blocking the door leading north, and you'll be able to get in. Talk to the girl with the pigtails and the pink dress, and you'll follow her backstage where you can talk to the Runaway Five. You'll find out that The Runaway Five are deep in debt and that they can't leave the theater until they work the debt off. Once you talk to everyone and leave the backstage area, you'll catch The Runaway Five's show (in which it is obvious there is a guest keyboardist, meaning that there are technically six people on stage). After the show, everyone's dialogue will change. You can now head back to the lobby.

Wednesday, May 1, 2024

PrinceWatercress plays Drill Dozer - Part 11 of 28


Wanna see and hear me get frustrated? Here you go. Just keep in mind that it's not the worst case of me doing just that.


Area 5-1: Clink Prison


The stage starts with Grutch and Gearmo showing up at a cliffside near Clink Prison, where the commissioner looks through Jill's rap sheet. When Detective Carrie questions the reasoning behind Jill's arrest and throwing her in jail without a trial, the commissioner tells her to keep her mouth shut before mentioning that the Red Diamond is still missing. After seeing Jill in jail, we then see the Drill Dozer activate on its own, much to the surprise of Grutch and Gearmo.

Without Jill, the Drill Dozer's jumping ability will be cut in half, and you'll be forced down further into the prison by your bad jumping. You also won't be able to reach the switch on the wall. Pressing B will allow you to hide in the shadows.

When you are fighting the enemies near the blocks, aim upwards to take them out from below with the drill.

To avoid the lasers, you'll need to use the B buttons. Be sure to watch the movement patters of the lasers. If the lasers hit you, you'll activate an alarm and the red blocks will disappear, and if you hit any spark pits, you'll lose some health and get sent back to earlier in the stage. Keep in mind that solid objects can block the lasers, giving you a potential safe spot.

The security guard in the yellow suit has a fist that you can drill, and once you destroy the first, you can destroy the suit outright. Be careful, because the fist can push you back. 

Pay attention to walls and ceilings for cracks you can break through for extra chips for continues as well as the ship.

You'll need to jump up with the socket lift in order to go up with them as you get closer to Jill.

Some turrets will shoot slime. If you rotate your thumb all over the Control Pad, you'll break free faster. While slimed, you cannot use your drill, so you'll want to shake all that slime off as quickly as possible.

You'll eventually reach Jill's cell. Once you break through the bars with the drill, you'll find out that the Red Diamond contains the spirit of Jill's mother, which controlled the Drill Dozer up to this point. From here, Jill gets in the dozer, and you have total control of the drill again. You'll be able to break through the wall on the right and go to second gear, and you'll be able go back to earlier points and turn off the lasers that gave you trouble earlier, and you can backtrack to wrench blocks for more chips.

You'll eventually have to head back to the start and hit the switch to take a lift to more of the level. The officers in the electrical suits will speed towards you when you are at their levels, and you'll need to drill down into them from above to remove the screw in the suit and weaken them. From there, 

There will be green tubes in the drill ducts with a number on them. These are called cannon clamps. The number indicates the gear you need to beat at to pass through them, or else you will be sent back. This will make getting through some of the drill ducts a little tougher, as you'll need to time up the revving of your drill just to get past certain points.

The first set of blue drill ducts will lead to the Magic Spice, which is a treasure you can get early in the game. 

The officer on the jetpack will carry a gun and follow you around. When he stops moving briefly, he will shoot multiple bullets at you, and if you get hit, you'll be sent back to the beginning of the area. You may have to walk backwards while drilling to block the bullets and get away from him. When you're near the door, wait for him to stop shooting, then get in there.

You'll soon reach the office where you saw the commissioner and Detective Carrie earlier. If you press B at the desk, you'll find a note with instructions to tell lies about the Red Dozers and give them a bad rap, giving the Skullkers free reign of the city while keeping the police off their backs and the commissioner bribed. The note is signed by Croog, who we have not seen since the beginning of the game. So not only have the police been corrupted, but we still have to deal with the Skullkers. If you look at the control panel, you'll find out that the green light at the guard tower is on, and that you'll need to head there nex.t Also, if you go through the jail bars to the right you'll find some treasure painted on the wall as well as some real treasure: the Samurai Helmet.

The lower door leading to the guard tower, you'll be trapped in a room where bombs drop down. To disarm them, you'll need to remove the screws on the bombs with your drill. If the lights around the bomb are red, use R. If they are blue, use L. Always stay in the center of the room, and always shift up to third gear. Thankfully, the bomb explosions don't kill you, which is good, because a few may blow up on you before this part ends.

You'll eventually find a big door. You'll also run into Detective Carrie, who helps you gain access to the door despite not condoning what we are about to do. Outside, you'll run into the commissioner, who uses the Green Diamond to control the Sentry Tower. Avoid the laser and missiles by staying on the move and using the steel block platforms to your advantage. When the sentry tower robot strikes with its claw arm, aim up and run the drill to hit the claw. The claw will fall off and you'll be able to go in.

You'll then go into the sentry robot to enter one part of it to take out a part of the inner workings. There will be a timer, and if you don't destroy the engine for the current part of the robot you are in, you'll get kicked out and you'll have to do that part of the sentry tower fight again. Hope you brought a lot of energy tanks! Any cables you cut while inside the sentry tower robot will add five seconds to your time. That may not be much, but you'll need all the extra time you can get, as your skills with going through the cannon clamps in the drill ducts will be put to the test. The neon signs will tell you if you are doing okay with the gear shifting. Arrows will tell you if you need to shift up or down, and "OK!" tells you that you are the correct gear.

On repeat visits to the inside of the sentry tower, you'll need to take an alternate route. Thankfully, all three routes are short; they're just difficult.

On the third phase, be careful with the robot arm, as sometimes the sentry tower robot will fake you out and pull the law away at the last second. Just pay attention and you'll eventually get in to destroy the third engine. Afterwards, you'll get the Green Diamond. Detective Carrie will then tell you that Croog was seen with a fifth diamond while with the commissioner, but that she does not remember what color it was.

Once you beat Area 5, you'll get the Art Museum map, which unlocks Area 2's secret area.

Monday, April 15, 2024

PrinceWatercress plays Willow for NES - Part 11 of 11


It took some doing, but I finally beat this game. Capcom did a swell job with this one.


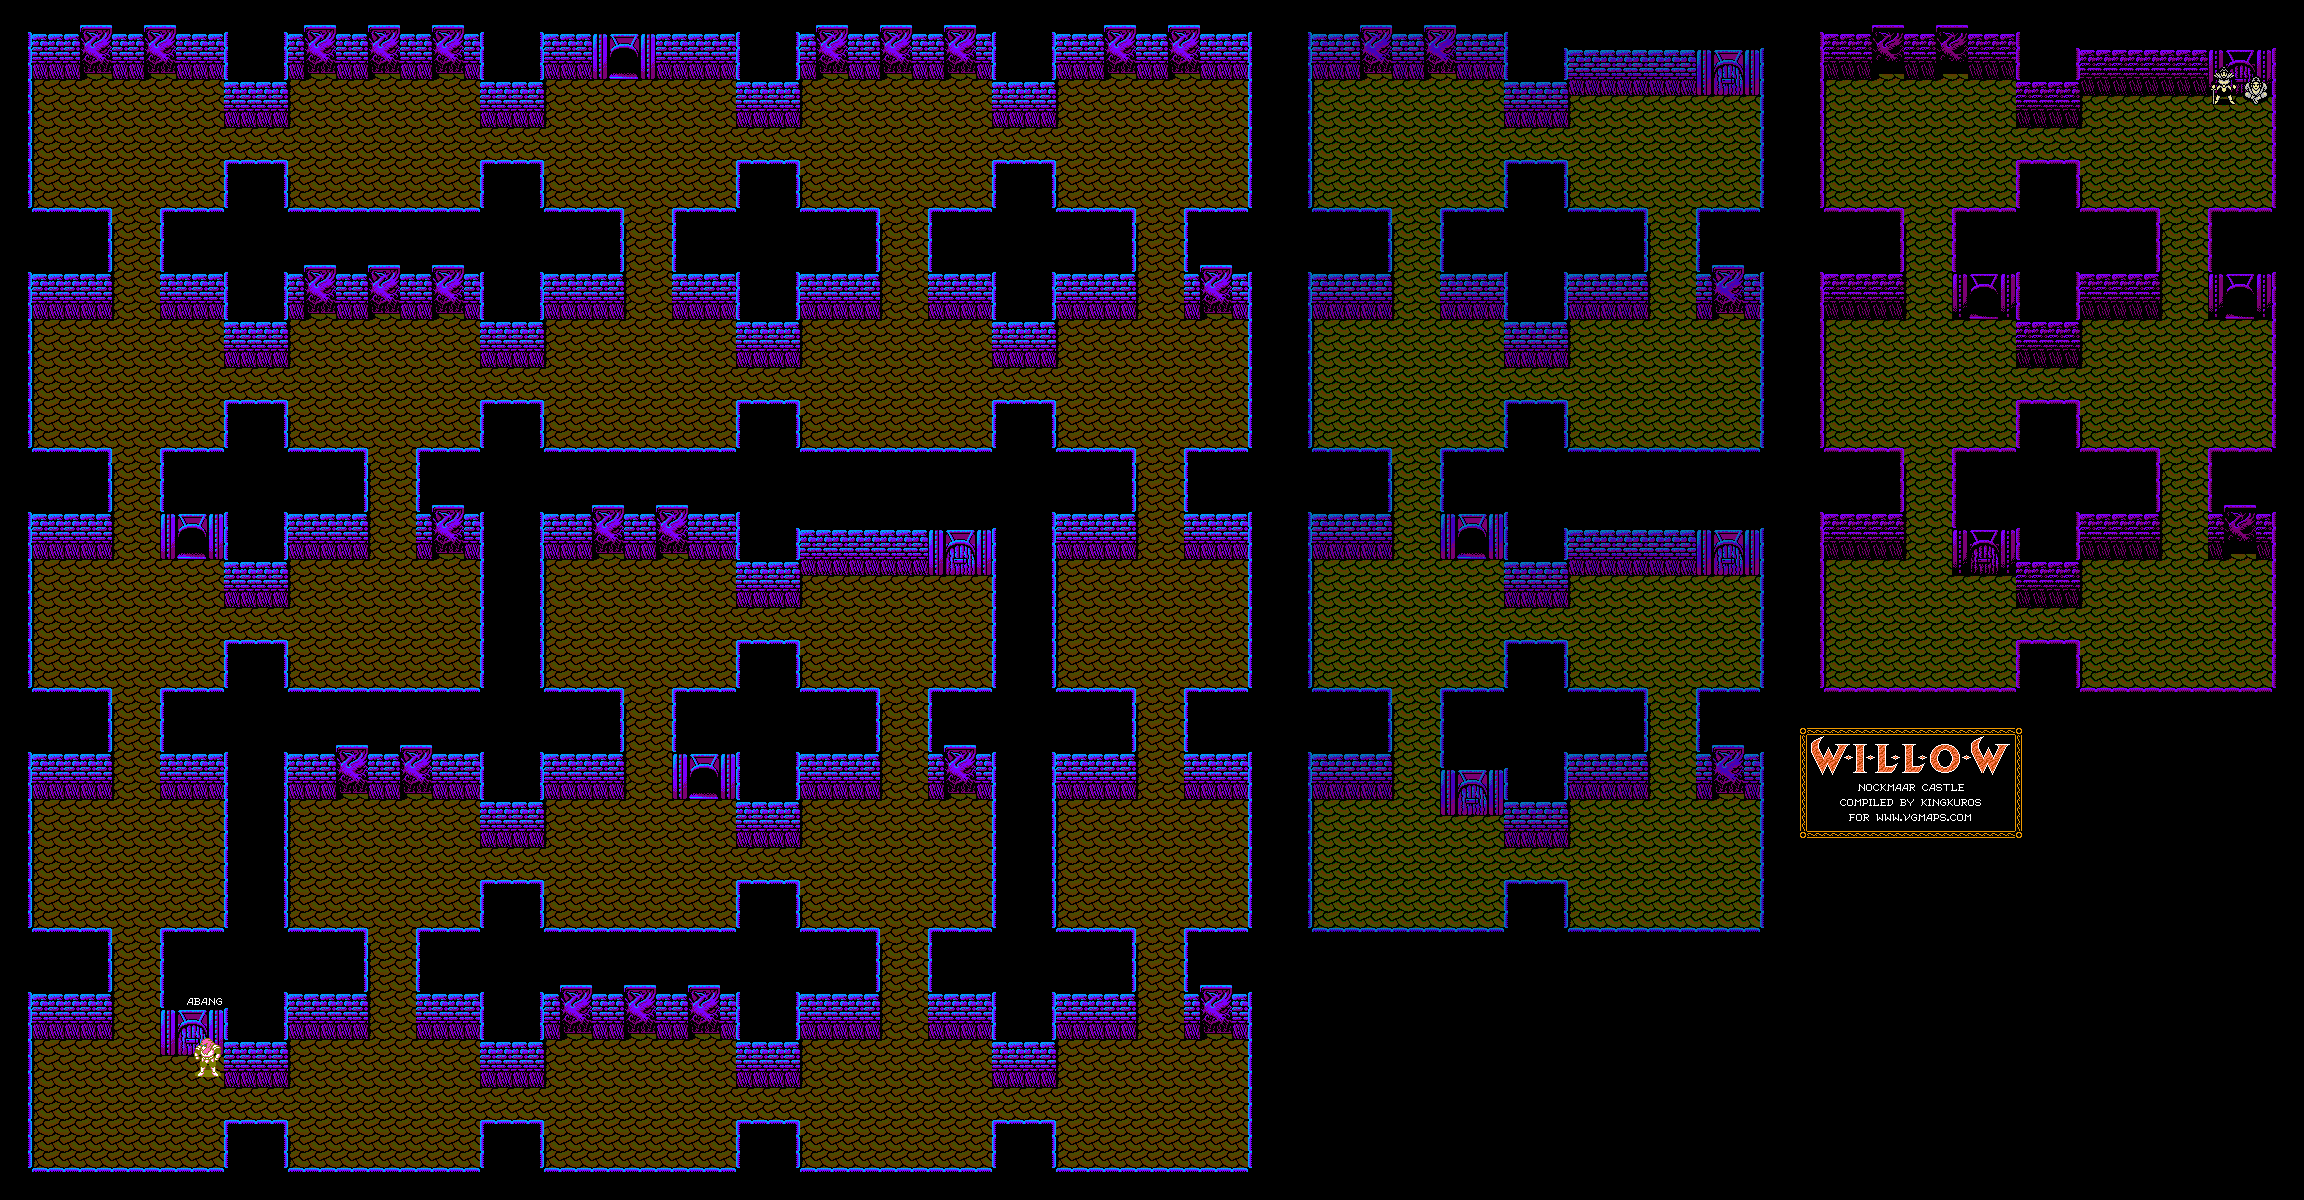
The door that Abang was standing in front of is a dead end. Instead, go north and east of that door and you'll be able to find the doorway that continues into the castle.

At the next floor, go north, then east when you can't go north anymore. Go through the door and enter the next floor. When you go north and east again, you'll meet Sorsha and Madmartigan. Sorsha won't let you escape, but Willow throws the Powder of Unrequited Love/Dust of Broken Hearts at her. Sorsha dodges it, and just like in the movie, Madmartigan falls in love with Sorsha. Sorsha then has a change of heart and tells you that the Crest of the Spirits is in a treasure chest in a cave below the castle.

Go through the door that Sorsha and Madmartigan were standing in front of and continue. You'll meet General Kael (a reference to well-known movie critic Pauline Kael), and he's given the Crest of the Spirits to Bavmorda. He's really easy if you know what to do. Stay down and to the right of him, and stand still and swing the sword at him. Since his attacks do a lot of damage, be sure you're healed up. If you do it right, you'll be able to corner him and take him out very easily. If you're all the way to the side, General Kael will go berserk and you'll get absolutely destroyed.

Enter the door to the north, cross the bridge, and then enter the door in the lower-left room. The rest of the path is fairly straightforward.

You'll then be in a square room with no visible exits. You'll finally meet Queen Bavmorda. She'll run around the room and leave flames behind. Equip the Magic Cane and fire it at her whenever she's close enough to you, so that you leave no margin of error between you and her when it comes to your shots. This cane obviously requires MP to use, and if you mess up here, you're done for.

When you beat her, you'll get the Crest of the Spirits back. You'll then fight Bavmorda again. If you were expecting this to be even more difficult, you're sadly mistaken. This time, she'll use the exact same tactics, but you can hit her with the sword. Just stand still and swing the sword repeatedly as soon as she comes towards you. Problem solved.

After the battle, Queen Bavmorda is struck by lightning and defeated, and your quest is over. Enjoy your ending!

Friday, March 8, 2024

PrinceWatercress plays Ka-Blooey - Part 11 of 25


Back to four levels to keep everything better compartmentalized, as the game gets a little bit harder.


Level 57

Hit the switch at the start, and keep hitting all the switches that pop up as you avoid the ball enemy. There will eventually be a small bomb in the lower left corner of the level after you hit all the switches. Detonate that small bomb and move right. Head to the right and detonate the small bomb near the teleporter, then enter the teleporter. Move up, detonate the small bomb and move left. Detonate the small bombs that you see as you keep going left, and on the fourth small bomb, go left and then up across the ice. Keep going up and hit the switch, and hit the switches that pop up while using the cracked titles as a means of avoiding the rotating orbs enemy. After hitting the last switch, a small aerial bomb will pop up on the upper right corner of the level quickly detonate it and move right.

Level 58

Hit the switches at the start, and watch out for the enemies while trying to go down across the ice tile you have spawned to hit the next switch. Go back up and to the left, and go south across the other ice tile you have spawned to hit another switch. Go back to the small aerial bomb and move down across the third newly-spawned ice tile to hit another switch, then go back to the small bombs in the lower right corner. Detonate the one in the corner first, then go all the way to the left and detonate the bomb on the rivet tile. Go back to the right and detonate the small bomb that you skipped, then detonate the small aerial bomb at the start and move up.

Level 59

Place the swell bomb in the slot tiles at the start on the lower left tile of "the square," then place the medium bomb one tile up north of the swell bomb and the small bomb one tile to the east of the medium bomb. Detonate the small bomb when the swell bomb is small, then move right and enter the upper teleporter. Take the blue guy into the nearby teleporter, then move the blue guy into the middle teleporter. Move the blue guy to the right to get rid of the small mine. Enter the nearby teleporter, then the middle teleporter yourself. Move right, then up across the ice and detonate the small bomb at the end, then move back down across the ice. Detonate the small bomb to the right of the small mine and move up, then detonate the other small bomb and move down. Detonate the medium bomb and enter the teleporter. Enter the lower teleporter. Go up to the small bomb to the right of the ice tile, detonate the small bomb and move left. Go left across the ice and detonate the last small bomb, then move right.

Level 60

Hit all the switches that you see as you move around the level while avoiding the enemies. Detonate the small bomb after hitting the second switch. Hit the switch near the temples. Move all the slot tile bombs to the left and away from the bombs near the large mine. Detonate the small bomb near the large mine and move either left or down, and make sure you take out the bouncing ball enemy. Take the blue guy to the mine at the temples. Detonate bombs near blue guy location. Detonate small aerial in lower left corner, with all slot tile bombs around medium aerial, then move up.