Part nostalgia-bomb, part note-taking and part FAQ, what started in GameTrailers as a video game blog is now on Blogger. This blog is a look back at video games, both popular and obscure, from the video game industry's infancy all the way to the previous console generation.
We're halfway through the game! More fun challenges lie ahead...
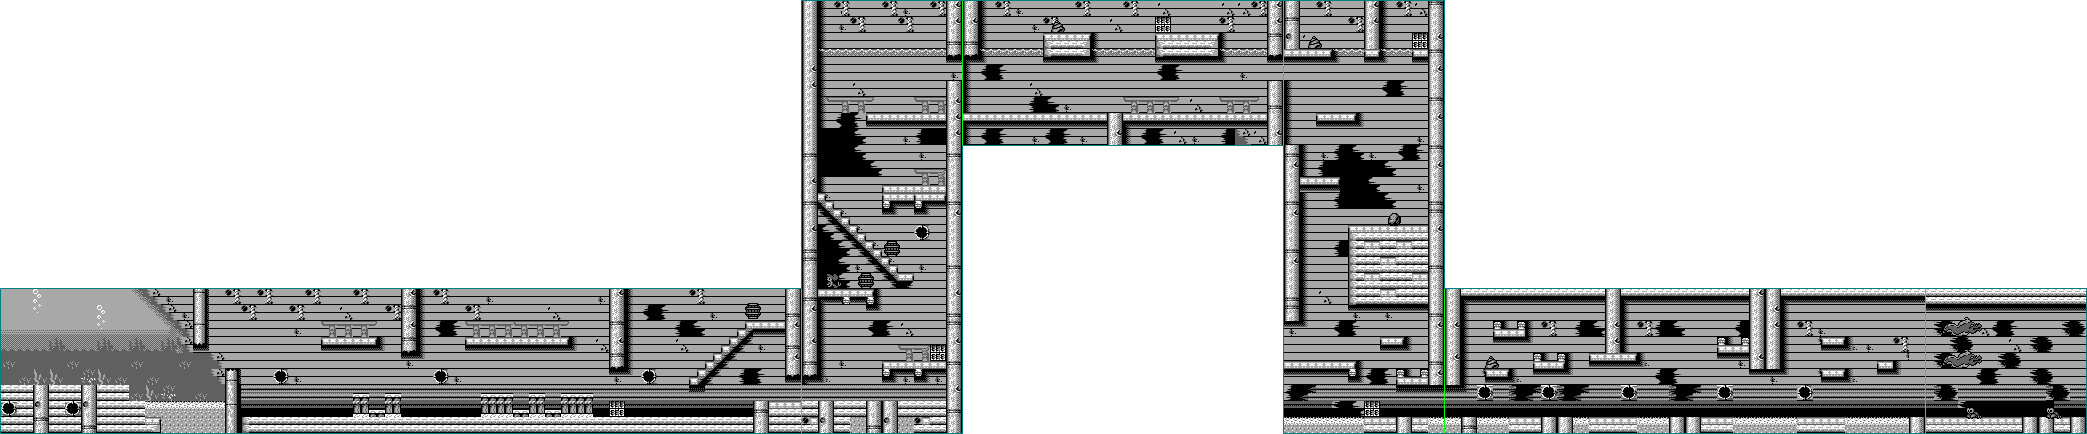
Stage 13: Winter Waters
The ice cubes with the faces will bounce forward at you, so don't go through the stage too fast.
The cave with the Z's coming out of it is just here for show.
You'll have to carefully jump across the cloud platforms in order to make your way closer to the end. Jump to the right at the very last one to reach the goal.
Stage 14: Steel Elevators
The rats wearing red stop at the edges of platforms, and are fairly fast.
The steel pipes are elevators. Go into them, then press Up or Down to use them.
Leap into the hooks to hang onto them, then hold Up and Down to move them up and down. If you need to, hold Up while leaping toward the hook to ensure that grab onto it.
Stage 15: Gift Wrapping Dept.
The knitting needles slowly move towards you, and can be easily defeated. Other than this, this is your typical "workshop" like level with conveyor belts and heart platforms.
If you jump through the parts of the conveyor belts that turn you into presents, you won't turn into a present.
Also, there's another brick wall monster in this stage.
Stage 16: Magic Bubbles
Another cave level.
If you take the lower path shortly after the start of the level, stay to the right of the magic carpet so the boulder enemy doesn't hurt you. You can eventually take the other path, which is good, since the higher path leads to a checkpoint and an extra life.
The helicopter enemies will fly towards you. Keep an eye out for them.
Stage 17: Louse The Mouse
This stage was called "The Attic" when it was ported to Super Nintendo.
The Attic is a bit of a very linear maze. You will have to make your way through the area to open the door to the chimney and continue on.
Spiders will move up and down, and can be easily zapped. The ghosts, on the other hand, slowly move back and forth and are indestructible.
Barrels can be ridden on to get past the coat hangers with the boxing gloves. You will have to jump over the coat hangers to avoid being knocked back.
The cacti are like spikes, and they only do one point of damage.
The switch can be activated with your magic attack. Once you hit it, go back to the locked door. You'll be able to go up the chimney automatically. There is a flame power-up that will last the whole next section, which is on the roof of the house. When you hit the star, you'll climb down another chimney, and you'll be in yet another maze. It will be easy to get to the bottom though. When you do, head to the right. Hit the switch, and you'll face the boss.
The boss is a giant mouse, and this boss battle is a bit more complex. Go all the way to the right and get to the platform that the boss is on so the boss chases after you. Hit the switch so that the ten ton weight lands on the mouse. From there, hit him with your magic attack. If you don't, you won't be able to damage the boss. After enough hits, the boss will go down. Make sure your aim is good, as the boss is faster on the way back to the platform.
Stage 18: Over Japan
It's Rocket Dog! There are dogs on rockets. Why? I don't know. Avoid them, as hilarious as they are.
You also want to avoid the kites, which will make your gifts bounce upwards and out of sight if they hit them.
It's now time for the second half of the game. Interestingly, there are difference between this version and the Super Nintendo version.
Stage 7: Before The Flood
I didn't even know that they changed the name for this stage until I sat down to re-tool this guide for Mega Drive. Huh. (It was "Flooded Basement" on Super Nintendo.)
There are some new enemies here: mice in scuba gear that move back and forth as well as spiders that move up and down.
Be sure not to move too fast in this area, you never know when you might run into a pit.
Be careful on platforms; some of them will fall under your weight, others move when you get on them, and others still will move in and out of the wall in the background.
There are some guys who are coursing with electricity who move back and forth who hide in some presents. Be ready to zap them when you see them.
As you go through the stage, you'll see the water. When you do, you want to get to the end a little more quickly, as the water will slowly rise. If you get caught in it, you will drown in it if you spend too much time in the drink.
Stage 8: Wood Factory
The music here isn't much different from the Super Nintendo version, though it is a bit slower and more relaxing.
There's another brick wall monster. Fun fact: the Mega Drive version was made first, and the Super Nintendo version was made later. When the Super Nintendo port was made, the brick wall enemy did not come along for the ride.
The hearts are platforms that move up and down. Be sure to be near the center when you land, as you can phase through the corners if you're not careful enough. Also, some red packages explode, as they contain bombs that explode after a short time.
There are some paths you can take for more enemies to kill and more power-ups to take. The worms slowly move back and forth, and conveyor belts nearly stop them cold if they move against them. As a matter of fact, the conveyor belts affect the movement of enemies, not just you.
Watch out for walls with punching bags in them. They can't hurt you, but they do make a return here and they can nearly give you a heart attack if you're not expecting them.
Stage 9: Magic Cave
The little brown guys with the jagged teeth move back and forth.
The army tanks will shoot at you if you are on their level and they are given enough time to do so.
The rocks that seemingly have faces do have faces and will come to life and jump at you if you get too close. Not even Anti-Claus can destroy them, so you're better off running under them when you see the magic that gets them animated.
Watch out for stalagmites that seem to be too bright to mix with the floor. If you run into them, they launch you back quite a bit.
Stage 10: Steel Factory
You'll be doing some precision platform. Again, be sure you are landing dead center on the platforms.
Unlike the Super Nintendo version, there are now brown tanks. They are just like the green ones.
The race cars go back and forth, and they can go pretty fast.
The purple airplanes float in the air, and they can also drop bombs. Be sure to attack them from a distance.
There is an extra life just above the exit.
Stage 11: The Timekeeper
The Timekeeper is a huge sentient clock. Get close enough to get him to jump at you, then jump away and head back to the ramp. From there, either jump on him or use your magic and hit him six times before you die. If he stops rolling back and forth on the ramp, you'll have to approach him so he jumps at you and rolls around on the ramp again. Make sure he doesn't spit any gears on you after the first cycle.
Stage 12: Over Russia
It's another flying level. This time around, you will be avoiding space satellites while dropping presents into the smoking chimneys. Remember that if your reindeer make it to the edge of the screen, you won't be able to move any further in that direction.
Oh, and you'll see the Kremlin as you near the end.
Only days before Christmas Santa slept in his house, An evil plot was brewing Cooked up by awful louse The cold and evil snowman Scared all the elves away. Timekeeper stole plans From Santa's house that day But for the vicious louse This wasn't bad enough; I'm really gonna show 'em I'm gonna play rough!!! He tore the presents open And on them cast a spell That's when Santa woke up Something wasn't well! All his elves had vanished His presents also gone And threats were awaiting surely more than one! Beware the magic potion Calling Santa's evil twin The angry Anti-Claus, His fiend from within! So Anti must be Santa Pick presents all the way To face the foes so bravely And make it through the day Go beat the evil bosses Who's lurking in the dark Find his sleigh and reindeer Set out to make his mark Find every stolen present That was unjustly craved For every kid on the earth Christmas must be saved!
And you're going to be doing this for 24 stages, one for each day before Christmas. Time to save Christmas in this Australia-only release and one of the first games developed by Norwegian developer Funcom!
Stage 1: Santa's Hallway
Love the advent calendar before each stage, as well as the art that you get before the stage begins.
Controlling Santa is simple enough. Left and Right let you move around, Up and Down let you look up and down respectively while Down lets you crouch, B lets you jump and A and C lets you shoot a projectile that will let you open up red and gold presents to find items. You can find elves for points, power-ups, and even enemies. You can also use that projectile to destroy your enemies with Christmas magic and turn them into blue presents. You'll need to collect as many as you can for later stages.
If you hold Down and Left or Down and Right, you can crawl. I did not even know this until after making Let's Plays of both versions of this game, believe it or not!
If you hold Left or Right before jumping, you will go farther and have less stiff-feeling jumps than if you jump and then move Left or Right.
Hats refill one of your hits. You can have up to five hits.
Bombs will blow up when unwrapped, so stay away from them.
The bell is a continue point. Run into it to trigger it, and you'll be back there when you die.
The Santa Head is an extra life.
The couches can help you jump higher. Just press B as soon as you are about to bounce on the seat.
The enemies here are pretty simple. The rats in overalls move back and forth, and they have a nifty animation where they kick at you if you are close enough.
The candy canes can be climbed on by holding Up on the Control Pad while jumping into them. You can hold Up and Down to climb up and down, but the candy canes will
The coffee turns you into Anti-Claus. You'll be invincible and be able to run through enemies, but you cannot pick blue presents up or open red and gold presents until you return to normal.
The brick wall enemy is exclusive to the Mega Drive version. You'll have to turn into Anti-Claus to beat him
The star is the goal. Touch it to go to the next stage.
Stage 2: Let It Snow
This stage will be over before you know it! That's how short it is!
Penguins will waddle towards you and throw snowballs, while snowmen will throw their heads at you. The jack-in-the-box can be easily destroyed when it is on the ground and not jumping about.
The first pit that you come across is the exit. Told you it was short.
Stage 3: Ice Cave
You drop down into a cave at the beginning of the stage. Makes sense.
Be sure to use Up and Down on the Control Pad to look up and down, it can stop you from making leaps of faith, even though the level isn't too difficult.
The owls fly around in a circle, so watch where they are as you attack.
The red block with the lightning bolt on it will turn you magic projectile into a fireball. You can use the fireball to melt the ice walls and rescue reindeer for points. The fireball disappears when you enter the next stage.
The cloud platforms disappear when you place your weight on them. They eventually come back a few seconds after they disappear. The spikes do not instantly kill you; they just take off one unit of health.
The icicles will fall when you get close enough to them.
Stage 4: Blue Magic
The toy helicopters are just like the owls in the last stage.
There are conveyor belts that will slowly carry you in one direction. Be careful near them, as there are tunnels with faces - on which the eyes follow you - that will wrap you in a present when you enter them. You'll be wrapped in a present, and while Santa can quickly get out of it, it can be rather annoying. At least it doesn't take any health away.
The magic carpets will take you somewhere when you jump on them, especially over bottomless pits.
Stage 5: The Evil Snowman
Every stage before a flying stage will give you a boss, and the snowman is the first one.
Be sure not to go to fast (which is sound advice for every stage). There are some iceberg platforms that you will want to be on watch for so you can jump onto them. Be sure to watch out for the fish that jump in and out of the water, as they can surprise you when you least expect them.
If you stand still on slopes long enough, you will slowly slide down them.
At the end, you will get the fireball. You will then fight the snowman. Avoid or duck under the snowballs he throws, then shoot him in the face. When you hit him six times, the evil snowman is gone.
Stage 6: Over England
Instead of the usual side-scrolling section, you're in a flying section! Press the B button when you are over the smoking chimneys to deliver presents while avoiding all the other things flying around, such as the helicopters, as well as running into buildings. The Union Jack air balloons do not harm you, thankfully.
You'll see London Bridge before the end.
After every six stages, you will get a password, so you don't have to play through the whole game in one sitting.
The first section has you climbing downwards on a rope. Yep, it's another rope section. Just remember that the white chameleon enemies strike more often this time around compared to previous rounds
The second section is some more pit jumping, and you'll finally find the fourth power-up. It's a cross that gives you 100,000 bonus points and makes you invincible for a short time.
The third section is the same as the first, except you're climbing upwards and not downwards.
The fourth section has the hunched-back creatures, the bat creatures and the worms. The worms are pretty fast. Stay on the tree branches to avoid as many enemies as possible.
The fifth section has even more tree branches compared to the last section. Stay on those, but beware of the yellow fur hide enemies as well as the beast riders; you'll need to take them down, especially if the former are in a totem pole formation.
The sixth section is inside a castle! Finally, some different scenery! Strike the horseback enemies as quickly as possible to take them down. This section will have the same enemies as the previous one.
To beat the final boss, run under him at the start of the battle and hit him twice. You'll want to do this for the first two hops the boss makes. For the third, you'll want to be to the left of him and ducking while attacking to avoid the claw hand that he shoots out. You'll want to keep using this "two under, one back" strategy as you fight him to beat the guy up without getting killed yourself, and hit the guy every time he lands on the ground. When you beat the final boss, peace will return to the land! You did it!
Once you've played up to this point, you've seen almost everything there is to see in this game. All that's left is to make it to the end.
Round 4
The first section has a low road, a middle road and a high road. You'll be dealing with flying enemies as well as enemies that will move through the ground to go up a level, making it so that no one road is completely safe. Fireballs also come out of the pits here.
The second section brings back the horse riders as well as the guys in the yellow hides that ac as totem poles
The third section is another rope section.
The fourth section is another waterfall area. Once again, be ready to jump onto platforms while dealing with the yellow flying creatures.
The fifth and final section is easy if you stay on the high road, jump on the fireballs to boost yourself over and just run through the area quickly.
The boss here is the one from Round 1. Same strategies apply.
There's some familiar territory, but there's also a few things returning and showing up here, as well.
Round 3
The first section is another rope section.
The second section brings back the enemies from the very beginning of the game.
The third section is more of the same.
The black gem with the green T on it gives you twenty extra seconds for your timer.
The fourth section has the yellow hunched-back enemies as well as the yellow guys that come out of the openings in the background wall. The brown bat enemies will swoop down on you.
The brief fifth section has you jumping over pits.
The sixth section brings back the hunched-back enemies and also introduces bridges. Be careful when jumping.
The boss here is much like the second one. If you need to, jump on the fireballs to take him down.
The running, jumping, climbing and fighting continues in Part 2! Run, Rygar, run!
Round 2
At the start of this stage, you'll have to deal with yellow flying creatures, fireballs and pits. If you have the fifth power-up, you'll be able to take out all enemies very well; if not, just keep running and take the ones behind you out when they get too close.
You'll then be climbing up a rope. The same strategies for when you climb down are the same for when you go up.
In the third section, you'll start seeing tunnels above the high road. Destroy the guys when they come out. The yellow hunched-back enemies also return here.
The fourth section is just like the first. Just remember that you can jump on enemies to make some jumps easier.
The fifth section has you climbing down a rope. The strategies from the first section still apply; thankfully, this section is mercifully short.
The sixth section has walls that block your path. Take the low road as soon as you start it, then return to the high road when you reach a dead end.
The seventh section is more horizontal pit jumping.
The eighth section has horse-like enemies, some with horseback riders. They take multiple hits to kill Take them out from a distance. As for the guys in the yellow hides, take out the top guy when they stand as a totem unless you can hit them from a distance. One of them can show up from behind if they show up in groups of four, so watch your back.
To beat the boss, stay close as he flies back and forth, then hit him a few times up close before backing away to avoid the fireball. If you have power-ups, this battle is even easier.
Yep, it's Rygar...but this version didn't show up in the West.
Round 1
Left and Right let you move around, Down lets you duck, Button 1 lets you attack and Button 2 you jump. Holding Up while attacking lets you attack upwards.
From left to right, you'll have your amount of lives and your current score, your current time remaining and the power-ups that you have. You'll score your first extra life at 50,000 points, and you'll earn more at 200,000 and 500,000. You won't get any more after that.
The enemies are pretty simple at this point. You don't have to duck to hit the zombies, but you will have to duck to hit the beasts. Hold Up on the Control Pad to hit the flying beasts that drop enemies.
Every so often, medals pop-up on screen, and if you hit them, you will reveal power-ups. If you hear a clinking sound, you'll known an important one has popped up. The icon that looks like a tiger head allows you to destroy enemies when you jump on them instead of just stunning them. It will be in the third slot of your inventory.
For the first section, just stay on the upper path. When you see the cave wall for the background end when you enter the second section, take the low road. (The spikes don't actually hurt you.)
The yellow flying enemies will dive at you. Stop and attack upwards when they show up. The brown blob enemies will move up from the low road through the ground into the high road. Take them out up close before they shoot fireballs at you. The yellow ground-based enemies just move forwards.
If you jump on the fireballs leaping in and out of the pits, you can bounce off of them and get to the other side safely.
The power-up for the second inventory slot makes your weapon bigger and more powerful.
The power-up for the fifth inventory slot gives you the ability to twirl your Diskarmor around in a semi-circle if you hold Up while attacking.
The power-up for the first inventory slot doubles your range, allowing you to attack anything on the far end of the screen.
In the third section, you'll be leaping from one platform to another as you traverse a mighty waterfall. The fifth power-up is really useful here.
The light blue gems just give you points.
In the fourth section, you'll be climbing down a rope. Wait for the white chameleons to attack before lining up and hitting them. If you see a yellow demon drop down to the top of the screen and move back and forth, take care of it immediately before it either dives at you or shoots out spiders. If you need to, press Left or Right to dodge the dive attack. The spides won't hit you unless your dodging to the left or right.
The worms will unravel to travel through the ground from the low road onto the high road before rolling back up and moving towards you again. The yellow enemies that are hunched back will dive at you if given the chance, so take them out as soon as possible.
To beat the boss, hit him twice, then back away. Make sure not to get too close, or he will leap out at you. Keep doing this until he dies. Having the first power-up really helps here. If you don't have it, hit once before backing away.
After Stage 3, Flounder will tell you there's serious stuff going on at the undersea volcano area. That serious stuff comes in the form of erupting undersea volcanoes. At least the fireballs from them are easy to dodge, as they come out very slowly.
You'll also see sandfish hiding in some sand pits in this stage. If you don't get close enough to them, you won't have to worry about sand popping out before they rise up to hit you.
The shrimp are the most annoying enemies in the game. They move quickly in your direction after they stand still for about a second.
The boss here is a fish with a music conductor's rod. He'll command the cannons on the sunken ship to shoot at you. Avoid the urchins and encase the fish that are shot out of the cannons with your bubbles, then send them back at him. It only takes a few hits to take this guy out of commission.
The evil faces are doors. Don't go into the first one by pressing A at it; instead, go right to the next one. Go in, then go back through the door. You'll be in an enclosed area. Go through the door again and you'll finally be on the right track. The rest of the maze is pretty straightforward.
Aside from the sleeping fish that shoot three miniature fish at you, there isn't much in terms of new enemies.
Ursula is dead simple. She shoots a bunch of spiked balls that turn into fish, starfish and sea urchins, but everything's really easy to avoid. Encase the fish in bubbles and shoot them at her head. That's it, honestly.
But just when you think you've got this won, you have to face a much larger Ursula with a trident.
Believe it or not, she's even easier. All she does is send fish (and nothing else) at you from both sides of the lower half of the screen and change the current of the water (just watch the trident), making it a little bit more difficult to move around. Unfortunately, that's all she does, and you can just encase the fish in bubbles and send them flying towards her head.
When you beat Ursula a second time, you've done it! You've won!
Believe it or not, some of the Disney-Capcom games had Game Boy ports. This was one of them, and interestingly, this one made it to Europe but missed Japan, unlike the NES version, which hit Japan but missed Europe.
The game takes place during the second half of the movie, it seems. Ursula is back, and she's taken control of the fish and making them do her bidding. If she isn't stopped, she'll eventually take over the whole sea. Ariel becomes a mermaid and heads back into the sea to stop her.
Being meant for girls, this is probably the easiest of the Disney games...but it's actually really fun if you like Capcom's Disney-based material.
The stages in the Game Boy version are the same as the NES version; they're just in black and white now.
Well, you're underwater, so feel free to move in any direction you need to. Ariel can move pretty quickly if you need her to, and it's like a shoot-'em-up where you can move in any direction as well as turn around. It really makes the game easier to get into. A lets you attack, and holding B lets you move faster.
Though you have five hearts for your life bar, you'll always start with three. This happens whenever you start a new stage. You can find hearts in certain areas that will be able to add one heart to your current health.
The enemies are pretty easy to deal with for the most part. Most of them will just swim towards you, but a few of them, such as the octopi, will shoot projectiles. You can fire bubbles at enemies with your tail, trapping them inside a bubble and allowing you to grab them to either throw them into a ceiling or at other enemies or hold them in your hands and ram through them. You can also pick up conch shells that you may find to do the exact same thing, but they also let you break open the chests to get treasure and health, so you'll definitely need them. The treasure just adds points to your score.
The dark and light pearls are the most useful. The light pearls give your bubbles increased range, while the dark pearls give you increased power. You can only have range or power...not both. You can increase your range or power up to three times, and if you switch from range to power (or vice versa), you'll increase the new stat while the old stat goes back to normal. Thankfully, this isn't set in stone, becuase if you reach maximum speed or power, you'll be able to reach maximum on the other stat afterwards without powering down the stat that's been been brought up as far as it can go.
The Ariel doll, if you find one, will grant you an extra life.
The octopi will be the first of the bigger normal enemies in the game. Unlike the smaller enemies, the bigger enemies cannot be encased with the bubble attack. Instead, you'll have to encase a smaller enemy and let them loose on the bigger ones.
The boss here is a shark. He takes four hits to defeat. He sends fish after you, which you can then attack with bubbles and send into him. He'll move to the other side of the screen and send more fish at you, but he's a real pushover.
When you beat a stage, you'll get a stage clear bonus as well as bonus points for any treasures you collected.
Flounder will tell you that Urusla is headed towards the sunken ship.
Hit the barrels with your tail to send them moving. They can get rid of enemies and also open chests if they run into one.
You can leap out of the water and onto dry land, but if you do that, Ariel will just hop around in the direction you move her until she enters water again. To do that, hold Left or Right on the Control Pad and the B button, then hold A to leap through the surface of the water. Once you're on dry land, hold the direction you want to go and keep tapping the A button. If there's a conch shell in the way, Ariel will push it forward. When it drops into the water, you can use it to open a chest and take down enemies on the way. Much like the smaller enemies, you can send them upwards, which is useful for reaching treasures on dry land. Just send them up through the surface of the water towards the chest.
The sea urchins move across floors and are indestructible. At least they aren't very big.
There are certain gaps in floors and corners where you can drop conch shells and bubble-encased enemies to get power-ups. You can get hearts to refill and extend your health this way, so give it a go. To extend your health, collect big hearts. You'll refill your health while adding one unit to your maximum health.
The boss here is Ursula's pet eels, Flotsam and Jetsam. They'll always change places as crabs drop from the ceiling. Hit the crabs with the bubble attack when they stand up, then toss the crabs at them.
When you beat this stage, you'll find out Ursula has frozen the sea. Yes, even though the game takes place almost entirely underwater, we still have ice physics.
Well, at least the ice physics apply to the platforms only. You'll hop a little farther on dry land, but not by much.
At this point in the game, you'll come across treasure chests that contain nothing in them. Once you get used to where everything is, you'll know which to avoid. They usually show up in areas where there are two chests nearby, but only one conch shell. Thankfully, the location of the chests that contain power-ups is fixed and does not change every time you play.
The seahorses will usually move downwards when you move towards them if you time it right, so getting rid of them isn't a problem.
The boss here is a walrus. Use the conch shells he sends at you and throw them back at him. The frozen fish in the ice cubes cannot be used against him, so just wait for the conch shells to come down and hit the boss with them. Yet another easy boss.
To beat the guys who come out of the ground to slash at you, just crouch kick them. If they hit you, just get close and wait while crouch kicking to hit them when they come back up. Some of these guys will be on the ground rather than in it; you'll want to crouch kick them as well.
At the world map, go north. To beat the three guys stacked on each others' shoulders, wait for them to come to you, then stand still and punch the one that drops down at you. The other two will approach; punch them. If you get hit by the first guy, just wait for them to approach you and try again. If they get too close, all three of them will attack you at once; use crouch kicks if that happens.
At the end, go southwest. You'll meet Garokk, who reveals that he is invincible as long as a seal is not broken. You'll also bring your maximum HP as high as it can go. You'll have to go back through the previous area, but it is far easier to make your way left than right as more enemies will appear behind you.
Back on the world map, go north. You'll meet some guys with flamethrowers. Keep the flamethrower on the screen at all times, and hit everyone else with crouching kicks. If the flamethrower guys get too close, duck down so the flames don't hit you.
From here, go southwest. You'll face Gross, who has a jumping punch. Keep using jump kicks, and when a dark black column surrounds Gross, hold back to get away and block the attack and keep from taking damage. When you get the last punch in, you'll restore Gross' memory and increase your defense while refilling a little bit of health.
You'll have to go through the previous area (again), but you can take out the flamethrower guy so that you can get the next flamethrower guy to appear behind you. From here, head west. You'll have more teleporter guys and projectile-throwing guys, but at least this area is short. You'll meet Rob, who tells you that there is a secret in the west mausoleum.
Head northwest, now that you've talked to both Garokk and Rob. You'll finally be able to enter the labyrinth. Enter the first three doors to fight some enemies for health, and if you need to, drop down the hole past the fourth door to "reset" the doors and keep your health high. When you're done, jump over the hole and keep going right. At the box, keep going right until you reach the hole at the end of the hallway.
Go down that hole and head left. Just like on the last floor, you'll be avoiding arrows, but at least you won't have rocks rolling at you. When you see a door, enter it for enemies and health, then keep going left while avoiding ceiling spears as well as a ceiling knife that you won't see coming unless you know it's there. After that knife, drop down and go right. (If you need health, go left until you reach a door that you can enter for enemies and health. From there, go right.)
The first doorway you see on your way to the right has more enemies and health. From here, jump over the hole and avoid the ceiling spears as you keep going right. Drop down the hole at the end, go left, fend off the axes and keep going left until you reach a box. Drop down and head to the right, and avoid the flame jets as you go. Drop down and go left again, and drop down the hole after the ceiling spears.
From here, head left, and jump up and left at the boxes. Avoid the ceiling spears as you keep going left, then drop down the hole and go right. Drop down the next hole and go right again. You'll be avoiding boulders as you continue right. The door you see on the way contains more enemies and health, and will be the last one to contain such before you reach the end. You'll find a purple statue that will change into an obelisk, and you can now try to solve the secret of the seal. You'll also get your health completely restored.
Back at the world map, go southwest. The staff enemies will be back, and you'll have to use crouch kicks against them like you did in Chapter 3. At the end, you'll meet Cynara, who will tell you that you will have to fight Garokk twice.
From here, you'll have to go back to the previous area. Thankfully, you don't have to go through the labyrinth again. From here, go east again and fight off the enemies. From here, go east. If you go southwest from here, you'll get an arena that is unnecessary to go to. (If you went to the arena, you'll face a guy with a boomerang. Keep hitting him with crouch kicks, and if he backs off and throws the boomerang, duck to avoid it. This battle is completely optional, but you do get some health back.)
You'll have to deal with the teleporting and flamethrower enemies one more time, but once you do, go north when you return to the world map. You'll face Garokk. His first form has very little health, but when you defeat him, he will turn red and he will have a big health bar. Garokk will repeatedly jump around and try to jump kick you. Block the black energy wave like you did against Gross, and stay near the left side while trying to jump kick him. If Garokk jumps over you and gets himself corner, face him and keep punching him to death so you can get the final blow on him as quickly as possible. He also has a multi-punch attack, but you can move back to avoid it.
When you beat Garokk, Garokk will immolate himself, and you'll beat the game. Max will tell Aarzak to spend his life together with Alyssa, and you'll see everyone you met throughout the game in the sky one last time. You just beat Last Battle!
The game isn't getting any easier as we face our brother and try to save Alyssa.
Chapter 3
At the beginning, you'll be on a ship. Soldiers will come out from both sides of the screen, and some will have shotguns and harpoon guns. When you reach the end, run to the right and keep punching to get a few hits in on the captain of the ship. If you can get in front of the man and trap him in the corner, you can just punch him to death before he can do much of anything. When you win, the captain - whose name is Daredevil - agrees to help you get over the sea.
Back on the world map, go northeast. On this smaller ship, there are a few enemies, but that's all. Some of the enemies have fireball guns. Regardless of projectile, jump over low shots and duck under high shots.
Continue to go northeast on the world map. Here,take out the guys spinning their blades with a kick. Use a crouching kick on the guys with the gold staves, and stand still and kick the birds when they dive down.
Back on the world map, go south. You'll meet more of the enemies from the last area. Some will throw projectiles, and you'll want to stand still and kick them (or crouch punch if you're powered-up). You'll want to do it this way, as it works better and there are few healing opportunities in this chapter. When you reach the end, you'll meet Duke, who apologizes for being unable to save Alyssa. Nevertheless, Aarzak is proud of Duke for turning over a new leaf. You'll then increase your maximum HP.
From here, go west. To defeat the guys that jump up and down while slowly moving towards you, just duck down and kick them. You can also hit them with a jump kick, but the crouch kick works better and they're less likely to teleport and re-appear on the other side of the screen. (Plus, I find out the hard way on Chapter 4 that crouching kicks work better, anyway.)
Back on the world map, go south. This place is entirely optional, but if you beat it, you'll increase your defense after meeting Cynara. (You can also get more practice on the teleporting enemies.) From here, head east. To beat the boss here, stop near the bridge and keep performing crouch kicks. If you get hit, use a jump kick or more crouching kicks. The boss can also create a clone of himself that does not have the blue matador's cloth, and that clone can hit you, too. If you get crowded, keep crouch punching at the guy with the cloth. You'll get a little bit of health back when you win.
To the northeast is another city. You'll have to face more enemies and even more birds as you move to the right. When you make it to the other end, head east.
Enter the door at the start and fight enemies to regain some health, then go right and fend off the axes thrown at you. You'll see another door soon. Enter that door and fight more enemies to get more health back, then go right. Watch out for the knives that drop down as you keep an eye out for the arrow coming in from the sides. You'll see another door. Go in and fight more enemies to refill more health. Further to the right is a set of boxes. Jump up and to the left at the top, then drop back down the hole and go to the door you just went through. By going up or down a floor, you "reset" all the rooms with enemies in them and make it so that you can re-enter them and fight enemies to refill your health. You can keep doing this until your health is full, and you'll need full health as there is a boss at the end.
Go up a floor when ou're read and head left. Watch out for daggers dropping from the ceiling as well as ceiling spears as you head to the left, and leap up and left at the top. Go up the boxes, then jump up and right. Go to the left and avoid the floor spears. The first door is empty, but the second door contain enemies and a chance to refill health. Go left after this and jump up and right at the top of the boxes.
Avoid the ceiling spears as you go right, then leap up and left at the boxes. Jump over all the rocks as you head left, then enter the first door you see for more enemies and health. After this, go left, leap up and right at the boxes, and watch out for falling rocks as you go right. If you need to, go down the hole that you see and enter the door to your left for more enemies and health. Even though you'll be going in a loop, this will be yourl last opportunity to get your health back to full.
When you're done, jump over that hole and keep going right while still avoiding boulders. Jump over the next hole that you see, then continue right. When you see the "prison bars" on the wall, keep going right. You'll fight Gromm. To beat him, jump kick him, then keep moving back. If you get cornered, jump over him. If you see him jump, be ready for either a kick or a fireball attack. If you see fire come out of his hands, jump back immediately. Get that last punch in for the coup de grace, and Gromm will come to his senses and you'll complete Chapter 3.
It's been a while since we'e seen Joueur du Grenier on the blog, and...well, here he is again in one of his earliest videos, which covers this game. The video does have English subtitles for those who need them, by the way.
We set sail for a new area and meet some new challengers and dungeons in the second chapter.
Chapter 2
When you start a new chapter, you will no longer be in a powered-up state. You'll have to get your power up some more to become stronger again.
At the beginning of Chapter 2, watch out for guys coming out from behind you. Duck to avoid daggers. To beat the boss, let the man come at you, then punch him twice. Move away, and get ready to attack the arrow that is sent at you. They always alternate between the left side of the screen and the right.
After beating the boss, you'll get some health back and you'll be on the map screen. Go left first. Go all the way to the left and you'll meet a little girl named Anne, who is Gere's daughter. You'll increase your maximum HP. You'll have to go through the first area of the chapter all over again, but you won't have to fight the boss a second time.
This time, take the upper path to have an easier time defeating all the enemies and making some progress. If you need to, pressing A to punch and then quickly pressing the other direction on the D-Pad to face the other direction while in a powered-up state will allow to fight off enemies on both sides.
From here, head right. There is nothing here at first. Continue to go right when you re-enter the world map, and you'll face Duke. He has three attacks: a punch, a kick and a projectile that he fires after leaping up. Your best beat to defeat Duke is to repeatedly hit him with jump kicks until you trap him in a corner. When you do that, keep hitting him with crouching kicks, then punch him to get the final blow. When you beat Duke, you'll increase your defense.
Go to the left on the world map. This time, you'll be in a labyrinth. Enter the door at the start and fight enemies to refill some health, then go right and deal with the arrows. When you see a door, drop down the nearby hole and go left. Avoid the ceiling spears as you go, then drop down and go left again. Drop down the hole that you see and go right and avoid even more ceiling spikes. Go up the boxes and go right.
By holding Up and C, then pressing the direction you want to go, you can make a longer, higher jump in that direction. This can only be dungeon in the labyrinths. You can also hold B and then press C, but the first way is easier.
Here, you'll be dealing with axes as you head to the right. Jump down the hole after the box, go left, and enter the door to fight some enemies and refill a little bit of health. Go left and deal with the arrows as you go towards the hole in the floor. Go down it and go right. Go down the hole at the end and go left. Avoid the fire jets that come out of the background wall and go down the next hole. From here, go left and crouch kick all the rocks. Go up the boxes, jump up and left, then keep going left to the next hole. Go down the hole and continue left and down another hole. Go right while getting the rocks out of your way. If any rocks bounce while coming towards you, just jump over it. You'll eventually reach the end of the dungeon, where you will Alyssa's mother Sophia and restore all of your health.
Take the lower path to the left on the world map. The guys on the motorcycles try to run you down, but you can knock them off their bikes with a crouching punch or a jump kick in the powered-up form. If you can time it right, you can hit the bike instead of the biker and make it fall down and explode.
When you make it all the way to the left, go south on the world map. You'll end up on a dock. Watch the background for any shimmers, as those are harpoons that will come down from the background. Also, to get rid of the harpoon guns on the ground, just hit them with a jump kick while powered-up. Some harpoons will come out from the right side of the screen, so be careful. When you reach the end of the dock, you'll end Chapter 2.
All is not well with the world! A great war had devastated the land and a nefarious power had established an empire where the good people were treated like slaves. But there was hope. The mighty Aarzak and his two companions Alyssa and Max banded together to reclaim their homeland. Using the secret martial art of Jet-Kwon-Do, Aarzak went to battle against The Duke, Master of Tae-Kung Fu. In the end, Aarzak was victorious and peace reigned in the land. However, before the battle was over, Gromm, Gross and Garokk, the three strongest and most evil warriors escaped. For three years the trio schemed and plotted to get back in power. One day they staged a surprise attack on the capital city. Alyssa was captured and taken to the Land of the Unknown. Aarzak followed the trail of Alyssa's captors to the ultimate savage land, where he prepared to fight the three seemingly invincible foes. After a fierce battle, Aarzak was able to defeat Gromm. However, in the midst of the fighting, Alyssa was taken by her captors to another location. In his quest to find Alyssa, Aarzak met his brother Gross. Some time ago, Gross lost his memory, and as a result he turned to a life of violence. To say Alyssa, Aarzak was forced to fight his brother. Luckily, good triumphed over evil, and Aarzak was able to restore Gross' memory. However, there was one last battle yet to be fought. Garokk, the most powerful enemy had to be defeated. There is a secret to defeating Garokk which is contained in the sealed legacy of the creator of Jet-Kwon-Do. After much thought, Aarzak was able to break the seal and learn how to defeat Garokk. Even with this knowledge, the fighting continued for days, yet in the end, Aarzak prevailed and Alyssa was rescued. And so goes the legend of Aarzak, The Last Hero!.....
Chapter 1
Left and Right let you move left and right, Down lets you duck, A lets you punch, B lets you kick and C lets you jump.
Life is your health. Score shows how many points you've gotten. Power shows how much butt kicking you've been doing, and if you reach a square above the meter, you'll be more powerful for the rest of the chapter. The time shows how much time you have left in the current area.
In the very beginning of the game, the enemies are pretty easy to beat. Use the kick to take care of enemies that get too close, as it is a little faster. By attacking while jumping, you can do a front kick that can take care of the spear men on the roofs. It won't be long until you reach the end and meet with Max.
You'll then be on the world map. If you press Start, you can see your stats. The Control Pad moves the arrow, and pressing C lets you go in the direction you've chosen.
The first place you want to go is the arena to the right of where you start on the map. You'll face a big green guy. Let him come to you, then punch him and move back a bit to avoid getting hit. After two punches, he moves back and tries to dive at you. Duck to avoid the dive, and repeat until you take the man down. Once you take him down, go all the way to the right to exit.
From here, go to the east. You'll face more enemies, Some will leap out from out of nowhere while others will come out of the ground, while others will rush out from the rooftops. Just keep a eye out for anything and you should be okay. If anybody throws something at you, kick the item to deflect it away. You'll meet Gere at the end.
Go back to the arena. From there, go northeast over the mountains. You'll meet Luisa, who tells you that the enemy has begun to move. You'll also increase your defensive power, which allows you to take less damage from enemies. Go back to the arena, then go southwest again. If any spear-carrying soldiers make the low "whoop" sound, duck down and kick them as they attack you. You'll meet Alyssa at the end and you'll increase your strength, which increases your maximum health in the process.
When you get enough power, Aarzak's shirt will explode and he will run around bare-chested. When that happens, you'll be able to multi-punch and multi-kick attacks while standing, and you can smack enemies clear off the screen while doing more damage with your attacks. You'll also have a different jump kick, and you'll be able to punch enemies off roofs instead of kicking them.
Going south is optional, and so is the boss here. To beat the green guy with the balls, hit him with jump kicks. If you see any fireballs, move away. Watch the balls to see where they go. After three kicks in your new powered-up form, you'll beat this guy and he'll explode like nobody's business. You'll also get some of your health back.
From here, head east. Jump kicks will help in getting rid of the guys who will try to throw stuff at you. When you clear this area, go straight north into the labyrinth.
In the labyrinth, crouch kick to keep the rocks away as you head to the right. If you enter the first door you see, you can fight some enemies to get some of your health back (assuming they don't hit you). You'll be kicked out after a little while, so do your best. Keep going right and you'll find another enemy room right next to the one you left. Keep going right afterwards and drop down the hole.
Go to the right. Enter the door that you see as you punch the arrows that come at you and take care of some enemies to get some health back. Jump up the crates at the end and jump to the right to get over the hole. Tread carefully and back away when the knives come down so you can crouch kick them out of the way. Drop down the hole to your right and go left, taking down more daggers as you go. Drop down the hole all the way to the left and go right. You'll see axes come at you from one side before looping around to the other. Go all the way to the right and drop down.
As you go left, watch the spears coming out of the ceiling. Get on the boxes, then jump left from the top box. From here, go left and take care of the axes thrown at you on the way. Jump up the boxes and jump to the left at the top box. Once again, avoid the ceiling spears as you go left. Drop down the hole at the end and go right.
Avoid the flame jets that come out of the wall. They won't hurt you unless you're completely out. When you see a hole in the floor in front of a door, go down it and go left. Inch your way forward to avoid the rocks that drop down from the ceiling. Go left when you see the light on the wall. You'll meet Zee and Bee, who are trapped in a cement block, and save them in exchange for some help. You'll refill your health completely for completing this labyrinth.
Back at the world map, go east. To beat Sid, hit him with jump kicks. Whenever you hit him, back away immediately. If he rears back with a glowing fist, jump away, and jump over his fireball when he shoots it out from a distance. Thankfully, you can move back to block, and you do not take damage when you block. When you get his health all the way down, you'll have to punch him with a standing punch to deal the final blow and kill him. If you're not used to Fist of the North Star - aka Hokuto no Ken - the anime series that this was based on before it was re-badged and re-colored, this detail is going to trip you up. (Black Belt for Master System, which was also originally a Fist of the North Star/Hokuto No Ken game, also did this.) You'll then go to Chapter 2.
Obviously, playing the last two stages in one video was a bad idea, since this video got far longer than I thought it would...but we got this game done nonetheless!
Stage 3
A magic charge in a backpack is available above the start of the level.
The stumps can be used as weapons, and the crazy tree arms work as platforms.
The purple dragons have both a high fireball and a low fireball; if they lean forward, they're going low. Thankfully, you can duck the high ones.
There is a door where you can meet a girl wearing white, pink and blue. She gives you a gameplay hint, then you'll leave. When you come back, all the power-ups re-spawn.
The bats move around in sine wave patterns. Be ready to duck if you think one is going to hit you.
The mini-boss is a vampire. Switch to Mimura's magic and use it when he sends a bunch of bats at you, and keep hitting him in the head in the meantime. He can also make apples drop down from the sky, so be careful.
After the vampire battle, you'll be in an auto-scrolling stage where you have to keep leaping to the left from cloud to cloud while avoiding monkeys and the apples that they throw as well as monkeys that hang from the ceiling and giraffes that pop out from the bottom. The ceiling monkeys can be knocked off with your wand, but you'll have to avoid everything else and deal with touchy jump controls that require you to simultaneously press the Control Pad direction and the jump button to get the best jumps. Also, if you go too far to the left or the right, you'll be pushed off the screen and you'll lose a life. The cliff edge signifies the end of this section; leap onto it and go right to get out of here.
After this, you'll be going up in a vertically scrolling section. New enemies include one-eyed red-and-purple aliens that shoot a short-range beam out of their eyes. You'll also have plenty of spikes to watch out for and a couple of rocks to throw at enemies.
You'll then be in a volcanic area. Fireballs come in and out of the lava, which can erupt upwards in plumes out of narrow passages. The hand enemies dive forward when you're close enough, and you'll want to jump up and hit them in the face. The rocks just bounce towards you and can also be attacked.
If you use a magic charge for invulnerability at the lava platforms part, you'll be able to cakewalk your way through it on the lava itself before the magic runs out.
The little guys with the thunderbolts on their heads jump up and shoot out sparks in diagonal directions. Wait for them to land before attacking them. They always do two short hops and a long one, and on the long hop, they shoot out sparks.
At the slope section, keep an eye out for airborne enemies. Afterwards, you'll have to watch the sky for rock enemies.
You'll then be at a river. The fire-breathing turtles act as platforms, and thankfully, you don't get pushed into the water when they lean upwards to breathe fire, so you can take your time on them. Be ready to jump after running down the slope shortly after the beginning. Also, the signs can be used as weapons.
The boss here is some sort of demon. Stay in the middle and attack the ball, then send the ball into the boss' face. Keep standing in the middle. Duck under the high-range lasers while jumping under the mid-range lasers. The punch should not hit you. After six hits, you'll beat the boss, and you'll also learn a screen-clearing magic attack.
Stage 4
It's back in town for this area. Road barriers and street light posts can be used as weapons while you leap across cars and beat up green birds that drop fish skeletons. Interestingly, the two street light posts have the Sega and Japanese Mega Drive logos on them respectively. You'll also see signs bearing the Magical Taruruuto-Kun logo, too. Be ready to glide near the end of the first section.
You'll then be chased by that guy with the helicopter from Stage 1 again, and this time, it's an auto-scrolling section where you have to outrun the guy. Do not grab the backpacks; even though one has an extra life, it's not even worth it.
When you jump forward, you will get pushed back. If the platform you are currently on does not have a guardrail in the background, that means you'll need to glide. Thankfully, gliding lets you move a little further towards the right side of the screen, and you'll want to be just right of the center in order to survive this part. The second glide is the worst. Either you have to glide, come out of it early and jump to the next platform...or you can come to a complete stop, make a running jump off the edge, and hope you land it. If you land it, you'll complete this section. Of course, since the glide controls take a while to get used to, you'll be losing a few lives near the end just to complete this section.
You'll then head to a building after a text cutscene to rescue the girl we met in Stage 1. In the block maze, you can move through the big blocks with the squares with the four dots; the big blocks with the triangles are solid. (Watch out for spikes!)
The pot hides a button that will make a brick wall lean so you can continue.
In the section with the green background walls, the panels with the devil faces act as platforms if you hit them with your wand.
In the next section, you'll be on platforms that move across tracks. Be ready to stay in the center and duck part of the time while you're on them. Thankfully, this section is easy when you know when to duck.
In the next section, you can ride your way through with the wheels from a tank, or you can destroy the wheels and destroy everything with the cannon. If you use the cannon, glide to get past the spikes. Regardless of which path you pick at the start, you'll reach the pot every time, and if you go all the way to the left past the pot, you can refill your health completely.
After some more wall panel platforming, go right when you see the wooden guardrails. You'll be in a maze. Go all the way to the right and enter the door with Up, then jump to the left over the spiked shield guy and enter the door behind him. Enter the center door in the next room. From there, use your wand on the purple thing on the ground to make a purple statue rise on the ground. Jump onto its head, then jump to the door on the upper right and enter. Beat up the dragon and enter the door near him, then grab the pot, go further down and take care of the enemy there before zapping the head of the nearby purple statue and enter the door behind it.
After a chance to refill two hit points, you'll face the final boss. Stay on the left side and whack away at the statues on that side. The fireballs always go low, high, two from the right, then two from the left before repeating. After the statues are destroyed, you'll face the final boss.
Wait until he stops moving so he shoots his fireballs. The fireballs create two tiny blob creatures that hop towards you, and when you destroy them, the boss will drop down. Attack him before he attacks you. You'll have to hit him eight times, and you'll get used to his pattern, which he never deviates from. Also, try not to be distracted from the girl in a sheer, see-through pink blouse with visible bra and panties.
After you beat the boss here, you'll finish the game! You did it! Enjoy the credits, which contains music that I'm sure is reminiscent of "How Dare You" by Basia at the beginning.
A Japan-only Mega Drive game based on an anime and manga? Well, now...
Stage 1
The Control Pad lets you move around and duck. A lets you cast magic, B lets you attack and C lets you jump. Holding C while in mid-air lets you glide forward, and if you let go during the glide and keep moving forward, you can go faster. You can change direction while jumping, but you don't go as far if you turn the other way. Your attack turns inanimate objects such as trash can, fire extinguishers, buckets and buckets into ammunition that you can throw at enemies, such as carts with cans on them as well as other enemies. You can also attack enemies directly with the wand itself.
The food that some enemies drop will replenish one of your hit points can give you points.
Press Up to enter doors.
The boss here is some guy riding a helicopter. Avoid the red-and-white flashing light that moves around Taruruuto-kun, as that is machine gun fire and it will hurt. After lasting long enough twice, you'll face your first boss. Jump over the soccer balls that are kicked straight forward, then hit the ones that bounce with the wand and send them at the boss' head. The boss doesn't go down until the nearby bin is out of soccer balls, and once you beat him, he begs for mercy before you go to the next stage.
You'll also get a new ability at the end of the stage: the ability to use magic by pressing A. This allows you to be temporarily invincible and go through enemies, but you only have a few charges.
Stage 2
There is a lot of platforming in this stage, and your jumping skills will definitely be put to the test here.
The cannon enemies are interesting. If you destroy the wheels, you can hit the cannon with the wand and use it as an auto-firing gun that can take down enemies. If you destroy the cannon, you can use the wheels as a means of transportation, especially over spikes.
Going down slopes makes you go faster. Use this to your advantage to make some long jumps.
The blue and gold backpack with the white star on it can be used as a weapon, but also hides a pentagram that gives you an extra magic charge. Other items can be hidden in them as well, such as the purple jar that refills all of your health.
The guy with the spiked shield in indestructible, but you can push him off-screen by using a cannon enemy against them.
The tiny Taruruuto-kun head is an extra life. You can also get extra lives every 50,000 points.
Spikes are not insta-kill. Keep that in mind.
The tiles with the faces can be turned into platforms you can use for a brief time when you use the wand on them.
After the part where you talk to the girl with the purple hair, use the glide to get past the spikes.
The red walls with the gray panels can be grabbed with the wand and thrown aside.
Buttons can be used to open up passages to other areas. Some of them open up faces that lead to the next section; others turn walls into slopes that turn back to their original form once you cross over.
The mini-boss here is some woman with purple hair who somersaults around. Stay under her and watch out for the three-way dart shot, and hit her with the two statues on both sides of the room, and hit her with the wand when she lands. The darts have more distance when she jumps back than when she jumps forwards.
After the mini-boss, you'll have to use the glide to slide through the narrow passages.
When landing on the blue-and-gold platforms, be sure you land dead center on them; otherwise, you may not land on them.
The boss here is some girl with red hair named Mimora. Avoid the white ball that bounces around the room as you walk up to her and hit her with the want. If she starts running in place, jump over her to ensure she doesn't run into you. She also knows you backwards and looping across the room at times - which you can't avoid - but at least it doesn't damage you if you stay on the ground.
After enough hits, you'll find out that you fought a clone of Mimora and the real one shows up to thank you. You'll gain the ability to summon Mimora and destroy all on-screen enemies as well as damage mini-bosses and bosses.
Here's something I found while looking for things for a Mega Man 3 epilogue, given that I've already posted the OST in the past. Here's a stage select theme remix from Maxim Zhuravlev, which is not only pretty darn good, but extended to 21 minutes. Enjoy!
...and for the third time, Wily goes down. See you next game.
Dr. Wily Stage 3
The music here is even more awesome.
Most of the enemies and obstacles here come from Top Man's and Shadow Man's stages.
Don't miss the Energy Can after that first vertical section at the beginning.
The "Ice Climbers" section with all the moving platforms is lined with spikes. Be sure to land on the platforms, as this part can be slightly unforgiving.
The boss here, or bosses, is a set of Mega Man clones. Use the Search Snake to find out which one is the real one. If you cause damage, you got the right one.
You can easily win this battle with the Proto Buster, but Search Snake causes more damage in less time.
Dr. Wily Stage 4
This stage is probably the first use of "3D elements" in a Mega Man game. Mega Man can get behind the pipes, as if they're part of the foreground. He'll be "instantly" behind it when you get a certain amount of him behind the piping.
The robot that throws the metal blocks can be temporarily incapacitated with the Spark Shock.
Counter-clockwise from the upper left, it's Needle Man, Magnet Man, Gemini Man, Hard Man, Top Man, Shadow Man, Spark Man, and Snake Man.
Magnet Man can be destroyed really easily with the Spark Shock.
Dr. Wily Stage 5
To beat Dr. Wily's first form, get under him and repeatedly hit the cannon underneath Dr. Wily's robot with Shadow Blade as quickly as possible.
For the second form, get out from underneath him and hit Dr. Wily with the Shadow Blade. Be careful to avoid the shots that pop out from the two turrets at his sides, as they home in straight on your current position.
You'll beat Dr. Wily, but it turns out you just fought a robot fake.
Dr. Wily Stage 6
Gamma has two forms.
For the first one, get directly under it, jump up and hit the head with Shadow Blade. If the shots that come out of the head arc slightly to the left, you're positioned right.
when the health is halfway down, the head is destroyed and replaced with an even bigger one with the real Dr. Wily at the controls inside. Get on top of the fist, which can be used as a platform. Then jump to the highest platform, switch to Top Spin, and jump off the very edge of the higest platform and use it on Dr. Wily. You'll beat him in one hit.
When you beat Dr. Wily, metal blocks fall on both you and Dr. Wily. Dr. Wily is seemingly crushed, as is Mega Man. A mystery man shows up and saves Mega Man, but can't find Wily. Mega Man wakes up in front of Dr. Light, and they both find out that Proto Man saved them.


