The Dracula battle here is a difficult one, but it can be done.
Stage 2
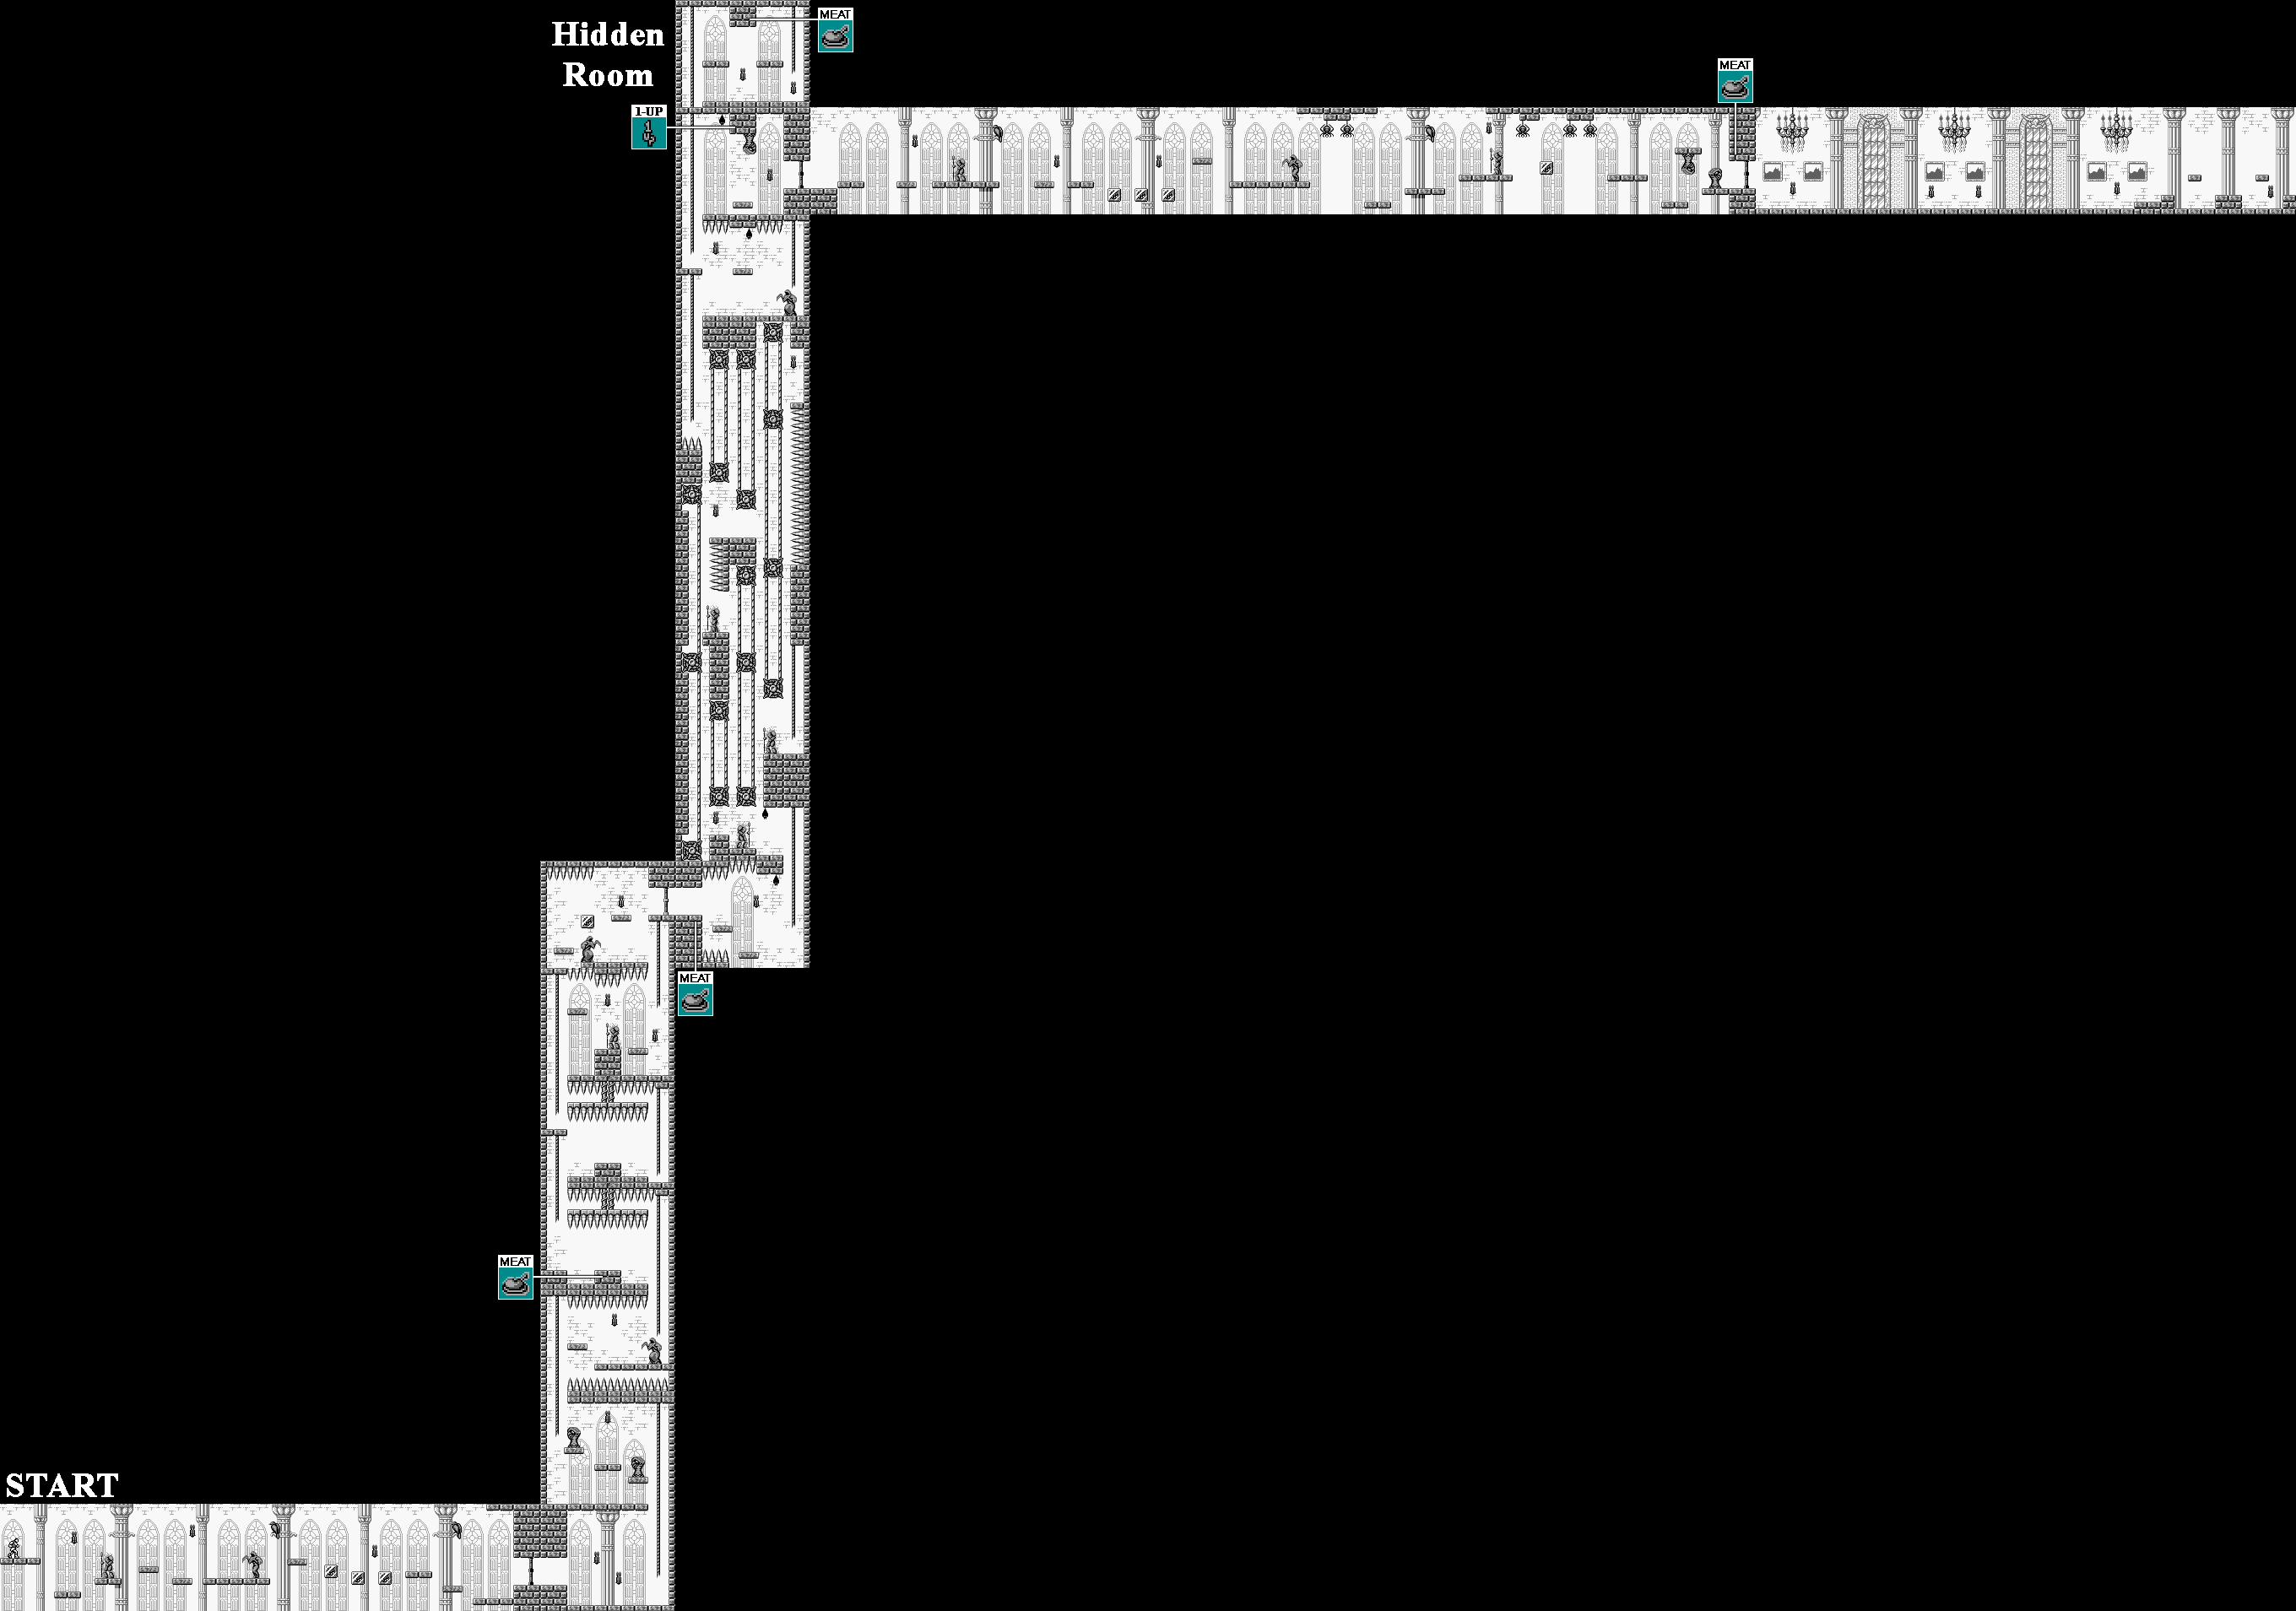
This time around, you're in a cathedral with a lot of platforms - including the break-away ones from the Crystal Castle - above a bottomless pit at the beginning. Once you go up the rope after this part, the fun begins, as you'll be seeing
For the first spiked crusher that moves up and down, take the lower path instead of destroying the column. If you destroy the left brick on the floor in the center of the room, you can get some wall meat (or a big heart). For the second spiked crusher, you'll have to move under it as it goes up and down and destroy the support column holding it up to continue on.
At the moving ropes, wait for the first rope to start moving upwards before walking into it. From there, you'll have to quickly jump back and forth between pairs of moving ropes to take out enemies. After this section, step off the left edge of the moving platform instead of jumping off so you don't hit your head on the ceiling spikes. In the room after that, there is a 1-Up hidden in the ceiling near the door, but it is hard to get.
If you jump repeatedly on the break-away blocks, you can keep them on-screen a little bot longer in case you need to jump off one to a moving platform.
Shortly after this (and some spider ropes), you'll enter a room with different music. Before you go through the door leading to this room, strike the ceiling above the door with the whip to find wall meat. You'll be able to power-up on your way to the right. You'll then meet by Soleiyu, who has been manipulated by Dracula.
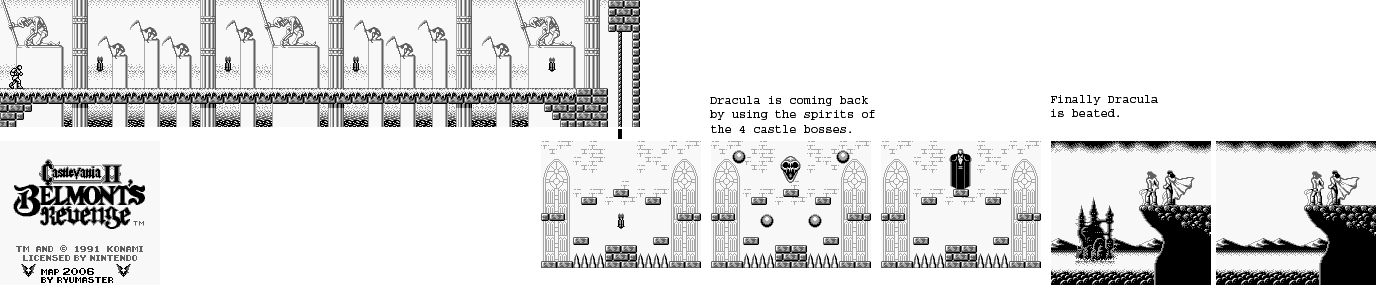
Soleiyu will move back and forth, and he will also jump on the platforms. Watch where he goes carefully. When he throws his daggers, the daggers will go into the corner and spin before eventually going to where you are. As long as you stay on the move, watch where Soleiyu is going, hit Soleiyu whenever you can and keep an eye on the daggers, you'll make it through this difficult battle.
After beating Soleiyu, Soleiyu (which I'm pretty sure is a mis-translation of "Soleil") will come to his senses. Since Dracula cannot use Soleiyu's powers anymore, he will now summon the power of the four castle spirits. This explains why the orbs go up into the sky when we beat the bosses of the past levels. We then head to the final battle.
Stage 3
In the path leading to Dracula, there will be only so few hearts to grab. Not only that, but you can't grab the ax, which is essential for beating Dracula in the Western version of the game. If you die at any point in the battle, you'll really be up a creek. When you go down the rope, you'll face Dracula. Dracula will teleport around the room in a specific way, and you'll have to position yourself just right to avoid getting hit by the orbs that split up and then re-converge where Dracula teleports to after he disappears. The following strategies are from Bkstunt_31's GameFAQs walkthrough, which I consulted during the final battle.
In the final chamber, start by standing on the left end of the lower-left platform and ducking to avoid the orbs. When the orbs move back in - which is Dracula teleporting, by the way - stand in the center of the bottom center platform (which is the floor between the spikes). Hit Dracula in the head with the whip, then leap to the platform to the right and keep walking right to avoid the orbs.
Dracula will teleport to the upper-left platform. Stay on the left edge of the platform you are currently on and duck to avoid the orbs. If you have the axe, you can throw one at Dracula's head here to get some extra damage in.
Dracula will then teleport to the upper-right platform. Make your way to the upper-left platform and duck at the very left edge of the platform to avoid the orbs. Dracula will then teleport to the bottom center. If you have the ax, you can stand at the far left and jump up to throw an ax to the right and hit Dracula in the head, then go back to the upper-left platform, face right and stand so that the toe of Christopher's "right foot" is off the platform, then jump at the right time to avoid the orbs. (This is the hardest orb dodge to do.) If you don't have the ax, just stay on the upper-left platform and be ready to jump.
Dracula will then teleport to the lower-right platform. Go to the left edge of the bottom center platform and duck to avoid the orbs. If you have the ax, you can jump up and throw an axe to the right to hit Dracula in the head on the way there, then duck just in time.
After this, Dracula will go back to the top center platform. Go all the way to the lower-left platform and duck to avoid the orbs. Dracula will then re-appear on the bottom center platform. If you have the ax, you can stand at the far left and jump up to throw an ax to the right and hit Dracula in the head, then go back to the upper-left platform, face right and stand so that the toe of Christopher's "right foot" is off the platform, then jump at the right time to avoid the orbs. (This is the hardest orb dodge to do.) If you don't have the ax, just stay on the upper-left platform and be ready to jump.
After that, the pattern repeats. You should have a good idea of where to stand and what to do depending on where Dracula goes next. It will take a lot of practice and a lot of trial and error to beat Dracula, but it can be done. Once you beat Dracula, that's it. There's no second form or anything. You're done. You just beat Castlevania II: Belmont's Revenge! Congratulations!

No comments:
Post a Comment