Saturday, May 31, 2014

HCBailly plays Final Fantasy - Part 9 of 38

In this entry: the Marsh Cave and the Dark Elf, Astos!

All maps by x_loto.


Marsh Cave


Map

The Gargoyles aren't that troubling, but they don't have an elemental weakness and their HP are pretty high, so spread out your offense.

One of the chests on the second floor has a Copper Bracelet. If you have a Thief or White Mage in your party, hook them up with this.

One of the rooms has a chest surrounded by statues. If you step towards the Chest, you'll trigger a fixed encounter.

You'll fight three Wizards. Even though they're wizards, they can't cast magic. Instead, they have strong physical attacks (lolwut). If you have Lit2, use it against them, since they're not strong against it.

You'll be able to open the chest when you beat them. You'll get the Crown.

Northwest Castle


Map

When you give the crown to the King, you'll find out that the King was really Astos all along!

Boss: Astos


The trick is to survive the first round. Astos may cast Rub, which can insta-kill a party member, and he can also cast Fast on himself and Slow on your party. Cast Fast on a strong party member and have that guy wail away at Astos.

Astos, unfortunately, isn't very strong. So he's pretty easy.

When you fight a boss, always cast Fast on your strongest fighters (and everyone, for that matter). Being able to cause as much damage as possible in a short amount of time is key in the boss battles for this game.

When you beat Astos, you'll get Matoya's Crystal.

Cave of Matoya


Map

Now that you have the ship, getting back here is much easier, as there's a port you can dock the ship at close by.

Anyway, talk to Matoya and she'll give you the Herb. Head back to Elfland.

Elfland Castle


Map

Talk to the guy standing next to the Prince, and he'll wake the Prince with the Herb. Talk to the Prince and he'll give you the Key.

Now go to the treasury and go through the door. You'll get the Silver Hammer (which is good for the White Mage) and the Copper Gloves (which are good for the Fighter).

HCBailly plays Final Fantasy - Part 8 of 38

Hopefully you've done everything in the guide so far. If you have, congrats. You're ready to tackle the Marsh Cave.

All maps by x_loto.

World Map

Are you ready? Let's do this.

Go west until you can't anymore, then go south. The hole in the ground that you see is the Marsh Cave. Use a Tent when you go there, and go in.

Marsh Cave


Map

Take the north path first. This will lead to four treasure chests for you to open. This will open some other chests as a result, but these other chests have what you've just found in these four, so don't worry about it.

The Crawls aren't very strong, but they can strike eight times in one turn, so it's better to take one out as early as possible. The Scum can Poison you with their physical attacks. The Shadows can Blind you, but thankfully, you should be able to easily destroy them with physical attacks at this point.

The Scorpions finally show up on us in this video. They can Poison with their physical attacks, but that's nothing a Pure Potion can't handle.

Friday, May 30, 2014

HCBailly plays Final Fantasy - Part 7 of 38

How to get gold, the HCBailly way.

If you press A and B 55 times, you'll get the 15 puzzle. If you complete it, you get 100 gold, but it keeps you from getting experience. Lame.

There is a peninsula northeast of Pravoka. Walk up to the edge and move left and right. You might come across the Zombos, who will probably kill you unless you're really powerful or you have the right weapons and armor (and a lot of Tents). If you have Fir2 and Hrm2, you might stand a chance against these things and get a ton of gold.

The forest near Elfland also has monsters that make for a treasure trove of gold, so if you want to grind against things that are more your level at this point, this place is pretty nice. Bring plenty of Pure Potions if you meet the Arachnids, though.

HCBailly plays Final Fantasy - Part 6 of 38

"You think running around in this game is going to be easy? Well, guess what? Welcome to 1987! You're gonna die, you stupid n00b!"

All maps by x_loto.

World Map

You want to know one thing in the original NES version of Final Fantasy that really sucks? You can only buy multiple copies of the same item one at a time. Every. Single. Time.

Anyway, let's head northwest of Elfland and head to the ruined castle that's there.

Northwest Castle


Map

Find the King in the throne room. He'll tell you to go south to the Cave of Marsh, and to bring the crown directly to him.

Before you do that, let's head back to Elfland.

Elfland


Map

If you have a Black Mage in your party, the Large Knife will prove useful. A Thief will benefit from a Sabre. If you have a Fighter and/or a Red Mage, get a Silver Sword.

As for armor, get the Iron Armor for the Fighter.

Get as close to 99 Heal Potions as you can. If you get the time and money to do so, max out.
Get 15 Pure Potions as well.

The magic shops in Elfland sell both Level 3 [b]and[/b] Level 4 magic spells.

For black magic, Fir2 and Lit2 are stronger versions of Fire and Lit, respectively. Hold Paralyzes an enemy. That brings us to Lok2. Unlike other versions, where it decreases enemy evade by 20 percent, it's buggy in the NES version and actually increases enemy evade by 20 percent. Fail. Slp2 is a stronger version of Slep, while Conf is a Confusion spell. Ice2 is a stronger version of Ice, and is actually pretty useful as it obviously deals more damage (and hits all enemies). Fast doubles the hit rate of melee fighters, which makes it extremely useful against bosses and worth giving to the Black Mage and/or Red Mage.

For white magic, Cur2 heals more damage than Cure and is useful for both the Red and White Mages. Heal is like Cure, but it hits everyone. (Healing spells are always good.) Hrm2 is a stronger version of Harm, and can put down those undead monsters that are likely to stun you. AFir protects against fire-based spells, and while you won't need it now, it'll prove useful later. Pure cures Poison much like the Pure Potions, while Fear causes the enemy to be more likely to run away. You could get AMut, but there's only one or two enemies in the entire game that can Mute. AIce, on the other hand, is essential as there are many enemies that have Ice-based attacks. You won't need it in the Marsh Cave, but it's definitely going to be useful later on.

Thursday, May 29, 2014

HCBailly plays Final Fantasy - Part 5 of 38

In this episode, we go seafaring and deal with some of the various lands in the game!

All maps by x_loto.

World Map

As you're sailing the seas, you'll be fighting Sahags at random intervals. They're not that bad, but if they land a critical hit on you, it can hurt.

As for the OddEyes, make those a high priority if you see them. They can Paralyze you with Glare.

Elfland Castle


Map

Our first stop will be the castle in Elftown. Here, you'll learn that Astos has put the Prince to sleep, and you'll have to wake him up. You'll also learn about the Cave of Dwarf at the west end of the Aldi Sea.

There is treasure here, but you'll need the key to open the door first.

Elfland


Map

If you have a Black Belt, buy the Iron Nunchaku. Replace all Wooden Shields with Iron Shields. Be sure to get a Wooden Helmet for the Fighter as well as any Mages you have.

The Item Shop here sells Soft Potions, so keep that in mind later in the game.

Dwarf Cave


Map

Go to the port northwest of Coneria and stop off there. Go southwest and you'll find the Dwarf Cave, which is really more of a dwarf village.

As you open any chests that you find and get some nice riches out of it, you'll find out that Astos stole the Crystal from Matoya. Fetch quests. Wonderful.

Smith the blacksmith can make a powerful weapon for the Light Warriors, but he needs some Adamant in order to do it.

If you go all the way to the west and follow the narrow corridor south, you'll find Nerrick. He needs some TNT in order to resume construction of his canal.

HCBailly plays Final Fantasy - Part 4 of 38

In this episode, we finally get a ship! Now we can traverse the whole world map!

All maps by x_loto.

World Map

The Madponys are shown off in this video. As mentioned before, cast Fire on them for maximum damage.

Anyway, let's head down to Pravoka, which is north and then east of the bridge to the main continent.

Pravoka


Map

One guys says "Help," then the guy across from him says why. Thanks, game.

Anyway, go west from the center of the village and you'll meet Bikke the Pirate. He'll send nine pirates after you, and you'll have to take down every single one of them.

Boss: Pirates


Good lord, these guys are really weak. They can go down in one shot, and they really don't pose any significant threat at all. If you have a Black Mage, you can cast Slep on them (if you have it) to give yourself a slight edge.

Other than that, there's really nothing to worry about with these guys.

Pravoka


When you beat Bikke's crew, he'll let you have his ship. From this point, you can go anywhere in the overworld...and given that this is an RPG from 1987, it's going to be pretty easy to get lost...unless you know what you're doing, of course.

A girl will tell you about some Elves that live across the sea, and that Matoya's Herb is the only thing that can wake their Prince. Gee, that'll come in handy later on.

Get the new armor here, it's worth it. Get a Wooden Shield and Gloves for the Fighter, give Gloves to the Red Mage, and if you want to, grind for a while before getting the Iron Armor. You'll get it later, but it'll be less expensive then. Your call.

For the weapons, get a Short Sword for both the Fighter and the Red Mage. You could get a Scimitar for everyone else, but you'll find something more powerful than that [b]really[/b] soon. Also, skip the Hand Axe, which has 5% less accuracy than the Short Sword.

The White Magic shop has four new spells, and they're all Level 2. Lamp cures the Darkness status ailment, Mute prevents enemies from using magic (which is somewhat useful) and also stops special attacks in this game (which is nice), ALit lessens damage from Lightning attacks, and Invs increases a character's Evade by 40%.

The Black Magic shop also has some interesting stuff. Dark inflicts Blindness on an enemy, Ice is an ice attack (some enemies are weak to ice, which makes this very useful), Slow lowers an enemy's HP by 50%, and Tmpr is supposed to increase the attack power of a character, but it doesn't even work at all due to buggy programming.

The same guy that told you that the town has been taken over by pirates will tell you that the Ship can only stop at ports, and that there are no ports in the north. You'll also find an old man from the town of Melmond, which is also in trouble.

Wednesday, May 28, 2014

HCBailly plays Final Fantasy - Part 3 of 38

We finally take on the first boss, which really isn't far away from Coneria at all.

All maps by x_loto.

World Map

Temple of Fiends


Map

Northwest of the town of Coneria is the Temple of Fiends. You'll have to go through this in order to rescue the princess.

Before you go into the room in the center, run around the building and collect the stuff from the chests in the room. You'll find a Cap in the chest on the lower-left corner. Some of the doors will be locked...don't worry about them for right now. You'll be able to open them later on.

The Bones are undead enemies. You could use Harm on them if you want to, but they're weak enough to be defeat with melee weapons. The Creeps can be taken down with the Fire spell.

When you're ready, go to the room in the center and face Garland.

Boss: Garland


Garland only uses physical attacks, so don't worry about spells being thrown around this early in the game. Cast Fire on him for maximum damage.

Talk to the Princess after you beat him, and you'll be warped back to the throne room of Coneria Castle along with the Princess. Talk to the King, and you'll find out that a bridge has been built so you can move on to the next continent. The Princess will also give you a Lute, which will come in handy later. (One of the people on the first floor says that the Lute can break the evil gate, whatever that means.)

Leaving Coneria - Really


Go north of the castle and you'll find the bridge that the King has built for you. You can head to one of two places - the Cave of Matoya or Pravoka. HCBailly will cover Matoya first, so let's go over there.

As soon as you walk onto the bridge, the game will immediately switch to the prelude. You'll also get the credits here as well. Guess what? There weren't that many people involved, but then again, this is a video game from 1987 we're talking about.

North of the bridge is a cave. This is the Cave of Matoya.

Cave of Matoya


Map

Near the door is a broom. If you talk to it (yes, you can talk to it), it'll say "PUSH B SELECT" backwards. I wonder what this means...

Inside the room is a witch. She can't see without her crystal and is wondering who took it.

The chests inside carry two Heal Potions and a Pure Potion (Antidote). Grab everything you can, because you [b]will[/b] need it sooner or later.

If you press B and Select at the same time in the overworld, you'll get the World Map. The crosshairs signify your party's current position. The flashing dots indicate all the locations you can go to in the game.

If you need to grind for levels, the area near the Cave of Matoya is a lot better, since you won't be spending as much time in battle mode.

HCBailly finally shows off the Creeps here. As mentioned earlier in this entry, use the Fire spell on them for maximum damage. The Ogres have a lot of hit points, so if you're going to go after one, take out all its little friends first so you can ensure a team effort on it. Killing an Ogre rewards you with 200 Gil, so it's more than worth it at this point in the game.

If you target a monster with a certain character, and the monster dies before that character attacks it, that character will hit nothing but air, so keep in mind that the game doesn't automatically change the focus of a character's attack to another enemy like later games in the series do.

HCBailly plays Final Fantasy - Part 2 of 38

It's time to suit up...and you're gonna find out how in one of the earliest console RPG experiences known to man.

All maps by x_loto.


Coneria


Buy the rapier for the Fighter, Red Mage and Thief; the Wooden Nunchaku for the Black Belt; the Wooden Staff for the Black Mage and the Iron Hammer for the White Mage.

Buy the Chain Armor for the Fighter and the Red Mage; and the Wooden Armor for the Black Belt (if he's not in the "back" positions).

Be sure to teach the White Mage Cure for the first White spell. This will come in very handy in the battles ahead. Harm does a decent amount of damage to undead monsters only. Fog increases a character's Absorb level (the ability to absorb damage and therefore take less from strikes), while Ruse increases the caster's Evade.

For Black spells, Fire is the first thing you want to go for if you have a Black and/or Red Mage in your party. "Lit" is basically "Lightning," and it works well on creatures in the ocean or water-based enemies. "Slep," or Sleep, can be used on large groups of enemies in case you need to minimize damage from the enemy. Don't even bother getting "Lock," since it always misses in the NES version no matter what.

Whenever you buy new weapons and armor, be sure to go into the menu and manually equip them. Each character can hold up to four weapons at a time for versatility.

There's a bug in the game: if you've got a Black Belt and the absorb doesn't match his level when he's equipped with nothing, go back to the armor screen, then leave and head back to the status. It should be normal once again.

Leaving Coneria


Stay just south of the village of Coneria and wander around. You'll be able to take on some weaker monsters and bring your characters up a little bit. (I would definitely recommend doing this in the beginning.)

You have five commands for every character: Fight, Magic, Drink, Item and Run. "Fight" lets you attack, "Magic" lets you cast magic, "Drink" lets you use potions, "Item" lets you look at your equipment, and "Run" lets the entire party try to run from battle.

Just like your party, the enemies don't have a front or back row, so attack whoever you like.

Some equipment, such as a Mage Staff, can cast a spell when selected in the Item sub-menu. Just choose "Item," pick the item, and press A to perform the special action. This won't happen for a while, though.

Keep in mind that you cannot use Soft Potions in battle in the NES version. If you're Stoned, you're screwed over until the end of the fight.

The Wolfs and Imps aren't very impressive, but there are MadPonys here. If you find one, cast Fire on it for maximum damage.

Tuesday, May 27, 2014

HCBailly plays Final Fantasy - Part 1 of 38

jarockstar27: I love how the king calls for warriors of light but gives them no armor or weapons to do the job, or at least some money...something....if that happpened today people would tell the king to go f*** himself and go to the bar or something

It's funny because it's true.

Anyway...the first Final Fantasy game for NES.

All maps by x_loto.

HCBailly gives a lot of helpful hints at the very beginning while he's choosing characters. The lead character receives 50% of all enemy damage, the second gets 25% and the other two get 12.5% each? Did not know that.

Magic charges are really hard to recharge: you're forced to either buy a House (which costs a lot) and use it, or go to an Inn (which you'll be doing most of the time anyway). So if you start out with a White or Black Mage, you have your work cut out for you.

You want to start out with the ability to deal strong physical attacks, so keep the Fighter, Red Mage and Black Belt in mind. Black Belt doesn't get some good armor until later on, but he can do good enough damage, so use a Black Belt as your third/fourth character.

The Red Mage can learn all the Black magic in the game except for Nuke. However, there are some White spells which the White Mage can learn that the Red Mage cannot, so keep that in mind if you're teetering towards a White Mage for character #3 or #4.

Finally, we can start the game.


Well, there's a castle to your north. Walk into it.

Coneria Castle


Keep walking north and you'll go up a flight of stairs and meet the king. He'll tell you that Garland has kidnapped the princess, and that you'll have to go and find her.

If you go south from the flight of stairs near the king's throne, one of the guards will tell you that Garland is holding the princess in a temple to the northwest.

Invisible lady is invisible.

There are some locked doors here, but unless you get the key from the king of Elfland, you won't be able to open them yet. We'll have to come back here later.

Coneria


When you exit the castle grounds, just walk into any of the town areas and you'll enter Coneria itself.

The building with the sign of the pot above the door is an item shop.

The building with the word "Inn" above it is, of course, an inn.

The building with the heart above it is a Clinic (which comes into play if one of your characters die, sorry, no Phoenix Downs here).

The building with the sword is, of course, the weapons shop.

The building with the scepter above it is the magic shop. There are two, one with a black sign for Black Magic and a blue one for White Magic.

The building with the shield is, of course, the armor shop.

Status Screen


The four grey circles on the upper-left are the orbs that you'll have to revive.

I think everything else here should be self explanatory, but the numbers below the word "MAGIC" below the HP values for Mages are the spell charges they have for each level of magic.


From here, you can equip weapons and armor, and also learn magic spells whenever necessary.

Flintstones Closing

Come on! Everyone remembers this, too!

Monday, May 26, 2014

TheMaskedCobbler plays The Flintstones: The Rescue of Dino & Hoppy - Part 7 of 7

Welcome to Jetsons World! Here, we have conveyor belts, glass dome-topped spires, and...George Jetson. Of course, the last one isn't a surprise if you looked at the title screen for a few seconds.

Future


Shortly after the conveyor belts at the beginning, you'll meet George Jetson. He won't be able to help you due to problems at the company, so go ahead and take the elevator behind him.

After the elevator ride, you'll see Dr. Butler on a giant monitor. After he taunts you, go to the right, making your way through the conveyor belts and avoiding the spikes. Use your Gazoo abilities to get past the fire pit to reach the next elevator. Use the Fly ability (don't flap your wings, this costs coins) to sail over the next three fire pits.

Keep walking to the right as soon as you reach the first crushing piston, and you'll be able to get past that and the next two without any trouble. Jump onto the hook and grab it like you would the edge of a normal platform, and hold on to get past the massive flame pit.

The robots that hop around go in one hit, but the walking cannons take as many as four regular club shots to take down. If you can get behind one and power up your strike to maximum strength, you won't have to deal with it for very long.

The next section has you jumping over narrow platforms. Be careful when dealing with the little spaceship that send down the bouncy robots at you, as they can speed away pretty quickly.  Use the Fly ability to get to the conveyor belt that takes you to the last elevator.

Finally, you'll come face to face with Dr. Butler. For his first form, hit him with the club and avoid his bullets simply by ducking. If he hits you, get behind him and pummel him as much as you can. After enough hits, he'll run away.

For his second form, get right in front of him before he can do anything, and just keep swinging the club. He won't be able to do anything due to his stun being long enough for you to hit him multiple times.

The last form is a giant tank. If you still have the exploding dinosaur egg, use it here. If you have 50 coins, you're golden. You're done. If not, just power up all your club shots and hit the glass dome that protects Dr. Butler. The only move he has in this giant mechanical monstrosity is the ability to move back and forth. No missiles. No guns. Nothing. There's no cheapness involved whatsoever. I expected more.

When you beat Dr. Butler, you've won! It's time to head back to the Stone Age to celebrate a job well done!


TheMaskedCobbler plays The Flintstones: The Rescue of Dino & Hoppy - Part 6 of 7

We cross the sea and make our way through an anachronistic Stone Age version of China. Why? I don't know.

Underwater


In this stage, you'll be dealing with rather easy underwater enemies while jumping from one bubble to another.

It should be noted that just like in the Mega Man series, this stage has some interesting gravity. You jump a little higher than usual, and because of that you can make some interesting long jumps that wouldn't be possible anywhere else in the game.

This stage can be laggy in some spots, so keep that in mind.

China


Could this level be any more stereotypical?

Seriously, there are kung fu men, guys jumping around with poles, jumping parasols, and knife throwers. There's also a lot of pits with bamboo spikes around here as well...which every Asian-themed stage I've ever seen has.

The second section brings a man with a cart. Whack the guy carrying it, then use it to get some speed and launch off the ramp to make your way onto a wooden ship. Make your way past all the ships (and the ice-spitting snail that makes a return appearance from the ice stage) and you'll fight a sumo dinosaur.

This dinosaur will spit a fireball every few hops, so whack this guy twice before stepping away and ducking underneath that flame. He'll also do a sumo stomp that freezes you in place for a second and he'll also attack you with his tail. Using powered-up club shots can help, as will the exploding dinosaur egg. If you need to get behind him (or throw axes from above), jump onto the bell at the top and do what you need to do from there.


After getting the last Time Machine part, you'll transport to Dr. Butler's world in the 30th century. Get ready!

Sunday, May 25, 2014

TheMaskedCobbler plays The Flintstones: The Rescue of Dino & Hoppy - Part 5 of 7


There's no Bugs Bunny, but nevertheless, this castle is crazy.

Haunted Castle


The boulders on chains can be easily avoided if you just keep running.

Using the ability to fly via the Gazoo power-ups allows you to skip parts of the stage.

The skeletons start chasing you after you walk past them a certain distance. When they get close, turn around and whack them! The door after the first skeleton can be entered with Up on the D-Pad, and if you do that, you'll find an extra life!

Grab onto the lever like you would a platform after clearing the next few feet of skeletons, then quickly make it past the lowering door and you'll be racing against the lava. When you make it to the top, you'll make it to the next door.

After a collapsing bridge that can be easily outrun as well as the fastest room in the game (PROTIP: enter the door to your immediate left), you'll face a Frankenstein's Monster. He'll go down in a few hits, but you can run past him while invincible if you want.


Shortly after that guy is Count Rockula. Use the Exploding Egg, and hit him whenever he reaches your level. After about eight hits, he'll fly away and you'll get your Time Machine piece.

OKAY WHATEVER

Why not?

Saturday, May 24, 2014

TheMaskedCobbler plays The Flintstones: The Rescue of Dino & Hoppy - Part 4 of 7

YOU CAN'T SKIP THE REST OF THESE STAGES

Jungle


A lot of the enemies and obstacles that you see here are from the first stage.

Be careful on the log and pterodactyl platforms, as they'll lower as soon as you stand on them.

The pink staircase dinosaur has a hidden secret in its mouth. Hit its beak with the club to find a barrel. Inside it is a 1-up. Be careful coming out, as he can bite you when his mouth closes.

The plants try to spit at you, the sabre-toothed tiger slowly crawl by, and the snakes try to stick their heads out in an attempt to bite at you. Thankfully, they're pretty easy.

You'll meet Barney, who tells you to hit the coconuts back at the boss before he walks away. Strangely, he looks interesting as a brunette instead of a blond. Thanks, NES graphical limitations.

If you have a Gazoo power-up, you can jump high and to the left of where you met Barney and refill all your health.

The platforms that swing back and forth are attached to...nothing, apparently. Thankfully, you can grab onto them and then climb up them to take a ride on them. Nice.

You'll then see a giant dinosaur claw. Just like in the Flintstones TV show intro, you can jump on top of it and slide off it, going straight across the pit before you land. Awesome!

The boss here is a sasquatch. Just avoid him as he jumps around, and hit the coconuts that fall from the sky back at him. If you have the exploding dinosaur egg weapon, use that, too. Thankfully, it's really easy not to get trapped in the corner when you know when towards and away from him, so you can whack him while he just stands there.

You now have another Time Machine piece as well as Barney in your party.

Basketball


Either TheMaskedCobbler is rusty, or this guy is harder than the other two. Score whatever baskets you can and try to run out the clock. Best strategy I can think of to keep this guy from scoring, at least for a little while.

TheMaskedCobbler plays The Flintstones: The Rescue of Dino & Hoppy - Part 3 of 7

Right next to the second basketball is an ice level.

Oh, there just has to be an ice level.

Frozen Village


Moving around can be tough, and once you start sliding, you won't be able to stop until you start moving in the other direction.

The guys with the bats smack snowballs at you, while the ice snails spit onto the floor. Their spit moves across the floor, and while it won't damage you it will push you back. The little Maoi Easter Islands that move around just...move around. They can also take a beating, because unless you hit them with a hard enough club shot, they'll just pull themselves together and come at you again in a matter of seconds. You'll also see shady-looking wind clouds floating back and forth, looking over their shoulder in a way that looks rather menacing.

Not far into the level, you'll meet Betty. She'll tell you about the mammoth boss before she walks away.

The little Ferris wheel platforms act differently than they did in the first level. The first one you grab onto starts moving very fast as soon as you grab onto the platform, while the ones above the bottomless pits move slowly above a ceiling full of spikes.

The secret to this as well as the two pits is to not jump anymore than you have to. Just drop to the second Ferris wheel and grab onto the third one. Then, run to the edge on the other side of the pits and grab them to avoid hitting your head on spikes.

If you won the first basketball game, you'll be able to go up above the spikes and get the power-ups above the narrow, seemingly impassable row of spikes.

To make your way under the spikes, run towards them and start sliding. While you do this, hold Down on the Control Pad. Fred won't duck, but he will lower his head into his fur tunic (shirt? outfit?) like a turtle. Finally, it has a use.

If you have the exploding dinosaur egg, the mammoth boss is pretty easy. Just keep dropping them until he comes your way, then hit it with the club until it dies. If not, just charge the club up to maximum and hit the mammoth from there.


When you win, you'll get another Time Machine piece and Betty will join you.

Friday, May 23, 2014

TheMaskedCobbler plays The Flintstones: The Rescue of Dino & Hoppy - Part 2 of 7


In this episode, Fred Flintstone becomes a vigilante for justice and beats the hell out of some guy that looks totally unlike anyone from the show.

City


Climb up the building at the start. You'll find another steak that will give you your fifth (and last) heart for your maximum health. Trust me, you're gonna need it. The second building has a hamburger on top. Just bust the barrel on the top to get it.

The robbers that are in plain sight just run around, so they're easy pickings for Fred's club. The ones that hide behind the doorways involve some more strategy. Jump over their bullets and smack them while they're hiding. Boom. They're gone.

If you explore this level, you'll find the slingshot, which is used just like the axe. Unlike the axe, which has an arced shot, you have a straight shot with the slingshot.

Believe it or not, you can jump higher off the awnings. Just jump when you're about to bounce and you'll go sky high.

The second section of this level has a boat at the bottom, which proves useful here as this part auto-scrolls.

The icon with Fred's face is obviously a 1-Up.

The egg acts like a bomb whenever you use it. It costs 10 coins to use one, but when you do, it kills all enemies on the screen. It also works on bosses, which kinda helps break the game at times.

When you re-appear above ground, you'll have to jump across a giant rib cage to avoid some spikes. Then you'll meet Wilma, who tells you there's a boss battle up ahead and gives you a stone axe to replace whatever weapon you have. (Gee, thanks, I wanted to see the egg in action.)

The boss here is really simple. He just jumps around and tries to hit Fred with his hammer. (At least he looks more menacing than any Flintstones character I've seen.) Just hit him with 10 stone axes to take him down. He's easy as well.

Basketball


Now that we have Wilma joining us, let's head to the basketball court east of the city. Guess what? This one's just as easy.

TheMaskedCobbler plays The Flintstones: The Rescue of Dino & Hoppy - Part 1 of 7

We cover a rather underrated game that utilizes a very popular yet underused (in terms of video games) license with probably the calmest LPer who ever lived.

Bedrock


To grab onto ledges, press and hold Up and Fred will grab on to the ledge once he's close enough.

Hold down the attack button and Fred will charge up his club swing. The more you fill up the power meter, the harder it's going to hurt. The only drawback is that Fred moves slowly as a result of rearing his club back.

The coins will come into play throughout the game, so grab them whenever you defeat an enemy. The steak in the barrel (I guess that's what it is) increases your maximum health by one heart, so grab it. Hit the see-saw with a powered-up strike to laucnh Fred into the air. The first one takes you to an easy-to-miss extra life if you go left.

Be careful when you walk on the skeleton bridge, as the last four segments before the tail fall when you walk on them.

The hamburger increases the length of the power meter, so grab one whenever you see it. A high power meter can come in handy later in the game.

Whenever you die, your power meter and energy return to normal and you lose half your coins. Be careful.

When you cross the pterodactyl platform to the other side and reach the see-saw, hit the barrel on the lone ledge. This contains an axe, and pressing Up+B lets you throw an axe into the air. You need coins in order to use this weapon, though, and it takes three coins to throw an axe. (Taito borrowed from Castlevania, I see.) You can carry up to 100 coins.

The boss here is a fire-spitting dragon. Hit him in the head five times with axes while avoiding his flame breath. Simple enough.

When you beat him, you'll get the first piece for Gizmo's time machine. Once you grab it, Fred automatically crosses the dragon to the other side.

Basketball


To the right of Bedrock on the map is a basketball court. If you can score more points than your opponent, you'll be able to win prizes. Thankfully, you can steal the ball from your opponent with a well-placed hip bump and win these games rather easily.


Whenever you win a basketball game, you'll get a Gazoo power-up. These will let you fly around in a level or leap high into the air to power your way through levels at times.

Thursday, May 22, 2014

Um...last.fm.


I couldn't think of anything else for an epilogue.

DeceasedCrab plays 5 Days a Stranger - Part 10 of 10

Finally, time to exorcise this spirit and go home!

Okay, that apparently didn't go over so well. Here's something you need to do before you read the Black Magic Book.

Give the Teddy Bear to Jim. Then, grab the shotgun off of the fireplace and give it to Simone. Now you can read from the book.

Simone and Jim will re-enact the destruction of the second child, then they and Trilby run away after Tribly "shoots" the spirit of the child. Simone and Jim meet up with a constable while Trilby slips off into the night.

Easter Eggs


If you keep looking at a door, the game eventually spins off a strange spiel about some girl named Patricia.

The TV shows different things on different days. On Day 2 it mentions Simone and Jim's disappearance. Day 3 brings up the death of the DeFoe estate's solicitor. Day 4 shows that someone else is hosting the documentary (Peter Daltry, to be exact), and Day 5 shows the police surrounding the manor.


Wednesday, May 21, 2014

DeceasedCrab plays 5 Days a Stranger - Part 9 of 10

We reunite the second child with his body in this installment!

Go back to Matthew's bedroom and you'll find Jim. Jim will ask you to throw away the apron, knife and welding mask from last night, and wants you to get rid of them. When you ask him about what happened, he'll mention what you did under the influence of the idol only to mention that he touched the idol and blacked out as well.

Head back to the library and use the hand on the black books on the right side of the bookcase. You'll get the Black Magic Book. Use the eye on it and you'll find the spell you're looking for. Go downstairs and head to the lounge. You'll find a pair of scissors on the dresser. Take them.

Use the scissors on the leather apron. You'll need the thin strip of leather for later. Tie the strip to the welding mask, then use it to the machete. This will be used to hunt down the second child's body. Head back to the kitchen and dip your newly made detector into that big bag of salt. (You'll notice that the portrait on the wall in the conference room is completely blank now.)

Head into the dungeon. Use your locator, and you'll find out that the child's body is here. Use it on the chains, and then look at it again. It will point upwards. Head up to the landing, and look at it again to find out it's pointing to the right. Enter the bathroom, and it will face southwest. Use the scissors to take your locator apart, then use the machete on the tiles. There's the kid's body. Take it.

But where are we going to find a place of fire and death? The trophy room with the fireplace, that's where. Place the body on the floor across from the fireplace, then place the apron in it and you'll lay everything else on the remains.


Go back to the lounge and talk to Simone, then go back upstairs and talk to AJ. Ask them both to meet you in the trophy room, and they'll head over there. Head back to the trophy room and use the Black Magic Book on Trilby.

DeceasedCrab plays 5 Days a Stranger - Part 8 of 10

Everything is revealed.

Alright, choose "What makes you think I killed Philip, anyway?" followed by "I was possessed by the ghost!" followed by "It possessed me just like it did when I killed AJ," then "I'm delirious with guilt most of the time." Simone will give you your tie back. Use the lockpick on the door, only to leave and find out that Simone has disappeared.

When you enter the conference room, you'll notice that the picture of Sir Roderick DeFoe is now a skeleton with blood stains on his jacket. Spooky. Head up to the landing and enter the bathroom. Simone will find you, and find out that you didn't really kill Philip after all. She saw the man in the welding mask, but he didn't notice her. The man in the mask himself then shows up. When he walks onto the rug, pull the rug out from under him. You'll find out it's...Jim?

Day Five


Jim is fine, and Simone now believes what's going on is actually...well...what it is. Trilby and Simone agree that it is time to find the ghost's body to make it quasi-mortal...and able to be killed. Turns out there's a reason for all this:

Sir Roderick had more than one son.

Turns out the monster that Sir Roderick created wasn't Matthew. It was someone else...and the boy behind the kitchen door that Matthew talked to is related to this. He was obviously a prisoner in the basement, since Sir Roderick didn't want Matthew to have anything to do with him. Turns out Belinda gave birth to twins, since she died twenty minutes after Matthew was born. Since Sir Roderick blamed this second child for her death, he kept this child locked in the dungeon and refused to acknowledge his existence. Since this child has no education and no love, he's completely mentally incompetent and insane, and he thinks everyone is Sir Roderick, who has come to torture him some more. Sir Roderick went mad and tried to kill him, but Matthew bandaged the second child up. This child lived long enough to don a welding mask and a leather apron and stab both Sir Roderick and Matthew to death with a machete.


The only way to stop this is to find this child's body and get its soul back in, so that he can be killed.

Tuesday, May 20, 2014

DeceasedCrab plays 5 Days a Stranger - Part 7 of 10


Well, we find some stuff and end up trapped in a toolshed. Fun.

Anyway, head downstairs and into the kitchen. Turns out there's supposed to be a staircase on the left wall, but it's been bricked over. Time to use the pickaxe on that wall and break a hole. Use the hand on the hole and you'll find a dungeon. Use the eye on the chains in the wall, then look at the salty bear again. It'll point southwest, so walk in that direction until the bear points straight down when you look at it. When that happens, use the hand on the area in the floor and you'll dig up a skeleton. It's Matthew, and Trilby finds another corpse next to it. Turns out this is Sir Roderick, meaning that both of them were killed by somebody.

Trilby then hears a smashing noise. Head back to the room with the fireplace and you'll find out that the glass dome with the idol has been smashed. Use the hand on it and Trilby will check it out only to find some stains.

Day Four


You'll see a screen where Phil is stabbed and the supposedly dead man in the welder mask gets back up only to be smacked in the back of the head with a lead pipe by Simone. Then Trilby will wake up in the shed.


There's no way out. Speak into the window, and Simone will tell you that you killed Phil. Turns out as soon as Trilby grabbed the idol, he blacked out and was possessed by the ghost. You'll figure that out as you ask Simone questions.

DeceasedCrab plays 5 Days a Stranger - Part 6 of 10

salty bear

Head back upstairs to the landing and enter the library. Jim will be there. Ask him a few questions, then ask if he wants to tag along. He'll join up with you.

Head back outside and use the saw on the tree. Since you have Jim with you, you'll be able to cut the tree.

Head back to the landing and use the lockpicks on the fourth door. Welcome to the bedroom. The wardrobe has a book above the clothes hangar, so grab that. Use the eye on the scratches below the window, and you'll find out they're not human. When you use the hand on the window, you'll find out that it's not jammed like the rest. Too bad it overlooks the back yard. Doesn't matter, though. We're going to get Trilby to do what Trilby does best.

When you head out, you'll see a windowsill to your right. Use the umbrella on the broken tile on the roof, and you'll use a grappling hook to get to the other side. It's like a combination of Batman and The Penguin. From there, open the window and you'll be in Matthew's bedroom. Grab the teedy bear off of the bed, then check the nightstand for a diary. When you leave this room, you'll come out through the third door on the landing.

Use the eye on the red diary to look through Matthew's entries, and on the green one for Sir Roderick's entries. Once you've looked through both diaries, Trilby gets a good gist of what's going on.


Time to head back to the library. When you do, use the hand on the black books on the right side of the bookcase. When you read it, you'll find out how to find Matthew: tie the teddy bear up with some sort of string, dip it in salt and have it point towards his body like a compass when you hold it out where the person in question sleeps. Time to head down to the kitchen, use the cord on the bear to tie it up, use the twig on it to hold it without using your hands, and place the teddy bear in the big bag of salt underneath the counter. With a salty bear on a stick in hand, it's time to head back to Matthew's bedroom and use it on the bed. Use the eye on it, and it will indicate that the body is downwards. Under the house, perhaps?

Monday, May 19, 2014

Doki Doki?


Panic.

DeceasedCrab plays 5 Days a Stranger - Part 5 of 10

People start disappearing. It's time we started looking around this house.

Head back outside and talk to Phil. Give him the plans to the house. He'll be disappointed as there is no way to access the front yard, and he will give you the metal detector. Go back to the pool and use the metal detector on the pipeline next to the pool. The trail ends at the hole in the middle in the screen where you talked to Phil. Use the hand on the dirt and you'll find something. It's a panel. Touch it, then head back to the pool to find that the water has been drained.

When you go down the ladder...you'll find AJ's dead body. It appears somebody has killed him before tying him to an iron hook at the bottom of the pool. Trilby will automatically head back to the foyer, telling Phil and Simone what happened. Phil then becomes mistrusting of everyone else and goes into the lounge. Simone will tell Trilby that Jim is upstairs, and Trilby automatically goes into the bathroom. Trilby finds somebody, only to find the word "Father" scrawled on the wall in blood, followed by a bathtub full of blood...and a charred skeleton pulling him in!

Once again, it's another dream.

Day Three


Jim wakes you. He already knows about AJ. When he heads out of the lounge, head to the conference room and talk to Phil. He's clearly got no trust in your or anyone else still alive in the manor. Jerk.


When you go outside through the screen door in the kitchen, you'll find a red subcompact car...Trilby's! But how did it get here? Strange. Anyway, use the hand on the car and Trilby will automatically unlock the door to the driver's seat and find his lockpicks. Must have fallen out of his pockets when he left the car. Looks like they'll be put to good use. Go ahead and use them on the shed behind you. Grab the pickaxe and the saw, then head out.

Sunday, May 18, 2014

DeceasedCrab plays 5 Days a Stranger - Part 4 of 10

In this episode, we get access to the library and do a little research of our own...

Alright, it's time to do some stuff.

Head to the front lobby, then enter the door on the left to the conference room. You'll see Jim seated in a chair. Ask him questions, and you'll find out that Simone has finally broken into the library.

Head outside and head back to the holes. You'll see Phil digging again. Asking him questions will prove he's more interested in finding treasure than finding a way out of here.

Now it's time to go upstairs. Use the hand on the second door and you'll find out it's open. This is the library, and Simone is there. Talk to her, and you'll find out that not only did she have the same dream as you, she didn't break the lock on the door and that it just decided to open itself up.

Use the hand on the beige books on the left side of the bookcase. This will give you a map that will come in handy. If you use the eye on it, Trilby will notice there's something on the map that doesn't belong.

If you haven't already, use the eye on the article in your inventory.

Use the hand on the blue books at the bottom left of the bookcase will net you a book on the DeFoe lineage. It goes into a bit of detail about the sudden disappearance of Sir Roderick DeFoe and his son Matthew.

DeceasedCrab plays 5 Days a Stranger - Part 3 of 10

We ask some questions and get...very little.

Well, it's question time. Ask Jim, Phil and Simone questions.

When you talk to Phil about how he managed to end up in the manor, he'll give you an article about the history of the DeFoe Manor.

Trilby will come to the conclusion that the house only traps people individually. The day ends with all four people in the room agreeing to look for AJ the next morning, so he can share research he's found on the house.

Day Two


Trilby will hear a sound and come to the front door. Phil, Simone and Jim will all be dead. A man in black wearing a leather apron and a welding mask comes out through the door on the left, and when Trilby asks who he is, the man takes his mask off and...it's Trilby's face.


Trilby then wakes up. It was all a dream.

Saturday, May 17, 2014

DeceasedCrab plays 5 Days a Stranger - Part 2 of 10

We meet the dramatis personae of this mysterious happening...

All right, let's head back to the front door. From here, enter the door to the left. The next room to the left is the kitchen. There's no food in the fridge, and the only thing of what seems like use is a big bag of salt. Go through the screen door, and you'll be at the back of the house.

Take the twig, then head to the right (the shed near the pool is locked). You'll see a bunch of holes where Phil has tried to dig his way out.

Well, there's nothing left to do here, so get back in the house and head back upstairs. You'll find somebody trying to get one of the doors to work. This is Simone. After a rather interesting conversation, Simone will head to the lounge.

Head back outside and use the hand on the tree. You'll find out someone's up there, so use the speech bubble on it. Jim will climb down from the tree. Guess what? Climbing the tree to escape is a no-go because of the ravine past the wall. He'll head to the lounge after you talk to him.


Head back to the lounge. It's the room to the right of the front door. Since AJ can't be found, it's just you four. Next time: we ask questions.

DeceasedCrab plays 5 Days a Stranger - Part 1 of 10

What starts out as a usual empty house heist goes terribly awry...

Well, time to start at the beginning.

Day One


The game starts with Trilby entering the DeFoe Manor through a window.

Anyway, use the Use command (hand) on the safe. (I'll be using the same commands as on 6 Days and 7 Days in the guide, since we should all be used to the interface of the game by now.) Trilby will find out the safe is empty. So much for that. Use the hand on the window and you'll find out that the window is stuck. Guess you'll have to get out the old fashioned way.

Use the hand on the door, and you'll soon find out you're not alone. The man you meet will soon run away. Go to the door all the way to the right side of the room, since the rest are locked and the window here doesn't work, either.

When you enter the bathroom, pull back the shower curtain to find...nothing. Leave the bathroom, go down the stairs and use the hand on the front door. It's locked in a mysterious manner. You're stuck here. Not surprisingly, the line's dead. However, there is a newspaper on the desk below the phone. Use the hand to grab it. Reading it will tell you about Clarence DeFoe's (the last of the DeFoe line and the last owner of the DeFoe Manor) supposed death.

Enter the door to the right of the unopenable front door. Enter the door to the north, and use the hand on the television. You'll get some more of the game's backstory. After that, grab the cord to the left of the television. You'll be needing it later. Enter the door on the right.

You'll meet another man in this room. You'll find out he's also trapped, and that his name is Philip Harty - Phil for short. You'll also find out there are three other people in this house. You'll be meeting them shortly. There's Jim (the youngest), Simone Taylor (a BBC correspondent who came to make a documentary), and AJ (a mysterious thin man with a mustache). AJ is the man who ran away from you at the beginning.


Phil will want you to find the other three and tell them to meet up with him in the lounge.

Friday, May 16, 2014

Mega Man 2 - The OST

NintendoCapriSun plays Mega Man 2 - Part 7 of 7


Enjoy your ending.

When you beat the alien, you'll find out that the room was dark, and that it was just a corporeal hologram controlled by the real Dr. Wily, who is revealed when the lights in the room come on. After finding out that his hologram has been defeated, Dr. Wily surrenders.

Mega Man then travels back home, with the seasons changing and his armor changing colors to match. Fall matches with Atomic Fire, Winter matches with Bubble Lead, Spring matches with Quick Boomerang, and Summer matches with Air Tornado.

When he makes it home, he vanishes. His helmet lies on the hill.

The credits show which members of Capcom made which Robot Master.


Thursday, May 15, 2014

NintendoCapriSun plays Mega Man 2 - Part 6 of 7

We finally finish Dr. Wily once again!

Dr. Wily - Stage 4
(continued)


The Crash Bomb orbs are probably the hardest boss in the game. The only walls you need to take out are the ones that directly block the orbs. Use the Items to reach the rest. If you die and recharge the Crash Bomber, the orbs will respawn, but the walls won't.

These things flash before they shoot at you, but if you rapidly press Start right before they hit you, they'll pass right through Mega Man and cause no damage whatsoever.

Dr. Wily - Stage 5


As soon as you enter Stage 5, you'll immediately take on the whole boss rush section. From upper left to upper right, clockwise, it's Heat Man, Air Man, Wood Man, Bubble Man, Quick Man, Crash Man, Metal Man, and Flash Man.

I could waste a whole bunch of time typing up what all of their weaknesses are, but I'm just going to repost this because it saves me a lot of time, it's really hilarious, and it's actually pretty easy to remember...because anyone can remember pictures!

Whenever you beat a Robot Master, they leave a large health pick-up. Always grab it. Always.

It should be noted that you can hold B down to charge up the Atomic Fire if you have it equipped.

Bubble Man's chamber does not have spikes for a ceiling.

Since Quick Man's chamber is now a level playing field, he's a lot easier as a result.

Metal Man is the only Robot Master that falls to his own weapon in one hit (two on Difficult).

If you use Time Stopper on Flash Man, you actually heal him.

When you beat all eight Robot Masters again, you'll see another teleporter pad in the upper center of the room. Jump in and you'll face Dr. Wily. Again. Use Crash Bombs on the window of his ship to blow off the armor and reveal Dr. Wily, then throw Metal Blades at him to finish him off as quickly as possible. When you win, the whole floor explodes and Mega Man gets sent falling...

Dr. Wily - Stage 6


There's no music here, and the only sound you hear are the drops of acid hitting the ceiling. If these things hit you once, just let them kill you. One hit from these saps a third of your life bar.

If you go all the way to the right as you fall and keep holding Right on the Control Pad, you'll be able to run without having to worry about those acid drops at all.


When you enter the final chamber, Wily turns into an alien. Only one weapon will work on him: Bubble Lead. Avoid him and the bullets he shoots out, and smack him with Bubble Lead in close. As you spend more time with this boss, you'll be getting this guy down to a science and just dodging everything perfectly on auto-pilot.

NintendoCapriSun plays Mega Man 2 - Part 5 of 7


We are now officially halfway through Dr. Wily's castle!

Dr. Wily - Stage 2
(continued)


After you make it past all those crushers, drop down and avoid the spikes. At the bottom, you'll face panels of the walls combining together to form robots. Use the Metal Blade or the Quick Boomerang on them to bring them down as quickly as possible.

Dr. Wily - Stage 3


Oh, hey, the music changes.

You could use your Crash Bombs to get that Energy Can and refill your energy at the beginning, but why would you want to?

When you make your way down, you'll land in the water. Avoid landing on the spikes as well as the giant metal fish that come out of the bottomless pits. When you make it to the end, you'll have to traverse a downward path lined with spikes. Avoid the spikes as you fall, which is harder than it looks because you fall faster for every consecutive screen you go down.

Once you reach the bottom, it's a short trip to the Guts Man Tank. To take it out, throw Metal Blades at its head while you avoid the tiny fireballs it spits out and the Mettaurs that come out of its stomach.

Dr. Wily - Stage 4


Oh, joy. The whole place is purple.

In case you need to refill some special weapons, you have two large weapons pick-ups at the beginning.

There are invisible floors in this level. To find out where they are, just use your Bubble Lead. The Bubble Lead drops straight down at the edge of a platform, so you can tell where to jump. The spike pit has a fake floor title just next to the ladder.

If you can successfully traverse the fake floors afterwards, you'll be able to help yourself to another Energy Can.


When you make it to the top, do not jump straight off the next ladder. Instead, climb down and wait. It's those moving platforms from Crash Man's stage again. Thankfully, these things are easy when you know where to wait at. You're better off using Item 2 at the last moving platform to ensure that you make it to the other side.

Wednesday, May 14, 2014

Self-explanatory post is self-explanatory.


Trust me, this is going to help.

NintendoCapriSun plays Mega Man 2 - Part 4 of 7

We finally start Dr. Wily's Fortress in this entry!

Wood Man
(continued)


The ostriches just jump every so often. You could take them down, but why would you want to when they leap right over you?

To beat Wood Man, you could use Atomic Fire. However, you can hit him multiple times before he sends those leaves from above in addition to the Leaf Shield if you use Metal Blade. Just avoid all those leaves and use an Energy Can if necessary.

Beating Wood Man gives you the Leaf Shield. And with that, we have all eight Robot Masters finished!

Dr. Wily - Stage 1


You'll be using Item 3 a few times to make your way over the walls at the beginning.

The 1-up you see when you reach the inside of the fortress is easy to get if you use the ladder above the platform that leads to it.

When you reach the top of the ladder that seemingly leads to nothing, use Item 1 to get to the ladder on the other side. Stand on the very edge of the platforms you create in order to go farther before you reach the ceiling. Once you start going up, you'll be dealing with the little blue guys again. Then, you'll be going over a very desolate hallway. Once you jump over a few platforms, the screen gets dark and starts to autoscroll. You'll have to deal with a dragon that follows you, and when you reach the end, you'll have to fight it.

To beat the dragon, pound him in the head with the Quick Boomerang. You'll be able to do the most damage as quickly as possible. Avoid those fireballs, and don't fall into the pit!

Dr. Wily - Stage 2


Use Item 2 to go past the spike pit. Take the ladder on the right to get an Energy Can. If you keep going down from here, you'll be able to get another Energy Can as well as two 1-ups and a bunch of weapon pick-ups.


When you drop down after the second 1-Up and second Energy Can, avoid the spike pits and aim for the hole in the center. You'll finally hit ground below. Deal with all the drills (and refill everything you need), and then use Item 3 to get up the wall.

Tuesday, May 13, 2014

NintendoCapriSun plays Mega Man 2 - Part 3 of 7


We finish off the rest of the Robot Masters and head to Dr. Wily's lair!

Quick Man


Using Item 3 here will help you to the extra life at the beginning.

Shortly after the beginning, you'll be seeing lasers coming out of the walls. Touching these will cause instant death. They're easy now, but not long into the level...

If you take the right path, you'll get another extra life and another Energy Path. You'll have to be quick to get in that cranny, though.

When you finally hit ground, you'll meet up with robots that look like torches. I'm guessing these guys were supposed to be in Heat Man's stage. When you get near them, the room finally lights up. When you defeat them, the room turns dark again. If it feels like you're (literally) going nowhere, jump to the right and you'll be able to continue.

The first two screens afterwards have the lasers but are thankfully pretty easy. For the third screen, avoid the weapons pick-up and go right as soon as you starting falling towards the fourth screen. You'll get a head start on the first three lasers. Stay away from the power-ups on the fifth screen, and run like hell on the sixth. The seventh is dead easy, thankfully.

Fighting Quick Man can be a pain. Carry plenty of Energy Cans with you, and use the Time Stopper when his energy is less than half.

Beating Quick Man gives you the Quick Boomerang.

Heat Man


You'll be dealing with a lot of platform jumping over lava while avoiding the little blue guys. The lava is instant death if you touch it.

Guess what? You'll be dealing with those crazy blocks in the wall that appear and disappear while acting as platforms from the Elec and Ice Man stage. They're still as annoying as ever.

You could do that long, long wall block segment, but if you have Item 2, it becomes a lot easier and you can breeze through it. You'll miss an extra life, but is it really worth getting?

Heat Man looks like a Zippo lighter, in case you're wondering. Hit him with Bubble Lead, and jump over him to the other side of the room when he lights up.

Beating Heat Man gives you Atomic Fire and Item 1.

Wood Man


If you hold B when you choose his stage, the stars in the background will change to birds. Why? Not sure. Nevertheless, it's one of the first Capcom easter eggs.

The first enemy you'll meet up with in this stage is the bats. When they uncurl themselves, they make themselves vulnerable. All they can do is fly towards you, though.

Not sure if those are rabbits or kangaroos, but they throw carrots at you. They don't move around very much either. They just jump towards you and throw carrots in your direction (and those carrots track really well). I'm guessing they're rabbits, but they still look like kangaroos to me. Maybe it's their noses?

You'll also fight giant robot dogs. Shoot them down with the Proto Buster (or the Metal Blade) as you avoid their flame attack, which curve down and then up. If you use the Time Stopper before the first one, you can skip these guys entirely.


The gorillas jump up from under the platforms if you get close. If you jump straight up and take them out with a Metal Blade or two, they should be no problem.

NintendoCapriSun plays Mega Man 2 - Part 2 of 7


We begin the episode by getting the most overpowered Robot Master weapon ever and take down two more Robot Masters afterward.

Metal Man
(continued)


The guys that take a ride on the gears are really hilarious. You can see when they're coming, too. Shoot the gear and the clown riding on it will be sent tumbling down.

If you have one of the Items (preferably Item 1), you can get the Energy Can here.

To beat Metal Man, just avoid the buzzsaws he throws at you and stay on one side of the screen. If you come towards him, he'll just leap all the way to the other side. Whenever you shoot, he shoots. Also, the direction on the conveyor belt changes every so often, so you'll have to be on your toes and keep an eye on what direction the floor is sending you.

The little dome-shaped guys that are low to the ground and move quickly when you're at their level can be taken care of with Bubble Lead or the Quick Boomerang.

When you beat Metal Man, the Metal Blade is yours. This deadly buzzsaw not only fires in eight directions, it also takes out a lot of bosses and enemies. It also has a lot of ammo, so you can basically use this with reckless abandon.

Air Man


Oh, boy. Air Man. Probably one of the earliest known side-scrolling stages I can think of that created the illusion of 3D in a 2D platformer with those clouds.

The huge platforms that materialize as you make your way across have some nasty hazards of their own. As long as you stand on them, an infinite amount of flying robots will come at you from the vents in the sides. Also, spikes rise and sink at the edges, which can make leaping on and off these platforms a pain. They hurt, too.

The robots riding on the platforms going in circles throw lightning bolts at you. At least taking these things out and leaping onto the platforms they guard is a lot simpler than what you had to deal with in the Ice Man stage back in the first game.

Once you're done with those platforms, you'll be dealing with birds dropping eggs. If the egg hits the platform, you'll be dealing with a bunch of smaller birds. At least these things are likely to drop power-ups if you kill them. You're better off destroying the egg before it hits the floor, though.

In the vertical portion of the stage, you'll see floor pads that shoot out what looks like pieces of animated blue bacon. These things are really annoying if they land on you, and it makes shooting those little floor pads harder just with their presence. Thankfully, you can just avoid the ones here entirely.

The guys with the fans in their torsos slowly push you back. Thankfully, they don't do much else, which makes them a breeze (pun not intended) to take out. Walk forward and keep an eye out for other threats as you take them out.

Near the end, you'll be dealing with birds, but you won't be able to see them because of the clouds. So be careful.

To beat Air Man - without the Leaf Shield you get from Wood Man, which is easier to pull off - avoid the tornadoes as they blow towards you and shoot at him. After three salvos, he'll jump towards the other side of the room. Be close to him when he lands, and you'll be able to pound on him with the Proto Buster for massive damage.

When you beat Air Man, you'll get the Air Shooter, which shoots three tornadoes in upward arcs. You'll also get Item 2, which allows you to fly forward on a tiny platform.

Crash Man


You'll be doing a lot of climbing and falling in this stage.

First things first: the blue guys that come out of the pipes endlessly spawn. So don't even bother trying to kill them all unless they're in your way. They'll be doing that a lot, too, as they always fly towards you.

The Mettaurs make a return appearance here, and this time around they're easier. When they peek out of their hats, they shoot three bullets at you and then run towards you. They only do this when you're a certain distance away from them, though.

The platforms after the Mettaurs follow a specific path, indicated by the white line in the wall. As you take the path to the ladder, you'll be dealing with those little blue guys again. You'll be doing this for about three screens.

After dealing with another stack of sentient cans, you'll be climbing again. This time, you'll also have platform jumping and Mettaurs thrown into the mix.

If you have Item 3, you can take the left path. Otherwise, take the right path and take the ladder to the right of that after two screens. You'll be going into space (I guess) and dealing with those stupid birds from the Air Man stage again. If you're on the left, you'll see that gas canister-shaped robot. The path to the left leads to another Energy Can.

The last portion before the boss door has an extra life, which you can easily get if you have Item 3. The crushing robots here are smaller and a lot easier to take down.

Beating Crash Man is a snap if you have the Air Shooter. Just face him, jump and shoot the Air Shooter at the top of your jump. He'll jump and throw down the Crash Bomb whenever you shoot, which makes his pattern a complete weakness when he runs into the tornadoes of the Air Shooter every single time.


Beating Crash Man gives you the Crash Bomb, which works just like the bombs Crash Man throw at you, except they travel forward in a straight line.

Monday, May 12, 2014

NintendoCapriSun plays Mega Man 2 - Part 1 of 7


If you're wondering what the difference between Normal and Difficult is, all the bosses take less damage from special weapons and some enemies take more shots to destroyed.

With that taken care of, on with the show.

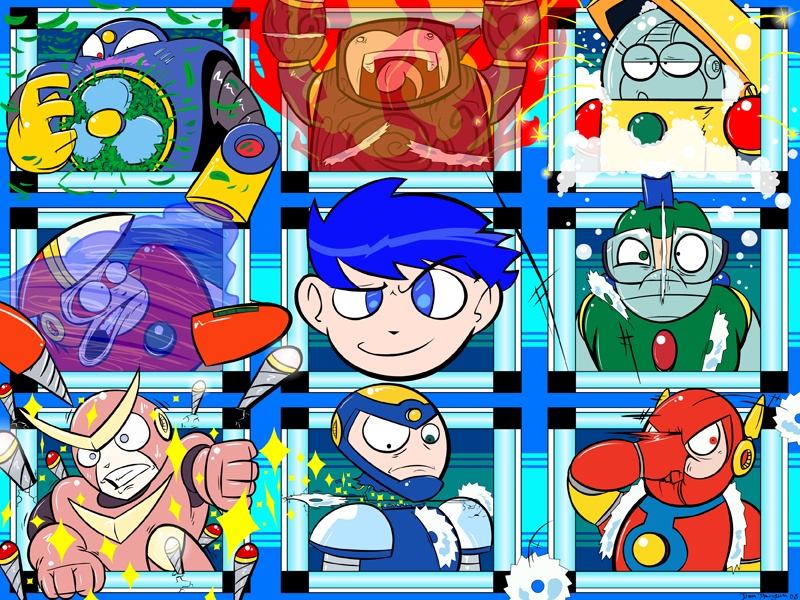
Instead of six Robot Masters to deal with, you have eight Robot Masters this time around. Once again, you can start with any Robot Master you want. Since I'm covering everything in the order NCS does it, we're starting with Bubble Man.

Bubble Man


Bubble Man is perhaps the easiest to deal with if you have just the Proto Buster, so let's go ahead and do that.

The frogs shoot miniature clones out of its mouth. Take out the source, then stand still to kill off all the underlings.

The robots with the red shells go faster when you shoot their shells off. Either hit them directly from a lower point or jump out of the way!

When you jump into the water, you'll jump higher than usual. Keep that in mind so you don't accidentally drift upwards into the spiked ceiling.

To destroy the big angler fish, just shoot at the angler on its head. The shrimp that come out of its mouth and lunge towards you can give you power-ups (and come in quite handy if you're playing this later in the game), so shoot them down as you take out the big fish. Unlike the last game, the health power-ups come out much more often from destroyed enemies, and you no longer have those pesky point icons to deal with. You can also get extra lives off of enemies if you're lucky.

Watch out for the jellyfish. Not only do they come down rather slowly, they also start following you shortly after they reach your level and explode upon contact.

Once you get out of the water, you'll start seeing crabs falling down the waterfall in the background. If they hit the platforms, though, they're not very fast and they go down in one shot.

To beat Bubble Man, walk under the bubbles and jump over the bullets, and shoot him as he slowly comes back down to the ground. He just keeps doing this while going from one side of the room to the other, so he's really not that hard at all.

When you beat Bubble Man, you'll get Bubble Lead.

Flash Man


I always did this guy first. Seriously, he's even easier than Bubble Man in an all-Proto Buster run.

The robots that look like gas canisters shoot both straight and at an angle. They take a short break from shooting before they switch between the two angles, so use that as opportunity to get some extra shots in on him. The straight shots have a bit of range and speed, so be careful.

As you go through this level, you'll be going through a maze of sorts. There are only a few dead ends, but if you take certain paths, you may be able to get extra lives or an Energy Can. (More on those later.) The floor also has quasi-ice physics, so you'll be sliding around for about a second after you come to a stop.

The walls that are comprised of squares with smaller squares in them can only be destroyed with the Crash Bomb, which you won't get until you beat Crash Man.

As you start going down the vertical portion of this stage, you'll meet MM2's version of the crusher robot. It's a Sniper Joe in a two-legged mecha, and he shoots at you in five angles. Even if you can (very easily) take this robot out, you'll still have the Sniper Joe to deal with. At least he can't move and he's got a pattern this time around.

The enemy that looks like a stack of cans can only be shot in the portion with eyes. If you're playing on Difficult mode, he takes two hits instead of one, and after that first hit, the other portions fly off of his head and come straight at you with no warning.

If you can stay on the top of the screen and manage to make it across all the small platforms at the end of the vertical portion, you'll be able to get an Energy Can. These cans can be used to completely refill your energy in the midst of a difficult situation (preferably boss battles), and you can carry up to four.

Flash Man is hilariously easy. Just shoot at him with the Mega Buster and stay out of his way. Stay in the air he pulls his arm cannon out. There's a good chance you might avoid his firepower completely.

When you beat Flash Man, you'll get the Time Stopper. You'll also get Item 3.

Metal Man


Metal Man not only has one of the most awesome weapons in Mega Man history, he's also got one of the better BGMs and level designs in the franchise as well. Gears spinning in the background, the earliest uses of conveyor belts, and one of the most frantic pieces of video game music from the late '80s.

The pink arrows that flash at the ends of the conveyor belt tell you which direction the conveyor belt you're on is going at a glance. One of the first that goes left has an Energy Can at the end, which is easily attainable.

The spiked crushers take out almost a third of a full energy bar, so avoid these at all costs. You can jump through the chains that hold them, but I wouldn't recommend it.

The drills come out in certain section of stages, they take a few hits before they go away, they give out a lot of power-ups if you go slowly, and they don't stop coming at all until you reach the end of said section. They can also hit you by surprise, so go slowly.


If you have one of the items near where the vertical portion begins, you can get the 1-up on the top conveyor belt at the end.

The Music of TaleSpin for NES

The Baseball Stadium

Bonus Stage

Boss Battle

The Cave

The City

The Clouds

Cutscene Theme

Game Over

The Haunted House

The Iron Vulture

The Jungle

The Mountain District

The Sea

Title Theme

Wildcat Shop

Sunday, May 11, 2014

corona180 plays TaleSpin - Part 5 of 5

It's the final video, and we take it to Don Karnage's domain!

Stage 7


For the penultimate stage, we enter the dark jungle.

The Pygmy Tribe shows up in this area as enemies, and surprisingly they're actually from the show. The guys on the ground throw spears upward whenever you're directly above them, and the catapults definitely give them some range in the air.

The totem poles act as turrets that shoot at you regardless of whether or not you're behind them, but thankfully they go away after a few hits.

The aerial part is like Joust, except you can actually fly without effort and you have a gun. The natives actually ride on giant birds and throw spears at you as soon as they stop moving.

To beat the boss, shoot down the gem in the statue, and avoid the natives' spears. Thankfully, you can shoot down both the native and the fireballs that come out of the statue's eyes.

If you keep going in a clockwise motion, you can easily avoid both the natives and the fireballs (the latter of which seem to follow you) and shoot just about everything you come in contact with out of existance.

Stage 8


This is it! We're in the mountains for the last delivery of the day!

There are no money bags to grab, no bonus stages to get into and no crates to collect, so just worry about shooting down everything in sight and making it to the end in one piece.

The guys that drop rocks on you don't take very much damage before they fall.

The boss here is Don Karnage in his tri-plane. Yes, there's three wings. You can only shoot him in the propeller and nowhere else, so avoid his bullets as he flies around in a circle and shoot at him when he's on the right side of the screen.

When you beat him, you instantly go to the Iron Vulture! To beat it, avoid the enemies as well as the bombs that fall from the sky (pay attention to the top of the screen to see where they'll be dropping from) and shoot down all the propellers. When you finally take down the propeller at the back, you've won!

Enjoy your ending cutscene where Kit Cloudkicker looks like he's been hit in the face with pepper spray and Baloo looks really sad for some reason. I thought the ending to Karate Kid was hilarious...