I had all the blog entries I wanted to post on here on a USB drive.
Two years' worth.
It's all gone now. The USB drive suddenly stopped working and I never backed any of it up.
I'm sorry, everyone. I'm sorry this is so sudden. But there's nothing I can do. This sucks so much.
- PrinceWatercress
1/21/2015
Wednesday, January 21, 2015
Classic Gaming Room reviews Enduro
Of course, you don't have to take my word for it.
/readingrainbow
AwesomeRickyC plays Enduro
Atari 2600? Sure, why not?
As you progress through the game, your pedometer goes up much like one of the manual, turned-by-gears types of the cars of the day in real life. (This game was released in 1983, prior to the "crash," after all.)
You start the race in the daytime, before the sun sets. It's bright and everything looks nice and clear, and for a first person driving game made for one of the consoles from the first half of the 1980s, everything looks good. Hold down the fire button, and move the joystick left and right to steer. Avoid all the cars, and race to beat the clock and pass the required amount of cars before sunset.
When the ground turns white, don't be alarmed. It's not snowing. It just means that it's about to get dark. Once the ground turns a nice forest green, the sun sets rather beautifully in the background. This effect is easier to notice if you're not the one playing, and it's really nice. Just to put that last statement in perspective, I was born in 1986, my first system was the Super Nintendo (even though I played NES and barely remember playing Atari before this) and didn't play this game until I saw it at a friend's house in 2010. I actually played the game as my friend described how it looked as the sun set and night took its place, and just seeing this in action first-hand almost made me crap my pants, to say the least. For something that's from between the dawn and rebirth of video gaming, this is rather impressive.
If the screen is in black and white and the pedometer and Activision logo aren't, don't adjust your set. It's nearly dark out! The cars disappear and are replaced with the glow of their tail lights. Shortly afterward, it's pitch black, and your vision is limited. You'd better be careful here, as you can barely see half the road and the tail lights of other cars will pop up when you least expect them to.
When it's light again, you'll start the next stage if you've passed all the cars, and you'll have to pass even more cars than last time. (At least you'll be able to see the cars again.) If you didn't pass the total number of cars the game wants you to pass, it's game over.
Hitting another car is disastrous. Besides bringing you to a complete stop for a few precious seconds, you get knocked back quite a bit. Every time that happens, it really sucks, as that's time and distance that's pretty hard to make up as you go along. That's especially more true in the later level, as the cars are spread out in more uneven patterns and they aren't all in a line like in the beginning of an Enduro session. Your best bet is to keep a high average speed and keep it as long as possible throughout the game to give yourself the best possible chance.
If you hit the guardrail at either side of the road, you'll slow down a bit, but at least it's not as bad as running into another car and it's easier to regain control. If you have a choice between hitting a car and the guardrail, hit the guardrail.
Looking back at all this, it's pretty easy to understand why I like this game over other games of the genres for the 2600, like...say...Night Driver. The graphics aren't slightly confusing sometimes like in Night Rider, and unlike the much-revered Pole Position, where you have a few seconds before every race to make yourself feel "ready," this game is non-stop. You'd better be ready for a long, long drive once you become really, really good at this game.
Would I recommend this game? Hell yeah. It's probably one of the most underrated Atari 2600 games of all time for its ease of controls, comfortable learning curve, and the transition from sunrise to sunset to sunrise again which still looks great all those years later. If you see this game, pick it up, especially if you have a 2600 that still works. It's definitely worth it.
Tuesday, January 20, 2015
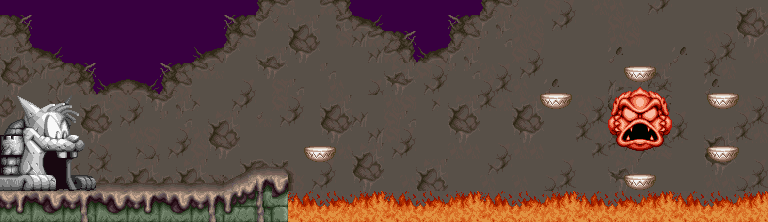
Svenshinhan plays Taz-Mania (SNES) - Act 5
What the crap, game.
Act V
Interstate Idiocy
This is a simple one-lane road. What the crap, game.
The huge gaps in the road are gone, but the potholes are back. Thankfully, the potholes are much easier to avoid than the huge gaps.
Looney Tunes Town
There are no Looney Tunes in this stage. What the crap, game.
Anyway, just about all the enemies and traps save for the huge gaps make an appearance here. Yep, both the water gaps and the water you can fall into make a triumphant return here.
The Taz trophy is an instant continue. Be on the lookout for these, since they show up once in a blue moon. Of course, being at this point in the game, that's probably some ill-timed advice now.
The Road Home
This road loops around like the rest of them. What the crap, game.
Anyway, this is just more of the same, minus the water. I'm surprised that the She-Devil didn't appear again (at least to my knowledge), since she appears in Wackyland onwards.
Also, this is the last level. After that, you just get the credits and no real ending whatsoever. What, not even an inkling of a story for those of us without the instruction booklet? Gee, thanks, game.

Monday, January 19, 2015
Svenshinhan plays Taz-Mania (SNES) - Act 4
Just when the game couldn't get any more annoying, there's an instant death trap that shows up in the last two-fifths of the game? Jesus Harvey Christ.
Act IV
Mountain Mayhem
There are now gaping holes in the road. Jump over them. You'll notice what they look like when there's no traffic light to the side and the "road" is completely black.
The green birds completely refill your health, assuming you can catch them. These guys are the rarest power-ups in the game, so you'd better be ready to get it.
If you hear a "Meep, meep" sound near an intersection, stay put. This is the (strangely slow) Road Runner, and if you can grab him you can completely restore your health. These guys are only slightly easier to get than the green birds.
Snowy Ridge
Good news about this level: the pterodactyl does not appear in this area at all. At last, a reason to not be paranoid and keep an eye on the skies.
The ice slicks make you slip and slide like crazy.
Wackyland
Oh, good lord. There's no Gogo Dodo here (despite the wacky spiral sun and the purple trees), the pterodactyl comes back, the road is narrow, and to top it all off, the She-Devil makes her debut in this stage.
The She-Devil is probably the worst obstacle in the game. Avoid her at all costs. If the She-Devil gets her hands on Taz, it's all over. Instant death. Waste of a good continue.
Don't know if this is the first stage where he does this, but Buddy Boar can come at you from behind. Always, always, always check for that rear-view mirror in the lower-right corner!
At this point in the game, catching all the kiwis takes longer and gets infinitely more annoying.
Bonus Level: Kiwi Grab
Here it is: the final bonus level of the game. Just nothing but a narrow desert road and some kiwis that put on the brakes more times than you can shake a stick at. Be ready for them to suddenly stop on you so you can get them in the nick of time and get maximum point gainage!
Sunday, January 18, 2015
Svenshinhan plays Taz Mania (SNES) - Act 3
The difficulty ramps up in this game really quickly. Get ready!
Act 3
Desert Dessert
The puddles of mud work like the puddles of water.
The cacti are one of the few pieces of scenery that cannot be destroyed with the tornado attack. You were warned.
The bushrats make their proper, non-bonus level debut here.
Speaking of debuts, this is the first level where you'll meet the neurotic Wendal T. Wolf. This guy latches on to Taz for friendship and doesn't let go. As a result - his fingers cover up much of the screen. To shake him off and regain 20/20 vision, use your tornado attack (or get hit). You'll shake him off, but be prepared to meet him again...and soon.
You'll have to keep an eye on the sides, too. The red-haired kid with the bow and arrow is Francis X. Bushlad, an aboriginal boy hunter (with white skin, strangely) who tries to hunt down Taz in order to become a man. (It's a tribal thing.) When he shoots the arrow at you, be prepared to jump. You can't destroy him, so just avoid his attacks.
Bull and Axl attack in a rather interesting way. They move past you, and after a few seconds, they come towards you and try to catch you with their net. If that happens, it's a game over unless you break free with the tornado attack. If you hit them with the tornado attack, though, you can get rid of hem and get a bunch of points out of it.
New power-up here: the spring shoes. They make you a little faster but they also allow you to jump higher.
Crazy Canyons
The road is really, really narrow here, so you'd better be careful if you're trying to dodge stuff.
The oil slicks slide you into the side of the road, while the potholes make you waste a few seconds if you fall into them.
If Didgeri Dingo gives you a clock out of that box, grab it. You'll get an extra 30 seconds on your time.
Bull and Axl also start throwing bear traps out to damage you in this level.
Wendal Woods
This one gets pretty hard because of the terrain and all of the traps involved.
Using the tornado spin can keep the pterodactyl from grabbing you on hills.
Bonus Battle: Bird Bath
This one has nothing but the blue birds flying around in the air, so keep running forward and jump and grab. Getting the birds is pretty easy, which makes for good self-competition when it comes to seeing exactly how many of them you can get.
Svenshinhan plays Taz-Mania (SNES) - Act 2
The craziness continues as we see a host of new obstacles and added difficulty with the existing ones. But we haven't seen anything yet, though.
Act 2
Jungle Jump
Didgeri Dingo start mixing in traps along with the power-ups at this point. Also, the kiwis start getting a little craftier here.
Also, the gaps of water are a little wider here than in the last act.
Whenever you earn 100,000 points, you'll earn a continue. You only have one life, so having continues is really helpful.
Rainy Daze
Buddy Boar starts swerving around like a maniac, so you'll have to be on your guard and be ready to jump when you see him at this point.
The puddles slow you down a little bit.
The pterodactyl can grab you and take you backward into the stage, so don't jump into the air. Otherwise, it will get you. At least it doesn't follow you around the stage forever...just for a few seconds. Caution should also be taken on higher ground, as it might be high enough for you to get nabbed.
If you do get nabbed, mash the buttons to break free.
Jungle Night
That black square near the moon is a ROM glitch. Disregard it.
A new power-up shows up if you can get it from Didgeri Dingo: the roller skates. These things make you go faster if you can get your hands on them, but be careful not to run into anything or you'll lose them. These things can be pretty nifty if you know what you're doing.
Bonus Level: Bushrat Brunch
Instead of kiwis this time around, you'll be eating as many bushrats as possible. These are the little aborigine rats running around with the spears, and they are dreadfully annoying. They only cross the road to go from one bush to another, which means you'll be spending a lot of time off-road here. If you see a red bird, go for it. You'll need all the extra time you can possibly get.
Saturday, January 17, 2015
Svenshinhan plays Taz-Mania (SNES) - Act 1
Get money. Get money. Eat kiwis. Get money.
Act 1
Main Course
The blue birds that fly around give you points. You'll need all the points you can get to earn a few extra lives. You'll see red ones later on that add a few seconds to your timer.
Eating birds will refill a little bit of your health, while kiwis completely replenish it. This is nice, especially in the later levels.
The first obstacle that you'll see is the bus. You obviously shouldn't let it run over you at the cost of some health (and a few seconds).
If you see Didgeri Dingo on his motorbike, grab at his box to get the contents inside. Sometimes you'll get some power-ups to refill your health, but beware...sometimes there can and will be traps in the box. So be careful.
When an enemy or obstacle is behind you, you'll see it in the "rear-view mirror" in the lower-right corner of the screen. Trust me, this mirror will definitely come in handy later in the game. Of course, once you get so far away from an enemy, the rear-view mirror will disappear.
The yellow meter in the lower-left corner is your health. You can do the tornado attack that Taz is so well-known for, but use it wisely as it slowly drains your health the more you use it. At least the tornado attack gets you up to speed in a quick second, and it also lets you tear through the scenery. If your health meter is flashing, you won't be able to use the tornado attack. Refill your health to regain use of it.
It should be pretty obvious, but please make sure not to run into the scenery. It kinda hurts. Also, you go much slower off-road.
When you eat all the Kiwis the level wants you to eat, the level is cleared. You'll then get a points bonus based on how much time you have left and how many things you've collected.
The Outback
You'll see the intersections with the traffic light and the water here. Jump over the water so you don't get slowed down. The intersections are no threat now, but in the next level and afterward, trucks run from one side of the screen to the other when the "Stop" sign appears. If they run into you, you're taking damage.
You'll actually start seeing the road go up and down like hills. Sometimes, you'll barely be able to see the road on top of the hills, so pay attention to where you're going.
Buddy Boar will be so busy talking on his monster-sized cell phone that he won't be paying attention to the road, and if you're not careful he'll run smack-dab into you! Avoid him like you would the bus.
If there is water on the sides of the road, don't fall in unless you want to lose at least two seconds and a bit of health.
Kiwi Cross
As mentioned in the last level, watch out at the intersections. When the stop sign is up, a truck will go from one side to the other.
The red birds start showing up here. They leave a little sparkly pattern when they fly, and eating one will add 10 seconds to your timer.
Bonus Level: Kiwi Grab
Every three levels, you'll get a bonus level. During the bonus level, grab as many birds and items as you can in one minute!
The kiwis are really crafty in the bonus stages. They can actually stop and head in the other direction, on you, and they'll start doing that in the main levels, too.
You [b]can[/b] find the red birds in the bonus stages, but that's only going to happen once in a blue moon.
Also, if you grab a kiwi right when it's about to turn around, you'll get a "2X" to pop up above where the Kiwi was. This indicates that you got double points for that Kiwi.
Friday, January 16, 2015
DeceasedCrab plays Whomp 'Em - Part 5 of 5
Hey, what kind of final boss is this?
Final Boss
After you fight off a few normal enemies that take multiple hits to kill, you'll finally fight the final boss.
Keep hitting the final boss with the Death Branch before he can do anything. The smaller his projectiles are, the easier it will be to avoid them.
When you beat the boss, you've done it! You've won!

DeceasedCrab plays Whomp 'Em - Part 4 of 5
Oh, boy. Now the game becomes somewhat unbearable.
Final Test
(continued)
You'll have to use the Whirlwind and the Flying Nimbus in tandem to get past all the columns.
If you fall through the white coral-like things in the pits, you'll fall back to the beginning.
In the space area, you'll be floating around, fighting off green fireballs as you bounce off walls. You can somewhat control where you're going, but most of the time you'll just be going towards the walls on your way to the end of this section using your upward and downward thrust to keep yourself from getting killed.
Thursday, January 15, 2015
TAS Whomp ‛em NES in 11:39 by adelikat
Spoilers abound.
Also, this tool-assisted record was set back in 2006 and has yet to be broken.
DeceasedCrab plays Whomp 'Em - Part 3 of 5
Gourd farming point at the beginning of the video!
Ice Ritual
(continued)
The purple jelly balls can be killed in two hits.
The darker walls in the center can be destroyed with the Whirlwind.
When you hit the boss, he'll start spinning around and splitting into several faces. If you keep using the downward thrust, you'll be able to bounce off of the boss and its faces like some guy on a pogo stick. When the boss turns red, don't let him hit you. If he does, he'll steal one of your magic potions and heal himself. Bouncing to the right after downward thrusting the boss works well at the tail end of the battle.
Beating him gives you a Flying Nimbus. Yeah, the same cloud Son Goku has. I kid you not.
Water Test
You can leap all the way to the surface while you're underwater. Also, the octopi take a mere two hits to kill, and they constantly drop gourds.
The jellyfish split into two much smaller clones when hit. Take down the clones to get rid of them once and for all.
Some of the sea life will spit needles straight up from the floor, but others will give you air bubbles that refill your life when you collect them. Nice.
Midway through the vertical section, you'll be leaping on and off icy platforms. The water that runs through them will knock you off the platforms.
The boss is some sort of frog. He'll move around the room before turning into water, which is when he starts moving across the walls and ceiling as well as bouncing around on the floor. Stay away from him and use the Spear Toss attack on him to hit him from a distance. You can still hit him while he's water, by the way.
Beating him gives you the ice attack.
Final Test
There's one more level to do, and it gives you the Death Branch if you complete it. This destroys everything onscreen at the cost of one heart.
The clouds cause you to jump higher than normal.
The flashing clouds are lightning clouds, and they will damage you if you touch them.
The enemies here are weaker versions of all the bosses you've fought before.
Wednesday, January 14, 2015
DeceasedCrab plays Whomp 'Em - Part 2 of 5
We make some huge progress in this entry as we take on a forest guardian as well as some Hard Man clone. Geez, could this game be any more of a direct rip-off?
Magic Forest
(continued)
The boss here is a cocoon. This is pretty simple: just don't stand where it falls. After you damage it enough, you'll unleash the butterfly inside. He flies around and shoots four spores at you in diagonal directions. Stay directly at his side as he flies around and whack him. He's pretty easy.
Beating him gives you the Web. This lets you capture enemies and toss them into other enemies.
Secret Cliff
The ground at the beginning is pretty slippery, so be careful as you move around.
The dragons slowly move around and spit fireballs. Beating them up isn't really worth it, so just jump over them (which you can easily do).
Don't know why they're still in the game, but the wooden statues with the Japanese fans run towards you. They take two hits to kill and they usually carry gourds.
Don't touch the TNT. Just jump over it, as the TNT does a heart's worth of damage.
As you climb up the ladders, look out for the boulders. If you go to the nook at the right at the very top and strike at the air, you'll find a big heart.
You can use the Whirlwind Technique to break the blocks and get the Spear Extension power-up. From there, just jump through the gold blocks to continue. You'll be able to pass by the green guy, which takes a few hits to kill.
The two green platforms move up as you jump on them. The first set can grant you a Magic Potion if you keep on jumping. You'll have to be quick on the draw with them, as they fall down and send you tumbling if you spend too much time on them.
As you take the circular motion platforms across the spike pit, watch out for the boulders that are thrown at you from the left side of the screen by an unknown assailant. If you know what you're doing on the platforms, they're pretty easy to dodge.
The boss is some sort of turtle. He'll bounce up and down around the room a few times, then uncurl himself and try to punch you once, a la Hard Man. (Hey, Jaleco, Mega Man 3 called.) When he stops, you can hit him with a downward stab as you jump over him for a free hit.
Beating him gives you the spear toss attack, which lets you toss a spear as you attack.
Fire Test
The turtle soldiers with the shields can be made into mincemeat with the spear toss attack, but a direct spear attack is the best way to go.
You're going to be dealing with a lot more boulders here.
The phoenixes can be easily taken care of with the upward thrust.
If you can reach the little nook just above the entrance to the climbing section and strike the air, you'll be able to find a lantern.
The platforms that rise out of the lava and fall back into it are pretty fast, so you'd better be quick while you're on them.
The boss here is some sort of blue flame. He'll float around in circles, giving you some pretty easy shots on him. He'll then turn into a fire monster, shooting the blue flames in four diagonal directions. He then leaps around across before changing back into the blue flame. He's really easy to beat, believe it or not.
Beating him gives you the fire attack. When you attack with it, your spear tip will burn ablaze with fire. This will help in the...
Ice Ritual
You'll start the stage going down, much like the Shadow Man stage in Mega Man 3. The pink hands move around like the green hands in the first level, and the purple guy near the end of the first section can be easily killed with the fire attack. After you go left, you'll be going down again. Use your downward thrust so some of the enemies won't damage you.
DeceasedCrab plays Whomp 'Em - Part 1 of 5
Have you ever wanted to play a Mega Man clone that's halfway decent and actually gives you infinite ammo for all the weapons? Then this is the game for you!
Level 1
After seeing that some evil demon has taken some sort of powerful totem powers, we immediately start playing the game.
The gameplay consists of jumping around and hitting things with your spear (yeah, you can definitely tell that was originally a staff). Your first enemies will be these mushrooms that are jumping around. They can hit you if you're not careful, but thankfully you have four hearts for a life bar. You'll be able to get more as you progress through the game.
The main character is pretty versatile. In addition to stabbing things with the spear, you can do an upward and downward stab, like in Zelda II: The Adventures of Link.
As you defeat enemies, you'll be able to refill your health with the hearts that they leave behind. A small heart refills one heart's worth of life while a big heart replenishes your entire life bar.
The green hands move dive downwards before they arc upwards. They're pretty quick.
The eyeballs move around in a zig-zag pattern, but instead of moving to the side, they fall straight down as they do so.
The magic potions are extra lives. You can carry up to three. You'll have to strike certain spots in the level with your spear to find them.
The spearhead lasts against four enemies before you finally lose it. The spearhead increases your attack strength. In case you need to know what power-ups you have, just look in the lower-left corner of your screen.
Sacred Woods
After you beat the first level, you'll be able to select any of the next six levels in any order you choose. Being a Mega Man clone, it should be pretty obvious that some levels are easier than others at this point. The recommended first level is the Sacred Woods.
When you start defeating enemies now, you'll be able to collect gourds. The more you collect, the more experience you attain and the closer you get to adding another heart to your maximum health. You can have up to 12 hearts in your life bar.
The green guys jump around and try to punch at you. They take two hits to kill.
Watch out for the pieces of bamboo that fall from the sky. If you need to, hold Up on the Control Pad to block them from hitting you on the head.
The bears take three hits to kill. They chase after you and block attacks shortly after you hit them. They always drop a Spear power-up.
The spiders can spit in four directions. They always drop gourds, so it's pretty easy to farm on Gourds on these enemies this early in the game.
The snakes camouflage themselves in the grass very well, and you'll have to duck in order to hit them.
The trolls just run at you with a spear in their hand. They're pretty slow and easy to kill in just a mere two hits.
The Deerskin Shirt looks like a tooth, and it makes you invincible for a few seconds. The Spear power-up extends the reach of your spear, and this extension lasts until the end of the level. The buffalo headdress increases your defense for four hits before you lose it.
The boss is some sort of forest guardian. He flies around the screen, throwing bamboo at you before falling to the ground towards you like a leaf. He then disappears, and it rains bamboo from the center to the sides of the screen before he reappears again and repeats his attack pattern. His life meter will be to the immediate right of your own. Stab him as he moves around, and don't forget to hold Up to block the rain of bamboo. When you kill him, you'll get a power-up. This is the Whirlwind attack, and it repels enemy attack while also breaking large rocks and opening up new paths.
Magic Forest
The first enemy you'll meet here is the flying pink elephant.Pink elephants on parade, indeed. Watch out for their bullets as you take them down.
The snails are invulnerable while they hide in their shells. Wait for them to peek their heads out and stop moving again before attacking.
The flowers spit seeds upward. Thankfully, these flowers have a pattern, as they wait between spits.
The leaves can be used to jump over the lava. You can jump higher while you're standing on them, like a springboard.
Wait for the pillbug to uncurl and stand around before hitting him with your staff.
The white platforms always go in one direction and respawn when they go past the edge of the screen. You'll have to use these on your way up near the end of the stage.
Tuesday, January 13, 2015
Agent Bakery plays The Magical Quest Starring Mickey Mouse - Part 10 of 10
This is it! The final battle between Mickey and Emperor Pete!
All maps by Will Mallia.
6-4
Emperor Pete is pretty nasty. When the yellow magic bolts come out of his hands, you won't be able to hit him in the face. He'll be doing this to conjure portions of the stone wall to come out and hit you, and there will be torches spawning from the ceiling to divebomb at you.
Switch to the Magic Turban and hit Pete's face with fully charged shots. Destroy the flying torches with it to refill your magic. Be sure to destroy the stone wall portions if they get in your way.
If you're using the Fire Suit, remember that you can stand on the stone wall portions to reach Pete's face, and the water pump will push them back as long as you're spraying them. If you hit the torches with it, you'll get the Fire Hydrants instead of the Magic Lamp.
After he takes enough damage, the yellow bolts will change to blue fire. It tracks where you are, so pay attention to the floor so you don't get burned.
When he turns red after some more damage, he'll alternate between the enemy summoning and the blue fire.
If you see a big yellow spark come out from between his hands during the yellow bolts, jump when it comes your way! It will move across the floor after coming down towards you.
After you do enough damage to Pete, you've beaten him! You've won!

Monday, January 12, 2015
Agent Bakery plays The Magical Quest Starring Mickey Mouse - Part 9 of 10
Okay, this was harder than it was supposed to be. You'll have to go through a maze of sorts in order to get to Pluto...
All maps by Will Mallia.
6-1
(continued)
To unfurl the magic carpets, attack it with the Magic Turban. From there, you can hop on and use Left and Right to move the carpet. It's a downward ride, as you'll see in the next part of the stage.
6-2
Unfurl the magic carpet with the Magic Turban, and use Left and Right on the Control Pad to guide the carpet to the end. Avoid the walls of spikes as well as the flying helmet enemies, and you should do fine.
6-3
In the beginning of the section, the torches will come to life and divebomb you. If you hit them with the Fire Suit's water pump, you'll be able to destroy them easily.
Jumping on the minature Petes manning the cannons will cause the cannons to stop shooting.
You'll also have to face the three mini-bosses from the first three stages again if you take the wrong entrance. The same strategies apply, but you'll have to deal with pits for the first one, Proto Man-style gaps in the floor for the second one, and a lower spiked ceiling for the third one.
Agent Bakery plays The Magical Quest starring Mickey Mouse - Part 8 of 10
Finally, we're at Emperor Pete's castle! Now to find Pluto and get out of here!
All maps by Will Mallia.
5-2
There aren't any enemies here. Also, you need not use the ice platforms to get through this level. All you need to remember is that the platforms go according to what direction you were holding the D-Pad when you landed on them (either left or right).
5-3
The boss here is a walrus Pete. He'll ice skate from one side of the screen to the other and breathe snowballs into you. Though you can use the Fire Suit to freeze his snowballs and damage him, the Magic Turban does even more damage when you charge it up.
If you're going to jump on his head (which also works here), be careful not to jump into his ice skates as he flips around or you're going to get hit.
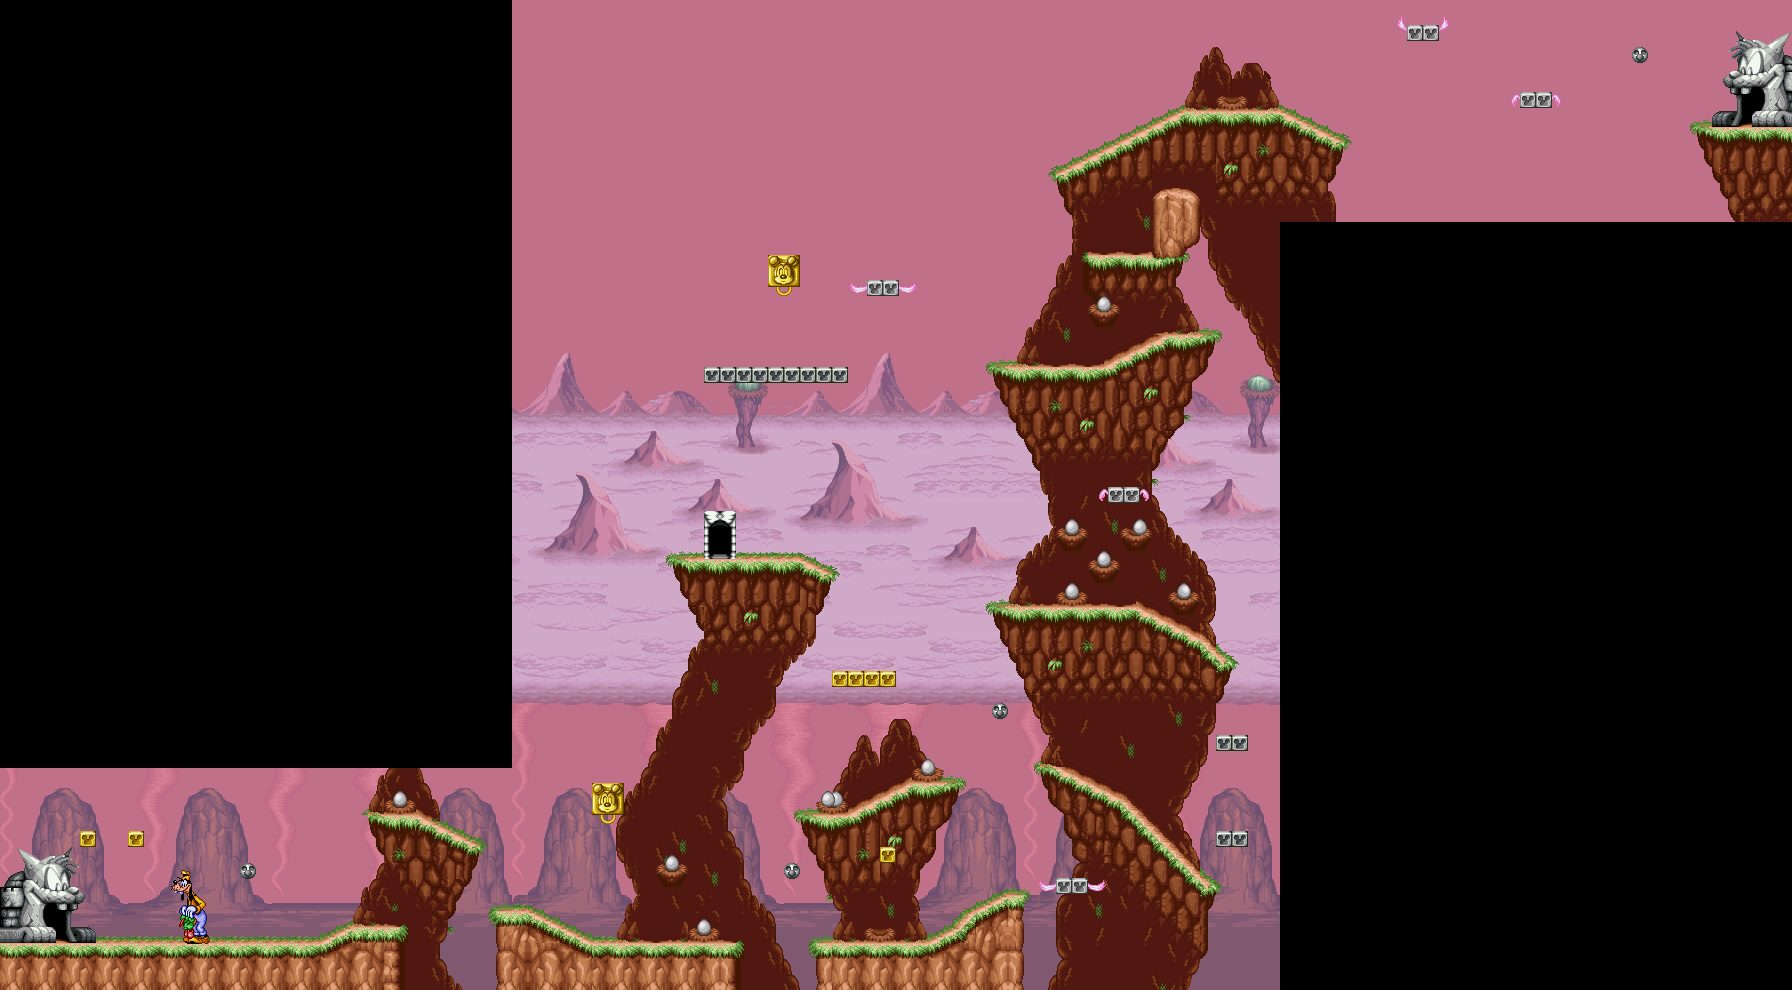
Stage 6
Pete's Castle
6-1
The blocks pointing upwards can be thrown to hit aerial enemies that are directly above you.
The flying helmets can't be defeated with a jump attack, though you can jump off of them to use them as a sort of stepping stone.
The floating circular platforms are trampolines. Wait for them to lower before jumping to get some added height. Don't stand on them for too long, or they'll rip.
Sunday, January 11, 2015
Agent Bakery plays The Magical Quest Starring Mickey Mouse - Part 7 of 10
The stages are now getting considerably shorter...
All maps by Will Mallia.
4-2
The gusts of wind push you downward.
If you go down the second gust and hang onto the ceiling, you'll be able to find a lot hidden blocks.
4-3
The boss here is an eagle.
When it divebombs towards you from the background, hold on to one of the grey spheres until it passes. Otherwise, you'll be blown clear off the screen and into the pit below.
The boss will then come down with an egg in its claws. Grab the egg with the rope, and then throw it into the eagle to damage it. It will then repeat its attack pattern. If the boss drops the egg, you'll have to dodge the two brown blobs that cover the floor and you'll have to wait for it to come back with another egg.
Stage 5
Snowy Valley
5-1
This stage (and its levels) is really short.
You'll definitely want to get the Fire Suit back out for these levels. When you spray the crystals in the air with water, you'll be able to create some temporary platforms. Cool!
The dandelions (dandy lions? I dunno) that come out of the ice crystals under the ground are just vanilla enemies.
The pink flower-like things push the ice platforms back and forth.
The ice platforms can be pushed by walking into them. If you jump onto them, you'll be able to ride them down the slopes like an icy surfboard.
Speaking of icy, be careful here. The ground in this stage is very, very slippery.
Agent Bakery plays The Magical Quest Starring Mickey Mouse - Part 6 of 10
We finally get all four suits in the game and watch the game mechanics get better. Nice!
All maps by Will Mallia.
3-3
(continued)
The Mickey Doll is a 1-up. I'm surprised I haven't seen one until now.
The General Store door near the boss is pretty nice. When you leave, you'll be able to come back next to the entrance, so you can farm for coins for a while and get all the life you need. If you need the upgrades for the Magic Turban and/or the Fire Suit, you'll be able to make getting those easier here, too.
3-4
The boss here is a statue. To beat it, keep hitting it with the Fire Suit's water pump. The fireballs that come out of the statue's mouth will hit the platforms, and if you extinguish them, you'll get a fire hydrant to refill the pump for your efforts.
As you work on it, the flame in the statue's mouth will slowly die out. Don't take too long to defeat the boss, as it slowly regains its strength. When the flame is extinguished, you're done.
Stage 4
Pete's Peak
4-1
When you start the level, Goofy will be there to give you the Climbing Suit. This suit comes with a rope that you can shoot in all directions to hang on stuff from if you use the Y button in conjunction with the Control Pad.
You can hang on the grey circles with the mouse face on them. You can then jump like you normally would to jump to the other side.
If you grab a block with the rope, Mickey will automatically start carrying it.
You can also use the Climbing Suit to get to the top of a platform. Just hold up and press Y, and then starting climbing with Up on the Control Pad. You'll be able to climb and hoist Mickey up to the platform above.
Sadly, the rope isn't as powerful as you would think it would be when fighting enemies. However, you can pull the shields away from the miniature Pete enemies with it. Without the shield, you can jump on them until they're dead.
The egg enemies just run towards you. They can be stunned with a jump and used to take out other enemies.
Saturday, January 10, 2015
CGR Undertow reviews The Magical Quest Starring Mickey Mouse
Leave it to CGR Undertow to give this game some high marks.
Agent Bakery plays The Magical Quest Starring Mickey Mouse - Part 5 of 10
This is the farthest I ever got when my parents rented the game for me from Blockbuster. Why? Because I was seven, that's why.
All maps by Will Mallia.
Stage 3
Fire Grotto
3-1
Go into the cave and prepare to take an elevator trip down. Shoot down the bats with the Magic Turban, and don't let the blocks or the ledges crush you.
That same guy is back, and this time he's got a hammer. When he hits the floor with his hammer, you'd better be out of the way of the part of the floor that shoots up into the spikes! You'll definitely want to charge your magic up here so you can spend less time against this guy.
He also shoots fireballs at you, but the fireballs are much easier to avoid.
3-2
When you start the stage, a block drops down to break the glass in front of you. You'll get the Fire Suit, and you'll be able to play as Fireman Mickey as a result.
Just like the Magic Turban, the Fire Suit has its own energy meter for its internal water pump. You can also cut the energy you use for it in half if you can find the General Store in this stage and pony up the coins.
The fire hose can break blocks and put out fires. It can also push the grey blocks and large stone blocks forward to help you reach previously unreachable areas.
The fire hydrants refill the Fire Suit's water pump.
The small flames that walk around can also walk on walls. The fire bats just fly around.
The fire pits hurt you, but at least they don't kill you on impact.
You'll see fire jets come out of the walls and the floors, and the wall-based fire jets can set platforms on fire. Extinguish them with the water pump before crossing.
3-3
You can push the blocks that move up and down forward with the Fire Suit.
If you use the Magic Turban underwater, you'll be able to breathe underwater if necessary and take care of that fish if necessary.
The ceiling of fire sets the platforms on fire, but thankfully it doesn't go all the way to the floor. The water in the floor extinguishes the fire on the platforms.
Friday, January 9, 2015
Agent Bakery plays The Magical Quest Starring Mickey Mouse - Part 4 of 10
In this leg of our quest, the Magic Turban becomes really, really useful.
All maps by Will Mallia.
2-2
Remember what the Wizard said about the Magic Turban allowing you to breathe underwater? Equip it before you enter the tree, or else you'll slowly lose all your health.
Use your magic to open up the sea anenome doors. Shoot down any bugs that swim around and any worms that move from one hole to another.
When you exit the tree, drop down and fall to the left. You'll find the General Store. If you need to, you can now refill your magic power in the store. If you have 200 coins, you can get a crystal heart. If you have 300 coins, you can cut your magic consumption in half.
To beat the boss here, avoid him and the seeds that he throws up in the air. When he's on one side of the screen, he can shoot his grass skirt at you like a boomerang. Stay away from it (jump over it if you have to) and remember that it lowers when it boomerangs back to him, and charge up your shots so you can hit him and kill him more quickly in the long run.
2-3
There's not very much to this area. Move past the statues before they swing their clubs down. Make sure not to touch the clubs while the statues are rearing back between swings, too.
You can stand on the statues while the clubs are down, but you'd better make your move before they rear back their weapons again.
2-4
The boss here is a giant Pete spider. He'll try to run into you and he can also shoot webs at you. If you get hit by a web, mash the buttons to break free!
The spider's main weak point is his face. Use charged magic shots to hit him from the other side of the screen, and jump on his head when necessary. When the spider's face turns pink, it's about to go down.
Agent Bakery plays The Magical Quest Starring Mickey Mouse - Part 3 of 10
We begin the second stage...and this is where stuff gets rather interesting...
All maps by Will Mallia.
Every time you beat a boss, you get more points and also get some more coins! The coins will come in handy for the second level, and you're going to find out why.
Stage 2
Dark Forest
2-1
When you start the level, you'll meet the Wizard again. He'll give you a magic turban and wizard's suit, and when you equip it, you'll be able to perform magic. You can switch between regular Mickey and the magic turban whenever you need to. This suit will let you zap enemies with magic bolts and also breathe underwater.
Throwing an enemy into a giant Mickey block will also open up the contents.
The bug hiding underneath the leaf is basically the Dark Forest's version of the bug from the Treetops area, except he doesn't jump around. He's pretty easy.
Do not let the fish in the water bite you. If they do, they'll drag you under, resulting in instant death.
The plants that drop the spiky seeds are indestructable, but you can stand on them.
The bean enemies that hang off of the vines and bounce up and down can be knocked off the ceiling with a regular shot, and then taken care of like a normal enemy. A charged shot, however, will kill them in one hit.
While you're playing as Wizard Mickey, you can hold down Y to charge your shots up, much like in the Mega Man games. This lets you kill some enemies outright and deal more damage to others, and you can also get more distance out of your shot, going as far as the other side of the screen. Of course, charging your shot depletes more of your magic power when you finally let it go, so collect the Magic Lamps to refill your magic.
Thursday, January 8, 2015
Agent Bakery plays The Magical Quest Starring Mickey Mouse - Part 2 of 10
We continue with the rest of the Treetops.
All maps by Will Mallia.
1-1
(continued)
The heart crystal adds a heart to your maximum health in addition to refilling all of your hearts. You can get a maximum of ten hearts, and having all that life can really make a difference.
1-2
Here, you'll be taking a ride on giant berries down a hill. To take a ride, just jump on. If you jump to the right and off the beaten path sometimes, you'll find something.
If you can make it to that grey block in the air, jump to the right into the trees. You'll land in the treetops, and you'll eventually find a ton of apples as well as another door. This takes you to the General Store. For now, you can refill your health, but as you progress through the game, you'll be able to buy other stuff.
You'll finally meet your first boss here: some guy with wings. You'll see him a couple of times throughout the game. Jump on his head to beat him. When you bop him on the head twice, he'll hang upside down on the trees like a bat and send some miniature clones at you. Jump on them and throw them at him to do some real damage! When you beat him, you'll be able to enter a cave and enter the next area.
1-3
Funny how Mickey just looks at you like "WTF" when you don't touch the controls as he sinks in the water.
Anyway, the wildlife here wants you dead. The frogs can be jumped on like stepping stones, the beaver waits for you to jump into the water so he can basically destroy you, and the starfish try to follow you. Wow, even the starfish want you dead.
If you see the chain to the side of the giant Mickey boxes, just grab it, pull it and let go as before. It'll still work.
1-4
This boss is pretty easy. Throw blocks at its head, or simply jump on its head. For the first couple of hits, a segment of the worm will pop off, and you can use it against the boss as well.
When his face turns red, get away from him and wait for his face to turn purple again so you can damage him. When he's short enough, he'll start jumping around. Keep hitting him in the head and he'll eventually go down.
Agent Bakery plays The Magical Quest Starring Mickey Mouse - Part 1 of 10
A Mickey Mouse game. That doesn't suck. Need I say more?
Hey, at least there aren't any plotholes.
.png)
All maps by Will Mallia.
Stage 1
Treetops
1-1
Fighting enemies is a little weird, but once you get used to it, it's a snap. Jump on them, then pick them up with the Y button. Press the Y button to throw them forward with a nasty little spin.
The berries take you to high places when you tear them off the tree and grab hold of them. They explode after a few seconds, but you'll be much higher by the time that happens.
The sleeping birds give you a coin when dropped and let go.
You're not really going to be able to do much until you open the door. When you enter the house, you'll meet a wizard. He tells you that Pluto has been taken by Emperor Pete, and to find him, follow his statues. He'll then distribute magical boxes throughout the land, and these will be your main weapons. These can be grabbed the same way as downed enemies.
The yellow boxes can be grabbed. The grey ones cannot. The red boxes respawn when you grab them, giving you an infinite ammo supply. Sometimes, you'll find coins inside the boxes. Pick them up, as you'll need them to purchase supplies throughout the journey in stores that are interspersed throughout the levels. The hearts replenish your health.
There's a hidden door above the house. Break the blocks to find it, then enter it to find two of those sleeping birds. As for the big box with the Mickey head in the center, grab the chain beneath it, pull down, and let go. You'll get a ton of apples worth 500 points apiece for your efforts. If you find fruit in a box, pick it all up to get a ton of points. You can find a lot of nifty stuff that you'll really need in the big boxes, including coins...so keep an eye out!
The only way you can run is to walk down a slope. If you keep jumping every few seconds while you're running, you can maintain that speed, but if you don't do that while you're on flat ground, you'll go back to normal speed in a few seconds. (This hint is really useful if you're trying to do a speedrun, tool-assisted or not.)
You'll see the miniature Pete soldiers quite a bit throughout the game. You'll have to stun them with a block before you can take them out. Jumping on them does nothing.
The bees are really easy. All you have to do is jump on them to get rid of them.
Wednesday, January 7, 2015
TAS Speedrun by Randil in 14:32, or "Spider Punching Made Easy"
If Randil was in the first film instead of Nancy, there wouldn't be any sequels.
Sryth plays A Nightmare On Elm Street - Part 6 of 6
We finally see the disappointing ending to this disappointing game.
The final fight with Freddy is pretty much the same as the "Freddy's Coming!" fight that you get if the "One, two, Freddy's coming for you" song stops. Yeah, it's that disappointing.
When you beat the game, you'll throw all of Freddy's bones in the nearby furnace and the nightmare is over...or is it?

Tuesday, January 6, 2015
Sryth plays A Nightmare On Elm Street - Part 5 of 6
We finally enter the last area of the game: Elm Street High. Wait, didn't everything usually start in the high school and end in Freddy's House? Wasn't the boiler in question in the plant Freddy worked in? Why is the game going in reverse?
Elm Street High School
This does not look like a school at all. I don't care if there are lockers here. I am disappointed, LJN.
The part near the beginning with the spikes has a rather nifty weakness: stand in front of the columns in the wall. The spikes won't be there.
You'll have to enter the Dream World and use the Necromancer powers to make some of the jumps to the bones.
This final level brings out a new hazard: spike traps that jump in and out of the pits like the red spiders. You won't be able to get rid of them, and they're a pain in the ass.
After you make it back to where the fire pit was and exit the third section, you'll go through a boss rush. You'll have to fight all the previous bosses in the order you fought them in one go.
Sryth plays A Nightmare On Elm Street - Part 4 of 6
We're returning to Freddy's house to find more of his bones and also further the means to an end. His end.
Freddy's House
Freddy's House is a long four sections, so be in for a fight!
You're better off doing this one in the Dream World and playing as the Necromancer, so you can hover around.
The second section has a lot of water dripping out of the ceilings. You'll have to be pretty careful not to die here.
If Freddy catches up with you, switch to the Necromancer. You'll be able to better avoid the hands that come out of the ground with the hovering ability, and your projectiles will have the best range. Keep in mind that just about every single time he slashes at you, he jumps afterward. The only time he doesn't do this is when he's on either edge of the screen.
The boss here is a combination of Freddy's hand from the third house and Freddy's face. You'll be fighting them both at the same time. Switch to the Shadow Warrior and keep track of where both bosses are going. Be sure to kick these bosses while you're jumping to avoid them, and you should be able to do fine.
Monday, January 5, 2015
A Nightmare on Elm Street - 4-Player TAS by chupapi in 16:15.75
Here's a tool-assisted speed run of the game with all four players active, all done by one person. Spoilers for the game are definitely in full force, and this one is pretty damn nuts.
Sryth plays A Nightmare On Elm Street - Part 3 of 6
Ohhhhh...so this is how you become a Dream Warrior. Thanks a lot, instruction manual.
Junkyard
Be sure to check the backs of the trucks, as the bones can almost blend in with the truck beds and nearly give you a mental breakdown.
The Yin-Yang symbol is the Shadow Warrior. This makes you a ninja, and you can throw shurikens and jump kick. Strange, considering there was never a ninja Dream Warrior in the movies.
The boss here is a skeleton bat. To beat it, fight it off with jump kicks as the Shadow Warrior, or use the Acrobat and take it out with the javelins. Use your throw attack against the small skull bats it spawns, so you won't accidentally be moving into the agile skull bat every so often.
Elm Street Cemetery
Once you get the key here, the next stop is the Elm Street Cemetery to the immediate west.
If you see a bubble coming out of the water, jump on it to use it as a platform.
Also, we finally see the cup of coffee. About time.
To beat the ghost, take it down as the Necromancer, as you'll have the best range with your magic.
Sunday, January 4, 2015
Sryth plays A Nightmare On Elm Street - Part 2 of 6
Okay, seriously, the game is easier than this. I know it.
House #3
The water droplets damage you, and they're blood in Dream World.
The wizard hat icon is the Necromancer. The necromancer can not only fire magic from long distances, but he can also hover.
There are three sections here. All three of them feature those stupid flies that home in on you, and some of the flies follow you and drop rocks as they go. One of them near the end flies really fast, making it harder to hit.
The boss here is Freddy's other glove, and it's not connected to anything. Instead, it bounces around and tries to swipe at you. If you don't have the Shadow Warrior ability (which is the ninja we'll see later), fight as the Acrobat and toss javelins at it. Stay on the move so you don't get hit. The Shadow Warrior can jump kick, but there's still a chance to get hit if you're too high or too low.
When you beat all three houses, it's time to head over to the junkyard. Head right until you see it and enter.
Sryth plays A Nightmare On Elm Street - Part 1 of 6
Oh, snap, he's back again!
Well, we know Freddy's back. But so is Sryth!
Anyway, I had to do quite a bit of information searching, as this one's kinda confusing and I'd like to know what the hell I'm doing in this game as much as you, so thank The NES Files for the .pdf file of the instruction manual as well as FByies's lone FAQ for the game on GameFAQs.
You may be wondering: this is an NES game, how can you play with four players? NES can't do multiplayer! Well, there was the NES Four Score and its wireless forerunner the NES Satellite, and they did four-player gaming with a select number of NES games before Nintendo 64 and Sega Dreamcast came about and made it mainstream. The Famicom also had a Famicom Four-Way Adapter, albeit an unofficially made one.
Anyway, you're playing as one of four teenagers, and you'll be running around punching snakes and stuff while trying to survive the Dream World.
The energy bar is your sleep meter. You lose energy on the bar when you get hit, but it also just goes down in general. It goes down as you stand still and it goes down as you're playing as well, but it goes down more slowly if you're in motion. When it's completely empty, you'll go to sleep and enter the Dream World, where all the enemies' appearances are horrifically different (pun somewhat intended) and the enemies are all tougher. You'll have to find the Boom Box in order to wake up and re-enter the normal world.
If you hear the "One, two, Freddy's coming for you" song, you'd better hope it doesn't stop. Otherwise, Freddy shows up, and you're going to have to fight him off.
You can take four hits before finally dying. Unfortunately, the game never shows you how many HP you have left, which is kinda strange. Also, falling into a pit equals instant death. You have three continues, which makes things a little harder, too.
Cups of coffee refill your sleep meter. You won't see those very often, though.
In case you're playing in multi-player mode, if one enters the dream world, they all enter the dream world. I blame the third and fourth movies. Thankfully, if one enters the next section in any given area after all the bones are collected, they all enter it with them.
The three houses at the beginning are locked. One of them is open, but it's different each time you play. Nevertheless, you'll go through each layout in the same order.
House #1
When you enter a house, you'll not only be fighting the creatures inside (amazing how all the wildlife is the same size you are), but you'll also be picking up bones. These are Freddy Krueger's bones, and you'll be picking them up throughout the game. The bone with the number in the center of the HUD allows you to see how many are left lying around the house.
If an enemy has a red variant, that variant isn't indestructible. It just takes more hits.
The running icon is the Acrobat. When you enter the Dream World, you can play as one of three Dream Warriors. The Acrobat is (obviously) one of them. To use the powers and switch between them, press Select in the Dream World. (Apparently, we don't find this out until the third video, and the manual isn't any help about it either as it doesn't tell you that you can do this. I kid you not.)
You won't be able to drop into the chute in the floor until you collect all the bones, so don't worry about accidentally falling down it.
When you collect all the bones in the second section of the house, you'll be able to fight Freddy.
You're better off fighting Freddy's hand as the Acrobat. Just stay to the left edge of the screen and throw Javelins at the hand as you keep it from touching you. When you exhaust the boss's health meter in the middle of the HUD, you'll get a key. Pick it up to unlock the next house and get an extra life.
It should be noted that you instantly enter the Dream World when you reach a boss.
House #2
When you enter the attic, you're going to be in for a tough time. The flies that come down from the ceiling will home in on your position, and it won't be any better when you enter the Dream World and they turn into ghosts with arms.
The boss here is Freddy's head. It's pretty much the same boss as last time, except that he spits tongues out at you, which you should take down as soon as possible. Once again, fight as the Acrobat in the Dream World. Thankfully, there is an Acrobat icon in the second section.
Saturday, January 3, 2015
NintendoCapriSun plays Mega Man 3 - Part 8 of 8
We finally beat Dr. Wily!
Dr. Wily Stage 5
To beat Dr. Wily's first form, get under him and repeatedly hit the cannon underneath Dr. Wily's robot with Shadow Blade as quickly as possible.
For the second form, get out from underneath him and hit Dr. Wily with the Shadow Blade. Be careful to avoid the shots that pop out from the two turrets at his sides, as they home in straight on your current position.
You'll beat Dr. Wily, but it turns out you just fought a robot fake.
Dr. Wily Stage 6
Gamma has two forms.
For the first one, get directly under it, jump up and hit the head with Shadow Blade. If the shots that come out of the head arc slightly to the left, you're positioned right.
When the health is halfway down, the head is destroyed and replaced with an even bigger one with the real Dr. Wily at the controls inside. Get on top of the fist, which can be used as a platform. Then jump to the highest platform, switch to Top Spin, and jump off the very edge of the highest platform and use it on Dr. Wily. You'll beat him in one hit.
When you beat Dr. Wily, metal blocks fall on both you and Dr. Wily. Dr. Wily is seemingly crushed, as is Mega Man. A mystery man shows up and saves Mega Man, but can't find Wily. Mega Man wakes up in front of Dr. Light, and they both find out that Proto Man saved them.
There you have it! That's Mega Man 3 finished!

Friday, January 2, 2015
NintendoCapriSun plays Mega Man 3 - Part 7 of 8
Read on for Ice Climbers-style platforming and a boss rush.
Dr. Wily Stage 3
(continued)
The "Ice Climbers" section with all the moving platforms is lined with spikes. Be sure to land on the platforms, as this part can be slightly unforgiving.
The boss here, or bosses, is a set of Mega Man clones. Use the Search Snake to find out which one is the real one. If you dealt damage, you got the right one.
You can easily win this battle with the Proto Buster, but Search Snake causes more damage in less time.
Dr. Wily Stage 4
This stage is probably the first use of "3D elements" in a Mega Man game. Mega Man can get behind the pipes, as if they're part of the foreground. He'll be "instantly" behind it when you get a certain amount of him behind the piping.
The robot that throws the metal blocks can be temporarily incapacitated with the Spark Shock.
Counter-clockwise from the upper left, it's Needle Man, Magnet Man, Gemini Man, Hard Man, Top Man, Shadow Man, Spark Man, and Snake Man.
Magnet Man can be destroyed really easily with the Spark Shock.
NintendoCapriSun plays Mega Man 3 - Part 6 of 8
Finally! We take on Dr. Wily and make some major headway!
Gemini Man Revisited
(continued)
The first Doc Robot fights like Flash Man. As you avoid him and his Time Stopper attack, pound him with the Needle Cannon.
There will now be holes in the ceiling, and the ladder bugs will be falling out of them perpetually.
The second Doc Robot fights like Bubble Man. As you avoid the bubbles (get next to him and they'll fly right over you) and try not to kill yourself on the ceiling spikes, hit him with the Shadow Blade. He'll go down in no time!
Break Man
In case you can't tell, that's just a Sniper Joe programmed to act like Proto Man. Fight him just like you did Proto Man in those regular stages.
Dr. Wily Stage 1
Oh, Jeebus, the music is awesome here.
Most of the enemies and obstacles here are from Top Man and Gemini Man's stages. The penguins are underwater now, and when they're on the same level as you, they'll charge.
The green walls can be broken with the Hard Knuckle, much like how the tiny walls in the second game could be destroyed with the Crash Bombs.
You can easily skip past the stupid re-appearing blocks with Rush Jet.
The boss here is some machine that sends turtle robots after you. Hit them with the Shadow Blade and avoid the tornadoes that come out of the floor and walls. Easy enough.
Dr. Wily Stage 2
Most of the enemies and obstacles here are from Needle Man and Hard Man's stages.
Be sure not to miss the two Energy Cans near the boss door.
The boss here is the Yellow Devil. Yep, he's back, and he's a lot easier this time around. Avoid the parts of the robot when he's coming together, and hit him in the eye with the Shadow Blade.
Sometimes, whole columns will come down at once and come straight at you as one piece so he can move to the other side of the room faster. Slide to avoid them all.
Dr. Wily Stage 3
The music here is even more awesome.
Most of the enemies and obstacles here come from Top Man's stage.
Don't miss the Energy Can after that first vertical section at the beginning.
Thursday, January 1, 2015
NintendoCapriSun plays Mega Man 3 - Part 5 of 8
Can you believe we're almost done with all this crap already?
Shadow Man Revisited
(continued)
The first Doc Robot fights like Wood Man. As you (try to) avoid his Leaf Shield and the leaves that fall from the ceiling, hit him with Needle Cannon.
The section after all those Sniper Joes with the bolas can give you a hard time, so use Rush Jet if you need to.
The second Doc Robot fights like Heat Man. Avoid the fire pillars that it shoots at you and hit it with Shadow Blade. Be sure to jump over it when it turns into a flame and charges at you.
Spark Man Revisited
You can destroy the bug on the first ladder with either the Shadow Blade or the Gemini Laser, though the Shadow Blade takes much less effort.
The spinning circles are conveyor belt platforms. They will slowly push you in the direction the center is rotating when you stand on them. They're not very big, and they're usually positioned above bottomless pits or a floor full of spikes.
The first Doc Robot fights like Metal Man. The bad news is that you don't have Metal Blade to kill him in one shot anymore. The good news is that the Magnet Missile not only does a good job of homing in on him while you stay on your side, it actually does the most damage out of all your special weapons. Hit him with it and avoid the circular saw blades that he tosses at you the same time you fire at him.
Be careful as you fall down the corridor after the first Doc Robot. This corridor is even worse than the one at the beginning of the second Shadow Man stage.
Once again, walk past the forming metal walls as soon as you see them.
The second Doc Robot fights like Quick Man. Hit him with either the Gemini Laser or the Search Snake (thank you, Mega Man Home Page). The Gemini Laser will have a better chance of hitting him either in the air or when you least expect it to, and the Search Snake will track him well on the ground. Just watch out for the boomerangs and those high jumps. They both do the same amount of damage, so don't worry if you run out of ammo for one of these weapons.
You can also use the Shadow Blade if you need to. It's not as powerful, but it can be a lot more efficient and you're more likely to hit him with the adequate range that it has.
Gemini Man Revisited
The ladder bugs are now running around on the ground. At least they don't climb up the walls, and they're actually easy to hit with the Proto Buster.
Subscribe to:
Posts (Atom)