Part nostalgia-bomb, part note-taking and part FAQ, what started in GameTrailers as a video game blog is now on Blogger. This blog is a look back at video games, both popular and obscure, from the video game industry's infancy all the way to the previous console generation.
WARNING: The placements of the items in this Let's Play are random. While you can get all these items, where and when you will come across will vary. You should be able to get an idea of what you should do, should you be stuck at a certain point, but everything about the placement of the items is random.
0:26 - The rose in action. Jessica Rabbit will jump off the stage and give you a very useful hint, such as "Look for the will in a cave above the top tunnel." Now that's helpful.
3:45 - The cheese in action, after Octo manages to get away from the rat. Now to get the rattle, which lures the snake away.
In this episode, we explore a little more of Burbank and see what a few of the items can do.
WARNING: The placements of the items in this Let's Play are random. While you can get all these items, where and when you will come across will vary. You should be able to get an idea of what you should do, should you be stuck at a certain point, but everything about the placement of the items is random.
0:17 - Here's Maroon Cartoons. Here, the black cat shows up on Octo and Tiggy. If you feed it the fishbone, the black cat will go away and you can get the object it was guarding; in this case, it's the whistle, which allows for more uses of said whistle that was found in the last video.
1:15 - This is the rose that the black cat here is guarding. Use it at the stage where Jessica Rabbit is performing at the Ink and Paint club and you will get a gameplay hint.
We have the dynamite plunger...but when are we gonna get the dynamite?
WARNING: The placements of the items in this Let's Play are random. While you can get all these items, where and when you will come across will vary. You should be able to get an idea of what you should do, should you be stuck at a certain point, but everything about the placement of the items is random.
1:53 - If you ever see Roger Rabbit jump very high outside of a building and hold on for dear life, that means the weasel in the straitjacket has appeared. Power up your punch to its highest strength and hit the weasel to get rid of him. You can also hit him a few times with weak punches before finishing him off with a slightly weaker than strongest punch.
2:38 - Benny the taxi cab will be parked in front of the store on the south side of Los Angeles. You can use him to drive around town much faster, should you find him. If you have the Whistle in your inventory, you can call Benny up instantly. Just walk into him and press Select to start driving, and press it again to get back on foot and enter a building. The Control Pad will control Benny, while A is the accelerator and B is the brake. Buzzards and cars cannot hurt you while you are in Benny, but the weasels will still come after you in their own vehicle.
2:52 - The dynamite plunger is used to blow up the wall blocking the tunnel to Toontown, assuming you have the dynamite to go with it. (It should be noted that if you lose all your lives or continue on a password, you'll have to re-buy the dynamite to blow the wall up again.)
6:38 - The Gag Factory is closed, but you can still search around. Look around here; I managed to find a piece of the will here. (Yes, you have to find the pieces of Marvin Acme's will just like in the movie.)
8:56 - Octo and Tiggy manage to find the cheese. Now they can go get that rattle!
10:15 - Here's the whistle. As mentioned earlier, the whistle allows you to call Benny on the overworld map.
10:55 - Here's what happens when the weasels - aka the Toon Patrol - catches up with you. To free Roger Rabbit, select the proper punchline before time runs out. Also, when you get caught, one punchline gets added to your list of punchlines.
Also, when you run out of lives, you'll see your password. You can write it down, but thanks to modern technology, you can always take a picture of it on your cellphone (or take a screenshot of what's going on in your emulator).
The adventure continues as Octo and Tiggy explore more of not-so-beautiful downtown Burbank!
WARNING: The placements of the items in this Let's Play are random. While you can get all these items, where and when you will come across will vary. You should be able to get an idea of what you should do, should you be stuck at a certain point, but everything about the placement of the items is random.
1:17 - The red rat will instantly kill you if you run into it. If you have the cheese in your inventory, you can lay the cheese near it and it will go away.
2:03 - That rat is guarding that rattle very well. Again, you'd better have the cheese, or that rat will kill you for even trying to take the rattle. The rattle is used to lure the red-and-gray snake away from an item.
3:40 - Interact with the gorilla guard with the Password in your inventory to get into the Ink and Paint Club. The "1-800-232-3324" phone number was a hint line with Jessica Rabbit mentioning some hints for the game, but the number has long since went out of commission and now serves a different purpose. You can also talk to Jessica Rabbit, but you need to leave a Rose on the stage in order to get a game hint.
4:55 - It pays to search everything in front of a building too, since you can find the Fish Bone in the trash. These lure the red-and-gray cat away from an item it is guarding.
5:22 - This black dog also guards an item. Unless you have the Meat, stay away from that dog.
6:57 - The crowbar allows you to open up locked doors.
7:07 - The heart will get you hints from a woman in one of the hotels in the game.
8:24 - Octo and Tiggy both learn that the black dog is guarding dynamite, which will be important later.
8:35 - A snake! This thing will also try to kill you.
8:51 - Here is the hotel. There are more than two doors here, and you can find more than one item here.
Just like in the movie, Roger Rabbit is framed for the murder of inventor and millionaire Marvin Acme, and private investigator Eddie Valiant has to clear Roger's name. You have to find four pieces of Acme's will to save not only Roger, but also all of Toontown, as Judge Doom wants to turn Toontown into a freeway.
WARNING: The placements of the items in this Let's Play are random. While you can get all these items, where and when you will come across will vary. You should be able to get an idea of what you should do, should you be stuck at a certain point, but everything about the placement of the items is random.
0:44 - The game begins in Eddie Valiant's apartment. Walk up to things such as desks and dresser drawers, then hold Up and press A and wait. Sometimes you might find something, sometimes you won't.
Pressing B repeatedly lets you power up the punch.
2:37 - More often than not, there will be a wallet on the side of the street. To pick it up, carefully inch towards it before Eddie bends down to grab it, then immediately stop. When you grab the wallet, head back to the door. If you just walk up to the wallet, the flower pot will drop down and hit Eddie, immediately killing him. Talk about a cheap death at the beginning of the game.
Also, watch out for the vulture that might fly across the screen, as it will drop a bomb from above. The rat can also hurt you if it runs into you enough times.
You can talk to people with A, but if you punch them with B, they will not help you until you leave the screen. By pressing A near somebody and waiting, you can see if there is an item in the immediate vicinity or not, saving you some time.
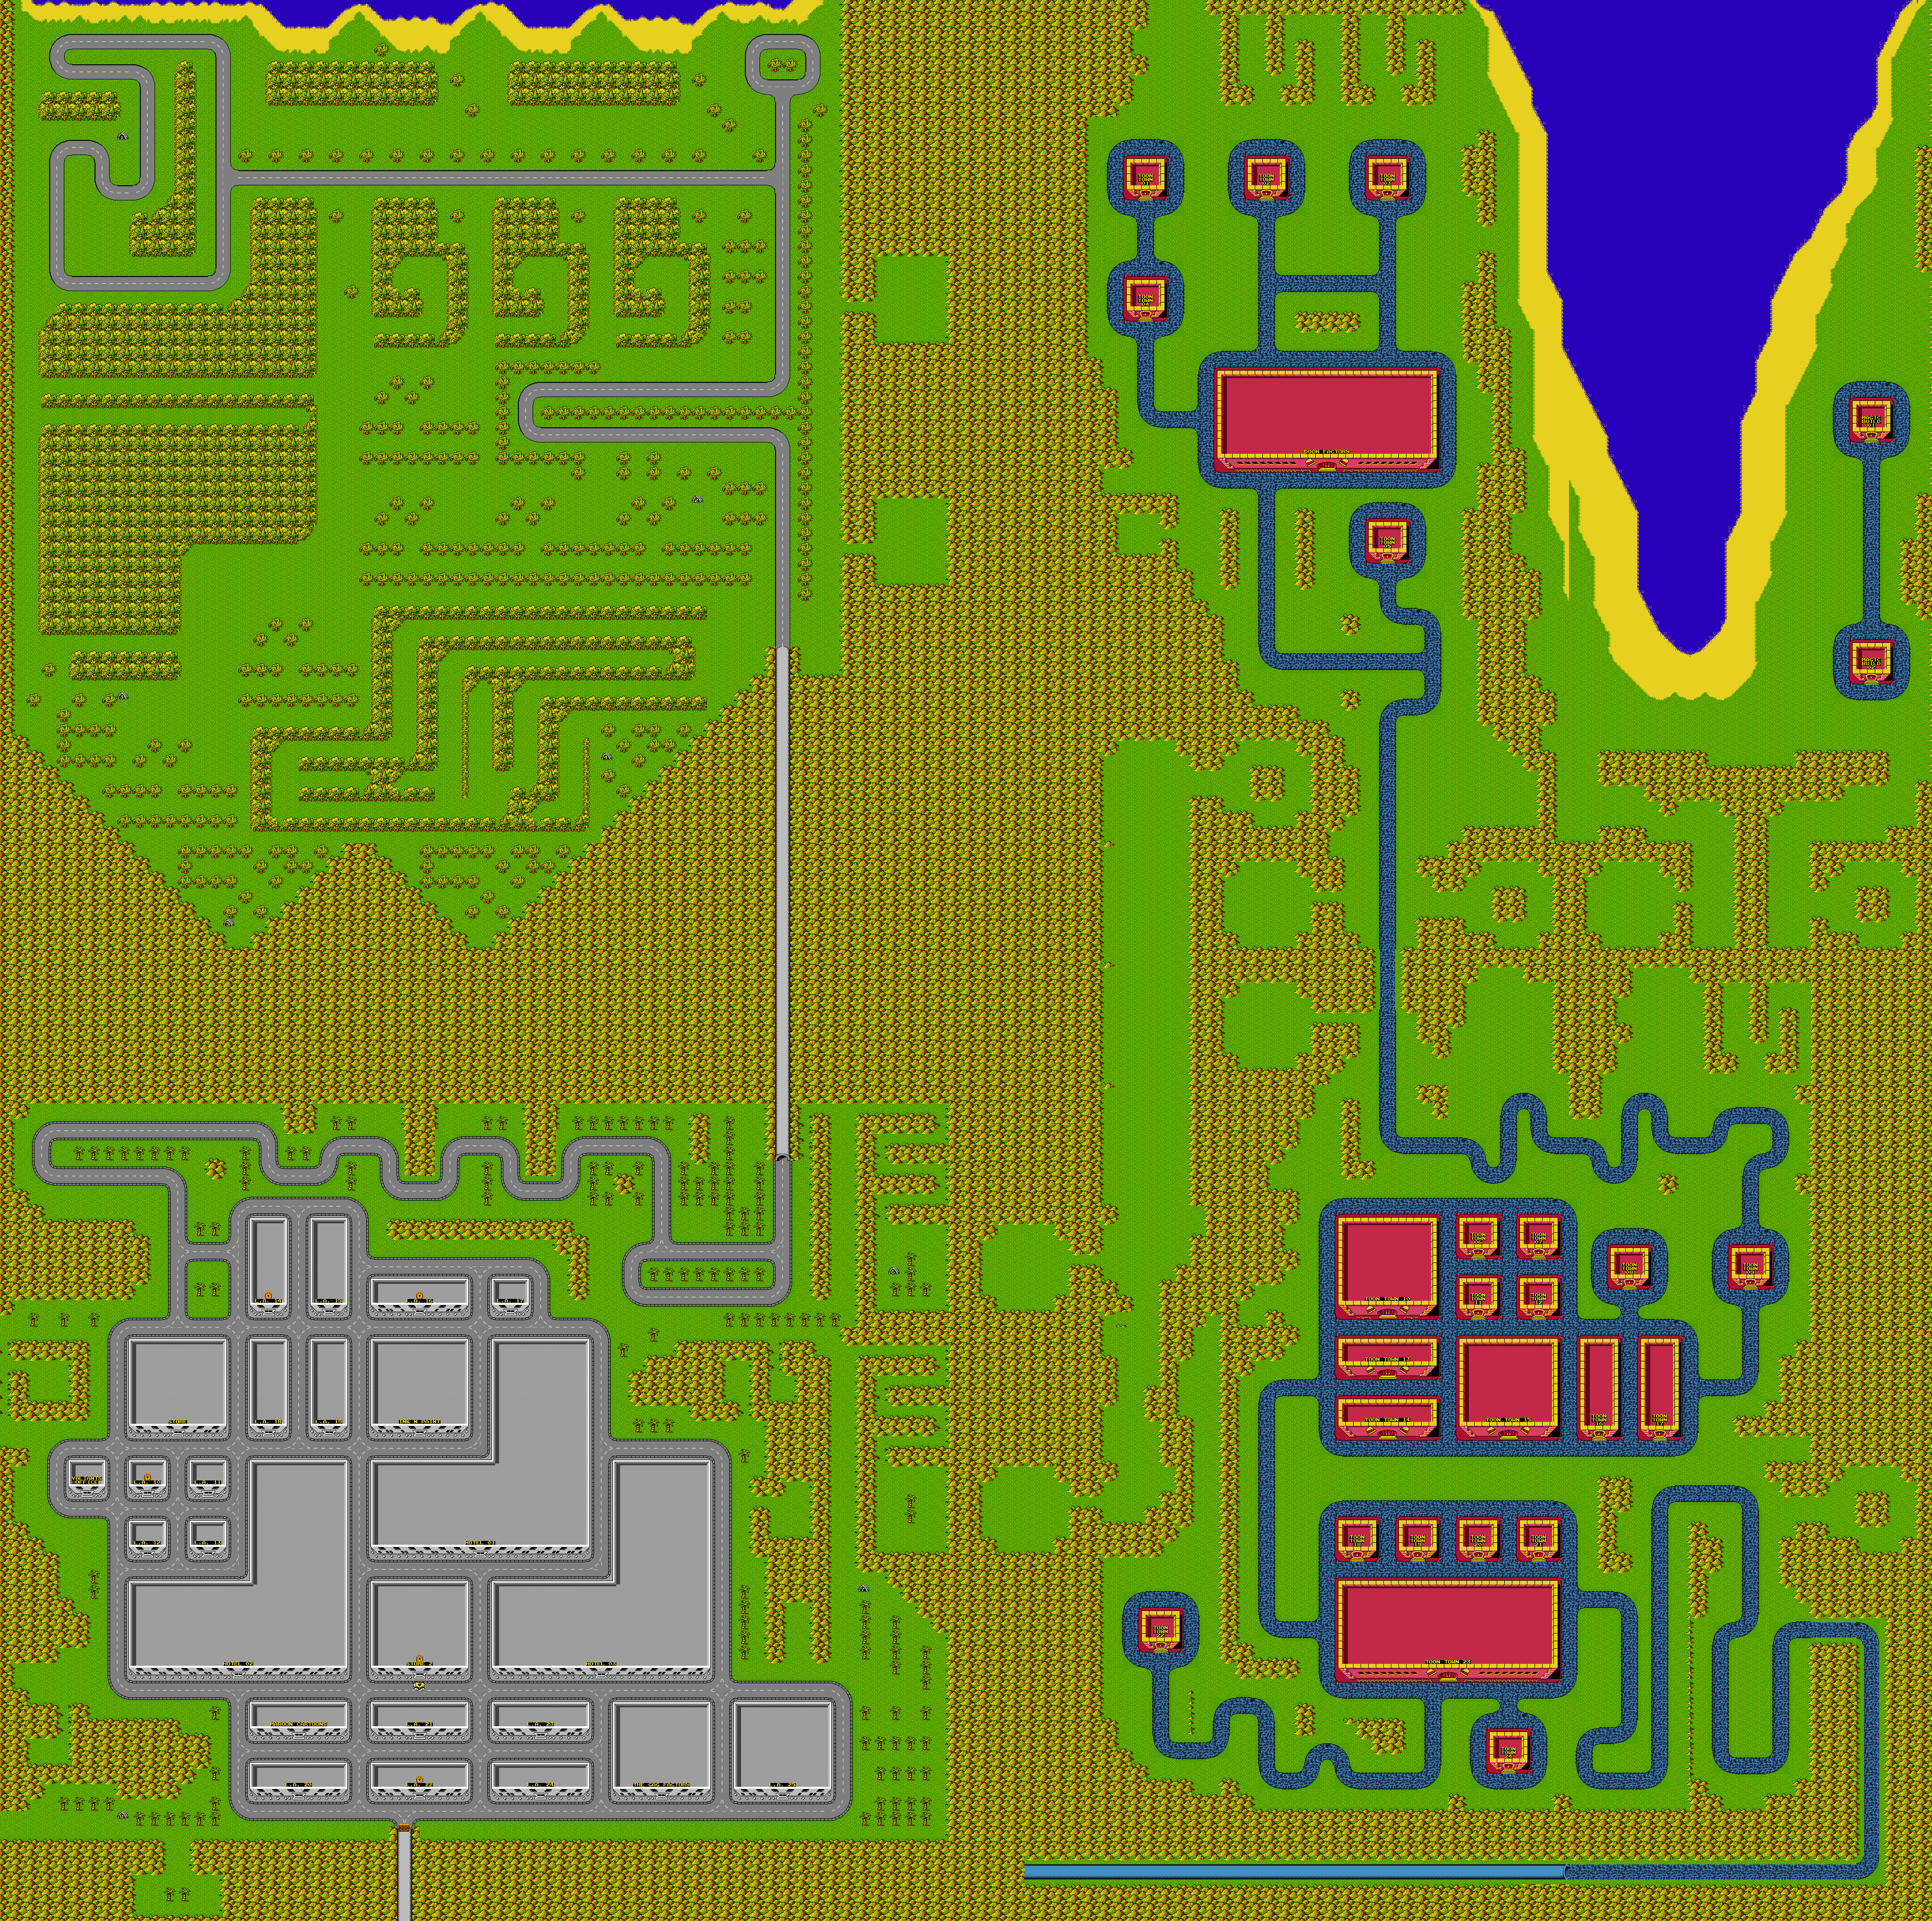
3:25 - Here is the overworld map. Right now, you're in the Burbank area of Los Angeles. Be careful, as it is possible to be run over by a car. If it happens to Roger, you're okay. If it happens to Eddie, you'll lose a life. Also, if the vulture carries Roger Rabbit off, you'll lose a life.
If you hear the siren, watch out for the weasels. They will try to run Eddie over in their car, and if they come out of their car, they will immediately come out and look for you. If they catch up to you, they will kidnap Roger Rabbit and tell a joke. If you do not supply the right punchline (signified by the "P" blocks at the top), they will beat up Roger Rabbit and you will lose a life. If you can get to a building.
3:50 - Now that you've left Eddie Valiant's office, you will want to go to every building and look for stuff. All of the buildings have different numbers, so if one area is giving you trouble, you can make a note of it for later (on pen and paper, of course). Sometimes you will find something, sometimes you won't. Even though we just left Valiant's office, if you come back, there may be a new item to find. If someone tells you that there is something in that location, there will be one item in that location.
Some of the buildings will be locked, others will not.
Be careful of other enemies such as dogs, cats and rats, as they will eventually kill you if they run into you enough times.
5:06 - The flashlight will allow you to see in the caves, which will be entered a little later.
7:04 - Yes, you can search the mouse hole. Keep that in mind.
7:27 - The password will be needed for the Ink and Paint Club.
9:16 - Some of the items can be bought at the store. To buy something, you have to select the wallet in the inventory by holding Select and pressing Up and Down on the Control Pad. From there, use the wallet by pressing B when it is equipped to get the item to drop. From there, you can pick up the item.
In case the item is not one you want, you can simply leave the store and come back in. The item will randomly change, should you do that.
The crowbar will allow you to break open locked doors, while the spring shoes will be used in the caves to get over pits.
And now, the epic conclusion to this thrilling saga!
In the next cutscene, Tintin, Captain Haddock and Zarrino try to find a passage further up the mountain. This sets the scene for the next level.
The level begins with you making your way up the mountain. Watch out for spikes as well as small falling rocks. Be sure to collect as many clocks as you can, as the clock will be going pretty fast here.
When you see the spiked slope, push the rock column to the left to give yourself a bridge of sorts to get past it.
Be sure to make running jumps at the end of the platform to make it past the long jumps; otherwise, you'll be losing a lot of ground and struggling to make it back up in time.
When you see the log on the ground, hold R and walk into it to push it. This will come in handy later. At that log, make a running jump to the right and keep going until the screen stops scrolling. You'll be able to get a treasure trove of power-ups as you climb up and head left to get a rope. You will need it to beat the stage.
Get back to the log from earlier and go up. There will be another log and some time. Push the log as far to the right as you can and make a running jump to the right off the very edge. You'll be able to finish the level and use the rope at the tree to make it to the end.
The next cutscene then shows the rope snapping on Tintin and he shimmies to the other side with Snowy in tow, causing him to fall down to the waterfall and unexpectedly find the secret entrance to the Temple of the Sun.
The next level takes place in the cave. Use the rock above the start to make it past the spikes, and push the rock covering the doorway immediately afterwards to the left to enter.
From here, push the rock to the right into the pit, then jump onto the platforms above the river as you head to the right. Grab the clock, then get in the water and swim right. Dive under the wall and you'll find a doorway. Enter.
Run to the left. At the mummy, crawl to the left. Go to the power-up on the left and climb up to the doorway. Enter.
Push the rock to the right and run to the right. Jump over the spikes, and wait for the rock to fall after you collect the health. Jump back to the left and enter the doorway you just passed by.
Jump to the right and enter the doorway, go into the background and head all the way to the right. At what looks like a dead end, enter the foreground and go right. You'll find the secret entrance at the wall.
The next cutscene shows Tintin, General Haddock and Zorrino pushing the secret entrance down only to be caught by people inside the temple, They are sentenced to death by the Prince of the Sun for violating the temple, and told that Professor Calculus will suffer the same fate for wearing the sacred bracelet. However, he grants them one favor: they are allowed to choose the hour and the day of execution.
In the prison cell, Snowy has found a piece of paper. This leads to a puzzle where you find a newspaper and have to put it back together before time runs out. Thankfully, the shape of the paper itself is a clue, though that will disappear after a short time.. Thankfully, you do not have to rotate the pieces; only place them. Get the small pieces out of the way first, and work from the edges to the center.
After the newspaper is put back together to reveal a picture of an eclipse, Tintin elects to die in 18 days' time by 11:00.
You'll then start the final level, where Tintin is seen running to his sacrifice while bound by ropes in an auto-scrolling stage. Avoid the rocks that fall and be ready to jump over spikes, guys carrying spears and rolling boulders as well as onto platforms. Thankfully, the spears being held by the people in your way will only hurt you if you run into the tips.
There is a platform that, should you be able to reach it, will take you to a 1-Up that will fully replenish your health.
At the end of the level, the funeral pyre will take place, but before Tintin, Professor Calculus and Captain Haddock can be burned to death, a solar eclipse occurs. The people of the sun relent, and promise to do what Tintin desires if he makes the sun reappear. Tintin somehow "makes the sun reappear," and Tintin, Calculus and Haddock are saved from execution.
The Prince of the Sun keeps his word and frees Tintin, Calculus and Captain Haddock. Tintin then says he only has one request: remove the curse from seven learned men who are still enduring terrible torture and end their suffering. Their wish is granted, Zarrino and Tintin say goodbye, and the game ends.
In this entry, Tintin has to descend a mountain on a condor before doing an escort mission.
After we free Zarrino, Snowy is kidnapped by a condor and Tintin must save him. Tintin manages to save Snowy, but now who's going to rescue him from the bird?
You can control the bird, but the controls are all confused. Up takes you down, Down does nothing, and Left and Right don't take you left and right very well. Not only do Tintin and Snowy have to avoid falling rocks and tree branches, but so does the condor, meaning that your hitbox is frickin' huge. Eventually, you'll make your way to the bottom, where the condor will drop Tintin and Snowy off, but this stage is a doozy.
One morning, high up the mountain, Captain Haddock sneezes and causes an avalanche. Tintin runs away from the avalanche and towards the screen, despite clearly being not dressed for the weather.
Tun way from and jump over the rocks. Thankfully, the avalance cannot catch up to you. The icy patches will not hurt you, but they will cause you to lose control for a few seconds and send you into some rocks, so jump over those as well. If you see a snowball come out of the avalanche behind you, stay away from it.
When you see a snowball come down the center of the screen and splatter, you've completed this level.
After this, Tintin, Captain Haddock and Zarrino prepare to enter some thick jungle. This time around, it's an escort mission as you help Zarrino across the jungle.
Jump over the gap at the beginning, grab the branch that is at the other end and drop it in the gap so that Zarrino can cross. From here, go into the background plane and cross the tree bridge, then go back towards the foreground and move the tree stump you see to the left. When Zarrino crosses, head to the right.
At the seesaw platform, run to the right end, then move to the left as Zarrino crosses so he does not fall into the swamp. While Zarrino will not cross if he sees an obvious hazard, he will haphazard walk into a not-so-obvious one and cause Tintin to lose a life.
When Zarrino stops this time, move to the right. Run back to the left when you see the wild animal. Zarrino will continue on, then stop again. You can knock the branch above the gap down to get Zarrino to cross. At the next hazard, jump to the right and move the stump to the left. If you skip the former and do the latter, you'll skip the former automatically.
There will be a gap with ants in it. Jump over the ants, then jump over the anteater. Get the health and the time in the background, then push the anteater to the left into the ants. The anteater will eat the ants and Zarrino will cross. At the next two tree platforms, jump at the ends to break the end off so that Zarrino can cross the swamp. The same goes for the small stump afterwards.
After a bit of a gap between obstacles, there will be a long tree platform. Jump at the end, and be careful so you don't fall into the swamp yourself. Do not try to land on the rock, as you will die. Jump over to the right at the end of the branch you just knocked down.
The next bridge has a gap. Jump the gap, then go right so the wild animal that is running back and forth will shake the trees, causing a branch to fall down. Take the branch, put it on the gap, walk over the gap, take the branch again, then take it to the left so that Zarrino can cross the rest of the swamp. When he crosses, pick the branch back up and take it to the other bridge.
Jump over the wild animal twice so it goes off-screen, then Zarrino will tell you to watch out or a large anaconda. Grab a rock, wait for the snake to lunge at you, then throw it at the snake so the rock hits the top of the head. After you do this six or seven times, the snake will be taken down. Be careful, as the snake is invincible as it attacks and Tintin's hit box expands to include his arm when you throw...so keep your distance.
In case the rock stops underneath the snake, grab the rock and run away quickly.
After you beat the snake, Zarrino will move to the right and say he will try to find a canoe so you can cross the river. This leads into the next level.
Here, you'll be riding the canoe. Use the Control Pad to avoid the branches and rocks that are in the way, Tintin is the hitbox, but the rest of the canoe is invincible. When you see alligators approach the canoe, use B and A to hit the alligators with Tintin's paddle. If they come from above; press A. If they come from below, press B. (A above, B below. Nice.) If they come straight from the middle, either button works. Also, watch out for hazards, because it is possible to be pushed so far back that you can go up the screen and die.
After the canoe ride, you'll get the fourth password. Enjoy the gag reel!
Who knew that standing on the back of a train could be so hazardous?
When Tintin makes it back to the boat, he tells Captain Haddock about what happened on the ship as well as the fact that Professor Calculus is on board the ship. Tintin and The Captain head back to shore.
The next day, Tintin and Captain Haddock follow Calculus' kidnappers to the Indonesian village of Jauga by train. Not surprisingly, the kidnappers sabotage by train by de-coupling the coach from the rest of the train.
Here, you'll be moving back and forth on the train, avoiding hazards next to the train such as signs while also moving to the sides of the train to avoid the suitcase that is sliding around, as it will hurt you if it touches you.
If you see a golden twinkle, that means that a clock that adds time to the stage will pop up. Grab them all; the timer here can be unforgiving.
When you see a tunnel, get back in the train and stay there; otherwise, you will fall off the train, which instantly costs you a life.
After you pass through three tunnels, you're done with this level. Tintin and Snowy climb out of the train and fall into a body of water below.
The next level takes place in a Peruvian village. Head to the left and go all the way into the background. From here, go left up the stairs in the background plane and keep going left. Don't go into the background yet; instead, keep going left. When you reach the next opening into the background, take it.
You'll see a bale of hay at the start. Use these hay bales to get up the hay bale walls. When you see an opening in the background after the dog, don't go for it; instead, leap off the edge of the platform to the right. Enter the background after going all the way to the right.
Tintin will notice a grown man bullying a child and call him out for it. This starts a mini-boss battle. Jump over him after getting him all the way to the left so he can punch you, then let him come towards you again. Press X to dodge his punches so he inadvertently punches the wall. There will be a health replenishment to the far right, should you need it. After he punches the wall four times, he runs away. Tintin then hears a mysterious voice in the bushes who tells you where Professor Calculus is being held. The voice tells you to come to the Bridge of the Inca tomorrow at sunrise.
The next day, Tintin and Captain Haddock head up the voices. They are lead up a hill by Zorrino, who was the voice in the bushes who helped you find Calculus. That night, they camp, but Zorrino is kidnapped, and Tintin and Captain Haddock have to look for him.
Be careful as you make your way down the mountains. The cacti can sap your health if you run into them, as will sharp, jagged rocks. It is also possible to fall from too high a height and lose one of your hit points from fall damage.
If you see a small boulder, jump on it to make it move. These small boulders can get you past spike pits.
If you see guys in ponchos with rifles, stay away from them, as they are instant death. At the first one, there are large rectangle-shaped boulders you can move in order to trap the first guy as well as use as a platform to continue with the level. The ones that are flat on the ground have to be jumped on in order to be moved, and the ones standing up can be pushed by just moving into them.
When you see a huge cactus, duck and crawl under it.
There is a hard-to-reach 1-Up at the bottom. To get it, jump on the small boulder above and let it roll down the hills. It will break the ground above the 1-Up, allowing you to grab it. Thankfully, grabbing a 1-Up will always refill your health, and you may be needing it at this point.
To get past the last poncho guy, run to the right as soon as he moves left past you as you stay on the top road. Jump on the boulder afterwards to stop the poncho guy, then take a massive leap of faith to get to where Zarrino is being held.
You'll then get your third password. Enjoy the gag reel!
In this entry, we head to the docks and onto a ship to tail someone, but things suddenly take a turn for the worse.
The next cutscene has Captain Haddock driving with Tintin and Snowy to the docks. He says the police have seen a car that fits the description of the attackers. From here, you'll be playing a driving stage.
Avoid all the other vehicles as you drive in the pouring rain. There will also be large tree branches being moved around in the air, and you do not want to be hit by those, either. You'll have to watch all of the vehicles carefully to see where they are coming from as well as going to go. This one will take some practice.
At one point, there will be a truck on the left side while a motorcycle speeds by on the right. Stay behind the truck and wait for the motorcycle, then move right.
When you reach a corner, the car will swerve slightly if you are in the center. Keep the car moving towards the center to make it past the turns.
At the docks, Tintin will mention that talking to the police didn't get anywhere, then Snowy runs off to the right.
In this stage, you'll not only be going into the center of the stage as well as the background, but also the foreground. Just press Down when in the center to go towards the foreground.
At the beginning, jump on the left side of the barrels, then jump over the sharp planks of wood. Watch out for the guy carrying a plank as well as the guy who is throwing boxes off to the side.
To jump over the barrels in the background plane, walk up to it, stand next to it, then make a standing jump to the right while holding down Y.
After the area with the long jump over the barrel spikes, go into the background plane and go left to find a hidden 1-Up. From here, keep going right, and you'll find Professor Calculus' hat. Run into it and it will blow to the right.
When you see the crates set up in a staircase pattern in the background, go to the background plane and go up the steps. You'll avoid the guy who is throwing barrels like Donkey Kong and meet a guy whose crane is broken and is in need of tools. Head back to the left, and take the staircase up. Jump onto the rear car, then run to the left to the train and talk to the guy fixing the top of the car that you saw earlier. He will give you a wrench. Take it back to the man needing tools. Head to the right, and you'll find Calculus' hat again.
Snowy will chase after the hat, and you will have to follow Snowy to the right, running all the way there and going into the three gameplay planes to avoid hazards while also jumping over jagged planks that act as spikes. Eventually, you'll catch up with a kid, who found the hat in Shed 17.
You'll get another cutscene where you'll find out that the Pachacamac was there only to sail off again for Callao, a port in Peru. Tintin and the Captain head to Peru as soon as possible, and at Callao, Captain Haddock will notice through his binoculars that a yellow flag is up on the Pachacamac, indicating that there is an infectious disease on board. Tintin then plans to go aboard the Pachacamac tonight, which leads to the next level.
At the start of the level, run to the left and enter the foreground to avoid the guy in the poncho walking back and forth. Keep going left and go into the door behind the stairway. Head left and press the switch to turn the engines on. Leave the room.
Go up the nearby stairs and do not run into the blue-shirted guy walking back and forth, as doing so will cause them to take you prisoner and instantly kill you. Go to the left and enter the door. Hit the switch, then leave.
Go back down the stairs and enter the door to the right past where the guy in the poncho was moving left and right. There is a switch just to the right; flip it and keep going right to push the crates forward to avoid the poncho guy. Go into the door, then keep going right. Just before the bunks, you will see a bottle on the ground. Pick it up. Head to the right some more, and head into the foreground after seeing the guy reading the newspaper. Wait for the two guys on patrol to move past you, then run to the right and enter the door. When you hear something along the lines of "Ora!," that means somebody is nearby.
In the next room, run all the way to the left to avoid the poncho guy. You'll get a hidden 1-Up. Hide in the background to avoid the poncho guy, then enter the door on the left.
If you need health, go into the foreground and run to the right for some. Otherwise, go up the nearby stairs. When you see the blue shirt in the cabin, press A to throw the bottle at him, then get in the background plane. Get in the cabin and flip the switch, then get out while avoiding the blue shirt guy. Go back down the stairs and go to the left. Enter the door in the foreground plane.
Run to the left, and get in the foreground to avoid the poncho guy and the blue shirt that comes after. Enter the door you find, then go into the door. Run to the left and you'll find Professor Calculus resting in the cabin. Unfortunately, a poncho guy shows up and point a gun at your back, telling you that Calculus has committed sacrilege by putting on the Inca bracelet.
You'll then see a cutscene where Snowy and Captain Haddock find out that shots are being fired on the ship. It appears that Tintin has gone overboard, and is now swimming to the docks. Unfortunately, someone is firing at him while he is in the water in an attempt to kill him. Watch the ship as you move back and forth, so you know where the bullets are going. If you run into the splashes, the bullets can still hit you. If you see two lights at once, stay in the middle of them so neither bullet hits you.
The splashes will get a lot bigger as Tintin gets closer to the foreground where Snowy is, and because of that, the splashes where the bullets land have bigger hitboxes, which can make the end of this harder than it should be. When the boat that Snowy is on starts moving, you've completed this level. This one will take some practice, but once you know where the bullets are going, this one becomes easier.
Also known as Les Aventures de Tintin: Le Temple Du Soleil, or simply Tintin: Le Temple Du Soleil. Much like Tintin in Tibet, this only got a European release. You can choose between English, French, Spanish and German languages at the start of the game. Move the fireball to the one you want and select it. The game is based partly on the comic book adventure of the same name as well as The Seven Crystal Balls.
The story begins in the heart of Peru. The Sanders-Hardiman (known as "Sanders-Hardima" here) expedition has found what it has been looking for: the ancient Peruvian mummy of Rascar Capac, also known as "He-who-unleashes-the-fire-of-heaven." Shortly after they find Rascar Capac's mummy, however, both Professors Sanders and Hardiman are hit with mystery illnesses and all the news sources believe that it is either a curse of Rascar Capac's revenge.
You'll suddenly be playing as Tintin, and you will learn that Professor Catonneau has been attacked by one of the Thompson Twins (no, not the band). (Cantonneau first appeared in Tintin and the Shooting Star.) Tintin will mention that he will tell Dr. Midge. From here, Tintin will go through the door that is right in front of him.
The game controls just like Tintin in Tibet; as a matter of fact, the game has the same ending. You can run with Y, jump with B, and even move between the foreground and the background with Up and Down on the Control Pad. Use this room as an opportunity to learn how to dodge museum guards as well as museumgoers.
Just like in the first game, there is a scroll with Tintin's face and the number of lives you have left in the upper-left corner, and as you take damage, it rolls up. If it is fully rolled up, you lose a life. Also, the timer in the upper-right corner comes back with a vengeance. Don't let it make a full revolution clockwise, or you will also lose a life.
You will pick up a gold idol before you finish the first section. This will refill your health if you need it. From there, enter the door. The room will be dark, but the light switch will be dimly but noticeably lit. If you press the A button near it, you will turn the lights on. From here, jump over the sharp, pointy planks of wood and grab the crates to place them elsewhere and use them to get around. Be careful, but be fast; the lights are only on for about 15 to 20 seconds before they turn off again.
Once you reach the other side, you'll meet the other Thompson twin, who will tell you that Dr. Midge's office is at the end of the corridor. Make your way to the right, and watch out for people again. You'll reach Dr. Midge's office only to find out that Dr. Midge is out like a light, too. Leave the office, and go all the way back to the left to meet both of the Thompson Twins and let them know that Dr. Midge has also caught a mysterious illness. Tintin will then let them know he will tell Professor Tarragon.
Head to the left from here, once again, carefully avoiding other people and reaching the door. Instead of Professor Tarragon, you'll meet Professor Calculus, who says that Tarragon has left and that he will introduce you to him.
You'll get a cutscene where Tintin is introduced to Professor Tarragon. Snowy is scared of Rascar Capac's mummy, which is nearby and under glass. Tintin will learn that something was carved on the walls of Rascar Capac's tomb, which states that after many moons will come seven strangers who will carry Rascar Capac's body away only to be pursed by a curse over land and sea.
Suddenly, an explosion is heard, and the power goes out.
At the start of the second level, head to the right and avoid the orange fireball that flies around. This thing will zap Tarragon and carry Professor Calculus into the air and on a table. While the masks on the wall will fall when you get close enough, the chandelier can only be knocked down by the fireball. Be ready to duck under the fireball and crawl when necessary.
After going through a door in the background, be ready to avoid another chandelier and duck down to avoid the fireball, which will still be following you around. Grab the idol behind the crate if you need it, then enter the nearby door.
If you see a bump in the carpet, Tintin will trip if he runs into it. Masks as well as statues will fall from the wall. so watch out.
After going through one more door, be ready to jump over the fireball as it moves towards Raspar Capac's mummy. The fireball will hit the mummy, and the mummy will disappear. Tarragon will tell you of a message he has just finished translating where it is said that Raspar Capac will bring down the cleansing fire upon anyone who desecrates his tomb.
You'll then get another cutscene, Tarragon's crystal ball suddenly smashes into pieces, and Tarragon is now catatonic like all the others. The next day, Tintin tells Professor Calculus that Tarragon is in a bad state, but given that Calculus cannot hear very well, he thingks that Tarragon is going around the estate and will join him. Outside of the building, Calculus finds a bracelet that was on the mummy's arm and puts it on. Tintin tries to catch up with him, which starts the third level.
Go up to the first tree and press Up on the Control Pad to hoist yourself up the tree. Jump from one branch to another when necessary, and make your way to the top. You'll find a bloody handprint at the top of the tree, then Tintin will notice Calculus' umbrella below. Move left and right to make your way down the tree, then head to the right and jump over the tree branch on the ground to find Calculus' umbrella. Tintin will tell Captain Haddock - who is in the background - that Calculus has been attacked,
Run to the right and avoid being hit by the bullet from an unseen gunman, then go into the background and stand near the bush. Press X, and you'll be able to switch to Captain Haddock. Use Y to move fast and press B to shoot. Move Haddock all the way to the right and shoot to get rid of the gunman, then switch back to Tintin. Get in the foreground as soon as you are able, then press X to switch to the Captain again, move all the way ot he right and shoot. You'll be switching between both characters often. Also, Captain Haddock has a limited amount of ammo, so do not shoot the gun unless someone is shooting at Tintin.
At one point, you'll find a stick on the ground that Tintin can pick up. Before you can do that, though, someone will shoot at Tintin. Jump over the bullet, run to the right and get in the foreground, then switch to Haddock and shoot at the unseen gunman. Then, switch back to Tintin and backtrack to the stick to pick it up before continuing with the level.
Eventually, Haddock will run out of ammo, and you will have to continue without him. As Tintin, run up to the house and duck to avoid one last shot, then press A to whack the gunman in the wrist with a stick, causing him to drop the gun. You'll then get your first password.
If you fall down the pit in the room full of columns in Stage 3, you'll end up here. You'll also get the bad ending. Yay!
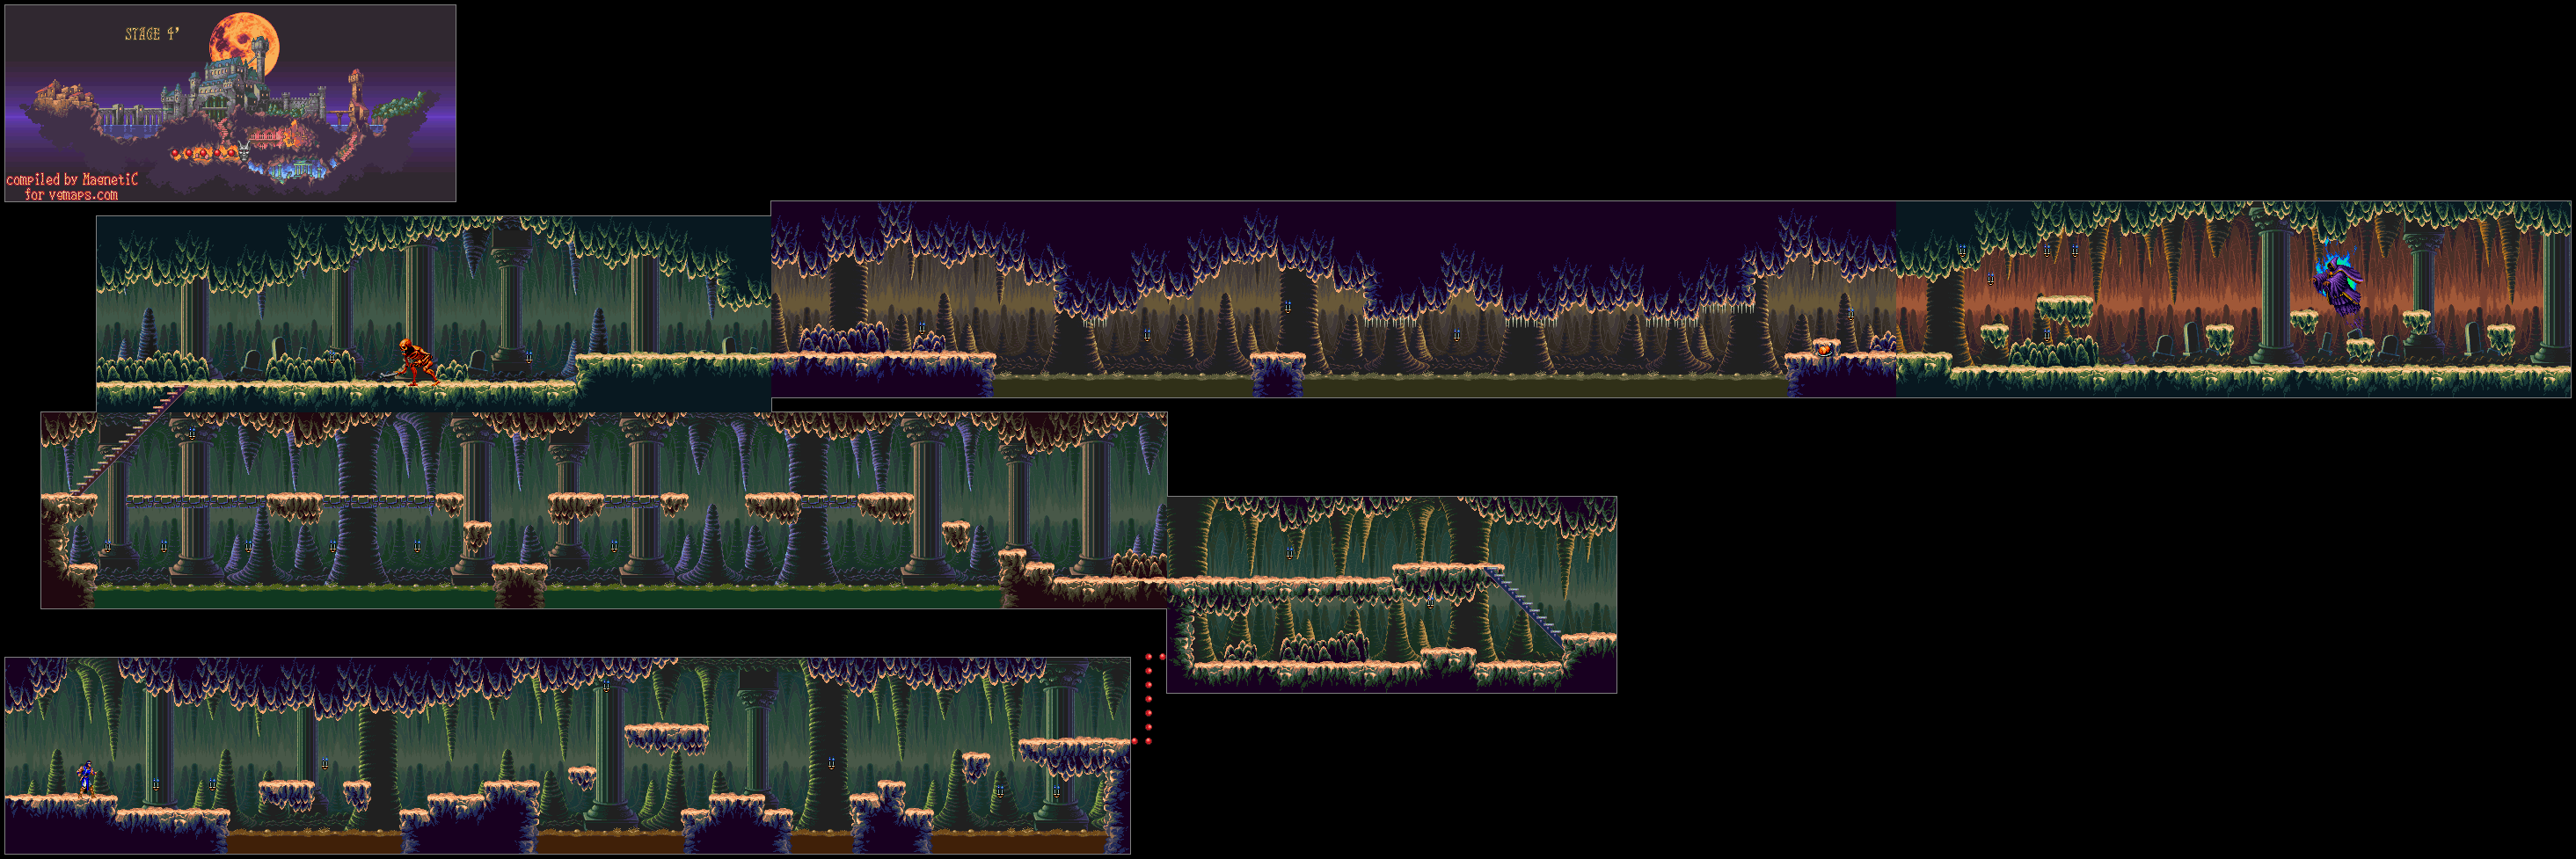
The mud pits will slow you down, cause you to sink if you stay in it long enough and contain mudmen that will pop out, so watch out. Also, there are plenty of jumping skeletons in the first sections.
The Stopwatch uses five hearts to use and stops time - and enemy movement - for a brief time. Beware: there are some enemies that it has no effect on. The Item Crash is a clock shield that will damage any enemies unlucky enough to take it on.
In the second section, have the red Ax Armor come to the right and strike it repeatedly when it hits the wall so you don't have to deal with it anymore.
In the third section, don't jump on the rectangular platforms unless you have a death wish, as they will tilt and send you tumbling into the green mud below, which will eat at your health. This makes positioning yourself in such a way as to defeat all the bats essential. To avoid the last bat, jump onto the stairs. The ax won't work unless the bat is flying.
The big red skeleton throws his bone, dashes and swings, then jumps at you. Stay away from both attacks, then stay a bit close to him to stay under it when he jumps. Keep striking the mid-boss whenever possible, and move appropriately.
In the fourth section, you'll be using the mud floor to your favor. To get past the ceiling spikes, sink a little lower than usual so you jump out when Richter is halfway covered in mud. That way, your jump out of the mud isn't as high. You can destroy the rock in the ground to get some wall meat at the end if you need it.
In the fifth section, you'll get a bunch of hearts as well as a dagger. There is a hidden candle with a cross hidden in the ceiling between the entrance and the shorter platform.
You'll then face the boss. The boss is basically a dark magician, who I'm assuming is Shaft, Do not let the orbs touch you or fly around for a while, then will curse you if they touch you. Thankfully, you can strike them to get rid of them. Also, watch out for the skeletons that he can summon.
This boss also has a second form. The tombstones he creates will do some damage, but you can get rid of them. Both forms can easily be taken care of with the ax.
In the second section, you'll not only see flea men, but also giant bats that drop flea men! If you have the ax, you'll have an easier time clearing the skies even though the bats will drop the flea men pretty fast.
The third section is a vertical climb, except the stationary platforms crumble as you stand on them. You have to be light on your feet to keep on jumping as well as take on the flying enemies that will try to knock you off. Thankfully, the platform at the top does not fall apart.
The fourth section is full of wood panel walls and Spear Knights. Watch out below when you take out the first one, then move forward get the other two to back off. You'll then meet some Sword Knights, but they are easy to take care of if you keep your distance and dodge when they move their swords upwards.
There are a few staircases to the left of the Spear Knights go down and to the left to get the meat. If you go up the stairs, go back down and strike the candle that has re-spawned, you can get the meat again!
Take the stairs going up and to the left after the Sword Knights. You'll have three more Spear Knights to deal with. At least you'll face two out of three on the lower level. At the gap with the fourth Spear Knight, you will have to time ax throws to get rid of the Spear Knight.
In the fifth section, it will be platforming, birds that swoop at you and blue Ax Armors that slow you down. At least the platforms don't break.
The boss here is a werewolf. Stand just to the side of center for a few free hits, then keep your distance. If he ducks, be ready to jump over a slide. If he jumps to the wall, get back when reaches to the jump. If he jumps all the way up in the center, be ready to move around and strike to avoid the pinball attack. When he runs out of health, he turns into a naked man and disappears.
Remember that boss we skipped to head to Stage 5'? Here's how you fight it in case you lost the key and/or did not save Annette.
The boss will be different here if you did not save Annette, Annette (or a girl who looks just like her; I'm assuming it's Annette) gets consumed in some way by a giant skull and gets turned into a succubus. The ax and the cross are pretty good sub-weapons to use here. Just watch out for the eyes when they turn into fireballs; they will home in on you. They can also turn into blue and orange orbs that move around in more or less a straight line. They can also turn blue and shoot lightning downward. Watch out when lightning moves up and down the eyes; that means lightning is about to strike.
If you fail to save Annette and/or Maria, you'll get a different screen at the end where Richter Belmont looks back on the village on horseback.
But hey, you finally beat Dracula X! Congratulations!
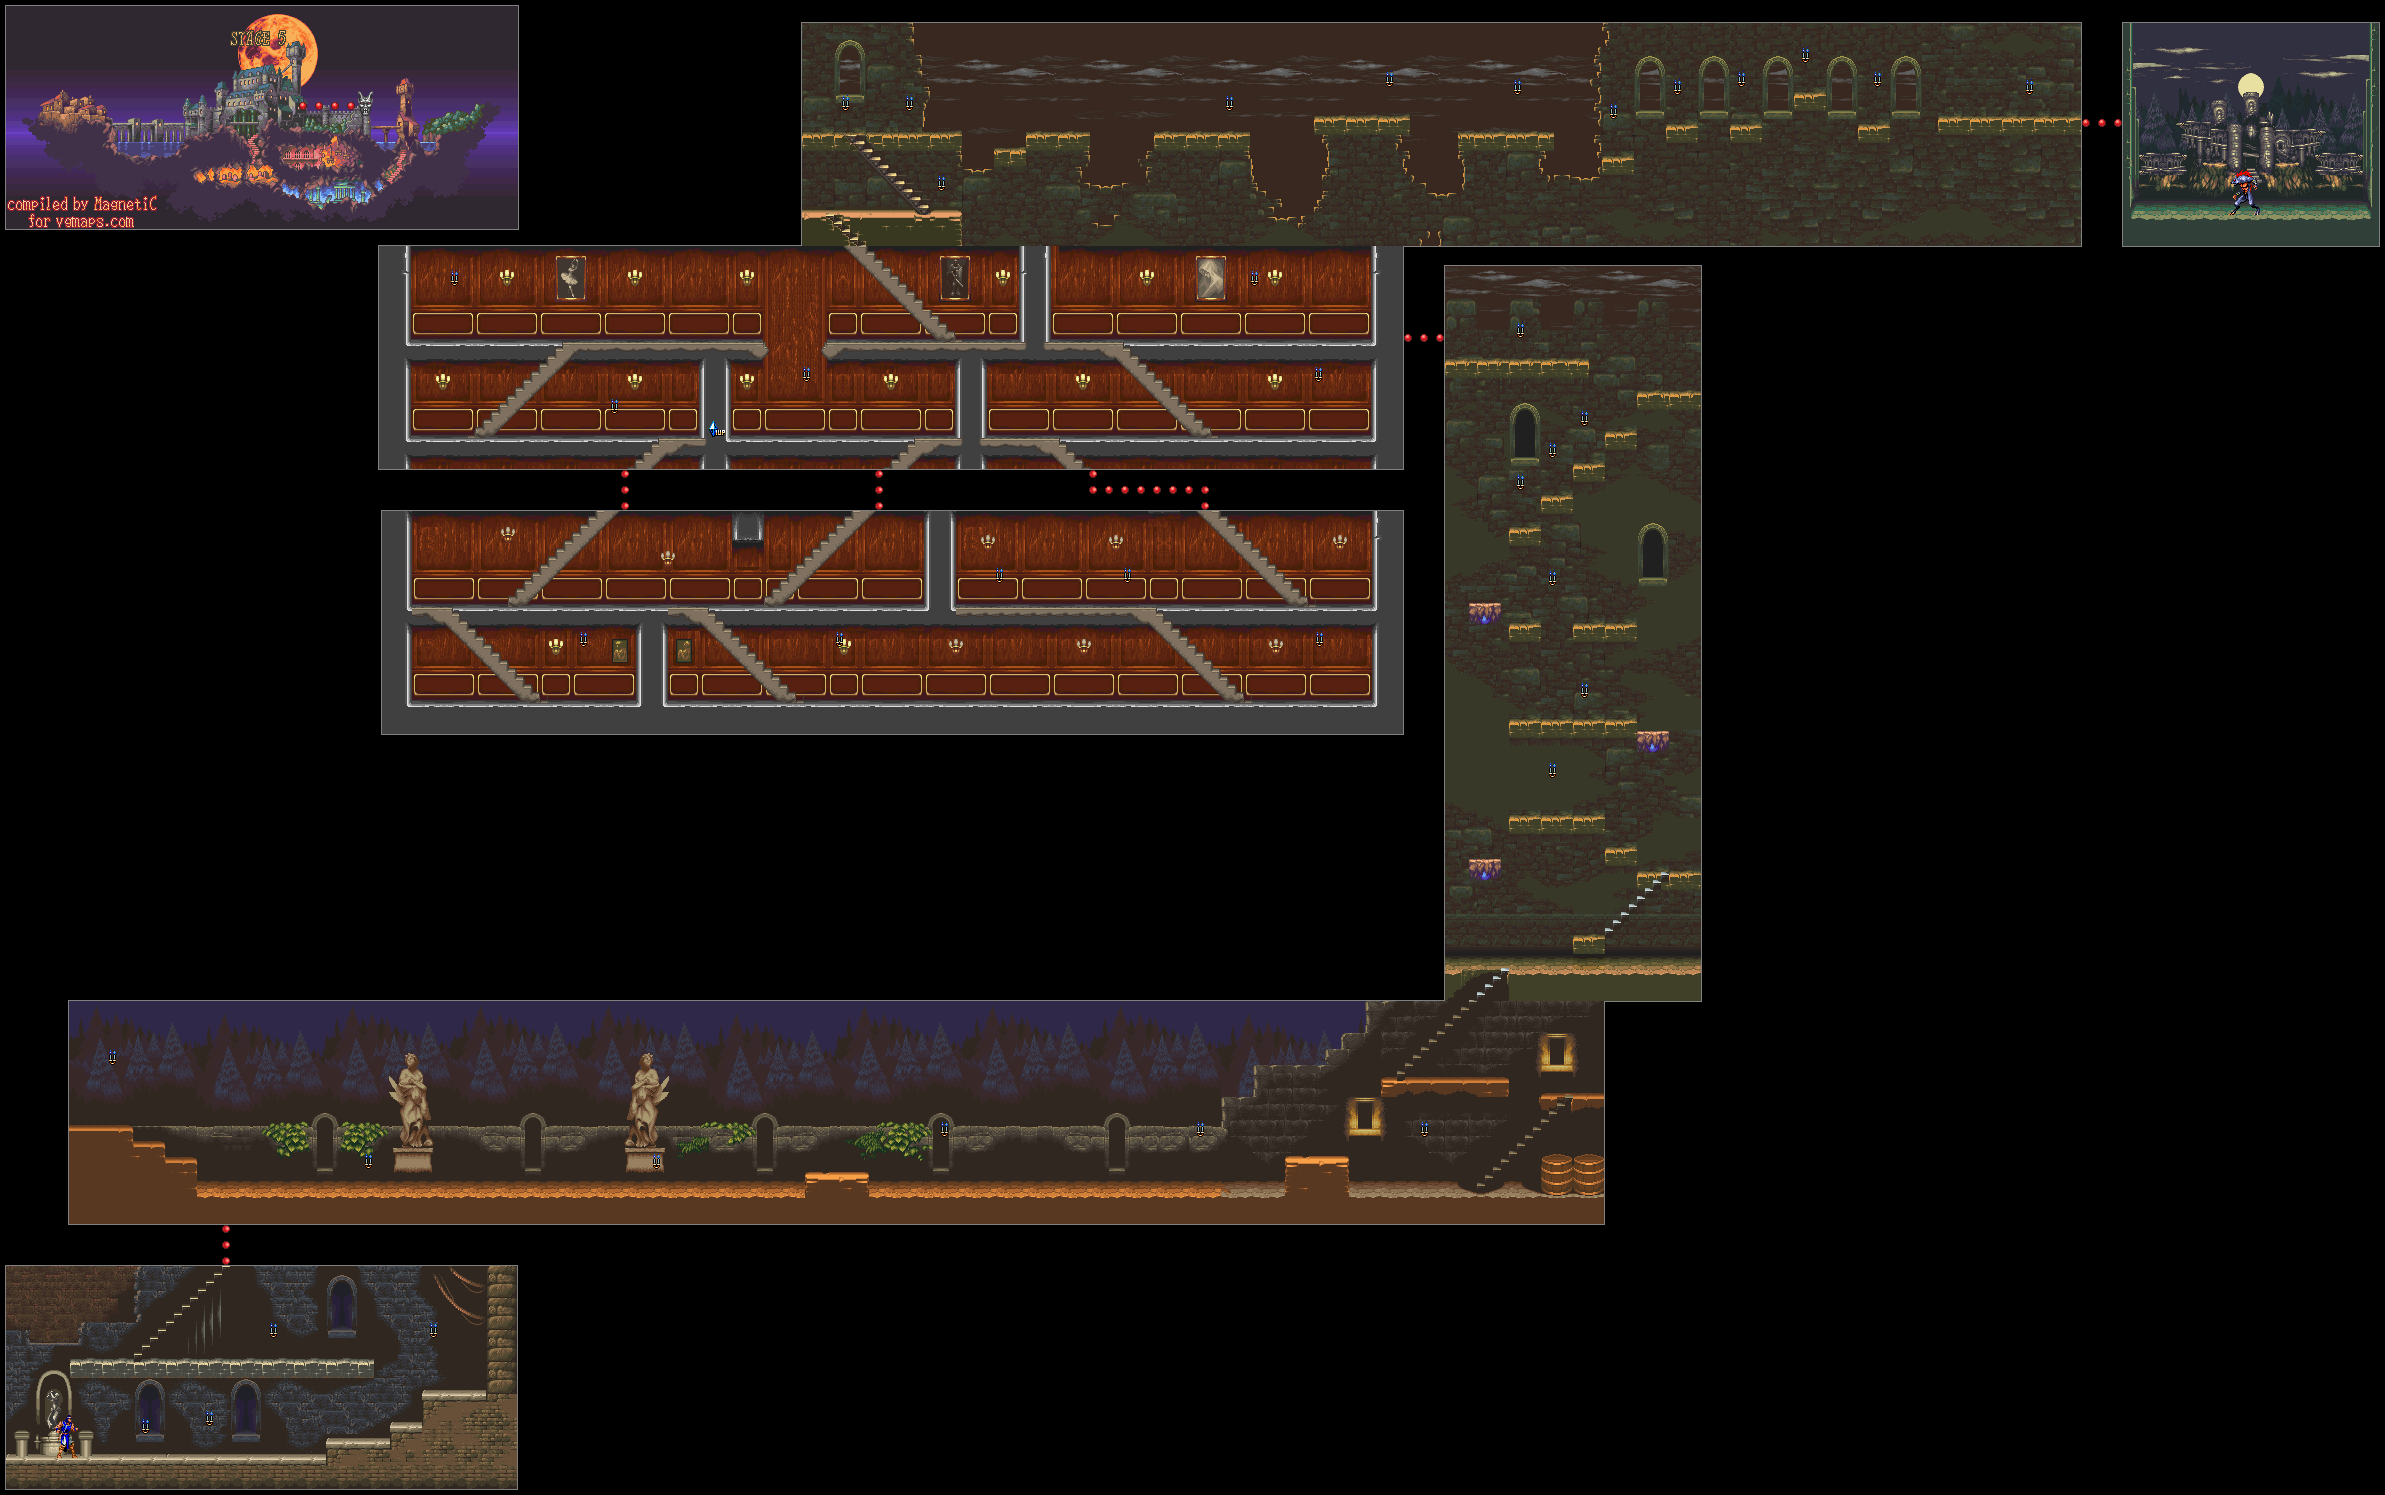
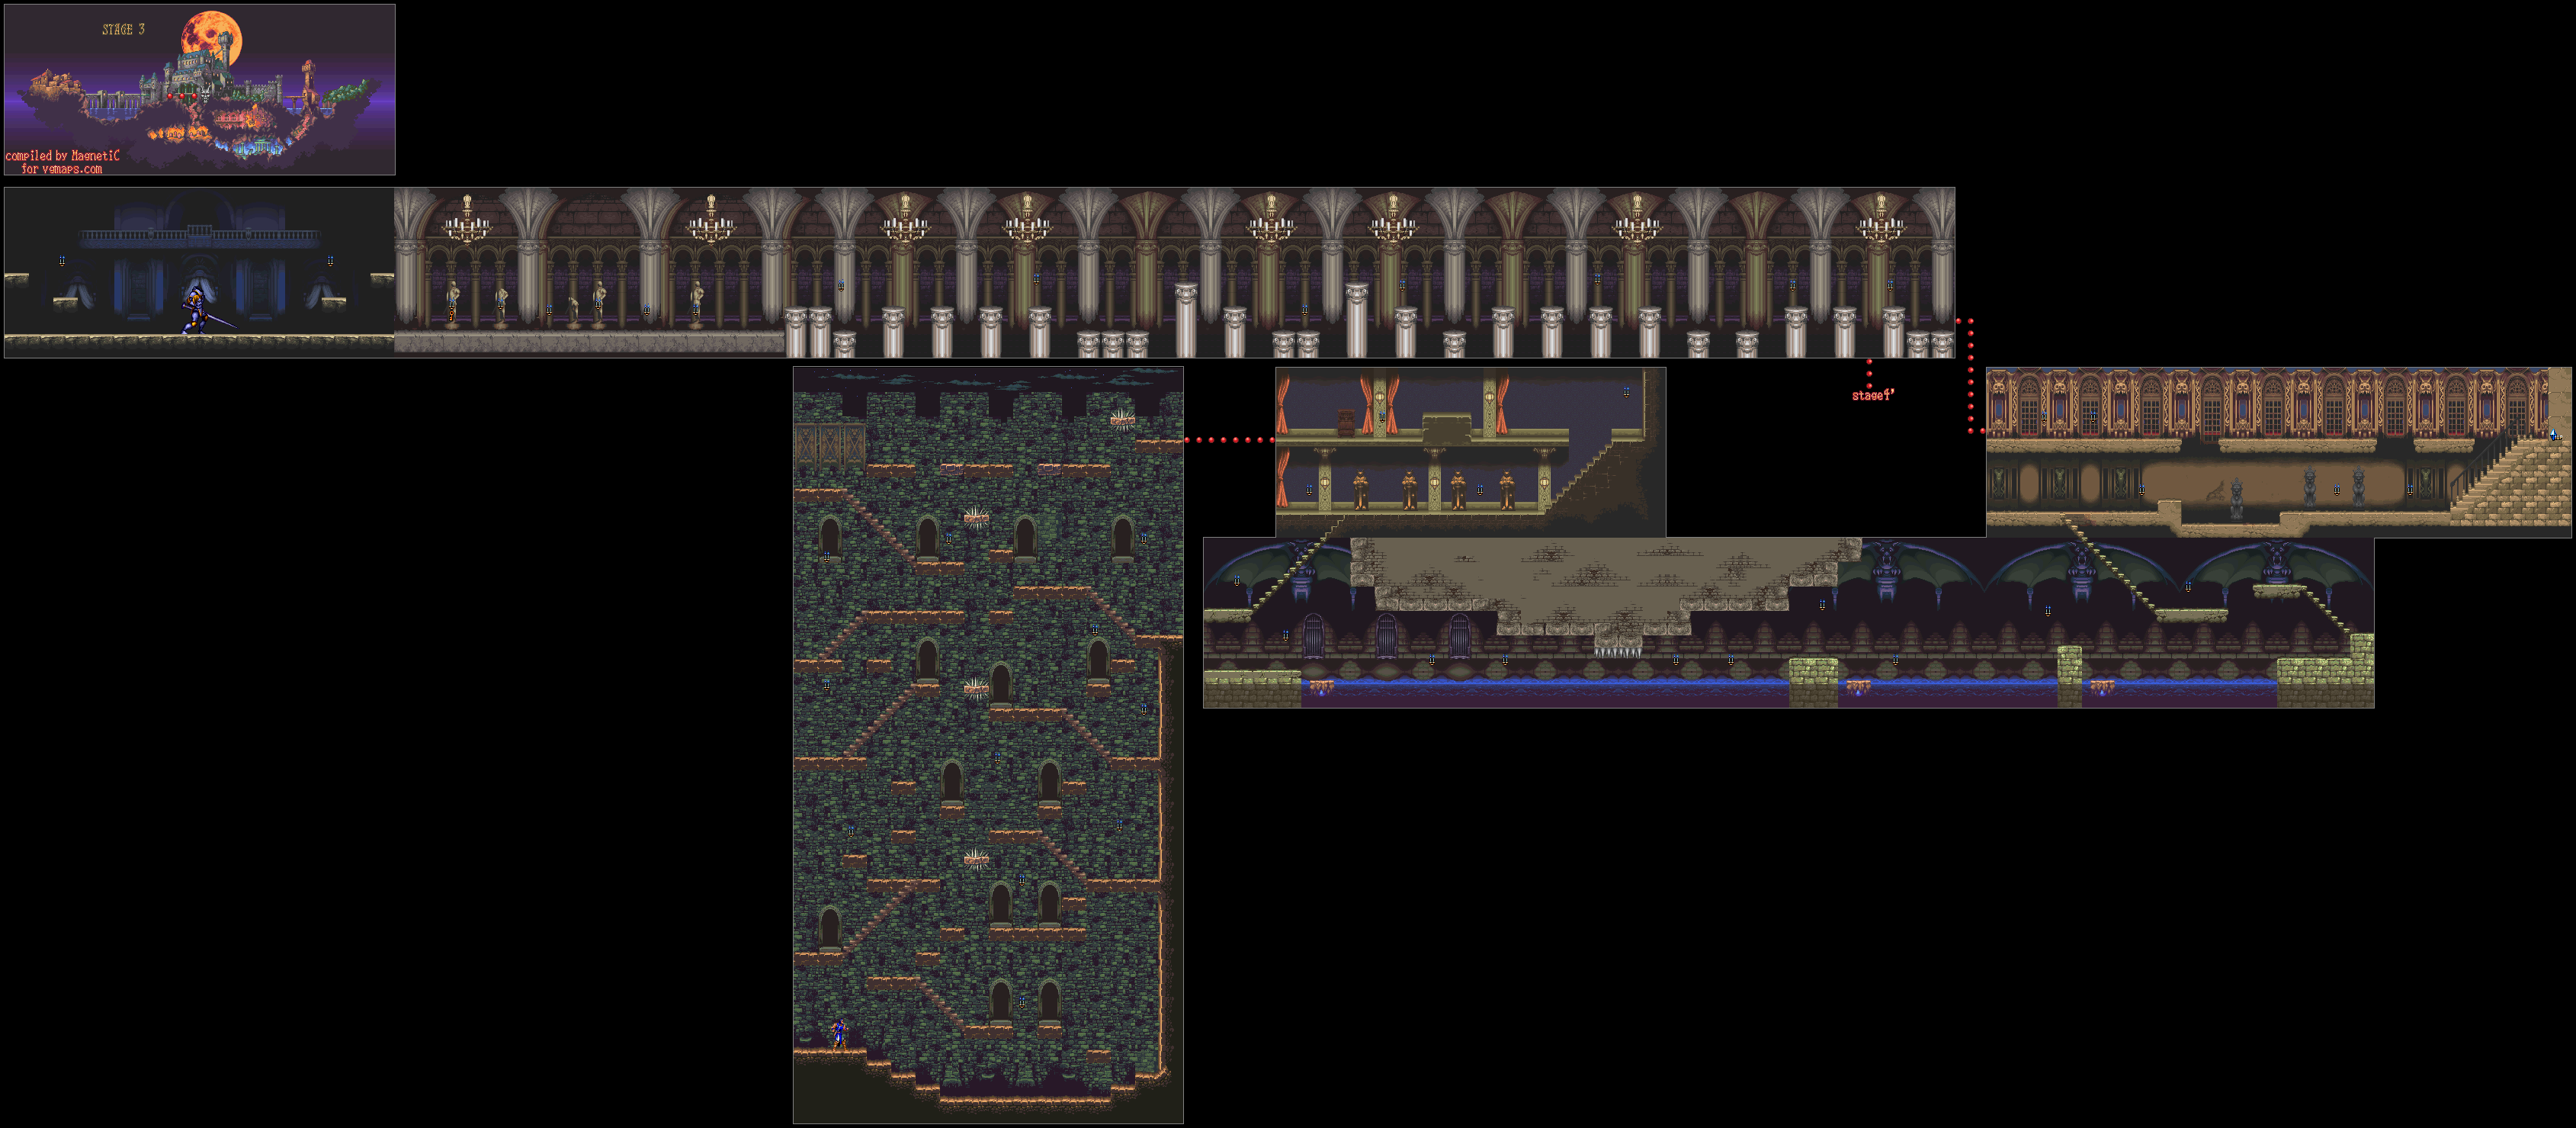
As soon as you make your way up to the right and go up the stairs, you'll be making your way into the castle while fighting zombies, Bone Pillars and a Bone Dragon. Make your way down after the Bone Dragon, then you'll be taking some moving platforms up while dealing with Spear Knights and Medusa heads.
Midway up, you'll have a choice between left and right. Left leads to a dead end but also gives you candles you can whip for things. The right leads to more power-ups, but if you drop down, you're going to be backtracking for a little while back to the vertical section with all the moving platforms.
Above that left path, you can strike the column to the left multiple times with the whip to find a hidden 1-Up.
All the way to the top to the left is the area above the dead end. Be ready to jump. If you can hit the candle up top, grab the jug on invincibility, land back on the platform and somehow make your way to the left, you can take out the Ax Armor that awaits on the other side.
The candles in the next section give you multiple sub-weapons as well as some big hearts. Get the Ax, you're going to need it.
The next room is Dracula, and the floor is full of columns and instant death pits. The candle all the way to the left contains health-replenishing meat, so save it until you really need it.
There are five platforms in Dracula's room. Standing on the center platform gives you a good way to hit Dracula from afar. If he is on the platform left of center or the far right platform, you can jump up and hit Dracula in the head - his weak point - with the Ax. Be careful on the far left platform; it is too easy to hit the meat candle.
Dracula can spawn right on top of you, but the good news is that he doesn't hurt you by touch until he materializes all the way. Because of that, you can jump away from him and hit him in the head with the whip.
If you hear Dracula laugh, but cannot see him, move to the side so his fireballs don't spawn.
Dracula has two fireball attacks: a three-way shot that can easily be jumped over on a higher platform (or ducked under on a lower one) and two big fireballs that advance somewhat slowly and can be ducked on a lower platform. All the fireballs can easily be destroyed with the sub-weapons (especially the Ax).
When you beat Dracula is his usual vampire form, he will turn into a demon and fly around. Demon Dracula has two moves: firing fireballs diagonally downwards at you and two energy waves that he sends towards both sides of the arena. If you keep throwing axes at him, you can mostly deal with his fireballs and you can easily kill him off, assuming you have enough hearts to do it.
After this, Dracula is done. Carefully jump your way to the center column and let the magic orb come to you. You're done. Dracula will get hit by the sun and turn into a puff of smoke.
Since you've saved Maria and Annette, you'll see both of them in the background of the credits screen.
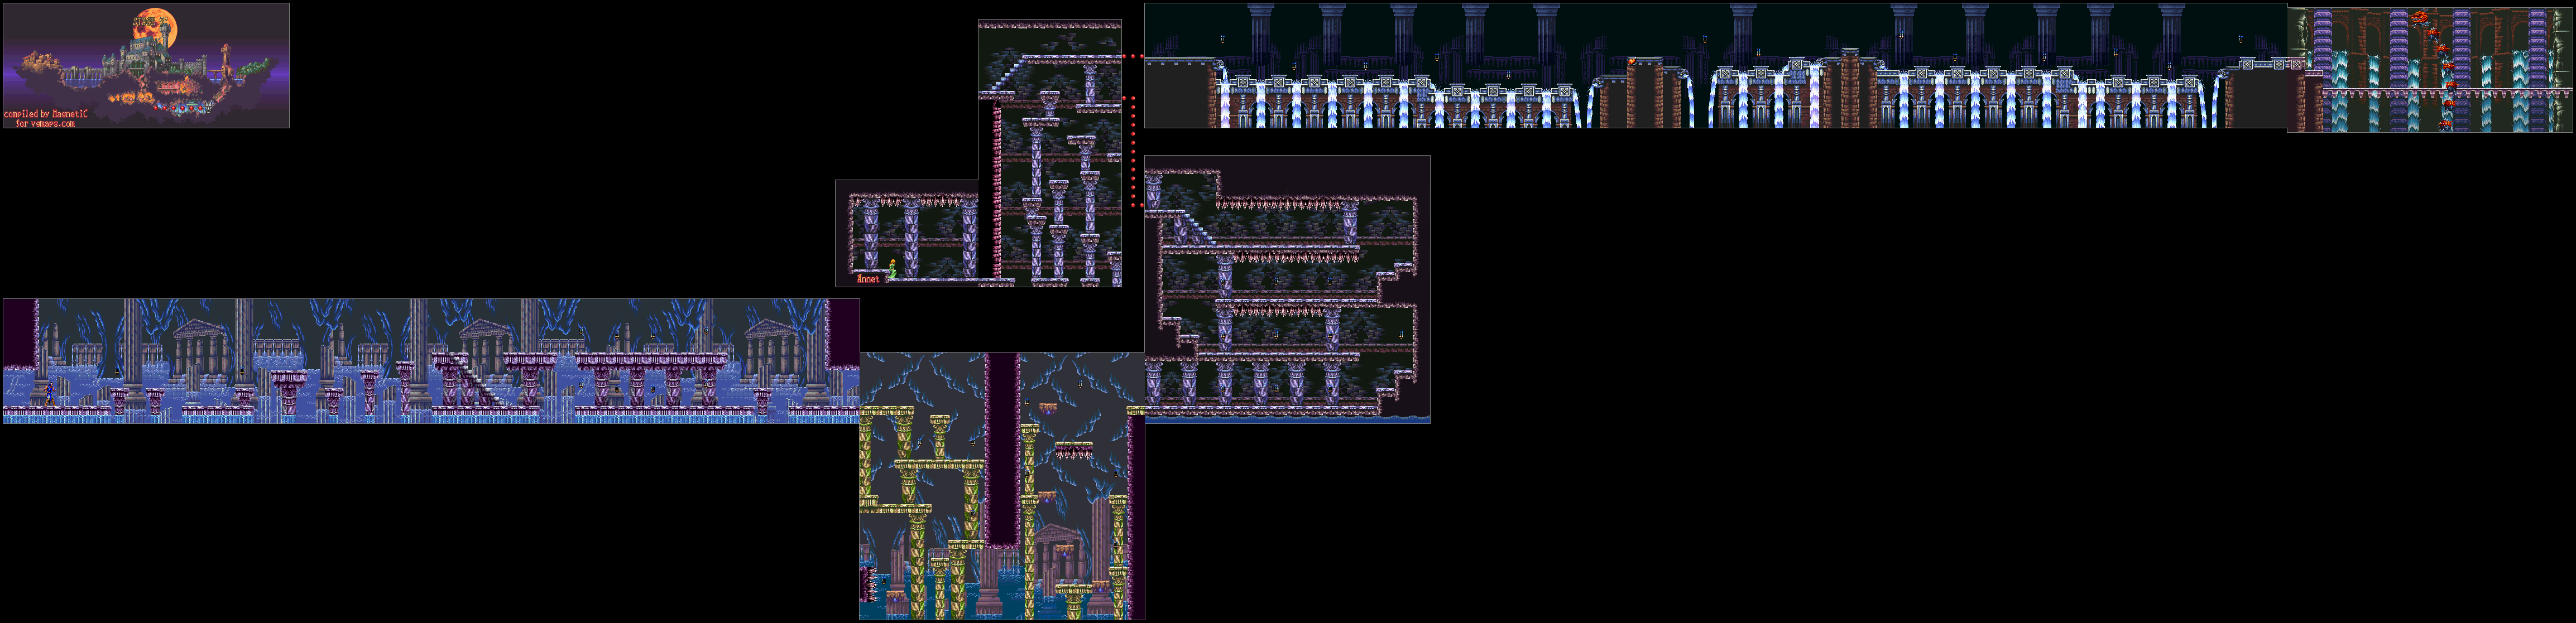
The first section starts out in what looks like the ruins of Atlantis. Besides the mermen, there are water skulls that come out of the water and slowly home in towards you, and while they go down easily. they can be a pain in the keister when you're dealing with other enemies. Watch out for the Bone Dragon at the end.
The second section has some more arches and platforms to drop down from. The mermen and the water skulls are back, and this time you'll be doing some vertical platforming as well. Watch out for the spikes when on moving platforms.
The third section auto-scrolls upwards, and if you get caught at the bottom, you'll either drown or deal with water skulls. Thankfully, there's only a few floors of this. Watch out for ceiling spikes, and be ready to fight some Bone Dragons.
In the fourth section, you have another fork in the road. If you go up and to the right, you'll face the boss, but you won't get the good ending. If you whip the water spout in the wall to the left a few times to get rid of it, then go further down, you'll be leaping down some platforms to the right, then to the left and to the right again before finding Annette. She will tell you to be careful as Count Dracula grows more powerful by the minute. You'll be able to get the good ending, and your health will be refilled. Now you can go up and to the right.
In the fifth section, you'll be on a waterway facing even more water skulls and mermen. Be ready to take out the crow when you start seeing lizard skulls spitting out water.
The boss is a giant red dragon that jumps in and out of the water. Be ready to jump over him and get the occasional hit, but for best results, come in here with the cross as well as a ton of hearts to him the boss with the Item Crash tree times. Watch out for the fireballs when its head stops high up in the air, and when you beat the dragon, watch out for a tornado of water from below, as that is the dragon going for one last desperation attack. Grab the orb. It's time for Stage 6.
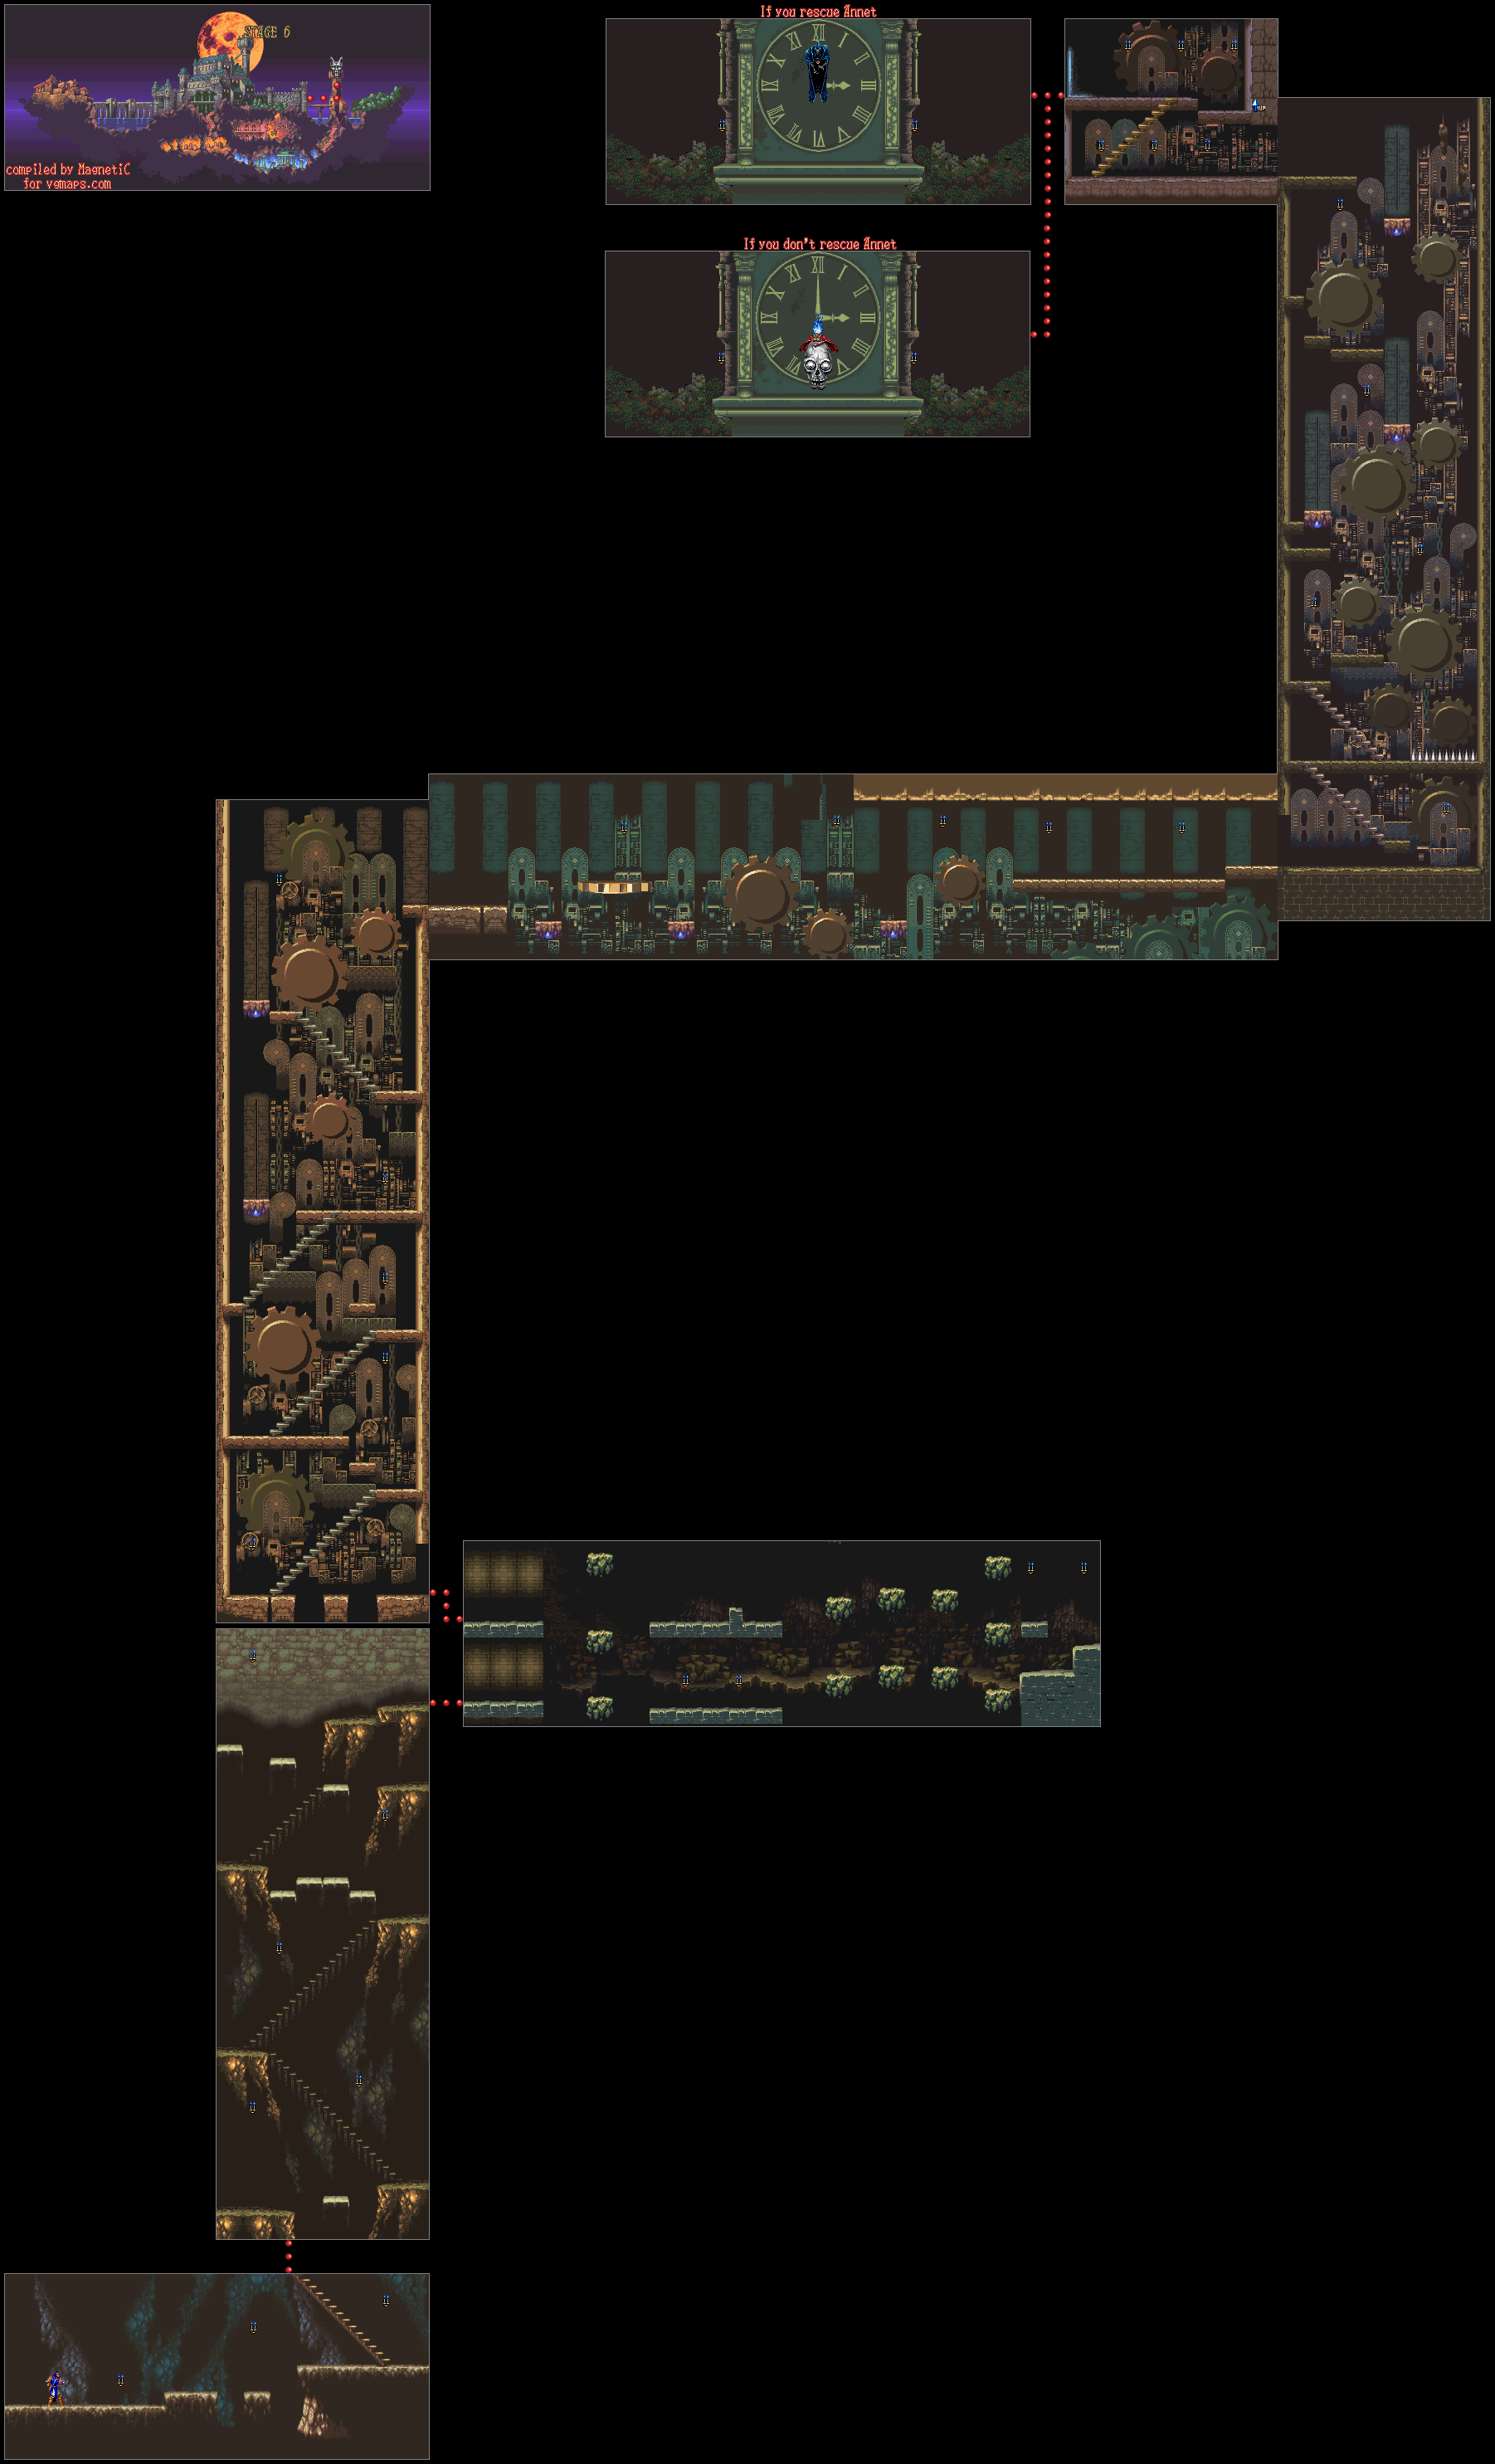
In the first section, be ready to fight some Blood Skeletons as you make your way up the stairs. In the second section, you'll be fighting crows that swoop down at you while also getting Bone Pillars out of your way. Take out the Ax Armor at the top and head on to the next section.
If you make your way to the right in the third section, you'll be able to get some wall meat, but you'll have to contend with some Spear Knights in order to get it. If you make your way up and to the left at the start, you'll enter the clock tower.
Here, you'll be going up stairs, taking on Spear Knights, You'll be leaping onto giant gears to reach some of the platforms, and you'll also have to watch out for a Spear Knight or two from below. Also, watch the sides for bats that fly in to make getting up the tower a rag.
The fifth section has more gears, but a few of them lay horizontal and also move you to the left or the right if you stay on them for long enough. When you get on the big gear following the flat spinning one, let it move you to the small gear to the right; otherwise, you're gonna die.
The sixth section is another vertical climb, except with more Medusa heads, more floor spikes and more platforms moving up and down. When you start seeing the platforms that move up and down, strike the candle to the left to get some health-replenishing meat.
Head to the left in the next section to face the boss, but before you do, strike the wall to the right of the doorway to find a hidden 1-Up.
The boss you fight at the top of the clock tower depends on whether or not you saved Annette in Stage 5'. If you saved Annette, you'll face Death himself. Do what you can to get rid of or avoid the scythes, and be ready to strike Death when he shows up. He may swoop in from below, so watch out. When he starts circling around a little bit, that is your best chance to strike him with the whip.
After enough damage, Death goes into his second form. Stand just at the "VII" on the clock face, duck down and whip to the right to get some hits in on Death's second form. Be ready to head to the right and duck down to avoid the attack where he jumps back and swoops towards the floor, then be ready to hit him again. If you have an Item Crash, use it here to do some big damage. After this, it's on to Stage 7.
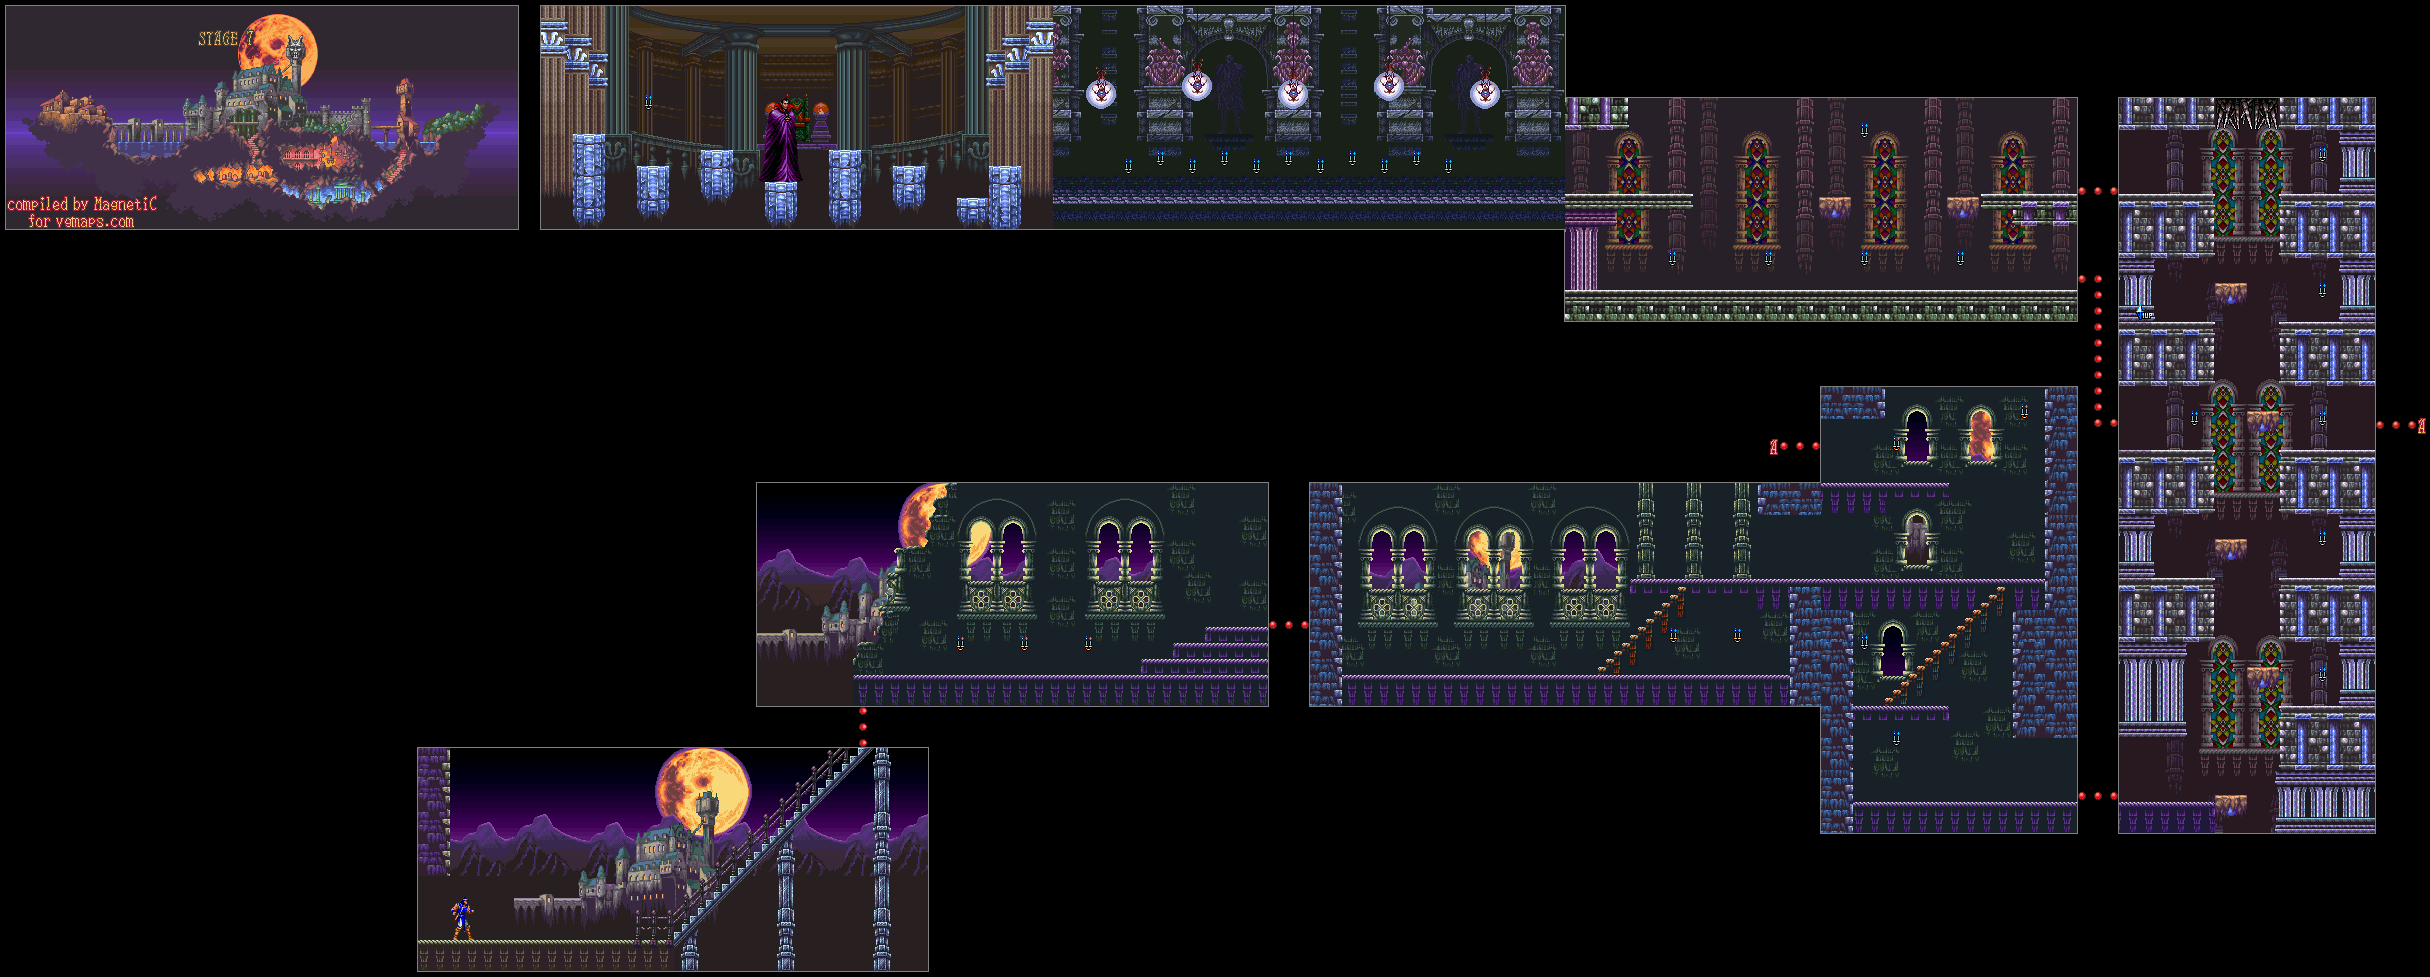
This stage starts with a rather vast room. Be careful, as there floating platforms with spikes on both the top and bottom. Use the backflip to get somehwere, if you have to, and take out the Medusa heads if they get in your way. Watch out for the platforms that will rotate and send you down when you land on them!
The second section brings back the Spear Knights. This part is simple.
The holy water takes three hits to use and creates a short trail of energy that travels forward for a few seconds. The Item Crash is Hydro Storm, a short rainfall of holy water that covers the screen and makes a return appearance in Symphony of the Night. Nice.
The third section has a platform moving across a bottomless pit of water. If you do not get on the platform immediately, you will have to wait for it. When you get on, duck down to avoid the low ceiling spikes, and watch out for mermen. After a few more moving platforms on the water, you'll be taking down a few more mermen.
The fourth section has a few fireball-spitting Bone Pillars as well as an Ax Armor. Whip the wall repeatedly after going all the way to the right to get a hidden 1-Up.
The fifth section is a series of pillars, bottomless gaps and chandeliers. Use the Ax to clear out the Bone Pillar walls. If you fall into any of the pits at anytime, this takes you to a different level and will give you the bad ending. Believe it or not, this game has more than one ending. If you make it to the other side, however, you'll take on an even bigger challenge.
At the other end of the pillar section is a bunch of candles, and the left-most one contains a key. You must keep the key - which takes up the sub-weapon slot - and take it to the door that it unlocks later on.
That means that you must carry it around in lieu of a sub-weapon when you fight the boss here: Dullahan. He is a much larger version of the Spear Knight, and not only does he have a longer reach and a jumping downward stab, he can slso send three giant lances at you through the floor. You can get away from them by backing away for long enough, and by that time, they will disappear back into the floor.
Dullahan can also throw his head into the air, and if his head touches you, Richter will be cursed and he will not more slowly than usual. He also has another attack that sends rocks down from the ceiling, but it is not seen here.
When you beat Dullahan, he will throw his head up into the air and shoot out a desperation seven-way shot before exploding. Grab the magical orb and head on to the next stage.
The first section has you fighting zombies. Go up the stairs, and make sure not to grab any sub-weapons so you don't run the risk of losing the key. You can do an Item Crash for exactly zero hearts that will make Richter jump into the air like he's about to do Hydro Storm only to come back down with a thought bubble containing a question mark appearing near his head. Using it like a special weapon makes Richter thrust the key forward. You can do massive damage by hitting an enemy that way, but don't press your luck.
The third section has spike pits and metal platforms with spikes on the bottom that are pulled up by chains before crashing down into the pits. Thankfully, you can jump onto the tops of these platforms to get around, and the spikes on the bottom won't kill you on impact if your health is high enough.
Watch out for the red ax armor enemy. Jump straight up when he charges at you.
The fourth section has platforms pulled by ropes and gears. Take out the floating skulls as you see them. There will be a door to the right, but if you have the key, you can open it up and find Maria Renard. Sadly, you cannot play as her like you could in Rondo of Blood. She thanks you, then tells you Annette is somewhere else and to go save her.
You'll get your health back after saving Maria, which is nice. However, you'll still have to fight your way to the end and you will still need to use the key for something else.
If you manage to find a rosary necklace with a cross on it, grab it. It destroys all on-screen enemies instantly.
In the fifth section, you'll be going left and facing the fleaman, a Castlevania staple. You'll also face the blood skeletons, red skeletons who will pull themselves back together and come back to life upon being struck. For the fleamen, wait for them to hit the bottom before ducking and whipping them if you're on their level.
The sixth section is the fork in the road. The left path leads to the boss, but up and to the right is another door that requires the key. If you open this door to the key, it will take you to Stage 5'. (Yes, that's an apostrophe next to the stage number.) Going there leads to the good ending, so if you have the key, take it if you want it.
For those wondering what this is, this is basically a pared-down version of Rondo of Blood with fewer alternate levels, redesigned levels, a different art style and Richter Belmont being the only playable character. For the longest time, this was the best the West had, since Rondo of Blood never showed up officially in the West until it received a Virtua Console release in the West in 2010. This game is known as Akumajo Dracula XX in Japan and Castlevania: Vampire's Kiss in Europe. Interestingly, the European version has a very interesting logo.
The story takes place in 1792. Lord Dracula is back, and he has exacted revenge on 19-year-old Richter Belmont, the direct descendant of Simon Belmont, who destroyed him several centuries earlier. He kidnaps Richter's girlfriend Annette and her sister Maria while sending a legion of unholy beings out to attack the town. Richter leaves with the Vampire Killer in hand and heads to Dracula's castle to defeat the Lord of Darkness once and for all!
Gotta love the background where Mode 7 fire swirls around the town.
Just like in past Castlevania games, you can move left and right, jump, crouch, use sub-weapons and strike things with your whip. Also like in past Castlevania games, hitting candles will give you hearts to give you ammunition for said sub-weapons and also allow you to obtain said sub-weapons proper.
Unlike in Super Castlevania IV, however, the whip attack works more like it did in the games prior to that; you can only attack left and right instead of the eight directions that Super Castlevania IV allowed.
The heads up display shows your health in the red bar and the boss' health in the blue bar below it at the upper-left corner of the screen. To the left of the two bars is the current sub-weapon in your possession. In the upper-right corner of the screen, you can see how many hearts you have. Small hearts are worth one heart, while big ones are worth five.
The knife lets Richter Belmont throw two knives forward, and costs one heart to use.
Enemies here include slow moving, ape-like skeletons that are a breeze to destroy, bats that fly at you when you get close enough, quicker human skeletons, bone pillars that spit fireballs at you, and Medusa heads that fly around in a sine wave pattern, slow moving zombies. The bone pillars spit fireballs, but those fireballs can easily be destroyed with the whip.
Pressing Up and Down on the Control Pad near stairs allows you to move up and down stairs. You can land on stairs while in mid-air with Up and Left or Up and Right, but unlike Super Castlevania IV, you cannot moonwalk up or down stairs. You can also drop off stairs by holding Down and pressing B.
The ax is thrown upwards to take care of stuff above Richter, and costs one heart to use. To use a sub-weapon, hold Up on the Control Pad and press Y.
You can carry only one sub-weapon at a time, and unlike past games (including Super Castlevania IV), if you accidentally take another one, you have a short amount of time to pick the one you carried last back up. This would feature in future games.
In this game, you can backflip. Hold down on the Control Pad, then press B and Richter will perform a backflip. It goes pretty far, and it may prove useful.
Money bags give you points when collected.
In the third section, you'll see a slightly darker-colored platform that is short and different from the rest. When you leap on it, leap to the right immediately so you aren't dropped into the spikes, which are instant death if you touch them.
The fourth section has bottomless pits. Watch out.
At the beginning of the fifth section, you will be chased by a demonic ram-like beast. Keep heading to the right while fighting off the zombies. When you reach a pit, jump forward off the very edge or use the backflip to clear it. Watch out near the end; there are two platforms that will drop you right into the final pit if you don't jump forward immediately after sticking the landing. When you reach the end, the beast dies.
The boomerang is a cross-shaped boomerang that flies forward before returning to you, and cost one heart to use.
In the sixth section, the fire is blue and a little bit lower. Collect more hearts from the candles if you need them, and head to the right. Strike a part of the stone stairway before the wooden platforms to find a piece of wall meat (floor meat?) to refill your health if you need to. When you make it to the wooden platforms, you'll face Cerberus. Stay under it when it jumps around, and when it shoots a fireball, jump over the fire when it travels towards you on the floor. The cross is probably the best weapon to use, as you can get multiple hits in.
When you beat Cerberus, an orb will drop down. Grab it, and you'll clear the stage. As you see the number of bonus points you get based on how much health and how many hearts you have, you'll also get a password in the background. Hearts, axes and holy waters will make up the passwords, but each icon also comes with a different-colored flame - hearts have green, axes have blue, holy waters have pink and blank spots have red - so you can always tell what icon you're looking at. Nice one, Konami.
Points are useful, by the way; you'll get your first points-based extra life at 20,000 points.
In this stage, you are crossing a bridge leading to the castle.
You'll be jumping gaps, and as you do this, mermen will jump up from the pit at the bottom. To make things worse, some of the platforms are unstable and must be jumped off of immediately, and the thin gray bridge also starts falling apart as soon as you put your weight on it. Use the Cross to get the best results, as you will need it to get rid of all the mermen in your way at this point. You'll then reach the drawbridge. Into the castle!
Some of the ape-like skeletons will throw barrels at you when you get into the castle.
In the third section, you'll meet some new enemies: the Evil Eye, a small eyeball monster which flies around and hits you with its tail and an Ax Armor that hides behind a shield and throws axes at you. The Ax armor will throw axes upwards just like you. Hitting one with the whip a few times will knock away the shield, allowing you to hit the enemy with
In the fourth section, you'll meet a panther-like skeleton enemy as well as the Spear Knights. The Spear Knights are the worst, as they can spin their spears around for some quick damage and they can attack you from above or below in addition to in front of you. Thankfully, Frezno uses his Item Crash. Hold X to use the Item Crash, and if the number of hearts you have is flashing, you can use a couple of hearts to do a damaging attack. If you have the cross and you perform an Item Crash, you can destroy all on-screen enemies at the cost of fifteen hearts. (The Item Crash ability would also show up in Symphony of the Night, which is a direct sequel to Rondo of Blood.)
In the last section, there will be a type of skeleton that will throw bones at you and attack you by extending its neck out. The latter attack has a rather short difference, but the former can still only go so far.
At the stairs, beat up both Evil Eyes before destroying the bottom of the stairs for some wall/floor meat to refill your health with.
The boss here is a giant bat that splits into a bunch of smaller bats. Strike the bat when it is big, then get on the platform to the left and backflip to the right over all the bats when they are below you. When you strike from the right, get on the lower of the two platforms to strike the giant bat, then face right and backflip to the left immediately.
You can still attack the giant bats when they are split up into smaller bats, and the Item Crash with the cross can save you from unnecessary damage while also hitting the giant bat. After that, grab the orb. It's on to Stage 3.
Batman faces the villains of the game in one last battle...as well as some new ones that didn't even show up in this game!
The Gauntlet
When the Batsignal shows up, Commissioner Gordon tells Batman that The Joker has escaped with the others from Arkham Asylum, and want Batman to meet them at the old warehouse by the Gotham Harbor. He warns Batman that they are trying to lure him into a trap, but Batman still cannot let them get away.
Do not take the Spray Gun or the Smoke Bombs with you; they will be absolutely useless in this stage.
This whole stage is a boss rush. You will want to fight well, and that will take some practice. After all, you will have limited opportunities to refill your health. Unlike other boss battles in other games, however, this one has a few surprises...
The first person you face is The Penguin. The same strategies from the first time around still apply. At least there is no attack helicopter this time around.
Next up is Scarecrow, and thankfully, there is no airplane to fight on. Use the Batarang to stun him, then hit punch him. Follow him when he jumps to the other side and punch him there. It is possible to get him in a pattern where he jumps, you follow and punch, he jumps in the other direction, you follow and punch, lather, rinse, repeat until he dies. If he gets too far away, throw the Batarang at him to stun him, then roll forward and hit him.
Next up is...Clayface?!? Wait, we haven't seen him at any point in the game! Duck to avoid the block of clay he throws at you, then get ready to avoid his two-way shot. If you see an upper shot, duck; if you see a lower shot, jump. When Clayface rolls around, jump over him until he stops. If you can stay near him as he stops in the corner, you can keep hitting him with crouching kicks, and you can keep close to him and crouch kick him until he dies.
In the next section, keep wall-jumping off the walls. You'll get a heart at the top. Make your way to the right and use the Grappling Hook to get over the wide bottomless pit. You'll face Catwoman. The battle against her works the same way as it did at the end of Stage 4: keep your distance, use your Boomerang and don't get cornered.
After some more wall jumping, you'll face...Man-Bat?!? We never saw him either! In Mode 7 fashion, he swoops by and threatens to end your adventure on top of the old warehouse. Step back and punch him twice, then be ready to punch him as he shows up from the side. Since you can punch him when he flies towards the background, he can and will go down pretty quickly when you know what to do.
The final boss is The Joker. This time around, The Joker fights on a jetpack. Stand in the middle and punch him. You don't even have to move; Batman will face the direction that Joker flies in from automatically. Just punch once when he gets close enough. That ends the first form.
The second form has Joker throwing bombs. Jump over the bombs and hit him with a Plastic Explosive if you have one. If he gets close due to you not having any, punch him before he hits you with the spray gun. If you can get close enough, he'll jump from one direction to the other.
Just like last time, you can use the Batarang to stun him to get a jump kick on him, and you can also punch the bombs back at him for some damage from a distance. However you do it, if you know what you're doing, you'll finish Stage 8 and finally beat the game. Alfred will congratulate you on a job well done, and the ending you get will depend on what difficulty you beat the game on. Hard has the best ending, obviously, but there are different endings for Easy and Medium. Hard, however, gives you an extended cast of characters list at the end. Enjoy the ending!


