Saturday, October 31, 2020

PrinceWatercress plays Kirby Super Star - Part 13 of 14


It's time to face all of the bosses one last time in The Arena!

The Arena

THE FINAL CHALLENGE! In his toughest battle yet, the Pink Wonder faces his strongest enemies.

This game is the boss rush of the game. There is no intro, and you have to push Start to continue.

You'll start in a room with two lifts and every ability you could access in Milky Way Wishes. If you want to pick your helper, feel free to make one here. From here, you'll start facing all the bosses in a random order, with the final battle always being Marx from Milky Way Wishes.

Between bouts, you'll be able to get one of two random abilities if you need them, and you'll be able to pick up one of the five Maxim Tomatoes on the tree to completely heal yourself. You'll want to use those Maxim Tomatoes wisely. Also, you can look at the sign in the upper-right corner to see how many fights you have left as well as who you will be facing next.

Interestingly, the boss health meter will show the names of the boss you're fighting.

You lose your helper when you face Heart of Nova, strangely.

One of the battles is a Waddle Dee with a health bar, while two of them will be a series of mini-bosses.

Dynablade
Fatty Whale
Whispy Woods
Chameleo Arm
Meta Knight
Wham Bam Rock
Computer Virus (Milky Way Wishes)
Kracko
Chef Kawasaki/Bonkers/Bugzzy
Heart of Nova
King Dedede
Waddle Dee
Lololo & Lalala
Twin Whispy Woods
Combo Cannon
Halberd's Reactor
Heavy Lobster
Poppy Bros. Sr./Chilly/Fighter mini-boss/Karate mini-boss
Marx

Once you beat all nineteen battles, you'll beat The Arena and you'll unlock the sound test, which lets you listen to every song and sound in the game. Have fun with that.

PrinceWatercress plays Kirby Super Star - Part 12 of 14


We're finished with Milky Way Wishes...but there's one more game to go...


Mecheye


This planet is like Revenge of Meta-Knight all over again.

The first section ahs you moving to the right and using barrel cannons here and there, while the second section has you hitting switches.

The switch with the block above it can be hit with beam. This will allow you to walk above the floor full of hot burning engines and spikes.

The door in mid-air that you will have to brave a wind current to enter will take you to the Yo-Yo ability.

Near the end of the section section, there are some switches that you can hit. If you have Yo-Yo, hitting them all is easier.

The third section is a lift that you can take to mini-boss fight chambers. Beating mini-bosses will net you food, the exit and the Plasma ability after the mini-boss at the very top. The top floor also contains a section where you can break a bomb block with Plasma to get a Maxim Tomato and three 1-Ups, but you can use Fighter to get then as well.

The boss here is Heavy Lobster. Same strategies apply.

Halfmoon


The first section has a very strong wind current moving you to the right. There is a warp star that you can take to the end of the section. You might as well take it, as the rest of it is just flying and avoiding shock titles and has nothing hidden.

The second section is a bit of a maze. There is one area where there is a star block blocking a path to the bottom. This leads to a door where you can get the Mirror ability.

The third section is a place with spiked balls that will shock you. There is nothing hidden here, so you might as well use the warp star unless you need the food and the 1-Up. After beating Chef Kawasaki and the Fighter mini-boss, you'll head to the fourth section.

The fourth section has a wind current that will push Kirby upwards. There is a door under some blocks that can be destroyed with an ability, and the door will lead you to the Ninja ability, which is the last ability we need to collect.

The Computer Virus from The Great Cave Offensive is the boss here, but you have three new battles. The first is the witch, which is the same as last time, but you have an evil knight who will send knives down on you, attack with stars as well as ice magic. If the Evil Knight stores energy, attacks will do more damage, and will also do damage if you block. After that you'll face a red dragon dragon that will use fire attacks and send boomerang-like cutters at you while pushing you back. It also has a short-range eight-way boomerang attack as well as the ability to retreat to increase its defense. These battles are absolutely easy, thankfully.

Nova

Once you beat all seven stages, you'll be able to go to Nova. When you meet Nova, you'll be able to wish for the Sun and Moon to stop fighting, but Marx bumps Kirby out of the way to use the wish to take control of Popstar. You'll find out that this was all a plot by Marx to take over Popstar. Kirby uses the seven stars to create his own space fighter to take him directly to Nova.

As Nova approaches Popstar, the Sun and Moon push Nova back. Go up to Nova and press Y to start the final stage.

Here, you'll be in horizontal shooter mode. Use the Control Pad to move around and keep pressing the A, B, X or Y to keep shooting, and make sure not to touch enemies, walls, floors or ceilings. You can have a helper here and have two-player simultaneous action as always, though the helper will always be Birdon (the Wing helper) after this short segment.

You'll soon face teh boss, which is the core of Nova. You'll have to destroy all of the cannons in the columns to destroy the core, and you may have to go through the last one and take damage in order to destroy it. Once you destroy the core, you'll face Marx. Marx has several attacks.

When Marx is in the center, he can shoot out four projectiles that curve forward and then back like a boomerang. These can be inhaled and used as projectiles.

If Marx goes up and drops small green balls, remember where they are and be ready to block in case you are where they landed at the wrong time, as the spiky vine columns they create can hurt.

When you see the flashing black-and-yellow circle in the floor, stay on the move so Marx doesn't hit you from the bottom of the floor as he rises up.

If Marx teleports to the side and is lit up, fly upwards and stay there immediately to avoid getting hit by the arrows Marx shoots out. 

If Marx flies to the side, he will drop a steel ball. When it is lined up with you, it will shoot out two ice balls to the sides, and those balls will freeze you if they hit you.

When Marx teleports to ground level, fly up immediately! Otherwise, the mouth beam he shoots out will hit you.

Marx will teleport a couple of times. He will then shoot out do the purple crescent boomerangs again, then do all the attacks at random points.

After losing more than half his health, Marx will introduce a new attack where he quickly bobs up and down before splitting in half and creating a portal in his wake, If you are too close to it, you'll be sucked in and you will lose health.

When you beat Marx, Marx will fall into Nova and ultimately destroy Nova. Kirby, the Sun and the Moon return to Popstar, then you get the credits. However, there is one more game...

PrinceWatercress plays Dora The Explorer: Barnyard Buddies - The Longplay


This is one of the longest videos that I've done for the channel. It's a simple game, and there's not much else to be said. Enjoy.

Friday, October 30, 2020

PrinceWatercress plays Kirby Super Star - Part 11 of 14


It's time to go through three more stages of Milky Way Wishes and get as many abilities as we can...and somehow bat a thousand doing that, too.


Skyhigh


You'll be in the clouds here.

The door above the star block after the start leads to Jet. You'll need it for lighting the fuse for the cannon up ahead; this will take you to the Wheel ability.

After this, you'll be in a door maze. There are eight distinct rooms in all in the maze, and if you enter the door in the middle of the room with the two Scarfy enemies, you'll find Wing. The door in the middle of the room with the two Crash Bomb enemies takes you to the boss.

You'll then face Kracko's second form. Same strategies apply.

Hotbeat


This is a very solar, very hot and very lava-filled planet. Be careful when flying around!

Midway through the first section, there is a bomb block you can destroy. Once you hit it, go forward, then immediately run back once you get the invincibility candy and fly up the column of lava you've created. Make your way up and enter the door to get the Fire ability.

In the second section, you'll be riding mine carts and running into posts and bomb blocks. Along the way, there are blocks in one of the ceilings that seem to be blocking something. Use Fighter to break the blocks, then fight Buggzy to get the Suplex ability.

The third section is a maze that you'll have to carefully float through. You'll soon find yourself in a barrel cannon maze with plenty of Maxim Tomatoes, and it will take you to a boss fight with the Chameleon boss from The Great Cave Offensive. Same strategies apply.

Cavios


The first section is a maze with plenty of mini-boss fights. Two of them - Poppy Bros. Sr. and Bonkers - give you Bomb and Hammer, respectively. Once you get those two powers, head to the far right, go all the way down the ladder, then head left to face Buggzy and enter the next section.

The second section has you flooding a cave by destroying a bomb block and hitting a switch to the door below at the start. Do this first, you'll get the Stone ability. From here, flood the cave and head to the right again. You'll soon make your way to Wham Bam Rock, the final boss of The Great Cave Offensive. Same strategies apply.

PrinceWatercress plays Kirby Super Star - Part 10 of 14


Now that we've completed all of the main games, it's time for a new one. We've unlocked Milky Way Wishes, so it's time to check it out.


Milky Way Wishes

HELP! You must stop the Sun and Moon from fighting!

The title screen cutscene tells the story of the Sun and Moon getting in a fight. A weird guy in a jester hat named Marx asks Kirby to stop the Sun and Moon from fighting, and says that the only way to do that is to collect seven stars to summon the giant comet Nova to make the Sun and Moon stop fighting.

In the tutorial, you'll find out that you won't be able to swallow enemies in order to copy their abilities. Instead, you'll have to utilize the Deluxe Copy Ability. By touching the Deluxe Copy Ability characters, you can keep the powers forever and pause the game to select any of the abilities that you've found. B lets you learn all the moves for that ability, while X lets you back out. You can also press X and switch between the powers you have with Left and Right, and pressing A to confirm.

From here, you'll be on the overworld map. Use the Control Pad to move around and press A to select a planet. The first one we're going to is Floria, the planet north of Dream Land (which you can't go back to).

Floria


When you play this game, you'll notice that all the enemies are different colors. This is the programmer's way of making clones of enemies that can't have their abilities stolen when you swallow them, and these palette swaps are only in this game.

In Floria, you'll have to go through the doors to switch between spring, summer, fall and winter. This will not only help you get to the end, but also find abilities.

Go through the door at the top of the ladder at the start until you end up in winter. From there, go left, and there will be a door that isn't there during any other season. Inside, you'll find the Ice ability.

From here, go back to fall. At the door above the lake, return to winter. You won't be able to break the ice around the door (yet), but if you switch to summer, the lake will be evaporated by the sun and you'll be able to go down there and get Fighter. (If you go here in Winter, you won't get anything.) From here, return to winter. You will be able to get past the waterfall to the right just by breaking the ice with the slide, which is frozen solid and won't be able to push you back like in the other seasons.

At the next door, go through the seasons to get food if you need the health, then go back to winter and continue forward. Enter the door past the tree until you go to summer. There will be a door to your left where you'll be able to get Cutter.

Go right. At the next door, switch to fall. You'll make it to the end. Here, you'll face Twin Whispy Woods from Revenge of Meta-Knight. Same strategies apply. Once you beat a boss, you'll get a star needed to power the Dream Fountain and call on Nova.

Southeast of Floria is Aqualiss.

Aqualiss


You'll drop down to a door at the beginning. Enter it.

In the first section, you'll be swimming around and also standing on some islands. Be sure to watch out for Gordos, and keep an eye out for bomb blocks. One will blow up a palm tree and reveal a door leading to Parasol.

There is a cannon near the end of the first section. It only leads to some pick-ups, though.

The second section is underwater, and has a few bubble like areas that act like air. If you swim into those areas, you'll be moving around like you're in mid-air until you end up back in the water.

The third section is a castle-like area surrounded by water as well as Meta Knight's soldiers. There is a room that will lead to a mini-boss battle with the karate mini-boss, and if you beat him, you'll get the Sword ability. The exit to the fourth section is in the lower-left corner at the start of the third section.

The fourth section is a maze. There are several paths, but only one is the right one. There are multiple doors, but only one doesn't take you back to the start. One of the paths will take you to Beam, which is the only Deluxe Copy Ability that you can get in this section.

The boss here is Fatty Whale from The Great Cave Offensive. Same strategies apply. After this, you'll clear another stage and get another star.

?

Between Skyhigh and Cavios, there is a bright green star that is different from all the rest. If you press Y on it, you'll end up in a jungle similar to the one from The Great Cave Offensive (with weird colors and inn music) followed by an area with black ground and a cobalt blue background. At the end, you'll get the Copy ability. This can be easy to miss. Don't forget to fly!

Also, if you've cleared a level, you can press Select on the pause screen to get out without having to get to the exit.

PrinceWatercress plays Dora The Explorer: Barnyard Buddies - Part 6 of 6


In this episode, we go up the Tallest Mountain, find the chicken, see the sun, end the game, and get no credits. Thanks for watching.

First | Previous | End

Thursday, October 29, 2020

PrinceWatercress plays Kirby Super Star - Part 9 of 14


It's now time for the finale of The Great Cave Offensive! Let's get the last treasures and get back above ground!


To get the Shiny Bamboo, you'll need a helper that will follow you around in the air, preferable Plasma Wisp. From there, fall into them and hold Up so that you super jump into the star block and break it. You now have access to the Shiny Bamboo.

To get the Tire, you'll need to create Wheelie as a helper with the Wheel ability in the room and jump onto him to get the Wheelie Rider ability. You'll have to hit the switch and quickly make it to the door on the other end so you can get the Wheel. This is one of the hardest to get and drove me nuts as a kid due to the low ceiling after the pit. The trick is not to use the ramp that sends you into the low ceiling. After getting the Tire, you can drop down and take a shortcut to the entrance to the room.

To get the Platinum Ring, just hit the first platform on a string with Cutter, drop down and make your way to the right to get to the chest. If you cut the string on the third platform, you'll block the path to it and you'll have to leave and re-enter the room.

From here, slowly go down, drop down at the center of the floor to get the Triforce.

You'll need to use Crash to get the Orihalcon. Just be near the door blocking it and you'll hit the switch.

The door where you have to drop down from leads to an ability room where you can get. Bomb, Ice or Parasol Here, you'll face Wham Bam Rock. He will hit you with his fists, flatten you from above, grab you from above, kick you with his fingers and even snap his fingers to cause rocks to fall down. When he snaps his fingers, inhale a rock and spit it at him. If the fists come out from the side, always stay away from them until they go away. You can also get rocks when he opens his hand up from above and makes the parts of his fingers fall down. (Sometimes they return to his hand in reverse.) Once you defeat Wham Bam Rock, you can go through one more mine cart section, take some elevators all the way up, and take a warp star out of this underground passage! You've beaten The Great Cave Offensive! Go ahead and look at all the treasures you've collected!

Once you've completed The Great Cave Offensive and Revenge of Meta-Knight, Milky Way Wishes will be unlocked.

Wheelie Rider

With a partner or alone, Wheelie Rider will be a great ride! When riding double, use teamwork to race past the bad guys!

Y: Rider dash
B: Rider jump
Left or right: Turn
Up + B or A: Get off the bike

(Player 2 can shoot stars with Y in conjunction with a direction held on the Control Pad.)

PrinceWatercress plays Kirby Super Star - Part 8 of 14


We're done with the third section of The Great Cave Offensive! It's now time for the fourth and final section of this game within a game.


To get the King's Cape, you'll need Ninja and have Rocky as your helper. There is a room past the entrance to the mini-boss area that has a platform on a string as well as a post, and you'll need to cut the string while Rocky hits the post by attacking it. When you enter the door below, get the Mirror ability to block the lasers that are shot at you so you can safely get the treasure.

Now it's time to face the mini-boss. The mini-boss is a chameleon. Keep your distance so the chameleon's tongue doesn't get you, and when it sticks to the background wall and spits balls at you, inhale a ball and swallow it to get the Paint ability.  This will damage the mini-boss, knock him off the wall and change his color. He can also attack with his legs and turn invisible, but Paint puts a stop to all that.

Past this point, you'll need Fire. You can get it past the mini-boss. There are three doors at the top: one to the left, one in the center, one to the right. Enter the left one first. Use Fire to light the candles for a brief time. There is a switch you'll need to hit to raise a wall that hides a door. If you can get into that door, you'll be able to get the Model Ship.

The door to the right leads to the Sun Ring, and there is a door leading to the Sun Ring that you won't be able to see unless you light the candles in that section.

At this point, you should have 45 treasures, and the Sun Ring should be the last thing that you have. Enter the mine cart section to the left of the castle. It's time for the fourth and final section.


The hole that spawns several enemies which appears when you hit the switch at the start can be entered. You can find the Wintertime here.

From here, go left and press Down to drop down the platform. Get Jet, go all the way to the right, store power, then drop down from as far right as you can go and dash forward with Y so you can get past the powerful wind current and drop down to where the treasure box is. This is how you get the Katana.

For the left door after the inn, the Charm is underneath a bridge. You have to press down at the part of the bridge with the lighter colors and the waterfall. Also, the middle of three cannons takes you to the Xmas Tree. Whatever you do, don't hit the bottom bomb block.

The left cannon will take you to the cloud maze. To open the fuse for it, use Jet's high jump to destroy the star blocks, then destroy the bomb blocks. You will have to walk through walls with stars to enter secret passages leading to doors, some of which lead to treasures.

The Spirit Charm is in the room with the falling star block generators. Do the mid-air Down + Y move on a stack of star blocks to get to it.

PrinceWatercress plays Dora The Explorer: Barnyard Buddies - Part 5 of 6


Well, I almost completed the game...

First | Previous | Next | End

In this episode, we find the goat and nearly complete the game.

At least you have something different going on with the grumpy old troll at the Troll Bridge. Too bad it's just a fetch quest.

The Spooky Forest is probably the biggest area in the game. You'll be moving around to get all 20 stars in this area if you're interested in doing that, as this area is yet another maze.

To find the chicken and complete game, you'll have to cross the Waterfall, then go through the Muddy Mudslide to get to the Tallest Mountain.

To cross the Waterfall, you'll need to find the Rope in a haystack and stop Swiper from swiping the rope. From there, mash the buttons to use the rope.

You'll be forced to tilt your controller to the right and use the Control Pad accordingly to move up to the top of the mountain.

Dora will slowly slide down the Muddy Mudslide if she stands still. Keep jumping uphill to go back. Be sure to look around for stars.

Wednesday, October 28, 2020

YTP: Phil Swift Sells Broken Boats While Jacked Up on Monster Energy (by @paperking99)


okay one more

PrinceWatercress plays Kirby Super Star - Part 7 of 14


The third section of The Great Cave Offensive is the most memorable, at least to me. You could just go to the left at the beginning and skip it, or you could go into the castle and get lost in there for a good while as you look for treasure. I recommend the latter!


What can I say about the third section? It's pretty big. It's easy to get lost here, and it left so much of an impression on me as a kid that I remember it very well. As a result, I'm only going to mention the treasures that require real effort just like I have in the first two sections of The Great Cave Offensive.

There is a room that has a stump you must have Hammer or Stone to pound down and reach a door below. To get the Hammer ability, you'll have to find the room where you fight Bonkers. Make sure you don't destroy the bomb block in the center, so you can get the Autumntime. If you hit the bomb block, you'll have to reset the room to try again. Once you get Hammer, return to that room and pound the stake. Enter the door below and take the elevators to the next room.

There will be two doors blocked by Flamin' Leos. The lower one takes you to the end of a path with water and Gordos that also contains , while the other takes you to a Suplex guy. Beat him to get the Turtle Shell, then enter the door to the right. If you go right from here, you'll find a cannon fuse you'll have to light underwater. You won't be able to do anything there yet. Instead, take the door below where you came in. This is where you're supposed to enter the lower section, and if you can get below the water, you can find a chest containing the Warrior Shield.

Now to go back to that cannon. This time, take Fire with you, and create a Burnin' Leo before you get in the water. Burnin' Leo will light the fuse, and you'll be able to get the Sword.

To get the Unicorn's Horn, you'll need something that destroy the bomb block below. After that, avoid being shot by the Shotzos and the treasure is yours.

You'll have to avoid all the Sleep pick-ups as the wind powerfully pushes you back to get Mr. Saturn.

You'll have to head left and jump as quickly as possible to get the Mannequin.

There is a room that lets you choose between Ninja, Wing and Plasma. Continuing further from here takes you to a mini-boss, but we're not tackling that yet. Instead, 

Stone works like it always has: it turns you into a statue and makes you invincible, and damages enemies from above. Turning into a stone turns into one of six kinds of statues at random, with two of them being harder to get than the others. You'll need Stone to go right from the Ninja/Wing/Plasma room and reach a collapsible bridge you can't reach another way. From here, you'll need Stone to get the Gold Crown.

Stone
Transform Kirby into various stone figures and smash the enemies.

Y: Stone
Y (in the air): Stone smash
Dash + Y: Turbo stone

* Kirby is attack-proof when he is a statue.

PrinceWatercress plays Dora The Explorer: Barnyard Buddies - Part 4 of 6


We find two more animals. Now to get through the last fourth of the game.

First | Previous | Next | End

In this episode, we rescue the pig and the cat.

To find the cat, we must go through the Icy River followed by the Thorny Forest, and we will end up at the Little Blue Tree.

At this point, you'll pretty much know that anything shaking contains a mariachi band.

You'll be able to cross the Icy River with ice skates. Once you find the ice skates in the trees (and stop Swiper), go through the bricks, then use the Control Pad to move and the buttons to do a spin.

You'll go through a small maze to get to the cactus with eight pink flowers (which looks purple) to get to the Little Blue Tree.

To find the goat, you'll have to cross the Troll Bridge and go through the Spooky Forest, and you'll end up at the Green Mountains.

Tuesday, October 27, 2020

PrinceWatercress plays Kirby Super Star - Part 6 of 14


In this entry, we have an RPG-style battle! We also go for the last of the treasures in the second section of the game!


You'll have to be quick to get the Saucepan. You'll have to hit the switch that makes it drop down with a water attack from the right side so you can press Up and open the chest. Crash will allow you to get the Brass Knuckle (you'll have to use Crash to get to the rest of the section it's in, anyway). Also, don't forget that there is an area below where you face Poppy Bros. for the Nunchaku, and that you'll have to brave a wind current to get there. The door in that area takes you to the Beast Fossil and the Fish Fossil.

The Bucket is a reference to Mario vs. Wario, a first-party Super Famicom game that never made it to the West.

With the Jet ability, you'll be able to move fast in mid-air. If you press and hold B in mid-air, you'll slowly fly into the air with a jetpack instead of how Kirby normally flies.

You'll have to deal with some air currents to get the 100 Dollar Coin. If you need to, hold Right when you need to take it slow.

Be careful when trying to get the Ancient Gem; the switch you get to open the path to it creates some spikes. Ditto for the Truth Mirror, as you'll have to deal with another wind current.

The middle section will lead to a room with the Fighter, Wing and Jet power-ups and a Maxim Tomato. After this will be the "Computer Virus" mini-boss. You'll fight a slime, a dancing doll, and a witch. These enemies fight in an RPG-like fashion. When they drop down, you can attack them for a short time. Pay attention to the message box at the top to see what happens. If the enemy attacks, be ready to block. Also, abilities will randomly show up at the sides. These mini-bosses aren't so tough, though the witch has a retreat ability that ups their defense.


After this, it's time for another mine cart ride section before dropping into the third section. The exit to the fourth section is to the left at the very bottom, while the inn is to the right at the very bottom.

Jet

Turn Kirby into a dangerous Jet. Store Jet power by holding Y. The moire power you store, the more powerful the attack.

Hold Y: Store power
Release Y: Jet kick
Release Y (in the air): Jet heading
Max power stored: Jet dash
Jet dash + Y: Jet cracker
Release Y (near enemy): Jet blow
Jet blow (max power): Diving rocket
Power stored + B: Save stored power
B (in the air): Hover
Max power + B (in the air): Ultra-jet jump

PrinceWatercress plays Kirby Super Star - Part 5 of 14


This one is going to take a while, but it's one of my two favorite games out of all the ones here. It's time for The Great Cave Offensive!


The Great Cave Offensive

Get through the deadly cave while collecting hidden treasures.

The game's opening cutscene shows Kirby falling into the underground world where this game's action will take place. If you go into the tutorial, you'll find out what you need to do: get out of this underground world and collect all the treasures you can. You can press X to see all the treasures you have found.


To get the Whip, hit the bomb blocks that are nearby except for the middle one so you don't trigger a lava barrier.

To get the Crystal Ball, you'll have to use Wing to hit two switches in quick succession to get past two doors before they close, then hit two more in quick succession  in order to climb up a ladder and get it before the doors leading to it close. You'll have doors to open in case you're trapped.

To get the Seiryu Sword, fly over the white blocks at the beginning so the chest does not fall into the lava, then go up and left and attack the statue ahead. The chest should now be yours.

In each section, you'll find an inn. Here, you can save your progress and current position in the game, and you can hit the switch for an instant Maxim Tomato to fully heal yourself.

You'll have to destroy a few statue heads near the end to get to the Zebra Mask.

You can easily beat Bonkers by destroying the tiles in the center with Wing. Bonkers will fall right into the pit!

You can use abilities like Cutter, Wing and Ninja to cut the strings that hold certain platforms. You'll have to do this near the end to get Springtime.

After all that, you'll be able to choose between Jet, Mirror or Sword (or none of them), then you'll face Fatty Whale. Avoid him as he moves around. If he corners you, block. When he shoots water out of his blowhole, suck up a fish or a rock that comes down and spit it at him. Every once in a while, he will jump out of the water and then back in, creating a big wave of water that will launch you upwards. Be ready to defend yourself and also get a rock or a fish if you need it to spit something at Fatty Whale. Eventually, he will go down, and you'll be able to go to the next section.

Between sections, you'll be able to jump in a trolley. Move forward with the Control Pad, press B to jump out and press Y to use the brakes.


By using your underwater attack to break through the blocks below the Dime, you'll get the Glass Slippers.

PrinceWatercress plays Dora The Explorer: Barnyard Buddies - Part 3 of 6


Since I don't jump as often in this episode, I don't make as much progress. The jumping continues next time!

First | Previous | Next | End

In this episode, we only find the sheep at the Golden Gate. We go to the Turtle River, then to the haystacks, then to the Golden Gate.

To get past Turtle River, you'll need to find the life jackets in a haystack somewhere. Don't forget to stop Swiper. From here, mash the buttons to move the boat.

There is a short maze - and Swiper - near the Golden Gate before you can find the key in a haystack to find the sheep. Enjoy that forced perspective that makes you tilt the controller to the left to move around 

To find the pig, you'll have to go Twisty River, then the Froggy Pond, and finally to the Strawberry Patch to find the pig.

To get through the Twisty River, you'll have to find the seven pieces of wood for the bridge in order to cross. Thankfully, they are very easy to get. Don't forget to stop Swiper.

Monday, October 26, 2020

PrinceWatercress plays Kirby Super Star - Part 4 of 14


Now it's time for Revenge of Meta Knight. This is probably the most bad-ass of the games, and I'm surprised that this didn't get its own game later on.


Revenge of Meta-Knight

Save Dream Land! Defeat Meta-Knight and his giant warship Halbert!

The opening cutscene shows Meta Knight wanting to take over Dream Land with the Halbert in an attempt to end its lazy lifestyle. Kirby flies out towards the Halbert in an attempt to stop them.

Throughout the game, there are text prompts throughout the game that you can go through with the A button. Also, all the levels are on a timer, and you'll have to get through the levels before the timer reaches zero.

Level 1

Here, you'll be hitting switches and going down ladders and elevators to get through the ship. To work an elevator, pressing Up and Down to control it.

You'll face Heavy Lobster at the end. Keep away from Heavy Lobster, and spit its miniature clones at it when it sends them at you. This battle won't last long, as you'll be blown into the ocean, where Level 2 begins.

Level 2

Here, you'll be making your way to the right as the Halberd flies away in the background. You'll eventually enter a cave that auto-scrolls upwards once you enter. As you go, the level scrolls faster and faster until you reach the end. The spiked ball will shock you if you run into it. After this, you'll be able to choose between Wing, Bomb and Parasol (or skip the power-ups entirely)

The boss here is Whispy Woods...at first. It's the same battle as in Spring Breeze, but when you beat hi, you'll get two Whispy Woods. Dodge the air pellets and send the apples at them, but watch out for when they spin around and drop worms, as well as when they attack you by trading segments of themselves with each other.

After this, you'll fly towards the Halberd only to be knocked out of the sky and into the forest.

Level 3

Here, you'll be entering and climbing the inside of a tree. There is a hidden door that leads to a Maxim Tomato, but watch out for the Shotzo. There is also another room that takes you to a 1-Up as well as the choice between Cutter, Sword and Fighter.

Eventually, you'll be able to choose between Ice and Cutter in the next section, and you'll be facing two Bonkers at the same time. Be sure to get Hammer if you want to get food for you and your helper as well as other abilities.

You'll have a section where you'll have to go up to make it to the boss, then you'll have to use Fire to light a cannon fuse to beat the level. It's always the right cannon. Also, if you still have Hammer at this point, Up + Y lets you light the fuse without using Fire.

You'll meet Dyna Blade, then you'll fly onto the Halberd...successfully this time.

Level 4

When you land on the Halberd, Dyna Blade will be shot down, but you'll be back in enemy territory. After the first section, you'll face some of Meta Knight's goons, then you'll take the elevator to the twin cannon. Before you fight the twin cannon, you'll face Poppy Bros. Sr. as well as a karate mini-boss who will try to grab and throw you in addition to throw energy projectiles at you. He gives you Suplex if you beat and swallow him.

You'll be able to choose Fire, Yo-Yo and Beam (or none of them) and get a full heal before fighting the twin cannon. You can suck up the cannon's cannonballs as well as the bombs that the hand drops. When you see the lower cannon open up, duck to avoid the laser, and make sure the floor doesn't raise up on you so you get hit by it. The hand that drops the bombs will also grab you, and can either slam you into the ground or position you in front of the laser.

Level 5

Here, Kirby goes into the left wing of the Halbert to wreak havoc. Watch the air current as you jump from one place to another, and defeat Chilly the walrus to blow up part of the ship.

Level 6

Here, Kirby will be in the ducts. Be sure to slide under the door when you hit the first switch. There will be a door leading to the next area, but if you continue left, the screen will scroll up. Go up the door that you find at the top to enter the armory to select between several abilities and get a full heal.

You'll eventually face Heavy Lobster at last...but you'll have to outrun it first. Get rid of the star blocks blocking your path, then make your way to the top. Heavy Lobster will be able to fight you much like it did last time, but you'll get other attacks such as a flamethrower to avoid and a red blob to either spit at it or swallow to get the Paint ability. If you get Paint, press Y to use the one-time Paint attack and paint Heavy Lobster red in addition to blinding it. This makes Heavy Lobster more unpredictable, but it still makes it a sitting duck.

Level 7

Now that the right wing is damaged, it's time to go under the ship. If you enter the circle-shaped circle with the food surrounding it at the beginning with Up, you'll find a hidden room with a few poewr-ups as well as invincibility, food and a battle with both Buggsy and Chef Kawasaki at the same time.

Once you're inside the ship again, you'll have to hit some switches to get around, then you'll have to take an elevator to get down. If you can some how enter the door surrounded by blocks by hitting the nearby bomb block, you'll get some food and a 1-Up.

After an opportunity to get Bomb, you'll face the reactor. When the blue laser cannon shows up from above, fly near the crystal to ensure the laser cannon destroy it. Watch out for the fire that comes out of the reactor cannon as ell as the floor fireballs that come out of the boxes inside the floor that slide into view. The reactor will go down in no time!

Level 8

The Halberd finally starts going down, and you'll be in an auto-scrolling section. The flashing cannons shoot at you, but they don't give any abilities.

Take the elevator up after taking the time to fully heal yourself, and you'll face Meta Knight's goons one last time. Afterwards, you'll face Meta Knight. Why you're allowed to choose between Ninja, Sleep and Plasma in the room before this, I'll never know.

Take the sword, then get ready to strike at Meta Knight. Meta Knight fights just like he does in Kirby's Adventure, so all you really need to do is keep hitting him. Watch out for the tornado he creates that will knock you into the air, but other than that, as long as you keep attacking, this is an easy battle.

Level 9

Now it's time to escape. Kirby will ride on Wheelie, Press Y to accelerate, and make sure to always jump the pits. Try not to hit walls or Meta Knight too many times, either. You only have so many seconds before you will lose a life.

Once you jump off the final ramp, you'll get off the Halberd. Meta Knight will fly away as the Halberd sinks, and you'll be treated to an ability and helper roll call.

Wing

Amaze your friends! Toss your enemies into the air and throw them for the Shuttle loop. 

Y: Feather gun
Dash + Y: Condor heading
Down + Y (in the air): Bomber heading
Forward + Y (near enemy): Toss
Y (after toss): Shuttle loop
B (in the air): Fluttering (this lets you fly faster than normal)

Plasma

Shock your enemies by firing sparks! Move the Control Pad to store energy and really electrocute those enemies.

The more you press the Control Pad, the more power is stored.

No power: Plasma needle
Slight power: Plasma arrow
Medium Power: Plasma spark
High Power: Plasma laser
Full Power: Plasma wave cannon

Yo-Yo

Use the awesome Yo-Yo to defeat your enemies in style!

Y: Yo-Yo throw
Dash + Y: Break spin
Up + Y: Up throw attack
Down + Y: Down throw attack
Forward + Y (near enemy): Hammer drop
Down, Up, Y: Gazer spiral

Sleep

Just take a little break and let Kirby sleep!

* Can't continue until Kirby wakes up*

* Good Night *

PrinceWatercress plays Kirby Super Star - Part 3 of 14


Now for Gourmet Race. This is a fun one.


All maps by Tropicon.

Gourmet Race

Race through "Gourmet World" to the finish, gobbling up all the tasty treats you can find.


For this one, you're racing from Point A to Point B for three courses. The only two things you need to do is to make it to the end of the course before Dedede does and to eat as many foods as you can.

You can practice the three courses, or you can play through them all in order in the Grand Prix to play through the game proper. By doing both things, you'll be able to get more points than Dedede and ultimately win Gourmet Race.

Course 1 and 2 are easy (for the most part), but for Course 3, you'll be able to choose a few power-ups to fly around with. Wing is the best, since you can easily fly upwards. Just remember that there are signs along the way, especially for Course 3.

Maxim Tomatoes are worth three points, by the way, so see if you can get them.

PrinceWatercress plays Dora The Explorer: Barnyard Buddies - Part 2 of 6


This game doesn't get any easier...or harder.

First | Next | End


In this episode, we rescue the pony at the Apple Tree and the goose at Butterfly Garden.

To cross the Rocky River, keep pressing any of the four face buttons on the controller to keep moving the boat. Ditto for the boat on Crocodile Lake.

To find the goose, we'll have to go to the Windy River followed by the Corn Field before finding the goose at Butterfly Garden.

You'll need to search the haystacks at the end of the Windy River to find the paddles for the boat. After you find the paddles, the boat controls like it always does. Don't forget to stop Swiper.

You'll have a short maze in Butterfly Garden before you find the goose.

Sunday, October 25, 2020

PrinceWatercress plays Kirby Super Star - Part 2 of 14


Now it's time to play through another game...and this one takes more time than I thought it would. But it gets done in one video! Here's Dynablade!


Dynablade

Dyna Blade is destroying all the crops. She must be stopped. Master the different abilities and defeat her.

The opening cutscene shows Kirby and the world at peace until one of Dynablade's feathers slashing a mountain in the background.

If you play the tutorial for this game, you'll learn how to copy enemy abilities. To do that, just inhale an enemy, then press Down or A to swallow them. The enemies that give abilities will be flashing before you inhale them. From there, you can press A and turn that ability into a helper, and you can throw your abilities to your helper to heal them and change their ability. The helper can also be controlled with the second controller, making the game two-player simultaneous in the process.

You'll also learn how to dash back and forth by double tapping Left or Right.

The game has a map, and you use the Control Pad and the A button to go to and choose your stage.

Stage 1

Go down to the door (and get Cutter if you need to). From here, you'll be heading to the right and taking out enemies as you go. For the third section, you'll be hitting bomb tiles to get rid of some walls as you make your way up. Near the end of the third section, you can find a Maxim Tomato and the sword ability.

For the fourth section, there are quite a few places you can go, but you'll eventually have to go to the right and drop down to where you face Chef Kawasaki. Just keep your distance, spit the plates he throws you back at him, and don't get caught in his pan. Swallowing him gives you Cook, which is a one-time ability that turns all on-screen enemies into food. After you beat Chef Kawasaki, you'll be able to beat the level and get the cannon mini-game that you'll play after every stage.

For the cannon mini-game, you'll fall into a cannon. The further you fill the gauge up when you press one of the face buttons, the further you'll get. Go far enough and you'll get extra lives.

Stage 2

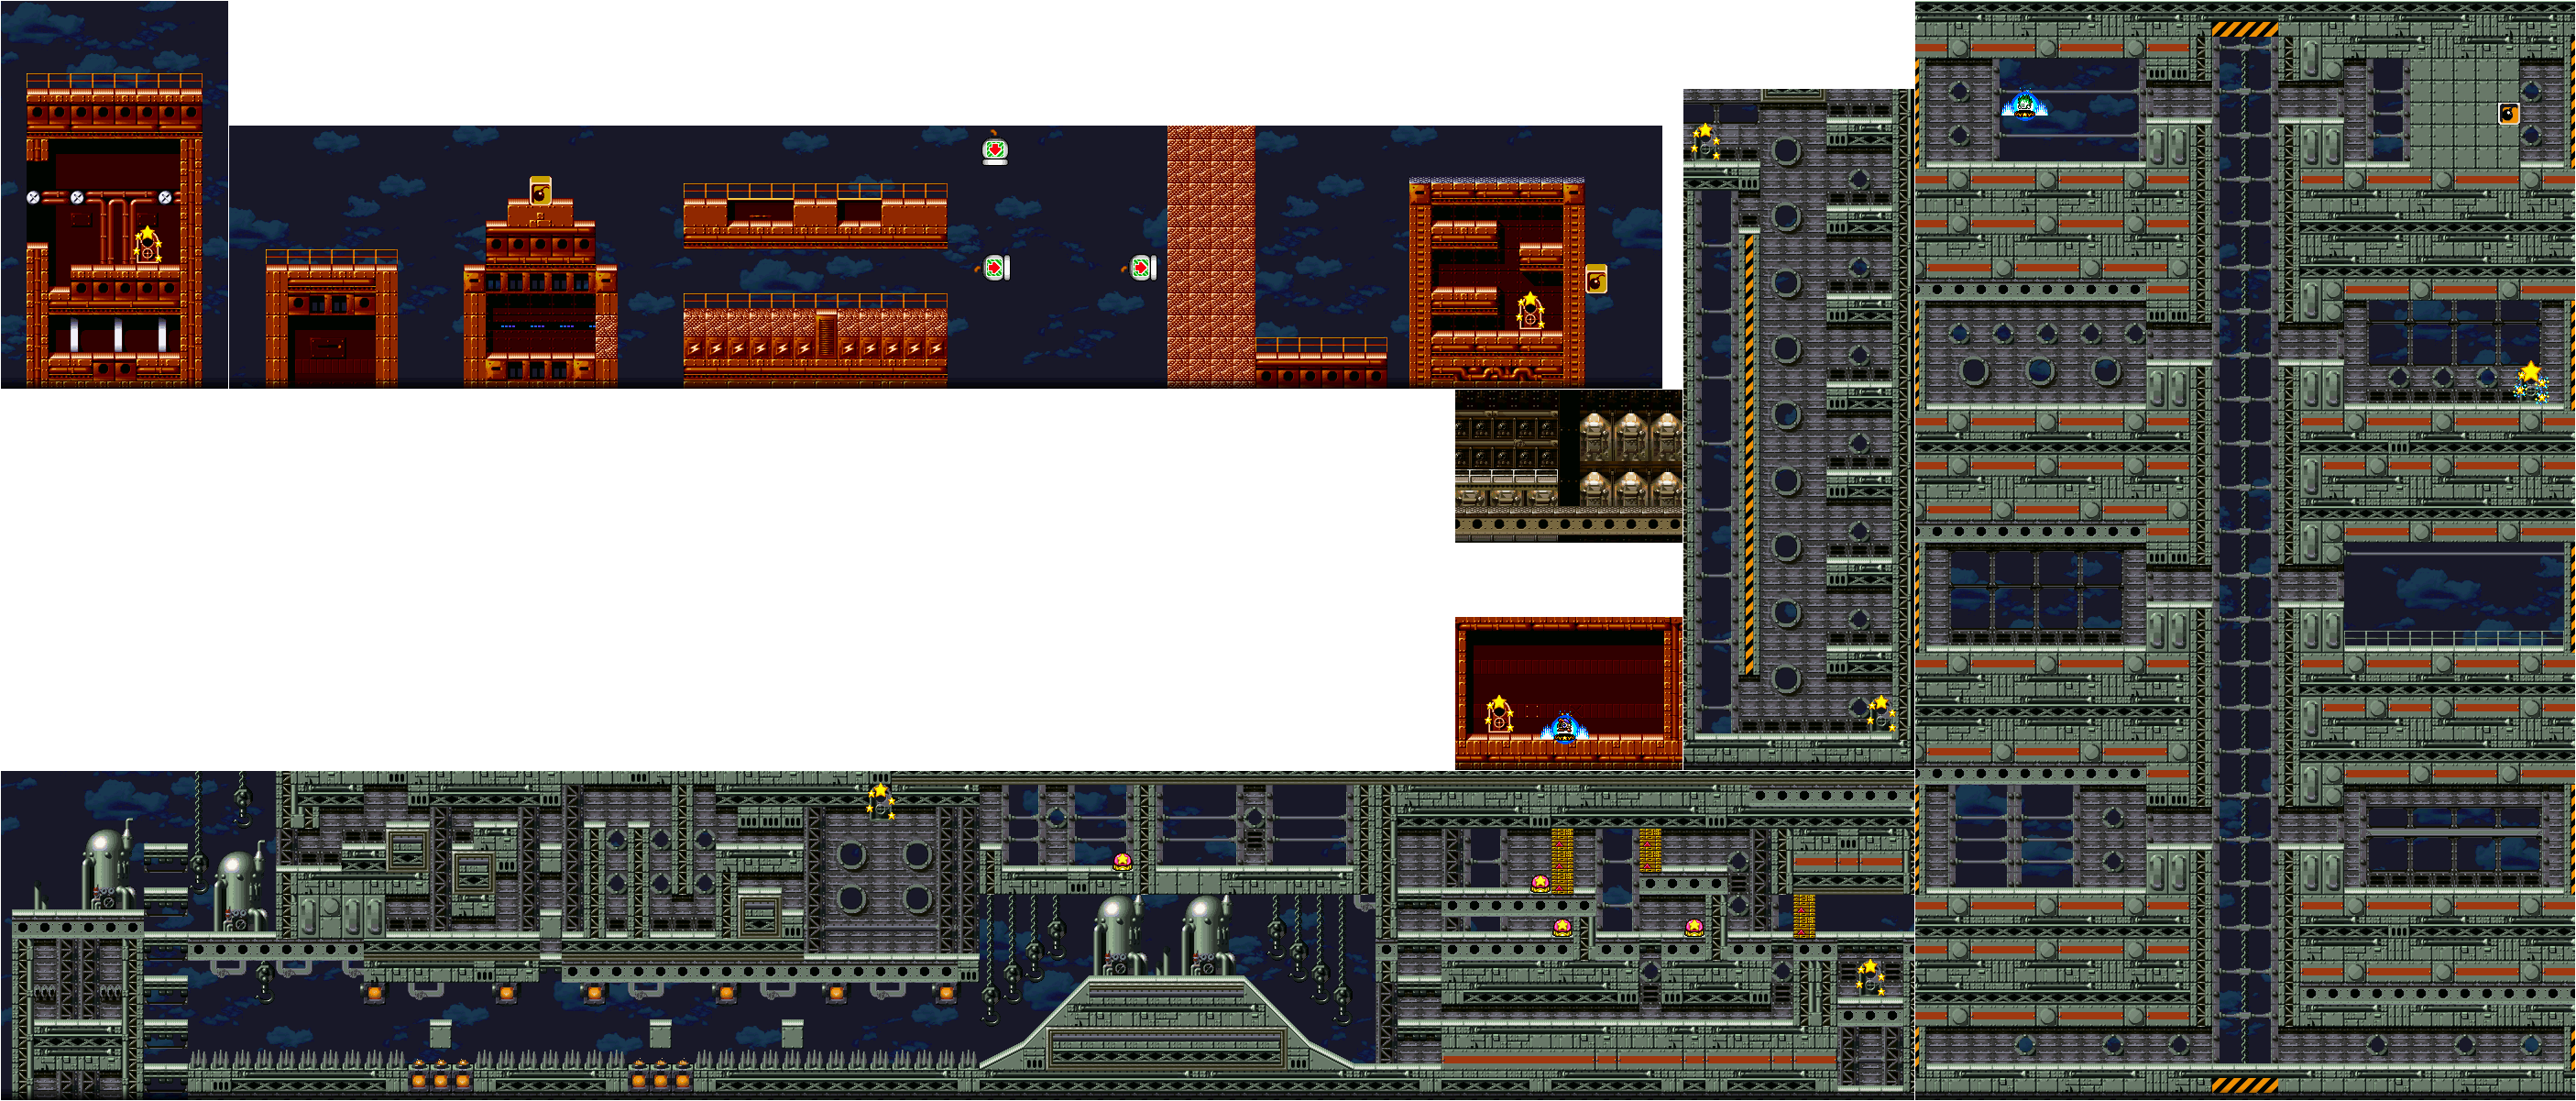
Here, you'll be entering a castle. Once you go in, there are a few places you can go to. There is a door soon after you enter the castle that allows you to fight some Meta Knight flunkies. Further to the right is a room on the outside where you can get the Ninja ability as well as an extra life.

When you go up from the ground floor, you'll be able to get the Mirror ability. Use it on the bomb tile to open a door that leads to a switch. Touch the switch to open up a bonus area where you can get some abilities for free.

You'll eventually enter an auto-scrolling section where you'll have to avoid falling coconuts and break blocks in order to get to the other side. Once you reach the warp star at the end, you'll be able to go outside.

Once you're outside, you'll be able to get the Wheel ability. With this ability, you can speed through this section with the greatest of ease and run through enemies with ease. You'll soon have to face Bonkers and send his stars and exploding nuts at him. Be sure to swallow Bonkers afterwards, because you can hit the post outside of the castle to destroy the castle and get three extra lives and an alternate exit.

Mini-boss

When you beat the second stage, you'll get an "E" icon that shows up. It is a fighter mini-boss. Just keep your distance, avoid the fists and inhale stars and send them back at her when necessary. When you beat here, you can take the Fighter ability from her. If you lose, or if you go to another stage without facing her, she never shows up again. This is the only mini-boss in this game, and I'm surprised Dynablade doesn't do this again.

Ability Room 1

Here, you'll get some, but not all, of the abilities in the game here. There is another ability room in Dynablade, and you can get the rest of them there when you unlock it. Be sure to test abilities on enemies.
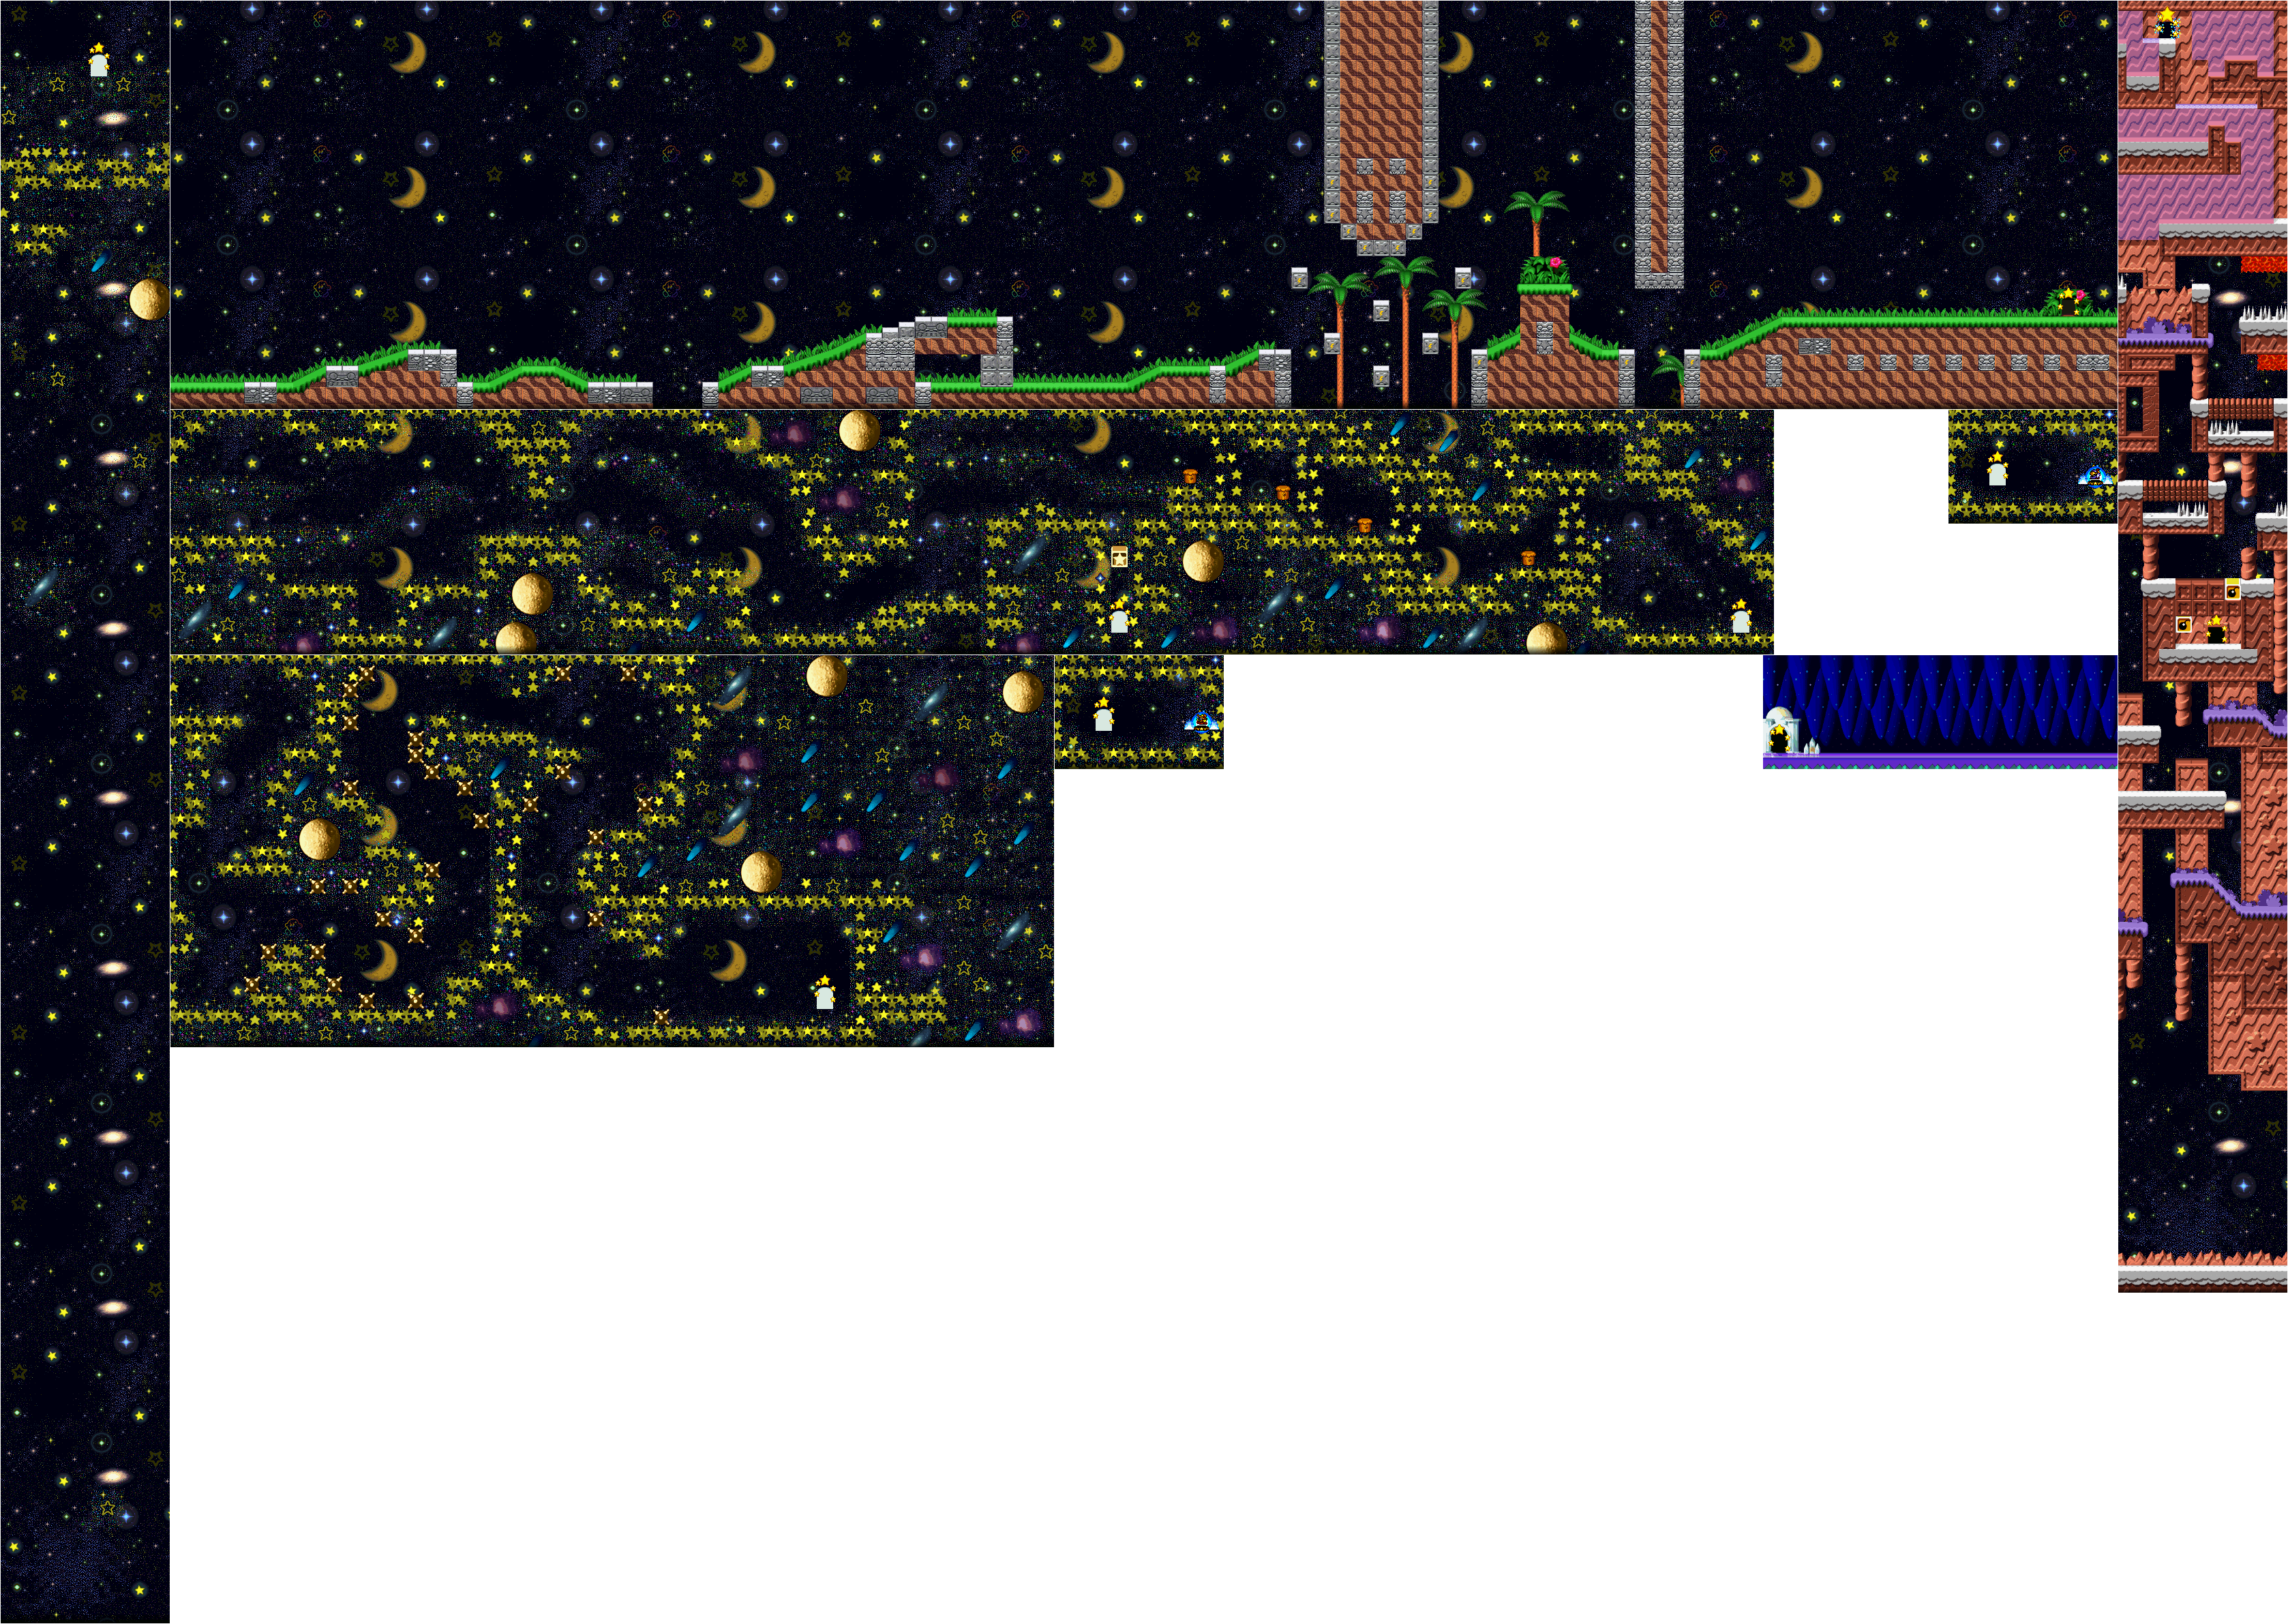
Stage 3

Here, you'll be in a cave.

The cave near the entrance to the third section leads to a Maxim Tomato and an extra life.

The third section has a wind current that pushes you to the right. It gives you bigger jumps as you go through the section, but it's not that much of a hindrance.

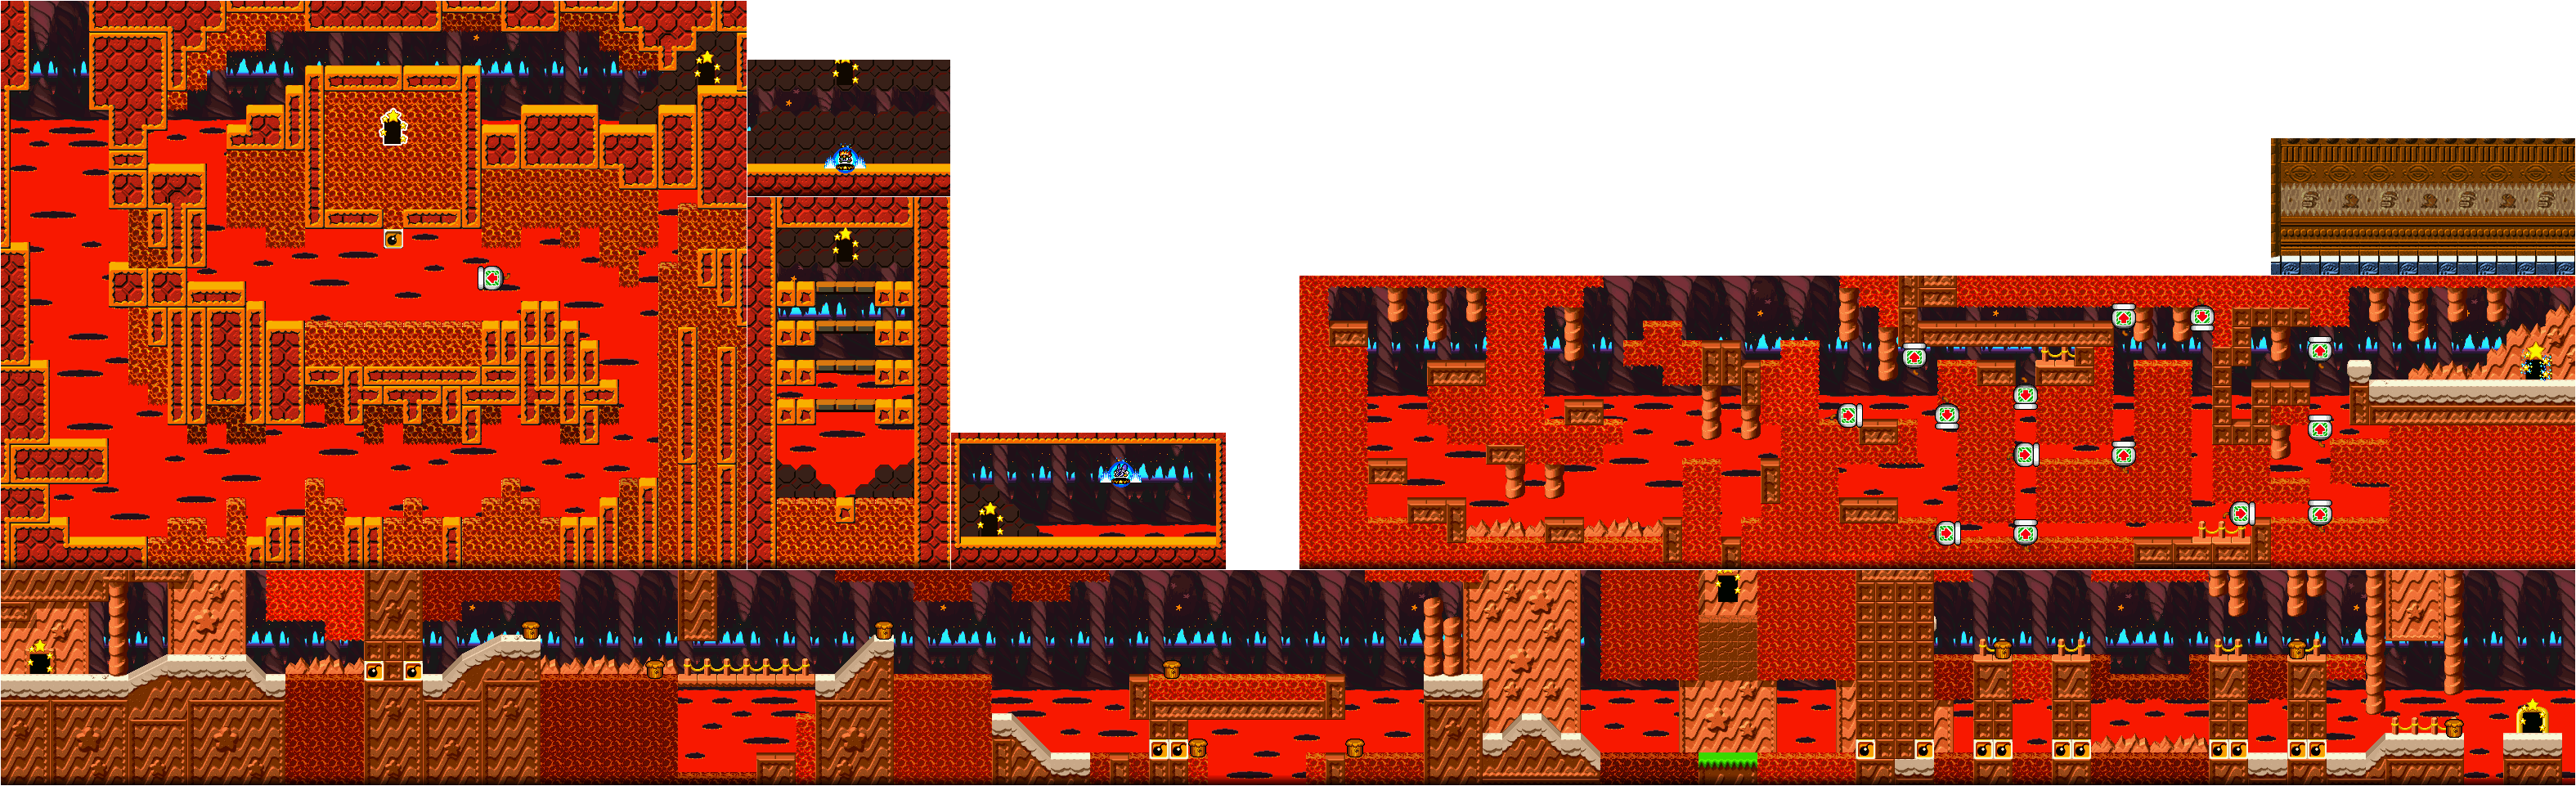
The fourth section is a lava cave. Be careful going down, and be especially careful at the bottom so you don't burn yourself on the lava tiles.

The fifth section is an ice cave. The Chilly enemies will shoot icicles at you, and can give you the Ice ability. There are some floors with tracks, and the little gray platforms on them will throw you forward. Some may throw you into traps, especially in later games, so be careful.

You'll face a mini-boss here: Buggzy. Keep your distance and avoid his dash attack, and spit the bugs he creates back at him to deal damage. If you swallow him, you'll get the suplex ability, which lets you perform some slams. You'll then clear the level. By pressing Y, you can grab enemies. You can punch them with Y, or press one of four directions for various slams. Double tapping Y does a multi-kick on enemies.

Stage 4

Here, you're going up a mountain. There will be Burnin' Leos that give you fire at the beginning and throughout the level. There is an alternate lower path in the first section that takes you to a room full of airborne cannons. Some of the airborne cannons spin, and you'll have to press B to shoot yourself out when the arrow is pointed in the right direction.

You can use the dashing fireball attack to get past the Gordos in the third section for three 1-Ups.

In the fourth section, you'll be going up. The bird enemies here give you the Wing ability, and it is possible to go back to behind the beginning and flood the bottom of the section while becoming temporarily invincible.

In the fifth section, you can light the fuse with Fire and get into the cannon before the fire reaches the cannon. This allows you to get two Maxim Tomatoes, some food and a 1-Up.

If you go left at the beginning of the sixth section, you'll find the switch for the other ability room. Go hit it! And if you need it, the Copy ability is there, too. Just press Y, and if you find an enemy with an ability, you'll replace Copy with that. You can also create T.A.C., a ninja cat with a bag who can grab an enemy and copy their ability.

If you hit the bomb block at the beginning of the sixth section, you'll turn some tiles into lava tiles and make it harder for some enemies to show up. Of course, it becomes harder for you to get around, too, so be careful.

If you can swallow the two Parasols at the beginning of the seventh sections, you get Mix. This is like Roulette in Kirby's Adventure, but it's completely random. You can also get nothing, the "Ouch!" status (which causes) damage or "I'm hit" (which kills you). Thankfully, this section is another short vertical section.

You'll then face a gauntlet of bosses in the next section. You'll face Chilly from Spring Breeze, Bonkers, and two Poppy Bros. Sr. The last one is just like the Spring Breeze battle, but you'll face two at one time. Just watch what you're doing, and keep an eye on them. If they're both on the same side of the screen, that makes things easier.

Ability Room 2

The abilities that were not in the first ability room will be here. One-time-only abilities like Crash and Mike cannot be gotten in these rooms at all.
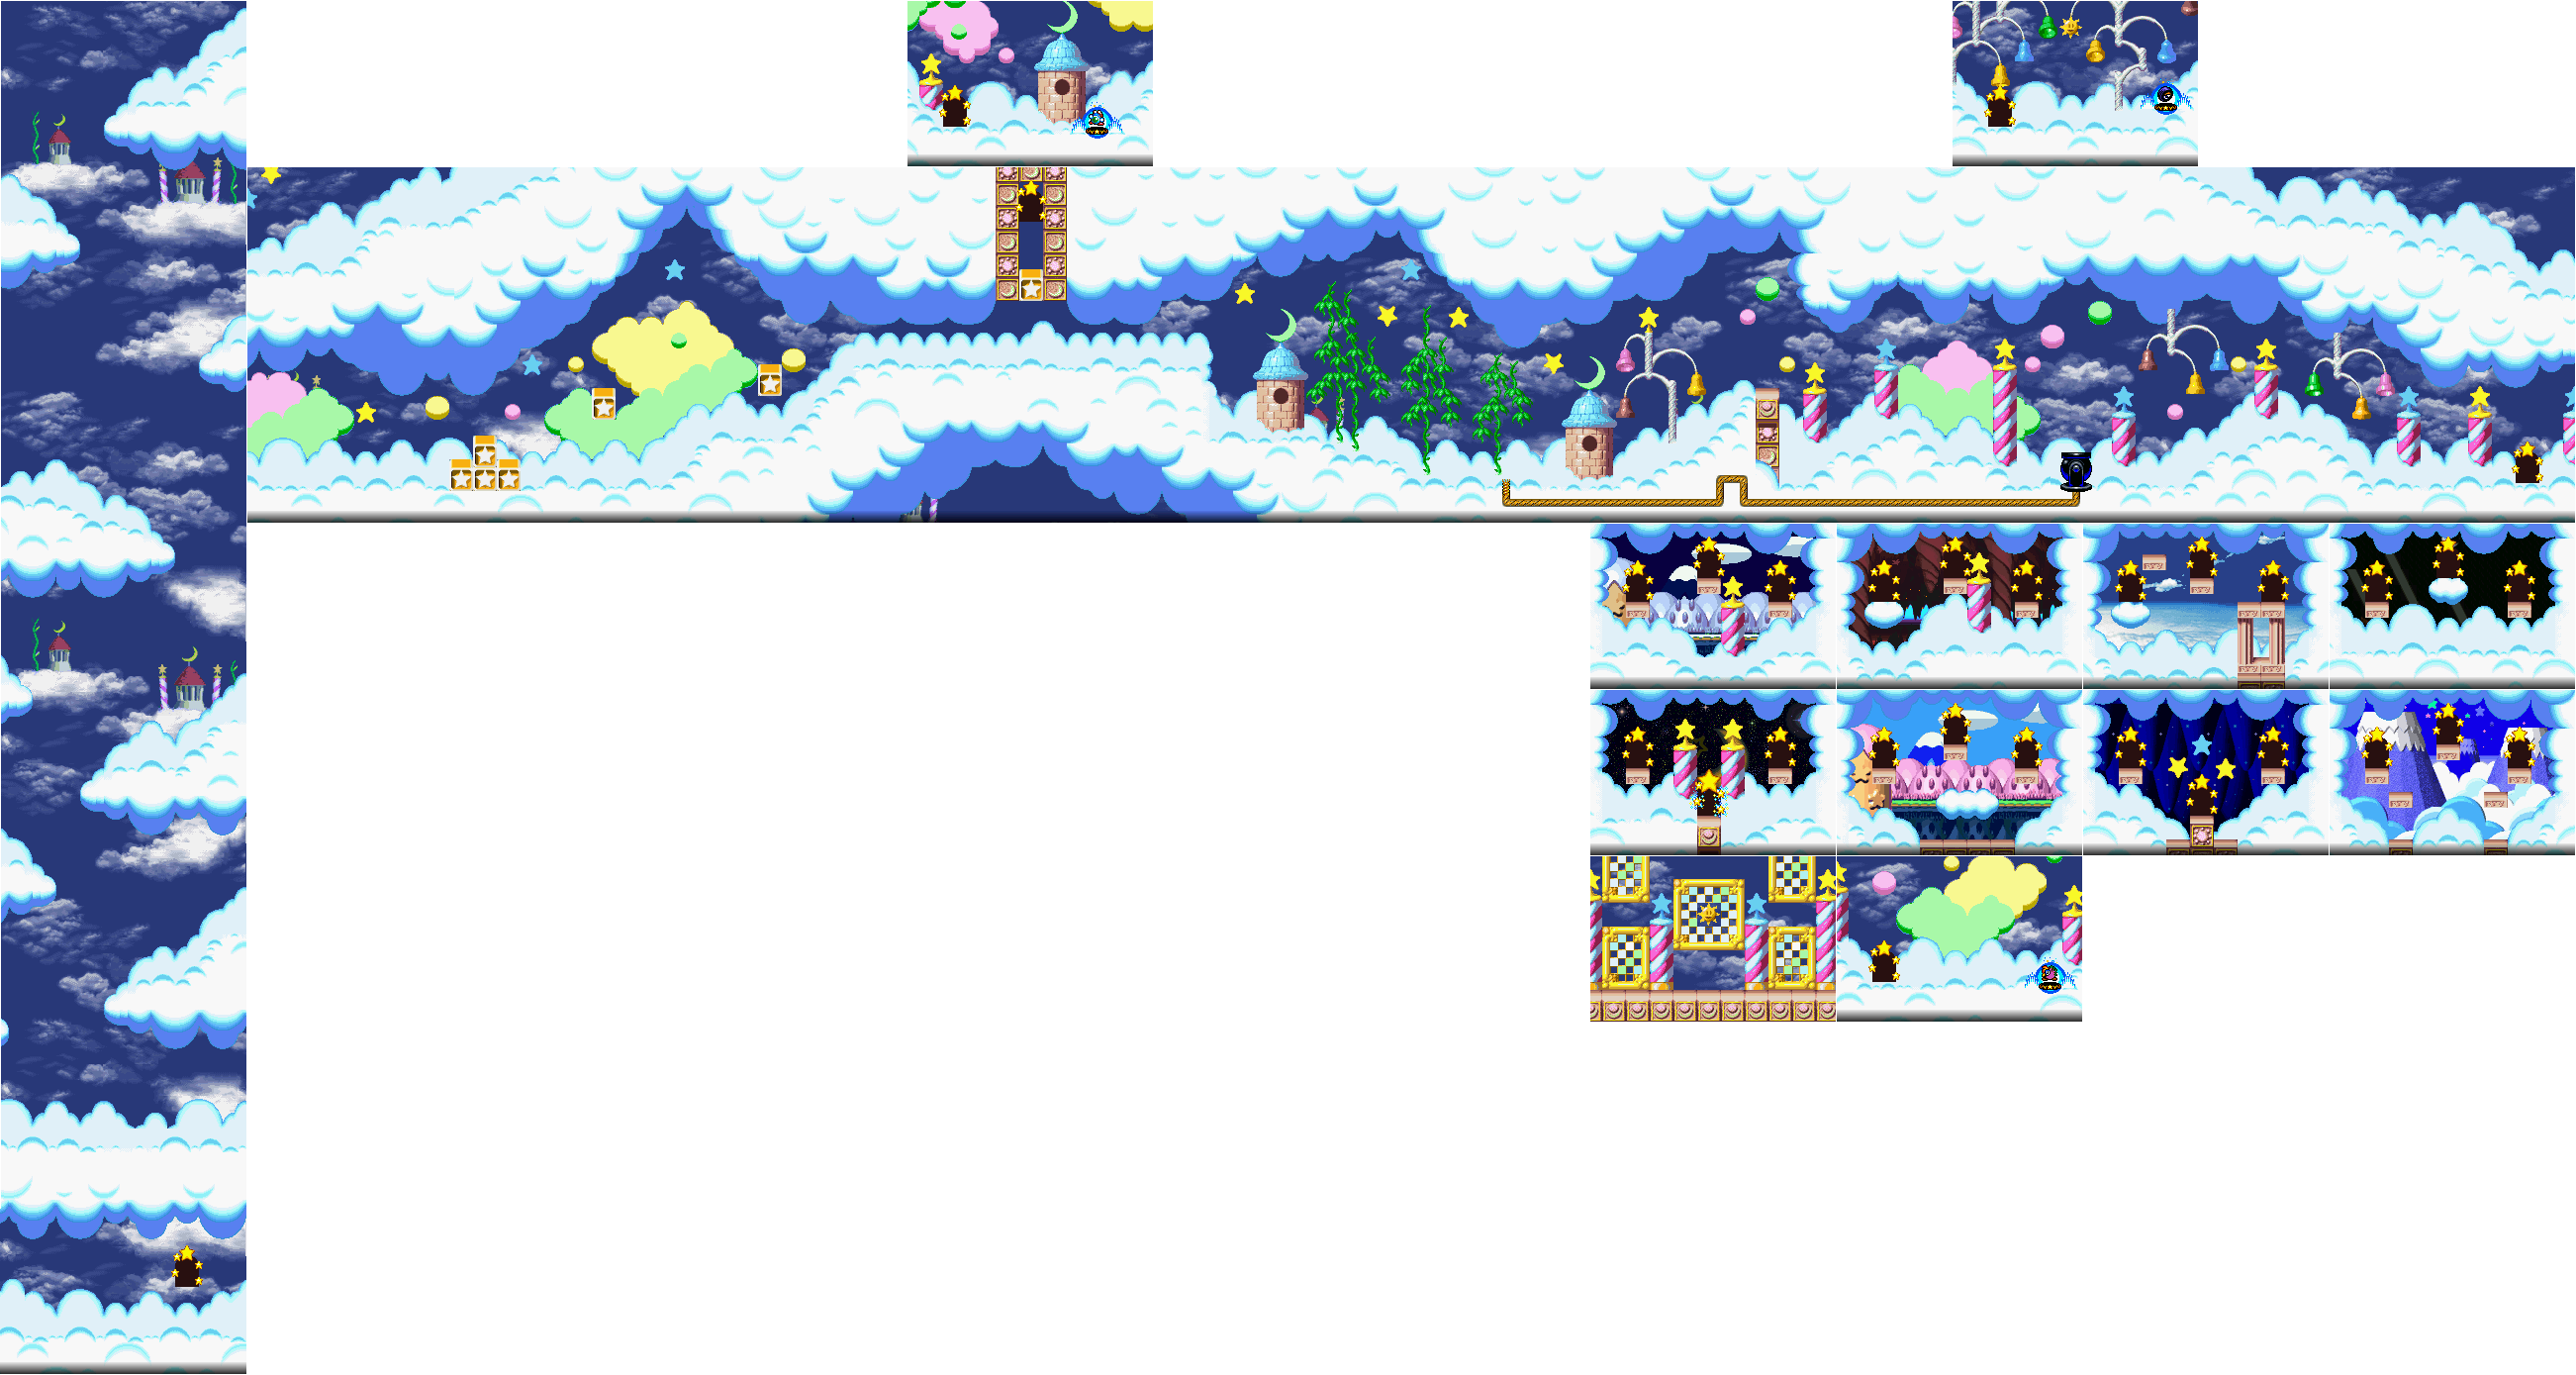
Final Stage

Here, you'll go up the mountain and face Dynablade. You can get the Cutter, Beam, Fire or Sword abilities (or not), then you'll face Dynablade. 

Stay away from Dynablade, and when she lands, inhale one of the stars she creates and spit it back at her head. When she jumps back and then dives as you, duck. Watch out for her extending head and her air pellets. Thankfully, the air pellets can be used against her as well.

When she goes into the air, she will try to land on you once, then dive at you from the background. Stay on the move and avoid her both times.

Eventually, you'll beat her and you'll find out that she was just want to protect and feed her kids. Kirby takes the kids to Whispy Woods to feed the birds. As Kirby teaches them to fly, Dynablade shows up and takes the kids back, and is now a friend of Kirby's. The game ends...almost. This game segues into Revenge of Meta Knight...

Parasol

Protect Kirby from enemies above! Splash, drill or toss your enemies into the sky! A lot of possibilities with the Parasol.

Y: Parasol swing
Hold Y: Parasol shield
Dash + Y: Parasol drill
Down + Y (in the air): Parasol dive
Forward + Y (near enemy): Parasol roll
Up (in the air): Parasol chute (this allows you to fall slowly with the Parasol)

Ninja

Copy the famous Japanese Ninja to hide in shadows and vanish into the darkness!

Tap Y: Knife throw
Hold Y: Quado-shock attack
Dash + Y: Dash attack
Down + Y (in the air): Ninja kick
Forward + Y (near enemy): Air drop
Upon damage, push Y: Hide defense
Push a wall in the air: Stick to wall
Stick to wall + B: Triangle jump

Mirror

Reflect enemy attacks or fool them by crating a double image of Kirby.

Y: Mirror cut
Hold Y: Reflect force
Dash + Y: Mirror body
L or R: Reflect guard

Wheel

Roll over your enemies! Call a helper and ride the Wheel. Watch out for thorns and don't speed!

Left or Right: turn
B: Brake
Y: Dash/Dash release

* Can ride on water.

Suplex

Capture enemies and use the buttons to perform various pro-wrestling techniques to defeat them.

Y: Dash capture; lifting up
Dash + Y: Turbo dash capture, lifting up
Down + Y (in the air): Pin point kick
Y twice quickly (near enemy): Quick stamping

After lifting up:
Up: back breaker
Down: Body slam
Forward: Pile driver
Back: German suplex
Y: Lariat
B: Jumping body slam (distance can be controlled with Left and Right)
Up or forward or back (in the air): Air body slam
Down (in the air): Air body down slam

Fire

Use Dash and Y to hurl burning fireballs. You can light fuses, candles, or even yourself to become a mega-powerful weapon.

Y: Fire blow
Y and Control Pad: Change fire direction
Hold Y + Back: Fire ball (hold Back to maintain move)
Dash + Y: Burning attack
B + Y: Fire ball spin
Y before landing: Fire ball roll (hit Y before landing on solid ground to perform the move)

Copy

Copy enemies' abilities without fighting! The helper will also be able to copy abilities!

Y: Analyze beam (Kirby)
Y: Sneaky hand (Helper)

Crash

Blow all the enemies away with one HUGE explosion. It's a one time chance, so use it wisely.

Y: Crash ability "Crash fire ball"

* Kill all enemies around you.
* One-time use

Ice

Turn Kirby into the ice man and turn the enemies into frozen blocks of ice. Don't slip!

Y: Freezer breath
Dash + Y or Y repeatedly: Freezer blizzard
Y (in the air): Freezer sprinkle
Forward + Y (near enemy): Freezer suction
Freezer suction + Y: Freezer ejection
Touching ice: Ice kick

PrinceWatercress plays Kirby Super Star - Part 1 of 14


It's eight games in one! Never mind that they're all short! It's eight games in one!


Well, we have a few games: Spring Breeze, Gourmet Race, Dynablade, The Great Cave Offensive, Megaton Punch and Samurai Kirby. The last two are mini-games. Milky Way Wishes and Revenge of Meta Knight have to be unlocked by playing through certain games.

Spring Breeze is the easiest one, so let's play that one first.

Spring Breeze

HELP! All the food from Dream Land has been stolen! Hurry, Kirby, or everyone will starve.

If you press X, you can get the demo. The story is exactly the same .

When you start the game, you'll be told if this is your first time playing. If you select "Yes," you'll get a brief tutorial. The Control Pad lets Kirby move left and right, and Up lets you open doors. B lets you jump, and pressing B again while in mid-air lets you float. You'll spit the air pellet out automatically when you land. Y lets you inhale enemies and star blocks and spit them back out at other enemies.

Food restores energy, so be sure to take it if you need it.

Once you get through the tutorial, jump into the warp star to start the game.

Stage 1: Green Greens

The stage layout is much like in Kirby's Dream Land, as will all the stages. You'll have a more variable energy bar, and the first door in the game features a Sir Kibble as well as a Maxim Tomato. By swallowing an enemy with A or Down after inhaling it and getting an ability - assuming the enemy has one - you can pause the game and get all the commands. I will list all the command lists throughout the guide.

Just like in Kirby's Dream Land, you'll face Poppy Bros. Sr., who will jump and move around while throwing bombs, as well as use a dash attack. If you don't have an ability, inhale the bombs and send them back at him.

The third section is the climb up the tree. The Kirby icon is a 1-Up.

The boss here is Whispy Woods. If you don't have an ability, just spit the apples that come down at Whispy Woods, and avoid Whispy's air pellets. Collect the star after the boss battle to continue to the next stage.

Stage 2: Float Islands

What can I say? You'll be in the water dealing with fish and exploding nuts and you'll also be going through a cave in the middle of the level. After the cave part, you'll be facing Chilly, who creates ice cubes you can swallow and send back at him, before flying to Castle Lolo, where you will face Lolo and Lala. Swallow the emerald blocks and spit them back out at Lolo and Lala to beat them and get the second star.

Stage 3: Bubbly Clouds

Here, you'll meet some new enemies, such as Shotzo, a cannon that shoots at you, and Scarfy, who will chase after you and explode if you spit an air pellet at them. It will eventually be night time, and the trick of pressing Up at the moon at the top of the final area before the boss still works. If you do that, you'll get a hidden room where you can face Bonkers, spit his nuts and stars back at him and eventually swallow for the Hammer ability.

The flowers will grab you if they hit you with their heads and drain a little bit of your health.

You'll face Kracko midway through the level, he produces Waddle Dees and bombs you can spit back at him. Just make sure to stay away from him whenever he moves.

On the rematch, avoid the thunder and beam attacks as well as Kracko's dives, and send the Waddle Dees back at him. It'll take a little patience, but he is beatable.

Last Stage: Mt. Dedede

The enemies here can be swallowed for abilities, but you can easily fight Dedede without one. Keep your distance, inhale and spit stars at Dedede when he produces, and don't get inhaled and don't get hit with the hammer. You can easily beat Dedede with two Hammer Flips from the Hammer ability if you can get in close and quickly destroy him.

Once you beat Dedede, everybody gets their food back! See you next game!

Kirby

** Using Copy **

Inhale an enemy by pushing Y and swallow it by pushing A. If that enemy has an ability, you can use it! Press A again to create a helper!

Y: Inhaling/Spitting out
B: Jump/Hovering
A: Copy an enemy/Make a helper; Return a helper/Void a copy

-Special Operation-

Double tap left or Double tap right: Dash
Down + B: Sliding
L or R: Guard

Beam

Use the Beam attack against enemies! Fire the Beam by pressing Y. This is a very handy and useful ability.

Y: Beam whip
Dash + Y: Cycle Beam
Dash + B (in the air): Beam machine gun
Forward + Y (near enemy): Capture beam (press Y again to fire)
Hold Y: Wave beam (hold to charge up, release to fire)

Bomb

Blast your enemies to bits! Take accurate aim and throw carefully. Your throw will be controlled by Y.

Y: Hold a bomb, throw a bomb, set a bomb (near enemy)
Down + Y: Drop a bomb
Dash + Y: Straight throw

* Bomb angle depends on how long you press Y. (Hold Y when holding a bomb to change the angle you throw the bomb at.)

Fighter

Copy the abilities of Fighter and assume the role of a mighty karate expert. Increase your power with practice!

* Strength of attack depends on how long you press Y.

Y: Vulcan jab (weak); Smash punch (strong)
Dash + Y: Leg sweep (weak); Spin kick (strong)
Y (in the air): Down kick (weak); Double kick (strong)
Up + Y: Rising break
Forward + Y (near enemy): Grab enemy
Grab + Y: Arm throw
Grab + Back + Y: Tomoe throw (Kirby only)

Sword

The King of weapons! Fire beams from the tip of your sword. Become a master by practicing multi-sword attacks.

Y: Chop (also works in the air); Chop & beam (when energy meter is full)
Y repeatedly: Multi-sword attack
Dash + Y: Sword stab
Down + Y (in the air): Down air stab

Mike

When Kirby sings, everybody plugs their ears! You're able to use the Mike three times.

Y: Level 1 Megaphone, Level 2 Desk Mike; Level 3 Stand Mike

* Noise blaster kills enemies around you.
* Three-time use

Cutter

The Cutter can cut anything in it's path. Use it to cut down enemies, as well as ropes that get in your way.

Y: Cutter boomerang
Dash + Y: Cutter dash attack
Y repeatedly (in the air): Cutter drop attack
Down + Y (in the air): High speed cutter drop
Y repeatedly (near enemy): Nonstop cutter attack

Hammer

Break through solid obstacles and pound in stakes to take Kirby to hidden areas.

Y: Hammer nail
Dash + Y: Hammer swing
Y (in the air): Giant swing
Dash + Y (in the air): Ultragiant swing
Up + Y: Hammer flip
Dash + A: Hammer throw (Kirby only; you will lose the ability if you do this)

PrinceWatercress plays Dora The Explorer: Barnyard Buddies - Part 1 of 6


Bet you didn't expect me to play this one.

Next | End

It's time for a super-fun PS1 game for kids. Why? How the heck should I know?

Move Dora around with the D-Pad and press any of the four buttons - Square, Circle, X and Triangle - to make Dora jump as well as perform other actions, such as have Boots search in nearby haystacks for items..

There are stars that you can pick up, but they do virtually nothing. You'll usually find twenty stars in a level. You can press R1 to see how many you have.

If Swiper the Fox shows up, press the button to tell him not to swipe.

Dora will go down steep slopes on wooden slides automatically.

There are some static items that barely move, and if you move into them, you'll see the little mariachi band from the cartoon.

When you meet the cow, you'll find out that the barnyard animals have gone through the open farm gate and have become lost. The first one you'll need to find is the duck. The map will tell you where you need to go to find the duck: go through the Sparking River, then go through Blueberry Hill to the Sunny Sunflower Patch.

You'll be able to save your game on the PS1 memory card between levels.

Jumping while moving around makes Dora move faster.

Sometimes, the camera will tilt at an angle. You'll have to tilt the controller and the D-Pad along with it to figure out how to move around with Dora.

Once you cross the bridge above the Sparkling River, you'll make it to Blueberry Hill.

Wooden planks will launch Dora forward into the air briefly.

You'll find a maze in Blueberry Hill in order to reach the end. Thankfully, the maze is not very difficult at all.

You'll find the duck at the end of the Sunny Sunflower Patch.

To get to the pony, you'll have to go across the Rocky River followed by Crocodile Lake to get to the Apple Tree.

Saturday, October 24, 2020

(YTP) Phil Swift Causes A Lot of Damage (by Blame It On The Lag)


okay one more of these

PrinceWatercress plays Lemonade Stand for Apple II - The 30-Day Longplay


Enjoy!


The game is simple. It's a lemonade stand simulator where you try to make as much money as possible. The game was created in 1973 by Bob Jamison for the Minnesota Education Computing Consortium, also known as MECC, for mainframe computers, then ported to Apple II in 1979 by Charlie Kellner. It's been on a lot of other consoles since.

It's up to you to decide how many glasses of lemonade to make, how many advertising signs to make at fifteen cents each, and how much to charge for each glass. You begin with $2.00 in cash, and the cost of making lemonade will . If you make more money than you spend making lemonade and advertisements, you'll make a profit.

The weather will be one of three things: sunny, hot and dry or cloudy. If the weather is hot and dry, expect a lot of customers; if it's cloudy, you may want to scale back in case of a thunderstorm, which will ruin everything.

Type in how many glasses of lemonade you want to make, then press Enter. Type how many advertising signs you want to make at fifteen cents, then press Enter. Type in how many cents you want to charge for each glass, then press Enter. If you need to change anything, feel free to do so; otherwise, let the fun happen.

For hot and dry days, you want to make more lemonade than usual, especially if the game tells you that a heat wave is predicted for the day. For cloudy days, you'll want to make less, as you'll see the chance of rain on a cloudy day before you make everything. If it rains, everything will be ruined and you'll be forced to lose money for that day. Thankfully, the rain comes down before the daily financial report, so if you get the financial report right away, that means you didn't get rained on.

If the game tells you that the street department is working today and that there will be no traffic on your street, you will want to treat the day like you would a cloudy day and make less lemonade.

At the end of each day, you'll see how much money you're making. Your income gains minus your expenses will be your profit for that day.

As the game progresses, the cost of making lemonade goes from two cents to four cents to five, as your mom will stop giving you free sugar and the cost of sugar will go up.

As you go through the game and make (and sometimes lose) money, feel free to experiment once you're swimming in money. You'll figure out how to fine-tune things as you go along, and you'll be able to maximize your profits as you play around with things.

All in all, this is a fun educational game for the Apple II, and one that you'll spend a little bit of time with. Definitely worthy of playing regardless of what console you play it on!

PrinceWatercress plays Jak and Daxter: The Precursor Legacy - Part 20 of 20


Here we are...the stunning conclusion to the first Jak and Daxter game!


2:31 - The sixth Scout Flyer.

3:16 - Prepare to blast and smash through all the Lurkers here to destroy the machines spawning them.

4:37 - A few more jumps, and the Red Sage is saved.

5:29 - With three Sages saved, we can go rescue Samos last. Take the Precursor platform to the side for that one bridge you couldn't reach. The platforms you've just revealed will be nearby.

6:26 - Wait for the platforms to slowly rotate to you to jump on them.

7:11 - The final Scout Flyer, the final Orbs and the final Power Cell. Also, Samos is saved! But Gol and Maia are still able to use the robot!

9:37 - All we have left is the elevator. Smash that button to go up to the top. Break the chests, then use the Precursor platform to face Gol and Maia.

10:38 - The first form. Get some Yellow Eco, then jump and shoot the eyes of the robot to stop that laser. Get to the Blue Eco vent, then get to the launcher. When Gol and Maia shoot that missile, JUMP.

12:21 - The second form. This time around, the silo is slightly open. Gol and Maia will throw Green Eco into the Dark Eco inside the silo to create some deadly lurkers. Grab the Yellow Eco and shoot the crap out of them, then get to the Blue Eco vent when it activates and use the launcher to avoid another missile.

13:10 - The third form. Jump over the shockwaves of the Red Eco balls as you gather Yellow Eco to jump up and shoot Gol and Maia's robot in the face. When the Blue Eco vent activates after you shoot the robot in the face enough times, you know what to do.

14:37 - The fourth form. Gol and Maia will shoot Yellow Eco at you from the robot's laser cannon. Gather up the Yellow Eco and shoot at that cannon, and run away after a few shots so you don't get blasted.

15:06 - The four towers near the silo create the legendary and rare White Eco. As useful as it is in changing Daxter back, you'll have to grab it for yourself and use it to beat Gol and Maia once and for all. All you have to do is just grab a cluster of White Eco on the ground without getting hit by any of Gol and Maia's UFOs, and the battle is over.

24:16 - If you don't have 100 Power Cells, you'll have to get that many before you can see what is behind the nearby door. If and when you do, however, you'll get this. See you next blog series.