Showing posts with label part 12. Show all posts

Sunday, September 13, 2026

PrinceWatercress plays Toy Story 2: Buzz Lightyear to the Rescue (PS1) - Part 12 of 16


In this video, we finish up the penthouse, fight Zerg atop the elevator, then head to the airport. We're getting close to the end of the game now...


Buckeye will be near the living room. Talk to him and you'll get the racing token minigame started. Here, you have to collect five horseshoes, and they will all be in the living room area. One is in front of the fireplace, one is between the wall and the coffee table with the cannon on it, one is on the couch, one is on the table next to the couch, and one is near Rex. This one is a lot easier to get after you destroy the cannon. You'll have only twenty-six seconds to do this in, and that's barely enough time. Your best path is Rex, fireplace, wall, couch, table (even though I save Rex for last here). Get to Buckeye with all five horseshoes before you run out of time to get the last Pizza Planet token. You're done here. Head to the next level.

Level 12: The Evil Emperor Zurg


It's now time to face yet another boss, and this time, it's the Zerg action figure from the toy store from earlier in the movie. This time, he's caught up with Buzz, and the battle that Rex had with Zerg in the video game now happens for real.

You need to spin into Zerg while avoiding the balls that he blasts out. The balls are yellow and go straight at first, but the green ones that he starts shooting when you do a little bit of damage to Zerg will home in on you. You won't be able to avoid those; instead, you'll need to spin at the right time to deflect them all without taking damage.

If Zerg flies into a corner, step back to get him out of the corner. Unlike Zerg, you can fall down the pit at the edges of the elevator you're fighting on and lose a life.

When Zerg is down to half health, he will shoot a combination of the yellow and green balls, and you'll need to keep spinning to avoid the green balls as you keep spinning into Zerg to destroy him. Once you defeat Zerg, he'll fall down the elevator shaft, and you'll never see him again.

Level 13: Airport Infiltration


The hunt for Woody continues to the airport, and if Al flies away with Woody, Woody will be gone forever. On the plus side, this level has some of the best music in the game.

You'll start out below the X-ray machines. Shoot down the enemies you see around here; you're going to need the coins for Hamm. You'll eventually come across a green suitcase; the stomp icon will tell you that you need to stomp on this and all other green suitcases to get to higher areas. You'll also need to jump off the brown suitcases to get to the poles that you need to swing off of to get to other conveyor belts and get out of this area. When you reach the tops of the X-ray machines, explore them; one of them will have the first of five Little Tykes airplane passengers that you need to collect, and the big white shelf at the end of the conveyor belt section will have Hamm at the top of it.

You'll eventually come to an area with some doors in the wall. You can head to ground area for a few of the tokens, but you can also head further upwards for more conveyor belts, more enemies to destroy for tokens, and the boss battle with The Prospector.

At ground level, you'll find Mr. Potato Head. You'll need to find his mouth in order to get the Hover Boots, which is the last gadget that you'll need to complete the game. Rex will be at the stack of suitcases where Mr. Potato Head is, and he will tell you where all the tokens are.

Rocky Gibraltar will be in the area with the slippery oil on the ground near the X-ray machines. You'll need to collect five weights before the whole minute that the game gives you runs out. One is on a nearby conveyor belt, the second is directly below it. The third will be near the stack of suitcases that you can't climb (yet), the fourth will be near the door near Rocky and the fifth will be below the giant model plane. You should be able to find them all, get back to Rocky and get a Pizza Planet token with plenty to spare.

Past Rocky and the oily area is a giant model rocket ship. While we can climb up the rocket ship, we won't be doing it yet. In the corner, there is a Little Tykes pilot who is looking for his five passengers; you'll need to return to him when you find them all. There is also what looks like a weight that is really a set of airplane landing wheels. Push it forward to get on the plane wings, which you'll need to use like combination ramps and see-saws in order to get higher up in the room. This is a little easier said than done, as the plane wings are huge. You'll be forced to double jump your way to get the wing to I'll have the way up to the top figured out next time, but for now, I do a little bit of climbing to get enough coins for Hamm for his Pizza Planet token to cap things off before next time. 

Thursday, July 9, 2026

PrinceWatercress plays Space Station Silicon Valley - Part 12 of 32


If you know what to do here, you can easily complete this level quickly.


Ice 'n' Easy Does It


Dan needs more information about the space station, and from that, you'll need the high mental energy build-up from the preserved, decapitated heads of the professors lying around in this area. (Don't ask how this works.)

You start out as a husky, and there will be three rabbits ahead of you. You only need to take out one of them and take it over, and once one goes down, quickly take control of it so they stop attacking you. Amazingly, you can't attack them and they can't attack you when you're a rabbit, so leave them alone.

There are two professor heads behind where you start. You'll be getting them later.

For now, go up the ice platforms. After hopping a gap, you'll end up in a more vast area with an igloo. This is where things start getting interesting. Before you go over there, though, go further to the right for one of the professors' heads. You'll have to backtrack to get back to where you were to enter the bigger area, but that will get one of the heads out of the way.

Once you're in the igloo area, you'll have to deal with three walruses with skis for legs and hovercraft engines at the rear. They can also fire missiles. If you fight them now, you will get decimated. Instead, head over to the igloo. Nearby will be a rabbit encased in ice. Use your thump attack with the B button near the ice cube to break it. This bunny will have a helicopter rotor on its head. Take control of it. You'll be able to fly by holding A and drop bombs by pressing B. Stay directly on top of the walruses and drop bombs on them, and watch out for the missiles. You only need to destroy one to complete the level, but if you destroy all three, you'll get a trophy for it. It will appear near the igloo.

As the heli-rabbit, do not run into walls while flying. You will take damage. Fly back to the start and go to the area over on the other end of the bottomless pit for a second head.

Head back to the igloo area and take control of a walrus. There is an area with a slope, a small pool of water and a ramp. The walrus has a turbo boost that can be used by holding A, and can fire homing missiles by holding B. You'll need to hold A to get moving, but once you're moving, you can hold Up and then steer with the Control Stick. You can also move more freely in this same manner while on the surface of any sort of water. Just remember that the walrus can be a tad hard to steer and that it can slide around if you're not careful. For best results, tap the A button; you'll preserve your turbo boost this way.

Boost up the ramp to get to another Power Cell and the third head. You'll now be able to get to the exit teleporter in the igloo and complete the level.

Heli-Rabbit


Type: Heli-Rabbit
Environment: Ice
Skill A: Flight
Skill B: Bombs
Water Resistance: OK
Mass: Light
Armour: Light
Strength: Medium
Traction: Good
Fall Distance: Low
Production: Short
Engine: Kerosene
Intelligence: Medium

Walrus


Type: Walrus
Environment: Ice
Skill A: Speed Boost
Skill B: Homing Missiles
Water Resistance: Excellent
Mass: Huge
Armour: Medium
Strength: Strong
Traction: Very Poor
Fall Distance: Medium
Production: Very Long
Engine: Coal
Intelligence: High

Power Cells


Saturday, June 6, 2026

PrinceWatercress plays Donkey Kong Land III: Dixie Kong's Double Trouble - Part 12 of 13


It's time to wrap up the main game. Let's do this.


Rainforest Rumble


The first bonus area is left of the start. To get to it, you'll have to drop straight down from the edge of the cliff and turn into Squawks as soon as you fall into the Squawks barrel. Me, not knowing this, did a helicopter spin to the left onto the Klick-Klacks to get to the other side. You'll be collecting the stars, but at the same time, you'll be shot from barrel cannon to barrel cannon, so it's more like you're just going to the end when you're really collecting all the stars.

The entire level has you playing as Ellie. It's a good thing you have infinite water spits, as it takes care of all the enemies in the first half of the level quite efficiently. At least you're not running at top speed here. 

The second bonus area is down the pit after the "No Ellie" sign and before the steel keg. All of the stars will be to the right of the Buzzes, so make sure you don't go too far to the left as you explore all of the conveyor belt ropes here to get all the stars. The Bonus coin will be down and to the right below the bottom-most conveyor belt rope.

The DK Coin is past the goal. Get rid of the big blue guy, then take the steel keg past the goal and throw it to the right over Koin's head so you can hit him in the back and take the DK Coin.

At least you can save your game here in case you didn't save it elsewhere.

Barrel Boulevard


At the O, you'll need to go both up and down. Above the O, you'll find the first bonus area. Use the barrels from the Bazuka to help yourself get there. For the first bonus area, you'll be moving from Rocket Barrel to Rocket Barrel while collecting the stars to get to the Bonus Coin on the other side. Below the O, you'll find Koin. The steel keg will be to the left after the descent leading to Koin; grab it and take it back to Koin and hit him in the back with the tried and true bank shot to get the DK Coin.

The seocnd bonus area is below the N. When you're climbing on the horizontal rope after the N, drop down again from the rope from the right side to find some platforms leading downwards. Watch out for the Klasps as you head to the left to the Bonus Barrel. Use the D-Pad to shoot yourself towards the bananas to get to the Bonus Coin on the other side.

There is a shortcut that lets you skip to near the end of the level below the second bonus area, but you'll miss out on the G as well as a few Bear Coins if you take it.

Ghoulish Grotto


The DK Coin is to the right of the Kopters after the start. Helicopter spin over the barrel cannon with Dixie, then grab the steel keg and hit Koin in the back with it to get the DK Coin.

There's an extra life you can collect if you don't take the barrel cannons at the start.

The first bonus area is in the pit before Squawks. It will have a tight squeeze between two Buzzes, but if you drop down it, you'll find the Bonus Barrel. You'll be collecting all the stars while taking a wild barrel cannon ride here. Helicopter Spin to the left with Dixie at the end for an extra life.

The second bonus area is above the second Ghost Barrel after the N. Wait for that Ghost Barrel to point upwards, then jump in and hold Left so you can land on the ground below the Bonus Barrel. (You can also wait for it to point up and left; if that happens Here, you'll be destroying all the Rekoils; be sure to hit them all on their way down.

Watch out for the Barrel Cannons below the Buzzes and the Kuchukas.

K. Rool's Last Stand


If you entered the Sheepy Shop in the world, the Bear Brother would have told you to come back with 77 Bonus Coins, which is all of the Bonus Coins in the game. When you enter this area for the first time, Baron K. Roolenstein will tell you to come back with six watches and the DK Coins. To do that, you'll have to go back to the Sheepy Shop in this world with 77 Bonus Coins, play and beat the card matching game one more time, and you'll have six watches and all the DK Coins. From here, you can face Baron K. Roolenstein once and for all.

For the first phase, jump over him when he moves towards you at ground level, then stay away from him to avoid the bombs. Grab the barrel, then stay standing where you picked up the barrel so that K. Rool runs right into it.

For the second phase, stay all the way to the left to avoid the bombs, then jump over K. Rool and go all the way to the right to avoid more bombs. Grab the barrel, then stay in place with the barrel in your hands so that K. Roll runs right into it.

For the third phase, jump over K. Rool when he moves towards you, then jump over the first two zaps and stay on the ground to avoid the next two. Jump over the next two zaps (which will have a slightly longer delay between the two), then jump over K. Rool. Jump over the next two shots, stay on the ground for the next two, jump over the next two shots while minding the delay. Grab the barrel and stand in place to score another easy hit.

For the fourth phase, stay all the way to the left to avoid the bombs. He will then fly left over your head. Run all the way to the right and avoid the bombs, then watch for two zaps followed by one more bomb. K. Rool will then fly over your head to the right. Move to the middle, grab the barrel, and stand in place while holding the barrel for one last hit. Go all the way to the right after that final hit to avoid a surprise bomb, then you'll get the 78th and last Bonus Coin and beat the main game.

Afterwards, Baron K. Roolenstein will give you six more watches, bringing your grand total to twelve (giving you all the watches in the game) before you get brought to the Time Attack Mode screen. You have just one more task before you can beat the game in full...

Tuesday, January 27, 2026

PrinceWatercress plays Super Mario Odyssey - Part 12 of 92


After spending the last couple of entries backtracking for Power Moons, it's time to move forward.


There's nothing left in the Sand Kingdom, so let's head to the Wooded Kingdom. In this kingdom, there is a giant greenhouse full of flowers that is famous for its beautiful Soirée Bouquet.

Road to Sky Garden


Rabbits will run away from you if you approach them, and while some of them may have coins, others will have Power Moons. If you hit a rabbit with your cap, you can briefly slow it down.

The Regional Coins are in the shape of nuts...the metal ones, not the ones that come out of a tree. You'll see both all over this kingdom.

The first new enemy you'll meet just from looking around will most likely be an enemy in an upside-down flower pot. This enemy is known as an Uproot, and throwing your hat at it will free it from the pot. Throwing your hat at it again will allow you to possess it. While playing as an Uproot, you can stretch yourself upwards by holding the B button. Letting go of B will allow you to do a somersault forward as soon as your legs return to your body, which happens pretty quickly. You do have a limit as to how high you can stretch yourself, but even then, getting to places you normally aren't able to get to as Mario alone is easier than you would think. The stretch ability will also allow you to break the nuts on the walls as well as push some platforms upwards as well as break blocks from underneath, so it's not just for jumping.

The residents of this kingdom are robots that are programmed to water the flowers. They will be in a tizzy when you first enter this kingdom, as Bowser, Peach and the Broodals are all here. Your main objective before you have free reign over where you can go is to get to the Sky Garden at the very top of the kingdom.

The Sphinx returns, and you'll need to answer a question to enter the rest of the kingdom. The question is "What does the monster want from this kingdom?" The answer is "Flowers."

The pinkish-purple goop is poisonous sludge, and if you run into it, it will damage you. Thankfully, you can get rid of it by throwing your hat at it. As you go upwards in the kingdom, you'll meet Piranha Plants that spit this goop out, including a big one that carries the kingdom's first storyline Power Moon. More on that later.

The lake near Talkatoo contains a pipe. If you enter it, you'll find a hidden passage where you can find not one, but two moons. I won't find the hidden second one until later.

There is a maze on the way to Power Moon #1 (see below). You'll find a few Regional Coins as well as a Power Moon in another nut. 

When you reach the halfway point (which has its own flag called Iron Path: Halfway Point), you'll find a big Piranha Plant. Throw your hat at it to stun it, then jump on it to destroy it. You'll get a Power Moon.

Power Moons


1. Road to Sky Garden - In the area where the "Iron Road: Halfway Point" checkpoint is located, you'll need to throw your hat at the big Piranha Plant to stun it, then jump on it to defeat it. This will net you a Power Moon.

8. Caught Hopping in the Forest! - Near the Odyssey, there is a rabbit. If you can run into it and catch it, you can get a Power Moon. This is most likely the first rabbit you'll see, but not the last.

10. Atop the Tall Tree - On the other side of the cliff path that starts near the Odyssey is an area with an Uproot. Take control of the Uproot, then use your stretch ability to jump from platform to platform to reach a nut. Stretch yourself into the nut to break it and get this Power Moon.

13. The Nut 'Round the Corner - There is a hidden path that you can find if you follow the edges of the kingdom, and it will be across from Talkatoo. Use an Uproot to get past the platforms that will fall under your weight, and stretch yourself high on the last platform to get to this nut, break it and get the Power Moon.

15. The Nut in the Red Maze - You'll need an Uproot to find the nut containing this Power Moon in the maze portion before you reach Power Moon #1. 

16. The Nut at the Dead End - From the "Iron Road: Halfway Point" area, there is a pole you can slide down to enter another area. One end has three regional coins, but the other end has a nut. You'll need the Uproot in this area to break the nut and get the Moon.

23. Shopping in Steam Gardens - Purchase a Power Moon in the gold coin Crazy Cap store for 100 gold coins.

39. Flooding Pipeway - In the lake near Talkatoo, there is a pipe you can enter. If you can move and swim past all of the Black Fuzzys and get to the other end, you'll get a Power Moon.

Regional Coins


Wednesday, December 3, 2025

PrinceWatercress plays Brave Fencer Musashi - Part 12 of 33


Now that we have the Misteria, we have to get back...and then we have to get the Aqualin, because of course there's no way Hotelo is making it to the summit.


Now that you have Misteria (and all the useful things) go back to the fork in the road below the giant fan and climb the wall to the right. 

If you take the right fork, you'll enter the scrap depository. Assimilating the blue mushroom guys, falling into the pool of liquid Binchotite or getting hit by the worms will cause you to be poisoned. However, if you Assimilate the worms, you'll get Antidote. For 6 BP, you can instantly cure yourself. It's pretty much worth getting as long as you're in the mine. You won't be able to go much further to the right until later in the game, however, as the gap between the two wooden platforms above the liquid Binchotite pit is too wide to jump across.

When you climb up the wall, head to the right. Keep going right and you'll eventually enter another area with a liquid Binchotite pit. Use the elevators to climb up.

Watch out for the falling rocks, as they will definitely hurt if they touch you.

When you take the elevator, take care not to drop down to the mechanism at the bottom. You'll be hit by the unviewable gears at the bottom. (Use your imagination. It's a black space, I know, but that's what I'm assuming is happening.

Take the first platform on the left side of the elevator that you see, then head left to get out of this section. Follow the path and you'll be able to get out of the mine.

Back at the castle, talk to KnightA (Knight Brisket). He'll teach you Tenderize. To perform it, press Square, Square, Triangle and you'll do a three-hit combo with both Fusion and Lumina.

If you talk to CookA (Cook Mary-Nade), she will tell you that she and Bailiff Jerky are planning to grow a rice field together, but Bailiff Jerky. Keep in that mind, and remember to rescue the Bailiff later in the game.

In the daytime (as early as 10:00), find the Mayor, now that you've got the Misteria. He'll thank you, but tell you that Hotelo hasn't come back from Twinpeak Mountain. You'll have to head up the mountain again, and I have to admit, it's actually pretty fun to go through that area.

You'll find Hotelo after you cross that broken bridge. He's given up on himself, resigning himself to "fate." Pick the first option "What a let down!" He'll tell you that you have only 12 hours until Tim turns into a Vambee.

Your best bet to beat the clock is to climb the orangish-brown walls whenever possible. This will really help. Head to the place where you met Jon with the four logs, and use the Earth Scroll to reach the poles. Swing across, then climb up the pole. Approach the running water at the top here to get the Aqualin, then drop back down to the second cave and head back to Hotelo. 

When you hand the Aqualin over to Hotelo, he'll head back to the village and the timer will stop. This was a pretty easy mission as long as you get used to the jumping, to be honest.

Head back to the village. When you leave the mountain, you'll find out Tim is well. Regardless of what dialogue option you pick, you'll also head back to the grocery and get an Orange for Hilda. She'll sell them from this point on in the game.

Head back to the castle and talk to Clown (Clown Weinee). Now that you have the orange, he and Acrobat Sausages will perform. You'll learn Shish Kebab. Grab an enemy, then throw them upwards with Triangle. Hit Triangle again, and you'll impale them when they come back down.

Saturday, November 1, 2025

PrinceWatercress plays Legacy of Kain: Soul Reaver - Part 12 of 28


In this entry, our adventure takes us to the ancient tomb of the Serafan, and we learn a rather nasty truth when we get there.


4:42 - Go back to the Pillars. There is one column that is not like the others, and now that you've defeated Zephon and gotten the ability to climb, you can leap into it and climb it to the top. At the top, there is an entrance to another area. Follow the path and enter either door to get to where you want to go next.

7:38 - Going the right way leads to another cutscene where we find the ancient tomb of the Serafan. After a brief history lesson from yours truly, we jump up the cliffs to find a teleporter.

11:59 - The Elder God warns us of a forgotten history when we go through this gate.

13:45 - Pulling the block leads to some crypts...and the names of them are those of us and our vampire brothers! As it turns out, Razier and his brothers were all originally Serafan, and after their passing, they were all revived as vampires by Kain. Interestingly, Turel is mentioned, even though he is not in the game, and Malek has a space in the tomb even though his soul was fused to a suit of armor in Blood Omen.

Tuesday, September 9, 2025

PrinceWatercress plays Woody Woodpecker in Crazy Castle 5 - Part 12 of 18


It's time for the last third of the game, and this is where the difficulty goes out of the window due to annoying enemies that are allowed to re-spawn and level design that allows said enemies to have an edge.


Fire Stage 1


You'll want to avoid the steam from the geysers.

The green enemies will spit a fireball forward if they see you.

The blue creatures that look like hedgehogs will spin towards you if they see you.

The yellow bats fly around in a specific pattern.

The black cat enemies can suddenly stand still before doubling back, which can make them an utter pain to deal with if you need to. Yeah, that's what this game needs: an enemy that stands still and then turns around when you don't want that to happen.

The boulders will fall down if you get close enough to them. They'll bounce towards you twice before ultimately breaking, but they will pose a threat in the meantime.

The fairy power-up gives you a fireball that will allow you to stun enemies and briefly freeze them. The fireball launches forward, but also returns like a boomerang, so if you miss the first time, you can hit an enemy on the rebound. That's either a good thing or a bad thing depending on the situation.

Fire Stage 2


You now have gray cat enemies to deal with, although they aren't able to do as much as the black cats, as they can't even use the ladders, much less the pipes or the mushroom trampolines.. Also, the black cat enemies can use the mushroom trampolines to get to higher areas.

The pipes are back! You can now use them to get to areas you wouldn't be able to get to normally. Unfortunately, the black cat enemies can use the pipes to get to you.

The breakaway platforms are back. Remember that you can only step on them three times before they break once and for all.

Amazingly, the clock that freezes enemies do not freeze the geysers that spit out steam.

Monday, June 9, 2025

PrinceWatercress plays Math Rescue - Part 12 of 19


...and Episode Two is done! Stay tuned for Episode Three!


Level 15: Back at the Space Station


Episode Two gives us one more maze-like level with three sets of numbers to collect in order to get the key to the door.

Whatever you do, do not drop down at the right-most part of the stage. That only leads to bottomless pits and frustration. Instead, it's the area to the left of the ladder leading to the "0" that you'll need to drop down from to find everything. This is where you'll find everything else as well as some warps.

Once you beat this level, you'll get to the ending.

As the number-stealers retreat for a second time, you are shocked to hear your butterfly friend suddenly speak. He tells you about Glixer II and the Gruzzles. Most surprisingly, you learn that Benny was once a Gruzzle. He long ago sought refuge on the planet Earth to escape the fate of being a pet to the greedy Glixerians!

The slime he dumps on the Gruzzles, your friend tells you, is stink mud , a common element on Glixer II. Its disgusting aroma, much akin to terrestrial skunk, makes the Gruzzles so ill that they have to zap back to their spaceship to take a bath. Furthermore, your friend warns you that your battle is not yet over. The Gruzzles are sure to return!

Be sure to order the final exciting episode! In episode #3 you journey to Candy Land in order to defeat the Gruzzles once and for all (well, maybe not)!

Don't miss the surprise ending!

Sunday, May 18, 2025

PrinceWatercress plays The Grinch (PS1) - Part 12 of 22


We make some big progress with Whoforest before running out of ideas as to what to do again...


The stalactites on the ceiling can be shot down with the Rotten Egg Launcher. This is how you get the blueprint piece encased in ice mentioned in the last video, and it's for the Grinch Copter. You'll need to shoot two more to open up the other half of the cave.

Remember that weird looking wall in the cave that looked like an ice cream sandwich that I tried to climb with the Octopus Climbing Device? You actually have to jump into the flat part on the top and grab onto it, then shimmy left. There's a Grinch Copter Blueprint piece on the other side.

The beast at the top needs to be breathed on; otherwise he will keep throwing rocks down. Break the nearby ice wall to find a platform with a guy in a green bodysuit, breathe on him to get his giftbox, then swing to the other side for more giftboxes and the final firework.

When you get all ten fireworks, you can approach the cake, press Triangle to place the fireworks, then enjoy the explosive results.

We're done with this area (for now, but not permanently), so let's take the cable car now that we have the access card. You'll have to deal with more green bodysuit enemies as well as snowball throwers. The Third Heart of Stone can easily be found. 

One of the enemies drops a giftbox that falls off the ledge onto the ground below. Keep that in mind when taking out all the enemies for their giftboxes in the cable car area.

A beast blocks a small cave with presents that only Max can access. Wait for the beast to swing, then breathe on them. (No wonder I was getting lucky with the beasts.) There is another small cave for Max near the ski lodge at ground level that contains a Grinch Copter blueprint piece.

To slime The Mayor's skis, there are two spots with snow hanging off of them. Shoot either of them as the dog is underneath, and when the dog is buried in a snow, you'll see a timer. Use this time to slime The Mayor's skis to complete one of the missions as well as get the nearby Grinch Copter blueprint piece. If the dog sees The Grinch, the dog will charge; if the dog touches The Grinch, it's instant death.

There are giftboxes in mid-air that you won't be able to get with the Rotten Egg Launcher. You'll have to come back later for them.

Watch out for the falling icicles near the ski lodge while pancaking giftboxes; they hurt.


Saturday, April 12, 2025

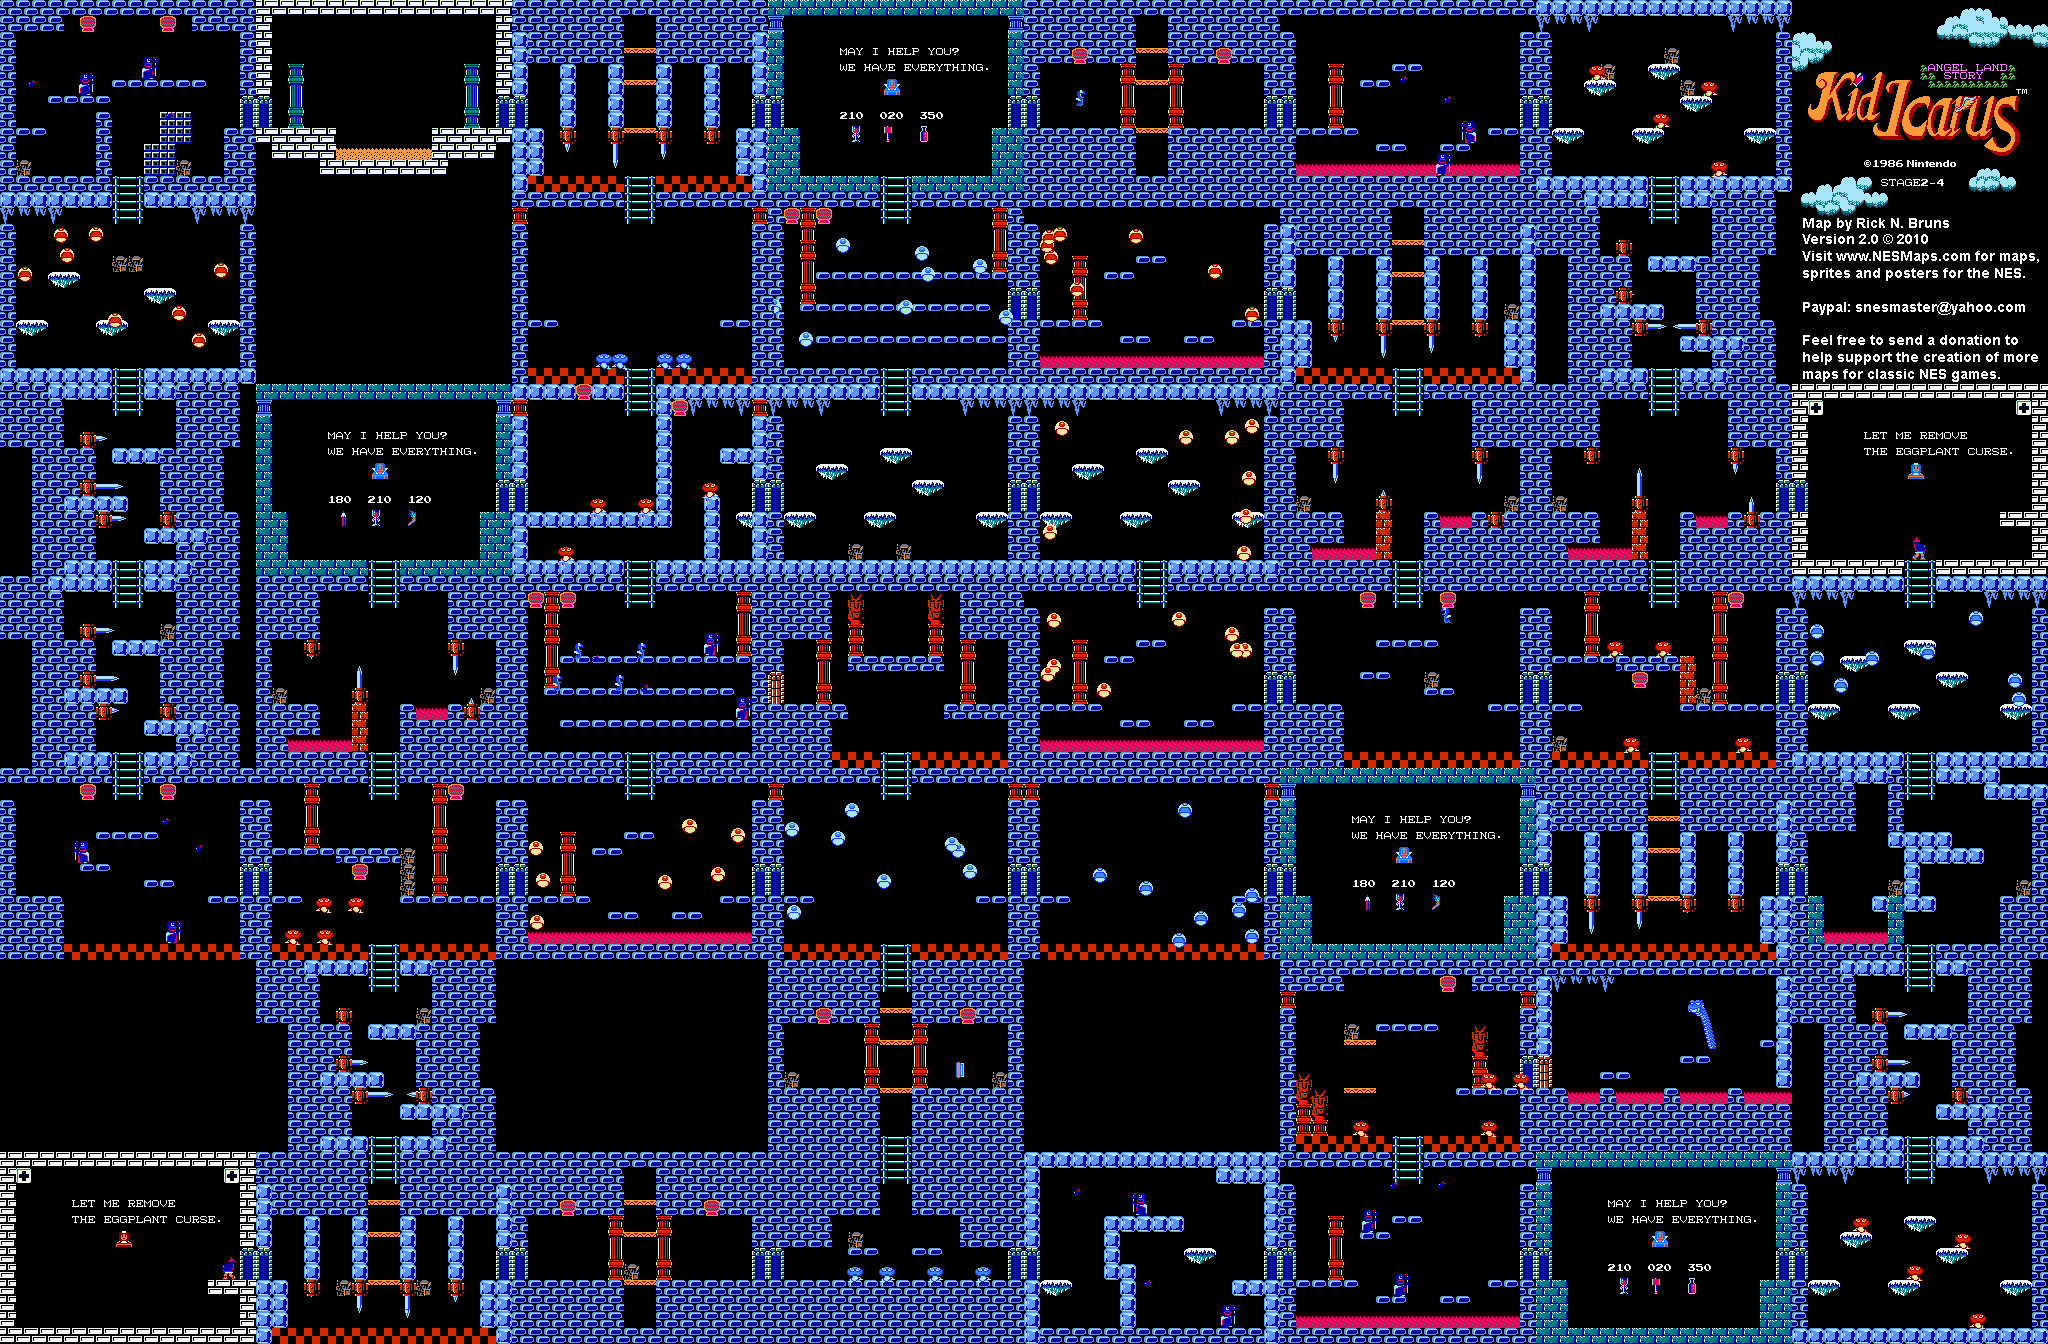
PrinceWatercress plays Kid Icarus - Part 12 of 15


While we can't get any more powerful from points, the amount of points that is possible to get after the first loop absolutely skyrockets.


World 2-3


The thorns in the ground will hurt you; try not to fall into them.

In the middle of the level, you'll need to watch out for the lava.

The upgrades from the training rooms where you have to shoot down the tiles do not work in the labyrinths.

If you wait long enough after buying something in a regular store (not a black market), you can buy something again. Also, if you press A and B at the same time on Controller 2 in the stores, you can lower the prices, but there is a 20% chance that the shopkeep will raise the prices instead.

Watch out with the platforms moving around near the thorns. Make sure the platforms are away from the thorns when you get on and jump off.

Near the end of the level where all the tombstones pop up, a gaggle of upgrade thieves will jump around. Tread carefully so they don't steal your stuff. Make sure you enter the Black Market in this area to get rid of them a little prematurely.

World 2-4


The floating circle enemies with the one eye (Tamambos) fly back and forth the same way that the Specknoses do and take one hit to kill. The blue ones will drop five hearts each, while the red ones drop ten each.

The red mushroom enemies (Shulms) will take a quite a few hits before they go down.

You'll have to face off against the Eggplant Wizards before you make it to the boss, whether you like it or not. There are two hospitals in this labyrinth: one in the lower-left corner and one in the upper-right corner.

The boss here is Hewdraw. Hewdraw will bounce around the room, and you'll need to avoid him while hitting him in the head and also stay out of the lava. It will take a while, but Hewdraw can be beaten.

Sunday, February 9, 2025

PrinceWatercress plays Wario Land II - Part 12 of 51


If you know where to go in this stage, you can get a ton of coins.


Chapter 3: Maze Woods

Story 2: Defeat the giant spear man


If you go down in the water at the start, you'll find a hidden coin passage. Also, there is a passage you can tackle through to the left after entering the first door that leads to more coins. From there, the trees in the background will tell you where to stand so as not to fall into hidden pits. If you fall into the pits, though, you can get some coins while being carried back by the current.

The turtle will get you across the water. Jump on it to get it moving, and be ready to get off and on it to get from point A to point B.

Halfway through the second turtle area, there is an area in the middle of the current where you can go down and find a hidden area with quite a few coins in it. Hold Down and Right and keep pressing B, and you can get one of the coin caches. Down and Left with B will help you get the other set.

You'll need to turn into Fire Wario in order to break the blocks leading to the treasure room, as well as the next door. At the next door, go into the water, go all the way right and then down. You'll sink below the screen. Keep holding Down and Left while pressing B to get a ton of hidden coins.

To beat the giant spear man, tackle him to turn him upside, then repeatedly ground pound him to damage and eventually defeat him. Don't forget to get the 100-coin coin when you're done.

Wednesday, November 20, 2024

PrinceWatercress plays Great Greed - Part 12 of 28


Let's take some on some enemies and get stronger before we explore the nation of Spaghetti.


To the west of where you enter will be the village of Macaroni Burg. Along the way as well as near the village, you'll meet some new enemies. The first is Rib Cage, which has 291 HP and is strong against Freeze Magic. Rib Cage can also cast Scare, which can lower your offense. Rib Cage drops 76 Experience and 225 Gold, and has a chance of dropping Plate Armor, which will be the best armor you can come across for a while.

In Macaroni Burg, you'll find out that there is a resistance army nearby, and that their leader is strong. You'll also find out that a lady fencer is hanging out in the Armory. When you head there, you'll find out that this lady fencer is looking for weapons for the resistance, but the weapons there are not good enough. When she turns around to leave, she will notice Sam, and ask him to join the resistance army. Say yes, and she will join you. (This is a "but thou must" situation.) The lady fencer will then tell you to head to the Southern Forest.

At the Armory, go ahead and buy the Hotcut, the Bronze Shield and the Iron Helmet (unless you have the Chrome Helmet from the Garican, in which case you don't need to). At the magic shop, get Flame 3, which is more powerful than Flame 2. Weaken can be used to lower the enemy's defense at the cost of 5 MP.

Now it's time to take on the rest of the enemies around here. At this point in the game, you'll want to level up for about an hour in the first village of every land you enter. As a matter of fact, you should have been doing that. This explains why the enemies usually never give me any trouble.

Chickik is a stronger version of Chikstik. It is strong against Freeze magic, and it can cast Fly. It gives 82 Experience and 238 Gold when defeated, and there is a chance that it will drop Bigcut, which is even stronger than the Hotcut, so if you get a Hotcut, equip it and hold onto it for a while.

If you see the message "Whoop, Whoop Amazon Attack," that's the lady fencer getting a free shot on the enemy, making your battle a little easier.

Brainy is weak against Freeze magic and strong against Bolt Magic. It gives 64 Experience and 175 Gold when defeated.

Pie Guy is strong against Bolt magic and can cast Flame 3. It gives 67 Experience and 140 Gold when defeated. It has a chance of dropping a Skewer, and while it is more powerful than the Hotcut, it is less powerful than the Bigcut. If you don't have the Bigcut, you can use this until you do. His head is on a plate, and when he dies, it turns into a skull. Nice touch.

Lolizard is weak against Freeze, but it can also cause Slip and cause you to slip and fall, stunning you for a short time. It gives 55 Experience and 218 Gold when defeated, and it has a chance of dropping a Med 3-5 scroll upon defeat.

Orangater has some pretty high defense, much like the Lemonater, and while it is weak against Freeze, it can also cast Heal 1. It gives 51 Experience and 232 Gold when defeated, and it also has a chance of dropping a Regain 3, which is the best of the Regain items and recovers 200 MP. Hold on to this for later in the game if you get on; you'll definitely be needing it later!

Tuesday, September 10, 2024

PrinceWatercress plays Chrono Trigger (Super NES) - Part 12 of 70


In this entry, we get the path to the Gate open, but we have some complications not only getting to the Gate, but also after we enter it.


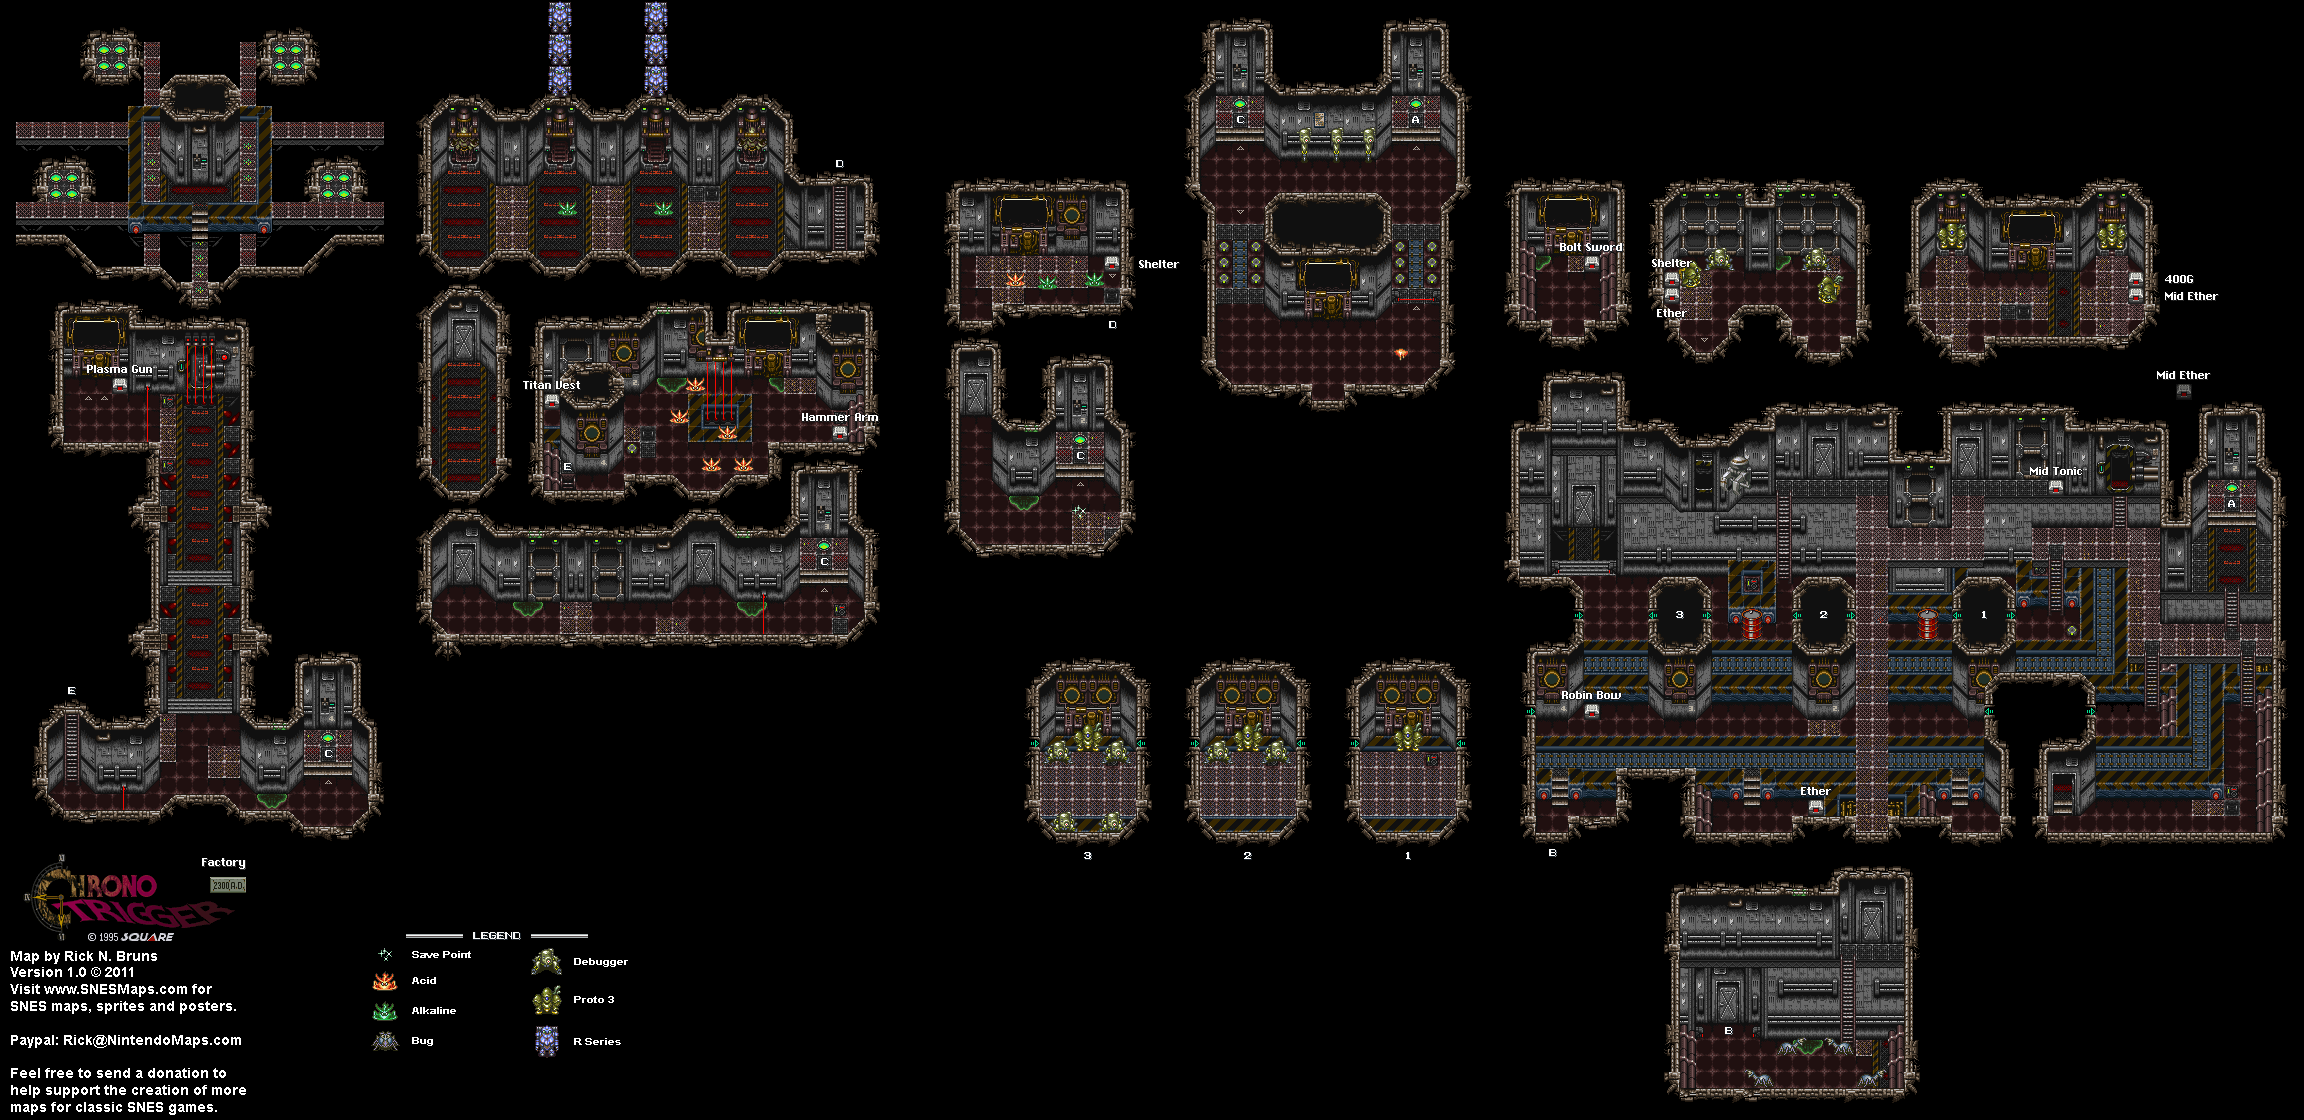
There's not much else to do here, so head to the bottom floor and head to the computer. The "ZABIE" lock will be operational, so press X, A, B and then Y at the tone to open the final door. There will also be a chest inside containing the Plasma Gun for Lucca, so don't forget to get that.

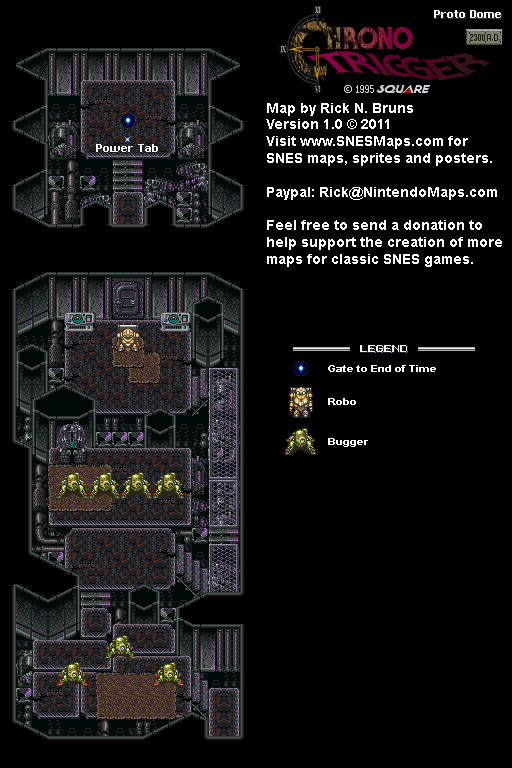
When you do that, go inside and hit the switch to power the generator for Proto Dome. You'll set off the alarm, and you'll need to get out of there before the security doors close on you. Thankfully, the game doesn't force you on a strict timer, and the crazy escape from the closing security doors is scripted and is trigger once you get close enough to them. Seeing Robo hold down that second pair of doors and narrowly escape being crushed is awesome.

You won't be able to use the elevators due to the security system going haywire (despite me saying you can), so you'll be forced to climb the ladder to get back up a floor. As you escape, you'll meet blue clones of Robo who happen to be Robo's friends...or so everyone things, as they all tell him that he is defective and chew him out for not destroying "the humans" that happen to be everyone else in the party. They then attack Robo by tackling him over and over before throwing him into a chute. From there, it's war.

To easily beat the R-Series, use Crono's Cyclone against one group of R-Series until they are gone, then do the same to the other. You'll want the other person in the party to heal regardless of whether it is Marle or Lucca. If you have the Rage Band on Crono like I do, you can make the battle a little bit easier with the counter hits that Crono will perform. In that case, you can use Marle or Lucca against any stragglers. Do not use Fire Whirl or Flame Toss, as the R-Series are invulnerable to them.

Once you beat the R-Series, Robo will be rescued from the chute. After a long journey from the Factory back to Proto Dome that involves dragging Robo back, Lucca will fix Robo up again. As she does, she asks Robo abut his plans for the future, for which Robo does not have any as nobody has ever asked him before. At this point, the door leading to the gate is open.


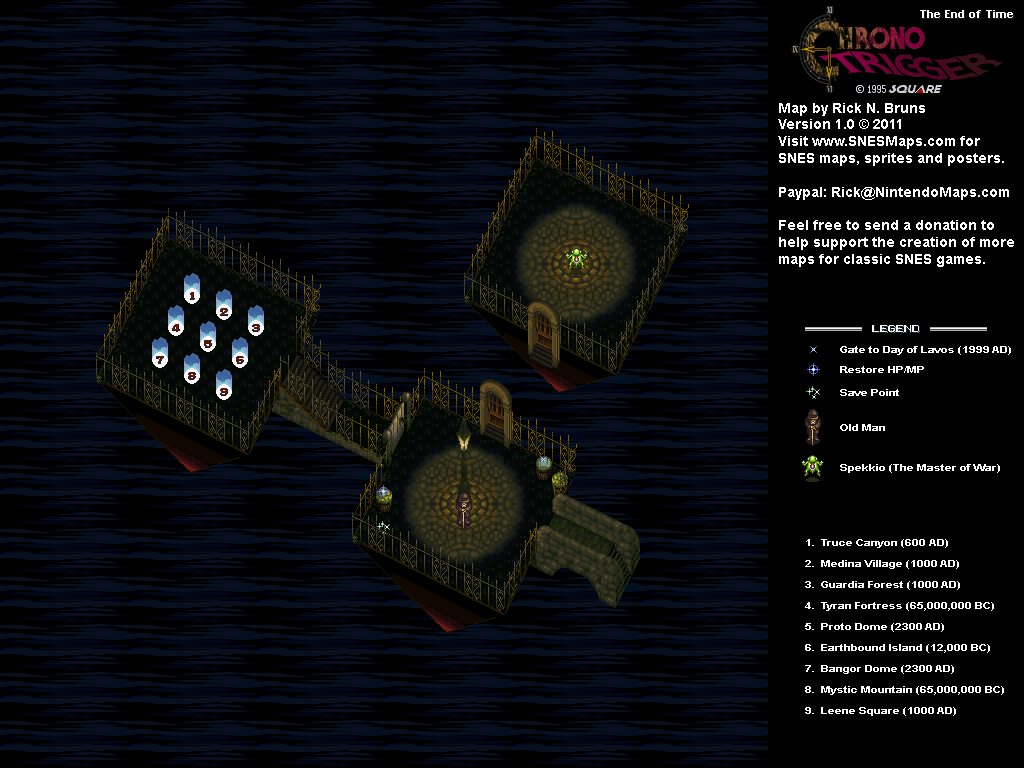
Robo is eventually fixed, and the four-strong party enters the Gate to the north after Robo says that there is nothing for him in the ruined future. Unfortunately, the Gate goes haywire for some reason, and the team ends up in a place in the middle of nowhere surrounded by virtually nothing else. There are pillars of light where they land, as well as a gate, some fencing, a streetlamp, a door and a bridge. There is also a barrel of flowers that replenishes the party's HP and MP, as well as a save point. The only person here is an old man in a brown suit and Trilby hat with a cane, and by talking to him, they find out they are at the End of Time and that parties of more than three always end up here. From here, you'll find out that you can re-organize your party and switch people in and out at any time with the Y button. Robo is the best person to leave behind (for now; as a matter of face, Lucca and Marle get mad at you if you choose them). Don't forget that party members can still gain experience while at the end of time, but they cannot earn Tech Points or learn new Techniques unless they are in the active party.

After this, the old man will tell you that the light pillars to the west will take you to different time periods, and to beware of the gate that leads from the bucket. You can't use it yet, and you definitely don't want to. If you head out to another time period, the old man will get your attention suddenly. Talk to him again, and he will tell you to to go through the door behind him. 

When you do, you'll meet Spekkio. After he asks if you think he is weak or strong, he will then have you perform the simple task of walking around the room clockwise three times from the door. That means you have to walk left from the door and walk around the room from there, not to the right.) If you did it right - which isn't too hard - teach you magic. You'll want Crono, Lucca and Marle in your party for this, as he will teach Crono Lightning magic (renamed Light magic in future versions of the game), Lucca Fire magic and Marle Water Magic (although Marle will get Ice, not Water).

From here, you can fight him if you want. If you do, however, Spekkio will be pretty strong. You cannot harm him with physical attacks; only magic. There is a way to win at this point, however. You'll want to keep Aura Whirl ready whenever more than one party member is under 100 HP at the same time so you can keep everyone's health high. The rest of the time, you'll want to use Crono's Lightning, Marle's Ice and Lucca's Fire against Spekkio if you have no reason to use a Tonic or Mid Tonic to heal anyone. It will take a little while, but you will eventually beat him. If you beat him between Levels 10 and 19 in his Kilwala form (which we do here), you'll get a Magic Tab and five Ethers.

There is a frog form for Spekkio that you can meet and face if you're between Levels 1 and 9 which considerably less HP and weaker spells, although it can still destroy you in that form if you're careless. If you beat that form (which you'll be almost unlikely to see unless you rush through the game), you'll just get a Magic Tab.

Regardless of whether you win or lose (or don't fight at all), the old man will get your attention again as soon as you leave the room after learning magic. He will tell you that while you may be itching to rip and back and forth through time, it is best to return to your era through the pillars of light to the west. One will take you back to Proto Dome, another will take you to Medina Village in 1000 A.D., while the third will take you to prehistoric times in 65,000,000 B.C. Obviously, you'll want to go to Medina Village, but I'm itching to head to prehistoric times for some stuff...

In the meantime, go back to Proto Dome. Walk away from the Gate, then go all the way back to the gate, then gently tap Down as soon as you are walking in place south of the Gate and press A. If you're in the right spot, you'll get a Power Tab.

Wednesday, August 21, 2024

PrinceWatercress plays Berzerk (Atari 2600) - Part 12 of 13


...and now for the easiest game variation of all!


Game 12 is the easiest game variation of all. The robots don't shoot at you, the game gives you an extra life every 1,000 points, and Evil Otto does not show up at all. As a result, this is a very good game mode to play for young children or anyone who is not used to how the game plays.

Tuesday, June 4, 2024

PrinceWatercress plays Ratchet and Clank: Going Commando - Part 12 of 54


Well, we're stuck on a desert planet. Let's see what we can do here.

First | Previous | Next | End

2:10 - These enemies will breath on you if you get too close. They're also perfect for weapons we have yet to evolve. Be ready to destroy some spawners, too.

The purple nanotech refills two hit points compared to just the one that the blue nanotech refills.

7:22 - Here, we get a wrench upgrade. We can do more damage up close.

12:21 - When you finally make it out of the cave, you'll meet the thief again. Once again, the thief is clumsy, and this time, the thief is finally revealed: a taller female Ratchet. She then tells you that with the Experiment in Mr. Fizzwidget's hands, the galaxy is now in danger. You'll also get coordinates to the Megacorp Testing Facility in Dobbo, but you're still going to need a ship.

15:08 - Before you can get the ship, a hippie forces you to give him crystals. You'll have to go out into the desert and hunt them down, then bring them to him.

16:41 - Instead of going into the desert, we'll be taking this path instead. 

19:06 - Use the Thermanator when the right side is up to get the first of three Platinum Bolts in Tabora.

21:07 - Freeze the water so you can wall jump.

22:05 - We have the glider! The glider allows us to fly across this lava chasm. Be sure not to run into anything as you get from the beginning to the end. At the end is the second Platinum Bolt and a warp back to the desert.

Controls:

As Ratchet:

Control Pad/Left Analog Stick: move
Right analog stick: move camera

X:
  • Jump and double jump (hold button after double jump to use Heli-Pack or Thruster Pack)
  • Wall jump (near certain walls)
Square: strike with wrench
Circle: pull out/shoot currently equipped gun
Triangle: 
  • quick select (hold and use in conjunction with Control Pad or left stick to switch guns; menu can be customized in Quick Select on the pause menu
  • double tap to switch between two most recently equipped weapons/items
  • interrupt on-screen messages

Select: open map
Start: Pause menu
  • Control Pad: select option
  • X: confirm option choice

L1:
  • center camera behind Ratchet (tap button to center)
  • first-person view (hold button and use left stick or D-Pad to look around; let go of L1 to move camera back behind Ratchet)
  • Square: wrench boomerang
  • Circle: fire gun
  • R1/R2: zoom in and out (Pulse Rifle only)
L2/R2: strafe (hold while moving)
L3: see health and Bolt totals
R1/R2: crouch (hold down)
  • Square: wrench boomerang
  • X: high jump
    • long jump (hold crouch button and jump while running to perform)
R3: open map

In water:
  • Square: dive and descend
  • X: surface and ascend
  • R1: accelerate with Hydro-Pack

As Clank:

Control Pad/Left Analog Stick: move
Right analog stick: move camera

When hanging off platforms:
  • Control Pad/Left Analog Stick: move
  • Forward+X: vault up
  • Back+X: drop down

Square: punch
X: Jump (press and hold in the middle of a jump to glide with Heli-Pack)
Triangle: command menu (hold and use in conjunction with Control Pad or left analog stick to choose commands)

Tuesday, May 14, 2024

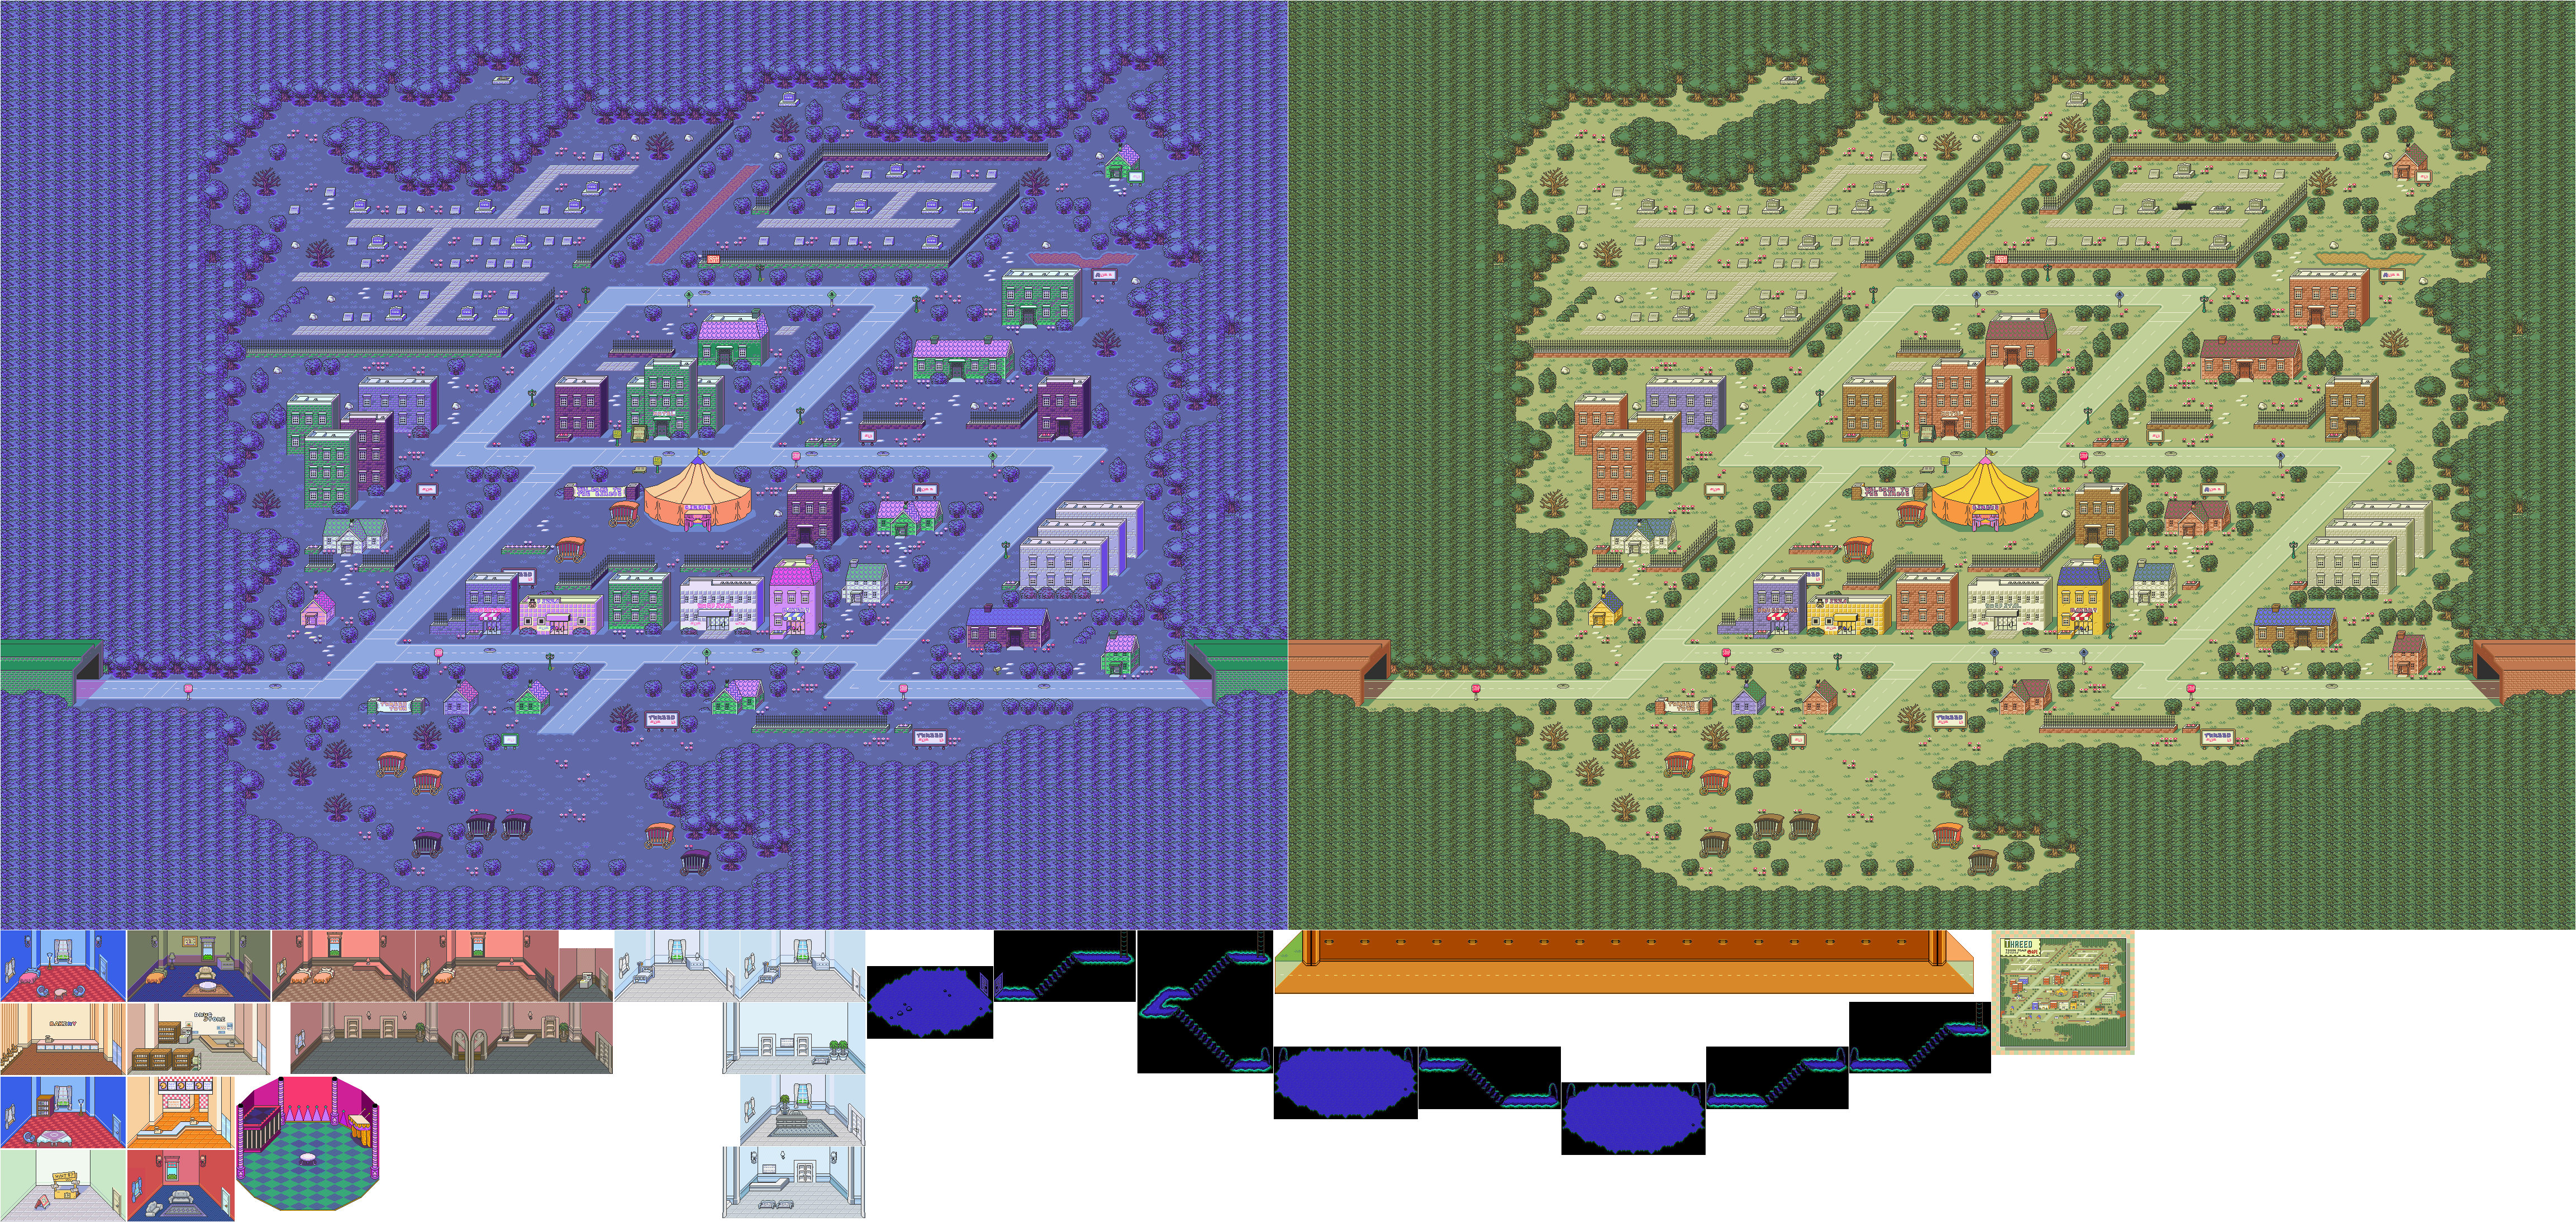
DeceasedCrab plays Earthbound - Part 12 of 53


In this entry, we get The Runaway Five out of debt and get to Threed only to find out that the town is in big trouble.


The door near where the police officer is standing is the owner of the Chaos Theatre. If you talk to him, he will tell you that The Runaway Five are now indebted to him and won't be able to leave unless they can work off a $10,000 debt. If you walk up to the man behind the desk and use the Wad of Bills, the Runaway Five will be free to leave. The Runaway Five will show up and thank you, then head out.

When you leave the theatre, you'll be able to hitch a ride to Threed on the tour bus. This time, the tour bus is so loud that it will scare off the ghosts on the way, and you'll be able to head there without any trouble. When you get off, you'll find out that The Runaway Five will be heading to Fourside before they drive off.


If you talk around town, you'll find out that Threed has a big zombie problem. The Zombie Relief Corps will be in the big tent in the center of town. If you talk to the people there, they will tell you that the zombies are advancing towards town and that they are not quite sure what to do.

At the hospital, if you go up the stairs and check the room on the left, you can check the drawer to find an Insignificant Item. You'll actually need this item later, so hang on to it or store it with Escargot Express. Speaking of which, store the Backstage Pass. You won't need it anymore.

There is a man selling weapons behind the pizza parlor. Keep him in mind for later, as he sells bombs and bottle rockets.

The Minor League Bat and the Thick Fry Pan are the next weapons for Ness and Paula, so be sure to get those ASAP.

The man in the suit in the small pink house on the west side will tell you that Lord Belch is the leader of the zombies, and that he works for Giygas.

You'll see a sign for Summers near the town. You'll be heading there later.

One of the townspeople will tell you that there is a hidden path near the graveyard. Keep that in mind for later.

You will not be able to enter the tunnel on the east side and head towards Fourside due to more ghosts.

The trash can near the east side tunnel has a Skip Sandwich.

The marionette enemy you can fight in the town is the Handsome Tom. It's not too terribly difficult for this point in the game, although they can cast Hypnosis Alpha and put one member of your party to sleep. You can also fight Zombie Dogs, which also should not give you much trouble. The kids with the jack-o'-lanterns on their heads are Trick or Treat Kids.

Paula can learn PSI Magnet Alpha at Level 15. This allows the caster to steal a small amount of PP from an enemy.

A person near the hotel will tell you that a woman with sunglasses has been seen talking to the zombies.

There is a Teddy Bear in the trash can near the hint shop, which is a small green house on the northeast end of town.

The fly is the No Good Fly, and the moving trash can is the Putrid Moldyman. The Putrid Moldyman can be pretty powerful for this point in the game. The No Good Fly does not have a lot of HP.

Ness will learn Meteor Beta at Level 22. This does more damage than Meteor Alpha.

The big gravestone north of town near the graveyard entrance brings out the photographer to take a picture.

The Smelly Ghost is just as bad as the Putrid Moldyman.

The Insecticide Spray can be used to instantly damage insect enemies.

The graveyard in the northwest part of town leads to a secret passage. The passage will be blocked by two zombies, however, and you won't be able to get past them. 

Thursday, May 2, 2024

PrinceWatercress plays Drill Dozer - Part 12 of 28


Croog knows you're getting close, and he's pulling out all the stops to ensure you do not stop his plans.


Area 6-1: Drill Missile


After you beat Area 5-1, you're forced to play Area 6-1 whether you're ready for it - or want to do it - or not.

I don't like it when a game does this. At all. The game is virtually grabbing you by the hair and virtually chucking you into playing a stage and not giving you a choice. This is no different from what MediEvil II did with the boxing match, when I wanted to save after going through the Kew Gardens and the game wouldn't let me until I completed the whole of the next part that it wanted me to go through. 

When you're forced into this stage like sardines into a tin, Croog unleashes his Drill Missile on the Red Dozers' home. As soon as it lands, it starts burrowing into the secret command dozer where Doug is laid up. You'll have to sneak inside the exhaust vent, get to the engine room and stop the missile before it gets there!

As soon as you get into the missile, you'll find out that the engine is designed to explode the missile when destroyed, and that you'll have to get to the spinning bit controlling the missile and destroy it.

Thankfully, you're not under a time limit through most of the stage. Watch out for the sparks. The pink ones travel faster than the blue ones. Also, get second gear as soon as you see it, so that you can destroy the self-repairing barrier.

The moving purple platforms will flip back and forth every so often. Get on the platforms when the electrified side is not exposed.

Once you get past the drill duct segment, you'll then have a three minute time limit in the lower-right corner. At this point, you'll need to drill through the blocks and avoid any mines that you run into. The explosions will knock you back and do a little bit of damage. Also, don't waste a lot of time here, as you'll still need as much time as possible to destroy the spinning bit at the bottom. Thankfully, destroying it isn't hard. Just drill into it and shift all to third gear every time while avoiding the sparks. Once the bit is backwards, you'll need to hold Up and press L to move the Drill Missile backwards.

Unfortunately, this trips another fail-safe: the missile's self-destruct sequence. You'll have to flip a switch in the engine room to get the engine to run in reverse. In the following drill duct section, go through all the ducts in third gear and maintain third gear throughout so that you don't get blown up.

When you get to the engine room, flip the level. Unfortunately, you're still not done, as this causes the engine to overload. You'll need to take the blue chip that is on the coolant tower to the right and move it to where the bar on the screen moves to balance the coolant levels before the bar gets too close to the side and causes the entire Drill Missile to explode with you still in it. When the display blinks and the screen shakes, the bar may switch directions. Be ready to stand in the middle and place the blue chip accordingly. For best results, place the blue chip when the bar is about to reach the last big bar on either side of the coolant levels. As you go, the yellow lights at the top of the towers will slowly light up, and when all five lights on both sides light up, you'll finally stop the Drill Missile before sending it back at Croog and blowing up his fortress. Croog responds by revealing his secret dozer.

Saturday, March 9, 2024

PrinceWatercress plays Ka-Blooey - Part 12 of 25


We're back on track on the levels - for now - as we make it halfway through the game. One thing is for sure: the game sure knows how to stay interesting with the puzzles.


Level 61

Enter the top teleporter. Detonate one of the small bombs, the enter the top teleporter. Take the blue guy to the teleporter, then detonate the other small mine. Enter the top teleporter. Line up slot tile bombs from upper left tile, detonate the bomb left of the teleporter, then enter the teleporter. Detonate the other small bomb, then enter the bottom teleporter. Detonate all the bombs here, then enter the bottom teleporter. Set up line of small, medium and four large bombs with the small aerial at the top-most center tile and the line of bombs moving to the left end. Detonate the small aerial bomb, then move right.

Level 62

Take the red guy to the large mine at the upper right corner, then detonate the small aerial bombs at the right-most end and head to the far right after detonating. When it comes to getting the red guy to the upper right, the cracked tiles are a clue as to where to go. The remaining tiles will spell "SU".

Level 63

Get the blue guy to the small mine in the lower right corner. Move everything out of the upper right corner to get the large bombs there. Once all the large bombs are in the upper right corner, put the medium bomb in the upper-right tile of the "square" and the small bomb to the left of the medium bomb. Detonate the small bomb and move left.

Level 64

Detonate the small bomb at north rivet tiles and get rid of the ball enemy. Go down to previous pair of balls, then left, down and right at bottom small bomb. Detonate the small bomb, then go left, up, up. Detonate the small bomb and destroy the other enemy. Go right. Detonate the small bomb, then go up, then right to the teleporter in the upper right corner. Go left, up, right, down. From here, go up, left, down, right, and detonate bombs as you go. Press left after detonating the last bomb.

Level 65

Go to the slot tiles west of the start. Place the small aerial bomb in the upper right-most tile, and place the medium aerial bomb at the right-most tile. Place the two nearby large bombs at the two bottom tiles. Detonate the small aerial bomb, then go right. Move the two large bombs at bottom up. Move the third large bomb up and right. Move red guy to the upper right corner of the level to detonate the lone large bomb in the level. Detonate the small bomb near the mines, then move up.

Sunday, December 24, 2023

KuuImpact plays Superman (NES) - Part 12 of 17


This is not meant to be a complete set of notes, nor does it show everything off. This did, however, get me in the right direction concerning this game. When I play through this myself (which I will eventually do), I'll show off a lot more.

Time to take out the rest of those enemies.


The first place you need to head to is the University Plaza in Staunton. Make your way down to the lowest level, then fight the blue fire enemy and beat it up by trapping it in the stairs and hitting it with punches. Pick up the Super Breath II extension it leaves.

The next area is the Palace Disco in Andersonville (which is the building located east of where you land if you fly there). The blue fire monster will not be far away, so punch it as it approaches you and get the Heat Vision extension it leaves.

Friday, November 3, 2023

PrinceWatercress plays Word Rescue - Part 12 of 14


I could only get three levels done here due to the layout of these levels. At least I made some progress here.


Level 9 - Clearing the Boulders


Watch out for Gruzzles hiding behind some of the rocks. There are also some ceilings you can hit your head on as well as some paths you can drop through. If you're playing on Hard, there will be Gruzzles swarming around at the top of the level.

Level 10 - The Cloudy Castle


Thankfully, getting around in this level is significantly easier. There are a few Gruzzles on the top on Hard, but the Gruzzles are easier to avoid here than they are in Levels 8 and 9.