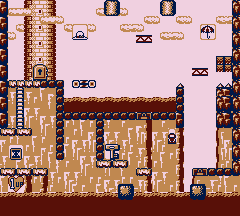
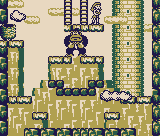
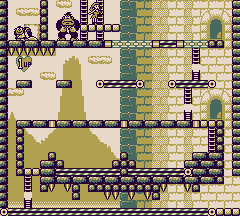
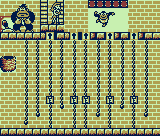
Tuesday, June 30, 2026

PrinceWatercress plays Space Station Silicon Valley - Part 3 of 32


In the third level of the game, things get slightly more complex.

First | Previous | Next | End

Honeymoon Lagoon


For this stage, you'll need to deactivate the electric fence as well as what Dan calls "The Big Machine." Dan also wants a sheep, but thankfully, you'll be able to bring him one.

You'll start as the racing mouse. Go up the ramp near the Big Machine with your turbo boost to get to it. Hit the switches first, and hit them to get four Power Cells and deactivate the Big Machine. As you pick up the Power Cells, you'll hit the floor switches.  You'll need to hit all four of them fast enough before one of them turns on to deactivate the electric fence. That's good, because the electric fence will absolutely destroy you if you try to go through it.

Past the electric fence is a path leading upwards as well as foxes on wheels guarding Power Cells. They will go after you and hit you with their tails for a lot of damage if they catch up to you, so you're better off not fighting them. There is also a ramp off to the side (and a Power Cell) with a blue ring in mid-air. If you launch off of it and go through the ring as the racing mouse, you'll make it disappear. That is just one ring of a few in this stage.

Past the foxes is a steep slope. Turbo boost up it and get to the platforms, and collect the Power Cells along the way. You'll soon find another slope leading upwards. Grab the Power Cell behind the tree before going off the cliff, going through the ring in the process before taking out one of the sheep so you can possess it and complete the last objective: bring Dan a sheep. (If you miss the ring before the sheep, you'll need to take control of the mouse and get it again, because you're not going to be able to run up that steep slope as a sheep.) Strangely, turbo boosting into the sheep as a racing mouse does damage to yourself.

There is a narrow ramp in the wall near the entrance to the level that leads up to a ramp. You'll want to go up that narrow ramp as the sheep, then jump and float off the edge to go through the nearby ring. 

Leave the area as the sheep and go back to the area before the foxes. From here, you'll be able to go into the neon-colored area below. As the sheep, you'll be fine in the water, and you'll also find a variation of the sheep known as the Springy Thingy. While you can move around freely with the Control Stick, you'll be forced to hold A in order to jump around. If you press A again in mid-air, you'll perform a diving corkscrew attack. If you use it on the foxes, you can take them out in one strike.

The foxes can teleport forward with the A button, while the B button performs the tail sweep attack that was a potential nightmare to avoid when you were the racing mouse.

Back in the neon-colored area with the water where you found the Springy Thingy, you can take control of a regular sheep again. A platform moving up and down on the wall will take you back to the top. From here, you can float across the platforms, collect the rest of the Power Cells, go through the rest of the rings and get to the exit. Before you exit, however, you'll get the trophy - a gold replica of the Big Machine- in the area with the final three Power Cells if you went through the rest of the rings before coming to this final area. Just use the float ability and watch your shadow, and you'll land the jumps.

Springy Thingy


Type: Springy Thingy
Environment: Europe
Skill A: Jump
Skill B: Baa!
Water Resistance: OK
Mass: Medium
Armour: Light
Strength: Weak
Traction: Good
Fall Distance: Medium
Production: Medium
Engine: Spring
Intelligence: Very Low

Fox


Type: Fox
Environment: Europe
Skill A: Teleport
Skill B: Tail Attack
Water Resistance: OK
Mass: Light
Armour: Light
Strength: Medium
Traction: Average
Fall Distance: Medium
Production: Short
Engine: Electric
Intelligence: Very High

Power Cells


1-4 | 5 | 6-7 | 8-9 | 10 | 11-15

Monday, June 29, 2026

PrinceWatercress plays Space Station Silicon Valley - Part 2 of 32


From this point forward, I'll have the locations for all fifteen Power Cells in a level at the very bottom of the blog entry.

As for the level itself, this one isn't that much more difficult, but you'll be getting deeper into the groove of having to accomplish things in a level in order to activate the teleporter.

First | Next | End

Have A Nice Day!


For this stage, you'll need to round up four sheep into the pen and use the switch for the electric fence to keep them there. You'll also need to find the racing mouse, which you will need to reach the exit.

The electric fence will be to the left of where you start. You can either kill four sheep and move them into the pen manually, or you can actually herd them in like a real dog. Since they always run away from you when you're controlling the dog, doing it the latter way is easier than you would think. Regardless of how you do it, getting four sheep into that fenced-in area in the corner near the starting point and then running into the switch to turn on the electric fence will let you clear that mission. Just make sure you don't run into the electric fence, because it will hurt you. 

You will, however, need a sheep in order to collect all fifteen Power Cells in the level. One of the sheep is near the bridges, and if you chase after it, you'll learn about the sheep's ability to float in mid-air. When you play as the sheep, you can press A to jump, but if you press and hold A, you can slowly float downwards, and you can even guide the sheep with the Control Stick so you can ensure that you stick a landing. Just keep in mind that the float ability drains the blue circle that acts as the energy gauge for Skill A when you perform a float, so you won't be able to float forever.

There is another dog at the other side of the stream. If you attack it as the dog, it will bite back. Stay behind it and keep attacking it to take it down. 

There is a set of platforms in a spiral that are each smaller than the last that you can jump to the top of. When you reach the platform at the top, the rest of the platforms will rise up, revealing a path to three more Power Cells. When it comes time to drop down, use the platforms to ease your way down instead of jumping or falling to the floor from the very top. Fall damage exists in this game, and it is damage that you do not want to take, especially when health pick-ups are scarce in some of the later levels. Of course, if you're using the sheep, you can just float downwards, making this moot.

There are two doghouses. One of them is open and contains the racing mouse, which you'll need to take control of to exit the level. Thankfully, it's just lying there with sparks flying out of it, so you can easily take control of it with the R button. The racing mouse, as you'll soon see by its specs when you control one for the first time, is made exclusively for speed. The A button is the turbo boost, and you'll be able to move faster while holding A for as long as the blue circle gauge has energy. The B button allows you to attack with the mouse's tail sticking out like a thumbtack, but you have to be right next to an enemy for it to work and you have to open yourself up entirely to attack in order to use it. The green circle gauge will empty the longer you hold the B button to perform the attack. You also don't want to move into the water with it, either, as it has poor water resistance. Dousing the racing mouse in water will quickly rinse your health meter, which is something you definitely do not want to do in any level with any animal with poor water resistance.

By taking control of the racing mouse, you'll complete the mission for finding it. But what about that other doghouse? As it turns out, it's for something that may be completely optional, but you'll want to do it for 100% completion.

The other doghouse is closed and contains a racing dog with wheels for feet and two missile launchers at its sides. If you approach the other doghouse as the racing mouse, the racing dog will leave the doghouse and race you. There is a starting line near the closed doghouse, and the racing dog will challenge you to a two-lap race around the pond blocking access to the teleporter. You'll race around the pond in a circle. To get the lead on the racing dog and keep it, you'll need to tap the A button to maintain a high speed, and you'll also want to press and hold A at the ramp - the raised portion of the ground in front of the pond - to jump over and clear the pond to get back to the starting line. You'll also want to stay close to the water - but not fall in it - in order to keep your turns narrow, much like in a real foot race. If you fall into the water, you're going to lose due to the mouse moving slowly in it while losing a ton of energy. If you use your speed boost too much, the racing dog will eventually catch up and overtake you. Thankfully there are black-and-white checkerboard arrows pointing to the right that constantly remind you of when to turn. By beating the racing dog, you'll get the trophy for this level: a golden racing mouse.

As for the teleporter, you'll need to use the racing mouse's turbo boost to go up a ramp over the pond to the island where the teleporter is. Once you're there, there's no turning back. Be sure to explore that island for the fifteenth and last Power Cell before you exit the level, or else you're going to have to play the entire level again just to get all fifteen Power Cells.

Racing Mouse


Type: Racing Mouse
Environment: Europe
Skill A: Speed Boost
Skill B: Tail Attack
Water Resistance: Poor
Mass: Tiny
Armour: Light
Strength: Weak
Traction: Average
Fall Distance: Medium
Production: Very Short
Engine: 2.0
Intelligence: High

Power Cells


1 | 2 | 3 | 4 | 5-8 | 9 | 10-12 | 13 | 14 | 15

Sunday, June 28, 2026

PrinceWatercress plays Space Station Silicon Valley - Part 1 of 32


Hello, Nintendo 64.

Next | End

Space Station Silicon Valley is back after being lost in space for 1,000 years. A professor and a platoon of space marines have went to the space station, but are missing and feared dead after their last transmission, as the robot animals have taken control of the space station. The World President Frank Bloke (I see what they did there), has sent in heroes for hire Dan Danger and Evo as a last measure.

Smashing Start

When the game starts, Dan and Evo find the space station, but as they fight over the music on the radio, Evo knocks Dan out, then they crash into a meteor and make a crash landing into the space station. Evo tries to activate the ejector seat, but to no avail. As a robot dog and a robot sheep declare their love for each other, Dan and Evo's ship kills the robot dog. As Dan and Evo wonder where they are, Evo's ejector seat finally kicks in, sending his robotic body through the top of the space station and separating it into four parts: head, torso, arms and legs. The chip inside of Evo that is essentially his consciousness survives all of this and comes back down. Upon landing, Evo's chip takes a life of its own and enters the now-deactivated robot dog. From here, the game begins, and you have control. Dan will be trapped in the ship and unable to do anything, while Evo will have to do all the work...and you're Evo.

You have two things to do here: get some energy, and get a sheep. Both are pretty easy.

The Control Stick allows you to move around in any direction. A and B have different abilities (known as Skill A and Skill B) depending on what animal you're controlling, and there's quite a few in the game. Left-C and Right-C let you rotate the camera, while Up-C zooms in and Down-C zooms out. 

For the dog, Skill A is the ability to jump, while Skill B is the ability to bark. If the dog is near another animal, you'll bite the animal instead, and you can keep holding the B button down to keep attacking. Biting will not only allow you to break wooden crates to find energy, but also attack the sheep until they are defeated so you can take them over. When a robot animal is deactivated, you can move up to it and press R to switch animals. The R button usually allows Evo to leave the animal and run around in chip form on his own, and from there, you can press it again near another deactivated animal to take control of it. Keep in mind that if you do this, Evo will slowly lose health as he is exposed to the elements, and he can eventually run out of health and die. If you do it near a deactivated animal while currently in one, however, Evo will automatically make the switch and you won't have to worry about Evo slowly dying or even losing an inkling of health in the process. 

The wooden crates with "SV" on them usually contain energy, which exists in the form of bright blue balls with a glowing core. One of these will refill up to 50% of the health meter, which is part of the HUD in the lower-left corner. Breaking one of these crates will allow you to access the energy.

Speaking of the HUD, the green gauge is your health, while the blue gauge is the health for the enemy you are attack. As for the green and blue balls, they are the recharge gauges for Skill A (blue) and Skill B (green). Some animals will use these gauges, while others will not. The green digital display numbers on the lower-right corner is your score. It is completely useless, and if you restart a level or die at any point, it resets to zero. Thankfully, you have infinite lives, so if you die, you'll have to start over, but at least you won't have to worry about a game over.

When you take control of a new animal, you can see information about them as well as what they can do. Pay attention to Skill A and Skill B, as these dictate what you'll be able to do in your new form. You'll also learn other things, such as how resistant to water the animal is, how far it can fall, how light or heavy its armor is, and how strong it is. If you need info on an animal again, take control of the animal you want to know more about, then approach a monitor on a wall - should you find one - and approach it as that animal.

The sheep is able to jump with the A button, and if you press and hold A, you'll be able to float. This will allow you to float slowly for a distance. B just lets you perform a sheep-like bleat and not much else.

When you complete all of the objectives for a stage, the teleporter - a blue hexagon around a purple metal border - will turn red and activate. Walk up to it and stand on it, and you'll complete the level.

Around the level, you'll see purple orbs. There are fifteen of them in each level. These are Power Cells, and you'll need to collect all of the Power Cells in the game. Thankfully, all of the fifteen Power Cells in this stage are easy to find as long as you move about the level. Just remember that there are three Power Cells behind the waterfall.

By pressing Start to pause, you can not only access the in-game options menu that lets you look back at the mission brief, replay or exit the current zone and change the volume levels for music and sound, but you can also see how many Power Cells you have in the current level. Thankfully, the sound you get when you collect a Power Cell plays at a higher key as you collect more of them, and when you collect all fifteen, you'll get a special sound.

If you walk onto the windshield of the ship, Dan will taunt you and you some lines of dialogue. If you deactivate all three sheep in the level, you'll also get some dialogue from Dan.

If you bark into the speakers pumping out the music as the dog, a low-pitched bark noise will come out of them.

Every stage also has a trophy. To get the trophy for this stage, you'll need to deactivate a sheep, move its body to the back of the ship where the exhaust port is, then get on the windshield as the dog and repeatedly bark. This will cause fire to come out of the exhaust port. One of the three will turn into the trophy when burned. (If you burn all three sheep, you'll get more dialogue from Dan.)

We're done here. Get on the teleporter to finish the level. 

Dog

Type: Dog
Environment: Europe
Skill A: Jump
Skill B: Bite Attack
Water Resistance: Excellent
Mass: Medium
Armour: Light
Strength: Medium
Traction: Average
Fall Distance: Medium
Production: Medium
Engine: Electric
Intelligence: Low

Sheep

Type: Sheep
Environment: Europe
Skill A: Floaty Hop
Skill B: Baa!
Water Resistance: OK
Mass: Medium
Armour: Light
Strength: Weak
Traction: Average
Fall Distance: Medium
Production: Medium
Engine: Bio
Intelligence: Very Low

Saturday, June 27, 2026

PrinceWatercress plays Donald Duck in Deep Duck Trouble (SMS) - The Longplay


...and here's the game in one sitting, minus commentary! Enjoy!


The story begins with Donald Duck asking Huey, Dewey and Louie where Scrooge McDuck is. All of a sudden, Scrooge is floating around like a balloon due to a curse from a mysterious pendant he found in a shrine on an uninhabited island. The pendant must be returned to the neck of a goddess statue inside the shrine, or else Scrooge is cursed to be a balloon forever. He gives Donald Duck his adventurer's diary to retrace his steps and find the island so he can return the pendant.

Donald Duck arrives at the island...and the adventure begins.

At the beginning of the game, there are four places you can go: the jungle, the valley, the inlet or the volcano. I start with the jungle.

The Jungle

Only those who possess the jungle king's crown may pass.


Scene 1: Savanna

Left and Right on the D-Pad let you move left and right, Button 1 attacks, and Button 2 kicks.

The heads up display is pretty simple. In the upper-left corner is the amount of lives you have, and in the lower-left is the amount of health you have.

Instead of being able to swing hammers or throw flying discs, you kick at things like blocks...and that kick has some nice animation going for it. You will have to kick blocks into enemies in order to move on, but you can also jump on them if a box is not available. To kick blocks, you'll need to walk into a block, keep holding the D-Pad towards the block, and then press Button 1.

Enemies include wolves that poke their heads out of the ground, sugar gliders that fly off branches, jumping kangaroos, and rolling snakes, You can sometimes get ice cream for replenishing your health if you defeat them. You can use blocks and other things if you want, but you can also jump on them to defeat them.

Kicking blocks can also reveal power-ups, such as money bags for points and ice cream for health. While the light brown blocks just go up and crumble upon landing, the dark blue ones travel forwards and can bounce back and forth in pits. This allows you to travel across spike pits, which is good, because spikes hurt. 

Chests contain better power-ups. A chili pepper will make Donald Duck run very fast, allowing him to plow through enemies and large walls of blocks. The effect only lasts for a short time. You can also find a cooked chicken that restores all of your health.

The ostriches are like those horses in the first stage of Sunset Riders: you have to jump from one to the next and get to the tree branch at the right side, or else you're dead.

After you complete a section, you'll get bonus points for the round as well as for how much health you have left before going to the next one.

Scene 2: Jungle

Whenever you get hit, Donald will get angry and will be unable to move for a second. The animation is very much Donald and very well done, but it gets a little annoying after a while.

The snails slowly move back and forth and hide in their shells. The snakes pop their heads out of the trees to get in your way.

Look high and low for things. You never know what you'll find. You'll mostly want to stay on the top, however, if you want to get through the scene.

Some vines take you to other places, while there are also pairs of vines that raises one vine while you stand on - and lower - the other.

The red flower shoots out projectiles, but it only does it once.

The leaves in the trees have to be kicked loose with a block, and once you do that, you'll be able to ride it down to another area.

You'll eventually encounter a gorilla. Instead of fighting him, you'll be running away. Be ready to jump over spike pits and on top of walls, and watch out for the fruit that drops down from the top of the screen. For some reason, the blue flowers on the ground seem to hint as to when you need to jump. At the end, the gorilla will run into a huge tree, revealing the jungle king's crown and sending you back to the world map.

The Volcano

The jewel made of fire will light the way.


Scene 1: Volcano 1

The bats will simply fly forward.

The moles will pop out of the floor and throw rocks at you, but you can jump on the rocks.

The crickets will jump back and forth.

The craters will shoot out lava, which will push a rock upwards to use as a platform.

In the second section, the bats will keep reappearing from certain spots and fly towards you as you make your way down. If you defeat a bat, it doesn't come back.

When the screen shakes, watch out for rocks from above. Be ready to hide under the nearby platforms where rocks can't reach you. 

The boulders moving back and forth in the spike pits allow you to get over the pits. Thankfully, you can stand on them, and Donald will do the rest. It's up to you to hold Left or Right and then jump off when necessary.

Scene 2: Volcano 2

The boulders will now be in lava. At least the lava isn't instant death.

Doors in the wall will lead you to new areas.

The platforms above the volcanic cones will be knocked upwards by the lava coming out of the cones. 

The flames move in a sine wave pattern. Some flames will come out of the lava and slowly move straight up.

There are also narrow platforms that sink in and out of the lava. Time your movements so that you get on them when they are coming up, and get to the next one.

The spiders swing back and forth like a pendulum when you jump on them once. Another jump on the head will defeat them.

You'll eventually enter a vertical auto-scrolling section where the lava rises from the bottom...and you can't afford to slow down here. Some platforms will rise with the lava, but will eventually be gotten rid of when they hit a ceiling. The treasure chest here contains a chicken, but it's more of a speed trap than anything else. I don't even bother getting it because of that. 

When you reach the rock at the end, you'll be running across the volcano. Be ready to jump over boulders that come at you from both sides of the screen, and should you fall into the lava pit, it will not instantly kill you. When you reach the end, a rock will hit a wall, revealing the Ruby of Fire, giving you one more treasure and ending the level.

The Inlet

Seek out the Golden Fang.


Scene 1: Under Water

The stage starts with Donald Duck putting on a pink shirt and diving gear before jumping into the water. This happens automatically, and you have no control over it.

Gameplay underwater is mostly the same, except you can swim by jumping repeatedly. Unfortunately, you cannot defeat enemies by bopping them on the head.

Enemies include eels, fish, manta rays and even rocks from undersea volcanoes. If you plug a block into a small gap, you'll get rocks, but you can get power-ups...even an extra life.

In the second section, you will have to deal with schools of long fish. You'll have to go up, wait for one to pass by, then swim around while trying not to get hit by them. Watch out for the red fish and the sea urchin that moves back and forth on the ceiling at the beginning.

In the third section, you'll see urchins that stay in one spot. To the right of the start of the section is an extra life.

The thin blue-green fish that look like knives will drop down when you get close enough, and slowly move back up. You can walk across the gaps as they move back upwards.

The big snoring fish will try to suck you in. When they close their mouths, there won't be a current pulling you in any more; instead, you'll be pushed back (and hopefully, not into the spikes).

A bottomless pit with bubbles at the bottom will push you up.

Scene 2: Sunken Ship


The clam will chomp upwards in an attempt to attack if you get too close. Unfortunately for them, they can only jump so high.

Keep in mind that you need solid ground to kick a box, crate or chest...even if that means that the solid ground is another box, crate or chest.

The anemones will send any block sent into it up or down at an angle, depending on whether they are on a floor or ceiling. You'll need to do this to break some crates blocking your path.

The pink fish will puff up when hit with a block and slowly follow you.

The broken portholes will fall down when approached.

If you reach the surface of the water, get up on the platform from underneath to kick the box into the ceiling, breaking it to fill the area with more water and reach new areas.

The boss is a shark. This time, you'll be chased upwards. Pay attention to the shark to see where it will bite you from, and watch out for any ceilings, as they will immediately block your path and cause you to take an unwanted hit. Make sure you're not too far down so that the shark bites you.

You'll eventually reach the top and get back on the boat...and the shark will lose its golden jaws on the hook, allowing you to take the Golden Fang to end the level.

The Valley

The quill of the falcon will show you the way.


Scene 1: Valley

You'll be jumping up platforms and avoiding bees at the start. At least you can jump on their heads afterwards.

Updrafts will send you to higher areas, but be careful not to fall into bottomless pits after being carried upwards.

The mountain goats will leap from one platform to another, and can be used to get to other areas.

There are multiple paths to take, and in case you defeat bees en route to a higher one, try looking for a lower one.

The logs that fall down the waterfalls can be used to go upwards as you jump from one to another.

At the top-right corner of the first section, there is a block that unleashes a geyser when kicked. The geyser will take you to another area above the clouds.

Blocks can be kicked upwards to break frozen waterfalls down and use them as platforms to reach new areas. They can also be forced downwards by mountain goats, so be careful. Bringing snow down can reveal some platforms you can use to get to the end, so keep an eye out for bright spots in the walls.

Scene 2: Ice Cavern

At the start, you'll be forced down into an ice cavern. The tiny abominable snowmen can be simply jumped on, but they also like throwing ice, too.

The ground is slippery in this section, and you can slide down quickly on the slopes.

The diamonds just gives you points.

Ice cubes act just like the light brown blocks, and they can sometimes be instantly replaced when used. They can also knock icicles off the ceiling to use as platforms across water. If you fall into the water, it is instant death.

To get past the yellow narwhals, kick an ice cube so it lands on the nose.

Be careful on ice platforms above water, as some segments will be raised from below by narwhals.

In the second section, you'll be riding ice platforms across water. Be ready to duck at times, as there are low spiked ceilings and the ramps will send you and the platform into them.

The third section is vertical. Be careful where you kick an ice cube, as it can send a small snowball tumbling down. Sometimes, you'll want this, as this will allow you to make room for new areas as well as to get out of the cave.

You'll then meet the falcon, who carries you to another area before chasing after you. This time around, the screen scrolls down as well as to the right, and you'll have to jump over bottomless pits as well. Whatever you do, don't let the falcon five into you, as it can grab you and potentially drop you above a pit.

You'll eventually run into a block that causes a geyser to blow the falcon away, allowing you to get the Quill of the Falcon and clear the level.

With all four treasures, Donald will throw the treasures in a sacred lake in the middle of the island to reveal the shrine. Welcome to the final area!

The Shrine

The correct path shall be one of one hundred.


Scene 1: Shrine 1

The first section has you jumping over water pits as piranhas jump in and out. You'll also start seeing a thing that will recur every now and then: expansive spike pits where you have to kick an iron block into it and then jump on it when it returns to travel over the pit.

The purple crabs come down from the waterfall endlessly.

In the second section, you'll have to kick a block into a crack in a low ceiling to get some water to leak out, which in turn will slowly push you to the right when you stand on it. Be ready to duck to avoid spikes.

In the third section, hit the chest at the far right, then keep running up the slopes and hitting each chest, grabbing chili peppers as you go.

In the fourth section, you'll see jars that shoot out crabs endlessly as long as you keep defeating them. The crabs only leap out to the left, though.

In the fifth section, you'll be going down slopes while trying not to fall into spikes. The platforms are safe zones, but only before they fall down under your weight. If you reach solid, even ground, however, spikes will start coming out from the left. You'll want to avoid those, too.

Use the chili pepper in the chest at the end of the sixth section to get through the wall of blocks.

Scene 2: Shrine 2

The ghosts move and back and forth, and stop to take a humanoid form. You can jump on them while in humanoid form to get past them.

Be careful on the platforms that move on the track on the background wall. If you see any statue heads in the wall, be ready to jump over their fireballs when you're lined up with them.

If you see a circle with an arrow on a background track, you can kick a block into it to change its direction, keeping the platform from hurling you into impending doom.

The blocks that look like a bridge inside the background wall go in and out. When they are bright, that means they are currently jutting out of the wall and you can stand on them. Just be ready to move before they recess back into the wall.

The statues with the spear will jab at you if you get too close. Jump before you reach to avoid getting skewered.

The torches that move up and down are platforms, but you can only stand on them when the fire is out. When the fire is out, however, the room goes dark, so you'd better know where to land before the flame comes back up.

The weights that slowly move up and then quickly drop back down can be used as platforms.

The ghosts in the third section will fly towards you, but you can jump on their heads to get rid of them. Also in the third section, you'll have to time your movements so that you can travel across a pit while two platforms are moving on background tracks at the same time.

The bridge at the end of the third section takes you to the fourth section when it disappears as you stand on it, sending you down a pit. 

In the fourth section, you'll have to ride a log. The ancient tablets of the duck pointing will tell you whether to go down a pit or continue to take the high path in this auto-scrolling section. If you take the wrong path, you won't be reaching the end of this world.

The Statue

To reach the statue, you must pass the final trial.


Scene 1: Statue

The floating heads shoot fireballs at you and fly forward in a sine-wave pattern. Jump over the last two and avoid their fireballs.

You'll then face the final boss: the goddess of the temple. She will fly around, and when she fires a laser at the ground, the laser will produce a block. Avoid the debris that is produced from the laser, and kick the block into the goddess.

Every once in a while, the goddess will shoot four small fireballs downwards; avoid those. She has a shorter pause before the four-way shot compared to the laser shot.

After enough hits, the goddess will float upwards, then start teleporting all over the room. She has a five-way shot as well as a spiral shot that will fly towards her outstretched hands. There are three places where she can stand - the sides and the center - and she will do the spiral balls at the sides while shooting the five-way shot at the center.

At this rate, you won't get any more blocks, so wait for her to teleport to one of the sides and wait for the spiral balls to diminish. If you can time it right, you'll be right above her head as soon as the balls start to disappear, and you'll be able to hit her.

When you beat the goddess, Donald will put the necklace back on the goddess statue, then a crown will appear on its head. Donald takes the crown and heads home with it, then puts it on only to become a balloon himself. Scrooge, Huey, Dewey and Louie head back to the island to get Donald un-cursed while Donald is carried around on a string. The game then ends.

Friday, June 26, 2026

PrinceWatercress plays Donald Duck in Deep Duck Trouble (SMS) - Part 6 of 6


I honestly forgot that the final boss was female. Whoops. Anyway, that's the game finished!


The Statue

To reach the statue, you must pass the final trial.


Scene 1: Statue

The floating heads shoot fireballs at you and fly forward in a sine-wave pattern. Jump over the last two and avoid their fireballs.

You'll then face the final boss: the goddess of the temple. She will fly around, and when she fires a laser at the ground, the laser will produce a block. Avoid the debris that is produced from the laser, and kick the block into the goddess.

Every once in a while, the goddess will shoot four small fireballs downwards; avoid those. She has a shorter pause before the four-way shot compared to the laser shot.

After enough hits, the goddess will float upwards, then start teleporting all over the room. She has a five-way shot as well as a spiral shot that will fly towards her outstretched hands. There are three places where she can stand - the sides and the center - and she will do the spiral balls at the sides while shooting the five-way shot at the center.

At this rate, you won't get any more blocks, so wait for her to teleport to one of the sides and wait for the spiral balls to diminish. If you can time it right, you'll be right above her head as soon as the balls start to disappear, and you'll be able to hit her.

When you beat the goddess, Donald will put the necklace back on the goddess statue, then a crown will appear on its head. Donald takes the crown and heads home with it, then puts it on only to become a balloon himself. Scrooge, Huey, Dewey and Louie head back to the island to get Donald un-cursed while Donald is carried around on a string. The game then ends.

Thursday, June 25, 2026

PrinceWatercress plays Donald Duck in Deep Duck Trouble (SMS) - Part 5 of 6


Hope you can stay on a raft while jumping on bats and following directions from ancient murals.


The Shrine

The correct path shall be one of one hundred.


Scene 1: Shrine 1

The first section has you jumping over water pits as piranhas jump in and out. You'll also start seeing a thing that will recur every now and then: expansive spike pits where you have to kick an iron block into it and then jump on it when it returns to travel over the pit.

The purple crabs come down from the waterfall endlessly.

In the second section, you'll have to kick a block into a crack in a low ceiling to get some water to leak out, which in turn will slowly push you to the right when you stand on it. Be ready to duck to avoid spikes.

In the third section, hit the chest at the far right, then keep running up the slopes and hitting each chest, grabbing chili peppers as you go.

In the fourth section, you'll see jars that shoot out crabs endlessly as long as you keep defeating them. The crabs only leap out to the left, though.

In the fifth section, you'll be going down slopes while trying not to fall into spikes. The platforms are safe zones, but only before they fall down under your weight. If you reach solid, even ground, however, spikes will start coming out from the left. You'll want to avoid those, too.

Use the chili pepper in the chest at the end of the sixth section to get through the wall of blocks.

Scene 2: Shrine 2

The ghosts move and back and forth, and stop to take a humanoid form. You can jump on them while in humanoid form to get past them.

Be careful on the platforms that move on the track on the background wall. If you see any statue heads in the wall, be ready to jump over their fireballs when you're lined up with them.

If you see a circle with an arrow on a background track, you can kick a block into it to change its direction, keeping the platform from hurling you into impending doom.

The blocks that look like a bridge inside the background wall go in and out. When they are bright, that means they are currently jutting out of the wall and you can stand on them. Just be ready to move before they recess back into the wall.

The statues with the spear will jab at you if you get too close. Jump before you reach to avoid getting skewered.

The torches that move up and down are platforms, but you can only stand on them when the fire is out. When the fire is out, however, the room goes dark, so you'd better know where to land before the flame comes back up.

The weights that slowly move up and then quickly drop back down can be used as platforms.

The ghosts in the third section will fly towards you, but you can jump on their heads to get rid of them. Also in the third section, you'll have to time your movements so that you can travel across a pit while two platforms are moving on background tracks at the same time.

The bridge at the end of the third section takes you to the fourth section when it disappears as you stand on it, sending you down a pit. 

In the fourth section, you'll have to ride a log. The ancient tablets of the duck pointing will tell you whether to go down a pit or continue to take the high path in this auto-scrolling section. If you take the wrong path, you won't be reaching the end of this world.

Wednesday, June 24, 2026

PrinceWatercress plays Donald Duck in Deep Duck Trouble (SMS) - Part 4 of 6


With the four selectable levels cleared, we can enter the final stretch of the game!


The Valley

The quill of the falcon will show you the way.


Scene 1: Valley

You'll be jumping up platforms and avoiding bees at the start. At least you can jump on their heads afterwards.

Updrafts will send you to higher areas, but be careful not to fall into bottomless pits after being carried upwards.

The mountain goats will leap from one platform to another, and can be used to get to other areas.

There are multiple paths to take, and in case you defeat bees en route to a higher one, try looking for a lower one.

The logs that fall down the waterfalls can be used to go upwards as you jump from one to another.

At the top-right corner of the first section, there is a block that unleashes a geyser when kicked. The geyser will take you to another area above the clouds.

Blocks can be kicked upwards to break frozen waterfalls down and use them as platforms to reach new areas. They can also be forced downwards by mountain goats, so be careful. Bringing snow down can reveal some platforms you can use to get to the end, so keep an eye out for bright spots in the walls.

Scene 2: Ice Cavern

At the start, you'll be forced down into an ice cavern. The tiny abominable snowmen can be simply jumped on, but they also like throwing ice, too.

The ground is slippery in this section, and you can slide down quickly on the slopes.

The diamonds just gives you points.

Ice cubes act just like the light brown blocks, and they can sometimes be instantly replaced when used. They can also knock icicles off the ceiling to use as platforms across water. If you fall into the water, it is instant death.

To get past the yellow narwhals, kick an ice cube so it lands on the nose.

Be careful on ice platforms above water, as some segments will be raised from below by narwhals.

In the second section, you'll be riding ice platforms across water. Be ready to duck at times, as there are low spiked ceilings and the ramps will send you and the platform into them.

The third section is vertical. Be careful where you kick an ice cube, as it can send a small snowball tumbling down. Sometimes, you'll want this, as this will allow you to make room for new areas as well as to get out of the cave.

You'll then meet the falcon, who carries you to another area before chasing after you. This time around, the screen scrolls down as well as to the right, and you'll have to jump over bottomless pits as well. Whatever you do, don't let the falcon five into you, as it can grab you and potentially drop you above a pit.

You'll eventually run into a block that causes a geyser to blow the falcon away, allowing you to get the Quill of the Falcon and clear the level.

With all four treasures, Donald will throw the treasures in a sacred lake in the middle of the island to reveal the shrine. Welcome to the final area!

Tuesday, June 23, 2026

PrinceWatercress plays Donald Duck in Deep Duck Trouble (SMS) - Part 3 of 6


In this entry, we head to the inlet, which feels like the shortest out of the first four levels.


The Inlet

Seek out the Golden Fang.


Scene 1: Under Water

The stage starts with Donald Duck putting on a pink shirt and diving gear before jumping into the water. This happens automatically, and you have no control over it.

Gameplay underwater is mostly the same, except you can swim by jumping repeatedly. Unfortunately, you cannot defeat enemies by bopping them on the head.

Enemies include eels, fish, manta rays and even rocks from undersea volcanoes. If you plug a block into a small gap, you'll get rocks, but you can get power-ups...even an extra life.

In the second section, you will have to deal with schools of long fish. You'll have to go up, wait for one to pass by, then swim around while trying not to get hit by them. Watch out for the red fish and the sea urchin that moves back and forth on the ceiling at the beginning.

In the third section, you'll see urchins that stay in one spot. To the right of the start of the section is an extra life.

The thin blue-green fish that look like knives will drop down when you get close enough, and slowly move back up. You can walk across the gaps as they move back upwards.

The big snoring fish will try to suck you in. When they close their mouths, there won't be a current pulling you in any more; instead, you'll be pushed back (and hopefully, not into the spikes).

A bottomless pit with bubbles at the bottom will push you up.

Scene 2: Sunken Ship


The clam will chomp upwards in an attempt to attack if you get too close. Unfortunately for them, they can only jump so high.

Keep in mind that you need solid ground to kick a box, crate or chest...even if that means that the solid ground is another box, crate or chest.

The anemones will send any block sent into it up or down at an angle, depending on whether they are on a floor or ceiling. You'll need to do this to break some crates blocking your path.

The pink fish will puff up when hit with a block and slowly follow you.

The broken portholes will fall down when approached.

If you reach the surface of the water, get up on the platform from underneath to kick the box into the ceiling, breaking it to fill the area with more water and reach new areas.

The boss is a shark. This time, you'll be chased upwards. Pay attention to the shark to see where it will bite you from, and watch out for any ceilings, as they will immediately block your path and cause you to take an unwanted hit. Make sure you're not too far down so that the shark bites you.

You'll eventually reach the top and get back on the boat...and the shark will lose its golden jaws on the hook, allowing you to take the Golden Fang to end the level.

Monday, June 22, 2026

PrinceWatercress plays Donald Duck in Deep Duck Trouble (SMS) - Part 2 of 6


It's time to play another level of this pleasant little game, and this time, we're going through a volcano.


The Volcano

The jewel made of fire will light the way.


Scene 1: Volcano 1

The bats will simply fly forward.

The moles will pop out of the floor and throw rocks at you, but you can jump on the rocks.

The crickets will jump back and forth.

The craters will shoot out lava, which will push a rock upwards to use as a platform.

In the second section, the bats will keep reappearing from certain spots and fly towards you as you make your way down. If you defeat a bat, it doesn't come back.

When the screen shakes, watch out for rocks from above. Be ready to hide under the nearby platforms where rocks can't reach you. 

The boulders moving back and forth in the spike pits allow you to get over the pits. Thankfully, you can stand on them, and Donald will do the rest. It's up to you to hold Left or Right and then jump off when necessary.

Scene 2: Volcano 2

The boulders will now be in lava. At least the lava isn't instant death.

Doors in the wall will lead you to new areas.

The platforms above the volcanic cones will be knocked upwards by the lava coming out of the cones. 

The flames move in a sine wave pattern. Some flames will come out of the lava and slowly move straight up.

There are also narrow platforms that sink in and out of the lava. Time your movements so that you get on them when they are coming up, and get to the next one.

The spiders swing back and forth like a pendulum when you jump on them once. Another jump on the head will defeat them.

You'll eventually enter a vertical auto-scrolling section where the lava rises from the bottom...and you can't afford to slow down here. Some platforms will rise with the lava, but will eventually be gotten rid of when they hit a ceiling. The treasure chest here contains a chicken, but it's more of a speed trap than anything else. I don't even bother getting it because of that. 

When you reach the rock at the end, you'll be running across the volcano. Be ready to jump over boulders that come at you from both sides of the screen, and should you fall into the lava pit, it will not instantly kill you. When you reach the end, a rock will hit a wall, revealing the Ruby of Fire, giving you one more treasure and ending the level.

Sunday, June 21, 2026

PrinceWatercress plays Donald Duck in Deep Duck Trouble (SMS) - Part 1 of 6


Oh, hey, I'm finally playing this one. About time I did, because this is a fun game.


The story begins with Donald Duck asking Huey, Dewey and Louie where Scrooge McDuck is. All of a sudden, Scrooge is floating around like a balloon due to a curse from a mysterious pendant he found in a shrine on an uninhabited island. The pendant must be returned to the neck of a goddess statue inside the shrine, or else Scrooge is cursed to be a balloon forever. He gives Donald Duck his adventurer's diary to retrace his steps and find the island so he can return the pendant.

Donald Duck arrives at the island...and the adventure begins.

At the beginning of the game, there are four places you can go: the jungle, the valley, the inlet or the volcano. I start with the jungle.

The Jungle

Only those who possess the jungle king's crown may pass.


Scene 1: Savanna

Left and Right on the D-Pad let you move left and right, Button 1 attacks, and Button 2 kicks.

The heads up display is pretty simple. In the upper-left corner is the amount of lives you have, and in the lower-left is the amount of health you have.

Instead of being able to swing hammers or throw flying discs, you kick at things like blocks...and that kick has some nice animation going for it. You will have to kick blocks into enemies in order to move on, but you can also jump on them if a box is not available. To kick blocks, you'll need to walk into a block, keep holding the D-Pad towards the block, and then press Button 1.

Enemies include wolves that poke their heads out of the ground, sugar gliders that fly off branches, jumping kangaroos, and rolling snakes, You can sometimes get ice cream for replenishing your health if you defeat them. You can use blocks and other things if you want, but you can also jump on them to defeat them.

Kicking blocks can also reveal power-ups, such as money bags for points and ice cream for health. While the light brown blocks just go up and crumble upon landing, the dark blue ones travel forwards and can bounce back and forth in pits. This allows you to travel across spike pits, which is good, because spikes hurt. 

Chests contain better power-ups. A chili pepper will make Donald Duck run very fast, allowing him to plow through enemies and large walls of blocks. The effect only lasts for a short time. You can also find a cooked chicken that restores all of your health.

The ostriches are like those horses in the first stage of Sunset Riders: you have to jump from one to the next and get to the tree branch at the right side, or else you're dead.

After you complete a section, you'll get bonus points for the round as well as for how much health you have left before going to the next one.

Scene 2: Jungle

Whenever you get hit, Donald will get angry and will be unable to move for a second. The animation is very much Donald and very well done, but it gets a little annoying after a while.

The snails slowly move back and forth and hide in their shells. The snakes pop their heads out of the trees to get in your way.

Look high and low for things. You never know what you'll find. You'll mostly want to stay on the top, however, if you want to get through the scene.

Some vines take you to other places, while there are also pairs of vines that raises one vine while you stand on - and lower - the other.

The red flower shoots out projectiles, but it only does it once.

The leaves in the trees have to be kicked loose with a block, and once you do that, you'll be able to ride it down to another area.

You'll eventually encounter a gorilla. Instead of fighting him, you'll be running away. Be ready to jump over spike pits and on top of walls, and watch out for the fruit that drops down from the top of the screen. For some reason, the blue flowers on the ground seem to hint as to when you need to jump. At the end, the gorilla will run into a huge tree, revealing the jungle king's crown and sending you back to the world map.

Saturday, June 20, 2026

PrinceWatercress plays Rising Damp - The Longplay


Now for the game, minus commentary! Enjoy!


Despite having the same name as a 1970s British sitcom, this has nothing to do with the show starring Leonard Rossiter or Don Warrington. Instead, this is a type-in arcade-style game from Issue 4 of Acorn Programs from June/July 1984. In this game, you move left and right to collect all the droplets that you can in a bucket before the strength of the floor below your bucket completely weakens and gives way from all of the falling water droplets. In each stage, you have 60 seconds to survive until the carpenter shows up and re-strengthens the floor. The strength of the floor starts out at 100, but goes down by 5 every time a water droplet hits the floor. 

The game starts out easy, but by the time you reach the third screen, the game becomes near-impossible to complete. It is very possible for a droplet to drop down in an area that you can't reach despite your best efforts, even when there are only so many areas in the ceiling where the water drops can drop down from at that point due to how fast the droplets are coming from. Good luck trying to reach even the fourth screen in this one. One session of this game will only last a few minutes, at most.

Is the game playable? Yes. Are there any problems with the controls? Absolutely not, from what I gathered. At the end of the day, this game gets really hard, really quickly, but at least it's enjoyable for what it is and how long it lasts. The graphics, while pretty crude, are easily identifiable and easy to pick apart. You'll only hear sounds when you either miss or catch a water droplet, but given how the BBC Micro is, especially with games from the first half of the 1980s, it's serviceable and something I can't complain about. It may be one of the earlier type in games for the system, but it's good for what it is.

Friday, June 19, 2026

PrinceWatercress plays Rising Damp


Not to be confused with the 1970s ITV sitcom of the same name.


Despite having the same name as a 1970s British sitcom, this has nothing to do with the show starring Leonard Rossiter or Don Warrington. Instead, this is a type-in arcade-style game from Issue 4 of Acorn Programs from June/July 1984. In this game, you move left and right to collect all the droplets that you can in a bucket before the strength of the floor below your bucket completely weakens and gives way from all of the falling water droplets. In each stage, you have 60 seconds to survive until the carpenter shows up and re-strengthens the floor. The strength of the floor starts out at 100, but goes down by 5 every time a water droplet hits the floor. 

The game starts out easy, but by the time you reach the third screen, the game becomes near-impossible to complete. It is very possible for a droplet to drop down in an area that you can't reach despite your best efforts, even when there are only so many areas in the ceiling where the water drops can drop down from at that point due to how fast the droplets are coming from. Good luck trying to reach even the fourth screen in this one. One session of this game will only last a few minutes, at most.

Is the game playable? Yes. Are there any problems with the controls? Absolutely not, from what I gathered. At the end of the day, this game gets really hard, really quickly, but at least it's enjoyable for what it is and how long it lasts. The graphics, while pretty crude, are easily identifiable and easy to pick apart. You'll only hear sounds when you either miss or catch a water droplet, but given how the BBC Micro is, especially with games from the first half of the 1980s, it's serviceable and something I can't complain about. It may be one of the earlier type in games for the system, but it's good for what it is.

Thursday, June 18, 2026

PrinceWatercress plays Donkey Kong for Game Boy - Part 11 of 11


In this entry, we beat Donkey Kong once and for all!


Stage 9-8


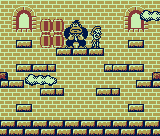
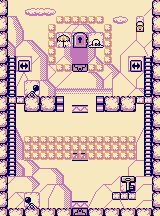
There's wind this high up in the tower, and the barrels drop Mini Mushrooms when you throw them into Donkey Kong. Unless you use the handstand, the barrels will not stop at all.

When you beat DK here, you'll finally be reunited with Pauline.

Stage 9-9


Uh-oh! DK's back, and he's eaten some Mega Mushrooms to get bigger!

When he pounds the floor, you'll want to be out of the way. Some debris will fall, but some of it are barrels. One of them will continue to fall. Stop it with your handstand and throw it at DK's face.

The best place to stand is on DK's nose, since all you'll have to worry about is the debris.

After two hits, DK will smash his knuckles together to try to hit you if you're on his nose. To avoid it, stand on his nose and jump straight up. He'll still cause barrels and debris to rain from the sky, but you've got to be quick with the barrels. If you can't get your hands on one before DK shakes the screen, the barrel on the floor will disintegrate and you'll have to wait to get another one.

If DK lifts his hands up, he's going to do two fist crushes. If his hands slide sideways, he's about to clap his hands together.

After two more hits, DK will hide under the floor and pound at the ground with his fists. Stay at the center, and move away to avoid his fists and the debris. After this, you'll have to deal with the usual tactics from this battle and get two more hits in. Thankfully, these two hits are the last, and once you land them, it's over! You've beaten Donkey Kong for Game Boy!

Wednesday, June 17, 2026

PrinceWatercress plays Donkey Kong for Game Boy - Part 10 of 11


We chase Donkey Kong up his own tower in this entry. The end is in sight...


Stage 8-11


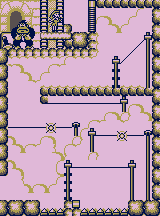
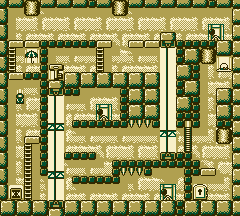
Go to the left, get the magical ladder icon with the handstand jump and place it near the key. Place the key on the conveyor belt, get the magical ladder icon to the right, and use it to gain access to the other side of the conveyor belt. Hurry over there and get the key, then use the last magical ladder icon so you can climb to the exit door. This one will definitely require some crackerjack timing to pull off, but it is possible.

Stage 8-12


Stay underneath the dark, square-shaped platforms whenever possible. The boulders cannot tumble straight down from above them. As for the rest of the area, watch where the rocks are going, and remember that you have no safe spots and that it is pretty easy to 

The lava is instant death. Don't let the intermission fool you!

Stage 8-13


For this one, you'll want to place the magical bridge so that it's flush with the platform where the key is. From there you can throw the key up and get back to the door by using the seed-spitting flower as a platform. You can also place the magical bridge so that it's above where the seed-spitting flower is as a safe strategy.

Stage 8-14


There are four switches. The top switch will be called "Switch 1." The bottom three, from left to right, will be "Switch 2," "Switch 3," and "Switch 4." As you're moving through this stage, watch out for the fireballs that are shot downward by the Panzer.

Toggle Switch 3 first. From there, go up and go right to Switch 4, then go left and hit Switch 2. Go up and hit Switch 1, and wait for the block enemy to be right-side up before jump on and then over him.

Go back down and hit Switch 2 so the block guy on the left reaches the bottom, then hit Switch 4. When the block guy on the right hits the bottom, toggle it again. This will ensure that the door blocking the key is open. You can now grab the key and get out of here. Just wait on the fireballs that the Panzer spits out so they don't hit you.

Stage 8-15


Go up, and wait on the conveyor belt as the first crusher comes down. Jump onto it and jump on the moving platforms, and get the second crusher to come down. Jump onto it, then go to the right. Use the crumbling blocks to wait on the moving platforms nearby if you need to. Get the key, and use the rocks moving on the lava as platforms. Again, keep jumping on them so they don't sink into the lava, and watch your position as you do. Use the magical springboard to get to the ladder leading back to the starting point.

Stage 8-16


You'll be dealing with the wind as well as egg-pooping birds as you throw walking rocks at DK. Focus on throwing the walking rocks at DK, as DK may inadvertently kill the bird. Of course, the bird will respawn, but at least you won't have to deal with it for a few seconds.
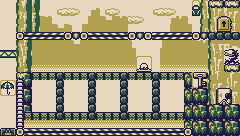
World 9: Tower

Stage 9-1


For the final world, you will be dealing with Donkey Kong and Donkey Kong Jr.

For this first stage, you'll have to brave the conveyor belts to get to Pauline and try not to get hit in the head by falling objects. At least you can backflip or handstand jump to the bridge if it's triggered, as DK Jr. will be playing around with the switch up top.

Stage 9-2


DK Jr. will be throwing springboards while DK Jr. will be toggling the bridges, but if you're quick enough you should be able to get through this without any problems. The backflip and the handstand jumps will both be your friends here.

Stage 9-3


For this one, DK Jr. will be playing with the switches, and you're going to be doing quite a bit of waiting. The switch will toggle both doors and bridges. Do not land on the walking horned skulls, as jumping onto them is instant death if you do.

You'll also be waiting on ladders to move their way up, and you'll also have the Mini Mushrooms to avoid again.

Stage 9-4


This one is similar to the final stage of Donkey Kong Jr. For this one, you'll have to move five keys to the top while avoid the eggs of the bird as well as Mini Mushrooms. When you move all five keys up to the top, you'll lock DK Jr. in a cage. We won't be seeing him again.

Stage 9-5


Just use your backflip to get to the top. This is simple.

Stage 9-6


For this one, you're spinning on wires to get to the top. For the final, diagonal wire, spin five or six times to land in front of Pauline. Any more and you'll be sailing straight into DK. Just make sure the switch is triggered so that the door blocking the end is open.

Stage 9-7


For this level, all the blocks will dissolve. You'll want to avoid the Mini Mushrooms, otherwise you'll have to time your jumps carefully so you don't screw it up at the end. You definitely don't want to fall to the bottom here.

Tuesday, June 16, 2026

PrinceWatercress plays Donkey Kong for Game Boy - Part 9 of 11


In this video, we tackle one of the wildest stages that the game has to offer.


Stage 8-3


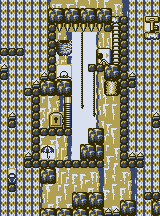
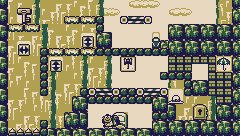
You can swim inside the waterfalls, and you can ascend if you hammer the A button fast enough. Use this to your advantage to swim to the top of the stage, then go down the ladder and toggle the switch to open the door to the exit. Go back up, get the key, drop down while avoiding the spikes, and ride the crusher to get to the door.

All this time, you'll have to avoid both the bird and the eggs it drops, so watch the skies.

Stage 8-4


Avoid the hedgehogs, and go for the switch as soon as you can get to it (DK will be playing with a switch that controls the bridges).

The intermission shows Mario standing on rocks to try to get to DK.

Stage 8-5


Just use the Super Hammer to get rid of the bricks and the hedgehogs. This is easy. You don't even need the ladder, since you can get around easily with the handstand jump.

Stage 8-6


Place the magical springboard under the handbag, then use it to get up. Avoid the crushers as you go right. Go down and get the key. Take the moving platforms, flip the switch just under where the key was. Avoid the crushers as you make your way to the door.

That's one way to do it. The other way is to hit the top switch to the right, then the bottom one to get to the top. You can then hit the switch in the upper right, get the key, then bring the key back down to the exit.

Stage 8-7


The Panzers make their first appearance since Super Mario Bros. 2 and all of its ports. 

Avoid the Panzer, get the key, hit the magical bridge platform and use the platform to break your fall. DK Jr. will be playing with the switch, but all he'll be doing is reversing the direction of the conveyor belts. The hammer is only there if you want to grab all the bonus items.

Stage 8-8


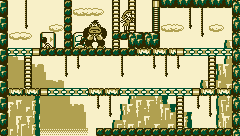
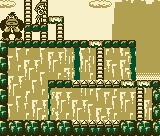
All you're really doing here is avoiding the rocks that Donkey Kong throws as you make your way towards Pauline. You can ride on top of them just like in the intermission, too, and you'll actually need to do that in order to get across the spikes and up the second ladder to get to DK and Pauline.

In the intermission, Mario jumps higher to make it easier to get across the waterfall.

Stage 8-9


If you want to skip the water, you can always get hit by a Mini Mushroom so you can take the bottom route. Otherwise, be careful around the fish and don't let them bite you. As for the switch, you'll want to move it to the left.

Stage 8-10


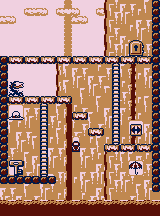
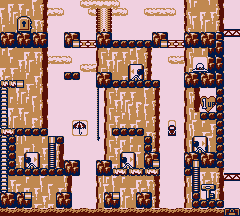
For this one, get to the magical springboard with the handstand jump and position it so you can get the key. Make sure that the tiny, singular bottom platform does not fall down. Once you grab the key, stand on that platform and ride it down to the door. You could continue to collect magic springboards, but you might find this to be easier.

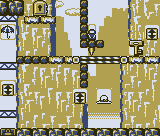
You've also got the wind working against you much like in some of the Airplane stages here, so be careful. In this stage, it is all too easy to fall to your death.

When it comes to getting the key down to the exit, if you can get the key to land on the left side of the left spike pit, then hold Left after picking the key up from the spike pit, you're good.

Monday, June 15, 2026

PrinceWatercress plays Donkey Kong for Game Boy - Part 8 of 11


We're getting close to the end, and we've still got plenty of levels to go.


Stage 7-5


The icicles, when they fall, will act as platforms. When they shake, they're about to disappear before they slowly respawn on the ceilings. You'll have to be ready to jump from one icicle to another.

Stage 7-6


For this one, wait for the walking flames to fall after running out of ice blocks to melt, then wait for two of them to get on the bridge above the moving platforms. Toggle the switch and the rest of the ice blocks will be melted.

The switch also reverses the direction of the moving platforms, so grab the key, go up on the moving platforms and toggle the switch when you have fire near the exit again.

From there, you'll want to place one of the magical bridges so that the fire will walk on them and melt the ice blocks surrounding the exit. Place another one directly under the exit, and you're good to go.

Stage 7-7


For this one, grab the key and get in the water. You can use the key to take out all of the underwater enemies by throwing it at them.

You can use a handstand jump to get the purse underneath the exit.

Leave the key there, then use the magical platforms and bridges to make your way to the door. Watch out for the squid when you get back in the water.

Stage 7-8


After keeping the icebergs on the surface of the water, you'll be taking a quick ride on conveyor belts while avoiding a (literally) crushing defeat. Thankfully, the conveyor belts go in the direction where you want them to go, so if you can time your movements perfectly, you can get to Pauline before DK shakes the screen again.

Stage 7-9


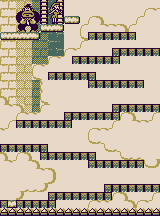
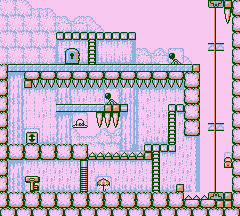
Head to the right and flip the switch, and carefully ride to the bottom of the moving platforms with the icicle. Stand on the walrus to trigger the icicles into falling down, then go up and cross the icicle bridge. Just remember that you'll need to walk underneath the spike pit to get the icicles to come down first. Use the magical ladder to reach the nearby switch and toggle it. This switch causes a bridge to appear to your immediate right and also causes the moving platforms to go back up. You'll also open the door blocking the key, so get the key and get back to the start.

Stage 7-10


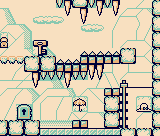
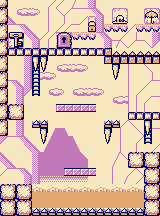
You'll need to use the icicles as platforms to get to the end. You'll want to run across the second icicle as it's falling. For the ladder before the end, you'll want to get on the last icicle while it's in mid-air in order to climb the ladder, as you cannot grab a ladder while jumping.

The three bonus items are at the end. You'll need to get to them and jump back as quickly as possible; just watch which platforms come down.

Stage 7-11


The invisible door is in mid-air between the magical bridge and ladder icons. It's not exactly between them (it's a little higher up), but it's in that relative location.

Use the magical ladder at the top to get to the switch and toggle it. You can get the key, but there's still the problem of getting to the door. Let the walking flame run out and melt the ice blocks in your way, then drop down from the left and get the magical springboard. Place it in Mario's fall path, and you'll save yourself from falling too high.

If you put the magical bridge where the door is, the game won't let you position the bridge there as it will overlap the door. From there, you can use the magical platform and springboard to get to the bridge. The bridge must be touching the top half of the fourth wall block of the bottom.

Stage 7-12


The icicles make it slightly harder to grab some of the barrels. Thankfully, there are three spots where the barrels will stop moving and stand upright, so you should have plenty of ammunition to hit DK with.

World 8: Rocky Valley

Stage 8-1


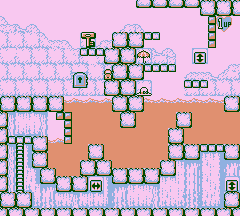
Get in the water, grab the key and toss the key up once you're all the way to the right. Go up, plant the magical ladder so that you can climb upwards. Toss the key up over where the hat is. Climb up and get the key before it disappears. If you need to take out the fish, keep in mind that the key will reappear where it is found when it falls into a pit. Avoid the armadillos on the way to the door. You're done.

Stage 8-2


Go to the right, hit the switch, then jump over where the hedgehogs are on the way back. When you reach the platforms, stand on the platforms on the bottom to get rid of them, then throw the key on the conveyor belt and duck to get under the gap. Grab the key, then take the platforms upwards and avoid everything that gets in your path.