Part nostalgia-bomb, part note-taking and part FAQ, what started in GameTrailers as a video game blog is now on Blogger. This blog is a look back at video games, both popular and obscure, from the video game industry's infancy all the way to the previous console generation.
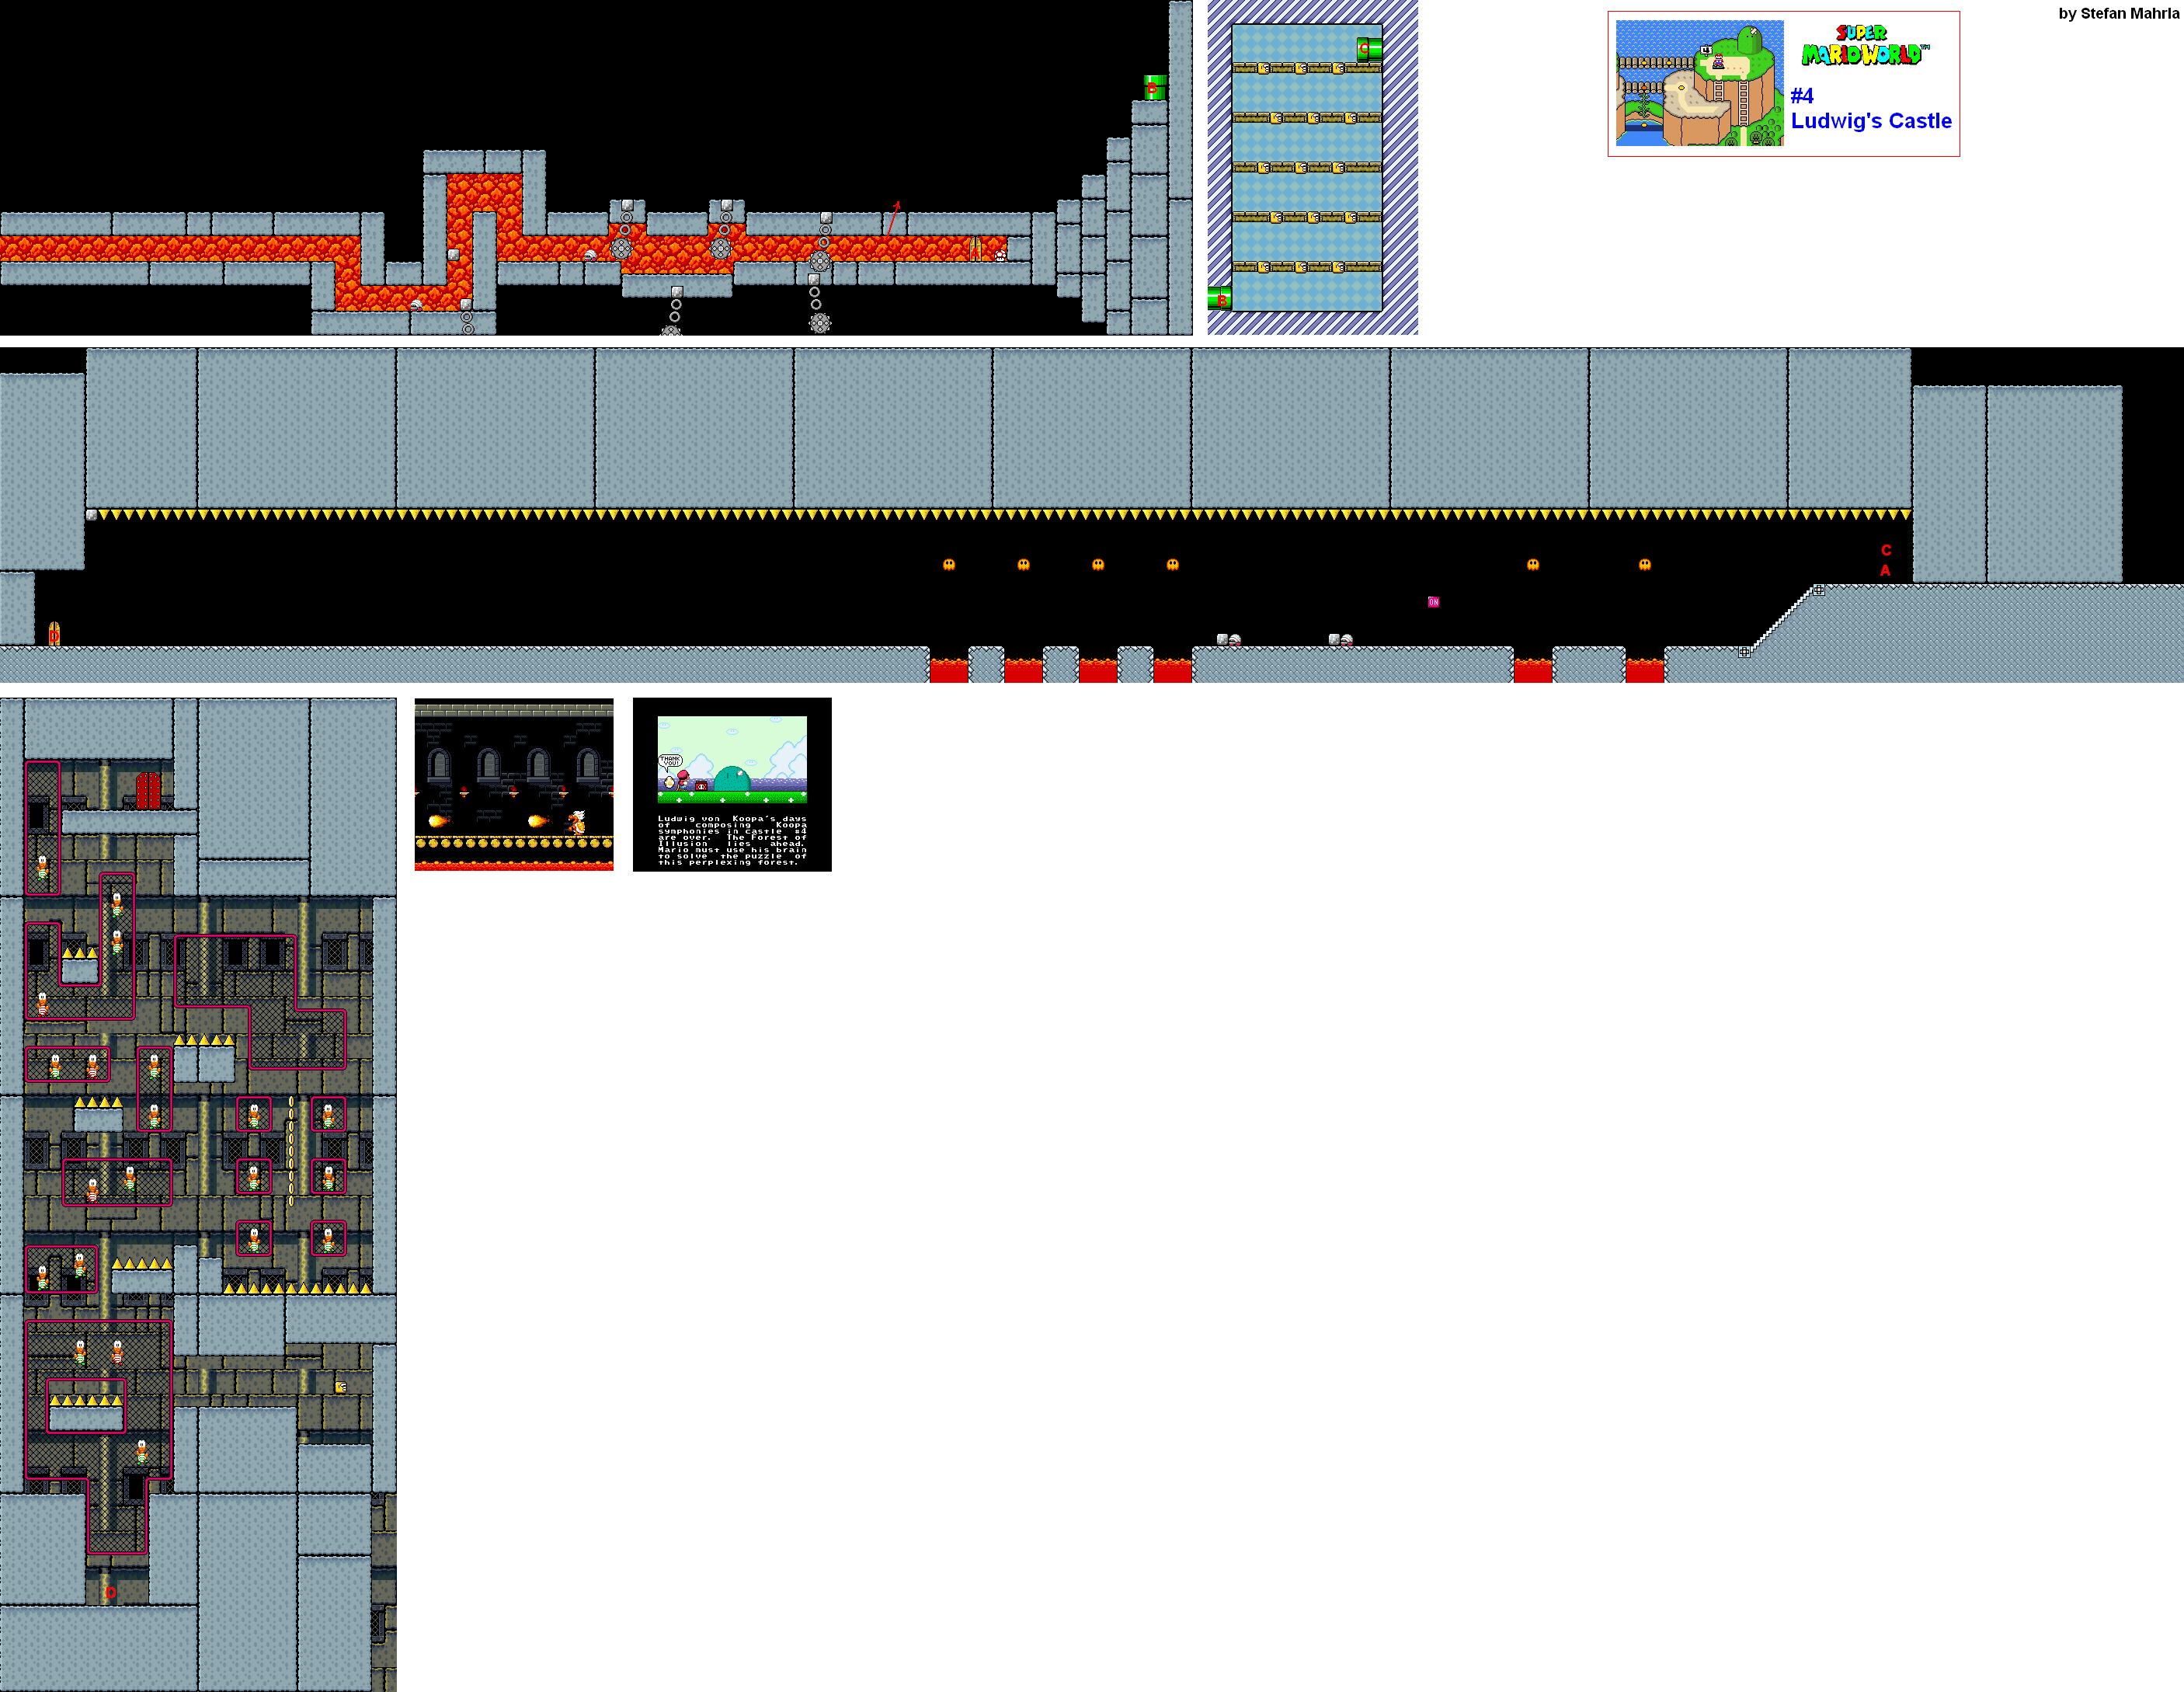
The first section of this castle is a narrow corridor with ball and chains and Bony Beetles. (Love that orange background wall, it shows what the Super NES was capable of in terms of color.) Use Caped Mario to get rid of the Bony Beetles, and remember that the chains in the rotating ball and chains do not hurt you.
There is a small part of the ceiling near the end that you can jump through, and if you go to the right from there, you will get the three-block mini-games.
Regardless of whether you go through the mini-game or enter the nearby door (take the Mushroom if you need it!), you'll enter a long corridor with a spiked ceiling. Run to the left as quickly as possible, jumping over lava pits and avoiding Podaboos and Bony Beetles. When you see the On/Off switch, hit it. Make sure the ceiling is as low as you can get it without hurting yourself while hitting the switch, so you can get some extra time as the ceiling slowly rises back up before dropping down again. Also, when you are near the door to the next section and the ceiling is all the way down, you can hear a Thwomp sound when you spin jump. That's a weird glitch.
The next part is full of spikes and fences you can climb. Be careful as you jump from one fence to another, and punch out those Koopas if you can. If you can stay off the ground and hit the Koopas from above by moving into their heads in they are on your side, you can get a 1-Up here.
At the top is the boss door, and entering it will take you to Ludwig Von Koopa (obviously named after Ludwig Von Beethoven). You will find out that unlike the other Koopa Kids, Ludwig is the only one whos boss battle is not rehashed, so once you've been to this point, you've seen all four types of castle boss battles.
Of course, if you are Fire Mario, you can just throw fireballs until he dies while he's still spinning, cheesing him to death in the fastest way possible.
Avoid the fireballs that Ludvig spits out, and jump on his head. He will then start spinning. Run around the room (which is pretty big for this battle), and he will eventually somersault over your head. When he lands on the bridge above the lava, he will be vulnerable again. After three hits, he's done. Next stop: Forest of Illusion!
Well...almost. We still have Butter Bridge! Time to go to the top of Vanilla Dome!
This course is a auto-scroller, and the speed will vary a bit as you make your way through the course. The platforms will come in pairs, and when you stand on one, it will lower while the one next to it will rise. When you step off, they slowly equal off again like a scale.
You'll also be dealing with Paratroopas as you make your way through the course. If you have not been through the Red Switch, you're definitely going to need them after the third Dragon Coin to continue with the rest of the course.
You'll be hitting blocks from below in order to make your way up once you're halfway through the course, but at this point the worst is pretty much over.
Caped Mario is the best Mario for this course, so bring an extra Cape eather before you go through here.
Getting through this course takes you to Butter Bridge 2.
Here, you'll see a lot of Caped Koopas. You'll see some with red capes who will swoop in from btoh sides of the screen, so be careful. Also, watch out for those Koopas kicking shells at you from above. With those things and the Caped Koopas moving around at the same time, you'll have to be careful where you are going as you go through here.
If you fly to the right at the start of the leve, you can find an easy-to-miss Dragon Coin above some cloud platforms. There is also one in a blue pipe past the checkpoint.
Clearing this stage takes you straight to Ludwig's castle, but we've already completed, so let's head to the Forest Of Illusion.
Forest Of Illusion
This place has quite the twist and turns. What you think may be an exit will take you to a place you've already been. Be careful.
New enemy here: the Wigglers. You can kill them a Koopa shell (or a Goomba) and you can also eat them with Yoshi, but if you jump on them, they will turn red, get mad and follow you around. You'll then have to get rid of them properly in order to defeat them.
If you can hit the block surrounded by all the note blocks, you can get a 1-Up to show up. Hit the note blcoks from below to get the 1-Up to come to you. Just make sure to grab it before it drops into the pit.
Watch out just before the checkpoint, as the trees that hide Mario can also hide the Wigglers from view.
When you reach the glass box with the rotating power-ups, grab the Starman, then run to the right as quickly as you can. You can get numerous 1-Ups this way, and if you get 1-Ups, you'll get 2-Ups from all the Wigglers you hit until the Starman's power runs out.
There are two exits. The first one is accessed via grabbing the P-Balloon near the end and floating to the left above the wood platforms. From there, you can land where the keyhole is, hit then nearby block from below, grab the key and put it in the keyhole to head to the Forest Ghost House. The traditional exit past the P-Balloon block will take you to Forest of Illusion 2.
This is the only course in the game where you will meet Torpedo Ted. The black squares with the skull and crossbones contain hands that drop torpedoes, which will then come at your general direction. Unlike Bullet Bill, you cannot destroy Torpedo Ted at all.
The only enemies you will meet here are the scuba mask fish, but you can easily get rid of them.
Beating this area will take you to the third Star Road entrance and course.
Vanilla Dome
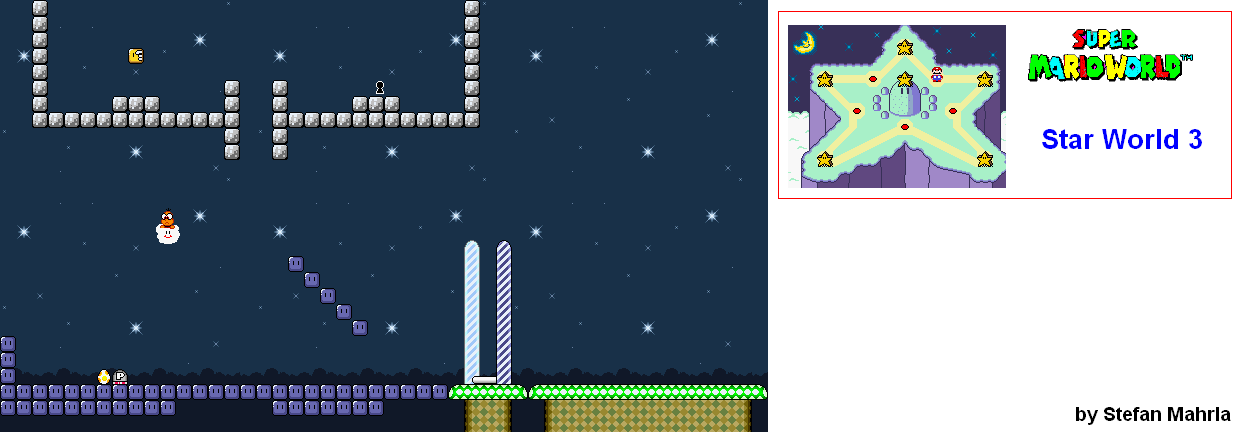
I forgot to do Star World 2! Let's do Star World 2!
This is a very, very easy and straightforward underwater area. You can get a blue Baby Yoshi here, and feed him with the Starman at the beginning, or you can feed him with the fish here. I recommend trying to get lives with the Starman first, then saving the baby Yoshi for when the Starman's power runs out.
There are two exits. The pipe leads to the normal exit, but if you dive under it, you'll find the key and keyhole that takes you to Star World 3.
This area is super short. If you go straight to the right, you'll take the traditional exit. But if you take a block and kick it up at the Lakitu in the cloud, you can then jump into the cloud and ride it with the Control Pad. It doesn't last forever, though, so be careful. Just fly upwards, and you can hit the block to get the key for the keyhole on the right. This will take you to Star World 4.
Also, you can get a yellow Yoshi here. Just feed it the Spinys that the Lakitu throws.
Shortly after the beginning, you'll meet a new enemy: the Sumo Brother. These guys will move a little bit to the left or the right while doing karate chops, and then they will stop the ground. They are usually on high platforms, and when they do their sumo stomp, a lightning bolt drops from below and covers quite a bit of ground. The best way - and the only way - to defeat a Sumo Brother normally is to hit the block they are standing on from below, as they will usually be standing on blocks.
There are also a ton of Monty Moles here. Be careful, and have a Fire Flower handy.
If you enter the blue pipe after the checkpoint, you'll be going into a swimming area with two of those spiny fish. This is not a good idea at first, since you will be going backwards when you exit and you will be at the top of the green pipe when you come back. However, if you jump to the cloud platforms to the right and move slowly to the right from there, you can get four 1-Ups and not just the one like I originally thought.
Sometimes, when you eat a pink berry with Yoshi, you can get a tiny cloud to pop up. It will drop coins with happy faces on them that count as regualr coins, and if you can collect them all, the cloud will give you a 1-Up before it flies away.
Be very careful with the Chargin' Chuck at the end, as he can split into three.
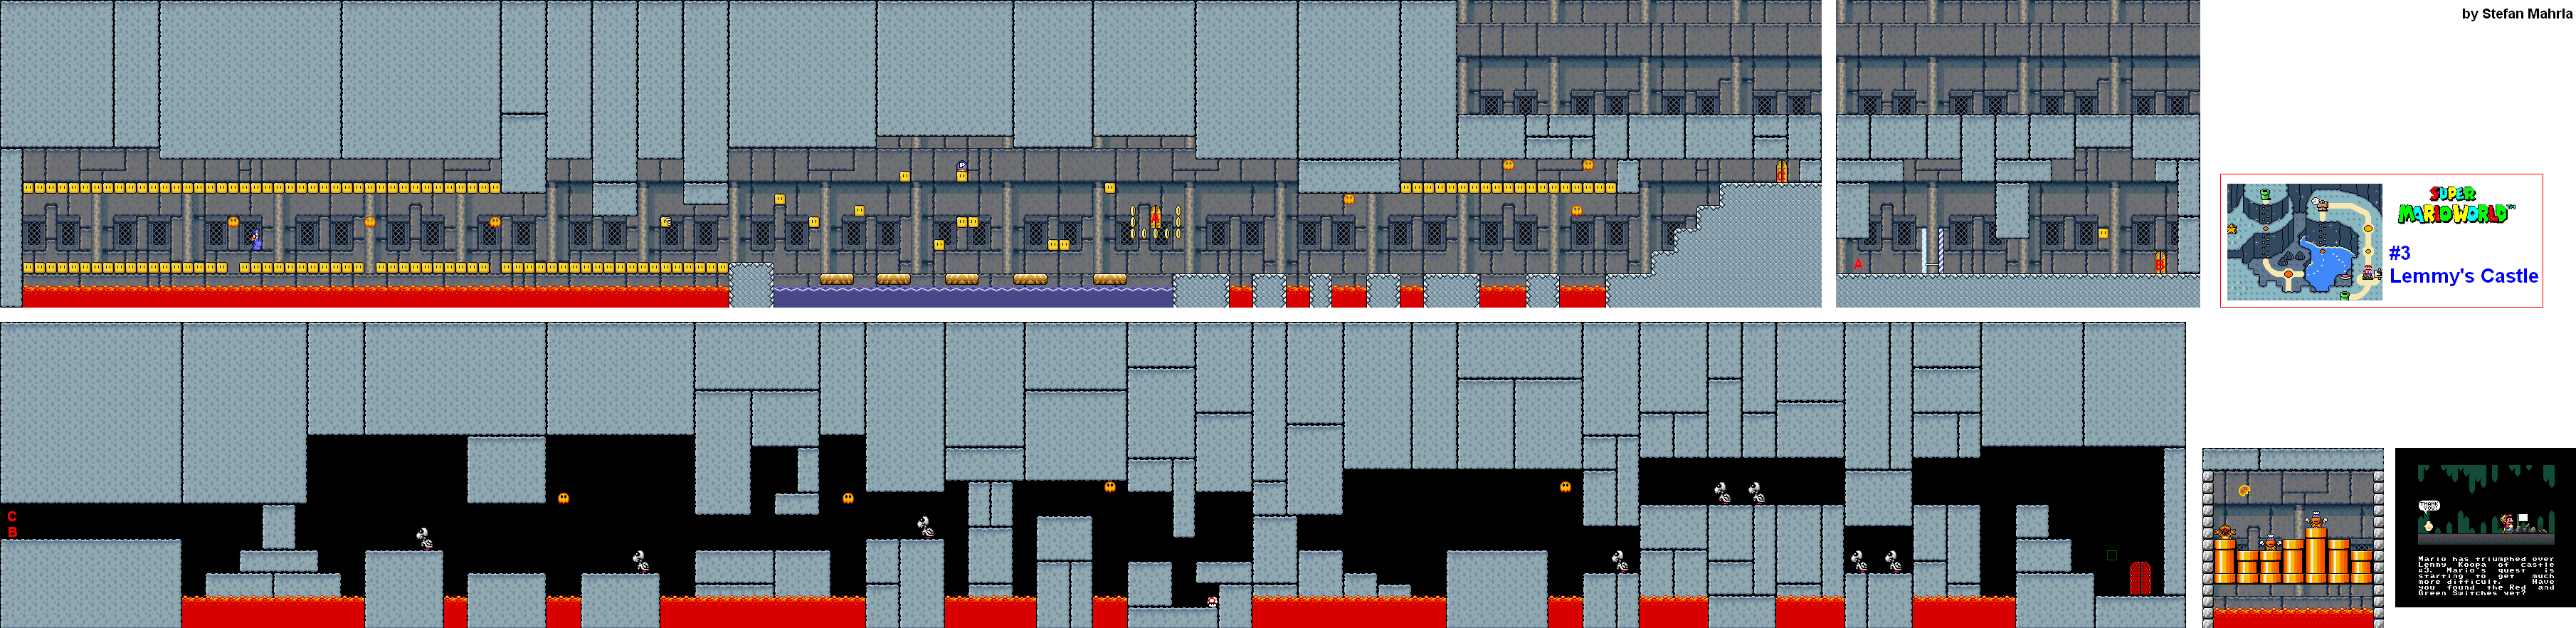
In the first part of this stage, you will meet the Magikoopa for the first time. The Magikoopa is a Koopa in a blue wizard's robe who will shoot magic at you. If it hits any of the blocks in the air above the lava, that block will turn into either a coin or a yellow Koopa. Leaping on a yellow Koopa gives you a coin just for de-shelling them.
You can jump on the Magikoopa to defeat him, but he will eventually come back.
If you can somehow get to the P Switch in the water section afterwards, you can access a door that is in mid-air. If you can get the left-most column of coins before hitting the P Switch, getting to that switch will be easier. If you can get in, you'll be able to hit a checkpoint so that you don't have to deal with the Magikoopa again in case you lose a life. Also, the lone block will contain a 1-Up.
Readrdless of whether you make it to the checkpoint room or if you go past it into the second lava section, you'll end up at the next section. Here, you'll have to wait for platforms to rise and fall out of the lava while avoiding Podaboos and dealing with Dry Bones. Having Caped Mario to take down the Dry Bones with a spin after you jump on them makes it a little easier near the end.
To beat Lemmy (named after the late Lemmy from Motorhead), you'll have to stay on the move and watch the tops of the pipes. There will be two fake Koopas and one real one, who just so happens to be Lemmy. You'll also want to watch out for the Podaboo in the room that is bouncing around at 45 degree angles. When you're close to Lemmy (he'll be the only one moving), be ready to jump on him before he ducks back down into the pipe. The fake Koopas and Lemmy will come out of random pipes at a timed interval, so keep an eye out and be ready to jump to avoid accidentally touching any of them as well as to dodge the Podaboo.
When you jump on Lemmy three times, you'll free the third of Yoshi's friends and you'll be able to head to the fourth area in the game. But we're not quite done yet. Instead, we're going back up the left-hand path and going to the roof of the Dome so we can go to...
If you know what you are doing in the first half of the level, you can get plenty of 1-Ups just by jumping on the green Para-Troopas that are flying about. It especially helps if you are Caped Mario if you're trying to pull that off, since you'll be able to slowly float to the next set of Para-Troopas and stomp on them without touching the ground.
After the checkpoint, you'll meet the Spinys! They're just like the orange spiked turtles you've seen in past Mario games. There will also be a Lakitu peeking out of a pipe who you can defeat by jumping on his head. Just like his cloud-bound cousins, he throws Spinys. Also like his cloud-bound cousins, he is a jerk.
Also past the checkpoint are Para-Bobombs. When they land on the ground, they act like regular Bobombs. You may remember them from the second (Western) and third Super Mario Bros. games, as they walk towards you and after a certain amount of time, they stop moving, start flashing and eventually explode. If you're caught in the explosion, it's going to hurt.
Up until now you have only seen blue P Switches. Near the pit of Spinys, you will be introduced to the silver P Switch. Stomping on it will turn all enemies into silver coins for a limited amount of time. If you collect enough of these silver coins (which are worth no more or less than standard coins), you will get a 1-Up.
If you jump into the green pipe with the Lakitu in it at the end, you can press a P Switch and run to the right to not only get a Dragon Coin, but also get shot back out to where you were out of a huge diagonal pipe. Also, if you can fly to the right at the very beginning of the course, you'll find a Dragon Coin that is very easy to miss.
Here's a new thing: dolphins! Thankfully, these dolphins are very friendly, and will help you complete the stage by acting as platforms. The ones that look straight up and leap strictly vertically are the hardest to land on, but that's what Caped Mario is for.
The angry, spiked puffer fish can be killed with fireballs from Fire Mario, but you can just as easily avoid them if you're nimble enough.
Thankfully, this course is very linear and very easy to get through.
This fortress is in water on the overworld screen...which means that you're going to be underwater the whole time.
There are four Fortresses in all in the game, and while you don't have to get through any of them to beat the game, beating them does help you find paths to some cool stuff.
There are two ways to get to the second section: the narrow pathway with the spiked ceiling that you can take with Small Mario, or swimming to the blue pipe at the end. If you take the long way, however, you skip half of the second section.
If you see brown spikes, they will shake and then fall down when you get close enough.
You'll also meet the Bone Beetles here. Just like the Dry Bones, stomping on them will cause them to fall apart for a short amount of time. Just make sure you're not about to land on them when they stop and expand their back spines, as that makes them temporarily invincible until they come out and start moving again.
Oh, and the skeleton fish, known as Fishbones in-game. Avoid the skeleton fish at all costs.
At the end of the Fortress, you'll meet the Reznors. The Reznors will be the boss of all four Fortresses, including this one. They stand on the platforms of a moving carousel, spitting fireballs at you which will track your current position. To defeat them, jump into the undersides of the platforms to instantly knock them off.
When you beat two of the four Reznors this way, the bridge will start disappearing. This is your cue to get on an empty platform, and quickly. The best way to counter this is defeat one Reznor, then wait for the next to pass you by and defeat the one after that. That way, you'll have plenty of room to move around when you finally get on a platform. From there, you'll have to stay on the carousel to take down the other two Reznors.
Once you're done, you'll unlock Butter Bridge, which allows you to take a shortcut straight to the fourth castle if you can successfully cross it. But we're not tackling that just yet; instead, it's time to head to...
Mountains of Dinosaur Land/Twin Bridges
There's not a lot to this part of the game, but there are still plenty of surprises here.
The platforms and their paths are back...and this time around, you'll have to deal with shaky saw blades on motors coming at you from both sides! Get on the very top platform, then move between the platforms and keep Mario from being an unplanned surgery patient by avoid the spikes, and you can get three of the five Dragon Coins.
When you make it back to some sort of solid ground, you'll find the Wings. If you are currently riding Yoshi, you can grab them and enter a bonus stage for some Dragon Coins. If you haven't grabbed any of the Dragon Coins for the current course, you can get all five here Regardless of whether you make it to the end or not, if you drop to the pit below, you'll clear the stage and get the normal exit.
It should be noted that if you touch the Wings, your current Yoshi will immediately turn into a blue Yoshi. So there's that.
The optional pipe section contains Bullet Bills that always travel diagonally, show up in groups of four and always go right for your current position. Stay on the move here.
The second half of the stage has you climbing up and down a motorized rope while avoiding more of those saws. Thankfully, this part is not too long.
There are two exits, and they are both at the end. The traditional exit that you see first will take you to Cookie Mountain, but if you can all the way here with Yoshi and Caped Mario, float underneath that goal and press A to get on the other side of that goal, you can keep going right for a 3-Up Moon as well as another goal gate. This will take you to Soda Lake.
This is a strictly vertical level, complete with springboards and plenty of Para-Troopas. The springboards will prove useful if you are proactively looking for the Dragon Coins, as will the vines you'll be uncovering through this stage.
When you reach the gap blocked by the six Para-Troopas, take the nearby springboard to the left, and use it to jump to the pipe to the left. This takes you to a secret exit that will take you to Star World 2. That works if you have the Blue ! Blocks activated; otherwise, you'll have to get up there with Caped Mario.
The traditional exit will take you to the pipe at the top of the left-hand path, which will take you to more levels at the roof of Vanilla Dome.
There are four hidden one-ups on the small platform section shortly after the beginning of the stage that I did not know about. Interesting.
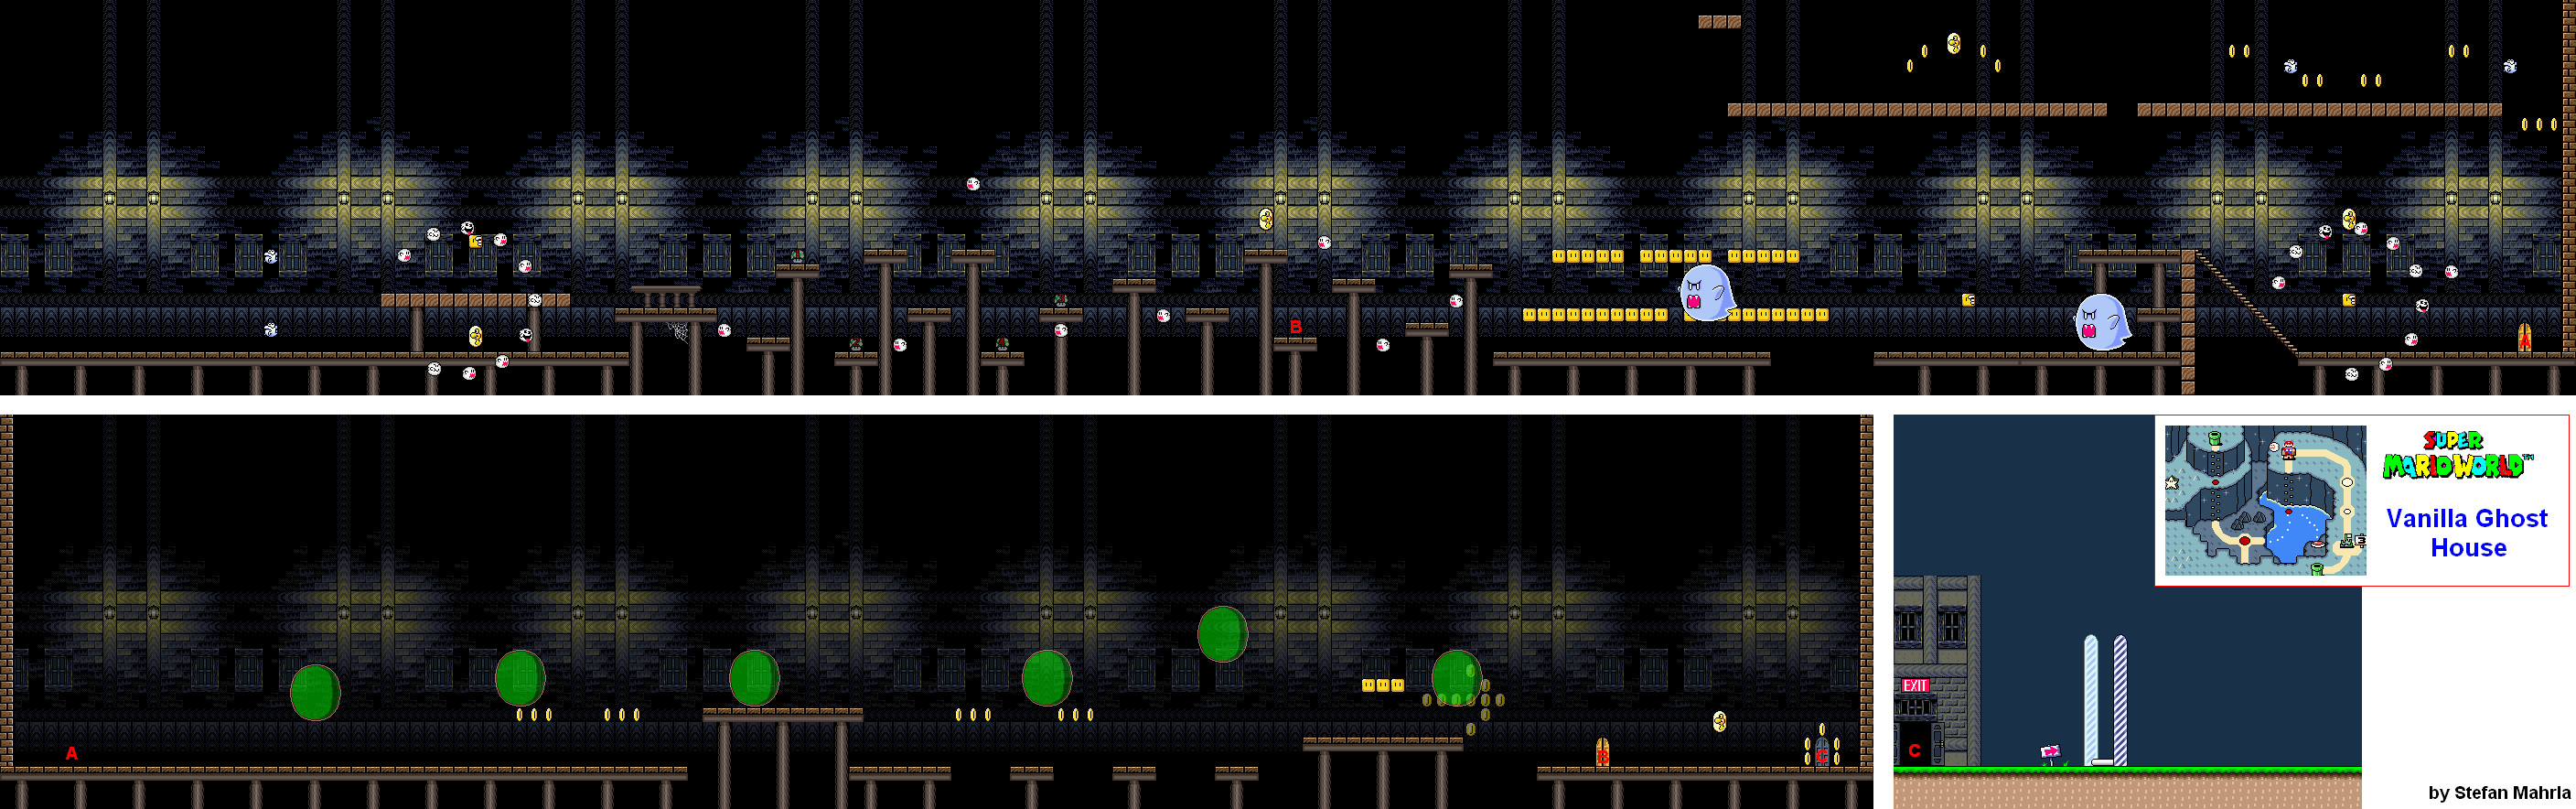
Unlike past Ghost Houses, this one is far more straightforward. There is a block that contains a vine where the first Big Boo is, and it takes you to a path above another Big Boo and a Boo Buddy carousel - and some Eeries! - as well as a Dragon Coin.
The second section has these large, floating green orbs. You cannot defeat them, but if you spin jump on them, you can hold A to make a high bounce off of them. There is a gold door at the end, but it takes you back to just before the first Big Boo. Instead, hit the blocks before it to find a P Switch, then hit it and go beyond the gold door. There is the exit. Just make sure to grab the coins surrounding where it will be first.
For this one, you will be riding a skull raft through several rivers of lava. You will meet the Blarrgs here - invincible fire dragons who will peek their heads out, look both ways, then dive at you.
You can fly up after the second skull raft to enter a special bonus room where you can play the three-block game for a few one-ups before showing up just before a Yoshi (if you can hit the block) as well as the checkpoint.
If you didn't go into the bonus area, you will have met the upside-down Pirahna Plants, which look more like the traditional Piranha Plants of old. You can kill them with a fireball, a cape spin or Yoshi. If you did, you'll meet them near the end.
This stage may seem short, but you will be hounded by Bullet Bills. Yep, the bullets with angry eyes and clenched fists are back, and while they do show up later on as they always have, in this course, they come out from out of nowhere and come at you from all sides of the screen. The ones that come from the left are the worst, as you'll want them to get off the screen as you can easily outrun them, causing unwanted slowdown and making getting around Bullet Bills even worse.
At the beginning, they come from only the left and the right, but after the checkpoint, they come from all sides.
The blue pipe you will see shortly after the all-sides barrage will take you to a lava raft section that will take you close to the end when you reach the other side.
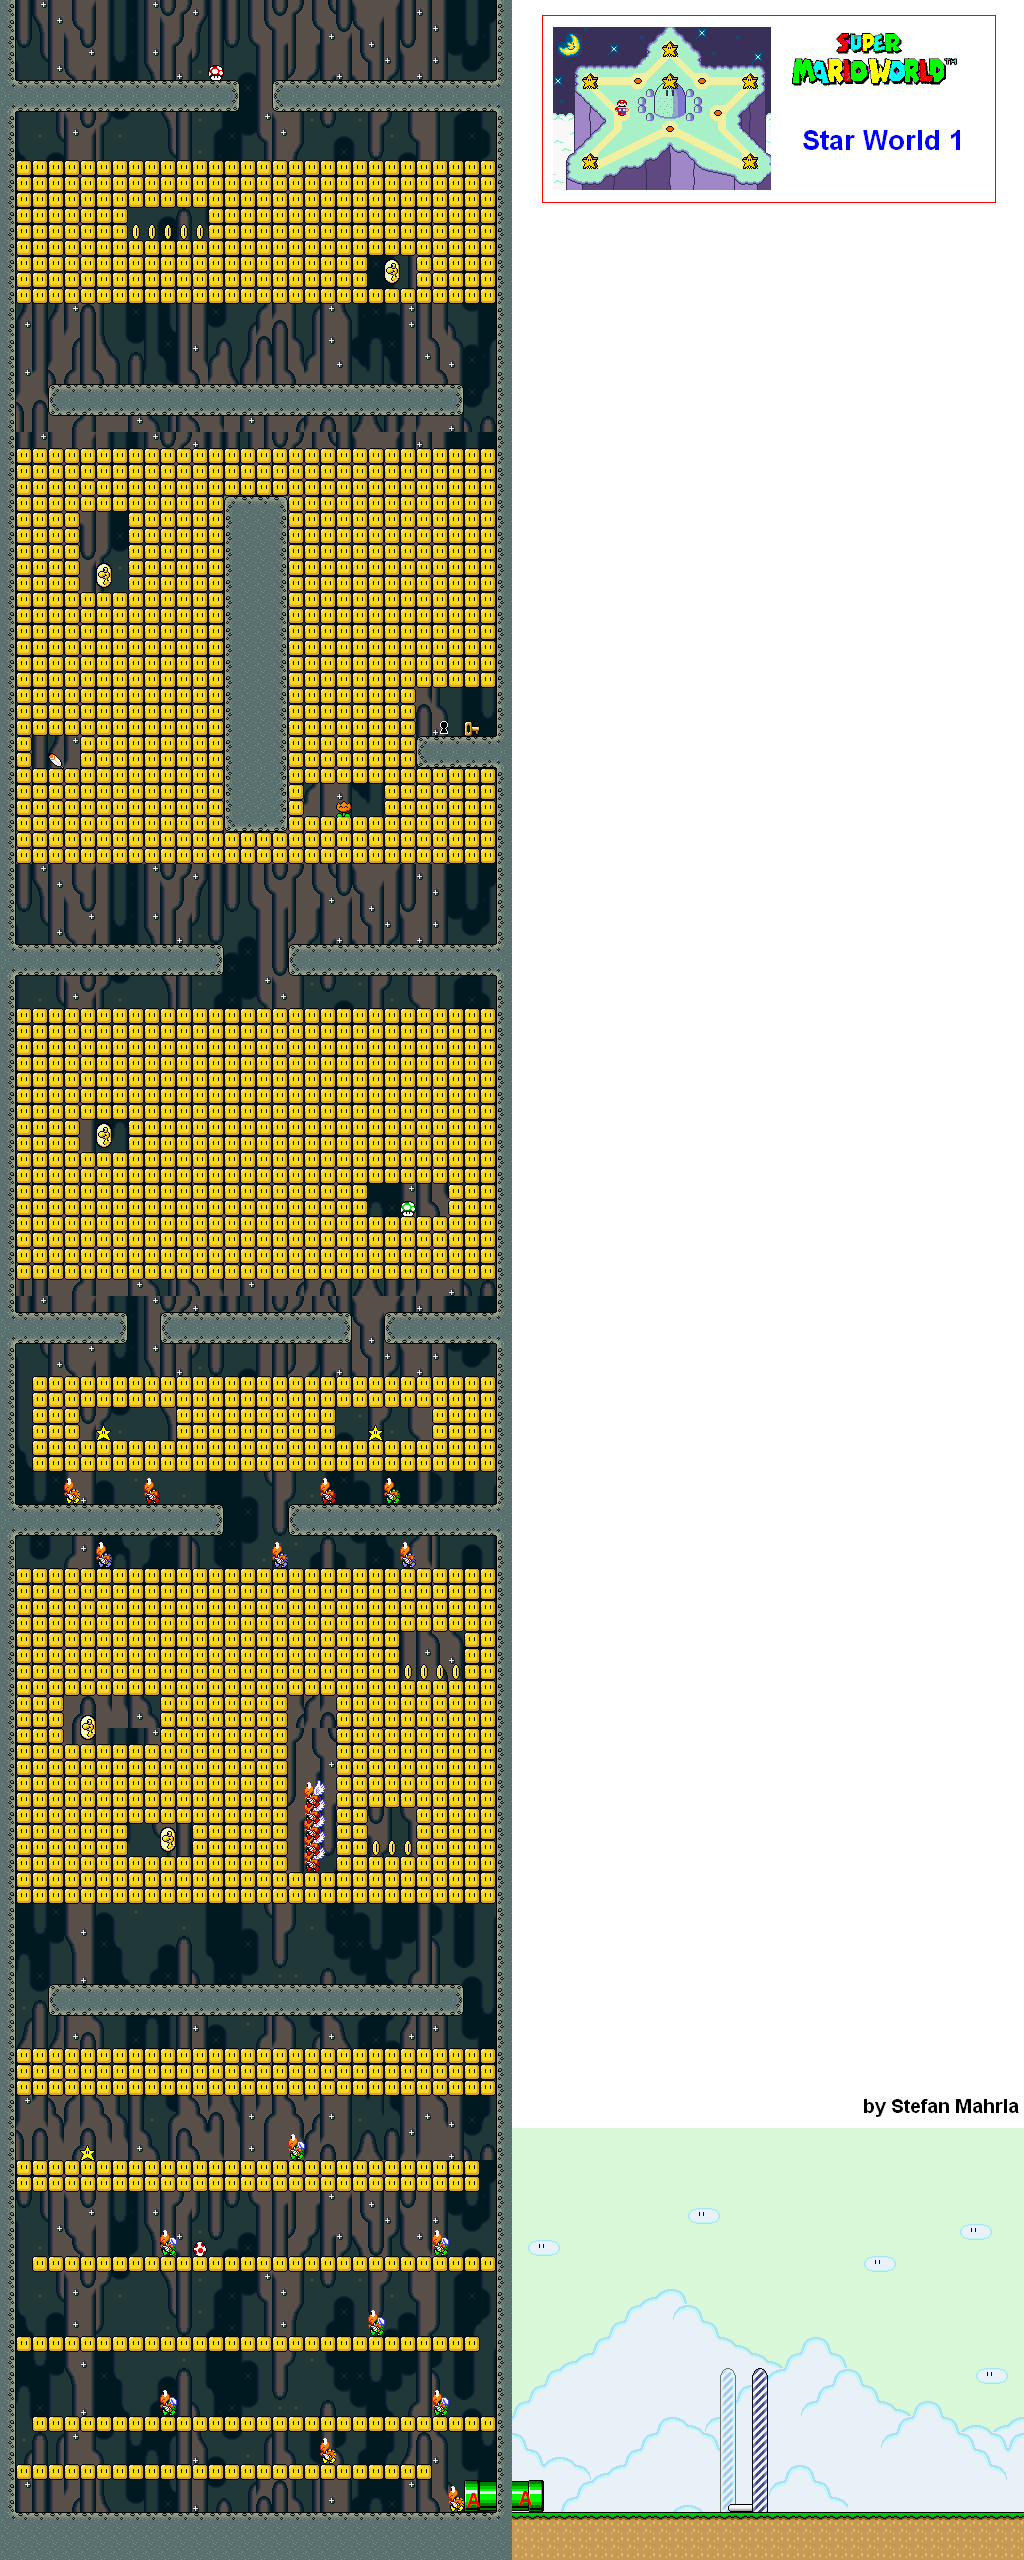
With the Star Road, you can play some rather interesting courses, skip ahead to other parts of Dinosaur Land, skip ahead to Bowser's Castle (if you so choose), and even discover something Special. There are five entrances to Star World all throughout Dinosaur Land, and with that come five courses.
If you're Small Mario, grab the Super Mushroom and become big, then spin jump through the blocks. If you know where you're going here, you can find all five Dragon Coins to get the 1-Up.
Be careful if you're Caped Mario when you do this; if you move around too much, you can accidentally trap yourself in the blocks and die, even if you're riding Yoshi.
Speaking of knowing where you're going, going all the way to the right at the second spin jump section and breaking the blocks from above there takes you to the key and keyhole. This will take you to Star World 2 and its respective Star Road entrance (which is in Vanilla Dome, where we can't go yet).
If you continue to go down, you'll find a Starman and even find a Red Yoshi. In the Star Road courses, you can find Red, Blue and Yellow Yoshi; however, they will be a baby and cannot be ridden on right away. Move it into an enemy to eat it, as eating five enemies will let the Yoshi grow into a full-grown Yoshi which you can then get on and ride. Red Yoshis can spit fireballs out after eating a Koopa, regardless of what color the shell was. Also, you can combine Koopa shell powers this way, too. Let's say you're riding a Red Yoshi, and you eat a blue Koopa shell. You'll be able to fly like you could with the blue shell, but since Red Yoshi will spit out fireballs upon spitting out a Koopa shell regardless of color, you'll have a free three-way shot for when you're finished.
If you take a Baby Yoshi to a goal, you will turn them into a 1-Up. If you feed a Baby Yoshi a power-up, they will grow to full-size instantly.
If you take the regular, goal-type style exit, you'll just go back to the Star Road entrance. If you use a Star Road entrance again, you'll warp back to Dinosaur Land.
If you fly all the way up at the beginning, you can play the three-box mini-game again for a few extra lives. You can then skip all the way to the last section before the boss. I'll cover that section shortly.
At the beginning, you'll meet a new enemy: the Thwimps. The debuting Thwimps are tiny Thwomps that are just as indestructible and take little leaps back and forth at regular intervals. Sometimes they will leap straight up.
If you took the slow-moving escalators - and avoided the slowly swinging spiked ball-and-chains that go in a circle, which shouldn't be too hard - you'll meet the Thwomps themselves. (At least the chains on the ball and chains can't hurt you.) If you've played Super Mario Bros. 3, you should know the drill by now: wait for them to drop when they close, them move past them when they rise up. This time around, the Thwomps will make irritated faces when you get close enough, and if you get just a little bit closer, that's when they drop down for the potential kill.
The next section is the one you could have skipped over earlier. Here, platforms will be moving back and forth through static floor, and you will have to move carefully so that you can get on certain platforms and also avoid jumping on spikes. The spikes do not kill you instantly, but they do bring you back to being Small Mario, so be careful.
You'll also meet the Dry Bones, another enemy from Super Mario Bros. 3 who makes their first appearance here. You can kill them if you spin into them as Caped Mario, but if you jump on them, they will break apart and eventually pull themselves together. In later courses, they will stop moving and throw a bone forward every once in a while.
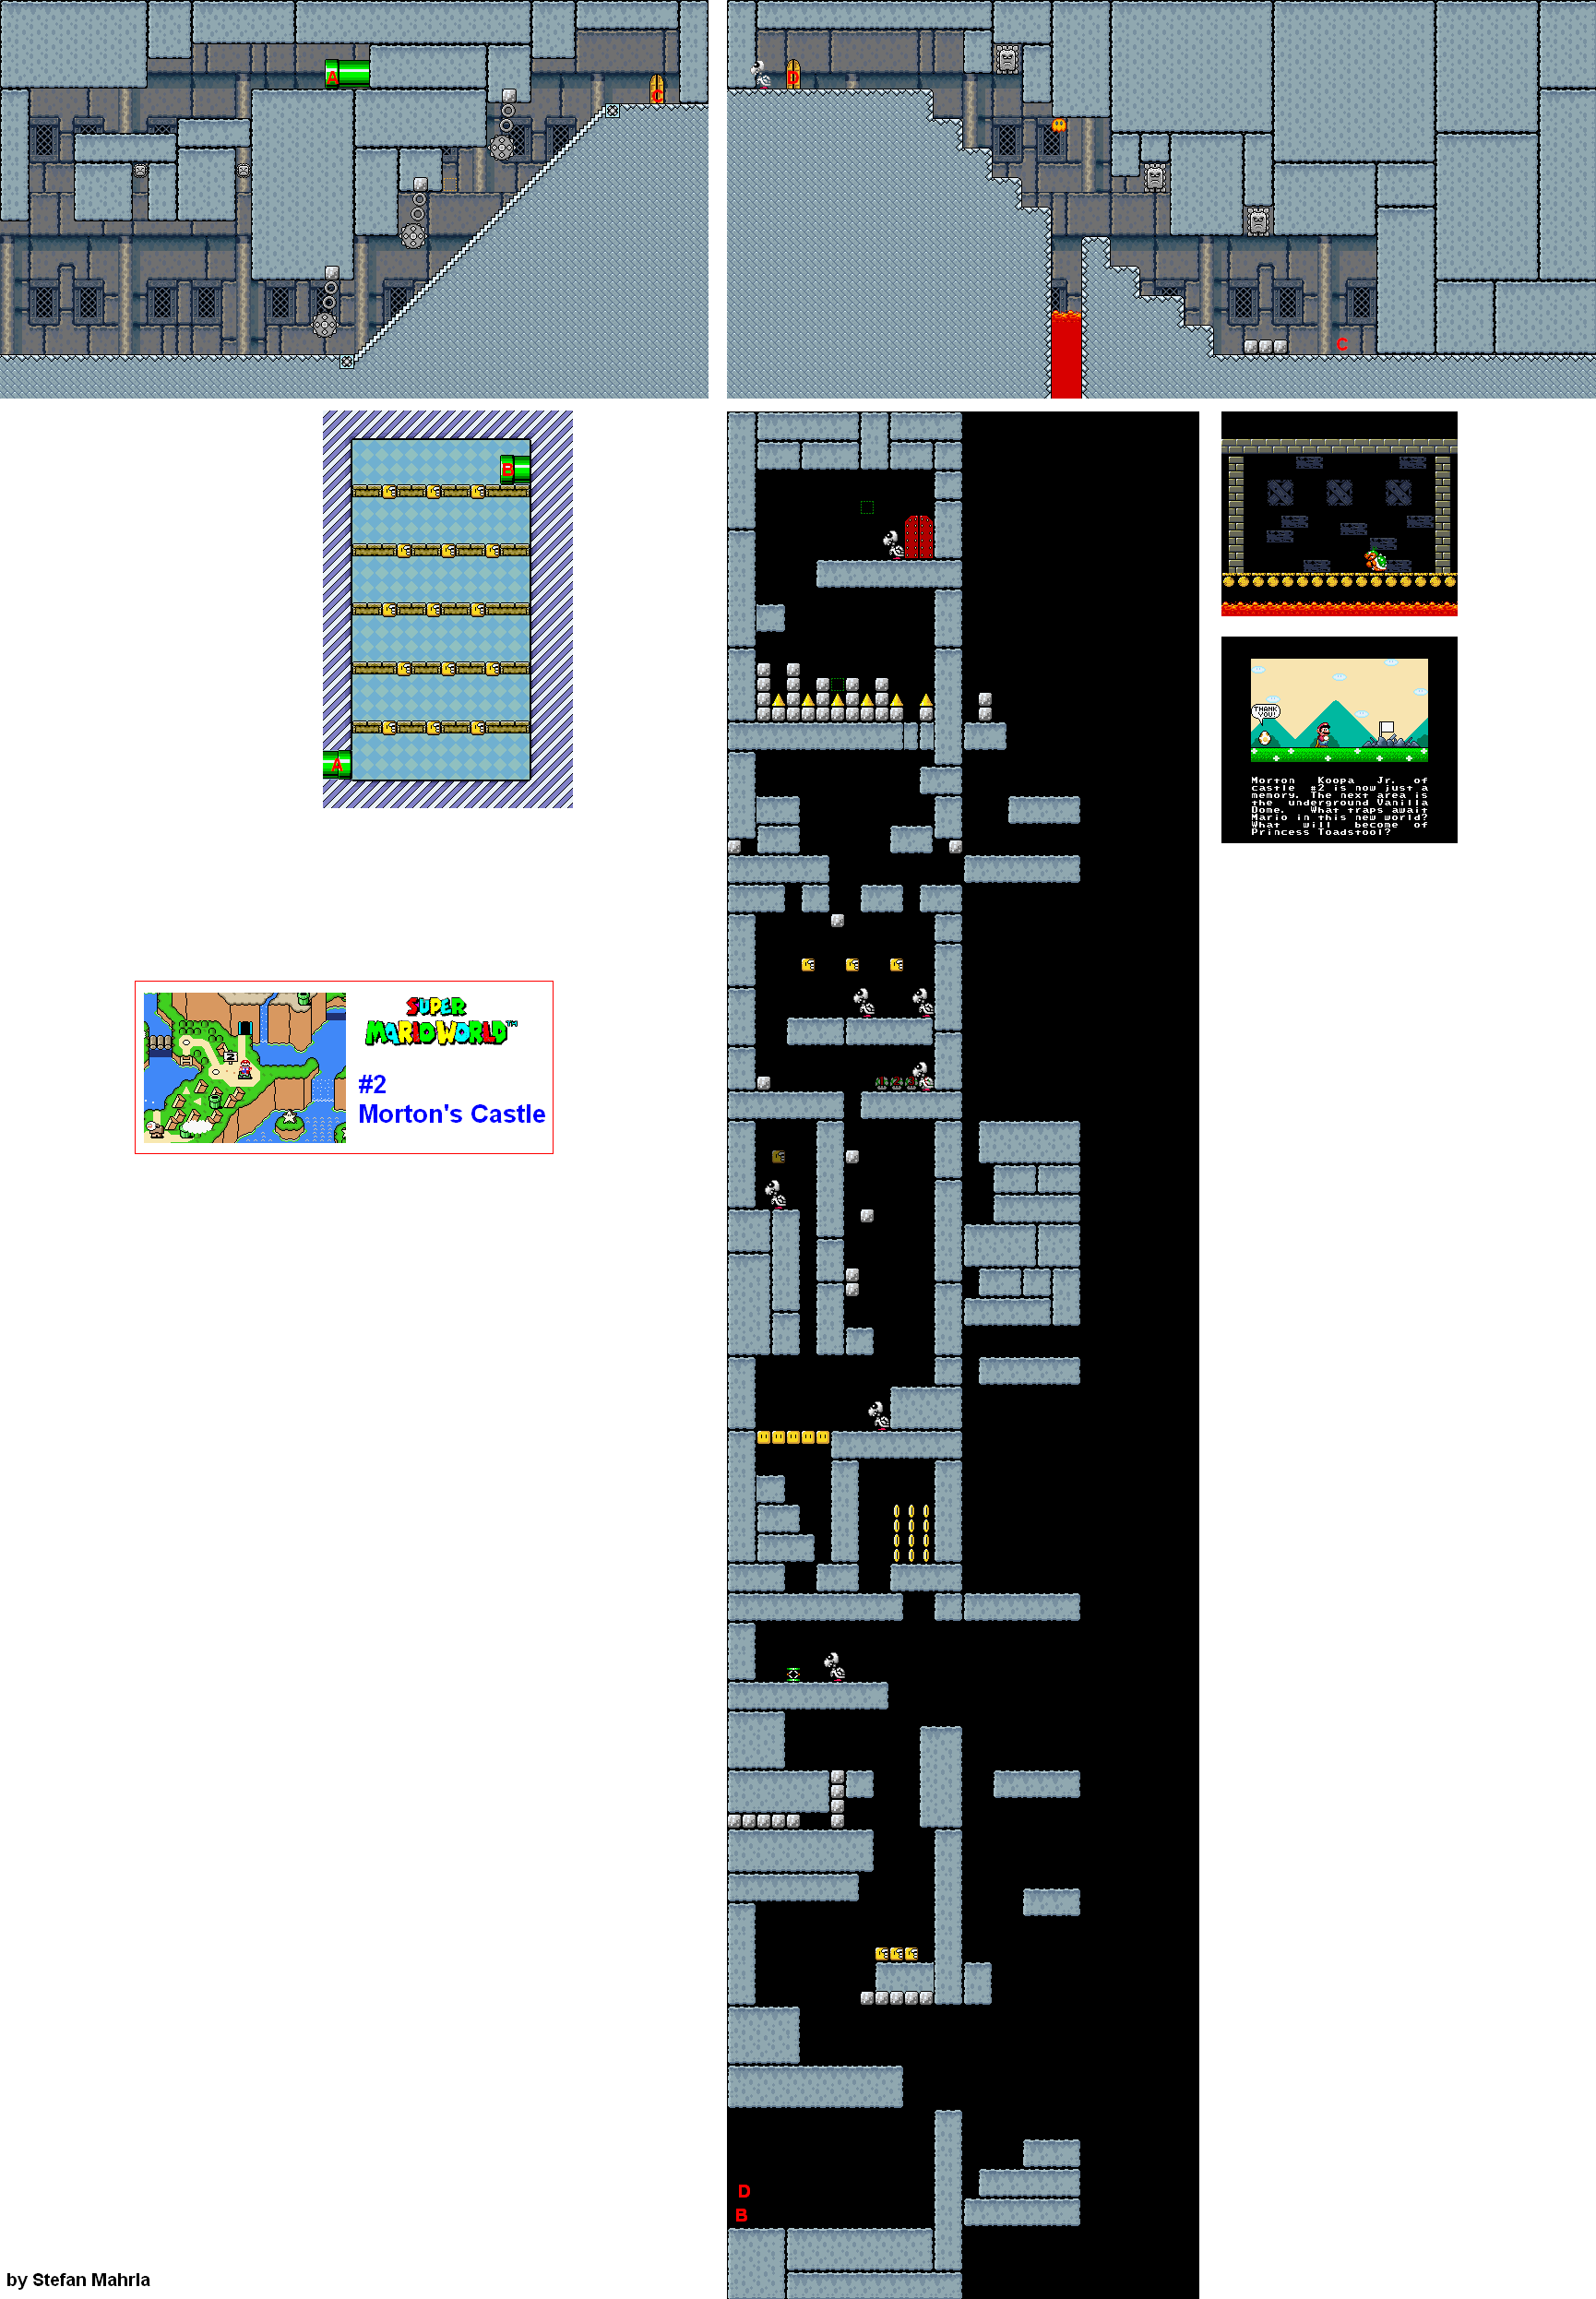
You'll eventually meet Morton Koopa, Jr. (a reference to the late comedian Morton Downey, Jr.). Jump on him before he runs onto the wall and climbs up it. If you're lucky, you can jump on him three times before that can even happen. If he runs on the wall, he will be invulnerable until he runs on the ceiling and tries to drop down on you. He will try to drop down on you when you are directly under him, but if you stay on the move, you will definitely avoid this attack. Once he is on the floor, his attack pattern starts anew. Three bops on the head will do him in. If you are Fire Mario, you can throw two fireballs at him and then jump on him once to defeat him almost immediately.
After beating Morton Koopa, Jr, you will be able to head to Vanilla Dome.
Vanilla Dome
It's time for some fun in the caves as the difficulty gets a little higher and things get a little crazier in the third world of the game.
This is the first course that has a big dot instead of a little dot. A big dot means that it is a little larger than other courses. Most of the big dots will be red.
The Swoopers, Spike Tops and Buzzy Beetles all come back from Donut Plains 2, and you won't be meeting any new enemies here.
If you can get above where the red dotted-line blocks are, you'll be able to open a path leading towards the Star Road entrance from earlier.
In the underground part with the yellow platform and the lava, use the star to get a 1-Up from all the enemies if you can, and get to the other side before the platform sinks into the lava.
You may have to be small Mario to get some of the Dragon Coins, but thankfully there's not much to this level. Just remember to run and jump up the super-steep slope when you see it.
You'll be doing a lot of exploration here as you swim around, hit blocks to find vines, and take on Chargin' Chucks who will burst through blocks with their tackles to get to you.
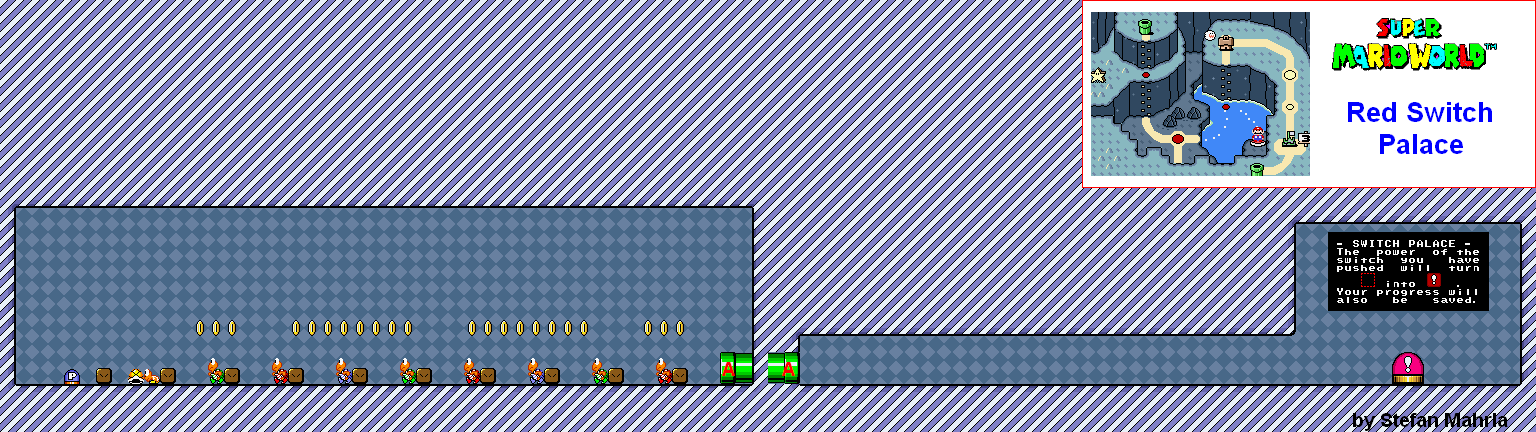
At one point in the stage, you will have to surface and go left. There will be a P Switch. Carry it to the right past the wall of coins to the left, then hit the switch and drop down where the blocks covering the gap after the Buzzy Beetles are now coins. You will be able to find the key. Just take care of the Cheep Cheeps with Fire Mario and get the key into the keyhole to access the Red Switch Palace.
At one point near the end, there is an ice cavern - with ice physics - that seems nice, but does not let you skip much of the level. The gate at the end will take you to Vanilla Ghost House.
If you can hit the P-Switch, grab the yellow shell before the Koopa can get into it, and use the newly-made platforms, all without firing a fireball at any of the Koopas, you can get a 1-Up just by keeping the shell you just kicked on the screen.
The Red ! Blocks don't do anything when hit from below, but they can act as platforms to previously inaccessible areas.
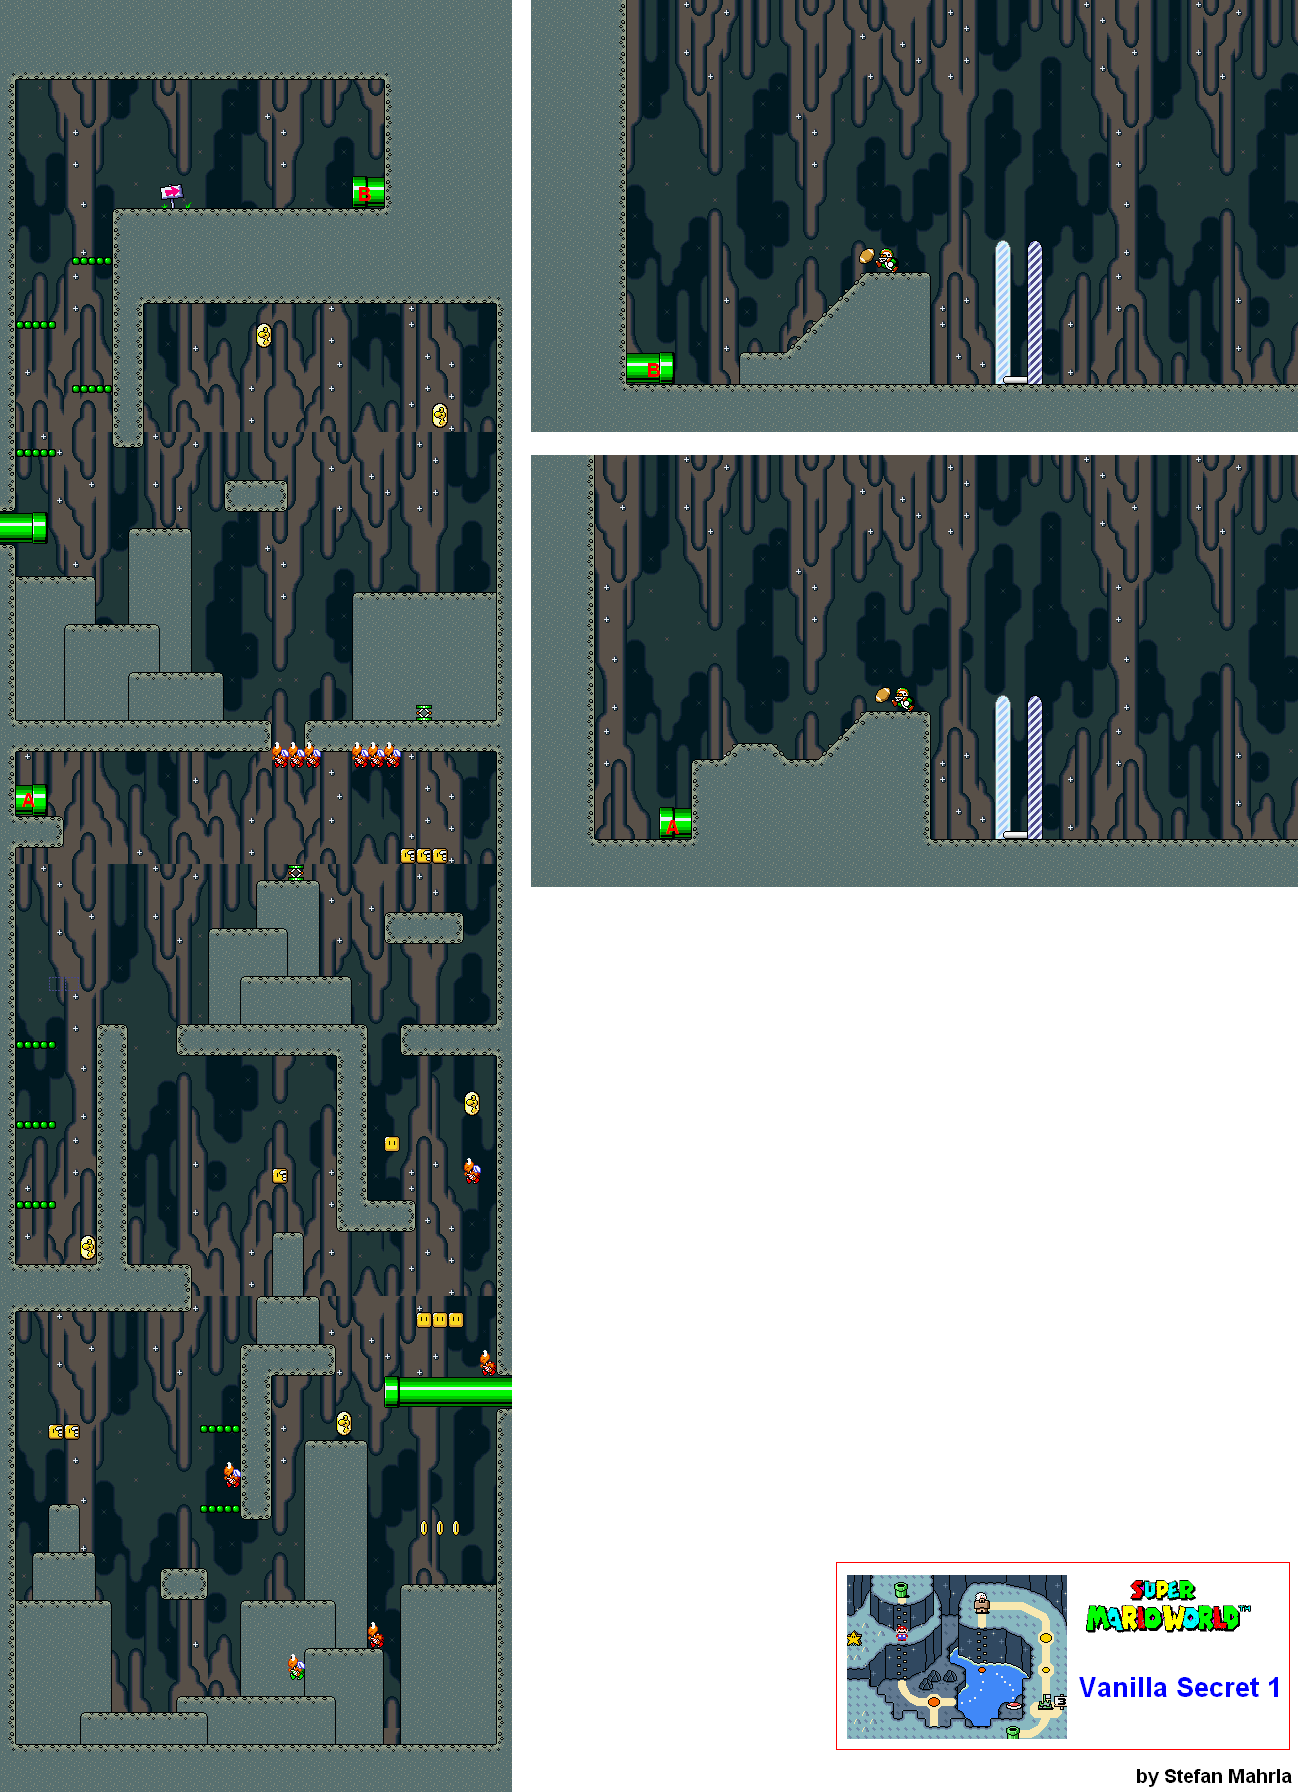
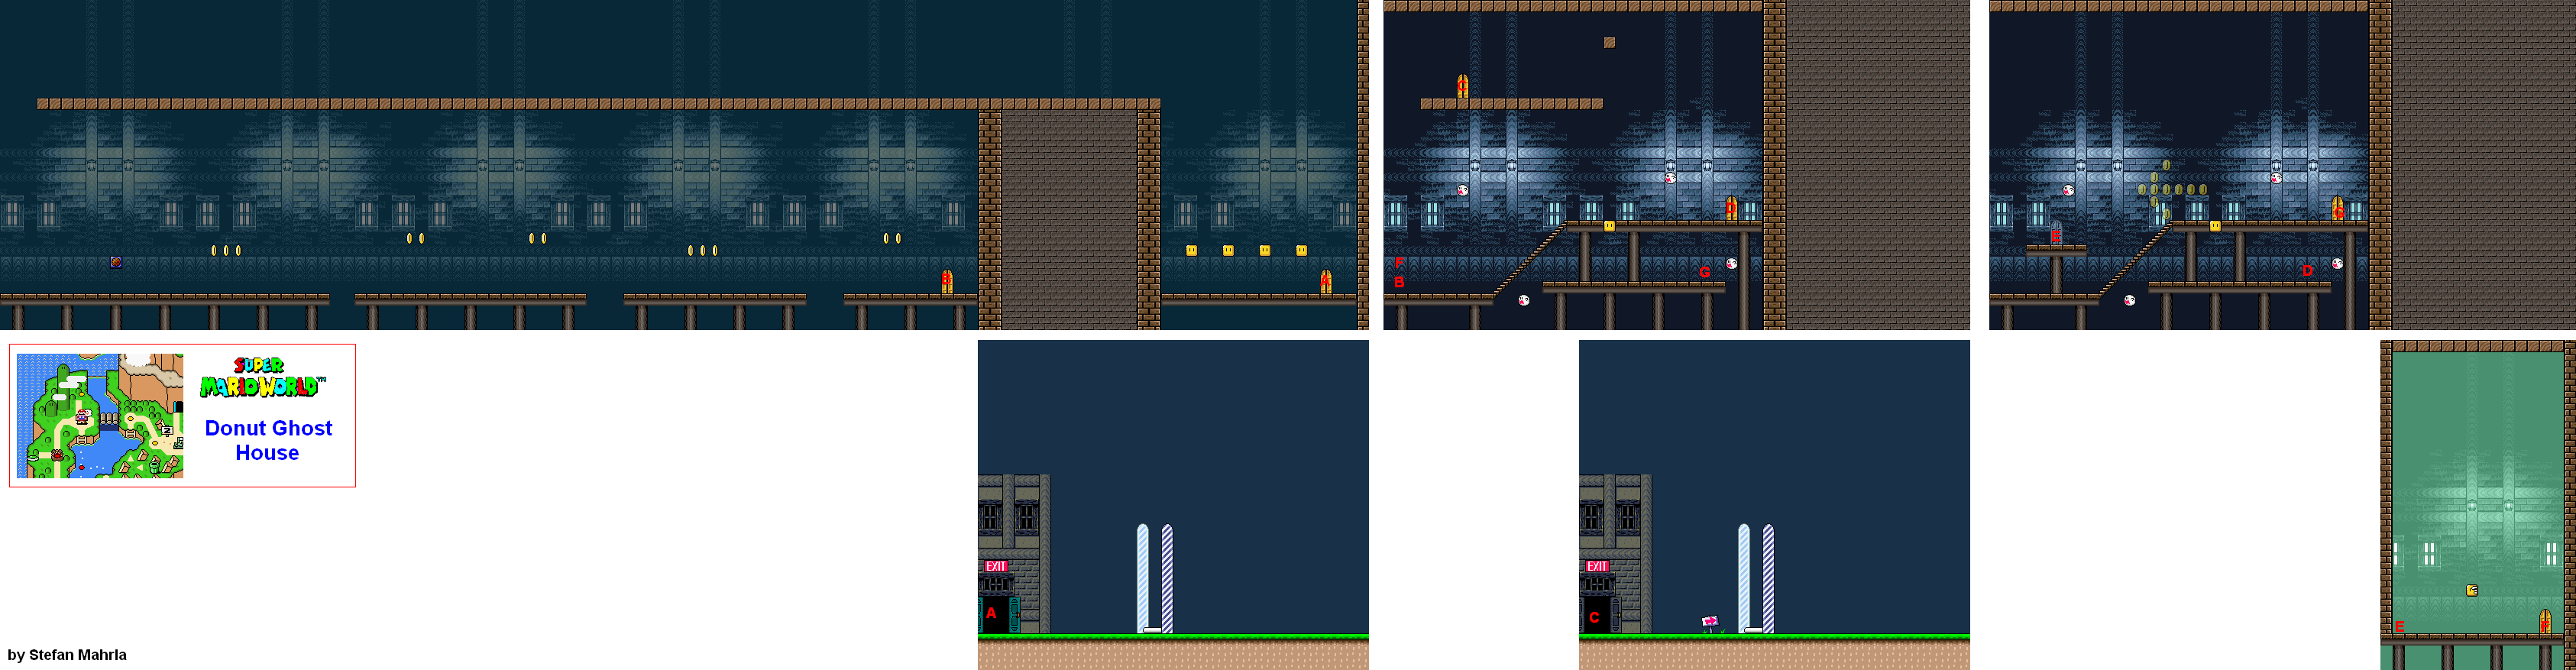
Might as well take care of this underwater course early, since it has two exits. The traditional one at the end of the level will take you north to Donut Ghost House.
You'll meet plenty of new enemies here. Besides the Cheep-Cheeps you first met in Yoshi's Island 4, which tend to move back and forth in a specific pattern, there are the scuba mask fish that constantly move towards you as well as Rip Van Fish, who will wake up and chase you if you get way too close to him.
The blue pipe can be entered for an area where you will be introduced to the P Balloon. Pick it up and Mario will inflate like a balloon. Use the Control Pad to move He won't do this forever, and when he starts fluctuating in size, that is your cue to find a place to land as soon as possible. If you can fly to the top and not hit any Para-Troopas, you'll be able to get two Dragon Coins at the top and two 1-Ups, assuming you have Caped Mario. To exit this area, just go to the pipe on the right-hand side of the room and go down it. You'll skip a little bit of the level here.
There are seven Dragon Coins in all here, and if you get any Dragon Coins past the fifth one, you'll get a 1-Up for every subsequent Dragon Coin.
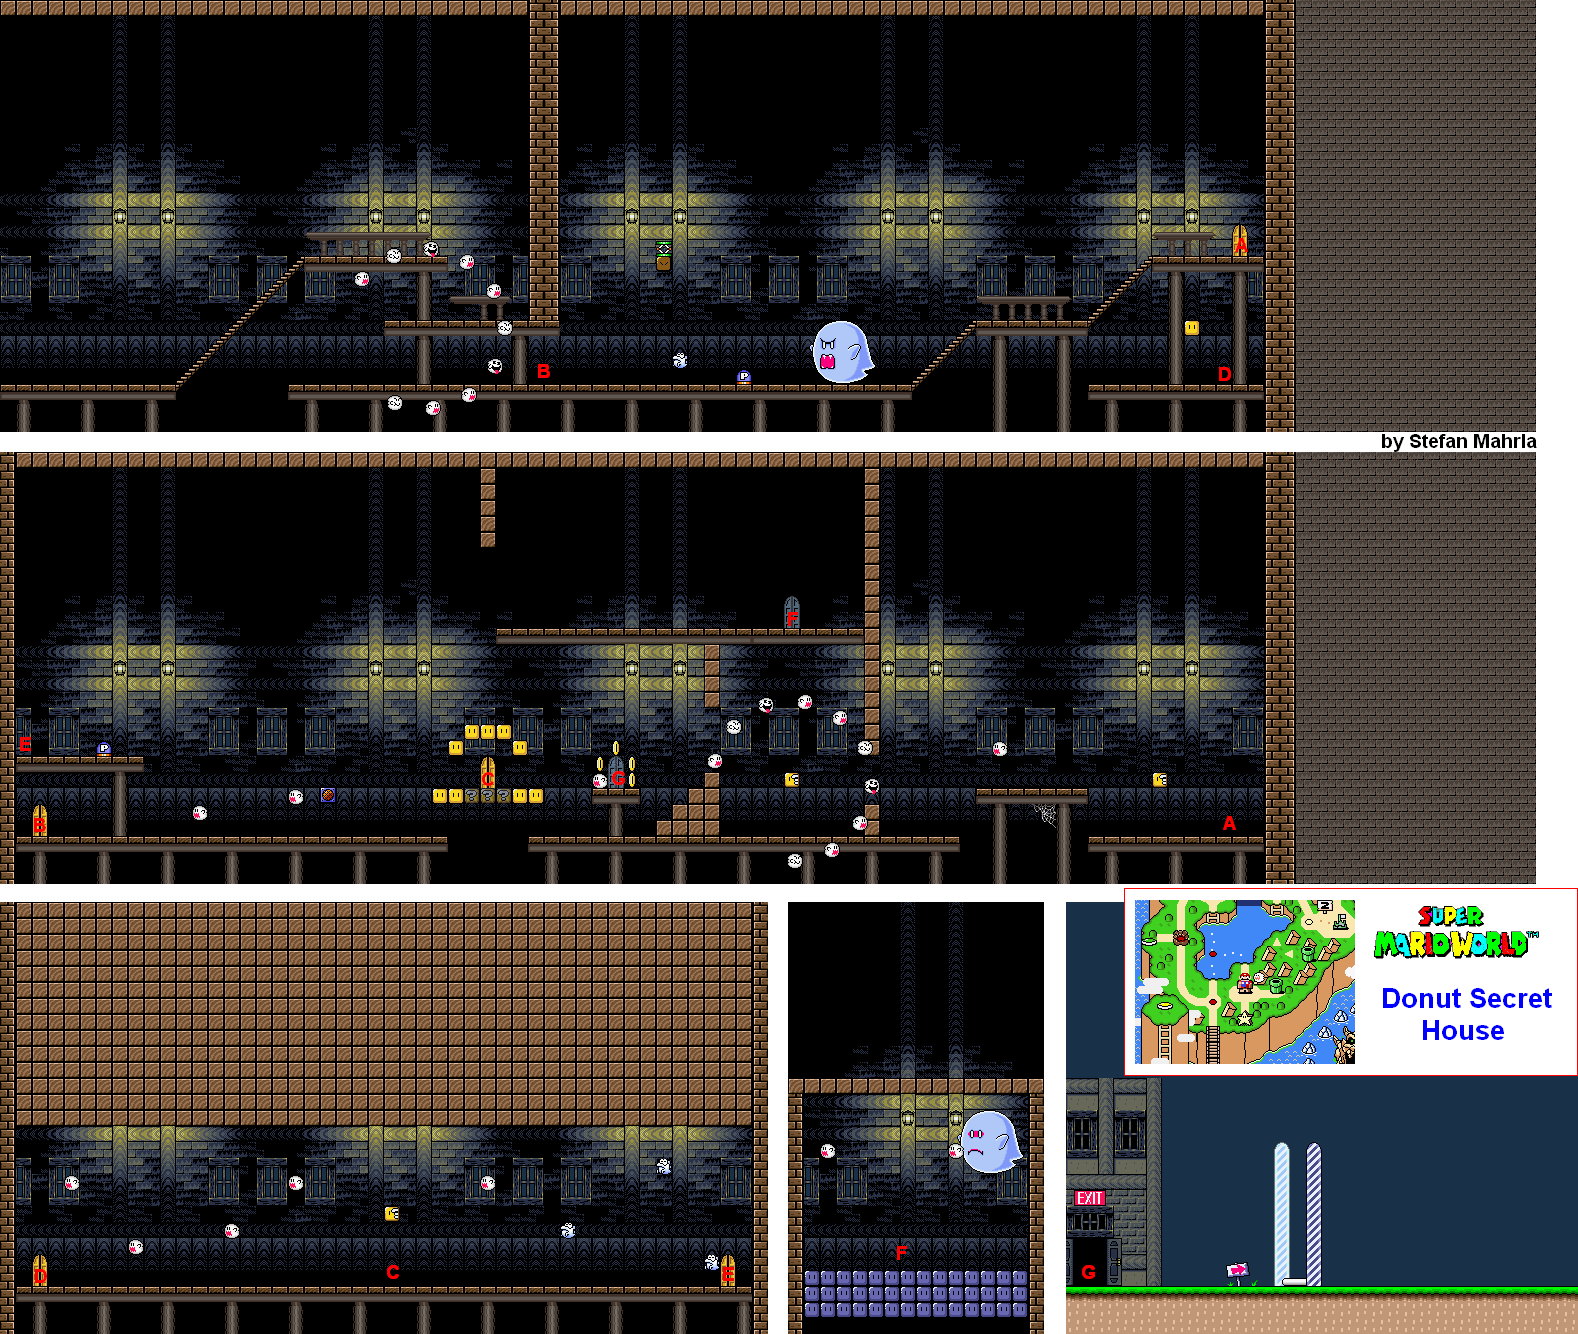
To get the key, you will have to either hit the P-Switch and hurry to the right to get to where the key is (having Fire Mario helps here), or you can hold X or Y and use the Control Pad to guide Mario further to the right to where the key is and trigger it there. From there, you can grab the key and take it to the keyhole, which will allow you to go to Donut Secret House.
To reach the original exit, make your way to the right and avoid the Boo Buddies carousel. To the right is an Eerie (a dinosaur ghost). Avoid it. If you need to, hit the P Switch and grab the springboard to it, and press B right when you are about to jump to clear the Big Boo. You can then run to the right and enter the door.
If you want to, you can get the Big Boo to follow you by facing away from it, then pressing down on the stairway when it is close enough to slide into it and kill it. (This was discovered after the Let's Play was made, and is therefore not mentioned here.) You can also slide on any slope by pressing and holding Down on the Control Pad.
Once you enter the door, make your way to the left, avoiding the Boo Buddies as you go. Much like the Big Boos, you can manipulate the Boo Buddies by facing away from them, which will give them incentive to slowly approach you. They will hurt you to the touch, regardless of whether they are standing still or not.
From there, hit the P-Switch, then run to the right. There will be a door. Enter it. You'll find a path to Star Road, but we will cover it later. (Make sure you grab the outline of coins first, otherwise you won't be able to enter the door and you'll have to re-enter the room by going all the way to the left, entering the door you see and getting past the Big Boo again to get back there.)
For the alternate exit, hit the P-Switch, then go to the door that was in mid-air and hit the block directly above it from below. This will give you a vine. Climb up the vine and make your way to the right, where there will be a silver door if you are fast enough. From here, enter the door. There will be a mini-boss battle.
Here, you will have to avoid the Boo Buddies while throwing the blocks that make up the floor here at the Big Boo when he turns solid. Do not hold X or Y unless you intend to grab the block, and be ready to kick it upwards. The Big Boo will go from transparent to solid at regular intervals, and after three hits, the Big Boo will be vanquished. Beating this boss battle will take you to a pipe. This will take you to the Valley of Bowser, but thankfully, you'll be high up in the upper-left corner, where you can take on Donut Secret 2.
If you enter the door that is mid-air, going left will take you to the platform after that Big Boo that you could not reach (as well as a 1-Up in a block), while going right will take you back to the previous room.
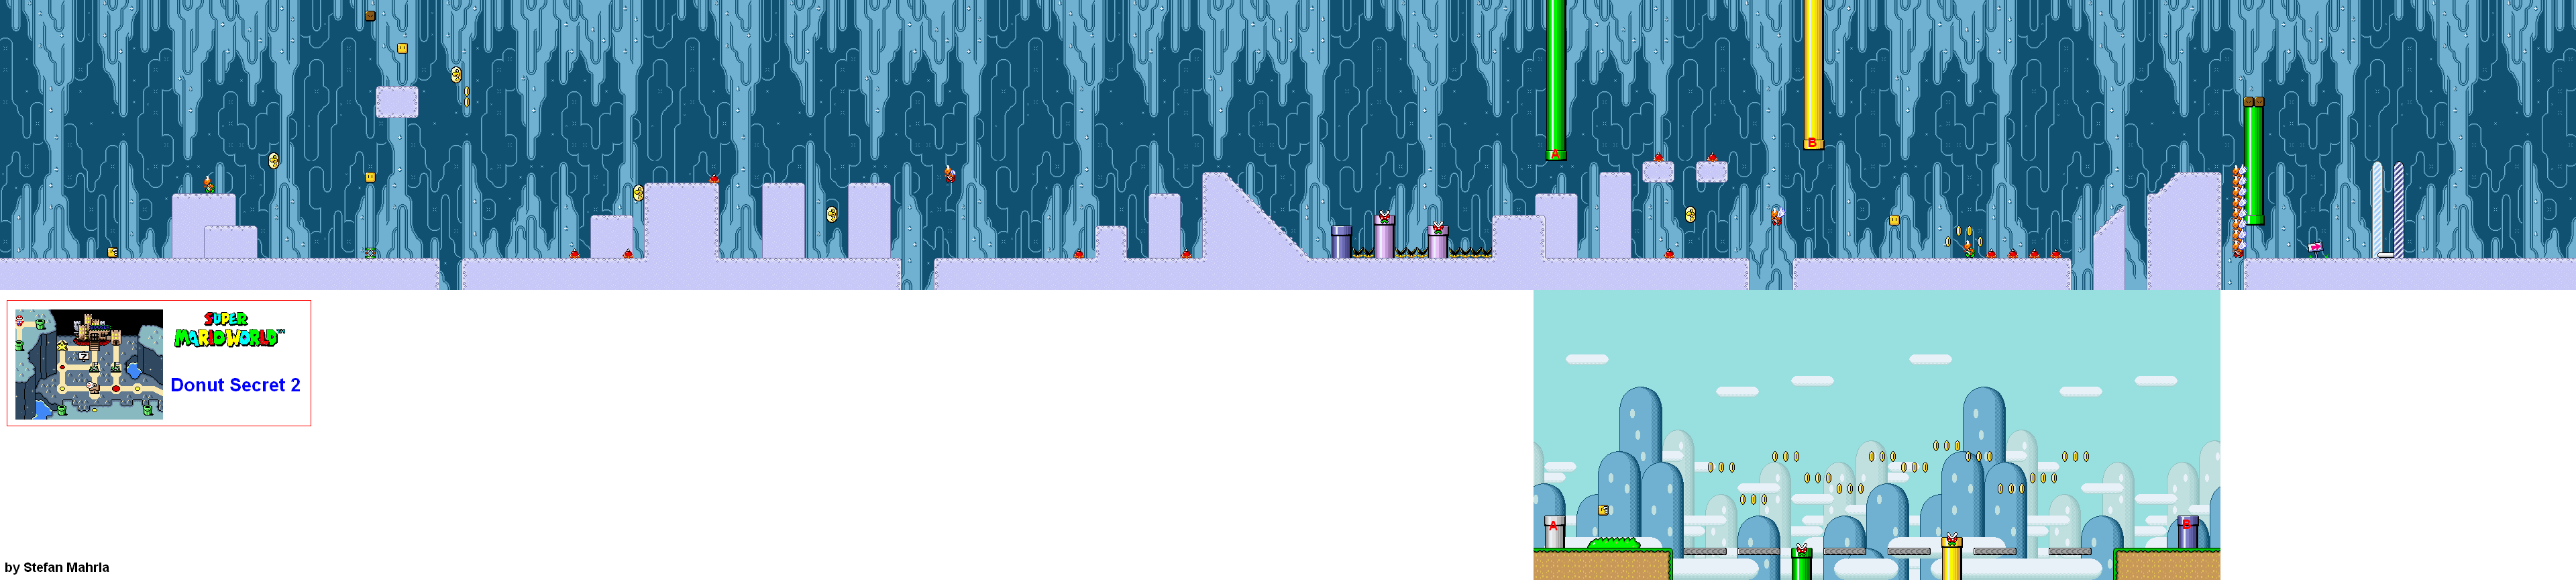
This is an ice level, and of course, it will have ice physics. Be very careful as you explore the level, try to find all five Dragon Coins (hit a block above a springboard to take a vine and reach the second one) and get through the level.
The above-ground section that you can enter near the end does not have much of a purpos and does not let you skip that much of the course, which is short enough to begin with. Sure, you could grab the P Balloon and get the coins, but other than that, you don't skip a whole lot of the level. Do it only if you feel like it.
You'll be introduce to some new things here. There are the solid black lines that act as paths for platforms, as well as the On/Off Switches that you can press to change the track where necessary to get yourself out of danger.
The blue Koopas move faster than all the other ones. Also, when a Koopa is knocked out of a blue shell, you can get a different version of the naked Koopa who will kick any shell in his path forward. If you eat a blue shell with Yoshi, Yoshi will sprout wings, and you can tap B to fly.
You'll also meet the black Fuzzies, who move across these paths. Avoid them, since there is no way they can be destroyed.
You can also do a coin block mini-game before you leave. Just take the upper path near the end, stay on the platform and get on the pipe. Go down, and you can play the mini-game.
You'll meet the yellow Koopa at the beginning...sort of. If a naked Koopa leaps into a Yellow Koopa shell, they will start spinning around, turn invincible and home in on you. You can kill it with a spin jump, but that is about it. If you eat a yellow Koopa shell with Yoshi, you can create sand clouds that knock enemies back when you jump and hit the ground.
The Goombas also make an appearance here. They have a mushroom-like appearance here, but it is harder to notice compared to past games. Some of them will have wings and jump around at regular intervals.
Some of the pipes will increase and decrease in length. You can use that to your advantage.
You'll also meet the flying Sledge brothers, who will stand on flying gray platforms that swoop back and forth as they throw hammers at you. Stay below them and hit them from below by jumping into the underside of the platforms to knock them off.
There is a bunch of cloud platforms as well as some one-ups above the slopey part, but you have to get them in a certain order or else they will not be collected. You can also fly up and get a 3-Up Moon at the end.
Just after the slopey part, you can go down a pipe and brave winged Paratroopas for a Dragon Coin. Thankfully, you'll get shot out to the continue point when you exit that area. Just be sure to jump to grab the tape.
Near the end, Para-Goombas - Goombas on parachutes, will slowly drop down and sometimes be the culprit for a little bit of slowdown (which does not happen often in this game, thankfully). Thankfully, you can get a Starman in a nearby block and mow down a ton of enemies for lives. The box the Starman comes out of it is interesting: it is a glass box that cycles between a Mushroom, a Fire Flower, a Cape Feather and a Starman before going back to the Mushroom. If you can grab the power-up at the right time, you can get the Starman.
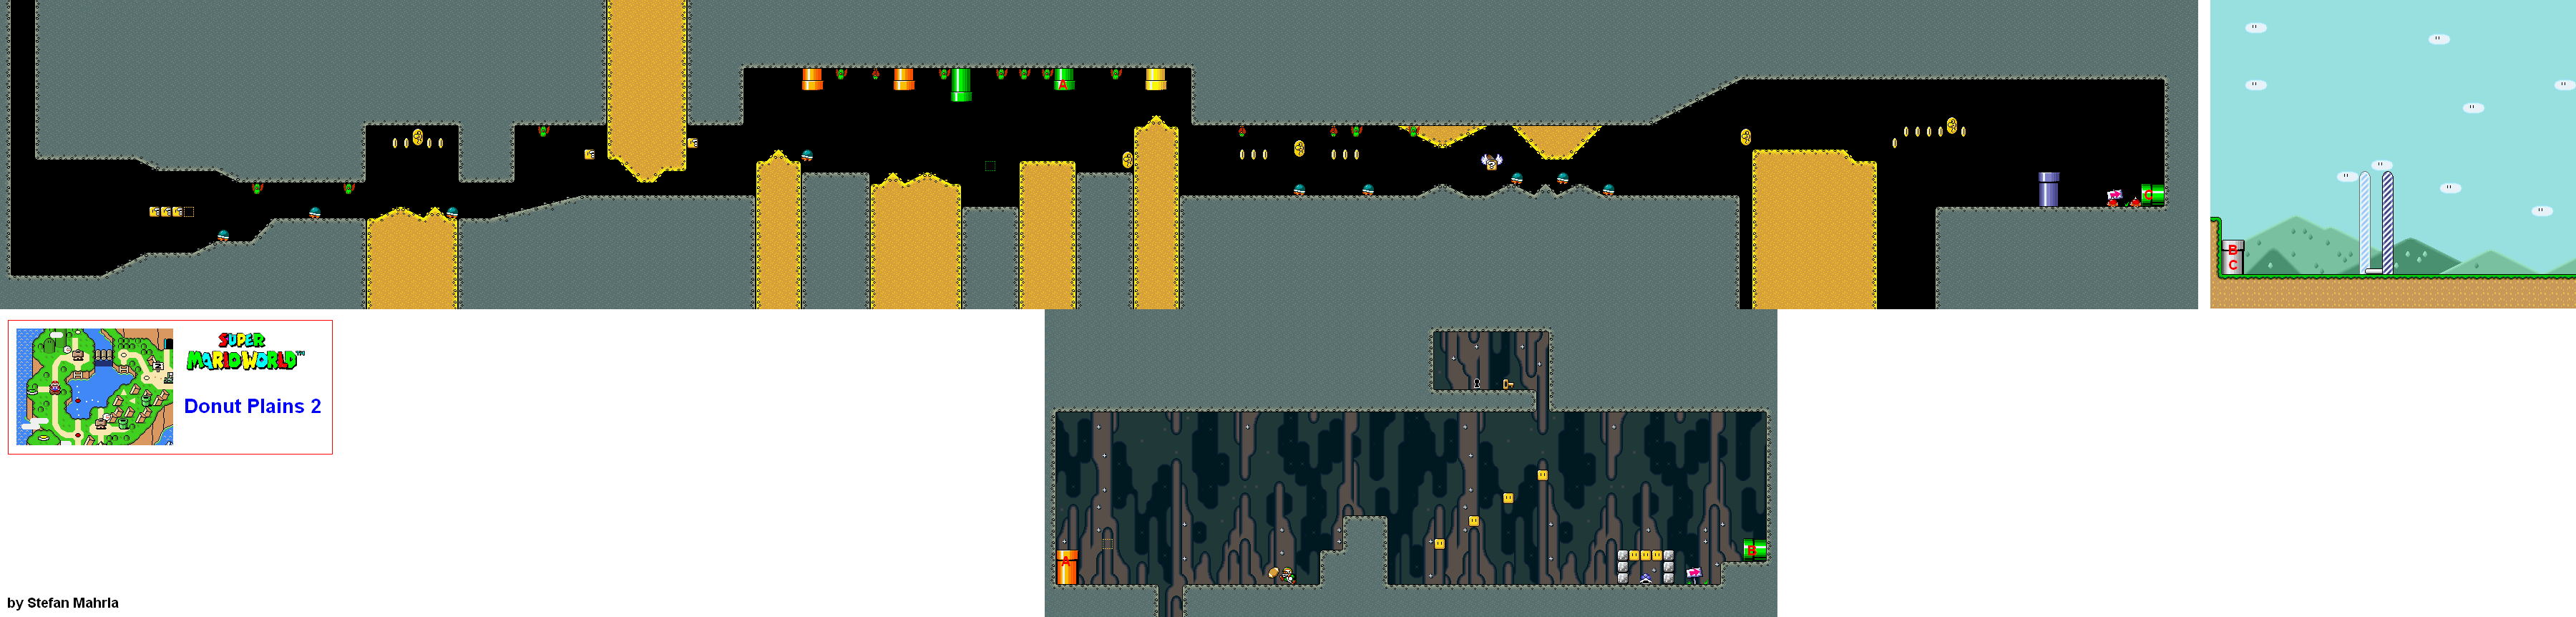
Up until this point, every single normal course you have seen has had a yellow course marker. This signifies that there is only one exit. Donut Plains 1 is the first instance of a red course marker, which signifies that there is two exits. One of them is the traditional end of level goal, but the other one is located somewhere else.
The first enemy you will meet here are the Caped Koopas. These guys wear capes, and they will run at you before jumping up and flying forward. There will be others that swoop in out of the air. Some of these Caped Koopas will have flashing capes, and when you stomp on them with a normal jump, you will receive a Cape Feather. You can then stomp on him again to destroy him.
Grabbing the Cape Feather will turn you into Caped Mario, which allows you to fly in the air for longer than you could as Raccoon Mario...if you know what to do.
Run forward until Mario has hands to his sides. (This is harder than in Super Mario Bros. 3 due to the lack of a P Meter and the lack of an audio cue saying you're at full running power.) Keep holding the run button, and then press and hold the jump button. From there, you have to alternate between Left and Right on the Control Pad in order to fly. You have to get a certain rhythm going to stay in the air without going all over the place, but once you get it down, you can use it sail over some levels and look for hidden things in mid-air.
The first Charging Chuck you see throws baseballs forward. Some will be high, some will be low. The throwing of balls in sports that have them will be a theme with these guys.
The plants that spit tiny fireballs that gently float down are Volcano Lotuses. You can easily destroy them with a Koopa Shell, or you can spin into it by moving into it while spinning as Caped Mario. To spin as Caped Mario, press Y while on the ground or in the air. Keep pressing Y to constantly keep spinning. You can also perform a spin attack by pressing A. Fireballs will not work on Volcano Lotuses, so forget about burning them to a crisp with Fire Mario.
The Paratroops - the Koopas with wings - make their debut here. Sometimes they hop around, sometimes they fly in a certain simple pattern. They take one hit to de-wing and another to de-shell.
With the cape, you can hold A or B to gently float downwards. Using the regular B button jump gives you better results, since you can hold that in conjunction with Y and sometimes bounce off stuff if you know what you're doing.
There are two blue pipes that you can go through. The first one that is connected to four stone blocks takes you to a bonus game. Here, you have a few chances to hit three ? Blocks in a certain order. If you hit the right blocks in the right order, they will all have O's on them and the third one will give you a 1-Up. If you get any one of them in the sequence wrong, the remainder of the blocks in the row will also turn brown, meaning you messed up. You will have to activate the switch at the Yellow Switch Palace in order to enter this area, though.
The second set of blue pipes, which is just after the checkpoint, takes you to a wide-open area where you can practice your skills with Caped Mario, if you so choose. You'll also see the Triangle Blocks. If you see these, you can run into them and then keep running forward to run all the way up the nearby wall. If you're on Yoshi, you will merely bounce off the top of it. There are a ton of coins in this room, so you can get a few 1-Ups here. (If you collect all the coins in this area in the Game Boy Advance version of the game, the four birds from Yoshi's House will fly around you until you leave the room as a reward. This takes a lot of time to do, though.)
Near the end is a bunch of green-dotted line blocks as well as a Triangle Block. If you can get up there, you will reach a key and a keyhole. Grab the key like you would a Koopa shell, then carry it into the keyhole. If you did it right, the keyhole will expand and suck you in, and you'll be able to enter another course. In this case, it will be Donut Secret 1, which is in the lake to the north.
If a course marker has dirt around it, it means that the stage will take underground.
The screen is an auto-scroller, so be ready to pay attention, move and avoid things when necessary. Ememies here include the Swoopers (the green bats that swoop down and then fly forward when you get close enough), the Buzzy Beetles (the blue-shelled turtle like enemies who are impervious to Fire Mario's fireballs just like in games past) and Spike Tops, new turtle-like enemies who debut in this game and slowly walk forward. They have the ability to turn corners on floors, walls and ceilings as well as they can walk on them.
The yellow floors and ceilings will slowly move up and down.
You'll also see the winged ? Block for the first time. It's just a ? Block that has wings that allow it to fly around. Hit it from below to get something. Stand on the top of it to move around as it flies (though there's no reason to do so here).
Thankfully, the auto-scrolling here is pretty slow, and if you're patient, you should be able to get through this course without a problem.
After the crushing ceiling shortly after the start, there are a couple of pipes in the ceiling. The second green one will take you to a hidden area. Here, you will meet a Chargin' Chuck that kicks footballs at you, and you will also see a couple of blocks followed by a blue Koopa shell located underneath three blocks. You can get the Koopa shell and hit the highest block to reveal a vine, then you can use the lower blocks like a staircase to the vine and climb up it to a key and keyhole. You can also hit the highest block with a cape or a Yoshi super jump. This takes you to the Green Switch Palace.
The auto-scrolling gets a little faster near the end of the stage that leads to the goal post, but thankfully, it's no sweat.
If you can press the P Switch just right, the naked Koopa will kick the Koopa shell to the left. It will bounce off the wall, and if you keep running to the right from there, you can get a 1-Up.
Hitting the Green Switch will changed all the green dotted-line blocks to solid green ! Blocks. Hitting them from below will always give you a Cape Feather.
The Ghost Houses are a maze of sorts, and most of the time they will have two exits. Whenever you complete a Ghost House, you will be allowed to save your game.
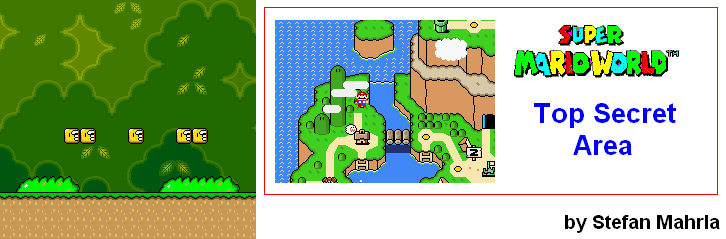
Remember those pamphlets that advertised Nintendo Power that appeared in the boxes of every Super Nintendo game ever that started in 1991 and never changed? If you played these games back in the day, there's no way you can forget them. If you can fly up and all the way to the left at the very beginning, you can reach a hidden set of platforms above. Jump over the pits and avoid the ghosts when they turn solid, and at the end you will find a few 1-Ups and a goal post that leads to the Top Secret Area. The Top Secret Area allows you to get your fill of power-ups, and if you ever need a Fire Flower and a Cape Feather, you can find them all here. You can even get Yoshi in the Top Secret Area, which is nice.
Anyway, here's how to deal with the level normally. Run all the way to the right at the beginning, avoiding the Boo Buddies when they turn solid and dive down at you, as well as the pits in the floor. From there, run to the right. You'll end up on the lower level of the next room. Leap to the left to the stairs and go right to the door on the upper level and enter it. From there, you'll be on the lower level of the previous room. Hit the block to the left from below, then go up to the upper level and climb up the vine. That's all you have to do to reach the normal exit.
In the second room, if you hit the block from below there, you'll get a P-Switch. If you hit it, you'll see an arrow made of coins telling you to go to the left. There, you will find a silver door that isn't normally there. If you enter it, you will be in another room. Hitting the ? Block here from below will cause a line of coins to come out, and you can control where it goes with the Control Pad. Mario will, of course, be moving as you do this. If you have Caped Mario, you can fly around and get your fill of coins. Thankfully, it's easy to figure out where to go to exit the level regularly.
It's time to play a Mario game at last! This was the first one that I beat as well as the first one that I really got into back then.
Overworld map by Rick Bruns. All other maps by Stefan Mahrla.
Ah, yes, the first game I ever had as my own when I was seven years old. It was the first game to come out for the Super Nintendo Entertainment System in Japan, Europe and North America, and it brought a lot of new places, new faces and new things to the Mario universe, much of which are still used to this day.
Not only can you save your game, but for the first time, the Mushroom Kingdom does not factor into the plot. Sure, Princess Toadstool/Peach is still kidnapped by Bowser, but now you are in Dinosaur World, which has a score of new antagonists and allies to introduce.
When you enter the overworld, you can use the Control Pad to move Mario from one course to another. When you see a course you want to enter, press A and you'll go in, much like in Super Mario Bros. 3.
There's nothing you can do here. If you jump into the blue block with the orange circle from underneath, you'll get a message from this individual named Yoshi, who has gone to rescue their friends who were captured by Bowser. It seems Bowser has kidnapped more than just Princess Toadstool.
Walk off either end of the screen to leave. From here, Yoshi's Island 1 is to the left, and Yoshi's Island 2 is to the right. Let's start with Yoshi's Island 1.
The sliding shell-less Koopa at the beginning of the level is just one of numerous new enemies you'll meet in the game. Also included in the new enemies you will meet here is the Banzai Bill that follows afterwards. It's big enough to make 7-year-old me think I was fighting a mini-boss at the very beginning of the game. Thankfully, you can take both down with a single jump.
The controls are simple. Left and Right on the Control Pad let you move around, Up lets you look up and Down lets you crouch. B lets you jump, while A lets you do a spin jump. Holding X or Y lets you run.
The purple dinosaurs that slowly walk forward are Rexes. You can kill them in one hit with a spin jump, but you can also use a regular jump to hit them twice, flattening them on the first one (which also makes them move faster). It's pretty funny.
Sometimes, you can walk past a bush and a power-up like a mushroom will pop out of it. Mushrooms turn you into Super Mario, while Fire Flowers will turn you into Fire Mario, just like in the old games. Getting hit in either form turns you back into Small Mario, and if you get hit as Small Mario, you will die.
The HUD on the top is pretty simple. From left to right, you have the number of lives you currently have, the number of Dragon Coins you have (more on those later), the number of Star Points (more on those later), the current power-up you have in reserve, the amount of time you have, and the amount of coins you currently have followed by your score.
The Dragon Coins are larger coins that have a dinosaur's face on them. There are five of them in any given level, and if you find all five before you leave, you get a 1-Up.
The blue box has the power-up you have in reserve. Let's say you're already Super Mario, and you pick up another Mushroom. You will still get the points for it, but it also shows up in the blue box on the top. You can press Select to cause it to come down so you can collect it - especially if it is another power-up like a Fire Flower - but in case you get bumped down to Small Mario, it will drop down automatically. The catch? You still have to catch it as it comes down, or you will lose that power-up. You'll then have to get another one in the box somehow.
You can be Super Mario and pick up a Fire Flower, and the Mushroom will still show up in the box, so in case you get hit, you have a third hit, provided you can grab the Mushroom as it comes down. You won't have your fireballs, but you still have a second hit again nonetheless. The blue box at the top can be very useful.
If you see yellow blocks with short vertical lines for "eyes," press A to spin jump while on top of them when any Mario other than Small Mario to break them from above.
Just like in the NES games, you can press Down while standing on the center of a pipe. Sometimes, you can go down a pipe and see what's below. You can also jump up into a pipe while holding Up to go up a pipe in the ceiling.
The small blue barber poles with the tape in between them is a checkpoint. Jump into the tape and you'll continue from that point when you re-enter the level after you die.
To pick up an object like a Koopa shell, move into it while holding X or Y. Keep holding the button to keep carrying it, and let it go to let go of the item. If you're moving when you do that, you will kick the item forward. You can also throw an object up by holding Up and letting go of X or Y (depending on which button you were using). This will let you hit the box above the red Koopa shell shortly after the continue point, which will award you with a green 1-Up Mushroom (which obviously gives you a 1-Up).
The Fire Flower is back, and it turns you into Fire Mario. To shoot fireballs, press Y. You can also shoot fireballs if you press A to spin jump.
The Piranha Plants are now free from their vines, and will now shoot out of pipes before jumping right out of them. You'll also see Chargin' Chucks - the football players - throughout the game. Some jump up and down, others run at you for a tackle, some throw balls of various sorts at you, but they're all annoying.
The big blue striped poles with the moving tape at the end is the goal. The higher the tape is if and when you touch it, the more Star Points you get. Get 100 Star Points, and you will enter a bonus stage at the end of the level. (More on that later.) The most you can get is 40, but it has to be at its absolutely highest point to get it. More often than not, you'll probably get 30.
When you beat Yoshi's Island 1, you will open up a path to the Yellow Switch Palace, complete with a ladder going up a mountain and a pool to swim through.
There is a P Switch at the beginning of the stage. If you leap on it, coins will cover the room for a limited amount of time. Grab as many as you can before they disappear. You'll be able to get at least one extra life.
After that, go through the pipe, make your way to the end and jump on the switch to turn all the yellow dotted-line squares into yellow ! Blocks. If you hit one from underneath, it is an instant Mushroom.
That's all for the left end of Yoshi's Island, so it's time to go to the right and enter Yoshi's Island 2.
You have a free shot at a 1-Up at the beginning. Grab the Koopa shell, kick it to the right on the above platform, then run to the right so the shell hits all the nearby Koopas.
If an egg comes out of a block, then congratulations! You found Yoshi! Yoshi is a dinosaur with a saddle on his back, and you can jump into him to ride him. Press Y to grab things with Yoshi's tongue and hold them in his mouth, and press Y again to spit it out in case Yoshi's can't swallow it. Some of the things that Yoshi cannot swallow include, but are not limited to, Koopa shells and P Switches; however, he can swallow them if left in his mouth for too long.
To get off Yoshi, press A to spin jump off. If you are in the air when you do this, you will do a superjump. Remember this for later.
In case you are hit while on Yoshi, you will be knocked off Yoshi and Yoshi will run away. Jump on him before he falls into a pit (or something) and you'll be able to ride him again.
After the Chargin' Chuck, you'll meet a new enemy: Monty Moles. These little moles will pop out of the ground and out of platforms in the background, and they will do one of two things: chase after you, or move in one direction. They can be easily taken down either way.
Sometimes, you can find a vine in a block. If you're not riding on Yoshi, you can get in front of it and hold Up on the Control Pad to climb up. Hold Down to climb down. You never know what you might find at the top...or in-between.
Oh, and don't worry about Yoshi disappearing if you go of-screen. That won't happen unless you are very far away from him.
There is a pipe you can go down where you can grab some blue blocks and kick them upwards into other flying blocks. One of them will carry a 1-Up. When you grab the Blue Blocks by walking up to them and holding X or Y, they start glowing. When the glowing slows down, they are about to disappear, so you do not have long.
The P Switch at the end will allow you to skip the Chargin' Chuck on the way to the goal.
Watch out in this level. There are plenty of bottomless pits, even though there are plenty of moving platforms to keep you in the air. There are some that expand and contract (sometimes vertically), and other that rotate if you stand on the center of them for a while.
If you go down after meeting the first Koopas, you'll find a yellow pipe. Go down it, hit the P Switch, and take the temporary coin block bridge to get a Dragon Coin.
If Yoshi eats a Red Koopa and spits it out, Yoshi will spit out a three-way fireball attack. Different colored Koopas give Yoshi different abilities.
The green block with the white star will give you a 1-Up if you have collected 30 coins in the stage; otherwise, you will only get one coin.
If a course marker on the map is in water, it means that water will be involved in the level somewhat.
The blue pipe takes you to a land-based area where you will meet Pokey from the Western version of Super Mario Bros. 2. If you have Yoshi, you can eat him segment by segment. Whenever Yoshi swallows something, it counts as collecting one coin. It should also be mentioned that Pokey has five segments if you are riding Yoshi; if you are not, Pokey only has three.
The sea urchins in the water can be eaten with Yoshi, and you can spin jump on top of them (and some other spiny enemies) to bounce off of them.
Pressing Start to pause the game followed by pressing Select in a level you have completed will allow you to exit back to the overworld.
By holding Up when pressing Y to get Yoshi to eat something, Yoshi will not duck as he extends his tongue.
If you can hit the P Switch and then get the Starman - which gives you temporarily invincibility - you can run into enough enemies to earn a few 1-Ups.
If you fall into the bottom of the screen, you will die.
Iggy's Castle is the first of quite a few special buildings such as castles, fortresses, and other places that you will see in the game. The first screen will always show you going into the building, but you can always skip it. If you bring Yoshi with you, you will drop Yoshi off at the front door before going on. Thankfully, you get to keep him even if you die in this stage.
Here, you'll be climbing on fences. Position Mario in front of the fence, then press Up to start climbing. From there, you can move in eight directions with the Control Pad and press Y to punch. If you see a door, you can press Y to punch the door and swing over to the other side. If an enemy is on the same side of the fence as you, they can hurt you; otherwise, they can not. Press B or climb down to a floor
If anything like a Koopa is on the other side of the fence, you can punch them with the Y button to knock them off and score some points. If they're on the same side of the fence, you can climb downwards onto their heads to take them out. The game considers you to be in the air as long as you are on the fence, and as long as you stay on the fence, you can get an extra life if you can defeat enough enemies this way.
Unlike you, if Koopas ever reach the end of a fence, either horizontally or vertically, they will climb over to the other side.
The lava is obviously death, so don't fall into it. Speaking of fiery things, the Podaboos (the fiery things that have been known to leap in and out of the lava dating all the way back to Super Mario Bros.) make their first in-game appearance here. Avoid them at all costs.
If you see a doorway, move in front of it and press Up to go through.
The second section is auto-scrolling. Watch out for the crushers that come down from the ceiling, and be careful not to fall into any pits along the way.
The boss here is Iggy, one of the seven Koopa Kids from Super Mario Bros. 3 (and named after Iggy Pop). You will have to jump on him to push him back, and hope the ground behind him is sloped downward as the platform you will be fighting on will be rocking back and forth. When you knock him into the lava, the boss fight is over. Be sure to stay on the platform, so you don't fall off, especially at the end.
Here it is: the thrilling conclusion of GS Mikami: Joreishi wa Nice Body!
The final boss is pretty easy. Stand just to the side of center for a free overhead swipe in the air, then avoid the attacks. If the boss shoots out lightning from the top of the screen, avoid it. Thankfully, the lightning always lands near her. If she shoots out those blue dragons that track you, swipe them away with your baton. If she drops down, get away so that you don't smacked with that two-pronged spear.
The floor rocks back and forth as the battle progresses, and you can use that to get a little bit of a boost as you fight the final boss. You can simply overhead swipe from the edge when it's leaned upwards and hit the boss without jumping, which can be a plus. Just watch out for everything else.
If you know what you're doing, you can beat this boss in less than two minutes.
After the match, the apartment is a mess, and Mikami is irritated with Yakujin. The statue is in the trash...where it sorta belongs. You've beaten the game!
The boss is easy, but the level itself? Not so much. It's still doable, though.
Report 7
This level is probably the most frustrating of them all.
The question mark gives you a gray baton that lets you shoot out platforms you can grab with the overhead shot in mid-air. You must be in the air to create the platforms, and you can only have two on the screen at any time. The platform-creating projectile can also damage enemies, too. so at least you're covered there. Be sure that you are standing on a platform when you create one; otherwise, you may lose the projectile you're trying to land on. Thankfully, if you get hit, you do not lose this power-up; however, it only lasts for the non-boss section. Unlike other levels in the game, there is just the one section followed by the boss.
This ability will prove most useful if you can stay up top. If you don't, you'll go all the way to the bottom, where you'll see enemies such as fairies that shoot projectiles forward, flying clowns with fans, bunny girls that shoot lightning and jumping statues. Probably the funniest ones are the flying ghosts that look like 100-yen coins. When struck, they turn into 50-yen monsters, followed by smaller golden coins.
You'll also notice the background switch between a blue hue and a red hue. When the background is blue, gravity is normal. When it turns red, gravity is reduced and you will have some floaty jumps as a result. You may have to wait a while for the gravity to lessen before you can make a move if you're at the bottom, where you'll have to watch out for pits.
At one point on the bottom path of level (assuming you even reach it), there is a point where Yokoshima drops down from above and grabs onto you, slowing you down tremendously. If that happens, mash Left and Right on the Control Pad rapidly until he lets go.
After smacking Yokoshima again, a purple werehorse appears. He creates his own version of Mikami with a much more modest dress and her own baton. She can easily be trapped on the side of the screen and smacked repeatedly. Then, you have to whack the purple guy out of the air. When you do, he will crawl around the screen. This is your cue to duck down and smack him with your baton. Just like the evil Mikami clone, you can trap him on one end of the screen and repeatedly whack him.
After you grab the green jewel, you'll instantly go back to the apartment before putting the jewel in. The bust will have more macabre eyes, a snake wrapped around it and a skull in its hand. All of a sudden, a demon with a trident will appear, and you will have to fight it...
We take on our hardest case yet as we head to a construction site for another jewel for the bust!
Report 6
This report sees Mikami entering a construction site. The blue curtain ghosts will swoop down at you, spirits in construction hats will throw spackle at you, and rats will squeak by that you can only hit when you duck down. Cement bags will flop back and forth, and when they start moving, move back, duck down and strike. It will hit them.
The leaping one-eyed rocks are indestructible. You will have no choice but to jump over them. If you strike them, they will be stunned for a moment. Be sure to stay close before you jump over them.
You'll also see conveyor belts here. Pay attention to where the lines are moving to see where they go.
The balloon bombs with the skulls on them quickly count down from three to one before they explode into a six-way shrapnel shot.
When you see Okimu, back away. She will either drop a couple of power-ups or she will drop a couple of cement bag enemies.
The question mark power-up gives you something completely random.
In section two, you'll see purple blobs that stay put on the conveyor belts as well as ghost hands carrying lanterns that slowly move in one direction. You'll eventually drop down in some sort of murky material that will slow you down unless you keep jumping. Watch out for the monsters that pop out and throw rocks at you. Wait for them to stop throwing stuff to get closer and hit them.
Later on in the section, you'll be surrounded by lantern hands and shrapnel bomb balloons. Be ready to swing your baton like crazy. When you reach the bottom again, strike the jumping rocks when they reach the bottom so you can jump over them.
The boss here is a ghost clown. When he appears, jump up and hit him with an overhead swipe. Be sure to hit him before he can back away, otherwise you will have to avoid the fireballs that he drops down. You can stand between two fireballs if you need to, but you can also stand at the left edge of the screen.
After enough hits, he starts riding a mouse holding a needle. Destroy the miniature clowns before they shoot out an unavoidable attack. Also, watch out for the projectiles that the clown ghost shoots towards the floor; otherwise, they will turn Mikami into a little girl and you won't be able to attack until you change back. This attack will hurt you and cause you to lose your power-up. The weak spot will be the mouse's head.
If you do have a projectile, stand where the vertical girder in the background is on the left side of the screen, and shoot at the head from there.
When you beat this boss, you'll get the gray gem which adds to the knee pads on the best and also creates a crown. The armor is starting to look more demonic.
Back at the apartment, it is revealed that the seventh gem is in the dream world. In order to get there, we have to whack Yokoshima hard enough to whack him unconscious.
And we have the flying level, which can be tricky if you're not sure what to watch out for.
Report 5
The first thing you will find out is that the broom in this level is pretty slow. It does not change direction on a dime, either.
At the beginning, there are two demons carrying power-ups. Hit the lower one, since the red wave projectile it carries will be more useful here.
Other enemies you will meet are brown masks that dive down, green which that shoot projectiles, skull dragons that take two hits to kill and fly quickly at you after the first hit, blue dragons who dive upwards after blowing fire, yellow dragons that dive upwards and tiny green spiked guys who come at you in groups.
Be sure to keep an eye on the entire screen at all times; you never know when you'll be ambushed.
The boss here is some sort of vampire. When he spins around, move in circles, and keep striking at the boss. Keep an eye all over the screen afterwards, so you can avoid him as he flies from one end of the screen to the other multiple times. Keep attacking, too. You never know when you'll beat him.
When you beat that vampire, you'll see gauntlets, a skull and a scythe on the stone bust.
