We've defeated Lemmy. Now it's time to explore the mountains of Dinosaur Land.
Overworld map by Rick Bruns. All other maps by Stefan Mahrla.
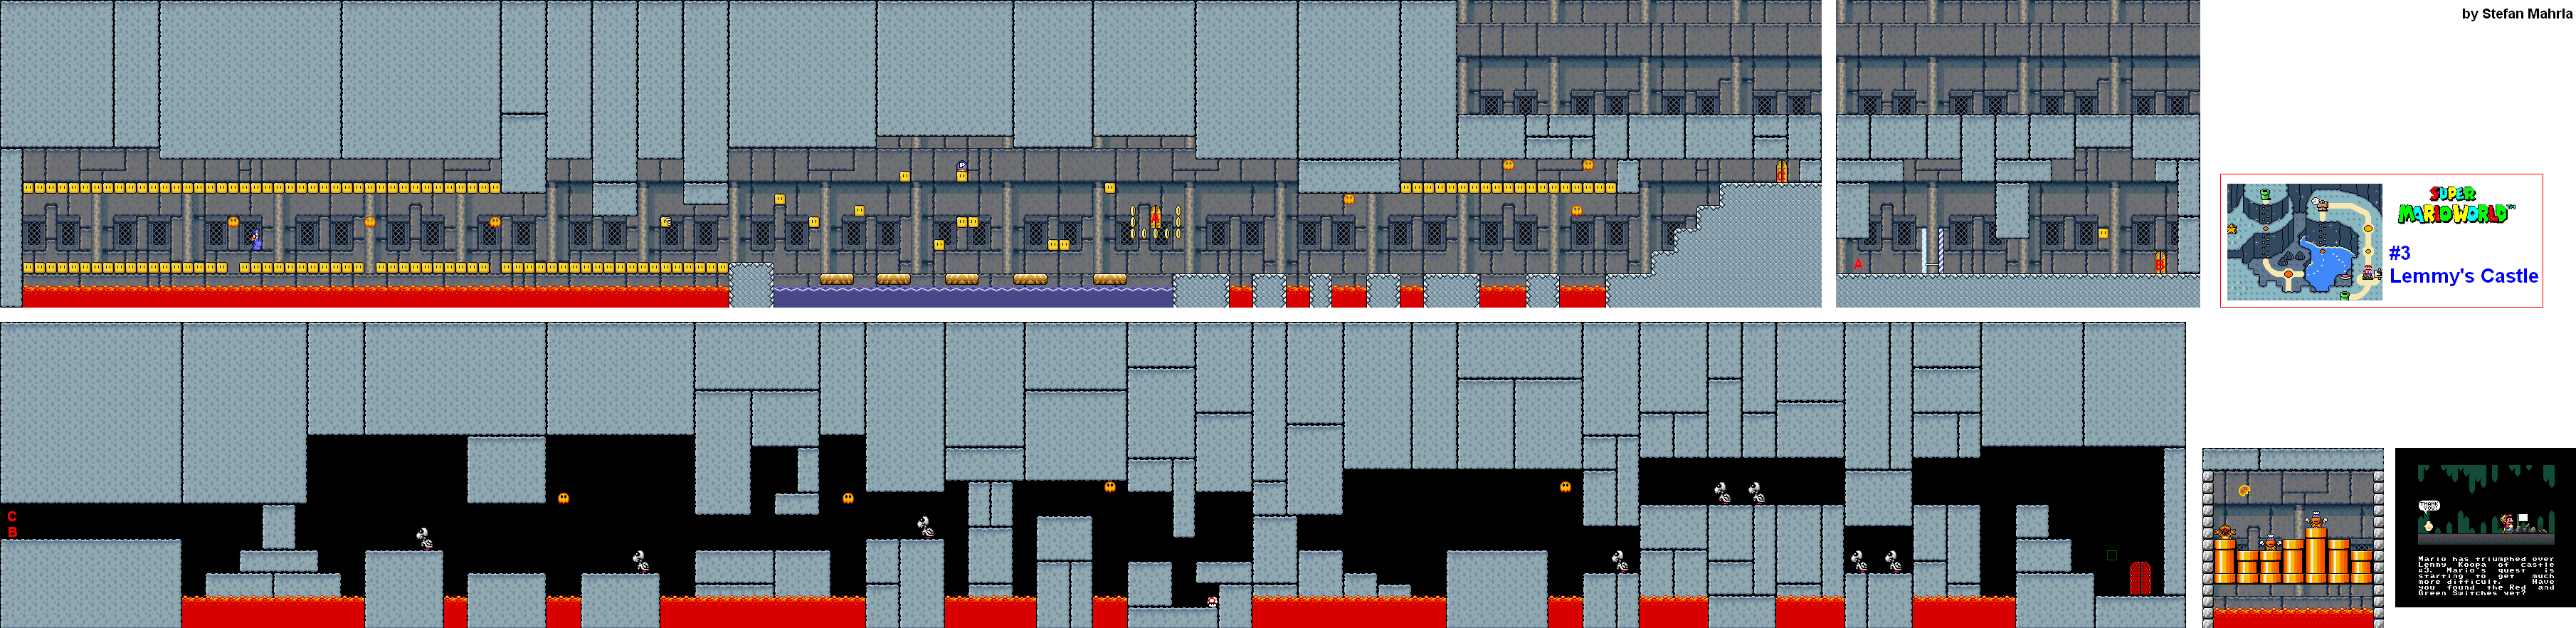
#3 Lemmy's Castle
In the first part of this stage, you will meet the Magikoopa for the first time. The Magikoopa is a Koopa in a blue wizard's robe who will shoot magic at you. If it hits any of the blocks in the air above the lava, that block will turn into either a coin or a yellow Koopa. Leaping on a yellow Koopa gives you a coin just for de-shelling them.
You can jump on the Magikoopa to defeat him, but he will eventually come back.
If you can somehow get to the P Switch in the water section afterwards, you can access a door that is in mid-air. If you can get the left-most column of coins before hitting the P Switch, getting to that switch will be easier. If you can get in, you'll be able to hit a checkpoint so that you don't have to deal with the Magikoopa again in case you lose a life. Also, the lone block will contain a 1-Up.
Readrdless of whether you make it to the checkpoint room or if you go past it into the second lava section, you'll end up at the next section. Here, you'll have to wait for platforms to rise and fall out of the lava while avoiding Podaboos and dealing with Dry Bones. Having Caped Mario to take down the Dry Bones with a spin after you jump on them makes it a little easier near the end.
To beat Lemmy (named after the late Lemmy from Motorhead), you'll have to stay on the move and watch the tops of the pipes. There will be two fake Koopas and one real one, who just so happens to be Lemmy. You'll also want to watch out for the Podaboo in the room that is bouncing around at 45 degree angles. When you're close to Lemmy (he'll be the only one moving), be ready to jump on him before he ducks back down into the pipe. The fake Koopas and Lemmy will come out of random pipes at a timed interval, so keep an eye out and be ready to jump to avoid accidentally touching any of them as well as to dodge the Podaboo.
When you jump on Lemmy three times, you'll free the third of Yoshi's friends and you'll be able to head to the fourth area in the game. But we're not quite done yet. Instead, we're going back up the left-hand path and going to the roof of the Dome so we can go to...
Vanilla Secret 2
If you know what you are doing in the first half of the level, you can get plenty of 1-Ups just by jumping on the green Para-Troopas that are flying about. It especially helps if you are Caped Mario if you're trying to pull that off, since you'll be able to slowly float to the next set of Para-Troopas and stomp on them without touching the ground.
After the checkpoint, you'll meet the Spinys! They're just like the orange spiked turtles you've seen in past Mario games. There will also be a Lakitu peeking out of a pipe who you can defeat by jumping on his head. Just like his cloud-bound cousins, he throws Spinys. Also like his cloud-bound cousins, he is a jerk.
Also past the checkpoint are Para-Bobombs. When they land on the ground, they act like regular Bobombs. You may remember them from the second (Western) and third Super Mario Bros. games, as they walk towards you and after a certain amount of time, they stop moving, start flashing and eventually explode. If you're caught in the explosion, it's going to hurt.
Up until now you have only seen blue P Switches. Near the pit of Spinys, you will be introduced to the silver P Switch. Stomping on it will turn all enemies into silver coins for a limited amount of time. If you collect enough of these silver coins (which are worth no more or less than standard coins), you will get a 1-Up.
If you jump into the green pipe with the Lakitu in it at the end, you can press a P Switch and run to the right to not only get a Dragon Coin, but also get shot back out to where you were out of a huge diagonal pipe. Also, if you can fly to the right at the very beginning of the course, you'll find a Dragon Coin that is very easy to miss.
Vanilla Secret 3
Here's a new thing: dolphins! Thankfully, these dolphins are very friendly, and will help you complete the stage by acting as platforms. The ones that look straight up and leap strictly vertically are the hardest to land on, but that's what Caped Mario is for.
The angry, spiked puffer fish can be killed with fireballs from Fire Mario, but you can just as easily avoid them if you're nimble enough.
Thankfully, this course is very linear and very easy to get through.
Vanilla Fortress
This fortress is in water on the overworld screen...which means that you're going to be underwater the whole time.
There are four Fortresses in all in the game, and while you don't have to get through any of them to beat the game, beating them does help you find paths to some cool stuff.
There are two ways to get to the second section: the narrow pathway with the spiked ceiling that you can take with Small Mario, or swimming to the blue pipe at the end. If you take the long way, however, you skip half of the second section.
If you see brown spikes, they will shake and then fall down when you get close enough.
You'll also meet the Bone Beetles here. Just like the Dry Bones, stomping on them will cause them to fall apart for a short amount of time. Just make sure you're not about to land on them when they stop and expand their back spines, as that makes them temporarily invincible until they come out and start moving again.
Oh, and the skeleton fish, known as Fishbones in-game. Avoid the skeleton fish at all costs.
At the end of the Fortress, you'll meet the Reznors. The Reznors will be the boss of all four Fortresses, including this one. They stand on the platforms of a moving carousel, spitting fireballs at you which will track your current position. To defeat them, jump into the undersides of the platforms to instantly knock them off.
When you beat two of the four Reznors this way, the bridge will start disappearing. This is your cue to get on an empty platform, and quickly. The best way to counter this is defeat one Reznor, then wait for the next to pass you by and defeat the one after that. That way, you'll have plenty of room to move around when you finally get on a platform. From there, you'll have to stay on the carousel to take down the other two Reznors.
Once you're done, you'll unlock Butter Bridge, which allows you to take a shortcut straight to the fourth castle if you can successfully cross it. But we're not tackling that just yet; instead, it's time to head to...
Mountains of Dinosaur Land/Twin Bridges
There's not a lot to this part of the game, but there are still plenty of surprises here.
Cheese Bridge Area
The platforms and their paths are back...and this time around, you'll have to deal with shaky saw blades on motors coming at you from both sides! Get on the very top platform, then move between the platforms and keep Mario from being an unplanned surgery patient by avoid the spikes, and you can get three of the five Dragon Coins.
When you make it back to some sort of solid ground, you'll find the Wings. If you are currently riding Yoshi, you can grab them and enter a bonus stage for some Dragon Coins. If you haven't grabbed any of the Dragon Coins for the current course, you can get all five here Regardless of whether you make it to the end or not, if you drop to the pit below, you'll clear the stage and get the normal exit.
It should be noted that if you touch the Wings, your current Yoshi will immediately turn into a blue Yoshi. So there's that.
The optional pipe section contains Bullet Bills that always travel diagonally, show up in groups of four and always go right for your current position. Stay on the move here.
The second half of the stage has you climbing up and down a motorized rope while avoiding more of those saws. Thankfully, this part is not too long.
There are two exits, and they are both at the end. The traditional exit that you see first will take you to Cookie Mountain, but if you can all the way here with Yoshi and Caped Mario, float underneath that goal and press A to get on the other side of that goal, you can keep going right for a 3-Up Moon as well as another goal gate. This will take you to Soda Lake.
No comments:
Post a Comment