Here's every track from Sly Cooper and the Thievius Raccoonus, also known as Sly Raccoon in PAL regions.
Thursday, September 30, 2021
HCBailly plays StarTropics II: Zoda's Revenge - Part 1 of 15
Surprise! After so many months of posting stuff based on my own material, I've got notes based on other Let's Plays by other uploaders.
Just like with Secret of Evermore, I was just about to play this one when HCBailly started uploading videos for StarTropics II. When that happened, I held off on this one on the chance that HCBailly (or his fanbase) came across something that I didn't know about. Not surprisingly, this Let's Play and the forthcoming notes ended up being the basis for what I did in my own.
Just like with Secret of Evermore, I was just about to play this one when HCBailly started uploading videos for StarTropics II. When that happened, I held off on this one on the chance that HCBailly (or his fanbase) came across something that I didn't know about. Not surprisingly, this Let's Play and the forthcoming notes ended up being the basis for what I did in my own.
Next | End
If you leave the game running long enough, you'll get up to speed on what happened at the end of the first game, as well as brief descriptions of the main and supporting protagonists.
Chapter 1
The game starts with us meeting Mike Jones, the protagonist from the first game. This time, we're back in Seattle, Washington (nice nod to Nintendo of America there, game). Regardless of whether or not you remember his uncle, Dr. Steve Jones, you'll learn from Mike that there was a cipher on the meteor that served as the vessel for the children of Argonia from the end of the first game, and that Dr. Jones is trying to decipher us. Suddenly, Mica, the oldest of the children and daughter of King Hirocon of Argonia, contacts Mike telepathically. She tells him that her father spoke to her in a dream, and that all he said was "Was it a cat I saw? Was it a rat I saw?" before her telepathy powers disconnect.
Mike meets up with Dr. Jones and tells him about the dream message that King Hirocon gave to Mica. After pondering it, Dr. Jones realizes that the two questions that Hirocon proposed to Mica read the same both backwards and forwards, and that Hirocon wants him to reverse the cipher
Dr. Jones then asks Mike to get the Oxford Wonder World. Mike pulls the book out and reads the cipher, which is based on "Papa Oom Mow Mow" by The Rivingtons, which The Trashmen used later on for "Surfin' Bird," and is also the words used to wake up Bananette in the first game. This makes the book flash and open up a portal, which Mike is sucked into. This ends Chapter 1.
Chapter 2
The portal drops Mike into another time and space. From here, you have control.
From here, head north. The caveman you meet will tell you that the ground ahead has many holes. If you fall into them, Thankfully, they are easy to navigate.
.png)
.png)
.png)
The game controls much like the first one. The Control Pad lets you move around, while B lets you attack with weapons such as the rocks that you find and A lets you jump. When you are on the block-like platforms surrounded by platforms, you can jump one-block gaps. Unlike the first game, however, the forced grid-like movement is gone, and you can also move around diagonally. Jumps are no longer committal, and you can now change direction while in mid-air. Make a habit of moving diagonally, as it will help you out in the future. You'll also have floors and platforms with higher elevations, and the lighter the shade that the color of the platform is, the higher it is in relation to other platforms.
Use the rocks to take out the pigs, which will charge at you if you are lined up with them in a straight horizontal or vertical line.
Just like the first game, collecting five stars replenishes one of your heart. You start out with five hearts instead of three this time around.
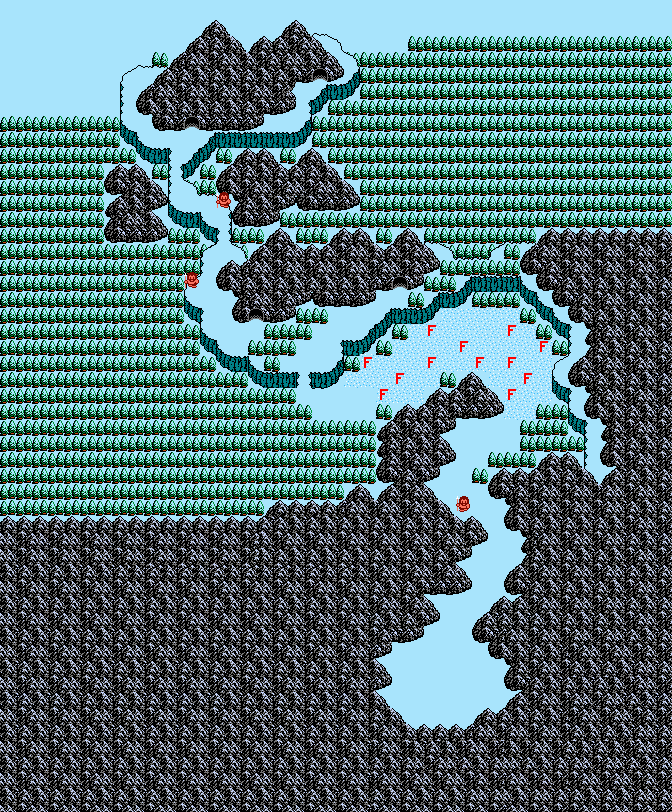
When you make it through the snow field, you'll reach a cave.
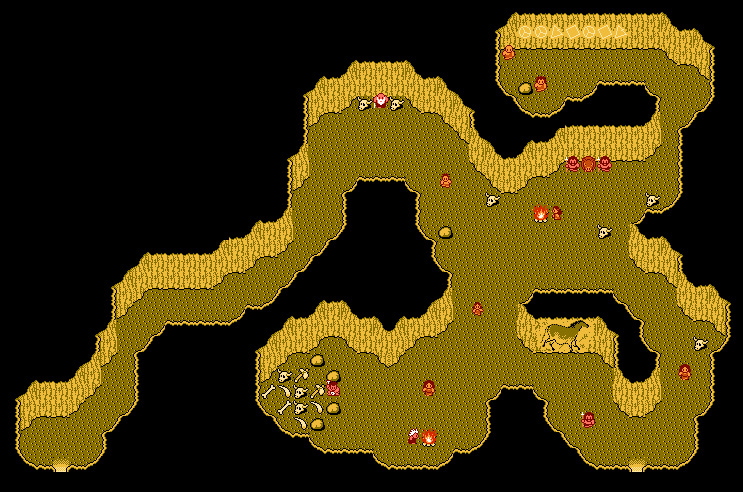
You'll come across what is more or less a caveman village. You'll find out that some of the children are being nabbed by a monster known as Yum-Yum that lies to the north, and that there is a prophecy of a reliever coming to the south to save the village. To the north of the entrance is a sequence of shapes drawn by Pikazo, who is now traumatized into silence after he and his friend fought Yum-Yum and lost.
If you talk to the man near the bones and hammers, he will tell you that his name is Tink and that he makes axes and hammers. He will give you a hammer to use as a projectile weapon for free. Now you can defend yourself with something other than rocks.
If you talk to the old man near the exit, you'll find out that the prophecy is about you, and you will be taken with going to the north and fighting Yum-Yum. When you leave the cave at the other side, one of the two cavemen you will meet will tell you they hope you have Tink's axe.
PrinceWatercress plays Tomba! - Part 16 of 22
It's time to look for all the red chests now that we have the 10,000 Year Old Key. By doing this, we net ourselves over 400,000 AP and get two Evil Pig Bags.
In this video, I've got my green experience bar at max level.
I also go hunting for all the red chests that I've missed. Here's where they are and what they have:
Watch Tower: It's where I found the Flower Seed. It contains a Large Lunch Box.
Forest of All Beginnings: It's in plain view near the second house. Inside is a Lunch Box.
Ol' Pond: It's near the Trick Village entrance. Inside is the 10,000 Year Old Bell, which takes us to the 10,000 Year Old Man.
Charity Square: It's to the left of the Leaf Slider door. Inside is a gem for 100,000 AP.
Mushroom Forest: There are two at the bottom above bottomless pits, and they contain a Charity Wing and a 1-Up.
Seaside Mansion: It's with the other chests. Inside is two gems worth a total of 200,000 AP.
Lava Caves: Inside the three red chests here are two Charity Wings and two 1-Ups.
Old Tree Hill: It's all the way to the right. Inside is the Navy Evil Pig Bag.
Masakari Jungle: To the left of the Village of Civilization and the tall tree is the red chest containing the Dashing Pants, which makes Tomba move faster when equipped.
Trick Village: There are a few here. Below the entrance is a 100,000 AP gem. Inside the maze in the upper-right corner is the red chest with the Yellow Pig Bag inside.
Haunted/Thief's Mansion: One of the rooms on the north side of the mansion has a red chest with a Large Lunch Box.
Also, to the right of the Phoenix's Nest, I get the Jewel of Wind after having gotten maximum wind experience. It gives Tomba green hair and gives him the ability to double jump in mid-air when you equip it and activate its magic with Square.
Wednesday, September 29, 2021
PrinceWatercress plays Sly Cooper and the Thievius Raccoonus - Part 23 of 23
With this entry, we complete the last of the levels for the Master Thief Runs and get 100%.
A Perilous Ascent
This was the last one that I did in my initial playthrough during my months-long PlayStation 2 marathon, and it was the hardest. Not surprisingly, I do this one first this time around just to get it out of the way. For this one, you won't be rolling a whole lot. The only real strategy that will come in handy here is to use the double jump in the falling icicle segments without getting hit. As for the searchlight section where you have to cross the narrow platforms, you'll have to do those the old-fashioned way, as using the shortcut there will be fatal. Use the double jump in the icicle sections; you'll save the most time there.
Flaming Temple Of Flame
For this one, memorizing the level is essential, as it can be easy to get confused as to where you need to go, especially when you're inside the building where all the disciples are training. As for that fireworks platform with the searchlight on it, I hit it first, then I get on it right as it ascends so I don't get caught. Once you have those two things in particular down, you're good to go. Just remember to double jump where the narrow pathways with the searchlights are when you need to if you need to save even more time.
Duel By The Dragon
After having to go through this one for the Clue Bottles and again for the Vault, you should have an idea as to how to get through this one. You'll want to make sure that you're good with your platforming, and that you don't waste time hitting the fireworks. When you make it to the end, you'll want to run around the stone hand while swinging the cane around so you can easily hit all those firecrackers to trigger the exit. Once the exit is in sight, you'll have no time to waste. Get to it immediately.
The Unseen Foe
Ah, yes. The last one. This is the one Master Thief Sprint where the power to turn invisible gets the chance to shine. Don't forget that you can press the Circle button to go invisible when you need to, especially when you have no way of avoiding a laser or an enemy's spotlight. As for the conveyor belt you have to run against to defeat the enemy at the end, get on the conveyor belt and move forward as the enemy moves his spotlight to one side. Once you're close enough, whack him. For the drop at the end, there is a shortcut where you can go into the middle at one point and then move forward through the lasers to get to the exit, but I take the safe way here.
And with that, we have 100%. Enjoy the rest of this run, and enjoy the developers' video that comes afterward. Be sure to pay attention, as things are different colors and some enemies and objects have different appearances due to all the footage coming from a pre-final version of the game.

PrinceWatercress plays Sly Cooper and the Thievius Raccoonus - Part 22 of 23
We're halfway done with the Master Thief Sprints! This entry covers all of the Sprints for the third chapter of the game.
The Dread Swamp Path
Believe it or not, you can use the spire jump technique to completely bypass the first spider in the stage entirely. As for the big creatures that you have to kill both halves of, you'll still have to smack them out of your way. Just remember that you still have to take a leap of faith in order to make it to the end. Watch out for those searchlights!
The Lair of the Beast
You'll barely have enough time to get through this one. Best advice I can give for this stage is to do the spire point jump from branch to branch and vine to vine, and make those swings on the hooks quick. As you'll see here, I don't even have the time to pick a fight with the enemies; I just go straight through. I also take a bit of a shortcut from running into the water while in a hurry; as a result, I'm bounced further ahead and I got a good boost through a bit of the end as a result.
Descent Into Danger
The two minutes and change that you get for this is just enough for you to make it to the exit with a few seconds to spare. Knowing the layout for this stage is definitely well-advised, as you'll need to know where to turn in order to get to the next area. As for those lasers spinning around the column, the more space you have from where you need to get on and where you need to get off, the better.
A Grave Undertaking
This one ended up being the hardest one to do, and it's all due to the ghosts at the end. The ghosts at the end will make it very difficult to get to the green light and stop the timer for a job well done, and the best bet for this one is to get a charm during the run and hold on to it until you get to the very end. At this point, you should have all the vaults opened, and if you have the water safety ability, you'll get back on the narrow path and you can get to the exit before the ghosts come back.
PrinceWatercress plays Tomba! - Part 15 of 22
In this entry, we finally take care of business in Trick Village, meeting with the 10,000-Year-Old Man, learning to dive underwater and finding the ten Math Beads.
Back at the Haunted Mansion, I come out through the stone doors to show off that you go to the Underground Maze from there. At the south side, the room with the pool of water leads to a chest with a Large Lunch Box.
From here, I head back to Trick Village and take care of business there.
To the right of the entrance to Trick Village is a house with a chimney. Jump into the chimney, and you'll meet the 10,000-Year-Old Man. This will complete the "The 10,000 Year Old Man" objective. He will tell you that Trick Village has sunken underwater, and that there are ten Math Beads with numbers on them hidden in the tower. If you can find all of the Beads and bring them back to him, he will tell you everything you want to know. This will trigger the "The 10 Math Beads" objective.
However, you cannot collect the Beads just by swimming through the water; you'll have to be able to dive underwater as well. The 10,000-Year-Old Man will tell you that a mermaid came by to see him, and that she found an important item that she had lost in the waterfall. Unfortunately, she cannot get to it on her own, but if you were to help her get it back, you may be able to learn how to dive. The Mermaid will be resting at the (no-longer-)Haunted Mansion. One of the doors at the Mansion leads to a pool of water that you can only dive into. Nearby will be the mermaid. Talk to her, and she will be wondering how to get the necklace from the waterfall.
Head further to the right, avoiding the trees that are sticking out of the water as you do. The blue chest that you see will contain the Seashell Necklace. Head back to the cave at the Mansion where the mermaid is and use the necklace as an item. This will clear the "The Mermaid's Entrance" objective. The mermaid will then mention that she lost something in the water here and that if you can get it you, you'll have learned how to five. This will open up the "What's Underwater?" objective. From here, you can press Down on the surface of the water to submerge, then hold the direction you need to go and press and hold Square. Tomba will dive automatically and get the Mighty Fish Food. When you put the food in the water, the Mighty Fish will show up, and depending on which place you use it in, you'll max out the experience for either the red bar, the blue bar or the green bar. This will trigger the "Mighty Fish Food" objective.
If you use the Mighty Fish Food in the Ol' Pond, you can summon a fish. Grab the fish to complete the "Mighty Fish Food" objective. There are three other places where you can use it and summon a fish: the Ol' Pond, one of the rooms with water in it at the south side of the Mansion and the Masakari River in the Deep Jungle. If you grab the fish at the Ol' Pond, you'll max out your fire (red) experience. If you grab the fish at the river in the Deep Jungle, you'll max out your water (blue) experience. If you grab the fish at the mansion, you'll max out your green (wind) experience.
If you go further to the right from the necklace, you'll drop from a waterfall into the Deep Jungle.
Back at Wobbly Wharf, I head back to the bridge and dive down into the water to go to the barrel. This will complete the "Where The Barrel Rolls..." objective. I also swim in the Ol' Pond to reveal that the frog and the turtle are underwater. You don't have to do this at all, but it's nice.
From here, I go into the underwater maze in Trick Village.
At the bottom of the water in Trick Village is a maze. You'll need to go through it to get all ten Math Beads. Watch out for the fish, and remember that there are walls that you can move assuming you can swim into them in certain directions. There is not only an entrance to the maze at the bottom, but also an entrance at the very top. Check . When you talk to the 10,000-Year-Old Man with all ten Math Beads, you'll clear the "The Ten Math Beads" objective, and he will give you the 10,000 Year Old Key. He will also tell you to ask the Million Year Old Man for the story of the Evil Pigs, then give you the Thief's Wire to open the Underground Maze, and you'll trigger the "Source of Evil Magic" objective. The 10,000-Year-Old Man will also mention that the Million Year Old Man lives in the Underground Maze underneath the Watch Tower.
At the bottom of the maze is a blue crystal. If you touch it, you'll trigger the "Blue Hidden Powers" objective. This is the Jewel of Water, and you'll need to fill up on Water (Blue) Experience to pick it up. When you get enough Water Experience, you can grab it and complete the objective.
The Blue Chests here mostly contain Charity Wings, but one has a Large Lunch Box. If you want to open a chest, get above it and press X. While you can use Circle to attack enemies when on top of them, it doesn't work against the fish, though you can use the Jewel of Fire to destroy them (which I don't learn until later). Tomba will somersault down With the 10,000 Year Old Key, you can open the red treasure boxes, and one of them near the lower-right corner of the maze next to where Math Bead 6 was is the Yellow Evil Pig Bag. This completes the "The Underwater Pig Bag" objective. You can find also find a 100,000 AP gem and a Vitality Max +1 with the 10,000 Year Old Key as well. The 10,000 Year Old Key opens up all the red chests in the game.
Tuesday, September 28, 2021
PrinceWatercress plays Sly Cooper and the Thievius Raccoonus - Part 21 of 23
Now that the first chapter of the game is down, it's time to head back to Mesa City. Thankfully, we have an easier time here.
A Rocky Start
For this one, just don't stop. Make sure to single jump between the spire points, and at the points just below the mattress, use the mattress to skip your way to the second one in the set. Watch out for those floor lasers, and be ready to switch lanes as soon as they flash so that the alarm doesn't go off and cause the timer to run at double speed until you kill the alarm. At this point, the Master Thief Sprint runs become a little easier.
Boneyard Casino
For this one, you'll need to use the roll when you need to, and you need to make sure that the dogs with the machine guns don't catch you. The laser floors are easy to deal with; as for the part where you need to sneak behind the two dogs on the ledge, be ready to use the double jumps. Once you reach the flooded parts of the casino, be careful where you step. You'll still need to be quick with the roulette wheels that have the laser traps, but you'll also want to be careful and use your shadow as a means of anticipating where you'll land. If you need to double jump, do it. As for the roulette wheel, keep doing single jumps and save the double jump for when the green key space on the wheel is close so you can ensure you leap onto it.
Back Alley Heist
As long as you know where to go, this one is easy. However, there is a glitch with this one: it is possible to run clear into the exit and not have it trigger. Instead, you're expected to be above the exit while jumping towards it in order to trigger the finish line and get credit for it. I'm not kidding.
Straight To The Top
Another one that is easy as long as you know where to go. I had a leg up on this one, as I used this level in particular for some test recordings to get the quality up to snuff and find out what settings worked for me.
Two To Tango
Yet another level that's easy to get squared away if you know where to go. At this point, the levels where you aren't forced to use the Roll to gain speed and save some time are easier to do than the ones where you are.
PrinceWatercress plays Sly Cooper and the Thievius Raccoonus - Part 20 of 23
Now that the main game is over, the Master Thief Sprints have begun! The first of four entries on these takes us all the way back to Sir Raleigh Frog's domain, which actually has a few of the toughest Sprints to do.
A Stealthy Approach
This was the first Master Thief Sprint that I attempted and beaten when I played the game for the first time, and not surprisingly, it's the first one that I do for this Let's Play. Just touch the hourglass and the sprint will start. Just don't use the move you got after beating Clockwerk, because the game takes the hourglass away from you if you do.
You're going to be using the Roll move to get some speed in the straightaways of all the Master Thief Sprints. As a matter of fact, it's the one move you're going to be using more than anything else with the Sprints, as the clock for the Sprint speeds up and slows down with Fast and Slow respectively, giving you no real advantage at all. As a result, you have to use Roll to move a little bit faster and even go down hills faster. Unless you use Roll, you won't have a chance of beating the sprint for A Stealthy Approach.
Into The Machine
Into The Machine has you learning how to get past the narrow walkways you have to sidestep across in order to save time. You'll have to use the double jump, then press Circle and hold the analog stick or D-Pad towards the walls in order to move across faster, keep yourself on the narrow pathway and save some time.
You'll also have to memorize the stage a little bit and figure out where those rings are so you don't get disoriented and cost yourself a few seconds.
High Class Heist
This is probably the hardest of the Master Thief Sprints in Tide of Terror. You barely have enough time to get through this one. You'll have to figure out how to get past the lasers quickly so that you can go from set to set without delay and without setting them off. You'll also need to know how to double jump over the laser fence near its end. After that, you'll have to know when and where to cut corners after the jump across the lily pads, so you can avoid the spotlights. You'll have to do the double jump across the narrow pathway around the column close to the end, and you'll have to be very careful not to touch the spotlights immediately after it. That last stretch with the spotlights is perhaps the hardest part of the whole Sprint, and this Sprint took over 30 minutes to ultimately clear.
The Fire Down Below
For this one, you'll need to be as quick with the spinning wheels as you are with your footwork. This is especially true of the last wheel that you have to run on, due to that pesky spotlight. Once you're able to get on the conveyor belts, don't forget to roll.
A Cunning Disguise
For this one, you clearly can't use the barrel aside from at the very start. Otherwise, you're going to lose this one. The hardest part is dealing with the squid guards; I was able to find a hiding place as well as an easy-to-miss 1-Up I didn't know about before with the first one. As for the one near the end, I just had to roll towards him and hope for the best. Also, getting a charm during the run or doing this run with a gold charm works best; you'll more than likely need the charm to get past the dart-shooting globes at the end.
The Gunboat Graveyard
The timer here may seem intimidating, but it really isn't, as long as you know the route to the exit. The spotlights at the beginning make things a little dicey, but if you know where they will be and how far they go as they sweep back and forth, you shouldn't have much of a problem making it to the exit before the time runs out.
PrinceWatercress plays Tomba! - Part 14 of 22
In this entry, I do more noodling around than I do completing objectives, but at least I get a few extra lives.
At Charity Square, I open a blue chest to get a big AP gem, then put the last of the Leaf Butterflies in the cage. By bringing all 29 Leaf Butterflies to the guy in the cage at the Charity Square, the cage will fly high into the air, and you'll end up in Hidden Village. The egg in the village will hatch and you'll clear the "Leaf Butterflies" objective and get the Golden Leaf Butterfly for your efforts.
Also, Yan is near where the statue used to be. By talking to him, you'll learn about the existence of the Flower Tower, but he will leave it to you to find where it is and tells that you need to do a few things in order to find it. You'll also complete the "Hide and Go Seek" objective and get the Golden Bowl, which lets your maximum health go beyond eight units.
In the Lava Caves, I find a 1-Up in a blue chest, then - after some exploration - leave the Lava Caves and notice a wooden (read: 100-Year-Old) chest to the left. Inside was two Charity Wings, though.
From here, I head back to the north side of the Thief's/Haunted Mansion and enter the door near the Smile Door. Inside is the leader of the thieves, and if you talk to him, you'll find out that he has lost his treasure, too. He will then leave, and you can open up the blue chest that was behind him to get the Boss' Jewel. By grabbing this, you'll get 100,000 AP and complete the "The Boss' Jewel" objective that you just revealed by talking to the guy.
Remember the door at the other end of that moving platform that lead to some stone doors? If you open the chest that is here, you'll get a Vitality Max +1.
In the Mushroom Forest, I go chest hunting and find a 1-Up and two Charity Wings. The yellow flower in the background near the end is the one that has yet to bloom. Keep it in mind for later.
Monday, September 27, 2021
PrinceWatercress plays Sly Cooper and the Thievius Raccoonus - Part 19 of 23
In this entry, we beat Clockwerk once and for all - or so we think - and get that last entry for the Thievius Raccoonus.
A Strange Reunion
Use the left analog stick to aim and steer, and press Square to fire rockets. You'll soon meet Clockwerk. Carmelita will then shoot at certain parts of Clockwerk in order to disable them, and you'll need to shoot at the parts that flash white with your own rockets to destroy them without getting blasted yourself.
After that, you'll have to fly through the rings that Clockwerk shoots at you. After enough rings, Carmelita will shoot another part of Carmelita and make it flash white, and you'll have to shoot rockets at it until that part is destroyed. Between parts, you'll have to continue to fly through rings. This is possibly the hardest part about the battle.
The last part has you moving towards Clockwerk's head. When you approach, you'll have to avoid the lightning bolts that Clockwerk sends at you as well as the lasers that are close to Clockwerk's body. When you make it to the body, you'll need to jump to it and strike at the head until it is destroyed. After this, Clockwerk is destroyed, the Thievius Raccoonus is (almost) complete, and the Cooper Gang's adventures continue...or do they?
Duel by the Dragon
Now that you've beaten Clockwerk, you can open the vault near the end. Inside is Colonel Reid Cooper's Time Stopper Technique, which freezes all enemies in the stage for a few moments. You'll then get a cutscene signifying that the Thievius Raccoonus is complete, but you're not done. Next up is the Master Thief Sprints and the game is 100% complete.
PrinceWatercress plays Sly Cooper and the Thievius Raccoonus - Part 18 of 23
In this entry, we rescue Carmelita, hack into a computer and climb like our lives depend on it.
A Daring Rescue
When you get here, you'll find out that Carmelita has been captured by Clockwerk. Sly, not wanting the cops and robbers game to continue without her, decides to rescue her.
At the start, you'll need to go left and spire jump and climb without getting electrocuted. Land on the spire points at the top, then land on the ramp to bring it down. Go up the ramp, avoid the searchlight on the way to the other side and smash the dart machine to jump into the barrel. From here, you can sneak past the searchlights to get to Carmelita.
When you approach Carmelita, she will think Sly is behind everything, but Clockwerk triggers a gas trap, knocking Sly unconscious. Bentley is forced to hack into the system to turn it off before further harm comes to Sly.
Bentley Comes Through
It's time for another twin-stick shooter-style stage, and this time, you'll have to play like your life depends on it. Once again, the left stick moves and the You'll have five hits, and you'll need to shoot the "asteroids" to knock out the yellow data packets and collect them. When you collect them all, you'll go to the next level.
The green droids that move around are the security system, and their red projectiles will try to follow you around. If they connect with you, it's instant death. If you run into anything else, you lose one hit point. There is a chance that if you get hit by one of these things, you can come back with three hit points out of the maximum five that you start. Thankfully, the walls don't hurt you in any way.
There are four levels, and the difficulty gets harder the further you go. Once you go through all four levels and get all 13 data packets, you'll disarm the gas trap and save both Sly and Carmelita. Carmelita will ask Sly to smash the base of the tube she is stuck in, then proposes a temporary truce.
A Temporary Truce
At the beginning of the level, Carmelita finds out directly from Sly what is going on between him and Clockwerk. Carmelita mentions that she has hidden a jetpack at the top of the death ray in the distance, and that Sly will need it to fight Clockwerk. Unfortunately, one of Clockwerk's falcons grabs the signature Cooper cane out of Sly's hands, and Carmelita now has to cover Sly while Sly gets to both the cane and the jetpack.
This level is much like the two levels where you had to shoot things down for Murray. Keep the target reticle around Sly so you can shoot down the lava monsters and the robot falcons when they show up, then get ready to shoot down all the energy towers at the top to finish the area and make a path for Sly. Of course, when you destroy the energy towers, lava monsters will show up from behind Sly, so be sure to take them out. Sly will soon get his cane back, and it's on to the next area.
Sinking Peril
Here, you'll have to spire jump, rail walk, rail slide and climb your way to the top.
Double jump over the golden arches that produce electricity. If any gears drop into your path, smash them with the cane.
When the golden arches produce sparks, they are about to produce electricity. Wait for the shock, then move forward.
You'll need to spire jump onto the spinning hooks so that you can both land on them and not hit the field of electricity surrounding them.
Also, going back to the hub for the first world, getting the charm and lives, saving and re-loading and getting everything again will help you get the lives and extra hits that you need.
PrinceWatercress plays Tomba! - Part 13 of 22
In this episode, I leave the jungle and get a ton of stuff done, including getting Baron! With Baron in the inventory, getting around is much, much easier.
At the Iron Tower, you'll find out from the guy outside that the Machine Room is beyond the door, which is impossible to open and has been left untouched for a long time that even the generator inside has come to a stop. This will trigger the "Break the Rusty Door!" objective. Meanwhile, you can enter the room to the left for a gem worth 10,000 AP and the room to the right for some fruit.
Leaving the Iron Tower area and going left takes you a cage with one of those Bonsugee from the Mushroom Forest in it, except purple. If you talk to the guy in the hard hat, he will tell you that you won't be able to open up the door to the Iron Tower unless you blew it up with a bomb. This triggers the "I Need A Bomb" objective. If you talk to the guy again, he will tell you that he made a bomb a long time ago, but that it is dangerous and he didn't have any use for it; therefore, he hid it in the jungle in the highest tree. He will also tell you that it looks like a coconut, but it is actually a really powerful bomb that even the iron door of the Iron Tower wouldn't be able to stand up to.
If you talk to the guy next to the Bonsugee, he will tell you it took a lot of work to find it and that he has studied the Mushroom Forest for a while and found out that the Flower Tears need a special bottle from the yellow Bonsugee in order to collect them. He will tell you that the yellow Bonsugee used to live in the forest a long time ago, and now that the Evil Pigs have cast a spell on the forest, you'll have to break the spell on the forest in order to get the bottle. This triggers the "I Need a Tear Bottle" objective. The man will also tell you that there is only one flower in the Mushroom Forest that sheds tears, and it is the one that hasn't bloomed. You'll need the Rise and Shine Powder that the other Bonsugees carry in order to make that flower bloom. The opening to the right contains Charity Wings, but nothing else.
The bomb that you just learned about is just next to the entrance to the Village of Civilization. Just go to the tree to the left of the door, climb all the way up, and you'll find the Bomb and clear the "I Need a Bomb" objective. Go back to the door of the Iron Tower and use the Bomb as an item to blow up the door. You'll clear the "Break The Rusty Door" objective. You'll then be able to go through the door, find the generator and get it started again. This will trigger something in the Watch Tower area east of the Dwarf Village and clear the "We Need Power..." objective. You will then be thanked for getting the generator back up and running, and you'll be told that a 10,000-Year-Old Man who lives near the large pool at the top of the waterfall knows all about the Evil Pigs, and to find him, you'll need to go through the Village of All Beginnings to get to the top of the waterfall. This triggers the "The 10,000 Year Old Man" objective. You'll also get the key to the door at the Ol' Pond. From there, you'll need to ride the raft from the hill with the old tree to return to the (now no longer) Haunted Mansion. The raft will be on the table at the factory, and you can go ahead and take it. This triggers the "Let's Ride the Raft!" objective.
From here, leave the generator room and leave the Iron Tower area. There will be a guard. Talk to him and he will tell you that he just came back from the Village of All Beginnings and that he saw "the Witch." Turns out, her name is Mizuno, and he thinks she is cute and wants to see her again. This triggers the "The Cute Witch" objective.
Go back to where the purple Bonsugee and talk to the guy near the go-kart. He will try to fuel it up with normal water, but he will soon find out he will need to make a Fuel Bar. This triggers the "Food for Fuel?" objective. He will tell you that he will need a Fuel Bar to make the go-kart, which is actually called a "GoGoCar," to move. Unfortunately, he can find the ingredient needed to make the Fuel Bar, and that all he needs is a little bit of wine. He will tell you that a bucketful should be enough to finish the Motocross Course.
If you talk to the guy who told you about the bomb, he will tell you that his grandpa told him that there is an elevator near some kind of Watch Tower in the Dwarf Forest that is supposed to go underground. This triggers the "What's Under the Forest?" objective, and reveals that what you triggered near the Watch Tower was that elevator. Also, you can now get the raft in this area. Just touch it and it's yours.
Go back to the river in the jungle, head to the right and use the Raft at the wooden dock. This will clear the "Let's Ride the Raft!" objective. You'll return to the mansion near Baccus Village.
Back at Baccus Village, I head back to the guy who was asking for Cheese. Since I have ten pieces of Cheese, I can complete the "Some Cheese Please" objective and get two Large Lunch Boxes. If I come back with five more pieces, I'll be able to get something else, but you can get both items and complete the objective automatically if you are able to bring him fifteen pieces right then and there.
I also head to the town square and talk to the guy to the right of the building. By talking to him, he will give you the Wine, which you can take back to the Factory for the Fuel Bar.
The first house you saw in the Village of All Beginnings is the home of Mizuno. Just press Up at the door and you'll meet her. Talk to hear to clear the "The Cute Witch" objective. She will then mention magic candy, and tell you that you will need a Biting Plant Flower, some Silver Powder, some Molasses, Kokka Claws, a Butamushi Thorn and Needlegator Teeth. Once you have them all, you can throw them in the cauldron in the house. This will trigger the "Let's Make Candy!" objective.
Mizuno will then mention that she has forgotten three large crystal balls and a mirror to make something with. This will trigger the "What The Witch Lost..." objective. At this point, however, we should have the crystal balls, so use them. All you need now is a mirror.
When you enter the doors at the other side of The Ol' Pond, you'll trigger the "The Underwater Pig Bag" objective. Welcome to Trick Village. I don't explore this area yet, however..
Back at the doctor's hut at the north side of the Dwarf Village, I open the blue chest for the Charity Wings side and hand off the Fruit of Knowledge, completing the "Delicious Knowledge Fruit" objective. The woman will then be impressed with what you went through to get this far in taking care of Baron and mention that even Baron knows how far you went to get the Healing Herbs and the Fruit, and you'll also clear the "A Man's Best Friend" objective because of this. The woman will then tell you that Baron might have special powers and that Baron's ears so big that they may enable him to fly. This will trigger the "Baron's Strength" objective.
If you talk to the woman again, she will tell you about the seaweed at the beach behind the mansion in the Village of All Beginnings, and mention that the seaweed is supposed to be good for you. She usually goes to get some seaweed so everyone in the village will be healthy, but she will not be able to get it this year and asks you to get some for her. This triggers the "Seaweed For Your Health" objective.
I also go back to the Dwarf Elder's house. Amazingly, a flower has grown, and this completes the "Plant a Flower Garden" objective. From here, I take the flower, which is a Golden Flower, and put it in the inventory. (Note: I've since found out that once you plant the seed, you have to complete six events for the flower to bloom.)
Back at the Watch Tower, there was an elevator in the wooden platform that rose when I completed the "We Need Power..." objective. By walking into it, this completes the "What is this?" objective (which you can reveal by breaking the wall where the elevator is before you bring it up in the Deep Jungle). By using this elevator, we go down to the Underground Maze and complete the "What's Under The Forest" objective? Unfortunately, we won't be able to do much here yet, and talking to the guy just to the west of where we came in reveals the "Dig Like a Mole" objective. At least there's Cheese in a 100-Year-Old Chest to the north, and the guy nearby will tell you about the Blue Fortune Teller, who requires a lot of AP to talk to. This triggers the "The Blue Fortune Teller" objective. Also, to the south is a blue chest with the Needlegator Teeth you'll need for the candy, and there are two red chests you can't open yet. There is a doorway near with another digger, and he will mention the door nearby that you can't open. This reveals the "The Thief's Door" objective. You'll need a tool such as a special wire to open the door, and that won't be for a while.
From here, I go to the Seaside Mansion. From here, I can get the Seaweed for the doctor in the Dwarf Village. It will be to the left of the door leading into the Mansion. By handing the seaweed back to the town doctor in the Dwarf Village by using it as an item near her, Baron will have grown considerably and you will clear the "Seaweed For Your Health" objective. From here, you'll get Baron as an item. This clears the "Baron's Strength" objective, and from this point forward, you now have an infinite Charity Wing and you can do fast travel any time you want!
From there's, it's back to the Factory. By using the Wine near the guy who needed it to make the Fuel Bar, you'll clear the "Food For Fuel?" objective and get the Fuel Bar before the guy will leave on the GoGoCar. You can now use the GoGoCar near where the game began in the Village of All Beginnings.
Sunday, September 26, 2021
PrinceWatercress plays Sly Cooper and the Thievius Raccoonus - Part 17 of 23
In this entry, we defeat the Panda King before heading into Clockwerk's inner sanctum.
Flame Fu!
Now that you have all the Treasure Keys, it's time to unlock that second set of fireworks, smack the locks off with Square and hang onto it Circle to take a ride to the Panda King.
Move to the side while moving forwards so the fireballs don't hit you. That way, you can get closer to the Panda King without getting hit. From here, this is where the Panda King's martial arts come in.
The Panda King has three attacks, and he telegraphs them all by saying their names before performing them. Not surprisingly, he ends up being the easiest boss in the game, even easier than Sir Raleigh Flag. The attacks are as follows:
Booming Chop: The Panda King will get one hand up before chopping at you. Move to the side to avoid getting smacked.
Fiery Wheel: The Panda King will performing a spinning chop on the floor. Jump over it when it comes your way.
Palms of Thunder: The Panda King will get his arms up while saying this one. Move away from him, but not to the sides. If you move to the sides, you're still going to get hit.
Be sure to do as much damage as you can between attacks. After you land a specific amount of damage, he will bump you away with his belly, and you'll have to move diagonally towards the Panda King to get to him again. This will keep going until you get his health all the way down. Once that happens, you'll be moving on to the final chapter of the game after Bentley reveals that the Panda King used metal from the Krack-Karov Volcano in Russia. You'll then learn about the designs of Otto van Cooper's airplane, which allows for a turret to be placed on the van.
The Cold Heart of Hate
The fifth member of the Fiendish Five is Clockwerk, a giant owl who has turned himself into a cyborg over the years just to make the Cooper family's life miserable over the centuries, much like Dracula with the Belmonts in Castlevania. As a matter of fact, his likeness has been seen in photos of the Cooper Clan throughout the Thievius Raccoonus. Unlike Castlevania, however, this is coming to an end, and the last part of the Thievius Raccoonus is coming back to Sly.
A Hazardous Path
Unlike the other four worlds, there is no hub, and the levels happen one after the other.
For this one, you have a turret. Sly will man it while Murray takes the wheel. You'll have to shoot down the many falcon robots that Clockwerk sends at you before they catch fire and divebomb you, and you'll also have to shoot down the mines that litter the road before they blow up the van. At one point, you'll have to shoot down rocks before they can slam into the van and send you off the path.
Use the left analog stick to move the target reticle and use Square to shoot. You can hold Square down for rapid fire.
Burning Rubber
For this one, you'll have to destroy sixty computer terminals that drop down from the sky before the land slugs here do the same. Use the left analog stick to move the van around and the Square button to hit the computer terminals with the battering ram. Make sure that you hit the enemies with the battering ram to get rid of them for a while. For best results, destroy monitors when they are pooled together in a small group so you can keep the number of terminals you're destroying going up slightly and get a slight advantage on the land slugs.
PrinceWatercress plays Sly Cooper and the Thievius Raccoonus - Part 16 of 23
In this entry, we enter another race before getting shot at by Carmelita again.
A Desperate Race
This level is directly below the area with the wooden platforms in the second part of the hub.
Once again, you're driving the van. The left analog controls everything and Square uses the nitro boosts just like last time. The same strategies you used in the other race, such as making the turns as short and quick as possible and using the boosts near the other racers, also apply here. The only difference here is that you're in a colder place, and there will be ice on the ground in spots. You do not want to be on the ice, as that ice will make you lose control very, very quickly. Thankfully, you can get back in the race in a way with a boost, should you have one. Race carefully, and the Treasure Key should be yours.
Duel By The Dragon
There is a flag pole to climb up near the moving wooden platforms. This leads to here.
Carmelita's back, and this time, you'll have to do even more stuff avoiding getting blasted. As you progress through the level, you'll have to swing on hooks, leap off platforms and even hit the occasional firework to knock down walls and use them as bridges.
There are clue bottles behind the first tree in the level.
There is a set of icicles that can be used as platforms to get to some clue bottles. If those platforms break, you'll have to play through the level again to get them. Not only can you break them easily with your cane, but Carmelita can shoot them down with her shock pistol.
Be sure to look around in the more open areas of this level; you'll be sure to find some clue bottles somewhere.
There is a vault near the end of the level, but you won't be able to open it until you beat the game.
At the end, hit all the rockets to get rid of Carmelita...for now.
PrinceWatercress plays Tomba! - Part 12 of 22
In this entry, we finally head into the Deep Jungle, learn to swim and try to help out in the nearby village.
There's not much else to do (that I can think of), so it's time to head to the Phoenix's Nest. Once you have five Bunk Flowers from the Lava Caves, go up to the Phoenix, use them, and you'll re-strengthen the Phoenix. This time, you'll be able to fly into the jungle. You'll complete the "The Master of the Skies" objective for doing so, then you'll get a cutscene where the flight is successful. You'll end up in the Deep Jungle, and get a new objective: "The Jungle Pig Bag."
The tribesman will hurt you, but you can kill them with the Jewel of Fire (something I completely forgot about while playing this). They do endlessly spawn, but you can get AP from them. There will be a 100-Year-Old Chest shortly after the start, and inside is the Funga Drum, which you'll need for the "What's A Funga?" objective. There are red man-eating plants here, but you can avoid them by jumping up the vines that will be slippery if you grab on. Also, watch out for the drums; you'll be bounced back if you move into them.
You may be able to find some Leaf Butterflies here. If you do, hunt them down here, as this is where you will find the last four needed for the "Leaf Butterflies" objective.
There are chests above the wooden cage. The 100-Year-Old Chest contains a Large Lunch Box, while the 1,000-Year-Old Chest contains a Vitality Max +1. You'll also find a man in the background. He will be relieved that you are not one of the Masakari (the tribesmen that act as enemies here), and will tell you that he came from the Clock Tower that is in the Village of Civilization up ahead. He will tell you that he is looking for his hat, which blew away and landed somewhere around here, but he saw a weird looking monkey with it. He is too scared to chase after him, what with the Masakari being about. He will tell you get the hat back if you see a strange monkey with striped pants on, as that is the monkey that has it. That monkey is Charles, whom we haven't seen in a while. This triggers the "Find Charles!" objective.
From here, use the fruits on the vine to slide past the big spike pit, but don't slide into the cage or else you'll be surrounded by Masakari and lose a life. Also, there are bananas in the foreground area. Be sure to get those before heading to the right. Further to the right from the Bananas is Charles. Land on the bridge and into the water, and Charles will teach you to swim in exchange for a refreshing drink. This triggers the "A Refreshing Drink" objective. He will give you the hat that the man you met earlier is looking for. This is the Miner's Hat, and returning it to the man by using it as an item near him will clear the "Find Charles!" objective. He will tell you that you can enter the Clock Tower in the Village of Civilization at any time, but you won't be able to enter the Iron Factory.
The big tree to the left of the man leads to some stuff. If you jump to the right, you'll be able to get the Large Lunch Box and the Vitality Max +1 that were mentioned earlier. Also, you can now enter the doors that were blocked by the man who needed his hat back. This will allow you to enter the Village of Civilization. If you jump to the left, you'll find Yan. You'll need Yan's Lunch Box at this point. If you talk to him with Yan's lunch box in your inventory, he'll let you keep it and he will also give you two pieces of Cheese. You'll also complete the "Take Out" objective.
At the Village of Civilization, you can go to the right to enter the Clock Tower. Up at the top is the guy you met earlier. He will give you some juice in return for getting his hat back, but he does not have Bananas. Give him teh Bananas, and he will make the Banana Juice for you. Head back to Charles and give him the Banana Juice, and you'll be able to bring it to Charles to complete the "A Refreshing Juice" objective and learn to swim. All you have to do is jump into the river, and Charles will take care of the rest. Move forward by holding the direction you want to go while pressing Square. Just swim to the right, then back to the ladder. You'll complete the "I Can't Swim..." objective.
If you jump back into the river, you can head to the right and go to the other side of the river. If you hold Up and press X while in front of a ladder, Tomba will jump into a ladder in the background - assuming one is directly in front of him - and climb up it automatically. Besides a save point, you can also find the Knowledge Fruit and a parrot. If you jump onto the parrot, the parrot will talk to the old tree nearby. The old tree nearby will ask you to find some Pump Rocks and step on them to push them back into the ground in order to bring nutrients back to it. This triggers the "The Pump Rocks" objective.
Also, there is a platform you can drop down to from the right of the first Pump Rock in this specific area. This will act as a shortcut to the river.
If you go back to the top of the Clock Tower and talk to the man there twice, the man will ask for your help to get the Machine to work so that the Clock Tower's gears can run again. From here, you'll be able to go to the Factory and the Iron Castle. You'll also trigger the "We Need Power..." objective.
Saturday, September 25, 2021
PrinceWatercress plays Sly Cooper and the Thievius Raccoonus - Part 15 of 23
In this entry, Murray goes for yet another Treasure Key, and you'll be back on the gun platform to shoot more stuff.
The King of the Hill
Now that you can unlock the fireworks, you can blow up that panel and access more of the level. Before you can do that, there is something near the unseen foe, and you'll need to swing off a hook and jump off a platform to reach it. This is King of the Hill.
Once again, Murray will be running towards another treasure key, and you'll need to move the target reticle and blast anything that comes at him.
The monkey with the nunchaku are the first enemies you'll see...and hear. You'll hear them coming a mile away. Be ready to blast them when you do.
When you see a firework, shoot it to light it up and open up more of the level.
Near the end, you'll see the big brown guys that man the catapults. You'll see more of them when Murray approaches the key. At that point, the game will zoom in on the enemies that you need to shoot once you spot them and move the target reticle towards them.
Rapid Fire Assault
Once you're in the second part of the area, you'll need all the Treasure Keys to light a bigger set of fireworks to reach the Panda King.
To reach Rapid Fire Assault, you'll need to ride on the wooden platforms that are moving in a circle, then you'll ride a gunboat again. Get ready to shoot down both enemies and barricades again as you progress through the level.
Monkeys will spawn enemies through openings in the floor; shoot the doors down to close off those openings.
After the conveyor belts that will push you back, you'll need to shoot down walls while avoiding the snowballs being sent at you with catapults. Move back and forth while shooting to evenly cover the walls and make it easier to open some wide holes in them.
Shoot down the pedestal at the end to get the Treasure Key.
PrinceWatercress plays Sly Cooper and the Thievius Raccoonus - Part 14 of 23
The hunt for Treasure Keys in the fourth chapter of the game begins. Be ready to deal with a lot of martial artists as you get everything around here.
Flaming Temple of Flame
This is near the one guard that is moving around after the hooks at the start of this hub area.
At the first set of hooks, go under the hooks for three clue bottles. You'll also want to go down at the second set of hooks for some clue bottles that are easier to miss than that first set as well as a charm. You'll need to walk across a narrow ledge for that second set.
You can strike the monkeys that are swinging their nunchaku on the pillars, but there is really no reason to. They can hurt you if you move into them, though.
Be careful with the martial arts monkeys. They will stand around for a little while before attacking again, and the attacks can take you off guard if you're not watching them closely.
There is a platform below where the second checkpoint is. This is where you'll find a fireworks platform and some extremely easy-to-miss clue bottles.
The fireworks platforms will carry you upwards when struck with the cane. Be sure to go down after taking the first non-hidden fireworks platform and strike the guard before getting the clue bottles near him.
The laser floor has a host of lasers you'll have to jump over to get to the other side.
The vault is at the end where the laser floor is, and it contains Sir Augestine of Cooper's technique for defying gravity. From this point forward, you will not take damage or lose a life if you fall into a bottomless pit.
The Unseen Foe
This is at the opposite end of Flaming Pillar of Flame. Watch the flashlight on the guard. When the light moves away, approach and strike as he falls asleep for a moment.
This is where your invisibility technique will have its finest hour. There are conveyor belts, and if you can move while invisible, you'll get past them faster. Just make sure you don't drop the vanishing act while in the light.
Make absolutely sure that you look everywhere as you go places, as clue bottles and small safes can be right under your nose and you wouldn't even know it.
The invisibility technique also lets you go through lasers and not just searchlights and flashlights, so use it when the laser wall approaches you.
The fireworks spires are much like the torch spires in Mz. Ruby's world. After the first set, get to the back of the roof of the pagoda and drop down, smack the guard and get the clue bottles.
On the conveyor belt going straight after that, you'll need to double jump over the flashlight to smack the guard. After that, look around once you're on the other side for a host of things to break, including clue bottles.
The rest of the level is a climb up the tower, another laser floor, and then a drop down a shaft full of lasers similar to the elevator shaft at Interpol. Once again, look for the platforms and jump to them one by one to avoid the lasers. It is possible to drop down the middle and then reach the treasure key, but you need to know where
The vault - and the last clue bottle - is at the top of the final tower, with the last bottle on the spire. The vault contains the blueprint for the Panda King's lair, allowing you to use the Binocucom to find all the secret for the fourth chapter of the game.
PrinceWatercress plays Tomba! - Part 11 of 22
In this entry, we open some 1,000 Year Old Chests and find the Hidden Village.
The 1,000 Year Old Chest at the Seaside Mansion contains a blue gem that gives 100,000 AP when taken.
Remember the 1,000 Year Old Chest in the Dwarf Forest on the way to the Dwarf Village? It contains a Vitality Max +1.
In the Watch Tower area, you can equip the Bucket by using it an item. From there, you'll need to find the dew drops that fall down and get them to fall into your bucket. From here, go back to the fire in the Dwarf Forest that you saw on the way to the village. Go up to the fire, use the Bucket that is now full of water as an item to put the fire out and reveal a Baked Yam. Take the Baked Yam. You'll need it soon.
Remember where the lost dwarf child was in the Watch Tower area? If you go there now, you'll find some Flower Seeds. Get them and trigger the "Flower Seeds" objective, then take them back to the Dwarf Elder's home and use them as an item where the dwarf child is standing. This will complete the "Flower Seeds" objective and start the "Plant a Flower Garden!" objective. To do this one, you'll just need to come back here later.
The dwarf child will tell you that before the Evil Pigs put a spell on the forest, there were flowers in the forest, and that he wants to plant a seed to grow one. He is, however, scared that flowers may never grow here again.
Also in the Dwarf Village, go back to the woman who said she lost something in the forest and use the Baked Yam as an item. She will tell you that this is what she was looking for, then she will tell Tomba to pull her finger. He automatically does, and you'll hear a fart sound. (I'm guessing yams help with bad gas or something?) In exchange, the woman will give you a Vitality Max +1.
Since we don't have a certain item yet, we cannot go past eight hit points yet. You'll still want to pick these up, as the game will still keep track of the ones you've gotten and the Vitality Max +1 items will fully refill your health when you get them.
Back at the Lava Caves, Grapple straight up just to the right of where the thief was. If you latch onto a plant that you can't normally see, you've found it. Make your way up and jump on the accordion rock, then de-equip the Funky Parasol and jump straight up and grapple when the accordion rock is at its highest. It takes a few tries to get up there, but if you latch on to something while throwing the Grapple straight up from here, hold Up. You'll latch onto a plant. Get the gem for AP and climb up the ladder. Welcome to the Hidden Village.
If you talk around, you'll find out about a boy named Yan who loves to play hide-and-seek. Unfortunately, nobody has seemed to find him. If you talk to the man in the house next to the save point sign, he will give you Yan's Lunch Box. DO NOT EAT THE LUNCH BOX. You'll then get the "Take Out" objective.
Another person in the village will tell you that the Koma Pigs are protecting "some sort of unusual gold thing" in the area. Could this be where the Koma Pigs are storing all that gold...?
If you talk to the guy with the blue hair who is walking around outside in the village, he will wish he had something to eat. This triggers the "I'm So Hungry" objective. If you walk in his path to stop him and use a Lunch Box, he will introduce himself as Taro and give you some Cheese in return, completing the objective.
At the north end of the village is a giant egg statue. Maybe it serves a purpose...?
Friday, September 24, 2021
PrinceWatercress plays Sly Cooper and the Thievius Raccoonus - Part 13 of 23
In this entry, we face Mizz Ruby in a QTE battle for the ages, then head to China to look for the Panda King.
A Deadly Dance
Now that you have all the Treasure Keys for this world, go ahead and throw the keys in the locks at the edge with the horns near the entrance to Down Home Cooking. This will allow you to go to the top of the cauldron with the spinning masks and stand on it, using the steam to rocket you over to Mizz Ruby's lair.
At the beginning, you'll need to spire jump to the flat platforms before the stalactites hit you. When you reach Mizz Ruby, strike her. She will teleport, then you'll have a different kind of boss battle: one where Mizz Ruby casts magic in the form of the face buttons on the PS2 controller and you'll have to press the buttons in order to keep from getting hit. Whenever you reach Mizz Ruby, hit her immediately before she does anything, then you'll have to play more Simon Says.
During the second game, the game will slow down a bit. At the end, you'll need to wait for her to strike the ground with her tail, then jump forward and hit her.
During the third game, it gets faster, then it slows down a bit before getting pretty fast at the end. One more hit, and it's on to the mountains in China where the Panda King lies. You'll also get the third part of the Thievius Raccoonus as well as Slytunkhamen's invisibility technique.
Fire In The Sky
The fourth member of the Fiendish Five is Panda King, the demolitions expert a man who learned to make fireworks only to be rejected by the noblemen. In revenge for being shunned, he used his fireworks to commit crime and strike back at those who turned their noses up at him. He is currently perfecting a new fireworks-based fighting technique up in the mountains of China.
A Perilous Ascent
The guys with the sticks will leap at you when you get close enough, but you can strike before they do.
The guys with the catapults will send enemies in snowballs at you, but as long as you don't move straightforward and move to the side to avoid the snowballs, you can get the hit the guys at the controls up close.
While holding Circle to get around the narrow passages, watch the sky for icicles that will drop down at regular intervals.
If you press and hold Circle while stand, you'll use the invisibility technique. Unfortunately, you can't move while using it - yet - and it won't work if the enemy has already spotted you.
Striking fireworks will allow you to break open doors as well as walls, allowing you to create bridges to continue on.
To avoid the searchlights at the sides of the building, you'll need to stand below the awnings above the windows. If you get spotted, you're getting hit.
At the end, you'll need to not only take out the enemies from behind as you move around the trees for the treasure keys, but you'll also need to keep a look out for the last of the clue bottles...and there's a lot of them in that tree maze area, especially on top of the wall. You should have fourteen clue bottles before reaching this point; the other sixteen will be over here. Once you get the Treasure Key at the end, you can unlock the door.
The vault is near the end where you had to hit all of the fireworks, and it contains Huckleberry Cooper's technique for moving while invisible. You can now move while holding the Circle button to become invisible. You'll move very slowly, but you can move while invisible. (I forget to open this up, and I go back for it at the beginning of the next video.)
Inside The Stronghold
Here, you'll need to collect three Treasure Keys in total to unlock some fireworks and open a nearby hatch so you can access more of the hub.
CGR Undertow reviews Sly Cooper and the Thievius Raccoonus
This review is based on the PS3 port from The Sly Collection and has widescreen support, but it's still the same great game through and through.
PrinceWatercress plays Tomba! - Part 10 of 22
Now that the Lava Caves aren't burning up, we can now explore the place for some cool stuff, find new destinations and even get some new objectives.
Now that the insides of the Lava Caves are no longer on fire, we can head over there and explore. Of course, that means making the arduous trek to them in order to get in there.
Near the end of the first section of Phoenix Mountain, if you can somehow get up on the platform near the end, you can go left and talk to a guy with a shield and spear. If you do, he says "Funga." This triggers the "What's a Funga?" objective, which you won't be able to complete for a while. There are also some branches you can swing on, but you're better off saving them for later when the wind dies down.
At the Lava Caves, equip the Grapple and the Funky Parasol. Use the Grapple to go straight up at the entrance and get to the Evil Pig Door. When you see it, un-equip the Funky Parasol, equip the Jewel of Fire and jump towards the door. You'll face the Pink Evil Pig.
To beat the Pink Evil Pig, get to the platforms at the top, then pounce on the Pink Evil Pig when he appears and toss him in the bag when the opening is facing you. The Pink Evil Pig will teleport in and out and shoot thunderbolts down. Watch for waves of energy to see where the thunderbolt will land, and remember that if the thunderbolt hits a platform, it will shock all of the platforms that share its color...so watch where you're standing! If you have a hard time not getting shocked, use the Jewel of Fire for temporary invincibility. For beating the Pink Evil Pig, you'll break the curse on the Haunted Mansion.
From here, we can explore the Lava Caves. Use the Grapple to latch onto the bottom of a platform and pull yourself up, and use the Funky . Along the way, you'll find Bunk Flowers. You'll need to get five of these to get the Phoenix back to good health.
Somewhere up top in the Lava Caves is a guy on a cliff in the wall. He is there because the area where he is standing is shielded from the heat of the lava, and by continuing to talk to him, he will tell you that he lost a very important item that he was taking care of for his boss, and came back here to look for it. Unfortunately, the heat made it unbearable. This triggers the "The Troubled Thief" objective. Thankfully, there is an area near the top that you'll need to use the Grapple to latch onto the orange plant platform between a wall and a cliff, and on the cliff is a white sack. This is What The Thief Lost. No, seriously, that's the name of the item. Make sure not to touch the red glowing parts of the walls on the way up, as they will damage you. Bring it back to the thief you met earlier by going up to him and using it as an item, and you'll complete the objective.
The chests that you can open for now contain Charity Wings, extra lives and Lunch Boxes. One of the 100 Year Old Chests even carries a Vitality Max +1, and that chest will be in the lower-right corner of the Lava Caves. For best results, have the Funky Parasol equipped and press Down to speed up your descent once you open the chests so you can get the contents. Thankfully, if you don't get the contents, the chests will re-spawn, giving you a second chance at the treasure.
The demon pigs that fly around can be ridden on, and you can float on them to make it easier to get somewhere. You can even change directions while doing this. I don't figure this out until later in the Let's Play, though.
At the other end of the Lava Caves is the entrance to the Phoenix's Nest. Here, you'll meet the Phoenix again. I don't do anything yet, though
If you leave and come back after completing "The Troubled Thief," you'll find What The Thief Lost. Touch it to grab and trigger the "What The Thief Forgot" objective. Head back to the Haunted Mansion, now that you've broken the curse, and go up to the chimney. The thief you met earlier will be hiding there. Stand next to him and use What The Thief Forgot to give it back and complete the objective. You'll get two pieces of Cheese in return.
Thursday, September 23, 2021
PrinceWatercress plays Sly Cooper and the Thievius Raccoonus - Part 12 of 23
In this entry, we get the last two Treasure Keys in Haiti before taking on Mz. Ruby.
Descent Into Danger
This stage is also near the spinning platform with the masks.
At the start of this level, you'll be jumping across giant rafts in the swamp water before climbing a bone rope across. Make sure to watch the flashlights so you don't get spotted. You'll then climb another bone rope at the first checkpoint.
Once you're above the start of the level, watch where you're going. The wooden planks will crumble under your weight, so you'll need to stay on the stone platforms and watch the searchlights while avoiding the spiked logs. You'll eventually have to come down to the platforms you passed under at the start to get some stuff that's easy to miss.
After climbing some more ropes, you'll need to drop down for some clue bottles, then you'll have to avoid the laser beams spinning across a column. You'll then have to destroy some candles on a series of platforms to let down the purple barrier and open the way further.
You'll find the vault on the way to the treasure, and inside is Matthew de la Coopeur's perpetual slow-motion technique, which lets you slow down time whenever you want, not just when jumping. Use L2 and R2 until "Slow" is selected, then hold Triangle to move in slow motion whenever you want.
Down Home Cooking
Near the masks - and A Ghastly Voyage - is a trampoline you can jump on that leads to some windows. One of them leads to this mini-game type stage. Also, if you strike the two candles near the nearby purple barrier, you can make movement around the hub easier.
For this mini-game, you'll need to whack 50 chickens in 90 seconds and avoid the bomb-toting roosters. Keep running around and keep swinging the cane. When you hear the whistle, the bomb-toting roosters will show up. Stop swinging the cane unless you know you can hit a nearby chicken, and maneuver the bomb-toting roosters into each other, even if that means jumping over one of the things on the floor. If you can pull it off, you'll be able to get the Treasure Key.
PrinceWatercress plays Sly Cooper and the Thievius Raccoonus - Part 11 of 23
How does running into a piranha suddenly create gasoline? This game, man.
Piranha Lake
There is a bone rope in the first part of the overworld. Climb it to get to Piranha Lake.
For this one, you're in mini-game mode. You'll have to use the left analog stick to steer and accelerate and X to shoot flames. In order to power the flamethrower, you'll have to run down the piranhas in the water. You'll need to be able to do this in two minutes or less.
You'll need to run down a few piranhas first. After that, go up to a group of tiki torches and make sure that all the torches you light up are next to each other. Make sure all the torches you light up are close to one another so you don't have to drive around figuring out where the last few are. You should be able to light up around - but not exactly - 15 of them in the first minute to have a shot at making it happen.
Once you light them all up, you'll get the Treasure Key.
A Ghastly Voyage
It's time to unlock the gate with the locks. This will unleash the beast from one of the earlier levels, and it will destroy the nearby gate and open up more of the world.
You'll need to stay behind the masks on the carousel, and you'll need to open up the top of the carousel in order to get to the other areas. There is a floating platform with a gun near one of the doors; this leads here.
For this one, you'll be on a floating platform with a gun. Use the left analog stick to move and the right analog stick to shoot. You'll be on a boat that is moving around on the water at first, and you'll need to shoot down the giant gravestones that will spawn ghosts.
The enemies with the flaming skulls will throw their heads at you. As long as you stay on the move, those flaming heads won't hurt you.
Afterwards, you'll disembark from the boat, and you'll need to destroy the barricades surrounding the enemies as well as the enemies themselves in order to get some coins and continue on. As you get closer to the end, you'll start seeing combinations of the flaming skulls and the headstones. Again, as long as you stay on the move and you're good at moving the right analog stick around as you move, you'll be able to get the treasure key.
PrinceWatercress plays Tomba! - Part 9 of 22
Now that we have the 1,000 Year Old Key, we can open up the blue chests. It's imperative that we do, as this will allow us to go back to the Haunted Mansion and fight the Green Evil Pig, which will open the game up a little bit and allow for some more exploration.
Now that I have the 1,000 Year Old Key, I go out to open the blue 1,000 Year Old Chests, and the first two I go for are in Phoenix Mountain and the Lava Caves. The one at Phoenix Mountain below the Lava Caves entrance contains the Grapple, which is a grappling hook with more range than the Blackjack. This is a very important item that you'll need to get, and it also completes the "A Precious Treasure Chest?" objective.
Inside the Lava Caves is the Green Evil Pig Bag, which opens up the "Lava Caves" objective. However, you still won't be able to get very far in the Lava Caves until you put the flames out. It's time to head back to the Mansion. Remember the Smile Door that you had to open on one side of the mansion? Well, you'll have to get a Laughing Mushroom from the Mushroom Forest to open it again, and this time, the door to the Green Evil Pig will be there now that you have the Green Evil Pig Bag.
There is a Dwarf on one of the platforms now, and if you talk to him, he will tell you that he came to get some Flower Tears to revive the Charity Fountain in Charity Square. Unfortunately, he does not know how to get the Flower Tears. Keep this in mind for later. This opens up the "Tears from a Flower" objective.
At the highest platform in the Mushroom Forest is a 1,000 Year Old Chest. Inside is a 1,000 Year Old Bell, which takes us back to the 1,000 Year Old Man's room in the Mansion.
Interestingly, you can hold R1 and hold Up or Down on the Control Pad to look up or down. I keep forgetting you can do this.
The chests in the bottomless pits of the Mushroom Forest contain Charity Wings and 1-Ups, making them worth getting once you get the keys for all the chests.
Another 1,000 Year Old Chest on a platform contains the Mysterious Mushroom. Getting it completes the "The Mysterious Mushroom" objective. Using the Mysterious Mushroom lets you switch between laughing and crying between uses, making it so that you don't need to go back to the Mushroom Forest to get mushrooms to laugh or cry anymore.
Now to go to the Green Evil Pig. As mentioned earlier, go to the Smile Door, use the Mysterious Mushroom to laugh, go in, use the Ordinary Mushroom, then hold Up and press X to get on the platform and enter the door. Once you go in, you'll face the Green Evil Pig.
To beat the Green Evil Pig, stand on one of the large platforms beneath the Green Evil Pig Bag, then be above him when he stops flashing so you can throw him into the opening of the Pig Bag when he appears nearby. As you face him, he will throw a meteor up into the air, which will soon fall towards you at a much bigger size. By beating the Green Evil Pig, you will cool down the Lava Caves so that there is no more fire. If you need to, use the Jewel of Fire and press Square to use the Fire Magic for temporary invincibility.
Subscribe to:
Posts (Atom)