Showing posts with label part 21. Show all posts

Saturday, July 18, 2026

PrinceWatercress plays Space Station Silicon Valley - Part 21 of 32


Unless you experiment with things, you're not going to know what the level name hints at.


Weight For It!


Not only do you have an elephant that you have to get out of a tree, but you also have to activate a switch to reveal some stepping stones and take control of a piranha. Time to get to work.

You start off as a lion. A jumps and B roars, and the roar also acts as an attack. There will be a hyena near where you start; chase after it and keep roaring at it to destroy it. There will also be a gorilla running around; you'll want to roar it to death too. Thankfully, you can do it from a distance atop a tree root. 

From here, take control of the gorilla, go up the ramps, and grab the box. Take the box to ground level near the red ring that is floating over the ground, then grab the boulder that is also laying around near this ring. Throw the boulder over the red ring to get rid of it, then take the boulder and throw it into the red ring above the water near the exit. Grab the box and take it to the ring near the speaker, then get the boulder near the speaker and throw it into the ring. Go up the ramps to the top of the mountain, swing to the top of the giant tree trunk, then throw the nearby boulder into the nearby red ring. There will be some vines to the side; swing to the other side and hits the switch to activate the stepping stones. Use the nearby waterfall to drop down.

From here, grab the box, bring it to the top of the mountain, then grab the boulder that is halfway up the mountain and throw it through the red ring that is suspended in mid-air nearby. By throwing boulders through all the red rings, you'll get a trophy. The trophy will be at the top of the mountain, ready to grab.

Go inside the tree trunk and place a hyena on the middle platform in the center, then go back to the top of the mountain and place the box on the metal platform. Now you see why the level has the title that it has. Swing to the top of the tree trunk, then switch to the hyena and jump across the stepping stones. Travel around the perimeter of the level. Near the big palm tree, there is a parrot. Laugh it to death with the hyena. From here, you can take control of the parrot.

Fly back to the pool that you saw after the stepping stones and hit the switch to reveal a metal platform, then get in the water to get the piranhas' attention. Get out of the water and divebomb them to defeat them, then take control of one of the piranhas. As a piranha, follow the path, and when you see a wooden wall a little further down the path, get to the surface and jump over it to hit another switch. This will reveal a metal bridge and lower the door.

Go back to the parrot and take control of it, then get back to the tree near the huge logs. There are two ways to get the elephant off the branch. The first is pushing it off with the parrot. The second - which is probably not intended - is taking control of the lion and repeatedly jumping and roaring to shove it off more slowly. I do the latter. You'll need the elephant to get the last two Power Cells and exit the level.

Lion


Type: Lion
Environment: Jungle
Skill A: Jump
Skill B: Roar Attack
Water Resistance: OK
Mass: Heavy
Armour: Light
Strength: Strong
Traction: Good
Fall Distance: Medium
Production: Long
Engine: Nuclear
Intelligence: High

Power Cells


1 | 2-3 | 4-5 | 6-7 | 8 | 9 | 10 | 11 | 12 | 13 | 14-15

Thursday, February 5, 2026

PrinceWatercress plays Super Mario Odyssey - Part 21 of 92


So much for a trip to the city...Bowser's at it again! That's twice he's kicked our collective butts now!


When you take off for the Metro Kingdom, you'll run into Bowser and his airship on the way there. You'll stop over at the Cloud Kingdom.

From here, hit the ? hats with your own hat to turn them into platforms, then get ready to fight Bowser. Bowser will throw his hat; throw your hat at it to stun the hat and wear it like your own. Go after Bowser and jump over the shockwaves he produces as he tries to get away from you. When he lands on his butt, get in front of him and hit him repeatedly with the Y button until you send him into the spiked wall in the distance.

On the second phase, he throws three hats. Throw your hat at the one that isn't dark purple, then wear it and go after Bowser again. Avoid or punch out the spheres that Bowser throws at you, then get in front of him when he's on his butt and knock him into the nearby wall.

On the third phase, there are six hats. One, then two, then three are unleashed; go after the white one like you did before. Go after Bowser and watch out for the shockwaves and the spheres, then start punching Bowser. When he stops blocking, be ready to jump when he swings his tail, then start hitting him again until you launch him back on his airship.

Afterwards, Bowser gets mad, and he shoots down the Odyssey with the cannons from his airship. You'll then end up in the Lost Kingdom, and the Odyssey will be damaged. Cappy will tell you that you will need some Power Moons to fix it.

When you go further into the island, a vulture will swoop down and kidnap Cappy. You'll need to ground pound the golden pillars with the steps between to not only change which pillars are up and down, but also to get to this vulture. It won't take long to get to him, and when you approach, he will fly to the lower stone pillar. Ground pound the higher one just before he lands so you can knock him into the air and defeat him to get Cappy back. Talk to Cappy, and he will rejoin you.

The Wiggler-like enemies are called Tropical Wigglers and are among the most fun in the game. When you possess one, you can press the A button to extend your body, and you can use this to get from platform to platform and reach some areas more safely. You can also use this ability to grab things such as Regional Coins and keys that are directly over the purple lava that is all over this kingdom. Just remember that if you see the sweat drops coming out of the Wiggler and that the Wiggler's hands are not on the ground, you cannot reposition yourself in that particular place with the A button; you'll need to put your head and hands back above solid ground in order to de-extend yourself. Remember that these 

The he green guys with the purple eyes will throw your hat at you like an explosive projectile if you throw Cappy at them are Trapeetles. This is dangerous, but if you can avoid the projectile and keep these guys facing the way you want them, you can get rid of some obstacles with this attack.

Power Moons


1. Atop a Propeller Pillar - This Power Moon can be found on a spinning propeller-shaped pillar in the Swamp Hill area.

2. Below the Cliff's Edge - This is one a ledge off the edge of the north-eastern side of the Kingdom. This one is directly near where "Peeking Out from Under the Bridge" (see below) can be found.

3. Inside the Stone Cage - You'll be able to see this one near the Odyssey, but to get to it, you'll need to ground pound the pillars that are near it so you can reveal the opening to the cage, go inside and collect the Power Moon.

4. On a Tree in the Swamp - Bring a Tropical Wiggler to this spot, then ground the center pillar to raise the other two and make it easier to get this Power Moon.

5. Over the Fuzzies, Inside the Swamp - At the Mountainside Platform checkpoint, use a Tropical Wiggler to get on the tree platforms near the Fuzzies moving back and forth to avoid trouble and get the Power Moon on the other side.

6. Avoiding Fuzzies Inside the Wall - At the Mountainside Platform checkpoint, there is a Hat Door you can open with your hat. It leads into the nearby 8-bit area. Avoid the Fuzzies and get the Power Moon on the other side with the help of the moving platforms.

7. Inside the Rising Stone Pillar - On the way to the vulture, hitting the taller stone pillar here not only makes a staircase rising up, but also shows a hidden Power Moon to the side.

8. Enjoying the View of Forgotten Isle - At the top of the mountain in the center of the kingdom, you'll find the Crazy Cap Shop. You'll also find a Power Moon above a tree.

9. On the Mountain Road - On the way up the mountain in the center of the kingdom, you'll find a flashing spot on the ground. Ground pound it for a Power Moon.

11. Wrecked Rock Block - There are four blocks set up like a square in Swamp Hill. Throw Cappy at the nearby Trapeetle, then get him to destroy the blocks. One of them will contain a Power Moon.

15. Moon Shards in the Jungle - On the west side of the Kingdom, there is an area where you can take a Tropical Wiggler and go from platform to platform to grab five Moon Shards. Collecting all five will net you a Power Moon, but watch out for some of the Fuzzies that are circling a few of the platforms!

16. Peeking Out from Under the Bridge - To get this Power Moon, possess the Tropical Wiggler here, then land on the roots of the trees to inch yourself towards this Power Moon.

17. Twist 'n' Turn-Up Treasure - You'll need to take a Tropical Wiggler back to the beginning and go behind the Odyssey. Use your extension powers to grab the key, and you'll be able to get this Power Moon.

20. Get Some Rest, Captain Toad - In the middle of "Moon Shards in the Jungle" (see above) you will come across a hidden cave if you look hard enough. Use a Tropical Wiggler to get in, then turn back into Mario and talk to Captain Toad for a Power Moon.

21. Shopping on Forgotten Isle - Purchase the Power Moon on sale in the Crazy Cap shop at the top of the mountain in the center of the kingdom.

Regional Coins


Friday, December 12, 2025

PrinceWatercress plays Brave Fencer Musashi - Part 21 of 33


In this video, we finally fix the Gondola, but once we do, danger strikes the village.


Carpenter Carvey (CarpentA) will tell you the Gondola Gizmo has a gold rim and looks fancy. Carpenter Cubey (CarpentB) will tell you it looks like a wheel. Carpenter Dicey (CarpentC) will tell you it has four carefully calculated holes.

So...a fancy wheel with a gold rim and four carefully calculated holes. Got it.

You can talk to Wid about the Scrap Depository, but you won't get much out of the conversation.

Head back to the Scrap Depository, which is the path to the right after dropping between the blades of that huge fan. Now that you can double jump with the Legendary Shoes, you can explore this area now.

Watch out when traversing the gondola platforms here. Some of them are containers that hold liquid Binchotite from the Binchotite pool below, and touching it will both damage and Poison you. Ditto if you fall into the pool of liquid Binchotite at the bottom. Thankfully, Assimilating the worm enemies here will allow you get the Antidote ability in case this happens.

Believe it or not, the one you're supposed to pick up is a fancy, gold-rimmed wheel with one hole in the center and the other three holes around it.

When you return the real Gondola Gizmo, Musashi will automatically rest at the castle and accidentally oversleep.

Return to the village, and you'll find out from Mrs. Govern that the village has been set on fire. Equip the Water Scroll and use it to find the eight flames. Thankfully, you don't have a time limit, so take your time in finding all the flames and extinguish them with the Water Scroll until they're completely gone.

When you get rid of all eight flames, you'll talk to Mrs. Govern, and you'll find out Ben and Ed - the same guys who tried to steal the church bell - set the village on fire.

I finally get the Legendary Gloves after putting out the fires, which means I can land more critical hits.

Now that you've put out all of the flames, head to the Mayor's house and knock on the door. Mayor Govern will be over his cold, and thanks you with a Calender. You can't get rid of it, and this will come in handy later. Mrs. Govern will also gives you the Rocksalt.

Monday, November 10, 2025

PrinceWatercress plays Legacy of Kain: Soul Reaver - Part 21 of 28


We get one more glyph, and this time, it's the final glyph in the game.


0:35 - We make our way through a door and into a path. This leads to some sort of machine. Take out the enemies here, then climb up the ductwork. There is a crate at the top, and you'll need to push it off the top and into the path of the gear from the gap near where you came in from. Place the box in the path of the gear, then turn the crank. This will stop the gear from turning too many times and will keep the gas in the pipes going indefinitely, lighting the lighthouse.

6:22 - Drop down here and go into the opening below the lighthouse. Follow the path to a spiral staircase. Make your way down. There is a path off to the side leading to some more machinery. Phase into the spirit realm to move forward, then go down the stairwell and use a glyph halfway through to take out a hidden enemy. This will lead to...

9:28 - ...another puzzle. You'll need to put a path together for the pipes so you can get some water flowing. After the blocks are in place, go up and turn the crank. This will get the machinery nearby going. Go to the machinery and use the gas coming out of the pipes to glide upwards to another area that you can reach by jumping off the bellows.

12:58 - Drop down and follow the path. Drop down from the top of the machinery, then go back up the spiral staircase and go through the door to exit. When you get back to the lighthouse, it will start spinning, and the light will travel to a triangular window nearby. Jump across the pistons in the water and enter the nearby door, then go through the door across. You'll be in an area where light is traveling to a triangular hole in the wall. Shift to the spiritual realm, and you'll get the Sunlight Glyph, which is the final glyph in the game. This glyph will hit all on-screen enemies with sunlight, stunning them.

Tuesday, May 27, 2025

PrinceWatercress plays The Grinch (PS1) - Part 21 of 22


It's now time to head back to Wholake, the hardest of the four levels to get everything in. We have our work cut out for us, but we know what we have to do.


Going back underwater, we need to chase after the two glowing things that were swimming around. Turns out, they were parts all along, and if we run into them while accelerating at turbo speed, we can get them. 

Two of them are hidden behind walls you'll need to hit at turbo speed to break. They are located here and here. When you reach these areas, you'll need to do something to get the parts. For the first one I mentioned, you have to do a surface jump into the target to raise the trap and get the part. For the second one, you'll have to surface jump into a stalactite you bring it down, crush a sunken ship and get the part that is left behind. Don't forget the giftboxes! After getting all five parts, you'll turn the Marine Mobile into a fearsome beast and complete the modification mission.

Shortly after you come out of the cave at the beginning, there will be a scout who was not there before. Equip the Rotten Egg Launcher, then talk to him. If you can shoot down ten crows within fifteen seconds, you'll get his GPS, which acts as the last of the sleigh parts. Do yourself a favor: aim in the general direction of where the crows are going and fire like mad to get a bunch at one time. You should just be able to get ten crows within the allotted time.

With all five sleigh parts collected, you'll finally be able to access the sleigh and play the final level, but we're not done yet. I use the Grinch Copter to destroy all those pesky mid-air giftboxes in the first and third sections of the level...especially the third. The third section has some areas that I usually wouldn't be able to reach without the Grinch Copter, including the top of the waterfall, which has some well-hidden giftboxes, and the platform above the Mayor's Villa. 

As for the mission with the scarves, we have the Grinch Copter to take care of that. When it comes to the scout up on the platform above the Villa, you'll need to breathe on him with the bad breath attack, then shoot at him repeatedly with the Rotten Egg Launcher while he is stunned and knock him off the edge for a scarf. This is also true of the scout near the Mayor's motorboat, so stun him and knock him off the dock! There's one guy who flies around, and you'll need to catch up to him and hit him with the bad breath attack so you can land and get the scarf below. There's also the scout on the stump that involves that big log, which we've done in the past. Finally, there's one guy near the shore, and you'll need to breathe on him with the bad breath attack to get his scarf. When you have all five scarves, go back to the old guy in the cave. You'll be able to smash his giftboxes and complete one of the missions.

Remember that see-saw platform? Stand on the platform with Grinch, then press Select to call Max so he can get the rope. When you have it, get to the Mayor's Villa disguised as a scoutmaster using the big rock and the see-saw (you'll need to shoot the stick holding the platform to bring the rock down again), and the guard will get out of the way. Tiptoe to the bed and press Triangle when the game tells you, and you'll drag the Mayor out of the villa and off into the lake and complete the mission related to it. 

At this rate, we have all the presents smashed and 96% of the game complete.

Tuesday, February 18, 2025

PrinceWatercress plays Wario Land II - Part 21 of 51


Well, this level was pleasant enough to get through.


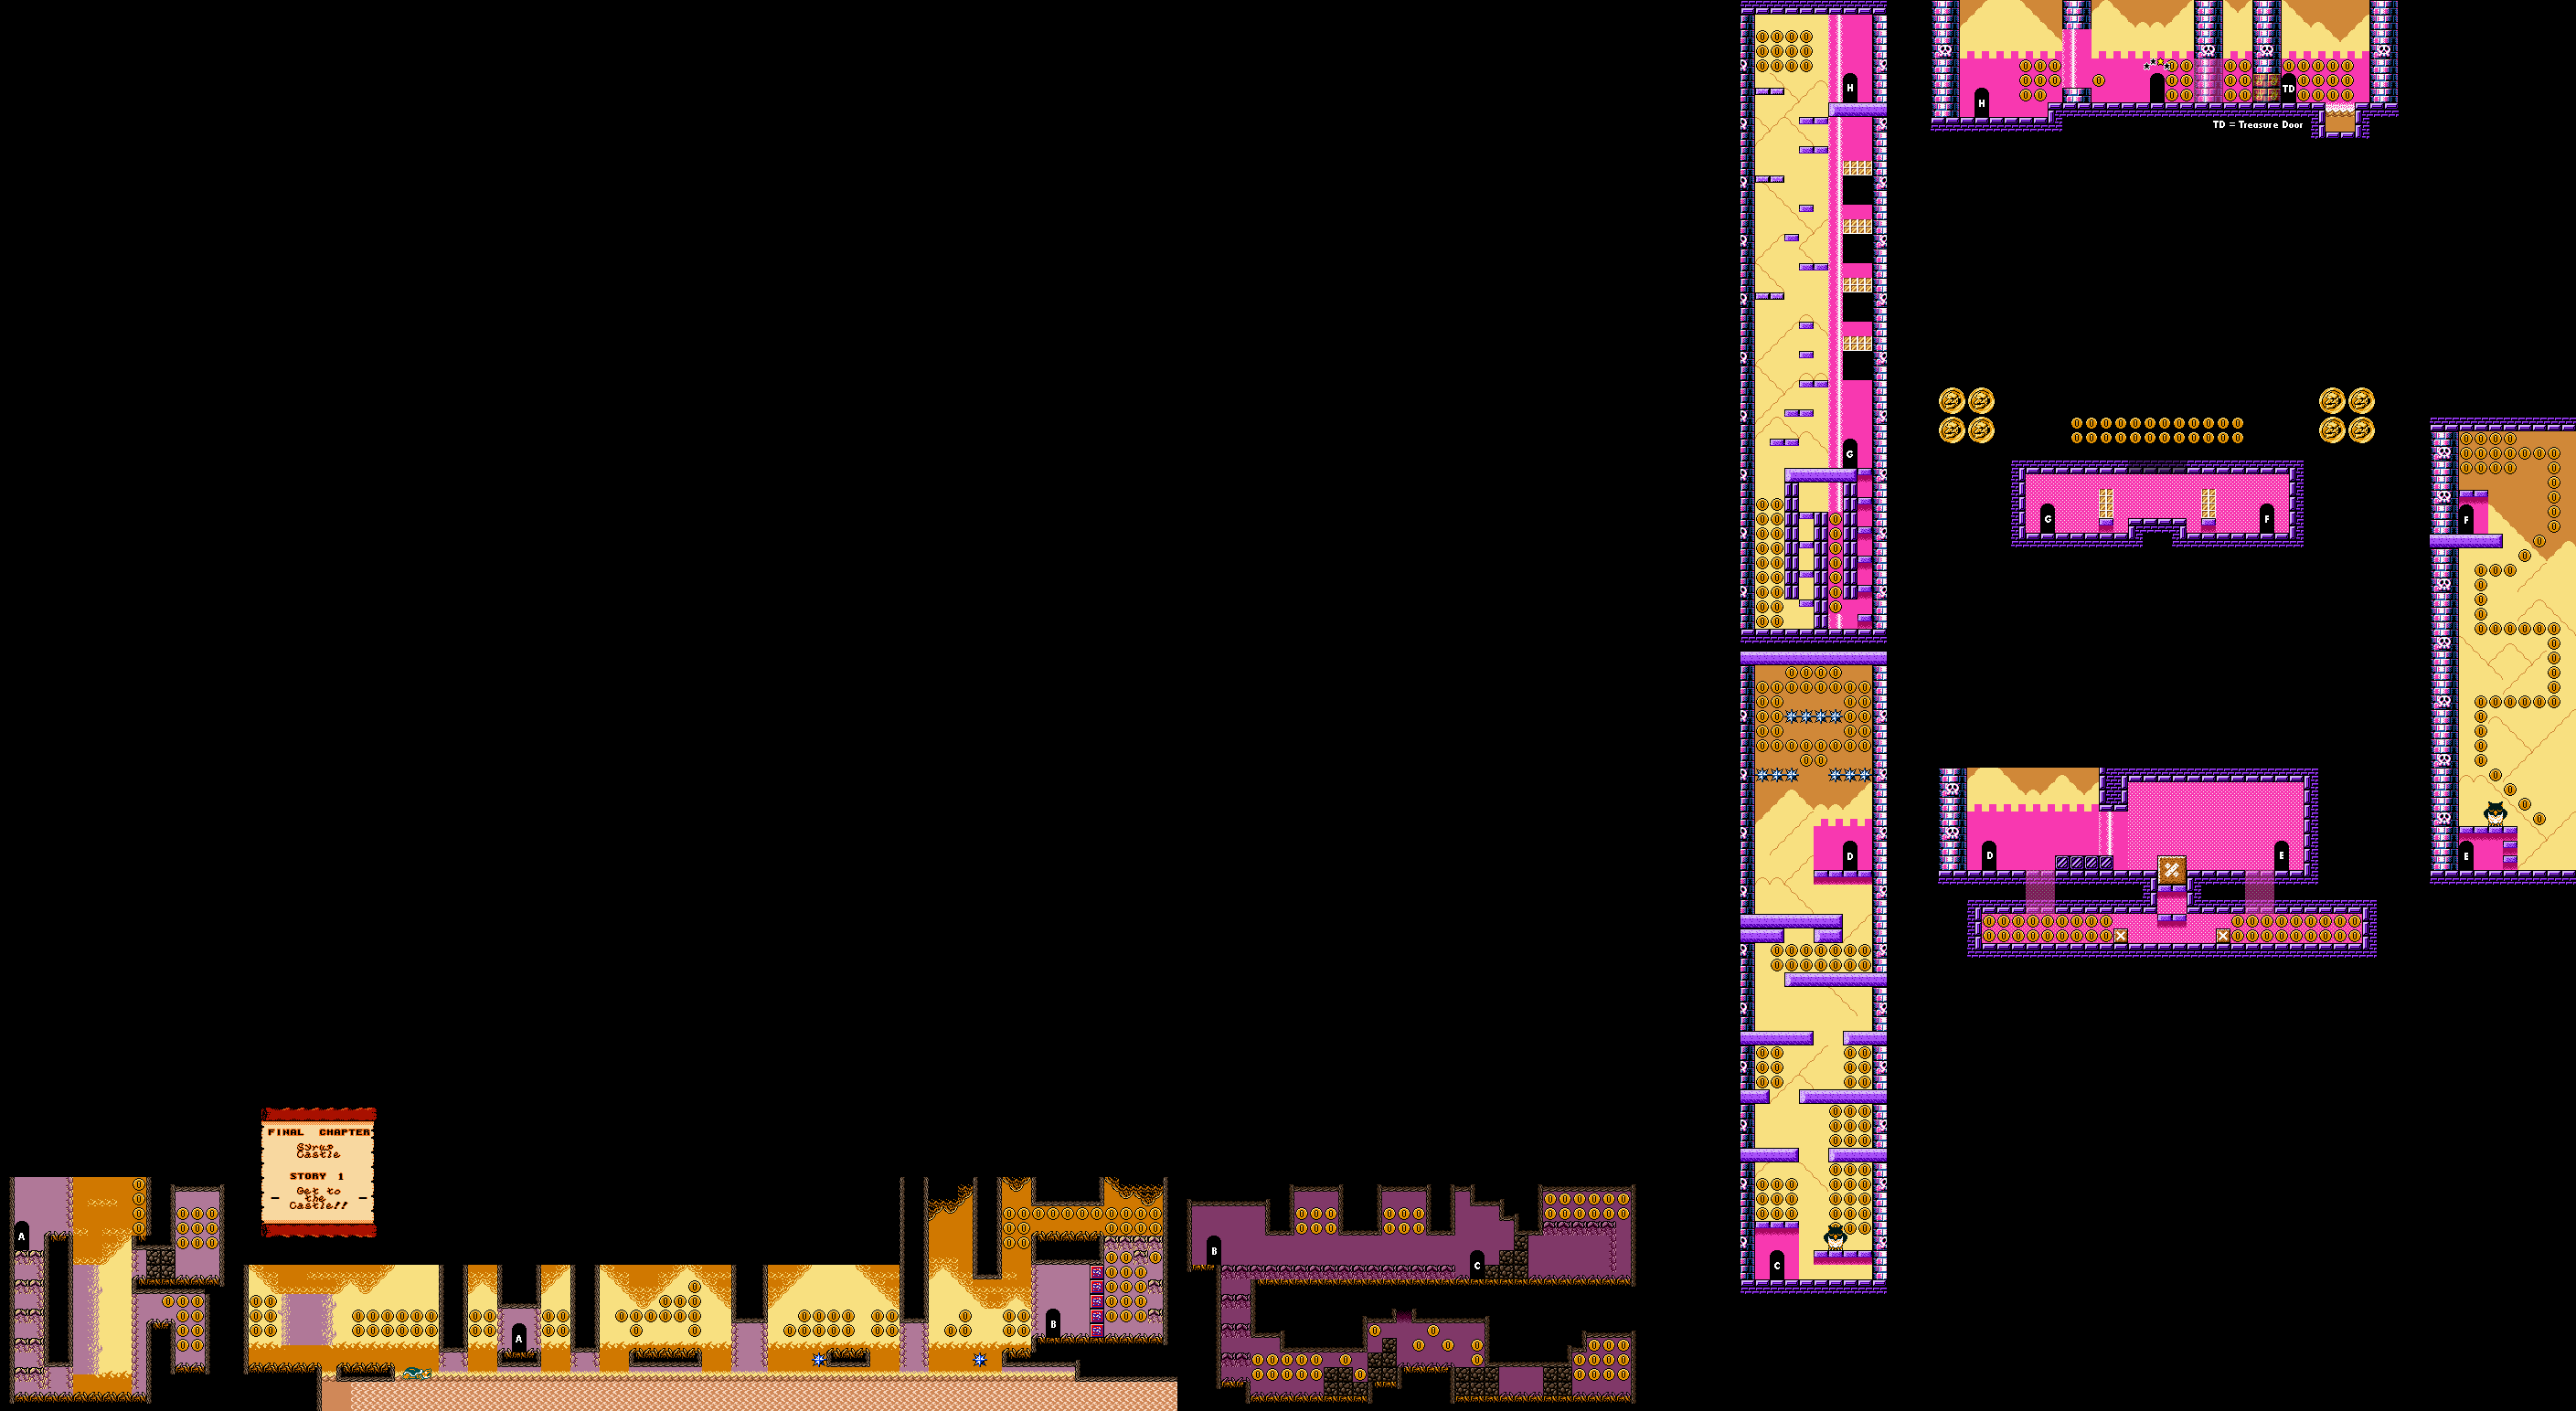
Final Chapter: Syrup Castle

Story 1: Get to the Castle!!


Once again, you're in the forest. You'll need to use the fire-blowing fox to get the coins near the door leading to the next area.

For the area with the monsters that get angry when you tackle one of them, there is a fake floor leading to a lower area where you can find more coins.

You'll then have to fly with the owl. Be ready to get away from the birds when they get ready to attack you. As for the next area, there are some breakable floors that lead to more coins.

You'll then have to fly with the owl again to avoid some spikes. The next couple of areas are straightforward. The area with the Spear Goons has a breakable ceiling that leads to more coins, and you can take out all the bottle-throwing guys easily 

Before going to the exit, let the fox set you on fire and go through the wall right of the exit. That leads to the treasure room, where you can win a magic cane.

Friday, November 29, 2024

PrinceWatercress plays Great Greed - Part 21 of 28


In this entry, we finally make our way to Burger, and we find out that Bio-Haz's soldiers are already on the ground ready to wreak havoc.


From Won Ton Village, you'll need to head back to the mountain. Back at the exit, you'll meet Mr. Noodle. Talk to him, and he will tell you that he slipped while trying to stop a child from falling, and asks you to help him find and rescue the child, who keeps calling the name "Marcela." Gum Drop will ask you to help her find the child. Mr. Noodle will tell you that the child is at the bottom of the cliff, way over to the left. Gum Drop will set up a barrier, while Mr. Noodle will head back to town.

You'll need to head to the lower-left corner of the canyon in order to find the child. Be ready to fight enemies and heal up when you need to. The place you need to go is south of where the chest with the Fix in it was. When you get there, you'll find Junior, who is injured. Four men will show up and carry Junior back to Steak's house, then Gum Drop will tell you to head back to the village. Sadly, you can't use the Escape spell, so you'll have to head all the way back to the village by foot.

Head back to the inn at Won Ton Village if necessary, then head to Steak's house. Talk to Mr. Noodle, and he will help you get to Burger. He will tell you to meet him at the cape to the south. At the cape, head all the way to the south. Mr. Noodle will appear from behind you, ready to get you to Burger by kite. Gum Drop will sadly say goodbye to you, as there is no way she can abandon Junior now. Before you leave, she hands you her earring. You'll then get on the kite, and Mr. Noodle will fly you to Burger.

At Burger, talk to the people. You'll find out that Burger is the most polluted town in all of the land, soldiers of Greene's army have been stationed at the abandoned house on the west side of town, and that Greene Castle has been overthrown. The shops, sadly, are closed, so you won't be able to buy anything here. You'll also find out that Dust Ball is attracting all the trash in the tower to the north. You won't be able to enter the tower...yet.

Enter the house that is not near any others in the west end of town. You'll be stopped by a soldier of Greene, who happens to be Lunch Box. He will open up a ladder to a hidden room, where you'll also meet Time Out. Time Out will tell you that they are going to attack the tower in the north, and Lunch Box will tell you that he is about to instigate a riot in order to make it possible. When the siren goes off, you'll need to enter the tower.

Aside from all the treasures here, you can also press A at the pot to refill your HP and MP. This is a relief, as even the inn itself is closed. The Power spell will increase your Strength when cast in battle at the cost of 10 MP. 

When the siren goes off, leave the house and get to the towers. You can talk to the soldiers to fight them, but the Choppers are pretty weak despite giving 350 Experience and 200 Gold. They are weak to Bolt magic and strong against Flame magic, however. If you need the experience and gold, however, you'll have an endless supply of them, so you've got that going for you at the very least.

Just head north to the tower. You'll enter, and from there, you can make your way through it to fight the big bad who is causing trouble. The only enemy you will face here are Choppers, and you can just blaze through them if your level is high enough.

If you need to refill your HP and MP, head back to the abandoned house that is by itself, stand two tiles east from the top of the bed to reveal the ladder, then walk into the ladder to go back to the healing pot.

At the top of the tower is a wizard named...Thyme. (I thought his name was Dust Ball?) Thyme has 1948 HP and 4095 MP, and can cast Drain, Flame 4 and Freeze 4. Be ready to heal with Heal 4 - a lot - and make sure to cast Power to increase the strength of your physical strikes and counteract Drain. Thyme gives 4000 Experience and 1800 Gold when defeated, which is quite a lot for a boss, and has a chance of dropping a Med 3-15 scroll. Thyme will tell you that Bio-Haz is trying to save this world by bringing the trash from the world of Greene into the human world, which really isn't a solution at all. 

Once you beat Thyme, the tower will be free of monsters, and you'll be free to return to town at your leisure. When you reach the entrance, Lunch Box and Time Out will show up to tell you that they will be starting a local militia with the people in town, and will ask you to head to Greene Castle to the east. When you head back to town, the shopes wills till be closed, but there will be two people at the entrance to the south who will be able to sell you items and spells and take any items that you don't need.

Thursday, September 19, 2024

PrinceWatercress plays Chrono Trigger (Super NES) - Part 21 of 70


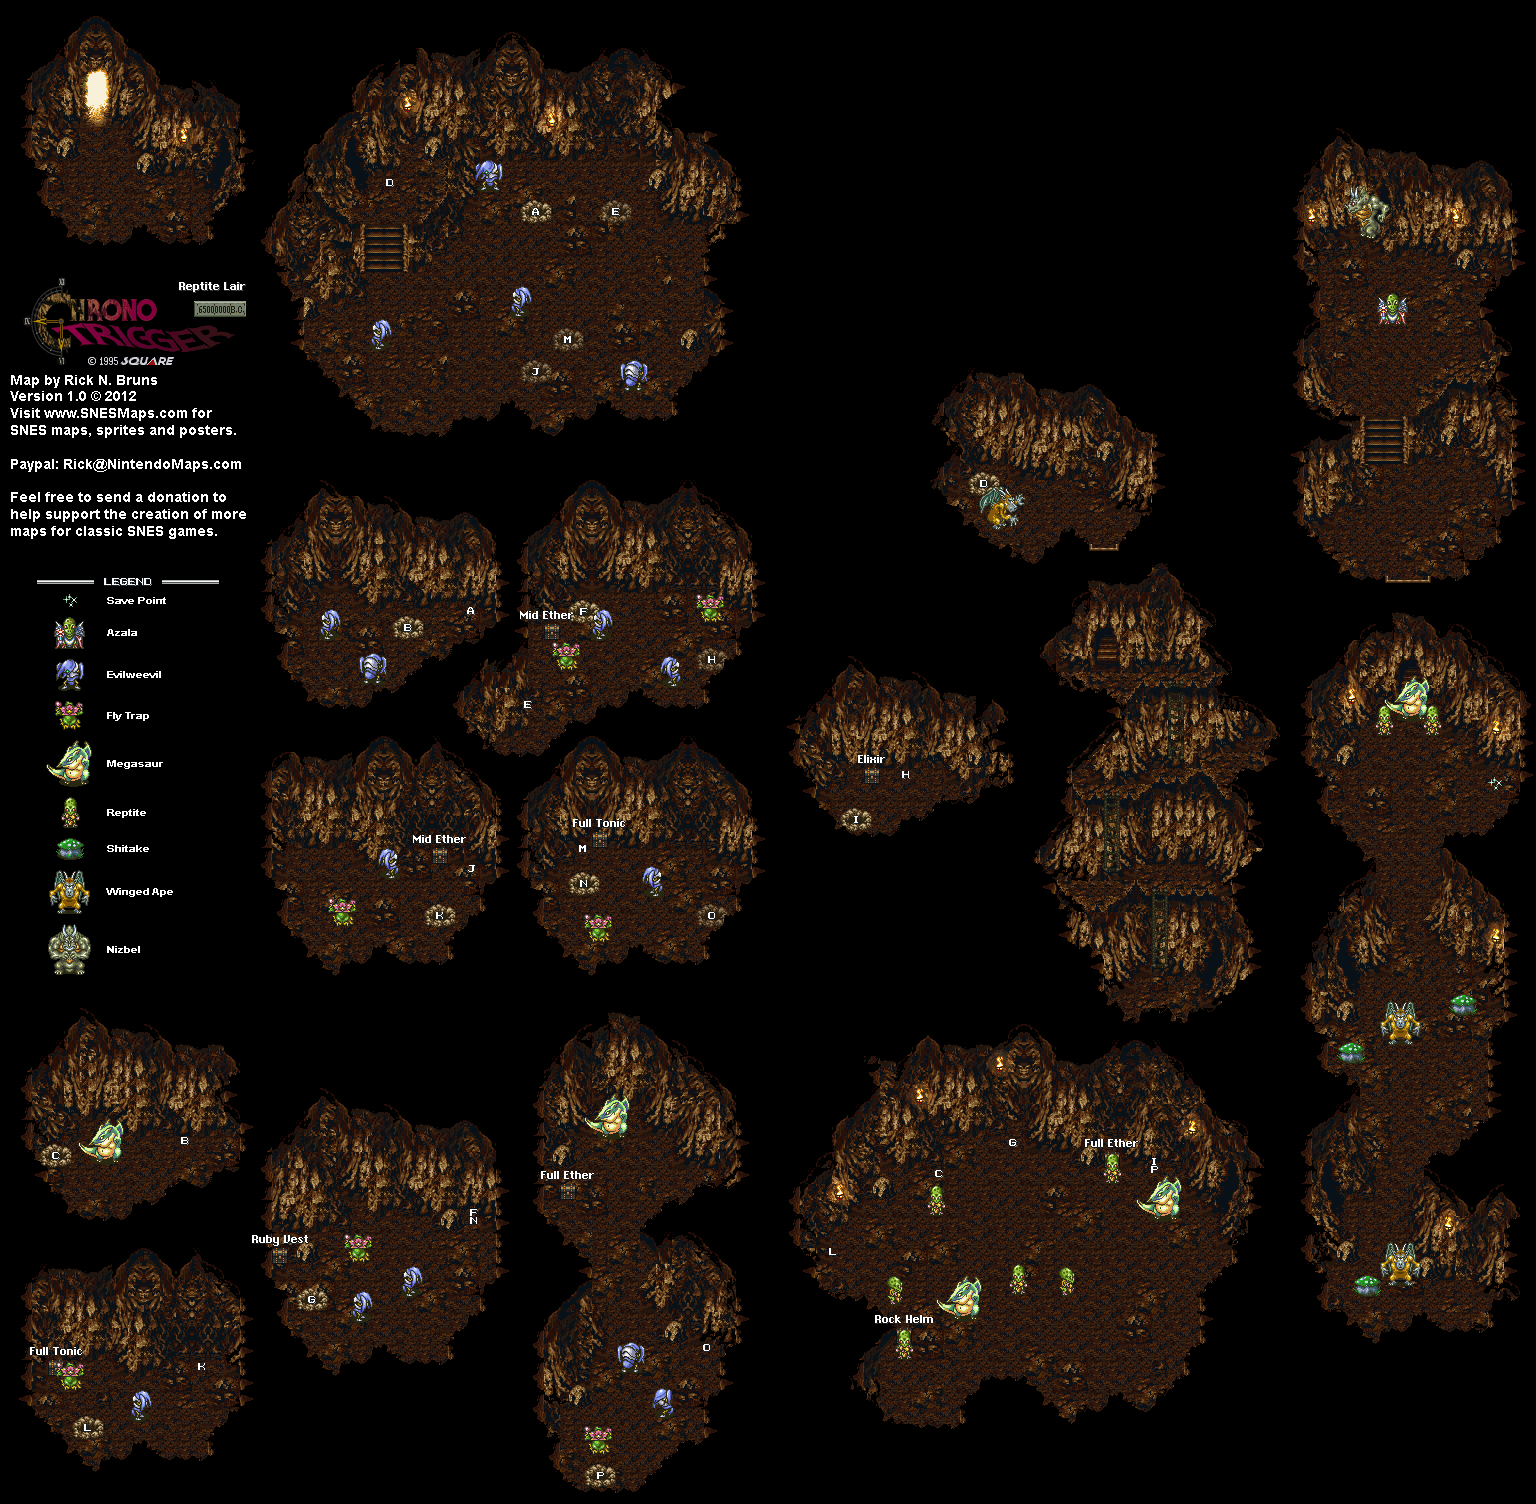
This was the biggest, most absolute pain to do, just because of one of the paths requiring access from a specific spot in the first room.


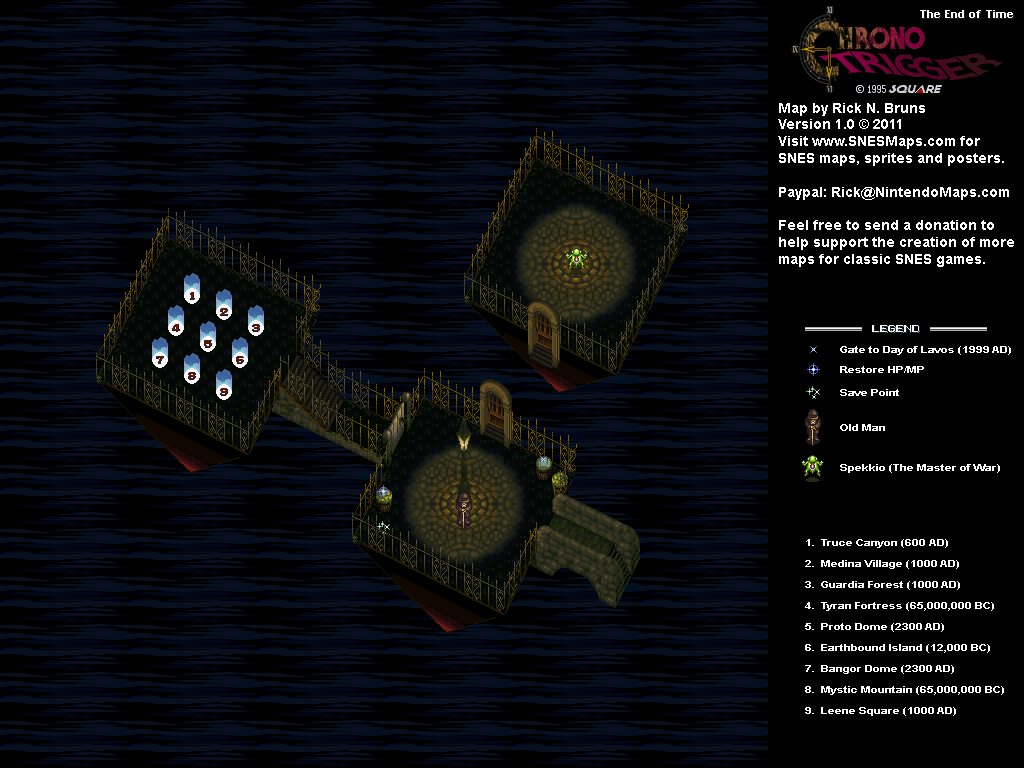
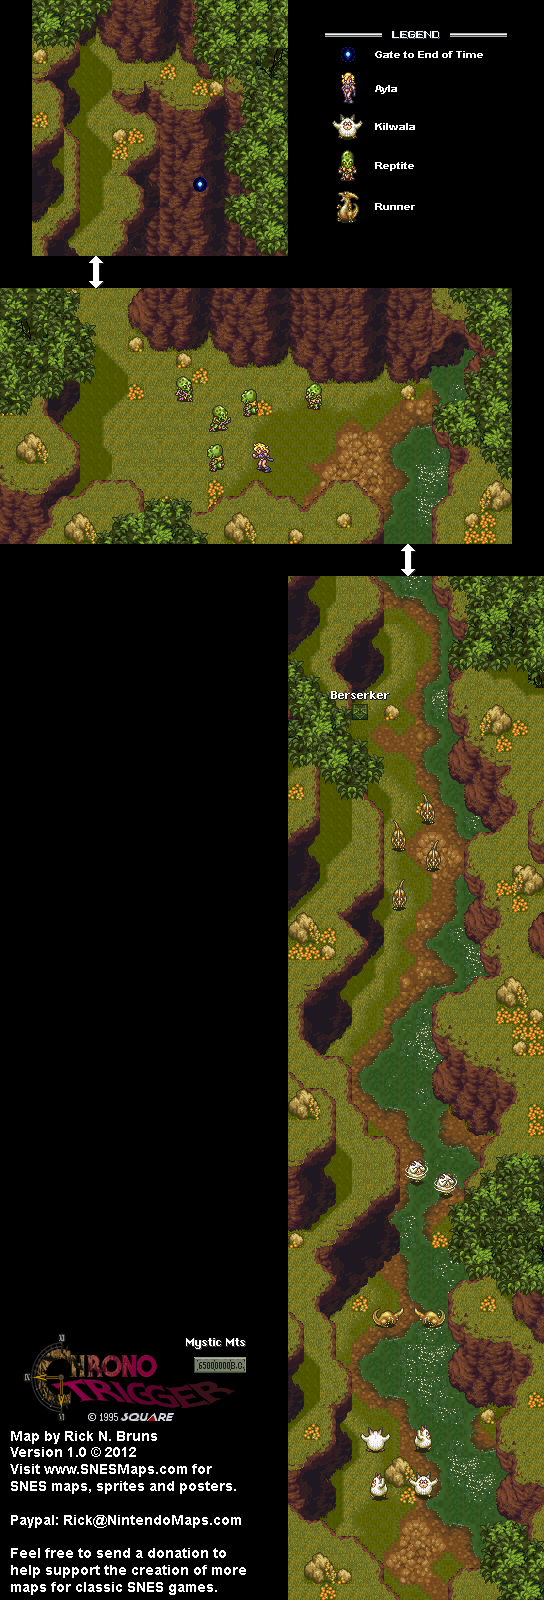
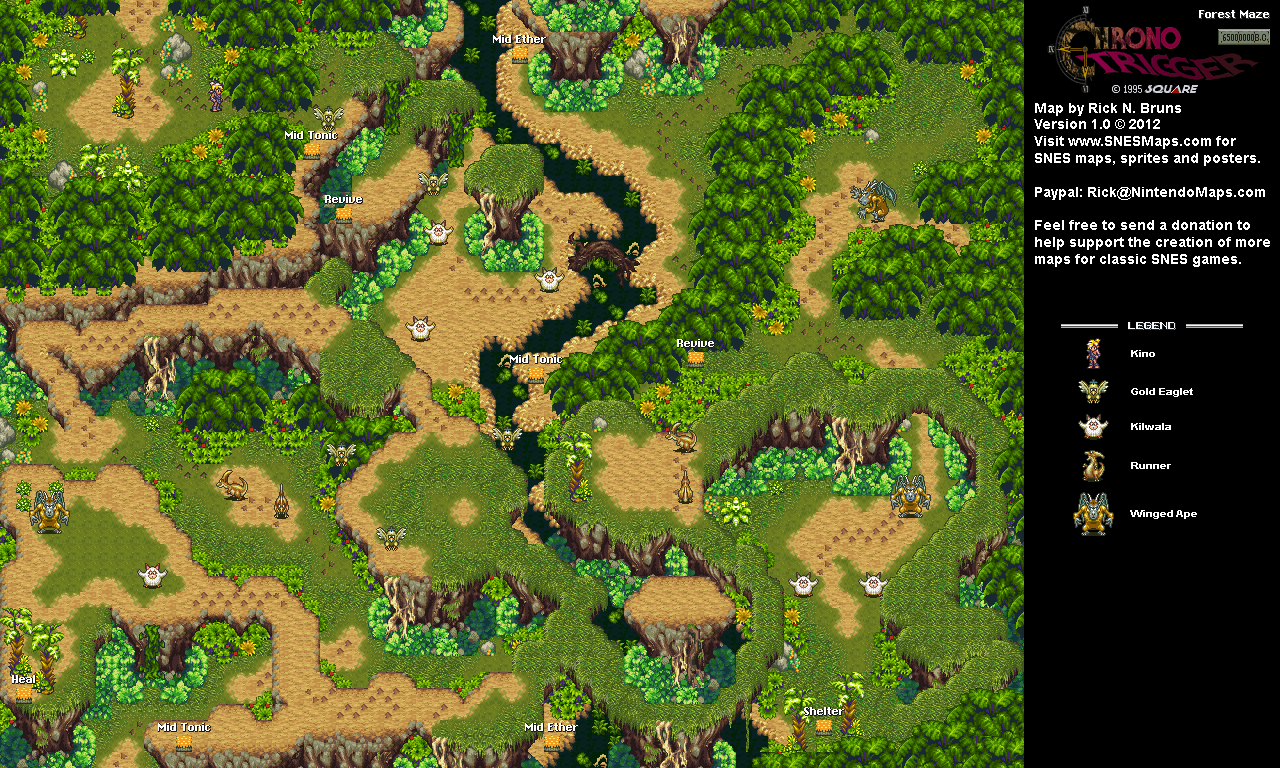
Now that I have the time to do it, I head back to the Reptite Lair and try to take all those paths near the beginning while also getting some Tech Points for my party. This ends up taking longer than I planned.

Three of the paths are pretty easy to access. You'll meet a new enemy while taking the other paths: the Meat Eater. The Meat Eater will put you to sleep as a counterattack if you don't kill it upon attacking it, but it doesn't do much else.

In order to take the alternate paths, you'll have to wait for the EvilWeevils to dig holes at the start of the Reptite Lair. While three of the paths are very easy to access, the one containing the Full Tonic (which restores 500 HP) and the Full Ether (which restores 50 MP) as well as the big room with the Megasaur is hard to access unless an EvilWeevil digs in a specific spot, unlike all the others, which can be accessed from anywhere other than the southeast corner. That specific spot is right here. If the EvilWeevils dig where you don't want them, leave the room and re-enter to try again.

There are also a few alternate paths within the alternate paths, and those all involve waiting for another EvilWeevil to dig a hole in the underground paths leaving to all the treasures. Just like with waiting for the alternate paths to open up at the start, this can also take a while.

Thursday, June 13, 2024

PrinceWatercress plays Ratchet and Clank: Going Commando - Part 21 of 54


We head back to the battle arena in the Maktar Nebula to take on the last of the challenges.

First | Previous | Next | End

1:56 - The Mega Challenge! Time to destroy a whole bunch of enemies and get a whole bunch of bolts at the end. Oh, and getting gun experience. We need that, too. On the tenth and final battle, Chainblade shows up, but the wrench challenge is off and Megaturret Glove use is fair game, which means that he's getting torn apart.

6:10 - The Limited Weapon Challenge. Here, you have only eight shots with the Mini-Nuke to kill all the enemies. For best results, lump everyone together for one shot. You only have four rounds of this, so make your shots count. Also, see if you can get the enemies to inadvertently hit each other, as infighting can help you save a shot or two.

7:36 - The game calls this battle against Chainblade and B2 Brawler a "Tag Team Battle" when the proper term is "Handicap Match." Once again, bust out the big guns, including the Megaturret Glove, if you want to survive. Both bosses tag in and out at regular intervals, but The Megaturret Glove tears through them in record time.

9:04 - The Endurance Challenge. Here, I start using the Synthenoids to do some damage without having to use my guns. I should have kept using them a little more throughout the battle, because those things are awesome and are absolutely deserving of being evolved. Nevertheless, I do bust out more of my weapons to get experience for them. Also, make use of the ammo crates every so often to get some more ammo for your guns.

17:20 - The Ultimate Challenge. The Lava Gun is good for those sphere enemies. In Round 6, you'll face Chainblade. In Round 11, you'll face the B2 Brawler. In Round 15, you'll face Chainblade again, and in Round 16, you'll face B2 Brawler and a punch of sphere enemies. The Megaturret Glove will make these four rounds much easier.

At this rate, there isn't much left to do in Maktar Nebula.

Controls:

As Ratchet:

Control Pad/Left Analog Stick: move
Right analog stick: move camera

X:
  • Jump and double jump (hold button after double jump to use Heli-Pack or Thruster Pack)
  • Wall jump (near certain walls)
Square: strike with wrench
Circle: pull out/shoot currently equipped gun
Triangle: 
  • quick select (hold and use in conjunction with Control Pad or left stick to switch guns; menu can be customized in Quick Select on the pause menu
  • double tap to switch between two most recently equipped weapons/items
  • interrupt on-screen messages

Select: open map
Start: Pause menu
  • Control Pad: select option
  • X: confirm option choice

L1:
  • center camera behind Ratchet (tap button to center)
  • first-person view (hold button and use left stick or D-Pad to look around; let go of L1 to move camera back behind Ratchet)
  • Square: wrench boomerang
  • Circle: fire gun
  • R1/R2: zoom in and out (Pulse Rifle only)
L2/R2: strafe (hold while moving)
L3: see health and Bolt totals
R1/R2: crouch (hold down)
  • Square: wrench boomerang
  • X: high jump
    • long jump (hold crouch button and jump while running to perform)
R3: open map

In water:
  • Square: dive and descend
  • X: surface and ascend
  • R1: accelerate with Hydro-Pack

As Clank:

Control Pad/Left Analog Stick: move
Right analog stick: move camera

When hanging off platforms:
  • Control Pad/Left Analog Stick: move
  • Forward+X: vault up
  • Back+X: drop down

Square: punch
X: Jump (press and hold in the middle of a jump to glide with Heli-Pack)
Triangle: command menu (hold and use in conjunction with Control Pad or left analog stick to choose commands)

Sunday, May 19, 2024

DeceasedCrab plays Earthbound - Part 21 of 53


In this entry, we get past the traffic jam. On to Fourside!


The Bad Buffalo moves slowly around the screen, and it can be a little easy to get behind it for a sneak attack. It can pack a punch when attacking, though.

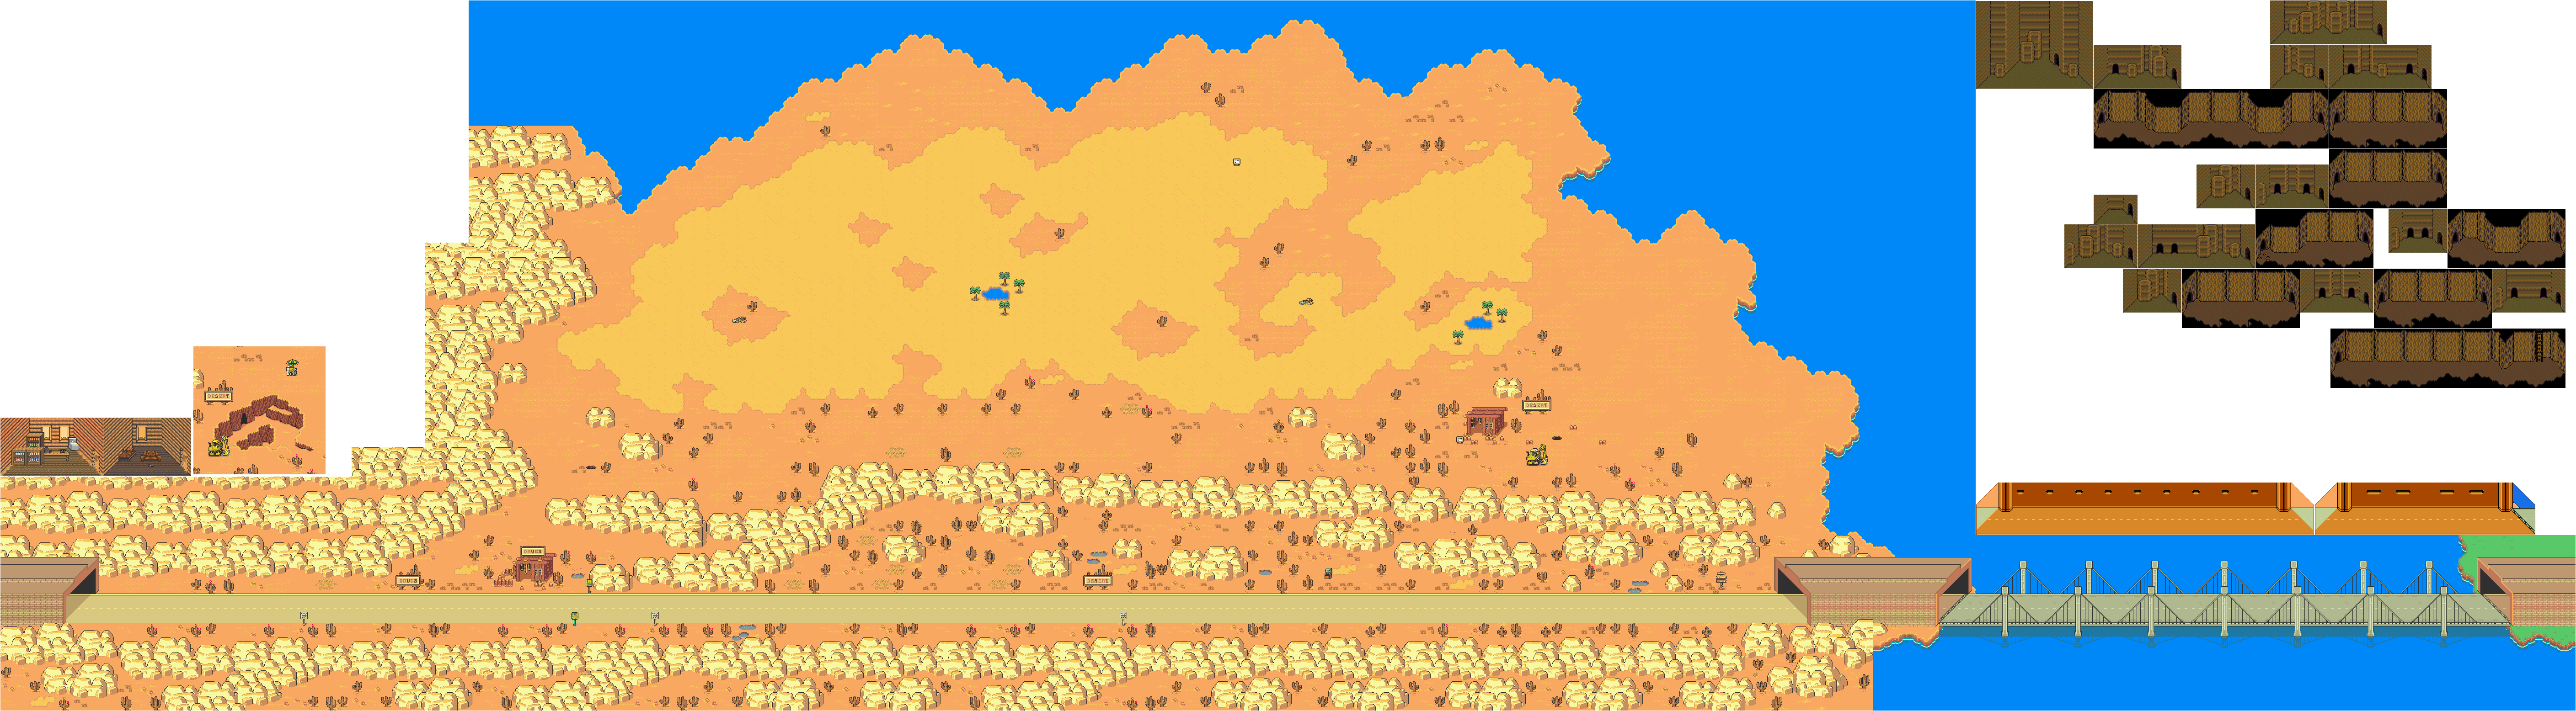
If you see a twinkle in the desert, walk up to it and interact with it. This is the missing contact lens that the person in the bakery in Fourside was wanting returned. Amazingly, it is near the sign that talks about the contact lens.

You'll find a shack with an excavator southwest of the northern desert expanse. There will be a guy there who is trying to dig for buried gold, and is needing some food. If you can give him a food item from your inventory, he will give you the gold if he finds it. You'll want to do this for later. As for the nearby shack, you can use the black phone to save your game and do phone stuff there. (The gold digging is based on a TV special where Shigesato Itoi looked for Ieyasu Tokugawa's gold; he never found it.)

If you go into the shack and back out after giving the guy some food, you'll find a hole where the guy used to be. You'll find a shovel there, but not much else. You'll have to come back here later.

At the northwest coast of the desert expanse, you can find a present with a Sudden Guts Pill in it.

If you make it all the way to the west end of the desert expanse, you can head south and reach the tunnel leading to Fourside, and the traffic jam will have cleared up. If you head west, Pancho, Pincho and Tomas Jefferson with a broken slot machine. If you talk to the broken slot machine, the Sanchez Brothers - as Pancho, Pincho and Tomas Jefferson are known as - will act as the slot machine game. If you get three of the same thing, you can get an item, including a PSI Caramel.

Going west from the Sanchez Brothers will lead you to a giftbox with $1000 in it. Be sure to get it, as any money you can get in the game helps.

From here, head east into the tunnel so you can get out of the desert and stop getting sunstroke. Keep going east and you'll make it to Fourside.


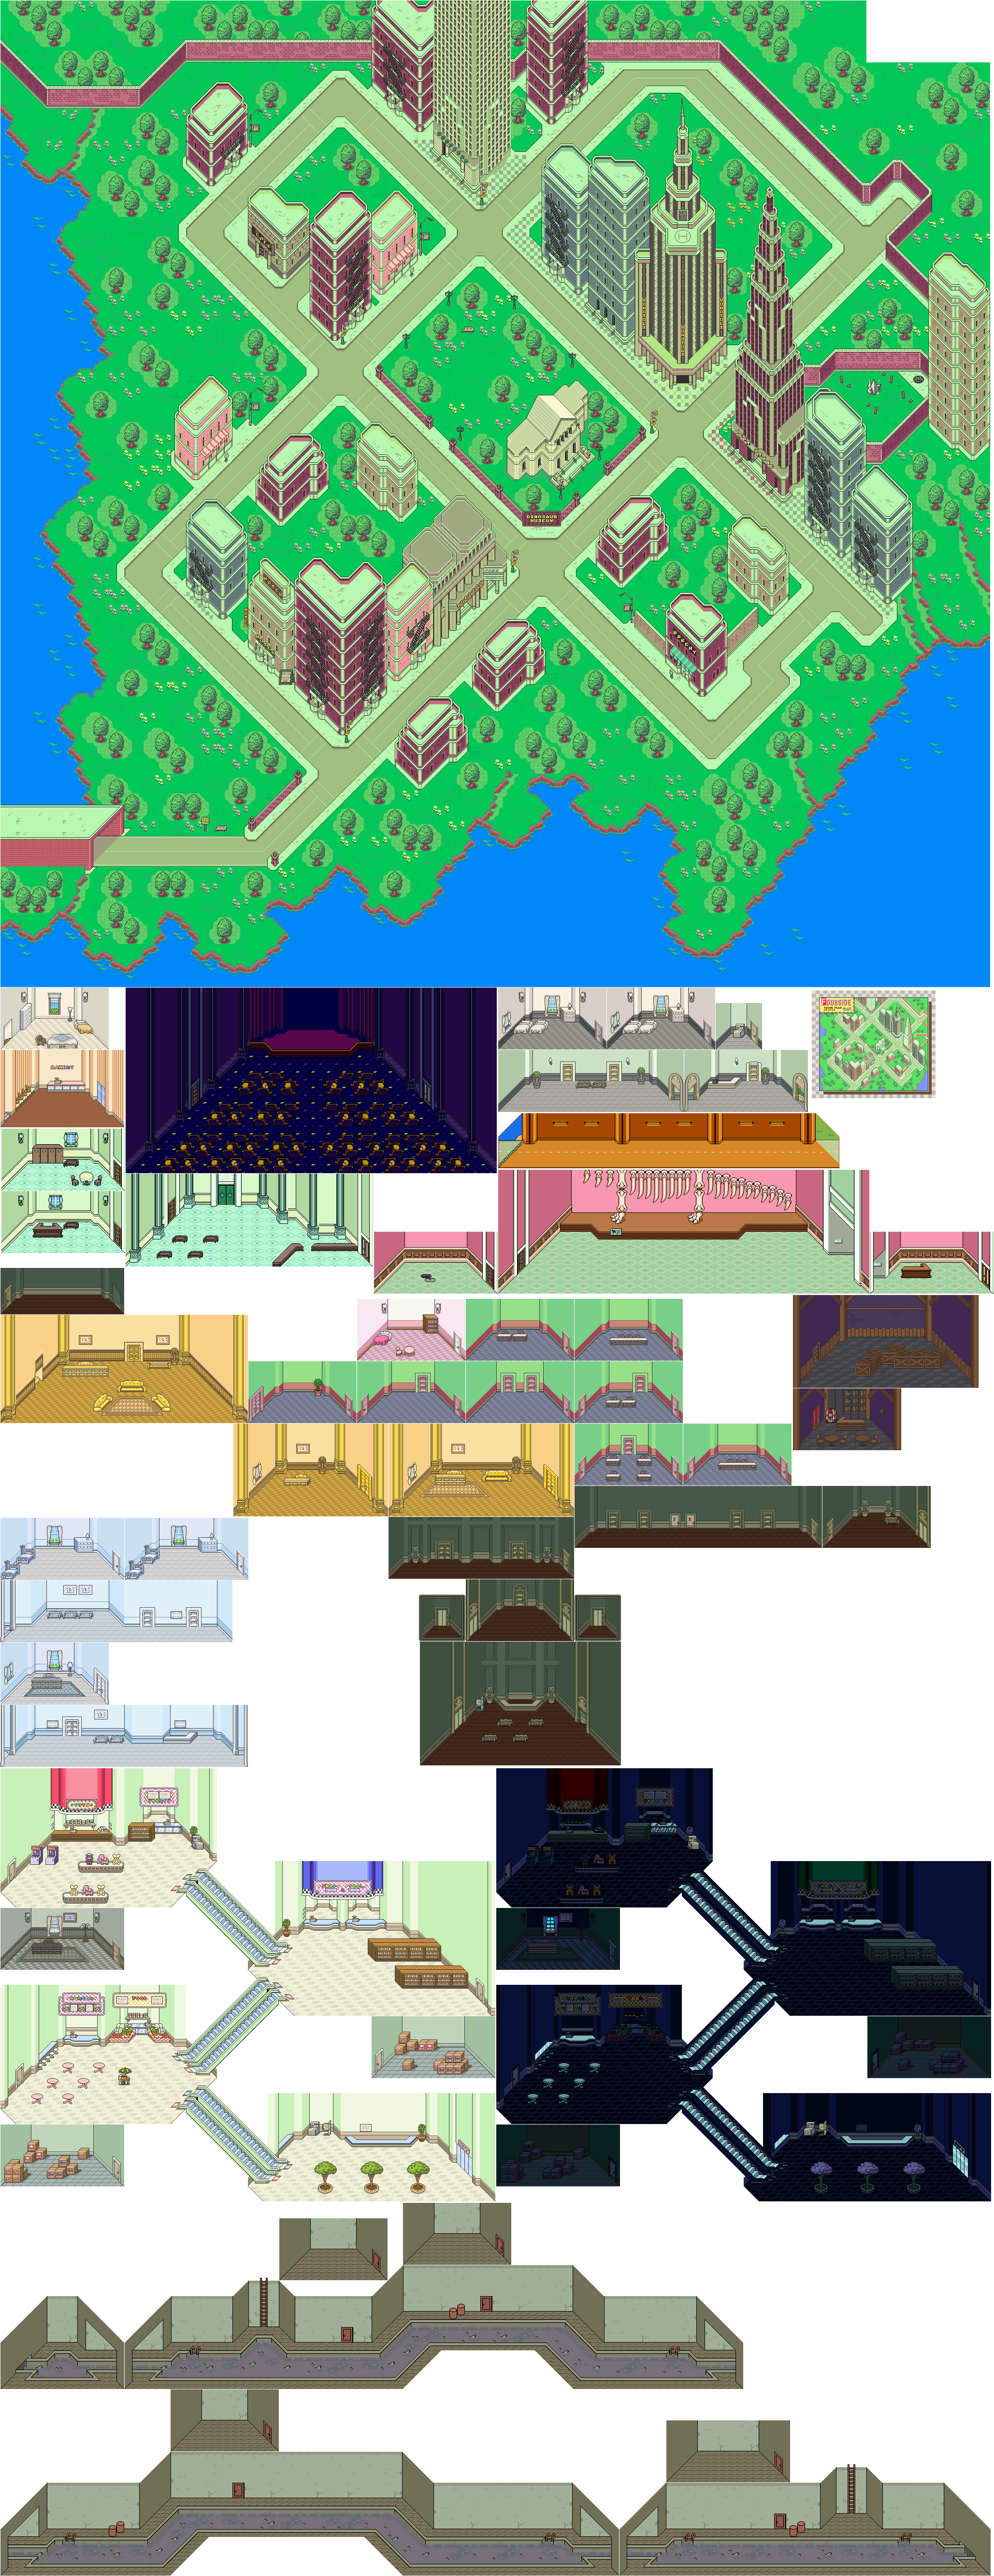
When you talk to people, you'll find out that the city is benefitting from the appearance of one Mr. Geldegarde Monotoli. Remember that name for later, as another NPC with a drink in his hand will tell you that Monotoli's men stole everything from him.

There are monsters you can encounter here, such as the Crazed Sign, which can put you to sleep with Hypnosis Alpha and paralyze you with Paralyze Alpha. Paralyze can last after the battle and cause whoever has it to have a slower walk cycle outside of battle. The only way to cure it at this point is to talk to the guy with the blue hair and mustache at the hospital. Just pick "Restore Feeling" and pay $90.

One of the buildings on the east side has a sign mentioning a planning meeting for Earthbound 2 from the APE Software Development Team that only allows entry to those related to the project. You won't be able to see it, obviously.

The Annoying Reveler - a blue human with a suit - is not much of a threat. As long as you stay in the center of the city, however, you won't see a lot of enemies.

There is a cafe (which is really a bar) in the northwest corner of town. Turns out, the beers are cappucinos in this game. One man will tell you that he had such a caffeine buzz (read: was so drunk) one time that he knocked on the wall instead of the restroom door that somebody answered. Another guy will be Monotoli's former employer, and that Monotoli's schemes made his company go bankrupt and left him homeless. He will say that Monotoli did not use to be so powerful and that he wants to find out his secrets, and that he is spending his time in the cafe to see if Monotoli ever drops in. The woman near the bar says kids shouldn't drink espresso, while the barkeep says that Monotoli might drop in once in a while. Another will mention that Monotoli has a maid named Electra.

The hint guy is behind all the buildings where the hotel is.

You'll find out near the Dinosaur Museum in the center of town that Monotoli quietly drops in and out of the cafe to the northwest, and that Mr. Monotoli has supposedly made a deal with a pure evil entity in exchange for power. You'll also find out that there is a new singer named Venus at the Topolla Theater (a reference to the Apollo Theater) who is better than The Runaway Five. Another people will ask about the people digging for gold in the desert, saying they would be able to satisfy a million dollar debt very easily. 

Southeast of the Dinosaur Museum is the bakery. The guy with the saxophone near there says that in the old days, Mr. Monotoli was just a regular, unattractive real estate agent before he got the power to control the police force, and that the city has taken a turn for the worse.

If you enter the bakery, you can buy bread on the first floor. If you use the Contract Lens near the guy at the second floor, you'll find out that the guy is Penetella Giovanni, and that it is a tradition in his family to keep things forever. He will then give you will get a Pair of Dirty Socks. They solidify one enemy of choice during battle when used, then disappear from the inventory. That's it.

The cop on the far east side will tell you that Mr. Monotoli's protection comes first and that the safety of the citizens comes second. Ugh.

Also on the far east side is the Department Store. You won't be able to go in, and you'll find out there that ever since Monotoli took over Fourside, strange happenings have taken place inside the department store.

The guy with the glasses near the brick wall will hint to you that there is a Your Sanctuary location on the other side. You won't be able to get there until later.

There is a junk store in the northeast corner of town run by a guy with a red mohawk and sunglasses. You can buy broken stuff, Defense Spray and Rust Promoters from him, but that's about it. Be sure to buy the Broken Gadget; if Jeff repairs it, it will become the Double Beam, which is a very powerful weapon for him. The Broken Iron can be fixed to create a Slime Generator.

The blue woman with the shopping bags is the Extra Cranky Lady, who will attack you with shopping bags. Like the Annoying Reveler, she is not much of a threat.

Saturday, May 11, 2024

PrinceWatercress plays Drill Dozer - Part 21 of 28


And now it's time for the other route through Stage 5's secret area. Once we're done here, the hardest part of getting 100% is over.


Area 5 Secret Area: Escape Tunnel


This time around, we take the lower route at the start.

On the lower route, you'll start by getting the enemies with the fists to help you across the pits. Goad the enemies towards you, then be ready to drill into the fist as it rockets forward. The hardest part of the first section is latching onto the socket lifts at the end, but if you can do that, you can just launch yourself backwards to the right and continue on.

In the second section, you just need to avoid the sparks and the enemies with the socket lifts. Don't forget about the cannon clamps.

You'll be seeing more cannon clamps in the third section, but this section is easier to get through if you come in with maximum health. 

For the last section, you'll need to destroy the flying laser shooter again. To make matters worse, the three turrets at the top shoot slime, and you may have to get rid of them just to get rid of the laser shooter. Once the laser shooter is destroyed, you'll get the Chip Fossil.

Wednesday, October 25, 2023

Jerry Martin plays Strong Bad's Cool Game For Attractive People - Part 21 of 53


Now that the whole e-mail tax thing is over, it's time for Teen Girl Squad and Algebros!


Back at the Homsar Reservation, click on the cave painting and Strong Bad will make fun of it before entering Cave Girl Squad, which is the Teen Girl Squad mini-game for this episode.

To score 6000 points, give the dinosaur egg to The Ugg-ly One and give the chisel to What's-Her-Face. The egg will shake afterwards. At the mall, give the stone slate to What's-Her-Face to kill her off, then give the ribbon to the Cheerleader. After this, the egg wil start hatching, then what's left of the gang goes to Egypt. Use the wheel on So-And-So, then Ogg Oggerson shows up and both of them go into orbit in his car and they both die. Use the dog on Cheerleader to summon Anubis and curse the Cheerleader and kill her via scarab beetle plague. Use the gun on The Ugg-ly One, then the egg will hatch and a meteor will kill her. You'll then be at the museum. Use the picture of the fish with feet on the Cheerleader and Charles Darwin will show up with a boombox. The story then ends.

Back at Strong Bad's house, go to Strong Bad's room and play Math Kickers. Move with the arrow keys, and press Z to attack left and X to attack right. Q quits, and Space Bar pauses.

If you have the Polar Coordinates attack (right, up, left, Dex, Ryu), you can easily cheat and get through all the enemies; otherwise, you'll have to solve all the problems yourself by getting an equal amount of ninjas on each side. Just try not to get hit by their math shurikens. When you get an algebraic equation, you'll have to keep attacking it to break it down and solve it. If it rises up, move down, then wait for it to slam the ground before going up to it and attacking it again. You start with six lives, and if you get hit by a ninja's math shuriken or if you get crushed by a quadratic equation, you lose a life, and if you lose them all, it's game over.

OUTFITS:
- Eye Patch: Inside cereal box in kitchen
- Camo Pants: Inside dryer
- Strong Badia Shirt: Use Black Metal Detector just outside Strong Badia.
- King's Beard: Check the right side of King's fridge throne
- Crown: Unplug King's computer and check on top of it
- Beret: Move The Cheat to the open field in Maps & Minions.
- 'Lectric Boots: E-mail thepizz about 'Lectric Boots at the King's computer

CALLING STRONG SAD NAMES:
- Talk to Strong Sad (Before escaping)
- Talk to Strong Sad about fence twice (Before escaping)
- Examine Shower (Before escaping)
- Use Pillow on Strong Sad (Before using on statue)
- Use the Fake Sword on Strong Sad (Before taking over Bleak House)
- Talk to Strong Sad about Strong Badia (Before taking over Bleak House)
- Talk to Strong Sad about Strong Badia twice (Before taking over Bleak House)
- Talk to Strong Sad about Bleak House (Before taking it over)
- Talk to Strong Sad about Strong Badia (after usurping Bleak House)
- Use Fake Sword on Strong Sad at Homsar Reservation (before taking it over)
- Use Tuning Fork on Strong sad at Homsar (before throwing in hole)
- Talk to Strong Sad at Marzistar (before reinstating Homestarmy)
- Talk to Strong Sad at Bleak House (during Extended Play)

ALGEBROS MANUAL PAGES:
- Page 3: Under box near the fence.
- Cover: Check Strong Bad's mailbox.
- Page 2: Check Marzipan's mailbox.
- Page 4: Check under the box in Pompomerania.

FLAGS:
- Concessionstan Flag: Check bush near Concession-Stantinople.
- Strong Badia Flag: Check brick wall.
- Bleak House Flag: Check under box on Strong Sad's bed.
- Cheat and Tirerea Flag: Check Tire after giving medal to The Cheat.
- Homsar Reservation Flag: Check Mysterious Bush at Homsar Reservation.
- Marzistar Flag: Use the Black Metal Detector near the garden on Marzistar.
- Pompomerania Flag: Order Bull Honkey twice in a row.
- Country Flag: Use Black Metal Detector near the big Country flag in Country.

TEEN GIRL SQUAD CARDS:
- Tar Pit: Check Strong Sad's books in Bleak House.
- Egg: Use lighter on the barred window in Bleak House.
- Alien: Use Black Metal Detector near cave in Homsar Reservation.
- Darwin: Check the Ex-Fish at King of Town's castle three times.

SETTING THINGS ON FIRE:
- Maps & Minions Box
- Smoke Detector
- Strong Bad's bed 
- Strong Sad's flag 
- Strong Sad's bill of rights 
- Strong Sad's constitution
- Mysterious Bush in Homsar Reservation
- Kimono
- Lone Skull #1
- Lone Skull #2
- Pile of Skulls
- Unlit Candle Holder
- Model UN Board (Extended Play)

- Beat Maps and Minions Deluxe in nine turns or less.
NEW! Score 6000 on Teen Girl Squad.

Friday, June 16, 2023

PrinceWatercress plays Bugs Bunny & Taz: Timebusters - Part 21 of 23


Now that we're finally done with the last hub world, it's time to check out the rest of the Transylvanian Era, starting with the Haunted River, which will chew you up and spit you out if you're not careful.


1:10 - When you enter the Haunted River, you can move the raft with the D-Pad. Press X to jump, and hold Circle to crouch. Love how Taz acts as the "motor" for the raft here.

The trick to crouching is to hold Circle ahead of time in order to ensure that you don't run into anything you're supposed to crouch under.

As you go, you'll need to watch out for spears that pop out of the walls, the claw-like tree branches that swipe at you and the bats that fly out. Those will damage you, but the crocodiles and the whirlpools will instantly destroy your raft and cost you a life.

Sometimes, there will be stalactites that fall from the ceiling and stalagmites that are in the way. Both of these things damage you, which is surprising considering that the stalactites seem like they should destroy your raft on contact.

When you reach the big whirlpool, you'll get the second boss coin.

1:49 - The first crate.

2:53 - The second crate.

4:08 - The third crate.

4:28 - The fourth and fifth crates.

11:20 - And now, the hazards of trying to find places when everything looks the same.

Friday, April 14, 2023

PrinceWatercress plays Sly Cooper: Thieves In Time - Part 21 of 48


This video ended up being one of the shortest for the entire Let's Play. Imagine that.


Operation: Mousetrap

You'll have to play as Murray to start this job.

Even without Bentley to explain everything, it becomes quite clear that the gang needs to break into the castle. This is where the fire bulbs and Merlin's Magic Powder comes into play. Once the drawbridge comes down, they do whatever it takes to get the job done.

Murray will be in a spy suit in the moat. Press Circle to detonate the fire bulbs and lower the drawbridge. From here, everyone makes it to the castle, but Sir Galleth blindly charges at Penelope, gets overpowered and gets his cane stolen, because he obviously didn't learn from the robot dragon. Penelope almost closes the portcullis on the gang, but Carmelita pushes Sly - who is in the Archer costume - forward so he can deal with Penelope. Penelope then mans a bigger robot knight body and proceeds to crush Sly.

From here, we need to jump to avoid the ground pound shockwaves and run to avoid the lasers. Do not jump; that will have some bad results. You'll need to jump to the tower that the game tells you to go to, then draw the bow, shoot an arrow through one of the holes in the shield and guide it to the target, which is marked by flashing green lights. From here, you'll need to run to the robot, then keep pressing R1 when the game tells you to in order to break throw the armor and expose the giant robot's joints.

The red lights with the crosses are where missiles will land. Avoid them as you run to the next tower.

After hitting the three targets, you'll have to do this all over again to deplete the other half of Penelope's health. Once it's done, however, Penelope is defeated, but Sly is pinned down underneath the giant robot. As Penelope is about to finish Sly off, Bentley stops her and tries to reason with her, but it is no use. This leads to Bentley fighting Penelope in a robot suit modeled off of the moat monster.

The left stick moves around, while X dodges and Square attacks. When you fill up the Gadget Meter, Triangle performs a super punch that is best used after a three-hit combo. Stay back to avoid the two punches, then press X to dodge when Penelope jumps forward and attacks before attacking back. Eventually, she will get tired as you do damage to her and only throw the two punches, then she just throws one. Once she's low on health, keep pressing Square and you'll defeat her. 

After this, you'll head to ancient Arabia, and a gold coin that Carmelita pocketed as evidence happens to be from that era and their ticket there. As it turns out, Salim al-Kupar's Forty Thieves are down to a mere handful, but now even he and those last associates have disappeared. It's up to the Cooper Gang to find out what is going on.

Abilities:

Licks of Lightning (Murray): A fist type that does lightning damage and shocks enemies.

Achievements:

I Believe The Time Is Now: Beat Episode 4.

Controls:

Left analog stick: move
Right analog stick: move camera
X: Jump and double jump (hold X on second jump for hover jets as Bentley)
Square: attack
Circle: 
  • interact (usually with anything that has sparkles) (Sly)
  • steal from enemies (from behind) (Sly, Bentley, any of Sly's ancestors)
Triangle:
  • knock enemies upwards (from behind; press Square to slam enemies down for stealth slam) (Sly, any of Sly's ancestors)
    • press Circle after knocking enemy upward to perform Silent Obliteration (Sly; replaces Stealth Slam; must buy on ThiefNet)
    • press Square for Stealth Slam (any of Sly's ancestors)
  • spin attack (hold to charge) (Sly)
  • throw bombs (Bentley)
  • Thunder Flop (in mid-air) (Murray)
  • spin attack (hold to perform) (Murray)
    • control with left stick (must buy on ThiefNet)
  • Raging Inferno Flop (in air; Murray; must be bought on ThiefNet)
  • charge attack (Sir Galleth)

L1:
  • bomb aim (Bentley)
  • smoke bomb/flash bomb (Sly; must buy on ThiefNet)
  • aim/strafe mode (Carmelita; must hold button down)
    • left analog stick: move
    • R1: shoot (can only shoot in strafe mode)
L2:
  • hold for costume select menu (Sly)
    • hold down to stay in menu; use D-Pad or left stick to make selection
  • hold for weapon select menu (Bentley)
    • hold down to stay in menu; use D-Pad or left stick to make selection
  • hold for fist select menu (Murray)
    • hold down to stay in menu; use D-Pad or left stick to make selection
  • hold for shot select menu (Carmelita)
    • hold down to stay in menu; use D-Pad or left stick to make selection

L3: activate compass
R1: run (hold while moving to perform)
  • Paraglide (Sly; in air; must buy on ThiefNet)
  • Adrenaline Burst (Bentley; double tap to activate; must buy on ThiefNet)
  • Clothesline (Murray; double tap and steer with left stick; must buy on ThiefNet)
R2:
  • Trigger Bomb (Bentley; must have bomb on field to detonate manually; must buy on ThiefNet)
R3: Binocucom
  • Right analog stick: move
  • Left analog stick: zoom in and out
  • R1: take picture (when applicable) (Sly, Bentley)

Start: pause menu
Select: map
  • Left analog stick: zoom in and out, switch between map and status
  • Right analog stick: move map
  • Circle: back

Thursday, February 23, 2023

PrinceWatercress plays Blood Omen: Legacy of Kain - Part 21 of 41


In this entry, we finally meet Vorador, who wants us to embrace our vampirism and gives us his aid. This adventure is about to get a little more interesting.


0:43 - Have the Repel spell at the ready for the enemies in this room with the checkerboard floor. The purple demons spawn their own orange counterparts. Don't forget the blood vial and the magic refill!

1:46 - At the spikes, use your magic to destroy everyone, then head south. In the next room, use Control Mind on the woman on the balcony. Take her west and move into the panel on the wall. Press X to go back to playing as Kain, then continue south. Take out the demon and get the rune triangle, then continue west and take out the demons. Once again, Repel is useful here. Use the Mist Form to enter the northern door.

4:32 - Here, you'll get Blood Shower. With this spell, you can drink the blood of the two bandits and the two people chained to walls here to suck everyone's blood at once and open the door. 

5:54 - In the door to the north, you can some more blood from the people here. Feed off of everyone here with Blood Shower to open the door to the north.

7:51 - Be careful when you enter, as there will be enemies who will come at you. The panel on the north wall opens up a secret (see below): the doorway to the west. Going further leads to some Energy Bank and Heart of Darkness pick-ups as well as a magic refill. There is also a panel in the north wall that leads to another secret (see below). This opens a door to the east in the previous area. 

9:25 - Follow the spikes closely so you can pick up a ton of spells. The Mist form makes this easier.

10:46 - Here, we learn about the Serafan and the Vampire Purge from a nearby book. There is a switch to the east of the book that triggers a secret (see below), opening a door to the south. Use Control Mind on the human to the south, and take him south until you see a doorway to the west. Head there, then follow the path to the north. The glowing green light is a switch, this allows you to go further to the south. Follow the path and you'll end up in another area.

13:11 - To your immediate west at the start of this room is another secret panel hidden under some drapes. Walking up to it triggers secret #69 (nice; see below). From here, you're done with the guy you've possessed; you can go back to playing as Kain. Head to the north of where the book was to find more Flays and Hearts of Darkness.

15:05 - From here, head east, then take the doorway to the north. You'll find a save spire. Further to the north is Vorador, who tells Kain that he should embrace his vampirism before mentioning his past, where he talks about how he defeated Malek and took vengeance on the Circle of Nine for supporting the Serafan's vampire purge. The opening cutscene, which gets replayed here, now makes complete and total sense, as it is he who is put on the stake, but we also get more of the battle between Malek and Vorador. Vorador says that since his attack on the Circle of Nine, the vampires have not been bothered and only come out to feed, and warns Kain not to interfere with the affairs of man as Serafan are too tedious an affair to bother with. He then hands Kain a ring that allows Kain to summon him.

From here, pick up the ring at the north end of the table, then go through the grid-patterned panel on the north wall with the mist form. This is a secret (see below) that leads to some pick-ups. Watch out for the attractor, and use the mist form to walk on the water.

23:17 - As you go east from here, hit the panel on the northern wall of the exit room to find another secret (see below). To the north is another grid-patterned panel you pass through in mist form to find more pick-ups. From here, you can go south and follow the path to the exit. The teleporter will take you to another save spire and an exit to the south leading back outside.

Secrets

66 and 67. - The panel on the north wall opens up a door to the west leading to Energy Banks, Hearts of Darkness and a magic refill. There is also a panel on the north wall; you'll want to hit that for another secret. This opens a door to the east in the previous area.

68. - There is a switch to the east of this chronicle that opens a door to the south.

69. - In the northwest corner is a switch hidden by drapes. Walk into the northern wall in that corner to find the secret.

70. - This grid-pattern panel can be passed through with the mist form. On the other end is a chamber with a watery floor where you can grab some stuff.

71. - As you go east here, hit the panel on the northern wall in the exit room. You'll find another secret.

Friday, January 27, 2023

PrinceWatercress plays The Bugs Bunny Crazy Castle 4 - Part 21 of 27


In this entry, we spend another two levels in Stage 11. Slow and steady, as ever.

Stage 11-3

Getting invincibility from carrots at the beginning - if you can pull it off - can be useful, as you can get rid of some nearby enemies more easily.

From here, you want to make your way to the top and hit up all of the doors before making your way to the exit.

Stage 11-4

Just like in Stage 11-3, you'll want to be careful where you go, and you'll want to watch out for Wile E. Coyote. You'll also want to get the sledgehammer at the top of the level as quickly as possible to make it easier to get to some areas. Once you get the sledgehammer, this level is a lot easier and you can spend all the time you need figuring out which indoor entrance lead where.

Thursday, December 8, 2022

PrinceWatercress plays Spyro the Dragon - Part 21 of 21


Here it is...the final battle with Gnasty Gnorc and beyond!


Gnasty Gnorc

This isn't going to be easy.

To lower the platforms that Gnasty Gnorc stands on and shoots at you with magical lasers from beyond your reach, you'll have to look around and chase after thieves. Every time you flame a thief (they're pretty fast), you'll get a key.

Of course, the first key isn't going to unlock the platform where Gnasty is standing. Instead, it opens a door. Open the door and you'll immediately find another thief. Get him and you'll get the key to the platform. Turns out it's a wall that acts as a stair when you use the key there. From there, charge after Gnasty, and flame him as soon as he turns around. After that first hit, you'll be chasing after him again.

This time around, you'll be gliding. Your gliding skills are going to be put to the ultimate test. Don't bother keeping up with him. Instead, just focus on jumping from one platform to the other, which all slowly move into the walls, and don't stop for even a moment. If they sink into the walls, you're boned. When you meet him one more time, flame him again. Gnasty Gnorc is gone in just a mere two hits.

Whatever you do, don't lose a life. Otherwise, you're starting this whole level over again. Once you beat Gnasty Gnorc, you'll get the credits.

Gnorc Gnexus

After beating Gnasty Gnorc, you'll return to Gnorc Gnexus. You'll find out that there is another trapped dragon in the center. Free him, and you'll find out that you'll have to have 100% in order to enter the final level. Of course, if you've collected everything up until this point, talking to him actually gives you 100%. 

Anyway, it's time to show this sucker off.

Gnasty's Loot

At first, it may look like you're stuck. But when you glide into the pool at the beginning of the level to kill yourself, you'll find out that Spyro can fly.

Yes. You can fly in this level.

You can only fly as high as you've gotten in the level, so use that as a hint about where you should go next.

As expected, you'll be beating up thieves in order to get the keys that open doors in this level. Some of them will be in planes that you will have to flame down in order to get the key. The second plane will take a little bit of work and some keen flying, but he can be taken down. Just keep flying, and he'll eventually mess up and make it easier for you to hit him.

Once you unlock the last door and collect the gem on the other side, you can fly anywhere in the level! All that's left is to look around the top of the level and flame all the firecrackers to open up the impenetrable metal chests! From there, find the exit and follow the path of gems to find the second half of all the treasure! Once you've found all 2000 gems, you've finally done it! You've beaten the game! Congratulations!

Monday, July 11, 2022

PrinceWatercress plays Sly Cooper and the Thievius Raccoonus AGAIN - Part 21 of 23


In this video, we'll tackle the Master Thief Sprints for the second chapter of the game.


A Rocky Start

For this one, just don't stop. Make sure to single jump between the spire points, and at the points just below the mattress, use the mattress to skip your way to the second one in the set. Watch out for those floor lasers, and be ready to switch lanes as soon as they flash so that the alarm doesn't go off and cause the timer to run at double speed until you kill the alarm. At this point, the Master Thief Sprint runs become a little easier.

Boneyard Casino

For this one, you'll need to use the roll when you need to, and you need to make sure that the dogs with the machine guns don't catch you. The laser floors are easy to deal with; as for the part where you need to sneak behind the two dogs on the ledge, be ready to use the double jumps. Once you reach the flooded parts of the casino, be careful where you step. You'll still need to be quick with the roulette wheels that have the laser traps, but you'll also want to be careful and use your shadow as a means of anticipating where you'll land. If you need to double jump, do it. As for the roulette wheel, keep doing single jumps and save the double jump for when the green key space on the wheel is close so you can ensure you leap onto it.

Back Alley Heist

As long as you know where to go, this one is easy. However, there is a glitch with this one: it is possible to run clear into the exit and not have it trigger. Instead, you're expected to be above the exit while jumping towards it in order to trigger the finish line and get credit for it. I'm not kidding. 

Straight To The Top

Another one that is easy as long as you know where to go. I had a leg up on this one, as I used this level in particular for some test recordings to get the quality up to snuff and find out what settings worked for me.

Two To Tango

Yet another level that's easy to get squared away if you know where to go. At this point, the levels where you aren't forced to use the Roll to gain speed and save some time are easier to do than the ones where you are. 

Wednesday, March 30, 2022

PrinceWatercress plays Bugs Bunny: Lost In Time - Part 21 of 23


In this entry, we play the final level of The Pirate Years and go for a wild ride on a mine cart.


Remember that one rope with the electric current coming down in The Carrot Factory? If you climb up it after the electricity passes down, you'll find a golden carrot at the top.

3:34 - Be ready to break ten crates.

As for the clams, you'll need to jump on them to get the pearls and place three of them on the pedestal in the nearby cave to open up a path to another part of the level.

4:28 - The first crate. If you get caught on the wall during the wrap-around jump, keep jumping towards the crate and you should be able to reach it.

6:17 - Kick the tree to send this guy flying, then light the TNT barrels with the torch. You'll be able to use a pirate as a platform across the water.

7:53 - Get this guy winded, then kick him from behind multiple times to get the wheel back and open the gate.

11:10 - Grab the TNT barrels, place them in front of the boulder blocking the mine entrance, then light them up to blow the boulder up and open up the mine entrance.

12:31 - Jump up to the targets to take alternate paths as well as avoid things that lay on the mine's path and grab all the crates. Watch the arrow above Bugs' head to see where you're going to go. You'll need to take all the paths if you want to get all of the crates, clocks and golden carrots.

Left and Right lets you avoid things to the sides as well as parts of the sides of the tracks that are torn up, and also lets you get some things just to the side as well.

If you reach a clock, you've reached the end of the certain area and you're about to enter another one.

Down lets you duck under low overheads, such as the boards held by the pirates.

12:48 - The second crate.

13:04 - The third crate.

13:58 - The fourth crate.

14:40 - The fifth crate.

15:51 - A clock and the sixth crate.

16:22 - The seventh crate.

16:41 - The eighth crate.

16:52 - The ninth crate.

18:42 - The tenth crate is in this area, where you'll be using Left and Right to ram Pirate Sam into the TNT barrels on the side. Also, be ready to grab the golden carrots to the side. If anything is flashing red or has a lit fuse, be ready to avoid it. When you see Sam, ram into him with Left and Right. Once you beat Sam, hit the target above your head to finish the level.

Friday, January 7, 2022

Kikoskia plays Silent Bomber - Part 21 of 23


After destroying the reactors, it's off to the Brain Room for the final confrontation with Benoit.


Once you blow up all four reactors, you'll need to get out. At least there isn't any time limit when you blow up the last reactor. After you get out, you'll see the Fermian Cannon blow up just before it can fire. 

Before the final level of the game begins however, you'll find out that the Dante is accelerate towards Earth and slam it into Hornet. The hologram of Benoit then shows up, revealing he ordered the Dante to eliminate Hornet and that Brain is carrying that order out in the most rational and practical manner. The only way to stop it is to get to the Brain Room where he and Jutah can settle things once and for all.

Annri tells Jutah not to go alone, but Jutah says this is his fight. Annri asks Jutah to come back in one time.

Mission 14

Benoit said to come to the Brain Room. Whatever he's planning, I don't have any choice. To destroy Brain...That's the last objective left to me!

Operation: Destroy Brain!

The Brain Room is a series of red paths. When you reach the first fork, Benoit's hologram appears again and states that the Dante is slowly closing in on Hornet before disappearing. As you take the right path through the maze, Benoit will keep explaining in detail how Hornet will be destroyed: The Dante's speed is gradually increasing and will pierce the atmosphere like a bullet, and the fragments of the crash will descend towards the earth and cause unspeakable chaos. Meanwhile, there will be E-Chips lining the dead ends, so explore this area carefully!

You'll definitely want to re-arrange your E-Chips so that shields are at max, as you're going to need the extra protection in the final battle. Also, you'll need a lot of range to make what's up ahead easier.

From here, you'll eventually reach an elevator that takes you to the final battle. If you can demolish the Brain Room, the Dante will stop functioning. After being tormented by multiple Dante holograms, the final battle begins.