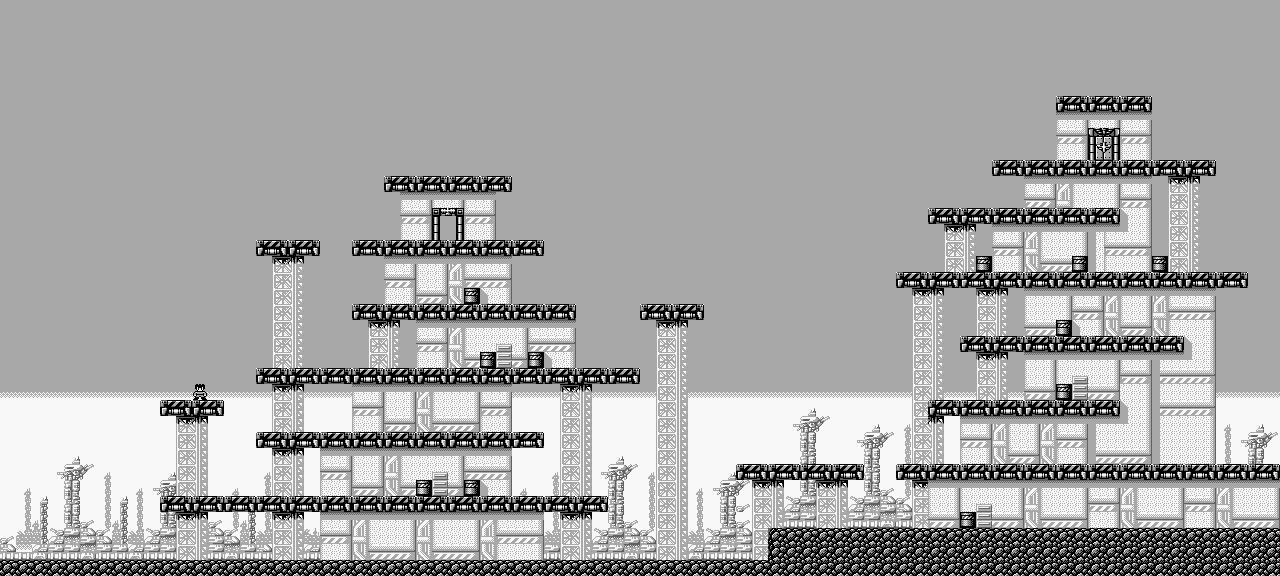
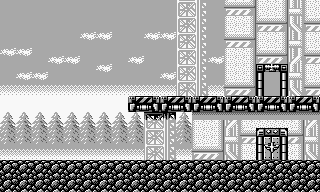
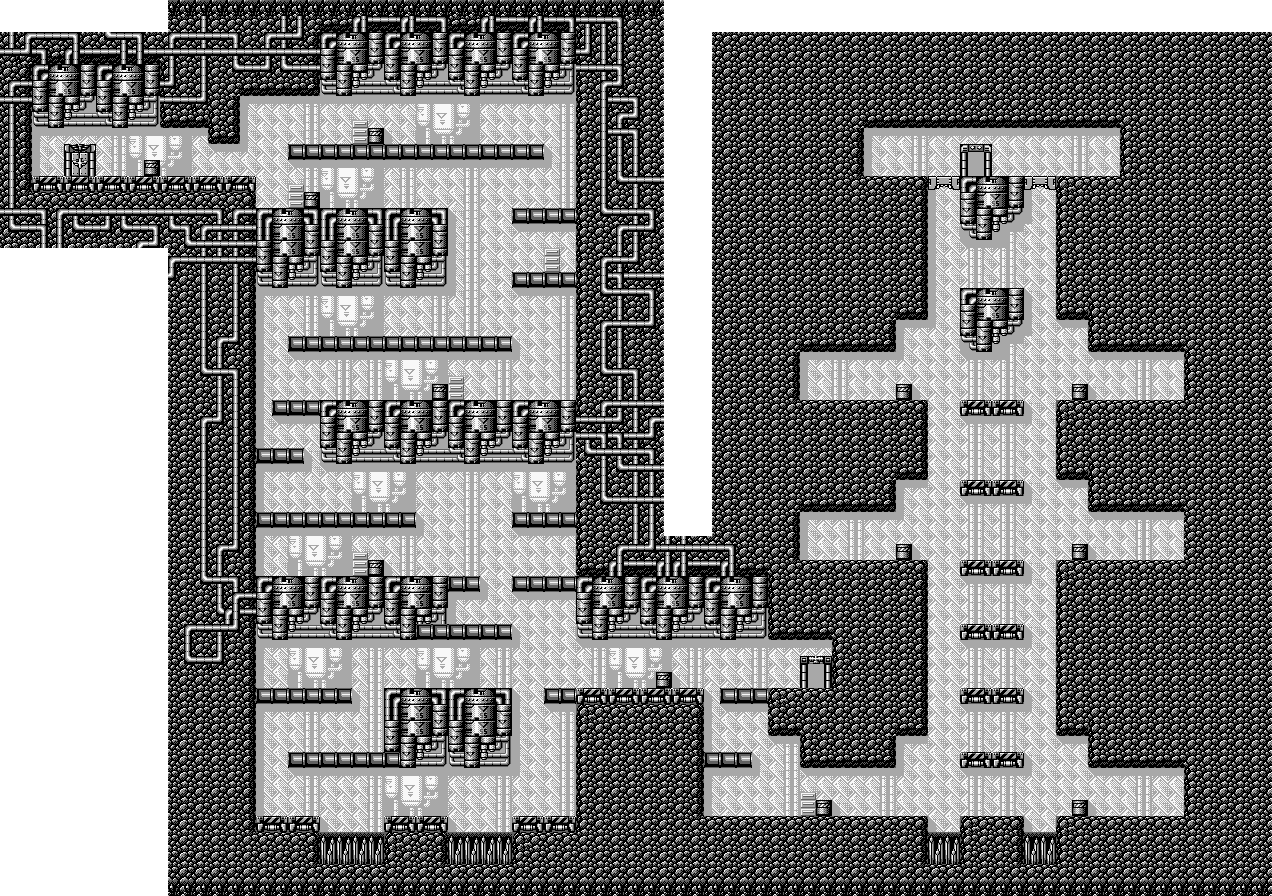
Tuesday, September 22, 2026

PrinceWatercress plays Punky Skunk - Part 5 of 8


In this entry, we almost wrap up two worlds in one video. How about that?

First | Previous | Next | End

Sugar Rush Hour


There are multiple paths that you can take through the stage. You'll always find the skates at the beginning of each one. Equip them when you need to make a long jump and unequip them when you don't.

The small green stick with the blue top is a button you can jump on. It will activate sets of platforms that you'll need to jump across quickly.

Keep jumping on the spinning cylinders to stay on them, and avoid the spikes.

The yellow platforms rise up a bit before finally coming down.

The rolling guys take one hit to defeat, but they can be pretty fast and they can overwhelm you if given the chance to do so.

Pedal Paddle


It's time for another boss battle, and this time, you and Commander Chew are racing each other on pedal boats. You'll need to keep mashing the Square button while pressing X to jump over the mines. You'll want to jump over the mines in such a way that you not only clear the mines, but also the explosions that result when you attempt to get over them.

There are signs at the bottom that tell you how much distance you have left until you reach the goal. You'll stop seeing mines at the "100" sign, so once you see it, start mashing Square like your life depends on it. If you win, you go on to Alpine Isle. If you lose, you lose a life and you have to do this short yet slightly frustrating race all over again until you succeed.

Alpine Isle

Crevasse Chaos


The mice in the sugar gliders take two hits, but if you hit them at the right distance, you can hit them twice with your regular skunk spray attack after you knock them back on the first hit. The paraglider makes it easier to bop them on the head in case you want to sail through the first section of the level.

The second section introduces the baseball pitchers that move up and down as they spin. When they stop spinning, they will be vulnerable, and you can attack them. As for the vertical drops, just glide down slowly with the paraglider and you'll be fine.

You'll eventually get your hands on the digging claws again. Take out any and all enemies as you get to the goal. If you head back to the beginning of the level while underground, you'll find an extra life.

Frost Forest


In the first section, you'll need to get the pogo stick and bounce up the trees while taking out the forest blobs and the mice. You'll want to use the pogo stick as much as you can, since you won't be missing much and the entrance to the next section will be at the top, anyway.

In the second section, you'll need to use the pogo stick again, and you'll also need to watch out for the cloud platforms that will shock you. As for the green and yellow platforms with the arms and legs, make sure you're on the edge of them when you jump forward...including the yellow one. You'll need to use the pogo stick to move forward from that platform, and it took me a few tries.

In the third section, you have more trees and more platforms that will fall. This section is shorter compared to the first two, and you'll need to go around the level clockwise not just to get to the exit, but to get to the bonus area. Left of the "In" portal is another candle with a mini-game warp, which leads to another Captain Flag mini-game. Thankfully, this section is short, and you can get back to the exit to the next section relatively quickly.

In the fourth section, get the skates and quickly make your way down. You can use the skates to take out the ball enemies. Just remember to get on the ramp at the bottom and jump to the right so you can get to the goal.

Slope Slidin'


There is a mini-game here, but I didn't know it was there when I made this video. I get it at the beginning of the next one.

Get the skysurfer. It will make it easier to rush through the level. After that, you can get the skates, although you won't necessarily need them. There are a lot of mouse enemies here, but they can easily be defeated. As long as you make your way to the right, you'll easily get to the goal.

Monday, September 21, 2026

PrinceWatercress plays Punky Skunk - Part 4 of 8


In this entry, we have even more digging to do before continuing into Jubilee Town.

First | Previous | Next | End

Pathgrinder III


Yep, it's time for more digging. Grab the diggers, wreck the enemies, avoid the spikes, and take detours into dead ends for pick-ups. You'll be able to see pick-ups in the sand if you're paying attention. You'll also want to destroy the drill tank spawners as quickly as possible, especially in the second section, because the spawners and the drill tanks are not going to be kind.

There is a colored icon instead of a monochrome icon in one of the walls at the beginning of the second section, and if you walk into it, you'll find out that it's indicating that the wall is a false one. Keep heading left and jumping over the spikes, then destroy the candle to warp to a mini-game. It's another pedal mini-game. You should know what to do by now.

At the start of the second section, quickly attack the drill tank spawners from above. Your claw will somehow hit them, and you can take out the tanks before they become a problem. 

Castle Hassle


Get the skates at the beginning. You'll need them to jump across the conveyor belt platforms. Make sure that when you transform and take the skates on or off, you do it in mid-air so you aren't whisked off the platform when you regain control of Punky.

The robot hands shooting yo-yos can easily be attacked.

The enemies that drop down on the ropes return from the beginning of the rope, and they can't touch you while you're on the conveyor belt platforms in the second section as long as you don't jump into them.

Volley Boss


It's time to take on Commander Chew again, and this time, it's in a game of volleyball.

Press Square to hit the volleyball the moment it is above you to send it back...not a second sooner, not a second later. The moment you start the ball hitting animation is when you will hit the ball. You'll score a point when you hit the ball so that it lands on the floor. If it goes out of bounds, the other person scores a point. Not surprisingly, Chew kept hitting it out of bounds during the battle. The first person to score eight points wins. 

Jubilee Town

Chew Ninjas


Grab the paraglider and use it to ride with the currents while bouncing off the enemies.

Be careful with the cloud platforms; while you can stand on them, you'll want to jump into the air when they start producing electricity so you don't get hit and potentially knocked off. They will turn blue before they shock you.

At the upper-right corner of the first section, there is a candle to destroy for a mini-game. Guess what? It's the slot machine mini-game again. This time, I managed to luck out and get four Punkys on the first try, so that's another red crystal in the collection.

The second section brings out the titular ninjas. They hide in the background, come out to throw a shuriken, then hide again. You can only attack them when they're attacking. Also, the spikes in this section are transparent and can be a little difficult to notice at times, so stay away from the walls in the more narrow parts of the section.

Rainbow Dome


Grab the skysurfer and use it to go up and down the slopes, mowing down the enemies as you go. Some of the enemies will run after you and constantly roll snowballs at you, but you can destroy the snowballs in addition to the enemies themselves.

There is a mini-game if you take the low road after the huge slope leading downwards instead of riding the yellow platform. It leads to a matching mini-game, which is much easier than the slot machine. (You can tell I hate the slot machine.)

The second section has a lot more ground to walk on and is therefore more straightforward than the first one.

Sunday, September 20, 2026

PrinceWatercress plays Punky Skunk - Part 3 of 8


In this entry, we finish up the third world and get started on the fourth. The slot machine mini-game makes this take longer than it should.

First | Previous | Next | End

Tomb Wader


In this area, you'll be in a pyramid. The shifting sands act much like the water from the fountain level in the previous world, so if you're used to the water there, you'll be able to get around pretty well as you take out enemies flying around the screen on the sailboards. Also, if you explore the level, you might even find a false wall or two that will take you to pick-ups.

There is a candle holding a mini-game entrance in the second section hidden behind a false wall near the goal. Guess what? It's a slot machine mini-game. You're better off getting Punky on the fourth and faster reel first before messing with the other three; it's the only way to ensure that you get the red crystal for a health extension. Not surprisingly, I spend more time than I would like getting the red crystal here, but at least I'm able to stock up on lives. 

As always, you'll want to watch out for the enemies. The mine dropping faucets are back, as well as the mice that are disguised as synchronized swimmers that jump in and out of the sand. 

Sandtraps


You'll be able to get the skysurfer at the beginning of the level. You'll need it to make some of the jumps in this level, and the yellow platform midway through will allow you to get a 1-Up that you see early on. You'll also be able to grab a pogo to replace the skysurfer near the end, but you won't really need it.

There are enemies that throw bowling pins, but they are easy to get rid of if you attack them from a distance.

Near the end, you'll want to head left and walk off the edge to find a candle hiding the mini-game entrance. This time, it's the matching mini-game, which is easier compared to the slot machine mini-game we played in the previous level. Once you get the red crystal for the health extension, you're good to go. Amazingly, once you're done with the mini-game, you're taken back to the 1-Up that was almost midway through the level, and not back to the beginning.

Da Bomb


It's time to face Commander Chew again, and this time, you have another easy boss...if you know what to do. Move the bomb launcher with Left and Right on the D-Pad, and catch the blue bombs with the see-saw like arms while avoiding the red ones. Make sure the bombs don't explode on you. When you catch one bomb, you'll launch it when you catch another. You'll want the bombs that you launch to fly directly into Commander Chew from underneath. Once you hit Commander Chew enough times, it's time to head to the fourth island of the game.

Chewtopia

Treetop Trounce


You'll get the pogo at the beginning of the level, and you'll be needing it to explore the level.

You will sink in the leafy areas of the tree as you stand on them, so watch where you're standing. The pogo will help you save yourself from sinking easily. 

If you can get to the upper-left corner of the level, you can drop down to get a 1-Up.

The green blob enemies will slowly move towards you if you are a certain distance away from them, but they are easily defeated. You'll also have the mouse enemies running around dressed like flower pots, and they can walk off edges to get to you.

To get to the mini-game, you'll need to get the paraglider, then go back and drop down off the left edge as you jump back up and to the left where the pit is. Glide to take the air current to the right, then attack the candle to enter the mini-game and play another round of Captain Flag for a red crystal. Keep in mind that you jump higher with the paraglider equipped, so watch out for those spikes!

Saturday, September 19, 2026

PrinceWatercress plays Punky Skunk - Part 2 of 8


In this video, we blast through the second world of the game with Kahuna Bay, then get started on the Forbidden Temple.

First | Next | End

Kahuna Bay

Fountain Follies


The swimmers jump in and out of the water, and can easily be attacked. The faucets will drop bombs, but you can actually destroy the bombs with your physical attack.

Speaking of the water, the water slowly pushes you in specific directions, and it's not hard to tell which way the streams of water will take you if you stand still long enough.

Along the way, you'll find a pogo stick in the wall. You'll need to go back to the left, go down the water running off the platform, and keep holding Right until you go through the wall. From there, you can get the pogo stick. You don't need to jump on the way to the pogo stick, but I do it anyway. Once you get the pogo stick, you can head back to the left.

The green platform with the sad face will drop down if you land on it, so get to the other side quickly!

You'll also find a candle enemy standing around doing nothing but dancing. Go up the waterfall after it to get to the ceiling, then head left and attack it to play a Captain Flag mini-game. Just like with all the mini-games from the first world, doing well enough will net you red crystals and health extensions. There is a big upside to entering the mini-games multiple times, which you can do, and that is playing them well enough every single time and getting a ton of extra lives out of it. However, there is also a downside to entering a mini-game: once it's over, you get kicked back to the beginning of the section you're in, and in some cases, back to the beginning of the level. It's not that bad here, since this level is pretty short due to still being early in the game, but it is still a pain, especially in later levels.

Rainforest Rally


It's time for another skating level, and this time, things get a little more interesting. There will be a mouse with a slingshot shooting shots that explode when they hit the ground. You won't be able to defeat him, and you won't be able to get on his track either. Thankfully, you can tell which platforms you can land on, as the platforms you can interact with are more brown and less gray. You'll also want to watch out for the guys on the bungee cords that drop down. They have a limited range, but they can still get you in mid-air if you're not careful.

Pathgrinder II


It's time to dig with the claws again. Watch out with the rocks, as they will drop down if you create a path underneath. Interestingly, you can use the rocks to get past some spike pits and collect some items, including stars.

The enemies become a little more daring at this point. You have the little black dots with eyes that bounce around where there isn't dirt, and you have the BB Brigade's tank generators that spawn infinite mice in drill tanks. If you destroy the generators with the claws, the enemies will stop showing up.

This is the first level with more than one section. If you walk into the bubble with the word "In" inside of it, you'll be teleported. Above the start of the second section is a candle leading to the cycling mini-game. As always, I complete this one for another red crystal. At least I don't get kicked back to the very beginning of the level after completing it; just the beginning of the second section.

Drill Sergeant


This is your first boss battle with Commander Chew, who will sic the Driller XL on you. Kelly will show up and tell you to attack the holes that Commander Chew's face pops out of, as the ones with the fire will explode into debris that can hurt you if you attack them. This is not a hard boss battle by any means, but you will risk hitting the flaming drills just to get to Commander Chew, and near the end, you'll have as many as five drills popping out, with only one of them being Commander Chew. Once Commander Chew falls down, however, you'll complete the second island.

Forbidden Temple

Jetstream Jinx


This is the first level where the paraglider and the jet streams that push you around everywhere take center stage. Grab the paraglider, then get ready to glide and get pushed around by the air currents. Along the way, you'll see plenty of flying enemies - some that fly in circles, others in straight lines, all of whom will slowly fly towards you - but you can always hit them from above to get rid of them and get some stars in addition to a boost forward through the level. There are also enemies that pump up balloons and fly straight towards you, but they're not much more dangerous than the other flying enemies that you'll see here. Thankfully, you don't have to look for a bonus area here, so just focus on heading towards the goal.

Friday, September 18, 2026

PrinceWatercress plays Punky Skunk - Part 1 of 8


It's a shame that the advertising made this game look extreme and edgy when it wasn't and that the game magazines tore this game to shreds when it came out for being as tame as Tomba. Even though it doesn't bring much new to the table, it's still a solid game.

Next | End

If you leave the title screen running long enough, you'll see a cutscene of Badler, the leader of the BB Brigade, send his troops after Punky. Why is he doing this? Because Badler is destroying the chain of island where Punky Skunk and his friends, Kelly and Nash, live in an attempt to take them all over. It's up to Punky Skunk to stop Badler.

From here, Nash introduces the first of several inventions that you'll be able to use throughout the adventure: the paraglider, which allows Punky to glide by pressing X in mid-air when equipped. Meanwhile, Kelly will get info on the members of the BB Brigade. After this, the game starts.

Woodlands

Drop Zone


Left and Right allow you to move, Down ducks, Up lets you look up, X jumps and Square attacks. (This is assuming you are using the default controls.)

At the top of the screen, you'll have your current amount of lives and health, your current form, and the amount of starts you have. Collecting 100 stars nets you a 1-Up. Small stars are worth one, while big ones are worth five. Beating up enemies will not only net you small stars, but also the occasional health refill that replenishes one of your hit points. The "1-Up" symbol is an extra life.

The enemies here will just slowly move towards you; hit them with your skunk spray by pressing Square. Use your jump to hop over the bottomless pits at the start of the level. Enemies do re-spawn, but thankfully, they'll usually drop health or stars just about every time you defeat one.

Once you collect the paraglider, you'll be able to get the ability to glide by pressing X in mid-air. You'll also be able to use the glide ability to be pushed around by air currents, and thankfully, you can see which direction the currents will push you in by watching them. While the paraglider is equipped, you can switch between the paraglider and your regular, non-ability gameplay with the Circle button. Also, while you have the paraglider equipped, you won't be able to attack with Square, but the game does give you the ability to jump on enemies to defeat them, which is something you can't do as regular Punky.

With the paraglider, you can easily zoom through the level and get a feel for how the paraglider works. This is the first level you'll be using it in, but it will not be the last.

The pole at the end with the BB flag is the goal. Attack the button (or jump on it, if you still have the parachute equipped) to get rid of the BB Brigade flag and clear the stage. You'll get five stars for each unit of health you have left.

Once you beat the stage, you'll enter your first mini-game, which is a clone of the Game & Watch game Flag called "Captain Flag." Use the shoulder buttons to follow the directions and raise or lower a red or white flag before Captain Flag does. If you can do it correctly enough times, you'll get a red crystal (much like a Heart Piece in the Zelda games). Collecting red  and if you're perfect, you can get that as well as a ton of extra lives. As you'll soon see, it pays to play the mini-games well.

R1: Raise Red
R2: Lower Red
L1: Raise White
L2: Lower White

You'll also get the pogo stick after playing the game. When you have it equipped, hold down X to jump higher. There is a ceiling on the jump, but the high jumps will prove useful.

Mushroom Romp


When you enter a level or world, the game will give you a chance to save to the memory card before you enter. When you select the save option, make sure you move the cursor to Yes so you can actually save your game. X lets you enter, Triangle lets you back out.

The guys in the caterpillar suits can only be hurt when their spikes are down and not sticking out.

The rainbow color orbs refill all of your health, as opposed to the green orbs that only refill one.

For this level, you'll need to jump up the mushrooms to get to the goal on the other side. This is where the pogo stick comes in. Thankfully, you don't have to press X as soon as you land upon jumping with the pogo stick equipped in order to get a higher bounce; you can just hold the button, which is great if you're not in the mood to deal with timing to get the higher jumps.

Completing the level introduces you to another mini-game: the pedal generator mini-game. Left and Right let you switch between the four bikes, while tapping Square repeatedly makes Punky pedal. You'll need to fill up all four gauges and get them in the blue zone to turn on the lights before time runs out, and if you can do that, you'll get a red crystal as well as a 1-Up the moment that all four lights are on. This mini-game isn't too hard as long as you're fast and you're paying attention to all four gauges as you're filling them up.

You'll then get the skysurfer, which acts just like a snowboard. You can still move left or right, but if you go down slopes for fast enough and long enough, Punky will glow gold, and as long as Punky is glowing gold, he will be invincible.

Cool Runnin'


Drop Zone is to the west of the cabin and Mushroom Romp is to the east, but Cool Runnin' is to the north.

The yellow platforms will ride up the track in the background when you stand on them. This will get you to higher areas.

The bowling pin enemies will throw bowling pins at you, while the flying enemies will fly around in circles while also trying to fly into you. Both can be easily taken out with the spray attack.

At the top, you'll get the skysurfer. It's not hard to glow gold and run through the enemies, but be ready to jump when you reach the big slope going downward so you don't fall into a bottomless pit. If you can get the speed and jump at the right time, you can easily jump right to the goal.

After clearing this level, you'll be introduced to the slot machine mini-game, which is the hardest of the four. Use Left and Right on the D-Pad to switch between the four buttons and press Square to stop the reels so that they land on Punky. You'll want to stop the reel when Punky is on the line in the middle. The reels get harder as you go from left to right, and I found myself starting with the right-most reel first later on to make things a little easier. You'll need to get all four reels to stop on Punky to get a red crystal for a health extension, even though this level's edition of the mini-game will give it to you at three. Again, it's all about those extra lives.

You'll then get the skates. You'll be building up speed, and you won't be able to stop on a dime unless you press Down on the D-Pad while the skates are equipped. The skates allow you to be fast, but you'll also want to be careful.

Desert Derby


As soon as you grab the skates, be ready to move, as the screen starts scrolling when you do. If you go too far to the left, you'll instantly lose a life...so watch it. This can be pretty easy to do, and if you're not ready for the scrolling as soon as you pick up the skates, you'll be whisked to the left, to your doom. 

There will be a guy on an ostrich throwing spears, and you'll want to avoid running into the spears even if they are on the ground. Aside from that, you can still jump on enemies and go for as many stars as you can.

You can run into the button at the goal with the skates equipped to trigger the goal and clear the stage.

Clearing this stage introduces you to the matching mini-game. You'll need to look at the lone monitor in the upper-right, then move the cursor with the D-Pad and press X (not Square!) when you highlight the title that is shown on the lone monitor. You only have thirty seconds, but once you figure things out, you'll be able to get in the groove and get a lot of matches before then. You'll have to do well to get the red crystal, but if you do really well, you'll get a bunch of bonus lives along with that red crystal.

When you collect four red crystals, your maximum health will increase by one hit point...so beat those mini-games!

Completing this game will net you the diggers, a set of heavy metal claws. You can use them to dig in the dirt and you can throw them at enemies with Square, but you won't be able to jump unless you take them off with Circle.

Pathgrinder


This is where you'll get used to the digging controls. Once you get the diggers, you can walk into the dirt and move in four directions through it with the D-Pad. You'll be able to attack from a distance with the 

There are waterfalls of quicksand that will cause you to sink downwards, although they don't kill you. Watch out for spikes, however, as they will hurt you if you touch them.

When you beat the level, Commander Chew and his minions will kidnap Nash as punishment for helping Punky. You'll have to go from island to island to find Nash.

Thursday, September 17, 2026

PrinceWatercress plays Toy Story 2: Buzz Lightyear to the Rescue (PS1) - Part 16 of 16


In this entry, we take on the final boss battle. It's a bit underwhelming, but they couldn't make something up and they had to something. All's well that ends well, I guess.


Level 15: Final Showdown


Strangely, the loading screen says "Prospector Showdown." Interesting.

With all 50 tokens collected and all of the levels completed, it's time for the final battle. For the final boss, you'll be taking on three bosses - the prospector, the gunslinger and the blacksmith - all at the same time.

The gunslinger is the easiest to take care of. Run away from him and lock on to him from a distance, and shoot at him as you jump over the bullets he shoots. Make sure you charge your laser to do more damage, too.

Next, you'll want to take on the prospector while keeping the blacksmith away from you. Thankfully, the blacksmith moves around rather slowly. Run around him and keep pressing the spin button to damage him with the spin attack. As you do this, The Prospector will keep striking with his pickaxe, but he will keep missing.

Finally, there's the blacksmith. Run far away from the blacksmith when he strikes the ground, then round around in a big enough circle so that the energy wave doesn't hit you and you can run back to the blacksmith boss and hit him with a spin attack, then repeat the process until he goes down.

As the battle progresses, the plane - and the camera - will lean back and forth. Thankfully, it's not enough of a dealbreaker for this level to the point that it becomes harder to focus on what you need to do during the level. 

Once you defeat all three bosses, you'll save Woody and Jessie, you'll get an ending cutscene, and you'll roll credits on this game. You just beat Toy Story 2 for the PS1!

Wednesday, September 16, 2026

PrinceWatercress plays Toy Story 2: Buzz Lightyear to the Rescue (PS1) - Part 15 of 16


In this entry, we tear through the last regular level of the game.


Level 14: Tarmac Trouble


This entire level takes place on the airport runway, and you'll need to explore every bit of it to find as many coins for Hamm as possible as well as to find all of the tokens.

The first thing that you want to do is scour all of the ground level. You want to shoot down all the enemies that you can find and take their coins, because you're going to need them for Hamm's token.

The level is divided by eight zones, which are all numbered. Rex will be between Zones 1 and 2 on the back of the luggage truck, ready to tell you where everything is. Zone 3 is where you'll find out about the five pieces of luggage from the Little Tyke figurine who is there, which I'll mention the locations of shortly. Hamm will be in Zone 5, and we head there for his token once we have enough coins. You'll find the green laser in Zone 8. 

There are five pieces of luggage jumping around that serve as the collectible for this level. They are located in the following areas:
  1. near the wall in Zone 4
  2. at the top of Zone 8
  3. the top of the moving plane
  4. the front of the luggage truck between Zones 1 and 2
  5. at the top of the plane entrance ramp in Zone 6
Once you get them all, take them to the Little Tyke in Zone 3 for a Pizza Planet token.

There is green ooze that you want to avoid stepping in at ground level, and there are also Rocket Boots scattered about ground level, as well. If you need to, grab a pair and zoom towards where you need to go; you'll save yourself some time doing that.

At the center of the airport is the central pole. You can find Slinky there, and if you talk to him, you'll start an interesting challenge: stay on the path without jumping or walking into the green slime and get to the end all before time runs out for a Pizza Planet token. The game has decided to pull a King's Quest II for one of the tokens, and I actually like it. And yes, the challenge will suddenly end if you accidentally press the X button and jump. You want to watch where you're going, but at the same time, you don't want to take too long regaining your bearings and repositioning yourself so you don't walk into the green slime that the timer runs out before you can get to the token. It can be a little tough, but it can be done.

There is a lights puzzle at the top of Zone 1, and you can easily reach it by taking the zipline at the top of the luggage truck where Rex is. To complete the puzzle, you'll need to match the lights at the bottom with the lights at the top within three moves or less. You have a moves counter at the far right, and you have four buttons to stomp on. Each button will turn on one light but turn off another. The first turns on the red light but turns off the blue light, the second turns on yellow but turnbs off red, the third turns on green but turns off yellow, and the fourth turns on blue turns off green. If you take more than three tries, the puzzle resets with different lights turned on, but that is the only penalty. Thankfully, if the situation calls for it, you can hit the switch to turn on a light that's already on while simultaneously turning off another color, which can make things easier. Once you complete the puzzle here, the nearby helicopter will drop down, and you can get the Pizza Planet token below the rope.

There is a plane that slowly flying around the level. By climbing up the rope at the center pole near where Slinky is, you can jump onto the plane and carefully run and jump your way to the other side. Keep in mind that the plane will always be turning left as you're jumping around on it, so you'll have to plan your jumps accordingly. From here, you can wait for the planet to get to the zone where you want to go. You'll need the plane to get to the luggage at the top of the plane entrance ramp in Zone 6, the blacksmith boss at the top of Zone 7, and the luggage at the top of Zone 8.

The blacksmith boss is at the top of Zone 7. To beat the blacksmith boss, you'll need to run far away from the blacksmith when he strikes the ground, then round around in a big enough circle so that the energy wave doesn't hit you and you can run back to the blacksmith boss and hit him with a spin attack, then repeat the process until he goes down. You can do that, or you can just keep taking the hits and spin into the blacksmith boss repeatedly while grabbing the nearby battery in case you're low on health. That also works. Regardless of how you do it, beating the blacksmith boss will net you a Pizza Planet token.

And that's Tarmac Trouble finished. All we have left is the final boss battle.

Tuesday, September 15, 2026

PrinceWatercress plays Toy Story 2: Buzz Lightyear to the Rescue (PS1) - Part 14 of 16


We do our last bit of backtracking before returning to our regularly scheduled Let's Play.


Now that we have the Hover Boots, it's time to head back to the storeroom with all the cardboard boxes in Al's Toy Barn. We need to head back and get the five chicks. They are in the following locations:
  1. at the top of the box across from the storeroom entrance
  2. the first skateboard challenge (the one that involves getting on the skateboard, bouncing off a trampoline, jumping to a platform off of a toy kiosk, swinging off a horizontal pole and sliding down a zipline to the egg)
  3. on the gumball machines in the corner that require bouncing off a running hay stack ride machine to bounce to
  4. near the skateboard past the two sets of spinning bicycle wheels
  5. near the vent leading back to the starting area, past the hen
The first one requires the Hover Boots, as you will need them to get over a box that you can't even grab with a double jump. Once you get on top of that box, you'll soon have to jump across three boxes that are moving up and down, and you can tell which ones are the moving ones due to the yellow and black caution stripes on the wall near them. From the third box, there will be a token that you can see below; jump to that token, then make your way up the boxes ahead to get the chick.

Once you get all five chicks, talk to the hen near the blue cones blocking the slime pit for a Pizza Planet token.

I also show off the honest method of getting the race token for Andy's Neighborhood. This method involves the Rocket Boots, and it's a lot faster. As long as you stay on the track while going at super speed, especially at the last corner by refraining from jumping over the grass just before the corner, you'll be credited for a lap. As long as you stay on the move, you should be able to get this Pizza Planet token easily with the Rocket Boots.

I then cap the video off by beating the Bombs Away boss, because why not?

Monday, September 14, 2026

PrinceWatercress plays Toy Story 2: Buzz Lightyear to the Rescue (PS1) - Part 13 of 16


In this entry, we get done with the Airport Infiltration level. We're close to the end of the game now, but we have some loose ends to take care of after this...


At the start of this video, I head up the conveyor belt area. There are a lot of poles to climb and rods to swing off of, and you'll need to make use of them to get to the top. There are also platforms that act as lights that you can stand on for extra coins if you need them. Along the way, you'll find your second Little Tykes passenger.

I then head back to the plane and move up the plane wings that act like see-saws. I then have to land on a red platform (which is part of the back wing of a nearby plane), then jump towards a nearby platform to get Mr. Potato Head's mouth. From there, I head back to the suitcase stack and give the mouth to Mr. Potato Head for the Hover Boots.

With the Hover Boots, you can hold X to float higher and let go of the button to float lower. You cannot exactly fly with them, but you can float with them temporarily. The boots will allow you to get to the top of the suitcase stack, where you can face The Prospector. To beat him, you cannot shoot him; instead, you have to run around him and keep pressing the spin button to damage him with the spin attack. As you do this, The Prospector will keep striking with his pickaxe, but he will keep missing. You'll be able to get a Pizza Planet token from him in mere moments. Stomp on the nearby green suitcase afterward and take the zipline to get your third Little Tykes plane passenger.

The last two plane passengers will be in the room with the rocket you have to climb up. Finding out where you need to go is as simple as looking around, whether it be with the active camera or with the first-person view. You'll need to land on small platforms to get higher, and you'll also have to swing off the occasional rod and climb the occasional pole, too.

The turbines will blow you back if you're caught in front of any of them. You'll need to float over to the lowest one to get your fourth Little Tykes passenger, and you'll need the Hover Boots to do it.

To get up to the top of the rocket ship on the platform past the turbines, you'll need to grab the Hover Boots, float up to the nearby platform, float up towards the nearby slope at the top of the rocket, then all the way to the top, where you can get a Pizza Planet token.

At the same platform where you need to get to the top, you'll need to drop down to the platform underneath, then drop down to the platform underneath that. You'll find your fifth and final Little Tykes passenger here. You can now go to the Little Tykes pilot and pick up the fifth and final token for this place.

You're done here. Next time, before we play the final level before the final boss battle, we head back to Al's Toy Barn! Then we get the race token in Andy's Neighborhood the proper way. 

Sunday, September 13, 2026

PrinceWatercress plays Toy Story 2: Buzz Lightyear to the Rescue (PS1) - Part 12 of 16


In this video, we finish up the penthouse, fight Zerg atop the elevator, then head to the airport. We're getting close to the end of the game now...


Buckeye will be near the living room. Talk to him and you'll get the racing token minigame started. Here, you have to collect five horseshoes, and they will all be in the living room area. One is in front of the fireplace, one is between the wall and the coffee table with the cannon on it, one is on the couch, one is on the table next to the couch, and one is near Rex. This one is a lot easier to get after you destroy the cannon. You'll have only twenty-six seconds to do this in, and that's barely enough time. Your best path is Rex, fireplace, wall, couch, table (even though I save Rex for last here). Get to Buckeye with all five horseshoes before you run out of time to get the last Pizza Planet token. You're done here. Head to the next level.

Level 12: The Evil Emperor Zurg


It's now time to face yet another boss, and this time, it's the Zerg action figure from the toy store from earlier in the movie. This time, he's caught up with Buzz, and the battle that Rex had with Zerg in the video game now happens for real.

You need to spin into Zerg while avoiding the balls that he blasts out. The balls are yellow and go straight at first, but the green ones that he starts shooting when you do a little bit of damage to Zerg will home in on you. You won't be able to avoid those; instead, you'll need to spin at the right time to deflect them all without taking damage.

If Zerg flies into a corner, step back to get him out of the corner. Unlike Zerg, you can fall down the pit at the edges of the elevator you're fighting on and lose a life.

When Zerg is down to half health, he will shoot a combination of the yellow and green balls, and you'll need to keep spinning to avoid the green balls as you keep spinning into Zerg to destroy him. Once you defeat Zerg, he'll fall down the elevator shaft, and you'll never see him again.

Level 13: Airport Infiltration


The hunt for Woody continues to the airport, and if Al flies away with Woody, Woody will be gone forever. On the plus side, this level has some of the best music in the game.

You'll start out below the X-ray machines. Shoot down the enemies you see around here; you're going to need the coins for Hamm. You'll eventually come across a green suitcase; the stomp icon will tell you that you need to stomp on this and all other green suitcases to get to higher areas. You'll also need to jump off the brown suitcases to get to the poles that you need to swing off of to get to other conveyor belts and get out of this area. When you reach the tops of the X-ray machines, explore them; one of them will have the first of five Little Tykes airplane passengers that you need to collect, and the big white shelf at the end of the conveyor belt section will have Hamm at the top of it.

You'll eventually come to an area with some doors in the wall. You can head to ground area for a few of the tokens, but you can also head further upwards for more conveyor belts, more enemies to destroy for tokens, and the boss battle with The Prospector.

At ground level, you'll find Mr. Potato Head. You'll need to find his mouth in order to get the Hover Boots, which is the last gadget that you'll need to complete the game. Rex will be at the stack of suitcases where Mr. Potato Head is, and he will tell you where all the tokens are.

Rocky Gibraltar will be in the area with the slippery oil on the ground near the X-ray machines. You'll need to collect five weights before the whole minute that the game gives you runs out. One is on a nearby conveyor belt, the second is directly below it. The third will be near the stack of suitcases that you can't climb (yet), the fourth will be near the door near Rocky and the fifth will be below the giant model plane. You should be able to find them all, get back to Rocky and get a Pizza Planet token with plenty to spare.

Past Rocky and the oily area is a giant model rocket ship. While we can climb up the rocket ship, we won't be doing it yet. In the corner, there is a Little Tykes pilot who is looking for his five passengers; you'll need to return to him when you find them all. There is also what looks like a weight that is really a set of airplane landing wheels. Push it forward to get on the plane wings, which you'll need to use like combination ramps and see-saws in order to get higher up in the room. This is a little easier said than done, as the plane wings are huge. You'll be forced to double jump your way to get the wing to I'll have the way up to the top figured out next time, but for now, I do a little bit of climbing to get enough coins for Hamm for his Pizza Planet token to cap things off before next time. 

Saturday, September 12, 2026

PrinceWatercress plays Toy Story 2: Buzz Lightyear to the Rescue (PS1) - Part 11 of 16


Now that we're done with backtracking for the moment, let's play more of the game!


Level 11: Al's Penthouse


Rex is near the entrance! He will tell you that:

  • Hamm is in the bathroom, which you can reach through a hidden vent. He will also tell you to look out for locks to shoot.
  • Jess has lost her critters, and is waiting on the kitchen table.
  • Bullseye will have a challenge for you in the entrance hall.
  • You can get to the token on top of the train bed if you can solve the train puzzle and get the train to stop on the dead end track by stomping on the yellow switches.
  • The gunslinger boss will be in the Woody's Roundup set in the trophy room.

The kitchen is next to Rex. You'll meet two new enemies that you'll be encountering for the rest of the game: the evil sheriffs that will shoot you if they see you, and the snakes that will bounce around if you get too close. The lock-on ability will be useful against both of them. Just remember that you can jump while locked-on to avoid the sheriffs' bullets.

There will be a padlock on the refrigerator. Shoot it down, and you'll be able to go inside and climb your way to the countertop. Stomp on the scale, and you can get to the cabinets. There will be a cannon shooting from the corner, but you won't be able to destroy it until you can double jump off some lights hanging off some chains and get to the switch on the other side, stomp it and make the cannon explode. The chains the lights hang off of are slippery, and you will slide down off of them and fall to the floor below until you quickly double jump from one chain to the next.

You'll also see a buzzard, another enemy you'll keep running into until the end of the game. The buzzards will fly at you if you get close enough to them, but once again, locking on and blasting away will be a big help in taking them down. By continuing to run around the room from that switch, you'll be able to double jump off one more chain and pick up the first of five critters. Jessie will be standing on the kitchen island

The stovetop on the kitchen countertops will burn you if you stand on them, so don't do that.

Across from the start is the living room. There is another padlock you can shoot down on the cabinets; doing so will open up a path to the bathroom. We'll leave that alone...for now. In the living room, you can jump from the coffee table to the couch to the side table to the wooden railings. Jump the gap to the second railing, then get on the fireplace, get on top of the cabinets, then double jump to the first light fixture and swing off each one to the switch on the other side. Stomp the switch as soon as you get to it, because there's a cannon on the coffee table and it will fire at you just regularly enough to make things miserable. From the switch, double jump forward to get the second critter. You can only get the second critter with a double jump from the switch, and if you fall down at any point, you're starting all of this over.

The train room has a box that you can push into it. Push the box to the big train and get the third critter. The hint cube here will more or less tell you what Rex has told you already. Keep an eye on the flashing tracks and watch how they move as you stomp the switches while you also follow the train, and watch out from the fire from the cannon in the center of the room. For best results, start from the dead end and work your way backwards, stomping the switches as you go to ensure that you have a path straight to the dead end. Once you've got the train out of the movement loop, you can push the box near the tracks to the huge train in the room, jump up, stomp the switch to destroy the cannon, then grab the Pizza Planet token.

The trophy room is next to the train room. Take out the sheriffs from the table in the center of the room, then push the box along the path. Push the lunch box at the end of the box path all the way forward, then travel along the perimeter of the room. You'll end up in the Woody's Roundup set, and while the switch for the cannon is there, so is the gunslinger boss! Run away from him and lock on to him from a distance, and shoot at him as you jump over the bullets he shoots. The gunslinger boss is a really easy boss, and you'll get a Pizza Planet token for beating him.

Stomp the switch in this area to take out the corner cannon. While getting out of the Woody's Roundup set, you'll be able to find a second switch. Stomp it to destroy the table cannon, then get the fourth critter, which is nearby.

The bathroom is through a hidden path in the living room cabinet. You'll need to stomp the blue switches to raise the water level. The switches will be on each level that the water can rise to, and the bottom-most switch will be in the bathtub, where you can also find Hamm and get a Pizza Planet token if you have enough coins.

The next switch is on the top of the tub, and after that, you'll need to jump from one sponge to another to the countertop, as the water will flood the room at this point. You'll then need to stomp the switch on the counter and jump back on the sponges to get to the switch on the shelf above the door. Stomp on the red switch there to destroy the cannon, then jump to the top of the shower door to stomp the next water switch. You can then jump on the sponges to the top of the cabinet near the cannon and jump to the fifth and final critter. The water is timed, but you can stomp a blue switch on a lower level to bring the water back, so you aren't forced to start all the way over if you make a mistake. Also, if you leave the bathroom, all the water will automatically drain back out before you can get back to the living room.

With all five critters collected, we can finally head back to the top of the kitchen island and talk to Jessie for another Pizza Planet token. 

Friday, September 11, 2026

PrinceWatercress plays Toy Story 2: Buzz Lightyear to the Rescue (PS1) - Part 10 of 16


In this entry, we take a detour back to Alleys and Gullies to collect the remaining Pizza Planet tokens.


For this video, we're heading back to Alleys and Gullies. Since we have the Grappling Hook now, we can use it at the ground level to look for the five ducklings and fight the boss.

The five ducklings are located in the following areas:

  1. The awning at the top of the marketplace area
  2. On the water behind the barricades in the marketplace area
  3. In a nook on the other side of the gully 
  4. In a window to the side of one of the balconies that has three bars
  5. In a gutter near the boss battle area

The last two ducklings are in areas that require the grappling hook. This part is pretty gun, as you have ziplines with electricity to avoid and a lot of ladders to climb and balconies to explore. You'll be using the first-person aiming view extensively to look and see where you need to go next. It's an arduous climb

To beat the spinning top boss at the top of the alley, stay out of the water and move away from the boss when it moves towards you. When the boss is away from you, use your lock-on to ensure you hit the boss. Also, stay away from the water; you don't want to slip and slide while you're doing this. Taking the boss down nets you a Pizza Planet token.

The mother duck will be in the center of the ground level area. Talk to her with the five ducklings to get a Pizza Planet token. With these two things out of the way, you're finally done with this level.

Thursday, September 10, 2026

PrinceWatercress plays Toy Story 2: Buzz Lightyear to the Rescue (PS1) - Part 9 of 16


In this level, we complete Elevator Hop before going back to make more use of the Grappling Hook.


Now that we've got the elevators up and running after playing around with the control panel in the last video, we can drop down and collect our prize: a Pizza Planet token. You can now use the elevator platforms to get up and down the elevator shaft. The edges of the platforms go the rainbow route from red to purple and follow the "ROYGBIV" sequence, with red being the bottom platform and purple being the very top. When you see the black and yellow cylinders on the elevator cables, you'll know you're at the very top where the purple platform is.

By jumping between the two sets of platforms and getting to certain levels, you'll be able to get to certain parts of the level. There will be a boss battle at the top, and the start of the level will be at the bottom, but there are several parts in-between that are worth checking out.

The fourth mouse will be near the other shortcut switch that you can hit with the stomp that takes you up to the top. Also at the top is the boss. To defeat the Spider Gunro boss, you'll want to run around the room and turn around to shoot the spider. You'll want to avoid the flamethrower and the jump attack, and stay away from the webs that get shot around willy-nilly that will slow you down. You'll want to be quick with turning around and blasting the spider, because the spider is as quick as it is relentless. Thankfully, like other bosses, you don't have to worry about its health meter getting refilled if you die, so it's easy to get the Pizza Planet token for fighting this boss.

Also at that location will be the race challenge at the top. For the race challenge, you'll need to follow the token to the bottom of the shaft without falling into the pits. Thankfully, the pits are easy to identify by the yellow and black diagonal caution lines that you'll see. Just jump over the areas that have these lines and you'll get to the token with a couple of seconds to spare. Don't forget to pick the token up!

The fifth and final baby mouse will be in the elevator shaft, directly below where the control room is. You will definitely have to double jump from the elevator platforms in order to reach it.

The mother mouse is back at the control panel for the elevator, so you'll want to go back to her and get her Pizza Planet token. Also, Hamm will be in the electrical room from the beginning of the level where you had to go to get Mr. Potato Head's missing foot for the grappling hook and the rest of the level. At this point, their Pizza Planet tokens are the only ones left, and I end up grabbing both of them to complete the level.

Wednesday, September 9, 2026

PrinceWatercress plays Toy Story 2: Buzz Lightyear to the Rescue (PS1) - Part 8 of 16


We take on our third big boss before heading up the elevator shaft as we chase down Al.


Level 9: Toy Barn Encounter


Get behind the UFO to avoid the laser it shoots out, and shoot it from behind with the lock-on ability. When you do this, a normal enemy will pop up, and you'll have to shoot it down. The first three cylinders will contain one enemy, while the last three will contain two. If you haven't figured out that you can destroy the Zerg soldier with the shield with the spin attack yet, you will now. Also, make sure you're not under the boss; the boss can lower its altitude in addition to shooting at you.

Level 10: Elevator Hop


In this level, you'll be in the elevators leading up to Al's penthouse suite, and you'll be going up and down...a lot. You'll start out in the vents. One of them leads to Mr. Potato Head, and you'll need to find his ear and hand it to him to get the Grappling Hook, which we'll also need for Alleys and Gullies. Two of the vents will have fans that act as shortcuts that will take you further into the level, but you'll need to find the switches first. The one remaining vent will be the path you need to start progressing into the elevators.

The room with the electrical controls leads to Hamm as well as Mr. Potato Head's missing foot and a baby wind-up mouse. There are five of these mice, and we'll need to collect all of them in order to get the collectibles token. Stay near the wall as you jump from platform to platform here so you don't get knocked down to the bottom, and watch for the electricity that is coursing everywhere, both on the rods you can swing across with as well as the water covering the floor.

Once you get the Grappling Hook, use the lock-on ability, then lock onto the red hooks and press Square to use your grappling hooks. You can have up to ten grappling hooks. This is the only way to use the hooks, so don't worry about accidentally using a hook, as you'll still be able to defend yourself with your laser. Also, if you see a vented part of a floor, wall or ceiling, fire will come out of it, so watch where you're standing as you use the grappling hook.

The snakes will jump towards you if you get close enough. Use your lock-on to take them out more easily.

Rex will be in the entrance to the elevator shaft, which is where we will be doing a lot of the exploration for this level. He'll tell you where everything is. He's also worth mentioned because he is where you will find your second baby mouse.

If you see any fans, wait for them to stop before using the grappling hooks. This will give you more time to aim.

If you keep following the vents, you'll see the control room. You'll find the switch to stomp to give yourself a shortcut back here from the start, and you'll find the mother mouse that I mentioned earlier. There is also the third baby mouse to collect moving around on the ceiling, and while collecting it is a pain, it can be done.

Believe it or not, you can jump and double jump in the lock-on view. Remember that for later.

As for the control panel with the three buttons you need to stomp, you need to stomp the buttons so that all three of the cables are in the middle. The first one raises the red cable, but lowers the green one, the second raises green but lowers blue, and the third raises blue, but lowers red. The quickest way to do this is stomping the second switch, the first, the third and then the second again, in that order.

Tuesday, September 8, 2026

PrinceWatercress plays Toy Story 2: Buzz Lightyear to the Rescue (PS1) - Part 7 of 16


After doing what we could and only what we could in the last two levels, it's nice to be able to do everything and move on here. What really makes this interesting is that you can speedrun through this level if you really know what you're doing.


Launcher, then stay away from the boss and keep firing while still standing near the boss, and you should be able to get the Pizza Planet token for this. Also, watch out for the slime while you're in here.

Level 8: Al's Space Land


Compared to Al's Toy Barn, you can complete this level in about fifteen minutes if you know what you're doing.

The Zerg Knights with the shields can be destroyed with the spin attack. I avoid them at this point because I don't know it yet. Also, this is the main gripe I have with the spin attack: It works, and it does its job, but at the same time, it has so few uses compared to your blaster that you forget that you have it, and this leads to positions where you could be stuck when you're really not.

The UFO near the start is looking for five missing aliens. Find them, come back, and you'll get a Pizza Planet token. You'll find your first one on the mobiles hanging above where you start. You'll need to push a box to some other boxes on the floor so you can jump to them. While climbing on the mobiles, don't hold Down; instead, gently tap it to go down carefully so you don't fall off.

Another path at the start leads to a purple UFO character that will challenge you to yet another race. This time, you'll need to go down a bunch of ziplines without falling all the way down. As you go down each zipline, you'll see a small red line. These red lines are where you need to hold Up on the D-Pad and jump (or double jump) to the next zipline. If you can pull this off and get to the checkerboard platform before the purple UFO does, you'll get a Pizza Planet token. From the token, you'll want to double jump forward to get your second alien. As for the rest of this area, there's not much else aside from a few enemies.

Yet another path has you shooting down enemies while also avoiding raining tennis balls. At oine point, there will be a bunch of bars that you'll need to swing across. If you can do that and then double jump from one platform to another, you'll eventually get the Cosmic Shield. You'll need this to protect yourself from the barrage of lasers that will pelt you and slowly ebb away at your health, as you'll eventually get hit by a laser in the second half of this path no matter what. The third alien is below a zipline; you'll need to jump off early and land on some boxes to retrieve the little guy. You'll find Hamm a little further down the path, and I get his Pizza Planet token. Above Hamm is the fourth alien.

There is also the arcade. Jump on the cup to get on the stool so you can get on the other stools as well as the arcade machines for coins and health. You'll eventually push another cup to the floor. You can double jump to the ball pit and go inside for some more coins as well as the fifth and final alien.

Near the ball pit is the claw machine. Stomp the button once to get the claw moving horizontally, then stomp it again to get it moving vertically. Stomp the button a third time to drop the claw. You'll want to align the claw's shadow with the Pizza Planet token's, and if you can pull that off, the claw will pull the token out of the machine. The token will then drop to the floor where you can get it.

Rex is also in the arcade on the floor near the claw machine, but we've done everything and we're not going to need his services at this point.

There are some boxes blocking one more path, and you'll need to climb up and jump across the strings of the mobiles to get to the top of the boxes and leap over them. Behind the boxes is the boss battle for this level. To beat the evil Buzz, keep away from him and avoid both his homing missiles and his lasers by running away from the former and jumping over the lasers, and use lock-on to him him when he is lined up with you. Coming here with high health is advised, and you'll find one battery in the room where you face him which can help with that matter.

I finish the level by returning the aliens to the UFO. With that, we have this level completed in about fifteen minutes!

Monday, September 7, 2026

PrinceWatercress plays Toy Story 2: Buzz Lightyear to the Rescue (PS1) - Part 6 of 16


Al's Toy Barn is another area where you won't be able to get everything on the first go-around. There's still plenty to do, however, and once you figure it all out, the game gets a little more interesting.


In the watery area known as the gulley, there are platforms moving across the water that spawn in and out every so often. The lily pads, on the other hand, are stationary, and can be used to wait for the moving platforms. If you fall down into the water, you won't be able to recover by double jumping if you land on the slope leading to the bottom. You'll need to get to the stairs and double jump up them to get back to dry land.

In the center of the gulley, you'll find Slinky. Talking to Slinky triggers the race token, where you'll need to double jump from the center platform and back to it while collecting the five bones nearby. If you fall into the water, it's a long way and a good amount of time back, so you'll want to be good on your double jumps at this point. Once you get all five bones, talk to Slinky for the token, then get out of here. You won't be able to do anything else here...yet.

Level 6: Slime Time


When you approach the garbage can, you'll face your second boss: a slime creature in a garbage can. The second boss will bounce around, and when you get close enough to him, he will throw a projectile at you. You will need to spin at the right time to bounce the projectile right back at him. When the projectile hits, keep shooting at him, then spin the next projectile back at him. You'll be alternating between spinning and shooting to get this guy to shrink and compress him into the can to do damage. Every phase will go the same way, with the only difference being that the boss gets bigger and bigger the more damage you do to him. After four phases, the boss will go down for good.

Level 7: Al's Toy Barn


Once again, you won't be able to do everything on the first shot...so do what you can.

You'll need the Rocket Boots to cross over to the shopping cart. In order to get the Rocket Boots, you'll need to find Mr. Potato Head's missing arm. You'll find Mr. Potato Head's missing arm, you'll have to get on one of the checkout counters at the start of the level. To get on the checkout counters without the Rocket Boots, you'll need to get to the trampoline, bounce onto the top of the shelf, jump onto a shopping cart, jump on top of a Buzz Lightyear box, swing on a bar to another platform, then go down the zipline and jump to the missing arm. Watch out for the slime surrounding two of the checkout counters; it will hurt you if you step in it in any way.

Once you have the Rocket Boots, you can not only get that one token in Andy's Neighborhood the honest way (which I'll show off near the end of the Let's Play), you can now make use of the switch you can stomp on to activate the hay bale ride at the beginning. You can also barrel down the ramps on the checkout counters, stomp on the spring in the shopping cart at the end, move past the egg to swing across from bars, bounce off the hay bale ride and find a chick.

In the hallway past the trampoline, you'll find a rooster wearing overalls and holding a pitchfork. Talk to him to trigger a race challenge. You'll need to stomp the skateboard, then get to the egg that I mentioned earlier to get another chick. If you talk to the rooster again, you'll be able to do this challenge again for a Pizza Planet token. This time around, however, you only have 23 seconds instead of the 45 you had for the chick. If you're smooth and you know what you're doing, however, you can get this token easily.

Rex will be in the storage room if you're looking for him for all the hints.

There is ooze on the floor in the office room. Stay away from it and jump up the chair to the table, where you can find Disk Launcher ammo. Use the Disk Launcher to destroy the red padlocks on the file cabinets, but be careful when you hit them. The file cabinets that you free will move in and out, and you'll need to use them as platforms to get to get to the exploration token at the other end.

Hamm will be on a table in the office. Talk to him with 50 coins for his Pizza Planet token.

Left of the trampoline is a bit of an obstacle course. Avoid the bouncing basketballs, jump through (or around) the bike tires and avoid the spokes, climb up the jump rope, jump around some more bicycle wheels, jump to the skateboard and grab your third chick, stomp the skateboard, push the box across the path and avoid the hula hoops. The hen will be here; talk to her when you have all five missing chicks, which you won't be able to do until you get the Hover Boots.

Sunday, September 6, 2026

PrinceWatercress plays Toy Story 2: Buzz Lightyear to the Rescue (PS1) - Part 5 of 16


We finally face two of the greatest enemies in the years that I've done these Let's Play videos: a table and a balloon.


As Rex will have mentioned if you've talked to him, you'll need the Disk Launcher to face this boss. Once you have it, however, the jackhammer boss isn't that hard: just stay near the boss as it follows, but do not be close enough for the boss to attack you. From there, keep firing off Disk Launcher shots at regular intervals. The boss will be following you the whole time, but you don't even need to turn around to fight back, due to how the Disk Launcher works. Beating the boss will net you a Pizza Planet token.

The only token that is left is the one that involves Slinky the Dog in the sand pit at the bottom of the building. Talk to him, and you'll have 50 seconds - more than enough time - to collect five wrenches. Thankfully, all of the wrenches will be in the sand pit area; all you have to do is hop around and scan the perimeter of this area to find all five wrenches. Once you find them all, talk to Slinky again for a Pizza Planet token.

If you choose to exit a level after collecting a Pizza Planet token, you'll see Buzz fly away.

Level 5: Alleys and Gullies


Unlike the previous levels (unless you count Andy's Neighborhood because you don't know how to get the race token without the boots), you won't be able to get everything here in one trip. This is because you won't be able to get the grappling hook, which is available in this level, until later in the game. 

The boxes with the planes can be shot down, but it will definitely take a bit of effort. The green laser will definitely help in that regard. Also, only the first two planes to come out of the box will drop coins when defeated. The planes will fly around and can be easier to destroy with the lock-on ability, but if you get close enough to them, they will notice you and start shooting.

The purple hovercraft shoots bombs out like a mortar, and it takes a bit of a beating before it gets destroyed. Use charged or green lasers to take it out.

The marketplace is in one direction at the start, while the gully is in the other. I head to the marketplace for his video. Wait for the electricity to move down the wire before going down the ziplines so you don't get shocked. You'll find Hamm here (and he gets his coins in this video), and you'll find one of the ducklings in the pool behind the road blocks. There is also a tunnel under the water that leads to an extra life.

You'll need to push a box to get some disk launcher ammo, then you'll need to jump to some watermelons, take out the Zerg robot with the shield with a disk launcher shot while using the two see-saw platforms as ramps, then stomp on the scale to get to a switch to turn on the fan. You'll then need to move another box to another table near where the balloons are, then grab onto the balloons and jump from the first one to the second one to get a Pizza Planet token. This one is really hard to do just because of how unintentionally hard it is to grab onto the table near where the balloons are, and because the game apparently doesn't want Buzz to grab the table, this becomes a task unto itself. Also, you just want to take a single jump towards the balloon once it pops out of the oxygen tank, then ride it to the nearby garbage can to get the exploration token. 

While you're at the fan switch, you can jump to the umbrellas and get a good number of tokens. This will also allow you to double jump to the awnings near the marketplace entrace, where you can find your second duckling.

The mama ducking is at the central drain. You won't be able to find all of her ducklings until you get the grappling hook.

Saturday, September 5, 2026

PrinceWatercress plays Toy Story 2: Buzz Lightyear to the Rescue (PS1) - Part 4 of 16


In this video, we start tackling a more interesting level and exploring it for Pizza Planet tokens: the Construction Yard.


Level 4: Construction Yard


You'll be able to get your hands on the green laser immediately at the start. Use this to take care of any enemies, including the new flying ones that will drop bombs if you get close enough to them.

Exploring the ground level is essential at the beginning of the level, as you'll find quite a few coins for Hamm here as well as most of the missions. The construction foreman near the start will ask you to find his fiving missing Little Tikes workers and return to him for a Pizza Planet token, Hamm will be at the top of the tractor near the wheelbarrow,

One of the Little Tike workers will be on a wheelbarrow that you can access by pushing a cinderblock towards it. You can reach Hamm from here. 

At the bottom of the building that is under construction. The bottom level is a sand pit, and you can sink through it and take damage. I jump across it just to make sure that I don't sink. There is also a metal platform in one corner, and as you go up the building, the platform will act as an elevator that takes you all the way up to the highest point that you've taken during your stay in the level. In case you fall all the way down, just come all the way back to this corner and wait for the platform to lower so you can double jump onto it and take a big shortcut back.

Rex will be in one corner at ground level, and he will tell you where all the token are, as always.

The wooden ramp at ground level leads to the trailer, and here, you'll have to mix paint in order to get a Pizza Planet token. Avoid the green ooze and jump on the dry areas, then jump onto the chair and then the table. Climb up the pole, then jump to the top of the filing cabinets. Some of the drawers open and close, and I end up using only one of those drawers to get to a second Little Tikes worker before getting to the paint mixing station.

Here, you can stomp on the buttons to pour the paint into the bucket that you need to move into the white circles on the counter. The circle indicate not only where you need to put them to pour specific colors, but also to put certain colors when you're done making them. You have red, blue and yellow paint to work with, and you can make all three colors the game asks of you - purple, orange and green - with just two colors each. Red and blue combine to make purple, red and yellow combine to make orange, and blue and yellow combine to make green. When you're done making purple paint, move it to the picture of the purple paint can; the same goes for orange and green. When you create all three colors of paint, you'll get a Pizza Planet token.

The bulldozer will be your means of getting up the girders of the unfinished building. Not only will you find the third Little Tike worker inside, but you'll also find a switch that lowers the shovel. You'll need to stand on the shovel to get on the lowest level of girders. Once you're on the girders, avoid crushing pistons as well as falling nails, and pay attention to any mesh in the corners to see where you can get past walls. You'll find the fourth Little Tikes worker on the lowest level of the girders.

If you see any wall switches while on the girders, stomp them when you see them. This will allow the elevator platform in the corner of the unfinished building to move to that level in case you take a big tumble. At least there's no fall damage in this game.

Your main mode of going from one level of girders to the next is the yellow and black "caution" girders that move up and down. They will tilt as you move from one end to the other.

Mr. Potato Head's ear will be on the third level of the girders. When you return it to Mr. Potato Head near the paint mixing trailer, you'll get the Disk Launcher. The Disc Launcher is a homing weapon, and you can carry up to thirty shots. You get ten whenever you pick it up, and it will replace the green laser if you have it. If you stay where you picked up the Disk Launcher ammo, you can get up to thirty if you wait around long enough. When you fire a disk, it will home in on any nearby enemy and hit them, including those nasty bomb-dropping robots that float around in the air. You don't have to go into first-person mode and use the lock-on ability unless you need to; if you're near the enemy, it's getting nailed.

I end up getting the Hamm token before getting the Disk Launcher, so there's that.

After three levels of girders, you'll find a wooden ramp that takes you to the top level. Not only will you find the fifth Little Tike worker off to the side from the red girder platforms, but you'll find the boss. I will mention how to fight the boss in the next video. As for this one, I close it out with the Little Tikes token. Next time, we'll get the boss token and the challenge token.

Friday, September 4, 2026

PrinceWatercress plays Toy Story 2: Buzz Lightyear to the Rescue (PS1) - Part 3 of 16


In this video, we take care of the last of the Pizza Planet tokens in Andy's neighborhood, then take on our first real boss.


As you've probably noticed, the Hamm coins will lead you to the gaps in the fences where you can access other areas to get more Pizza Planet tokens. One of these areas is a backyard pool, and if you stomp on the bellows at poolside, you'll inflate an inflatable duck raft. When you fully inflate the raft, it will land in the pool. Stomp on the raft, then jump straight up when the raft jumps upward to get the open air Pizza Planet token.

Moving around in water will definitely slow you down, and even your jumps will feel floaty. Keep this in mind, as this isn't the only level where you're going to be underwater for some reason.

The perimeter of the yard with the pool is a gambit of double jumps, with the occasional enemy to shoot down. You've probably noticed that enemies re-spawn after a while, but it definitely becomes annoying here. Halfway through the series of jumps that you'll have to make, you'll be able to push a wooden plank. Do it; you'll need to make it easier to get to the last potted palm tree at the end, where you'll find your fourth soldier.

There is another area with a pick-up truck with no wheels as well as a clothesline. By stomping the two switches near the truck, you can lower the truck so you can jump on it and stomp the hood to be launched into the washing machine. From here, you'll be able to jump to the clotheslines. At the clotheslines, you'll need to quickly - and carefully - jump from one clothesline to another to avoid running into drying clothes while getting to the basket at the end, where you will find the fifth and final soldier. Now that you have all five soldiers, you can head back to Sarge at the beginning of the level for a Pizza Planet token.

You'd think you'd be done with the level for the time being, since Rex will tell you that you need the Rocket Jet Boots to beat R.C. Usually, you would be right. However, there is a trick to beating R.C. without them, but it takes a bit of practice, a bit of knowledge about how things in the game work, and a bit of patience and getting some timing down.

To beat R.C. without the boots, you need to stay in the center of the track at all times as R.C. accelerates around the track. If R.C. runs into you, he will come to a dead stop. Use the time that R.C. is not moving to make some headway on the racetrack, and keep moving and watching for R.C. You obviously have to double jump over the sand pits and the water puddle, as the sand pits slow you down tremendously and the water puddle is slippery.  If you know that R.C. is going to catch up to you just before the sand pits, stop before the sand pit in the center of the road, have R.C. run into you, then double jump over the sand pit. You'll also want to do this near the water puddle if necessary. 

We have all the Pizza Planet tokens, so it's time to head out of here. If you want to see the race done with the boots instead of without, I'll show that off near the end of the Let's Play.

Level 3: Bombs Away


Bombs Away is your first boss, and it's a plane that flies around and shoots at you.

Walk forward to start the boss battle. Charge up your laser at all times; it will do more damage to the big bosses just like it does to the level bosses that give you tokens. Stay still and do not move around; this will keep you from getting bombed with water balloons. When the plane flies far away before diving forward and shooting the machine gun, this is when you want to lock on to the boss and fire a fully charged-up laser. Three charged shots (six regular) will take this super-easy boss down. Your reward for beating this boss battle is another clip from the movie in addition to the next level.

Thursday, September 3, 2026

PrinceWatercress plays Toy Story 2: Buzz Lightyear to the Rescue (PS1) - Part 2 of 16


In this entry, we finish up the first level of the game. On to Level 2.


The basement is off to the side from the living room. Avoid the poisonous green goo as you jump around on dry land and get to Mr. Potato Head, who will give you the Cosmic Shield in exchange for his ear. While you cannot jump very high on the toxic goo, you can get to the wooden platform safely and then get on the boxes to explore the rest of the basement.

Pushing the boxes in the basement will allow you to reach a Pizza Planet token. In every level, there will always be one Pizza Planet token out in the open; thankfully, Rex will tell you about it if you find him. As for the zipline in the basement, it will take you to the fourth sheep.

The kitchen is near the basement entrance, just off to the side from the living room. The trash can will get you on the countertop if you push it; watch out for the hot water coming out of the pot on the stovetop. The fifth and final sheep will be on top of the cabinets near the sink and countertop; you'll need to push a scale off the top of another set of cabinets, then stomp on it to get to the sheep. Bo Peep will be on the table; you can either jump up the chair or climb up the broom to get to the top of the table. Talk to her with all five sheep collected to get a Pizza Planet token.

We're done, and if you talk to Rex at this point, he will tell you that you have all the tokens. On to Level 2!

When you exit a level, you'll see what you've collected. At the top, you'll see what the five tokens are. There is a Hamm token, a collectibles token, a race token, an out in the open token and a boss token, and the levels never stray from this formula. In the middle is the amount of coins you've collected for Hamm. At the bottom, you'll see which power-ups you've collected throughout the game. We have the Cosmic Shield, but we'll need the others to fully complete the game. You'll then be able to save your game before being taken to the world map. Left and Right will let you switch levels, while X lets you confirm and Triangle takes you back to the main menu.

Level 2: Andy's Neighborhood


When you start the level, the rescue mission begins. Buzz finally leaves the house and explore the neighborhood.

At the start, avoid the lawnmower; it will hurt you. You'll also see a bunch of molehills on the lawn. The hint cube will tell you that you'll make the soldier surrender if you stomp the molehills that he is near. Look for the stomp symbol and the fireworks to see where to stomp. With each stomp, you'll smoke out the molehills, and on the last one, you'll get a soldier to pop out so you can collect him. You'll also find Sarge on the stoop. He will ask you to find his five soldiers, and if you can do that, you'll get a Pizza Planet token.

When you leave the starting area, you'll come across a racetrack. The RC car will be waiting for you to race him again for another Pizza Planet token, and you'll also see a bunch of car enemies that look like Emperor Zerg. The car enemies require a charge shot to quickly destroy, and if you have the green laser, one shot will tear them to ribbons. Rex is near the huge tree and the swingset. Watch out for the slime coming down from the tree.

You can climb that tree by jumping up the swingset (and collecting your second soldier on the way up), then climbing the rope holding up the tire. Once you're in the tree, you'll meet Hamm almost immediately, so head over here when you need to hand him the coins for the Pizza Planet token. While on the tree, you'll need to jump on the green leafy parts that act as platforms. You may have to go up other parts of the tree, but the completely green parts are the ones to concentrate on. There is also a see-saw platform, and you'll need to get it to lean to one side by getting it to lean all the way to the side in order to continue on.

There is a rope off to the side when you're halfway up the tree. You'll want to double jump to it and grab it, because this will pull the rope down and give you a shortcut back up the tree. This is good, since you'll need to swing off some bars in order to get to the top of the tree, where you'll have to fight a Zurg kite for a Pizza Planet token. Charge up your laser and use the lock-on ability to hit the kite, then stay away as the kite lowers and spins around to hit you in retaliation. Thankfully, this is the whole battle, and once you beat the kite, you'll be able to get a Pizza Planet token.

The video ends with me getting the Pizza Planet token from Hamm, since I'm able to get back up to him.