Showing posts with label part 16. Show all posts

Thursday, September 17, 2026

PrinceWatercress plays Toy Story 2: Buzz Lightyear to the Rescue (PS1) - Part 16 of 16


In this entry, we take on the final boss battle. It's a bit underwhelming, but they couldn't make something up and they had to something. All's well that ends well, I guess.


Level 15: Final Showdown


Strangely, the loading screen says "Prospector Showdown." Interesting.

With all 50 tokens collected and all of the levels completed, it's time for the final battle. For the final boss, you'll be taking on three bosses - the prospector, the gunslinger and the blacksmith - all at the same time.

The gunslinger is the easiest to take care of. Run away from him and lock on to him from a distance, and shoot at him as you jump over the bullets he shoots. Make sure you charge your laser to do more damage, too.

Next, you'll want to take on the prospector while keeping the blacksmith away from you. Thankfully, the blacksmith moves around rather slowly. Run around him and keep pressing the spin button to damage him with the spin attack. As you do this, The Prospector will keep striking with his pickaxe, but he will keep missing.

Finally, there's the blacksmith. Run far away from the blacksmith when he strikes the ground, then round around in a big enough circle so that the energy wave doesn't hit you and you can run back to the blacksmith boss and hit him with a spin attack, then repeat the process until he goes down.

As the battle progresses, the plane - and the camera - will lean back and forth. Thankfully, it's not enough of a dealbreaker for this level to the point that it becomes harder to focus on what you need to do during the level. 

Once you defeat all three bosses, you'll save Woody and Jessie, you'll get an ending cutscene, and you'll roll credits on this game. You just beat Toy Story 2 for the PS1!

Saturday, January 31, 2026

PrinceWatercress plays Super Mario Odyssey - Part 16 of 92


Our adventure takes us not only into the Deep Woods, but also into the first of several technical problems in making this Let's Play possible. I'm amazed I managed to get this one done.


There is a "hidden" area in the eastern side of the kingdom known as the Deep Woods. To enter it, you'll need to get to the eastern side of the kingdom and leap into the bottomless pit. Instead of dying and losing ten coins, you'll end up in a new, much darker area. Here, you'll find a couple of Power Moons as well as the last nine Regional Coins.

The planters will provide a way out if you can throw a seed into them. To get a seed, you'll need to find the robot that produces one when you talk to it. It will be near the walls; just keep running around the Deep Woods until you find it.

If you see any glowing spots on the ground, you'll find gold mini-Goombas if you ground pound them...usually.

The T-Rex returns in this area. You'll need to get the the T-Rex's attention in order to get it to chase you, as this one is awake now...and it's angry! You'll then need to trick it into running into a solid wall. When that happens, you'll briefly stun the T-Rex. You can then throw your hat at it to possess it. You'll need to do this to complete the Dark Woods as well as the Wooded Kingdom. Also, keep in mind that if the screen shakes, the T-Rex is nearby, so keep that in mind.

Power Moons


28. Rolling Rock in the Deep Woods - There is a rock that you can kick in the southern end of the Deep Woods where the babbling brook ends, and if you kick it, it will start glowing. Breaking it fully reveals a Power Moon.

29. Glowing in the Deep Woods - There is a scarecrow near the babbling brook. If you throw your hat at it, you'll reveal a blue platform and a Power Moon. You don't have much of a hint as to where to go to get it, and your best bet for finding it is going in one particular direction and long jumping until you see it. This one can be a bit difficult, but it can definitely be done, and if you're fast enough and you're able to figure out where you need to go, you can get this. (I'm not really sure how best to explain how to collect this one, so I really hope this helps.)

30. Past the Peculiar Pipes - In the eastern end of the Deep Woods, you'll see a pipe in the wall. You'll need to enter a series of pipes in the proper order, which is different each time you play, to reach the Power Moon at the end.

31. By the Babbling Brook in the Deep Woods - For this one, you'll need to stun and possess the T-Rex in the forest. There is a block near where the river begins, and if you run into it with the T-Rex, you'll uncover a glowing spot on the ground. Ground pounding this glowing spot reveals a Power Moon.

32. The Hard Rock in Deep Woods - You'll need the T-Rex for this one. This time, you'll need to find where the river ends, then break the nearby block with the T-Rex and  ground pound the glowing spot that is revealed for a Power Moon.

33. A Treasure Made from Coins - There is a Coin Coffer enemy on a small hill. Possess it, then take it back to the widest part of the brook. There is a sapling there; spit 500 coins at it as the Moneybags in order to grow the plant to full height and reveal a Power Moon. You'll need to climb a nearby tree to the top and then jump off to get the Moon.

34. Beneath the Roots of the Moving Tree - In the eastern end of the Deep Woods, there is a pine tree with a green capture point on the top of it. Throw your hat at it, then move the tree out of the way to find a glowing spot. Ground pound that glowing spot to find a Power Moon.

35. Deep Woods Treasure Trap - There is a really big tree near the southern end, close to where you can find the T-Rex. If you circle around it, you'll find a pipe leading inside the tree. You'll end up in front of three treasure chests to throw your cap at. The correct order to open them in is middle, left, and right. Doing it right will give you a Power Moon.

36. Exploring for Treasure - At the north end, you'll need to find where the babbling brook begins. There will be a locked door and a robot. Talk to the robot while equipped with the Explorer Hat and the Explorer Outfit, and you'll accomplish the prerequisite of being dressed like an explorer in order to get in. To get these two outfit pieces, you'll need to spend the Regional Coins that you find here at the Crazy Cap shop near the Odyssey. Inside the door is a Power Moon in a treasure chest. 

Regional Coins


Sunday, December 7, 2025

PrinceWatercress plays Brave Fencer Musashi - Part 16 of 33


We take on the last area of the dungeon beneath the restaurant, then find out what all those ghouls were released for: an ugly belt.


Now for the last area, which is opposite the door we entered last time. Jump on the floating platforms and watch where they go so you don't fall into the abyss. You'll be dealing with a lot of Vambees here, too.

You'll see some puzzles where you have to move a red block. Move it to the glowing red eye to continue on. Thankfully, the eye block puzzles aren't that hard.

The white cubes will either run into you or crush you. You obviously want to avoid them.

Jump down and left on that platform that slowly rises up and down.

After that part, you'll enter a maze area. Assimilate the nearby ghost to get the temporary Sublime ability. You'll have an out-of-body experience where Musashi's soul jumps out of his body, allowing you to fly through the maze and memorize the path through this maze, because once you return back to your body (either after taking damage or after enough time has passed), the room will get dark and those dark brown squares in-between the lighter ones won't be there. When I played through this game, I didn't even know you could do this, so I just jumped from one platform to the next and hoped I landed on the other side.

After crossing the upper road in the room where you started, you'll reach another maze. The Bincho Field here contains Carpenter Cubey. The chest here contains a Bedpan, but you won't find out it's a Bedpan until you appraise the item inside. Take it and get the cash.

In the next room, you'll be dropping down in a darkened area, trying not to hit any spikes. Luckily, this part is even easier than the mazes.

You'll soon reach another maze. There is an area where you drop down. Take it and you'll save Knight Chucks, who will have another technique for you if rescue him from the Bincho Field. You'll then be able to teleport to the end of the maze after you rescue him. The chest you'll find in the maze on the way here contains a Helmet, which is going to be another useless item.

Now break the eye and get outta here!

Now that you've smashed all four eyes, you can now head to the door behind Mannick.

When you return to the eye door, you'll find out Mannick is missing. Inside the door is a treasure box, which is the reason why Mannick bought the restaurant but also let the ghouls out. When he opens the treasure box, he finds an ugly belt. After chastising Mannick for putting the village in danger and especially for putting Hilda and her son Tim through hell, Mannick promises to change his ways and hands Musashi the UglyBelt.

But first, head back to the castle. Talk to KnightB (Knight Lardwick) to learn Crosswise Cut, assuming you haven't already. Tap Triangle, then Square for a double sword attack. After you've talked to Knight Lardwick, talk to KnightC (Knight Chucks). You'll learn Desperado Attack. Press Square, Triangle, Square, and Triangle to do a devastating attack. 

Wednesday, November 5, 2025

PrinceWatercress plays Legacy of Kain: Soul Reaver - Part 16 of 28


In this entry, we explore the human citadel off to the side near the Pool of the Dead.


0:51 - Now that we can be in the water without being phased out of the material realm, we can take this path to a citadel full of humans. Be ready to fight some humans push some boxes around, and take a look around on the way there.

(For those curious, falling into the Pool of the Dead will still kill you, and you'll end up back in front of the Exalted One if you do.) 

3:43 - Welcome to the citadel. You can walk up to humans and grab them, then hold down Circle to suck out their life force. You can also kill them like you can the monsters, but where's the fun in that?

Also, regarding the flamethrower soldiers, you can wait for them to stop firing before giving them a beatdown. 

5:22 - This path leads to something cool. There will be some stairs leading upwards; take them to the teleporter room.

7:47 - Time to go underwater. Blow up the grate that is in your way, then swim past the fans (which cannot damage you), and look for a certain opening. When you find one of Rahab's brethren, you're on the right track. Climb the wall, and you'll get part of a health upgrade at the top.

9:17 - That's not all. You can glide downwards to another area, which contains another statue. Enter the door to the right of the statue, follow the path and push the block in the wall down the waterfall to find...

11:27 - ...this area. Push the block into the gap into the floor to flood the area. The water will enter the vent. Go back to the statue, and you'll get the Water Glyph, which gives you more magic points and the ability to drown all on-screen enemies and stun them for a fatal blow.

16:10 - It's time to go in a different direction. There is another door near the flamethrower guy, and if you go through it and follow the path, you'll find another watery area. Glide to the wheel and turn it to drain the water here.

Saturday, September 13, 2025

PrinceWatercress plays Woody Woodpecker in Crazy Castle 5 - Part 16 of 18


Never thought I'd lose a life to a suddenly-(not-)appearing invisible enemy, but here we are.

Fairy Stage 1


The Pinocchio enemies will chase after you, as will the pink bears. The UFO's will be the standard flying enemy that you'll have to deal with around here. Start making it a habit to run around a lot and paying attention to get the slip on enemies.

You will not have a lot of room to maneuver on the cakes, so you'll need to be very careful.

You'll eventually have to get into the robot, get to the door at the top and flip the switch. This will allows you to go up to the top of the left cake, as pulling the switch will cause the robot to switch sides.

The fairy power-up turns you into a robot, and you can stun an enemy in front of you as the robots. Sadly, you won't be able to climb ladders as the robot.

Fairy Stage 2


You'll be told to "press the nose to bridge the gap. You'll have to push the nose by walking into it to make bridges to other platforms. These bridges won't be up for long, so you'd better be ready to run to the other side. That's rough, since you 

The red boxes with the orange lids and the yellow stars are trampolines, but you'll need to leap onto them to be launched quite high into the air.

Friday, June 13, 2025

PrinceWatercress plays Math Rescue - Part 16 of 19


Time to make some more progress in Episode 3...and this is where the level design starts getting messy again.


Level 8: Lava Castle


You'll get bonus points off a green truck at the start. There is also a ceiling to jump through for a secret area left of the start.

Level 9: Return to Space


Yep, it's back to platforming and maze-like level design again. I want to say it's not too bad, but it's too easy to hit the wrong number and there are Gruzzles everywhere.

Level 10: Space Attack!


Be careful on the pipe platforms, as you can accidentally drop through them by pressing Down on the arrow keys.

Follow the pipes when you see all the "Danger" signs, so you don't accidentally take a leap (or drop) of faith for the "9".

Thursday, May 22, 2025

PrinceWatercress plays The Grinch (PS1) - Part 16 of 22


The box bounce part was absolutely annoying. But just wait until I find out what the Sonic Scarecrow is for!


As long as you're in the Scoutmaster uniform, the scouts in the second section won't bother you. Of course, other adults involved in Scouting won't be so kind.

Pushing the rock off the cliff gives you a piece of the blueprint for the Marine Mobile.

The skunk will spray at you if you get too close. The bug zapper will zap you if get too close, but if a bug is chasing you around, it will zap the bug. The bugs do damage you if they see you and catch up to you, which can suck.

The boats will be in this second section, and you'll need something to drill a hole into them.

When Max goes through the hole in the blue building, he will knock some paint over, and he will look like a skunk. Find the skunk as Max, and you'll get its attention. Lead the skunk to the Scoutmaster blocking the dark blue building. This will scare the Scoutmaster off, and you can get what was behind him: two boats, a Marine Mobile blueprint piece behind the building and the fourth and last Heart of Stone in the game.

Watch out for the moose, as they will charge at you if you get close enough to them.

This part. This part right here. You're forced to jump on all of these in order to break them, as the Rotten Egg Launcher doesn't do anything, and if you fall into the water from point A to point B, you have to keep going until you finally break them all to get credit for them. If you think that's bad, the next video has something even worse.

For this part, you'll want to follow the groundhog around and pancake the groundhog when it comes out of the ground. By doing this, you'll get back one of the giftboxes that the groundhog stole, which you'll need to pancake to get credit for. The more you pancake the groundhog, the faster it goes. When you pancake the groundhog enough times, you'll get all the presents that it stole.

Above where the groundhog was is a red building. Next to that building is the Sonic Scarecrow, which is the even worse thing in the next video that I mentioned while talking about the box bouncing part that frustrated me to no end. Inside the red building is the drill, and you'll need that to drill holes in the boats to complete one of the missions here.

Remember the climbable wall near the start? Turns out there is a rope that you can grab onto with the help of the Rocket Spring, and climbing it all the way to the left will take you to a giftbox that you can destroy with the rope spin. Dropping down at the end takes you to a tent, a Marine Mobile blueprint piece and a giftbox.

At the North Shore, there is a path leading to the Mayor's Villa. The branches near the entrance lead to a giftbox. As for the path to the Villa, there are new things that you can do. The cranks can be jumped into, and spinning readies the big log trap. There is a guy on the stump, and if you crank up the trap to back up the log, shoot the beehive above him and then hit the nearby button, you'll knock the guy into the water. We'll have to do this for something later...

The scouts in the area have slingshots that they will shoot at you with if you get close enough to them while not in the scouting uniform. 

There's a platform with rumbling rocks on it. Hmmm...

There's a weight involving a boat, but I don't how to use it...yet.

There are also branches to swing on near the waterfall, and there are also giftboxes in that area.


Thursday, February 13, 2025

PrinceWatercress plays Wario Land II - Part 16 of 51


The first stage in the town starts with us on a speeding train. We'll have to stop it to get off safely and continue chasing Captain Syrup.


Chapter 4: In Town

Story 1: Stop that train!


You'll need to get to the engine and stop the train by tackling the switch from the left side, but before you can do that, you'll have to get from the back of the train to the front. There are openings in the ceiling where you can move on the top of the train, and while you're up there, you'll be pushed to the left. Mega Man never had this problem. The main enemy you'll be dealing with are the birds that will dart out at you if you get close enough to them, but if you can time your movements, you can jump off them as they attack and get to other train cars. For some reason, you cannot do the ground pound while on the top of the train. To get to the treasure room, you'll need to backtrack to the left near the end at the top of the train and drop down one of the openings leading back down to the train that you would not have been able to reach otherwise. Beating the mini-game will net you an ocarina.

Sunday, November 24, 2024

PrinceWatercress plays Great Greed - Part 16 of 28


In this entry, our adventures in the nation of Escargot begin.


From the village of Fly Port, head to the west and follow the coastline as you do. You'll soon find a lone tree; walk into it and you'll enter the cape. At the tree is a man in a cloak named Cadmium, who is the commander of Bio-Haz's Hunter group. He will warn you that you are target of his subordinates, and gives you the choice of either obeying Bio-Haz or defeating him, then he will tell you to come to the cave in the northwest when you make your decision. Cadmium also gives you the Cool Mint leaves so you can travel across the desert, then he leaves.

There is a third enemy here that I managed to come across between this entry and the last: Bug Boy. He can cast Confuse, but that is the least of your worries with him. Beating Bug Boy gives you 118 Gold and 155 Experience.

From the cape, head north and into the desert, and follow the mountains. You'll find Torte Village. At the magic shop, you can purchase Guard to increase your defense at the cost of 10 MP, and you can also get Flame 4, which is the strongest fire spell in the game. At the weapon shop, get the BigCut and the Ceramic Shield. If you don't have the Alloy armor, go ahead and get the Ceramic Armor.

The people of Torte Village will tell you that the air is polluted and that a great wizard has returned. As a matter of fact, everyone here is a wizard. There is a building in the northwest corner that looks different from all of the rest, but you won't be able to do anything there...yet.

Head to the big building all the way on the north end to advance the plot. Two women will show up and lead you to "Grandmother." "Grandmother" is actually Microwave. She will tell you that Citrus will be fine, and that she also knows about Cadmium coming after you. She then joins your party for a brief time before telling you to head to the storage house to get the Zap 1 spell, and her ability to cast spells on enemies in the background can be pretty helpful in battle. The storage house is the aforementioned building in the northwest corner of town. It's time to head in.


Now that you have Microwave in your party, you'll be able to enter this dungeon. The person at the stairs will warn you that the magical warping device is out of order and that monsters have taken over the dungeon.

There are some new enemies in this area besides the ones that you've met so far in this country. The Konklone is weak against Flame magic and Strong against Bolt magic, and can cast Confuse and Bolt 2. It gives 134 Gold and 283 Experience when defeated. The Beano is weak against Flame magic and strong against Freeze magic, and can also cast Stick, which can cause you to be stuck to the floor and unable to move for a short time. It gives 130 Gold and 306 Experience upon defeat, and has a chance of dropping a Carbon Helmet. This is good if you have the Ceramic Helmet, but don't have the Chrome Helmet.

If you see plain floor that doesn't look like brickwork in the center of a room, walk into it. You'll change where the door is among the four walls in a clockwise fashion. Some doors are one way, so you'll need to watch where you're going.

In the first room with three chests, only open the one in the center. That one contains a Med 3-10 scroll; the other two contain Trash.

In the second room with three chests, only open the left and center chests; the right chest contains Trash. The Stamp may be worthless, but at least you can sell it without losing money.

The Clothes are the weakest armor in the game. You're better off tossing them or selling them for what little Gold they are worth.

You'll eventually find Zap 1 in a chest. Zap 1 has a random chance of instantly killing an enemy upon casting, and it does not always work. From here, you can either walk out the long way or use Escape to instantly leave the dungeon.

Back in the big house at the north end of Torte Village, the guy near the bookshelves will tell you that the HP of the guard at the north cave are endless. Keep that in mind for later.

Saturday, September 14, 2024

PrinceWatercress plays Chrono Trigger (Super NES) - Part 16 of 70


Our exploration of the southern continent in the Middle Ages shows us an old town that doesn't exist in the present day and reunites us with Frog.


In the southern continent, there are a ton of places you can go to.

At the residence on the north end of Dorino Village, you can talk to the old man more than once if you have the Naga-ette Bromide from the Cathedral (which you can still get if you haven't already). He will notice the Bromide, and if you give it to him, you can open the dresser to get a Magic Tab.

At the Dorino Inn, you'll find out that the enemies with hammers in the nearby Denadoro Mountains can be disarmed if you use Fire magic on them to burn their hammers. You'll also find out that the hero that everyone is talking about is in Porre Village to the south.

If you go to the Elder's House in Dorino, the town chief will be talking to Toma, telling him to find the mythical Rainbow Shell. Toma will head to the Inn, and if you talk to him there and pay his tab, you'll find out that some creepy, dangerous frogs have taken over the forest to the south.

Talking to the chief afterwards will lead to learning that the Rainbow Shell allows for the creation of some reflective armor.

On the north end of the southern continent is the Denadoro Mountain, which we'll head to later. At the eastern peninsula is the Magic Cave, and while we can go there, we can't do anything there yet. Between Dorino, the mountains and the cave is Fiona's Villa, where Fiona is waiting for her husband Marcos to come back from the war so she can work on saving the forest around her home. You can find two Mid Ethers in the nearby chests.

The market in Dorino has the usual healing items, but the market in Porre to the south has Gold Suit and Berets, so be ready to buy those for whoever needs them and sell off your old armor.

At the Elder's House in Porre, the woman at the counter will be wanting some Jerky. Keep her in mind for later. You'll also find out from the village chief that the Magic Cave lies under a mountain east of Denadoro, but you won't be able to go in there for a little while.

Tata's House is at the south end, and you'll find out that some kid is in possession of the Hero's Medal there.

If you head to the Cafe, you'll find Toma again. Pay his tab, and you'll find out that he has found out the Rainbow Shell is on an island, but he has no idea which island. Meanwhile, he has spent all of the money that the chief of Dorino Village has given him. Meanwhile, the old man at the far right will tell you that Frog has been here.


Northwest of Porre is the Cursed Woods. The Gnawers are more powerful versions of the Gnashers from the Cathedral, while the T'Poles are frog enemies that can hit you with a rain attack and counterattack by trying to flatten you if your attack doesn't kill them.

Interestingly, counterattacks cannot trigger counterattacks, so if anyone is equipped with the Rage Band, they won't get a free strike in if they're hit with the T'Pole counterattack.

Along the way to the green bush to the north, you can find a Mid Tonic and a Shelter. You'll eventually see the green bush at the north end shaking, and if you walk into it from the north end, you'll find Frog's house. Frog will show up happy to see you, but when you talk to him, he will find out that the king has been injured. Frog, once again having confidence issues much like he did after he left your party the first time, will start having confidence issues again, feeling that he can do nothing for the king and that he is no hero. You're done here...for now.

Saturday, June 8, 2024

PrinceWatercress plays Ratchet and Clank: Going Commando - Part 16 of 54


Crystal collecting complete! Onwards!

First | Previous | Next | End

2:49 - YOU'RE NOT SUPPOSED TO BE UP THERE. YOU COME DOWN RIGHT NOW, MISTER.

15:40 - Welp, glad I gave context to my future self, because I was confused here making this blog entry.

24:23 - We get our 100th crystal and a skill point.

Skill Points:

Heal Your Chi: Collect all 100 crystals in the desert in Tabora.

Controls:

As Ratchet:

Control Pad/Left Analog Stick: move
Right analog stick: move camera

X:
  • Jump and double jump (hold button after double jump to use Heli-Pack or Thruster Pack)
  • Wall jump (near certain walls)
Square: strike with wrench
Circle: pull out/shoot currently equipped gun
Triangle: 
  • quick select (hold and use in conjunction with Control Pad or left stick to switch guns; menu can be customized in Quick Select on the pause menu
  • double tap to switch between two most recently equipped weapons/items
  • interrupt on-screen messages

Select: open map
Start: Pause menu
  • Control Pad: select option
  • X: confirm option choice

L1:
  • center camera behind Ratchet (tap button to center)
  • first-person view (hold button and use left stick or D-Pad to look around; let go of L1 to move camera back behind Ratchet)
  • Square: wrench boomerang
  • Circle: fire gun
  • R1/R2: zoom in and out (Pulse Rifle only)
L2/R2: strafe (hold while moving)
L3: see health and Bolt totals
R1/R2: crouch (hold down)
  • Square: wrench boomerang
  • X: high jump
    • long jump (hold crouch button and jump while running to perform)
R3: open map

In water:
  • Square: dive and descend
  • X: surface and ascend
  • R1: accelerate with Hydro-Pack

As Clank:

Control Pad/Left Analog Stick: move
Right analog stick: move camera

When hanging off platforms:
  • Control Pad/Left Analog Stick: move
  • Forward+X: vault up
  • Back+X: drop down

Square: punch
X: Jump (press and hold in the middle of a jump to glide with Heli-Pack)
Triangle: command menu (hold and use in conjunction with Control Pad or left analog stick to choose commands)

Friday, May 17, 2024

DeceasedCrab plays Earthbound - Part 16 of 53


In this entry, we fight off the zombies' master, then head towards Saturn Valley.


The Broken Air Gun, when fixed, becomes the Magnum Air Gun. If you can fix it before you get to Threed or if you can fix it at this point in the game, equip it. It's better for Jeff than the Toy Air Gun.

Be sure to buy some Bottle Rockets for Jeff before entering the underground path.

The Smilin' Sam is a re-color of the Handsome Tom, and is just as dangerous. 

The Silver Bracelet is better than the Copper Bracelet, so give it to whoever has the lowest defense.

You'll eventually face a Mini-Barf. It will almost consider you a friend for having Fly Honey, but it will remind you that they are the mortal enemy of humankind. Aside from the belching sounds that you'll hear throughout the battle, the stink breath will cause your party to not stop crying. Kill it with Fire; it may not do a lot, but it will hurt more than anything else. Bottle Rockets work wonders, too. When you beat the Mini-Barf, it will tell you that it wanted to slurp your Fly Honey up and that Master Belch also loved Fly Honey before dying.

At Level 24, Ness will learn Healing Beta, which cures Poison. At Level 19, Paula will learn Fire Beta, which will hit multiple enemies with fire damage.


The other side of the underground path leads to Grapefruit Falls. The man outside will sell you foods for a small fee if you need any. He will also tell you that Saturn Valley is up ahead.

The brown crocodile is a Plain Crocodile. The green frog is an Armored Frog. The zombie here is a Farm Zombie. At this point, Rockin' Beta can take out the frogs and zombies if you're powerful enough.

You'll find a cave halfway to the waterfall to the north, and the path leads to Saturn Valley. The Violent Roaches are not very powerful.


The Mr. Saturns here speak simply, with a very weird font. At least you can heal up, save your game and withdraw and deposit money here. The Mr. Saturn in the trash can is Dr. Saturn, and he can completely heal you for free.

The Broken Iron will become a Slime Generator when fixed. It can stop enemies from moving, effectively stunning them, and can be used infinitely.

Monday, May 6, 2024

PrinceWatercress plays Drill Dozer - Part 16 of 28


It's time to play the rest of the secret areas, but before I do...let's check out how to get chips!


When you beat the main game, you can see how many treasures you've collected in all the levels. When you collect all the treasures, you'll have fully completed the game.

The Mega Bit and the rest of the maps will be available in the shop once you beat the game. The Mega Bit will let you break through the steel gray blocks that have been blocking you from getting cool stuff throughout the game.

As for how I got a ton of bolts, I kept playing through Area 6-1, as that is a great place to get some bolts before you reach the engine for the drill missile. I do a playthrough of this level, and this time, I play it better.

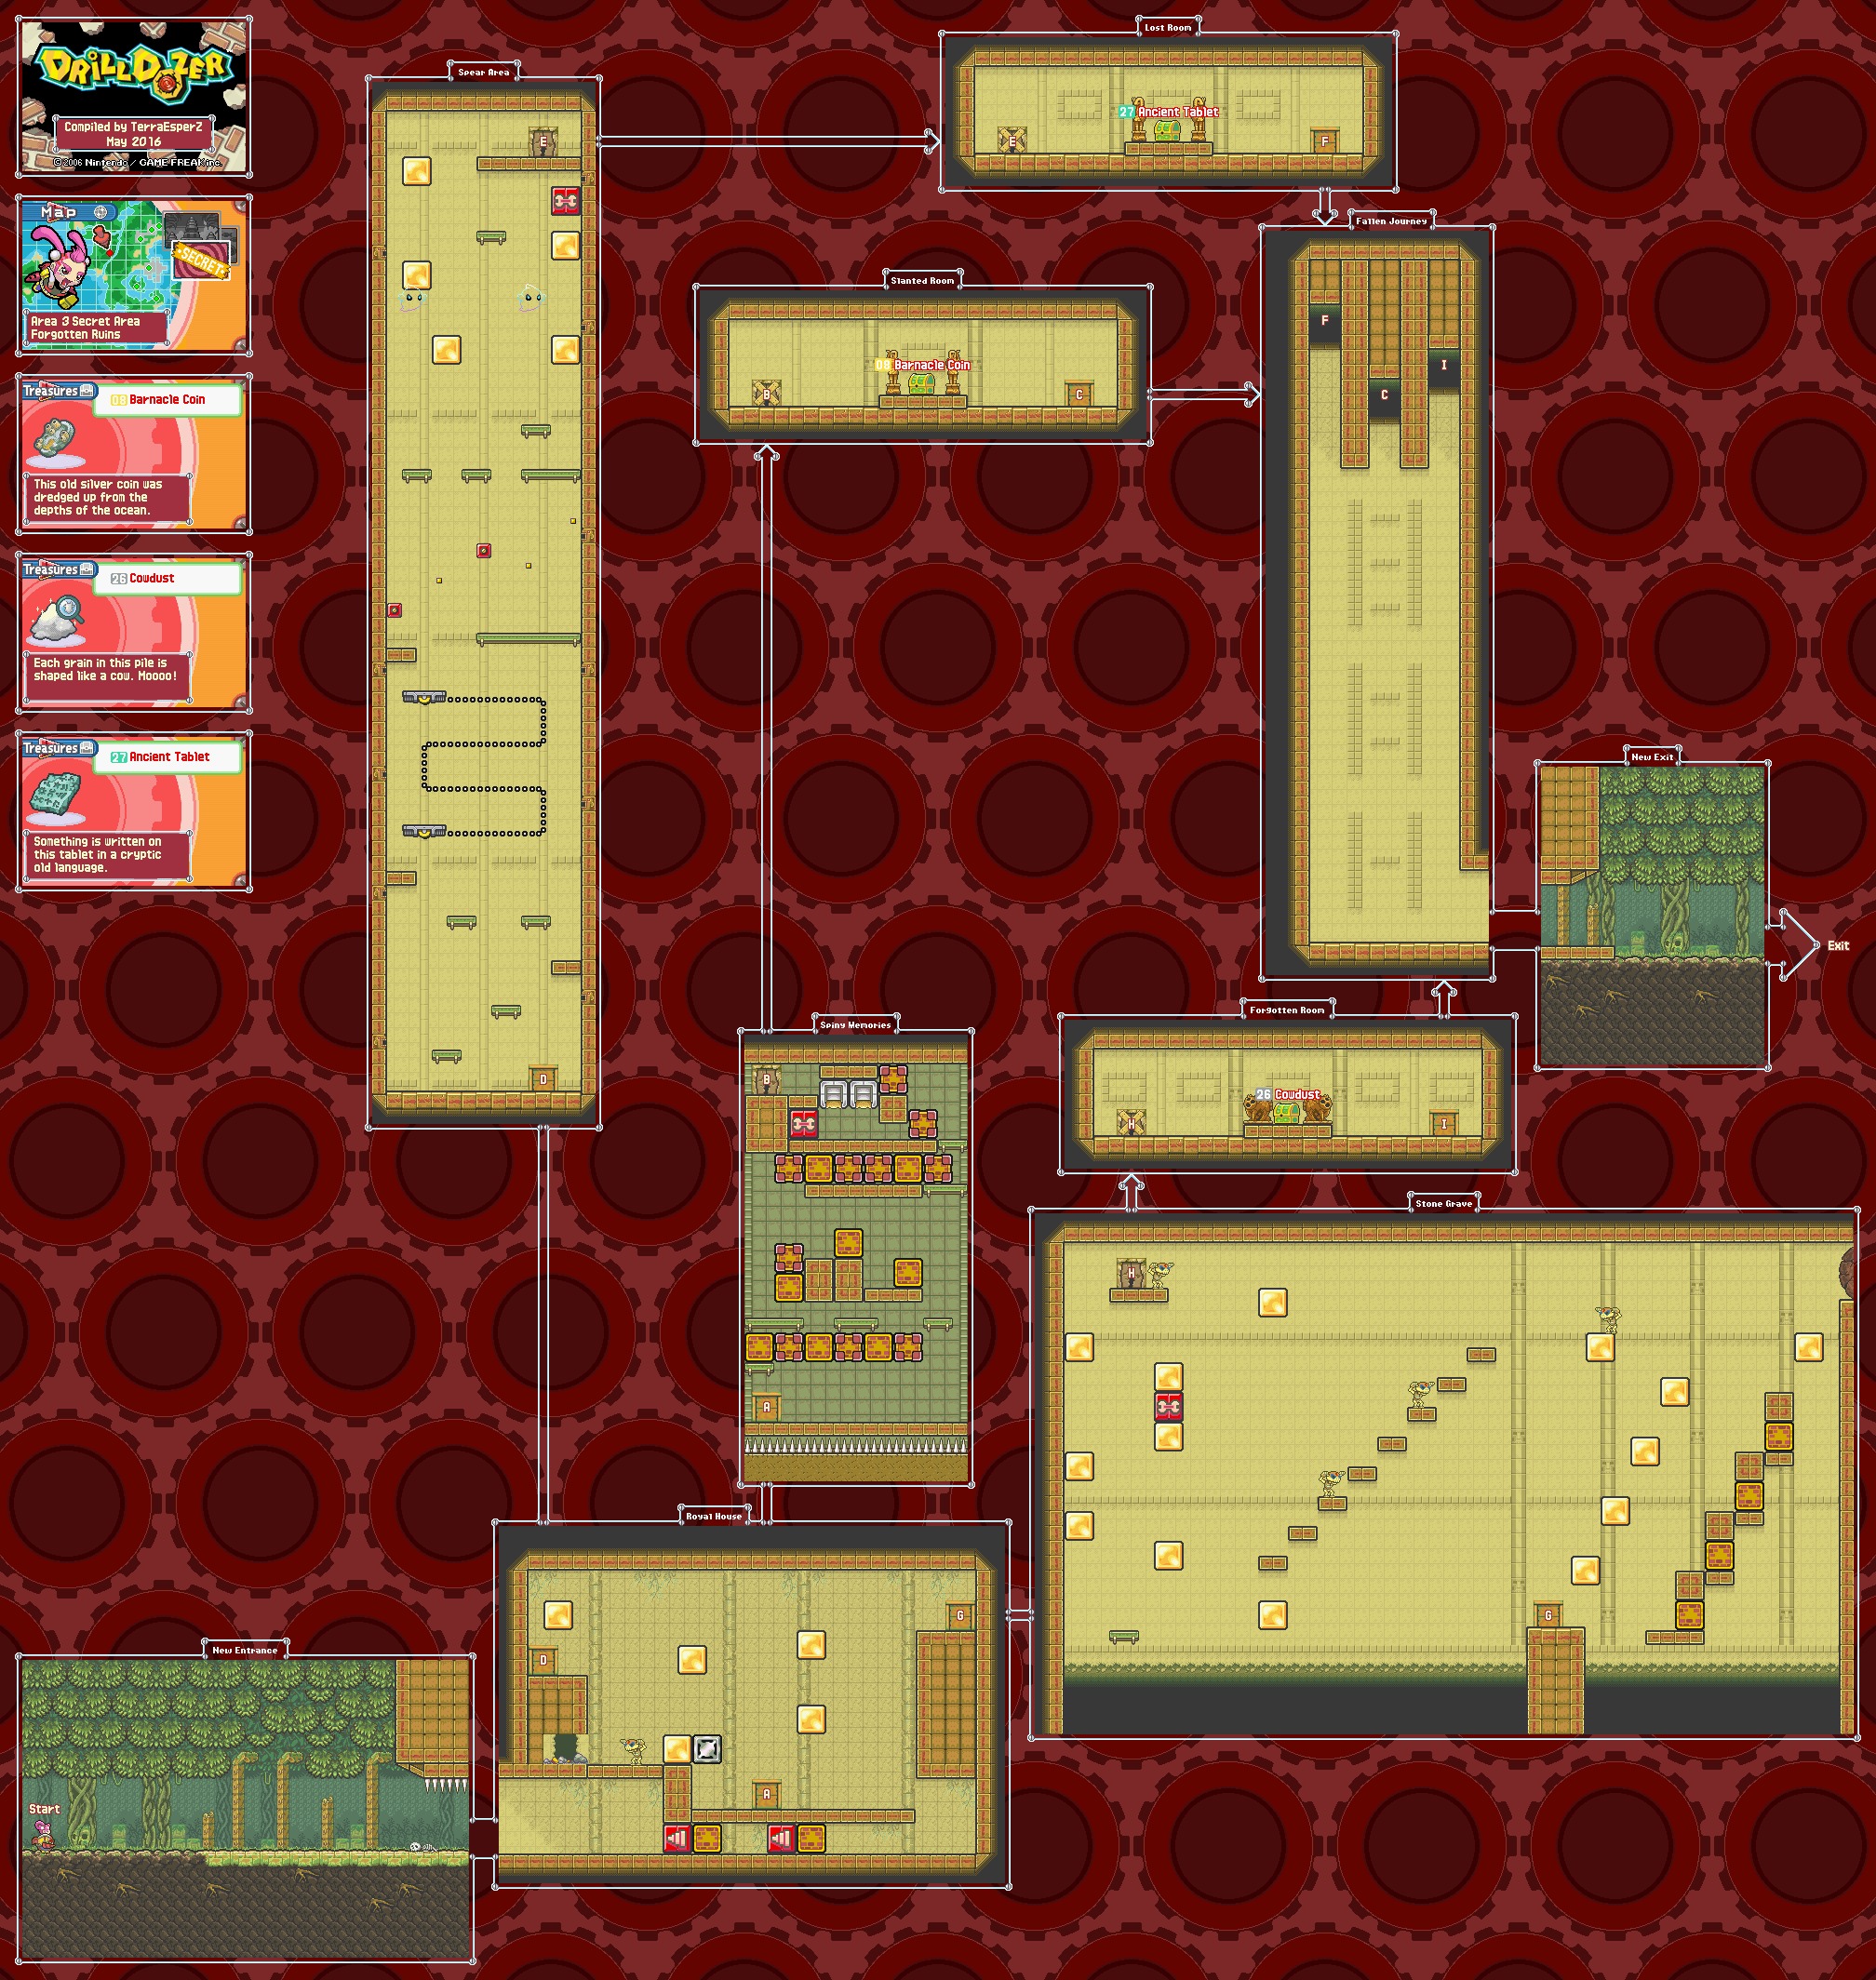
Area 3 Secret Area: Forgotten Ruins


When you enter the level, you'll be able to get third gear right out of the gate, which will make things easier.

There are three routes, and we'll take all of them. For this video, we will be entering the first door we see as soon as we enter the ruins.

For the first part, you're racing against the spikes again, and you'll need to carefully make a path so that you can get to the top and enter the door there. If it's in your way, you'll need to destroy it. There are a few blocks that you won't need to destroy, either because said blocks make it easier to get somewhere or because it's not in your way as you get to the top.

When you enter the door at the top, you'll be able to get the Barnacle Coin.

Wednesday, March 13, 2024

PrinceWatercress plays Ka-Blooey - Part 16 of 25


Not only do the levels start getting big again, but they also get a little harder again. Also, we get to see Level 83, which was removed from the game when it was brought to Nintendo Switch Online (due to the game not being released officially in Europe until then).


Level 81

Hit the center left switch (referred to here as the "left switch"). Move the nearby small and medium bombs two tiles to the right. Detonate the small bomb north of the center tile. Move the small bomb on the north slot tiles up one, then detonate the small bomb on the regular tile. Hit the upper left switch (referred to here as the "up switch"). Detonate the small and medium bombs moved near the "left switch", then hit the lower left switch (referred to here as the "down switch"). Move the medium bombs on the east slot tiles one tile up, then detonate the small bomb on the regular tile and and hit the lower right switch (referred to here as the "right switch"). Place the medium bomb two tiles right of the medium bomb near the temple, then place another medium bomb two tiles north of the previously placed medium bomb near the "right switch," and place a third medium bomb north of the mine in the lower right corner. Place the remaining small bombs north of the medium bomb near the mine. Detonate the middle small bomb and step to the right.

Level 82

Watch for the enemy as you do all this. Move the medium bomb all the way to the left. Place one small bomb near each mine. Place a medium bomb two tiles left from the innermost mine in the center spiral. Place one small bomb south of the medium bomb. With the three small bombs on the left, detonate the upper one first, then the lower one, then the middle one. When the enemy passes by, detonate the small bomb you placed south of the medium bomb to destroy the enemy and two of the mines. From here, make your way backwards around the stage and detonate the small bombs you placed next to all the mines. Detonate the final small bomb you placed near the mine at the start, then detonate the small aerial bomb. Detonate the small bomb next to the medium bomb in the center of the stage, then detonate the remaining small bomb.

Level 83

This level was censored out of the Nintendo Switch Online version of the game, which was the game's first official release in Europe (where it had already been on the home micros under its original name Bombuzal, as the slot tiles made the shape of a swastika. On the cartridge versions for both Super Nintendo and Super Famicom, this level remains intact, but if you play your way to Level 83 or input the password for it on Nintendo Switch Online (NBJL, as it is the American version that is on the service), you'll be kicked forward to Level 84.

Place the medium aerial bombs on the corners, the large aerial bomb in the center, and the small aerial on the bottom-most center tile. Detonate the small aerial bomb, then step to the right.

Level 84

Go left three times. Detonate the swell bomb when it is small. Go right, down, then left. Send the red guy into the mine on the right. Go down twice, then left into the teleporter. Detonate the small bomb and move up, hit the switch and enter the nearby (left) teleporter in the lower left corner. Hit switch in the upper left corner, then detonate the bomb. Go back to where the red guy was and place the small bomb on the slot tiles to the south up one tile. Hit the nearby switch twice to summon the red guy and simultaneously get rid of the bomb. Go back to the right teleporter in the lower right corner. On the way, detonate the small bomb, hit the switch in the upper left corner, then get back into the right teleporter. Hit the nearby switch again, then enter the left teleporter in the lower right corner. Send red guy to the medium aerial in the upper left corner, then take the right teleporter in the lower left corner again. Go right across the ice. Make a small-medium-large line in the square of slot tile - large in the upper left corner, medium in the lower left corner, and small in the lower right corner. Go back across the ice to the left teleporter in the lower left corner and enter that teleporter. Detonate the last bomb and move up.

Level 85

Go right two times. Detonate. Go down, left, left, then down. Detonate. Go right three times, then up one time. Detonate. Go left three times, then up one time. Detonate. Go left, then down two times. Detonate. Go down, right three times, up, then right. Detonate. Go down two times, then left. Detonate. Go left four times. Detonate. Go up two times, left, then down. Go the last small bomb and detonate it, then move up.

Level 86

Detonate the small aerial bomb in the lower right corner, then move up or left. This gets rid of all the bombs and the tiles will spell "C+VG," a reference to Computer and Video Games Magazine in the UK.

Tuesday, December 26, 2023

KuuImpact plays Superman (NES) - Part 16 of 17


This is not meant to be a complete set of notes, nor does it show everything off. This did, however, get me in the right direction concerning this game. When I play through this myself (which I will eventually do), I'll show off a lot more.

It's now time to head to Freedom Island, which is the one place in the entire game that we have yet to go to.


When you go down the dig point at Metropolis Park with Super Spin, use your X-Ray Vision to see the enemies before going down the first ladder you see. Keep using X-Ray Vision at every screen. Go left and go down the ladder, then head right and head down the first ladder you see. Go left, then go down the next ladder. Head right, then go up the next ladder you see. From here, head left (right is a dead end), jump over the water, then go up the ladder. Head right from the ladder and go up the next ladder you see, then head right again and go up the next ladder. When you beat up the purple ghost in this room, it will tell you that their boss is waiting for them at Freedom Island.

Go back down the ladder, then head left and go down the next ladder. Head all the way to the left and go up the ladder, then go right and go up the ladder. Finally, head left and jump up the opening to end up back in the park.

Freedom Island is all the way to the west. Head to the building west of Metropolis Park to farm up on pick-ups and health, because you're going to need them. Since there is a phone booth near the building, you can easily do both here.

Monday, October 23, 2023

Jerry Martin plays Strong Bad's Cool Game For Attractive People - Part 16 of 53


In this entry, we spend time at the Homsar Reservation. Hilarity ensues.


If you use the Fake Sword on Strong Sad while at the Homsar Reservation, you can make fun of him. (You must do this before taking the Homsar Reservation over.) If you use the Tuning Fork on Strong Sad while there, you can make fun of him again. (You must do this before using the tuning fork for its intended purpose.)

If you click on the nearby mysterious bush, you can find the Homsar Reservation flag. You can then light the bush on fire with the lighter.

If you talk to Strong Sad, Strong Sad will mention that he drank some of the water. Mention the cold one, and he will mention it again. You then get a new dialogue option: the thermometer. Click on it, and Strong Sad will mention he might be getting sick and coming down with acute pretendicitis. Use the lighter on the first aid kit, and Strong Bad will warm up the thermometer. Strong Sad will take his temperature and get a false positive, and think he is coming down with something after being so hot that his skin should melt off. Use the mechanical Strong Bad doll on Strong Sad, and he will think he has the chills. 

Head to the right and use the metal detector near the cave painting of the cinderblock and the mailbox. You'll get the Alien paper for the Teen Girl Squad comic.

Talk to Homsar. Strong Bad will mention that he needs to get through the Homsar Reservation, but he gets the feeling that Homsar is not very willing. Click the picture of Strong Bad with the hat, and Strong Bad will try to speak Homsar's language. Strong Sad will not understand what is being said, and think that he is sick again. He will run away, then come back with his pretendix in a jar. As it turns out, they have subsidized health care in the Homsar Reservation. Go figure. You can now take the "organ in a jar," much to the chagrin of Strong Sad.

From here, head to Concession-stan. If you walk around Bubs, you'll be at the back of the concession stand. Click on the door to knock on it, and you'll find out that the back of the concession stand is a black market where you can buy weapons, artifacts and organs. Give Bubs the organ in a jar, and Bubs will be willing to trade you for a broken piece of an old pot.

Head back to the Homsar Reservation. Use the power strip on the mysterious pylon, and a yellow flash of light will be produced. Throw the tuning fork inside to get another flash of light. Finally, throw the three-ring binder inside, as well as the pottery shard. By throwing these four things inside the pylon, Strong Bad will start speaking in Homsar's language, and it will be obvious to anyone but him.

If you click on Homsar now, you'll finally be able to understand everything he is saying. From here, you can ask Homsar questions. Click the Strong Badia flag, and Strong Bad will ask if Homsar wants to join Strong Badia. Homsar will ask why his people should risk open war for Strong Bad and his considerable style. Strong Bad will explain - in Homsar's language, much to Strong Sad's confusion - then Homsar will join Strong Badia before joking around with him. He then performs the ancient sacred ceremony along with Strong Sad, and the two of them cause an earthquake that causes the pylon to shoot out of the ground and the cave to open. With this, the Homsar Reservation will be conquered as Homsar, Strong Sad and Strong Bad enter the cave.

OUTFITS:
- Eye Patch: Inside cereal box in kitchen
- Camo Pants: Inside dryer
- Strong Badia Shirt: Use Black Metal Detector just outside Strong Badia.

CALLING STRONG SAD NAMES:
- Talk to Strong Sad (Before escaping)
- Talk to Strong Sad about fence twice (Before escaping)
- Examine Shower (Before escaping)
- Use Pillow on Strong Sad (Before using on statue)
- Use the Fake Sword on Strong Sad (Before taking over Bleak House)
- Talk to Strong Sad about Strong Badia (Before taking over Bleak House)
- Talk to Strong Sad about Strong Badia twice (Before taking over Bleak House)
- Talk to Strong Sad about Bleak House (Before taking it over)
- Talk to Strong Sad about Strong Badia (after usurping Bleak House)
NEW! Use Fake Sword on Strong Sad at Homsar Reservation (before taking it over)
NEW! Use Tuning Fork on Strong sad at Homsar (before throwing in hole)

ALGEBROS MANUAL PAGES:
- Page 3: Under box near the fence.
- Cover: Check Strong Bad's mailbox.

FLAGS:
- Concessionstan Flag: Check bush near Concession-Stantinople.
- Strong Badia Flag: Check brick wall.
- Bleak House Flag: Check under box on Strong Sad's bed.
- Cheat and Tirerea Flag: Check Tire after giving medal to The Cheat.
NEW! Homsar Reservation Flag: Check Mysterious Bush at Homsar Reservation.

TEEN GIRL SQUAD CARDS:
- Tar Pit: Check Strong Sad's books in Bleak House.
- Egg: Use lighter on the barred window in Bleak House.
NEW! Alien: Use Black Metal Detector near cave in Homsar Reservation.

SETTING THINGS ON FIRE:
- Maps & Minions Box
- Smoke Detector
- Strong Bad's bed 
- Strong Sad's flag 
- Strong Sad's bill of rights 
- Strong Sad's constitution
NEW! Mysterious Bush in Homsar Reservation

Sunday, August 6, 2023

PrinceWatercress plays Crystal Caves - Part 16 of 16


Well, we have to replay some levels we played before, but we finally got this game beaten. Happy 350th Let's Play, me!


0:20 - You'll have to go down the pipe to start the level. The light switch is to the right at ground level. Watch out for those robots!

You'll need to shoot the blocks near the blocks near the green door and hit the switch to turn the laser turret off.

The stalactites will fall but will not hurt you as you ride the platform below them. As for the stuff at the top, don't waste any time trying to get everything.

3:44 - This area has low gravity, and every time that you fire your gun, you'll be pushed back a bit.

Here, you'll need to find the three colored levers in order to open a path to the exit.

The "Danger" sign does fall down as you walk under it.

The switch in the lower-right corner of the level turns off the laser turrets, which makes it easier to get to the red lever.

6:14 - The first thing that should be mentioned is the low gravity, which pushes you back every time you fire your weapon.

The red mushroom lets you get past the stalactites at the beginning. From here, you'll need to go down every chasm to get everything. The first one has invisible blocks you'll need to uncover. The next two has spiders to shoot down, and the fourth is pretty simple. The fifth has a stop sign that easily gets you past everything. Don't forget the invisible block! The sixth has the pit of green goop; jump near the bottom to avoid the goop. The seventh has one more crystal that you'll need to get. The last has a P icon that you'll need to shoot down the purple wall enemy at the end.

Make sure you get everything, or else you'll have to go back to the main level and do this all over again.

10:02 - In this very gray level, you'll need to look for invisible blocks and carefully take out all of the flying green enemies.

Watch where you are going. Make sure you explore the areas near the red and blue levers, and go to the blue lever area first. Once you drop from the top, there's no way back, and the path to the exit is also a "no turning back" point.

The blue ball enemy is near the air machine, which can be a recipe for disaster.

Once you beat all sixteen levels, Mylo buys his own solar system to make into a multi-planet vacation resort from Mr. Rip Eweoff...only for the solar system's sun to blow and go supernova. Mylo returns two weeks later and makes it the location of (hopefully the first) Mylo Burger. From that, he finally gets his riches, and the game ends. You just beat Crystal Caves!

Sunday, June 11, 2023

PrinceWatercress plays Bugs Bunny & Taz: Timebusters - Part 16 of 23


We do another racing level, but thankfully, this one is much easier compared to The Shield Race.


1:09 - In "The Carpet Chase," you'll have to make it past the other guy on the magic carpet to get the magic lamp back. If you can do that, you'll get a boss coin.

If you can get all the banners, you'll get 25 gears at the end.

Pressing Square lets you throw rocks at enemies, such as the guys walking around on the arch and the guys flying around near ground level.

There are a lot of walls and arches that can cause instant death if you run into them.

Just like with "The Shield Race," the ACME crates are easy to reach. If it's not on an arch outside, it'll be on the ground inside. Also, just like in "The Shield Race," I'm not timestamping the crates, since they're super easy to get to.

Sunday, April 9, 2023

PrinceWatercress plays Sly Cooper: Thieves In Time - Part 16 of 48


In this entry, we crush The Grizz's artistic dreams once and for all before heading to medieval England.


Duty Calls

You'll need to play as Sly to get this job started.

For this one, you'll have to tail The Grizz until Bentley can get the code to his fortress off of his phone. Thankfully, The Grizz has been tagged with the homing darts, and all you have to do is follow him and the signal.

From here, you'll want to keep a good distance away from The Grizz as he moves around. For the best results, keep to the high ground. As he moves around, you'll find out that he is talking to Cyril de Paradox - who he apparently despises - and that he needs the eggs to produce paint for his prehistoric art. Also, The Grizz will keep losing signal, which is weird, because how he gets a cellphone signal in the Ice Age is never explained.

Eventually, The Grizz will start running when he gets close to his fortress. You'll need to run with him in order to stay on him, but you'll still want to keep your distance so you don't get spotted. The Grizz will eventually lose his signal completely and throw his phone to the ground, destroying it and ruining Bentley's chance at getting the security code for the fortress. As the fortress gates close, Carmelita shows up and tells Sly that she has the security codes and full schematics for The Grizz's mountain base for Bentley.

After this, you'll get a cutscene. Carmelita, having taken a few days to cool off, has come to the conclusion that she never changed Sly even though she thought she did, and that they both fight for justice on the opposite side of the law, as she only chased after Sly after the fact. However, she has a tough time living with that, having always known Sly as some horrible hardened criminal when that was furthest from the truth. Nevertheless, she realizes that they both have a common enemy in Cyril de Paradox. At this point, Carmelita is back on the team.

Operation: Jurassic Thievery

Once again, you'll have to play as Sly to get this started.

It's time to stop The Grizz once and for all. Bentley will target the egg vats, while Bob will have to pry some pressure valves open. Murray will have to get to the master control panel so nobody can reset the system as well as take care of any guards that get in the way. After this, The Grizz's paint production plant will be disabled, and everyone can go after The Grizz.

Make your way to the fortress, then interact with the console to open the gates. The gang splis up in parties of two, then you'll play as Bentley. Time your jumps with the hover jets carefully so you don't lose health, and take out any guards that you see as stealthily as possible. Pay attention and look around for areas that you will need to throw bombs at so you don't accidentally blow yourself up and cost yourself progress.

Watch out with the platforms on the geysers. Wait for them to come down and come to a full stop before getting on, then wait for them to go as far up as they can in order to see where you need to go next. Be careful with the spinning blades that you'll have to land on, as they go pretty fast.

Eventually, you'll have to take a nest elevator upwards to continue on. After this, you'll need to plant some bombs on one of the emu enemies and get it to the other emu before detonating the bombs. This will distract the mammoth guard, allowing you to move on. You can also detonate the bombs when the emu is near the mammoth, then take out the other emu. Either way, you'll get the job done.

You'll need to use your regular darts on the spinning blades of the egg vat. Just look at the targets, zoom in and fire the darts to get rid of them. This opens up a bridge that lets you continue on. There will be a mammoth guard in front of a terminal; blow him up and get ready to play another Spark Chaser mini-game with motion controls.

Once you complete the mini-game, you'll have to deal with some piston-like platforms. Wait for each platform to tilt back up before standing on it. You'll then have your second egg vat. Once again, shoot at the targets indicated with the dart icon with darts to blow up the vat. Just watch out for the flaming pendulum that is moving back and forth.

You'll then play as Bob. You'll need to jump across spike pits and avoid jets of fire to get to the pressure valve. When you make it to a pressure valve, interact with it with Circle and rotate it by rotating the right stick clockwise. At the second pressure valve, go all the way down and to the right for a Sly Mask (see below).

After the third valve, Murray saves Bob from a fiery fate, but he falls onto another egg platform, which leaves the resetting of the master control system to Sly. You'll need to jump from platform to platform with the Sabertooth costume, pull levers, hand off of hooks and paraglide  to get to the control system. In the geyser section, there is a platform off to the side; you'll need to go there for another Sly Mask (see below).

Once you make it to the master control system, take out the mammoth guard to get everyone to the other side. As for Murray, he runs right into The Grizz and decides to fight him while everyone else watches. Despite being big on his own art, he is tired of everything, and all he ever really wanted to do...was ice skate. Wait, what?

This leads to a boss battle between Murray and The Grizz. Run around in a circle on the ice and make sure The Grizz does not run into you when he says "Here comes The Grizz!" If he creates an energy ring, jump over it or else you will be frozen. If he creates three, double jump. If he does a belly flop, jump to the side.

When The Grizz jumps in the air and spins before slamming the ground, he will create a rock wall around himself. You'll need to find the ice cubes in the walls and punch them enough times so they slide into him while avoiding his freeze rings, and you'll need to send them all into him before the rock wall shakes and crumbles. If it shakes and crumbles, you'll have to do this whole part over.

After the circular wall, you'll have to do some button pressing similarly to when Murray was dressed as a geisha in feudal Japan. Watch the buttons for The Grizz's combination, then press the same buttons as the bar passes over them on the bottom of the prompt. Sometimes the buttons will be replaced with a yellow circle with a black question mark over it, and you'll need to remember the buttons for The Grizz's sequence to press the right button when you reach those yellow circles.

Eventually, The Grizz will go down after you get three successful button combinations. Keep punching him with Square to get some health out of him and to do some damage to his health bar, then you'll enter the second phase. It's mostly the same as the first, but you'll also have to jump over spinning ice cubes. If The Grizz stomps, watch the ice floor for white circular icons so you don't get hit by icicles. 

When you get the circular rock wall the second time, you'll get more ice cubes. Stand between two of the ice cubes at a time and punch between them to send them both at The Grizz at the same time; otherwise, you'll run out of time and you'll have to do this phase all over again. This time, you'll have to deal with the freeze rings as well as the icicles from Grizz's stomping. Once you send all the ice cubes at him, it's more button sequence remembering and then more punching before it's time for the third phase.

For the third phase, The Grizz will sometimes do the "Here comes The Grizz!" dive multiple times in a row, and his far-range belly flop will freeze you. As for the rock wall, you'll have groups of three ice cubes with a gap between them. You'll need to punch two of them at a time before sending the third at The Grizz, and you'll need to do this before the rock wall shakes and crumbles. This can be a little tough to do, due to the icicles and freeze rings that The Grizz shoots out and the amount of space that the ice cubes command on the wall, but punching out two ice cubes at a time really helps. 

After this, it's more button sequence recognition followed by one more opportunity to punch The Grizz's lights out. After that, Murray throws The Grizz into an ice wall that doubles as a window and reunites with the gang. 

After this, Carmelita rejoins the gang, this time more willingly, then Bentley is able to re-connect with Dimitri and find out that medieval England is the next destination, with The Grizz's crown as a means of opening a gateway. There, the gang finds out that Sir Galleth Cooper, founder of The Cooper Order, is being forced to work as a festival jester by Paradox's goons.

Abilities:


Run While Charging (Sly): Allows Sly to run with the left stick while charging up his charge attack.

Flash Bomb (Sly): Throws a flash bomb that blinds enemies. Replaces the Smoke Bomb.

Achievements:

Bearcicle: Beat The Grizz in Episode 3.

Collectibles:

Sly Mask #31 - In "Operation: Jurassic Thievery," go all the way down and to the right at the second pressure valve to get a Sly Mask.

Sly Mask #32 - In "Operation: Jurassic Thievery," go to the platform to the side of the geysers you'll need to paraglide across with Sly to find another Sly Mask.

Controls:

Left analog stick: move
Right analog stick: move camera
X: Jump and double jump (hold X on second jump for hover jets as Bentley)
X + Circle: climb wall (Bob)
  • left analog stick: climb
  • Left/Right + X: leap over gaps
  • R1: slide down
Square: attack
Circle: 
  • interact (usually with anything that has sparkles) (Sly)
  • steal from enemies (from behind) (Sly, Bentley, any of Sly's ancestors)
Triangle:
  • knock enemies upwards (from behind; press Square to slam enemies down for stealth slam) (Sly, any of Sly's ancestors)
    • press Circle after knocking enemy upward to perform Silent Obliteration (Sly; replaces Stealth Slam; must buy on ThiefNet)
    • press Square for Stealth Slam (any of Sly's ancestors)
  • spin attack (hold to charge) (Sly)
  • throw bombs (Bentley)
  • Thunder Flop (in mid-air) (Murray)
  • spin attack (hold to perform) (Murray)
    • control with left stick (must buy on ThiefNet)
  • Raging Inferno Flop (in air; Murray; must be bought on ThiefNet)

L1: 
  • bomb aim (Bentley)
  • smoke bomb/flash bomb (Sly; must buy on ThiefNet)
  • aim/strafe mode (Carmelita; must hold button down)
    • left analog stick: move
    • R1: shoot (can only shoot in strafe mode)
L2:
  • hold for costume select menu (Sly)
    • hold down to stay in menu; use D-Pad or left stick to make selection
  • hold for weapon select menu (Bentley)
    • hold down to stay in menu; use D-Pad or left stick to make selection
  • hold for fist select menu (Murray)
    • hold down to stay in menu; use D-Pad or left stick to make selection

L3: activate compass
R1: run (hold while moving to perform)
  • Paraglide (Sly; in air; must buy on ThiefNet)
  • Adrenaline Burst (Bentley; double tap to activate; must buy on ThiefNet)
  • Clothesline (Murray; double tap and steer with left stick; must buy on ThiefNet)
R2:
  • Trigger Bomb (Bentley; must have bomb on field to detonate manually; must buy on ThiefNet)
  • guttural roar (Bob)
R3: Binocucom
  • Right analog stick: move
  • Left analog stick: zoom in and out
  • R1: take picture (when applicable) (Sly, Bentley)

Start: pause menu
Select: map
  • Left analog stick: zoom in and out, switch between map and status
  • Right analog stick: move map
  • Circle: back

Saturday, February 18, 2023

PrinceWatercress plays Blood Omen: Legacy of Kain - Part 16 of 41


Our journey takes us into the swamps. Before heading to Vorador's Mansion, we do some exploration...and boy, is it going to pay off!


1:02 - We find Vorador's Mansion. We could teleport there or we could travel there by foot. Time to use the Mist form and travel to the dry land southwest. Watch out for the cannon and the poison spewing plants.

3:49 - The light green land in the swamps is safe, but the dark green land is poisonous swamp water that will eat away at your health until you use the Mist form. Also, the zombies here will pull themselves together when you kill them unless you use a specific weapon.

4:19 - Just south of where we entered is another blood fountain. This fountain will give you the second of three strength upgrades.

5:48 - Southeast of the blood fountain is a building where you can get the Blood Gout spell. Hit the switch to the north to continue on.

6:52 - Blood Gout allows you to throw your own blood on enemies to feed on them from a far distance. This will allow you to suck the blood of the people chained to the wall at the far ends here at the expense of some magic power, and this also opens the door to the south.

7:35 - More fun with Blood Gout. If you turn your blood green from hitting the blogs, use an Anti-Toxin. As for the path to the south, watch the spikes to see where to go when. Take out all the chained humans to open a door to the southeast.

10:44 - Use the Mist form to get past the spikes, and use your Flays to blow past all the enemies. There's a Blood Vial and a Rune Triangle in here as well; be sure to get them as you beat up the monsters and open the path to the teleporter.

14:27 - Northeast of the Blood Gout building, you can get the Control Mind spell. But we'll handle that in the next video...