Showing posts with label part 14. Show all posts

Tuesday, September 15, 2026

PrinceWatercress plays Toy Story 2: Buzz Lightyear to the Rescue (PS1) - Part 14 of 16


We do our last bit of backtracking before returning to our regularly scheduled Let's Play.


Now that we have the Hover Boots, it's time to head back to the storeroom with all the cardboard boxes in Al's Toy Barn. We need to head back and get the five chicks. They are in the following locations:
  1. at the top of the box across from the storeroom entrance
  2. the first skateboard challenge (the one that involves getting on the skateboard, bouncing off a trampoline, jumping to a platform off of a toy kiosk, swinging off a horizontal pole and sliding down a zipline to the egg)
  3. on the gumball machines in the corner that require bouncing off a running hay stack ride machine to bounce to
  4. near the skateboard past the two sets of spinning bicycle wheels
  5. near the vent leading back to the starting area, past the hen
The first one requires the Hover Boots, as you will need them to get over a box that you can't even grab with a double jump. Once you get on top of that box, you'll soon have to jump across three boxes that are moving up and down, and you can tell which ones are the moving ones due to the yellow and black caution stripes on the wall near them. From the third box, there will be a token that you can see below; jump to that token, then make your way up the boxes ahead to get the chick.

Once you get all five chicks, talk to the hen near the blue cones blocking the slime pit for a Pizza Planet token.

I also show off the honest method of getting the race token for Andy's Neighborhood. This method involves the Rocket Boots, and it's a lot faster. As long as you stay on the track while going at super speed, especially at the last corner by refraining from jumping over the grass just before the corner, you'll be credited for a lap. As long as you stay on the move, you should be able to get this Pizza Planet token easily with the Rocket Boots.

I then cap the video off by beating the Bombs Away boss, because why not?

Saturday, July 11, 2026

PrinceWatercress plays Space Station Silicon Valley - Part 14 of 32


Compared to other levels, it will take a bit of effort to get all the power cells as well as the trophy.


Pinball Blizzard


Something is jamming the signal to the teleporter, and in order to counter this something, we need to counter it with...music. We need to collect the silver notes, then play the song on a giant keyboard.

You start off as the ski husky. Take out the penguin king and the lackeys first. You'll need them soon. Next, you'll need to take out the polar bears, who will wake up when you get close enough to them. They will hit you with an earthquake attack if they see you. You only need to defeat one of them, but it's better to defeat all of them. In order to get them to wake up, however, you need to be aware of where they are looking and then be in their field of vision in order to get them to wake up and shake the ground - and decimate your health - with a somersault. Thankfully, if you're not near them, not only will they not attack, but they also leave you alone.

The snowballs near the polar bears contain Power Cells; make sure you destroy them and collect them all.

Once you take care of the polar bear problem (which can take a while), you'll see a moving platform nearby. Jump on it with the A button as the polar bear by pressing it once to jump and again to do the jump-thump attack that gives you a little more height so you can get on the platform, then press B to hide and hold the button down so that you can smash into the ice cubes nearby.

There are penguins past this point. Do not kill them. Leave them alone. This will be important for later.

After getting the two Power Cells near the platform, take control of the Penguin king. The King Penguin is much like the King Rat, except you can jump instead of drop mines. Holding down A will allow you to use a jetpack that will take you upwards for a short distance, which will prove useful. Get up the nearby platforms for two Power Cells and a silver note. You'll need the silver notes, so pick them up. The ones you'll need are on the platforms near the penguin king, the platforms afterwards, and the chasm near the polar bear platform. You'll also see a penguin. If you run into the penguin, he will produce a musical note. Once again, do not hurt the penguins. You will need them later.

There are six penguins in all, and the more you run into and touch, the more notes they play when you touch one. They play a melody, and you'll need to play and remember that melody. They will be on the penguin king platforms, the platforms afterwards, the Power Cell platform near the polar bear platform, the chasm near the polar bear platform, near the piano, and at the column underneath the piano.

Exploring past the polar bear platform takes you to the piano. There are five black keys and eight white keys. The piano will play notes, which are different every time you play the stage, and the keys you need to hit will light up pink. If you mess up on the current pattern, you start over on the current pattern and keep doing it until you get it right. As you get the patterns correctly, you'll reveal more floating platforms. After playing six notes in sequence, you'll reveal all the platforms and open a path to the top where the teleporter is and you'll also activate the recorder. 

When you find all six penguins and reveal all six notes by touching each one, you'll get a pattern that you need to play on the keyboard. Unlike the platform puzzle, it's the same sequence every time. You'll also need to complete the platform puzzle from earlier and activate the recorder. The X button clears the recorded pattern, the red circle is the record button, and the green triangle is the play button. Move into a button to make it perform its respective action. Record, then hit the following white keys: 5, 6, 4, 8, 1, 4. (All numbers are from the left side of the keyboard to the right.) Hit the play button to play the sequence, and you'll cause the six penguins to summon a seventh one in a UFO to produce the trophy. If you killed any of the penguins before doing this, not only will you not get the full pattern, but you will not get the trophy. This is why the penguins should be spared. The trophy will be at the top of the huge platform after the ones near where you found the King Penguin. You'll need to boost jump onto a speaker in order to get to the top, then grab the trophy.

From here, head back to the piano and jump on the platforms you summoned to get to the teleporter. As you jump from platform to platform, each one will play the notes you played on the piano in order to get them to show up in the first place, in sequence. Nice touch.

Polar Bear


Type: Polar Bear
Environment: Ice
Skill A: Jump-Thump
Skill B: Hide
Water Resistance: Excellent
Mass: Huge
Armour: Medium
Strength: Strong
Traction: Poor
Fall Distance: Medium
Production: Very Long
Engine: Fusion
Intelligence: Very Low

King Penguin


Type: King Penguin
Environment: Ice
Skill A: Boost Jump
Skill B: Penguin Army Attack
Water Resistance: Excellent
Mass: Light
Armour: Light
Strength: Medium
Traction: Good
Fall Distance: Medium
Production: Short
Engine: Jet
Intelligence: High

Power Cells


Thursday, January 29, 2026

PrinceWatercress plays Super Mario Odyssey - Part 14 of 92


We're at the summit of Iron Mountain. Next time, we'll defend the Secret Flower Field before exploring the Wooded Kingdom at our leisure.


One of the robots near the Odyssey will introduce you to the white flowers that make you go forward, which I talked about in the last video. To grab them and speed up temporarily, you will need to throw your hat at them every single time; you can't just move into them. This will allow you to go up steep slopes for a brief time, and the more you keep throwing your hat at these flowers, the longer you can do this.

At the summit of the mountain, possess a Sherm with Cappy, then shoot down the four Bowser face targets while avoiding the rolling balls that shoot out of the cannon. This opens up the path to the real boss for this kingdom and nets you Power Moon #3 (see below).

Power Moons


3. Path to the Secret Flower Field - Take control of a Sherm and shoot down the four Bowser targets while avoiding the balls that the cannon shoots. When the cannon is destroyed, you'll reach the entrance to the flower field (and another boss), and you'll also be able to get this Power Moon.

5. Behind the Rock Wall - For this one, you'll need to use a Sherm to blow up the rocks blocking your path upwards. From the top, you can then get on the left side and drop down to get this Power Moon.

6. Back Way Up the Mountain - There is an 8-bit area hidden behind some blocks you can break with the Uproot near the "Iron Mountain Path, Station 8" checkpoint. Go through it, do some basic running and jumping, and you'll find this Power Moon at the end.

43. Flower Road Run - For this area, you'll need to hit the P switches and run across the moving plant path while avoiding the Goombas and doing a little bit of wall jumping. You'll find the Power Moon at the exit.

45. Elevator Escalation - At the very steep-sloped wall, stay all the way to the right to reach a door. Take control of a Sherm, take out all the enemies and destroy any cages in your way to hit all the P switches. You'll find the Power Moon after getting past all the Sherms.

Regional Coins


Friday, December 5, 2025

PrinceWatercress plays Brave Fencer Musashi - Part 14 of 33


In this episode, we take on our second chamber within the underground dungeon.


Back at the castle, if you talk to Mercenary Stue (MercenA) or Mercenary Potrowst (MercenC), they will mention thieves. This will be important for later on.

The Shield is really a Frisbee, and the OddHat is really a PiePlate. Both are useless and should be sold for money.

Now it's time to enter the door to the right of Mannick. If you need to restore your HP and BP, just talk to him and he'll hook you up with some cake you'll eat immediately.

The first room has a ton of spikes and a bunch of moving platforms. You'll have to jump from one platform to another as they move in and out of the walls. If you drop to the bottom, you'll be forced to take the teleporter back to the top.

If you go across from the entrance, you'll be at a dead end. Instead, leap to the sides near that door to continue on.

Assimilating the Vambees gives you B.O., a powerful body odor that causes enemies to run away from you until it lasts.

Knocking or throwing the Vambees into the panels with the eye on them that are on the floor will close up the spike pits, allowing you to continue.

Don't let the Vambees get their hands on you. Otherwise, they'll bite you for a few seconds, leaving you unable to move for that time.

Going to the sides takes you to a pair of spike pits. You'll want to go to the right first. Avoid the spikes so you don't take a whole bunch of damage.

You'll want to go to the right side first. You'll be in a dark room where the blue fireball that bounces back and forth is your only source of light. Go up and right, then follow the path. Hit the Bincho Field with Lumina to rescue Bailiff Jerky. Go back to the first room and take the left path.

The path here is a mirror image of the path on the right side. The only difference is that when you follow the path to the second room, there's more spikes.

There will be two teleporters instead of a Bincho Field in the next room. You'll want to take the one on the right.

The bats with the lanterns will attack you by tossing the lanterns into the ground or ramming into you. If you Assimilate one of them when they get close, you'll get Firefly, which allows you to illuminate nearly the entire screen. You'll definitely want this power-up, even if it only last for a limited time.

The purple slimes will poison you if you touch them.

Take the left teleporter, then assimilate the Firefly technique again. Follow the path again. Take the left teleporter again. Take the left teleporter again. Enter the door nearby.

Now you're in a maze surrounded by lava! Block the arrows from the arrow shooters as you make your way down, then Assimilate one of the bats again when you reach the dark area. The chest here contains Powder, which you can take to the Appraiser.

You've found the eye! Now smash it and take the teleporter back!

Monday, November 3, 2025

PrinceWatercress plays Legacy of Kain: Soul Reaver - Part 14 of 28


At this point, I really get frustrated with the game. It gets a little better, but still...

0:21 - Time to move on while also being furious with the game, as the game can be a bit punishing at this point. You'll need to use the high jump and the glide to get from one platform to another, then you'll need to follow the path to reach...

4:24 - ...this underwater path. I show where you're not supposed to go before showing the path where you're supposed to go: up some broken pillars to a portal to shift planes, into a nook where a weapon is, and across the wooden beams high into the ceiling. When you get to the last wooden beam, you'll need to find the area to the side that you'll need to jump to just to continue on. Use your projectile attack to destroy the stained glass window.

8:47 - Now for this part. You'll need to be close to the edge just to jump from platform, then make a high jump and glide to the roof. By walking around, you'll find a bell tower. Glide over there and press Square at the chain to ring the bell and open the door at the bottom of the spiral staircase. It's underwater, but you'll need to go down the stairs and jump from one platform to the next to get back to the material realm and...

14:10 - ...face Rahab. You'll need to aim at the stained glass windows by holding L2, R2 and Triangle all at once and pressing Circle. At the same time, you'll need to jump from platform to platform to avoid getting blasted by Rahab and also to destroy more stained glass windows. Thankfully, if you hear Rahab laugh, he's about to shoot a projectile at you. If you slip and fall into the water, you'll need to jump back to the portal back to the material realm, shift back and get back in the battle.

When you smash all eight stained glass windows, Rahab will die and you'll absorb his soul, which allows you to get into the water without being automatically phased back into the spiritual realm and also allows you to swim.

Thursday, September 11, 2025

PrinceWatercress plays Woody Woodpecker in Crazy Castle 5 - Part 14 of 18


Man, this took more time than it should have.


Fire Stage 5


Conveyor belts finally make their debut in this stage. You'll be seeing machinery that puts lava in big pots, and if you touch the pots in any way, it will hurt. There is a switch in the upper-left corner of the level that stops the pots from scooping up lava. This will allow you to ride the pots upwards and progress further into the level. You can also go up the pipe to the door that lets you get the metal block passer. This gets you un-stuck when you make it to the lower-right corner of the level.

Take care near the crushers above where you start, as you don't want to get smashed or accidentally fall through them. Amazingly, if you do get crushed, you only lose one heart. If you get caught between the crusher and the top of the screen, you'll also lose one heart.

If you get the object that lets you pass through metal blocks, be careful near the switch, as there is a bottomless pit below where the switch is that will instantly kill you if you fall in. A bottomless pit in a Crazy Castle game? That's a first.

Wednesday, June 11, 2025

PrinceWatercress plays Math Rescue - Part 14 of 19


We end up doing another two levels here because I can't keep track of which numbers I've already gotten very well. Ah, well.


Level 3: Sweet Secrets


I'm finding a three when I don't need a three because I already hit a three and I can't even remember that I hit a three. Go figure.

Be sure to jump into the walls if they're thick enough; the one that is leads to another room if you do. You also have a couple of warps; make sure you enter them all.

Level 4: Dessert Delight


Compared to the slightly confusing layout of the previous level, this one is a bit more linear. The door is at the upper-left corner of the level. Thankfully, there are no secret areas.

Also, I just realized that some of the platforms are made out of gummy bears.

Tuesday, May 20, 2025

PrinceWatercress plays The Grinch (PS1) - Part 14 of 22


In this entry, we finally explore the inside of the power plant. Also, Windows decides to mess with newly applied (at the time) in-system noise reduction settings regarding the microphone. That gets fixed before next time.


Be sure to check the bottom of the power plant before making your way up for Nitro Eggs, rotten eggs, and giftboxes.

The guys with the shock sticks will shock the metal floors if given the chance. You'll need to hit them with the Slime Shooter and get up to them to hit them with the bad breath attack before they shock the floor and do a lot of damage. Remember that they will jump around when you aim at them with the Binoculars and the Slime Shooter.

Some of the climbable walls will be electrified. You can slime the walls with the Slime Shooter and slime a portion of the wall so that you can climb straight up. The slime will dissipate after a while, so you'll want to get up the wall pronto. Also, if you have to backtrack, jump off the edge in case there's an electrified wall below; just dropping down will get you shocked.

The Slime Shooter can also be used to take out the cameras. This will ensure safe passage through some doorways.

The sentry robots are back. Take them out with Nitro Eggs.

Shoot the green buttons with the Rotten Egg Launcher to turn them red and turn off the generators. There are four generators in all, you'll turn off all the power in Whoville and complete one of the missions. You'll also unlock the Grinch Copter blueprint piece at the bottom, although you'll be forced to the exit and then forced to re-enter once you shut off all four generators. You'll also unlock a shortcut to the central dump next to the Mount Crumpit vacuum tube so you don't have to take the long way back and forth.

Some green buttons will deactivate power lines, and you'll want to shoot those buttons to deactivate the lines so you can shimmy across when necessary. If you don't see the button immediately, look around in the immediate vicinity; you'll find the button eventually.

For some reason, the frame rate chugs in certain spots, especially if you don't have all the generators shut off.


Monday, April 14, 2025

PrinceWatercress plays Kid Icarus - Part 14 of 15


I pull off some odd stuff in order to stay at 999 Hearts...and it pays off! We're getting the best ending next time!


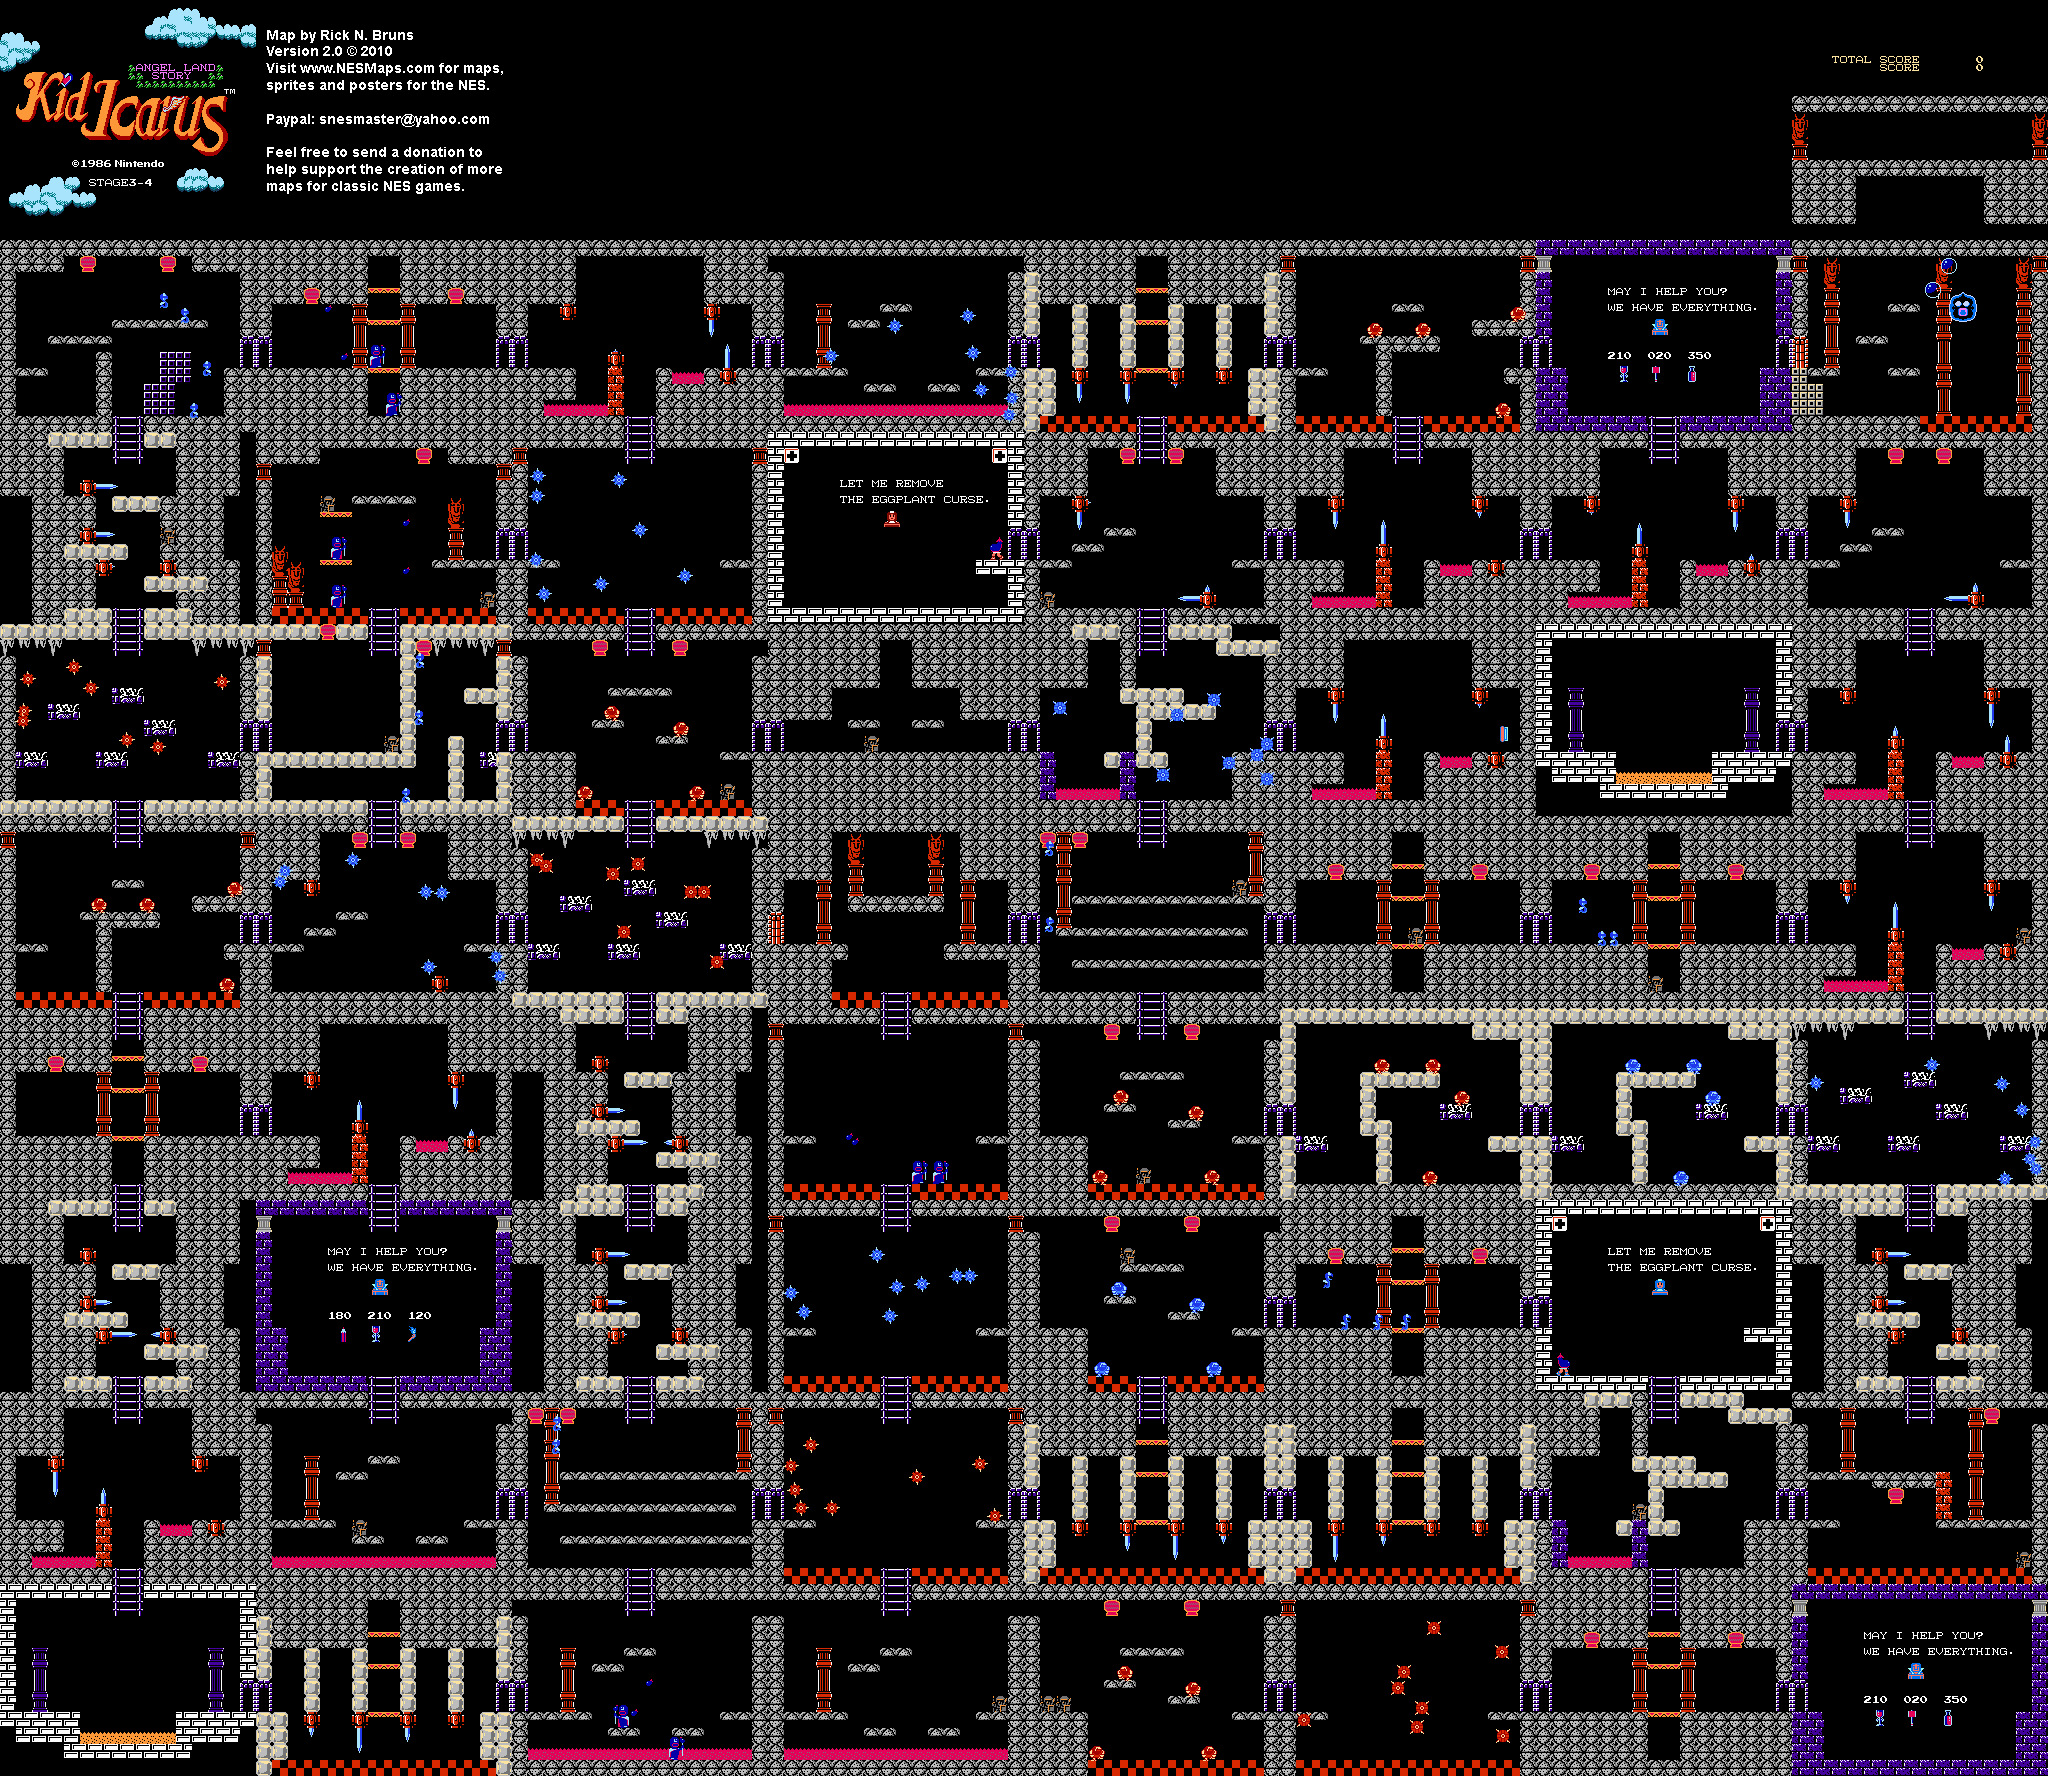
For those wondering, I finally figure out how to get past the Eggplant Wizards in that one room in World 3-4. As for the rest of the video, I relied solely on the Waters of Life I had just so I could get to the hot springs in World 3-4 and heal-up from there...and it worked! Next video will absolutely be the last!

World 3-3


Being able to destroy the Octos with your shield and get a ton of Hearts is fun. At this point in the game, I do a little better at using the rotating shield as a weapon.

The door to the left of the exit is the last regular shop in the game before the ones in the final dungeon.

World 3-4


If you go down at the start, be careful! There are Eggplant Wizards in the room below that are waiting to turn you into an eggplant on your way down. If that happens, you'll have to go two screens down, one screen right, one screen up and two screens right to the nearest hospital.

The things that look like spinning shurikens are the enemies here that fly around in random patterns, and are known as Tros. They're worth shooting down for the points and the hearts. The guys with the beards (Uranos) just walk back and forth.

If you can quickly get to the top row of rooms in the dungeon, you can just keep going right to face the boss. The last room before the boss will be a store, so refill your health.

Near the end, there will be another room full of Eggplant Wizards, and you won't be able to avoid it. Believe it or not, the Eggplant Wizards have two kinds of throws - low and high - and you can tell the difference between them if you keep leaving and re-entering this room. You'll want the Eggplant Wizards on the left side of the room to throw high so you can immediately brute force your way to the right without stopping and shoot down Eggplant Wizards on the way to the door on the other side. I don't figure this out until my second loop through the game. Needless to say, I'm not a fan of this labyrinth, and I'm not a fan of the Eggplant Wizard placement here.

The boss here is Pandora. There will be two orbs moving in the room along with Pandora, and when Pandora turns black, he will be harder to see. Take your time, avoid the orbs and get a shot in when you're able.

When you beat the first three stages, Pit will equip himself with the three sacred treasures, then the game goes into horizontal shmup mode.

Tuesday, February 11, 2025

PrinceWatercress plays Wario Land II - Part 14 of 51


This level introduces the wasps, whose sting - and the allergic reaction - will cause you to reach higher heights.


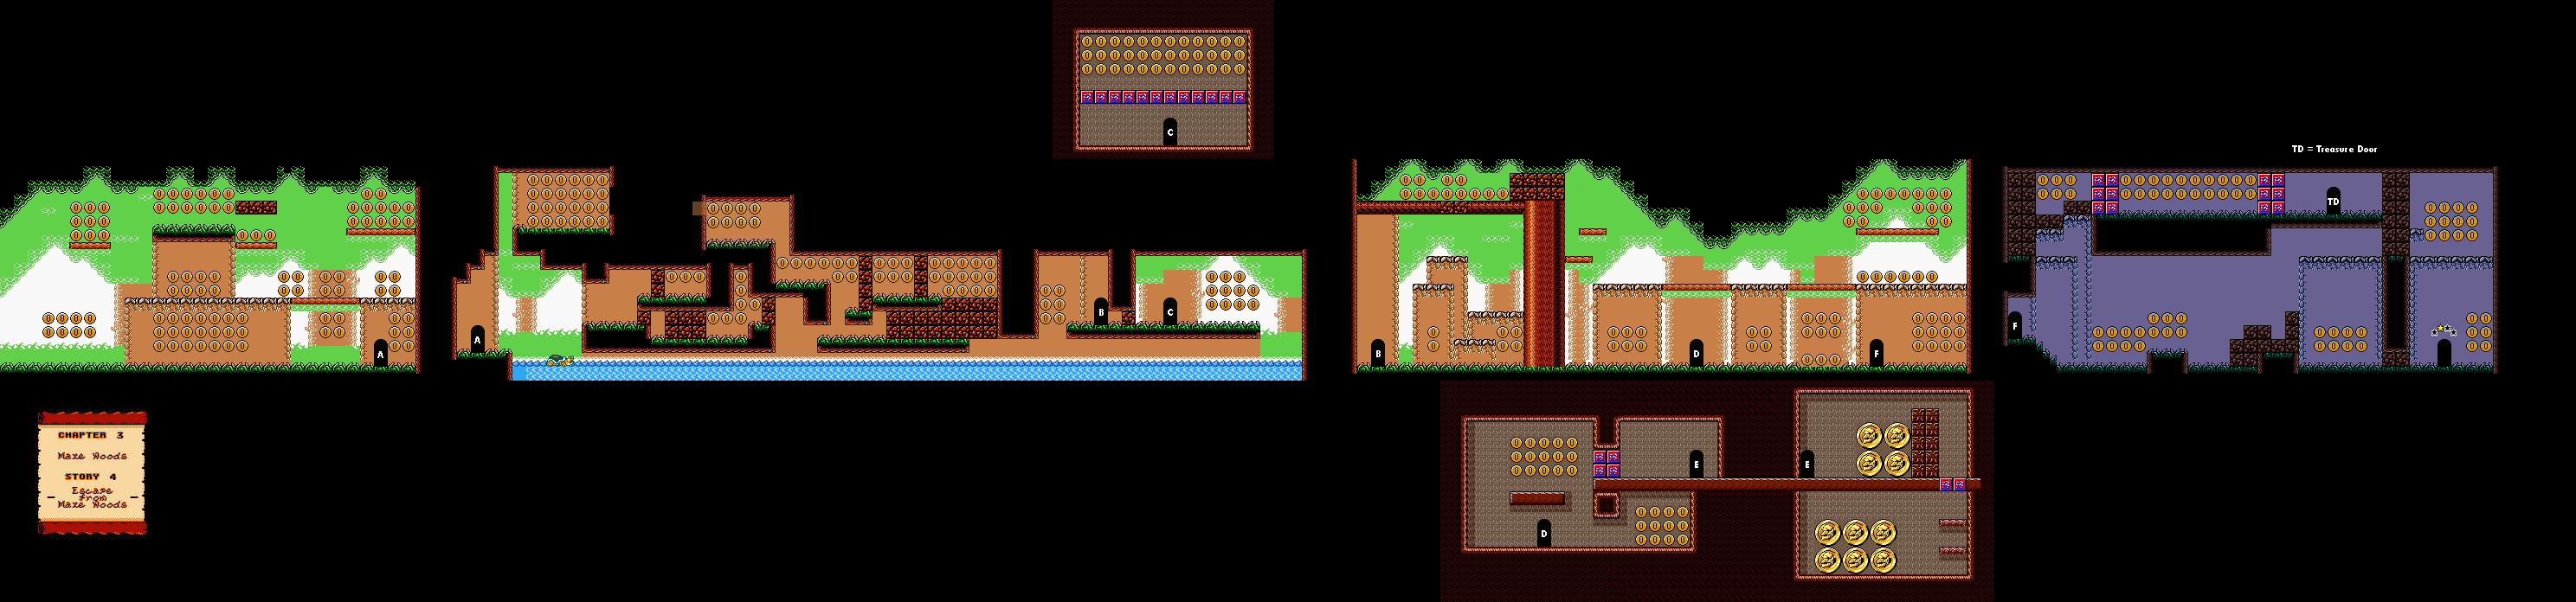
Chapter 3: Maze Woods

Story 4: Escape from Maze Woods


The wasps will dive at you if you get close enough, and if they sting you, you'll turn into a floating Wario. You'll float until you hit a ceiling, which will cause you to deflate and turn back to normal. This can let you reach areas that you could not normally reach. A jumping tackle can get rid of them, as can flying into them after getting stung. Use the wasps' sting to get all the coins you can.

In the room after the beginning, be ready to tackle a lot of blocks. You'll have to ride on the turtle multiple times. There is a path above the ceiling leading back to the left that leads to more coins. In the brown room to the far right, throw the Spear Goon upwards, then tackle the stove to where you can jump to get all the coins.

In the final room, you'll find the treasure room, where you can win a weird looking face idol, as well as an area you can only access by throwing an enemy through blocks. This will allow you to get some more coins, but you'll need to throw a Spear Goon up there and get up there yourself in order to access those coins. As for the exit, you'll have to roll down the slope and then roll through some blocks in order to reach it.

Friday, November 22, 2024

PrinceWatercress plays Great Greed - Part 14 of 28


Gee, who would have thought that the beauty contest was a Bio-Haz plot?


West of Pasta Village is the Fruits Forest.


Going east from the start and pressing A at the south end of the tree there will net you an Apple. Going further east from there will net you the Peach. As for the Walnut, it will be in a tree in the north end of the maze.

One of the chest contains Trash. You do not want to pick this item up! If you do, you won't be able to discard it like any other item, as it is considered littering, and the only way to get rid of it is to sell it. If you sell trash, you'll actually lose 1000 Gold, as you actually have to pay the shopkeeper money to take it off your hands...so don't get it.

The Limburg is smelly Limberger cheese. All you can do with it is sell it.

The Dragon is weak against Freeze Magic, and can cast Fly and Shove. It gives 79 Experience and 262 Gold, and has a chance of dropping Iron Armor, which is better than the Plate Armor dropped by the Rib Cage. If you get this, equip it.

The Bomber is weak against Freeze magic and strong against Fire Magic. If allowed, it will cast Steal, which will steal the fruits that you have collected and force you to collect them again. This is why it pays to come here at a high enough level. The Bomber gives 88 Experience and 222 Gold when defeated.

"Amazon Attack" is not "Citrus Attack" now that you know Citrus' name.

You can also find Weaken for free in one of the Fruits Forest chests.

Now that you have the three fruits, talk to Fifi again. Fifi will be able to make the costume for Citrus. He will then tell you to head back to your room and rest. To advance the plot, you'll need to head to the inn and spend 15 gold to rest there. Head back to Fifi to get the dress, then head to the big building on the east side of the village. Talk to the man south of the chest containing the grand prize, and you'll enter the contest. Citrus will take the stairs to the west, while you take the stairs to the east. Enter the stairs to the east.

When you go up the stairs to the east, follow the path to get a front row seat at the beauty contest. Citrus will win it handily after Fifi shows up and the powers of the dress are activated, and the dress works. As a matter of fact, it works too well, as the men in the audience are hypnotized by the dress. Fifi reveals himself as a follower of Bio-Haz, then dares you to move. Press A, then press Up to get on the stage. Fifi will get angry that the dress' powers does not work on Sam due to him being from Earth, then shows his true form.

Fifi has 1300 HP and is weak to Bolt, so hit him with Bolt 2. He can also cat Fire 2, so be on the lookout for that. If you're close to Level 30, however, he is really weak, as you can keep hitting him and he won't be able to do anything. He will start defending when his health is low, however, so if you need to, start casting Bolt 2 at that point. Defeating Fifi rewards you with 1050 Experience and 1500 Gold.

After the battle, Fifi dies, but not before hinting that something is happening within the resistance army. Citrus will tell you to get back to the resistance village. Before you go, open the chest to get the Stabber, and while it increases your Speed by 20, it is a lot weaker than what you've already got.

Head back north and head to the forest. Go west, then north as soon as you're able to, then east as soon as you're able to. When you reach the resistance base, you'll find out that everybone has been defeated and that whoever attacked them has entered the canyon to the southwest. If you enter the northern-most tent, you'll find out that Shrimp is gone.

Thursday, September 12, 2024

PrinceWatercress plays Chrono Trigger (Super NES) - Part 14 of 70


With nothing else, it's time to head back to our own time. Here, we find out what we need to do next in order to change history.


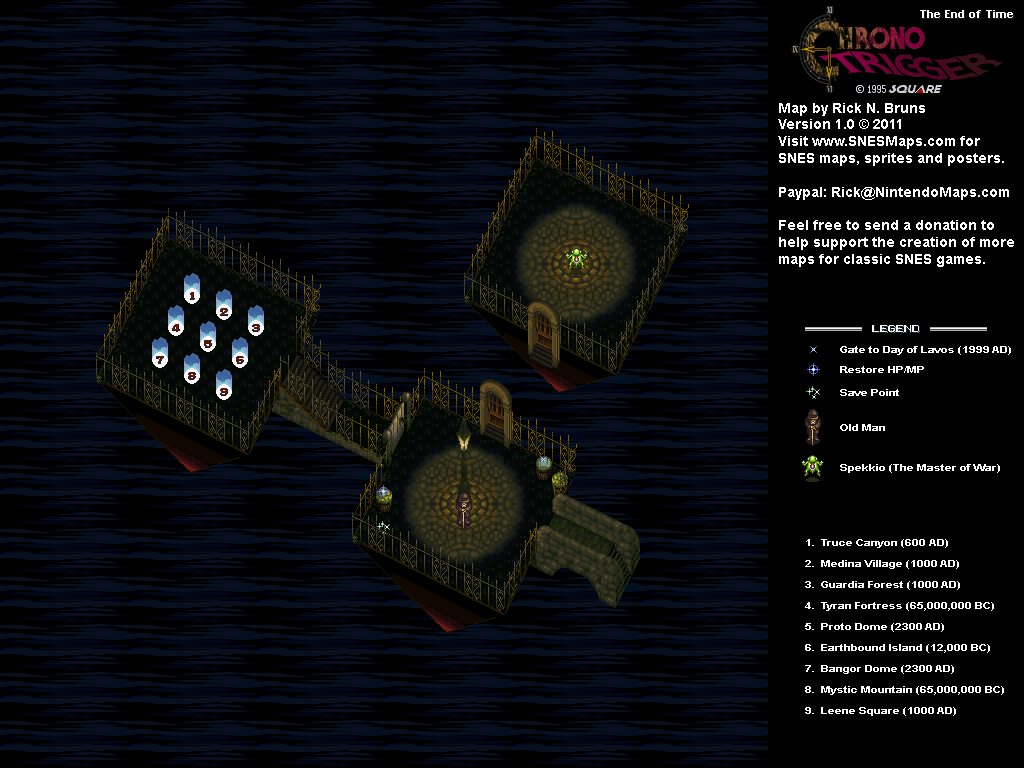
It's time to head back to our own time, so let's use the top center pillar of light, which takes us to Medina Village in 1000 A.D. It's not exactly home, but it's pretty close to it.

When you go through the Gate, you'll come out of a closet of a residence where two friendly Imps - a Blue Imp and a Mud Imp - live. If you talk to them for the first time, you'll get some Woolseyisms that refer to coming out of closets that have not aged well since the game's initial release (and were changed in the DS and all subsequent versions, ).

There is also a cake on the corner of the table the Imps are sitting that. You can press A on it and eat it after being given a prompt from the Imps as to whether or not you want to it, but once you say "Yes," you can't do it again. It's a one-shot deal.

When you leave the residence, the two Imps will tell you that the people in this village used to worship Magus and used to be part of a cult known as the Mystics, and that while some of the citizens have moved on, some still hold a generations-old grudge towards humans. You'll also be told that there is someone near the cave to the west that you'll want to meet.

If you go to the Inn, you'll have to fight the Hench innkeeper and the two Diablos before you can stay for a 200G fee. If you go to the Market, you'll have to fight the Hench shopkeep and his Omnicrone assistant in order to do business there. While the armor and weapons here are stronger than what anyone in your party has, you won't be able to afford any of it. You can still sell stuff, though.

If you go to the Medina Square, you'll see some people chanting and dancing around a statue of Magus, all of them wanting Lavos to kill the humans while also wanting to know why Magus created Lavos yet failed to kill humanity off.

If you go to the Elder's House, you'll meet Ozzie VIII, who has Imps working like slaves keeping the place clean. The countertop on the bottom floor will have a Speed Tab on the empty space, while the desk at the upstairs bedroom will have a Magic Tab between the houseplant and the book. Also, if you press X or Y to go to the respective buttons' menus and then leave while Ozzie VIII is on screen, he briefly turns Green before becoming blue again. There's a spoiler right there.

The Forest Ruins north of the village has a chest containing a Mid Ether, but you won't be able to do much else there.

There's nothing else to do here, so head west and enter the house. This is Melchior's Hut. Here, you can talk to Melchior - yes, the same Melchior who wanted to buy Marle's pendant - and buy the Red Katana for Crono and the Robin Bow for Marle. If you didn't get them for whatever reason, you can get the Plasma Gun and Hammer Arm for Lucca and Robo respectively, and if you need any, you can buy a Titan Vest. When you try to leave after talking to Melchior, Melchior will tell you that you will have to go through the nearby Heckran Cave to get back home to Truce Village...which is what we're going to do.

Heckran Cave


When you enter the area, you'll face two Henches. They're pretty easy, and they are the first of many battles that will happen one time only in this cave.

The Jinn Bottles will always spit out fire-blasting Octoblushes when you face them. The Jinn Bottles can Blind a single target, while the Octoblushes spit fire at a single target. Hit the Jinn Bottles with magic like Lightning, Ice and Fire, as it is the only way to do major damage to them.

You'll also meet the Tempurites as you go through the area with all the streams running through it. They only attack you with their snouts, and only magic can truly damage them.

The Rolypolys are purple Rolys that never come out of their ball form, and they can be easily taken out with Cyclone and Dual Techs that require it. The Cave Bats are new bat enemies that can only be taken down with magic attacks.

The MagicScarf is an accessory that increases any party member's Magic stat by two.

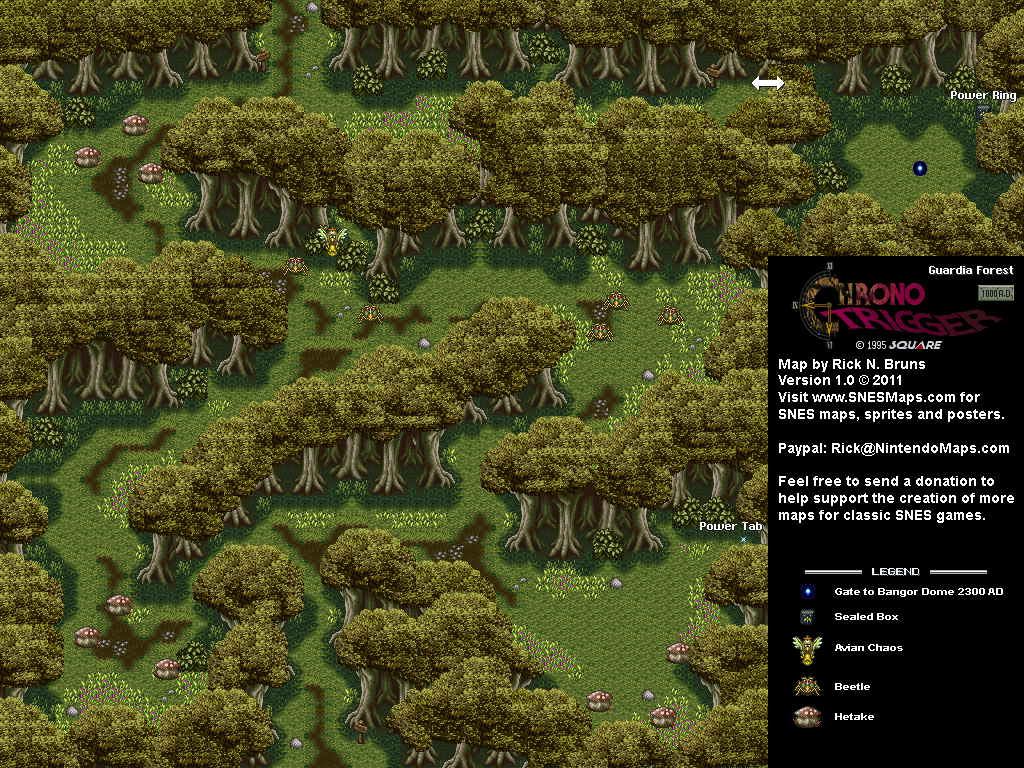
Near the end of the cave is a sealed box you won't be able to open until later.

You'll eventually face Heckran. Heckran can only be hurt by magic, and Heckran can hit single targets with Water, Lightning and the water-based Whirlpool. If you see the "Go ahead! Try and attack..." message, wait until you see "Brief counterattack break" before attacking him again, or else the whole party will get hit by Water2. Near the end of the battle, Heckran can hit a single target with "Yes indeed!" This physical attack will do quite a bit of damage to a single party members, so be ready to heal.

When you beat Heckran, Heckran will rue the Mystics' inability to destroy the humans 400 years ago, then Crono and company will go over what they know so far - that Magus created Lavos 400 years ago to defeat the humans - before realizing that they can use the Gate at Leene Square where the Telepod incident happened to go back to 600 A.D.

North of where you battled Heckran is a pool of water. If you jump in, you'll be carried back to the island where Lucca's house is, and if you stand where the two trees that are side by side on that island, you'll be able to jump back into the vortex in the water to go back to Heckran Cave if you want to return to Medina for any reason.


While you can go to Leene Square and use the Gate there to return back to The End of Time and unlock 600 A.D. again - which we do - you can also go back to the dead end in Guardia Forest to open that Gate and the one leading to Bangor Dome in 2300 A.D. back up. Thankfully, The Chancellor and the soldiers won't come back. If you head back to the castle, you'll just automatically leave.

If you go back to Lucca's House and go upstairs to talk to Lara, Taban will show up and hand Lara some money, then go back downstairs. If you talk to him there, you'll get the Taban Vest, which is better than the Titan Vest but increases Speed by 2 and protects against Fire damage. Only Lucca can equip it.

If you enter the market in Truce Village, you'll be able to talk to Fritz, who - along with Elaine - will thank Crono for saving him while in prison, and you'll get ten Mid Ethers. Fritz and Elaine's father will show up and check on things before also thanking Crono. 

If you talk to Crono's mom, Crono's mom will be shocked that Crono returned after hearing talk that he was about to be executed,, and tells Crono not to scare her like that ever again. You can also introduce Lucca and Robo to her, if you want.

Thursday, June 6, 2024

PrinceWatercress plays Ratchet and Clank: Going Commando - Part 14 of 54


It's time for Part Two of our trek through the Tabora Desert to get all the crystals, and as we get more crystals and build up our health and weapon experience, we also find the weapon mod station.

First | Previous | Next | End

11:45 - Believe it or not, this is one of three locations in the entire game where you can purchase weapon mods. Weapon mods require Platinum Bolts, and these modifications allow you to lock on to enemies with some of the guns, while others will allow for acid damage that does damage post-shot and electrical damage that does additional damage during the shot. I didn't know this at the time, but the game has enough Platinum Bolts to purchase all the mods, so I end up saving them for the end of the game.

Also, if you forget where this location is, you can always look for it on the in-game map.

15:04 - We won't be able to get what's at the top of this rock column...yet.

Controls:

As Ratchet:

Control Pad/Left Analog Stick: move
Right analog stick: move camera

X:
  • Jump and double jump (hold button after double jump to use Heli-Pack or Thruster Pack)
  • Wall jump (near certain walls)
Square: strike with wrench
Circle: pull out/shoot currently equipped gun
Triangle: 
  • quick select (hold and use in conjunction with Control Pad or left stick to switch guns; menu can be customized in Quick Select on the pause menu
  • double tap to switch between two most recently equipped weapons/items
  • interrupt on-screen messages

Select: open map
Start: Pause menu
  • Control Pad: select option
  • X: confirm option choice

L1:
  • center camera behind Ratchet (tap button to center)
  • first-person view (hold button and use left stick or D-Pad to look around; let go of L1 to move camera back behind Ratchet)
  • Square: wrench boomerang
  • Circle: fire gun
  • R1/R2: zoom in and out (Pulse Rifle only)
L2/R2: strafe (hold while moving)
L3: see health and Bolt totals
R1/R2: crouch (hold down)
  • Square: wrench boomerang
  • X: high jump
    • long jump (hold crouch button and jump while running to perform)
R3: open map

In water:
  • Square: dive and descend
  • X: surface and ascend
  • R1: accelerate with Hydro-Pack

As Clank:

Control Pad/Left Analog Stick: move
Right analog stick: move camera

When hanging off platforms:
  • Control Pad/Left Analog Stick: move
  • Forward+X: vault up
  • Back+X: drop down

Square: punch
X: Jump (press and hold in the middle of a jump to glide with Heli-Pack)
Triangle: command menu (hold and use in conjunction with Control Pad or left analog stick to choose commands)

Thursday, May 16, 2024

DeceasedCrab plays Earthbound - Part 14 of 53


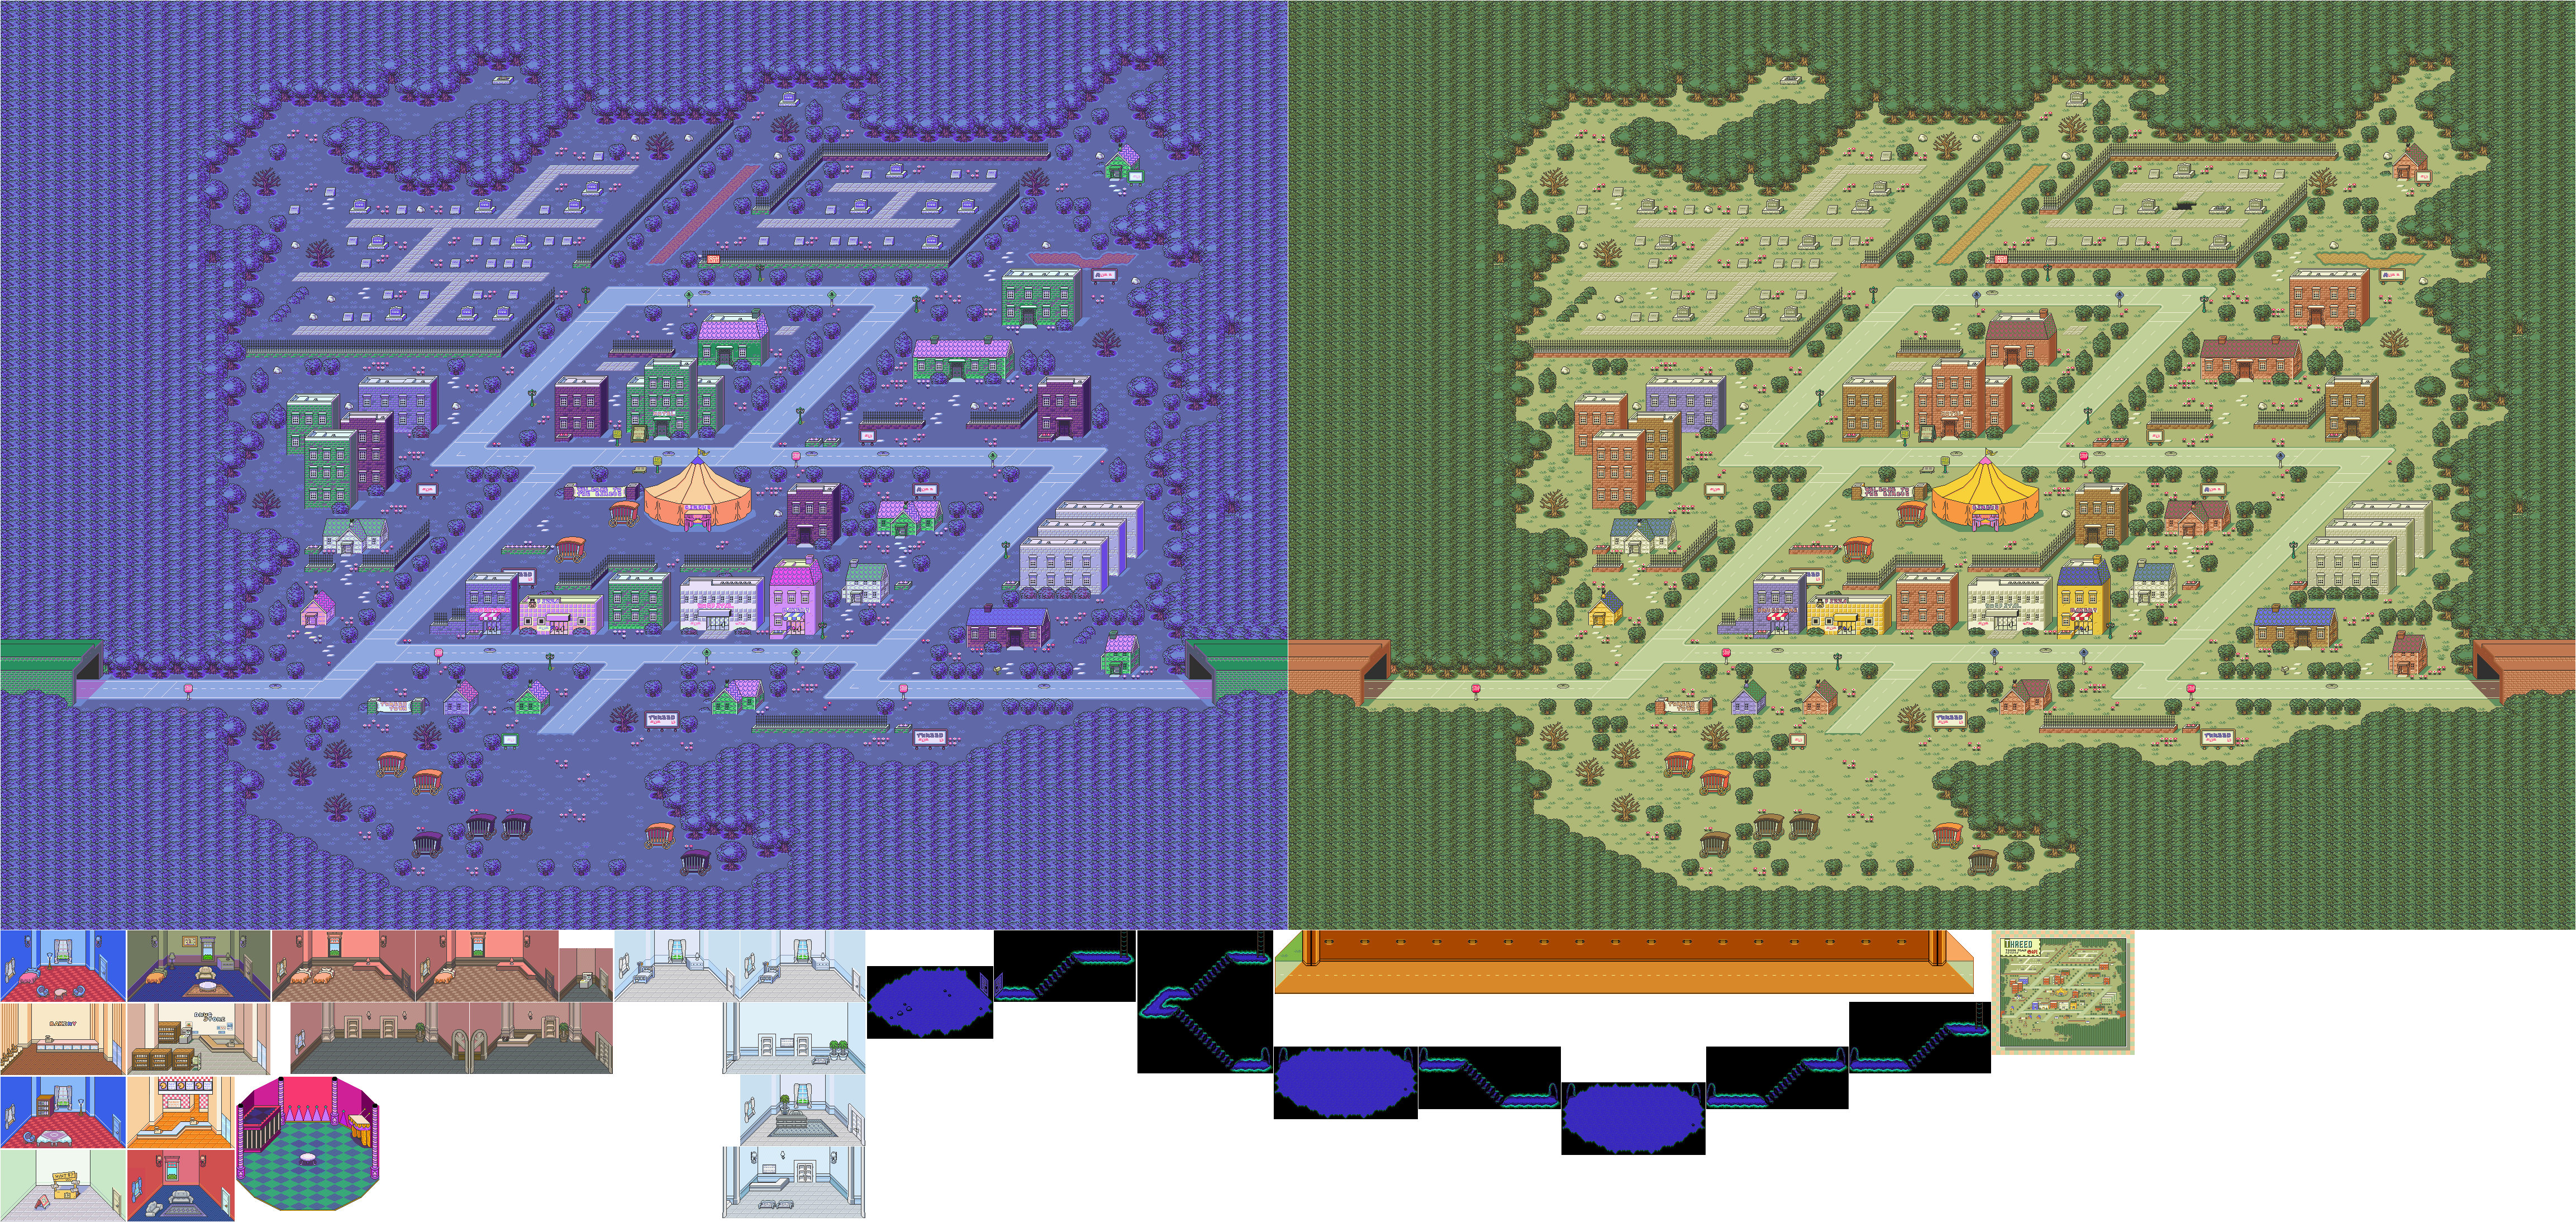
We finally get Jeff to Threed. Now it's time to do some damage to those zombies.


Brick Road's dungeon is a pretty simple affair to get through, with the odd sign from Brick Road here and there.

If you read the sign telling you to watch out for falling instruments, the photographer will show up to take a picture.

The Stun Gun is more powerful than the Pop Gun. Equip it when you get it near the exit.

When you leave the dungeon, you'll meet Brick Road the dungeon designer, who wants to combine his skills with Dr. Andonuts' intelligence to become Dungeon Man, the first part-man, part-dungeon hybrid in human history. Talking to him also acts as a free inn, so take that rest if you need it.

There will be an iron pencil nearby; you won't be able to get rid of it until later. Instead, go through the cave to the south.

The Attack Slugs will not take a lot of effort to defeat, especially if you have the Stun Gun equipped.

Do not sell stuff as Jeff. Any money that he gets from selling things will not transfer to the rest of the party when he joins.

Equip the Cheap Bracelet on Jeff if you find it; you'll also need it at this point in the game.

The Bottle Rocket can be used during battle to do a lot of damage to one enemy. Keep it around.

You will eventually come across a coiled up rope. Stand under it and use the pack of bubble gum so that the monkey can float up to the rope and drop it down so you can climb up and continue with the cave.

You will come across a boss in this cave. You won't be able to fight it until Jeff is united with the rest of the heroes of this game.

You'll soon reach Stonehenge and meet a female monkey. The monkey will leave you to chase the female monkey around. 

Avoid the cavemen if you are at a low level. They will absolutely bash your head in if you fight them at that point. If you're at Level 7 or 8, however, you won't have much of a problem, but they can still smash you if you're not careful. You're better off avoiding them completely, but if you're lucky when you beat one, you can get a Picnic Lunch

If you stand in the middle of Stonehenge, the photographer will show up to take a picture.

At the center of Stonehenge is a hold leading to a cave you can traverse. There will be a large iron eraser if you take that route, though. You won't be able to get past it until later in the game.

Head south of Stonehenge to find Dr. Andonuts' laboratory and talk to Dr. Andonuts. You'll find out that Dr. Andonuts is Jeff's father, and that he will know about Moon. Since his Phase Distorter that allows you to teleport is still incomplete, he will lend you the Sky Runner, which you can use to fly to Threed and catch up with the rest of the party.

If you climb up the stairs, you'll find a Broken Pipe. 

The machine near the stairs will refill your HP, so be sure to use it before you save your game at the phone on the desk and use the Sky Runner.

To use the Sky Runner, you'll have to walk into it a certain way. You'll then fly across the world and see some places that you'll enter later in the game - Fourside and the desert, both of which are west of Threed - before crash landing underneath the graveyard and meeting up with Ness and Paula. The Sky Runner will be wrecked, and you'll be stuck in Threed again. When Jeff asks the party to let him be their friend, say yes. From there, Jeff will join the party. You can use the Bad Key Machine to get out of the cell and climb out and back up to the graveyard.


Since they're mentioned here, it should be mentioned now. Paula has the Pray command, which allows her to cast a random spell of a random strength. It may help you; it may not. Jeff's Spy command will allow you to uncover enemy weaknesses.

When you head to the hotel, things will be normal again, and you'll be able to heal up there.

Saturday, May 4, 2024

PrinceWatercress plays Drill Dozer - Part 14 of 28


Now to take the other path. Guess what? It's the worser path.


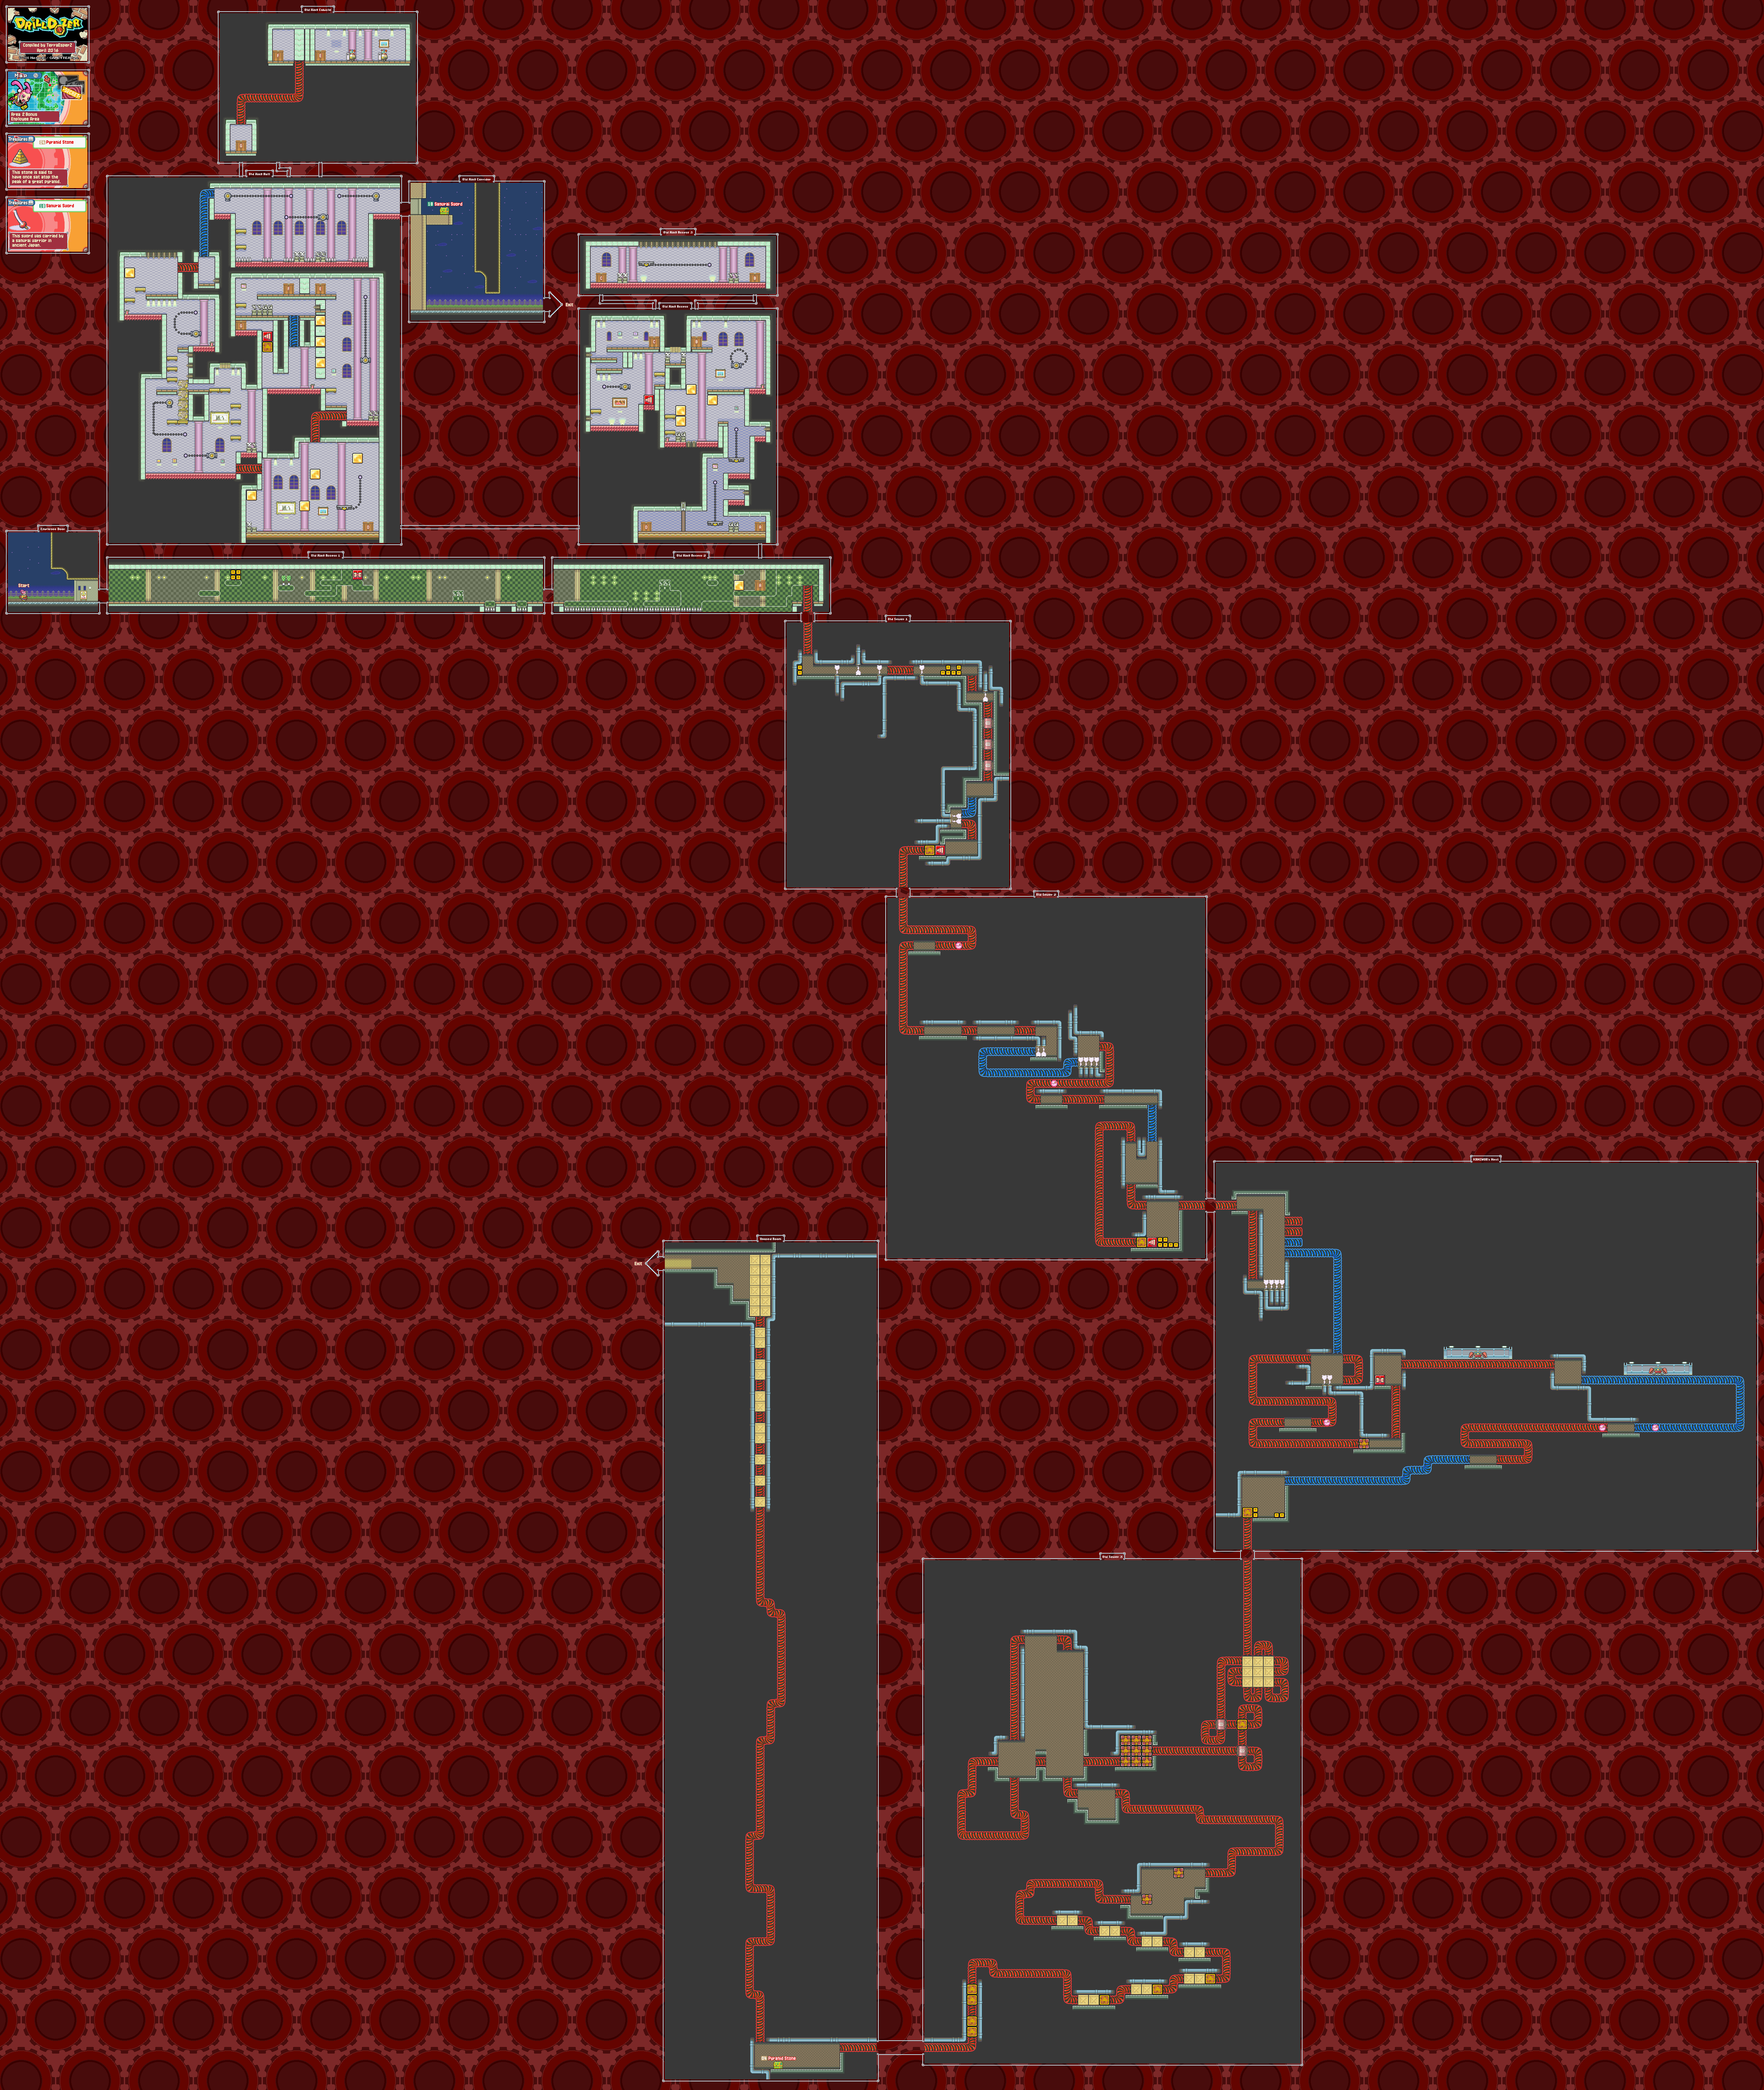
Area 2 Bonus: Employee Area


This time around, we'll be entering the door that briefly looked at in the last video. Guess what? This leads to the other path. 

You'll be dealing with laser turrets and plenty of platforms, socket lifts and rubber blocks are you make your way around. At one point, you'll have to stay underneath a moving platform while fighting enemies so as not to get zapped by the lasers above.

Your timing needs to be dead on and staggered as much as possible to get to the door above the slow socket lifts. For best results, you'll need to stay on the slow socket lift for as long as possible.

Once you get third gear, you'll have to get rid of one statue. Carefully tap a shoulder button so you destroy the bottom statue, or else you'll accidentally destroy more than one and you'll have to leave the room and re-enter to try again. After some laser shooters, you'll have to deal with three more socket lifts to get to the end of the level...and it is the worst three socket lifts that I have ever played around with and the worst experience that I have in this game due to the timing of when the socket lifts show up and trying to make sure I hit the right button combinations while also trying to stay in third gear so I can make it. For some reason, this takes six minutes, which is five minutes longer than it should have, landing in the spikes and attempting to jump over them horribly every time I mess up, resulting in the loss of quite a bit of health. You can tell that I don't like this. At all.

When you somehow make it to the end, you'll be able to get the Samurai Sword and get out of here.

Monday, March 11, 2024

PrinceWatercress plays Ka-Blooey - Part 14 of 25


We go back to more smaller levels in this video, but the difficulty curve starts going up and down here. Some of them may be easy to figure out, while others may not.


Level 71

Hit the switch in the lower left corner of the starting area. Go right, down, right, down, then right from the lower right corner of the starting area. Take the red guy to the bottom center, hit the switch, then detonate the nearby mine. Go north from the start. Detonate the large bomb. Hit the switch to the east. Take the small bombs to the small mines and detonate. Go to the small aerial bomb at the upper right corner and detonate.

Level 72

Detonate the large bomb at the north temple. Put the three small aerials on the second line of the slot tiles, and a fourth one on the center tile in the third line. Leave a gap on the tile right from the center one on the third line. Detonate the bomb in the center of the "small aerial T" and move up.

Level 73

Go to the upper right corner. Take the red guy through the cracked tiles to the mine in the lower left corner. Detonate an aerial bomb near a regular tile and step away. The tiles will spell out "THE ONE."

Level 74

Move the small bomb on the slot tiles at the start one tile to the right. Head to the right and set up a small-small-medium-large bomb line from the upper left tile in the set all the way down. Go left, then place the medium bomb in the lower right slot tile and leave the small aerial bomb left of it. Go back to the start. For all of slot title sets, place all bombs one tile to the left. Detonate the small bomb in the upper right corner and move left.

Level 75

Go left, then up. Detonate the small bomb. Go up twice and detonate the small bomb. Go left, then down. Detonate the small bomb. Go right, then down. Detonate the small bomb. Go left, left, down, then down. Detonate the small bomb. Go up and detonate the small bomb. Go up again and detonate the next small bomb. Go up, then right. Detonate the small bomb. Go left twice, then detonate the small bomb. Go down, detonate the final small bomb, and move down again.

Monday, December 25, 2023

KuuImpact plays Superman (NES) - Part 14 of 17


This is not meant to be a complete set of notes, nor does it show everything off. This did, however, get me in the right direction concerning this game. When I play through this myself (which I will eventually do), I'll show off a lot more.

In this entry, Level 4 is completed, and it's time to play the fifth and final level of the game.


If you talk to your boss at the Daily Planet, you'll get a password. Weird how this is showing up now. You'll also get something that sounds like gospel music playing in the background. As it turns out, the song in question is a Christian hymn called "Stand Up, Stand Up for Jesus."

Anyway, once you beat the three blue fire enemies, head back to the Metro Police Station, which is all the way to the left in the Teaboro area, and go inside. If they don't show up, you may have to head back to where they last were (which is the art museum, which is that big blue building) The F.B.I. agents there will tell you that Lex Luthor is hiding underneath Central Station, which is in the CBD area.

Once you take the subway to the CBD area, go left and use the Super Spin in the place with the different-looking tiles and go underground. Once you're underground, head all the way to the right and go down the ladder. From here, head right and go down another ladder.

At this point, you'll have no choice but to head left and go down the ladder. Then, you'll need to head right and go up until you reach the end, where you'll find Lex Luthor. Hit him with the Heat Vision and stay away from him and his club while also taking out the gangster. When you beat Lex Luthor, he will be arrested, but a gang of monsters will soon be on the loose.

Level 5

You'll be back at the Daily Planet. You'll be told to find out anything you can about the monsters. Lois Lane will also tell you that The B.G. Boys (whoever they are) are waiting for you at Senneville Battery Park.

When you leave the Daily Planet, switch to Superman immediately and use your X-Ray Vision to find the ghosts. From there, take the subway, then fly to Senneville.

Sunday, November 5, 2023

PrinceWatercress plays Word Rescue - Part 14 of 14


At last, it's over...until Math Rescue.


Level 15 - Sun on the Pueblo


This level has a maze-like layout, but it's nothing like the previous level. There are a few slime buckets to the left of the start if you need them.

Level 16 - Shade in the Desert


This level is pretty wide open. If you're playing on Hard, you'll have your fair share of Gruzzles, but you can easily take them down.

Level 17 - The Rock Maze


There is a maze-like corridor to the left of the door, and there will be plenty

There are cloud platforms above the house near the start, and if you jump to the left off the top-most one, you'll find the level's lone bucket of slime.

All of the words and pictures will be near the house at the start.

Level 18 - The Outlaws' Hideout


If you're playing on Hard, you're going to be surrounded by Gruzzles at the start, and if you don't have any slime, you're going to have difficulty staying away from the enemies. At least the level 

Level 19 - Pueblo by the Spring


Once again, you'll have your fair share of Gruzzles near the start, but you also won't have trouble getting around once you get rid of them.

Level 20 - Another Cavern

Use the ladders to go down instead of dropping down so you don't touch a secret word letter before you need to. Other than that, it's easy to get around here and take care of the Gruzzles, and the exit is at the top of the level.

Once you beat this level, you'll complete Part Three, you'll complete the game, the Gruzzles will have learned to read and will have stopped stealing things...until Math Rescue happens. For now, you've just beaten Word Rescue!

Sunday, October 22, 2023

Jerry Martin plays Strong Bad's Cool Game For Attractive People - Part 14 of 53


Now that we're out of our house, our revenge against The King of Town begins...


If you click on the sign in Strong Badia, Strong Bad will look at it before grabbing the Maps and Minions game board, which will replace the map that The King of Town took away. Strong Bad will have to conquer all the other "nations" in order to get as many allies as possible and defeat The King of Town.

If you click on the Maps and Minions box, you'll find Strong Badian currency, which Strong Bad calls "quesos."

If you click on The Cheat, you'll find out that The Cheat has seceded from Strong Badia and formed Tirerea. From here, you'll have dialogue options. If you click on the medal, Strong Bad will try to get The Cheat on his side, but to no avail.

If you use the Metal Detector to the left of The Cheat, you'll find the Strong Badia Shirt for the photo booth. If you use the Metal Detector near the right end of the fence, you'll find a power strip. You'll need this for later.

There is a box to the right of the photo booth, and if you click on it, you'll find Page 3 of the Algebros manual, which teaches the logarithm attack.

If you use the Metal Detector near The Stick, you'll find a tuning fork.

If you click on the bush near Bubs' concession stand, you'll find the Concessionstan flag.

If you talk to Bubs, you'll find out that Bubs has created his own autonomous commonwealth. From here, you have dialogue options. If you click on the concession stand, you'll find out that Bubs is selling souvenirs consisting mostly of cheese, watches and chocolate. Click it again to get a souvenir, and all you'll get is a Clockwork Strong Bad. If you have the quesos, you'll get the Clockwork Strong Bad following a rather hilarious demonstration of what it does.

If you click on the brick wall, you'll find the Strong Badia flag.

OUTFITS:
- Eye Patch: Inside cereal box in kitchen
- Camo Pants: Inside dryer
NEW! Strong Badia Shirt: Use Black Metal Detector just outside Strong Badia.

CALLING STRONG SAD NAMES:
- Talk to Strong Sad (Before escaping)
- Talk to Strong Sad about fence twice (Before escaping)
- Examine Shower (Before escaping)
- Use Pillow on Strong Sad (Before using on statue)

ALGEBROS MANUAL PAGES:
NEW! Page 3: Under box near the fence.

FLAGS:
NEW! Concessionstan Flag: Check bush near Concession-Stantinople.
NEW! Strong Badia Flag: Check brick wall.

Friday, August 4, 2023

PrinceWatercress plays Crystal Caves - Part 14 of 16


Man, that lower-right corner of the main level is pretty open.


0:45 - You'll need to use the stop sign for the platform to get to the upper area. Also, you'll need to jump off the edge to get to the red lever. Strangely, when I accidentally went back there and jumped near the purple enemies in the walls, they didn't come at me.

Turn on the switch near the gaps with the poison mushrooms to turn on the platforms. Leap at the bottom of the platform paths to avoid the poison mushrooms.

You'll want to get the crystal near the exit last, as you won't be able to go back when you go down there. Go get the stuff above the starting point first, then go back there. Thankfully, there's a nearby switch that turns off the laser turret.

9:28 - Watch out for the mine carts just past the start, and stand on the edge to avoid being hit by falling drops of water.

Be sure to get everything left of the gravity power-up first. Once you get the gravity power-up, shoot the blocks to the sides so you can use the nearby platform. From there, get to the green lever in the upper-left corner and activate it, then use that platform to get to the left and hit the switch to the left the pipes with the flames coming out to activate the platform in the upper-right corner. Get everything there, then go back and drop down to the area below where the switch is. Destroy all the blocks, then get everything here and exit.