Showing posts with label part 19. Show all posts

Thursday, July 16, 2026

PrinceWatercress plays Space Station Silicon Valley - Part 19 of 32


You have no idea how much of a pain this level was to record. If it wasn't the fire cave, it was the turtle. If it wasn't the turtle, it was the invisible maze. The it was the worst, but if you use the camera well, it can save you a lot of hassle.


Jungle Doldrums


You'll need to turn on the log ride as well as destroy the parrot in this stage in order to complete it.

You start off as the hyena. Drop down and circle around the hippopotamus and laugh it to death with the laugh attack. It has a water spit (A button) as well as a mine drop (B button), and both can hurt, so you'll want to do this while taking as little damage as possible. Once again, you have to keep the laugh attack going long enough to do any significant damage, and you have to be dangerously close to the enemy you want to defeat.  Once you defeat the hippo, take control of it.

The camera near the log ride will show you the complete loop around the level, including the fire pit that Dan mentions.

As the hippo, go into the water to walk on the surface below and hit the switch turning on the log ride. You can then turn back into the hyena and jump from log to log. Be careful when jumping, as the logs can do a little bit of damage if they hit you from the side. Also, make sure you're in the center of the logs before jumping. And before you ask, yes, you have to use the logs to get to the other side; you won't be bale to do that by just jumping out of the water.

On the other side, take out the elephants with the laughter attack. It takes a bit of time, but it will help out in the long run with this level. After that, push the rocks so you can get the Power Cells here as well as jump to the green area that leads to the next part of the level, which is the fire cave.

At the fire cave, you'll need to watch out for the moving walls as well as the rocks that shoot out of the lava and hit the ground nearby. For the walls, you'll want to jump back towards the floor before you get pushed far enough towards the lava to ensure you get to the other side. As for the rocks, you'll want to be patient and wait for those.

On the other side, use the hyena's laugh attack to take care of the elephant. Take control of the elephant, then corner the turtle and hit it with the water attack. You'll then want to take control of the turtle for the hardest part of the level: the invisible maze about the fire pit.

As the turtle, you'll want to keep firing your weapon in order to find where the invisible floor is. The rain machine nearby is supposed to help you figure out where the pit is if you hit the switch, but it does not do the best job. There are rocks that pop out of the pit that hit the invisible floor, but those are spread out. The turtle's A button weapon is far more reliable. For best results, you'll want to carefully inch forward just a bit and fire constantly. If you see an explosion in front of you, that means invisible floor will be there. If you don't, you're about to run into a pit. Change direction and fire towards other locations to find out where you need to turn and go in order to get through this maze, and rotate the camera so you don't accidentally fall off while trying.

Once you reach the other side, destroy the parrot. The parrot will be close to where you come out of the maze from, and if you know what you're doing, you can destroy it with a flurry of shots before it can fly away and attack you. Not surprisingly, the parrot attacks - and controls - the same way that the seagull from the ice levels does.

You'll now want to take control of the parrot and fly through the level. After all, why would you want to go through the invisible maze again? Fly towards the exit, but don't take it yet. Instead, fly back to the starting. There is a platform you can only reach as the parrot, which has the last two Power Cells. Also, go back to where you started the level. There is a platform on the tree that only the parrot can reach. Fly up to it, then keep flying your way up the tree. You'll find the trophy sitting there on a branch that you wouldn't have seen as any other animal, so you might as well fly over and get it. After that, you're finally done. Head to the exit.

Hippo


Type: Hippo
Environment: Jungle
Skill A: Snort Attack
Skill B: Sticky Mines
Water Resistance: OK
Mass: Huge
Armour: Tough
Strength: Strong
Traction: Good
Fall Distance: Medium
Production: Very Long
Engine: Coal
Intelligence: Low

Parrot


Type: Parrot
Environment: Jingle
Skill A: Flight
Skill B: Dive Bomb
Water Resistance: Excellent
Mass: Tiny
Armour: Light
Strength: Weak
Traction: Very Good
Fall Distance: Very High
Production: Very Short
Engine: Bio
Intelligence: Medium

Power Cells


Tuesday, February 3, 2026

PrinceWatercress plays Super Mario Odyssey - Part 19 of 92


Now that the Broodals are gone (already), it's time to explore more of the Lake Kingdom.


Here's some Hint Art for the Cascade Kingdom. Notice that there is one more rock formation on the picture on the right compared to the one on the left. Remember this for later.

Certain Power Moons can be found in more than one, but the way you'll be using to find it depends on which kingdom you go to when given a choice between two of them at the few points in the game where you'll have the freedom to do so. These Power Moons will be mentioned accordingly.

There is a seed in the spiky underwater tunnel. Talk to the Lochlady near the flower pot to get the seed to show up, then go through the spiky tunnel. It's easier to do this as a Cheep Cheep. Once you find it (and the four nearby Regional Coins), you'll need to switch back to Mario and take the seed back to the surface (to get more air) and back to the Water Plaza where you can plant it. The coin in the bubble will make it easier; save it for the journey back.

Power Moons

Lake Kingdom


4. End of the Hidden Passage - Use the Bouncy Flower at the Courtyard to get to a higher ledge with a zipper. Open up the wall with a zipper to find a hidden passage with a Power Moon.

10. Lake Kingdom Timer Challenge 1 - At the Courtyard area, there is a Scarecrow on a small plot of land. Throw your hat at it, then jump into the gap in the wooden blocks and keep ground pounding to get to the bottom fast enough to get this Power Moon.

11. Lake Kingdom Timer Challenge 2 - Warp back to the Courtyard Terrace after beating the Broodals and throw your hat at the scarecrow. Do a ground pound jump by jumping as soon as you hit the ground on a ground pound, and keep doing that to quickly get to the top and get this Power Moon.

15. Lake Fishing - In the Courtyard area, catch the big fish with Lakitu. You'll get a Power Moon.

16. I Met a Lake Cheep Cheep! - After you beat the Broodals, take a Cheep Cheep to the small land mass with the hole in the center and place the Cheep Cheep in the hole. The Lochlady will thank you for allowing her to see a Cheep Cheep up close, and you'll get a Power Moon.

18. Let's Go Swimming, Captain Toad! - Possess a Cheep Cheep and go down the long chasm in the Water Plaza. You'll find Captain Toad; talk to him for a Power Moon.

27. Found with Lake Kingdom Art - You'll need to find the Hint Art on the stairway leading up to the Courtyard area. Go to where the extra bone segment was located in the Hint Art and ground pound there. You'll find the Power Moon.

Luncheon Kingdom


47. Secret Path to Mount Volbano! - There are two ways to get this Power Moon.

If you went to the Wooded Kingdom first, then the Lake Kingdom, this Power Moon will be found in the painting in the pond in the Courtyard.

If you went to the Lake Kingdom first, then the Wooded Kingdom, this Power Moon will be found in the painting behind an iron block on the iron wall in the Wooded Kingdom, which can be reached atop the wall from the Station 8 checkpoint.

Regional Coins


Wednesday, December 10, 2025

PrinceWatercress plays Brave Fencer Musashi - Part 19 of 33


We go back to Twinpeak Mountain to rescue the castle weaver, then take on our second Crest Guardian.


Remember that super long pole you could climb near the summit of Twinpeak Mountain? Return there and double jump off the very top of it, now that you have the Legendary Shoes. You'll be able to rescue Weaver Dinneretta.

Talk to Weaver (Weaver Dinnerretta) back at the castle. You can choose between the L-Gloves and the L-Quilt. The Legendary Gloves up your critical hit rate, while the Legendary Quilt will increase the rate by which your HP and BP recover when you sleep anywhere outside of the inn, and also bring your tiredness back down to 0% if you sleep outside of the inn as well. The Gloves are a lot more useful, to be honest. If you're doing so badly that you require the services of the Legendary Quilt, you're doing something wrong. Whichever choice you make, come back in three days to get what you chose.

While in the dungeon under the restaurant, you may have noticed a door with that ever-familiar eye behind a pit that you couldn't jump over. Now that you have the Legendary Shoes, you can double jump over the pit...and now that you have the statue, you can place it in the opening in the door to open it up.

Use the Water Scroll to get over the water whenever necessary. You can also use it in the lava-infested areas so that if you accidentally fall in, you won't take damage before you get sent back to the nearest path of dry land.

The third room has a Bincho Field that you'll want to break with Lumina. You'll find it in the maze of stone cubes floating on the lava. You'll free Taster Salmonelli here.

In the fourth room, use the Water Scroll to extinguish the four flames. You'll open a door. Go inside and you'll take on the second Crest Guardian, the Relic Keeper. Despite the fact that it's hit the ceiling and has to hold it up to keep it from collapsing, he can still fight.

You'll want to use the Water Scroll to hit the fireball that flies around.

When the fireball turns into an owl shape, stay away and shoot water at it from a distance...and jump over those flames.

When the fireball turns into a sword shape. You'll want to stay as far away from it as possible, especially when it slowly swings downward. If you can't get away, use the Water Shield to keep yourself from taking damage for that one hit.

When you shoot enough water at the fireball, the Relic Keeper will duck down. Jump up and hit the core with Lumina to do some damage. You'll then go through the motions again.

In the second and third rounds, the fireball will either bounce off the walls like a ping-pong ball or jump up and down creating fire arcs from one end of the room to another. Time your position, hit it with the Water Scroll when you can and try not to get hit.

If the fireball appears in the center after the fire arcs attack, avoid the flame "arm" that pops out. Stay out of the air when it happens, and avoid the flames that drop down as well as the ones that surround the fireball itself.

In the third round, sometimes the fireball will turn blue and do a merry-go-around attack. Jump over the flames when they pass by. The flames can rotate clockwise or counter-clockwise.

After three hits, you'll win. The Relic Keeper will try to finish you off physically only to be crushed by the ceiling it was holding up. Now you have the core for this guardian and the Water Crest is liberated!

You'll then get another cutscene where Princess Fillet summons Kojiro. This turns out to be a mistake, as it's pretty obvious he only cares about fighting Musashi and getting revenge, judging by how instantly disobeys her, following Topo, another Thirstquencher enemy, instead. You'll then end up back in Grillin' Village.

Saturday, November 8, 2025

PrinceWatercress plays Legacy of Kain: Soul Reaver - Part 19 of 28


I just keep finding all these glyphs, man.


1:08 - Time to head back to the area where we faced our second brother and go through the area. I use the Fire Glyph to get rid of the enemies here, then...

4:28 - ...head this way. We haven't been here before. We need to make our way higher and break a glass window to find some magic energy.

7:40 - Time to head down where the steam is. There is a path we can follow, and another stained glass window to destroy. Behind it is another glyph.

8:36 - Phase back into the spiritual realm and take out the enemies, then phase back into the material realm, then grab the nearby bell hammer off the wall. Throw it through the nearby stained glass window, then go back to the metal gate and climb up the wall. Phase between the realms so you can use the platforms to your advantage and get back to where you broke the stained glass. Grab the bell hammer, go forward, and strike the bell with the bell hammer. You'll obtain the Sound Glyph, which lets you stun all nearby enemies with a blast of sound.

Monday, June 16, 2025

PrinceWatercress plays Math Rescue - Part 19 of 19


...and with this entry, Math Rescue is complete.


Level 15: The Dark Cave


In the final level of the game, you're going to be going through a ton of warps in order to get to where you need to go. However, if you can memorize where some of the numbers are, you can cut down on the backtracking in such a way that said backtracking will be reduced...assuming you're collecting all the numbers in order.

When you beat this level, you'll get the ending for Episode 3 as well as the entire game.

Whew! You've returned the numbers to their rightful places and captured a Gruzzle! It is a touching moment when the Gruzzle, Zorja, recognizes Benny as a long lost cousin.

Benny explains to the young Zorja that Gruzzles were not always pets and convinces her to choose freedom over the Glixerians.

With Benny translating, you invite all Gruzzles to come and live forever on planet Earth. In doing so, you have succeeded, not only in saving Earth's numbers for good, but in providing the gardeners on Earth with built-in slug control. The Gruzzles decide to move from the purple slime planet to the muckless, blue planet of Earth.

Best of all, your mother, who has been locked in the bathroom this whole time comes out into the living room. She is so happy to have the numbers back on her paycheck that she order pizza for everyone. In California, the highway patrol is so relieved that for a whole day, the officers give out doughnuts instead of traffic tickets.

For the Glixerians on Glixer II, however, things aren't so sunny. They fling stink mud at the backs of departing Gruzzles. Then things get out of hand and they begin throwing stick mud at each other. Soon the whole planet reeks of skunk!

But the Glixerians are not finished with the planet Earth! Watch for more episodes in the upcoming Gruzzle Puzzles.

Sadly, Gruzzle Puzzles never came out. But, hey, at least you've beaten Math Rescue!

Sunday, May 25, 2025

PrinceWatercress plays The Grinch (PS1) - Part 19 of 22


It took us a while, but we finally have two of the game's four levels absolutely completed.


Now that we have the Grinch Copter, you can use it to destroy giftboxes that are in the air, as there is no other way to destroy them. Just equip the Copter, then hold Circle to fly. You'll fly for as long as you have rotten eggs. If you hit any giftboxes with the spinning blade, they will be destroyed.

When you enter Downtown Whoville, you'll want to shoot the back of the van near the Christmas tree in the town square with the Rotten Egg Launcher when the doors in the back are open. If you can do that enough times, you'll get another sleigh part. With this and the giftboxes taken care of, Downtown Whoville is now complete.

Turns out, you could slime the horns playing the music in Downtown Whoville with the Slime Shooter.

When you enter Whoforest now, there will be a guy who wants to race Max to the cable car. This guy will try to take shortcuts by jumping (which Max cannot do), but if you have the route to the cable car with Max memorized, you can edge the guy out for another sleight part.

I finally found out that once you breathe on the snowball throwers here, you can pancake them to get their giftboxes. As for the civic center, the guys who dance around also have giftboxes, but you need to knock them off the ledges, then pancake them while they're stuck in the ground to get them. And the monster we snuck past on the way there? You can breathe on him for a giftbox.

You'll need to use the Grinch Copter in the cable car area to destroy some mid-air giftboxes, as these will more than likely be the last ones you will have left. That's Whoforest complete now!

Sunday, February 16, 2025

PrinceWatercress plays Wario Land II - Part 19 of 51


We have to go through a factory to catch up with Captain Syrup. Looking back at this video, I really knew my way around.


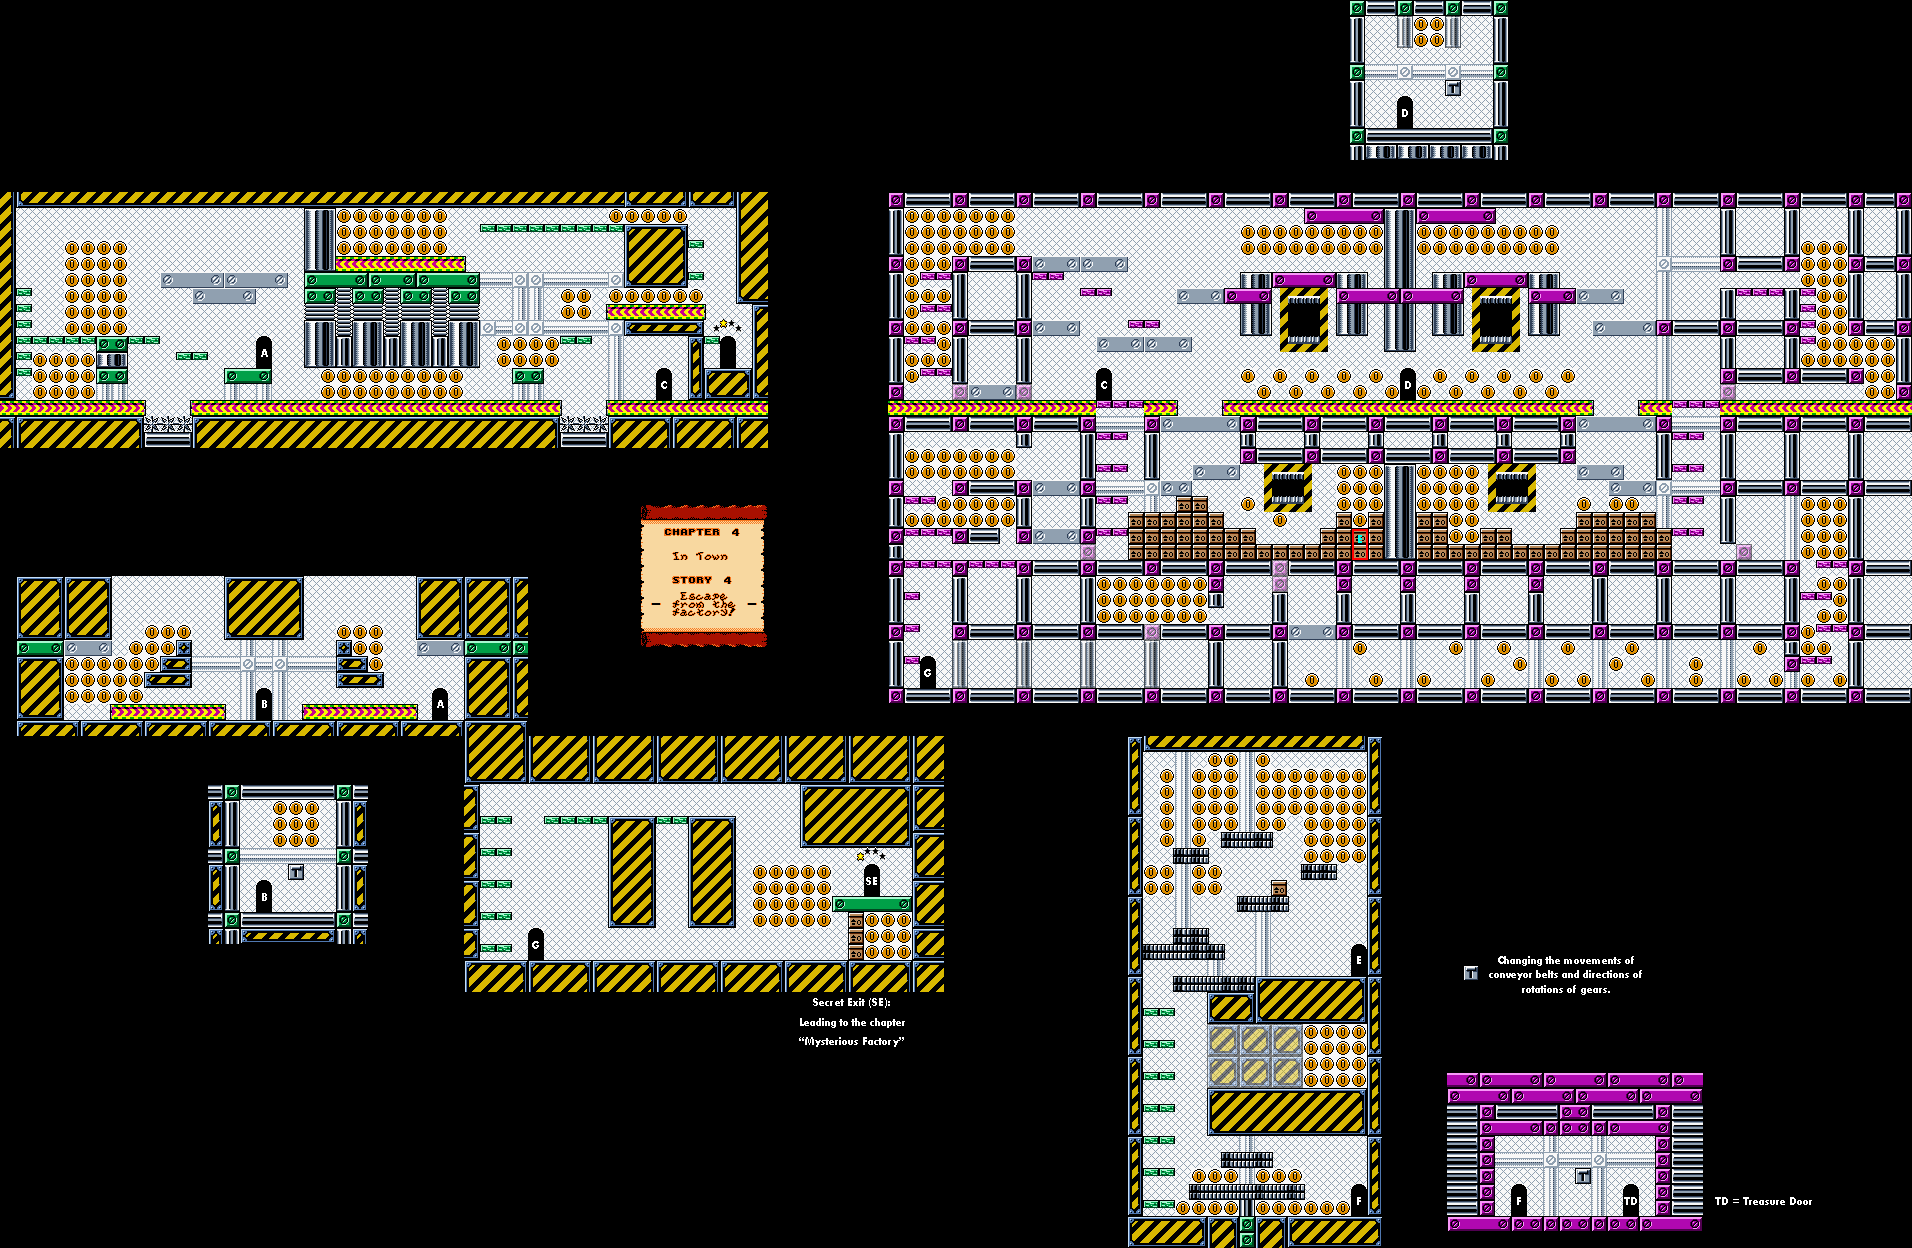
Chapter 4: In Town

Story 4: Escape from the factory!


There are conveyor belts here, and the chevrons very clearly show where they will push you. Also, watch out for spike traps.

You'll need to hit switches in order to switch the direction that certain conveyor belts move in.

If you press Down while performing a tackle, you can do a crouching slide. This can get you past some narrow passages while on some of the conveyor belts.

The guys who throw bottles are back in full force. It's possible to take them out with a jumping tackle if you jump from the right distance. You'll also have to deal with the birds that dart at you when you get near the treasure room.

The treasure room is pretty out of the way and is at the bottom of the room with the birds. You'll win a smoking pipe for beating this. As for getting out once you get the treasure, you'll need to hit the nearby switch in order to get the conveyor belts going in the right direction.

Wednesday, November 27, 2024

PrinceWatercress plays Great Greed - Part 19 of 28


It's time to make our way through the mountains...


Head northwest from Caviar Village. You'll find a forest. One you enter, just follow the path. At the three way fork near the end, don't go west; it leads to a dead end. The Rind is a really easy enemy to defeat that drops 195 Experience and 315 Gold. The Wrangler is just as easy as the Rind and gives 155 Experience and 208 Gold. Ditto with the Eye Pie, which gives 169 Experience and 296 Gold. The Eye Pie tends to run away, but they never do that to me because I am too fast and too powerful.

You'll eventually find a building. Talk to the man to enter the hot spring. Before you can go into the next room, however, you will have to hand your inventory - and your clothes - to the man guarding the door. From there, go into the water. You'll heal your leg in storyline. When you leave the room, the man you gave all of your belongings to will be gone. Leave the building, and you'll find out that the guy was really one of Bio-Haz's soldiers. You'll have to go back through the forest in your underwear to find him. Thankfully, the enemies here are really weak.

You'll have to head back to the beginning of the forest to find the guy who took all your stuff, and when you do, the guy will be confronted by Marcela. Marcela will get your weapon away from him, then you'll face Lickick. Lickick has 900 HP, but he is a vanilla enemy and is easy to take down. He gives 2500 Experience and 2600 Gold when defeated.

When you beat Lickick, Marcela will reveal herself to be Gum Drop Greene, one of the princesses of the Greene royal family, and she will mention that the programmers gave them all strange names, immediately breaking the fourth wall. She says that she is here to spy on the enemy while relying on Pint's help, but she ended up falling in love with Pint and his son Junior. 

Once you're out of the forest, you can talk to Gum Drop with Status. She will tell you to go to the mountain to the north. Keep going in that direction until you can't, then head west to find a sign. Read the sign, and you'll be able to climb the mountain.

When you enter the mountains, Gum Drop will put a magical barrier. This will protect you from the blizzard. She can also use it in battle in case an enemy casts a spell, and the barrier will protect you from the magic. 

The Ham Man is strong against Freeze Magic and can cast Shove. It gives 257 Experience and 815 Gold (which is a lot for this point in the game), and has a chance of dropping a Gold Helmet. The Gold Helmet is the fourth-best helmet in the game, so if you get it, equip it. The Hogninja can cast Scare, and gives 252 Experience and 701 Gold upon defeat as well as a chance of dropping a Radcut, which is better than the Badcut. The Espresso is weak against Flame magic and strong against Freeze magic, and can cast Freeze 2. It gives 248 Experience and 718 Gold, and has a chance of dropping a Gold Sword. This is better than even the Radcut and is the fifth-best weapon in the game, so if you get this, equip it. You'll be good on needing a new weapon for a while.

The beginning of the mountain is pretty straightforward to get through. After about six screens of the same path, you'll find a cabin and a cave entrance. The cabin is an inn where you can heal. In the Japanese version, this is a weird mountain hut and not an inn, and if you rest here, you'll have to fight an enemy called "Naughty Illusion," which is a large naked woman with long hair covering her backside, and you'll have to beat that enemy to continue on. This was cut out entirely for the North American version.

Tuesday, September 17, 2024

PrinceWatercress plays Chrono Trigger (Super NES) - Part 19 of 70


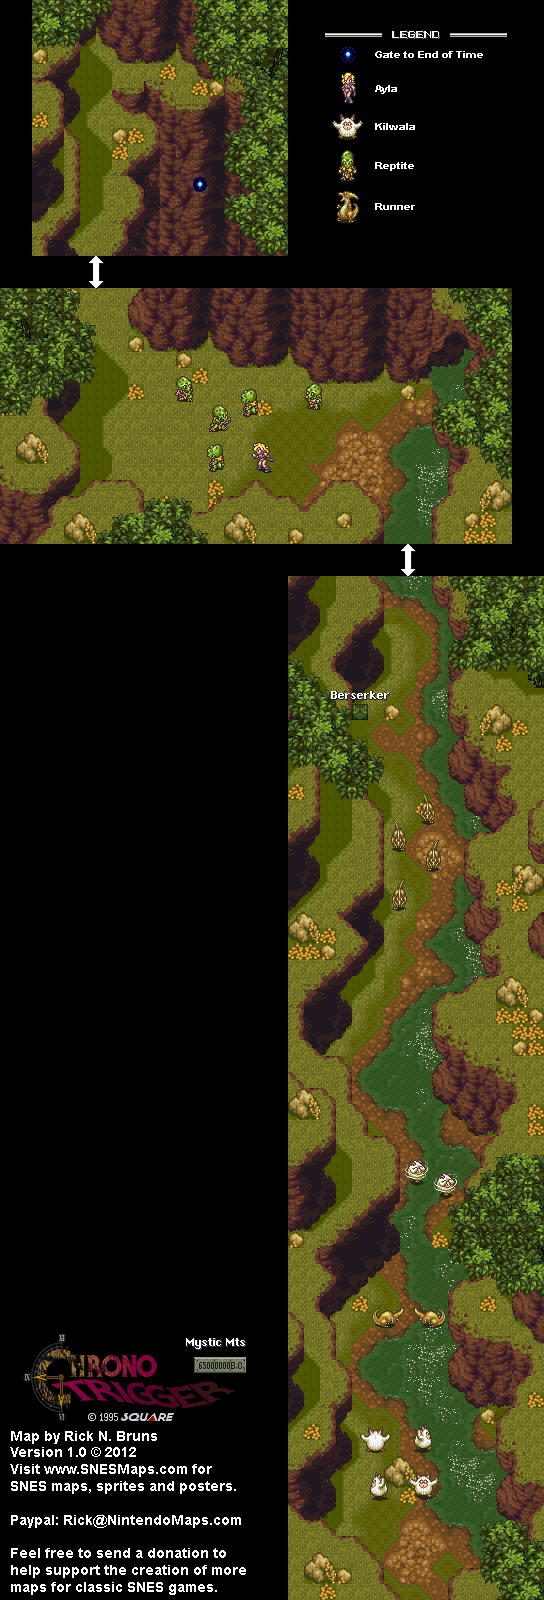
In this video, we head to the Reptites' lair to get the Gate Key back, and in the process, we make yet another enemy.


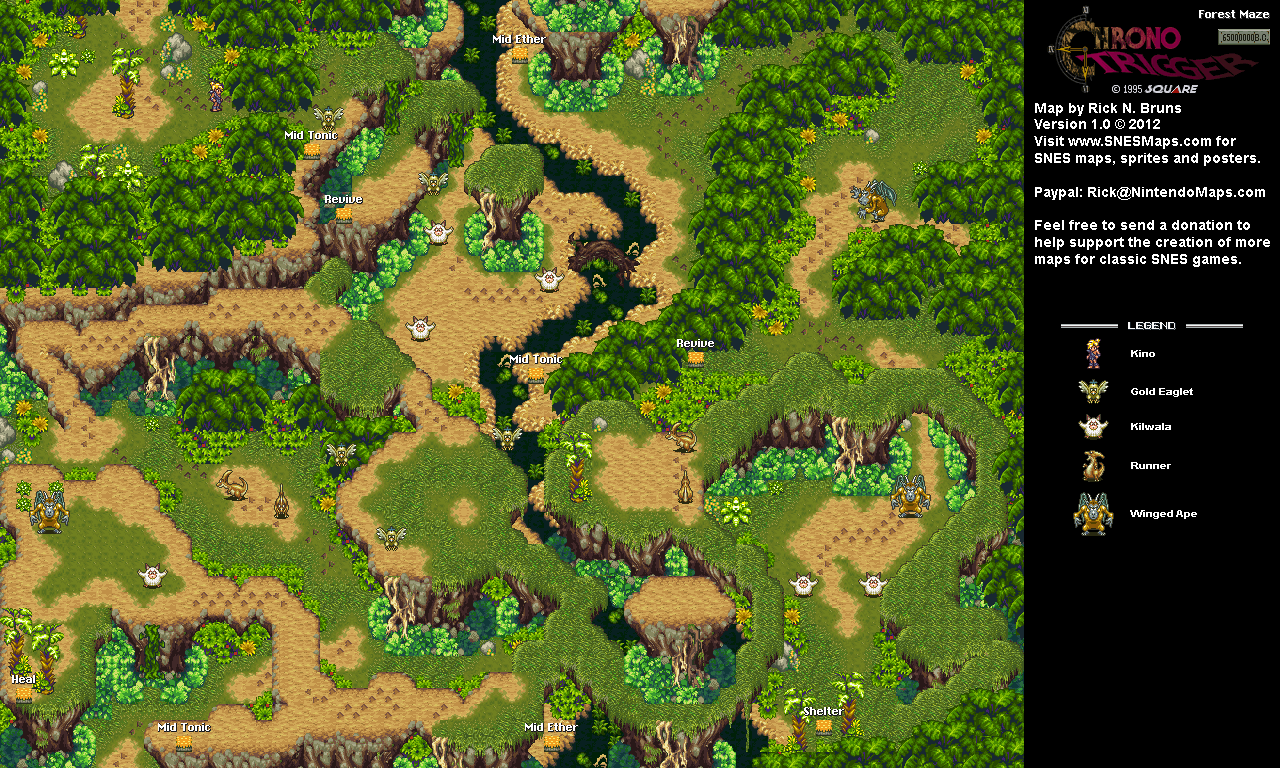
After getting some more free armor for Frog when he inevitably comes back into the party, we head into the Forest Maze.

The Forest Maze is not very hard to get through. While there are branching paths that lead to treasures and battles, it is still easy to find the exit even if you're not following the Reptite footprints.

There are two new enemies: the Gold Eaglets, which will turn into Red Eaglets and breathe fire at you instead of divebombing or scratching at you after taking enough damage, and the Winged Apes, which are weaker versions of the Cave Apes from the Dactyl Nest that fight the same way.

Along the way, we learn two new Techs for Ayla: Kiss, which heals one party members and also removes status ailments, and Rollo Kick, which is powerful enough on its own but can be paired with Crono's Cyclone for the Drill Kick Dual Tech, which can do a lot of damage. Keep that in mind for later.


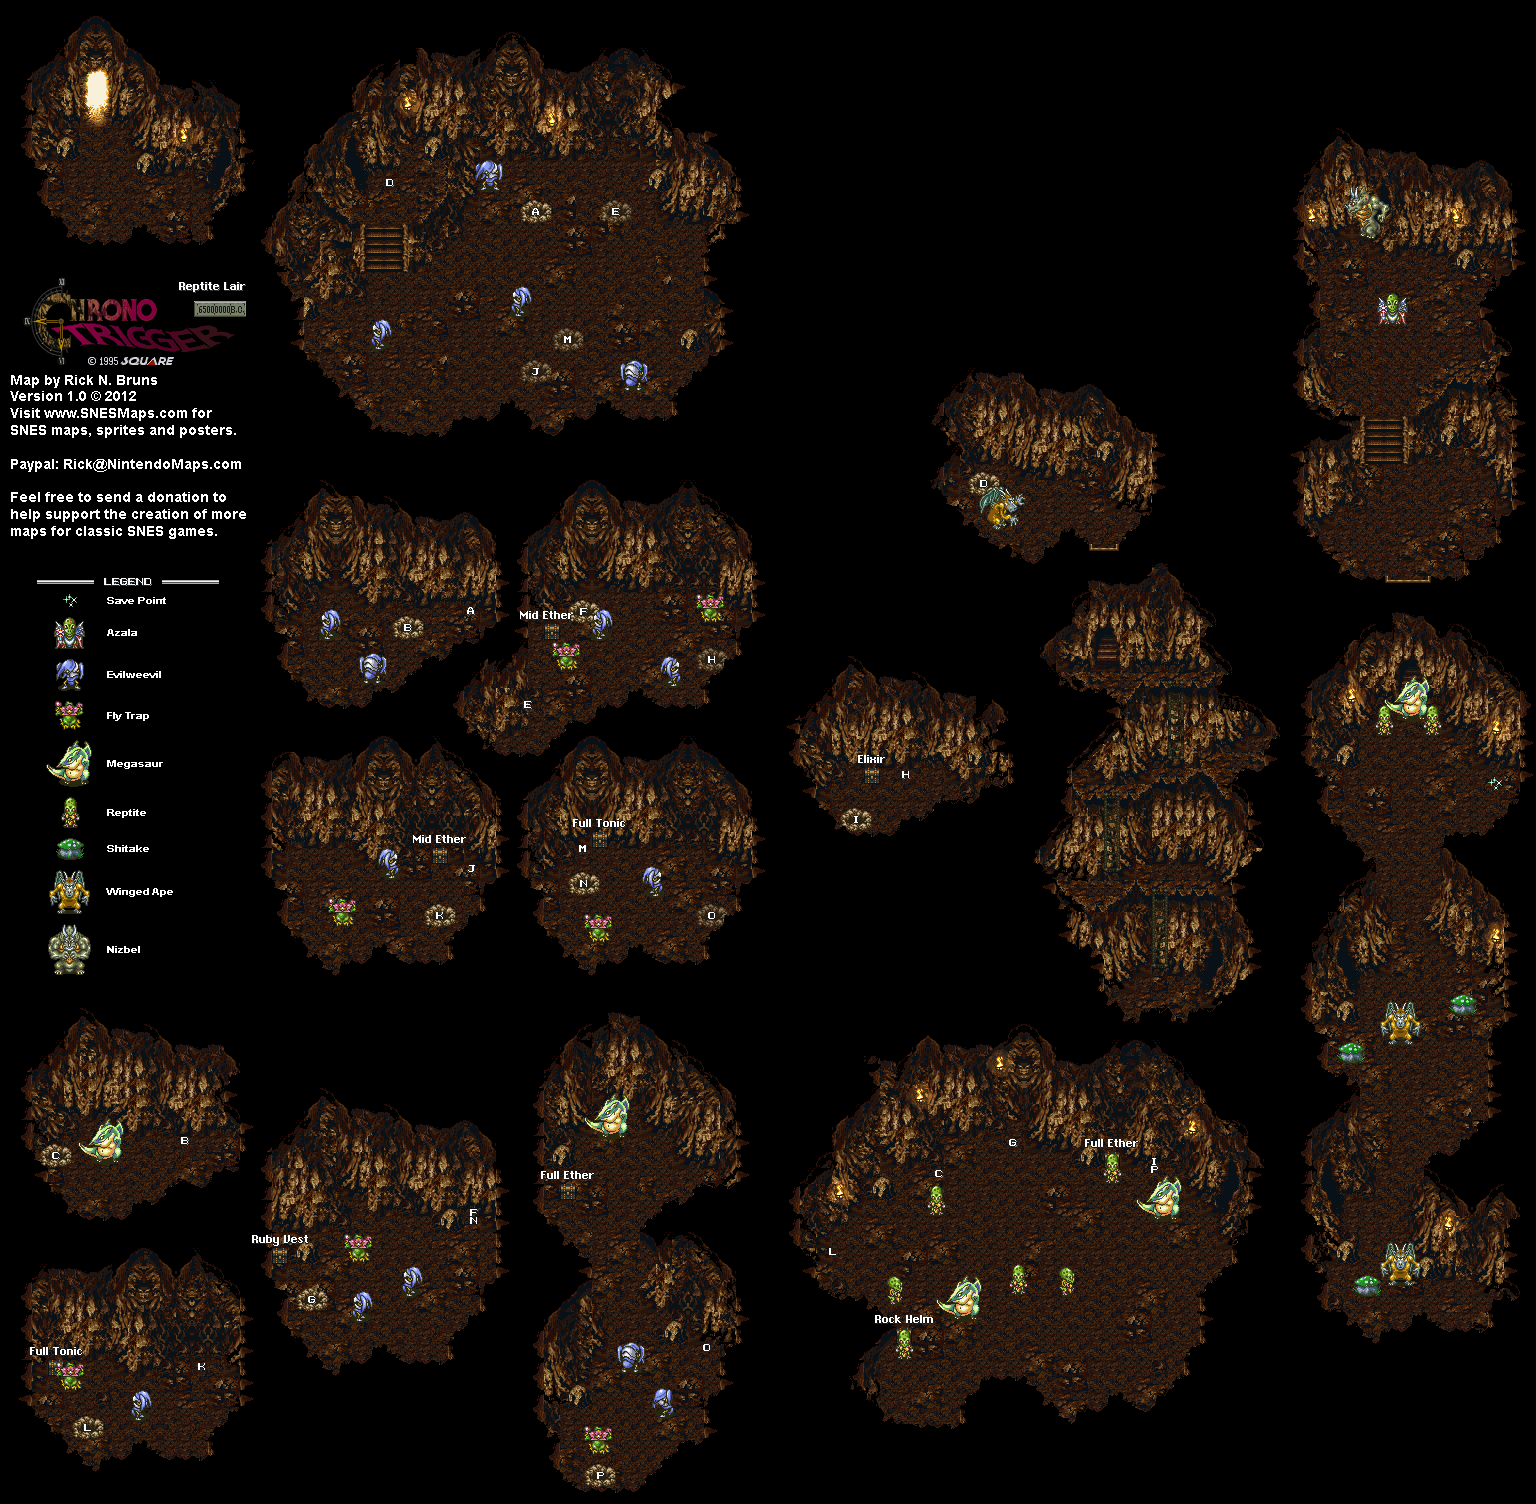
When you enter this place, the first monster you will face is the EvilWeevil, which is much like the Tempurite from Heckran's Cave except you don't need magic to defeat them.

If you stay in the first room after the entrance long enough, you'll see the EvilWeevil dig holes. There are three that can be made, and they all lead to alternate routes where you can pick up other treasures. I cover the main route that is already there at the start in this video, with plans to cover the rest in another video.

Along the way, we meet the Megasaur, a giant green dinosaur that can breathe fire. If you hit it with Lightning, you will not only shock it and lower its defense, but you will also stun it, allowing you to do more damage without getting beaten up. Beware: if you take too long, the Megasaur will unleash that lightning energy and zap your whole party and will begin to attack again, and you'll have to shock it a second time.

Eventually, you'll drop into a large room full of Reptites. Fight them like you did on the Mystic Mountains.

The Shitakes don't attack at all; they just run away if given enough time. The Winged Apes can throw them at members of your party, but that's about it.

Eventually, you'll run into Azala, who is admiring the Gate Key. When Ayla demands that the Gate Key be returned, you'll have a choice as to whether or not to tell Azala about the Gate Key. Regardless of which option you choose, you'll have to face Nizbel either way.

Nizbel can attack your party with an earthquake attack. Be ready to attack him a lot between attacks. However, in order to do that, you'll need to shock him with a Lightning spell in order to lower his defense temporarily. Do this only once, because he can release that lightning energy just like the Megasaur can and wipe our your entire party if you do it more than once. Your best attacks when Nizbel's defense is down are strong spells like Ice Sword, Fire Sword and even Drill Kick.

If you have Marle in your party, make sure she has learned Haste. Haste can raise a character's speed in battle, and if you cast it on Marle herself first, you can more easily caste Haste on the rest of the party and make them faster. This will work wonders for when you need to do a lot of battle on Nizbel in a short time and also when you need to heal the party on short notice. It's a great spell.


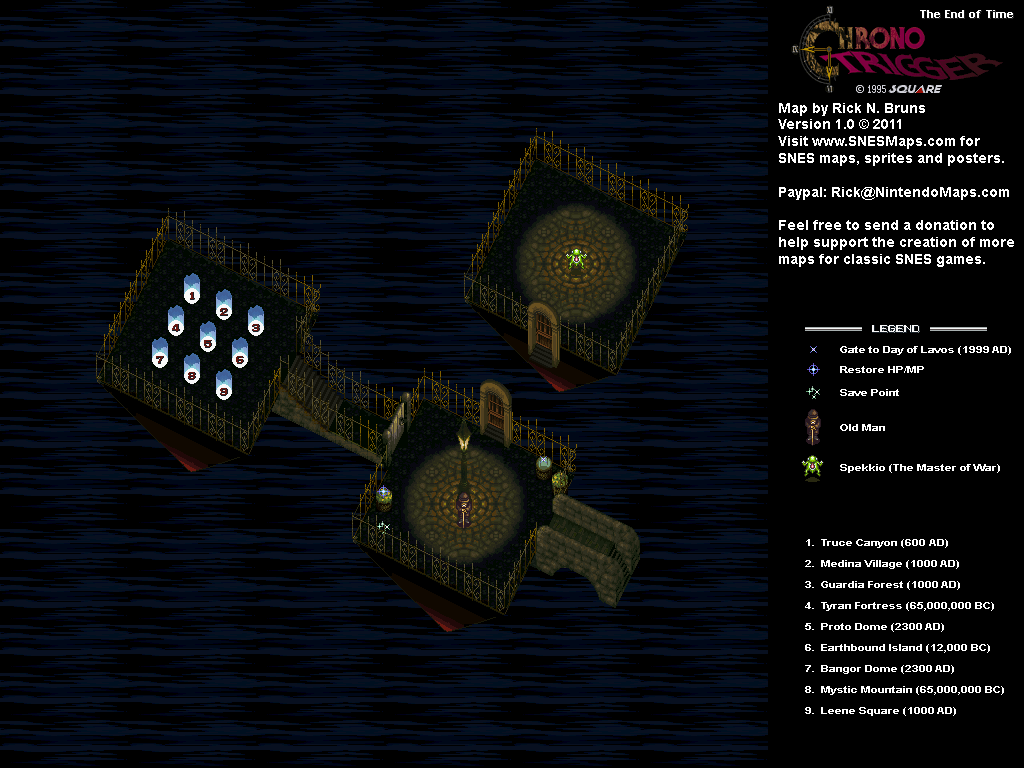
When you beat Nizbel, Azala will return the Gate Key and run away...for now. Afterwards, you'll be back in the Chief's Hut, and Ayla will leave the party for now. From here, it's time to head to the Mystic Mountains and head back to the End of Time. If you talk to the old man there, he will tell you to talk to Melchior in Medina Village in 1000 A.D. to get the Masamune reforged.

Tuesday, June 11, 2024

PrinceWatercress plays Ratchet and Clank: Going Commando - Part 19 of 54


In this entry, we take some time away from the story to get some things.

First | Previous | Next | End

2:40 - The Nanotech Boost in Tabora. You'll need to ascend with the glider so that you can get to the top of the fourth tower in the lava trail.

7:54 - Replaying the Electrolyzer fight in the Maktar Nebula arena for more experience.

11:33 - The Blitz Gun becomes the Blitz Cannon, which shoots a lightning shot with even further range.

12:58 - The Hazard Challenge. Once again, you're taking out all the enemies, although the hazards you'll need to avoid are the centerpiece of all this.

14:38 - The Chainblade Challenge. When he gets in front of you, do an airborne wrench strike. When he backs up and slices at the floor, jump while strafing. Beating him with just the wrench gives you a skill point.

17:01 - Buying the Synthenoid. The Synthenoid unleashes four support robots that float next to you and shoot at nearby enemies. They won't last forever and they will eventually disappear after each one shoots enough times. These things can help against multiple enemies.

17:20 - The Time Challenge. You'll need to beat 30 enemies in 30 seconds. The Lava Gun and the Megaturret Glove can really help here.

Skill Points:

Wrench Ninja: Blade to Blade: Beat Chainblade in the Maktar Nebula battle arena using only the wrench.

Controls:

As Ratchet:

Control Pad/Left Analog Stick: move
Right analog stick: move camera

X:
  • Jump and double jump (hold button after double jump to use Heli-Pack or Thruster Pack)
  • Wall jump (near certain walls)
Square: strike with wrench
Circle: pull out/shoot currently equipped gun
Triangle: 
  • quick select (hold and use in conjunction with Control Pad or left stick to switch guns; menu can be customized in Quick Select on the pause menu
  • double tap to switch between two most recently equipped weapons/items
  • interrupt on-screen messages

Select: open map
Start: Pause menu
  • Control Pad: select option
  • X: confirm option choice

L1:
  • center camera behind Ratchet (tap button to center)
  • first-person view (hold button and use left stick or D-Pad to look around; let go of L1 to move camera back behind Ratchet)
  • Square: wrench boomerang
  • Circle: fire gun
  • R1/R2: zoom in and out (Pulse Rifle only)
L2/R2: strafe (hold while moving)
L3: see health and Bolt totals
R1/R2: crouch (hold down)
  • Square: wrench boomerang
  • X: high jump
    • long jump (hold crouch button and jump while running to perform)
R3: open map

In water:
  • Square: dive and descend
  • X: surface and ascend
  • R1: accelerate with Hydro-Pack

As Clank:

Control Pad/Left Analog Stick: move
Right analog stick: move camera

When hanging off platforms:
  • Control Pad/Left Analog Stick: move
  • Forward+X: vault up
  • Back+X: drop down

Square: punch
X: Jump (press and hold in the middle of a jump to glide with Heli-Pack)
Triangle: command menu (hold and use in conjunction with Control Pad or left analog stick to choose commands)

Saturday, May 18, 2024

DeceasedCrab plays Earthbound - Part 19 of 53


In this entry, we reach the third "Your Sanctuary" location, then come back to a much brighter Threed.


You'll eventually face the Trillionage Sprout, the guardian of the third "Your Sanctuary" locations and two Tough Mobile Sprouts. It can cast Flash Alpha on your party and cause them to not stop crying. There's also the chance that someone can get confused as well.

Fire spells and Meteor Beta can be useful spells here, and the Big Bottle Rocket can also do some good damage.

Ness will learn Paralysis Omega at Level 29, which can paralyze all on-screen enemies in battle. Moon will learn Thunder Beta at Level 25.

Once you beat the Trillionage Sprout, you can head to the Milky Well and record the sound there with the Sound Stone, then heal your party and get a vision of Ness' mother. After that, you can head back to Saturn Village.


When you come back, you'll now have a longer ladder leading to and from the hot springs, making it easier to get around in the village. From here on out, you can get rid of the Jar of Fly Honey in your inventory through Escargot Express, as you won't be needing it anymore.

From here, head back to Threed.


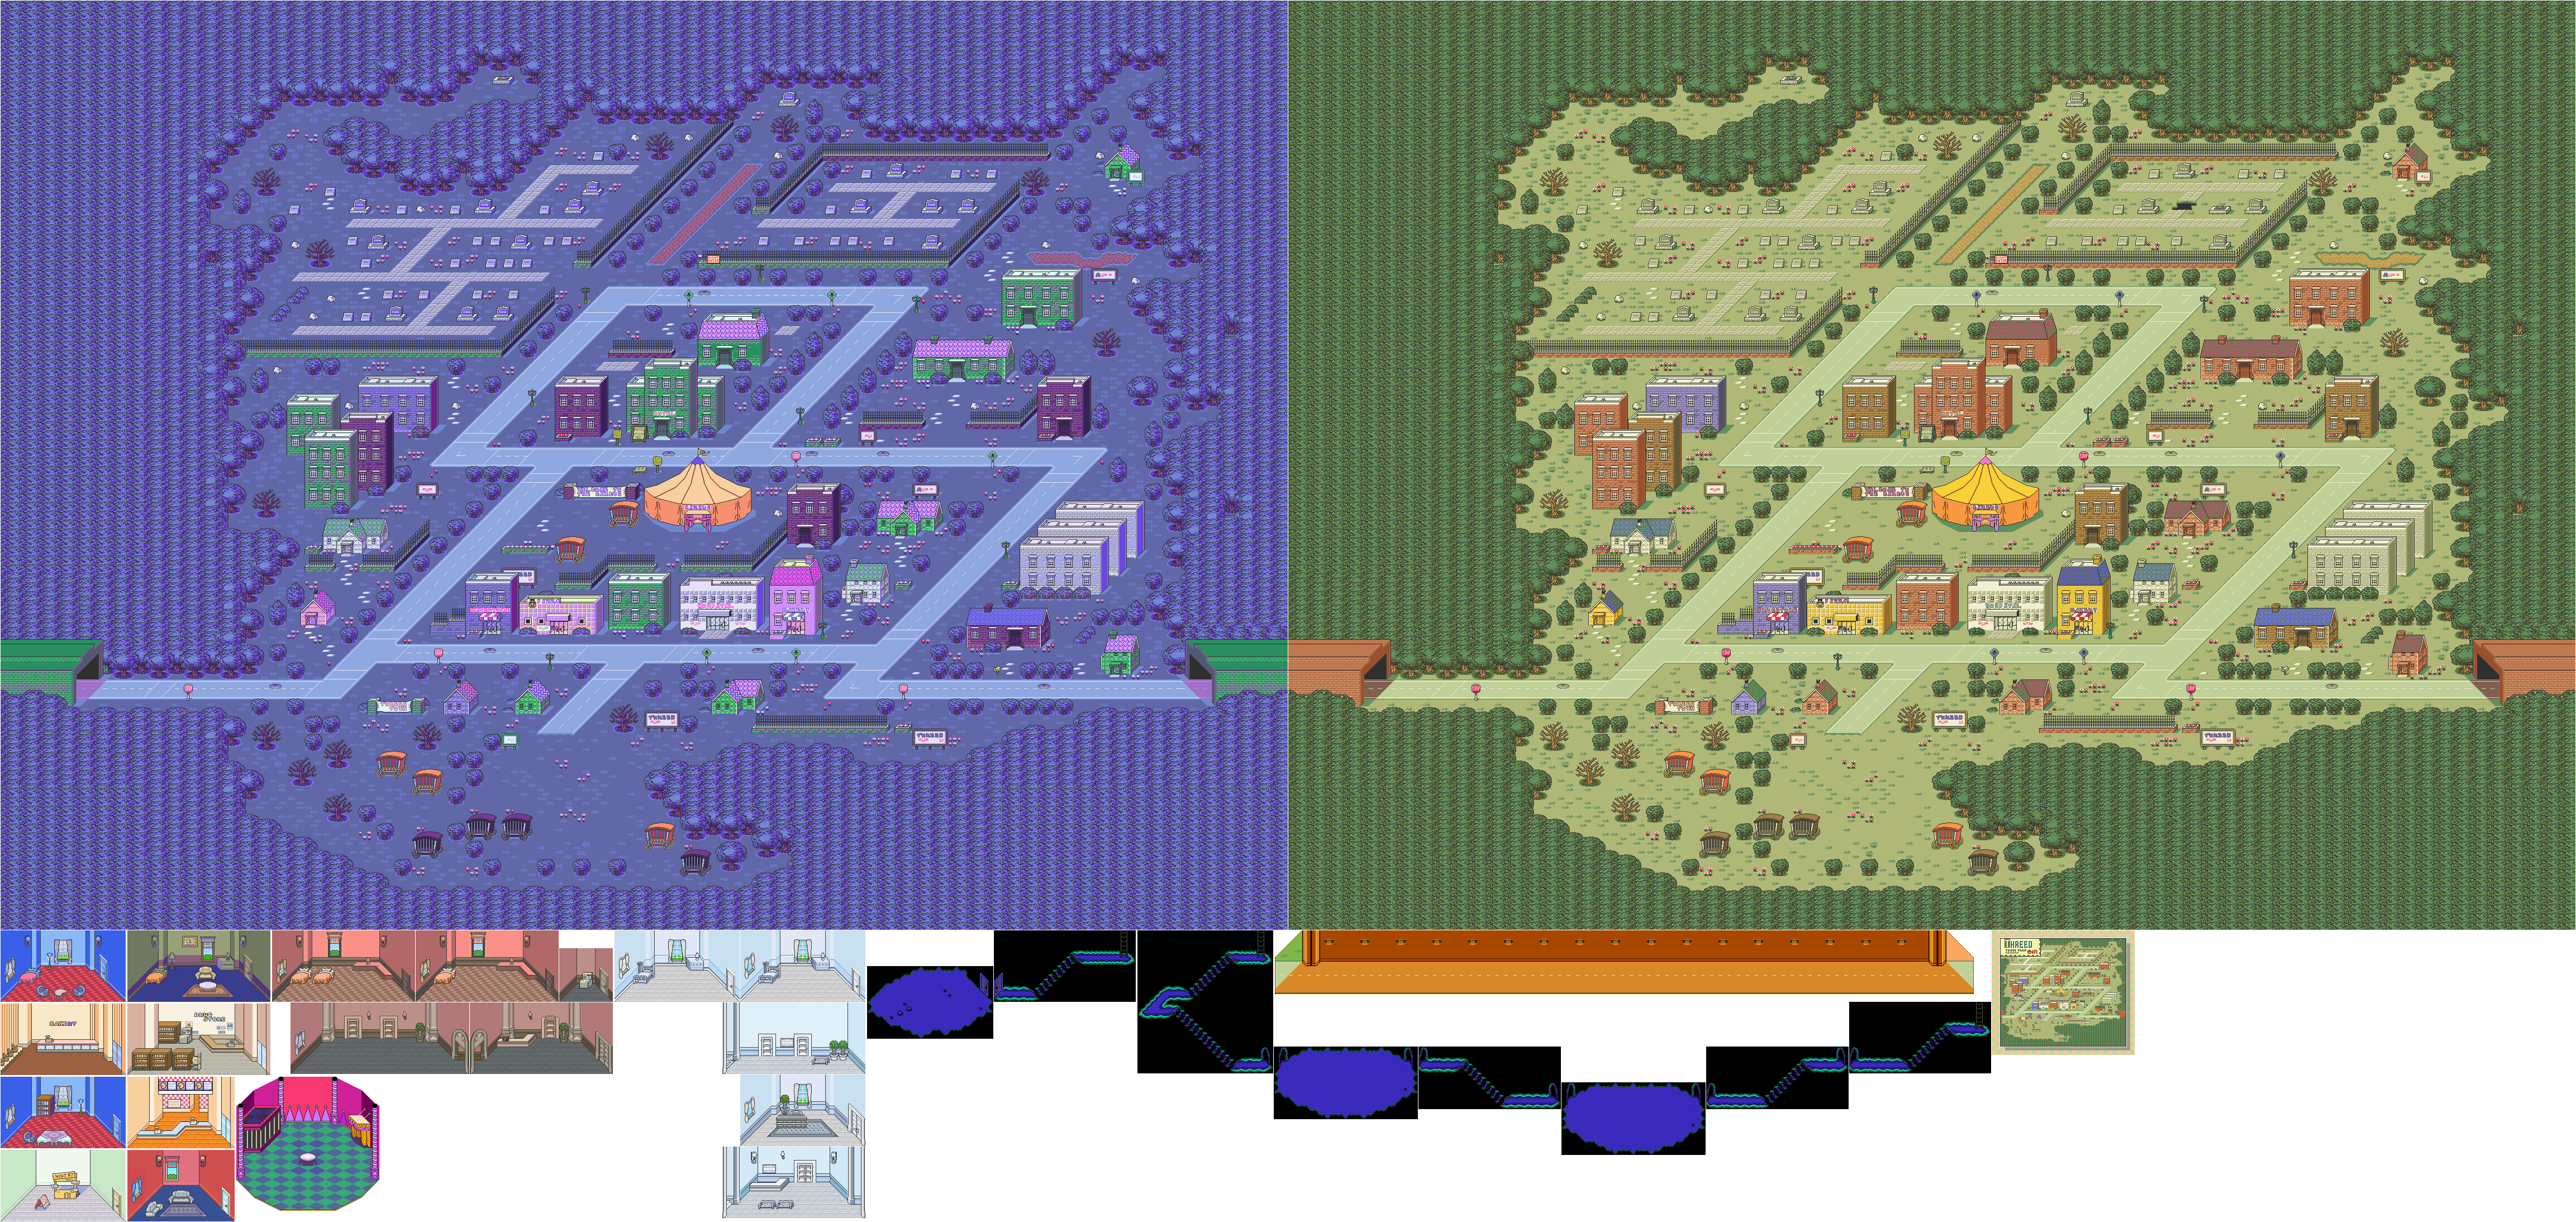
When you make it back to Threed, it will no longer be the dark place that it once was. You'll run into some people on the way back to town, and they will thank you if you talk to them. One of them will also mention that the ghosts in the tunnel has disappeared. If you talk to the rest of the people in the town, they'll also thank you.

If you approach the entrance to the big circus tent, the photographer will show up for another picture. One of the people in the tent will ask you if you can fix the Sky Runner in some optional dialogue.

One of the people at the hotel will tell you that The Runaway Five are now at Fourside.


Head back to Twoson with the Insignificant Item in your inventory. Thankfully, you can take the bus there for a few dollars by reading the sign from the sidewalk. Head to the Hospital, go up the stairs and go up to the man in the first room. Use the Insignificant Item to give it back to him in exchange for a Magic Truffle, which restores 80 PP. Save it for later, as there are only a limited number of those in the game.

Thursday, May 9, 2024

PrinceWatercress plays Drill Dozer - Part 19 of 28


This route was easier. It was also a whole lot of fun.


Area 4 Secret Area: Metal City Highrise


This time around, we take the top path. This time, you'll be drilling into those clamps, and using the other button to launch yourself upwards. You'll need second gear to get past the first section, and in all of the sections, you'll need to avoid the spiked black balls that move back and forth. Third gear will be on the second section. In the third section, there will be some turrets; be sure to take them out.

Despite how the level is, I had more fun with this one than I thought. This ended up being the easier path i the secret area by far.

You'll get the Glass Mask at the end of this route.

Saturday, March 16, 2024

PrinceWatercress plays Ka-Blooey - Part 19 of 25


Hard to believe we're almost at the end of the game now. I'm really starting to run out of things for the descriptions, so here's another five puzzles that will tie your brain in knots.


Level 96

Get rid of the enemies with the two switches north of the start. Detonate the small bomb in the upper right corner, then go right. Hit the switch in the upper left area. Go south across the ice, hit the switch, then detonate the small bomb near the ice on the left end. Enter the teleporter. Detonate the small bomb, go up, hit the switch, detonate the medium bomb and enter the teleporter. Detonate the small bomb, go south across the ice, detonate the medium bomb and enter the teleporter.

Level 97

Hit the switches in the upper right corner. Go to switch on the left and them them, then backtrack and hit the switches in the upper left corner. Go to the switches south of the upper right corner and hit them again so the tiles are restored. Then, go to the switches in the center and hit those, then hit the upper right switches so the tiles are restored. Go clockwise to the bombs in the lower left corner, then detonate the small bomb near the medium bomb. Detonate the small bomb near the teleporter in the lower left area, and detonate bombs as you go from teleporter to teleporter. Hit the lower center switch again, then detonate the left small bomb in the center set. Hit the upper center switch north of where the bomb was and detonate the small bomb north of the ice tiles. Detonate the small bomb near the bigger bombs in the lower right corner, then detonate bombs on the way to the small bomb at the left end.

Level 98

Hit all three switches at the start. Go right, hit the switch. Move the right medium bomb on the slot tiles one tile to the right, then detonate the small bomb. Go left, hit the switch, then detonate the small bomb near the mine. Detonate the small aerial bomb on the way to the left, and hit both switches on the way there. Bring the medium bomb to the newly-spawned slot tile. Detonate the small bomb.

Level 99

Hit the switch right of the start. Detonate the nearby small bomb, go right, go down, and hit the switch. Go right, up and then left to the blue guy and take the blue guy down, then right to hit the switch, and then up to the mine. Hit the switch on the way to where the mine was, go left across the ice, hit the switch there, go back to the right across the ice, hit the switch in the upper right corner, and enter the teleporter. Detonate the small bomb.

Level 100

For the lower left slot tiles, all bombs go on the bottom tiles. There should be two medium bombs on the left, a one-tile gap, a medium bomb and then a small bomb. Hit all the switches in the areas north and east of the spinner, including the switch that you spawn along the way (and get rid of the bouncing ball enemy, too!). You'll also have to hit the switch in the upper-left corner, and that will involve moving left across the ice at the top of the level. Take the top path to the upper right corner, place the medium bomb in the upper right corner and the small bomb to the left of it. Hit the untriggered switch (the only one still in the "up" position), then move, right, down, right, down, left, down and detonate the bomb. Go right three times and hit the switch, then go up twice and then left. Detonate the small aerial bomb and go left. Detonate the next bomb, then go up and left. Detonate the small bomb at the start (the one at the far left side of the level), then detonate the small slot tile bomb and move up. The tiles spell "MS."

Tuesday, October 24, 2023

Jerry Martin plays Strong Bad's Cool Game For Attractive People - Part 19 of 53


In this entry, we get ourselves some 'Lectric Boots, get some slick revenge against the king, and play a board game.


From here, head back to the computer and check the e-mail templates. Choose the "Food Order" template, then select "thepizz@virtualpizz.biz" as the address, then select any number for the second field and "'Lectric Boots" for the third field. A box will appear to the left of the computer when you get off the computer, and if you click on it, you'll get the 'Lectric Boots.

Go back to the computer and select the Tax Decree template. For the first field, select "Theoftown@strongbadshouse.res", then select "Creamy Ding Snack Cakes" for the second field and "forty million, forty thousand and forty four" for the third. This will cause The Of Town to declare war. You want this.

From here, go to the Maps and Minions board. Strong Bad will notice that The Of Town had the deluxe edition with the computer game pieces. From here, you'll play a game of Maps and Minions. You'll control The King, Coach Z, Homsar, The Poopsmith and The Of Town. Strong Sad, Strong Mad and Homestar are the enemy pieces. You can move your pieces one space at a time. Once you're done, you can click "End Turn." If one pieces runs into another enemy piece, both pieces will battle. Strangely, Strong Sad vs. Homsar will end in a draw, and Coach Z is never good in a fight.

If you move The Cheat to the space marked "An Open Field," you'll get the Beret.

OUTFITS:
- Eye Patch: Inside cereal box in kitchen
- Camo Pants: Inside dryer
- Strong Badia Shirt: Use Black Metal Detector just outside Strong Badia.
- King's Beard: Check the right side of King's fridge throne
- Crown: Unplug King's computer and check on top of it
NEW! Beret: Move The Cheat to the open field in Maps & Minions.
NEW! 'Lectric Boots: E-mail thepizz about 'Lectric Boots at the King's computer

CALLING STRONG SAD NAMES:
- Talk to Strong Sad (Before escaping)
- Talk to Strong Sad about fence twice (Before escaping)
- Examine Shower (Before escaping)
- Use Pillow on Strong Sad (Before using on statue)
- Use the Fake Sword on Strong Sad (Before taking over Bleak House)
- Talk to Strong Sad about Strong Badia (Before taking over Bleak House)
- Talk to Strong Sad about Strong Badia twice (Before taking over Bleak House)
- Talk to Strong Sad about Bleak House (Before taking it over)
- Talk to Strong Sad about Strong Badia (after usurping Bleak House)
- Use Fake Sword on Strong Sad at Homsar Reservation (before taking it over)
- Use Tuning Fork on Strong sad at Homsar (before throwing in hole)
- Talk to Strong Sad at Marzistar (before reinstating Homestarmy)

ALGEBROS MANUAL PAGES:
- Page 3: Under box near the fence.
- Cover: Check Strong Bad's mailbox.
- Page 2: Check Marzipan's mailbox.
- Page 4: Check under the box in Pompomerania.

FLAGS:
- Concessionstan Flag: Check bush near Concession-Stantinople.
- Strong Badia Flag: Check brick wall.
- Bleak House Flag: Check under box on Strong Sad's bed.
- Cheat and Tirerea Flag: Check Tire after giving medal to The Cheat.
- Homsar Reservation Flag: Check Mysterious Bush at Homsar Reservation.
- Marzistar Flag: Use the Black Metal Detector near the garden on Marzistar.
- Pompomerania Flag: Order Bull Honkey twice in a row.
- Country Flag: Use Black Metal Detector near the big Country flag in Country.

TEEN GIRL SQUAD CARDS:
- Tar Pit: Check Strong Sad's books in Bleak House.
- Egg: Use lighter on the barred window in Bleak House.
- Alien: Use Black Metal Detector near cave in Homsar Reservation.
- Darwin: Check the Ex-Fish at King of Town's castle three times.

SETTING THINGS ON FIRE:
- Maps & Minions Box
- Smoke Detector
- Strong Bad's bed 
- Strong Sad's flag 
- Strong Sad's bill of rights 
- Strong Sad's constitution
- Mysterious Bush in Homsar Reservation
- Kimono
- Lone Skull #1
- Lone Skull #2
- Pile of Skulls
- Unlit Candle Holder

Wednesday, June 14, 2023

PrinceWatercress plays Bugs Bunny & Taz: Timebusters - Part 19 of 23


In this entry, we get the fourth and final era of the game in full swing.


0:58 - Our introduction to the Transylvanian Era. Daffy meets Dracula, then drinks a potion that makes him a giant monster for no reason.

2:46 - The first of five crates is at the start. Also, break the coffins for items and collectibles. Just watch out for arms that may pop out of them to hit you with a hammer.

3:25 - The first out-of-time character in the Transylvanian Era. Shoot a carrot at him in first-person mode, then kick him.

4:18 - The second crate.

6:05 - The third crate, and a big brute. Be ready to run if they chase after you. 

6:40 - This machine can be used to switch brains with the big brutes and control them. We'll take advantage of that later.

6:51 - The fourth crate, and another big brute. If you don't get their attention, kick them!

9:36 - The brutes do not play around!

10:27 - We look for the red guy, but the red guy finds us. We then have to lead him to the brain transfer machine and play as the guy. You can only do brain transfers with Bugs. While playing as one of this big, beefy guys, Square punches, X jumps and Circle performs a charge attack. You cannot go anywhere past the hub world while playing as one of these guys.

The big red guy can break the red church bell door as well as the gold boxes in the immediate vicinity.

13:12 - You'll want to break any blocks that are nearby and grab any gears that you see. You can punch the rocks, and if you are in the punching animation, the rocks cannot hurt you. When you reach the top, punch the bell. You'll leave the area automatically and light up a window on the bell tower.

15:26 - Here, we learn how to float into the air with a bubble gum bubble with Taz. As Taz, attack the bubble gum dispenser with Square, then grab the gumball that pops out and eat it with Triangle. You'll be able to float slowly into the air, but this does not last forever, and the bubble will pop and you'll eventually fall back down.

To blow the bubble, you'll need to press the X button. When you press X, you'll hear Taz blow air into the bubble. When he stops blowing air, that's your cue to press X again. This will allow you to get into the air as much as possible and get as much air time as you can. You can also control Taz with the D-Pad, but watch where you're going, as it is possible to pop the bubble because you went somewhere that the game does not want you to go while blowing a bubble gum bubble. 

The rooftop here has a few gears as well as the fifth and final crate for the Transylvanian Era hub world. You'll also find the second out-of-time character for the hub world as well; thankfully, you can press L1 to teleport Bugs over to the roof to take care of him.

Wednesday, April 12, 2023

PrinceWatercress plays Sly Cooper: Thieves In Time - Part 19 of 48


In this entry, we take on a giant dragon robot with three heads before shutting the Black Knight's operations down.


Mechanical Menace

You'll need to play as Sir Galleth to get this job started.

When you get to the job marker, you'll find out that a mechanical beast has been terrorizing the village from a nearby cave. When you get over there, be ready to attack the tiny mechanical dragon-like enemies with wings that come at you, as they will spit fire at you and be a general nuisance. When you get to the cave entrance, Carmelita Fox will be following close behind in case Galleth gets himself in trouble again.

Once you're inside the cave, you'll have to climb a large mechanical tower with the help of the Catapult Crash. If you see any of the winged mechanical enemies, get rid of them. As for the tower, you'll need to climb your way up. Along the way, you'll also have to time your Catapult Crashes and upward jumps so you can easily get from one hook to another and you'll also have to deal with fire and flaming parts as well as the creatures from before. You'll also have to run on treadmills to bring hooks downward.

At the top, you'll find a robot dragon. Get up the column to the right, spire jump across the dragon's horns and get to the machine on the other side. Sir Galleth will pull the plug, but it only makes the mechanical dragon mad and catch him in one of its mouth. Carmelita shows up in time to see this happen and fights the dragon.

Use Square to knock out the smaller enemies with a pistol whip. As for the dragon itself, you'll need to aim at the heads and shoot at them. When one of the heads goes down, approach it so that you get a cutscene where you have to mash the R1 button to shoot one of the eyes out. You'll need to do this with all three heads. Watch out for the lasers that travel across the ground as well as the fire that the dragon spits. When the wings blow everything back, move forward to keep from being blown off the tower.

After taking out all three heads, you'll have to do it again to completely blind the dragon's heads. This time, you'll also have to deal with more fireballs at the same time and shoot down any homing missiles that the dragon shoots at you. As you go further and further into this battle, you'll have to deal with more and more attacks simultaneously. Once you take out the three heads again, you'll save Sir Galleth and complete the job.

There is a trophy/achievement for getting to the top of the tower fast enough, but that gets saved for another video.

Short Supply

You'll have to play as Murray to get this job started.

I don't show off any of Carmelita's shots until later, but you can choose between them with the L2 button much like with Sly's costumes, Bentley's ammo and Murray's punches.

When you start this job, Murray will have to head to the tavern - which is now a fuel production facility - to tear the place up. Sly will have to head to the shoemaker's to shut down the machines producing the giant robot parts. Sir Galleth will have to get into the bakery to shut down the generator for all of the facilities.

You'll start Murray's part first. Head to the tavern and enter the front door. Here, you'll need to stomp enemies to pick them up, then throw them into the vats to destroy them. Since the mouse enemies will sometimes show up here, you may have to shake them up for treasures for the "Hassan Would Be Proud" trophy.

Once you destroy the three vats with Murray, you'll play Sly's part of the job. Get to the shoemaker's and go inside, then equip the Archer's Costume, shoot an arrow at the target when the laser is out of the way and get to the top of the machine before the laser cuts the rope. The next arrow shot - which is just as hard because the same laser can also cut the rope - leads to a terminal that leads to a game of Spark Runner. When you get through Spark Runner, you'll shut down the machinery in the shoemaker's and switch to Sir Galleth's part of the job.

As Sir Galleth, enter the bakery. Knock the fire out of your way, then find the hook and Catapult Crash to the second floor. From there, you'll need to shut down the three sub-generators to turn off the main generator before time runs out and everything resets. Find a hook, use Catapult Crash to smash the pipes, then run to another hook and do the same thing while avoiding the lasers. Once you take out all the pipes, you'll shut down the generator. Get back down the hatch to the first floor before time runs out to complete the job.

Abilities:

Diablo Fire Slam (Murray): While holding an item, pressing Triangle slams it into the ground, creating a huge radial fire ring.

Auto Fire (Carmelita): Equipping this and holding the fire button down while aiming gives Carmelita a rapid fire shot.

Charge Shot (Carmelita): Equipping this and holding the fire button down while aiming gives Carmelita a shot that can charge up much like Mega Man and do more damage when fired.

Stun Shot (Carmelita): Equipping this gives Carmelita a shot that will stun enemies.

Triple Shot (Carmelita): Equipping this gives Carmelita a three-way shot.

Sprint While Charging (Sly): Allows Sly to sprint while charging up his charge shot with R1.

Dukes of Dynamite (Murray): A punch type that delivers explosion damage to enemies.

Sprint While Charging (Murray): Allows Murray to sprint while charging up his charge shot with R1.

Clothesline a lo Macho (Murray): Double tap R1 to clothesline the enemy without the need of the left stick.

Collectibles:

Sly Mask #40 - At the bottom of the mechanical tower in "Mechanical Menace," head off to the side for a Sly Mask.

Controls:

Left analog stick: move
Right analog stick: move camera
X: Jump and double jump (hold X on second jump for hover jets as Bentley)
Square: attack
Circle: 
  • interact (usually with anything that has sparkles) (Sly)
  • steal from enemies (from behind) (Sly, Bentley, any of Sly's ancestors)
Triangle:
  • knock enemies upwards (from behind; press Square to slam enemies down for stealth slam) (Sly, any of Sly's ancestors)
    • press Circle after knocking enemy upward to perform Silent Obliteration (Sly; replaces Stealth Slam; must buy on ThiefNet)
    • press Square for Stealth Slam (any of Sly's ancestors)
  • spin attack (hold to charge) (Sly)
  • throw bombs (Bentley)
  • Thunder Flop (in mid-air) (Murray)
  • spin attack (hold to perform) (Murray)
    • control with left stick (must buy on ThiefNet)
  • Raging Inferno Flop (in air; Murray; must be bought on ThiefNet)
  • charge attack (Sir Galleth)

L1: 
  • bomb aim (Bentley)
  • smoke bomb/flash bomb (Sly; must buy on ThiefNet)
  • aim/strafe mode (Carmelita; must hold button down)
    • left analog stick: move
    • R1: shoot (can only shoot in strafe mode)
L2:
  • hold for costume select menu (Sly)
    • hold down to stay in menu; use D-Pad or left stick to make selection
  • hold for weapon select menu (Bentley)
    • hold down to stay in menu; use D-Pad or left stick to make selection
  • hold for fist select menu (Murray)
    • hold down to stay in menu; use D-Pad or left stick to make selection
  • hold for shot select menu (Carmelita)
    • hold down to stay in menu; use D-Pad or left stick to make selection

L3: activate compass
R1: run (hold while moving to perform)
  • Paraglide (Sly; in air; must buy on ThiefNet)
  • Adrenaline Burst (Bentley; double tap to activate; must buy on ThiefNet)
  • Clothesline (Murray; double tap and steer with left stick; must buy on ThiefNet)
R2:
  • Trigger Bomb (Bentley; must have bomb on field to detonate manually; must buy on ThiefNet)
  • Catapult Crash (Sir Galleth; hold to charge)
    • X: press while holding R2 to perform Catapult Crash
    • Triangle: press while holding R2 to disconnect from hook
R3: Binocucom
  • Right analog stick: move
  • Left analog stick: zoom in and out
  • R1: take picture (when applicable) (Sly, Bentley)

Start: pause menu
Select: map
  • Left analog stick: zoom in and out, switch between map and status
  • Right analog stick: move map
  • Circle: back

Tuesday, February 21, 2023

PrinceWatercress plays Blood Omen: Legacy of Kain - Part 19 of 41


It's time to wrap up the Lost City and get everything that's left before continuing the adventure.


0:26 - From here, leave and go to the building to the immediate east.

1:03 - Use Control Mind on the enemy to the west. Trigger the switch to the north and go further west to the teleporter and walk onto it. From here, do the same to the enemy on the east side. Hit the switch to the north, then continue east and onto the teleporter. You'll be in a different area. Go south to six Hearts of Darkness. Press X to play as Kain again. From here, you can enter the door to the north. This counts as two secrets (see below).

2:24 - Walk around this room in a circle, and watch the projectiles and the spikes as you do. You'll want to step on the buttons on the sides. This opens the door to the north. Before you touch the teleporter, touch the serpent statue on the north wall. This counts as three secrets (see below).

4:40 - Go south to the open archway. The tile in the center is a teleporter. From here, go all the way southeast for a human and some pick-ups, then go to the building north of here.

6:12 - There are some pick-ups here as well as a teleporter leading back to Nachtholm. Don't use that teleporter just yet. Instead, look around while avoid the traps for doorways. The first one is in the northwest corner. Each room not only has something different, but also an easy-to-find button that you can step on to open another room. This leads not only to eight different rooms with eight caches of different pick-ups, but also eight secrets (see below).

13:15 - I use Inspire Hate to get everything here a little more easily. From here, teleport back to the other archway...

15:12 - ...and enter this building.

15:35 - You don't need to go here, but if you do, you can use Implode on the enemies here to easily kill them, then go into the room to the north for pick-ups and humans to feed off.

Remember that teleporter from about ten minutes ago I told you not to touch? Go back to it and walk onto it to go back to the road leading to Nachtholm. You're done in the Lost City.

17:38 - From here, I head back to the area just before the Lost City. 

Secrets


48 and 49. - Use Control Mind on the enemy to the west. Trigger the switch to the north and go further west to the teleporter and walk onto it. From here, do the same to the enemy on the east side. Hit the switch to the north, then continue east and onto the teleporter. You'll be in a different area. Go south to six Hearts of Darkness. Press X to play as Kain again. From here, you can enter the door to the north. This counts as two secrets.

50, 51 and 52. - Walk around this room in a circle, and watch the projectiles and the spikes as you do. You'll want to step on the buttons on the sides. This opens the door to the north. Before you touch the teleporter, touch the serpent statue on the north wall. That counts as three secrets. 

53 - 60. - There are some pick-ups here as well as a teleporter leading back to Nachtholm. Don't use that teleporter just yet. Instead, look around while avoid the traps for doorways. The first one is in the northwest corner. Each room not only has something different, but also an easy-to-find button that you can step on to open another room. This leads not only to eight different rooms with eight caches of different pick-ups, but also eight secrets.

Wednesday, January 25, 2023

PrinceWatercress plays The Bugs Bunny Crazy Castle 4 - Part 19 of 27


At this point, you can tell I'm getting peeved with the game.


Stage 10-7

Once again, you'll be seeing a lot of Gossamers. There's plenty of weapons here; use them to get rid of the Gossamers.

You'll need the pick-axe to get to the teleporter that leads to an area isolated in mid-air from everything else. Yes, that mid-air area has a key.

Stage 10-8

The good news: this is the last level of Stage 10. 

The bad news: there's another area isolated from the rest of the level that's easier to access by teleporter than by foot. Seriously, the level design for this level is a mess. 

Tuesday, December 6, 2022

PrinceWatercress plays Spyro the Dragon - Part 19 of 21


It's time to explore Gnasty's World. We have just two normal levels left, and here's the first one.


Gnorc Gnexus

The fodder here are mice (hey, kinda like Hurricos in the sequel).

This isn't a very big world. It's just a circle with three dragon heads blocking off your paths to the later levels. You'll have to complete each one in order to get to Gnasty himself!

Gnorc Cove

Make sure to look around and take your time when it comes to exploring. The path is linear, but looking around for where to go as well as where to find treasure. There's one chest that is easy to miss.

Knock the metal barrels back into the guys that throw them to take them out from a distance. Be careful not to charge into the TNT barrels. Flame them instead.

If those big men are carrying TNT barrels, flame them to get the barrels to explode, then flame them again to take them out!

Saturday, July 9, 2022

PrinceWatercress plays Sly Cooper and the Thievius Raccoonus AGAIN - Part 19 of 23


In this entry, we finally face and beat Clockwerk...but we're not done yet...

A Strange Reunion

Use the left analog stick to aim and steer, and press Square to fire rockets. You'll soon meet Clockwerk. Carmelita will then shoot at certain parts of Clockwerk in order to disable them, and you'll need to shoot at the parts that flash white with your own rockets to destroy them without getting blasted yourself.

After that, you'll have to fly through the rings that Clockwerk shoots at you. After enough rings, Carmelita will shoot another part of Carmelita and make it flash white, and you'll have to shoot rockets at it until that part is destroyed. Between parts, you'll have to continue to fly through rings. This is possibly the hardest part about the battle.

The last part has you moving towards Clockwerk's head. When you approach, you'll have to avoid the lightning bolts that Clockwerk sends at you as well as the lasers that are close to Clockwerk's body. When you make it to the body, you'll need to jump to it and strike at the head until it is destroyed. After this, Clockwerk is destroyed, the Thievius Raccoonus is (almost) complete, and the Cooper Gang's adventures continue...or do they?

Duel by the Dragon

Now that you've beaten Clockwerk, you can open the vault near the end. The combination is 2-3-1. Inside is Colonel Reid Cooper's Time Stopper Technique, which freezes all enemies in the stage for a few moments. You'll then get a cutscene signifying that the Thievius Raccoonus is complete, but you're not done. Next up is the Master Thief Sprints and the game is 100% complete.