Showing posts with label part 22. Show all posts

Sunday, July 19, 2026

PrinceWatercress plays Space Station Silicon Valley - Part 22 of 32


Somehow, getting the trophy here is harder than the level itself.


Jungle Jumps


You'll need to kill all the gorillas, kill all the hyenas and collect all the keys to get through this area.

You'll start off as the racing turtle. There will be a key on the path behind you, and there will also be Power Cells near it. There is also an area you can only enter with the turtle left of where you start, and it contains more Power Cells and a box with energy in it.

Go opposite of where the first key was and use the shell attack to take out the elephant, then use the turbo ramp to go up the ramps and go through the rings. Keep moving forward and turbo boost off the ramps to continue and go through another ring. You'll soon move past where you need to put the keys as you keep moving forward. Turbo boost off the ramp to get to the platform with the tree, then make your way further around the perimeter of the level to return to the start. Leave the gorillas on the way back alone for now.

Explore the ground area of the starting area. You'll find another elephant to take down, so do that. There is another area to enter as the turtle for energy if you need it. From here, control the elephant. There is a cave that you need to go to take out two motorcycle hyenas. Spit water at them and take them out, and make sure that neither of them falls into the lava. This is possible to have happen, and if it does, you won't be able to finish the level. You may take some damage, but as long as you're aggressively hitting them with water, you should be fine. Take control of the hyena from this point and use your missles to defeat the chameleon on your way out. As the chameleon, you have a tongue attack with A and the ability to be invisible with B, but you need to hold the button down to stay invisible and you won't be able to attack while you are. Unfortunately, with the way I've done things, I won't need the chameleon.

You'll want to control the hyena from here on in. Head back to the area just before you return to the start and take out the two gorillas here with your missiles. Take control of one of the gorillas and head back to the starting area. Go back to ground level and double jump across the metal boxes, then double jump over the branches that act as platforms on the tree to get to the bridge. Double jump from plank to plank to get your second key.

From here, you'll need to jump to the nearby vine and double jump up the branches to another vine. You'll need to swing and jump to a second vine, then jump off that to go through another ring. This is the fourth and last ring you need to go through, as well as the hardest, since you risk taking fall damage if you miss the vines on the way to the ring. If you go through all four rings, though, you'll get the trophy, which will appear on a log to the right of the first two ramps you saw near the first elephant. You'll need to swing on yet another vine to get to it, but at least the worst and the hardest of this is over. Just remember that you need to single jump off the vine or else you'll keep missing the trophy every time. There is also another ring near the keyholes, as well as a vine. This vine will take you to another vine, which in turn takes you to three power cells and a key. This key will be the third and last one you need.

When you have all three keys, go back to the keyholes. You'll unlock the panel in the ground and you'll be able to go through the exit teleporter.

Hyena Biker


Type: Hyena Biker
Environment: Jungle
Skill A: Speed Boost
Skill B: Missiles
Water Resistance: OK
Mass: Medium
Armour: Light
Strength: Medium
Traction: Poor
Fall Distance: Medium
Production: Medium
Engine: 2.0
Intelligence: High

Chameleon


Type: Chameleon
Environment: Jungle
Skill A: Tongue Attack
Skill B: Stealth Mode
Water Resitance: Poor
Mass: Light
Armour: Light
Strength: Weak
Traction: Very Good
Fall Distance: Medium
Production: Short
Engine: Fusion
Intelligence: Medium

Power Cells


Friday, February 6, 2026

PrinceWatercress plays Super Mario Odyssey - Part 22 of 92


In this video, we get what else we can from the Lost Kingdom at this point...and it's not much.


Power Moons


10. A Propeller Pillar's Secret - At Swamp Hill, there is a propeller pillar with butterflies in the center. Ground Pound the center of that platform for a Power Moon.

12. A Butterfly's Treasure - Near the Ground Pound switch that lets you wall jump up to the Crazy Cap shop, there is a butterfly on a clip. Slowly approach it, and when you see the small white hat icon above it, throw your hat at it to get a Power Moon. If if flies away, get its original position out of camera view, then try again.

14. Cave Gardening - Near the Ground Pound switch that lets you wall jump up to the Crazy Cap shop, you'll find a cave. Throw your hat at all the flower sprouts before they un-bloom for a Power Moon.

18. Soaring Over Forgotten Isle - At the top of the mountain in the center of the Kingdom, capture Glydon, then fly to the island over to the south away from everything else to get a Power Moon.

19. The Caged Gold - At Swamp Hill, you'll need to throw your hat at a Trapeedle and get it so that it flies right into the nearby cage containing a Power Moon inside. After this, you'll need to go up and around to grab the Power Moon.

Regional Coins


Saturday, December 13, 2025

PrinceWatercress plays Brave Fencer Musashi - Part 22 of 33


In this entry, we finally face Kojiro and rescue Princess Fillet, but we still have some work to do looking for Ben and Ed.


At this point in the game, you can find Wid in Farmer Lacter's field in the daytime. If you talk to him, he will think about checking on the mines to make sure everything is all right.

Now that your temporary mayoral tenure is over, head back to the forest. There is a road with a sign and two walls near it in the field past the path full of mushroom enemies. This leads to a path blocked by a rock that looks like a slug. Use the Rocksalt on it, and you'll find out it really is a slug.

Continue down the path. You'll quickly find a Bincho Field. Break it to rescue Artisan Teebone. If you return to the Palace later, he can temper Fusion to make it stronger if you talk to him. Do it; you'll need the extra attack power. Once forged, Fusion will grow a bright yellow, and it will be a lot stronger.

If the tide is too high for you to drop down to the platforms, come back later in the day. Head back into the forest, wait a little while, then come back. Eventually, the water will be low enough for you to explore. Use the Water Scroll to walk to the Water Crest, and use it there to drain all the water. Make your way down and you'll find the Fire Crest. Strike it with your sword to get it. The Fire Scroll will let you shoot fire and melt ice, and also light some objects.

After getting the Fire Scroll, Kojiro shows up...and he's got Princess Fillet! Musashi has no choice but to duel with Kojiro to save the Princess.

The key to beating Kojiro is to hit him when he's not holding his sword in front of him. Keep running around him in circles and avoid his attacks, then run up to Kojiro and hit him. Make sure he's not facing you, or else he will block your attacks. For best results, you can just run circles around him (both figuratively and literally) to avoid his attacks, then attack him from anywhere except directly in front of him with Lumina.

After you beat Kojiro, Musashi will escort Princess Fillet home to the castle. Leave the area and you'll be back at the castle. Your journey isn't over yet, though, as you still have Ed and Ben to deal with.

Before you do, there is a chest you'll need to open. It contains 500 Drans. I forgot it existed, and I end up going back to look for it in the final video.

Go talk to to MercenA (Mercenary Potrowst), MercenB (Mercenary Stue) and MercenC (Mercenary Metloife). You'll get hints, which I'll paraphrase here:

- Meandering Forest. Four Way Path: Gold, Knight (3x), Bishop.

- Left, Right, Right, Left, Straight Ahead

- About the knight...doesn't matter which way you're facing. Just go straight up.

Potrowst will tell you the game of Shogi has something to do with this. You'll have to learn about it from Scribe Shanky.

Tuesday, November 11, 2025

PrinceWatercress plays Legacy of Kain: Soul Reaver - Part 22 of 28


In this video, we make our way towards the last remaining brother...and do a whole lotta block pushing.


0:52 - Time to fire some enemy projectiles on the way back to the water. We'll have to go in a different direction in order to get to a teleporter. We need to head back to the Lake of the Dead, then get to where the broken bridge is and move forward.

5:02 - The water leads us to a very snowy place. Heading right when we get in leads to yet another teleporter that we need to activate. I head back to the Exalted One to heal up.

8:13 - Climb up the wall, then glide forward. You'll soon find out that Dumah's clan has been decimated as soon as you go in, and it is due solely to Dumah's own arrogance.

11:45 - Push the block here forward with your energy projectiles. You'll need to phase into the spiritual realm, fight off the enemies, then climb up and shift back to the material realm. 

13:10 - Push this block out of the wall, then jump up and glide forward to find a new area. Turn the crank to drain the water, then kill the enemies when they come back to life. From here, you'll need to move the blocks around so that you can stack three of them on top of one another and get them to the next area.

Wednesday, May 28, 2025

PrinceWatercress plays The Grinch (PS1) - Part 22 of 22


Just when you think you're done...


The "2500" door leads to a Grinch Copter mini-game where you have to have to fly though all the ring and get to the goal as quickly as possible. The "1500" door takes you to the Pankamania mini-game, where you'll have to pancake as many pumpkins as possible within 45 seconds to get the best score. Much like the swinging mini-game, these mini-games don't do anything useful.

Now for the sleigh. When you enter it, you'll play the final part of the game. You'll also notice before you get on the sleigh that there is a cavern entrance-sized hold behind the bookcase. Anyway, get in the sleigh, and you'll be chasing Santa Claus. Santa throws gifts out of his sleigh, and you'll need to use the D-Pad to steer the sleigh and grab all the giftboxes. If you miss one, you have to start all the way from the beginning. To make matters worse, the steering on the sleigh is absolutely horrible. It's like you don't ascend or descend fast enough and doing either feels slightly delayed. 

When you managed to get the ten presents, you'll have sixty seconds to shoot Santa ten times. Keep the fire button held down and watch where your machine gun for a Rotten Egg Launcher is shooting so you can easily pull this off. If you fail to shoot Santa down enough times, you have to do the present-grabbing again before you get another chance to shoot at Santa. I'm not kidding. The last part has to be absolutely miserable, as if getting some of the collectibles wasn't miserable enough already.

When you take down Santa, you'll finally ruin Christmas. Of course, just like in the book, the animated movie and the live-action movie this game is based on, the Whoville are still happy and caroling, and in a moment of weakness, The Grinch gives the presents back.

This should be the end of it...but for doing everything else in the game and getting 100%, we suddenly see The Grinch in a black leather jacket riding a motorcycle. The bookshelf moves, revealing a cavern leading into...a motorcycle race. X accelerates, Square brakes, R1 performs a wheelie and Left and Right on the D-Pad steer. You'll have to do three laps through a course, which you'll have to memorize as you go from lap to lap, as each lap is different from the last and you'll be avoiding more things such as logs, barricades, falling rocks, falling trees, the cops, and oncoming ramps. If you place anywhere under than first, or if you get caught by the cops, you have to start all the way over from the first lap. It also doesn't help that you lose so much speed and momentum if you run into anything, so you'll really have to get good to get in first early and maintain the lead the whole time. If you have to pause and press Triangle to leave and then re-start, do it. As for the ramps, you're forced to press R1 to pop a wheelie and jump off them, especially near the end of the third lap. If you miss that second ramp, you'll run into the cops, and you'll be starting the race all over again.

When you finally win the race in first place, you'll finally be able to roll credits...and that's it. You don't get an extra scene beyond the absolutely rotten motorcycle race. But at least we're finally done with this, and we can finally say that we beat The Grinch for Sony PlayStation 1!

Wednesday, February 19, 2025

PrinceWatercress plays Wario Land II - Part 22 of 51


Even in Syrup Castle, you'll run into new forms and new enemies.


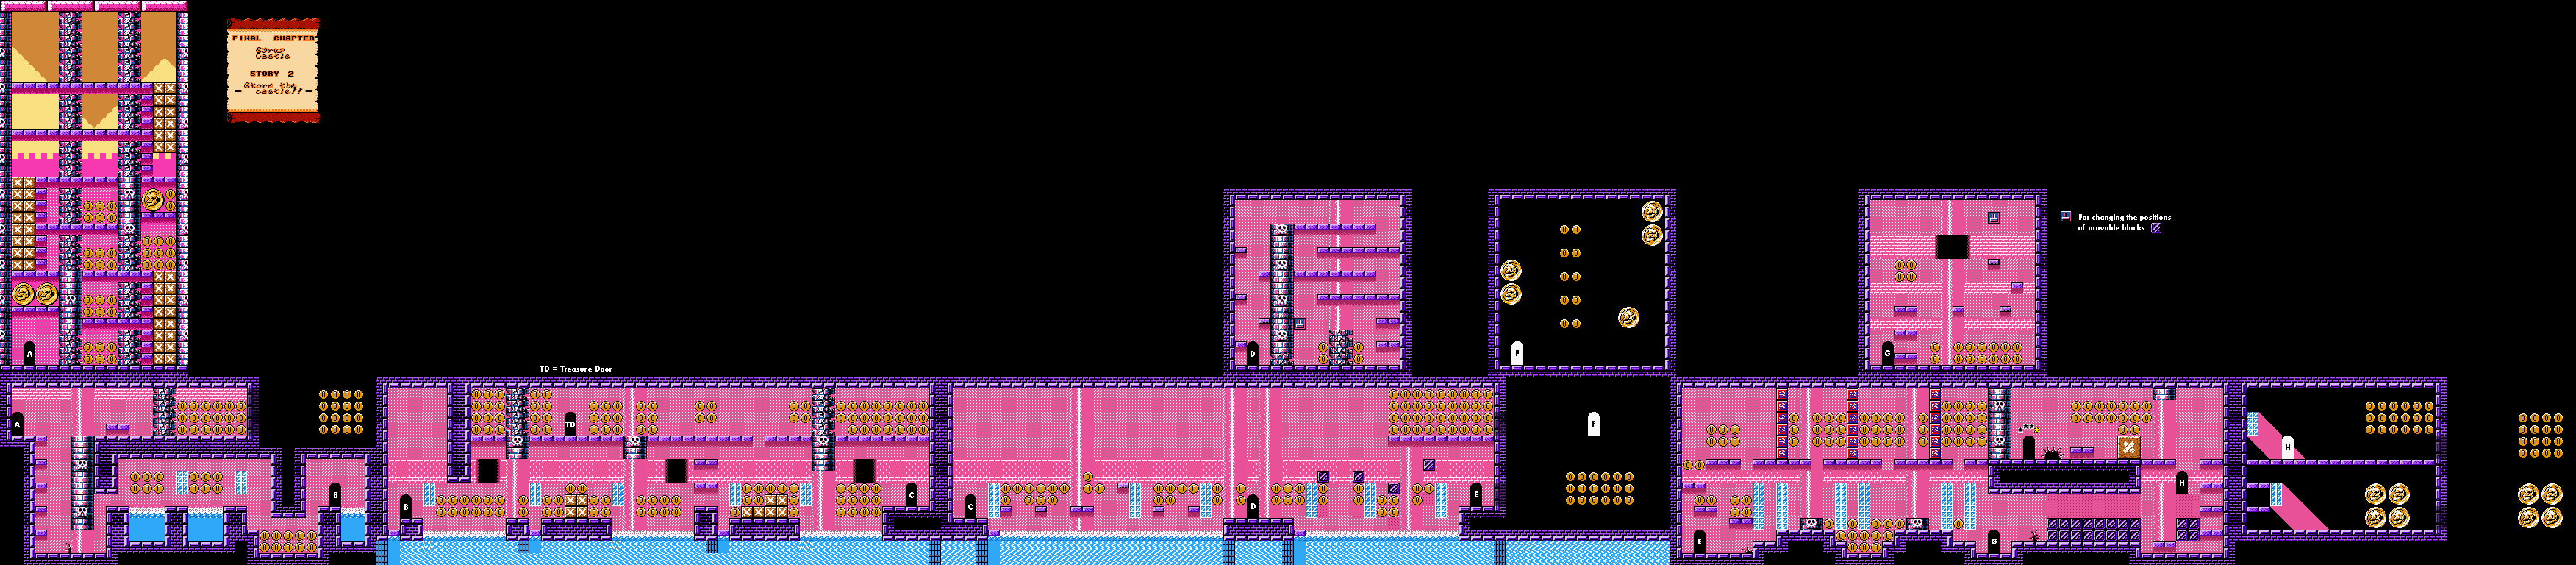
Final Chapter: Syrup Castle

Story 2: Storm the castle!!


The first section has you breaking through blocks to get to the next section. The guys with the hammers will turn you into Spring Wario if they hit you with their hammers, but you can use the form to get some coins you couldn't usually be able to get. From this point forward, be ready to tackle some walls for hidden coins.

The wizards will turn you into Small Wario. As Small Wario, you can jump up narrow little gaps. Hold Up for a high jump, and make sure you're near the edge when you jump so you can clear the gaps with the water, which will turn you back into regular size if you fall in.

You'll soon be jumping on dresser drawers while avoiding the flying spike skulls. You'll need to go up to enter the treasure in the first of these two sections and get the cloak, while in the second section, you'll need to hit a switch to lower some block projectiles so you can get to the end. 

The snowman enemy will spit a snowflake projectile and freeze you, which will send your frozen self backwards until you hit a wall and shatter out of your icy prison. You'll have to use one of them to open up a path leading to the coins on the other side of where the exit is.

Saturday, November 30, 2024

PrinceWatercress plays Great Greed - Part 22 of 28


There are six enemies around the town of Burger! Let's meet them!


Before heading to Greene Castle, let's get experience and gold off the enemies near town.

Bad Burger casts Poison 2, Sleep and Confuse. It gives 315 Experience and 90 Gold, and it has a chance of dropping a Platinum Shield, which is even better than the shield you have now and is worth equipping at this point if you get it, as the Platinum armors are the second-best in the game only to the Duramet armors.

Slicer can cast Shove, but that's about it. Slicer gives 380 Experience and 106 Gold, and has a chance of dropping the Platinum Sword, which is the second-best weapon in the game (the Hacker is the best).

Geguana is weak against Freeze magic and can cast Slip. It gives 370 Experience and only 74 Gold, but it has a chance of dropping a Platinum Armor.

Spinster is weak against Bolt magic and can cast Fly and Shove. It has 980 hit points, and unless you are powerful or using the Power spell, it will take a while to beat a Spinster. Beating one fives you 396 Experience and only 93 Gold.

Mush Man has only 660 HP, which is the least of the enemies around here. It gives 358 Experience and only 83 Gold, and it has a chance of dropping a Platinum Helmet.

Unfixed is weak against Flame magic, strong against Bolt magic, and can cast Bolt 4 and Lash. It leave 360 Experience and 80 Gold, and does not have an item drop. It is the only enemy I know of that can run away, and it can do a ton of damage if given the chance. As a matter of fact, both are related: if you get hit with Bolt 4 and you happen to be under 200 HP, there is a chance they will flee.

Friday, September 20, 2024

PrinceWatercress plays Chrono Trigger (Super NES) - Part 22 of 70


In this episode, we start exploring Magus' Lair.


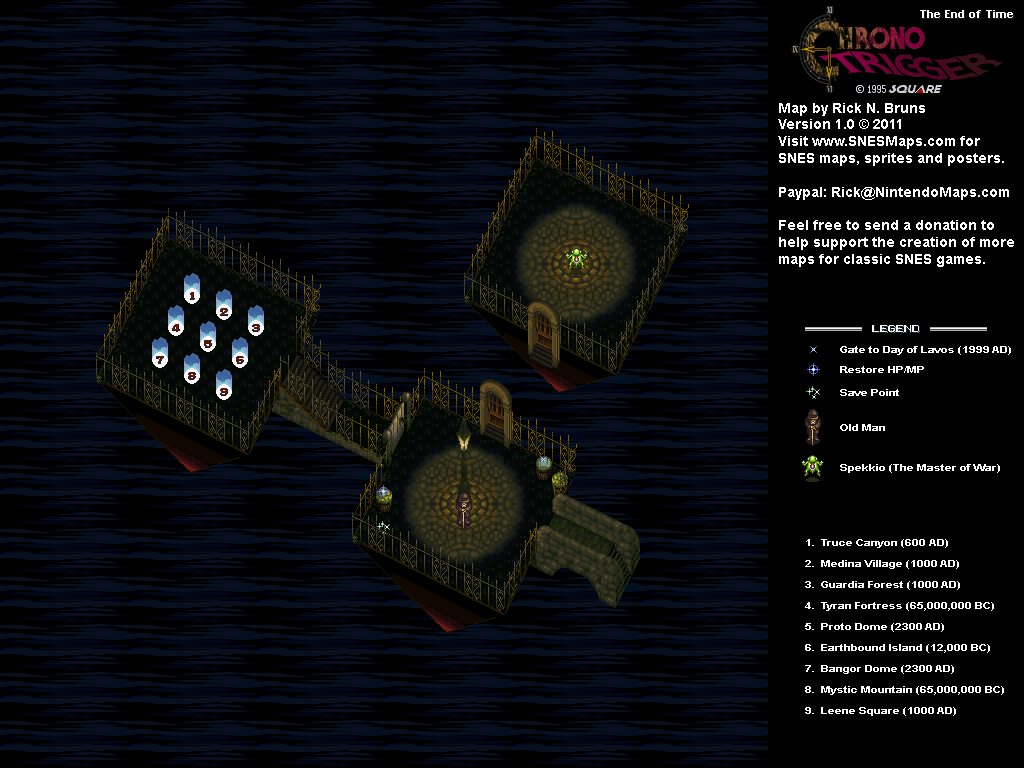
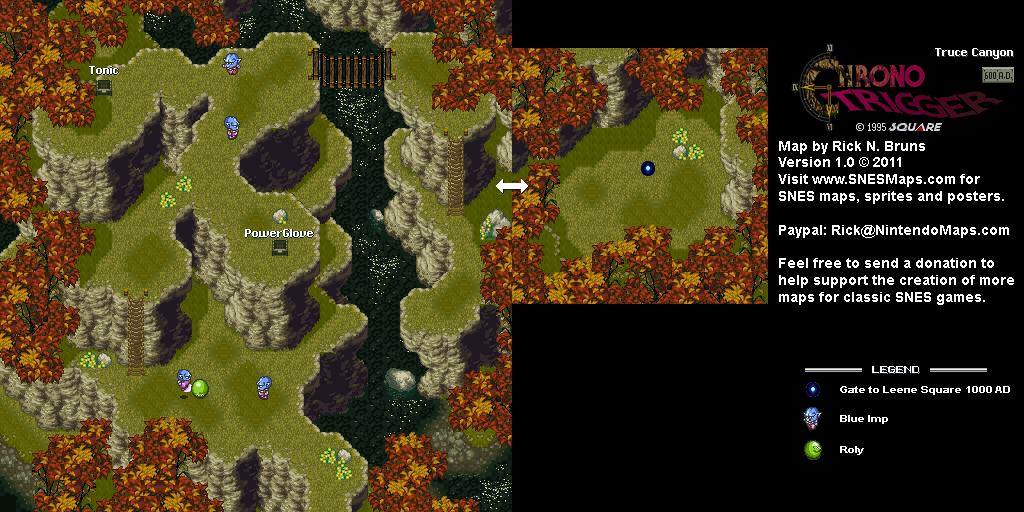
It's time to head back to the Magic Cave.

There are two enemies that you will face here: the Vamp and the Gremlin. While I later found out that you don't necessarily need magic to beat the Vamps, it does help. As for the Gremlins, magic is absolutely required.

There is a sealed box here; you'll have to come back for it later.

The soldier at the end of the cave will have a note written in blood telling you about a monster in Magus' Lair that will switch between physical and magical defense when struck. Keep this in mind.

There will be a bat following you around as you explore this cave, and later, Magus' Lair. It will fly away when you enter a battle, and rejoin you after.

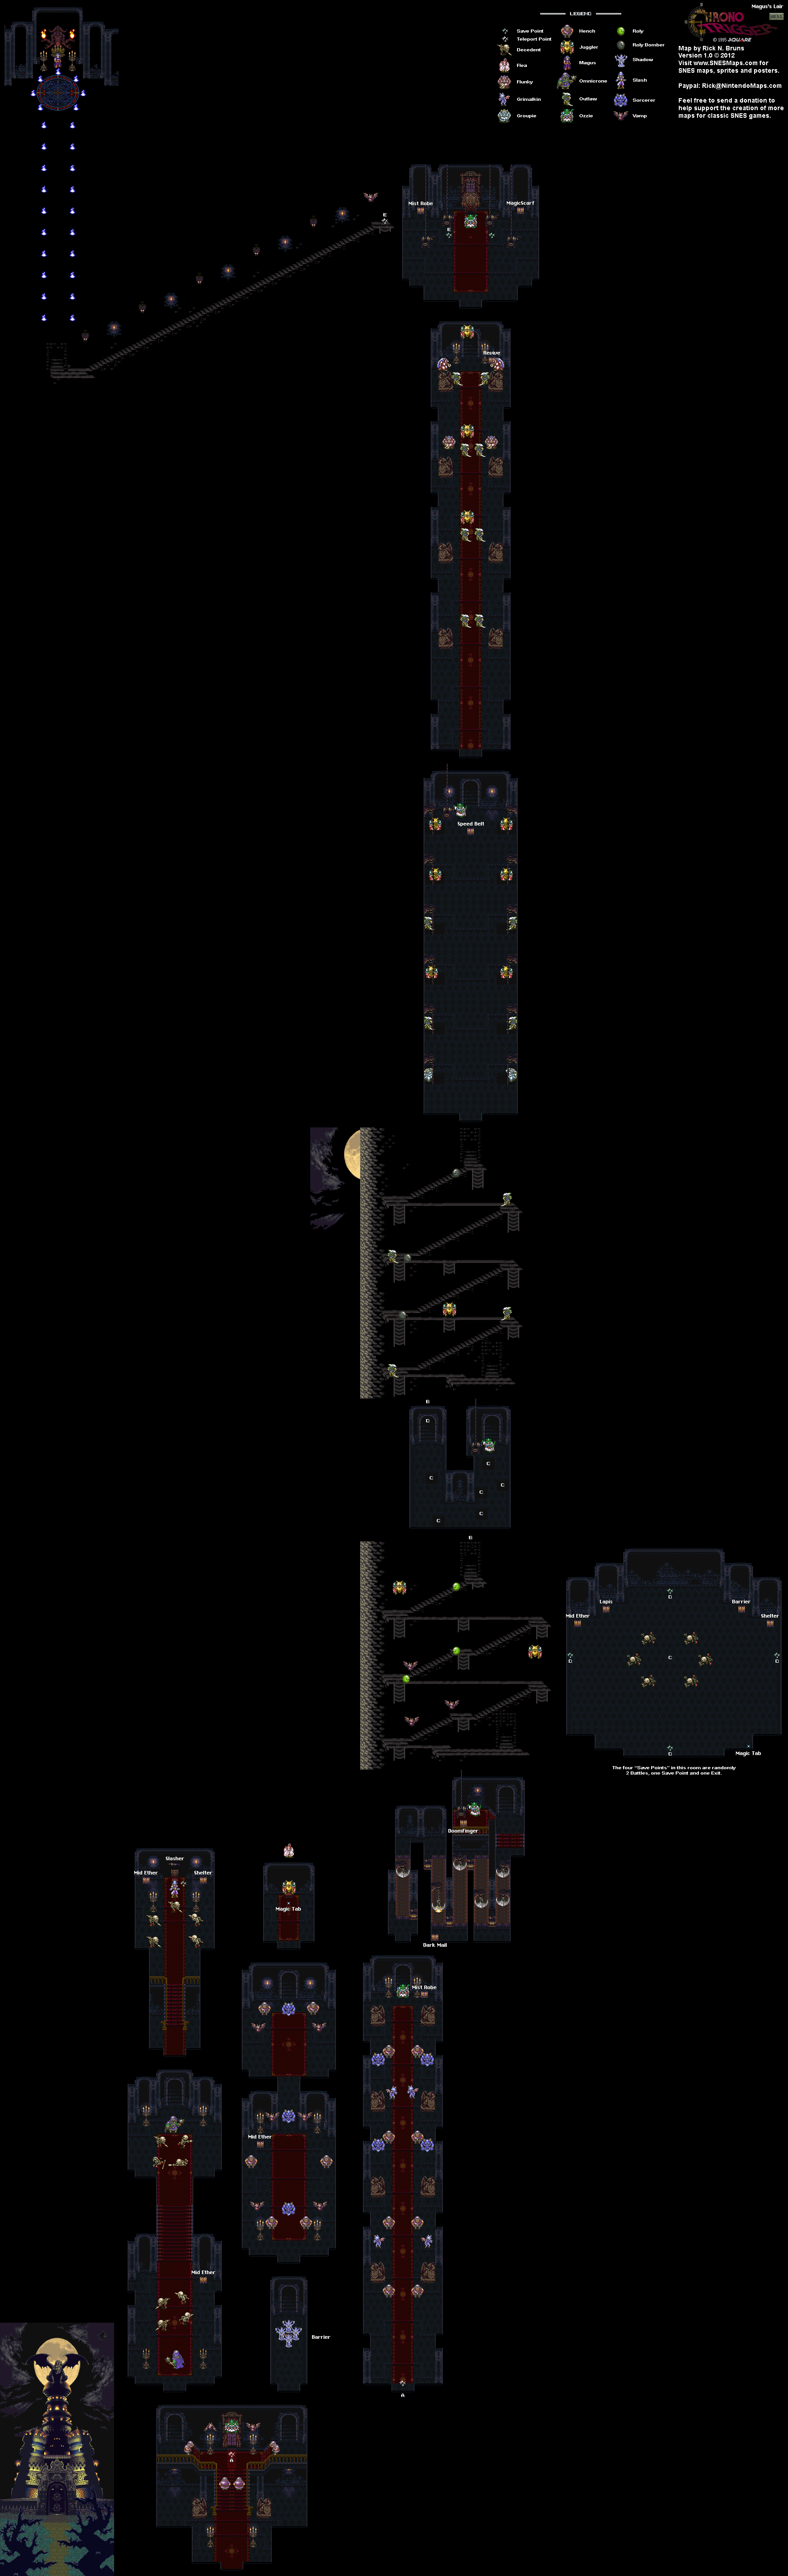
Once you reach the other side of the Magic Cave, you'll reach Magus' Lair.


When you enter Magus' Lair, there will be two areas you can explore: the left wing and the right wing. There will be people in these wings, but they will act rather peculiar if you talk to them. You'll even see four children surrounding a treasure chest.

One of the people you'll meet in the right wing will be a bit different depending on who the third person in your party is. If it's Marle, it's Marle's father King Guardia XXXIII; if it's Lucca, it's Taban; if it's Robo, it's Lucca. 

When you fully explore both wings, you'll find a save point. When you walk into it, Ozzie will show up. He will tell you that Magus is pre-occupied at the moment, and in order to get to him, you'll have to fight your way through the castle.

The maroon-colored Henches here have more HP than their blue-clad counterparts, so taking them down won't exactly be a picnic.

If you go back to the children surrounding the chest, they will want to know if you want the treasure. Say yes, and they will turn into Shadows. Kill them all with non-physical attacks, then open the chest to get a Barrier, which cuts magic damage taken during battle by 33%.

As for the right wing, you'll be facing Henches, Vamps and Sorcerers. The Sorcerers are weak to Fire, and will be healed by Water, Lightning and Shadow, so hit them with Fire. 

Friday, June 14, 2024

PrinceWatercress plays Ratchet and Clank: Going Commando - Part 22 of 54


In this entry, we spend some time taking on some challenges in the Feltzin System as well as on Barlow.

First | Previous | Next | End

2:39 - Challenge 4 in the Feltzin System is a race. You'll get a ton of bolts if you win, but if you go through the entire race without missing a ring, you'll get a Platinum Bolt at the end.

7:19 - Challenge 2 at the hoverbike races in Barlow is the Intermediate Circuit. I make this look easier than it is. It's not much different from Challenge 1.

10:55 - Challenge 3 at the Barlow races is the Vokovar Circuit. This time, the caves are open, and you can use the caves as a shortcut to save some time. There will be a shortcut to the right all of a sudden, and if you can take it and still hit the boost after you enter, you can reach a time of under 2:10.

13:21 - The winning run. Completing any of the races in under 2:10 will net you a Skill Point.

Skill Points:

Speed Demon: Get a time of 2:10 in the hoverbike race in Dobbo.

Controls:

As Ratchet:

Control Pad/Left Analog Stick: move
Right analog stick: move camera

X:
  • Jump and double jump (hold button after double jump to use Heli-Pack or Thruster Pack)
  • Wall jump (near certain walls)
Square: strike with wrench
Circle: pull out/shoot currently equipped gun
Triangle: 
  • quick select (hold and use in conjunction with Control Pad or left stick to switch guns; menu can be customized in Quick Select on the pause menu
  • double tap to switch between two most recently equipped weapons/items
  • interrupt on-screen messages

Select: open map
Start: Pause menu
  • Control Pad: select option
  • X: confirm option choice

L1:
  • center camera behind Ratchet (tap button to center)
  • first-person view (hold button and use left stick or D-Pad to look around; let go of L1 to move camera back behind Ratchet)
  • Square: wrench boomerang
  • Circle: fire gun
  • R1/R2: zoom in and out (Pulse Rifle only)
L2/R2: strafe (hold while moving)
L3: see health and Bolt totals
R1/R2: crouch (hold down)
  • Square: wrench boomerang
  • X: high jump
    • long jump (hold crouch button and jump while running to perform)
R3: open map

In water:
  • Square: dive and descend
  • X: surface and ascend
  • R1: accelerate with Hydro-Pack

As Clank:

Control Pad/Left Analog Stick: move
Right analog stick: move camera

When hanging off platforms:
  • Control Pad/Left Analog Stick: move
  • Forward+X: vault up
  • Back+X: drop down

Square: punch
X: Jump (press and hold in the middle of a jump to glide with Heli-Pack)
Triangle: command menu (hold and use in conjunction with Control Pad or left analog stick to choose commands)

Monday, May 20, 2024

DeceasedCrab plays Earthbound - Part 22 of 53


In this entry, we find out that The Runaway Five is in trouble again, we visit a dinosaur museum, and we head back to the desert and find a mine.


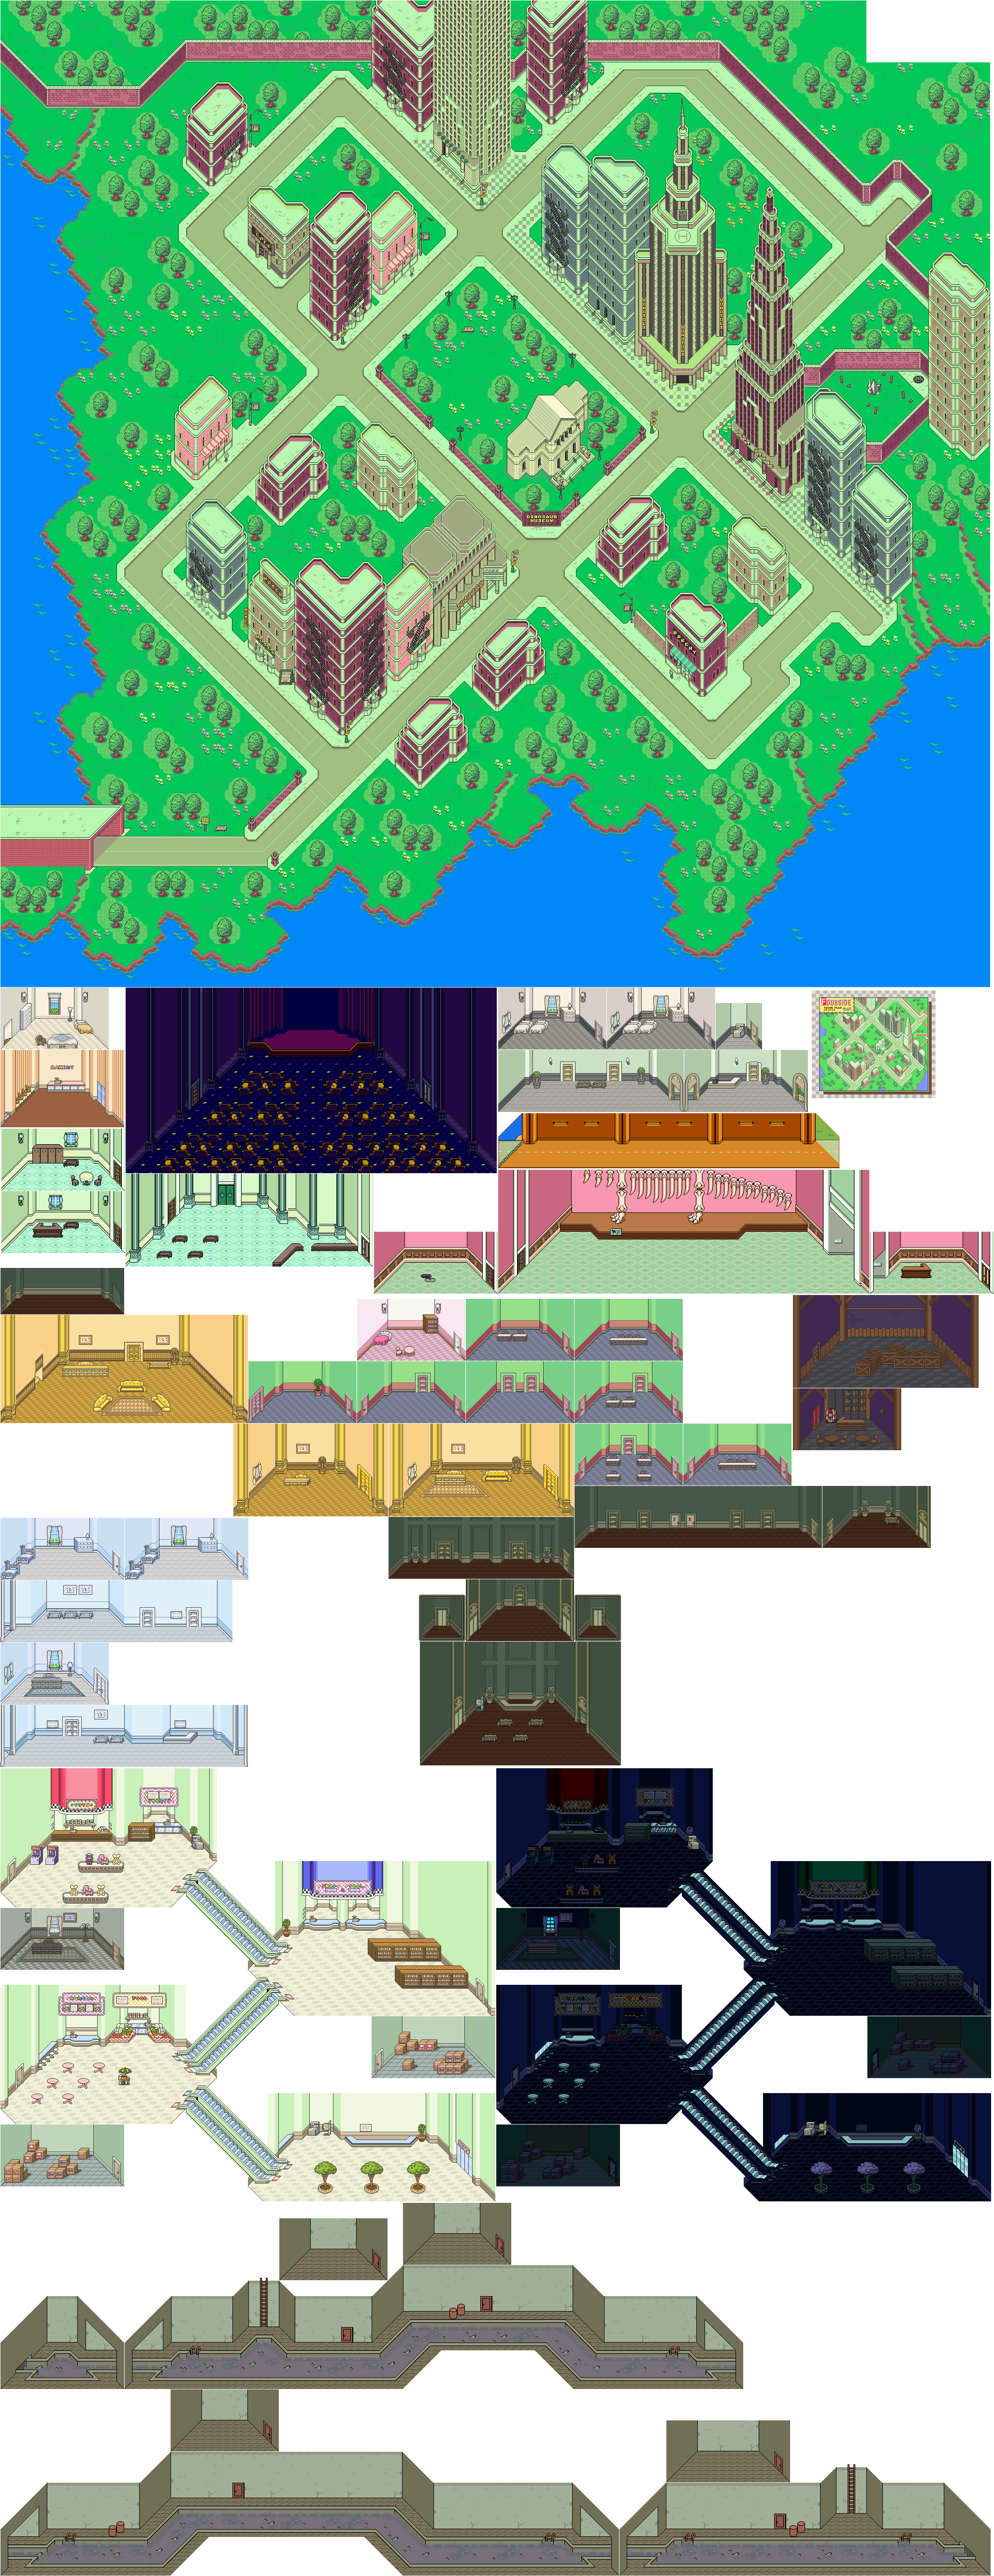
The cop near the Monotoli Building, which is northeast of the Dinosaur Museum, will know who you are if you talk to him.

Inside the building is a guy who lost his shirt in a solitaire tournament. There is also a phone as wel as an elevator. If you take the elevator, you can meet Pokey at the top. The bellhop will also tell you not to look at her hips.

Aside from Pokey, you can meet Pokey's father, who is now living the life of a rich man thanks to Pokey, in the door to the left past the bodyguards. The door to the right will have Pokey himself, and if you talk to him, he will call himself Master Pokey and refuse to help you before kicking you out of the room.

At the Dinosaur Museum, you can learn about dinosaurs at $5 per person. You'll also get your picture taken in front of the information sign by the photographer when you approach the sign. The guy blocking the door at the end is Mr. Spoon, the academic researcher. He will tell you that there are unconfirmed reports of live dinosaurs in the lower side of Scaraba who may have eaten the people there.

From here, you can head to the Topolla Theater and buy a ticket to watch the show. After using the show ticket to get past the usher blocking your path, you'll be able to head backstage. If you talk to them, you'll find out that The Runaway Five got cheated by the theater owner again. You'll also find out that you'll need their help to meet Monotoli. Afterwards, you'll catch The Runaway Five's show.

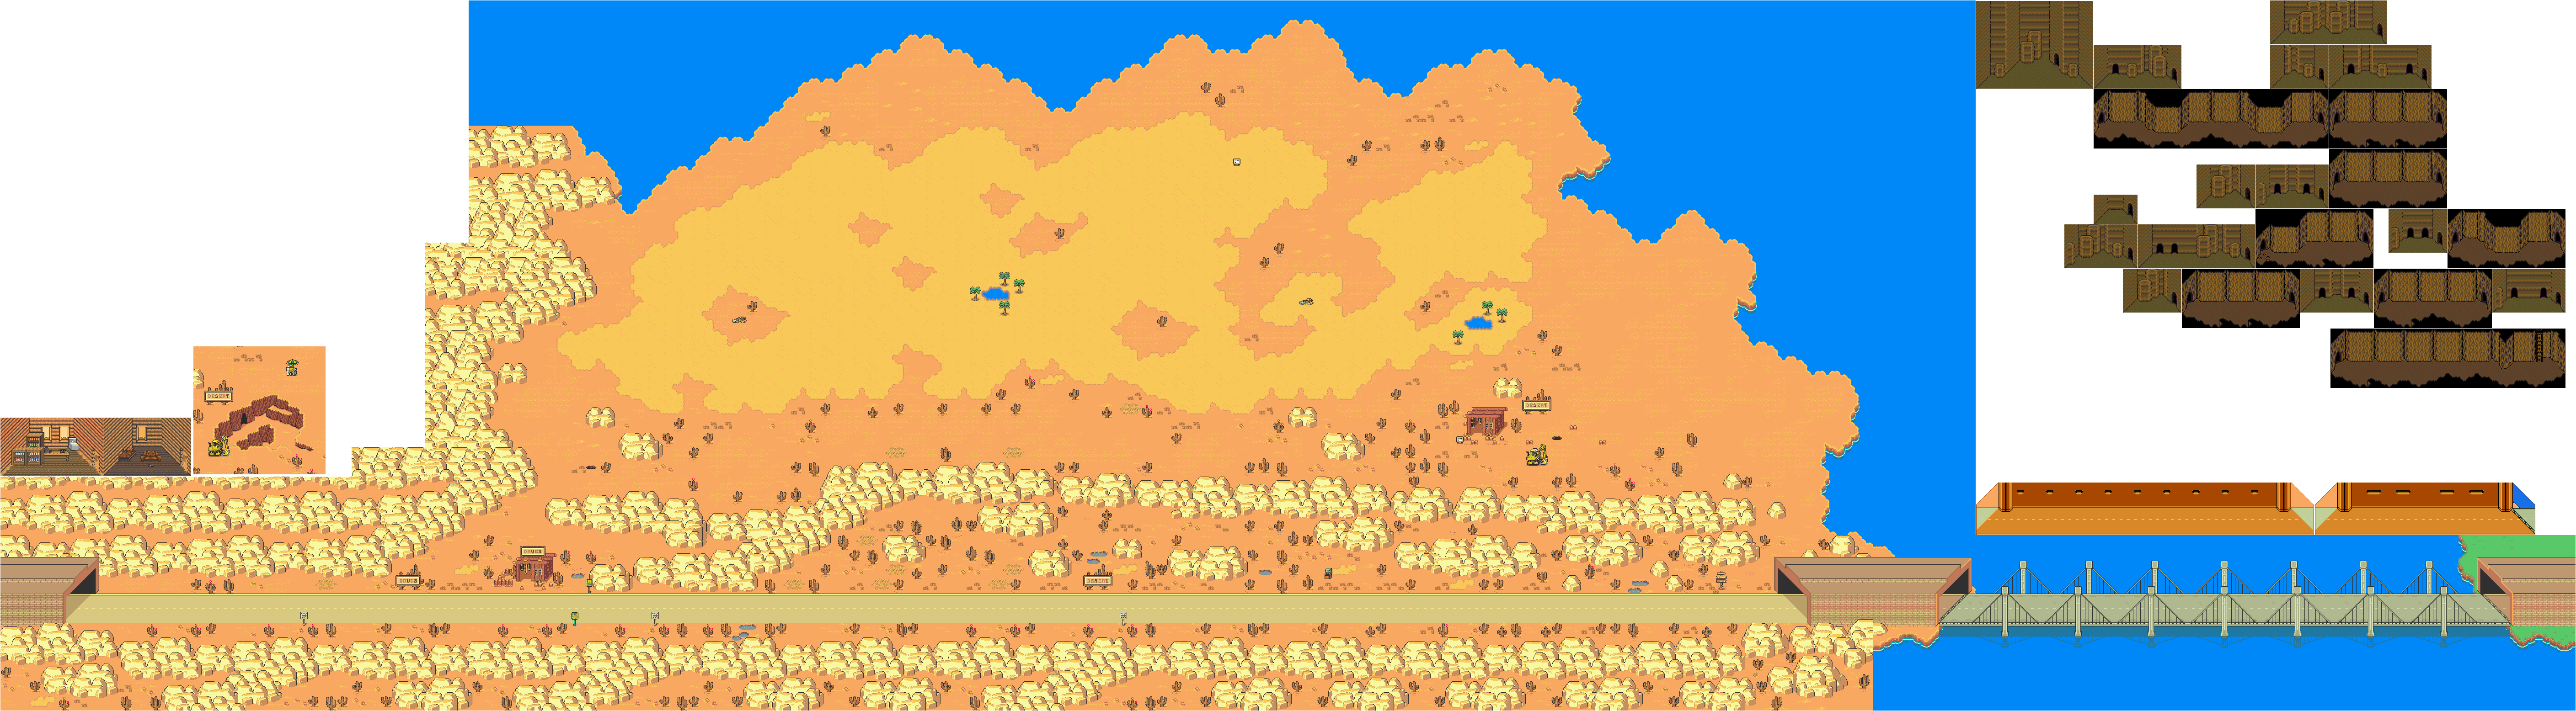
To the left of the theater is the owner's office. She will tell you that The Runaway Five owes her a million dollars and will be in deep trouble if they break their contract, and the only way to pay a million dollars on their behalf would be to find buried gold. From here, you'll have to head back to the desert and go back to the shack where the guy was digging.


When you head back to where the hole leading underground was, you'll find a whole cave. There will be a healer with blue hair and a moustache ready near the cave as well as a store where you can buy some healing items. You can still use the shack to heal up and save the game, which is nice if you need to level up at this point in the game.


When you enter the mine, the man at the entrance will tell you that he found a maze with five big moles. You'll need to defeat the moles in order to get the million dollars.

The Thirsty Coil Snake is a more powerful snake than the green ones you've met earlier in the game, and they will Poison you. Freeze Beta will do a lot of damage to it and easily kill it.

Paula will learn Defense Down Alpha at Level 29, which allows you to lower the defense of one enemy.

Throughout the maze, you will face five Gigantic Moles. They are all convinced that they are the third-strongest mole in the maze, and the words "No. 3" will be in the background when you fight them. They are vulnerable to Freeze, so use powerful Freeze attacks as well as Flash Alpha. Hit them with bottle rockets if you need to do a bunch of damage without using PP. Be careful if they use power shields, as those shields can deflect physical damage back on the attacker and do 50% of the damage done to the mole.

The Coin of Defense will obviously raise the defense of whoever equips it.

The Gigantic Ant can steal PP from your party and is vulnerable to Freeze Beta. It can also call for other Gigantic Ants to fight alongside it. The Noose Man is obviously a sentient noose and can be set on fire with Fire, and can also perform a binding move that can stop a party member from moving.

Sunday, May 12, 2024

PrinceWatercress plays Drill Dozer - Part 22 of 28


Amazing how the secret areas got easier and easier (sort of) until the very last one.


Area 6 Secret Area: Hidden Compartment


Compared to the other secret areas, this one has just one route and isn't long.

In the first part of the level, you'll be launching yourself from rubber block to rubber block. Before you can do that, however, you'll need to get to second gear and avoid a ton of sparks.

In the second part, you'll be avoiding even more sparks as you jump from platform to platform while avoiding even more sparks, and after that, you have small platforms to work with in addition to more rubber blocks. You'll find the Skull Badge at the end.

In the third part, get third gear, as you won't be able to get to the end without it. When you break the bricks, you'll uncover bombs. You'll need to wait for the bombs to get clear out of the way, and you may have to break certain blocks in order to clear a path and get to the end as quickly as possible. For getting to the end, you'll get the Bone Bell. After that, you'll exit the sixth and final secret area.

Tuesday, March 19, 2024

PrinceWatercress plays Ka-Blooey - Part 22 of 25


Just fifteen levels to go...


Level 112

Detonate the upper left large bombs and the lower left large bombs (the ones at the left set of temples). At the right set of temples, detonate the medium bomb to the right of the left mine. Detonate the medium to the right of that bomb. Detonate the medium bombs near the left temple, the medium left up of the upper left temple and the north temple. Detonate the medium bomb right of the upper right temple, the medium bomb right of the lower right temple, and the medium bomb near the south temple. You'll be going clockwise as you do this. Detonate the small bomb and go right to blow up everything else and survive.

Level 113

Head to the upper right corner. Hit the switch. Place the swell bomb on the upper right corner tile, one medium bomb to the south of it, and the rest of the medium and large bombs on the left end. Go back to the small aerial bomb at the intersection, go down, then down again and hit the switch. Go right, place the small bomb on "slot 4," go left, up, right on ice. Hit the switch and enter the teleporter. Detonate the medium bomb and enter the teleporter. Hit the nearby switch. Place two small bombs on the north end, the medium aerial bomb on the right end (to the south of the switch) and the remaining small bomb on the lower left corner. Loop back to the lower right area and detonate the small bomb and move left. Detonate the swell bomb in the upper right slot tiles area when it is small.

Level 114

Hit the switch north of the start. Place the small bomb on "slot 2," place the medium bombs on "slots 3 and 4." Detonate the small bomb and move up. Head right across the cracked tiles, hit the north switch, then hit the south switch. Detonate the small bomb and move left. Detonate the swell bomb near the upper right corner when it is small. Go across the cracked tiles to the red guy. Detonate the small bomb to the right of the red guy. Send the red guy across the cracked tiles to the right, hit the switch and detonate the medium aerial bombs. Hit the nearby switch, detonate the recently spawned small bomb and move either right or down. Hit the lower left switch, detonate the large bomb right of the temple, hit the switch, and detonate the other large bomb near the temple. Detonate the small bombs. The tiles spell "DB."

Level 115

Go north, hit the switch and detonate the small bomb to kill the enemy. Head right, hit the switch, detonate  the lower right small bomb, slide left across the ice and loop around to the temple. Move the large bomb on the slot tiles down, go down at the temple, hit the switch and enter the teleporter. Hit all the switches (referred to as "Switch #1," "Switch #2" and "Switch #3," respectively) and enter the teleporter. Hit the switch to the east to spawn "Switch #0." Enter the teleporter. Hit "Switch #0" once, "Switch #2" twice and enter the teleporter. Detonate the large bomb, move up and enter the teleporter. Go to the lower left teleporter, hit "switch #2" twice, detonate the medium bomb and enter the teleporter. Go down, then right. Detonate the small bomb. Detonate the small bomb to the south, then move left or right.

Thursday, October 26, 2023

Jerry Martin plays Strong Bad's Cool Game For Attractive People - Part 22 of 53


Episode Two comes to a close.


If you score over 2,000 points on the Algebros game, you'll get an in-game achievement for it.

If you beat Episode 2 with 100% completion, you'll get the Crossbones T-shirt.

OUTFITS:
- Eye Patch: Inside cereal box in kitchen
- Camo Pants: Inside dryer
- Strong Badia Shirt: Use Black Metal Detector just outside Strong Badia.
- King's Beard: Check the right side of King's fridge throne
- Crown: Unplug King's computer and check on top of it
- Beret: Move The Cheat to the open field in Maps & Minions.
- 'Lectric Boots: E-mail thepizz about 'Lectric Boots at the King's computer
NEW! Crossbones - Given to you when you complete the episode 100%.

CALLING STRONG SAD NAMES:
- Talk to Strong Sad (Before escaping)
- Talk to Strong Sad about fence twice (Before escaping)
- Examine Shower (Before escaping)
- Use Pillow on Strong Sad (Before using on statue)
- Use the Fake Sword on Strong Sad (Before taking over Bleak House)
- Talk to Strong Sad about Strong Badia (Before taking over Bleak House)
- Talk to Strong Sad about Strong Badia twice (Before taking over Bleak House)
- Talk to Strong Sad about Bleak House (Before taking it over)
- Talk to Strong Sad about Strong Badia (after usurping Bleak House)
- Use Fake Sword on Strong Sad at Homsar Reservation (before taking it over)
- Use Tuning Fork on Strong sad at Homsar (before throwing in hole)
- Talk to Strong Sad at Marzistar (before reinstating Homestarmy)
- Talk to Strong Sad at Bleak House (during Extended Play)

ALGEBROS MANUAL PAGES:
- Page 3: Under box near the fence.
- Cover: Check Strong Bad's mailbox.
- Page 2: Check Marzipan's mailbox.
- Page 4: Check under the box in Pompomerania.

FLAGS:
- Concessionstan Flag: Check bush near Concession-Stantinople.
- Strong Badia Flag: Check brick wall.
- Bleak House Flag: Check under box on Strong Sad's bed.
- Cheat and Tirerea Flag: Check Tire after giving medal to The Cheat.
- Homsar Reservation Flag: Check Mysterious Bush at Homsar Reservation.
- Marzistar Flag: Use the Black Metal Detector near the garden on Marzistar.
- Pompomerania Flag: Order Bull Honkey twice in a row.
- Country Flag: Use Black Metal Detector near the big Country flag in Country.

TEEN GIRL SQUAD CARDS:
- Tar Pit: Check Strong Sad's books in Bleak House.
- Egg: Use lighter on the barred window in Bleak House.
- Alien: Use Black Metal Detector near cave in Homsar Reservation.
- Darwin: Check the Ex-Fish at King of Town's castle three times.

SETTING THINGS ON FIRE:
- Maps & Minions Box
- Smoke Detector
- Strong Bad's bed 
- Strong Sad's flag 
- Strong Sad's bill of rights 
- Strong Sad's constitution
- Mysterious Bush in Homsar Reservation
- Kimono
- Lone Skull #1
- Lone Skull #2
- Pile of Skulls
- Unlit Candle Holder
- Model UN Board (Extended Play)

- Beat Maps and Minions Deluxe in nine turns or less.
- Score 6000 on Teen Girl Squad.
NEW! Score over 2000 points on Algebros.

Saturday, June 17, 2023

PrinceWatercress plays Bugs Bunny & Taz: Timebusters - Part 22 of 23


Just one more area to take on before we face our final boss...and this area isn't half bad!


1:13 - The first out-of-time character for Zootopia, as well as the first crate.

1:51 - By hitting the bell, you can enter the next area.

2:19 - The second crate.

2:48 - By shooting a carrot at the sign, you can move the sign so that it will point at a gate and then open it. Keep in mind that you cannot teleport your currently unplayable character into the individual gated rooms; you have to get both characters into an area manually.

3:30 - The third crate.

4:08 - You'll need to float all the way up here with Taz to find the fourth crate and one of the switches. To activate a switch, jump on it.

5:46 - Getting to the top of the cage and getting the second out-of-time character. Knock him down with a carrot with Bugs, and have Taz on top of the cage to get him afterwards.

7:45 - For this area, you can move the cages on the buttons with Taz. The fountain will spout less water as you go. Jump into the opening of the fountain with Bugs like you would a rabbit hole, and you'll find the final crate and another switch to jump on.

9:19 - Dive into the pool and get to the switch before you run out of time to get the third switch.

10:22 - For this area, you'll need to use Taz to float to the other side (and all the items in mid-air) and hit the final switch. It is now night, and when that happens, things get a lot spookier. You'll end up back at the beginning.

12:52 - When the enemies break out, hit them twice to take them out. Also, all of the gates will be open now, and you can teleport the other character where you need to again.

13:32 - Hit the bird on the other side with a carrot with Bugs, then get Taz to the other side with the bubble gum to get the gear.

14:25 - Throw bombs into the water to get rid of the piranhas to get everything in the clams. As long as you keep moving, you won't get hurt.

15:08 - Monster fighting time.

15:37 - You'll be fighting more monsters here. Also, where'd the coffins come from?

17:38 - Using the bubble gum machine one last time to get the boss coin and the last of the collectibles. Summon Bugs over here and hit the small plants on the ground to produce a shrinking pill, then throw the shrinking pill at the plants to shrink them for a limited time, then quickly get to the Boss Coin to complete the level and get out.

Saturday, April 15, 2023

PrinceWatercress plays Sly Cooper: Thieves In Time - Part 22 of 48


We've got one more episode to go through in this game, so we might as well get it started.


Episode 5: Forty Thieves

Lost and Found

You'll have to play as Sly to get this job started.

The crabs may be fodder, but they can attack you.

The enemies here include belly dancers with swords, the lizards with the gas cannons and the long tongues, and the baboons with the lanterns.

The three treasures here are the Pearl Earring, the Scorpion Tail and the Red Ruby Ring.

Some of the pots here contain cobras. You can smack the cobras to stun them and get away.

Salim al-Kupar has been driven into hiding, but he is still in the general area and it is up to the Cooper Gang to find out where he is. With Sly's DNA mapped out, Bentley has created a new visual guidance system that is programmed to detect anything Salim has come into contact with.

The first place to go is the lamp shop. When you go in, you'll find some fingerprints on a pot with the Binocucom. You'll also have to take a picture of the strange door so that Bentley can study it. Once you get these two things, leave.

From here, you'll need to find three targets on the radar: the Heat Imprint (which you'll have to take a picture of behind some bars), the Hair Follicle (which has footprints nearby a market booth), and the Cloth Fiber (which also has footprints near it and is near a dazed camel). Once you get pictures of these three things, you'll find out where Salim al-Kupar is - on a boat - and talk to him. Salim al-Kupar, who seems to be a bit of a flake and also lazy, joins the gang when food is brought up. We then find out about Miss Decibel - an aristocratic woman from a wealthy British family who unfortunately could not carry a tune and whose rotten temper caused a trumpet to be lodged in her trunk and give her a special new power to hypnotize anyone around her into doing anything she wants - who suddenly showed up and started throwing her money around. Salim and his three associates plan to rob her for one last heist before retirement, but Miss Decibel's technology overpowered Salim and got his associates kidnapped, and he has been trying to spring his associates out ever since. Unfortunately, Salim is not convinced that the Cooper Gang is here to help and Sly is forced to prove himself...again.

Open Sesame

You'll have to play as Sly to get this job started.

We find out that Salim al-Kupar had to pawn his thief outfit after losing a lot of money betting on camels, and we'll need to get it back. In order to do that, we will have to find three precious gemstones embedded in the city walls and bring them back to the pawn shop owner. All you have to do is remove them and bring them back. Just find them with the mini-radar, press Circle to interact with them, and you'll get them. Once you get all three gems, return to the pawn shop and you'll get the Thief Costume.

With the Thief Costume, you can press Triangle to swing a giant sword. This will allow you to break certain machines. You can also press R2 to slow down time. With this ability, time will slow to a crawl while you move at regular speed, but it also drains the Gadget Meter, so keep an eye on the meter. 

To open certain gates, you'll need to spire jump onto the nearby switch, then slow down time with the Thief Costume to get through before the gate shuts. 

When you go through the gate that the game tells you to, you'll meet Miss Decibel and Cyril de Paradox. Press Triangle to destroy the machine with the metal gears so you can follow them, then keep your distance - and out of sight - as you tail them so you can find out their plans. It appears that Cyril de Paradox is getting rid of the Cooper line and creating a fake royal lineage in order to become wealthy and powerful. You'll also find out that Cyril has a delivery boy to deliver food to the three kidnapped associates. Cyril and Miss Decibel will soon retire to a nearby tent, and you'll have to enter it in the thief costume to get the food delivery list as well as the locations of the associates.

Abilities:

Cane Push (Sly): Double tap R1 to quickly shove an enemy back with Sly's cane.

Paraglider Dive Attack (Sly): Press Square while paragliding when in range of an enemy to divebomb them. A blue arrow must be pointing at the enemy before you can attack them.

Achievements:

Keep Your Turban On: Find Salim al-Kupar.

Costume Party: Get all of the costumes in the game.

Collectibles:

Sly Mask #43 - Climbing the largest arch in the city to the top will net you a Sly Mask.

Controls:

Left analog stick: move
Right analog stick: move camera
X: Jump and double jump (hold X on second jump for hover jets as Bentley)
Square: attack
Circle: 
  • interact (usually with anything that has sparkles) (Sly)
  • steal from enemies (from behind) (Sly, Bentley, any of Sly's ancestors)
Triangle:
  • knock enemies upwards (from behind; press Square to slam enemies down for stealth slam) (Sly, any of Sly's ancestors)
    • press Circle after knocking enemy upward to perform Silent Obliteration (Sly; replaces Stealth Slam; must buy on ThiefNet)
    • press Square for Stealth Slam (any of Sly's ancestors)
  • spin attack (hold to charge) (Sly)
  • throw bombs (Bentley)
  • Thunder Flop (in mid-air) (Murray)
  • spin attack (hold to perform) (Murray)
    • control with left stick (must buy on ThiefNet)
  • Raging Inferno Flop (in air; Murray; must be bought on ThiefNet)

L1: 
  • bomb aim (Bentley)
  • smoke bomb/flash bomb (Sly; must buy on ThiefNet)
  • aim/strafe mode (Carmelita; must hold button down)
    • left analog stick: move
    • R1: shoot (can only shoot in strafe mode)
L2:
  • hold for costume select menu (Sly)
    • hold down to stay in menu; use D-Pad or left stick to make selection
  • hold for weapon select menu (Bentley)
    • hold down to stay in menu; use D-Pad or left stick to make selection
  • hold for fist select menu (Murray)
    • hold down to stay in menu; use D-Pad or left stick to make selection
  • hold for shot select menu (Carmelita)
    • hold down to stay in menu; use D-Pad or left stick to make selection

L3: activate compass
R1: run (hold while moving to perform)
  • Paraglide (Sly; in air; must buy on ThiefNet)
    • Square: Paraglide Dive Attack (during Paraglide; must buy on ThiefNet)
  • Adrenaline Burst (Bentley; double tap to activate; must buy on ThiefNet)
  • Clothesline (Murray; double tap and steer with left stick; must buy on ThiefNet)
  • Cane Push (Sly; double tap; must buy on ThiefNet)
R2:
  • Trigger Bomb (Bentley; must have bomb on field to detonate manually; must buy on ThiefNet)
R3: Binocucom
  • Right analog stick: move
  • Left analog stick: zoom in and out
  • R1: take picture (when applicable) (Sly, Bentley)

Start: pause menu
Select: map
  • Left analog stick: zoom in and out, switch between map and status
  • Right analog stick: move map
  • Circle: back

Friday, February 24, 2023

PrinceWatercress plays Blood Omen: Legacy of Kain - Part 22 of 41


In this entry, we head to Uschtenheim and find a few critical secrets.


0:39 - I go west first for a beacon, then I head east towards Uschtenheim. We also find Dark Eden in the distance, which we'll have to go to later.

3:07 - The Implode here hides a secret (see below). To the east is Uschtenheim.

7:52 - After exploring every other house here, I go to the one to the north of the sign. To open the door to the east, go back to Kain's Mausoluem with the Sanctuary spell, then head to the second mausoleum to the south. Go back to the puzzle that opened up the path to the exit and hit the right switch, then go back through Kain's Mausoleum with Sanctuary, then fly back to Uschtenheim and enter that house again. This time, the door to the east will be open. Approaching the teleporter activates a secret (see below), and the teleporter will take you to the spirit forge for the Heart of Darkness. As usual, approaching the path to the spirit forge triggers another secret.

If you leave through the main entrance, you'll find a gate to the east that only opens during the full moon. 

13:17 - You don't need to do this, but if you go to the pillars at this point, Ariel will tell you that the Circle have exiled themselves to the north and that Dark Eden is your next destination.

Secrets

72. - This Implode hides a secret.

73 and 74. - After exploring every other house here, I go to the one to the north of the sign. To open the door to the east, go back to Kain's Mausoluem with the Sancutary spell, then head to the second mausoleum to the south. Go back to the puzzle that opened up the path to the exit and hit the right switch, then go back through Kain's Mausoleum with Sanctuary, then fly back to Uschtenheim and enter that house again. This time, the door to the east will be open. Approaching the teleporter activates a secret, and the teleporter will take you to the spirit forge for the Heart of Darkness. As usual, approaching the path to the spirit forge triggers another secret.

Saturday, January 28, 2023

PrinceWatercress plays The Bugs Bunny Crazy Castle 4 - Part 22 of 27


Things start getting harder in Stage 11 at this point, but the worst is yet to come!


Stage 11-5

The spaces here are going to be a little more cramped compared to previous levels. It is possible to enter a door with an enemy nearby, get out and then get past the enemy while the enemy is briefly frozen in place, much like the previous games.

Stage 11-6

This is where I learn that the Dracula enemies can not only drop down, but also fly upwards.

Be careful if you drop down at the beginning so you don't get mangled by any of the cat enemies.

At this point, knowing where the glowing doorways to the inside areas are and where they can take you is absolutely essential, especially when you need to use the sledgehammer.

Tuesday, July 12, 2022

PrinceWatercress plays Sly Cooper and the Thievius Raccoonus AGAIN - Part 22 of 23


Now it's time for the third chapter's Master Thief Sprints. A Grave Undertaking ended up being the hardest out of all the sprints I had to do this time around.


The Dread Swamp Path

Believe it or not, you can use the spire jump technique to completely bypass the first spider in the stage entirely (something I completely forgot I could do). As for the big creatures that you have to kill both halves of, you'll still have to smack them out of your way when necessary. Just remember that you still have to take a leap of faith in order to make it to the end. Watch out for those searchlights!

The Lair of the Beast

You'll barely have enough time to get through this one. Best advice I can give for this stage is to do the spire point jump from branch to branch and vine to vine, and make those swings on the hooks quick. Even though I fight the enemies here, you can actually skip them. You can also take a bit of a shortcut from running into the water while in a hurry; as a result, you can be bounced further ahead and get a good boost through a bit of the end as a result.

Descent Into Danger

The two minutes and change that you get for this is just enough for you to make it to the exit with a few seconds to spare. Knowing the layout for this stage is definitely well-advised, as you'll need to know where to turn in order to get to the next area. As for those lasers spinning around the column, the more space you have from where you need to get on and where you need to get off, the better. 

A Grave Undertaking

I found some shortcuts and new tactics the second time around, such as using the roots at the tree just above the water at the start and making a path straight to the drum near the three ghost spawners. This one ended up being the hardest one to do, and while some of it is due to the ghosts at the end, at other times it was because I was too fast on the draw when it came to grabbing a rope or getting on a platform. The ghosts at the end will make it very difficult to get to the green light and stop the timer for a job well done, and the best bet for this one is to get a charm during the run and hold on to it until you get to the very end. At this point, you should have all the vaults opened, and if you have the water safety ability, you'll get back on the narrow path and you can get to the exit before the ghosts come back. If you're patient enough like I was this time around, however, you won't need the charm.

Thursday, March 31, 2022

PrinceWatercress plays Bugs Bunny: Lost In Time - Part 22 of 23


Today's entry is the Daffy Duck show as we play the last two levels we have yet to go to before the final one.


0:50 - Roll into this hole in the wall, get the torch out of the chest, light it up at the huge flame and light the four torches on the wall for a clock.

4:21 - This barrel goes into an area in the water you normally cannot access. Jump for the clock!

"Train Your Brain!" in Dimension X is now unlocked.

6:13 - Drop down near the drawbridge for "Downhill Duck." For this, you just need to make it to the end while grabbing all the locks and avoiding fences, rocks, trees and snowballs. Especially the snowballs. Left and Right let you steer. That's it. The clock is at the end.

8:54 - "Wabbit or Duck Season" is a competitive mini-game. Kick all the signs so they show Daffy Duck's face, and keep it that way when time runs out so Daffy gets shot and not you. Don't kick any Daffy signs or they'll go back to being Bugs Bunny signs. When the time runs out, whoever has more signs showing their face gets shot. It needs to be Daffy, obviously. Once you win, get the clock and get out of here.

Saturday, January 8, 2022

Kikoskia plays Silent Bomber - Part 22 of 23


The final battle with Benoit begins...and it can be particularly nasty.


You'll want to destroy the chess pieces from far away. You only need one bomb to destroy them, but there's also the problem with the firepower that they blast out. 

Just like in real chess, pawns just move vertically one side from the other. Knights move in an L-shaped pattern and can follow you all around the board. Rooks move only in vertical and horizontal straight lines while bishops can only move diagonally. One usually appears with the other The queens move like a rook and a bishop combined, and usually appears with knights. 

Unlike real chess, however, the knights here will produce green beams of light that will pack a punch if you get too close. The rooks and bishops move around before stopping to fire purple lasers all around. The queen has a four-way laser shot, but it can be jumped over. (Ironically, the knights that follow the queen have attacks that are harder to dodge.)

While you can drop bombs and detonate them when the pieces are nearby, it's better to use the Lock-On Unit and get the bombs to explode from there, as you can wipe out multiple chess pieces at once if you can get pieces to stay next to each other.