Let the third-party content matching mania begin!
Overworld map by Rick Bruns. All other maps by Stefan Mahrla.
Donut Secret 1
Might as well take care of this underwater course early, since it has two exits. The traditional one at the end of the level will take you north to Donut Ghost House.
You'll meet plenty of new enemies here. Besides the Cheep-Cheeps you first met in Yoshi's Island 4, which tend to move back and forth in a specific pattern, there are the scuba mask fish that constantly move towards you as well as Rip Van Fish, who will wake up and chase you if you get way too close to him.
The blue pipe can be entered for an area where you will be introduced to the P Balloon. Pick it up and Mario will inflate like a balloon. Use the Control Pad to move He won't do this forever, and when he starts fluctuating in size, that is your cue to find a place to land as soon as possible. If you can fly to the top and not hit any Para-Troopas, you'll be able to get two Dragon Coins at the top and two 1-Ups, assuming you have Caped Mario. To exit this area, just go to the pipe on the right-hand side of the room and go down it. You'll skip a little bit of the level here.
There are seven Dragon Coins in all here, and if you get any Dragon Coins past the fifth one, you'll get a 1-Up for every subsequent Dragon Coin.
To get the key, you will have to either hit the P-Switch and hurry to the right to get to where the key is (having Fire Mario helps here), or you can hold X or Y and use the Control Pad to guide Mario further to the right to where the key is and trigger it there. From there, you can grab the key and take it to the keyhole, which will allow you to go to Donut Secret House.
Donut Secret House
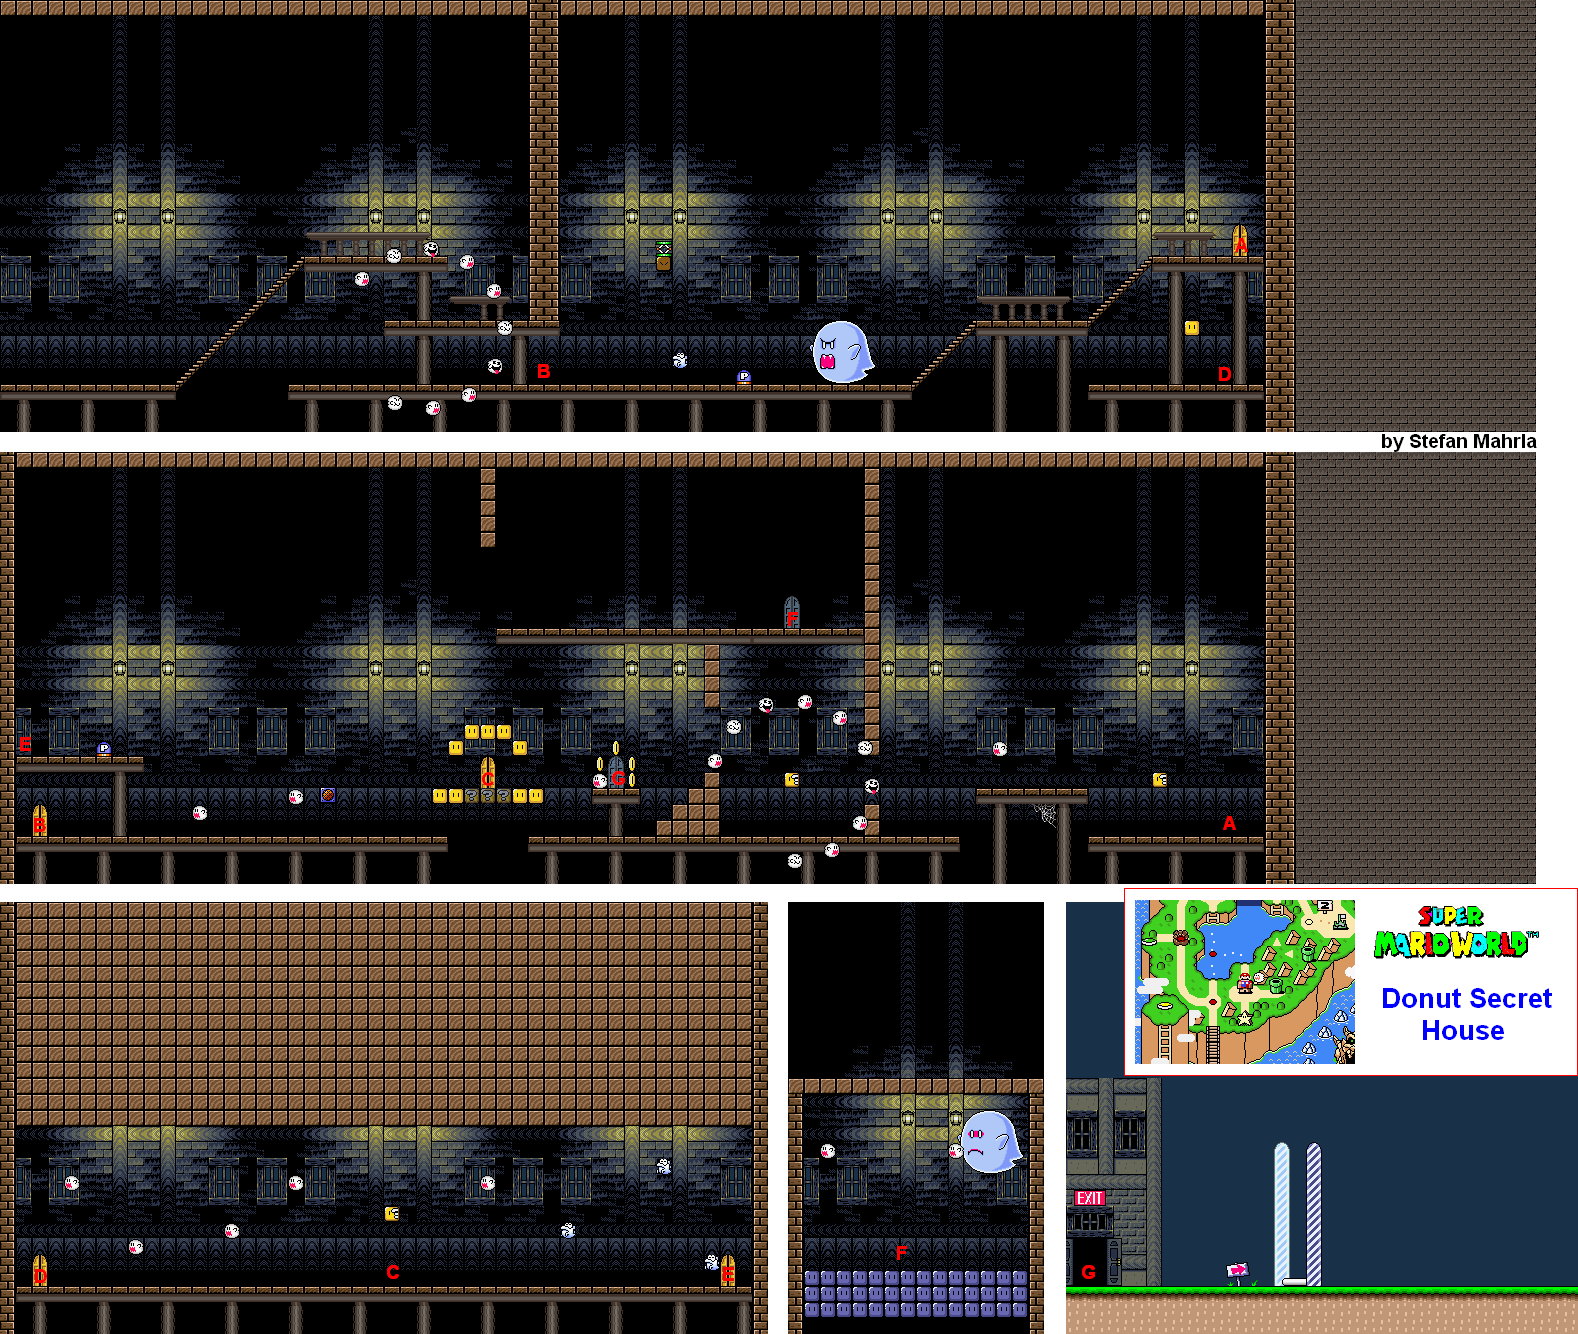
To reach the original exit, make your way to the right and avoid the Boo Buddies carousel. To the right is an Eerie (a dinosaur ghost). Avoid it. If you need to, hit the P Switch and grab the springboard to it, and press B right when you are about to jump to clear the Big Boo. You can then run to the right and enter the door.
If you want to, you can get the Big Boo to follow you by facing away from it, then pressing down on the stairway when it is close enough to slide into it and kill it. (This was discovered after the Let's Play was made, and is therefore not mentioned here.) You can also slide on any slope by pressing and holding Down on the Control Pad.
Once you enter the door, make your way to the left, avoiding the Boo Buddies as you go. Much like the Big Boos, you can manipulate the Boo Buddies by facing away from them, which will give them incentive to slowly approach you. They will hurt you to the touch, regardless of whether they are standing still or not.
From there, hit the P-Switch, then run to the right. There will be a door. Enter it. You'll find a path to Star Road, but we will cover it later. (Make sure you grab the outline of coins first, otherwise you won't be able to enter the door and you'll have to re-enter the room by going all the way to the left, entering the door you see and getting past the Big Boo again to get back there.)
For the alternate exit, hit the P-Switch, then go to the door that was in mid-air and hit the block directly above it from below. This will give you a vine. Climb up the vine and make your way to the right, where there will be a silver door if you are fast enough. From here, enter the door. There will be a mini-boss battle.
Here, you will have to avoid the Boo Buddies while throwing the blocks that make up the floor here at the Big Boo when he turns solid. Do not hold X or Y unless you intend to grab the block, and be ready to kick it upwards. The Big Boo will go from transparent to solid at regular intervals, and after three hits, the Big Boo will be vanquished. Beating this boss battle will take you to a pipe. This will take you to the Valley of Bowser, but thankfully, you'll be high up in the upper-left corner, where you can take on Donut Secret 2.
If you enter the door that is mid-air, going left will take you to the platform after that Big Boo that you could not reach (as well as a 1-Up in a block), while going right will take you back to the previous room.
Donut Secret 2
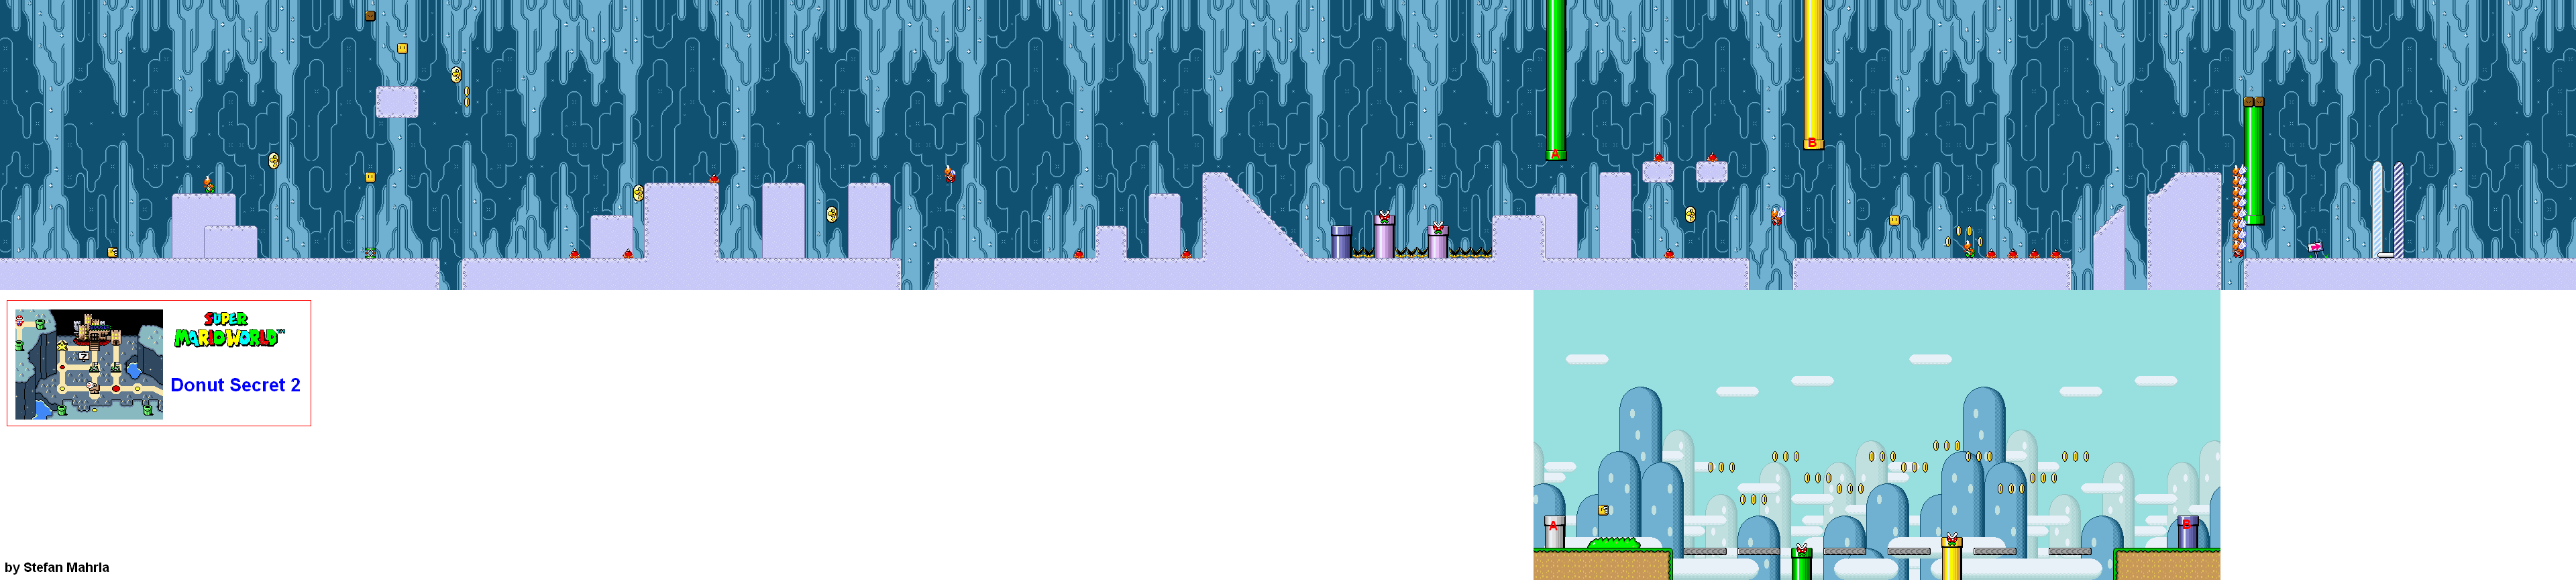
This is an ice level, and of course, it will have ice physics. Be very careful as you explore the level, try to find all five Dragon Coins (hit a block above a springboard to take a vine and reach the second one) and get through the level.
The above-ground section that you can enter near the end does not have much of a purpos and does not let you skip that much of the course, which is short enough to begin with. Sure, you could grab the P Balloon and get the coins, but other than that, you don't skip a whole lot of the level. Do it only if you feel like it.
Donut Plains 3
You'll be introduce to some new things here. There are the solid black lines that act as paths for platforms, as well as the On/Off Switches that you can press to change the track where necessary to get yourself out of danger.
The blue Koopas move faster than all the other ones. Also, when a Koopa is knocked out of a blue shell, you can get a different version of the naked Koopa who will kick any shell in his path forward. If you eat a blue shell with Yoshi, Yoshi will sprout wings, and you can tap B to fly.
You'll also meet the black Fuzzies, who move across these paths. Avoid them, since there is no way they can be destroyed.
You can also do a coin block mini-game before you leave. Just take the upper path near the end, stay on the platform and get on the pipe. Go down, and you can play the mini-game.
Donut Plains 4
You'll meet the yellow Koopa at the beginning...sort of. If a naked Koopa leaps into a Yellow Koopa shell, they will start spinning around, turn invincible and home in on you. You can kill it with a spin jump, but that is about it. If you eat a yellow Koopa shell with Yoshi, you can create sand clouds that knock enemies back when you jump and hit the ground.
The Goombas also make an appearance here. They have a mushroom-like appearance here, but it is harder to notice compared to past games. Some of them will have wings and jump around at regular intervals.
Some of the pipes will increase and decrease in length. You can use that to your advantage.
You'll also meet the flying Sledge brothers, who will stand on flying gray platforms that swoop back and forth as they throw hammers at you. Stay below them and hit them from below by jumping into the underside of the platforms to knock them off.
There is a bunch of cloud platforms as well as some one-ups above the slopey part, but you have to get them in a certain order or else they will not be collected. You can also fly up and get a 3-Up Moon at the end.
Just after the slopey part, you can go down a pipe and brave winged Paratroopas for a Dragon Coin. Thankfully, you'll get shot out to the continue point when you exit that area. Just be sure to jump to grab the tape.
Near the end, Para-Goombas - Goombas on parachutes, will slowly drop down and sometimes be the culprit for a little bit of slowdown (which does not happen often in this game, thankfully). Thankfully, you can get a Starman in a nearby block and mow down a ton of enemies for lives. The box the Starman comes out of it is interesting: it is a glass box that cycles between a Mushroom, a Fire Flower, a Cape Feather and a Starman before going back to the Mushroom. If you can grab the power-up at the right time, you can get the Starman.
No comments:
Post a Comment