Here it is: every track from Belmont's Revenge.
Showing posts with label Castlevania II: Belmont's Revenge. Show all posts
Showing posts with label Castlevania II: Belmont's Revenge. Show all posts
Thursday, January 2, 2020

Wednesday, January 1, 2020
PrinceWatercress plays Castlevania II: Belmont's Revenge - Part 6 of 6
The Dracula battle here is a difficult one, but it can be done.
Stage 2
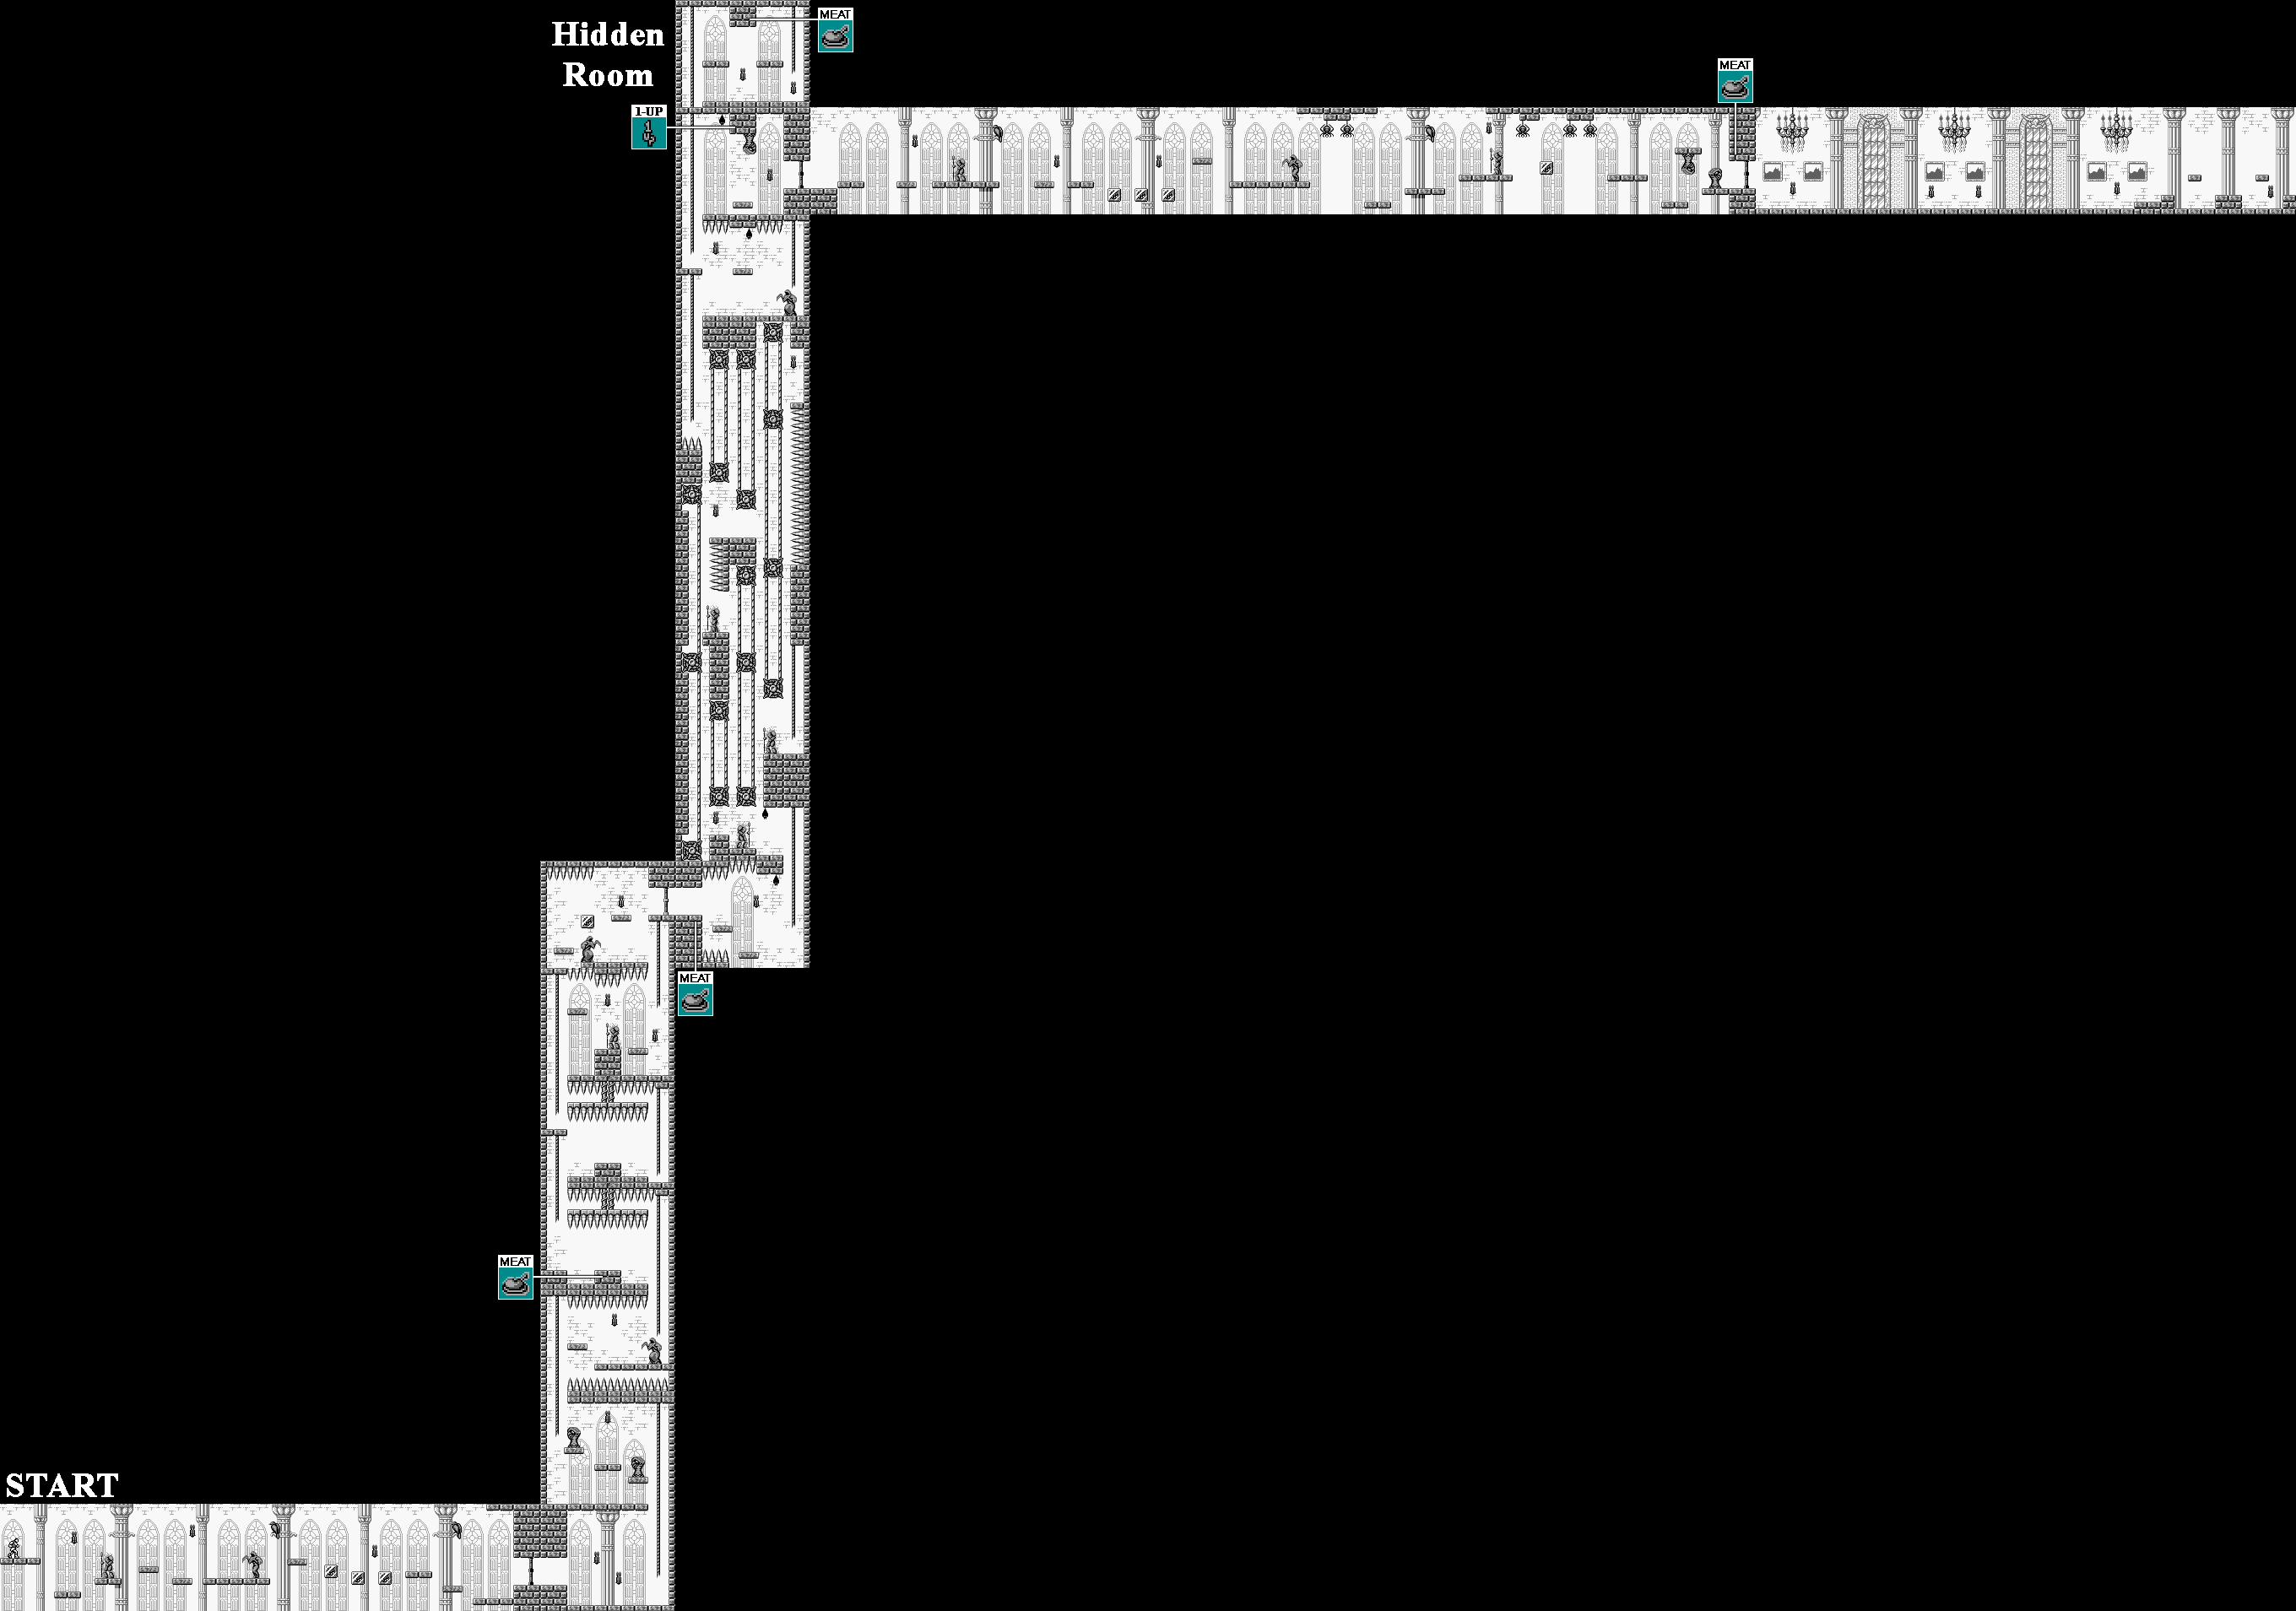
This time around, you're in a cathedral with a lot of platforms - including the break-away ones from the Crystal Castle - above a bottomless pit at the beginning. Once you go up the rope after this part, the fun begins, as you'll be seeing
For the first spiked crusher that moves up and down, take the lower path instead of destroying the column. If you destroy the left brick on the floor in the center of the room, you can get some wall meat (or a big heart). For the second spiked crusher, you'll have to move under it as it goes up and down and destroy the support column holding it up to continue on.
At the moving ropes, wait for the first rope to start moving upwards before walking into it. From there, you'll have to quickly jump back and forth between pairs of moving ropes to take out enemies. After this section, step off the left edge of the moving platform instead of jumping off so you don't hit your head on the ceiling spikes. In the room after that, there is a 1-Up hidden in the ceiling near the door, but it is hard to get.
If you jump repeatedly on the break-away blocks, you can keep them on-screen a little bot longer in case you need to jump off one to a moving platform.
Shortly after this (and some spider ropes), you'll enter a room with different music. Before you go through the door leading to this room, strike the ceiling above the door with the whip to find wall meat. You'll be able to power-up on your way to the right. You'll then meet by Soleiyu, who has been manipulated by Dracula.
Soleiyu will move back and forth, and he will also jump on the platforms. Watch where he goes carefully. When he throws his daggers, the daggers will go into the corner and spin before eventually going to where you are. As long as you stay on the move, watch where Soleiyu is going, hit Soleiyu whenever you can and keep an eye on the daggers, you'll make it through this difficult battle.
After beating Soleiyu, Soleiyu (which I'm pretty sure is a mis-translation of "Soleil") will come to his senses. Since Dracula cannot use Soleiyu's powers anymore, he will now summon the power of the four castle spirits. This explains why the orbs go up into the sky when we beat the bosses of the past levels. We then head to the final battle.
Stage 3
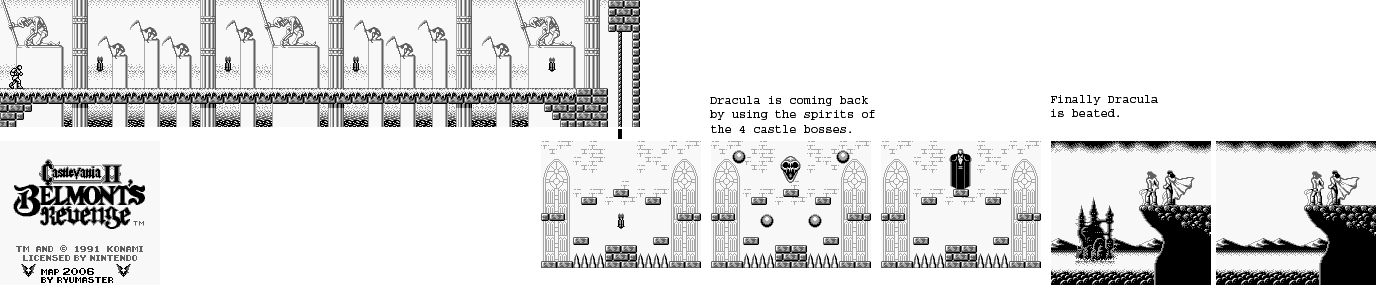
In the path leading to Dracula, there will be only so few hearts to grab. Not only that, but you can't grab the ax, which is essential for beating Dracula in the Western version of the game. If you die at any point in the battle, you'll really be up a creek. When you go down the rope, you'll face Dracula. Dracula will teleport around the room in a specific way, and you'll have to position yourself just right to avoid getting hit by the orbs that split up and then re-converge where Dracula teleports to after he disappears. The following strategies are from Bkstunt_31's GameFAQs walkthrough, which I consulted during the final battle.
In the final chamber, start by standing on the left end of the lower-left platform and ducking to avoid the orbs. When the orbs move back in - which is Dracula teleporting, by the way - stand in the center of the bottom center platform (which is the floor between the spikes). Hit Dracula in the head with the whip, then leap to the platform to the right and keep walking right to avoid the orbs.
Dracula will teleport to the upper-left platform. Stay on the left edge of the platform you are currently on and duck to avoid the orbs. If you have the axe, you can throw one at Dracula's head here to get some extra damage in.
Dracula will then teleport to the upper-right platform. Make your way to the upper-left platform and duck at the very left edge of the platform to avoid the orbs. Dracula will then teleport to the bottom center. If you have the ax, you can stand at the far left and jump up to throw an ax to the right and hit Dracula in the head, then go back to the upper-left platform, face right and stand so that the toe of Christopher's "right foot" is off the platform, then jump at the right time to avoid the orbs. (This is the hardest orb dodge to do.) If you don't have the ax, just stay on the upper-left platform and be ready to jump.
Dracula will then teleport to the lower-right platform. Go to the left edge of the bottom center platform and duck to avoid the orbs. If you have the ax, you can jump up and throw an axe to the right to hit Dracula in the head on the way there, then duck just in time.
After this, Dracula will go back to the top center platform. Go all the way to the lower-left platform and duck to avoid the orbs. Dracula will then re-appear on the bottom center platform. If you have the ax, you can stand at the far left and jump up to throw an ax to the right and hit Dracula in the head, then go back to the upper-left platform, face right and stand so that the toe of Christopher's "right foot" is off the platform, then jump at the right time to avoid the orbs. (This is the hardest orb dodge to do.) If you don't have the ax, just stay on the upper-left platform and be ready to jump.
After that, the pattern repeats. You should have a good idea of where to stand and what to do depending on where Dracula goes next. It will take a lot of practice and a lot of trial and error to beat Dracula, but it can be done. Once you beat Dracula, that's it. There's no second form or anything. You're done. You just beat Castlevania II: Belmont's Revenge! Congratulations!

PrinceWatercress plays Castlevania II: Belmont's Revenge - Part 5 of 6
Welcome to Dracula's castle. Once you're here, there's no turning back.
Dracula's Castle
Stage 1
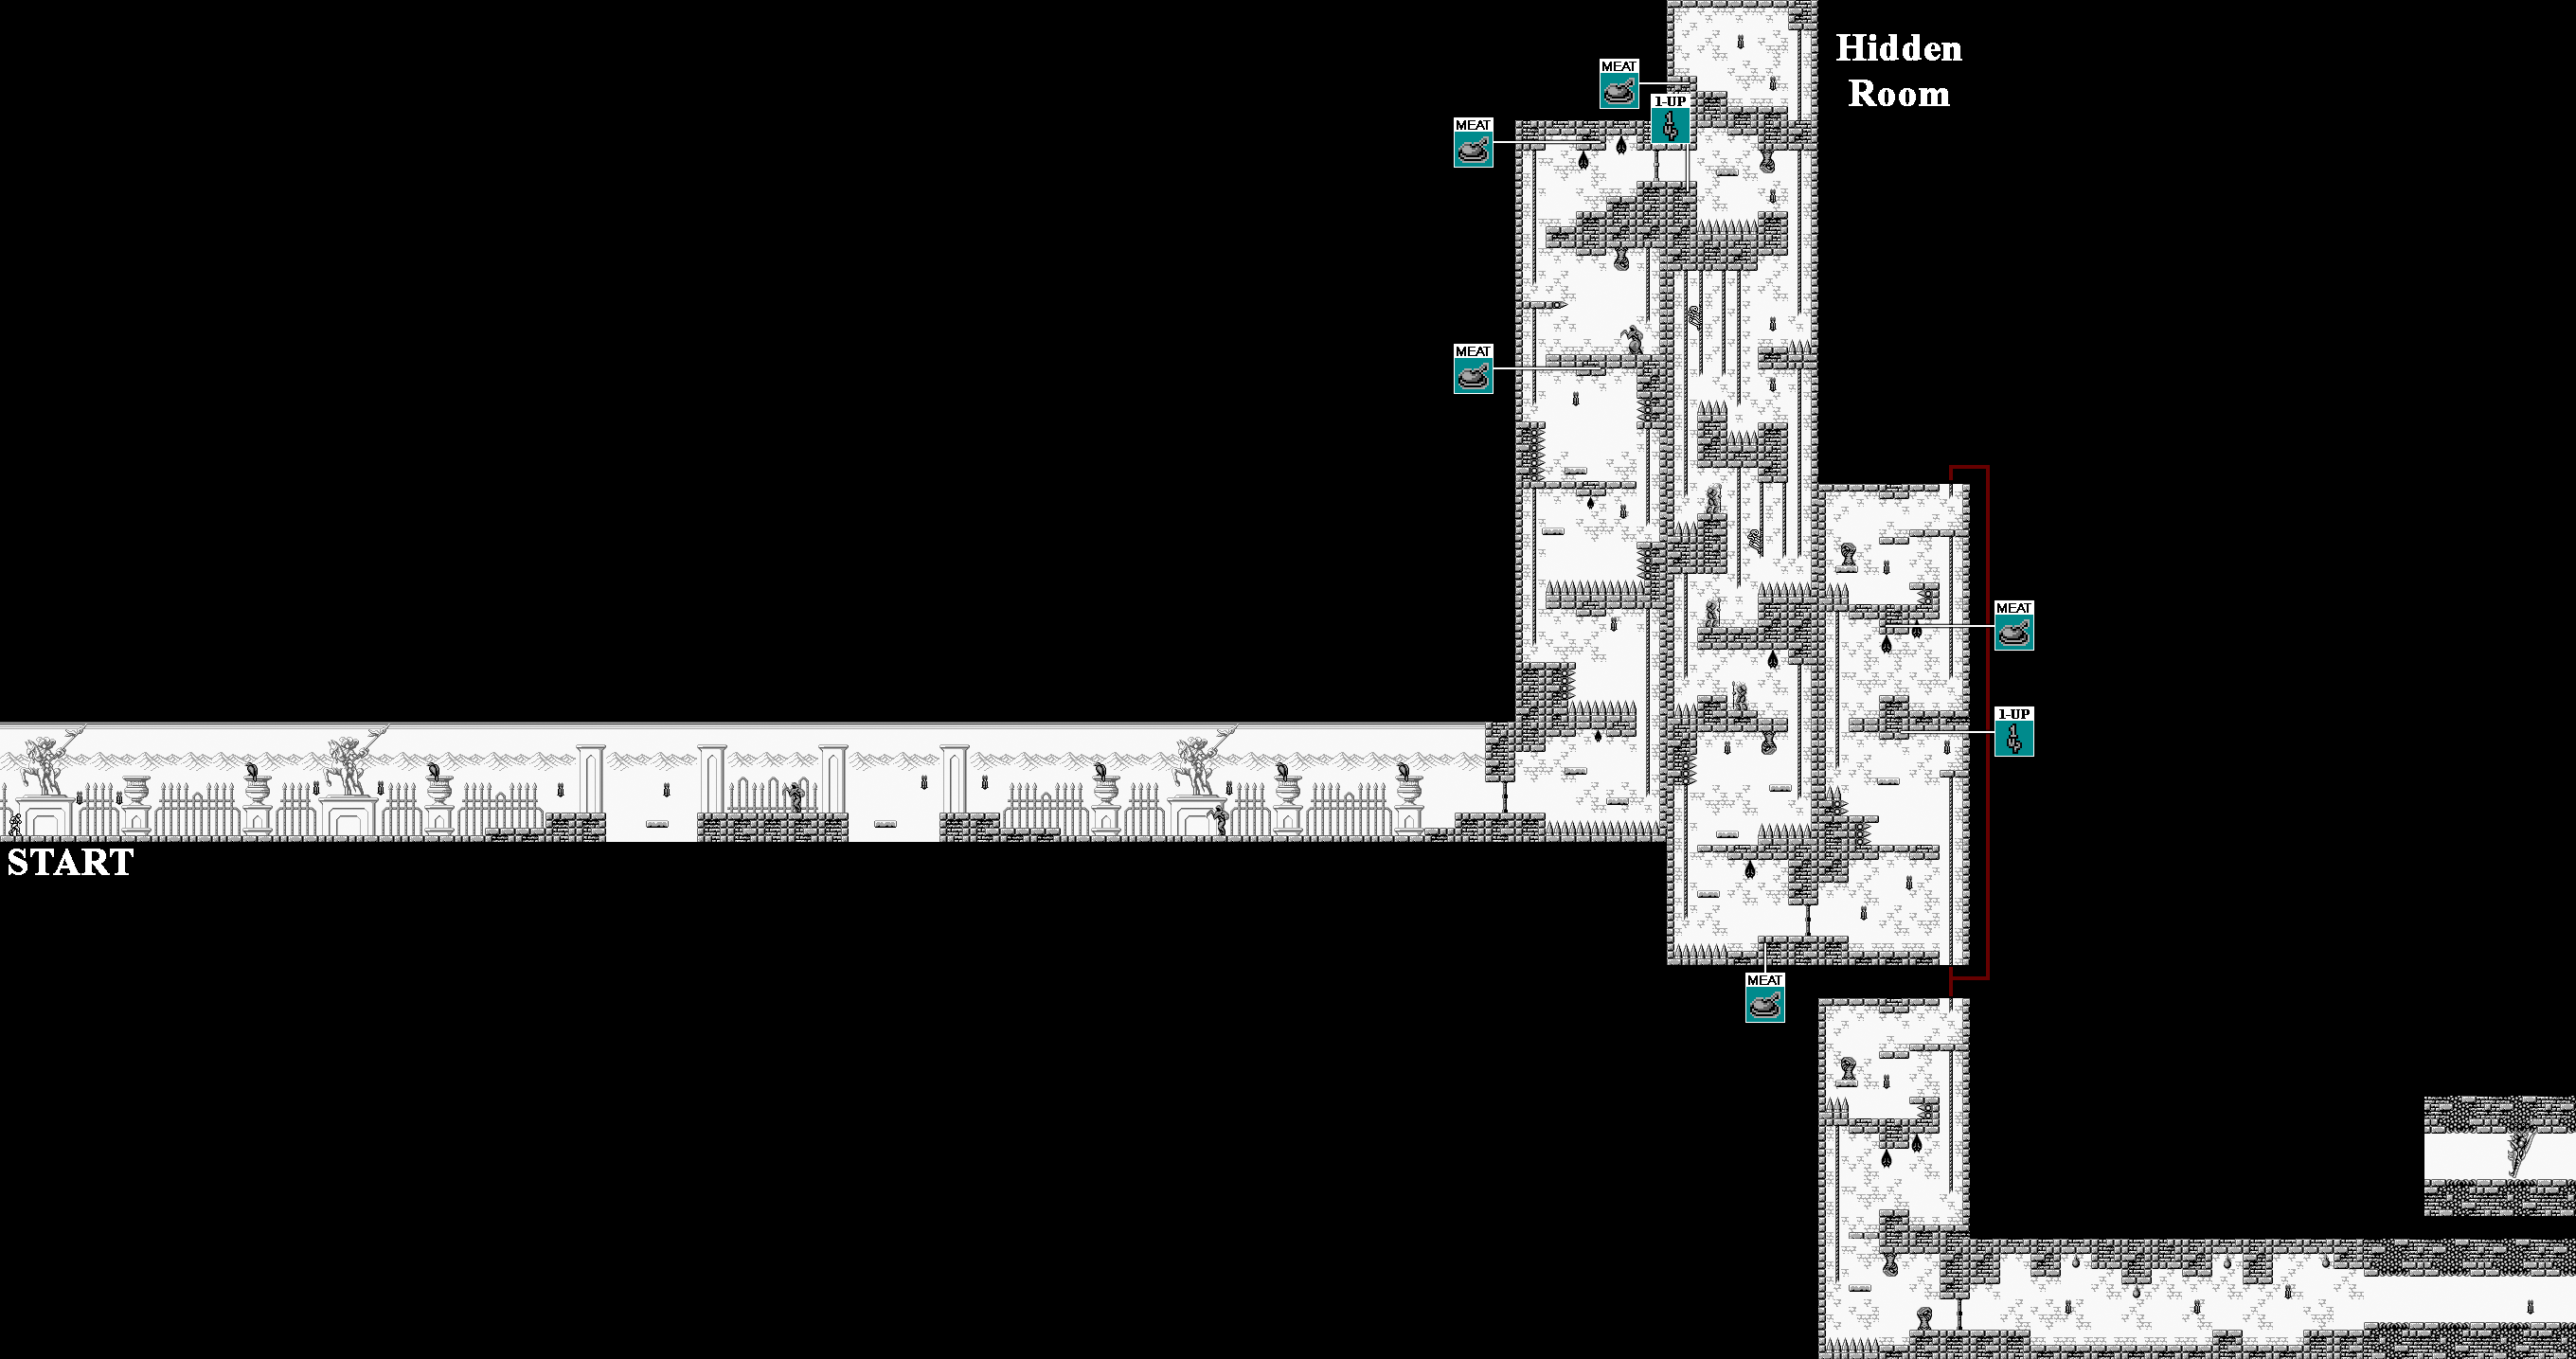
The hooded figures with the scythes throw their scythes like boomerangs. If they are standing when they throw their scythes, duck the scythes when they come your way, then jump over them when they return. If they are ducking, jump first, then duck.
When you enter the castle, jump onto the left edge of the left platform so that one of Christopher's feet is on the platform, That way, the nearby bat will not fly around. After that, you'll have to deal some wall spikes as you make your way up.
Near the end, you'll have to wait on top of the wall spikes in order to land on a moving platform below. As long as one of Christopher's feet touches the platform, you're good.
At the rope where you can either go up or down, go down or else you'll be in an endless loop until you go down.
There are several places where you can strike the wall for health-replenishing wall meat, but if your health is full, they will be big hearts instead.
The boss here is a bone dragon that goes in and out of the floor and ceiling segments that don't have bricks. Stand on the brick segments, hit the bone dragon in the head whenever you can and stay away from the far left side of the screen as much as possible. If you get cornered on the left side of the screen, see if you can get around the tail as it goes through the ceilings and floor.
Tuesday, December 31, 2019
PrinceWatercress plays Castlevania II: Belmont's Revenge - Part 4 of 6
In this entry, we take on the last of the selectable castles, then head down into Dracula's domain.
Cloud Castle
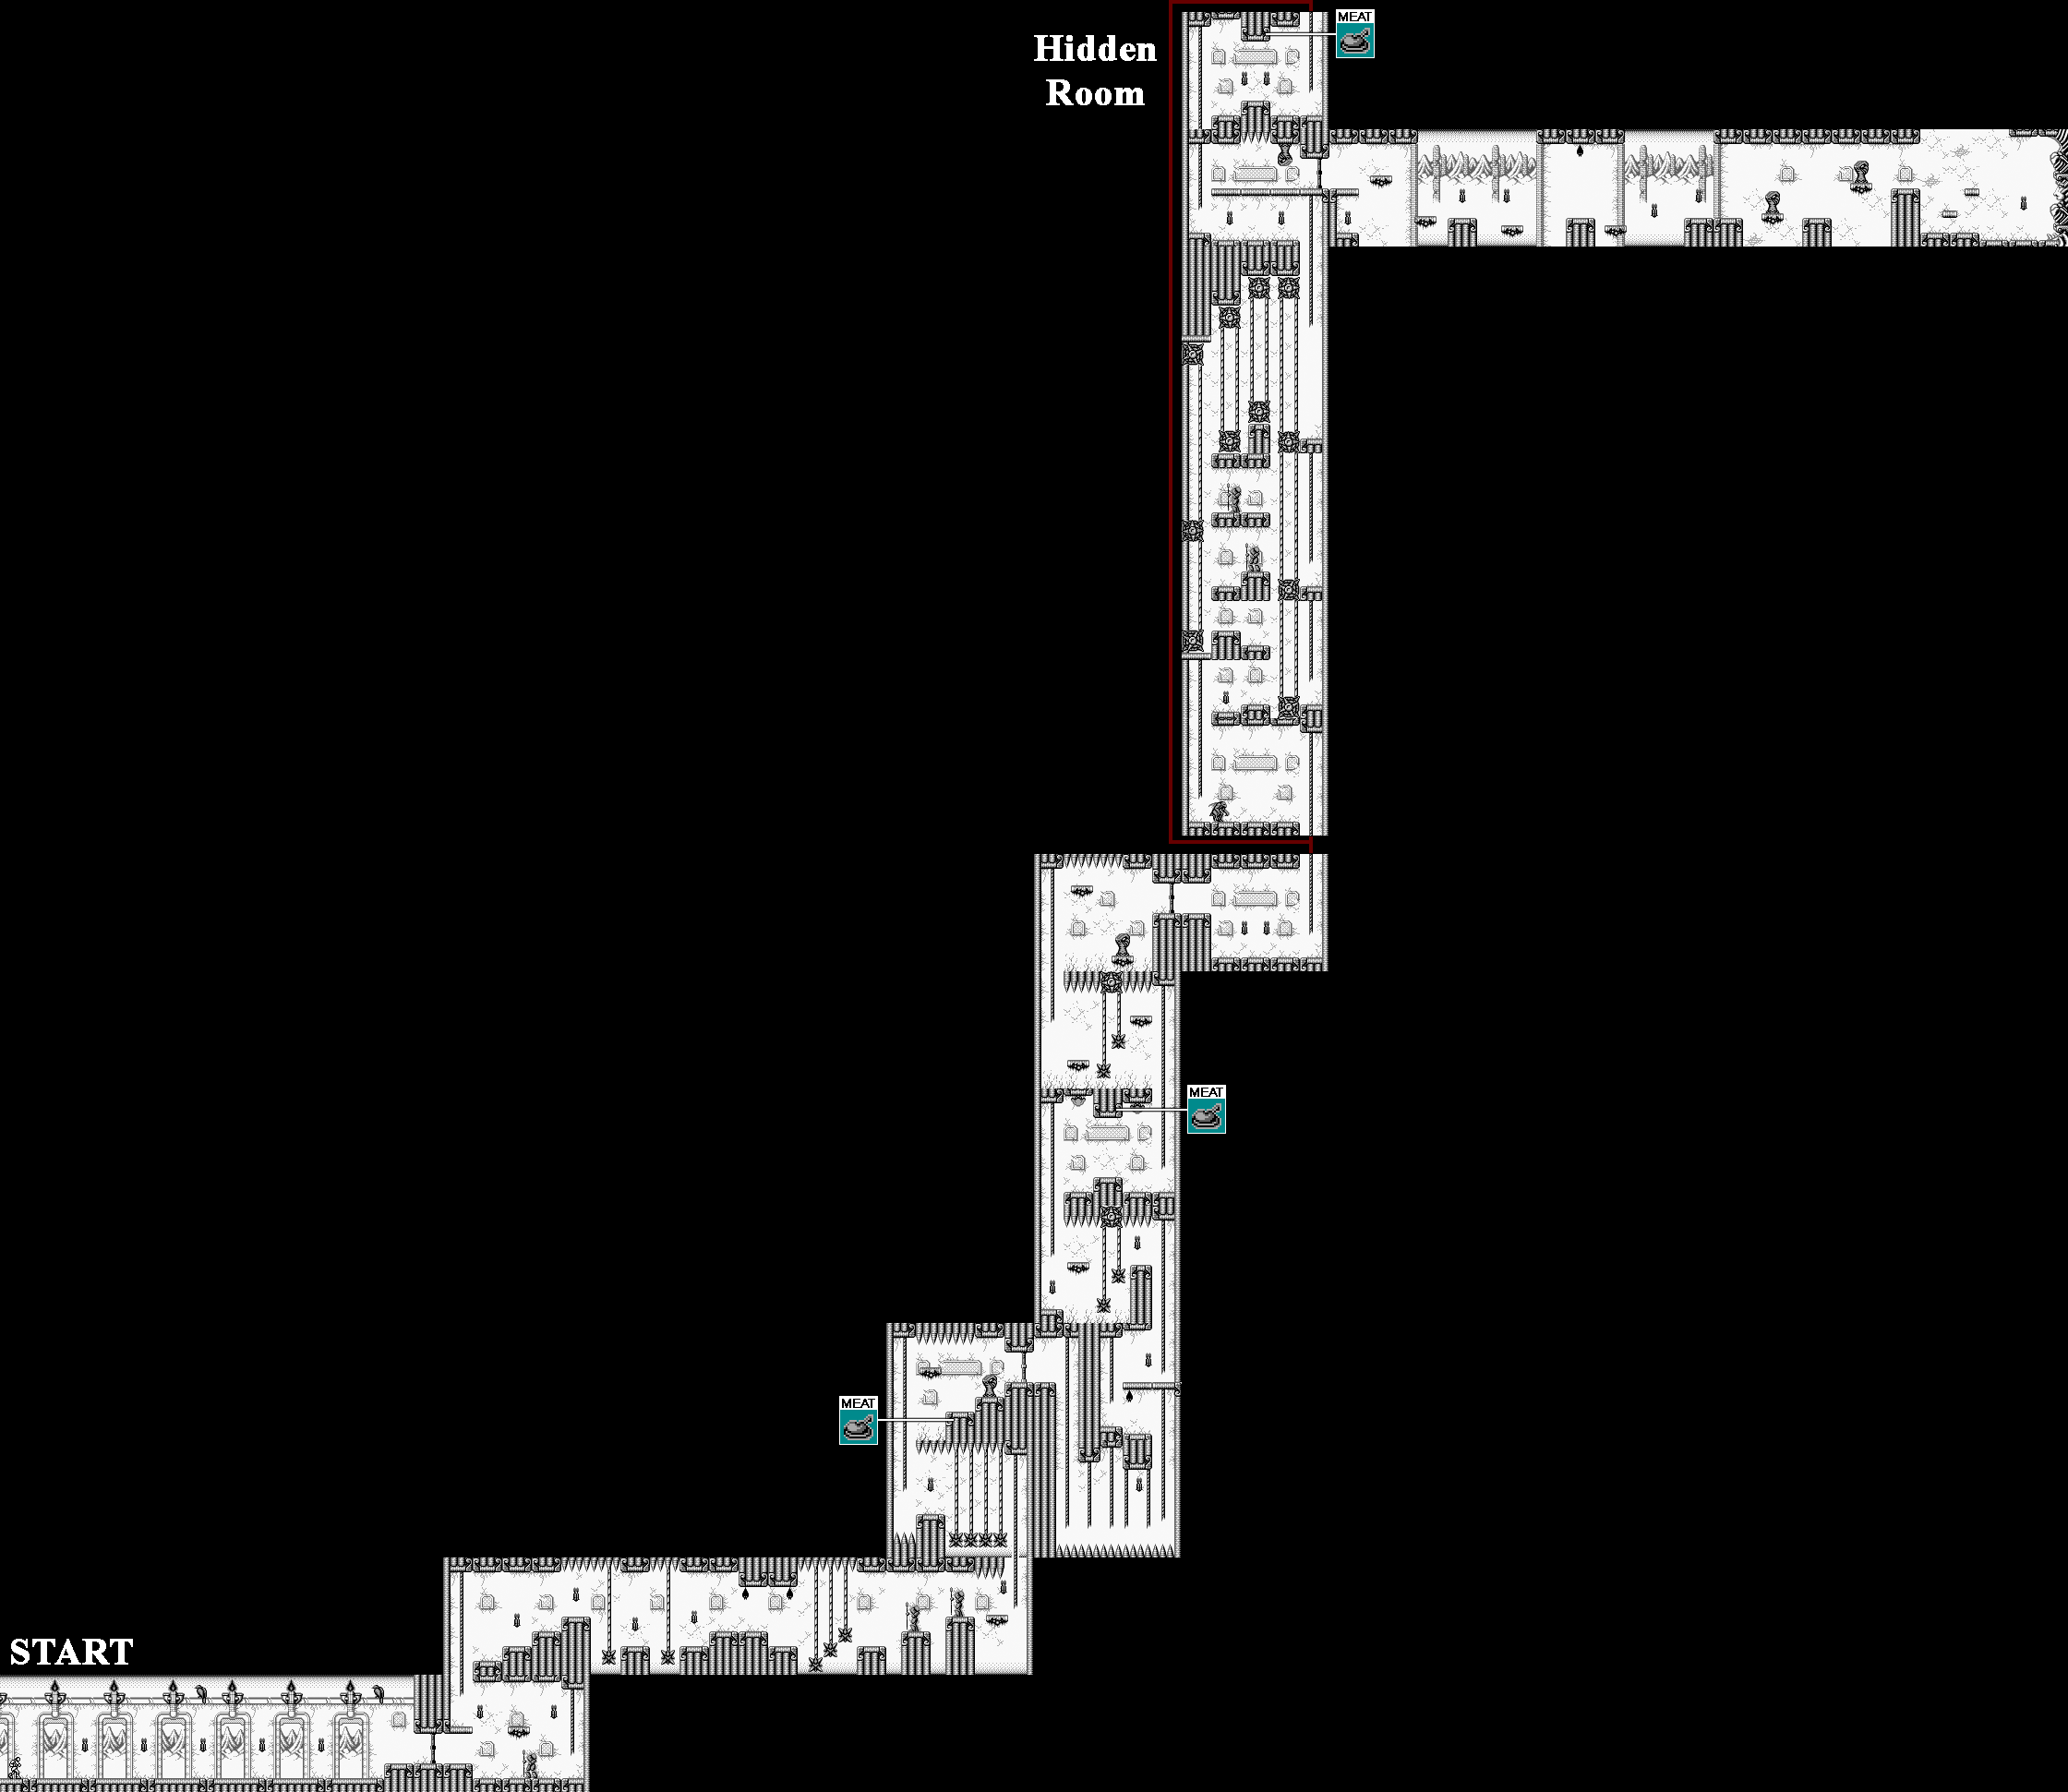
You'll have to deal with birds as you make your way to the first door. The suit of armor carrying the spear just slowly moves forwards. If you hit them from behind, they will turn around and
The ropes with the spiked balls at the bottom will rise when you climb on them. Jump off to where you need to go before you either get carried into the spikes or get hit by the spiked ball. For the set of three in a row, you'll want to jump into the third one, then quickly jump your way to the other side. When you reach the platform on the other side, walk back and forth so Christopher Belmont is back on the center of the screen. Dor the set of four in the road, leap into the middle of the first rope, then quickly hop your way left from one rope to another.
The spiked floor after the checkpoint will go up and down. Stay at the top of the rope, then jump off to the next rope when the floor descends.
Some of the spiked ball ropes will be pulley. When you get on the first rope, you will definitely want to jump to the other side, because the ropes will not stop moving or change directions once you latch on. Watch out for ceiling spikes, too, and don't touch the mechanism at the top as it will instantly kill you.
The rope elevators will change directions every few seconds. The machines that move the ropes up and down will kill you if you touch them.
The boss here is a pair of skulls that extend from the wall and shoot their spinal cord segments to the left side of the screen as they transfer from one skull to the next. For best results, stick to one of the two skulls, watch out for the spinal cord segments and don't get hit by the projectiles that are shot out by the upper skull. I usually stick to the bottom skull.
After conquering all four castles, a fifth one will come out from beneath the lake. This is Dracula's Castle...
Monday, December 30, 2019
PrinceWatercress plays Castlevania II: Belmont's Revenge - Part 3 of 6
Welcome to Plant Castle, which is full of ceiling spikes, those eyeballs from the original game and a boss that is strangely made a bit easier in the Western version.
Plant Castle

The ceiling spikes are instant death, so don't jump into them.
The eyeballs will blow up the bridge portions under them if they happen to be on the bridge. when you hit them.
In the room full of ropes, climb up the one on the far left so the skeleton that is sliding down does not take you by surprise.
The big bat splits into two smaller bats when you hit it, and those smaller bats will be moving when they show up.
The wall above the door leading to the second outdoor bridge section contains wall meat. You must hit the wall segment with the whip itself; whip projectiles will not uncover it. At that section, stick tot he bridge; the plant growth on the low road will slow you down. You'll eventually have to go down; make sure the monsters there don't power down your whup. You'll find more wall meat above the next door.
The spiders that spit projectiles also create ropes you can climb on with their web strands; make sure the spiders come down rather low before whacking them.
The boss is a pair of statues. Get on the platform in the center quickly, then hit the statue heads when they put their tridents down. Having the ax makes this easier, as you can hit them from below. (Take that, Japanese version!) The whip can destroy the projectiles that the statues spit out. When the statue walls move away, they will be harder to hit unless you have a projectile, but they will eventually move back towards the center. Thankfully, both statues share the same energy bar, so as long as you're hitting a statue in the face, you'll be all right.
PrinceWatercress plays Castlevania II: Belmont's Revenge - Part 2 of 6
Another video, another castle with its own individual enemies and hazards.
Rock Castle
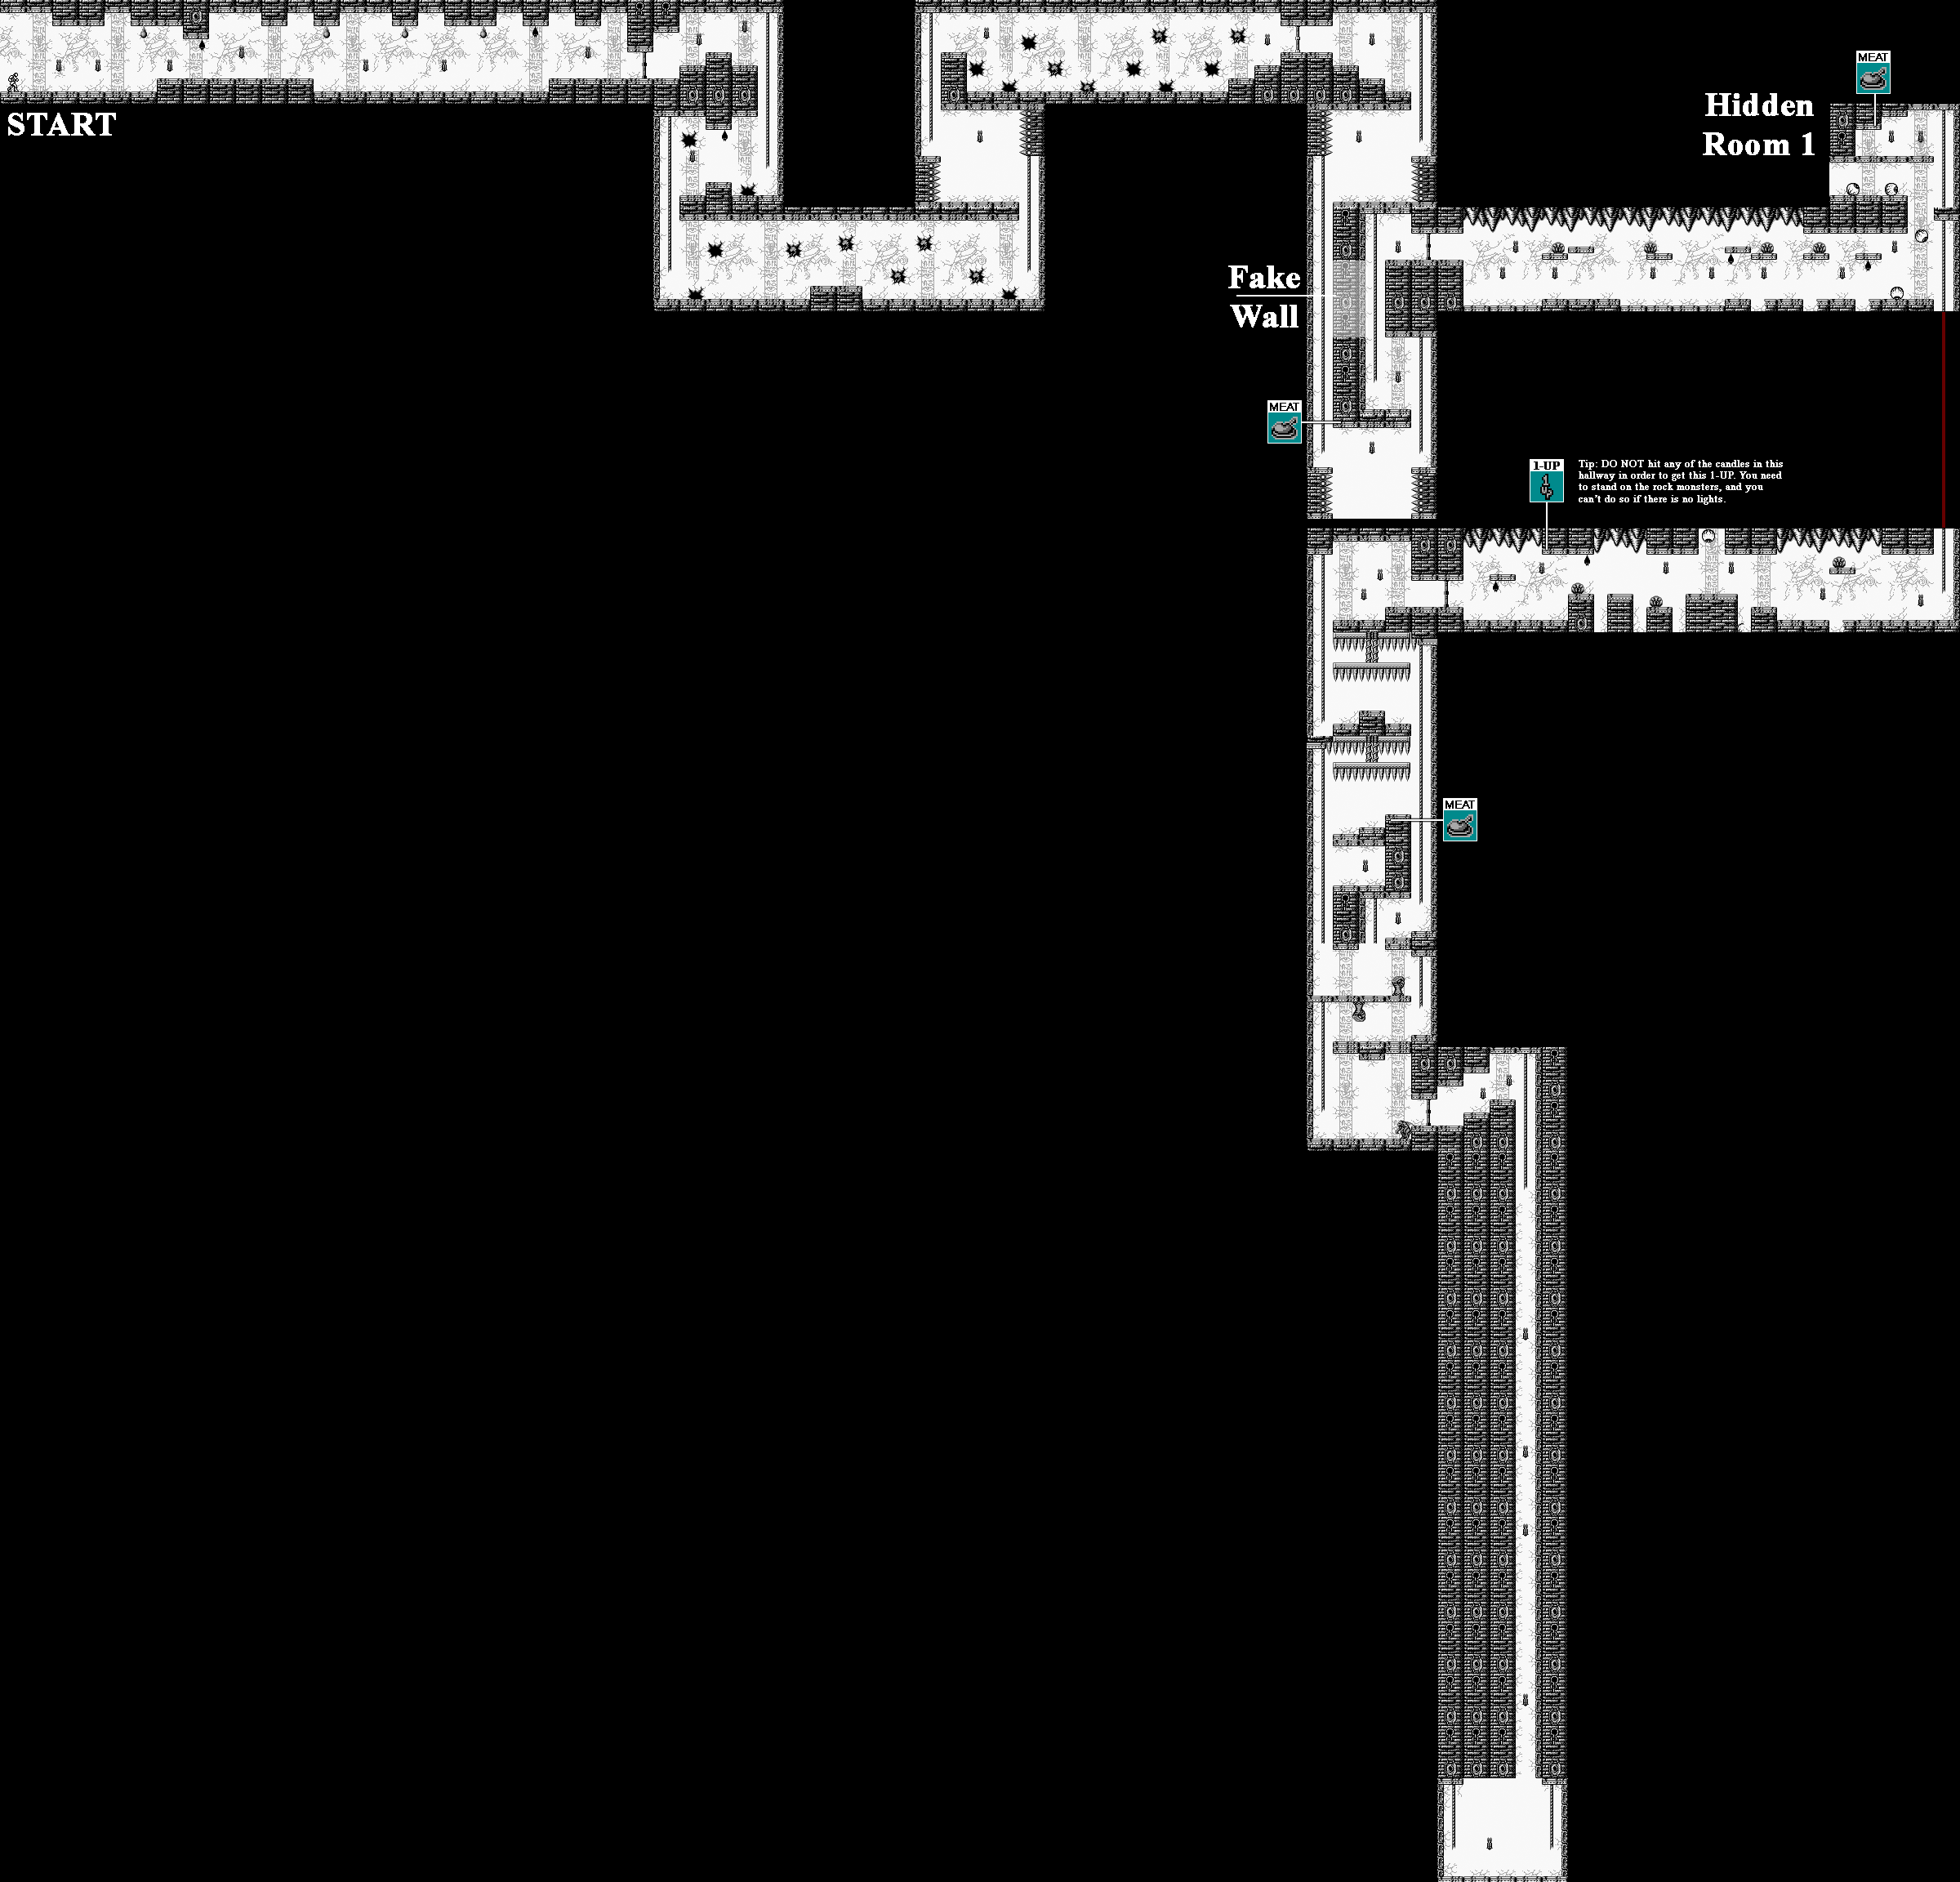
At the beginning, you'll fight mud men that drop from the ceiling. After one hit, they fall apart, but they die on the second hit. The bats will always fly around in random diagonal directions.
Keep an eye on the holes in the walls, as some frog creatures will leap out of them. The best way to take them out is by hitting them while they are still in the holes, but if they come out, you can hit them while ducking as they jump back and forth. The projectile power-up for the whip will make fighting them even easier.
When you reach the spike walls, watch for the the circles in the walls to flash twice. That is your cue to jump onto the top of the spikes that protrude out. By getting the timing down, you'll be able to get to the top of the room without being stabbed to death.
There will be another spike wall on the way down. Jump to the left before you reach the rope. There will also be a third one after that. For this one, you'll want the top spike to extend to the right. When it starts shooting out, get on it and hurry right, and jump to the platform where the other rope is when you're done. You can either get there as soon as you drop into the room, or you can wait and watch the pattern of the wall spikes before doing it then.
When you reach the area with the stalactite ceiling, be careful when hitting the candles. If you hit all the candles that are currently on the screen, you will make the room dark and the worm enemies will move back and forth. You'll have to progress to get another candle to show up, which will light the room back up and make the worms stop moving. Next time, be more careful with the candles, will ya?
You'll also meet the rolling eyeballs when you reach the rope leading downwards. If you hit them, they will explode.
When you reach the spiked crusher that moves up and down, you can get on top of the spike trap, duck down near the column and hit the column with the whip until the trap falls so you can continue on. If you have the projectile power-up for the whip, this is even easier, since you can destroy the column from the rope without having to kneel on top of the trap to begin with.
After a dagger demon, you'll be in the chamber lead to the boss. Drop down the rope, then try to hit as many of the candles as you can for some stuff. From there, you're in the boss battle room.
The boss here is a big demon with a sword. Strike twice with the whip, move back to keep from being slashed at by the demon's sword, and keep going until the boss' armor comes off. At this point, the boss will jump around and shoot energy beams out of the sword. If you have the Holy Water, you can climb all the way up the rope, use the Control Pad to get Christopher to face the center of the room then keep throwing Holy Water from the top of the rope to hit the boss from above. Just make sure you have plenty of health if you do this; you will be taking hits.
If not, or if you have low health, keep in mind that the demon will land either on the left side, the center of the room and the right side when it jumps around, and that you'll have to ready to move under the demon as it jumps and duck underneath the projectiles in order to avoid them. However you do it, it won't be long until you beat this boss.
Sunday, December 29, 2019
PrinceWatercress plays Castlevania II: Belmont's Revenge - Part 1 of 6
Dracula has arrived.
Dracula is looking to be re-born ever since his castle was destroyed as a result of his battle with Christopher.
15 years later...
A ceremony is held honoring Soleiyu, the son of Christopher, who will be the next vampire hunter.
Dracula has been waiting for thist ime because in order to return to Earth, he must use the power of Soleiyu.
The next day 4 castles appear while Soleiyu disappears into the fog. And now, a new battle must begin.
When you start the game, you'll be able to play through the four castles in any order you like. I'm going to go where the game's bat-shaped cursor happens to fall on.
Crystal Castle
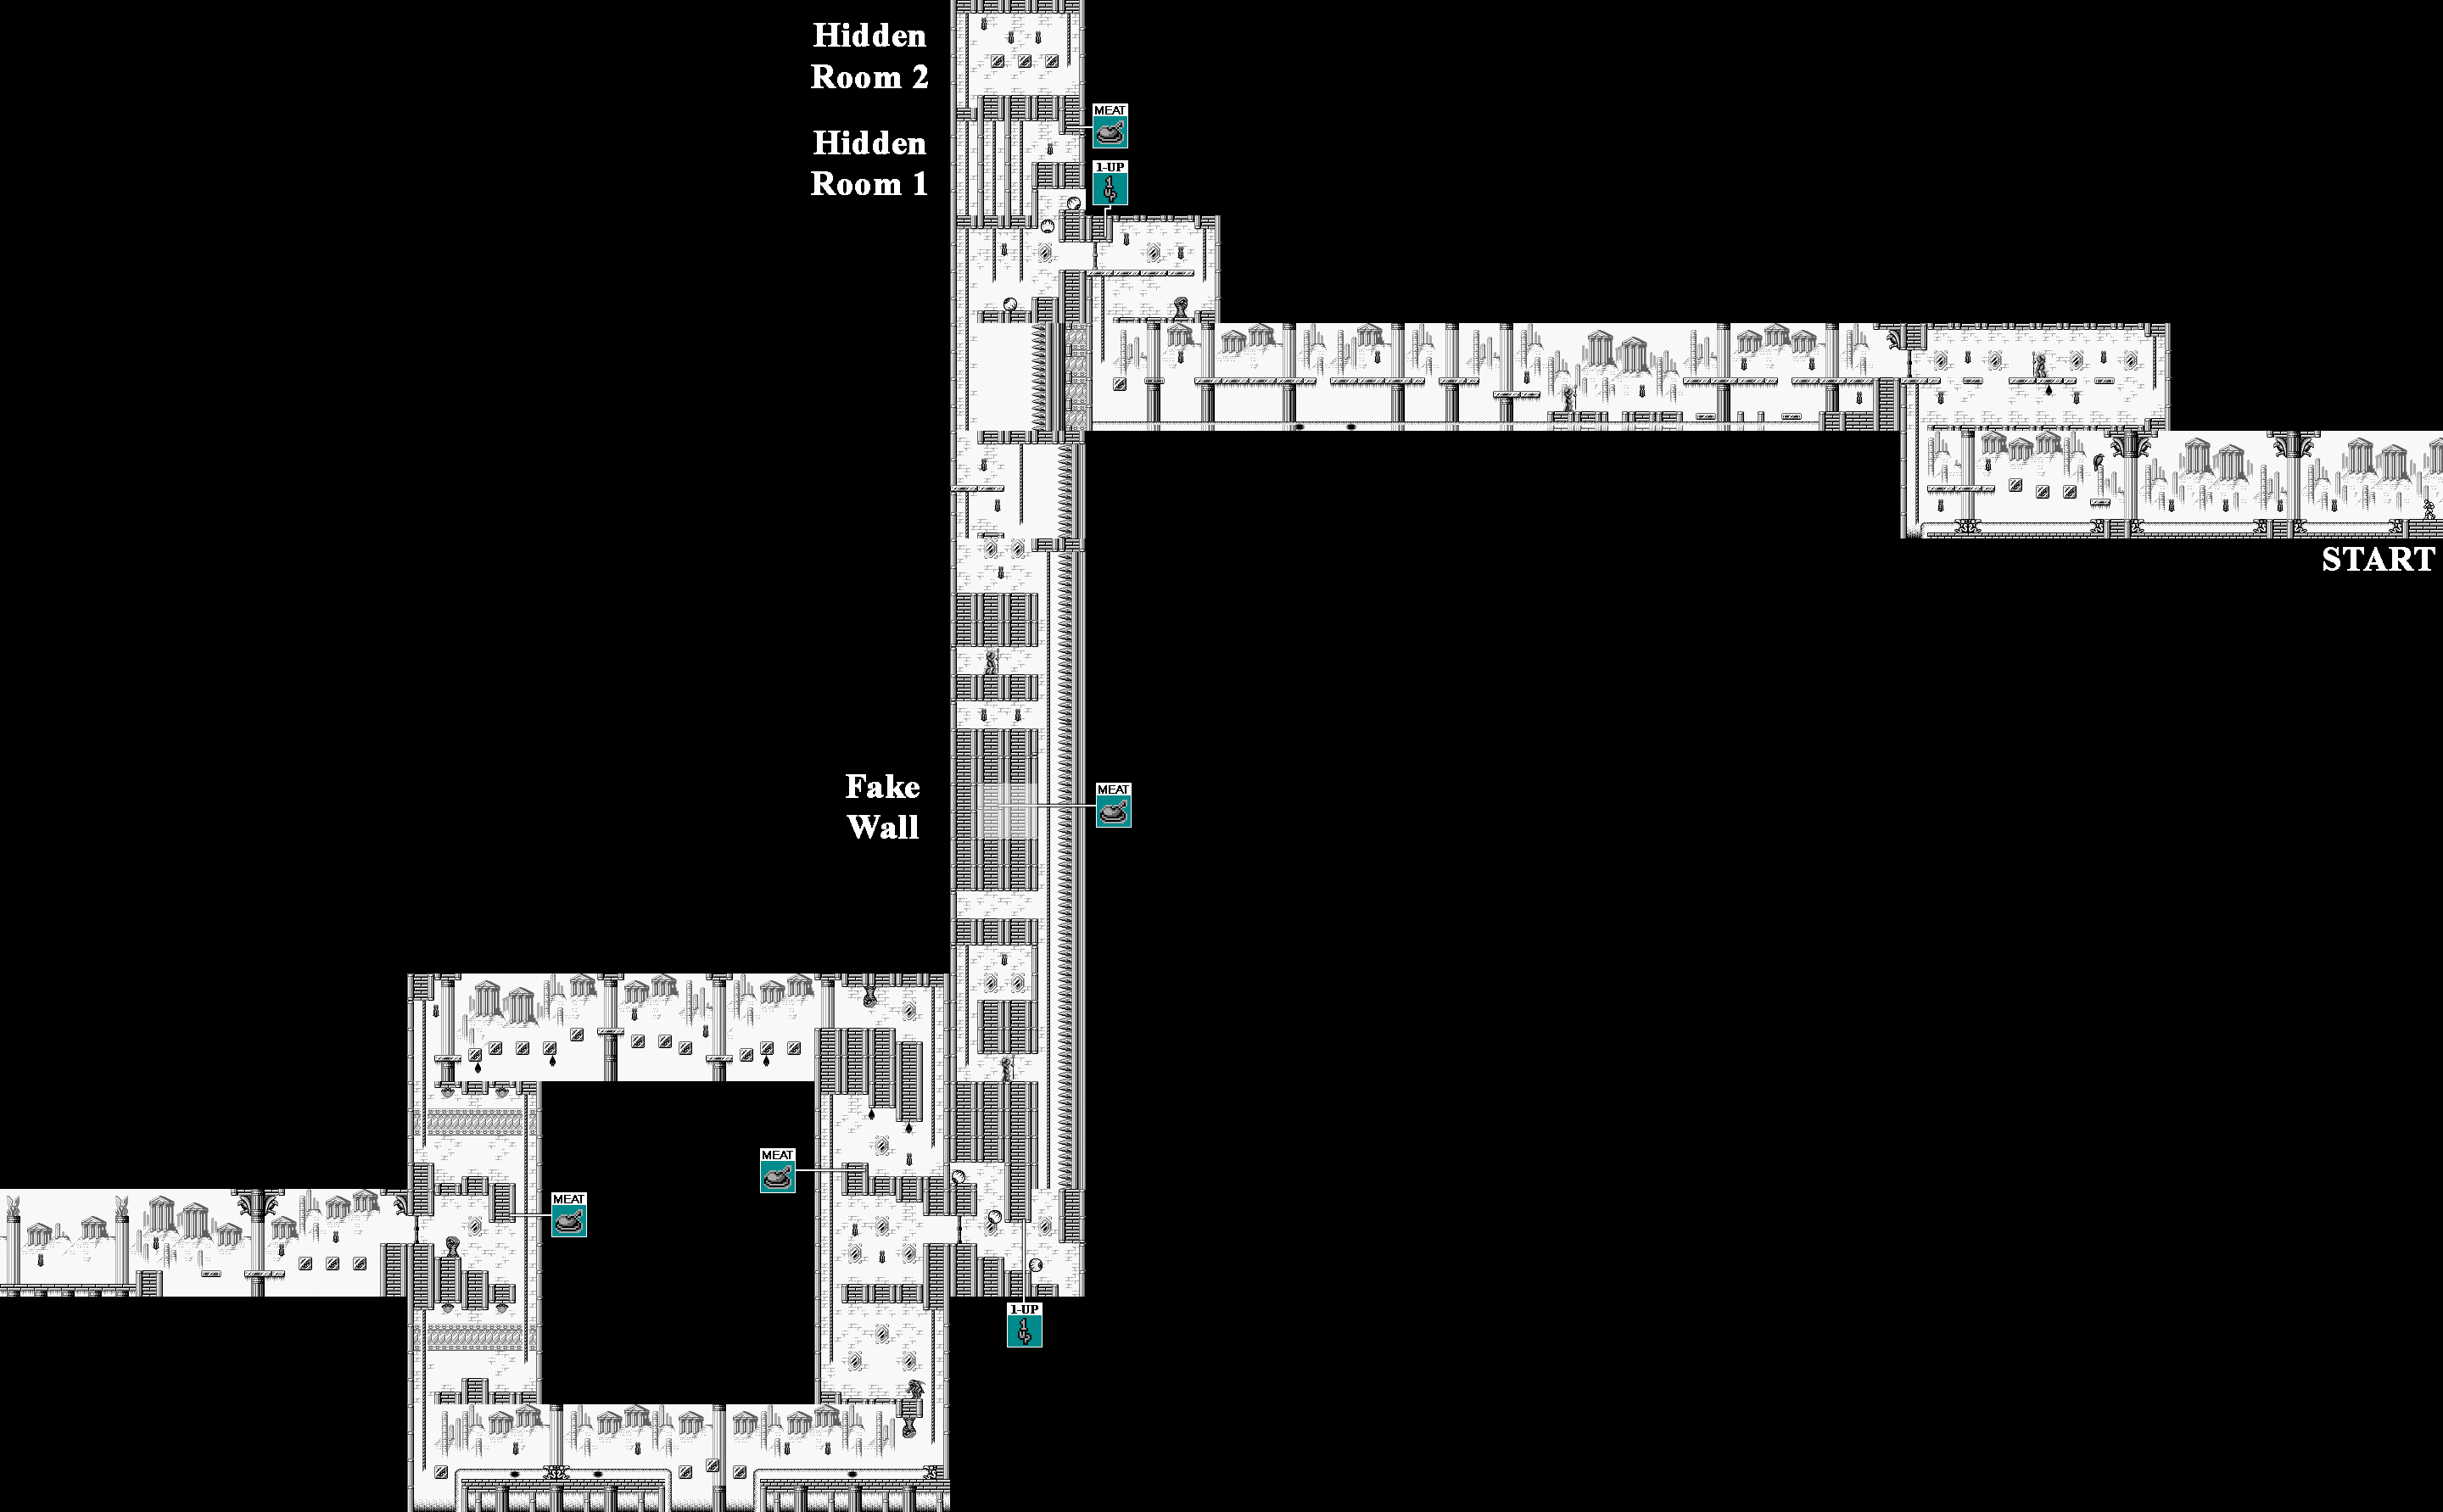
Left and Right on the Control Pad let you move around, and Down lets you duck. A lets you jump, and B lets you strike with your whip.
The P gauge at the bottom of the screen indicates your health, and the E meter is the health meter for the boss at the end of the stage. To the right of that is a space for your sub-weapon, and to the right of that is the amount of hearts you have as well as the time you have left in the stage. To get hearts and sub-weapons, you'll have to hit candles with your whip and take what comes out, just like in other Castlevania games.
Hitting candles not only gives you coins for bonus points, but hearts for sub-weapons and the sub-weapons themselves. Unlike Castlevania: The Adventure, you can hold Up and B to use one of two sub-weapons, should you get them: the holy water and the ax. The Holy Water is thrown down and the fire it produces can harm enemies, while the ax has a narrow upward arc that takes out airborne enemies. (The ax replaces the cross boomerang from the Japanese version to up the challenge on the Western versions.) You'll need hearts to use the sub-weapons, of course, and they don't use that many, but it still pays to stock up on them. Small hearts are worth one heart, while the big hearts are worth five hearts.
By pausing the game, you can see how many lives you have left as well as your current score. You'll get your first points-based extra life at 50,000 points.
The water at the beginning pushes you to the left or right. When the eyes on the statues where the water flows glow, the flow of the water will switch directions.
The crows will dive at you. If you need to, duck first, then smack them when they make their way back.
Holding Down and the A button allows you to slide down ropes much more quickly.
The crystal blocks will break under your weight and eventually shatter after you stand on it long enough.
The orbs will power up your whip. The first one turns the leather whip into a chain whip, and the second one lets you shoot fireballs. Unlike Castlevania: The Adventure, the only enemy that can take away your whip power-ups are the monsters that stick to the floors and ceiling and spit fireballs that bounce off walls, floors and ceilings. If they or their projectiles hit you, your whip will power down once and you will hear a sound that will confirm that.
When you're above the water that makes up the bottomless pit in one section; monsters will leap up in front of you in an attempt to run into you and knock you back.
When you near a door, hit the ceiling above it. You might find hidden health or 1-Ups.
The spike walls will move back and forth, and you'll want to make your move when these walls are not closing in.
As you get close to the end, you'll see a demon with wings that will jump high and throw daggers downward. If you can get it so he jumps back and forth over you, do it. You'll be able to hit him with the whip on the way down and the daggers he throws won't hurt you.
The jellyfish enemies will "swim" towards you after they drop down.
Near the end, you'll be in a loop. The enemy that will power down your whip will be near the door that leads to the boss. There is a candle where the boss battle takes place, and if you strike it, an orb will come out. Touch the orb to start the boss battle.
The boss here is a wizard that turns into a gem and controls a dark cloud. Get a few hits in while the gem is still on-screen somewhat, then get away to the side so the lightning and the trail of energy that it leaves behind on the ground can't hit you. This is a very easy boss and can easily be beaten with the whip, and it won't be long until you beat him and make this castle crumble. When the orb shows up, instead of dropping down to be collected like in other games, the orb goes up into the sky.
Subscribe to:
Posts (Atom)