Our last entry for Terranigma is a metal/rock remix of the underworld theme. Hope you enjoyed this blog series; stay tuned for more game strategies.
Showing posts with label Terranigma. Show all posts
Showing posts with label Terranigma. Show all posts
Thursday, July 16, 2020
Underground Theme Metal/Rock Remix (by TheOnlyDeerAlive)
Our last entry for Terranigma is a metal/rock remix of the underworld theme. Hope you enjoyed this blog series; stay tuned for more game strategies.

Wednesday, July 15, 2020
PrinceWatercress plays Terranigma - Part 50 of 50
Enjoy the ending.
Once Ark goes to bed, Darkside Elle tells you she tried to kill you as a baby in Storkolm because the Elder's word is absolute, but she understood from watching Ark grow up that we are all individuals. She knows Crysta is disappearing, but if she and Ark are bound by fate, they will meet again after being reincarnated. She then says goodbye to Ark, if only for a little while.
Ark then goes into a deep sleep and dreams of becoming a bird, flying around and seeing the surface world's future. From there, we see the dream of Ark flying around as a bird, traveling alongside both a train and a plane while looking at the future of the world before landing in a forest...all while the credits roll.
After the credits, somebody knocks on a door somewhere in Storkolm. Lightside Elle answers the door, then goes outside. The game never reveals who was at the door, and the game ends.

PrinceWatercress plays Terranigma - Part 49 of 50
It is now time for the final battle with Dark Gaia!
Once you enter the hole, it's just a short trip back to Crysta on the overworld map. If you talk to anybody in the town, they will turn into souls and attack you, saying if you had never found out, you would have been happy.
Once you trigger the red hue and the impending doom music, head to the Elder's house and see the Elder. He will thank you for resurrecting the world but tells you that you have learned more than you should know. He asks you to follow him so he can show you something.
Leave the Elder's house. The Elder will tell you to look at the sky. He will tell you that everyone in Crysta are replicas made from Crystal Blue, and float to the sky like Crystal Blue when used up. The Elder goes into a brief monologue involving duality before telling you that your duty is now finished. He then says it is now time to head towards the Gaia Stone.
You'll be teleported to a very strange place with very strange faces similar to those on the underworld tower doors. Keep running north and don't stop, and press A to go through the dialogue. You'll find out you are inside the sun in the underworld, and that the infinite corridor is the history of living things. You'll be told the planet was doomed with an unfortunate fate since the very start. The voice then states it will fight like you, with real form.
You'll be teleported to another room, where you'll meet Dark Gaia. This is the final boss.
Get to the far left at the start of the battle, and run around when you see the "Gaia's rage!" message. When he launches an orb of light, face Dark Gaia and keep using the rapid stab to reflect it back and attack him. Then, avoid the upper body when it travels towards you in the shape of a spiky ball, and go to the bottom of the screen and hit it with a dashing attack when it stops flashing.
You'll then be teleported to another screen when you beat this first form.
For Dark Gaia's second form, stay at the very bottom of the screen so Dark Gaia doesn't back away. Avoid the arrows, and when Dark Gaia approaches the north end of the platform, attack the mouth in the middle with your regular stab repeatedly. To avoid the laser, dash through it. Also, do not get hit by any of the crescents, especially the blue ones as they will freeze you.
There is a Sonic Boom attack that Dark Gaia can do, but it can easily be dodged by dashing to the far right or far left. You can jump over it, but going all the way to the side with the dash attack is better.
When the mouth in the middle unleashes a white light that covers the entire platform, block it. Otherwise, you will be absolutely annihilated.
Once you've done enough damage to Dark Gaia this time, you've done it! You've won!
After you beat Dark Gaia, you'll hear the voice from the hero's grave in Antarctica. Lightside Ark's spirit. He tells you that Dark Gaia created you to rule the planet as his own, and that you were created from Lightside Ark when Dark Gaia was first sealed, as was the rest of the people in Crysta. He then tells you about Storkolm and how the world runs on a balance of light and dark. When Darkside Ark came to realize that, everything was made great again. Both Arks then return to their respective worlds.
You'll be back in Storkolm, but now the Crystal Blue will be flying there. Ark realizes this was his hometown, but with nobody to share it with, it's meaningless. He feels the pain Lightside Elle went through when everyone else in her town was killed. Yomi shows up, and Ark wonders what he fought for all this time, as he resurrected the above world but unintentionally did it for evil forces' gain. Yomi reminds Ark that he created heaven and earth, and that there is always a balance. Ark then finally asks Yomi what kind of creature he is, and Yomi explains that before animals evolved, they all looked like him. In other words, Yomi is the distant ancestor of every animal ever. Yomi then says that humans evolved to stand on two feet and use tools, but now rely more and more on machines, and thinks that humans may evolve back into Yomi-like creatures. Yomi then tells Ark he is going back to sleep until the world has another legendary hero and is in need of them.
Ark then hears from Light Gaia, the soul of the above world. Now that Dark Gaia is destroyed, Crysta and the underworld will disappear, and the above world will return to normal. It is then revealed that the blood of both Light and Dark Gaias flows through Ark, and now that his duty is finished, his body will soon disappear as he was a creation of Dark Gaia. Light Gaia commands Ark to enjoy his last day in peace.
Ark then reappears in the Weavers' home. Strangely, Darkside Elle is still alive as if nothing had happened. Happy music plays in the town. From here, you can talk to everyone. Also, if you try to buy anything, the game won't let you. The Magishop will also be replaced by another merchant who tells you Magirocks don't exist. If you talk to the people in the Elder's house (now called Ark's, since the Elder doesn't exist anymore), they'll tell you the blue door just leads to a broom closet. If you talk to the fortune teller, she will tell you that a new world is starting. You'll learn that all traces of your journey have disappeared.
When you're done, go back to your room, where this whole game began and move into the bed. You can put the controller down. You're finally done. Enjoy the credits.
Tuesday, July 14, 2020
PrinceWatercress plays Terranigma - Part 48 of 50
In this entry, we beat Beruga at his own game, then get ready to return to the underworld.
Airship
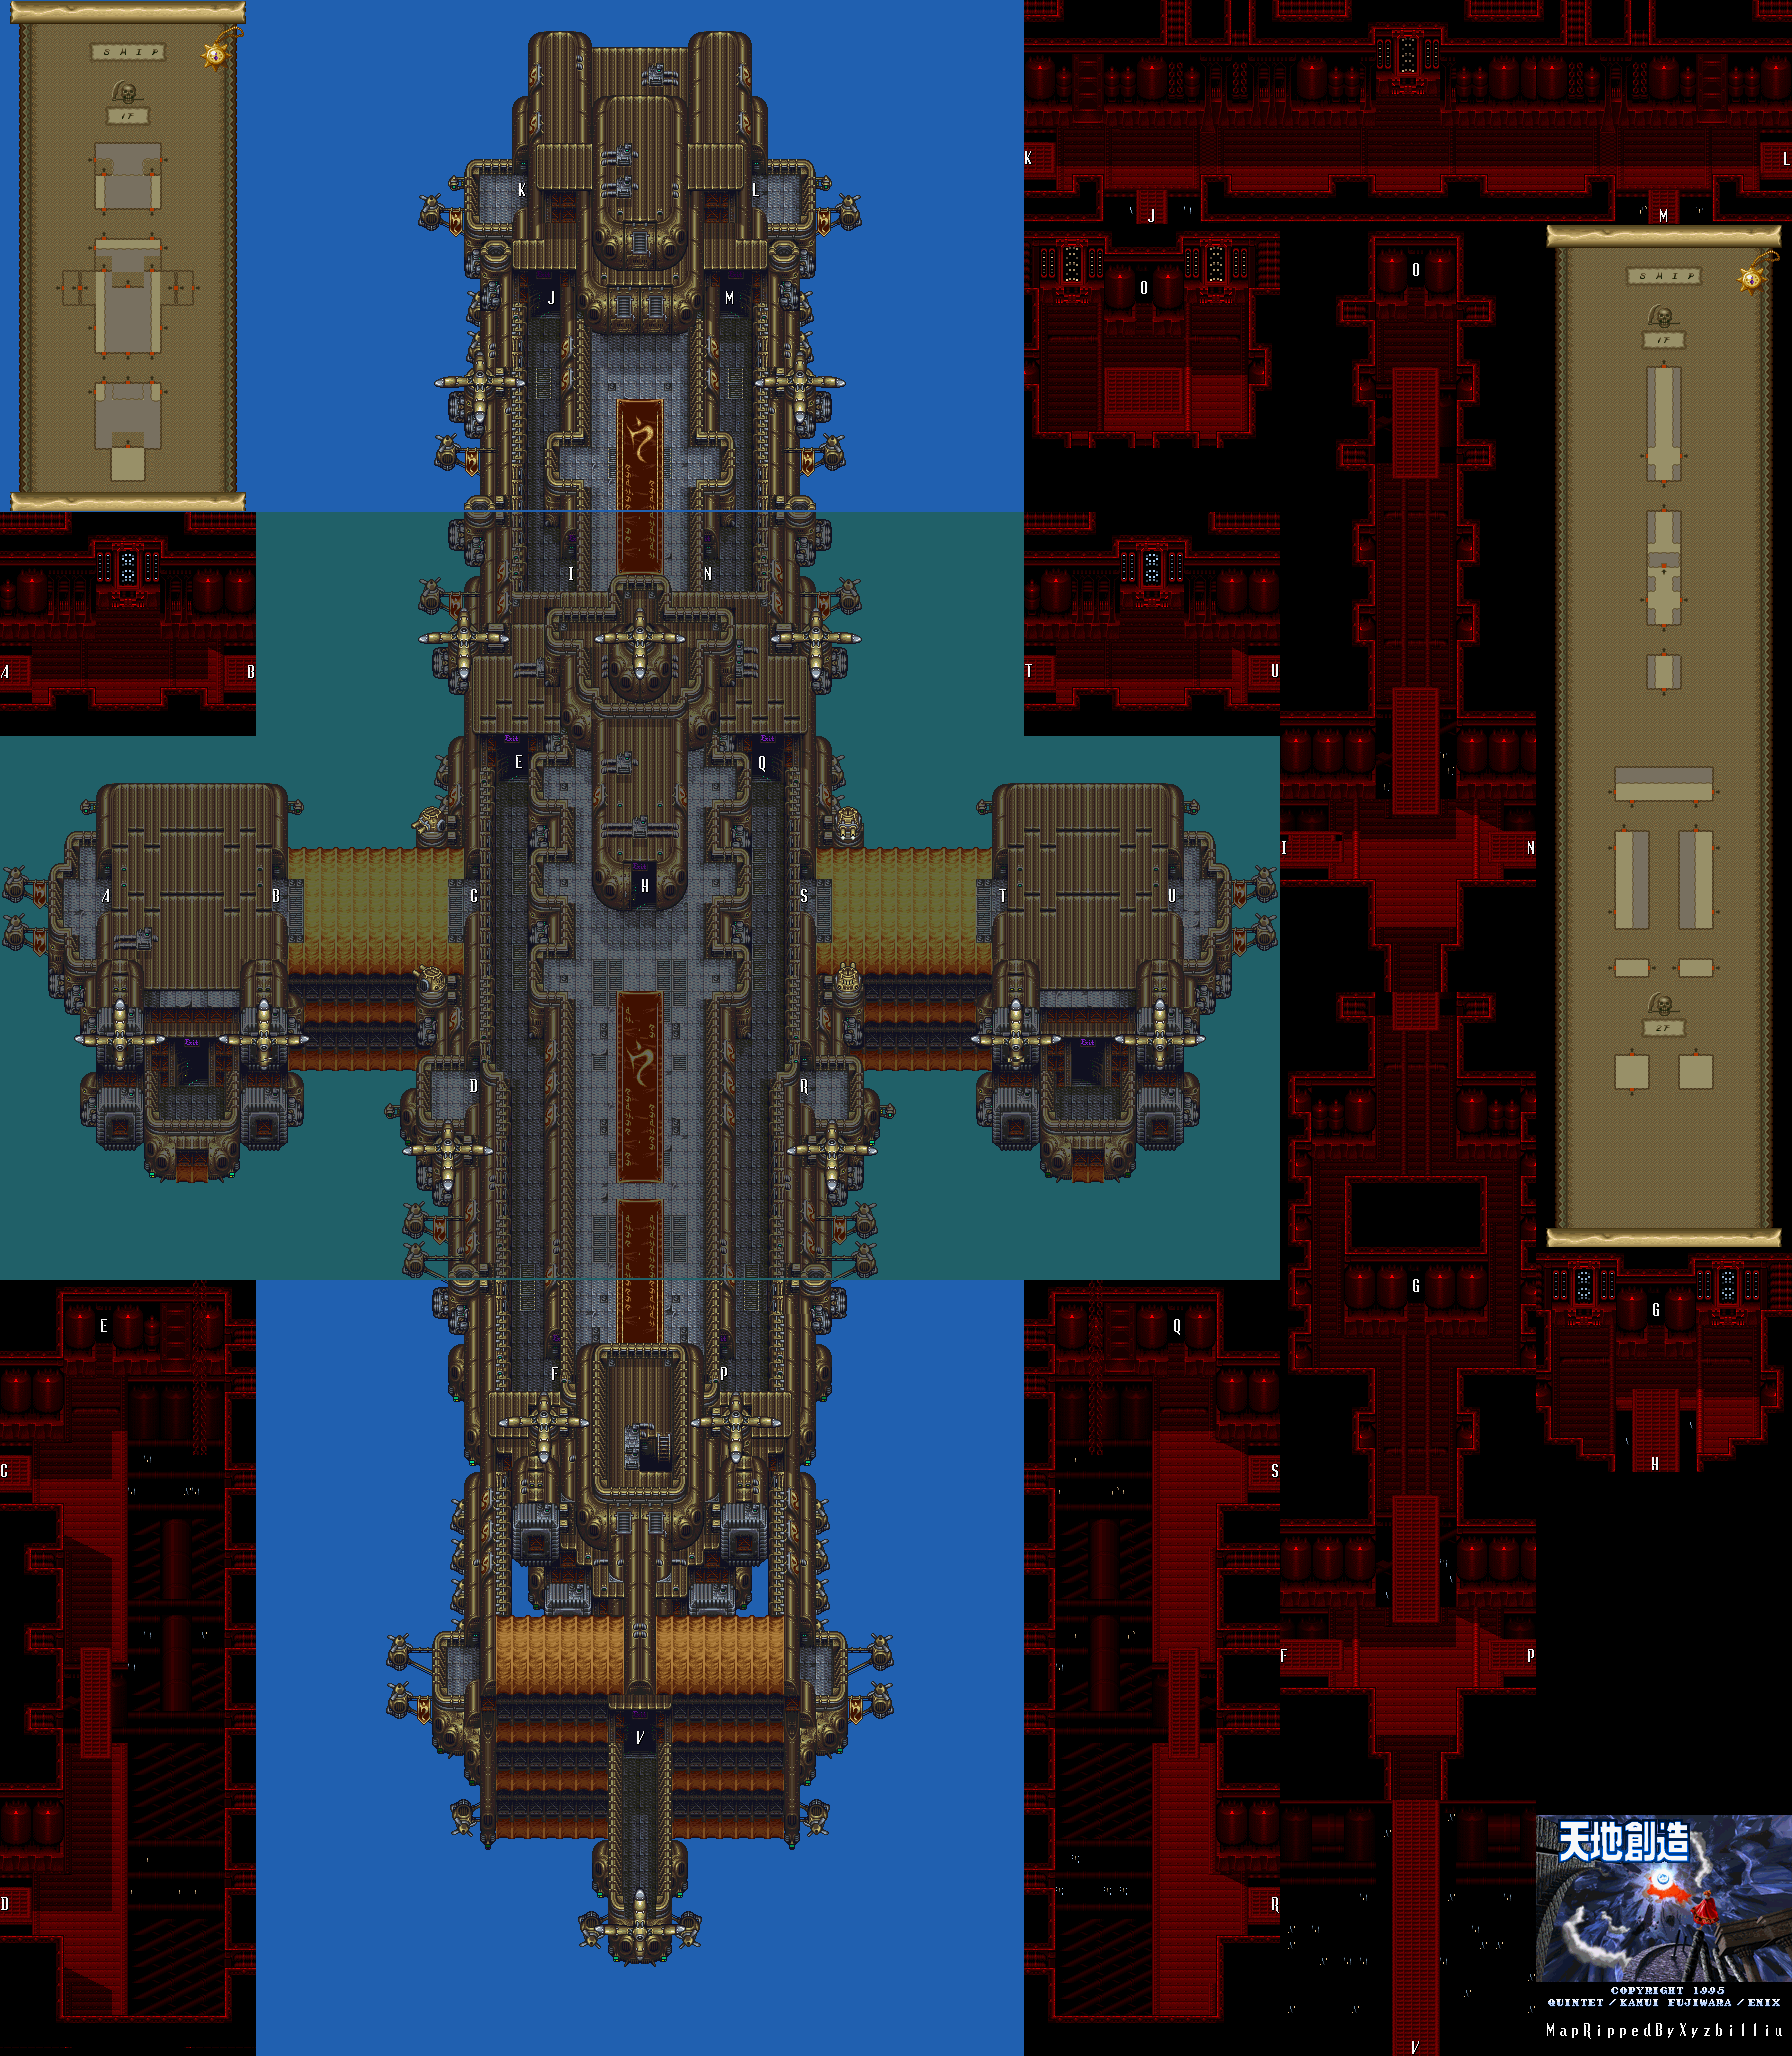
You'll land on the left side of the ship. In the next room, you'll meet Fyda and Royd, who will tell you that there are seven computers to knock out and that you'll have to put time bombs to knock them all out. You'll be handed the Time Bombs. It's time to knock this airship out of the sky.
Equip the time bombs and use one on the computer that was behind Fyda and Royd with the X button, then travel through the ship to find the others.
The seven computers are on the left wing of the ship, the right wing of the ship, the fore of the ship, the lower entrances of the second-highest deck (go across when you enter those) and the lower entrances of the bottom deck.
Some of the computers have security systems. They're the spinning cannons that you've seen in the Neotokio sewers and they shouldn't be too much trouble.
When you're on the middle of the wings, you'll want to move quickly as the other side as the turrets will fire at you.
As you explore, you'll find out that Beruga has escaped, but if the airship is destroyed, his evil plan is done. Also, all the escape pods have been destroyed except for the one that will be used for the escape attempt that will happen after all the time bombs are placed.
When you've planted all seven time bombs, head to the rear of the ship. When you see the metal bridge in the middle of the huge pit, you've reached it. Royd and Fyda will join you, and when Ark activates the time bombs, you'll hear from Beruga from the rear deck. Beruga will still be on the ship, and he tells tou that his boots have jet nozzles on the soles to keep him airborne. Yes, he can fly and we didn't know until he said so. He also says your stolen rocket belts are controlled by the computer, and that without the computers, they won't work. Unfortunately for Beruga, he gets dragged into the rear rotor of the ship and gets sliced to ribbons, like that one guy in Raiders of the Lost Ark.
Just before all hope is lost, a gull appears on the rear of the ship where the rear rotor used to be, and Royd and Fyda note that there is no way the gull could possibly fly this high. Royd tells Ark to get on the gull, saying there is no need to endanger everyone involved. Fyda says she and Royd will do what they can from here. Talk to the gull and choose the first option.
The scientist at Airsrock will see the airship crash and recognize it as the light of the apocalypse. Ark will appear behind. Talk to the scientist and he'll tell you the light fell in the direction of South America. There is only one thing we can do now...

From here, leave Airsrock and head to South America. Remember where the hole we entered the world from was? Well, we're going to have to go back there. When you re-enter this area, you'll find a huge hole that wasn't there before as well as Columbus. If you talk to Columbus, he'll tell you he never forgot how you rescued him at Sylvain Castle, and that he has explored the world since and seen the world change so much that his navigation techniques seem primitive now. He is now convinced you are the legendary hero, and that it is prophesized that the hero will disppear underground.
When Columbus asks if you're going, say yes. He'll recommend you save at the nearby book and ink well first, and that once you go into the hole, you may never be able to return to the light world.
PrinceWatercress plays Terranigma - Part 47 of 50
We finally expand Suncoast, then head towards Beruga's airship in an attempt to stop his plans to kill the world again.
Suncoast - The Expansion
.png)
The inn in the town is in the lower-right corner, and it has two floors and rooms. The left room on the second floor houses a bride and groom, and the groom has a fever. Remember the fever medicine you got from Litz? Give it to the bride. In return, you'll get a WaterPin as well as six Magirocks, giving you a total of 94 Magirocks. Leave the room, come back, and the groom will be cured.
Northwest of the stairs is the Merchant shop. The AlphaRod is sold here, and it's the last special weapon you can get in the game. It decreases Strength and increases Luck. Next to the Merchant is the Magishop.
You'll learn about the nearby zoo if you talk around.
The building to the left of the Sea House at the north end not only houses Keinz, but also the mayor. Talk to the old man in the room to the left, and he'll let you have Magirock #95. The old man likes the progress, but his wife misses the sound of the sea.
The guy on the right tells you the animals in the zoo were caught in Safarium.
In the upper-left corner of the town is the zoo.
-Zoo.png)
There's not much to do at the zoo. You can read the signs to see what the animals are. Other than that, there's not much you can do here and you can't save the animals.
There's not much else you can do. All that's left is to stop Beruga and Dark Gaia. Land on the airstrip in Russia, then make your way to the east to Siberia. In the northeast corner of that region is Beruga's Tower.
At this point, if you've forgotten anything, you'll want to go back and do it now. Once you make it to the end of the tower, you won't be able to return to the world map screen.
Labtower
Talk to Perel, Meilin and Meihou. Meihou will tell you that Beruga is being controlled by someone underground as he "resurrects" the world, and that he, Perel and Meilin will do everything to help. Meihou and Perel then leave. As you head north, Meilin will tell you that there is a surveillance camera ahead, and she takes care of it for you after several seconds. Once you get the text box from Meilin, you'll be able to move to the north. Another screen north, Meilin will create a mirage to help you. Head to the west, then take the door to the south. In the next area, you'll be grabbed by a claw...but it's really Perel helping you out. He'll tell you that Royd was controlling the crane. Head to the west.
On the next screen, Perel will tell you that there are lasers ahead. Perel uses his skateboard to disarm the lasers. Once he gives you the all clear, go on ahead. Talk to Perel, then head east. Go all the way east, then go up the stairs. Take out the cubes where necessary. At the end, go west. You'll run into Fyda, who tells you that two levers must be worked at the same time to open the nearby shutters.
Go to the lever on the north, and Ark and Fyda will automatically activate it. Head to the south and follow the path, and head all the way to the north when you reach the wide spread of floor at the end.
The final Magirock, Magirock #96, will be on the next path. Head left before you go to the next set of stairs, and you'll get it.
At the next set of stairs, you'll deal with the robot enemies you met in Beruga's Lab. Thankfully, the path through the tower is very, very linear. You won't have too much of a problem making your way around.
The gun guys will now throw grenades. Thankfully, they're easy to avoid.
You'll reach another set of levers. Royd will control one of them to shoot down the door up ahead. You'll soon reach another set of stairs. Go up, and you'll come across four rooms. Inside the one in the upper-left is the last treasure in the game: another Life Potion. Talk to Meihou, and he'll tell you to open the shutters. To the right is Meilin's room, and in the lower-right corner is Perel's room. Everyone will have to trigger a lever at the same time in order to open the shutters.
There is a mech robot you can fight near Perel's room. Keep going in and out of the room and keep killing the robot, and you can eventually get all the experience you need.
You'll have to go into the lower-left room for your lever. Interact with it, and all four levers will be pulled at the same time. Go south and follow the path, then go all the way to the end and drop down the hole. You'll land on an airship. At this point, there's no turning back.
Monday, July 13, 2020
PrinceWatercress plays Terranigma - Part 46 of 50
Nirlake has caught fire in an event not unlike the Great Chicago Fire of 1871. We rebuild it, then we expand Suncoast down in Australia.
Instead of heading to Siberia, head back to Nirlake instead. Instead of being a few houses, it will be a spot of dirt on the ground. You'll find out that since you've been gone, the whole town has been set ablaze and that nothing is left. A shack caught fire and the wind made it worse, destroying the entire village. (Given that Nirlake is where Chicago should be in real life, this is a reference to the Great Chicago Fire of 1871.) Talk to everyone in the town. One of them knows you go to other towns, and asks you to do him a favor. Say yes. He'll give you Nine Letter and ask you to give them to people you meet. There are nine specific people you'll have to hand the 9 Nirlake Letters to in order to get the town rebuilt.
Head east to Will's house. Will's house is the only house not affected by the fire. Equip the 9 Nirlake Letters and use them on him, and he'll be the first person to get to work on rebuilding. He'll tell you he'll get the kids of Kidsgart involved.
The next letter to send is in Freedom. Go to Bell's place and use the letters on Bell. He'll tell you he's still worried about Amanda, and agrees to contribute. Also, head to Eddy's place and use the letters on him. Eddy will then join in.
Head to Litz and use the letters on the sardines guy. He'll be touched by what's going on in Nirlake, and uses the money from his business to help rebuild.
Head to Britain and go to Rich's house. Use the letters on Rich and he'll send a courier with money for rebuilding.
Head to Loire. Use the letters on Matis, Pierre, the guy from the winery who gave you the wine, and Marily. Just head to their respective buildings and use the letters on them, and they'll help out as well.
Head back to Nirlake. You'll find out it's not only back, but expanded into a city with a shack to the west.
Nirlake
.png)
There are a few new places here, such as the cattle building in the lower-left corner of town that makes produces and ships it around the world. Now that the fire has made the town famous, people now come here for produce. To the left of that building is a pair of apartments. The left room contains nothing, and the right is where Amanda and her new boyfriend live. Unfortunately, they don't even remember you and tell you to get out.
In the lower-right corner is the Illinois Hotel. The shop is to the right of the entrance, and you can buy the Pro Armor here if you need it. This is the final special armor, and it protects against all status ailments. To the left is a pub.
By talking to the people, you'll learn that the shacks and barns that were here are relocated, that people can see Gossie, and that Mick has made his own diner. You can see that diner in the north end of town at the Mic Burger building. Talk to Mic, and you'll find out he's created his own restaurant and that he plans to expand across the globe.
Magirock #88 is in the back corner near the building in the upper-right corner. That happens to be the place where the family with the grandma lives.
In the upper-left corner of town is the Tourism Center. Be sure to have current photos of all the towns and share them here. These will allow you to expand one more town...
You can go inside Mic Burger and try a burger if you want. You can even ask for a smile and get a special animation from the girl at the counter. You can also buy a cola and fries, and everything costs 10 gems. Obviously, Ark will enjoy it when he eats it.
You'll also learn that Mick sold off his land when he hit it big with Mic Burger if you talk around inside the place.
There is also a farm to the west of the town. The people who still want to farm are still here, and if you talk around, you'll learn that people fear the lake god less and that farms got smaller as the town got bigger. Such is progress...
Will's house will be relocated. It will be northeast of the runway. Talk to Will, and he'll ask you to give any town that is interested in air travel the Airfield Plans. Say yes and he'll hand them to you. We'll be taking these to Suncoast in Australia.
Be sure you've shared all the photos you have with all the towns with a tourism center before you try the next town expansion, by the way. Also, this will be the very last one.
Suncoast
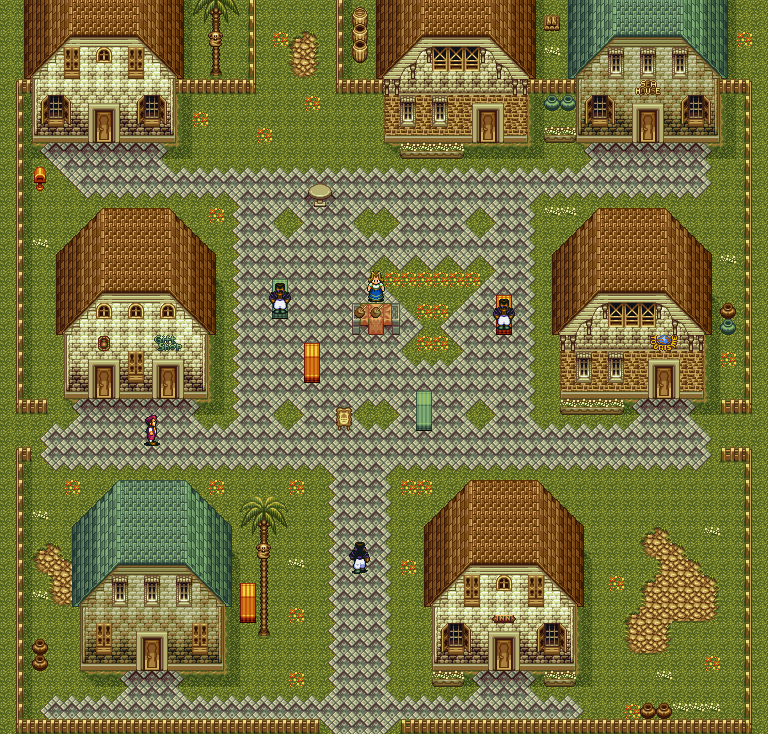
Head to the house to the left of the Sea House and give the old guy the Airfield Plans. He'll get the airfield built. Leave the town, head to a place in another region, then come back. The airfield will be there and the town will be a city.
There is a hut to the southwest of the town. There's not much here, to be honest. It's just the cattle ranch.
PrinceWatercress plays Terranigma - Part 45 of 50
In this entry, we get all the Starstones, then get resurrected in time to go after Beruga.
Head back to Airsrock in Australia and climb up to the top, and talk to the guy you meet there. He will tell you he is watching for the end of the world from here, and asks if you would listen to him. Say "sure." He'll tell you a certain race revered this grand view and vast nature as god, but today, modern societies make a racket about preserving nature. He asks how man thought they were so powerful as to protect gods, and thinks that the beginning of the end started there. As he watched, he paid heed to a voice that spoke to him about an older boy that appears bearing a rod - which is obviously you - to whom the Starstone must be given. He'll give you the fourth Starstone.
From there, head back to Japan and go to Neotokio.
Neotokio
.png)
At the beginning of the game, I mention the pub quiz that you could have done earlier in the game in the Japanese version. You can't do it now due to the entire population of Neotokio being wiped out, but it exists, and I mention it in here. The Cutting Room Floor has more information on this and other things hidden deep in the game's code. Winning the quiz nets you a Magirock, but since the Western version doesn't have the quiz, it isn't mentioned here.
Head up the stairs in the northwest corner of town and enter the police station. You'll hear what sounds like a phone ringing in the desk in the corner. Go up to the desk and interact with it. You'll find the Transceiver in the desk drawer, and Ark will take it.
You'll then hear a girl cry for help from the Transceiver. Yomi shows up and tells you that the girl doesn't seem to know how to operate the unit. Yomi will also ask if you hear the sound behind the girl. It's the sound of flowing water, and there is no river in this town. The girl has to be in the sewer...but where is the sewer.
Leave the police station and enter the small building near the stairs. The first lone door with the metal grate right in front of it will now be unlocked. This is the sewers entrance.
Sewers
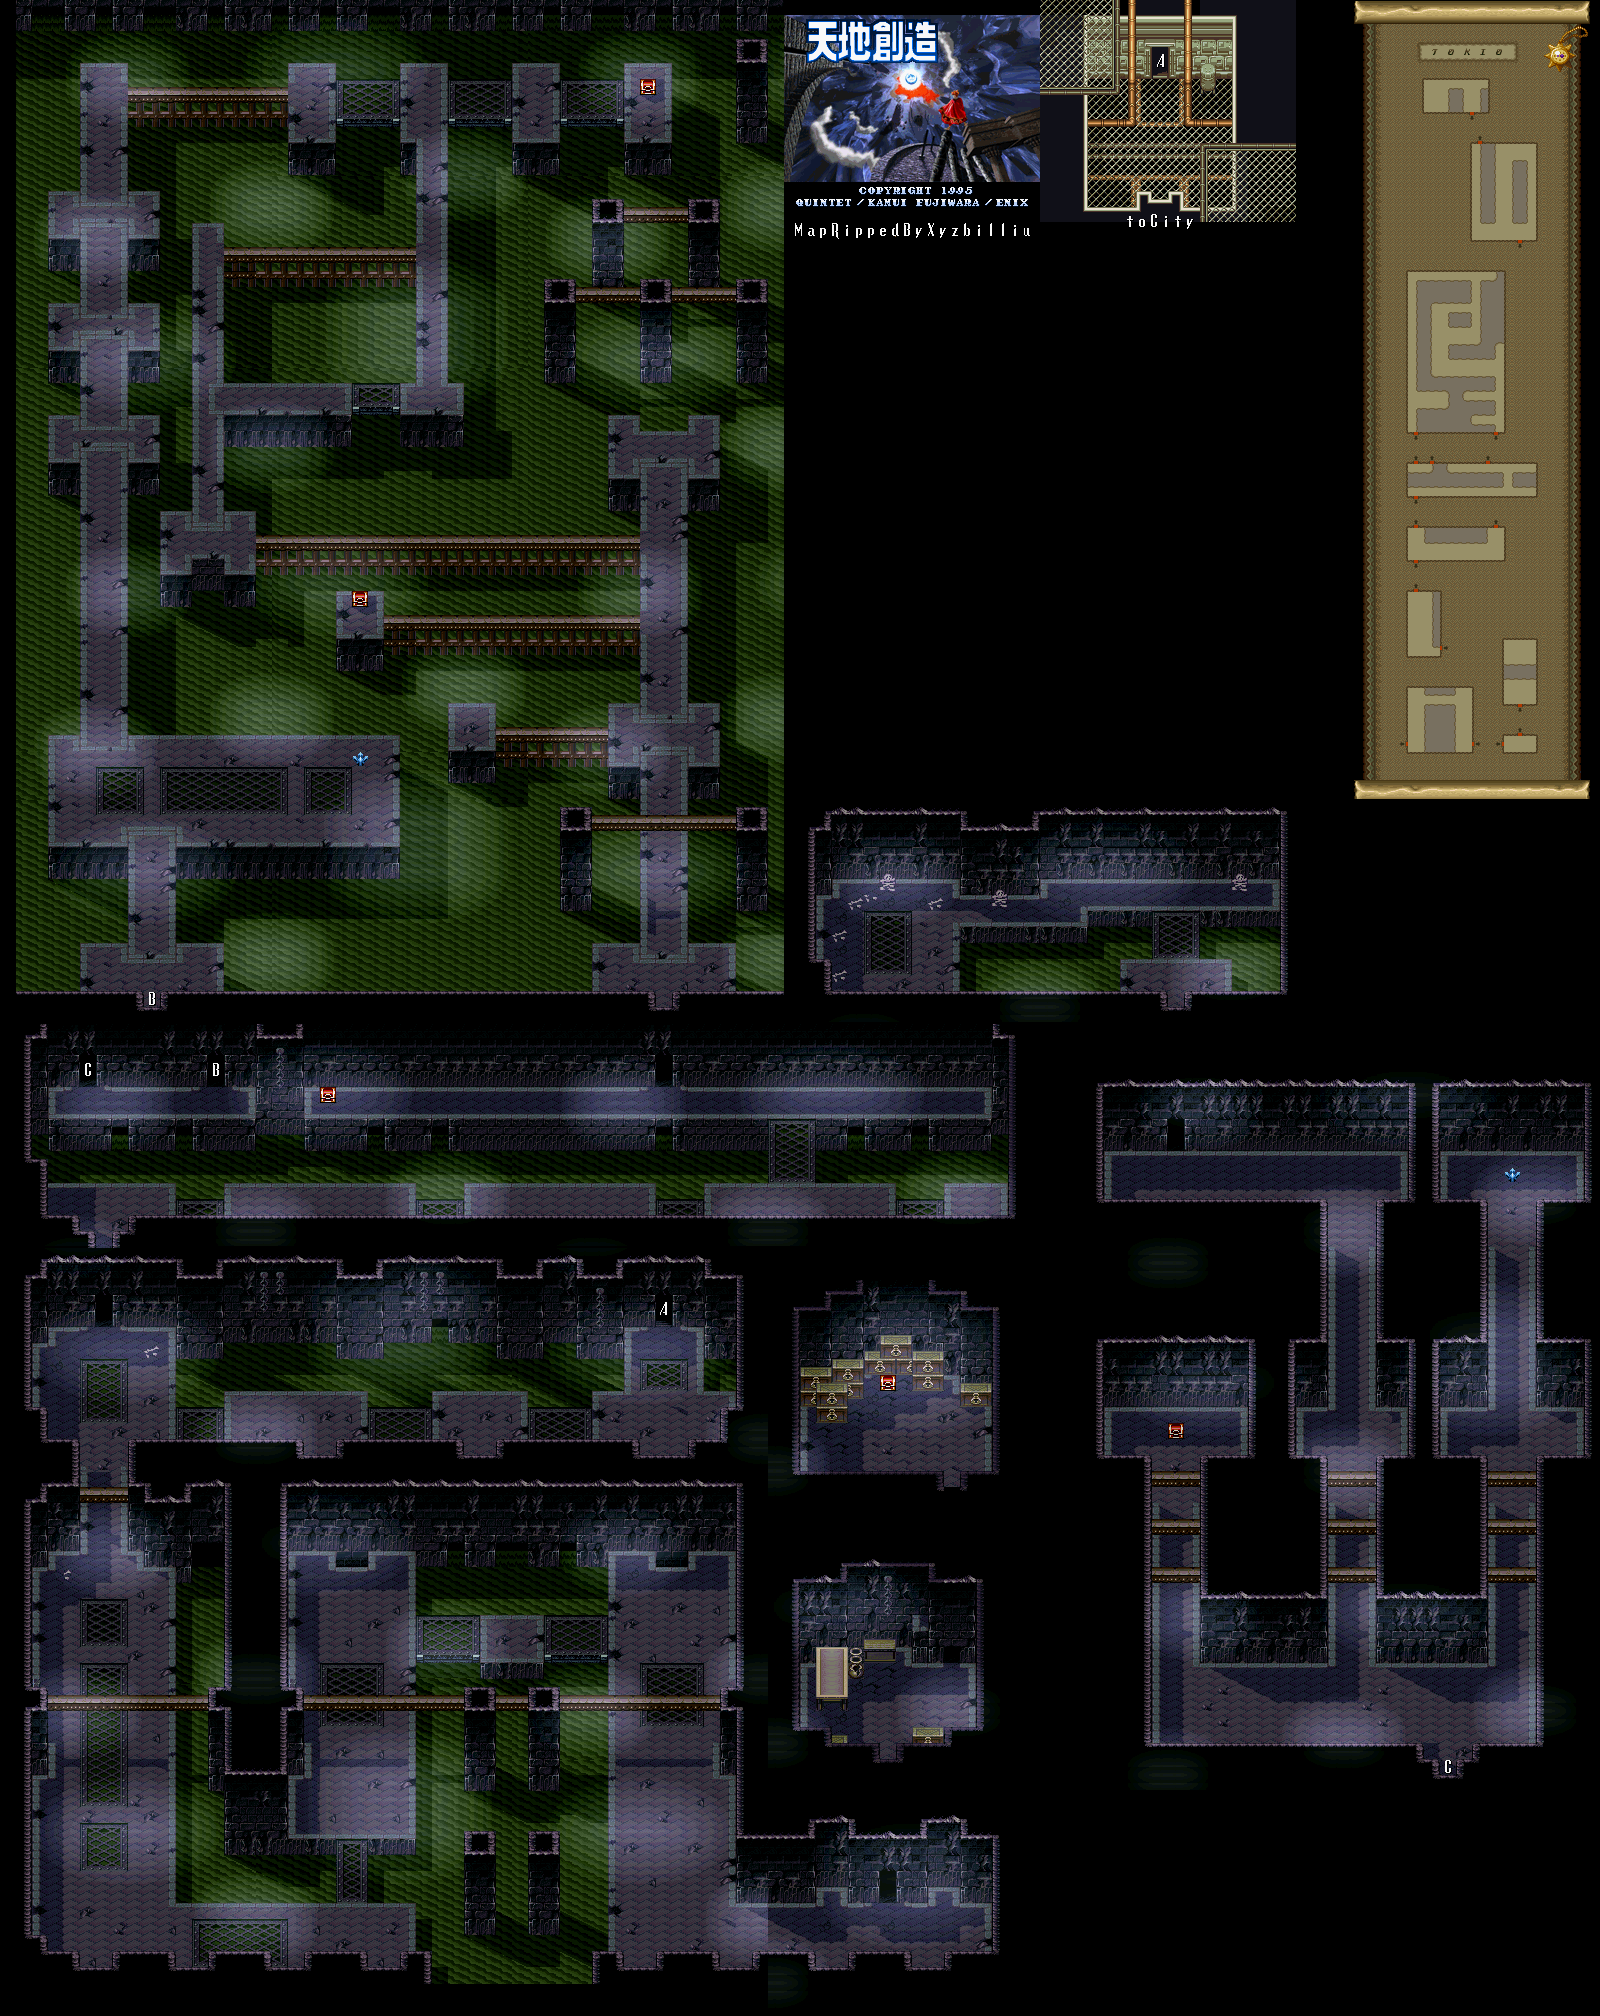
The beginning of the sewers is linear, for the most part. You'll be fighting the Slimes again, and you'll also fight some ghosts that not only shoot fireballs at you, but also crumble for a few seconds if you don't kill them right away. There is a door near the beginning of the path, but it's locked. You'll have to find a way to unlock it in order to continue.
For now, go south from this door. Watch out for the enemies with the guns, as they will steal your money if you get too close. You'll eventually find another door at the end of the path. Go inside, and you'll hear the Transceiver noise again. The girl will cry for help again, then scream. Go into the crawl space nearby and open the chest you find to get the Sewer Key.
Head back to the locked door and use the Sewer Key on it. As you make your way to the door, the girl will say that a lion is chasing her. When you open the door, you'll finally meet the girl...and the lion. Take down the spinning guns as you get to the chest with the H. Water, then enter the doorway in the upper-right corner, and you'll enter a very linear maze area that is much like the sewer areas of Dragoon Castle. You'll find a Luck Potion in a chest near the start, as well as the Fauchard off the beaten path. You'll want to equip this, since it's a pretty good weapon at this point.
Believe it or not, the EnbuPike actually does more damage to the floating spinning enemies and the mechanical enemies here.
In the second maze, you'll know you're going the right way when you make it to the upper-left corner of the maze. Don't forget to go right and collect Magirock #86 before you leave.
In the next section, there are three places you can go. Go to the left to find a chest that contains the KingArmr. Go to the right to get Magirock #87. Watch out for the mechs that shoot at you on the paths, as they can get you from a fair distance. The middle path lets you continue on to the dead end when you'll meet the girl and the lion. Head to them, and Ark will confront the lion. Yomi will show up and tell you that the lion is Leim, who has grown up since the last time we saw him. Talk to the girl, and she'll tell you that people just suddenly vanished, and that her parents disappeared right in front of her eyes. She tells you that a strange voice from her pendant talks to her, and that it cheered her up by saying light will shine if I live on. She gives you the pendant, which is the fifth and final Starstone.
You'll hear another message from the transceiver. It's from Freedom's research team. Ark will contact them, telling them where Liam and the girl are.
Leave Neotokio. You're done here.
From Neotokio, you'll have to head to Antarctica aka the S. Pole. There is a desert area surrounded by grass at the southern coast. Thankfully, you can move your ship there and walk into it. This is Dryvale, the edge of the world. Amongst all the tombstones are skulls. Equip the Starstones and use them on the skulls.
When you place them all, a soul appears to the north that sounds exactly like Ark. The soul commends you for coming this far and says it was possible because you are the legendary hero. The soul then changes into a shadow version of Ark and says that he represents the Lightside. He explains that you represent the Darkside. He says people are said to meet someone identical to them once in a lifetime, and that there are two Arks in the internal and external worlds. The re-emergence of Beruga has disturbed the balance, and the world has come to doomsday, which must not exist. He tells you to close your eyes and think deeply about the world, then kills you. This ends Chapter 3.
Chapter 4: Resurrection of the Hero
Inside a house, Princess Elle sits at a table. A baby that looks like Ark is asleep in a bed, and Elle tends to him. The baby looks suspiciously like Ark, and we learn that Princess Elle found the baby crying in a field in Storkolm. She has named the baby Ark due to the baby's resemblance to him. As Elle goes out to look for some food, the other Elle - Elle from Crysta - enters the house and is ordered to kill the baby as this was why she was brought from Crysta to the above world. It appears that Ark was resurrected as a baby. Elle from Crysta takes the baby from the bed before Princess Elle can return, and Princess Elle is shocked to find out that the baby is gone.
Elle from Crysta has brought the baby to an underground chamber, and is ordered to stop hesitating and kill Ark. It is then that the two Elles meet, and we find out that the voice ordering Elle from Crysta to kill Ark was none other than Yomi. Now we know why Yomi knew the password to Dr. Beruga's computer: Yomi was in on it all along, too.
Yomi orders Darkside Elle to kill Lightside Elle. As this happens, Kumari reaches Ark through telepathy and tells him to wake up, as all the living things in the world await his awakening. The great tree Ra also speaks to Ark, telling him the earth is screaming and that he should save the planet. Leim also reaches you through telepathy, and even he knows that the world has gone awry. He asks you to give courage to the world. The Kingbird also speaks to Ark, saying that the sky is crying and the tears are filthy. Kumari then tells you that plants and animals are with you even though you cannot converse with them, and tells you once again that the world awaits your awakening. Ark transforms back into an adult and returns to his normal self, and Ark's resurrection is complete.
Yomi is displeased, and says that he was to kill Ark when he has resurrected Beruga, but he bided his time as he thought he would find the hero. Now that Ark is the hero, nothing will be able to stop "us" when Ark is killed, and the earth will be reborn by the hand of not the Elder, but Dark Gaia, also known as "the Devil" by humans. We finally know who the highest power is in all of this!
Yomi orders Darkside Elle to kill Ark, but Elle refuses and leaves. Head north and talk to Darkside Elle, and she tells you she only wanted to meet you again...but not like this. She tells you she was ordered to kill someone on the surface world endangering Crysta. She had no idea that it was Ark.
Yomi shows up and tries to kill Ark himself, and Ark has no idea why Yomi would turn on him. Yomi finally explains everything: Ark was just a pawn in the Elder and Dark Gaia's scheme to recreate the world in their image. Yomi then says that the Elder's word is absolute, and finally tries to kill Ark. Yomi creates an earthquake that stuns Ark, but Elle rushes up to Yomi, tells Ark to save the surface world, and then sacrifices herself along with Yomi. After saying that she wanted to be with Ark forever, Elle dies along with Yomi as they are both sucked into a portal, killing both of them. Ark wonders if the world would have remained peaceful if he had not opened the box that day, but realizes it doesn't matter even though he wishes for things to be as it once was.
Go back to the other end of the room and talk to Princess Elle. Elle has no idea what to say, but Ark tells her not to worry. Elle says her Darkside clone may be gone, but wonders if she'll ever replace her. You then get to tell her who you really have feelings for, and if you say "Surface Elle," you'll get different dialogue.
Regardless of who you pick, Elle will tell you that the village had an old saying that the hero will visit, create a miracle and defeat the dark foe. Elle realizes that hero is you. She then shows you a box similar to the one you opened in Crysta, which contains the weapons of the Hero and says that Columbus found them on his voyages and hid them to make sure they didn't fall into the wrong hands. This is the secret that King Henri slaughtered the entire village of Storkolm - including Elle's parents - to find and Columbus ended up being tortured. She then tells you that the souls of the villagers became wolves to protect the arms, as only Ark can use them.
Approach the box from , and Yomi will show up...even though he died along with Darkside Elle. Turns out this is the Lightside Yomi, as the Yomi we knew was evil the entire time. Yomi will tell you that it's time to destroy Beruga, and you get the ultimate weapon in the game: the Hero Pike. (The only thing that compares in strength is the Enbu Pike, and that is only if your level is past 35.) You'll also get the Hero Armor, which is the strongest armor in the game.
If you talk to Elle again, she will tell you that she will await your return in this underground chamber, and asks you to come back when you're finished. Go up the steps, and you'll eventually be in the the Lightside equivalent of the Elder's house. Leave the house, and you'll run into a bird with a letter in its beak. Ark will read the letter, which happens to be from Meihou. Meihou is headed to Siberia, and he explains what has recently happened concerning Neotokio. He'll also tell you that some friends have also shown up to help stop Beruga in his new lab tower in the east of Siberia: Fyda, Royd, Perel and Meilin. He asks you to show up and assist.
From there, exit the town of Storkolm and the dark forest. Having a Bone Pin really helps with that.
Sunday, July 12, 2020
PrinceWatercress plays Terranigma - Part 44 of 50
It's time to find the Starstones if we are to have any hope in saving the world.
Lhasa
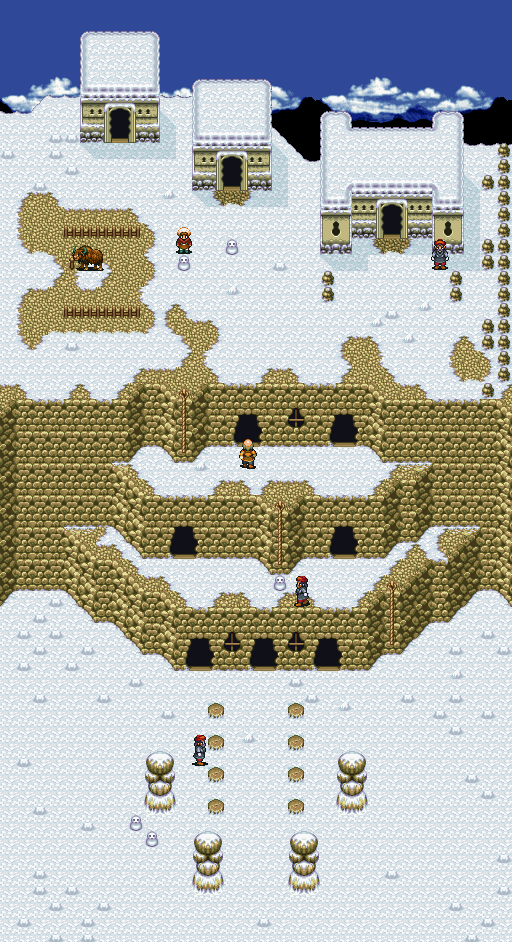
Let's save our game before we head out.
Go to any town, head to the Fortune Teller in the town and talk to her. She tells you that what you seek are in a dream, sand, ice, mountain and ruins.
Your first stop is South America. Head to the stopover near the mountains to the south and tell the bird to give you a ride. This will take you to Greenland, and the stopover bird is the only way to get into Greenland as rocks line the entire perimeter of the land.
To the west of the stopover area is a cave. Inside is a chest containing 961 Gems.
To the south of the stopover area is Penginea, a town of nothing but penguins. You won't be able to talk to any of them very well, even though they're smart enough to wear hats, make sleds, hang fish, go fishing, own and use their own furniture, use a kettle, sleep in a bed and even have a seal pull one of their sleds along.
There are six igloos, three on the left side and three on the right side, and you can only go into them if you crawl into them. If you enter the lower-left igloo, you'll find Magirock #84.
Once you get the Magirock, equip the Pretty Flower. Be sure you have nine of them, and use them on the penguin near the lower-right igloo. You'll exchange one of them for the first Starstone.
You're done here. Head back to the stopover and fly back to South America. From there, sail to the west coast. Go north, and you'll find Astarica. Interact wtih the pots, and a voice will tell you to take the goblet on the avatar. Ark will drink from it, then eventually black out.
Four ghosts will surround you. They will tell you that Astarica is a holy land that observes the growth of humans. Upon awakening, you shall be witness to an odd vision.
When you wake up, the temple will be lit up, and you'll meet Meilin and Perel...sorry, Meilia and Pela. They are priests seving Lord Meila. Pela will tell you to go hear what Lord Meila has to say. Lord Meila will be just in front of the entrance, and he looks like Meihou.
Meila will tell you that a holy ceremony is held yearly as per Astarica's custom. Night dew collects in the six goblets on the altar for a year, and one of them is said to bring the drinker closer to the gods. All the drinker does is drink one of the goblets and spends a year without food or drink. The wrong goblet means death, but the right goblet means that a god has been born within the tribe. It has been one year since the last ritual. Two priests have gone to inspect everything, but have not returned. He asks you to go look for them.
Go up to the statue at the north end of the temple and push it to the side to reveal a secret passage. Push the statues to the north and push them into the gaps in the wall at the north end. This opens a door. Go in.
The path here is very linear. Destroy the spiders as you go along. You'll find a chest containing the Holy Suit near the start, but it's not that good compared to what you have now. Don't forgot to face away from the flying eye monsters so you can use the jump attack to defeat them.
You'll also find Magirock #85 as you go along. Thankfully, it's very easy to get to.
When you reach the end, you'll see Royd, Fyda and Princess Elle, who are Roy, Fyla and...Elle. Turns out, Roy and Fyla are the priests, and Elle was the one who drank the right goblet and became a god. The year felt like centuries, but she knows now the true significance of a god. She then says that Humans are pathetic creatures driven by desires and living in misery, and that a ritual like this is only for gaining power over other tribes. She has had enough of people, and if they all disappeared, everything would be peaceful. Elle then uses her powers to kill Roy and Fyla and make them gods of death. Roy shows Fyla a human quality known as love, and Roy and Fyla embrace before they are killed.
Talk to Elle. She will ask if you come seeking an immortal body. Ark comes to the conclusion that people have two faces: the external soul and the internal soul, and that the goblet just brings out the internal soul. Elle will tell you to drink from the goblet. Interact with the one that was behind her in the cutscene. She will say that the end of the human race is trite. After that, you'll be out of the dream and back in Astarica.
There will be a chest in the room that wasn't there before. Inside is the second Starstone.
Head to the Sahara Desert in Western Africa. Head to a point that takes you to a desert. Nearby is a skeleton. Interact with it, and Yomi tells you to look at the skeleton's neck. It's the stone Leim found in the canyon, and Ark wonders why it's here. Yomi says that a human probably stole it from a lion's den. This is the third Starstone.
PrinceWatercress plays Terranigma - Part 43 of 50
In this entry, we head to Dr. Beruga's lab to find out what this "immortality" thing is all about. Guess what? It ain't good.
I got the X-Spear at the beginning of this video. It raises the probability of critical hits, making it easier to do a ton of damage out of the blue.
Anyway, time to head south of Mosque.
Beruga's lair is to the south, but we're not heading there just yet. Instead, we're heading to a cave to the northeast in the snow. In the cave will be the BlockRod, which changes strength into defense.
From the cave, head back to Mosque and go south to Dr. Beruga's lab.
Dr. Beruga's Lab
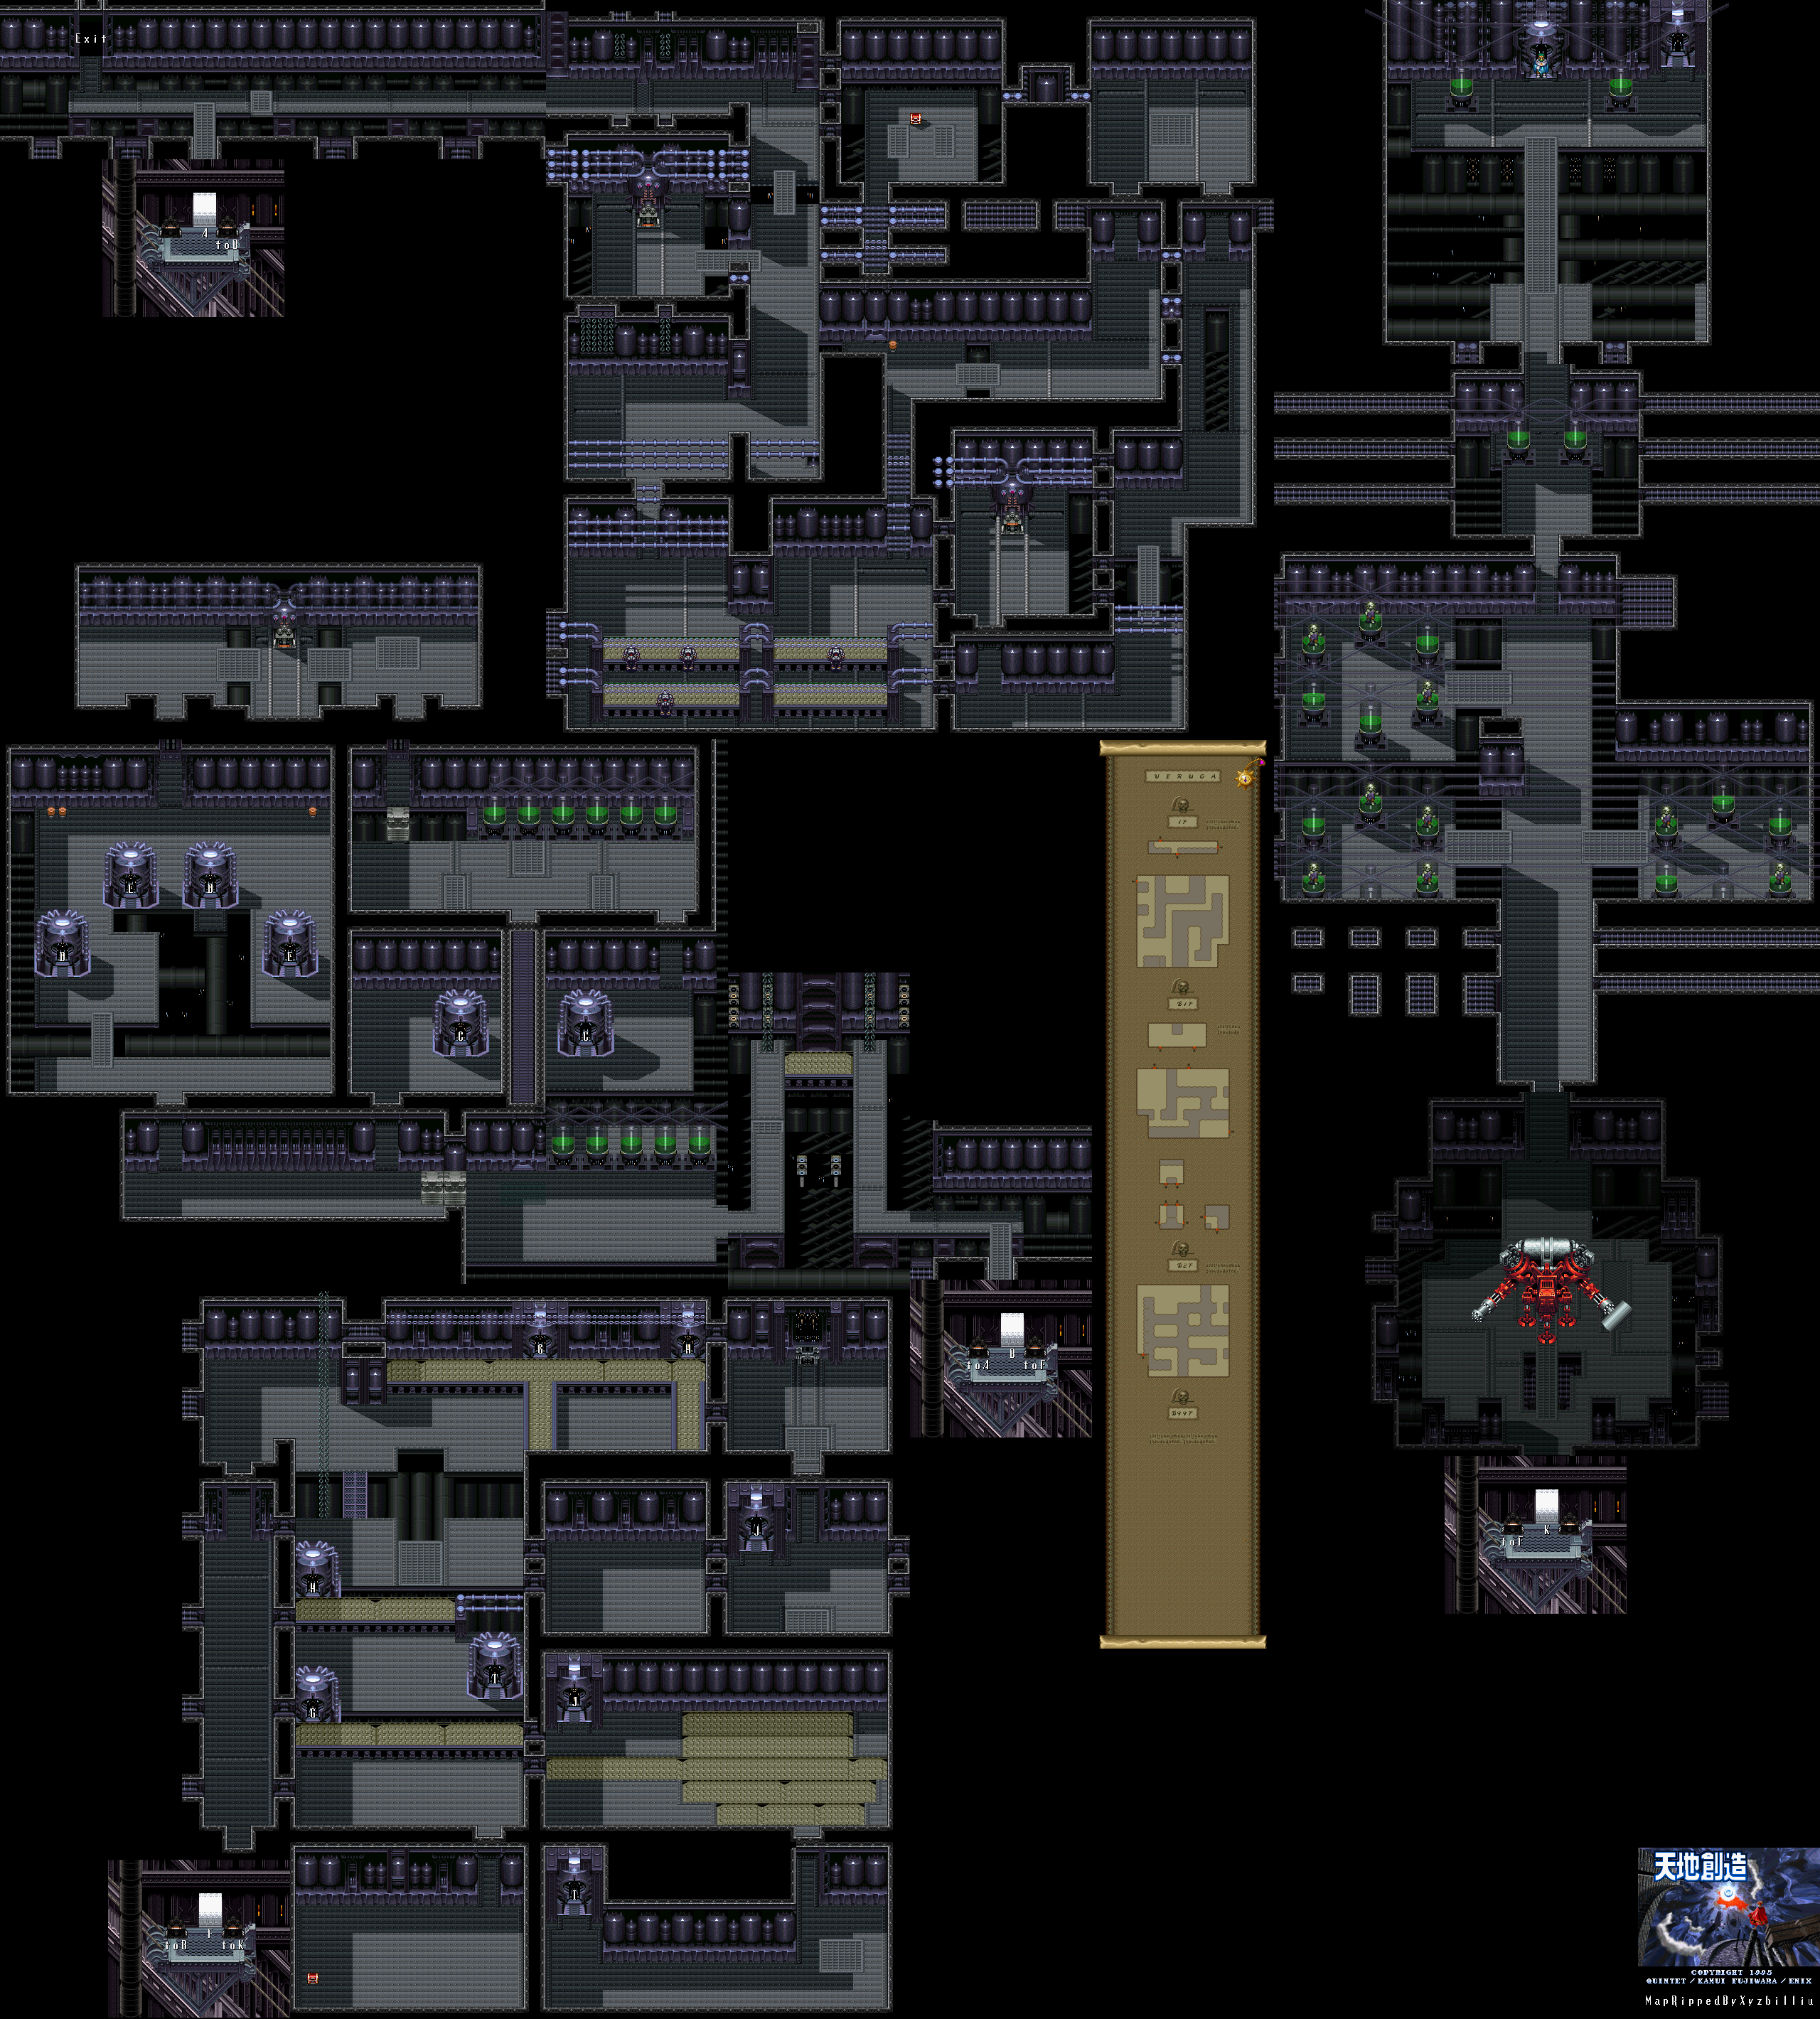
From the start, head to the east. On the next screen, keep going east until you can't anymore, then go south until you see a path to the west. Go there, and flip the switch to turn the lights on. From there, go back to the east and follow the path that you see. Climb underneath the pipes leading north from the machines, then pick up the brown cork-like thing, toss it away, and go into the crawl space it was blocking. This leads to a chest containing the SoulArmr, which you will definitely want to equip as it increases your maximum HP by 40.
Go back through the crawlspace and head east. You'll eventually fight some robots, but if you have the 3 Part Rod equipped, you can take them all out with a dashing attack...just be sure not to let them do one of their own. They will stand there stunned and eventually explode before they die. If you have the Geostaff equipped, you can do a little bit damage to the robots than you can can with the 3 Part Rod.
At the end of the path is another switch. Press it, then head back to the machines. You'll see some chains moving as you make your way back. If you go back to the conveyor belts, you'll see robots working on them.
Go all the way back to the start. Enter the path to the south nearest the entrance. This leads to an elevator. Press the switch to the right and you'll make your way down to the next level.
The next few screens are pretty self-explanatory. You'll eventually come across some tubes with some sort of green liquid in them. To the west of all of them is a crawl space. Go through it, and you'll find another switch. Use your dashing attack to take down the jetpack guys (don't let them shoot you, it hurts), then go to the east, take the doorway to the south and enter the teleporter.
At the other end, go south. Take out the jetpack guys. The blocks here can be pushed out of the way so you won't have to use the teleporter again, if necessary. From there, head west, then north. There are some teleporters. Don't take them, they all lead to dead ends.
Destroy the jetpack guys and head north. There are more jetpack guys. Destroy them all, then press the switch and enter the door at the other end. Push the block out of the way, then destroy the jetpack guys. You're now where you were before you used that first teleporter. Go back through the crawlspace that led you here, then head back to the elevator. You can now go down another level.
At the next level, you'll see giant cubes moving back and forth. The dashing attack does the most damage.
When you enter the bottom level, jump onto the conveyor belt and take the left teleporter. To the south is a treasure chest that contains a DEF Potion. Go back to the teleporter and take the other one. There is one just southeast of the one you came out of; take it.
Follow the path and you'll come across multiple conveyor belts, and take the teleporter at the end. Go north and you'll come across a computer. You won't be able to do anything on it, and Yomi will show up to tell you that the password is in place to shield the data, and will tell you to input "BLOODY MARY." Use the computer again, and Ark will put the password in. This will disengage the elevators and cold sleep device, which basically wakes up Dr. Beruga. After putting in the password, however, Ark will wonder why Yomi would know the password in the first place.
You'll connect to the database, and you have access to two section: Past History and Lab. In Past History, you can learn about the dawn of humankind, cold sleep and Earth's last day. The last one is pretty important, as you'll learn how the world pretty much died: a deadly airborne virus known as Asmodeus struck and decimated the human race. Some were saved by Dr. Beruga's work, but the survivors starved to death.
In the Lab section, you can learn about the lab's objective, vaccines and the facilities. You'll learn that the lab is around for research and development of groundbreaking technology, and robots are exclusively used due to the work being highly hazardous. You'll learn that a vaccine for Asmodeus was created in the lab to stop the plague, and was mostly successful. However, it was only available to a select few.
As for the facilities, you'll learn that the first floor is the robot assembly plant and the basement floors are the bio-lab. There are other basement floors, but they are under construction.
From the computer, jump back into the teleporter to enter it, then head back to the elevator. Take it down, and you'll go all the way to the 99th basement floor. You'll then take on a giant security mech with a chaingun and a hammer.
Take out the boss's three feet first. When the boss jumps into the air, keep running. When it lands, you'll be able to avoid the missiles. From there, you want to stay in front of the center of the robot, and use your dashing attack to destroy all three of the robot's feet. Staying to the left will subject you to a whiplash attack, and staying on the right will subject you to shock waves that travel diagonally. You'll be dealing with these attacks every so often, so stay close to the center of the robot and be ready to make your move when you can.
When you beat the boss, you'll finally enter the 99th basement floor. If you look around before you go north, you'll find some tubes with green liquids containing people who look much like the zombies in Louran. Something sinister is afoot.
When you go north to the final room, you'll see Dr. Beruga come out of cold storage. Beruga thanks you for waking him up, and said he went into cold sleep when the world died and waited until then asks you to follow him. You'll see the tubes with the zombies in them, and Beruga will tell you he created them.
This is what he means by ending death. He's literally creating a zombie world.
Walk toward the zombie Beruga is looking at. Ark will notice that the zombie is sad, and asks if this is really a good idea as the world would fill up immediately if people didn't die. Beruga will say he's taken this into account and declares that only the unnecessary shall die only the necessary shall live.
Approach Beurga. Beruga will summon some orbs and fry Ark. Beruga mentions the Three Laws of Robotics, but says the robots here have one more law governing them: anyone deemed a threat to Beruga must be immediately terminated.
Beruga then says his liege shall soon re-emerge from the underworld, as his liege is the world and knows all its truths. He then decides to witness the world on the verge of "great progress."
In Neotokio, a yellow fog encompasses the city. Everyone flashes weird colors, then disappears. This is Asmodeus wiping out everyone in the town.
You then go to a black screen with Ark. The Elder tells Ark that he has done well to groom the world, and that Beruga will make the world fantastic. He tells Ark his duty is finished and that he shall rest eternally. The liege is the Elder of Crysta. We've been played the fool all along. Ark wonders what he fought for all this time, and wonders if he was really shaping a world like Beruga wanted, and doesn't want to die without knowing.
A voice comes from out of nowhere and says that Ark will not die here, and explains that Ark exists outside the loop of fate, allowing him to change destiny. The voice teleports Ark to its source.
Lhasa
You'll wake up in Lhasa. Meihou will be nearby, and tell you he arrived just as Lord Kumari brought you back. He tells you the star of darkness hsa re-emerged and erased a city from the world without effort. He tells you to ask Lord Kumari to show you the way before the "dark star" consumes the rest of the world.
Head to Lord Kumari's chamber. He'll tell you what Beruga has done, says that Beruga has disrupted the loop of fate by ending death, tells you an old saying: "Starstones laid at the grave at time's end calls the golden child." Meihou journeyed around the world trying to figure out what this meant, but only got fleeting glimpses of the truth: human fate is a fixed loop, and what one seeks is not always found. Kumari then tells Ark is different as he exists outside the loop of fate. He tells you to seek out the Starstones and place them at the grave at time's end in order to realign the disrupted loop of fate.
Saturday, July 11, 2020
PrinceWatercress plays Terranigma - Part 42 of 50
In this episode, we head to Mosque and finally learn about Beruga.
Freedom
.png)
Freedom is now a bigger city than before.
Bell's office is now in a building in the upper-right corner of town. Bell will tell you he's getting orders for phones from all over, and that he feels fulfilled. He admits that maybe people can't go on any more without hearing other people. Upstairs, you'll meet Bell's new girlfriend, who remained close - wait for it - through the telephone. Bell has rebounded! Take that, Amanda! If you talk to Bell again after this, he'll just tell you it's a relationship conducted over the phone.
The door to the left of Bell's is Eddy's. You'll find out from the people on the first floor that he's studying other subjects. If you go upstairs and talk to Eddy, he'll tell you that he worries about how much light from electricity has changed lives and how it's changed human interaction (or something like that).
To the left of Eddy's is Kidsgart. Believe it or not, if you talk to the woman nearby, she'll tell you that the kids of Kidsgart are honest and adorable, which is a change of heart from how she felt about them before. If you go in, you'll find out that there's more to Kidsgart now, such as a shelf full of books, a television and even some respect, as the people of the town now like them after Will invented the airplane. One of the kids will tell you that Perel enjoys being with you so much that he has decided to follow you. Looks like we have one more ally. The room in the back is a bedroom, and an adult is there tending to the bedroom alongside being a teacher.
The lottery has a new item: the X-Spear. If you can somehow get your hands on it, it's a pretty good weapon: despite being weaker, it raises your luck as well as your critical hit rate.
The rest of the houses are just villagers, and they don't really say anything different from before the second expansion. Also, the Tourism building is across the street from the southern entrance.
Our next stop is Mosque. To get there, you'll need the airplane. You'll want to go to Taklama, which is in the center of Asia, and land on the runway there. To the north is Mosque, which is a reference to Moscow.
Mosque
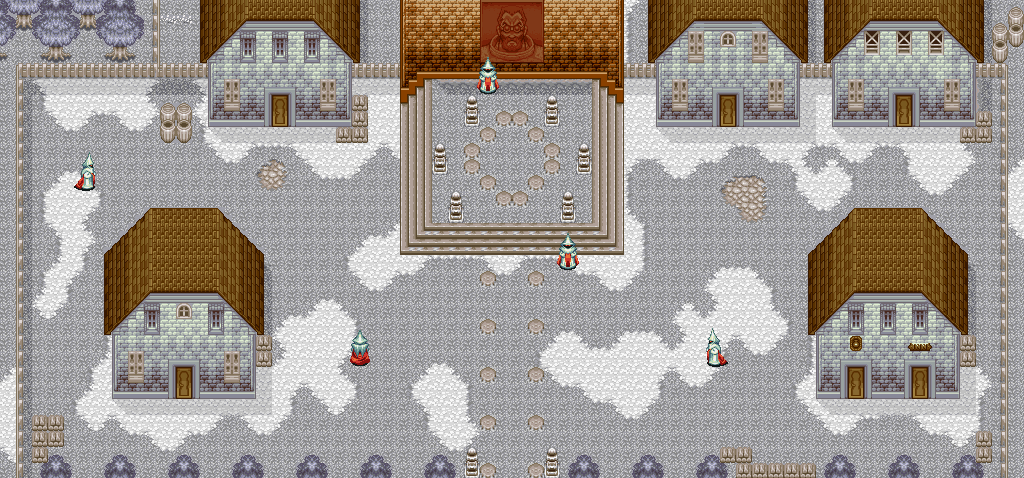
It's the Soviet Union all over again. Everyone here is dressed in white robes with red sashes. It's like they're Ku Klux Klan members in more royal regalia...and if I'm saying that, then you know something's up with this town.
In the center, you'll be told to head to the Disciples' Quarters to learn more about Beruga. You'll also see a shrine to Beruga himself. Everybody worships this guy like he's a god.
To the west of the shrine is a Domicile. If you talk to the guy in the room, he'll ask if you seek Beruga's word. Say yes, and he'll tell you to enter the back room to be educated by a disciple. One of the disciples will tell you that Beruga is in a castle in the lake to the south.
From there, take a seat between the two disciples in the front. You'll learn that Beruga won a Nobel Prize for his biotechnology and perfected DNA engineering to cure diseases. He is now dedicating himself to achieving the secrets of human immortality so people can live forever. You'll then be told that humans shun silence and fear the dark for they are afraid of death, that dying and being incarnated brings unimaginable pain, and that when human immortality is achieved, change will cease and there will be peace forever in what will be Beruga's utopia. You'll then learn that Beruga is in cryogenic sleep and will soon awaken.
The house in the lower-left corner houses a woman and child. You'll learn that the guys in the white robes are the White Disciples. They serve directly under Beruga, and the position is considered a great honor. Not surprisingly, the woman and child have been fed propaganda.
The inn is in the lower-right corner of the town. You'll learn that the Red Armor will increase your strength here.
In the upper-right corer is what appears to be an empty house, but if you enter the door to the north, you'll find Magirock #83 in plain sight. To the left of that house, you'll learn that Beruga is waiting quietly in the castle he built himself, and when he comes out, he will supposedly save his believers. The woman in the bed says she does not fear death, as she believes Beruga will defeat death.
PrinceWatercress plays Terranigma - Part 41 of 50
In this entry, we rescue ex-Princess Elle, Meilin is no longer a jerk, and we're finally able to create that airplane.
Turns out there was treasure part Magirock #81. Keep heading to the right and follow the path, then go north at the fork and jump over the pit to the east. You'll find an L.Bulb and 300 Gems.
From there, go back to the fork and take the path left. You'll be in the sewers. Make your way north Magirock #82 will be on an island to the east connected only by a thin wooden bridge. Enter the door there.
From there, follow the path again, and you'll find the 3 Part Rod. It raises your defense slightly, but the Enbu Pike is still stronger than this. Pick your weapon carefully.
Head back to the entrance. Head up the stairs to the west, then go northwest and enter the doorway there. Take the pots of water and throw them at the candlesticks to put the candles out. When you extinguish all six candles, the wall to the north will open up, revealing a door.
To the north is a bunch of paired statues. The statue to the north nearest you, however, is not paired. Go up to the wall across from it and interact with it, and you'll find the hidden switch that Meilin was talking about. Push the switch, and you'll open the door to the far north. Enter that door.
In the next room, run into the wall to the north with the Speed Shoes. You'll finally be in the room where Princess Elle is held captive. Talk to her. She'll tell you that she never thought she'd see you again, but here she is, seeing you again. Suddenly, Royd appears. He challenges you, but Fyda shows up and takes your place, telling you to get Princess Elle out of the castle. Get out of there, and you'll eventually meet Meilin. Follow her south, then east near the entrance, then north. Meilin will tell you that there is a drain up ahead, and it will lead you outside of the castle.
We go back to Fyda and Royd, and Fyda has the feeling she's met Royd before. Royd wants to know why Fyda is protecting Princess Elle, but Fyda says she has to no matter what. Royd lets her go, telling her to protect Elle.
You'll be back to Ark and Princess Elle. When you progress, Elle will tell you that she will wait for Fyda, as she feels that she can't leave her due to Fyda caring for her so much. She lets you go on ahead. Head east to the nearby door. Elle will then say that she can't be a burden to you anymore, and that there are things she must do.
The scene switches to Royd and Mr. Wong. Mr. Wong is ticked that Princess Elle has escaped, and that if Dr. Beruga at Mosque finds out, he will be very angry. He commands Royd to catch Elle, but when Royd finds out that Dr. Beruga is the mastermind behind whatever's happening, Royd turns on him, saying that his closest friend was one of the people killed in what was called "Preparation." Turns out Royd was a spy, and that the friend in question is King Henri. Royd then slowly approaches Mr. Wong as if to kill him.
You'll then regain control of Ark again. As you go through the sewers, Meilin will show up and say that she's managed to trick their pursuers with a fake image of Ark. Suddenly, the castle will begin to quake, and you'll be back at the entrance, unconscious. You'll be surrounded by Meilin and Perel. You'll find out that Dragoon Castle suddenly collapsed and that you and Meilin were shot up the drain. Thankfully, Ark is all right. You'll find out that the price of metal is going back down, and we can finally help Will.
Meilin apologizes again, but thanks Ark for not giving up on her. She heads back to Lhasa. Yomi shows up again, and asks what happened to Princess Elle and Fyda, then says that we should head back to Nirlake.
Nirlake
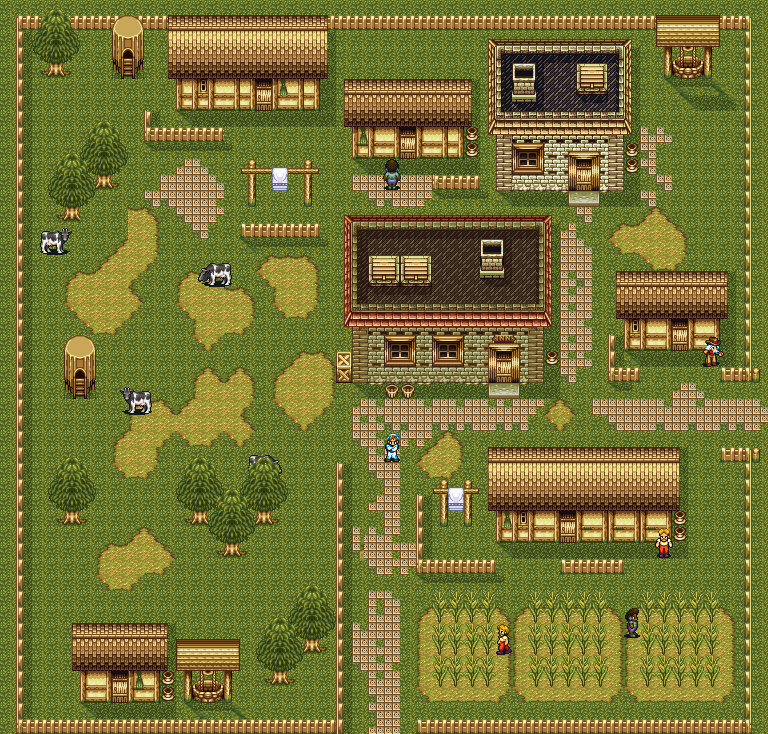
If you talk to Mr. Lon in Yunkou, he'll tell you that you did what you had to do and that Mr. Wong brought it on himself.
Head back to Will's house. Will and Anita will be there. Talk to Will, and he'll tell you his airplane should be finished as metal is available again. The airplane is now yours!
From the runway, press A. Once you're in the air, use L and R to ascend and descend respectively and press Y to accelerate. To land at an airfield, fly low and press A.
With the creation of the airstrip, Freedom has expanded once more.
Friday, July 10, 2020
PrinceWatercress plays Terranigma - Part 40 of 50
We head down to Dragoon Castle to find out why the price of sheet metal has skyrocketed...and we get more than we bargained for!
Dragoon Castle
Normally, you wouldn't be able to get past the guard, but now that Perel has joined in on the fun, he'll distract him so you can make your way in.
From here, you'll have more guards to deal with. If you run into their flashlights, they'll see you and toss you back to the entrance. The guards can be hard to deal with, as their movements can be random. Some of them may move, and some may not.
From the entrance, go all the way to the north. From there, jump over the pit and follow the path. If you have the Speed Shoes, you're in luck. If not, go get them. Equip them and run into the center of the north wall to open up a new door.
From here, go all the way to the north and make your way to the upper-left corner. Enter the door here, then go downstairs. You'll be in a dungeon. Explore the area and you'll eventually find Elle - your world's Elle and not Princess Elle - tied to chains situated above a pit. When Ark approaches her, she disappears. Go south, and you'll find out that you're trapped thanks to Meilin, who wants revenge for not having feelings for her. Also, she works for Mr. Wong and was ordered to trap you. What is up with this girl, anyway?
After Yomi makes a snarky comment, Ark sits there and sulks.
As Ark sulks back in the cell, we see Princess Elle being met by Mr. Wong and Royd. Turns out Elle knows that Mr. Wong killed her parents and everyone in the village so that King Henri would collect information for him. Mr. Wong doesn't care that he's killed innocent people for his own end, and says the day when only necessary people will live forever is close at hand.
Mr. Wong won't tell Elle why he wants the treasure of Storkolm, and he just tells her to shut up before commanding Royd to keep guard over her. Turns out Royd is only doing the job for the money and that he's just a drifter looking for a fistful of Gems.
The game then cuts back to Ark and Yomi in the cell. Ark hears a sound in the cell. Head to the pit, but don't go down it. Fyda is finally back and in good health, and she drops a chain for you climb up on. Make a running jump to the chain and climb up, and you'll meet Fyda.
When Fyda asks what happened, tell her about Meilin. Then, tell her you came here for airplane parts. Fyda has a feeling the Princess being brought here and the buying up of parts seem to be related, and heads to the castle's east side.
Leave the room, then head west and go back to the dungeon. If you go all the way to the south, you can get Magirock #80. From there, head back to the entry room.
You'll now want to head to the east. Take the stairs that you see, and make your way furhter to the east and enter the doorway. Make your way to the north and enter the doorway, then make your way east again by jumping from platform to platform. Take the southern road and jump your way east again, and you'll find Magirock #81.
Head west, then take the northern road. You'll find a chest containing 200 Gems. Go back to the beginning and head north, and you'll meet Elle from Crysta again. She'll tell you Princess Elle is held in the room to the north, and tells you to help her.
Go into the room to the north, then make your way through the maze of tables, chairs and open treasure chests to the upper-right corner. Go in the door there. At the other end of the next room, you'll meet Princess Elle...not! It's another trap by Meilin. You'll see both Elles, and Ark will be asked which Elle he likes. Ark, thankfully, breaks out of the illusion thanks to Fyda. Fyda then tells Meilin to show herself, and she does. Turns out Meilin wants Ark to suffer in return for hurting her feelings, and Fyda responds by slapping Meilin in the face and calling her out on her crap. Meilin cries and says that Mr. Wong can easily get rid of the both of them, then runs away.
Fyda joins you at this point. Head back to the beginning of the previous room, and you'll find out that the room has been sealed off. Mr. Wong shows up and says that Meilin has done her necessary job and that she too will be eliminated. Meilin doesn't understand, and Fyda has to tell her that he's basically playing master manipulator. Meilin cries, realizing how she has hurt Ark and her grandfather, but thankfully Perel breaks the doorway down and unseals the room and tells you to go find Mr. Wong. Fyda then leaves the room. If you talk to Meilin, she'll tell you to check the wall opposite the unpaired statue, as behind that wall will be the room where Princess Elle is held before apologizing for everything she ever put you through.
Thursday, July 9, 2020
PrinceWatercress plays Terranigma - Part 39 of 50
In this episode, we head to China to continue our journey.
From here, you want to go to China. Head down to the southeastern coast, which is close to Neotokio. There will be a castle of sorts and two spaces worth of buildings near a port. This in Yunkou.
Yunkou
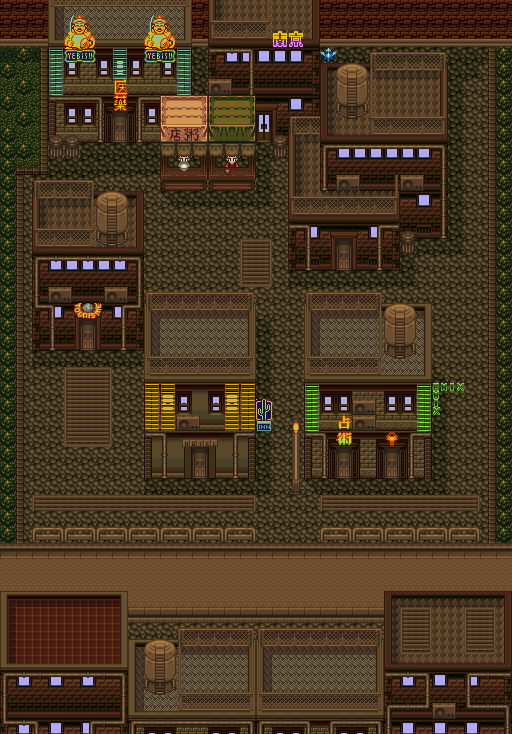
Yunkou is not a big place. You'll enter and exit from the sides of the road, and all the buildings will be to the north of it. Also, everyone speaks in broken English, and it's unclear to me whether or not if this is actually in the original Japanese version of this was done on purpose with the English translation that only officially made it to Europe.
The inn is close to where you enter from, and if you go downstairs from the entry level, you'll find out that Fyda is lying in a bed and has somehow become sick with a mysterious illness. The girl nearby will tell you that nothing tried so far has been able to help her.
To the left of the inn is the tourism center. You'll also learn about the nearby Dragoon Castle, which is no longer open to the public after somebody bought it.
To the right of the inn is the fortune teller and the Magishop.
Behind the building that is behind the fortune teller and Magishop is Magirock #78, which is tucked away in a corner. If you enter said building and enter the room on the left, you'll meet a couple who have abandoned their child in exchange for food during the worst of times and have no idea where she is, and they want to see her again. You'll find out that their daughter's name is Chija. If that name sounds familiar, that's because you met her in the Nomad's village. Go talk to the father again after you've talked to him and the mother, and Ark will tell him where Chija is. They'll head straight to the Nomads' village upon hearing this.
To the left of the couple with the missing daughter is a door that can be easy to miss and is right next to a trash can. This is Lon's, and Mr. Lon is not in the mood to speak with anybody. If you go upstairs and talk to him, he'll tell you his business is finished.
To the left of Mr. Lon's are two booths as well as the medicine house. The booths just sell you drinks for 10 Gems. In the medicine house, you can talk to the doctor here. You'll find out Fyda has a fever and bad dreams, and the only hope for her is Ginseng...but the only way to get it is through Mr. Lon, and he's out of business. If you go back to Mr. Lon (you'll have to press A at the door) and talk to him, ask for the Ginseng. He'll ask if you want to make a deal. Say yes. He'll tell you about his younger brother, Wong, who used to run the business with him until someone bought Dragoon Castle and also a lot of other things to store there. He then asks you to check on Wong, and he wants to stop him if he's doing anything bad. Say yes, and he'll give you the Ginseng. Talk to Mr. Lon again, and he'll tell you that he thinks Wong is at Dragoon Castle.
From there, head back to the doctor and hand him the Ginseng. He will tell you to make it into a drink that Fyda can drink so her sickness can be cured.
Go back to the inn and give Fyda the Ginseng. You'll then see a flashback to when King Henri attacked the village of Storkolm and how she had to kill in order to find the treasure for the king. You'll also learn that King Henri raised her since she was an orphan, and that she is protecting Elle because it is the last request of her parents.
When she is about to kill Princess Elle's parents, Ark shows up and the screen goes black. Fyda blames herself for all of Princess Elle's misery. When she says that you think of her as vicious, you have a choice between staying silent and saying that's not true as she protected Princess Elle as promised, even though it doesn't absolve her of the crime. Tell her that this is not true. After Ark asks Fyda who will protect Elle, you'll be back in Yunkou. Fyda will tell you to hurry to Dragoon Castle.
When you leave the inn, you'll meet Perel. He'll tell you he knows that you're helping Will and has decided to join you. When he asks if you've discovered anything, say that you have. Perel will tell you that it is time to hit Dragoon Castle with a full frontal assault.
Head to the Nomad's camp near Louran and head back to the upper-right tent where Chija was, and you'll find out that she is gone that that people who claim to be her parents came for her. You'll be told that she's probably back with her parents in Yunkou.
Head back to where you met Chija's parents. Talk to them, and they'll tell you that there is still a gap between them and Chija, but they intend to fill this gap slowly without hurry. Your reward is Magirock #79. If you talk to Chija, she thanks you.
PrinceWatercress plays Terranigma - Part 38 of 50
We're done exploring now, and it's time to advance the plot. This time around, we head to the lake near Nirlake now that we're able to get past the guy on the bridge.
Great L.
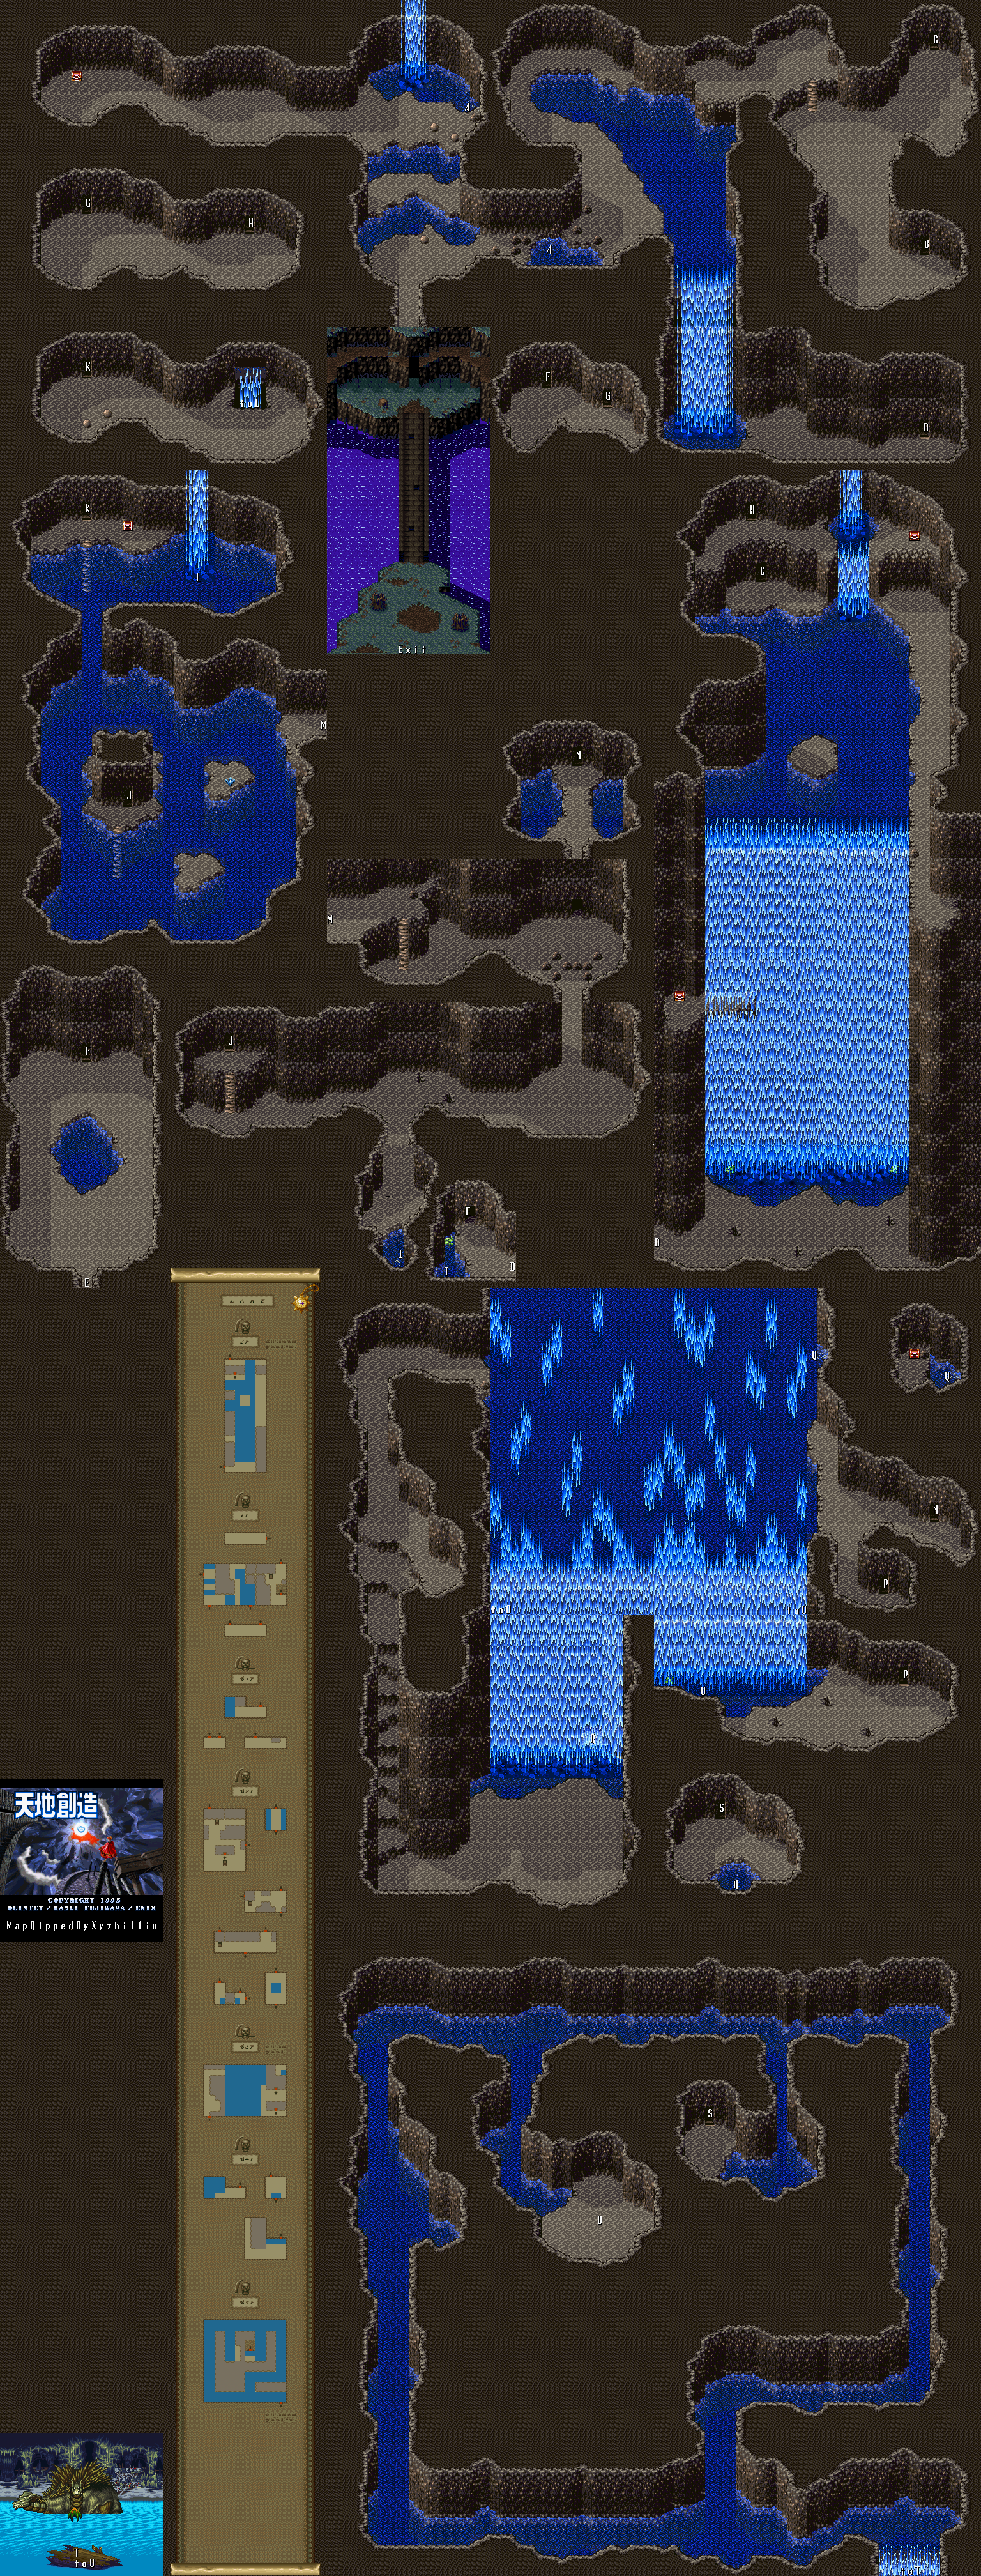
And with all that...it's time to progress the plot. Back to Nirlake! Head to the Great L. Cave and use the Engagement Ring on Servas. He'll find out what happened, and says he will go see her...by disappearing. From there, you can enter the cave from the north.
The rocks are very useful against the fish, and so is the Enbu Pike.
The Doumas near the beginning will spit bubbles at you. You'll want to stay away from those as you fight them.
You'll want to start this cave by going north, then west to open the chest that contains the Air Herb. The Air Herb is needed to take advantage of the bubbles that come out of the water in certain locations. If you see bubbles bubbling out of the water near walls, press A to dive into them and take a secret passage to another part of the cave. You'll need to do this to continue into the rest of the cave, and the only way to do it is with the Air Herb.
From there, take the waterfall down and take the stairs to the right, then head north through another stair case. The Slimes will come back with a vengeance, but they'll go down easy. Don't forget that they can Confuse you. Also, the red flower enemies can hit you with Deadly Poison (indicated by a red symbol) if you run into them, and if that happens, use a WindPin or leave the current room to cure it. You'll then see a shadow in the water nearby, and Ark will wonder what it is before hearing a cry for help. The shadow then moves away.
If you ever see water bubbles in the middle of the water, stay away. Those are sea serpents diving in and out of the water, and they can hurt you. From where you saw the shadow in the water, keep all the way to the left and go down the waterfall from the extreme left side. You'll land on a platform on the way down and you'll find a chest containing the Magic Anchor. From there, drop all the way down.
The green balls with the purple tentacles are called Pupila. They fight just like the Mermaid Tower boss: just face away, then immediately turn towards them and hit them with the dashing attack when their eyes open. You can also use your jumping attack if you don't have a lot of room. You're better off just using that move anyway, since it's far more effective.
From the Pupila, go left and then enter the door first. Follow the path from here and you'll be able to get 753 Gems. Make sure not to fall off the ledge trying to get it!
Head back to the area left of the bottom of the waterfall and go through the underwater passage. Head to the left and go up the stairs here. You'll fight some more Doumas. There's a Magirock here, but we'll have to do some stuff in order to reach it. For now, head north and open the chest near the stairs to get the GeoStaff, which has Earth elemental properties.
Go up the stairs and head to the right. You'll see some water trickling from a wall. Throw a rock at the wall and you'll cause the water to shoot right out. Drop down from where the waterfall is, and you'll finally be able to get the Magirock - Magirock #73 - that we had to pass by earlier.
From Magirock #73, head to the right and go into the opening in the wall. Follow the path again, and you'll be at another waterfall. Equip the Magic Anchor and use it to go north to find a secret passage to the right. This leads to a chest containing the Dragon Mail, which protects against Thunder. You won't be able to get this without the Magic Anchor, as the current here is pretty strong.
From the Dragon Mail chest, head to the west and go south. Go down the stairs and fight off all the monsters and go into the right side of the waterfall you see. Go into the door and swim your way to the lower-right corner of this maze.
You'll meet the Hitoderon. Fight off the starfish monsters with your dashing attack. If any starfish latch on, the Hitoderon will breathe fire at it to get it off of you. By killing the starfish, the Hitoderon - named Gossie - will give you the HornPin, which shields you from attacks and comes with 4 Magirocks, bringing you to 77 if you haven't missed any so far. Ark will then sense that Gossie wants to help him. You'll be back at the opposite end of where you entered the water maze from.
You'll finally meet Will. Talk to him, and he'll thank you for rescuing him. He crashed into the Great Lakes on a test flight and was attacked by starfish until Gossie saved him. He then says that the Lake God - the one mentioned by a few people in Nirlake - really exists. He asks you to come with him so he can repay you.
You'll both end up back at Will's house in Nirlake. He needs to get the parts again, and the only way to get new parts is through the Lon Trade in Yunkou, who began buying up metal for the parts. Until the price of metal comes down, he's stuck. Looks like Yunkou is our next stop.
Wednesday, July 8, 2020
PrinceWatercress plays Terranigma - Part 37 of 50
We finally see Loire in its final form, and we get to buy an apartment we'll never use.
Loire
.png)
Loire has changed...big time.
Pierre's house is the right door on the left building to the west of the entrance. Pierre has now had to employ people to keep up with work orders as his cameras are now available around the world.
To the left of Pierre's house is Matis' studio. When you talk to him, he says he now works like a machine for money chased by time and doesn't seem to like fame anymore as he is no longer painting what he wants to paint.
To the east of the entrance is the inn.
To the north is another screen...and more homes and businesses! The door below the man on the balcony is an apartment house, and the door to the right is for a vacant apartment. To get it, you'll have to inquire within at Loire Realty.
Loire Realty is to the building to the right of the apartment. Just enter the door on the right and talk to the guy at the counter, and tell him you want an apartment. If you have 800 Gems, an apartment is yours and you'll get the Apartment Key. You'll be able to enter the room.
The door to the left of Loire Realty is the furniture store. Here, you can buy furniture for your new apartment (which you must have in order to buy anything here). Just interact anything and you'll see how much it costs, and then you can decide whether or not you want to buy it. Everything is 100 Gems, and when you buy anything, it'll go directly to the apartment you just got. From there, you can enter your own apartment. If you have the table, you can save your game in the apartment, and if you have the bed, you can sleep here, too.
The building to the left of your apartment is that one family who had the grandmother. Sadly, the grandmother passed away between expansions. To the right of them is Mifta, who used to have a terrible job and can't go without a hat because of it.
There are some more buildings on the northern end. The one in the upper-left corner is the tourism office, and to the right of it is Marily's boutique. You can buy some suits, but they don't provide a lot of defense. Marily will be a different color palette than everyone else, and if you talk to her, she'll tell you that lots of orders have been coming in after she gave you the clothes and she can finally run her own boutique.
To the right of Marily's is the guy selling the croissants, who is standing next to Mme. Papilo's boutique. The woman doing window shopping there says the clothes are expensive and that the designs look old fashioned. If you go in and talk to her, she will refuse to close her shop down to the bitter end. Sucks to be her!
Next to Papilo's shop is the winery. Business is booming and the guy behind the counter can't keep up with demand.
The lower-right building is Jean's house. You'll find out that Jean has opened his doors to anyone who wants to make the town better. Jean himself will tell you that people's happiness cannot be measured by material possessions, and that he wants to help people live better, fuller lives.
That's pretty much it for Loire.
Head back to the northeast. There will be a bunch of trees all by themselves; walk into them. This is the poultry farm. You'll find out the guy running it opened a race track. It will be to the north, and you can beat on the winner. The woman near the counter will give you a tip for the next race for 10 Gems, and you can bet 50 Gems on who will win. The maximum Gems you can get from a race is 500.
PrinceWatercress plays Terranigma - Part 36 of 50
It's time to expand Loire again...and also Litz!
There's a secret area next to the mountains north of the oasis in Africa. Just stay near them and move around in the desert area to find it. You'll find a ton of gems in the two chests here.
Our next stop is to the north of Loire and Litz. It's the island of Britain, and in the north end is Rich's house. This is the house of a man named Rich, who is a self-centered super wealthy magnate and known for his generosity. Go in and talk to Rich, and he'll tell you that he wishes to decorate his house. Only thing is, he can't find anything worthwhile to do it with. He'll ask you to help solve his problem, and he'll tell you that money is no object when it comes to solving it. Give him the painting that you got from Matis in Loire. When he asks if he can have it, say yes. He'll thank you with 1,000 Gems, and if you talk to him, he'll ask you to inform Matis that he will amply support his artistic efforts.
North of Scandia is a lone island with a cave. It's a bit dark, and you'll have to scale some narrow ropes to get around in the cave located. At the other side is Magirock #70.
Head back to Loire.
Loire
.png)
Be sure to head to the tourism office and show your new photos while you're here to help the other cities expand, if you haven't already.
From there, head to Litz.
Litz
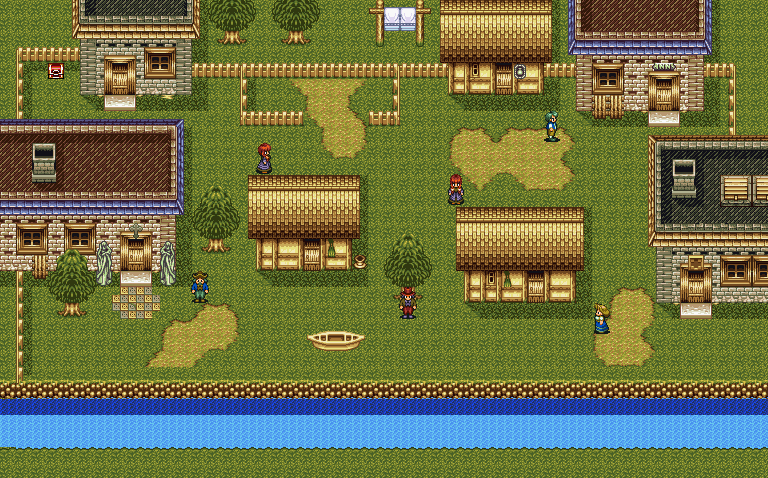
Head to the Crafts building and hand the guy there the Crystal. You'll have to check with him later.
The house west of the Crafts building is the guy needing something to pack the sardines in. Give him the Tin Sheet, and he'll have a way of packing sardines. Talk to the man again, leave, go back and talk to him again. He'll give you the Tinned Sardines. Talk to him again; this ensures that Litz will expand.
Freedom
.png)
Head to Stoma's house and give him the Tasty Meat you got from Suncoast. Let him sample it when he asks to have it. Stoma will like it and give it his vote of confidence, and reward you with 100 Gems.
From there, give him the Tinned Sardines. He'll give it a vote of confidence and give you 100 Gems for that as well.
Head back to Litz and talk to the sardines guy again after you give the Tinned Sardines to Stoma. From there, head to the port of Litz and get on the boat. If you don't talk to the sardines guy, the Litz expansion will not trigger as soon as you get on the boat.
Litz
.png)
This place is a little different from before the expansion...which is the only one that the town has.
The hospital is near the original entrance, and when you enter, you'll see that the inside looks a lot nicer. If you talk to the doctor, he'll tell you he got more patients when the town expanded.
You'll learn that the church has stained glass and that it is one of Litz's specialties along with tinned sardines if you talk to the townspeople.
At the upper-right corner of the town is the inn. If you enter the room to the right, you can eat some sardines.
The upper-left most house next to the church houses a sailor who spoke with Columbus, and learned about the village of Storkolm in Norfest (one can assume).
Believe it or not, you can walk to the west past all the northern-most buildings to get Magirock #71. You may have to move a little bit to the south as you do so to get in there.
The church is near where you got the Magirock, and can be distinguished from the rest of the town by its stained glass windows. You'll learn that the church has gotten bigger thanks to the town expansion. If you go into the room to the left, you'll also learn that Litz has invented compulsory education.
Further to the west of the church is another house. This is the Crafts building. Pick up the gray pots and toss them out of the way to get Magirock #72, then go to the room in the lower left. You'll find out that the guy making all these pots now has apprentices thanks to the town expansion.
You'll also see a coffee booth. For ten Gems, you can try some coffee.
The Cannery is in the house to the west of the hospital. Thanks to you and the town expansion, business is booming and the guy selling the sardines is now enlisting his neighbors' help to keep up with all the orders. Keinz will also be standing near the door here.
There's also an exit out of the town to the south.
From here, head to Loire and talk to the four people in the town who gave you items and asked you to take them around the world - Matis, Marilly, Pierre and the bartender at the winery. Once you do, leave the town, go to another region, come back, and Loire will be expanded for a second and final time.
Subscribe to:
Posts (Atom)