Showing posts with label part 41. Show all posts

Wednesday, February 25, 2026

PrinceWatercress plays Super Mario Odyssey - Part 41 of 92


Our adventures in the Luncheon Kingdom continue...


Climb Up the Cascading Magma


If you explore the lava in this area, you'll find out that there are vegetable chunks all over the level that you can run into for regular coins. You'll also find cannons that will launch you into the air if you jump into them. You'll be able to see the launch path before you press A to launch yourself, and you can get out of the Lava Bubble mid-flight to get to other places in the flight path if necessary.

After heading towards the Meat Plateau in the north end of the kingdom, it's time to head towards the northwest corner. You'll need to get in the lava as a Lava Bubble and take a cannon over a gap that takes you to the lava to the west of the village. From here, you'll be able to platform your way to the next area you need to get through. You'll also have to go through an 8-bit area before entering a cave and going up a lava waterfall with a Lava Bubble. Watch out for the logs! 

Near the switch that unlocks Power Moon #2, there are some mountains you can climb up for some Hint Art. This shows Poochie underwater in the Resort Kingdom. Remember this for later.

Power Moons


4. Climb Up the Cascading Magma - In the cave leading to the northwest corner of the kingdom, you'll need to leap into an unlit lantern with a Lava Bubble. Doing this will give you a Power Moon, open up the path ahead and advance the plot.

8. Atop the Jutting Crag - Near Salt-Pile Isle, there is a cannon you can jump into as a Lava Bubble that is surrounded by small hill-like mounds. Jump into the cannon and launch yourself, and when you're above the mountain in the middle of the launch path, get out of the Lava Bubble and land on the mountain to get this Power Moon.

11. Surrounded by Tall Mountains - There is a blue-green mountain near the Meat Plateau, and you can long jump to it and find a sparkle that you can ground pound for a Power Moon.

16. Golden Turnip Recipe 2 - In the area where you'll find Power Moon #8, there are a few turnips. The one in the center is golden. You'll want to open up a path back to the village with a Hammer Brother before you attempt this. Grab the turnip, then jump your way to the village while avoiding the enemies and their attacks. Throw the turnip into the blue stewpot, and you'll get the Power Moon.

18. Luncheon Kingdom Timer Challenge 1 - Above the Odyssey is a scarecrow. Throw your hat at it and wall jump your way to this Power Moon before time runs out.

19. Luncheon Kingdom Timer Challenge 2 - There is a scarecrow where you fought Spewart. Throw your hat at it, then use your long jump to get to the key and then back again to get this Power Moon before time runs out.

29. Alcove Behind the Pillars of Magma - As you're going for Power Moon #4, there is a gap in a wall near the lava geysers. Inside is a Power Moon.

30. Treasure Beneath the Cheese Rocks - There is a stack of cheese rocks near the Odyssey; breaking them with a Hammer Brother will reveal a Power Moon.

31. Light the Two Flames - There is a Fire Bro near the Odyssey. Take control of him, then take him to a dead with two lanterns. Light the lanterns with the Fire Bro's fireballs for a Power Moon.

Regional Coins


Monday, March 10, 2025

PrinceWatercress plays Wario Land II - Part 41 of 51


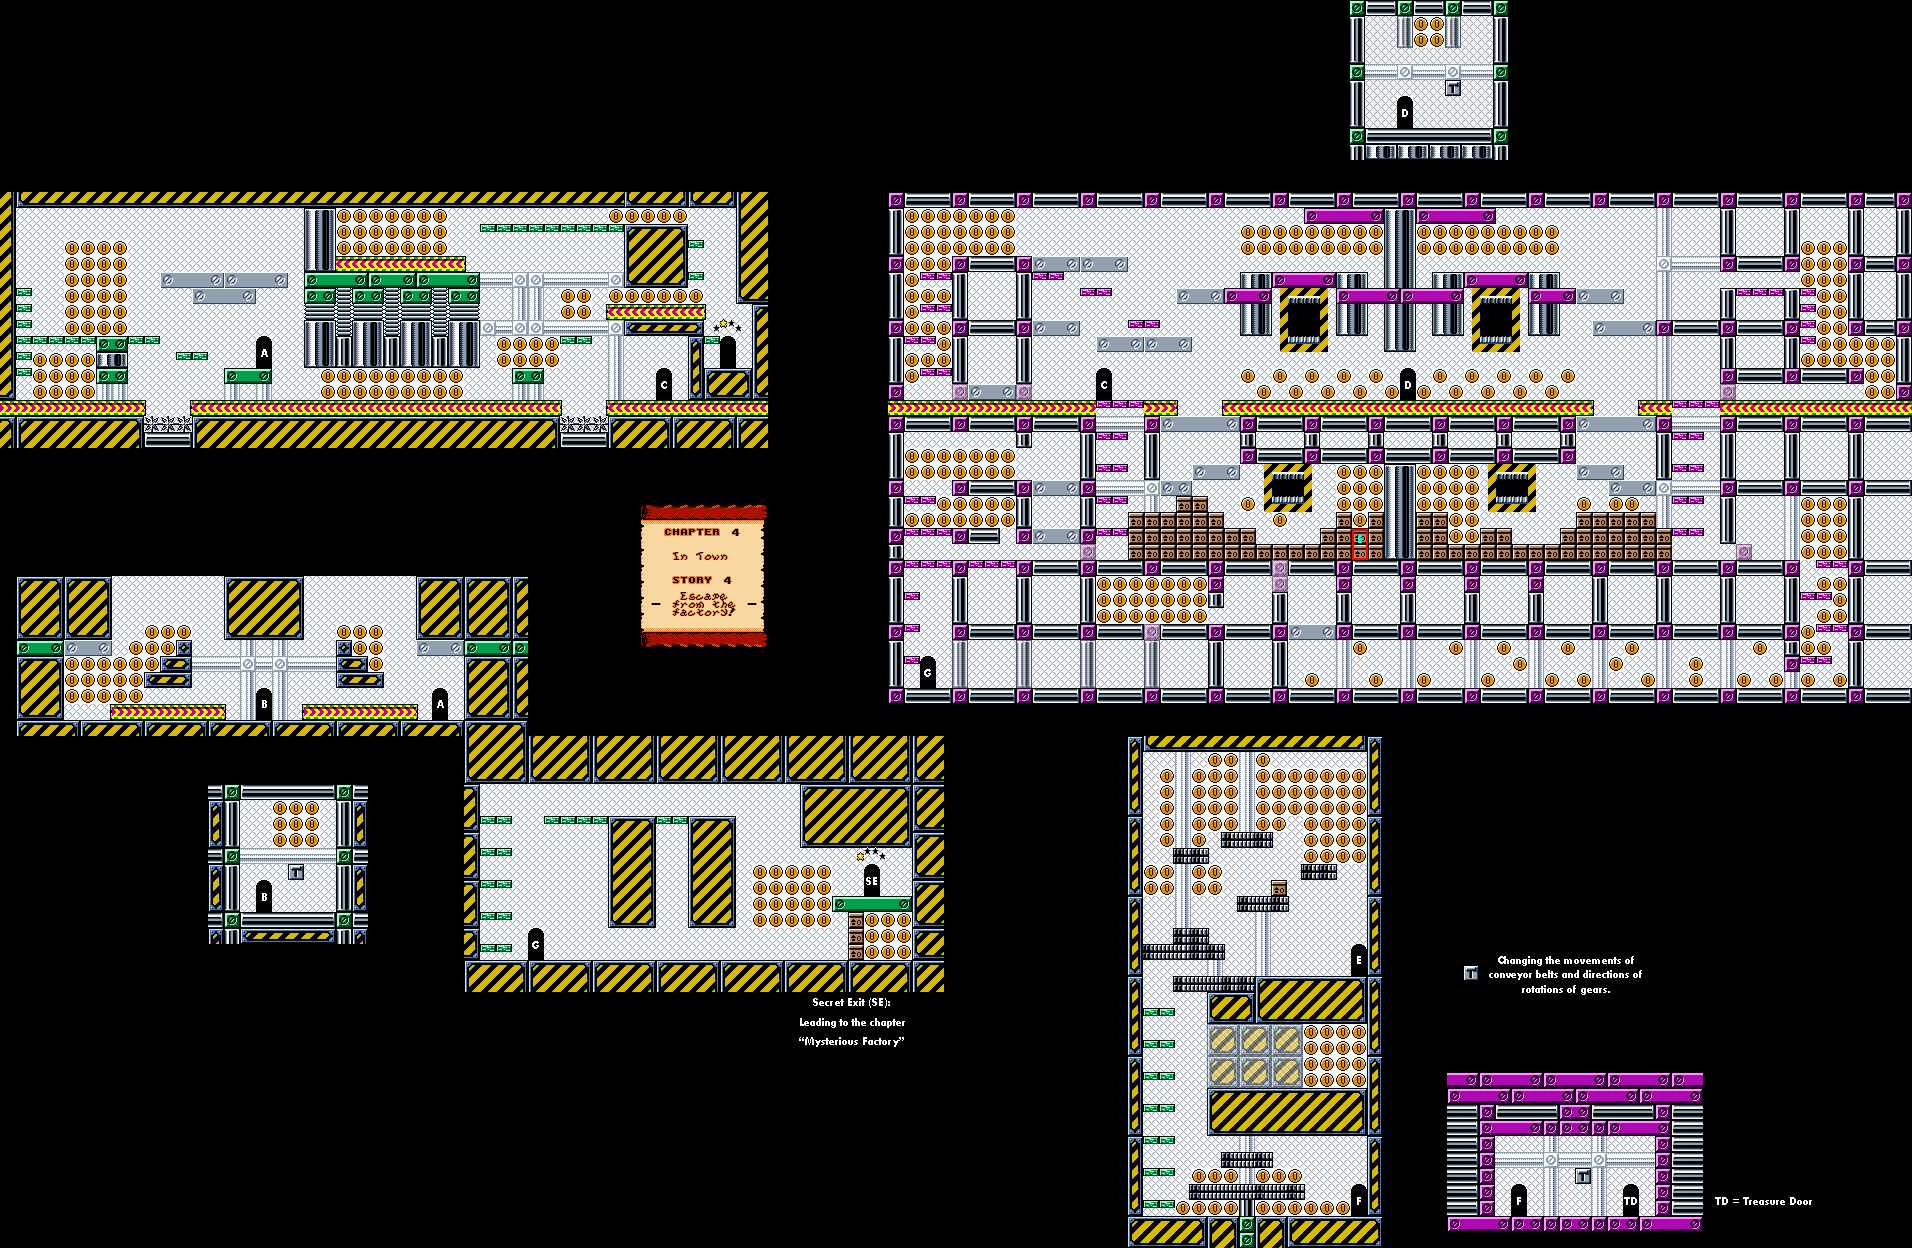
Our fourth side story takes place in a short multi-floor maze.


Chapter 4: In Town

Story 4: Escape from the factory!


You'll want to take the secret exit. To do that, you'll need to break through the floor where the guys throwing bottles are, get to the door in the lower-left corner, then get flattened so you can reach the door.

By taking this alternate exit, you'll chase Captain Syrup and her goons further into the factory.

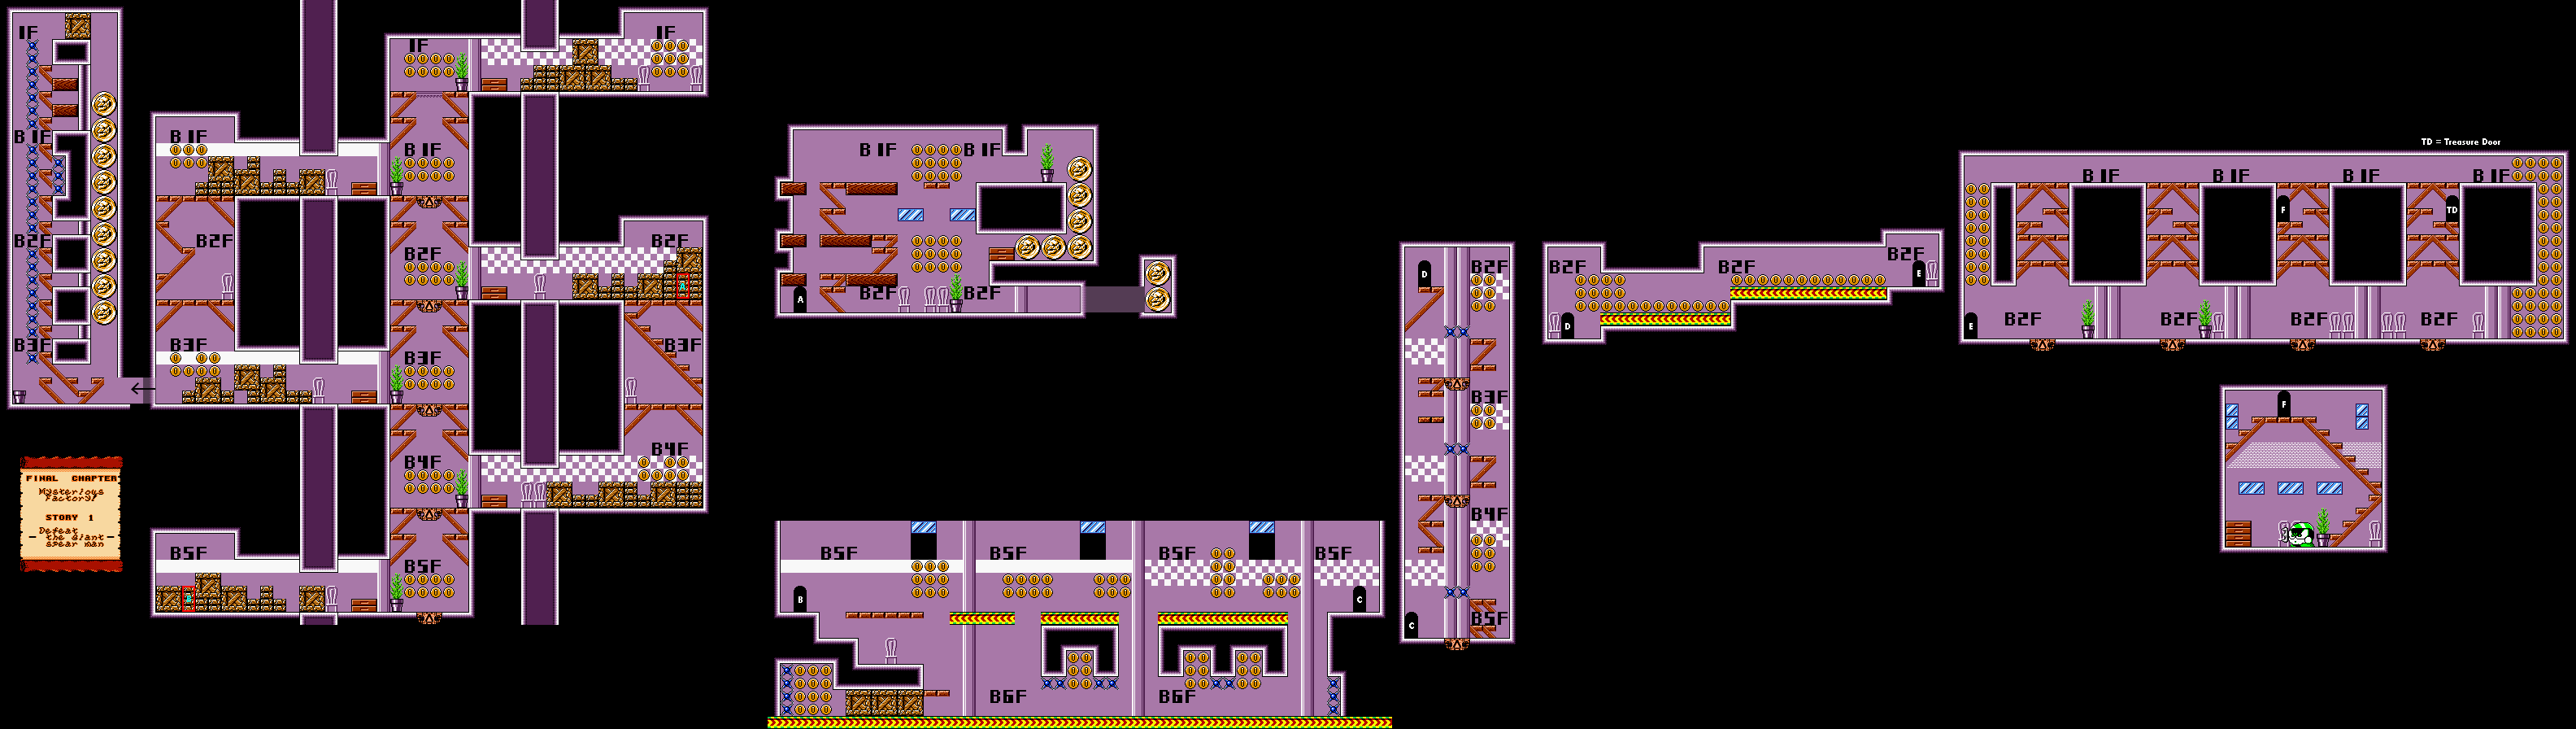
Final Chapter: Mysterious Factory!

Story 1: Defeat the giant spear man


Once again, you're going to be in an area with multiple floors and multiple elevators.

Watch out on the second basement floor, as there are a ton of snowmen. Tread carefully so you don't get frozen.

At the lowest floor, you'll need to watch out for the spikes that can also shock you. In the vertical chamber with the spikes and the elevators, run across the elevators, then jump up to them to get to the next door. As long as you keep your speed up and don't stop, the elevators as well as the falling platforms will not be a problem.

Tackle the left-hand wall on the third basement floor to get a bunch of coins.

In the big room near the end, the fourth elevator leads to the treasure room, where you can win a computer. The third elevator leads to the giant spear man. You should know how to take it out by now; just stay away from the stairs to make it easier.

Wednesday, October 9, 2024

PrinceWatercress plays Chrono Trigger (Super NES) - Part 41 of 70


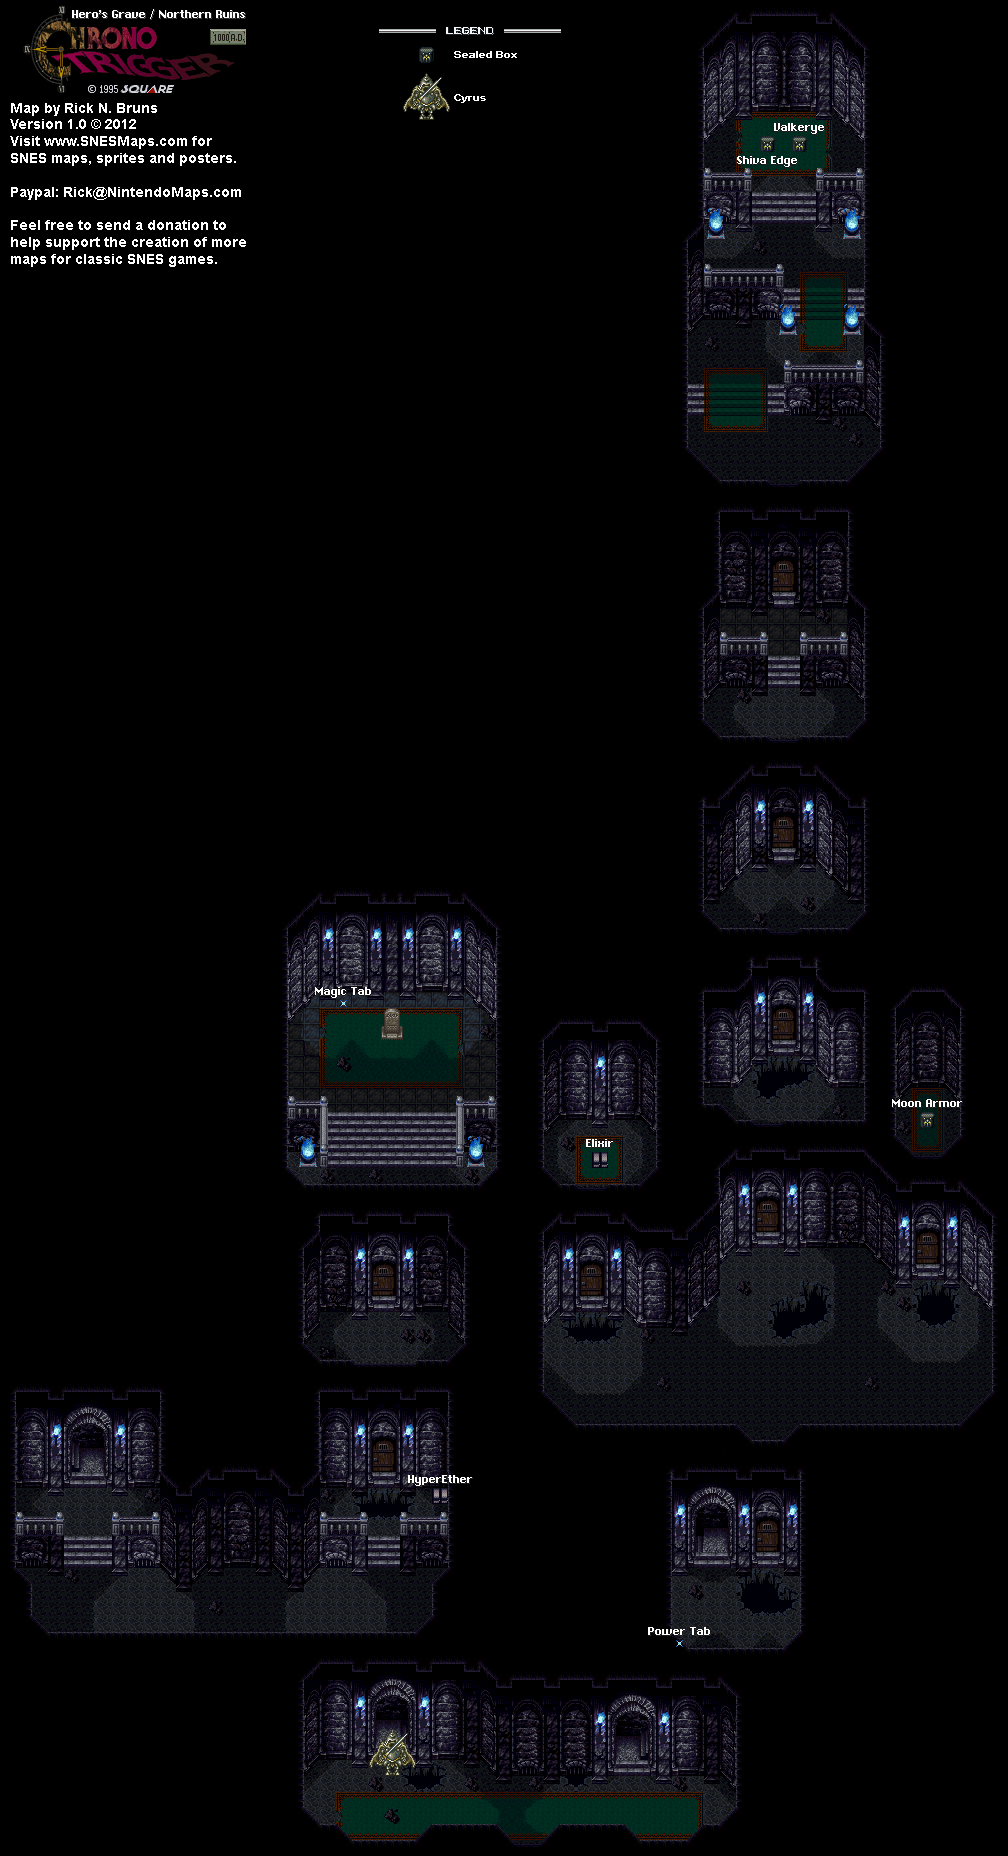
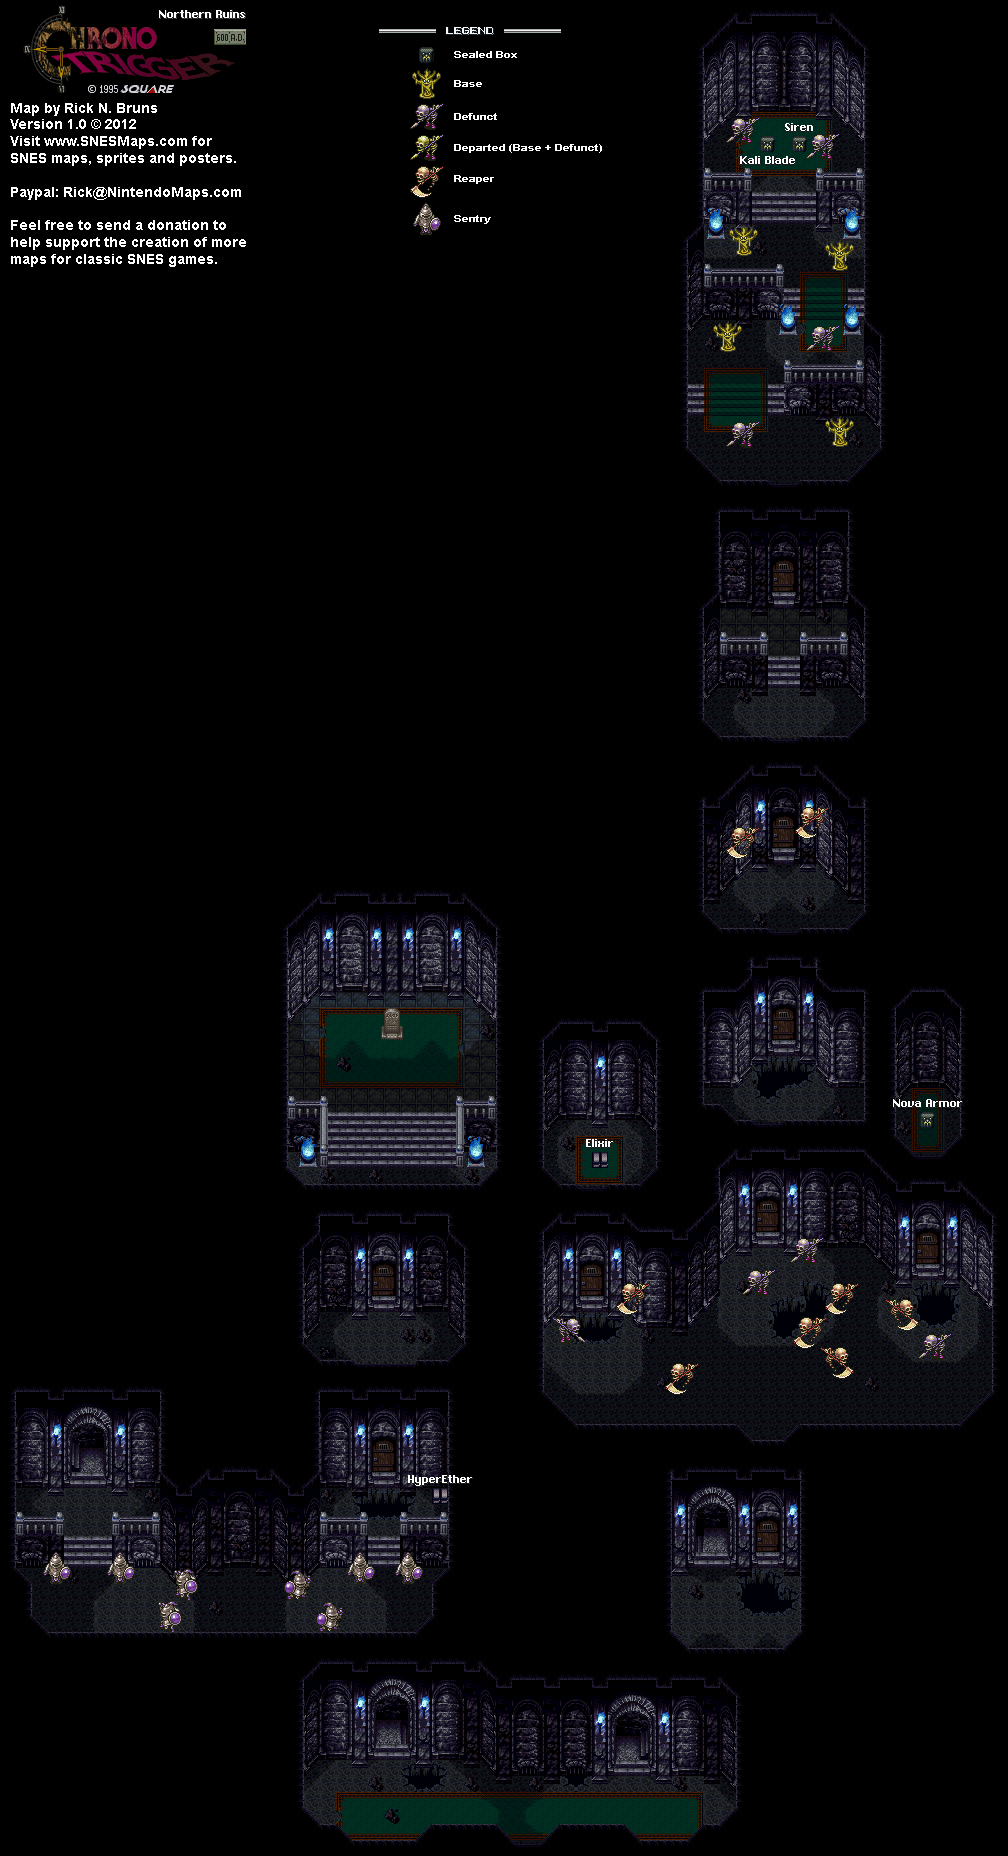
In this entry, we head towards the Northern Ruins - the resting place of the great Cyrus - to clean the place up and hopefully get everything inside.


If you head back to Lucca's House and go to Lara's room after saving Lara in the past, Lara will get out of her chair and move about.

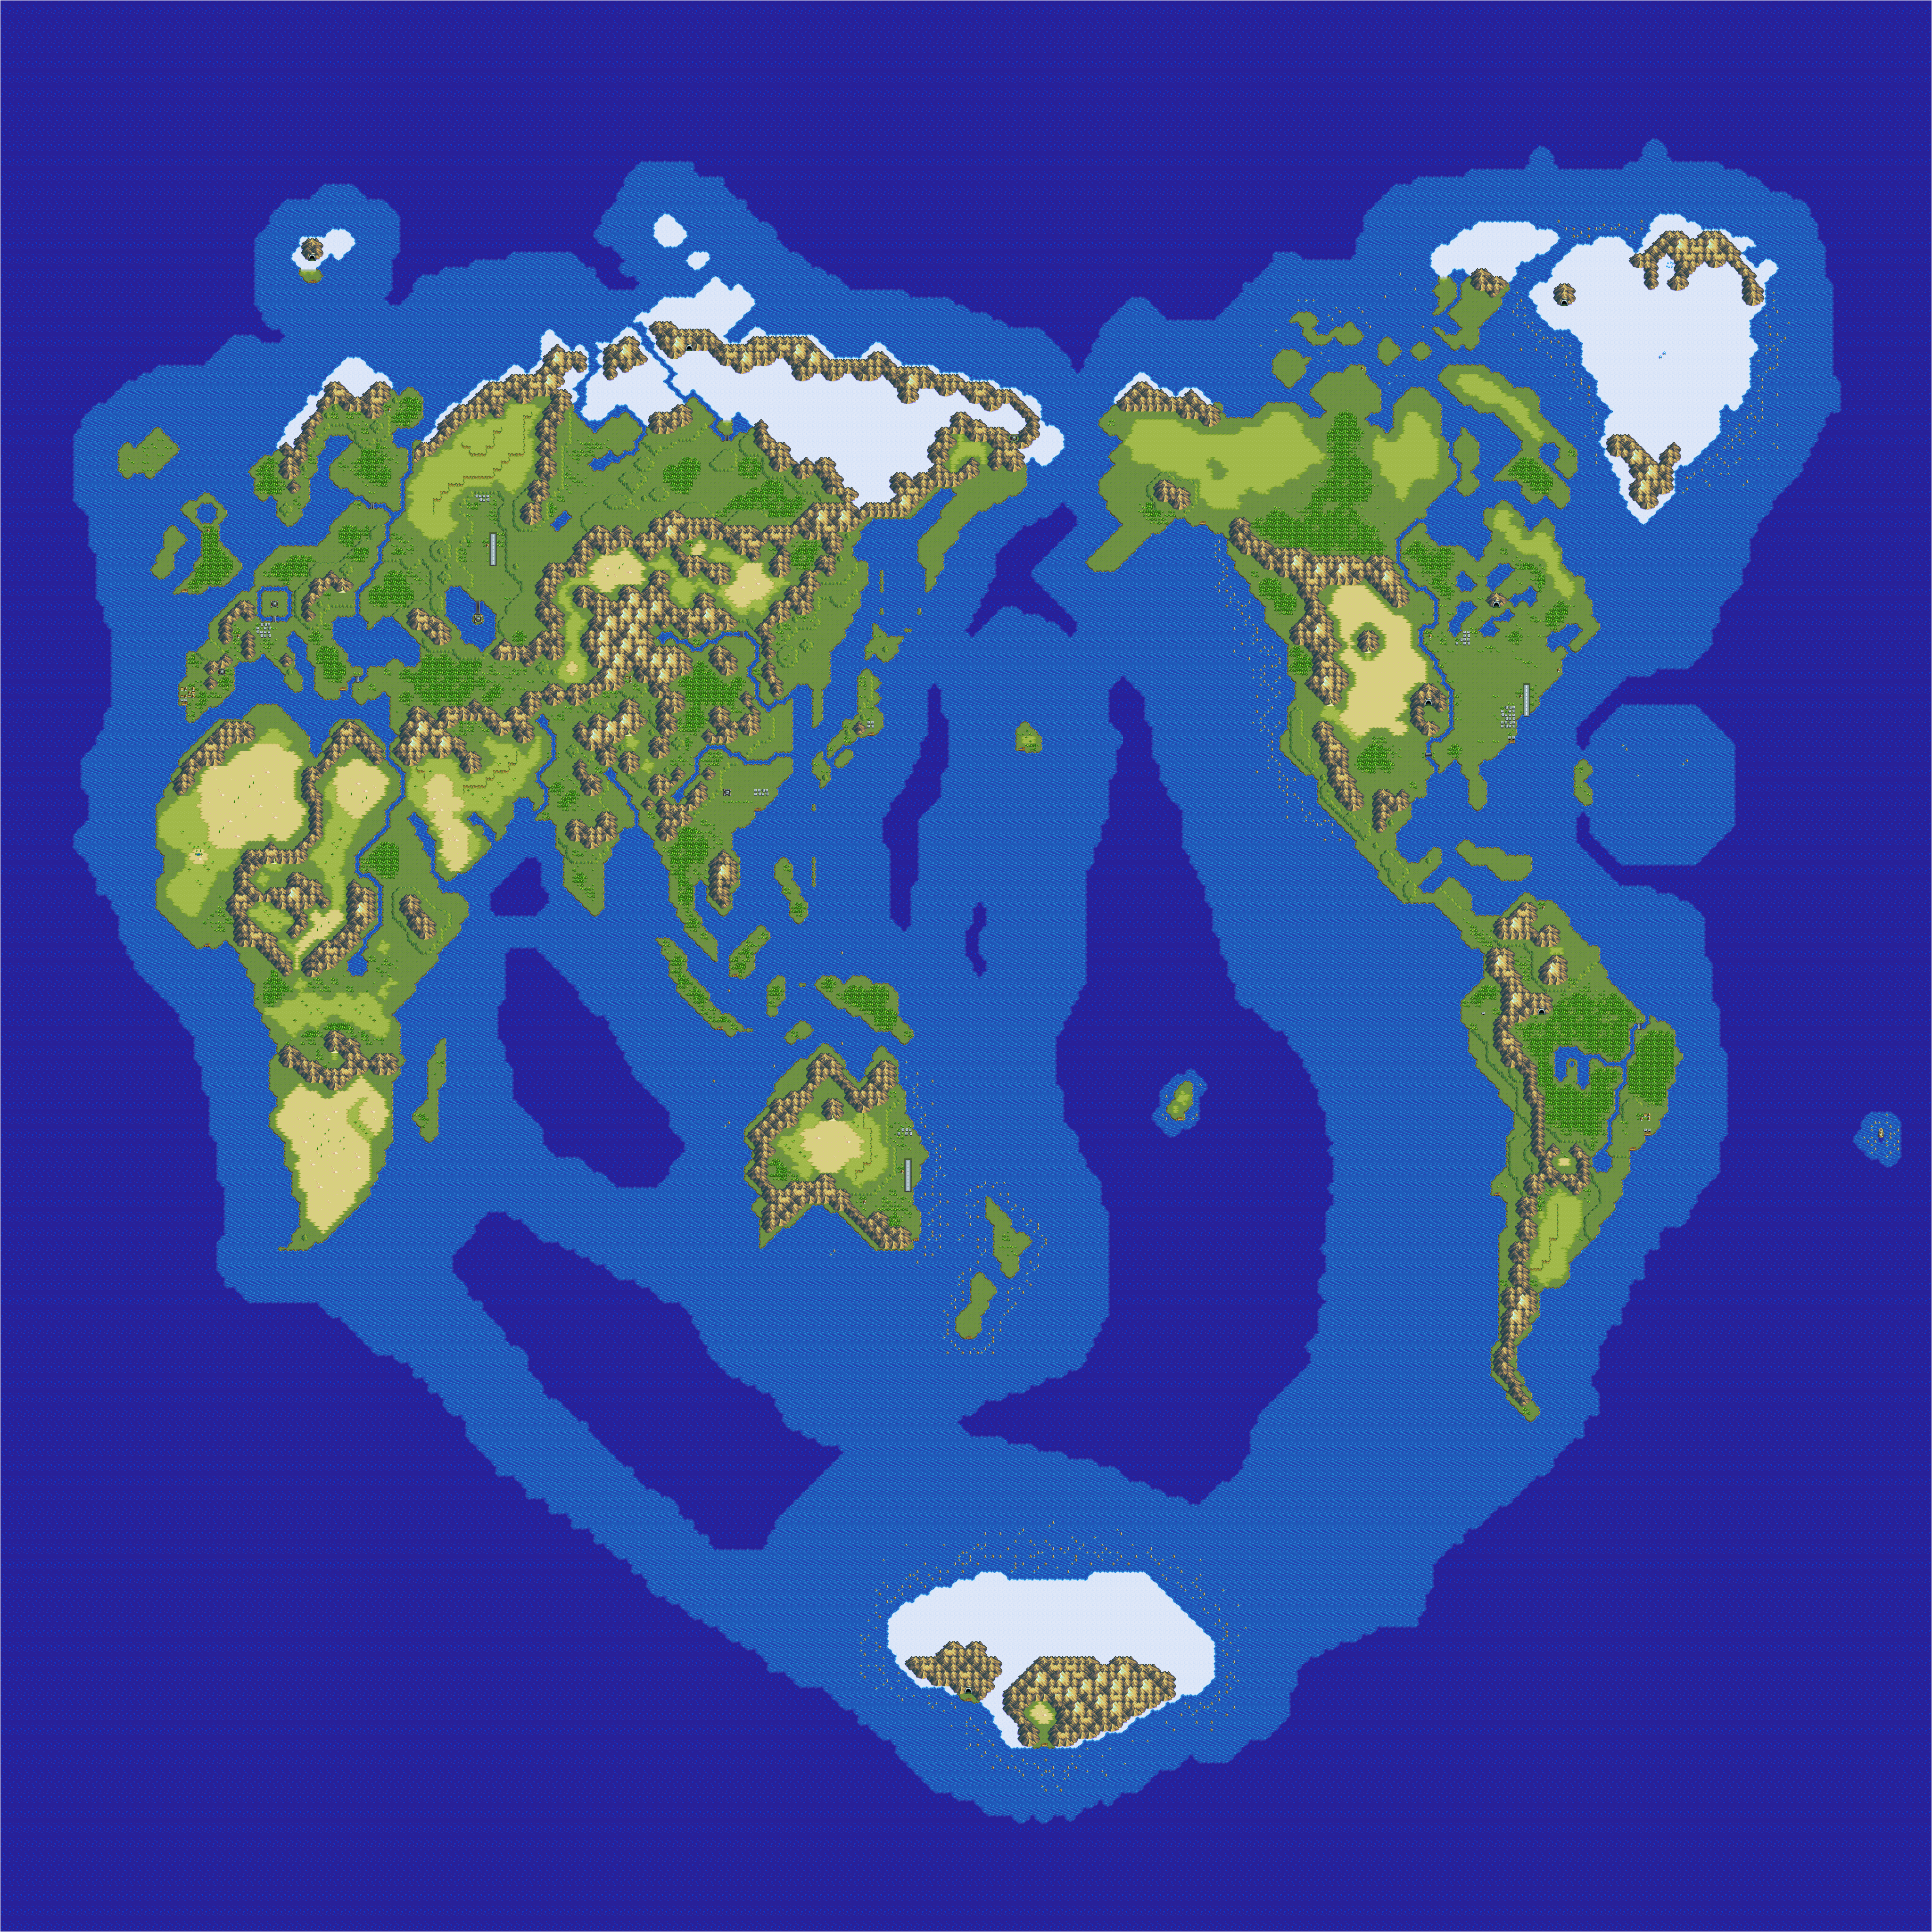
For the next side quest, we're going to the Northern Ruins near Choras Village in both 600 A.D. and 1000 A.D. Choras Village will be on the southeast end of the map in those two eras, with the big building being 

Northwest of Choras Village in 600 A.D. is an island that is not there in 1000 A.D. Interestingly, there is a cave that you can enter regardless of whether or not the entrance is opened up. This leads to the Giant's Claw, and if you go further in, you'll find out that Toma did indeed find where the Rainbow Shell was. The first room after the entrance is, amazingly, Azala's throne room in the Tyrano Lair, and if you hold Up and press A at the throne, you can sit on it briefly and laugh. I don't go any further though, so as not to go off track.

You won't be able to do much in the Northern Ruins in 600 A.D., and you'll be able to do even less in 1000 A.D. due to the big haunted suit of armor near the entrance. This is Cyrus' ghost, and you will fight him for a few turns before figuring out that fighting him is utterly pointless.

In 600 A.D., you'll need to head to the cafe. There, talk to the man who is drinking at the table. He will tell you that his tools have been stolen and therefore cannot do his work without them. From there, head to 1000 A.D. and head to the single residence in the whole town with the woman and the child. The woman will tell you that her husband keeps drinking at the nearby cafe at the inn and therefore never works. If you go to the cafe at the inn and talk to the drinking man, he will let you borrow his tools. Go back to the residence and talk to the woman, and she will give you the Tools. From there, you can take them back to the drinking man at the cafe at 600 A.D. and talk to him and give him the Tools when he asks if you will lend them.

Also in 600 A.D., you can talk to Toma. If you talk to him, he will tell you that he finally found the Rainbow Shell. He will also hand you his drink - Toma's Pop - and tell you to pour it on his grave in case he does not return. Head back to 1000 A.D. and go to the grave on the western coast, then go up to the grave, hold Up and press A to read Toma's tombstone and pour the drink on the grave. Toma's ghost will tell you where the Rainbow Shell is: Giant's Claw. This will finally open up the Giant's Claw northwest of Choras Village in 600 A.D. Don't forget to go to the north side of the tomb and press A to find a Speed Tab.

Once you lend the tools to the carpenter at the cafe, head to the residence at the south end of Choras Village in 600 A.D. Talk to the carpenter, and he'll head to the ruins with his apprentices and get to work. When you get to the ruins, however, you'll have to clear out some of the monsters in order to get more of the place fixed up. The first time is for free, but you'll need 2,000 G for every trip to the ruins after that.

I start with the Sentry enemies in the western doorway at the start. These guys can only be hit with magic attacks, and these guys can hit pretty hard, hitting you with their swords for a few hundred HP a strike and also being able to absorb half as much HP from one party member. If you kill one of them, they also fight back with MP Buster, so bring plenty of Ethers. The Sentry enemies will only stop showing up when you beat all three of the battles in that area, as there is one in the middle where you need to step in a specific spot to trigger a battle with four Sentry enemies. Further from there is Cyrus' grave, which I don't touch quite yet. Instead, I take the eastern doorway, where we'll continue next time.

Wednesday, July 3, 2024

PrinceWatercress plays Ratchet and Clank: Going Commando - Part 41 of 54


We'll be spending a lot of time in Grelbin near the end of the game...well, I did when I played it.

First | Previous | Next | End

2:10 - You won't be able to go where this teleporter leads...yet. Down the ramp it is.

2:59 - Oh, hey, somebody is strangely vacationing out here in this frigid planet...oh, it's that hippie from Tabora who wants his hands greased again, this time with 10 Moonstones. Great.

4:10 - You'll see all of the Moonstones out in the open, much like the Crystals in Tabora, and just like with the Crystals there are 100 in all and any excess you collect past the tenth one will get you bolts. Once again, using the map will really come in handy here. Also, just like on that planet, you'll have to deal with a lot of enemies, such as these snow beasts that can spawn out of the ground from out of nowhere. Hit them hard with the most powerful stuff you have and keep your distance. Unlike in Tabora, the enemies re-spawn in case you die, which makes experience farming easier.

6:30 - See monsters will pop right out of the covered pools of water and shoot lasers at you from a really good distance. Just like with the snow beasts, you'll want to hit them hard and heavy. Thankfully, when one is defeated, you don't have to fight it again even when you die, as defeating one will net you a Moonstone.

19:38 - Say what you want about this guy; at least he keeps his word. He also has a piece of the Hypnomatic, but you'll need more Moonstones before you can get it.

Controls:

As Ratchet:

Control Pad/Left Analog Stick: move
Right analog stick: move camera

X:
  • Jump and double jump (hold button after double jump to use Heli-Pack or Thruster Pack)
  • Wall jump (near certain walls)
Square: strike with wrench
Circle: pull out/shoot currently equipped gun
Triangle: 
  • quick select (hold and use in conjunction with Control Pad or left stick to switch guns; menu can be customized in Quick Select on the pause menu
  • double tap to switch between two most recently equipped weapons/items
  • interrupt on-screen messages

Select: open map
Start: Pause menu
  • Control Pad: select option
  • X: confirm option choice

L1:
  • center camera behind Ratchet (tap button to center)
  • first-person view (hold button and use left stick or D-Pad to look around; let go of L1 to move camera back behind Ratchet)
  • Square: wrench boomerang
  • Circle: fire gun
  • R1/R2: zoom in and out (Pulse Rifle only)
L2/R2: strafe (hold while moving)
L3: see health and Bolt totals
R1/R2: crouch (hold down)
  • Square: wrench boomerang
  • X: high jump
    • long jump (hold crouch button and jump while running to perform)
R3: open map

In water:
  • Square: dive and descend
  • X: surface and ascend
  • R1: accelerate with Hydro-Pack

As Clank:

Control Pad/Left Analog Stick: move
Right analog stick: move camera

When hanging off platforms:
  • Control Pad/Left Analog Stick: move
  • Forward+X: vault up
  • Back+X: drop down

Square: punch
X: Jump (press and hold in the middle of a jump to glide with Heli-Pack)
Triangle: command menu (hold and use in conjunction with Control Pad or left analog stick to choose commands)

Thursday, May 30, 2024

DeceasedCrab plays Earthbound - Part 41 of 53


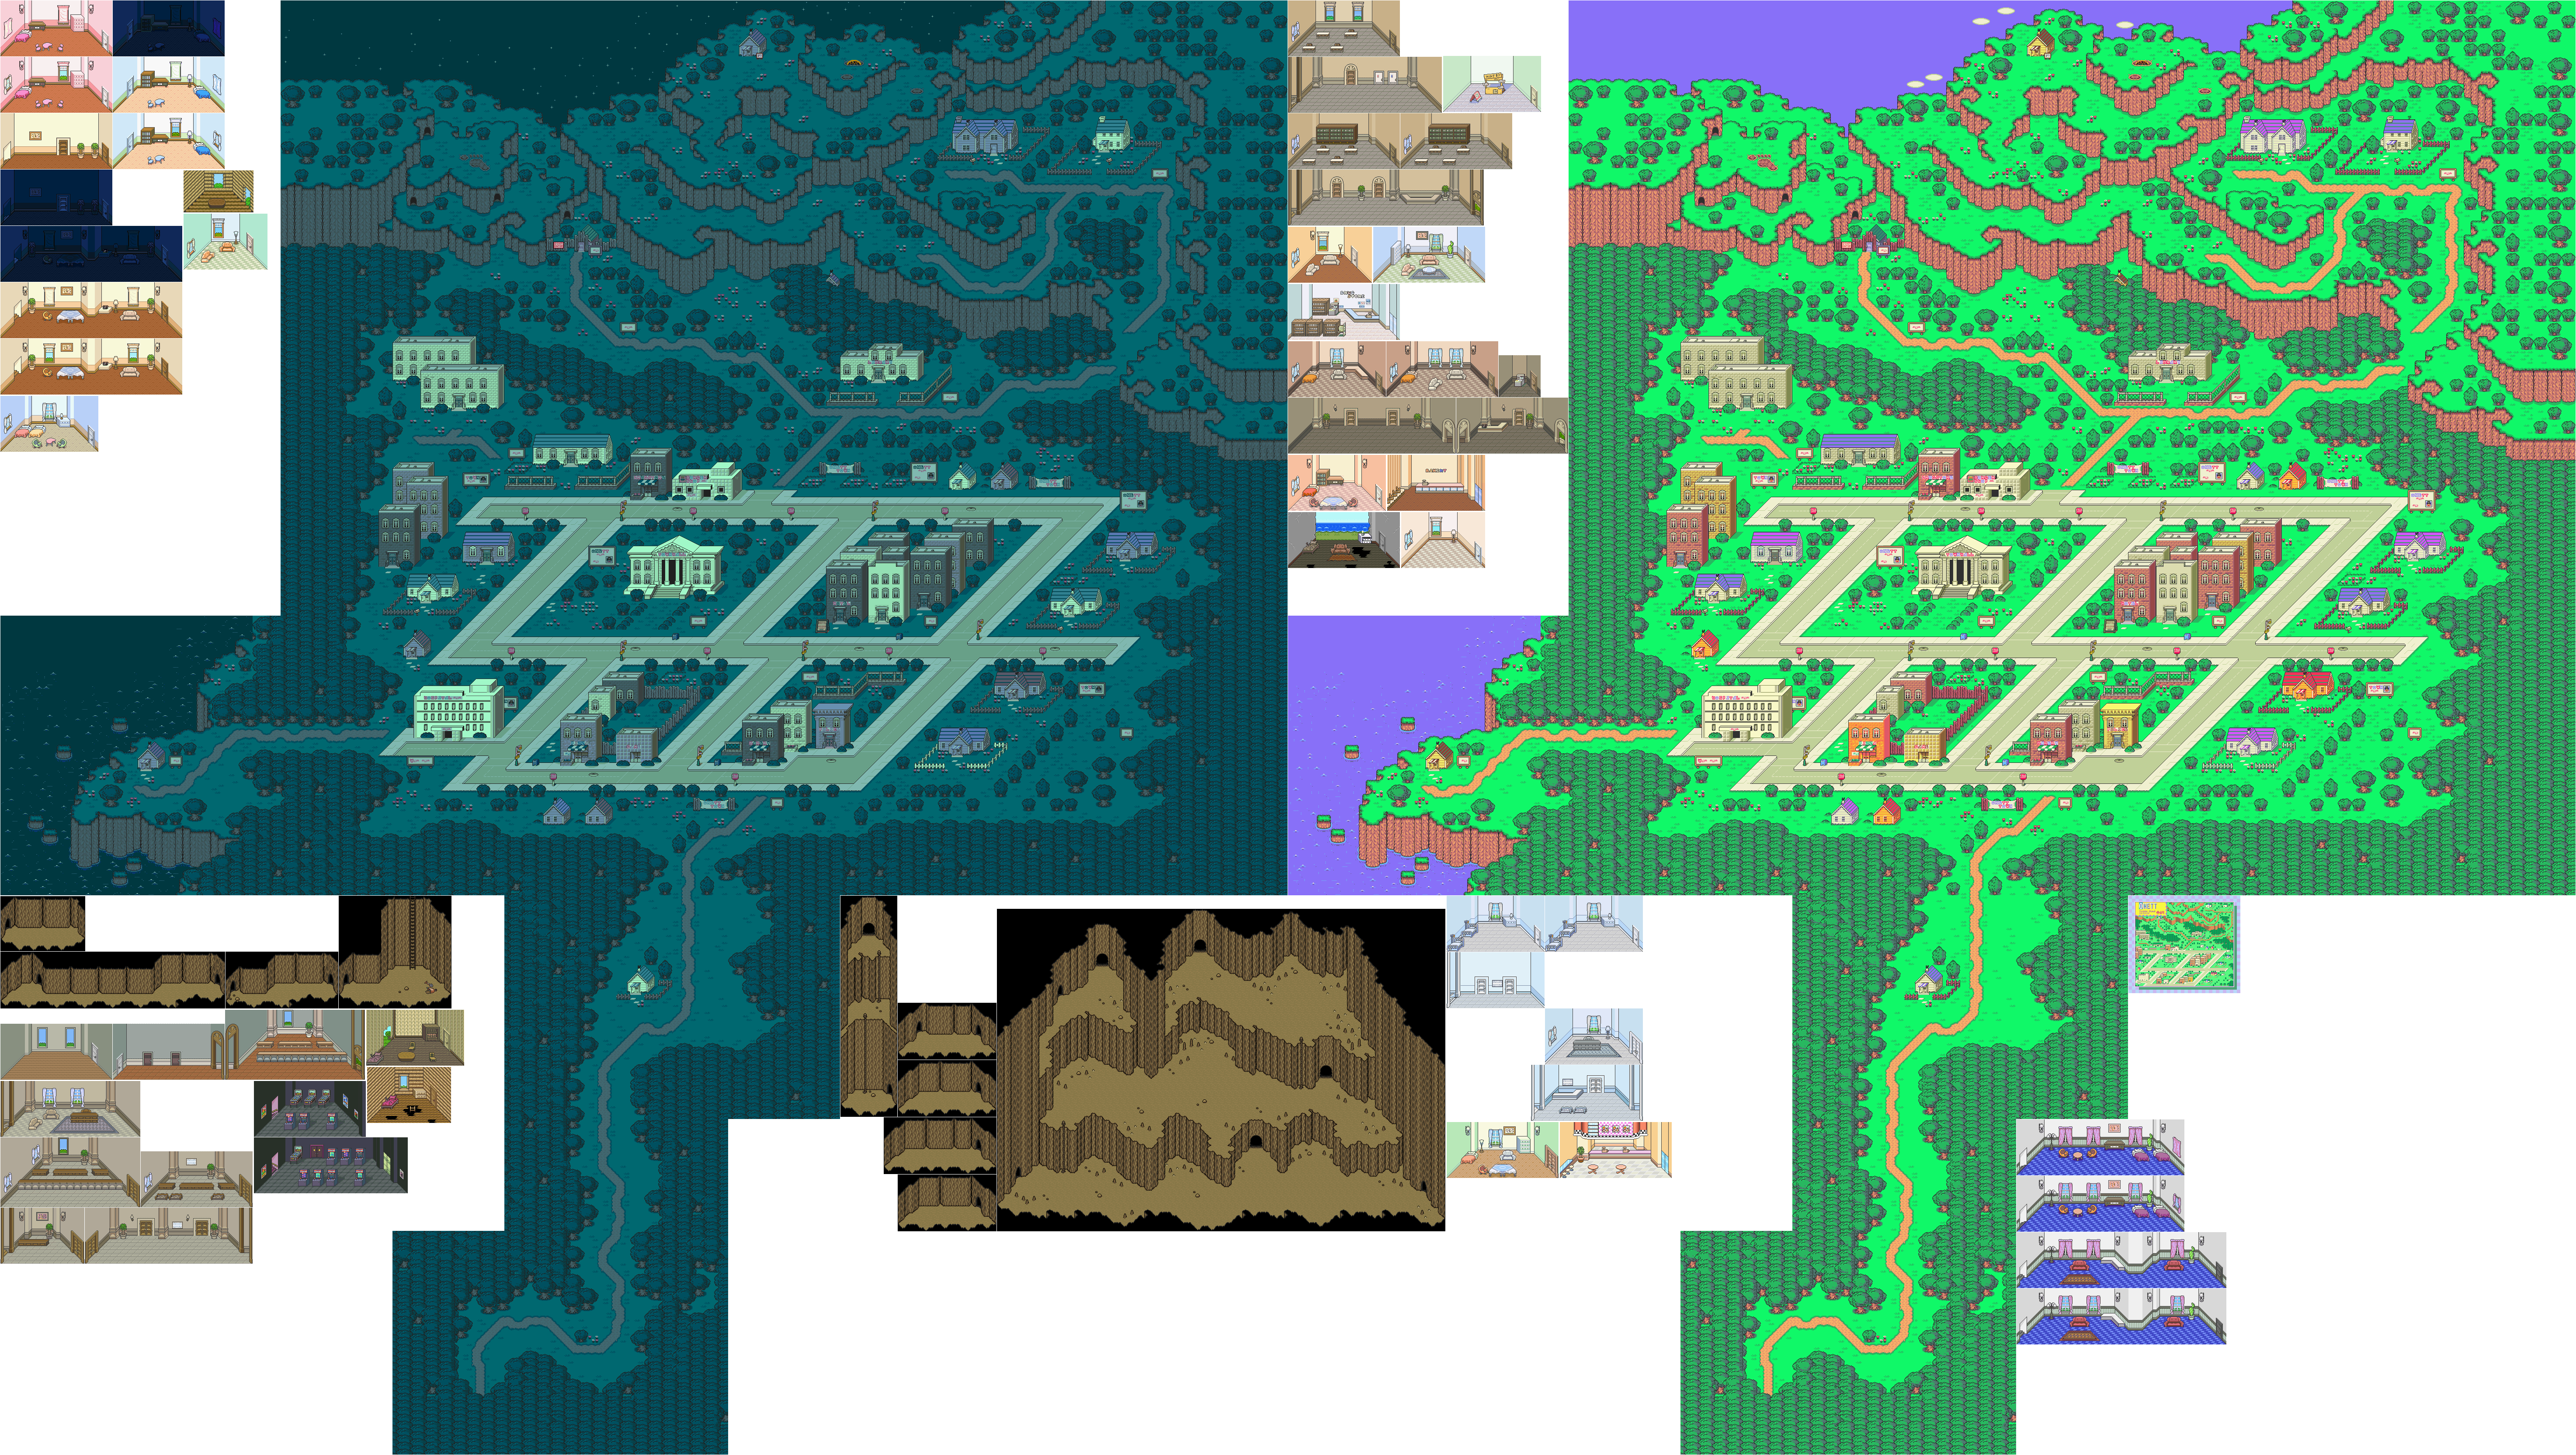
In this entry, we finally shut down the Stonehenge Base, then we...buy a house?!?


Past the room with all the tubes is a room with a Starman in it. Talk to the Starman, and you will have to fight it after it mentions the prophecy from the Apple of Enlightenment potentially being true.

The Starman Deluxe can cast Starstorm Alpha (which can do a lot of damage to the party) as well as Shield Beta. It can also fire a beam and call for both Starmen and Starman Supers. Keep hitting the Starman Deluxe with Multi Bottle Rockets and powerful spells, and keep in mind that if you focus on the Starman Deluxe, the rest of the enemies will disappear along with it.

Poo learns Shield Omega at Level 51.

When you beat the Starman Deluxe, the Stonehenge Base will shut down. There will be no more enemies in the base, so if you missed out on the Sword of Kings, you'll miss out on it for the rest of the game. If you go back to the room with the tubes, everyone who was kidnapped will be free. The Mr. Saturn who was kidnapped will give you the Saturn Ribbon, which increases defense by 90 and Luck by 40.

If you talk to Dr. Andonuts, he will tell you that he will start on the Phase Distorter as soon as possible.. If you talk to Apple Kid, he will tell you that he returned the "Overcoming Shyness" book back to the Onett Library.


Once you exit the base, either normally or through an Exit Mouse, head to Onett.


Remember the guy west of Onett who was selling a house? You should be able to buy the house from the guy now. If you buy it, though, you'll find out that there are holes in the floor, the furniture is completely wrecked and the back wall is completely gone. If you approach the coach, the photographer will show up. If you examine the dresser, you'll find a really weird story if you read the magazine.

Back at the library, talk to the guy in the mask. He well tell you that you will find it on the bookcase. Enter the door on the right and examine the left side of the bookshelf to find the Shyness Book. From here, teleport to Saturn Valley.


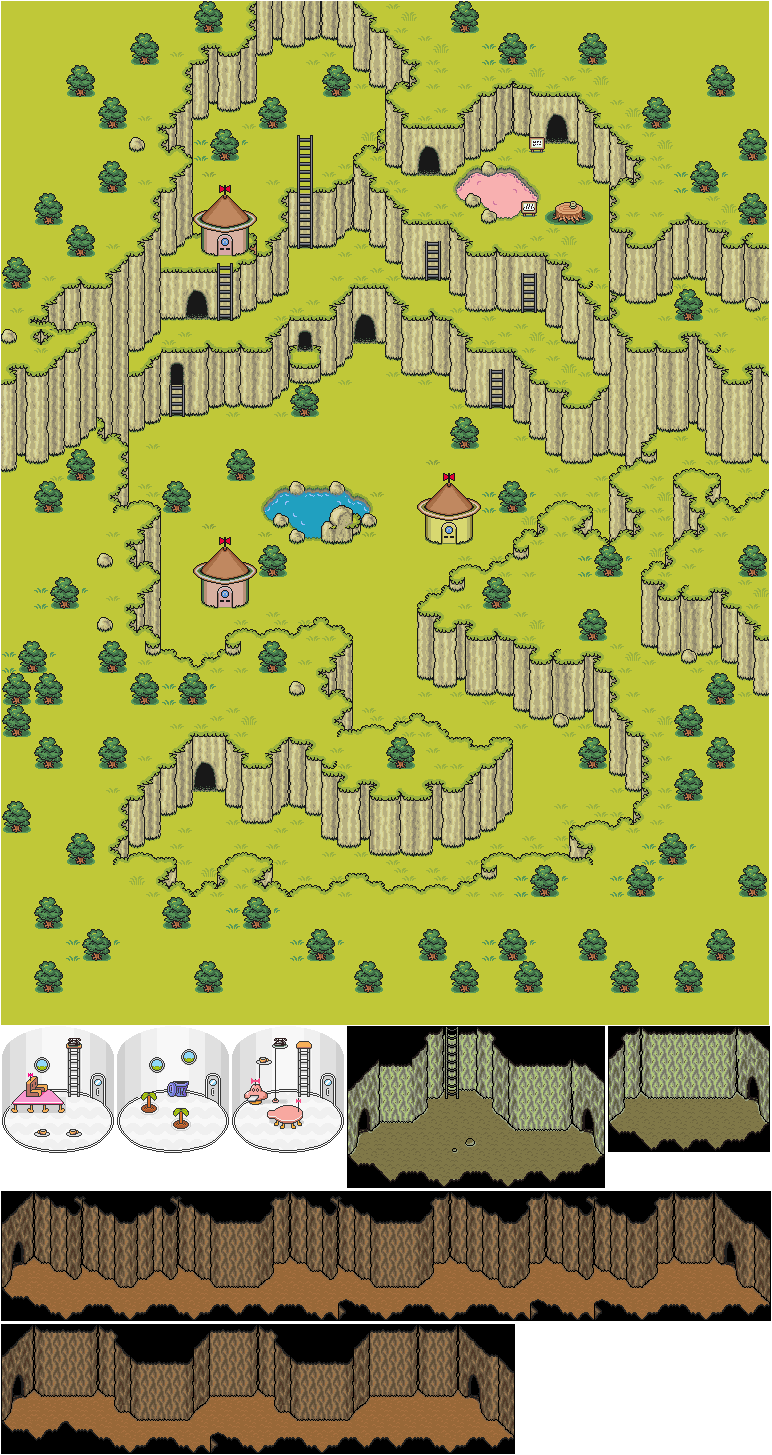
Back at Saturn Valley, buy seven Horns of Life at the store. You'll need these for trading at the Tenda Village.

Sunday, November 5, 2023

Jerry Martin plays Strong Bad's Cool Game For Attractive People - Part 41 of 53


In this entry, we take care of some loose ends, then fly to the sun.


If you use the Stickanee branch on Cutesy Button's garden, you'll grow a flower. Cutesy Button will then tell you that she has given the formula to the scientific community at large. After some fast forwarding, you'll take the Stickanee flower.

Head back to Paris. Once again, Sultry Buttons will be seen, but if you place the Stickanee flower on the podium and fly to Paris on the map again, you'll find Sultry Buttons near the flower. Use the Nunchuck Gun on her first, then talk to her. You'll get a Ruby Ring and a glass pyramid from her as Sultry Button expects you to shower her with priceless jewels, and Dangeresque will tell Sultry to met her in Hawaii at sunrise. Sultry will leave, then you'll need to return the ruby to Professor Experimento.

Head to Venice. Talk to the informant again and ask him what he is doing here (the first option). You'll find out that he is a psychic advistor sent to Venice by higher forces to help Dangeresque in his investigation. He will also tell you that he is a "touch psychic" and that he can figure out the significance of an item just by touching it. Ask about Perducci (the second object), and the informant will tell you that if you have any items that Perducci has touched, he might be able to help you find him.

When you stop talking to him, Dangeresque will realize that he has been in five countries and talked to five brothers, but he was told that there were only three brothers and that something is up. He will come to the conclusion that someone is lying and that he has to figure out who it is and get the info he needs. 

You'll need to head to Tokyo next. Use the Nunchuk Gun on the informant, and mention that the painting was not stolen from any ancient temple (the third option) due from info from two of the other brothers. The informant will give himself up before revealing that he is Perducci and demanding the painting back. Dangeresque and Perducci will fight over the painting, and the disk with the launch codes will fly out. Dangereseque will then grab the disk, foiling Perducci's plans, then Perducci will leave/run away.

If you use the Black Metal Detector near the river in Tokyo, you'll find the Perducci Bullet.

Head back to the Secret Lab. Give the ruby back to Professor Experimento for a Mandrell Sisters reference, then give him the disk. You'll then fly to the sun on the experimental rocket only to be contacted by Uzi Bazooka, who taunts Dangeresque. You'll then have to play Space Circus Catastrophe again. Once you complete the one level, you'll be at the sun.

CELEBRITY NAME DROPS:
- Sam and Max: Use the phone in Dangeresque's office.
- The Lorax: Look at the Stickanee Tree before taking the flower.
- Tri-Lambda: Use the Evil option while talking to Baron Darin Diamonocle.
- Burt Bacharach: Talk to Perducci at the Old Club.
NEW! The Mandrell Sisters: Give the Ruby to Professor Experimento.

CHARACTERS NUNCHUCKED:
- Renaldo: Do this in Dangeresque's office after you answer the door at the beginning.
- Dangeresque, Too?: Do this in Dangeresque's office after you answer the door at the beginning.
- Cutesy Buttons: Do this in Dangeresque's office after letting her in.
- Professor Experimento: Do this in Professor Experimento's lab when you first head here.
- Baron Darin Diamonocle: Do this when you unlock Brainblow Prison and go there for the first time.
- Killingyouguy: Do this when you enter the Old Club for the first time.
- Perducci: Do this when you enter the Old Club for the first time.
- Dadgeresque: Do this when you enter Venice for the first time.
- Monster: Do this when you solve the tile puzzle at the start of the Catacombs.
- Kidnapping Victim: Do this after you defeat the monster in the Catacombs.
- Informant: Do this when you get to Venice after finding out Perducci has the launch codes disk.
NEW! Sultry Buttons: Do this when you place the Stickanee flower on the podium in Paris, leave and come back.

SPACE CIRCUS MANUAL PAGES:
- Performers Page: Click on one of the flaps on the ruby powered rocket at the lab.
- Cover: Check the center hole after extracting the full heart in the Catacombs.
- Secret Weapon Page: Use the Dangeresque and Sultry Buttons photo on the computer at the lab.
- Space Map Page: Use the large knife on the bushes at Strongborneo.

DANGERESQUE 3 MERCHANDISE:
- Renaldo Sheets: Use the Nunchuck Gun on the rightmost Brainblow limits sign.
- Renald-O's: Use the Formula on the Stickanee tree.
- Dangeresque Figurine: Use the rock on the bottles in the Old Club.
- Killingyougy Lunch Box: Use the Branch on the river at Stone Bridge.

OUT & SPIT TAKES:
- Use the safety scissors on Cutesy buttons before distracting her.
- At Cutesy Button's place, walk towards her until she calls you "Strong Bad."
- Check the pedestal and ask Informant about the pedestal in Ireland.

OUTFITS:
- Monocle: In the tuft of grass next to Brainblow State Prison.
- Fedora: Hanging on the wall of the Old Club.
- Top Hat: Use the rock, then the nunchuck gun, on the Whale.
- Boots: In one of the fallen boxes in the Catacombs.

PERSONALIZED BULLETS:
- Killingyouguy Bullet: Use the Black Metal Detector in Brainblow behind Dangecaresque (the car).
- Diamonocle Bullet: Use the Black Metal Detector in Strongborneo near the quicksand.
- Sultry Buttons Bullet: Use the Black Metal Detector in Cutesy's yard near the flowers.
NEW! Perducci Bullet: Use the Black Metal Detector in Tokyo after reaving Perducci.

- Score 15,000 points on Space Circus Catastrophe.

Thursday, May 4, 2023

PrinceWatercress plays Sly Cooper: Thieves In Time - Part 41 of 48


Well, this didn't take long. That's because of a two-hour-long video of me getting absolutely frustrated that ended up getting scrapped. The next part will be a longer video of this that gives a better idea of how long it can take.


For this video, I go for the "Unexpected Package" Trophy. For this Trophy, you need to place a bomb into an enemy's loot bag 60 times with Bentley. While you can use the Heat Seeking ability to get the bombs to home in on the loot bag, it won't work every time, and you're better off getting right behind the enemy and placing the bombs for better results. For best results on that, hold Triangle to pull out and hold a bomb, and when Bentley's metal hand that holds the bomb extends, you'll place the bomb in the loot bag.

This is easier to do on smaller enemies that don't carry lanterns, as they panic when you place the bomb correctly. The larger lantern enemies won't react, but you can still do this with them.

Yes, you can put multiple bombs in the loot bag and have them all count towards the bomb total for this Trophy.

This ends up taking two videos to do; one on the main file after a miserable two-hour-long attempt that will never see the light of day due to my own frustration in making this happen, and another video that takes place on a practice file to give a better idea of how long it will take. The second video will be in the next part.

Achievements:


Unexpected Package: Place 60 bombs in enemy pockets with Bentley.

Controls:


Left analog stick: move
Right analog stick: move camera
X: Jump and double jump (hold X on second jump for hover jets as Bentley)
Square: attack
Circle: 
  • interact (usually with anything that has sparkles) (Sly)
  • steal from enemies (from behind) (Sly, Bentley, any of Sly's ancestors)
Triangle:
  • knock enemies upwards (from behind; press Square to slam enemies down for stealth slam) (Sly, any of Sly's ancestors)
    • press Circle after knocking enemy upward to perform Silent Obliteration (Sly; replaces Stealth Slam; must buy on ThiefNet)
    • press Square for Stealth Slam (any of Sly's ancestors)
  • spin attack (hold to charge) (Sly)
  • throw bombs (Bentley)
  • Thunder Flop (in mid-air) (Murray)
  • spin attack (hold to perform) (Murray)
    • control with left stick (must buy on ThiefNet)
  • Raging Inferno Flop (in air; Murray; must be bought on ThiefNet)

L1: 
  • bomb aim (Bentley)
  • smoke bomb/flash bomb (Sly; must buy on ThiefNet)
  • aim/strafe mode (Carmelita; must hold button down)
    • left analog stick: move
    • R1: shoot (can only shoot in strafe mode)
L2:
  • hold for costume select menu (Sly)
    • hold down to stay in menu; use D-Pad or left stick to make selection
  • hold for weapon select menu (Bentley)
    • hold down to stay in menu; use D-Pad or left stick to make selection
  • hold for fist select menu (Murray)
    • hold down to stay in menu; use D-Pad or left stick to make selection
  • hold for shot select menu (Carmelita)
    • hold down to stay in menu; use D-Pad or left stick to make selection

L3: activate compass
R1: run (hold while moving to perform)
  • Paraglide (Sly; in air; must buy on ThiefNet)
    • Square: Paraglide Dive Attack (during Paraglide; must buy on ThiefNet)
  • Adrenaline Burst (Bentley; double tap to activate; must buy on ThiefNet)
  • Clothesline (Murray; double tap and steer with left stick; must buy on ThiefNet)
  • Cane Push (Sly; double tap; must buy on ThiefNet)
R2:
  • Trigger Bomb (Bentley; must have bomb on field to detonate manually; must buy on ThiefNet)
  • Super Jump (Carmelita; hold and press X to perform; must buy on ThiefNet)

R3: Binocucom
  • Right analog stick: move
  • Left analog stick: zoom in and out
  • R1: take picture (when applicable) (Sly, Bentley)

Start: pause menu
Select: map
  • Left analog stick: zoom in and out, switch between map and status
  • Right analog stick: move map
  • Circle: back

Wednesday, March 15, 2023

PrinceWatercress plays Blood Omen: Legacy of Kain - Part 41 of 41


Do we save Nosgoth...or doom it? Find out today!


Once you go through the portcullis to the south, you'll instantly return to the Pillars of Nosgoth. When you approach the pillars, Kain will come across Mortanius killing someone. The game does not exactly make it clear, but the person that Mortanius kills is Anarcrothe, the only other member of the Circle of Nine you have yet to face, after an argument. Kain then faces Mortanius, who dares Kain to finish him.

From here, get Repel ready and take out the enemies who spawn the skeletons before going after Mortainus and smacking him around. The Repel spell will protect you from the skeletons who try to smack you around as well as the light-green skeletons who pop up and explode.

After enough damage, Mortanius transforms into a demon. Keep casting Repel and watch where Mortanius pops up, then smack him around until he falls into the floor and shows back up. As long as you keep Repel active, Mortanius cannot hurt you.

The two items at the pillars are Anarcrothe's Alchemical Scales and Mortanius' Death Orb, with Anarcrothe and Mortanius being the guardians of balance and death, respectively. Picking these things up during the battle is entirely optional, as Kain will use them to restore the pillars anyway. (It's not Elzevir and Moebius' items at all like I said in the video.)

When Mortanius fall, you can make a save file that takes you right back to the battle of Mortanius. This will allow you to see both endings.

It turns out that after all of this, the last member of the Circle of Nine is none other than Kain. After defeating Mortanius, you get two choices. The card on the left will let Nosgoth fall into ruin, while the card on the right allows Kain to save Nosgoth. If you pick the card on the right, Kain sacrifices himself and sends the vampire race into extinction to purify the pillars for all time and save Nosgoth, but if you pick the card on the left, Nosgoth falls into absolute ruin and Kain rules over it. Nosgoth falling into absolute ruin is considered the canon ending, and it sets the stage for the next game, Legacy of Kain: Soul Reaver.

And with that, you've beaten Blood Omen: Legacy of Kain! Congratulations!

Sunday, December 26, 2021

HCBailly and JB play Secret of Mana - Part 41 of 41


It's time for the final battle against the Mana Beast


It's time to take on the final boss of the game. Before that can happen, Randi has doubts about fighting a Mana Beast as they only want to restore Mana, and there is also the issue of Popoie disappearing if he uses up all of his Mana power. Popoie mentions that his world is separate from this one, and his disappearance will only lead to him going back to his own world. It also becomes apparent that Randi has no choice due to having the Mana Sword as well as his vow with his mother. From there, the fight begins.

First, have Purim and Popoie both cast Mana Magic on Randi, and have Randi equip the sword. This will revive the Sword temporarily. Next, cast Lucid Barrier on the whole party, then case Moon Energy on Randi. The fireball that the Mana Beast shoots at you won't work, but the charge attack will. From here, strike the Mana Beast with 100% shots from the sword with Randi. The Mana Beast will cast Wall on itself and also cast Lucent Beam on your party, but if you keep healing, you should be okay.

Once the Mana Beast goes down, the Mana Fortress comes crashing down, and Popoie disappears. Randi and Purim say goodbye to Popoie and Dyluck, then the Mana Beast turns into snow. Randi and Purim then take one last world tour and meet with everyone from their journey as the snow falls all over the world, then Randi and Purim both head back home, all as the credits roll. You just beat Secret of Mana!

Thursday, December 9, 2021

PrinceWatercress plays Sly 3: Honor Among Thieves - Part 41 of 42


The fifth chapter of the game has the fewest challenges at only four. Last Ship Standing, on the other hand, can be the hardest to do if you try to rush through it. Take that challenge one ship at a time for best results.


Episode 5: Dead Men Tell No Tales

Patch Grab

In this challenge, you'll need to hit the palm trees with your cane to get Jake's attention and lure him towards the anchor. Make sure you keep him in your sights as you do this and stay away from that flashlight or else it won't end well. Also, watch out for enemies, should they be in the area. Once you hit the trees near the wooden ramp, go up the ramp and get to the switch, then drop the anchor once Jake reaches the shadow.

Stealth Challenge

This one can be done very, very quickly. Take out the two flashlight guards with Silent Obliteration, then stay close to the peg leg enemy and keep stealing from him. You are under time pressure, but this one can be done very, very quickly.

Boat Bash

For this one, you'll have to destroy the six armored boats in a limited amount of time. Like last time, you have to ram into them to destroy the armor, then hold R1 and use the red circle to judge the distance of your shot before letting go of the button to blast them. For best results, I go as fast as possible, then get behind the boats and blast them from point blank range.

Last Ship Sailing

For this challenge, you're on the boat and you're destroying pirate ships! While you could take on as many as four ships at once to make this quicker, it also makes it a lot harder, as you cannot repair your ship during this challenge. For best results, you'll want to take on one ship at a time. It may draw this out a bit, but at least you'll have an easier time and you'll be able to preserve your ship's health for longer if you know what you're doing. While you don't have to capture the ships, I do it anyway. Also, if you haven't seen any enemy ships for a long time, check your map. You may be on the edge of the map and you'll need to move away from it to get other ships to show up. All in all, this is one challenge that you can more easily succeed at if you take it slow.

Pirate Treasure Hunt

For the final treasure hunt challenge, start by heading to the northwest where the waterfall is. There will be a mushroom shaped rock; stand there and look at the map. From here, walk 7 paces south towards the tents. There will be a pirate flag to the southeast; walk 10 paces towards it to the southeast and take out any enemies in your way before doing so. You will be near a small boat; face southwest and take 5 paces away from it. You will be near a fire; face south and go 9 paces. Skull Keep will be to the east; walk 5 paces east or southeast. Nearby is a building with a ship for a roof; go 4 paces northeast to get closer to it. From there, it's back to the waterfall from the beginning; go six paces northwest to finish the final treasure hunt.

Friday, November 5, 2021

HCBailly plays Final Fantasy II AGAIN - Part 41 of 65


In this entry, we head down to Castle Fynn's basement to get the White Mask.

Castle Fynn Basement


The chests at the beginning contain worthless items.

Blind is a Body elemental spell and requires Barrier to be Level 7 to block it.

The Parasites are Rank 4 can drain your MP with their physical attacks, and they are weak to Ice.

The Changers - which could be met in the Black Mask Cave earlier - can cast Swap to swap stats with one of your party members, making that specific person much easier to kill. That's not good, as they basically have less than you. They are also Rank 3 enemies, so good luck gaining experience from them. They are weak to Mind elemental spells.

The Brains can cast Fog and Mute on you. They are Rank 5 and are weak to Mind elemental spells, and for some reason, they are considered Werebeast-type enemies.

The Flame Shield will cut the amount of damage dealt from Fire-based spells dramatically. It is also one of the very few items in the game that resists Ice, and it has no equipment weight. There are only two of these in the game.

The Stalagmite is Rank 4, but there is nothing special about it and it not have any elemental weaknesses.

The Blood Sword is really useful for battle. Despite having absolutely no attack power, hitting an enemy with it will drain its HP. The amount you get is directly proportional to the stricken enemy's max HP. This is really good for bosses, as it makes it easier to keep one of your party members alive. Not surprisingly, HCBailly bans it this time around, as bosses will have so much HP that it can deal thousands of HP worth of them, especially when they start getting status immunities. 

Saturday, February 13, 2021

PrinceWatercress plays Sly 2: Band of Thieves - Part 41 of 49


In this entry, we steal an eagle egg, but to do that, we have to destroy the oil mains to create the updrafts necessary to glide to the nest.

Old Grizzle Face


You'll need to play as Murray for this one.

In this job, you'll have to destroy all the oil mains to order to help Sly get the upwards thermal drafts he needs to get the eagle egg. To destroy the oil mains, you'll need to throw fish at them so old Grizzle Face, the bear that is running around in the wild in this episode, will smell the fish on the oil mains and destroy them. Thankfully, Bentley will be constantly launching fish to your current position by throwing bombs in the water. All you have to do is stomp the fish to pick them up, then throw them at the oil mains.

As you do this, you'll have to wait for Grizzle Face to get there, so keep throwing fish at the main you're currently at and keep an eye out. When you see Grizzle Face show up to commit his act of destruction, hightail it out of there. You have four oil mains to take out in order to complete the job. Watch out for enemies, 

Thermal Ride


After completing "Old Grizzle Face," this is playable. You'll need Sly for this one.

You'll need the help of the Canadian eagles to win the Lumberjack Games. To do that, you'll have to steal an eagle egg and bring it back to the safe house, and you'll be able to use the parents' protective instincts against Jean Bison. Now that the mains have been destroyed, the updrafts created by the destruction will be enough to take Sly to the nest.

If you go too low at the updrafts, you'll be burned to a crisp, so stay as high in the air as you Paraglide from the top of the lighthouse. When you Paraglide into an updraft, the camera will focus on the next updraft you need to go to, so you can always move forward with the left stick or D-Pad without having to go in any other direction. 

After the updrafts, you'll want to steer well clear of the eagles. If even the wings clip you, you're starting the whole job over. Once you reach the island, use the hooks to get to the nest and get the eagle egg. From there, you can launch yourself off the hooks of the buoys, spire jump onto the top of them and make your way back to the mainland. Get to the safe house, and the job is done.

It's now time for the Lumberjack Games. During the log chopping contest, Bentley will have to place the eagle egg in Jean Bison's pants as Bison's turn is up so that the eagles can attack. For the climbing competition, Bentley will have to utilize grappling hook guns to grab onto Jean Bison with and pull him off the wall, keeping him from finishing first in that competition. As for the log rolling competition, Sly will have to grease the logs to keep Jean Bison from winning.

Controls

D-Pad/Left Analog Stick: move
Right Analog Stick: move camera
X: jump and double jump
Square: Horizontal Attack
  • horizontal attack (as Sly)
  • slam enemies launched into the air from behind (as Sly)
  • hook punches (as Murray)
  • Thunderflop (as Murray; in mid-air only)
  • crossbow swipe (as Bentley)
Triangle: Vertical Attack
  • vertical attack (as Sly; used to knock enemies into the air)
  • downward dive (as Sly; in mid-air only)
  • uppercut (as Murray)
  • drop bomb (as Bentley)
Circle: Action button (near blue/green/purple sparkles and character icons)
  • pickpocket (as Sly)
  • stomp (as Murray; use Square to throw object/enemy)
R1: hold to run

Select: Gadget Grid
  • Control Pad: highlight gadget
  • X button: confirm gadget
  • L1, L2, R2: assign gadget to button pressed

L1, L2, R2: use gadgets assigned to button pressed

Start: pause menu
  • Control Pad: select menu choice
  • X button: confirm choice
  • Start: un-pause game

L3 (press the left analog stick): locate beacons for mission objectives

R3 (press the right analog stick): Enter and exit Binocucom for first-person view
  • Left analog stick: look around
  • Right analog stick: zoom in and out (with up and down on right stick)
R1: 
    • take pictures with spy camera (as Sly; when applicable)
    • shoot sleep dart (as Bentley)

Hacking mini-game controls:
  • Left analog stick: move
  • Right analog stick: aim and fire gun

Saturday, July 11, 2020

PrinceWatercress plays Terranigma - Part 41 of 50


In this entry, we rescue ex-Princess Elle, Meilin is no longer a jerk, and we're finally able to create that airplane.

Turns out there was treasure part Magirock #81. Keep heading to the right and follow the path, then go north at the fork and jump over the pit to the east. You'll find an L.Bulb and 300 Gems.

From there, go back to the fork and take the path left. You'll be in the sewers. Make your way north Magirock #82 will be on an island to the east connected only by a thin wooden bridge. Enter the door there.

From there, follow the path again, and you'll find the 3 Part Rod. It raises your defense slightly, but the Enbu Pike is still stronger than this. Pick your weapon carefully.

Head back to the entrance. Head up the stairs to the west, then go northwest and enter the doorway there. Take the pots of water and throw them at the candlesticks to put the candles out. When you extinguish all six candles, the wall to the north will open up, revealing a door.

To the north is a bunch of paired statues. The statue to the north nearest you, however, is not paired. Go up to the wall across from it and interact with it, and you'll find the hidden switch that Meilin was talking about. Push the switch, and you'll open the door to the far north. Enter that door.

In the next room, run into the wall to the north with the Speed Shoes. You'll finally be in the room where Princess Elle is held captive. Talk to her. She'll tell you that she never thought she'd see you again, but here she is, seeing you again. Suddenly, Royd appears. He challenges you, but Fyda shows up and takes your place, telling you to get Princess Elle out of the castle. Get out of there, and you'll eventually meet Meilin. Follow her south, then east near the entrance, then north. Meilin will tell you that there is a drain up ahead, and it will lead you outside of the castle.

We go back to Fyda and Royd, and Fyda has the feeling she's met Royd before. Royd wants to know why Fyda is protecting Princess Elle, but Fyda says she has to no matter what. Royd lets her go, telling her to protect Elle.

You'll be back to Ark and Princess Elle. When you progress, Elle will tell you that she will wait for Fyda, as she feels that she can't leave her due to Fyda caring for her so much. She lets you go on ahead. Head east to the nearby door. Elle will then say that she can't be a burden to you anymore, and that there are things she must do.

The scene switches to Royd and Mr. Wong. Mr. Wong is ticked that Princess Elle has escaped, and that if Dr. Beruga at Mosque finds out, he will be very angry. He commands Royd to catch Elle, but when Royd finds out that Dr. Beruga is the mastermind behind whatever's happening, Royd turns on him, saying that his closest friend was one of the people killed in what was called "Preparation." Turns out Royd was a spy, and that the friend in question is King Henri. Royd then slowly approaches Mr. Wong as if to kill him.

You'll then regain control of Ark again. As you go through the sewers, Meilin will show up and say that she's managed to trick their pursuers with a fake image of Ark. Suddenly, the castle will begin to quake, and you'll be back at the entrance, unconscious. You'll be surrounded by Meilin and Perel. You'll find out that Dragoon Castle suddenly collapsed and that you and Meilin were shot up the drain. Thankfully, Ark is all right. You'll find out that the price of metal is going back down, and we can finally help Will.

Meilin apologizes again, but thanks Ark for not giving up on her. She heads back to Lhasa. Yomi shows up again, and asks what happened to Princess Elle and Fyda, then says that we should head back to Nirlake.


Nirlake


If you talk to Mr. Lon in Yunkou, he'll tell you that you did what you had to do and that Mr. Wong brought it on himself.

Head back to Will's house. Will and Anita will be there. Talk to Will, and he'll tell you his airplane should be finished as metal is available again. The airplane is now yours!

From the runway, press A. Once you're in the air, use L and R to ascend and descend respectively and press Y to accelerate. To land at an airfield, fly low and press A.

With the creation of the airstrip, Freedom has expanded once more.

Friday, May 17, 2019

HCBailly plays Final Fantasy IV (Super Famicom) - Part 41 of 70


After exploring Eblana Castle, we finally find out what happened to its people.


If you go into the lower area on the west side of the castle, head back towards the door and turn right before entering it again, you'll find a hidden passage to one of the treasure chests in the room.

Equip the Ice Spear on Kain before taking on the Steel Golem and the Skulljars. The Steel Golem is weak to ice; the Skulljars are weak to fire. Rydia can kill the Skulljars easily by summoning Ifrit.

The Slumber Sword puts enemies to sleep, but it is also a powerful throwing weapon.

The second floor has two Bacchus' Wines in jars as well as Mute Arrows that inflicts Mute on enemies.

The Bomb Spirit is more powerful than the Bomb Fragment and allows you to use Exploder to deal damage equal to your HP on an enemy. Of course, you'll kill the party member that uses it, so be ready to revive them.

The path to the Right Tower has a hidden passage behind the left column in the upper-left corner. Kuar's Whiskers is an instant death item that kills whoever you target with hit with it.

Go right when you go up the stairs to hit the switch. You'll find an Exit, an Ether, a pair of Hermes Shoes in a jar. To get the chest next to the hole, you'll have to find a hidden passage. You'll get monsters, however. The Kuar and Lamia have nasty counter-attacks if you don't destroy them in one hit. Have Rydia use the Apparition Rod on them to hit them all with Piggy. Using Kain's Jump command can make quick work of the Kuars.

The Blood Spear reduces all base stats by five and drains HP from opponents, but it's not a very good weapon due to the stat decreases.

The basement has two Ethers and a chest with monsters. The Mad Ogres are immune to Piggy and Toad, but you can Mini them. Have Rosa try to cast Mini on them to keep them from using most of their spells. You'll get another Silver Apple for your efforts.

That's everything for Eblana Castle. Take the Hovercraft over the shoals near the castle to get to the Eblana Cave.

Eblana Cave


The Shurikens are a weapon that you'll be needing pretty soon.

The Bloody Bats are weak to fire.

When you make it to the basement, you'll find out that there are humans. These are the people of Eblana, and they are now living in the cave now that Eblana has been decimated.

Tuesday, June 5, 2018

HCBailly plays Terranigma - Part 41 of 75


We finally take on Bloody Mary - one of the hardest bosses in the game - and rescue Columbus.


Sylvain Castle by xyzbiliu. Litz town map by Amir Azadur.

Sylvain Castle


It's time to finally head back to the portraits. When you do, the jewels will move into their rightful places. When that happens, you'll see a cutscene of chains being pulled down. A chandelier will come down and hit the floor. When you get back to gameplay, you'll find a hole in the floor. Go down it.

You'll then face what looks like four girls in pink dresses. Here, stand still and strike the one behind you when they come to a stop. If you need to, face the south wall and strike the one to the north when they all stop to ensure you get past that battle.

From there, go to the upper-right corner. When you talk to the guy there, you'll enter another room. You'll play a game of Simon Says. Do as the girl there says, and when you finally get to her, strike her. You'll be teleported to another room. It's boss time.

You'll fight against Bloody Mary. Stay away from here and use ElecRings until she falls. Hope you brought nine of them, or you're going to have a hard time. It is recommended that you be Level 23 for this battle.

Once you take down Bloody Mary, you'll finally be back near the man you tried to talk to. This is Columbus, and he has been tortured by the queen. When he asks why you rescued him, pick the first option. Columbus will then tell Ark why he was being tortured: because the three Sylvain Princes died on his voyage, but he feels he took the torture to atone for his own sins, even though he feels he cannot tell you the real reason. He says that royalty are all the same, much like Loire's King Henri and Sylvain's Queen. He plans to reveal his secret when the real hero shows up.

He says that when he discovered the new continent, he was convinced that everyone isn't that different, and he intends to spread his knowledge of navigation. He heads back to Litz, and you automatically head back there with him.

When you head back to Litz, you'll be at the hospital. He will have taught all the sailors at the port his navigation techniques, so you should be able to travel to the Americas. He then goes to sleep.

Litz


Go back to the girl at the counter at the hospital. When she asks if you want fever medicine, say yes. You'll get the Fever Medicine, which Emilio has now completed. If you talk to Emilio, he'll tell you that Columbus is totally exhausted and that he will be resting here for a while.

If you haven't done it yet, get the maximum amount of bulbs and Pretty Flowers before you go to the new continent.

Sunday, March 4, 2018

skorch82 plays Brave Fencer Musashi - Part 41 of 70


We become the mayor's assistant for a while, but then we find out that the job is not all that it's cracked up to be...

You'll find out that you'll be the mayor's assistant for a little while.

There's a good sporting chance that you've probably already done the well before coming down here. If not, that's your first assignment. Thankfully, we've already done this, so the last entry or two should be able to explain how to do it.

The next is getting the Gondola fixed. You'll need three Carpenters and a Gondola Gizmo. At this point, you should have all of them rescued. As for the Gondola Gizmo, you'll have to head into the Scrap Depository in the mine to find it. Mrs. Govern will ask you to ask Wid about it. For now, though, head back to the castle and you'll find out which Carpenters are there.

Carpenter Carvey (CarpentA) will tell you the Gondola Gizmo has a gold rim and looks fancy. Carpenter Cubey (CarpentB) will tell you it looks like a wheel. Carpenter Dicey (CarpentC) will tell you it has four carefully calculated holes.

So...a fancy wheel with a gold rim and four carefully calcualted holes. Got it.

You can talk to Wid about the Scrap Depository, but you won't get much out of the conversation.

Head back to the Scrap Depository, which is the path to the right after dropping between the blades of that huge fan. Now that you can double jump with the Legendary Shoes, you can explore this area now.

Watch out when traversing the gondola platforms here. Some of them are containers that hold liquid Binchotite from the Binchotite pool below, and touching it will both damage and Poison you. Ditto if you fall into the pool of liquid Binchotite at the bottom. Thankfully, Assimilating the worm enemies here will allow you get the Antidote ability in case this happens.

Believe it or not, the one you're supposed to pick up is a fancy, gold-rimmed wheel with one hole in the center and the other three holes around it.

Friday, September 1, 2017

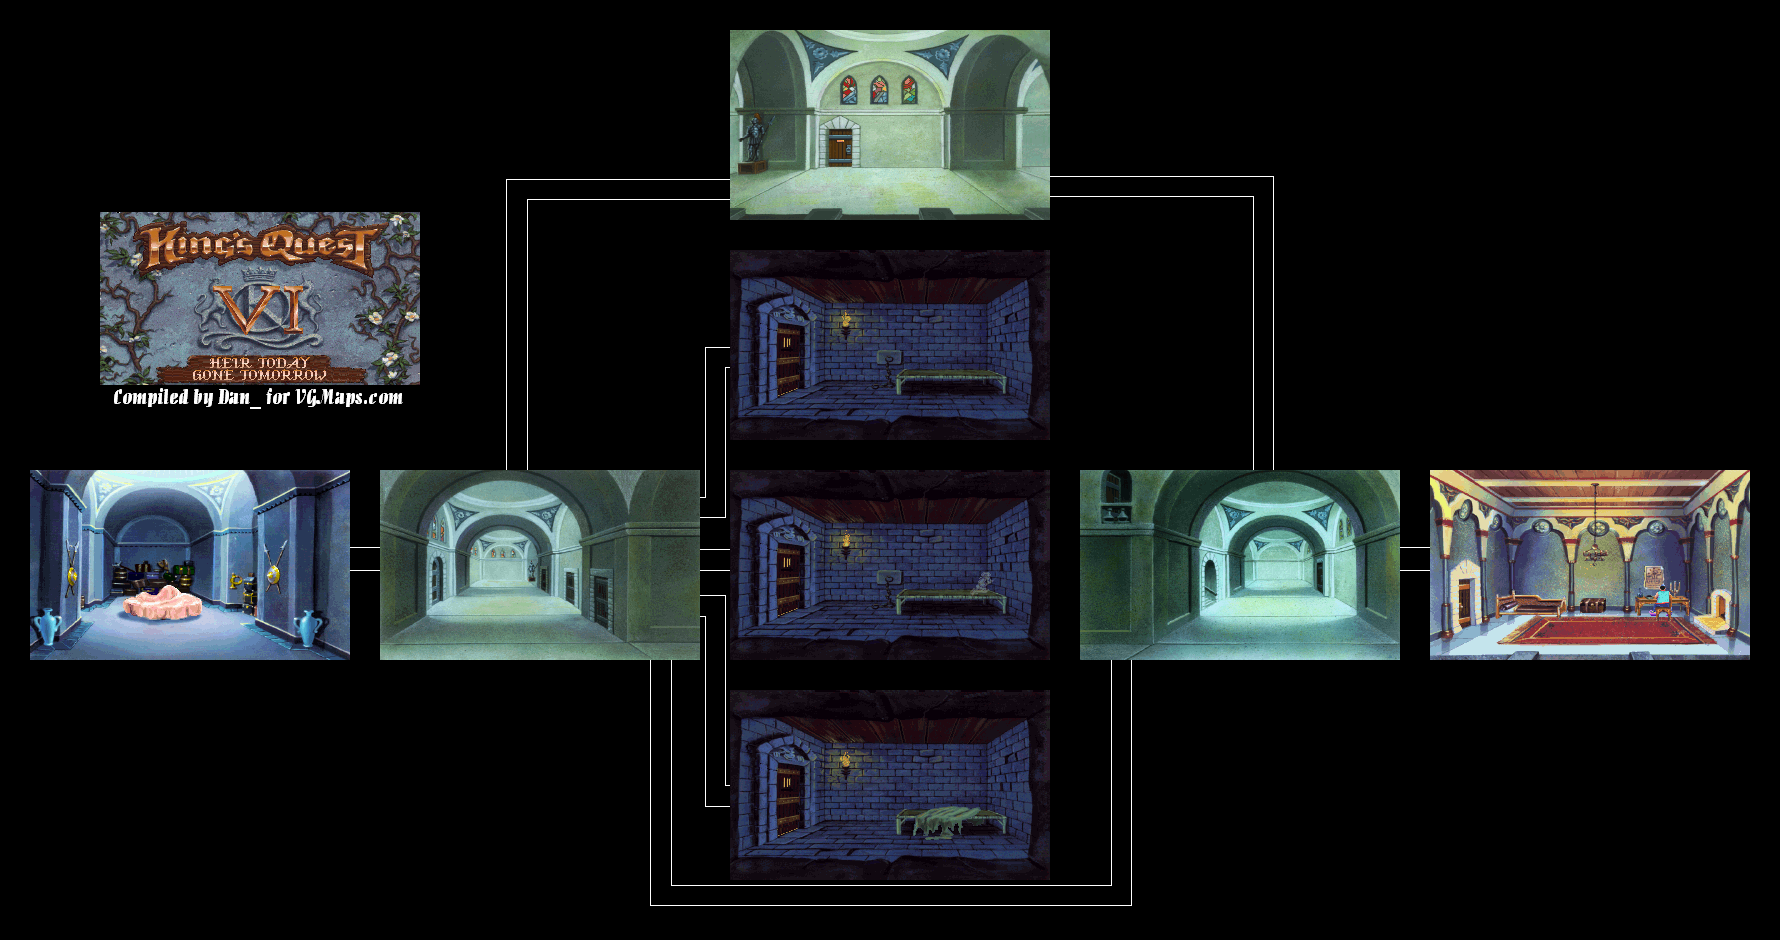
Dilandau3000 plays King's Quest VI: Heir Today, Gone Tomorrow - Part 41 of 43


We finally meet Cassima! But time is short...

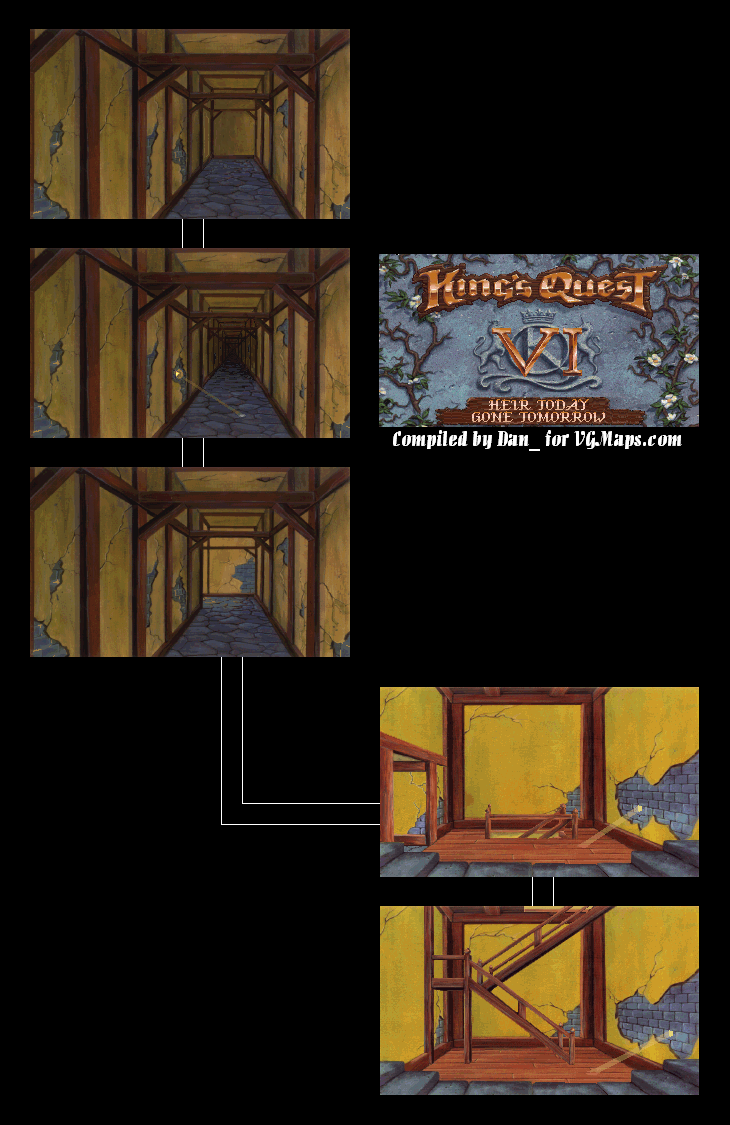
All maps by Dan_.


Go back to the stairs and look through the hole in the wall. You'll finally meet Cassima. Again, Cassima tells you that you're endangering yourself and tell you to do what you can from your end. When she wants to look at you, give her the letter in the Vizier's chest to give her something to prove her suspicions, and give her the dagger you got from Lady Celeste.

After some time, Cassima will hear someone coming. You'll hear her cry briefly, then silence.

Climb back down the stairs and exit the secret passage.


Go back to the west end of the basement and speak to the door in the  west wall with the speech bubble icon. The password is "ALI ZEBU." Alexander will intimidate the door into opening along with the password.

Inside is the treasure room. A small table is covered with a drapery with the initials A.A. - Abdul al-Hazred. Something's under it...

Thursday, May 18, 2017

HCBailly plays Final Fantasy III - Part 41 of 44


We take on the other Dark Crystals in preparation for the final boss!


The Dark Water Crystal will spawn an Echidna. Unfortunately, it's the Greco-Roman mother of all monsters and not the spiny anteater. I'm disappointed.

If you have a lot of Shurikens, use them and cast Haste on your Ninjas to do some "quad-nine" hits. The fabled 9999 hit strike is a reality here.

The Shurikens have to be equipped on at least one hand on every turn. When you use them, you'll have to remember to equip them again in order to use them.

The Dark Earth Crystal will summon Ahriman. Fight this guy much like you did Echidna, and keep your health high so that Meteo doesn't kill off your party. Be sure to equip Ribbons on everybody.

For the Dark Fire Crystal, you'll face the Two-Headed Dragon. Put your Ninjas in the back row and equip the Shurikens. Also, wear the Crystal Helmets as all of this boss's attacks are non-elemental.

Once you've beaten the four Dark Crystal bosses, you'll finally be able to go up the stairs across from the entrance and head to the final chamber.

Sunday, February 19, 2017

Chilean Retrogamer plays Wario Land 2 - Part 41 of 57


It's been fun, but now we have to get out of here and find Captain Syrup.

Chapter 3: Ruins at the Bottom of the sea

Story 4: Escape from the ruins!


0:07 - We see some strange blocks on our way up to the door to the right.

0:18 - Besides some coins, there is also a switch to toggle here.

1:29 - The blocks have been moved, allowing us entry into this pyramid.

1:35 - There are a couple of doors here, but let's take the one to the right of center after getting the coins.

2:38 - More coins, and another switch to toggle the blocks here.

2:55 - With the blocks moved to the left, we can now enter the door at the top. This is the treasure room, where you can win a lightning bolt.

3:41 - The switch will have to be hit again so you can get up here.

3:47 - By making your way to the top and hitting the switch in the door inside, you'll be able to continue.

4:38 - Break through the walls here to find a switch as well as some more coins.

5:31 - Not hitting the switch takes you to the boss. To beat this big fish, swim into it from underneath to hit it in the head while its mouth is closed. Otherwise, you're going to get eaten and spit back out, forcing you to restart the battle. You'll have to time it right for the last hit.

9:25 - Another picture piece.

Friday, June 10, 2016

angryponcho plays Spyro 3: Year of the Dragon - Part 41 of 41


Here it is, the end of the Spyro 3 guide - which took me four months at the time of completion because of other guides, moving out to an actual house, getting a laptop, trying to cover at least one game a week, and other things. Enjoy!

Skill Points


Sunny Villa


Flame all the potted plants without dying or entering a Challenge Portal to get a skill point and an extra life. (If you enter a Challenge Portal for some events like this one, you'll have to start all over again when you come back out of the Portal area.)

Once you get both Skateboarding challenges done, you can go for the course record of 3200 points. This one isn't too hard, believe it or not. Here's all the moves you can do, courtesy of JellyBeanLord.

Molten Crater


In that Challenge Portal area involving the two thieves, use the Supercharge on the ramp, then run into that cracked wall. You'll find an extra life butterfly, and if you get it, you'll get the Skill Point that goes along with it.

If you bring the tiki heads to the platform at the beginning of the level with Sgt. Byrd before you place them on the bodies, you'll get a skill point and an extra life. This takes a little bit of time, but it's well worth it!

Icy Peak


Remember the pedestal one of the thieves comes down from in that Challenge Portal area? Well, you can access it via the whirlwind in this area. Glide to the pedestal and land on it successfully to get a Skill Point and extra life that is way too easy to miss out on.

Seashell Shore


Near the exit is an aquatic chicken. (Yeah, a swimming chicken. Wrap your head around [b]this[/b], people.) It will swim around in a path much like the thieves, and if you can charge into it, you'll get a Skill Point.

Sgt. Byrd's Base


You may have noticed the gophers in the level. You'll have to bomb and/or shoot all the gophers that pop out of the holes in the ground. If you get too close, they'll immediately retreat back into the ground until you're far enough away from them again. They're slightly fast, but you [b]can[/b] get them.

Spooky Swamp


Destroying all the Piranha signs without leaving the level or entering a Challenge Portal gives you a Skill Point.

Enchanted Towers


You'll have to get 10,000 points on the skateboard course to get the Skill Point here.

Bentley's Outpost


There is a box you have to push off a cliff. Do that, and you'll break the box and get a Skill Point for your efforts.

Frozen Altars


If you can finish off the Yeti in the second fight in two rounds or less, you'll get a Skill Point for your efforts.

Lost Fleet


After you get the two Dragon Eggs for the skateboard park, you still aren't done yet. Since you probably have a good feel for the course now, run the course one more time. This time around, do three laps in less than 1:45.00. You'll get an extra life and a Skill Point if you're quick enough.

Charmed Ridge


Shoot the four windows in the Sgt. Byrd section out to get an extra life and a Skill Point. It should be noted that if you ever need an extra life or a complete health refill, you can always go for a Skill Point you've already achieved. This comes in very handy during the third part of the Cat Witches fight.

In the cave with the Superflame power-up, climb the wall to the left. Then, jump to the small platform on the right. There's a funny-looking platform that you'll have to glide to, and from there, climb onto the edge behind and to the left of you. There is one tower that is not on an island to your left. Glide to it and you'll get an extra life and a Skill Point.

Agent 9's Lab


If you blow up all seven palm trees in the level with the bombs, you'll be able to get a Skill Point and an extra life for your efforts.

Fireworks Factory


In the first room of the Agent 9 area, there is a red box that is pretty high up. Shoot it, and you'll get a machine gun with 500 rounds, a Skill Point and an extra life (which also amounts to full health restoration if you're really needing it at the beginning). This makes the Challenge Portal area a lot easier.

Haunted Tombs


If you swim into the stream just after the beginning of the level and enter the dark alcove, you'll get a skill point and an extra life that's all too easy to miss.

Desert Ruins


Once you beat the Challenge Portal objective, you can freely ride the manta ray. Use the missiles to destroy all the seaweed in the underwater area to receive another skill point and an extra life.

Dino Mines


In the Challenge Portal area, there are seahorses interspersed throughout the flooded mine shaft. If you take them all out, you'll get an extra life and a Skill Point.

In the Agent 9 section, you'll take a left at one point and take on three T-Rexes with revolvers in a narrow corridor that's somewhat hard to see past. In this section, there is an orange dinosaur behind them. Shoot him and you'll get an extra life and a Skill Point. He's hard to get if you're not paying attention, so be ready.