Showing posts with label part 38. Show all posts

Sunday, February 22, 2026

PrinceWatercress plays Super Mario Odyssey - Part 38 of 92


We're winding down Seaside Kingdom here...which means I have to play volleyball to get the last two. Thankfully, there's a trick to it, and I mention it in the next entry.


I eventually have to play the volleyball game. To play it, walk towards the volleyball court and head towards the net to start a game. The first Power Moon requires hitting the ball 15 times, but the second one requires hitting it 100 times. I almost do it legitimately with just Mario, but I mess it up at the last second, no thanks to the ball speeding up after reaching 50 hits. There's a trick to it, and I do it in the next video.

30. Moon Shards in the Sea - Near the Rolling Canyon checkpoint, there is a scarecrow underwater. Throw your hat at it to open up an underwater area full of eels popping out of the ground and find the five Moon Shards. Collecting them all will net you a Power Moon.

33. Lighthouse Leaper - Possess the Glydon at the top of the lighthouse and fly over to the Glass Palace (the giant glass where the fountain water collects), then talk to the Bubblanian near it. (If you talk to the Bubblainain before hand, he will mention Glydon's boast of being able to glide to the Glass Palace, which is a hint that you need to do this for a Power Moon.) Talking to the Bubblanian will net you a Power Moon.

34. Good Job, Captain Toad! - Captain Toad is on a high platform. To get to him, you'll need to take control of a Gushen, fly to the "Above Rolling Canyon" checkpoint, then fly to the platform where Captain Toad and his tent is. Talk to Captain Toad to get a Power Moon.

35. Ocean Quiz: Good! - Go back to the Sphinx near the Ocean Trench East checkpoint and answer all five of the Sphinx's questions.

What is the name of this land? Bubblaine

How many fountains did the monster seal? Four

When you, brave traveler, turn into a red fish, what ability did you get when you shake the Joy-con? Attack

There is a room in this kingdom that can only be entered if you’re wearing the chosen clothing. What is that clothing? Resort Outfit

Why am I here? To ask questions

37. Beach Volleyball: Champ - Head to the volleyball court near the Beach House and hit the ball 15 times to get this Power Moon.

47. Hurry and Stretch - There is a hat door in the northeast corner of the kingdom. Open it to enter an island in the middle of a vast ocean of lava. Take control of an Uproot and use the stretch ability to get to the top for a Power Moon before the island sinks into the lava. Watch out for the rock snakes that move around as you make your way up.

48. Stretch on the Side Path - Near the end of the area where you find Power Moon #47, there is a side path next to the narrow section leading to the end. There is a Power Moon on this side path.

50. Found with Seaside Kingdom Art - To find this Power Moon, you'll need to find the Hint Art in the Seaside Kingdom, which is found here. Head to the Metro Kingdom and go to where the words "KEEP CLEAR" are on the road near the Main Street Entrance. Ground pound above the second "E" in "KEEP" to find the Power Moon.

Friday, March 7, 2025

PrinceWatercress plays Wario Land II - Part 38 of 51


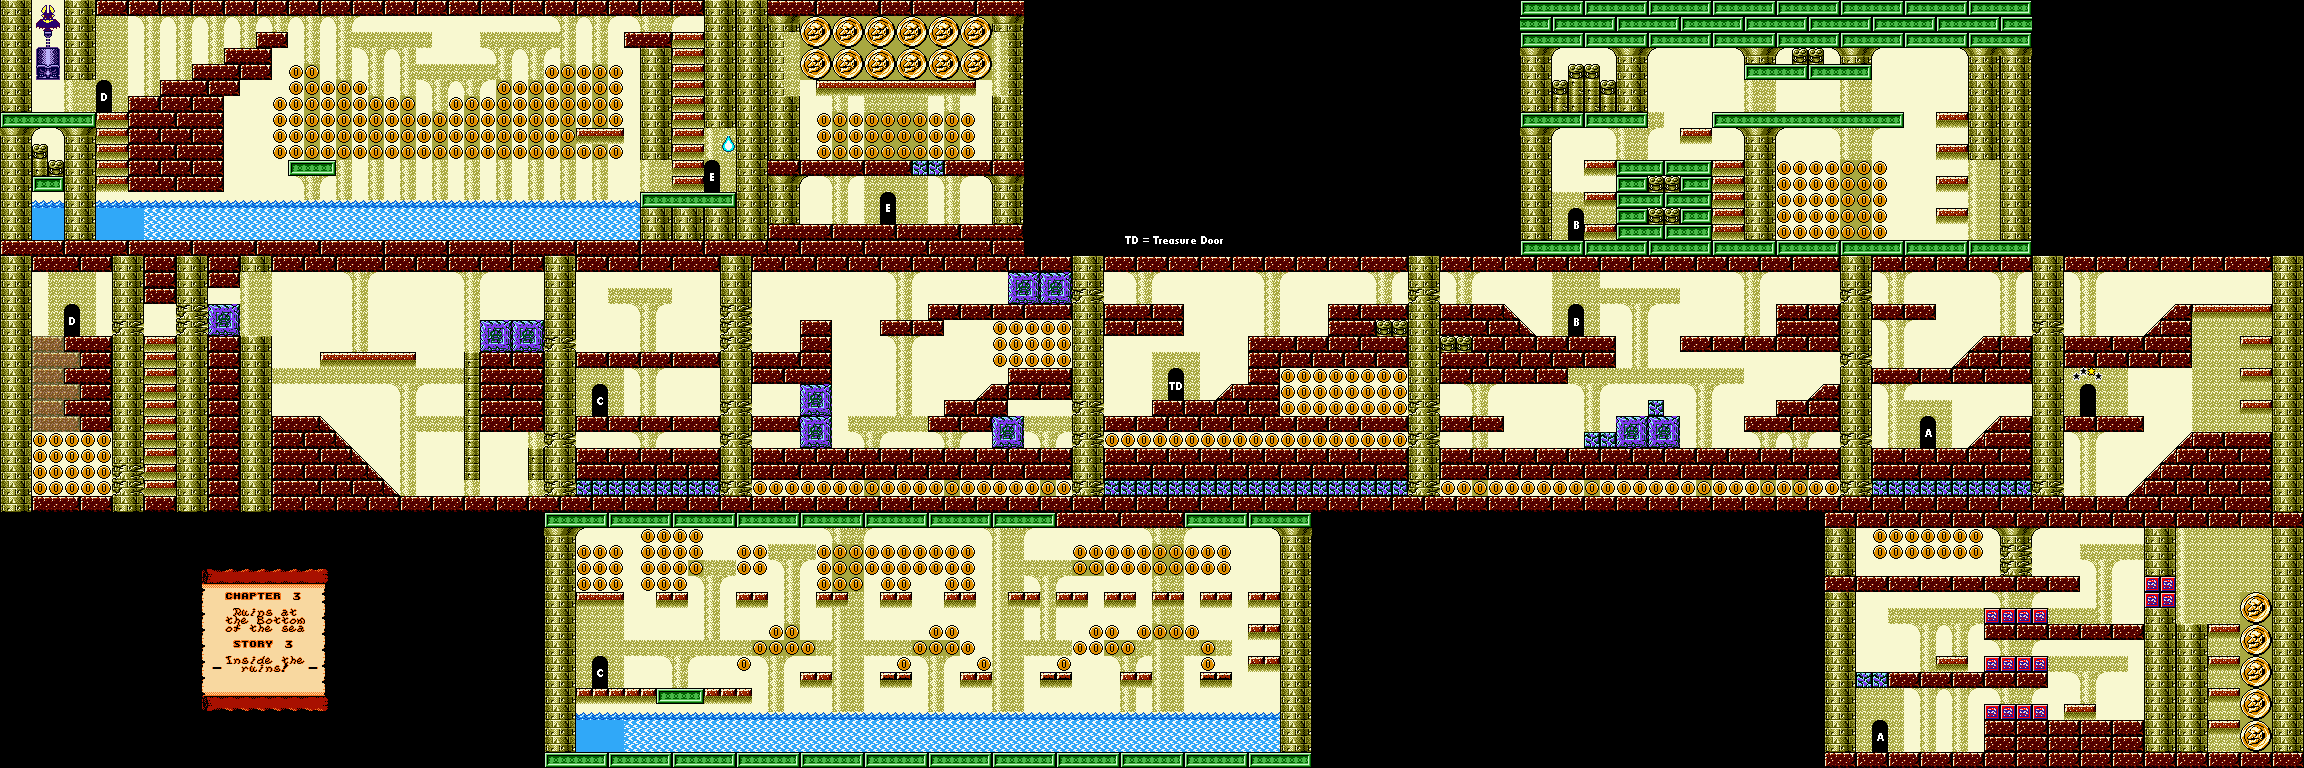
Despite the small size of this stage, there's going to be a lot of rolling, jumping and the occasional breaking of blocks. But if you can get it all done, you'll have a ton of coins and the treasure from the treasure room.


Chapter 3: Ruins at the Bottom of the sea

Story 3: Inside the ruins!


Prepare to be doing a lot of sliding down slopes and jumping while rolling just to open everything up at the. Not surprisingly, this is why the video takes so long.

It takes a bit of effort to get into the room where you can turn into Flat Wario with the help of the bat carrying the weight, but there is a lot of coins in that area.

For the room with the fish, tackle jump your way from platform to platform to get past the fish.

The treasure room is in the middle of the starting area, and if you beat the mini-game, you'll win what looks like a leafless tree.

In the upper-left corner of the starting area, you can butt bounce the left side of the area to find twenty hidden coins. I forgot to get these while rushing to do as much as I could as quickly as possible.

Sunday, October 6, 2024

PrinceWatercress plays Chrono Trigger (Super NES) - Part 38 of 70


In this entry, we finally bring Crono back. Let's get to work.

First | Previous | Next | End


When you go into the cave across from the save point, you'll face a Krakker and you'll also be able to get a Star Scythe for Magus. Afterwards, you'll face your second Lavos Spawn. Fight this one just like you did the first one. Once you beat it, go back and save so you don't have to do this again.

In the next section, you'll meet the second blue Pozoyo doll, who will tell you to be careful not to fall. Once you move past it, the wind will push you downwards, and if you fall off the edge, you'll be taken back to the save point. Thankfully, you won't be pushed back very far.

After facing up to as many as eight Krakkers as they slide down the next screen, you'll soon face the third and final Lavos Spawn on Death Peak. When you beat it, the shell will remain. Push it to the ladder that you cannot reach, then press Up and A on the shell and you'll climb up to the ladder so you can climb to the top.

You'll then reach the top of Death Peak. The pendant will react with the Chrono Trigger, which will soon shatter. At first, it seems as if this was all for nothing, but an eclipse is seen at the clifftop. You'll then be taken to the moment in time where Lavos kills Crono. From here, go up to Crono, hold Up and press A, and you'll replace Crono with the clone. You'll then bring Crono back from that moment in time to Death Peak, where he will be alive again.


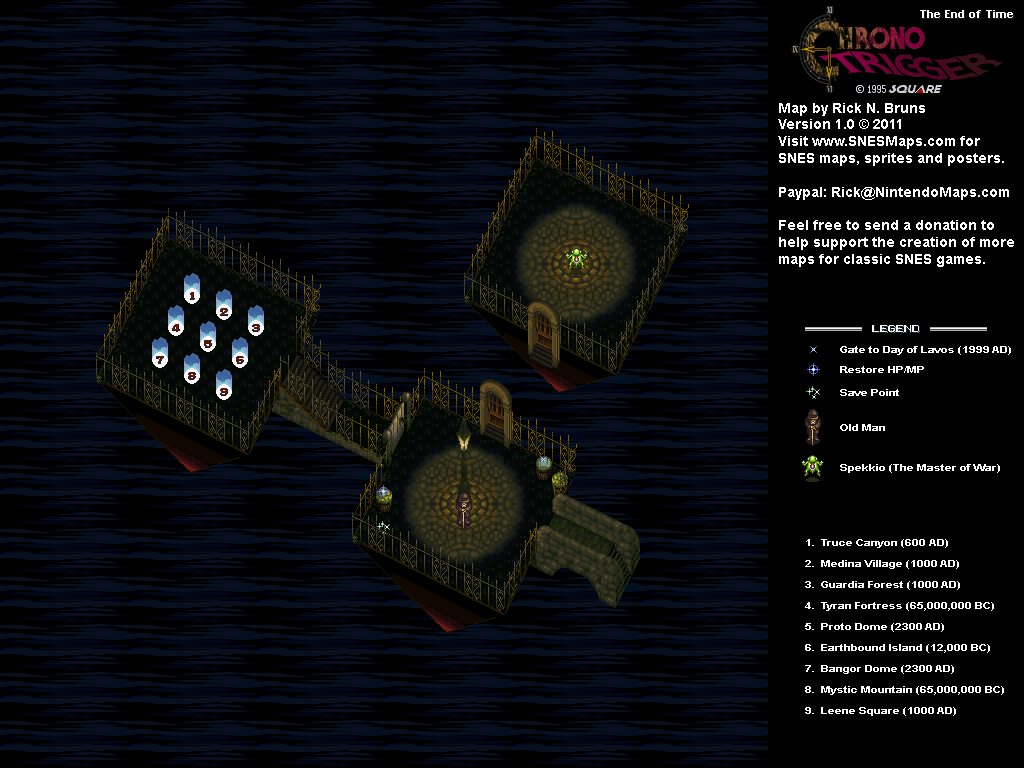
You'll then head back to The End of Time. From here, you can fight Lavos or head to the Black Omen, but we'll leave all that alone until later. If you talk to Gaspar, you'll find out that you have some side quests: which are as follows:

"In the Middle Ages, a woman's sheer determination brings a forest back to life..." - In 600 A.D., the Sunken Desert will show up near Fiona's house. This side quest only shows up if you told the woman with the mystical sapling in Zeal Palace to secretly plant the sapling. Head to the Sunken Desert and face the monsters, and the trees will soon be able to grow again.

"A fugitive in the Middle Ages, Ozzie, maintains an evil hideout..." - In 600 A.D., Ozzie has his own fort. You'll have to face him one more time.

"There's a task to be done in the Future, where machinery originated." - There is a place called Geno Dome in 2300 A.D. on an island we could not reach until now. We'll need to head there.

"And there's a very special stone that can shine its light on each generation, from the distant past to the far future..." - In this quest, you will have to find the Sun Stone.

"There's the ghost of a lofty knight, slain by Magus in the Middle Ages, who haunts the present..." - In Chorus Village in 600 A.D. and 1000 A.D. lies the Northern Ruins. You'll need to head there to put Cyrus to rest once and for all.

"There's an object in the Middle Ages that sparkles like a rainbow..." - The Rainbow Shell has been found in 600 A.D., and you'll need to go get it.

Sunday, June 30, 2024

PrinceWatercress plays Ratchet and Clank: Going Commando - Part 38 of 54


We don't do much in this entry, but what we do accomplish here lets us get that little bit closer to 100% completion.

First | Previous | Next | End

5:23 - There's an Infiltrator puzzle on the route to the left of where we start that we didn't solve. For this one, go up, up-right, right, up, down-right, right, up, up, right, down, right, down, right, and up-right. Your reward: a Nanotech Boost.

9:50 - At the Megacorp store in Oozla, go to where the curved wall is and climb up it with the Magneboots. The tube inside leads to a boss battle. Leap from lily pad to lily pad as this enemy approaches you. You don't want to be close enough for this thing to eat you, and you also don't want to go way too far, either, as that leads to this enemy submerging and re-appearing much closer to you. This enemy can also hit you with its arm and shoot down lily pads with its fireballs.

The Heavy Bouncer is a good weapon to use against this thing if you don't have any ultra-powerful weapons. If you run out of ammo on that, use the HK22. Beating this thing will net you the Box Breaker, which allows you to smash boxes close to you when you jump and strike with the wrench.

Once you get it, move around the Megacorp Store and use your newly earned ability all over every room. If you destroy everything, you'll get the message telling you that you got a Skill Point.

Skill Points:

Smash and Grab: In Oozla, break everything in the Megacorp Store. You'll need to get the Box Breaker from the boss battle inside the store that can be accessed with the Magneboots before you attempt this.

Controls:

As Ratchet:

Control Pad/Left Analog Stick: move
Right analog stick: move camera

X:
  • Jump and double jump (hold button after double jump to use Heli-Pack or Thruster Pack)
  • Wall jump (near certain walls)
Square: strike with wrench
Circle: pull out/shoot currently equipped gun
Triangle: 
  • quick select (hold and use in conjunction with Control Pad or left stick to switch guns; menu can be customized in Quick Select on the pause menu
  • double tap to switch between two most recently equipped weapons/items
  • interrupt on-screen messages

Select: open map
Start: Pause menu
  • Control Pad: select option
  • X: confirm option choice

L1:
  • center camera behind Ratchet (tap button to center)
  • first-person view (hold button and use left stick or D-Pad to look around; let go of L1 to move camera back behind Ratchet)
  • Square: wrench boomerang
  • Circle: fire gun
  • R1/R2: zoom in and out (Pulse Rifle only)
L2/R2: strafe (hold while moving)
L3: see health and Bolt totals
R1/R2: crouch (hold down)
  • Square: wrench boomerang
  • X: high jump
    • long jump (hold crouch button and jump while running to perform)
R3: open map

In water:
  • Square: dive and descend
  • X: surface and ascend
  • R1: accelerate with Hydro-Pack

As Clank:

Control Pad/Left Analog Stick: move
Right analog stick: move camera

When hanging off platforms:
  • Control Pad/Left Analog Stick: move
  • Forward+X: vault up
  • Back+X: drop down

Square: punch
X: Jump (press and hold in the middle of a jump to glide with Heli-Pack)
Triangle: command menu (hold and use in conjunction with Control Pad or left analog stick to choose commands)

Tuesday, May 28, 2024

DeceasedCrab plays Earthbound - Part 38 of 53


Our adventure takes into the Tenda Village, which makes for a nice respite from the Deep Darkness.


At one point, you'll find the plane that Pokey get away with in Fourside crashed in the middle of the Deep Darkness. For some reason, the engine has been removed, making repair of the helicopter impossible.

The Souvenir Coin is the best equippable coin in the game, with 80 Defense and 35 luck added to whoever equips it.

Manly Fish just jabs people with a spear and does not do much damage. 

Hard Crocodile just has physical attacks, all of which only target one party member. The bite and tail swing hurt more than the bash. It is weak to fire.

The red Mr. Belch enemy is Master Barf. Fly Honey does not work on him this time, so keep this in mind. During the battle, Poo will show up and hit Master Puke with Starstorm, killing him. That's right. Poo is back with Starstorm Alpha, and it can do quite a bit of damage. He's also back for good. When Master Barf dies, you'll also get the Casey Bat, which is the most powerful weapon for Ness but misses 75% of the time. Regardless of this, it is one of the most interest items in the game, and other players have done some interesting things with it.

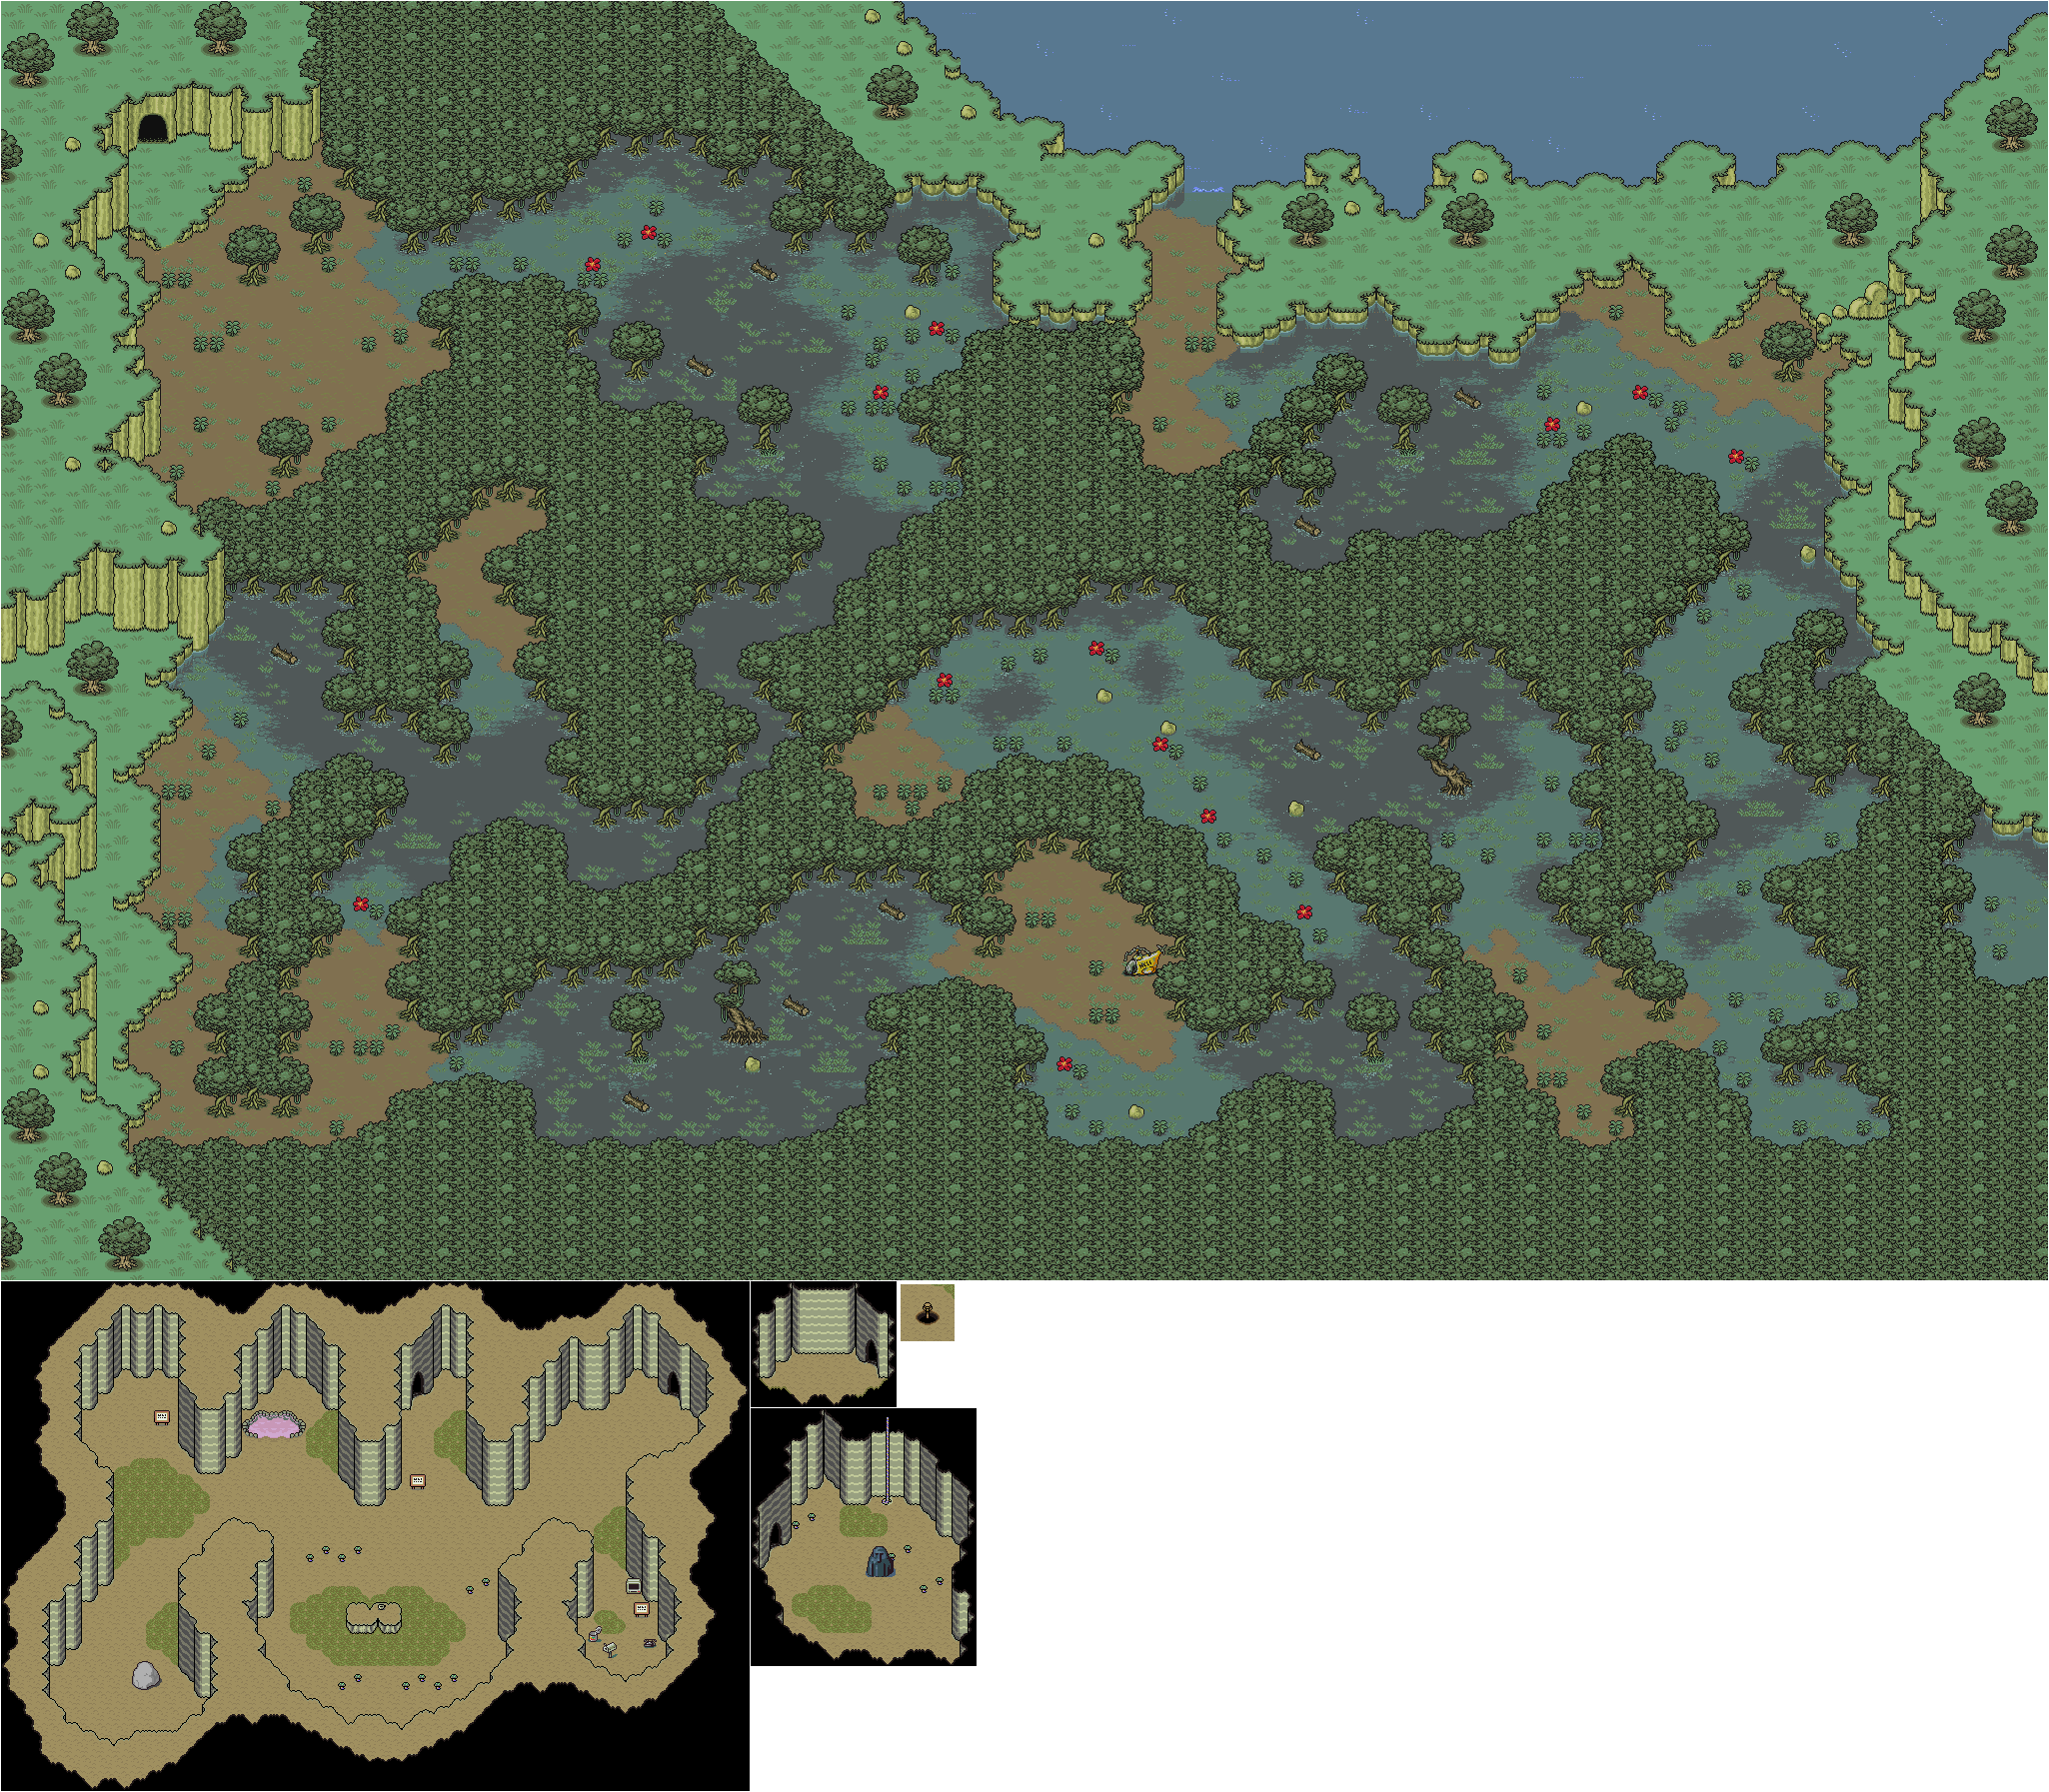
Eventually, you'll find a cave. This leads to the Tenda Village, where the Tenda, the occupants of the village, are all shy. 

South of the entrance is a garbage can with a Death Ray. The Death Ray is Jeff's most powerful weapon; equip it when you get it. There is also a phone you can use here.

One of the Tendas will tell you there is a book that teaches how to overcome shyness. If you can use it here, the Tendas will stop being shy.

The inn here is free, so use it if you need to heal or fix things with Jeff. There is also a hot spring much like the one in Saturn Valley here, as well.

One of the Tendas is not shy, and they will tell you that they buried a hole that leads underground because they found some dinosaurs. They also mention finding a talking stone there.

If you leave the Tenda Village from where you came in, you'll get a call from Apple Kid, who is at Dr. Andonuts' lab at Winters. As he calls you, he will be abducted. You'll then get a call from Orange Kid, who mentions that Apple Kid is missing and that he is the one who has the "Overcoming Shyness" book. 

From here, teleport to Winters.


When you return to Winters, you'll find out the female monkey is there, as well as one of Jeff's friends. He will mention that Tony has gone missing. When you head towards where the Tessie watchers are, you'll find out that Sebastian, one of their own, has been kidnapped.

Saturday, November 4, 2023

Jerry Martin plays Strong Bad's Cool Game For Attractive People - Part 38 of 53


In this entry, we explore the catacombs, then we have to fight the villains.


Place them Catacombs on the map, then head to them. 

Go up to the doors to head to the next room. Dangeresque will find out that there is a puzzle that kept Dadgeresque from going any further. You'll have to move tiles around, and the picture in the first room is a clue as to what you have to do.

To solve the puzzle, you'll need to turn the upper-left tile into the bowl of salsa, the upper-right tile should be the nachos on the blue plate, the center-right tile should be the flan with the cherry, and the lower-left tile should be the taco. All of the other tiles are correct. Inside is the other half of the gold heart to match the one that you already have in your inventory. You'll also open the next door, which contains a monster (Strong Sad in a green CGI suit, since The Cheat didn't add the CGI effects in post).

Use the heart half you have in your inventory on the one in the puzzle to merge the whole heart into the legendary Blood Soaked Albino Griffon Prism Heart, then click on the center tile where the heart is to find the cover for the Space Circus Catastrophe manual. After that, use the Nunchuck Gun on the monster, then use the whole heart on the monster to kill it. Afterwards, click on the boxes to find the Boots for the photo booth.

In the next room, you'll meet the Kidnapping Victim (The Poopsmith). Use the Nunchuck Gun on the Kidnapping Victim to add to your in-game achievements as well as a blooper. After that, get the metal detector. Yep, that item is here again, and you're going to use it to complete this episode 100%.

Talk to the Kidnapping Victim to save them, then Renaldo will show up and wonder what is going on. Dangeresque will mention that the girl, who is now a woman, was kidnapped by a monster with a broken heart, then the two of them head back to Venice so that Dangeresque can tell Dadgeresque that he was right. Dadgeresque leaves, then Dangeresque and Renaldo follow Dadgeresque to the kidnapper's hideout, but as Dangeresque tries to get in through the roof, he is stopped by Dangeresque Too (Homestar Runner), who is joined by Killingyouguy and The Cheat with a bazooka while holding Cutesy Buttons hostage. Dangeresque Too wants to be called Uzi Bazooka, then demands a trade: the formula for the rocket launch codes. When Dangeresque refuses, Dangeresque Too shoots Dadgeresque. After a sad scene, Dangeresque draws the Nunchuck Gun. This leads to a stand-off.

Click on Killingyouguy first. After a brief cutscene, Marzipan will move to the right. Click on Killingyouguy again to move Marzipan further to the right, then click on The Cheat. You'll get a cutscene where Dangeresque threatens to shoot the cheat. From here, click on Uzi Bazooka. Uzi Bazooka will refuse to co-operate and reveal that he is holding the rocket launch codes for Perducci, then Cutesy Buttons will swoop in, nab the launch codes disk and get them to Dangeresque. From here, it LOOKS LIKE YOU'RE GONNA HAVE TO JUMP!

After jumping, Dangeresque and company splits up. This leads to the car chase (complete with The Cheat running from one side to another with a tree branch to simulate moving trees). and Killingyouguy is chasing the car. Suddenly, the brakes are cut, and Dangeresque will have to fight Killingyouguy from the roof with the voice-activated autopilot taking over.

CELEBRITY NAME DROPS:
- Sam and Max: Use the phone in Dangeresque's office.
- The Lorax: Look at the Stickanee Tree before taking the flower.
- Tri-Lambda: Use the Evil option while talking to Baron Darin Diamonocle.
- Burt Bacharach: Talk to Perducci at the Old Club.

CHARACTERS NUNCHUCKED:
- Renaldo: Do this in Dangeresque's office after you answer the door at the beginning.
- Dangeresque, Too?: Do this in Dangeresque's office after you answer the door at the beginning.
- Cutesy Buttons: Do this in Dangeresque's office after letting her in.
- Professor Experimento: Do this in Professor Experimento's lab when you first head here.
- Baron Darin Diamonocle: Do this when you unlock Brainblow Prison and go there for the first time.
- Killingyouguy: Do this when you enter the Old Club for the first time.
- Perducci: Do this when you enter the Old Club for the first time.
- Dadgeresque: Do this when you enter Venice for the first time.
NEW! Monster: Do this when you solve the tile puzzle at the start of the Catacombs.
NEW! Kidnapping Victim: Do this after you defeat the monster in the Catacombs.

SPACE CIRCUS MANUAL PAGES:
- Performers Page: Click on one of the flaps on the ruby powered rocket at the lab.
NEW! Cover: Check the center hole after extracting the full heart in the Catacombs.

DANGERESQUE 3 MERCHANDISE:
- Renaldo Sheets: Use the Nunchuck Gun on the rightmost Brainblow limits sign.
- Renald-O's: Use the Formula on the Stickanee tree.
- Dangeresque Figurine: Use the rock on the bottles in the Old Club.

OUT & SPIT TAKES:
- Use the safety scissors on Cutesy buttons before distracting her.

OUTFITS:
- Monocle: In the tuft of grass next to Brainblow State Prison.
- Fedora: Hanging on the wall of the Old Club.
- Top Hat: Use the rock, then the nunchuck gun, on the Whale.
NEW! Boots: In one of the fallen boxes in the Catacombs.

- Score 15,000 points on Space Circus Catastrophe.

Monday, May 1, 2023

PrinceWatercress plays Sly Cooper: Thieves In Time - Part 38 of 48


We get seven more treasures in Episode 5 in this entry. Next time, we're getting the last of the treasures before working on the rest of the trophies.


The treasures in this game work much like they do in Sly 2: they will be in certain locations in the episodes, and you'll have to go out of your way to find them, interact with them to grab them, and bring them back to the hideout without getting hurt by the enemies. Sadly, there is no way to get them show up on the Select screen map. Unlike that game, where some items were on timers and others were not, all of the treasures are on timers and you'll have a certain amount of time to get a treasure back to the hideout. The amount of time that you get depends on the treasure.

Each episode - not counting the Paris prologue and epilogue - has 12 treasures in all, leading to a total of 60. There are also a few Trophies for going for all the treasures along the way.

I also create some rules of my own for the treasure collection videos as well.

1. There are no practice runs. Everything that is done is done on the fly.

2. You will need all of the costumes before even attempting to get all of these.

3. There is a total of twenty (20) minutes to collect treasures per video. Whether any more time is needed to get one more treasure is a matter of discretion.

4. The timer only starts after exiting the hideout and gameplay begins.

5. In case a return to the hideout is needed to get away from enemies or to switch episodes, the timer is suspended. The timer is only restarted once the hideout is exited again and gameplay begins again.

6. After the twenty (20) minutes are up, we get to read the treasure descriptions and rotate the treasures.

GamesRadar made for some pretty good notes on how to find everything; you can find them here.

2. Thief Treasure Chest


There is an Ancestor Door guarded by a laser field in the southern part of the hubworld. Use the Jailbird Costume to get across, then deflect a fireball with the Samurai Costume to open the door.

3. Golden Magic Lamp


This is at ground level in the southeastern part of the map. Hopefully you won't see as many searchlight guards as I did.

4. Gold Cobra


This is on a rooftop just south from the center of the map. Thankfully, you can easily Paraglide off the roof and get closer to the hideout.

5. Puffin's Cookie Jar


This one is on a high platform in the northeastern part of the map, near the magic carpet store with the giant magic carpet above it. You can use one of the flagpoles nearby to get to it. 

6. Jewel Encrusted Silver Scimitar


This one is on top of a box on the eastern part of the map near the river. Thankfully, if you know your way around the river, getting to the hideout isn't too difficult.

7. Arabian Carpet


Near the magic carpet store is an Ancestor Door that you need the Sabertooth Costume to get to. Doing the fifth and sixth treasures makes for good practice for getting this one back.

8. Bright Cane Polish


This one is on top of a tall tower in the northern part of the city. You can climb the nearby snake pole, or you can do what I did. Either way, you can easily Paraglide back to the hideout.

Controls:

Left analog stick: move
Right analog stick: move camera
X: Jump and double jump (hold X on second jump for hover jets as Bentley)
Square: attack
Circle: 
  • interact (usually with anything that has sparkles) (Sly)
  • steal from enemies (from behind) (Sly, Bentley, any of Sly's ancestors)
Triangle:
  • knock enemies upwards (from behind; press Square to slam enemies down for stealth slam) (Sly, any of Sly's ancestors)
    • press Circle after knocking enemy upward to perform Silent Obliteration (Sly; replaces Stealth Slam; must buy on ThiefNet)
    • press Square for Stealth Slam (any of Sly's ancestors)
  • spin attack (hold to charge) (Sly)
  • throw bombs (Bentley)
  • Thunder Flop (in mid-air) (Murray)
  • spin attack (hold to perform) (Murray)
    • control with left stick (must buy on ThiefNet)
  • Raging Inferno Flop (in air; Murray; must be bought on ThiefNet)

L1: 
  • bomb aim (Bentley)
  • smoke bomb/flash bomb (Sly; must buy on ThiefNet)
  • aim/strafe mode (Carmelita; must hold button down)
    • left analog stick: move
    • R1: shoot (can only shoot in strafe mode)
L2:
  • hold for costume select menu (Sly)
    • hold down to stay in menu; use D-Pad or left stick to make selection
  • hold for weapon select menu (Bentley)
    • hold down to stay in menu; use D-Pad or left stick to make selection
  • hold for fist select menu (Murray)
    • hold down to stay in menu; use D-Pad or left stick to make selection
  • hold for shot select menu (Carmelita)
    • hold down to stay in menu; use D-Pad or left stick to make selection

L3: activate compass
R1: run (hold while moving to perform)
  • Paraglide (Sly; in air; must buy on ThiefNet)
    • Square: Paraglide Dive Attack (during Paraglide; must buy on ThiefNet)
  • Adrenaline Burst (Bentley; double tap to activate; must buy on ThiefNet)
  • Clothesline (Murray; double tap and steer with left stick; must buy on ThiefNet)
  • Cane Push (Sly; double tap; must buy on ThiefNet)
R2:
  • Trigger Bomb (Bentley; must have bomb on field to detonate manually; must buy on ThiefNet)
  • Super Jump (Carmelita; hold and press X to perform; must buy on ThiefNet)

R3: Binocucom
  • Right analog stick: move
  • Left analog stick: zoom in and out
  • R1: take picture (when applicable) (Sly, Bentley)

Start: pause menu
Select: map
  • Left analog stick: zoom in and out, switch between map and status
  • Right analog stick: move map
  • Circle: back

Sunday, March 12, 2023

PrinceWatercress plays Blood Omen: Legacy of Kain - Part 38 of 41


In this video, we finally push the story forward into endgame. Here, we finally return the doll, but The Nemesis' forces destroy Willendorf's army. We then somehow get taken back to the past...


4:58 - Once you enter the throne room in Willendorf, there is no turning back, and you're forced to this part of Nosgoth. By returning the doll to King Ottmar, King Ottmar mobilizes his army to take on the forces of The Nemesis.

6:37 - Once you're on the battlefield, keep going north. If you need to fight your way over to the other side, so be it. As you go further and further to the north, King Ottmar and his forces will be whittled away, and even King Ottmar himself will perish. By the third screen, you will have no help and everyone will be gunning for you. When you reach the building to the north, you'll suddenly be teleported to what looks like the battlefield you were on, but a lot more green. You have been teleported to another time, and the time streaming device now lay in pieces at your feet.

12:28 - By killing the lone guard to the east, you'll find out that a man in a white cloak is hunting down the vampires. Strangely, the man in the cloak is surrounded by the same armored guards who serve The Nemesis. After this cutscene, the portcullis on the north wall will open. Follow the path and take out the enemies as you go. 

14:12 - This town is no longer burnt down, and there are no villagers. If you need some items, enter the six houses with the open doors. One of them will also contain a save spire; use an alternate save slot just in case.

18:55 - How quaint...this statue is under construction. Kain will come to the conclusion that he has gone fifty years into the past. To the north is a whole load of wooden houses instead of red tents. 

21:54 - William The Just/The Nemesis' fort. 

23:08 - Just like fifty years into the future, there is a full moon cave west of the fort. Believe it or not, you have to wait for it to open AGAIN for another secret.

Saturday, December 25, 2021

HCBailly and JB play Secret of Mana - Part 38 of 41


In this entry, we get some backstory on our hero, and everything starts making sense. There is nothing else to do than to go to the Mana Fortress.


The force of the energy knocks you to the bottom of the Mana Tree, which is now devastated. The Mana Tree then talks to the party, saying that the Mana Fortress is using up most of the world's Mana and that all of the beast will be transformed into one giant creature: the great Mana Beast, the only thing that can bring back Mana. Unfortunately, the Mana Beast has little control over its rage, and if it were to attack the Fortress, the world would be finished, and the only way to avoid this is to beat the Mana Beast with the Mana Sword, which can only be used by the people of the Tribe of Mana.

The tree will tell you that Randi's father, the legendary knight Serin, should be standing here now. Serin was the ghost that you saw at the sword at the beginning of the game. Unfortunately, he's gone after being badly wounded fifteen years ago by Emperor Vandole and eventually felled in Potos Village. You'll be taking his place. Not only that, but the Mana Tree is his wife and Randi's mother. If it isn't obvious at this point, Randi and his parents are part of the Mana Tribe. The women become the Mana Tree and the protectors of the world, while the men wield the Mana Sword and protect against evil.

Now that Mana is weak, the shields on the Mana Fortress are down, making it open to attack. From here, you can now go to the Mana Fortress. The Mana Tree will then use the last of its energy to summon the power of the Seeds of Mana, bringing the Seeds back and bringing your Mana Power to 8, giving the sword maximum power. Soon after this, you'll be able to go to the Fortress.

If you return to the Pure Land after this, you won't be able to explore it anymore. You'll just go back to the devastated Mana Tree.

Mana Fortress


Whenever you see the Mana Fortress on the map (the big gray ball with the spikes at the bottom), just approach it. When Flammie flies upwards towards it, let go of the Control Pad and let Flammie do the rest. Otherwise, keep flying if don't want to go over there, in case you want to get more experience or something. Keep in mind that the Mana Fortress will change position from time to time, so keep an eye on it.

At the outside, Captain Duck will make a return appearance here, as well as the Kimono Wizard, Metal Crawlers and Dark Stalkers.

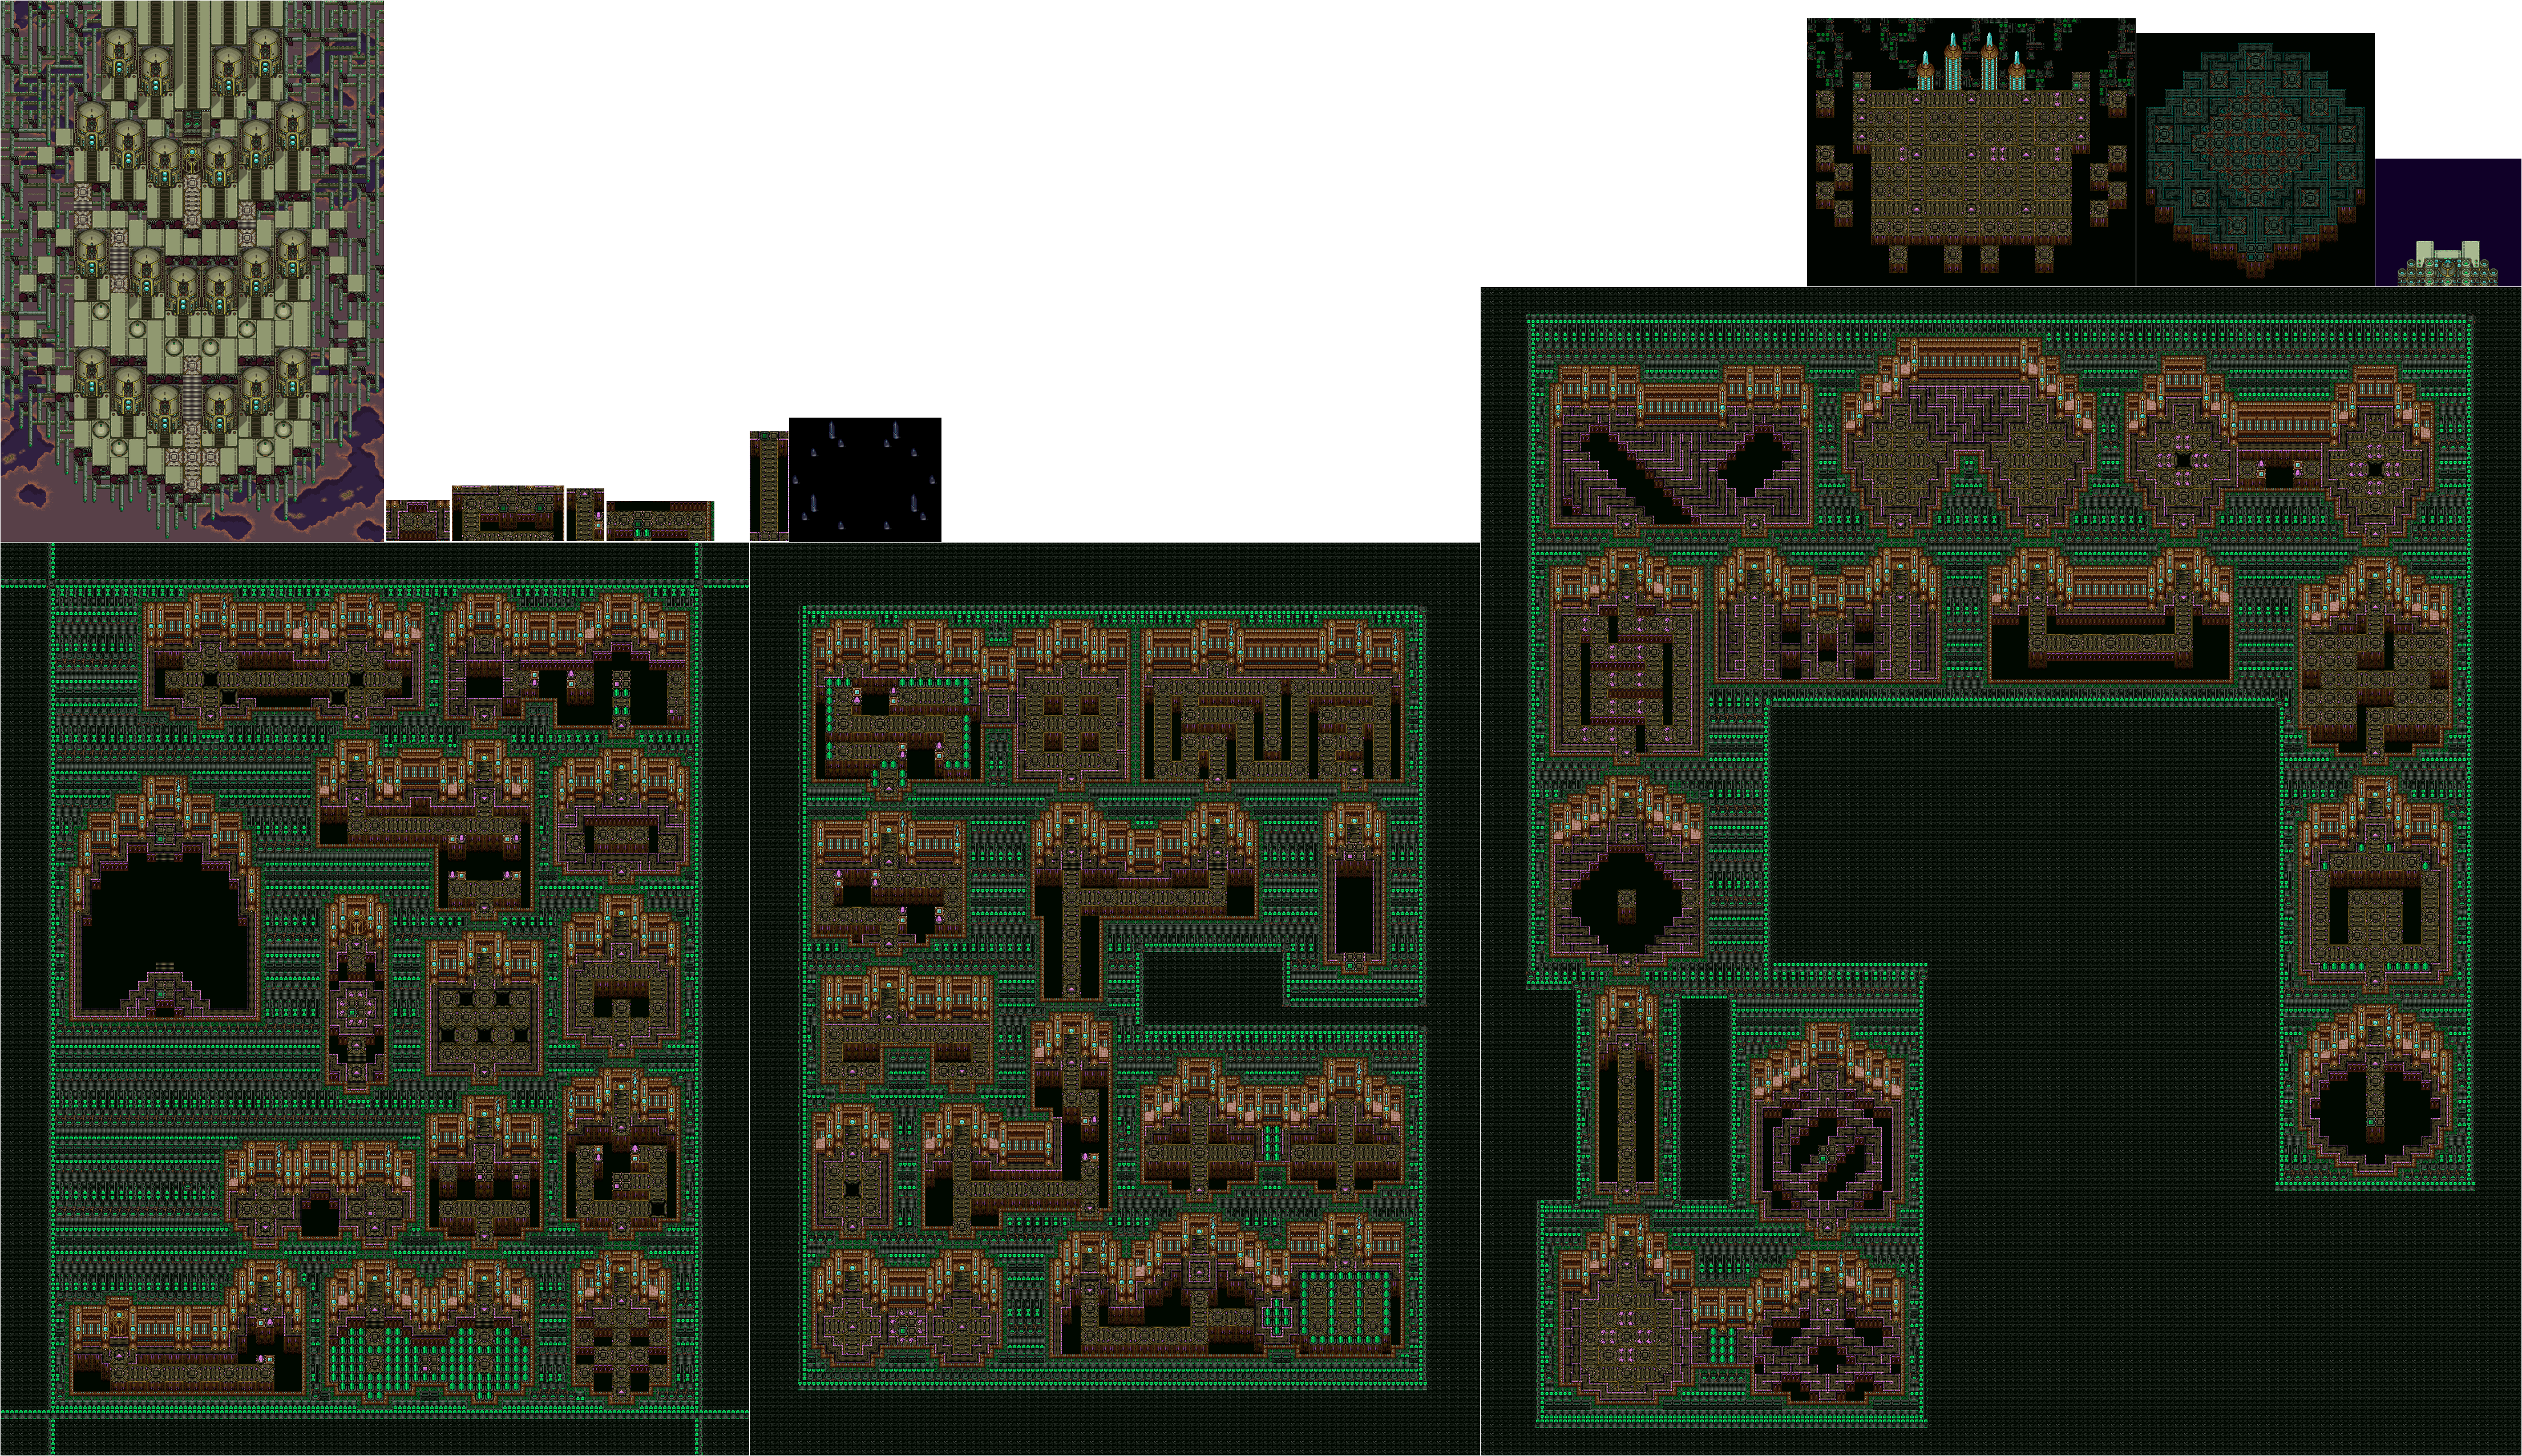
Once you're inside, you'll meet some new enemies. The Metal Crab can shoot bubbles around itself and cast Light Saber on itself. There is a chance you can get a Bow's Orb from it. The Garuda Buster is the most powerful bow in the game. (It should still be mentioned that the highest power level you can get a weapon to is Level 8.)

The purple crystals and the light blue squares near them are the whip jump points.

The Tsunamis are palette swaps of the Embermen, and can cast Acid Storm and Energy Absorb in addition to splitting into three. They have a chance of dropping the Spear's Orb. The Daedalus Lance is the best spear in the game. They can also drop Amulet Rings.

If you see a pink square tile, step on it to activate something that will open up the path.

The Wolf Lords are more powerful versions of the Werewolf enemy. They can cast Cure Water and Moon Saber, and they can also drop the Glove's Orb. This is the only way you can get the last two Glove's Orbs. The Dragon Claws are effective against Dragons, and the Aura Glove is the most powerful glove in the game.

The Beast Zombies make a return appearance from the Great Palace, as will the Turtlance and the National Scar.

The green crystals have to be cut down with a sharp weapon like the sword or axe. Unless you fully cut them down, however, they will soon grow back. Watch out with some pink tiles; some of them will cause fields of green crystals to grow back out.

Monday, December 6, 2021

PrinceWatercress plays Sly 3: Honor Among Thieves - Part 38 of 42


Now it's time for Episode 2's Master Thief Challenges...and you've got even more work to do here than in the first episode!


Episode 2: Rumble Down Under

Rock Run

This is a repeat of all the rock climbing you had to do to get to where the Guru was being held in the beginning of Episode 2; the only difference is that you're under time constraints. As long as you constantly press L3 to know where you need to go, run as much as you can and be both patient and careful with the rock climbing stuff, you should be fine here.

Cave Sprint

For this one, you'll need to make your way to the safe inside of the cave without getting hit once. The spinning drills at the start are probably the hardest part of this; using the Paraglider to get from one part of the drills to the other to save time is advised. After that, the rest of the challenge isn't as bad as long as you don't run into the lasers at the end.

Cave Mayhem

Here, you'll be destroying at least twelve enemies before you get to the exit. For best results, use a Level 2 or Level 3 spin attack when dealing with multiple enemies; this will allow you to knock multiple enemies into the pit below and save yourself a lot of time. The hardest parts of the path are the tunnels, but as long as you keep pushing the enemies back on the way to knocking them off, you'll be able to beat this. Also, go straight ahead at the fork in the road; otherwise, you'll be in a loop.

Scaling the Drill

This is one of the most annoying challenges for Episode 2. You'll want to pay attention and get from one hook to another as quickly as possible. As far as the gears are concerned, you'll want to keep holding Down and jump as soon as you're lined up with the next gear before jumping and latching on. Being careful but quick is key here; if you mess up even once, you won't be able to get to the computer at the top in time.

Guard Swappin'

For this one, you'll have to possess five different guards without hitting the ground as The Guru. Pay close attention to where you are going, and if you run into anything, move towards the guard you just fell off of and mash the Circle button immediately until you get back on. When transferring from one guard to another, stay as close to the guard you want to switch to as possible, then let go of your current guard while next to the next one and quickly make the switch. Knowing where you can go as you progress is crucial, as you'll have a better chance of running into another guard if you strike out towards another area than if you circle around the same area you're currently in.

Quick Claw

For this one, you'll have to throw all the enemies into the electrified fence into the distance with the crane while Murray opens up all the oil wells. Unlike last time, you'll have a whole slew of enemies, and you'll have to be ready to line up your shadow with every single one of them just to throw them away. Thankfully, there will only be two points where the enemies will stop to attack, so keep that in mind and keep an eye on any enemies that move to the side so you can get rid of them when the time comes. 

Pressure Brawl

This one can be difficult if you're not quick and you're not using the environment around you. Like in the main game, you'll start with Bentley, then you'll play as Sly, then you'll finish with Murray. For Bentley, you want to send enemies into environmental hazards to get past his section quickly, and that usually means staying near the electric fence and knocking enemies into it with Square. Once you switch to Sly, you'll want to use his shove and spin attacks to hit multiple enemies at once while also sending enemies into the fire, the drills or the electric fence. Once you switch to Murray, this is where the magic happens. If you happen to be near any of the three aforementioned hazards, punch the enemies right into them with the Square button; otherwise, knock them into the air with Triangle and destroy them with Square once you juggle them upwards. 

Croc and Coins

First things first: focus on getting the coins first, then throw the enemies into the crocodile to fill both gauges. Remember that you have no time limit, and that you can always beat up enemies not only for coins, but for health. As for throwing enemies at the crocodiles, clear out all the other enemies before throwing the one you want; otherwise, you're getting hit. 

Carmelita Climb

For this one, you'll be climbing up Carmelita to unhook both parts of the mask, but in this Master Thief Challenge, you won't have a lot of time to do this. Much like with the tower climb challenge in Episode One, you'll want to be both quick and careful, as one slip-up near the top will cost you the challenge clear. I'm surprised I messed up early on and still managed to get it done.

Outback Treasure Hunt

Go to the steps at the shack in the jail area where The Guru was held. From there, go south nine paces and out of the jail area. You'll then want to go southeast towards the crane for nine paces. You'll then want to face east towards the lemonade bar and go ten paces to the east. You'll then want to go southeast for 14 paces towards a small pick-up truck. Then, go south 28 paces away from the big truck. (That's the truck that you used to catch all those scorpions with.) Be careful not to fall on a torch. Then, go northeast four paces towards the underside of the wooden platform to hide from the crane. Finally, go south eight paces towards the large rock.

Wednesday, November 3, 2021

HCBailly plays Final Fantasy II AGAIN - Part 38 of 65


In this entry, we head back to Fynn, check out some new spells, and face some powerful magical enemies. 


Fynn


If you talk around, you'll find out that Paul the Ninja has made it back home.

Dispel removes elemental resistances and buffs from enemies, but it is bugged in the Famicom version. Mini turns enemies tiny and is an instant death spell as enemies can't cure it. It has the highest base accuracy of any white magic spell in the Famicom version (in other versions, it's Teleport). Fog is the permanent version of Silence and inflicts Amnesia, which enemies cannot recover from. Slow reduces the number of hits that the target can inflict on you, but it can underflow and raise the number of hits the enemy can inflict to the maximum, making them a real pain.

Unlike future games, Mini (which is in the magic shop in Phin) and Toad (in one of the chests in Castle Phin) are considered instant death spells (Black magic type and White magic type, respectively). They're also the most accurate of the instant death spells as well. They can also be multi-targeted, which can effectively make the game a lot easier and sometimes even break the game in some parts.

You can buy the Werebuster and the Wing Sword here if you need them.

While you're in the town, get a Giant Helm for Firion for later on, as well as some Gold Cuirasses. The Giant Helm will decrease his evasion, but increase his accuracy. Also, Quartz Plates for your party. They're just 1000 Gil apiece and they're really light.

The house in the lower-left corner of town is Paul's house. Ask him about Ekmet Teloess. He'll tell you that there is a White Mask behind a secret door in Castle Fynn, and to check the upper-right corner of the audience chamber (which is essentially the throne room).

Castle Fynn


The Sorcerers are in the chests with the Aura spellbook, and they can be pretty nasty: along with Fire 8, they can cast Deth 6 (Death) on your entire party if you're not careful. The Deth spell is like the Doom spell in the later games. Shell can protect against it, but so can the Protect Ring Interestingly, the Aura bestows the target's weapon with a Creature-type property that allows the character to do more damage to certain Creature-type enemies.

There is a stairway leading to a Mirror Chamber in the southwest corner of the ground floor, but you won't need the chamber until later. The Break spell is an instant death spell that permanently Petrifies enemies. Death is obviously an instant death spell, as is Toad, which turns enemies into Toads and is the black magic equivalent of Mini.

Head to the upper-right corner of the throne room and press A at the wall. Use the Ask command, select Ekmet Teloess and you'll be able to access the hidden passage. This leads to the basement, but before you go down here, you can find a secret passage leading to Gold Armor, a Golden Shield and a Gold Cuirass. The Armor is heavy, but the Shield is useful against Poison-type attacks and you'll need the Gold Cuirass for later.

Friday, June 25, 2021

PrinceWatercress plays Ratchet and Clank - Part 38 of 38


In this entry, we play New Game Plus Mode for the last five Gold Weapons and get all of the unlockables.


Once you make it to Novalis again on New Game Plus mode, there will be a teleporter at the start that was not there before. If you use it, you'll enter a chamber where you can get all ten gold weapons.

The Gold Tesla Claw has more range and more power, and you can also attack more than one enemy.

The Gold Devastator has a more powerful shot that splits into multiple homing shots to hit multiple enemies.

The Gold Mine Glove has more range and more power, and moves towards enemies from further away than usual.

The Gold Morph-o-Ray morph things in less time and produces bigger chickens.

The Gold Decoy Glove creates a different decoy (Ratchet with red eyes and a devilish smile) that explodes when an enemy comes into contact with it.

When you have everything you'll get a "Making Of" Video and the commercials. Interestingly, the "Making Of" video has pre-final footage of the game, which makes it worth checking out. You'll also get the full sketchbook and epilogue, too.

And with that, there's everything to Ratchet and Clank!

Controls

As Ratchet: 

Control Pad/Left Analog Stick: move
Right analog stick: move camera

When hanging off platforms:
  • Control Pad/Left Analog Stick: move
  • Forward+X: vault up
  • Back+X: drop down

X: Jump and double jump
  • R1: stomp (must have Thruster-Pack)
Square: strike with wrench
Circle: pull out/shoot currently equipped gun/use gadget
Triangle:
  • quick select (hold and use in conjunction with Control Pad or left stick to switch guns; menu can be customized in Quick Select on the pause menu
  • double tap to switch between two most recently used Circle button weapons/gadgets

Select: Map
  • Left stick/D-Pad: move map
  • Right stick: Zoom in/out
  • X: view missions
  • Circle: play Infobot for planet
  • L1: previous map
  • R1: next map
  • Triangle: Exit
Start: Pause menu
  • Control Pad: select option
  • X: confirm option choice

L1: tap to quickly center camera; hold for first-person view (hold button and use left stick or D-Pad to look around; let go of L1 to move camera back behind Ratchet)
  • Square: wrench boomerang
  • Circle: fire gun
L3: see health and Bolt totals
R1/R2: crouch (hold down)
  • Square: wrench boomerang
  • Left+X or Right+X: side somersault
  • Down+X: backflip
  • X (while running): long jump (must have Heli-Pack/Thruster-Pack)
  • X: high jump (must have Heli-Pack/Thruster-Pack)
  • Double tap: hover (must have Thruster-Pack equipped)
    • L2: strafe left (while hovering)
    • R2: strafe right (while hovering)
    • X: exit hover mode (while hovering)

In water:
  • Square: dive and descend
  • X: surface and ascend
  • R1: turbojets (must have Hydro-Pack)

Trespasser:
D-Pad or Left Analog Stick:
  • Up and Down: switch rings
  • Left and Right: rotate rings
Triangle: leave Invinco-Lock screen

As Clank:

Control Pad/Left Analog Stick: move
Right analog stick: move camera

When hanging off platforms:
  • Control Pad/Left Analog Stick: move
  • Forward+X: vault up
  • Back+X: drop down

Square: punch
X: Jump (press and hold in the middle of a jump to glide with Heli-Pack)
Triangle: command menu (hold and use in conjunction with Control Pad or left analog stick to choose commands)

Wednesday, February 10, 2021

PrinceWatercress plays Sly 2: Band of Thieves - Part 38 of 49


Now that we have the clue bottles for this area collected, we can get the vault almost immediately and we can also get started on trying to take those Clockwerk Talons.

Treasure of the Video

Collectible Plate - This one is not too far from the safehouse. Just wait for the time for the log to float by and you should be able to run to the safe house.

Recon the Sawmill


You'll need to play as Sly to start this mission.

Once you reach where the mission is supposed to start, use L3 to find all the areas where you need to take pictures, then get near those areas and take pictures of them with the Binocucom. You'll need to take pictures of the sawmill blades, the bear, Jean Bison's house and a boat. Once you do that, Bentley will be able to formulate a plan.

You'll then need to head to the lighthouse. Use the floating jetsam as a means to get there, then look for the Sly icon that indicates a crawlspace that you need to enter. Once you're inside, take pictures of the spinner, the front door and the battery charger. The spinner is the hardest thing of the three here, as it is quite fast. Once you get all of those pictures, you'll be able to take a picture of Jean Bison, who is mumbling to himself about the Lumberjack Games and making the Clockwerk Talons the prize for this year.

After this, you'll get another slideshow from Bentley to signal the second leg of the episode. The gang will have to take part in the Lumberjack Games. Sly will need to get a log chopping guide that has been frozen in ice by a recent avalanche for the Games, and that plans to store the gang inside the battery to take a shortcut to Arpeggio's blimp need to be started immediately in order to get the last of the Clockwerk Parts. Unfortunately, Bentley does not know where the battery is, and Sly and Murray will have to join the RC car combat club in disguise and take in order to get this information. Meanwhile, Jean Bison's house needs to be bugged. (We're doing this again?) Sly will need to steal radio tags off local bears and jerry-rig them into a sensor array to keep tags on Jean Bison.

Laser Redirection


You'll need to play as Sly to start and play this one.

To get that frozen book, you'll need to bounce the beam of an industrial laser out the window so that Bentley can harness its power and free the book. There should be a switch that will bounce the beam out of the building; once you trip it, you should be able to go outside and utilize its power from there.

The vault is here, and if you can open it, you can get the Lightning Spin. By utilizing this move, you'll perform a spin strike that allows Sly to shock all enemies around him. This uses special weapon energy, so be careful.

From here, your laser beam dodging and platforming skills will be put to the test. If any saws are moving, wait for them to stop before utilizing them.

Once you throw the switch, the laser will be redirected. Climb up the ladder and you'll be outside. Find where the laser and its small trail of smoke is and press Circle where the laser and smoke are to redirect it with one of a few crystals that Bentley has put in Sly's pouch. For the parts where you have to stand on the claw-shaped ice crystals, just walk to where the laser is and you will break them apart to get the laser going elsewhere. After a while, you'll get the log chopping guide and free a wooly mammoth who then runs into the ice and goes back to being frozen.

Controls

D-Pad/Left Analog Stick: move
Right Analog Stick: move camera
X: jump and double jump
Square: Horizontal Attack
  • horizontal attack (as Sly)
  • slam enemies launched into the air from behind (as Sly)
  • hook punches (as Murray)
  • Thunderflop (as Murray; in mid-air only)
  • crossbow swipe (as Bentley)
Triangle: Vertical Attack
  • vertical attack (as Sly; used to knock enemies into the air)
  • downward dive (as Sly; in mid-air only)
  • uppercut (as Murray)
  • drop bomb (as Bentley)
Circle: Action button (near blue/green/purple sparkles and character icons)
  • pickpocket (as Sly)
  • stomp (as Murray; use Square to throw object/enemy)
R1: hold to run

Select: Gadget Grid
  • Control Pad: highlight gadget
  • X button: confirm gadget
  • L1, L2, R2: assign gadget to button pressed

L1, L2, R2: use gadgets assigned to button pressed

Start: pause menu
  • Control Pad: select menu choice
  • X button: confirm choice
  • Start: un-pause game

L3 (press the left analog stick): locate beacons for mission objectives

R3 (press the right analog stick): Enter and exit Binocucom for first-person view
  • Left analog stick: look around
  • Right analog stick: zoom in and out (with up and down on right stick)
R1: 
    • take pictures with spy camera (as Sly; when applicable)
    • shoot sleep dart (as Bentley)

Hacking mini-game controls:
  • Left analog stick: move
  • Right analog stick: aim and fire gun

Thursday, July 9, 2020

PrinceWatercress plays Terranigma - Part 38 of 50


We're done exploring now, and it's time to advance the plot. This time around, we head to the lake near Nirlake now that we're able to get past the guy on the bridge.


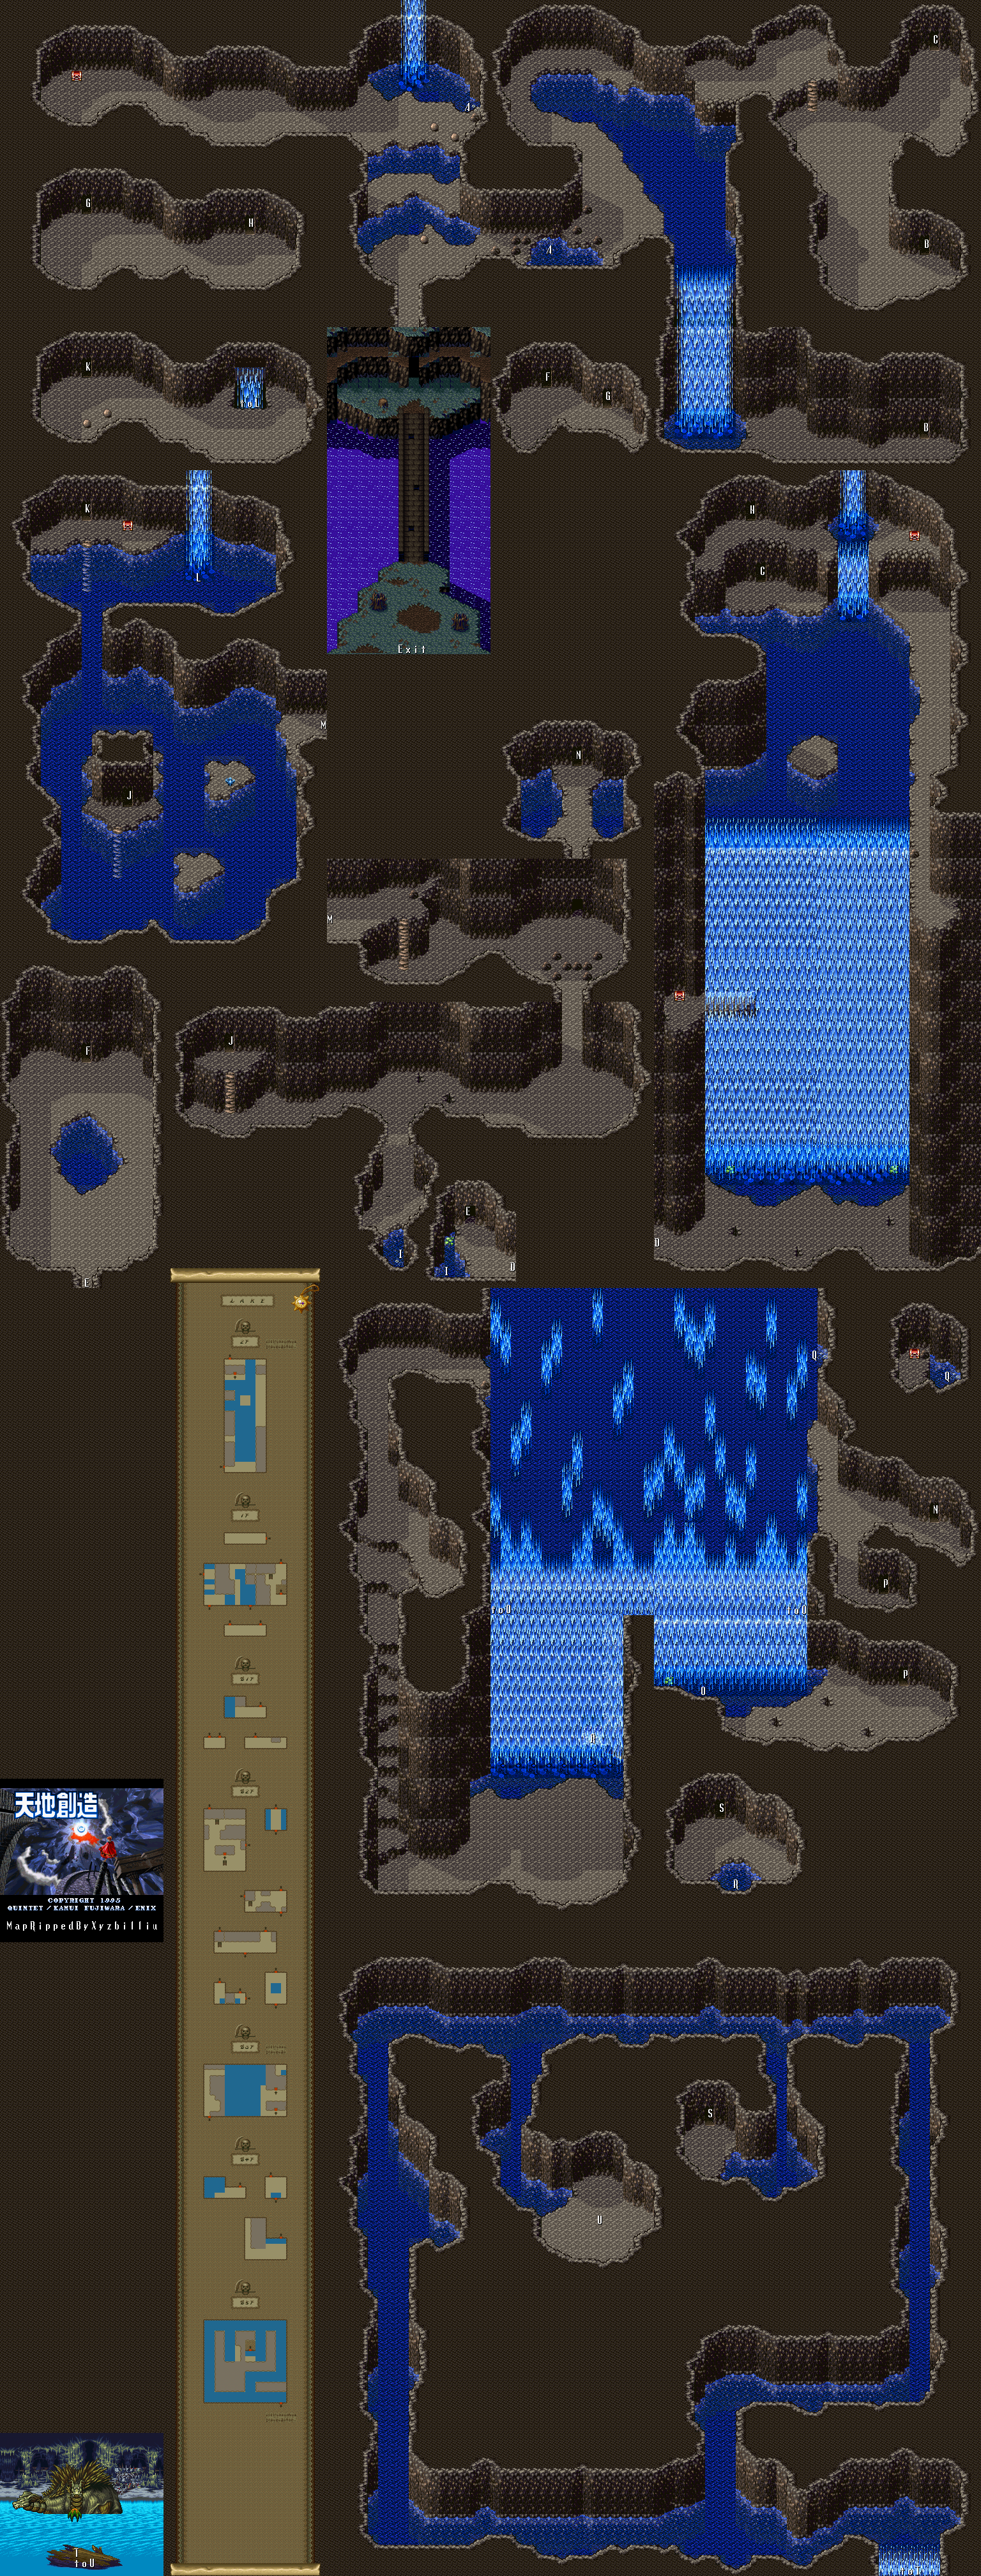
Great L.


And with all that...it's time to progress the plot. Back to Nirlake! Head to the Great L. Cave and use the Engagement Ring on Servas. He'll find out what happened, and says he will go see her...by disappearing. From there, you can enter the cave from the north.

The rocks are very useful against the fish, and so is the Enbu Pike.

The Doumas near the beginning will spit bubbles at you. You'll want to stay away from those as you fight them.

You'll want to start this cave by going north, then west to open the chest that contains the Air Herb. The Air Herb is needed to take advantage of the bubbles that come out of the water in certain locations. If you see bubbles bubbling out of the water near walls, press A to dive into them and take a secret passage to another part of the cave. You'll need to do this to continue into the rest of the cave, and the only way to do it is with the Air Herb.

From there, take the waterfall down and take the stairs to the right, then head north through another stair case. The Slimes will come back with a vengeance, but they'll go down easy. Don't forget that they can Confuse you. Also, the red flower enemies can hit you with Deadly Poison (indicated by a red symbol) if you run into them, and if that happens, use a WindPin or leave the current room to cure it. You'll then see a shadow in the water nearby, and Ark will wonder what it is before hearing a cry for help. The shadow then moves away.

If you ever see water bubbles in the middle of the water, stay away. Those are sea serpents diving in and out of the water, and they can hurt you. From where you saw the shadow in the water, keep all the way to the left and go down the waterfall from the extreme left side. You'll land on a platform on the way down and you'll find a chest containing the Magic Anchor. From there, drop all the way down.

The green balls with the purple tentacles are called Pupila. They fight just like the Mermaid Tower boss: just face away, then immediately turn towards them and hit them with the dashing attack when their eyes open. You can also use your jumping attack if you don't have a lot of room. You're better off just using that move anyway, since it's far more effective.

From the Pupila, go left and then enter the door first. Follow the path from here and you'll be able to get 753 Gems. Make sure not to fall off the ledge trying to get it!

Head back to the area left of the bottom of the waterfall and go through the underwater passage. Head to the left and go up the stairs here. You'll fight some more Doumas. There's a Magirock here, but we'll have to do some stuff in order to reach it. For now, head north and open the chest near the stairs to get the GeoStaff, which has Earth elemental properties.

Go up the stairs and head to the right. You'll see some water trickling from a wall. Throw a rock at the wall and you'll cause the water to shoot right out. Drop down from where the waterfall is, and you'll finally be able to get the Magirock - Magirock #73 - that we had to pass by earlier. 

From Magirock #73, head to the right and go into the opening in the wall. Follow the path again, and you'll be at another waterfall. Equip the Magic Anchor and use it to go north to find a secret passage to the right. This leads to a chest containing the Dragon Mail, which protects against Thunder. You won't be able to get this without the Magic Anchor, as the current here is pretty strong.

From the Dragon Mail chest, head to the west and go south. Go down the stairs and fight off all the monsters and go into the right side of the waterfall you see. Go into the door and swim your way to the lower-right corner of this maze.

You'll meet the Hitoderon. Fight off the starfish monsters with your dashing attack. If any starfish latch on, the Hitoderon will breathe fire at it to get it off of you. By killing the starfish, the Hitoderon - named Gossie - will give you the HornPin, which shields you from attacks and comes with 4 Magirocks, bringing you to 77 if you haven't missed any so far. Ark will then sense that Gossie wants to help him. You'll be back at the opposite end of where you entered the water maze from. 

You'll finally meet Will. Talk to him, and he'll thank you for rescuing him. He crashed into the Great Lakes on a test flight and was attacked by starfish until Gossie saved him. He then says that the Lake God - the one mentioned by a few people in Nirlake - really exists. He asks you to come with him so he can repay you.

You'll both end up back at Will's house in Nirlake. He needs to get the parts again, and the only way to get new parts is through the Lon Trade in Yunkou, who began buying up metal for the parts. Until the price of metal comes down, he's stuck. Looks like Yunkou is our next stop.

Wednesday, May 15, 2019

HCBailly plays Final Fantasy IV (Super Famicom) - Part 38 of 70


Our quest in the Tower of Bab-il continues with a huge treasure trove.


The Green Beret increases Strength and Vitality by five. Equip it on Yang.

The Eyes is weak to Thunder, so have Yang equip the Thunder Claw. If anyone else attacks it, it will send out a Stone Golem. You can use the Apparition Rod on the Stone Golem to hit it with Piggy before hitting it with Yang's Fairy Claw for immense damage. The Stone Golem is also weak to ice.

The Ice Spear is a little stronger for Kain than the Fire Spear, but keep the Fire Spear handy for later.

The Chimera should be hit with Rydia's Bio, or else it will hit the entire party with a nasty Blaze attack. Do not use Piggy; it will not work.

The Ice Brand is the ice elemental weapon for Cecil. Again, keep the Fire Sword handy.

The Cat Claw increases Strength and Agility by five points for Yang. It can replace the Hell Claw, which you should still keep around for non-elemental enemies.

The Killer Bow increases Strength by five. You'll want to save that for Rosa later on.

The Flame Knight is weak to ice, but it is also weak to Piggy, as are the Flame Dogs.

The MysteryEgg will hatch into a monster if you touch it with anything, but if you destroy it Kain's Jump command, it can be destroyed immediately without hatching.

The Ice Shield obviously has ice resistance. Give it to Kain.

The Ice Armor is another piece of armor with ice resistance. Give it to Cecil.

The Arctic Wind is slightly more powerful than the Antarctic Wind.

Monday, June 4, 2018

HCBailly plays Terranigma - Part 38 of 75


We head down to Spain and Portugal for new adventures.

World map by Tropicon. Litz port and town maps by Amiz Azadur. Sylvain Castle map by xyzbiliu.


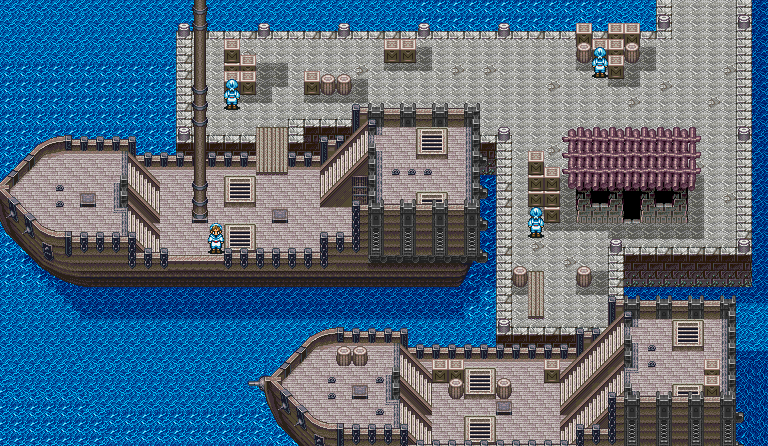
On the western coast is the port of Litz, in Portugal.

Litz


There are ships here, but there's one problem: nobody has the navigation skills to get to another continent. A Spanish ship has set sail, but it hasn't come back yet. You won't be able to do anything...yet.

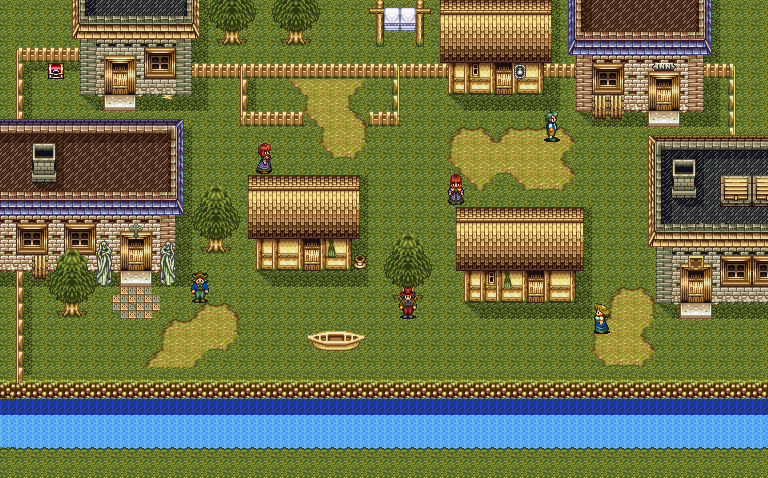
To the north is the town of Litz itself.


The building right at the entrance is a hospital. Dr. Emilio, the town doctor, wishes there was better medicine so that he could save more lives. If you enter the rooms to the north, you'll see a child who has gotten a fever, as well as Dr. Emilio himself, who is studying medicine for infectious diseases and also does socialized medicine. You'll also learn from one of the people that Dr. Emilio is worried about a friend of his named Columbus, who has gone missing.

If you talk to Dr. Emilio a couple of times you'll learn he's trying to find a cure for the fever, and that Columbus got a fever-curing herb on a journey. Only thing is, Columbus has yet to return. He recently discovered a new continent, then reported it to the Queen of Spain and hasn't been seen since.

Talking around in town will bring up info about the nearby Sylvain Castle, where the Queen of Spain ruled. But when her three sons died on a ship, she went insane. You'll also learn that an evil spirit descended on the nearby castle of Sylvain and doomed the nearby country of Spain. You'll also learn that sardines are the town's specialty.

To the left of the hospital is the Crafts building. The man in the building has been asked to make something for the church, but he can't get his hands on a rare mineral.

To the left of that building is Keinz. He'll tell you there is no local industry here, and at least one key industry is needed, or else there will be no growth. The town can only be expanded once, but it won't be until near the end of the game.

To the left of Keinz is a house where a man is trying to keep sardines from rotting quickly in transit and wants to preserve them for a long time.

To the left of the sardines guy is the church. The guy walking around near the church tells you about the Quatros. If you go into the Church, you'll find out that the Church wasn't even censored, and that Jesus on the cross is there. If the game ever came out in America, this whole area would be guaranteed censored.

The chest in the upper-left corner of town contains a Luck Potion. Next to the Luck Potion chest is another sailor who will tell you about a portrait in Sylvain Castle in Spain which supposedly has precious jewels in the place of eyes. This portrait attracted many thieves, none of whom have returned.

The upper-right corner of town is the Merchant's shop and the Inn. At the Merchant's, you can buy L.Bulbs. This can be very useful. At the Inn, you'll meet Roy again. He asks if you've seen Princess Elle around, and that she disappeared after King Henri was killed. Another guy in the building tells you about Columbus, and the guy next to Roy tells you about about a ghastly killing light coming from the nearby castle.

You can actually consume the foods on the south side of the table. If you want to use the room here, just talk to the guy in front of the door, pay the 10 Gems, and then use the save book and rest if you wish.

To the east, surrounded by mountains, is Sylvain Castle.

Sylvain Castle


Hope you're at least level 19. Otherwise, you're gonna have a hard time.

The water in the fountain is acidic. If you try to jump in, Yomi will stop you.

Go straight north into the entrance. Equip the SlvrPike and use the dashing attack to destroy the armored guards here.

Friday, March 2, 2018

skorch82 plays Brave Fencer Musashi - Part 38 of 70


We finally take on the boss in the dungeon underneath the restaurant!

In the fourth room, use the Water Scroll to extinguish the four flames. You'll open a door. Go inside and you'll take on the second Crest Guardian, the Relic Keeper. Despite the fact that it's hit the ceiling and has to hold it up to keep it from collapsing, he can still fight.

You'll want to use the Water Scroll to hit the fireball that flies around.

When the fireball turns into an owl shape, stay away and shoot water at it from a distance...and jump over those flames.

When the fireball turns into a sword shape. You'll want to stay as far away from it as possible, especially when it slowly swings downward. If you can't get away, use the Water Shield to keep yourself from taking damage for that one hit.

When you shoot enough water at the fireball, the Relic Keeper will duck down. Jump up and hit the core with Lumina to do some damage. You'll then go through the motions again.

In the second and third rounds, the fireball will either bounce off the walls like a ping-pong ball or jump up and down creating fire arcs from one end of the room to another. Time your position, hit it with the Water Scroll when you can and try not to get hit.

If the fireball appears in the center after the fire arcs attack, avoid the flame "arm" that pops out. Stay out of the air when it happens, and avoid the flames that drop down as well as the ones that surround the fireball itself.

In the third round, sometimes the fireball will turn blue and do a merry-go-around attack. Jump over the flames when they pass by.

After three hits, you'll win. The Relic Keeper will try to finish you off physically only to be crushed by the ceiling it was holding up. Now you have the core for this guardian and the Water Crest is liberated!

You'll then get another cutscene where Princess Fillet summons Kojiro. This turns out to be a mistake, as it's pretty obvious he only cares about fighting Musashi and getting revenge, judging by how instantly disobeys her, following Topo, another Thirstquencher enemy, instead.

Thursday, August 31, 2017

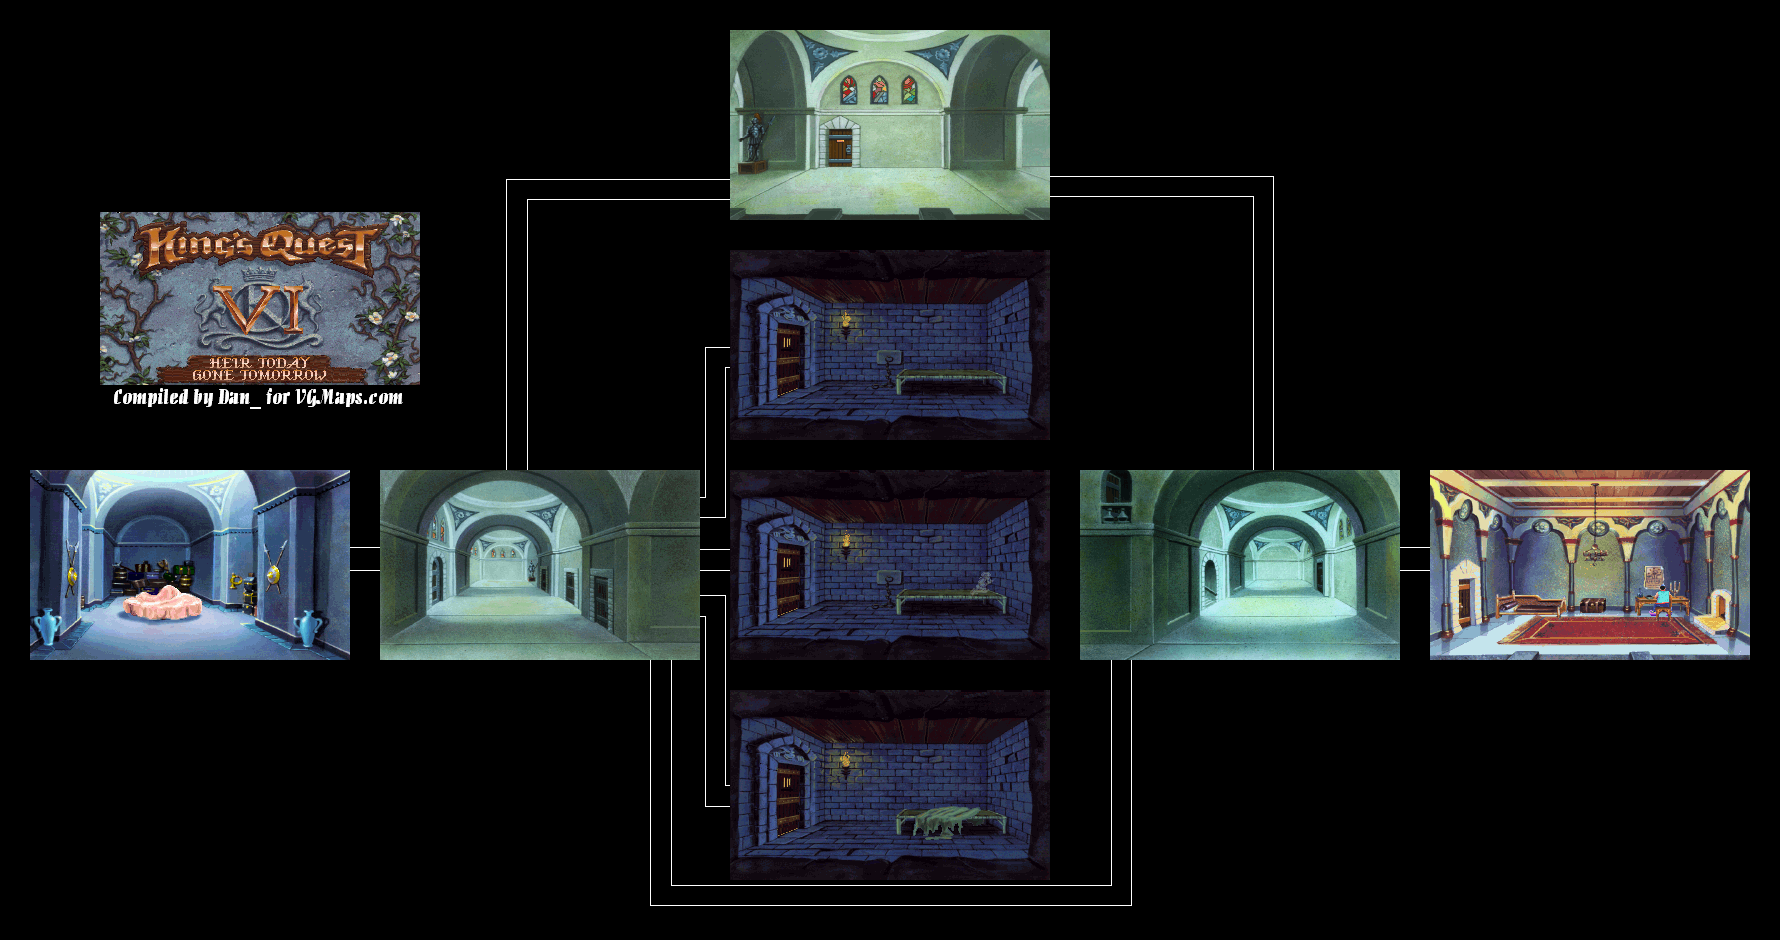
Dilandau3000 plays King's Quest VI: Heir Today, Gone Tomorrow - Part 38 of 43


We're back...and now it's time for the rescue attempt!

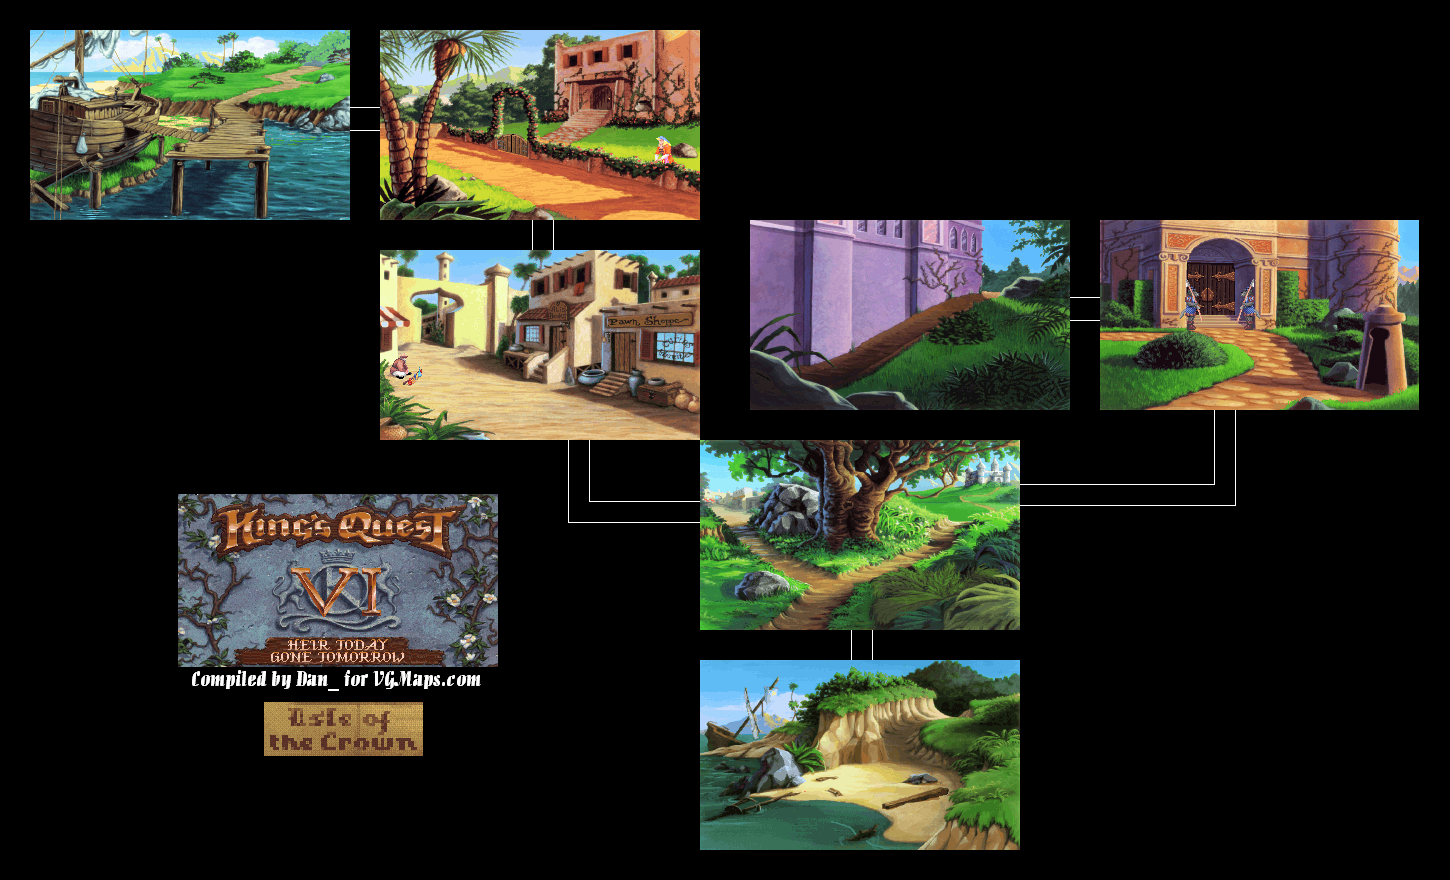
All maps by Dan_.


Head to the Pawn Shop and trade for the painting brush, then head back out. Give the lamp you used for the rain spell to the lamp peddler. You'll then see the lamps that the peddler has. Pick the second one from the right, since it looks exactly like Shamir Shamazel's lamp. The peddler will leave, but not before trying to rub the lamp you gave him to see if there's a genie inside...and finding nothing.

Head back to the castle and walk to the side of it. You've already got the River Styx water and swamp ooze in the teacup. All that's left is to stir it with the black horse feather. The color drains from the feather and the thick water turns into paint. From there, use the paintbrush on the castle wall, and read the Magic Paint spell from the spellbook. The door becomes real, and you'll be able to enter...but once you go in, there's no turning back.


You'll end up in the basement. If you stay in this area long enough, you'll hear the sound of guard dogs opening a door and approaching your position. Head into one of the three dungeon doors to the right, preferably the left or middle. You'll find a ghost of a young boy sobbing. This must be Ali. If you speak to him, he can't find his mother. Use the handkerchief on him, and he'll be able to feel her now. Before he goes, he'll tell you that there is a hidden door behind a "man of steel," or suit of armor. Nobody knows about it but him.

Wednesday, May 17, 2017

HCBailly plays Final Fantasy III - Part 38 of 44


We explore the last of the Sylx Tower in this entry!


As soon as you hit the fifth floor, you're going to be dealing with dragons. They have thousands of HP and you can steal Elixirs from them with the Thief. There is a 1 in 64 chance of them dropping a piece of the Onion equipment, which is the most powerful armor set in the game.

On the last floor, you'll have to walk in the water to reach the Crystal Shield and Crystal Helmet.

The door at the last floor leads to the Dark World. Once you go through this door, you won't be able to go back.

In the next room, there are five dragons and a mirror. Walk towards the mirror. Anyone reflected in the mirror will be trapped by the Five Dragon Demons' curse.

Friday, February 17, 2017

Chilean Retrogamer plays Wario Land 2 - Part 38 of 57


The S.S. Tea Cup has finally sunk. Of course, the place it's sunk to could have treasures of its own. Nice stroke of luck there, Wario!

Chapter 2: SS Tea Cup

Story 4: Drop the anchor!


1:35 - I don't remember this from last time. Throw the football helmet enemy into the wall to access...

1:49 - ...this room. You'll have to move that detached stove around to get...

3:19 - ...here. Break the block at the bottom and the S.S. Teacup will spring a leak.

3:52 - The ship jumps up before it tips over and sinks. Ships don't do that in real life, Nintendo. Anyway, Captain Syrup and her goons escape through some ruins in the sea with a submarine. Wario, as you're about to see, has his work cut out for him.

Chapter 3: Ruins at the Bottom of the sea

Story 1: Escape from the Tea Cup!


4:31 - Look familiar? Yep, it's the room you just flooded. As a matter of fact, this story is just like 2-4, except it's waterlogged.

4:42 - We're going have to deal with those drill-nosed fish yet again.

5:01 - Going to the right from there takes you to this coin room.

5:36 - We continue to the right, then end up in this room. There's a door further on to the right.

6:31 - Move this huge metal thing from underneath to get the coins here. Not sure what that thing is. Maybe it's a pot?

7:03 - There's a door even further to the right. Now it's time to get in there, and enter the door to the left.

7:19 - Watch the bubbles coming out of the cracks as you go down.

7:43 - You know you forgot the treasure, right, Wario?

8:01 - Go back, take the ladder and enter the door up top for the treasure room. Of course, if you're familiar with the layout of 2-4, you'd know this was here anyway. The treaure looks like the big worm with the mouth that you shoved the bombs in in Link's Awakening, except it has two mouths. I want to think it's a scepter. I don't have a clue.

8:47 - Now we can get out of here.

9:30 - Another picture piece.