Showing posts with label part 49. Show all posts

Thursday, March 5, 2026

PrinceWatercress plays Super Mario Odyssey - Part 49 of 92


In this entry, we clean out Bowser's Kingdom...for now. Next stop: the moon.


The Regional Coins near the giant golden Bowser head can be jumped to just by jumping onto the nearby lanterns, and you can even climb on the chains. Whenever you're on a lantern, it will stop shaking so that you can concentrate on moving and getting the Regional Coins there.

Power Moons


9. Past the Moving Wall - On the left side of the Beneath the Keep area, there is a wall that you can latch onto with a Pokio. There will also be a set of moving walls that will take you to this Power Moon.

10. Above the Poison Swamp - This Power Moon is on the northeast corner of the lava pool at the Beneath the Keep checkpoint.

11. Knocking Down the Nice Frame - Take control of Lakitu near the Beneath the Keep checkpoint and get to the northwest corner of the lava pool. Use the slingshot to get on the roof, then go down the front of the room and hit the frame with the flashing lights hanging off the center from behind with Cappy. The frame will fall into the lava and you'll get a Power Moon.

12. Caught on the Iron Fence - This one is way too easy to miss. There are Bowser heads crafted onto the columns of the small iron gate behind the Odyssey, and one of the heads faces away from the platform rather than towards it. Press and hold the Y button when you throw your hat at this Bowser head to reveal a Power Moon.

13. On the Giant Bowser Statue's Nose - Believe it or not, you can drop down onto the nose of the giant golden Bowser head at the top of the Beneath the Keep area. If you ground pound there, you'll find a Power Moon.

31. Scene of Crossing the Poison Swamp - You'll need the Samurai Helmet and the Samurai Armor for this Power Moon. Equip them both, then go to the other side of the Crazy Cap Store. You'll find a locked door, and you'll need to dress like a Samurai to open it. Go in, and you'll find the Power Moon in a pipe leading into an 8-bit area. Just complete the three short sections with the mushroom platforms that sink down when you step on them as well as the moving platforms from Super Mario Bros. and you'll find the Power Moon at the end. For the final section, jump on and kick the Koopa, then jump over the shell as you stand on the mushroom platform so that the Koopa can break the bricks without you getting hurt.

32. Taking Notes: In the Folding Screen - In the 8-bit area where you found Power Moon #31, you'll find a treble clef. Grab it, then use the platform moving around to get all the notes for another Power Moon.

Regional Coins


Tuesday, March 18, 2025

PrinceWatercress plays Wario Land II - Part 49 of 51


Well...at least the game's being honest here.


Final Chapter: Uncanny Mansion

Story 4: Coming back is difficult


At the start of the level, it will become obvious that you will need to hit a switch to move some blocks so you can enter the door above where you start. For now, just get to the end while getting as many coins as you can. As you explore, you'll notice that there are no enemies and that when you hit the switch, going back will be difficult.

When you reach the room with the switch, hit the switch, take out the enemy and get the six big coins, then go back into the previous room. Not only will you be forced to remember where the platforms were in the room now that it's dark, but you'll have to deal with enemies now. Coming back...is difficult.

Once you get out of the previous room, you'll still have to deal with enemies, but at least you'll be able to get more coins. You'll also be able to enter another room with a pair of dressers. Once of them contains a ghost; touch the ghost to go all the way down and collect even more coins. 

In the second room in the level, you'll be forced to take the lower path due to the blocks being moved, but this does take you to the treasure room, where you can win a bottle of wine. The path to the entry room is littered with ghosts, and if you get turned into Zombie Wario once, you'll have to do this room all over again after touching the sunlight.

In the entry room, avoid the ghosts while getting all the coins and getting to the exit.

Thursday, October 17, 2024

PrinceWatercress plays Chrono Trigger (Super NES) - Part 49 of 70


...and now, to battle Lavos. However, this is just one part of the battle...


If you press A at the bucket of water to the right of the door to Spekkio, you can go to the Day of Lavos 1999 A.D. and fight Lavos. If you choose to fight Lavos, you'll get a small boss rush of sorts. 

You'll fight Lavos mimicking these bosses in the following order: Dragon Tank, Guardian, Heckran, Zombor, Masa & Mune, Nizbel, Magus, Azala and Black Tyrano, Giga Gaia. Same strategies apply.

For the Dragon Tank, the creature on the right is the head, the middle part is the body, and the creature on the left is the wheel. Due to the odd layout compared to the real Dragon Tank, it's easier to destroy all three parts at the same time.

After the Giga Gaia battle, you'll face Lavos much like you faced it at the Black Omen. When "Destruction rains from the heavens!", be ready to heal up afterwards, then start hitting Lavos with everything you've got. The lightning attack afterwards can inflict Chaos on people, so make sure you have Prism Helms or other status protecting items equipped on all your party members. The needle attack will hit one member of the party for a ton of damage.

At this point, you should be strong enough to defeat this form of Lavos, and when you do, you'll be able to enter Lavos' shell. Inside will be a path leading to an even more dangerous battle, but there will also be a save point as well as a portal. Once you beat this boss rush, you won't have to do it again.

You can actually go towards the final battle without having to fight this form of Lavos. If you get in the Epoch, travel to 1999 A.D. and agree to fly towards Lavos when prompted, you'll get an awesome Mode 7 cutscene where you fly through Lavos. This destroys Epoch, however, and there will be no turning back - no save point, no portal - if you do this. 

Thursday, July 11, 2024

PrinceWatercress plays Ratchet and Clank: Going Commando - Part 49 of 54


It's now time to go through the hoverboard races in Joba!

First | Previous | Next | End

In this entry, we're playing the remainder of the hoverboard races in Joba.

Challenge 2 is the Intermediate Circuit. This one is similar to the Amateur Circuit/Challenge 1, but the racers are a little smarter...if you're forced to deal with them.

Challenge 3 is the Joba Circuit. This time, all of the routes are open, and this is where you can take some alternate paths to get away from the other racers. This is also the first course where you can take the shortcut, which is here. Take a left after the first turbo boost on the shortcut to get the Nanotech Boost here.

Challenge 4 is the Assault Circuit. In this and Challenge 5, the enemies will finally start firing at you. For this challenge, you'll want to take advantage of every turbo boost, be it a pick-up or a ring, that you come across. If you get shot down, it will take a bit of effort to get back into first place, so you'll want to get first place as quickly as possible and use the turbo boosts to stay there.

Challenge 5 is the Expert Circuit, and you'll want to reach through this like you did Challenge 4. To be safe, I used the shortcut on all three laps, which really helped with keeping enemy racers at bay.

Controls:


As Ratchet:

Control Pad/Left Analog Stick: move
Right analog stick: move camera

X:
  • Jump and double jump (hold button after double jump to use Heli-Pack or Thruster Pack)
  • Wall jump (near certain walls)
Square: strike with wrench
Circle: pull out/shoot currently equipped gun
Triangle: 
  • quick select (hold and use in conjunction with Control Pad or left stick to switch guns; menu can be customized in Quick Select on the pause menu
  • double tap to switch between two most recently equipped weapons/items
  • interrupt on-screen messages

Select: open map
Start: Pause menu
  • Control Pad: select option
  • X: confirm option choice

L1:
  • center camera behind Ratchet (tap button to center)
  • first-person view (hold button and use left stick or D-Pad to look around; let go of L1 to move camera back behind Ratchet)
  • Square: wrench boomerang
  • Circle: fire gun
  • R1/R2: zoom in and out (Pulse Rifle only)
L2/R2: strafe (hold while moving)
L3: see health and Bolt totals
R1/R2: crouch (hold down)
  • Square: wrench boomerang
  • X: high jump
    • long jump (hold crouch button and jump while running to perform)
R3: open map

In water:
  • Square: dive and descend
  • X: surface and ascend
  • R1: accelerate with Hydro-Pack

As Clank:

Control Pad/Left Analog Stick: move
Right analog stick: move camera

When hanging off platforms:
  • Control Pad/Left Analog Stick: move
  • Forward+X: vault up
  • Back+X: drop down

Square: punch
X: Jump (press and hold in the middle of a jump to glide with Heli-Pack)
Triangle: command menu (hold and use in conjunction with Control Pad or left analog stick to choose commands)

Monday, June 3, 2024

DeceasedCrab plays Earthbound - Part 49 of 53


In this entry, we finally travel into the past to take on Giygas' domain.


Use the Meteorite Piece in front of Dr. Andonuts to power up the Phase Distorter. Dr. Andonuts will tell you to get some rest, so head to the nearby inn, rest, and talk to Dr. Andonuts again. The Phase Distorter will be completed when you talk to him. Talk to him the first time, and he will tell you that the Phase Distorter is sensing some enemies from the Lost Underworld. Talk to him a second time, and you'll be ready to use the Phase Distorter. Don't forget that the Phase Distorter can fully heal you and save your progress.

When you use the Phase Distorter, you'll end up in a weird land. The man who taught Poo Starstorm will show up, teach Poo Starstorm Omega, then disappear.

To the east is a broken Phase Distorter. Search it to find a Horn of Life, then check out the cliff to the north. When you head back, Dr. Andonuts and Apple Kid in the Phase Distorter 3 and will tell you that they have found Giygas, and that he is attacking from many years in the past. Talk to Dr. Andonuts, and he will tell you that you will have to warp to the past, yet lifeforms cannot be transported, as life is demolished in the process of warping. In order to get there and survive, your brain "program" will have to be transferred into a robot body, meaning that your spirit is transferred into the robot while your actual body is left behind. There is also a chance that you may not be able to return and get back into your original body once this occurs. Not surprisingly, you will have to accept to do this in order to finish the game.

Once you accept, your party will be robots, and you'll be able to active the Phase Distorter 3 and head to Giygas' domain in the past.


Once you're here, there's no turning back.

The Ultimate Octobot can fire a beam and paralyze one part member, and can also steal an item. It is also pretty easy to beat up. It has a one in eight chance of dropping a PSI Caramel.

The Wild 'n Wooly Shambler can fire a beam, but it can also cast Shield Beta on one enemy and can also cast Flash Beta against you. 

The Nuclear Reactor Robot can fully heal one enemy and can also fire a beam. It can also explore upon defeat. It has a one in eight chance of dropping a Super Bomb.

The Squatter Demon can bite using poisonous fangs (which poisons a party member) cast Hypnosis Alpha, can use a Shield Killer and can also bite hard, which diamondizes one party member.

The Ghost of Starman from Onett returns as an enemy here.

The Legendary Bat is the best weapon for Ness in the game.

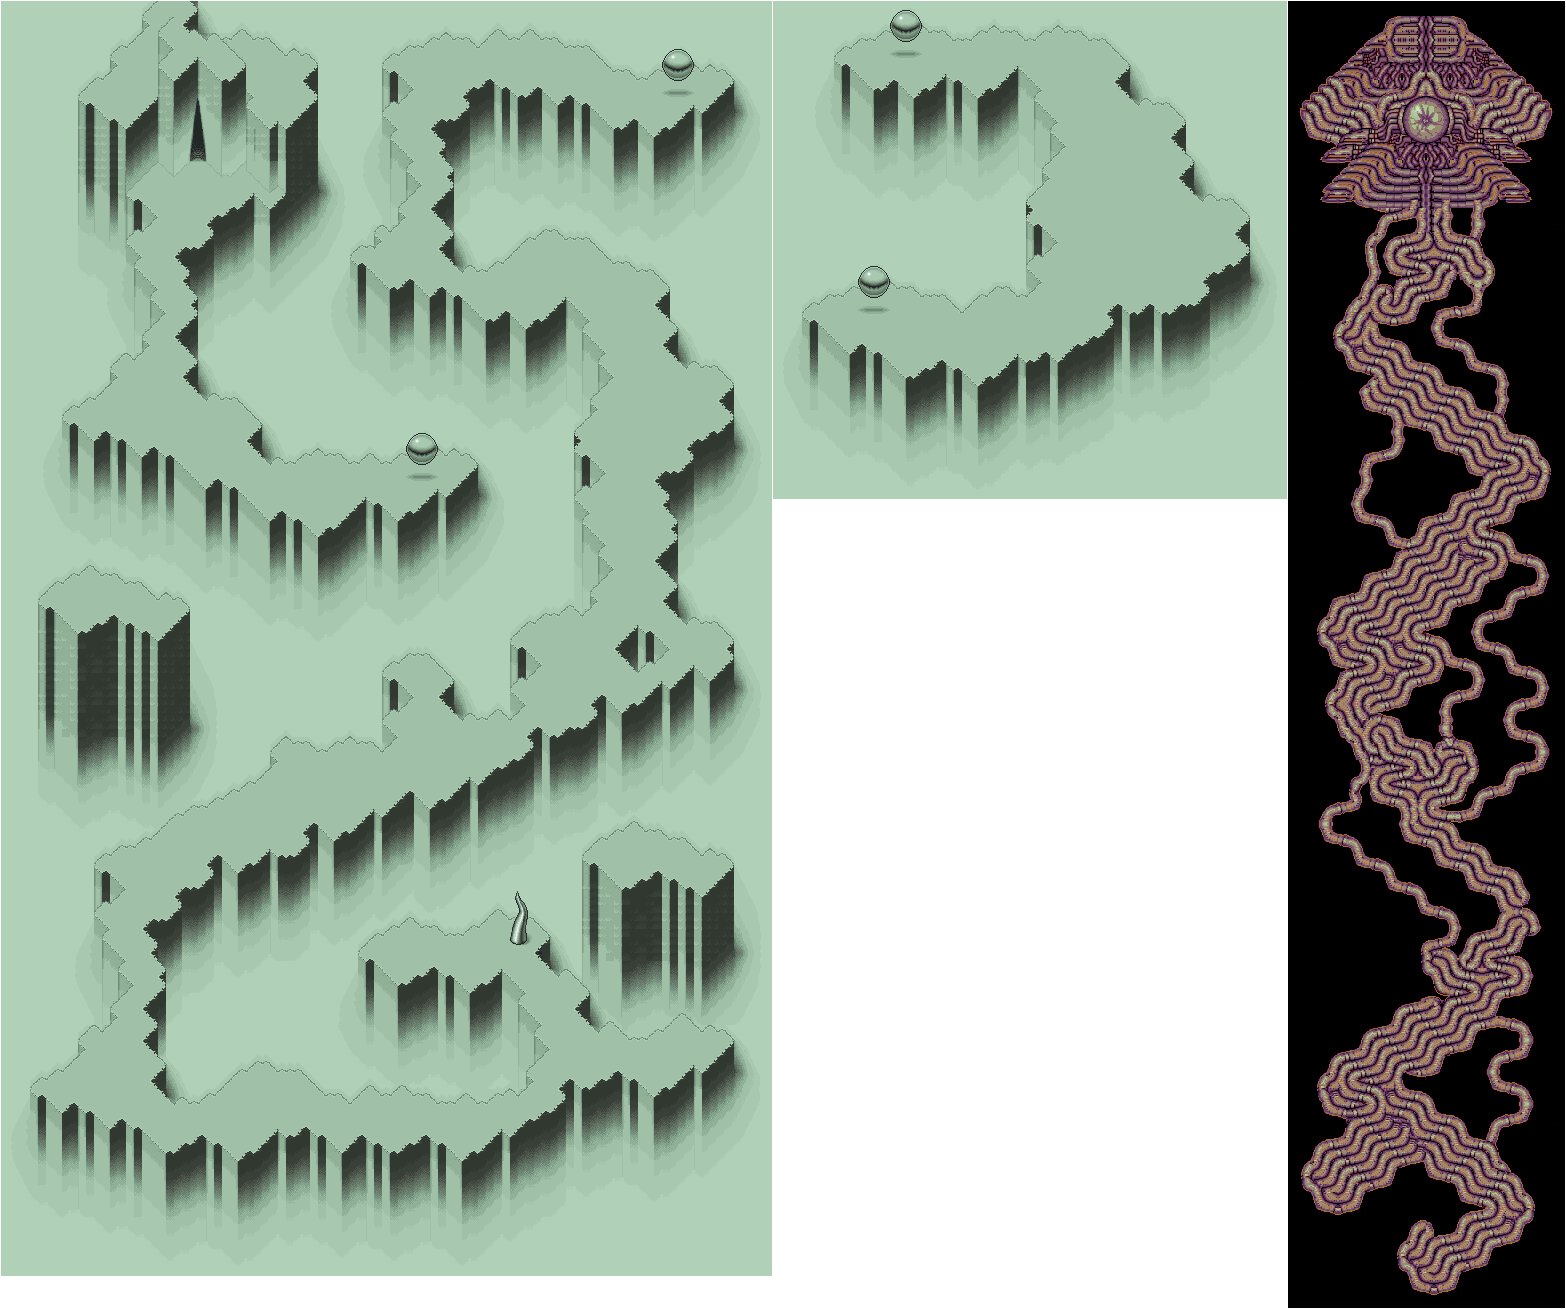
The orbs will teleport you from one part of the cave to another.

The Final Starman can cast Shield Beta, Starstorm Alpha, Starstorm Beta, Brainshock Omega and Healing Omega, making them one of the most dangerous enemies you can face. They also start with Shield Beta active, so you'll need to remove their shield first. 

You'll eventually come across a gap in a wall. This leads to the final battle with Giygas. 

Friday, November 10, 2023

Jerry Martin plays Strong Bad's Cool Game For Attractive People - Part 49 of 53


In this entry, we get rid of our annoying anime counterpart and get a sword.


With Bubs saved, you'll be able to play any game in the arcade machine, including those "crazy foreign-type games," but you'll still have to take down Trodgor yourself.

Head back to the Peasantry Inn and use the Snakes on the crate. From here, use Boxer Joe on the Snakes to smash the crate and find a medkit. Take it.

Head back to the Videlectrix Mainframe. You'll be able to play Stinkoman 20X6. When you go in, you'll find out you're in the HUD at the bottom of the screen while Stinkoman is above you. Stinkoman 20X6 can now be placed on the map.

From here, talk to Stinkoman. Click on Stinkoman (the first option), then use the angel option to compliment his boots. If you use the devil option, Strong Bad will ask why Stinkoman is called what he is called, as it sounds a little harsh, only to be called Dumb Butt Face in return.

If you click on the sword, Stinkoman will refuse to help with getting the sword. If you click on the robot (the third option), Stinkoman will make fun of his enemies on the screen, Chorch (the one with the pinchy arms) and Browntant (the one shooting at him).

From here, you can click on Browntant (the robot shooting at Stinkoman). Click on Stinkoman (the second option) to tell Browntant that Stinkoman makes fun of him behind his back. Browntant will tell you that he is not surprised, but given that he is prone to gossip thanks to daytime TV, he still wants to know what Stinkoman is saying. Pick the turtle (the first option) to mention that Stinkoman thinks he is too slow, and Browntant will give shooting faster a shot.

From here, talk to Chorch (the robot with the arms). Pick Stinkoman (the second option) to mention that Stinkoman is making fun of him and Browntant. When Chorch wants to know what Stinkoman is saying exactly, pick the second option to tell him that Stinkoman thinks he is too predictable. Chorch says he will not be able to stop thinking about it, then change up his moves. Stinkoman will get upset, and Choch and Browntant will eventually beat him and celebrate by heading off for some cold ones. From here, Strong Bad is finally in the game.

Use Mista Fixit on the ladder below you to fix it, then click the fixed later to climb it. Use Mista Fixit on the broken ladder to the left, and you'll also find a box. Click on the box to get the Stinkoman Hair for the photo box.

Use Mista Fixit on the broken platform to the right to fix it, then use him again to fix the broken ladder to the right. You can now click on the ladder to climb up it and get the Trogsword (as well as a Thundercats reference), which will allow you to slay Trogdor.

From here, head back to the Videlectrix Mainframe.

GOOD GRAPHICKETEERS CARDS:
- Carpal Tunnel Connie: Examine Strong Sad's bookcase.
- Trick Card 1: Use Gel-Arshie on Strong Bad's mailbox.
- Trick Card 2: Take a picture of the ghost to the left of the photo booth.
- Anti-Social Angus: Underneath the box in Peasantry Inn.

PARTY MEMBERS:
- The Algebros: Talk to The Algebros on the brick wall.
- Snake Boxer: Talk to the Snake Boxer in the Crates area and talk to him.
- Performing Bear: Click on the Space Circus Catastrophe game in the Mainframe.
- Gel-Arshie: Get the killscreen in Gel-Arshie's Fruitboarder.
- Innkeeper: Talk to the Innkeeper about repairing Limozeen's Spaceship.
- Mista Fixit: Use ??? on the bucket in the Crates area.
- Limozeen: Use the Innkeeper on Limozeen's Spaceship.

OUTFITS:
- EGA Hat: Smash the crate near Bubs with Snake Boxer.
- Stinkoman Boots: Take a picture of the ghost in the Strong House bathroom.
- Stinkoman Gloves: Use Gel-Arshie on Bubs' Concession Stand.
- Trogdor Shirt: Line up Trogdor with Cottage on the code wheel and use Gel-Arshie on it. (You need to do this before going to Peasant's Quest.)
- Elf Boots: Underneath the box in Peasantry Forest.
- Mista Fixit: Use Mista Fixit on the Cool Car.
NEW! Stinkoman Hair: Use Mista Fixit on the leftmost broken ladder in Stinkoman 20X6.

GAME BOXES:
- Halfathon Box: After obtaining the Light Musket, return and destroy the crate again.
- Lady Crate Ape Box: Underneath then box in Strong Bad's front yard.
- Fruitboarder Box: Use Gel-Arshie on the Brick Wall.
- Spirits of '76: Take a picture of the ghost to the left of the scorpion cave in Peasantry.

GHOSTS TO FREE:
- John Hancock: Give the feather quill to him in Strong Mad's Room.
- Samuel Adams: Give the tea bag to him near the stairs leading to the basement.
- Paul Revere: Give the lantern to him in the TV Room.
- Benjamin Franklin: Give the key to him in the computer room.
- ???: In the picture in the right side of the TV room.
- ???: In the picture in the bathroom near the tub.
- ???: In the picture near the left side of the photo booth.
- ???: In the picture in Peasantry Forest, left of the cave.

CHEAT COMMANDOS FIGURINES:
- Swampslash: Take a picture of the ghost in the TV Room.
- Dryghost: Use the Quest Item on the Munchox before using the Scorpion Food.

PEASANTS BURNED:
- Use the Innkeeper on Limozeen's Spaceship.

Tuesday, November 9, 2021

HCBailly plays Final Fantasy II AGAIN - Part 49 of 65


Now that we've gone through the fire floors, it's time to go through the ice floors.


It's now time for the Ice floors, complete with Ice items in the chests. Vampire Girls (VmpGirl) can easily be killed with a powerful Life spell, and Devil Flowers (DvFlowr) can both Poison and Confuse you if you don't set them ablaze fast enough.

Be careful around the ice water, as it does damage you when you walk in it.

The Ice Spear is a little more powerful than the Flame Spear. The Ice Gloves protect against Fire, and while it weighs quite a bit, it's not much of a problem if you have high evasion and a high experience level on shields. The Ice Armor protects against its own element.

The Devil Bloom (DvilBloom) is Rank 6 and has 1100 HP, and it can Poison or Confuse you with their physical attacks.

The Ice Sword is stronger than the Flame Sword, in case you are using swords.

The Basilisks are Earth-type enemies, and they can Petrify you. You won't much of a hard time with this game compared to others, as you'll more than likely have spells or armor that can protect you from their Glare attack.

The Ice Gigas (I.Gigas) can be tackled the same way as the Fire Gigas, and is the weakest of all the Gigas enemies here. Osmose can drain its entire MP if it's powerful enough, which can make the battle a lot easier.

After the Ice Gigas, you'll get the purple and gray floors.

Sunday, February 21, 2021

PrinceWatercress plays Sly 2: Band of Thieves - Part 49 of 49


At last...the final confrontation with Clockwerk/Clock-La! How will this all end?

Mega-Jump Job


A radio pulse will need to be sent out to Carmelita so she can find the blimp. You'll need to jump up four radio towers and power them up via a Mega-Jump pack. By pressing R2 (or whichever button you assign it to), you can perform a super high jump.

Use L3 to find the four radio towers, and use the Mega-Jump Pack button to jump up to the radio towers. You can also Mega-Jump off spire jump points, too. Once you make it to the platforms of the towers, you'll need to make wrap-around jumps to the top of the tower you're on, then press Circle at the very top to activate the tower. Be sure to use the Paraglide to float towards the towers while you are high in the air.

The Mega-Pack will only work for this job; once you're done with this part, the Mega-Pack will be gone.

Carmelita's Gunner


Close to the safe house is where you will meet Carmelita. From here, it's (almost) down to business where Sly mans the turret to take on Clock-La. Like with all the other turrets, you'll need to watch the temperature gauge at the bottom while aiming with the left control stick or D-Pad and firing with R1.

Try to get whatever damage you can on Clock-La as you keep all of her attacks from hitting you. If any missiles are fired at you, destroy them. The missiles with the red trails take multiple shots to destroy. As for the electric rings, they are handled a little differently; unlike the first game, where you had to shoot the rings multiple times to shut off the electricity flowing into the center so you could safely pass through them, you only have to shoot them once here and keep from accidentally hitting them a second time and powering them back on, leading you to shoot them a third time to turn them on again.

If red waves emanate from Clock-La, shoot her multiple times quickly, or else you'll get hit with a powerful psychic shockwave.

Once you beat Clock-La, Clock-La will crash into the blimp, sending the safe house scattering into the air with Bentley and Murray still inside. It's now time to make your getaway, but you'll need to save Bentley and Murray first.

Showdown With Clock-La


You'll have to jump - and Paraglide - from one platform to the next in order to catch up with Clock-La. Hold R1 at all times. When you reach the last platform, jump towards Clock-La and keep Paragliding towards her. You'll eventually land on one of her wings to take her on.

Spire jump your way to the right wing behind Neyla's wing without getting hit. When she looks at you, get a few shots in, and when her eyes glow red, get on the spire jump point at the back of her neck to avoid getting blasted.

After this, Clock-La will crash land in Paris. It's time to finish the job and remove the hate chip inside of Clock-La to power her down for good. As Murray, jump over the lasers, then go up to Clock-La's face and lift up Clock-La's face. From here, you'll play as Bentley. Lay down bombs on the two hinges at the side of Clock-La's mouth and place bombs to blow them up. From there, you can grab the hate chip with Bentley, but when that happens, Clockwerk/Clock-La's beak will crush Bentley, effectively paralyzing him. The Cooper Gang gets away, with Murray carrying Bentley out as Clockwerk/Clock-La explodes.

With Clockwerk's parts destroyed and in heaps, Carmelita destroys the hate chip, which in turn destroys Clockwerk's body and renders all the parts inoperable. Afterwards, Carmelita puts the Cooper Gang under arrest, and Sly proposes he goes quietly while Bentley and Murray are allowed to walk. Carmelita agrees, and Bentley and Murray leave their gear behind as they leave. After Carmelita gets promoted for capturing Sly, Sly and Carmelita get to know each other on the plane ride to prison, but when Carmelita finds out that the plane ride has taken two hours - and Sly notices he has seen the Eiffel Tower seventeen times - Carmelita finds out what is going on and Sly manages to escape, leading to the least cliffhanger-y ending and the easiest 100% completion in the series, due to the game having nothing like the Master Thief Sprints from the first game or the Master Thief Challenges from the third game. Congratulations!

Controls

D-Pad/Left Analog Stick: move
Right Analog Stick: move camera
X: jump and double jump
Square: Horizontal Attack
  • horizontal attack (as Sly)
  • slam enemies launched into the air from behind (as Sly)
  • hook punches (as Murray)
  • Thunderflop (as Murray; in mid-air only)
  • crossbow swipe (as Bentley)
Triangle: Vertical Attack
  • vertical attack (as Sly; used to knock enemies into the air)
  • downward dive (as Sly; in mid-air only)
  • uppercut (as Murray)
  • drop bomb (as Bentley)
Circle: Action button (near blue/green/purple sparkles and character icons)
  • pickpocket (as Sly)
  • stomp (as Murray; use Square to throw object/enemy)
R1: hold to run

Select: Gadget Grid
  • Control Pad: highlight gadget
  • X button: confirm gadget
  • L1, L2, R2: assign gadget to button pressed

L1, L2, R2: use gadgets assigned to button pressed

Start: pause menu
  • Control Pad: select menu choice
  • X button: confirm choice
  • Start: un-pause game

L3 (press the left analog stick): locate beacons for mission objectives

R3 (press the right analog stick): Enter and exit Binocucom for first-person view
  • Left analog stick: look around
  • Right analog stick: zoom in and out (with up and down on right stick)
R1: 
    • take pictures with spy camera (as Sly; when applicable)
    • shoot sleep dart (as Bentley)

Hacking mini-game controls:
  • Left analog stick: move
  • Right analog stick: aim and fire gun

Wednesday, July 15, 2020

PrinceWatercress plays Terranigma - Part 49 of 50


It is now time for the final battle with Dark Gaia!


Once you enter the hole, it's just a short trip back to Crysta on the overworld map. If you talk to anybody in the town, they will turn into souls and attack you, saying if you had never found out, you would have been happy.

Once you trigger the red hue and the impending doom music, head to the Elder's house and see the Elder. He will thank you for resurrecting the world but tells you that you have learned more than you should know. He asks you to follow him so he can show you something.

Leave the Elder's house. The Elder will tell you to look at the sky. He will tell you that everyone in Crysta are replicas made from Crystal Blue, and float to the sky like Crystal Blue when used up. The Elder goes into a brief monologue involving duality before telling you that your duty is now finished. He then says it is now time to head towards the Gaia Stone.

You'll be teleported to a very strange place with very strange faces similar to those on the underworld tower doors. Keep running north and don't stop, and press A to go through the dialogue. You'll find out you are inside the sun in the underworld, and that the infinite corridor is the history of living things. You'll be told the planet was doomed with an unfortunate fate since the very start. The voice then states it will fight like you, with real form.

You'll be teleported to another room, where you'll meet Dark Gaia. This is the final boss.

Get to the far left at the start of the battle, and run around when you see the "Gaia's rage!" message. When he launches an orb of light, face Dark Gaia and keep using the rapid stab to reflect it back and attack him. Then, avoid the upper body when it travels towards you in the shape of a spiky ball, and go to the bottom of the screen and hit it with a dashing attack when it stops flashing.

You'll then be teleported to another screen when you beat this first form.

For Dark Gaia's second form, stay at the very bottom of the screen so Dark Gaia doesn't back away. Avoid the arrows, and when Dark Gaia approaches the north end of the platform, attack the mouth in the middle with your regular stab repeatedly. To avoid the laser, dash through it. Also, do not get hit by any of the crescents, especially the blue ones as they will freeze you.

There is a Sonic Boom attack that Dark Gaia can do, but it can easily be dodged by dashing to the far right or far left. You can jump over it, but going all the way to the side with the dash attack is better.

When the mouth in the middle unleashes a white light that covers the entire platform, block it. Otherwise, you will be absolutely annihilated.

Once you've done enough damage to Dark Gaia this time, you've done it! You've won!

After you beat Dark Gaia, you'll hear the voice from the hero's grave in Antarctica. Lightside Ark's spirit. He tells you that Dark Gaia created you to rule the planet as his own, and that you were created from Lightside Ark when Dark Gaia was first sealed, as was the rest of the people in Crysta. He then tells you about Storkolm and how the world runs on a balance of light and dark. When Darkside Ark came to realize that, everything was made great again. Both Arks then return to their respective worlds.

You'll be back in Storkolm, but now the Crystal Blue will be flying there. Ark realizes this was his hometown, but with nobody to share it with, it's meaningless. He feels the pain Lightside Elle went through when everyone else in her town was killed. Yomi shows up, and Ark wonders what he fought for all this time, as he resurrected the above world but unintentionally did it for evil forces' gain. Yomi reminds Ark that he created heaven and earth, and that there is always a balance. Ark then finally asks Yomi what kind of creature he is, and Yomi explains that before animals evolved, they all looked like him. In other words, Yomi is the distant ancestor of every animal ever. Yomi then says that humans evolved to stand on two feet and use tools, but now rely more and more on machines, and thinks that humans may evolve back into Yomi-like creatures. Yomi then tells Ark he is going back to sleep until the world has another legendary hero and is in need of them.

Ark then hears from Light Gaia, the soul of the above world. Now that Dark Gaia is destroyed, Crysta and the underworld will disappear, and the above world will return to normal. It is then revealed that the blood of both Light and Dark Gaias flows through Ark, and now that his duty is finished, his body will soon disappear as he was a creation of Dark Gaia. Light Gaia commands Ark to enjoy his last day in peace.

Ark then reappears in the Weavers' home. Strangely, Darkside Elle is still alive as if nothing had happened. Happy music plays in the town. From here, you can talk to everyone. Also, if you try to buy anything, the game won't let you. The Magishop will also be replaced by another merchant who tells you Magirocks don't exist. If you talk to the people in the Elder's house (now called Ark's, since the Elder doesn't exist anymore), they'll tell you the blue door just leads to a broom closet. If you talk to the fortune teller, she will tell you that a new world is starting. You'll learn that all traces of your journey have disappeared.

When you're done, go back to your room, where this whole game began and move into the bed. You can put the controller down. You're finally done. Enjoy the credits.

Tuesday, May 21, 2019

HCBailly plays Final Fantasy IV (Super Famicom) - Part 49 of 70


We've got quite a few new enemies in this entry, so read on to find out how to beat them all!


The Belfegoyle isn't exactly the toughest enemy in the world, and they are weak to projectiles like boomerangs and arrows.

There is a secret path in the left-hand wall of the third floor, and one of the paths leads to a Poison Axe and a Forged Kitana. The Poison Axe isn't anything to write home about, but the Forged Kitana is a great weapon for Edge.

The Arache keeps casting Quake, but if you've cast Levitate, this can't harm you.

The Bloody Red is weak to projectiles.

The Fiend - a little red demon - will counter-attack with Charm, but if you cast Toad or Mini on them, you 

There is a warp tile on the third floor. It will take you to the fourth floor.

The secret path on the right-hand wall leads to a chest containing five Satanites. Get to Rydia's turn as quickly as possible and cast either Toad or Mini on them. If you can hit all of them with it, the battle becomes much easier.

Beating the Satanites gives you the Defender Sword for Cecil. Save it for later.

The fourth floor is the Phantom World. When you talk to the monsters here, you'll find out that they are good and that they have been waiting for Rydia to return. You'll also hear about the Phantom King, who rules over the Phantom World.

There is a hidden area on a tile north of the chest with the 6000 Gil. The Yoichi Arrows and the Yoichi Bow are powerful are here, but you may find the bow more important than the arrows.

One of the monsters is a Chocobo...and the Chocobo talks! To the west are two Bombs, and they talk, too.

At the Inn, you'll learn that if you cast Levitate, you can escape Titan's wrath.

To the west of the inn is a room with a save portal.

One of the monsters will mention that unless you can defeat Lady Ashura, the Phantom King will not listen to you.

The Rat Tail is a useful item, and you'll have to step on the warp tile leading to the town from the north to get it.

At this point, it's time to level grind before going further. Be sure that Rydia learns Bolt 3.

Sunday, June 10, 2018

HCBailly plays Terranigma - Part 49 of 75


We finally head to the Mermaid Tower to take care of the monsters...and it's dead easy!

World map by Tropicon. Liotto maps by Amir Azadur.


Liotto


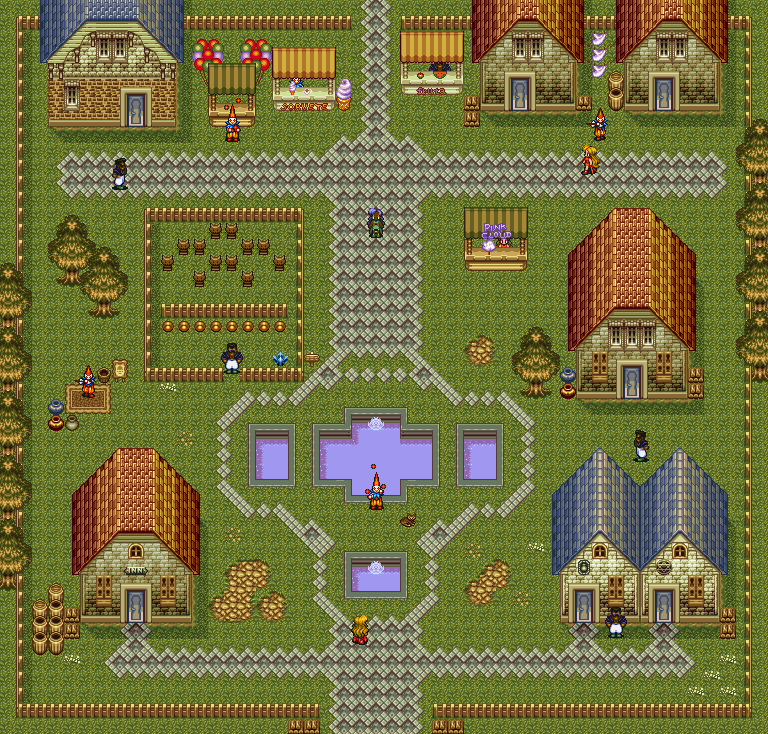
To the right of the entrance to Corcobet Hill is a fruit stand. Here, you can eat an apple or a watermelon.

To the right of the fruit stand is a woman with a dancing monkey. Okay. To the right of that house is a woman who will tell you about the Mermaid Tower. If you toss the wastebasket near the bed and hit the monkey with it, the woman will get mad at you and the monkey will stop dancing.

The Pink Cloud booth is where you can buy some cotton candy for 10 Gems. You'll also meet Meilin here. How she managed to get all the way to the Americas is never explained, but when you talk to her, she'll tell you she's decided not to leave your side again. Regardless of your decision, she'll ask to go look at the carnival. Meilin will join you again.

Near the Pink Cloud booth is a woman with blue hair. She'll tell you a sailor has claimed that Astarica is behind the mountains in the northwest, and that the people there held rituals to get closer to God. We won't be able to go over there until later in the game. 

Head to Corcobet Hill. She'll tell you that she wants to believe that if lovers do meet at Corcobet Hill, they will remain happy. She then asks if it would be odd if she got to like someone...even if that someone was you. She tells you that she will be back at Corcobet Hill later tonight and that she wants you to return to tell her how you feel about her. She then tells you right out of the blue that she loves you.

You have a girlfriend in Elle underground. What.

Head to the inn and enter the room to the left. Sleep in the bed, and it will be night when you leave the inn. Head back to Corcobet Hill. You'll then see Elle from Crysta, who tells you she came here with the Elder's permission. She then tells you that the sights of Crysta were beautiful because she was with you, and that she knew for the first time how lonely she was without you. Elle then declares she wants to be with you like back then...then she disappears.

Meilin shows up from behind the statue, and tells you that you saw the person in your heart...and that it wasn't her. She then hates your guts again.

When you leave Corcobet Hill, it will be daylight again. You're done here.

Liotto


Head to the port. You'll see a captain talking to three soldiers, and he will announce that he will give a boat to anyone that defeats the monsters near the Mermaid Tower. Talk to the captain to take him up on his challenge. Say "Sure!" and he'll tell you to get on board when you're ready. When you're all ready, talk to the captain, tell him you're ready, and you'll automatically head to Mermaid Tower.

Make your way up to the stairs at the north end, then keep making yout way to the south once ytou drop down. There will be a doorway at the bottom. Go north after you enter. The Thunder Pike will kill all the fish that swim around easily. Be sure not to get hit, or else the bubbles the spit will throw you back to the wall and be pretty annoying.

You'll soon come across a huge room. Here, you'll fight a boss, which happens to be a blue palette swap of the fish you've fought in the tower. Equip the Thunder Spear if you have it, then face away from the boss so it approaches it. When it closes in, quickly hit with a dash attack. If you have the Thunder Spear and your level is at least 23, you can finish the boss off in one strike. Otherwise, back away from the boss and be ready to strike again.

Once the monsters are destroyed, there will be no sign of other monsters and mermaids will return to the tower once again. Go back upstairs and you'll meet the mermaids. The mermaids are happy to be back and ready to help humans navigate, as this tower is a beacon for humans.

One of the mermaids is named Nana, and she used to be a human girl. She tells you that she was on a ship to Freedom to meet her fiance when a storm hit the ship and took it down. She will give you the Engagement Ring to hand to Servas, and a message for him to get back together with her when they're reborn. Poor Servas...

Another mermaid will tell you that is this is where ships go when lost at sea, and where souls who die at sea gather.

There is a chest where you first meet the mermaids, and if you open it, you'll get the Sea Spear.

Thursday, March 8, 2018

skorch82 plays Brave Fencer Musashi - Part 49 of 70


We've gotten something that will help us through the castle, but now we've got to make our way through the maze again...

Now that you've got the BlueEye, it's time to make your way back through the maze. This time, however, you'll want to head to the door in the lower-left corner with the Steel ability. Use it to get past the spikes in the path. Follow the path from here and you'll be able to rescue Butcher Chops.

Head back down to the lower level and enter the right-hand door on the left side of the lower level. Use the BlueEye on the locked door here. You'll find Janitor Sloppy-Joe.

From here, double jump onto the stairs and stay on the upper level. You'll find the RedShoes, which happen to be the L-Shoes Legendary Shoes). You can now walk on the slippery slopes here.

Head back into the right-hand door on the right side of the lower level. Now that you can walk up the slippery slope in here, you can open the chest at the other end. This contains a RedCloth which turns out to be E-Undies...Ed's undies. Eww. Give those to Connor at the pawn shop.

Head to the right from here. You'll enter another maze much like the one you had to go through earlier. If you see any discolored spots on the floor, those are the shadows of those monsters that will crush you.

There is a Bincho Field in the upper-right corner.

Head to the door in the lower-right corner of the maze.

There is a treasure chest in this maze, but the treasure is something you'll either end up discarding or selling at the Pawn Shop. That's all you need to know.

Thursday, February 23, 2017

Chilean Retrogamer plays Wario Land 2 - Part 49 of 57


We're heading back to the town as we snap up the last of the treasure.

Chapter 4: In Town

Story 5: Anyone for B-ball?


5:18 - Now to look for the secret exit here. Collect all the coins, then head to the right.

5:43 - Keep going...

6:16 - Now go the right, go up the stairs and enter the first window.

6:30 - Use the Ground Pound to get the Spear Goon to come to you, then throw him through the wall to the right of the boss room door. Just keep going right. It's there.

Sunday, December 8, 2013

brickroadbrickroad and SovanJedi play Secret of Evermore - Part 49 of 88


After a zillion hours, Brick and Sovan finally find Sting. Watch to find out how they did it.
All maps by Grizzly.
 

Desert


Guess what?

I finally found out how to get the Sting spell...something I never found as a kid.

You basically have to travel north to the second oasis, then you have to travel about nine screens up and four screens right. (You basically have to go between the second and third oases, reach another oasis in this direction, then you have to keep going northwest until you find the man.) You should be able to find the Alchemist from there. He'll give you the Sting formula.

Sting

2 Water, 1 Ethanol

If you talk to him again, he'll let you equip and unequip spells. If you talk to him as The Dog, he'll give you a free Spiky Collar.

Nobilia


When you return to Nobilia, you'll find out that the marketplace is empty. Head down to the Town Square and you'll instantly walk up to the Sacred Dog. The fake Horace will place the Diamond Eyes in the Sacred Dog, and you'll have to fight the monster underneath it that's been waiting to be revived after all this time...Aegis.

Monday, June 24, 2013

Eexecute plays Turok 2: Seeds of Evil - Part 49 of 51


That thing's ugly.

All right, when the battle begins, target the arms and avoid its hands as it swings at you. When you hit them enough times, it grows some new arms (they're tentacles!) and you'll run away in the immediate cutscene.

From this point, the Mother will try to lower itself and drop back down, causing boulders to fall from the ceiling. It'll also propel itself towards you in an attempt to smack you with its own bulk. Keep hitting the arms and keep moving around, and it'll grow legs.

At this point, hit it in the head and avoid the mouths that it sends after you. Also, avoid the pink energy blasts it shoots out of its mouth. After enough damage, it runs away.

You'll unlock a new cheat and it's on to the Primagen, but first...the Level 5 Primagen Key...