Showing posts with label part 48. Show all posts

Wednesday, March 4, 2026

PrinceWatercress plays Super Mario Odyssey - Part 48 of 92


Now that Bowser and the Broodals are gone, it's time to get everything else in Bowser's Kingdom.


8. Sunken Treasure in the Moat - This is found in the pool of water to the left past the Main Courtyard checkpoint. Just dive down and follow the path to get this Power Moon.

15. Caught Hopping at Bowser's Castle! - At the top of the keep, there are two rabbits. Chase and catch the one on the right for a Power Moon; the left one only gives you a coin.

17. Bowser's Kingdom Timer Challenge 1 - After beating the Broodals' robot, return to the site of that boss fight for another checkpoint as well as a scarecrow. Throw Cappy at the scarecrow, then jump up the platforms and get the Power Moon before time runs out.

27. Fishing(?) in Bowser's Castle - At the Beneath the Keep Checkpoint, you'll want to head to the east side and look for Lakitu. Possess Lakitu and look for the shadow of the big fish. Catch the fish to find Poochy instead of a Cheep-Cheep and get this Power Moon.

30. Bowser's Castle Treasure Vault - At the Beneath the Keep Checkpoint, you can either go to the east and use a Pokio to get up the wall, or you can get to the roof, head east and drop down. Either way, you'll find this room with a ton of coins and a treasure chest containing a Power Moon.

33. On Top of the Spinning Tower - There is a pool of purple poison near the Beneath the Keep checkpoint. Near it is a set of doors, and to open the doors, you'll need to defeat the nearby Stairface Ogre. Inside is an area where you'll need to take control of a Pokio to climb up a tower and find the Power Moon at the top. Watch out for the spinning segments!

34. Down and Up the Spinning Tower - Once again, you'll need a Pokio. You'll need to get on the other side of the tower near the bottom in the area where you found Power Moon #33. There, you'll find an alcove containing a key. Grab the key, then climb up the tower. You'll find the Power Moon at the top.

35. Jizo's Big Adventure - There is a Warp Pipe in the Showdown Arena area that leads to a puzzle that requires placing Jiro statues on P switches. Thankfully, being in a Jiro statue protects you from being stung by spikes. You'll need to open a path leading to the exit in the center to get this Power Moon.

36. Jizo and the Hidden Room - In the area where you find Power Moon #35, you'll need to place a Jiro statue on the P switch near the pipe that you came into the area from. You'll need to head back to the exit, then wall jump and cap jump off the remaining wall into the alcove in the center of the wall for a Power Moon.

Regional Coins


Monday, March 17, 2025

PrinceWatercress plays Wario Land II - Part 48 of 51


It is deceptively simple.


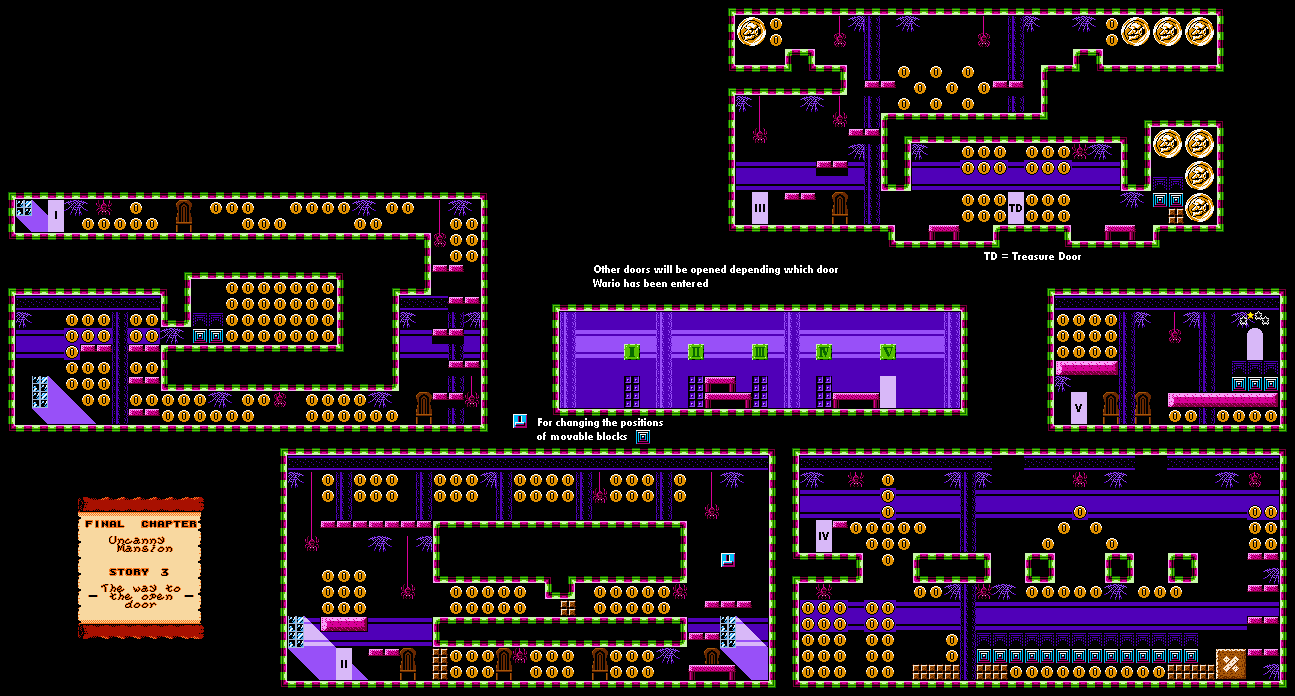
Final Chapter: Uncanny Mansion

Story 3: The way to the open door


When you start the level, there will be five doors, each with the Roman numerals of I - V above them. The fifth door will be the only one open at the start, and when you enter it, you won't be able to reach the exit unless you hit a switch to move the blocks upwards. Get the coins here and leave.

When you return to the previous room, V will be closed and IV will open. Go into Door IV and get all the coins, then head back to the entry room. IV will be closed, and I and V will be open. Enter I, and let yourself become Zombie Wario to take out all the enemies and get their coins. Get what you can and return to the entry room.

Door III will be open. Enter there. The treasure room will be to the right, but make sure you take out the enemies and get the coins before playing the treasure room and winning the chalice.

II and IV will be open. Enter Door II, and watch out for the ghost and the birds on the way to the switch. Hit the switch. Leave, and II and IV will still be open. Go through IV and get the coins you missed, then re-enter Room I and get the coins you missed. Be sure you re-enter room III afterwards and get the coins you missed there, too. Enter II one more time, then IV, then V. With the blocks in place, you can finally exit.

Wednesday, October 16, 2024

PrinceWatercress plays Chrono Trigger (Super NES) - Part 48 of 70


In this entry, we finally open up all the sealed doors and chests now that the Pendant is able to open them all up.


Now that we're able to open sealed doors and chests since we powered up Marle's pendant at the Mammon Machine, we can.

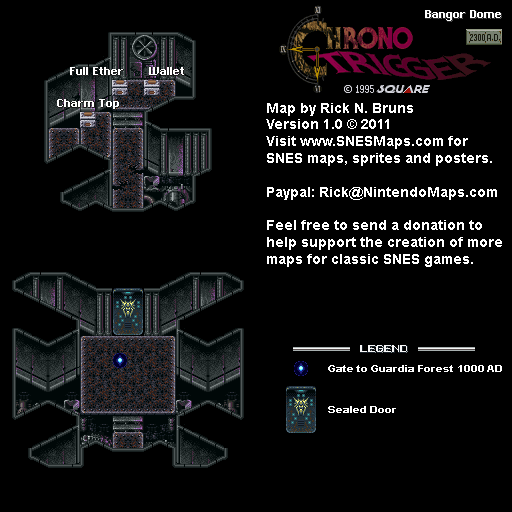
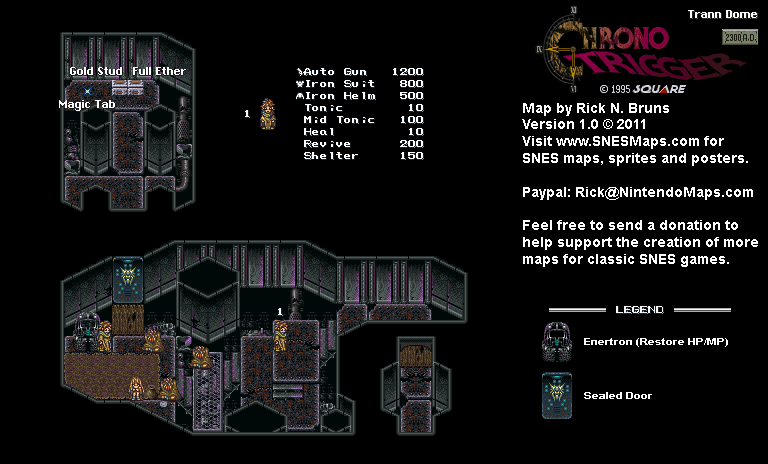
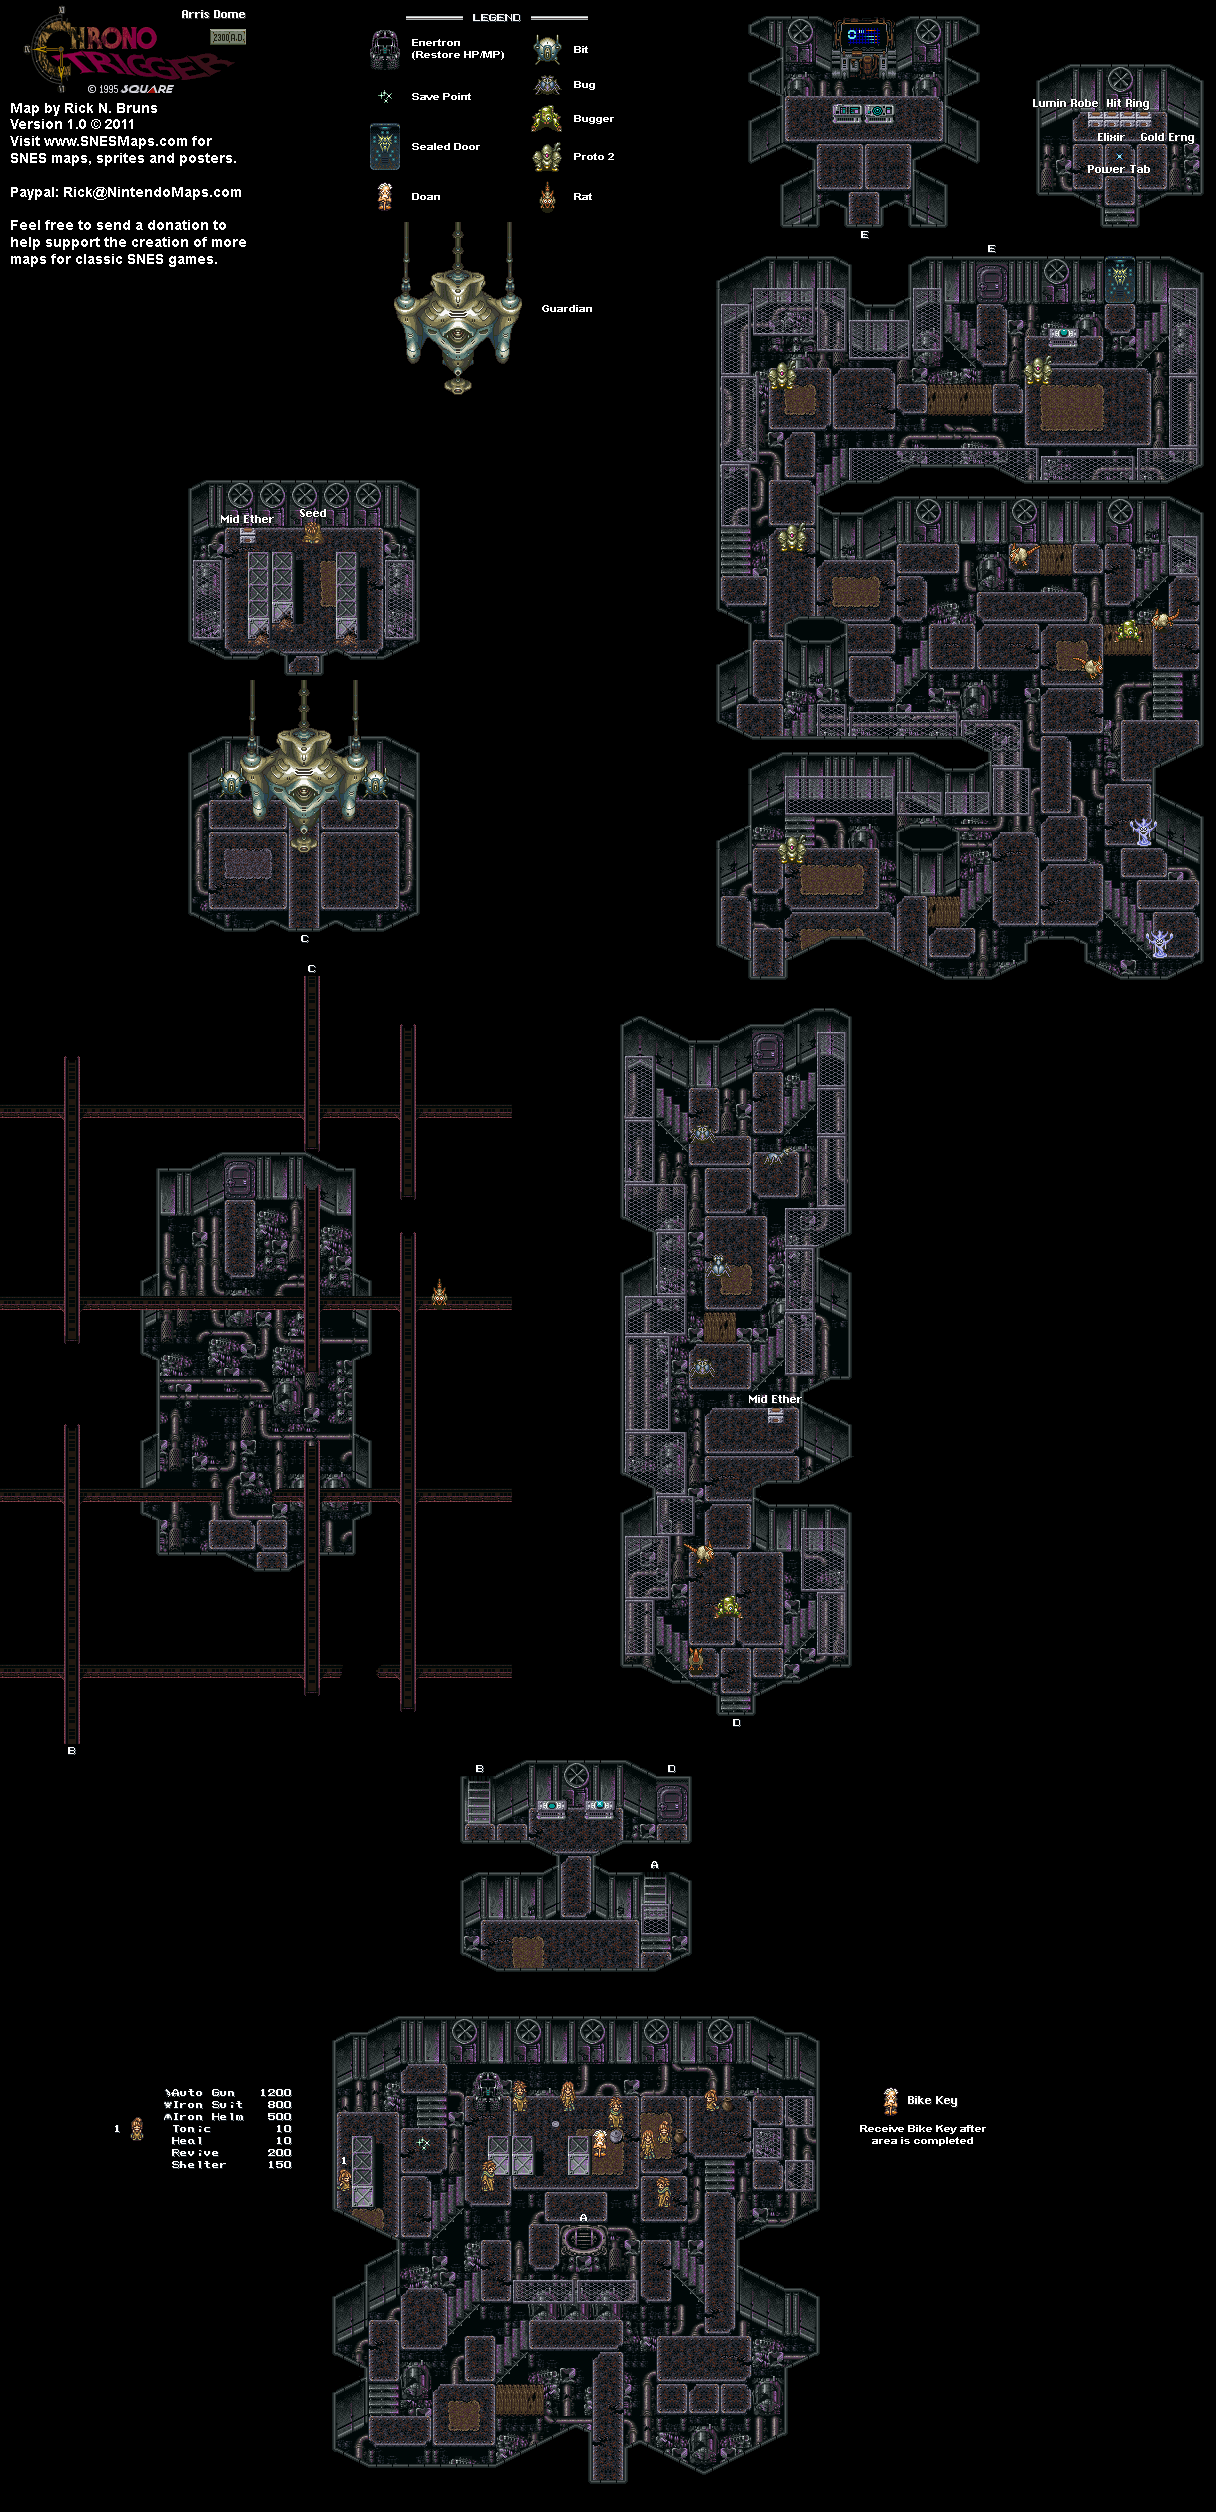
First up are the sealed doors in 2300 A.D. There are three: one in Bangor Dome, one in Trann Dome and one in Arris Dome. Bangor and Trann can be accessed as soon as you get there, but you'll need to head back down to close to where the computer is to get to the sealed door there.

At Bangor Dome, you can get the Charm Top, a Full Ether and a Wallet. The Wallet converts experience points to gold when equipped on anyone in the active party. The Charm Top is an accessory that only Ayla can equip, and when used, ups the chances of Ayla getting an item - especially a rare one - with Charm. It's a very useful accessory and will come into play in the late game.

At Trann Dome, you can get a Gold Stud (which cuts MP use by 75%) and a Full Ether. You can also find a Magic Tab on the ground.

At Arris Dome, you can find a Lumin Robe, an Elixir (which refills all HP and MP for one party member), a Hit Ring and a Gold Earring (which increases the wearer's HP by 50%, essentially doubling it).


Powering up Marle's pendant with the Mammon Machine also allows you to open all the sealed chests. However, there is a secret to this.

You'll need to go to the chests in 600 A.D. and press A near them. You'll get a prompt as to whether or not you want to open them. Choose "No." Go back to those same chests in 1000 A.D. and open them to get an upgraded version of what you could have gotten in 600 A.D.

The Vests absorb all elemental damage of their respective type (Red for Fire, Blue for Water, White for Lightning/Light, Black for Shadow/Darkness), as opposed to the Mails that only absorb 50%. Also, the weapons you can get with this trick are more powerful than the ones you can get without it.

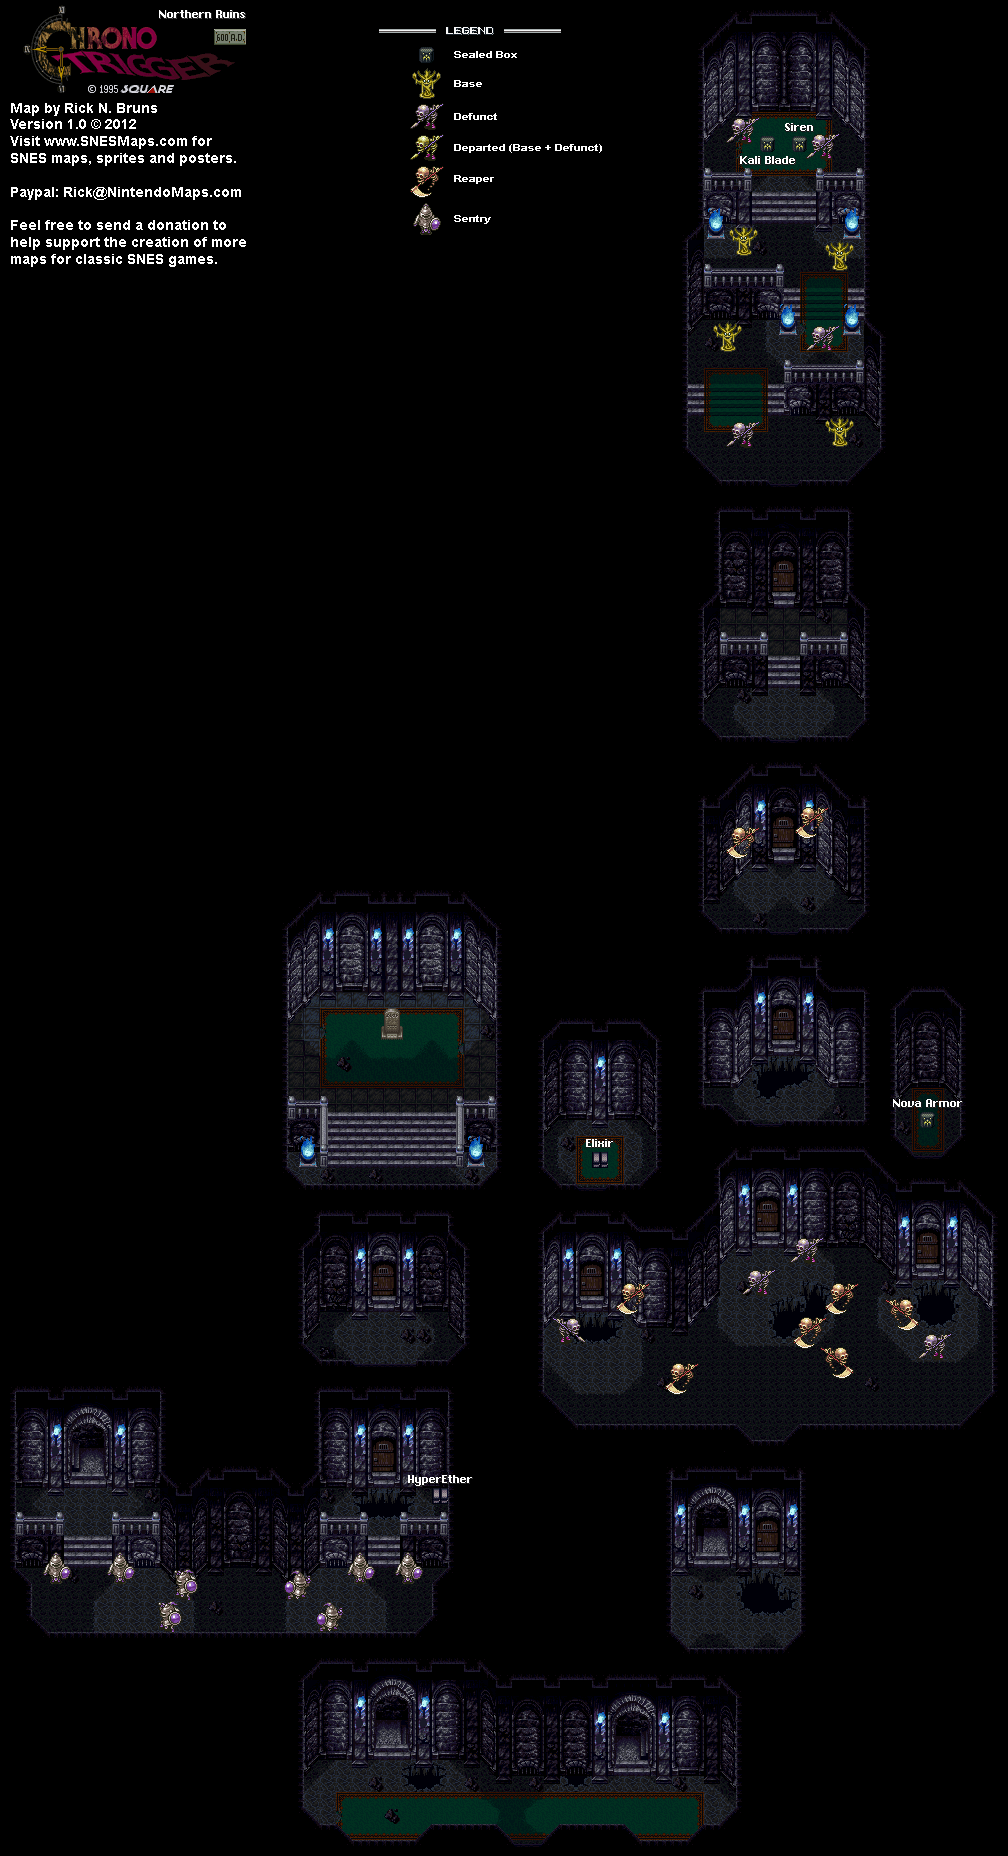
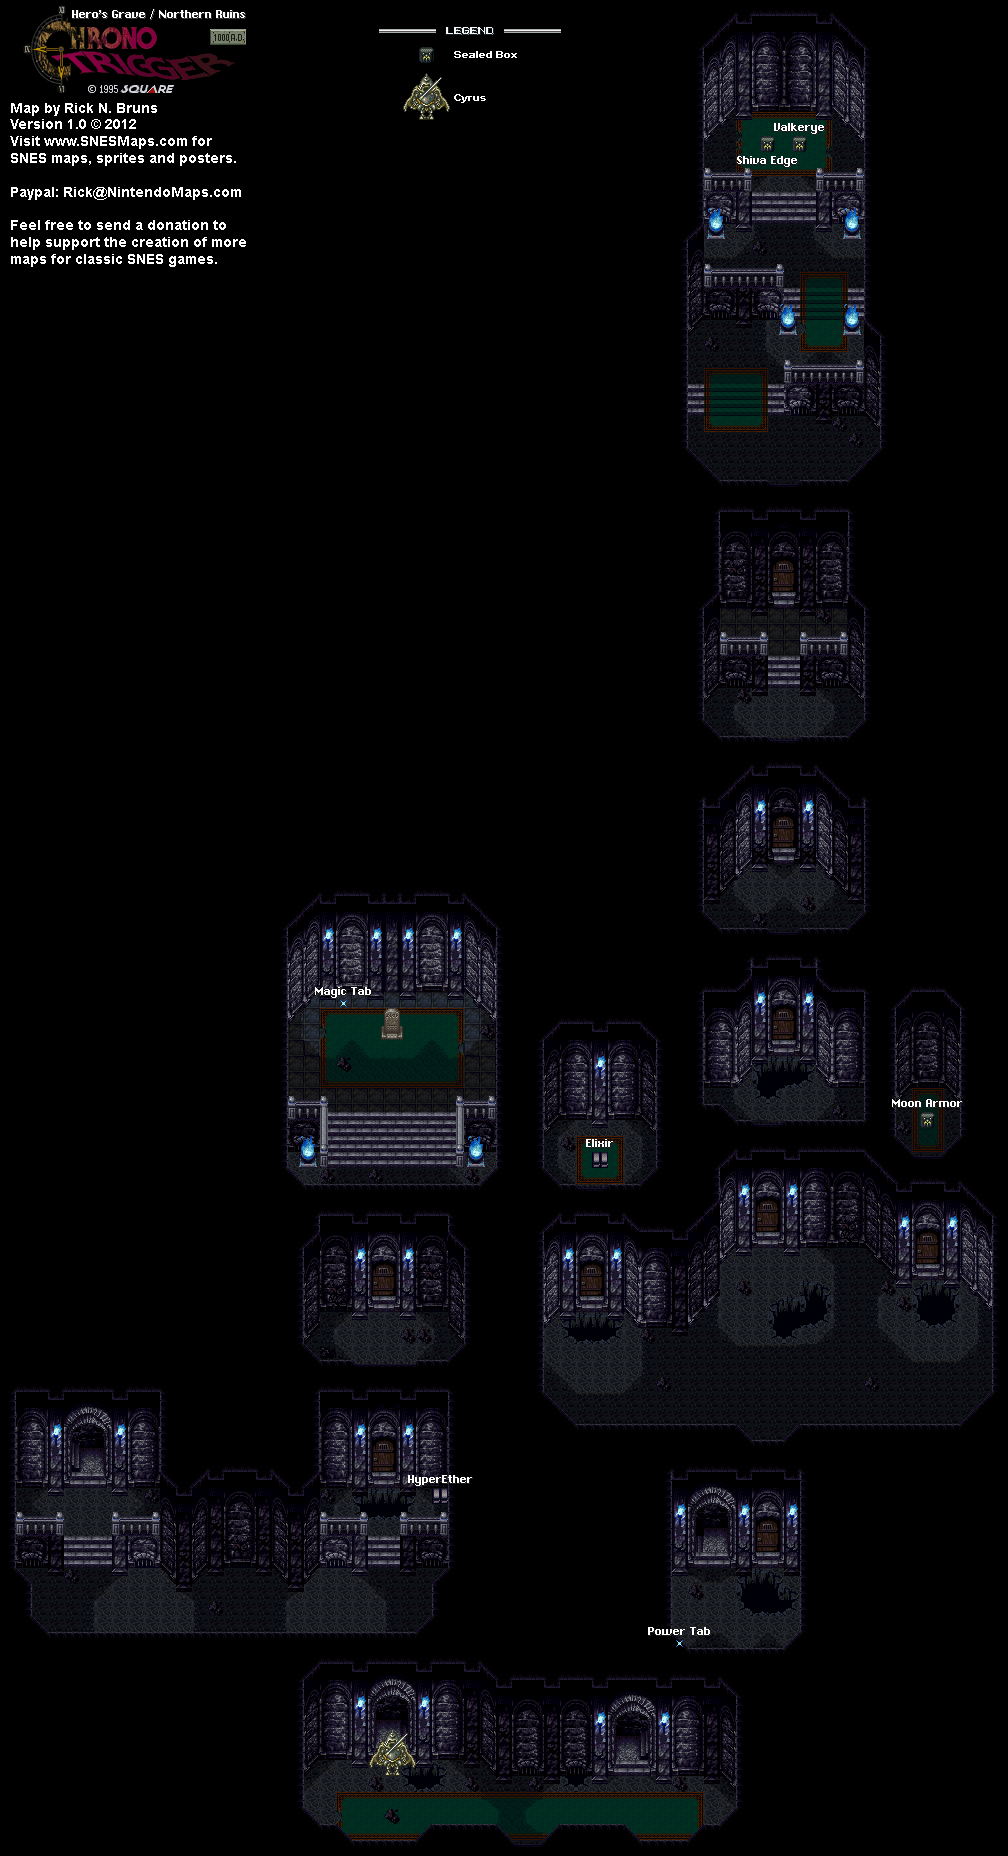
The Nova Armor protects from status ailments, while the Moon Armor - which has more defense - does not (it only increases Magic Defense by ten points). The Siren can inflict Stop on enemies, while the Valkyrie, which is more powerful, does not. The Shiva Edge, compared to the Kali Blade, does quadruple damage on critical hits.

The Magic Cave, Heckran's Cave and Guardia Forest chests are the only chests to which this rule does not apply. Magic Cave and Heckran's Cave do not have opposite era equivalents, and the Guardia Forest chests for both 600 A.D. and 1000 A.D. are seemingly considered completely different chests.

Here is the list of everything you can get with and without the trick.

Truce Inn: Blue Vest (600 A.D.) / Blue Mail (1000 A.D.)
Porre Elder's House/Mayor's Manor: Black Vest and White Vest (600 A.D.) / Black Mail and White Mail (1000 A.D.)
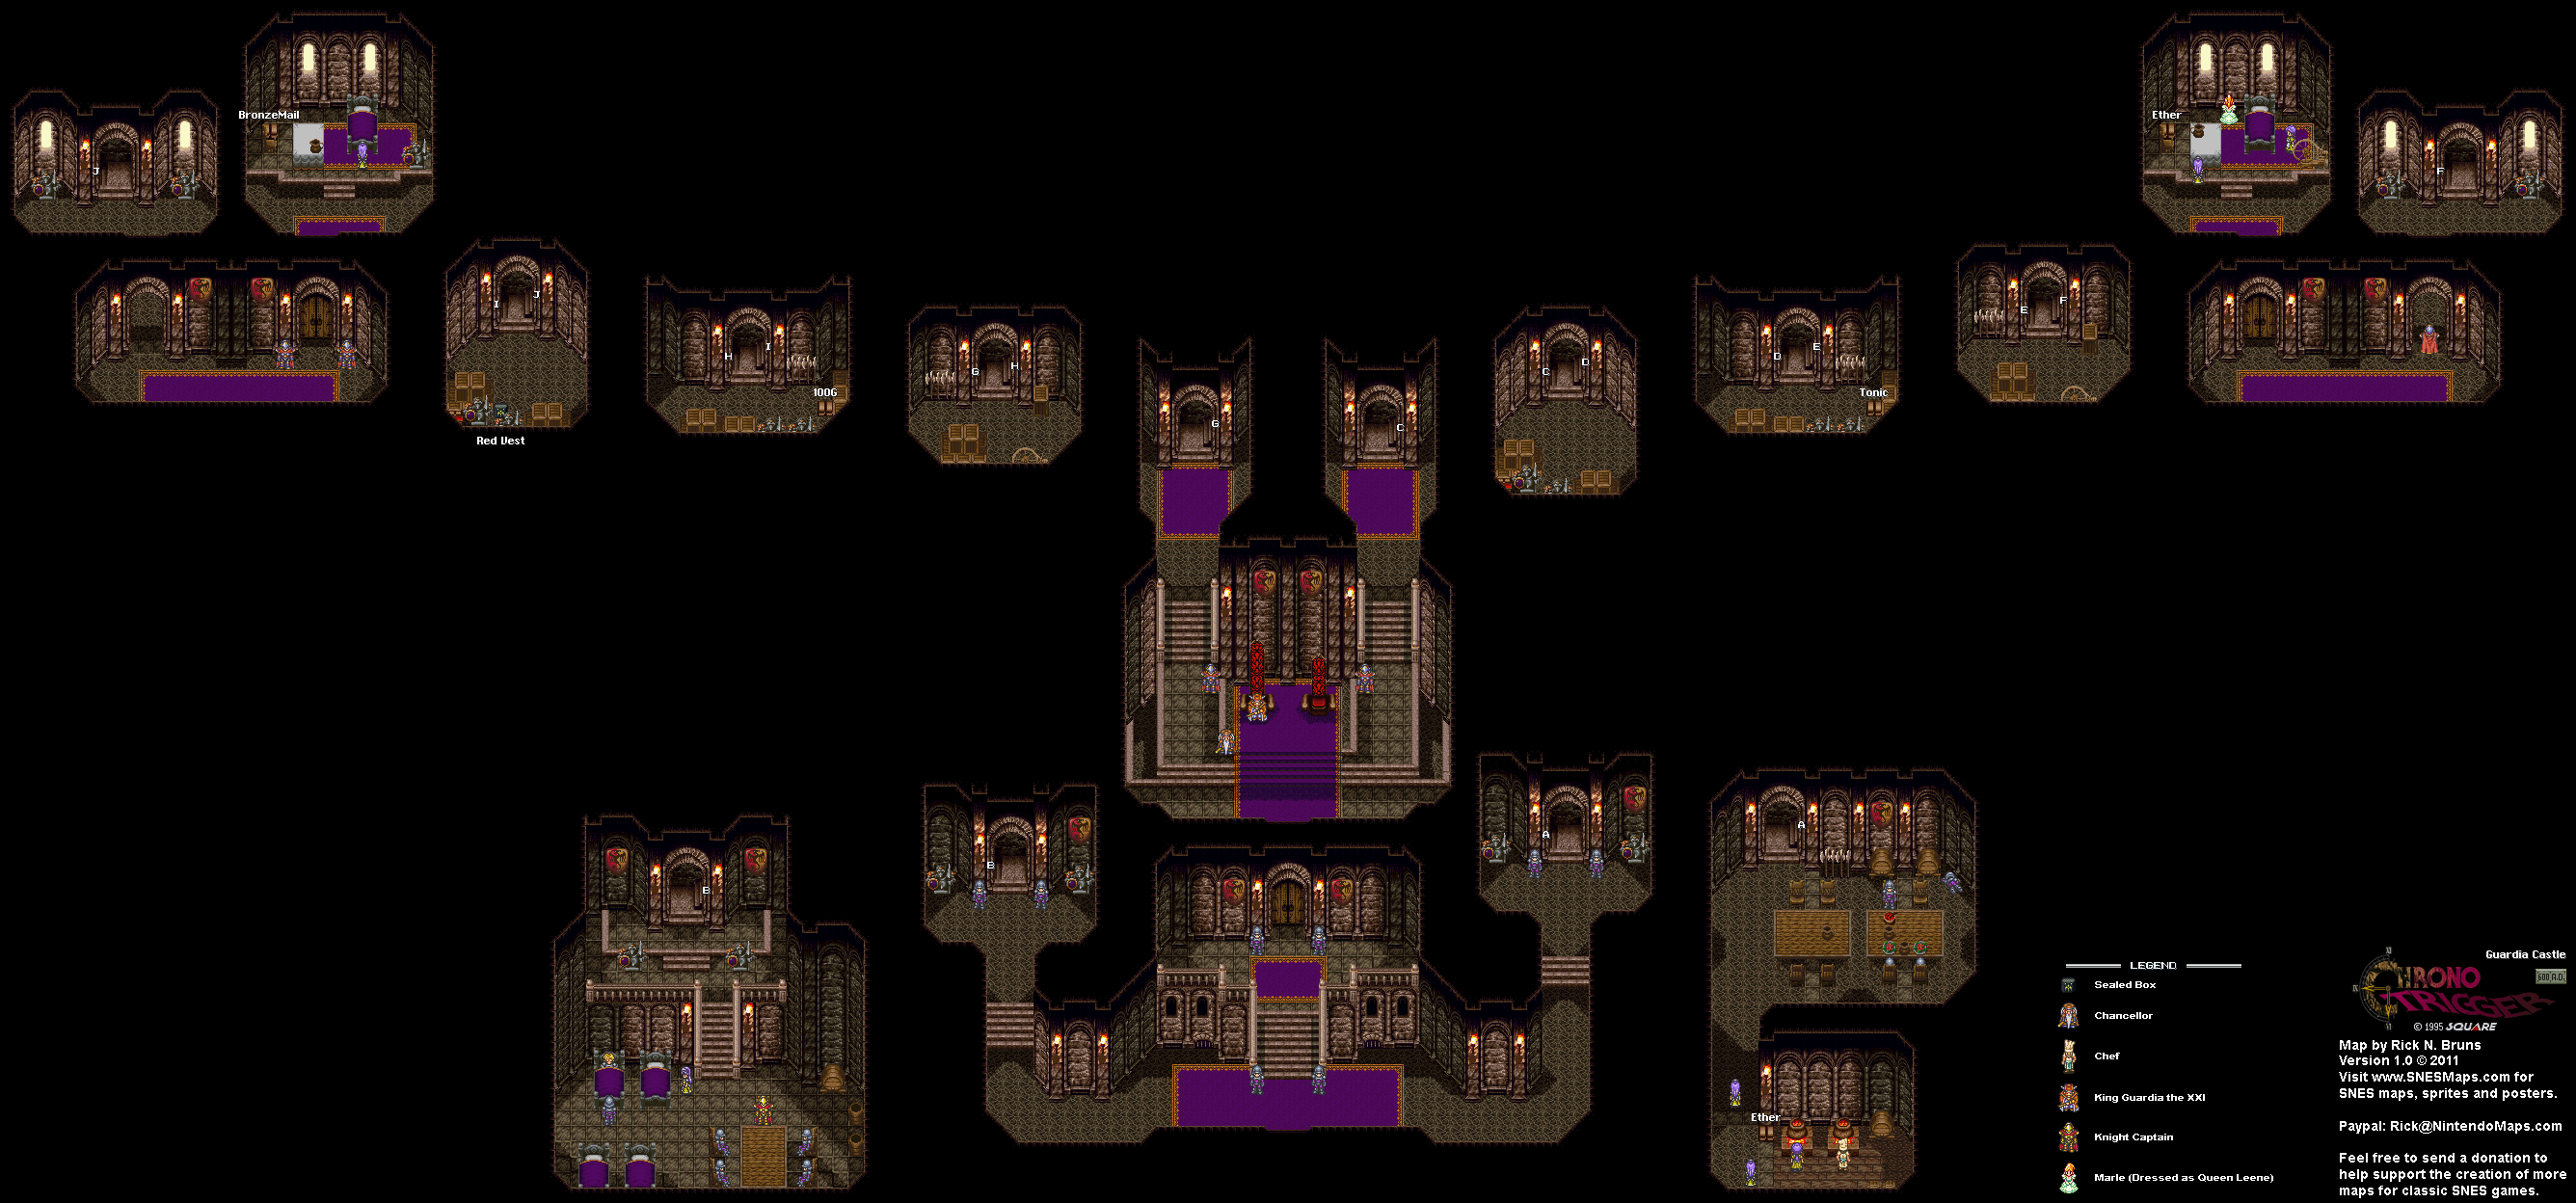
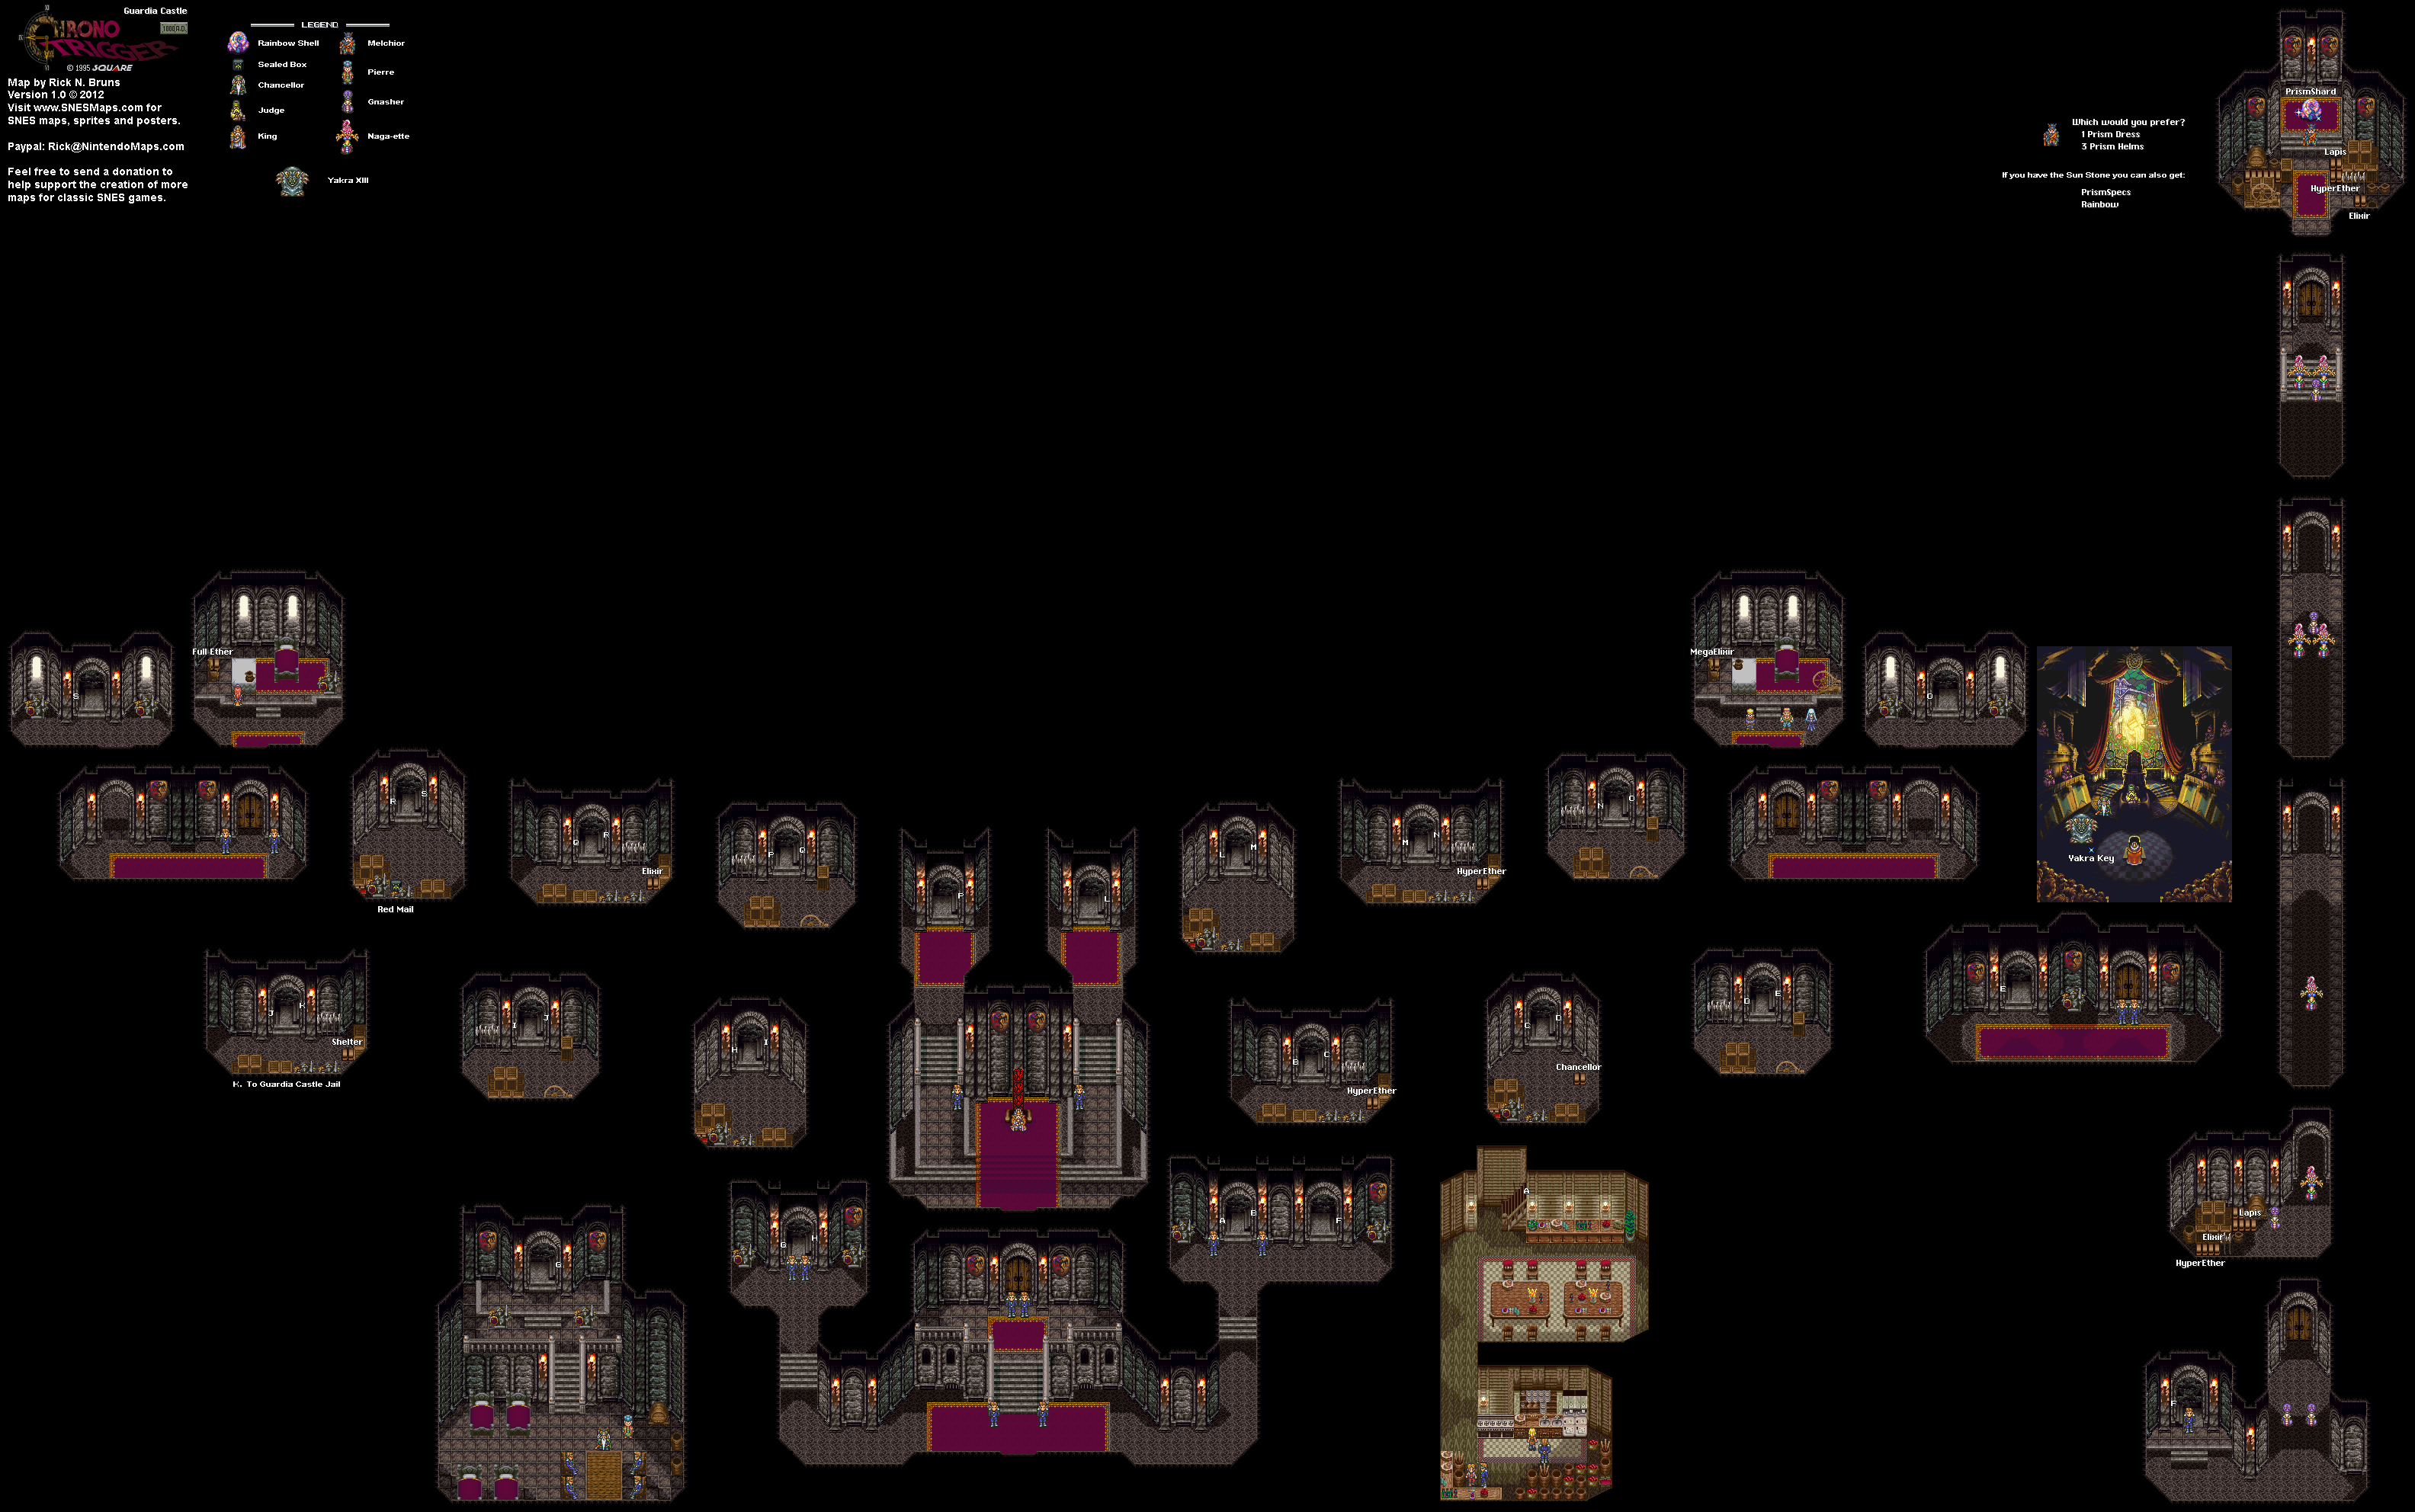
Guardia Castle: Red Vest (600 A.D.) / Red Mail (1000 A.D.)
Northern Ruins/Hero's Grave: Nova Armor, Siren, Kali Blade (600 A.D.) / Moon Armor, Valkyrie, Shiva Edge (1000 A.D.)
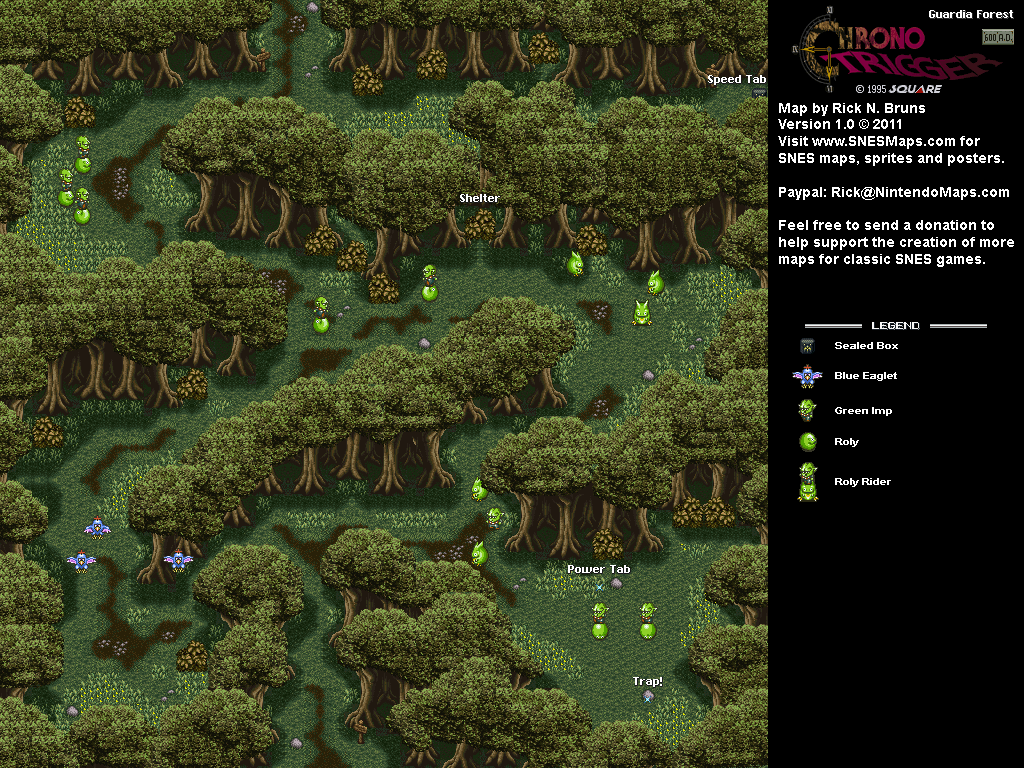
Guardia Forest (600 A.D.): Speed Tab
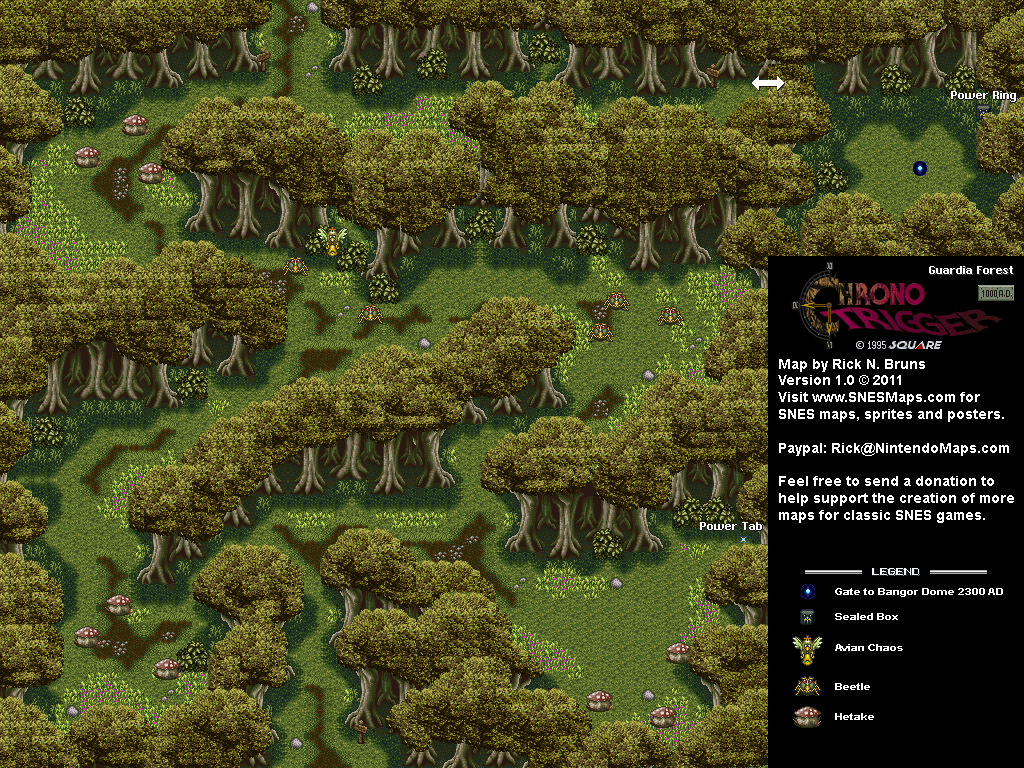
Guardia Forest (1000 A.D.): Power Ring
Magic Cave (600 A.D.): Magic Ring
Heckran Cave (1000 A.D.): Wall Ring and Dash Ring

Wednesday, July 10, 2024

PrinceWatercress plays Ratchet and Clank: Going Commando - Part 48 of 54


In this entry, we go back to some previous planets to get some upgrades, pick-ups and another Skill Point.

First | Previous | Next | End

2:40 - In order to re-spawn the Protopets near where you met Angela in Grelbin, you'll need to save and load (unless your last checkpoint is near those Protopets). Getting the Protopets to create all of their clones will give you the biggest trove of experience that you can get. This will come into play a little later when I need to reach maximum health.

10:48 - The Spiderbot will evolve into the Tankbot, which is much like the Spiderbot except that it has a turret that can fire at enemies with the Square button.

13:32 - You can use the Hypnomatic here to open up another area. Take out the yetis for experience, then go up the ladder for a Platinum Bolt to complete the item collection for this planet.

18:18 - You'll have to use the Hypnomatic at this pyramid on Damosel in order to blow up the robot and blow a hole in the wall to get a hidden Platinum Bolt.

23:02 - Using the Wrench to take out all the enemies on Joba will net you another Skill Point. You'll also unlock more stuff for Slim Cognito's Ship Shack.

Skill Points:

Wrench Ninja II: Massacre: Defeat all the enemies on Joba using only the wrench.

Controls:

As Ratchet:

Control Pad/Left Analog Stick: move
Right analog stick: move camera

X:
  • Jump and double jump (hold button after double jump to use Heli-Pack or Thruster Pack)
  • Wall jump (near certain walls)
Square: strike with wrench
Circle: pull out/shoot currently equipped gun
Triangle: 
  • quick select (hold and use in conjunction with Control Pad or left stick to switch guns; menu can be customized in Quick Select on the pause menu
  • double tap to switch between two most recently equipped weapons/items
  • interrupt on-screen messages

Select: open map
Start: Pause menu
  • Control Pad: select option
  • X: confirm option choice

L1:
  • center camera behind Ratchet (tap button to center)
  • first-person view (hold button and use left stick or D-Pad to look around; let go of L1 to move camera back behind Ratchet)
  • Square: wrench boomerang
  • Circle: fire gun
  • R1/R2: zoom in and out (Pulse Rifle only)
L2/R2: strafe (hold while moving)
L3: see health and Bolt totals
R1/R2: crouch (hold down)
  • Square: wrench boomerang
  • X: high jump
  • long jump (hold crouch button and jump while running to perform)
R3: open map

In water:
  • Square: dive and descend
  • X: surface and ascend
  • R1: accelerate with Hydro-Pack

As Clank:

Control Pad/Left Analog Stick: move
Right analog stick: move camera

When hanging off platforms:
  • Control Pad/Left Analog Stick: move
  • Forward+X: vault up
  • Back+X: drop down

Square: punch
X: Jump (press and hold in the middle of a jump to glide with Heli-Pack)
Triangle: command menu (hold and use in conjunction with Control Pad or left analog stick to choose commands)

Monday, June 3, 2024

DeceasedCrab plays Earthbound - Part 48 of 53


Our return to Onett proves to be a rather nasty one. Giygas knows we are getting close, and he has made the place dangerous to keep us from getting to him.


The Evil Eye can be particular nasty. Not only can they diamondize a party member with a glare, but they can paralyze the part with Paralysis Omega and cause strangeness in the entire party with Brainshock Omega. It is very susceptible to Freeze spells.

Ness will learn Rockin Omega at Level 75. Paula will learn Fire Omega at Level 64. 

If you enter your house, you'll still be able to fully heal and manage your inventory.

When you get to the meteor, interact with it. When you see something you can reach and grab, select "Yes" to get the meteorite piece.

If you need Multi-Bottle Rockets, teleport to Deep Darkness and talk to the weapons vendor near where you come in. If you need Brain Food Lunches, teleport to Dalaam and buy them there. You'll need them for the final battle. When you're ready for end game, head to Saturn Valley.

Thursday, November 9, 2023

Jerry Martin plays Strong Bad's Cool Game For Attractive People - Part 48 of 53


In this entry, we find out that Paul Revere is lactose intolerant, head to Peasantry, and collect ye items.


If you use Gel-Arshie on the code wheel, the screen will be tinted red.

By walking to the side on the two parts of the code wheel, you can match things with other things and see what gets you an answer and allows you to get in a game. It can also get you a secret. If you match Trodgor with the Cottage, you'll get the Trogdor T-Shirt for the photo booth.

If you match Paul Revere (the ghost with the lantern) and the lantern, you'll find out that Paul had no favorite ice cream flavor because he was lactose intolerant. You'll then be able to get into Peasant's Quest. Just talk to the window asking for the copy protection question and choose the fourth option to get started, then choose the second option to move on through.

In Peasant's Quest, you'll start out in Peasantry, which you can now put on the map. When you move around, you'll talk to Homestar briefly, and you'll find out there is pixelated food in the window helping him survive.

To the right of where you start is a box. If you click on it, you'll get some Elf Boots for the photo booth (and a reference to moving around in the early graphic adventure games similar to Peasant's Quest).

To the right, you can pick up the pebbles and put them in your inventory.

Left of the inventory, you'll find out that The King of Town is a scorpion. There is also a mysterious orange pixel that you can click on and take. If you take a picture where you found the pixel, you'll find another ghost as well as another box containing the game box for Spirits of '76.

Use the mysterious orange pixel on the King of Town scorpion, and the scorpion will smack it away and break it. If you grab the pixel again, you'll get the Dryghost Cheat Commando figure, which was unreleased.

Right of the lake box where you found the pebbles is the inn and carriage repair shop. If you click on the box there, you'll find the Anti-Social Angus Good Graphicketeer card. This is the fourth and last one that you'll need, and you can put them all together to make a picture of a stick of chewing gum.

If you talk to the old man near the inn, you'll find out that he has an old game-style text box for his subtitles. Ask him about the inn (the second option), Strong Bad will find out that the carriage repair shop exists because the inn does not make enough money. From here, you'll get a fifth option that allows you to ask the old man if he can repair Limozeen's spaceship, and if you choose it, you'll get The Innkeeper (spelled correctly as "The Inkeeper") to join your party.

After placing the Peasantry Inn on the map, head back to the Crates! area and use the pubbles on the bucket of rivets near "Mista Fixit." "Mista Fixit" will then join your party.

Exit the area and head left until you reach Limozeen's spaceship and use The Innkeeper on it. The Innkeeper will not know what to do at first, and when he tries to fix it, he gets torched by Trodgor, which inadvertently fixes the spaceship. The Limozeen Space Machine will join your party.

Head further to the left until you reach the Cool Car and use Mista Fixit on the Cool Car. Mista Fixit will fix the car and find the box for Mista Fixit inside the carburetor, fixing the car.

If you use The Limozeen Space Machine on Marzipan at the Concession Stand, they will beam Marzipan up only for her to throw crates at Limozeen as they leave. 

GOOD GRAPHICKETEERS CARDS:
- Carpal Tunnel Connie: Examine Strong Sad's bookcase.
- Trick Card 1: Use Gel-Arshie on Strong Bad's mailbox.
- Trick Card 2: Take a picture of the ghost to the left of the photo booth.
NEW! Anti-Social Angus: Underneath the box in Peasantry Inn.

PARTY MEMBERS:
- The Algebros: Talk to The Algebros on the brick wall.
- Snake Boxer: Talk to the Snake Boxer in the Crates area and talk to him.
- Performing Bear: Click on the Space Circus Catastrophe game in the Mainframe.
- Gel-Arshie: Get the killscreen in Gel-Arshie's Fruitboarder.
NEW! Innkeeper: Talk to the Innkeeper about repairing Limozeen's Spaceship.
NEW! Mista Fixit: Use ??? on the bucket in the Crates area.
NEW! Limozeen: Use the Innkeeper on Limozeen's Spaceship.

OUTFITS:
- EGA Hat: Smash the crate near Bubs with Snake Boxer.
- Stinkoman Boots: Take a picture of the ghost in the Strong House bathroom.
- Stinkoman Gloves: Use Gel-Arshie on Bubs' Concession Stand.
NEW! Trogdor Shirt: Line up Trogdor with Cottage on the code wheel and use Gel-Arshie on it. (You need to do this before going to Peasant's Quest.)
NEW! Elf Boots: Underneath the box in Peasantry Forest.
NEW! Mista Fixit: Use Mista Fixit on the Cool Car.

GAME BOXES:
- Halfathon Box: After obtaining the Light Musket, return and destroy the crate again.
- Lady Crate Ape Box: Underneath then box in Strong Bad's front yard.
- Fruitboarder Box: Use Gel-Arshie on the Brick Wall.
NEW! Spirits of '76: Take a picture of the ghost to the left of the scorpion cave in Peasantry.

GHOSTS TO FREE:
- John Hancock: Give the feather quill to him in Strong Mad's Room.
- Samuel Adams: Give the tea bag to him near the stairs leading to the basement.
- Paul Revere: Give the lantern to him in the TV Room.
- Benjamin Franklin: Give the key to him in the computer room.
- ???: In the picture in the right side of the TV room.
- ???: In the picture in the bathroom near the tub.
- ???: In the picture near the left side of the photo booth.
NEW! ???: In the picture in Peasantry Forest, left of the cave.

CHEAT COMMANDOS FIGURINES:
- Swampslash: Take a picture of the ghost in the TV Room.
NEW! Dryghost: Use the Quest Item on the Munchox before using the Scorpion Food.

PEASANTS BURNED:
NEW! Use the Innkeeper on Limozeen's Spaceship.

Thursday, May 11, 2023

PrinceWatercress plays Sly Cooper: Thieves In Time - Part 48 of 48

With 100% of everything in the game completed, all that's left is to show off the unlockables, the entirety of Maximum Chaos, my near-hour long review of the game where I take more of an in-depth look than usual, and the secret post-ending credits you get for obtaining the Platinum Trophy.


Unlockables

5 Sly Masks: Monkey Paraglider - A new skin for the Paraglider with the Sanzaru logo on it.

10 Sly Masks: Camouflage Paraglider - A new skin for the Paraglider that gives it a camouflage pattern.

15 Sly Masks: Ultimate Sly - A superhero skin for Sly Cooper.

20 Sly Masks: Ultimate Bentley - A superhero-style, more futuristic-looking skin for Bentley.

30 Sly Masks: Ultimate Murray - The diving suit that Murray wears in the final job of Episode 4.

40 Sly Masks: Ultimate Carmelita - A full body suit and sunglasses for Carmelita.

50 Sly Masks: Ratchet's Wrench - Replaces Sly's cane with Ratchet's wrench from the Ratchet and Clank series. Enemies also drop bolts instead of coins. Hitting an enemy with this unlocks the "Future Tech" Trophy.

60 Sly Masks: Cole's Amp - Replaces Sly's cane with Cole's Amp from inFamous 2. Hitting enemies will electrocute them no matter what.

Maximum Chaos re-play

Before closing this video out, I wanted to take care of some unfinished business with Maximum Chaos and play through it all the way. If you've played the arcade machines from the five main episodes, you'll recognize the three sections from those machines, albeit in shortened editions. Mercifully, the Spark Chaser section is much shorter, and with the System Cracker section, you're just facing that multi-colored boss tank one more time. Not surprisingly, this got easier once I played all the other arcade machines.

Epilogue

Once you complete the game 100% and go through the credits either by beating Cyril de Paradox again or looking at the credits in the pause menu (go to Extras, the Cinematics), you'll see what happened to Sly Cooper. Turns out, Sly is still alive and in ancient Egypt with the torn remains of Cyril de Paradox's blimp all around him. The game then ends, and since then, we have had yet to get a fifth game in the series, leaving the future of Sly  - and the series - in jeopardy.

And with that, that's all there is to Sly Cooper: Thieves In Time!

Monday, November 8, 2021

HCBailly plays Final Fantasy II AGAIN - Part 48 of 65


The monsters get nastier as we get further into the tower...


The monsters get more powerful as you go further up the tower.

The second and third floors contain all fire-related items, including another Flame Shield. The third floor is also full of lava. The Flame Helm, interestingly, protects against Ice, unlike the Flame Armor.

The T.Mlboros (Terra Malboros) are Earth-elemental enemies, so use the Gaia sword against them. They can also Poison and Paralyze your party members.

When you talk to the mage blocking your path to the fifth floor, it will change into a Fire Gigas (F.Gigas). This guy is really powerful and can hit you with Fire 16, and unless you have an extremely powerful Ice spell, you won't be able to damage him substantially enough with Ice. Use Barrier, inflict Curse, hit him hard and keep your party's HP high...and hit him with Toad or Mini if you can!

Saturday, February 20, 2021

PrinceWatercress plays Sly 2: Band of Thieves - Part 48 of 49


In this episode, we have to disable one last power station before the final confrontation with Clockwerk aka Clock-La.

Murray/Sly Tag Team


You'll need to play as Murray to start this one.

The Diablo Fire Slam is a slam attack you can perform on a grabbed enemy.

For this job, Bentley will need to take out some wall-mounted power stations by throwing enemies into them, then pry the door into a nearby engine room by hand. There are five power stations in all, and you can look for them all with the L3 button.

Interestingly, this is the one time that the helicopter eggs will come in super-handy. Just stomp and throw them like you would any other enemy at the power stations to take them out. In other areas, you may have to use things such as explosive drums, chairs and barrels that are in the vicinity and readily available to throw to quickly destroy the power stations.

Once all five power stations are destroyed, use L3 to find the door you need to lift. Get there, then mash the buttons after you grab the door to get it open. From here, you'll be playing as Sly again.

Since I first see them here, I'll mention them here: Clock-La has her own searchlights, and if you get caught under them, enemies will show up.

In the engine room, you'll need to jump around constantly to avoid the lasers while the laser walls slowly move. At the top floor, you'll have to spire jump between saws at regular intervals while still keeping from moving too fast and running into the laser walls. Next to the switch is the final Vault. Open it to get the Shadow Power move. It's the invisibility from the first game, and you can move with it much like the improved version of the move from that game, except slightly faster. It uses special weapon energy, so don't rely on it too much.

After you hit the switch and complete this leg of the game, it's the grand finale. Carmelita has contacted Bentley via short wave radio and has agreed to help the Cooper Gang defeat Clock-La. Unfortunately, she cannot find the blimp, so the strength of four local radio towers. Once Carmelita is in range, she will need a tail gunner to face Clock-La. The blimp is almost above Paris, and Clock-La's plan cannot come to fruition...

Controls

D-Pad/Left Analog Stick: move
Right Analog Stick: move camera
X: jump and double jump
Square: Horizontal Attack
  • horizontal attack (as Sly)
  • slam enemies launched into the air from behind (as Sly)
  • hook punches (as Murray)
  • Thunderflop (as Murray; in mid-air only)
  • crossbow swipe (as Bentley)
Triangle: Vertical Attack
  • vertical attack (as Sly; used to knock enemies into the air)
  • downward dive (as Sly; in mid-air only)
  • uppercut (as Murray)
  • drop bomb (as Bentley)
Circle: Action button (near blue/green/purple sparkles and character icons)
  • pickpocket (as Sly)
  • stomp (as Murray; use Square to throw object/enemy)
R1: hold to run

Select: Gadget Grid
  • Control Pad: highlight gadget
  • X button: confirm gadget
  • L1, L2, R2: assign gadget to button pressed

L1, L2, R2: use gadgets assigned to button pressed

Start: pause menu
  • Control Pad: select menu choice
  • X button: confirm choice
  • Start: un-pause game

L3 (press the left analog stick): locate beacons for mission objectives

R3 (press the right analog stick): Enter and exit Binocucom for first-person view
  • Left analog stick: look around
  • Right analog stick: zoom in and out (with up and down on right stick)
R1: 
    • take pictures with spy camera (as Sly; when applicable)
    • shoot sleep dart (as Bentley)

Hacking mini-game controls:
  • Left analog stick: move
  • Right analog stick: aim and fire gun

Tuesday, July 14, 2020

PrinceWatercress plays Terranigma - Part 48 of 50


In this entry, we beat Beruga at his own game, then get ready to return to the underworld.

Airship


You'll land on the left side of the ship. In the next room, you'll meet Fyda and Royd, who will tell you that there are seven computers to knock out and that you'll have to put time bombs to knock them all out. You'll be handed the Time Bombs. It's time to knock this airship out of the sky.

Equip the time bombs and use one on the computer that was behind Fyda and Royd with the X button, then travel through the ship to find the others.

The seven computers are on the left wing of the ship, the right wing of the ship, the fore of the ship, the lower entrances of the second-highest deck (go across when you enter those) and the lower entrances of the bottom deck.

Some of the computers have security systems. They're the spinning cannons that you've seen in the Neotokio sewers and they shouldn't be too much trouble.

When you're on the middle of the wings, you'll want to move quickly as the other side as the turrets will fire at you.

As you explore, you'll find out that Beruga has escaped, but if the airship is destroyed, his evil plan is done. Also, all the escape pods have been destroyed except for the one that will be used for the escape attempt that will happen after all the time bombs are placed.

When you've planted all seven time bombs, head to the rear of the ship. When you see the metal bridge in the middle of the huge pit, you've reached it. Royd and Fyda will join you, and when Ark activates the time bombs, you'll hear from Beruga from the rear deck. Beruga will still be on the ship, and he tells tou that his boots have jet nozzles on the soles to keep him airborne. Yes, he can fly and we didn't know until he said so. He also says your stolen rocket belts are controlled by the computer, and that without the computers, they won't work. Unfortunately for Beruga, he gets dragged into the rear rotor of the ship and gets sliced to ribbons, like that one guy in Raiders of the Lost Ark.

Just before all hope is lost, a gull appears on the rear of the ship where the rear rotor used to be, and Royd and Fyda note that there is no way the gull could possibly fly this high. Royd tells Ark to get on the gull, saying there is no need to endanger everyone involved. Fyda says she and Royd will do what they can from here. Talk to the gull and choose the first option.

The scientist at Airsrock will see the airship crash and recognize it as the light of the apocalypse. Ark will appear behind. Talk to the scientist and he'll tell you the light fell in the direction of South America. There is only one thing we can do now...


From here, leave Airsrock and head to South America. Remember where the hole we entered the world from was? Well, we're going to have to go back there. When you re-enter this area, you'll find a huge hole that wasn't there before as well as Columbus. If you talk to Columbus, he'll tell you he never forgot how you rescued him at Sylvain Castle, and that he has explored the world since and seen the world change so much that his navigation techniques seem primitive now. He is now convinced you are the legendary hero, and that it is prophesized that the hero will disppear underground.

When Columbus asks if you're going, say yes. He'll recommend you save at the nearby book and ink well first, and that once you go into the hole, you may never be able to return to the light world.

Monday, May 20, 2019

HCBailly plays Final Fantasy IV (Super Famicom) - Part 48 of 70


Our adventure through the Sylph Cave continues!


The dead end near the save point houses a hidden passage that leads to an Elfin Bow. It's a little better than the Killer Bow and increases Wisdom by five, so hand it to Rosa.

The Flame, Ice and Lightning Arrows are arrows for the bow weapons that obviously have elemental properties to them.

The Mage Masher inflicts Silence on enemies and does quadruple damage against Wizards, but it has a low hit percentage.

You'll eventually find a building inside the cave. When you go in, you'll meet the Sylphs...and Yang! It turns out that Yang is still alive, but unconscious, even though he was sealed in a room that exploded. If you go upstairs, you'll find a path back to the overworld. It's time to head to the cave just north of Tomera.

Cave To Phantom World/Cave of Phantom Beasts


Once again, you'll have to cast Levitate to avoid the glowing brown areas. Also, when you enter, Rydia will tell you that the Phantom World itself is not too far down from the start of this cave.

The Summoners can summon Lightning Dragons (Lit.Dragon), which can cast some pretty powerful lightning spells. Kill the Summoners as quickly as possible to stop the summoning, but focus on the Lit.Dragons if you want to focus on leveling up your party. They can also summon Goblins - an enemy from the beginning of the game - which can allow you to get the Goblin summon. As for the Lit.Dragons, they are immune to nearly everything, so hit them with the most powerful attacks you have.

Saturday, June 9, 2018

HCBailly plays Terranigma - Part 48 of 75


We're done in North America. Now it's time for South America, where we'll see new places and a new quest...

World Map by Tropicon. Liotto maps by Amir Azadur.


There are trees near the Colorado River (which is supposed to be the Mississippi). Walk into them and you'll find the river crossing. The guy near the river will tell you that he needs better lumber that is more resistant to water, and the only place to find it is the forest northwest of Nirlake. This is how you're supposed to figure out that you're supposed to go into that forest area near Nirlake to get the Logs.

Since we have nine of them, equip the Logs and talk to the man again. You must have nine or he won't be able to build the bridge. When he asks for them, let him have them. Keep letting him have them until you've given him all nine. Leave the area, go back and you'll not only get a completed bridge, but also Magirock #58! You can finally travel west!

Now that you've gone to the west, you've finally gone full circle. The mountain area northwest of the river is Sanctuar, and we've been there before. Head back to where you first met the Kingbird, you'll not only meet the now-freed Kingbird, but you'll also get Magirock #59. If only you could talk to Kingbird, though. Sigh...

Leave Sancutar and head to South America. You'll come across Guiana on your way south. Since you moved the Quatros from Litz, they'll be in the northern coast past Guiana. Once again, you can talk to the dancer in the upper-right tent and do the massage thing again for a few Gems. 

There is a bridge near the east coast, and if you go south down it, you'll reach the town of Liotto. However, there are some other areas of interest to go to, such as a set of trees next to the mountains near the southern end of South America. This is the stopover that will take you to Greenland. Further south is another forest area near the coast where if you enter it, you'll find a mushroom maze. Talk to the mouse (yes, you can somehow talk to the mouse and it will talk back in human language, which isn't supposed to work anymore) to start the challenge. You'll have to get through the maze as quickly as possible for a prize.

From the mouse, go straight north, then go west - removing any cacti in your way if necessary. You'll come across a log tunnel that goes south. You'll want to go through this log by crawling through it, then pick up the cacti to the west and swim all the way to the end. If you get there in time, you'll get Magirock #60. You can leave from the other end to head back to the world map.

From that forest, go north and hug the mountain to find another hidden area. There is a chest that has 378 Gems and another chest with a Life Potion. There's nothing else here, unfortunately.

Now it's time to check out Liotto. Let's head to the port first.

Liotto


You'll learn about Mermaid Tower in the east, which has been populated with monsters. Due to the tower's sudden appearance, people who have set sail from here have since started disappearing mysteriously.

Now it's time to head into the town.


Love the music here. Quite a few of the people here are fun-lovers, obviously.

The building to the left is the inn, and the innkeeper's young daughter is running the desk until her mom gets back. She lets you stay for free.

There is a guy standing in front of the building to the right of the fountain, which houses the item shop and Magishop. He'll tell you that weapons named "something Staff" have special effects and are worth equipping.

The building behind the store is another house. Apparently the kid living here is a big soccer fan. I'm guessing the Pelo poster above the bed is a Pele reference.

There is a Magirock in the fenced-in area northwest of the fountain. There is where you can play "Cream-A-Cat" to get it. You'll be throwing balls at wooden cats. Use your running throw to hit all the cats. If you have two next to each other, center yourself between the two cats and throw the ball with a running throw straight to the north. If the two cats next to each other fall simultaneously, you did it right. You'll have to do this technique in order to hit all the cats with all the balls, which you will need. As a reward for hitting all the wooden cats, you'll get Magirock #61.

The clown with the flute will tell you that Corcobad Hill is to the north, and it's where lovers declare their love to each other and find happiness.

The building in the upper-left corner is where you can try some Brazilian food for 10 Gems a piece. What you really want, though, is Magirock #62 in the room behind the door.

The "Sorvete" booth to the north sells ice cream cones and coffee for 10 Gems each. I'm guessing that supposed to read "Sorbet."

Also, Corcobet Hill is really a town square with a miniature Christ the Redeemer statue. You can tell that Liotto is based off Rio de Janiero. 

Wednesday, March 7, 2018

skorch82 plays Brave Fencer Musashi - Part 48 of 70


We trek through more of the Frozen Palace, and we come across some interesting enemies as we do...

When you're finally up there, you'll be in an ice maze. Despite the close distance of the camera, it's easy to feel your way through and memorize your way through the area. There will be some coins and enemies that will act as landmarks.

Watch for the shadows on the floor in the maze. These indicate the locations of stone golems that will drop down and try to crush you like the Thwomps in the Mario games. If you can Assimilate them, you'll get Steel, which allows you to turn metal and destroy the spikes in this area by simply running into them.

The lower-left corner of the maze contains a Bincho Field. Break it to free Alchemist Leanman.

To beat the Musashi clones here, use Lumina Rotation. Not only will they be unable to perform the move, you'll meet the criteria of "May the unhurt have victory!" both quickly and easily. You can also use the Fire Scroll, assuming you're careful. You'll get the BlueEye for your efforts.

Wednesday, February 22, 2017

Chilean Retrogamer plays Wario Land 2 - Part 48 of 57


At last, we take on Captain Syrup again!

Final Chapter: Mysterious Factory!

Final Story: Awaiting Syrup!


0:07 - There is a door on the lower level between the first two crushers. Enter it.

0:29 - There are a ton of coins that you can get here with the help of the fire foxes.

1:33 - Now to mumble and fumble with the conveyor belts and enter the door at the upper level. 

2:36 - At least this room is much easier. Avoid the drunken penguins as you enter the door to the right.

3:00 - The door in the middle of the area with the two guys with the hammers leads to the treasure room, where you can win a Game Boy, of all things. After this, you'll want the hammer guy to squash you so you can enter the door in the upper-left corner of the room.

5:03 - The rest of the level is the boss room and Captain Syrup herself. When she comes down to your level, tackle her three times. She'll then go back up and send bombs out at you. Avoid the bombs as they attack you and jump on the tops of the bombs that fly around. Throw them straight up at her. She'll go down after another three hits.

6:27 - PICTURE PIECE GET

Saturday, December 7, 2013

brickroadbrickroad and SovanJedi play Secret of Evermore - Part 48 of 88


We learn another alchemy spell before taking on the next boss.

We learn another alchemy spell before taking on the next boss.

Right Bank


That Bronze Axe will also work on the rock wall blocking the cave on the east side of the Right Bank area. Break the wall with the Bronze Axe, then go inside and you'll meet an Alchemist. He'll give you the Drain formula, which works like the HP Absorb spell in Secret of Mana - it drains the enemy's HP and transfers it to you.

Drain

1 Ethanol, 2 Roots

From here, head back to Nobilia. If you need alchemy ingredients, talk to both the alchemist that gives you Drain as well as Blimp again. You have yet another boss battle coming up. Hope you can get lots of Ethanol and Roots...levelling up Drain for this battle can be helpful.

Sunday, June 23, 2013

Eexecute plays Turok 2: Seeds of Evil - Part 48 of 51

We're almost finished with Level 6. Hell yes.

0:52 - Before you leave, you meet Adon again

2:31 - The Nuke Weapon in action. It can carry up to five shots and, as seen earlier, the weapon canisters for it look like metal eggs with radioactive symbols on them.

3:41 - Once again, doors don't exist to these things.

5:49 - The last switch to disable the force field around the Primagen Key.

6:33 - "Let's see if we can make this jump." *jumps* "Did you see that? That was fucking awesome! That was just...FFFFFUUUUUUUUUUUU--"

7:47 - Turok makes his way to the Level 6 boss, and in typical T:DH fashion, you load up on every weapon before you enter the lair.