Showing posts with label part 44. Show all posts

Saturday, February 28, 2026

PrinceWatercress plays Super Mario Odyssey - Part 44 of 92


In this entry, Bowser forces another detour on us.


Ruined Kingdom


When you head to Bowser's Kingdom, Bowser will head Mario and Cappy off at the pass again, this time on the back of a giant black dragon. The Odyssey gets blasted out of the sky, and Bowser gets away on his airship. You'll then end up in the Ruined Kingdom, yet another kingdom that is not that big and has only a few Power Moons, which you'll need to repair the Odyssey.

As you make your way upwards, throw your hat at the golden hooks piercing through the floor. One of them will reveal an electric globe you'll be able to ride to an isolated platform where you'll finally face the giant black dragon.

Stay on the move to avoid the purple energy as well as the chakrams that roll around that are created by it. The small mass of purple electricity on the floor indicates where the dragon is about to zap. When the dragon smacks his head on the floor, you'll need to jump over the electricity that courses along the floor. He will then be tired. This is your opportunity to jump onto the dragon's head and throw your hat at the hooks in the dragon's head. By removing all the hooks and ground pounding the glowing spot on the dragon's head afterwards before the dragon revives, you'll score a hit. In case the dragon wakes up, your progress with the hooks will stay the way that it is until you either lose all your health or complete the current attack phase.

There are four spots where you can ground pound the ground for a heart, should you need them. They will be indicated by glowing cracks in the ground.

For the second phase, you'll have to avoid more five chakrams instead of three, and the crackling energy will have slightly more complex patterns that look like double helixes. You'll also have to remove four hooks instead of three.

For the third phase, you'll have to avoid over a dozen chakrams and deal with crackling energy that forms loops that you'll need to jump between. You'll also have to deal with five hooks on the dragon's head, which means you may have to go through two attack loops to get the job done. Once you do, you'll get Power Moon #1.

If you go back to the dragon afterwards, he won't mess with you afterwards.

Once you beat the dragon, you can repair the Odyssey by throwing your hat at the globe, then you can head to Bowser's Kingdom.

Power Moons


1. Battle with the Lord of Lighting! - Defeat the black dragon (see above).

2. In the Ancient Treasure Chest - Left of the stairs leading to the battle with the dragon is a path with a handhold you'll need to jump into and shimmy across to get this Power Moon sitting in a chest.

3. Roulette Tower: Climbed - There will be a rocket ship near the dragon after you get Power Moon #1. This leads to an 8-bit area. You'll need to hit the P switches with your hat or by running into them yourself to stop the platforms so that they are on the bottom. For the last set of platforms, keep the red one at the bottom, the blue one in the middle, and the green one at the top. At the end, you'll find a Power Moon and a rocket ship that will take you back.

4. Roulette Tower: Stopped - Near the end of the 8-bit area, you can kick a Koopa shell to the left to break some blocks and head to a hidden area. Stop the platforms at the bottom of the squares to get to this easy-to-miss Power Moon.

Thursday, March 13, 2025

PrinceWatercress plays Wario Land II - Part 44 of 51


But Wario's the hitbox, not the owl...


Final Chapter: Mysterious Factory!

Story 4: Don't shock the owl!


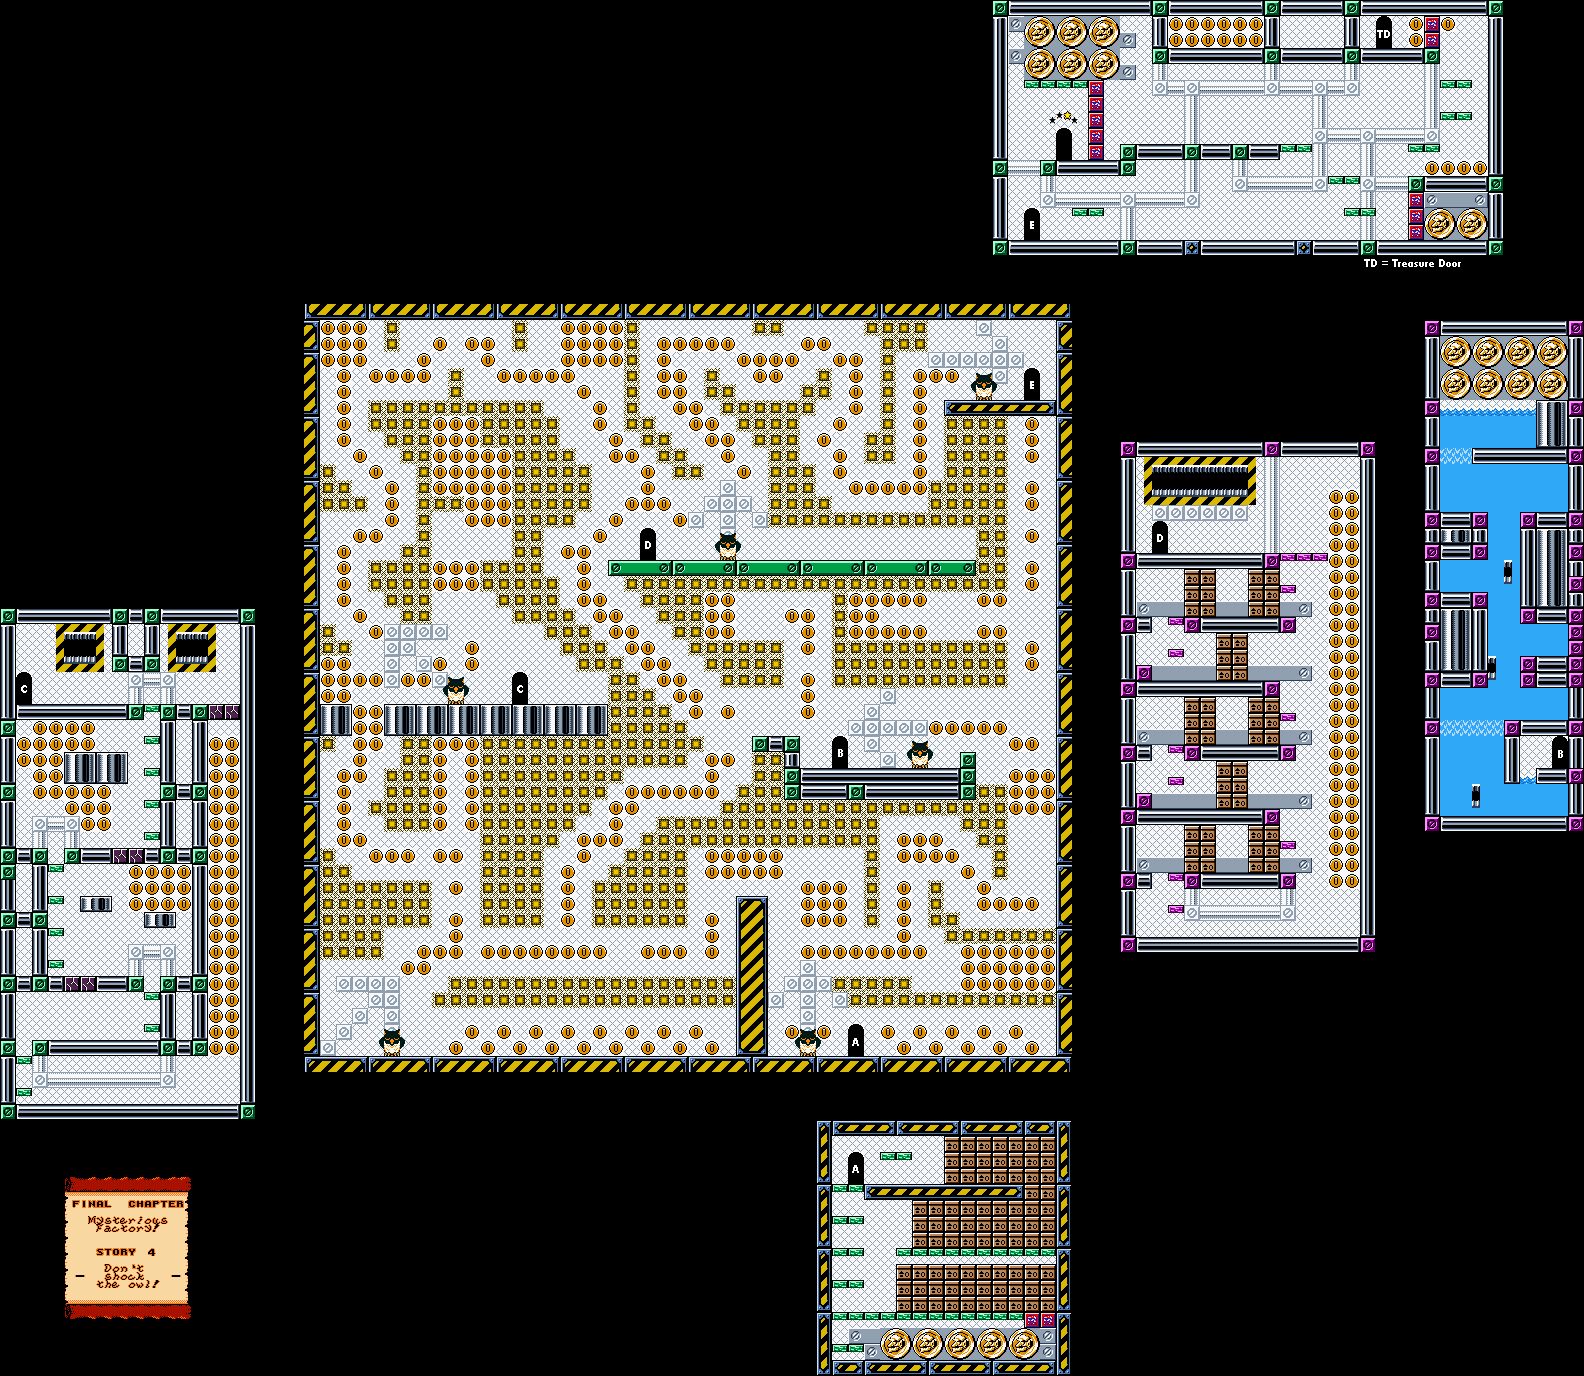
A more accurate title would be "Don't shock Wario!" That's because if he's the one touching all the flashing squares in this short maze, he's the one getting zapped.

There are five doors in this short maze, and there is an owl near all of them.

The door in the lower-right corner of the maze leads to some coins. You'll need to throw an enemy into some blocks to get the big coins.

The door above that one on top of the platforms with the small blocks inside them leads to an underwater area that leads to even more big coins. You'll need to use the bubbles to get to the top here, and thankfully you can swim down when you're done.

The door on the square platforms west of center leads to two bottle throwing guys as well as some cake-throwing chefs. Use the cake to break the blocks and get a ton of coins.

The door on the long rectangular platforms above the center of the maze leads to a bunch of platforms, a bunch of boxes and a bunch of coins. Tackle the enemies from below with a jumping tackle so you don't get shocked.

The door in the upper-right corner of the maze leads to the treasure room where you can win a Metroid as well as the exit. You'll need to throw enemies around to reach both as well as a few big coins.

Saturday, October 12, 2024

PrinceWatercress plays Chrono Trigger (Super NES) - Part 44 of 70


It's time to head to the Giant's Claw, which looks A LOT like the Tyrano Lair.


Now that we have some optional stuff done, it's time to head to the place that the optional stuff is tied to: Giant's Claw, northwest of Choras Village in 600 A.D.

As established earlier, this place shares rooms with the Tyrano Lair in 65,000,000 B.C. There are some cave areas to add some twists to everything, however. There are also new enemies.

The Fossil Ape is the hardest of the four enemies you'll deal with here. While they are just like the Winged Ape and the Cave Ape enemies from earlier in the game, these guys can pack a punch! The other enemies aren't so bad. The Leapers leap at you, but that's all they can do. The Gigasaurs can be hit with any magic for substantial damage, which is good, as hitting them with lightning-based magic causes them to do the lightning discharge attack on your party immediately. Even Magus' Dark Bomb can do over 1000 damage easily. The Lizardactyl is a blue version of the Avian Rex, but it can also be taken out very easily.

There are two Power Tabs. One of them will be in a dead in the large the cave area you'll need to get through, while the other one is in a area that you'll need to drop down a hole in order to access. When you land in what was the jail cell near the old Tyrano Lair entrance, head west and take the stairs to find the Tab.

The Blue Rock allows Lucca, Robo and Magus to perform the Omega Flare Triple Tech. Lucca will need Flare, Robo will need Laser Spin and Magus will need Dark Bomb before it can actually be performed with the Blue Rock equipped on one of them, however.

The ZodiacCape is only equippable by Marle, Lucca and Ayla and increases Magic Defense by 10 in addition to being a good source of armor defense.

There are some rooms with buttons. There are usually of the "one button opens the path, the other introduces enemies" variety, although one has three buttons. One produces a save point, the other drops two Fossil Apes down on you, and the other produces a pit you'll have to go down in order to progress.

When you reach the cell where Kino was held in the Tyrano Lair, you're almost there. There will be a save point there in case you couldn't use the one earlier, and there will also be a door there...

Saturday, July 6, 2024

PrinceWatercress plays Ratchet and Clank: Going Commando - Part 44 of 54


That's the last of the Moon Stones, but we're not done with this planet...yet.

First | Previous | Next | End

In this entry, we finally get all of the Moonstones on Grelbin. If you do that, you'll get a Skill Point: "Be A Moon Child."

And with that, it's time to do other things.

Skill Points:

Be A Moon Child: Get all 101 Moonstones on planet Grelbin.

Controls:

As Ratchet:

Control Pad/Left Analog Stick: move
Right analog stick: move camera

X:
  • Jump and double jump (hold button after double jump to use Heli-Pack or Thruster Pack)
  • Wall jump (near certain walls)
Square: strike with wrench
Circle: pull out/shoot currently equipped gun
Triangle: 
  • quick select (hold and use in conjunction with Control Pad or left stick to switch guns; menu can be customized in Quick Select on the pause menu
  • double tap to switch between two most recently equipped weapons/items
  • interrupt on-screen messages

Select: open map
Start: Pause menu
  • Control Pad: select option
  • X: confirm option choice

L1:
  • center camera behind Ratchet (tap button to center)
  • first-person view (hold button and use left stick or D-Pad to look around; let go of L1 to move camera back behind Ratchet)
  • Square: wrench boomerang
  • Circle: fire gun
  • R1/R2: zoom in and out (Pulse Rifle only)
L2/R2: strafe (hold while moving)
L3: see health and Bolt totals
R1/R2: crouch (hold down)
  • Square: wrench boomerang
  • X: high jump
    • long jump (hold crouch button and jump while running to perform)
R3: open map

In water:
  • Square: dive and descend
  • X: surface and ascend
  • R1: accelerate with Hydro-Pack

As Clank:

Control Pad/Left Analog Stick: move
Right analog stick: move camera

When hanging off platforms:
  • Control Pad/Left Analog Stick: move
  • Forward+X: vault up
  • Back+X: drop down

Square: punch
X: Jump (press and hold in the middle of a jump to glide with Heli-Pack)
Triangle: command menu (hold and use in conjunction with Control Pad or left analog stick to choose commands)

Saturday, June 1, 2024

DeceasedCrab plays Earthbound - Part 44 of 53


In this entry, we open up the road to the final "Your Sanctuary" location.


The Sea Pendant protects from Fire, Freeze and Flash.

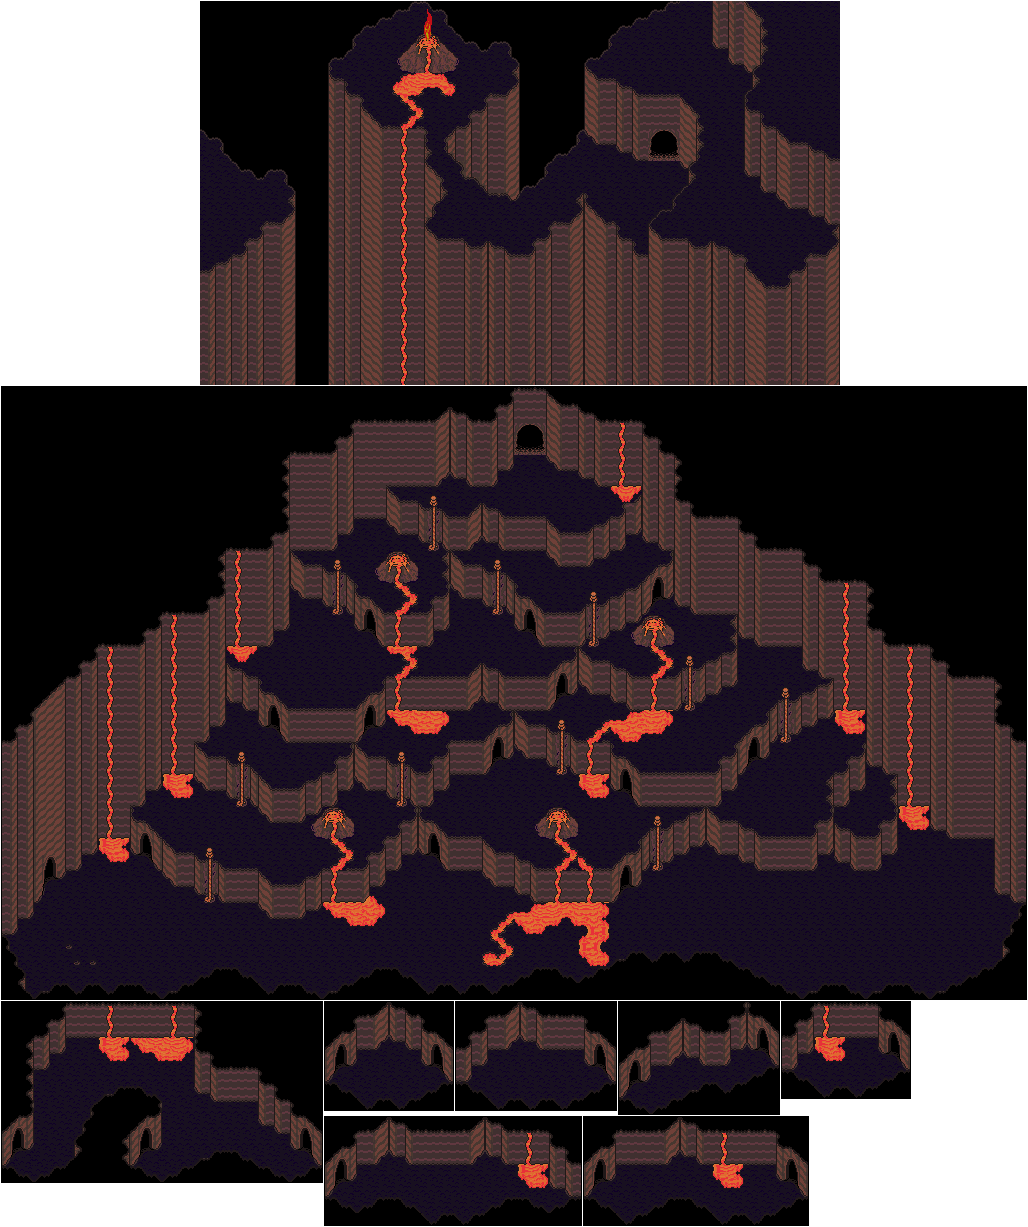
As you make your way further into the Lost Underworld, you'll find out that Pokey has been here. You'll also find an underground Tenda village, and the Tendakraut will allow you to go in. Once you're in, the Tendas will take the Tendakraut.

There will be a talkative mystery rock in the village that you can talk to. The rock will tell you that your destiny is also the worlds, and that you must reach all of the "Your Sanctuary" locations in order to see "Your World." He also tells you where all of the "Your Sanctuary" locations are. If you find and get to the first seven, Fire Spring will open up just southwest of this village when you talk to this rock.

There is also an inn where you can stay for free in you need to. And of course, you can call Dad as well as Mom on the free phone.

At the store, get the Ultimate Bat for Ness if you don't worry about Guts, and the Holy Fry Pan for Paula. The Shiny Coin increases defense by 70 and Luck by 30. The Mammoth Burger recovers about 200 HP.

The Tenda in the corner of the village functions as an ATM. 

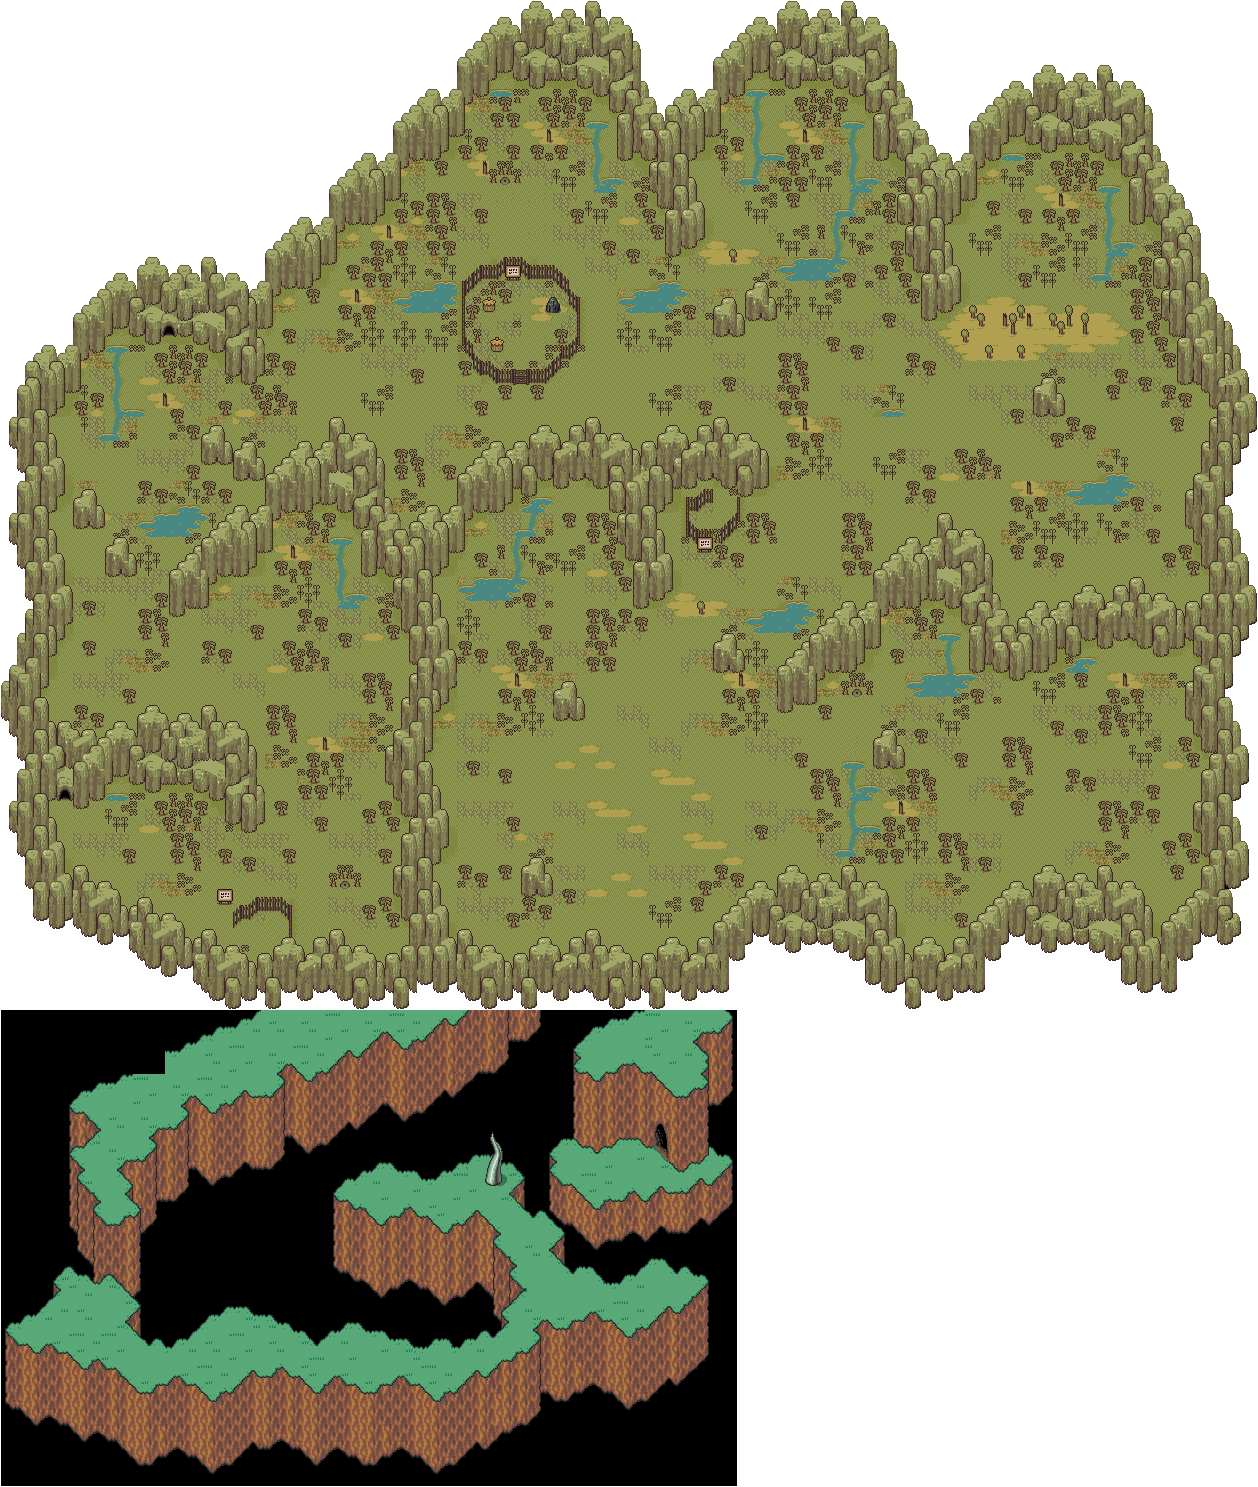
Northwest of the village is a cave, but you won't be able to do anything there. Close to this cave is a gift box containing the Cloak of Kings, which only Poo can equip and will increase his defense by 20 and his Speed by 40. With this, you should have all of the equipable items for Poo.

The Ego Orb will bash, tear into and lunge forward towards one party member. The bash does low damage, and the tearing into and lunge attacks do high damage. It is weak to Freeze.

There is a small fenced-off area in the Lost Underworld near the Fire Spring that only contains a Tenda as well as a phone. It's a nice place to heal up and save the game.


The Psychic Psycho (in red) can cast Fire Alpha and Fire Beta. The Major Psychic Psycho (in purple) can cast Fire Alpha and Fire Gamma, as well as Shield Omega and Paralysis Alpha. Have PSI Shields up, as the Major Psychos can do a bit of damage. The Major Psychic Psycho also has a 1 in 128 chance of dropping a Star Pendant, which increases defense by 30 and protects from Fire, Freeze, Flash and Paralysis.

The Soul Consuming Flame can spew a flaming fireball that can hit one party member, breathe fire (which is the same as Fire Gamma) and shoot out a spray of fire (which is the same as Fire Omega). The last two attacks are multi-targeting. It has a 1 in 128 chance of dropping a Meteotite. The Evil Elemental can bash, disrupt the senses of one party member and leave them unable to use PSI, and possess a party member with a mini ghost. It has a 2 in 128 chance of dropping a Luxury Jerky.

Tuesday, November 7, 2023

Jerry Martin plays Strong Bad's Cool Game For Attractive People - Part 44 of 53


Welcome to the fifth and final episode, where we jump into the world of Videlectrix!


Episode 5: 8-Bit Is Enough

After the events of Episode 4, Strong Bad jumps only to bump right into an arcade machine. When that happens, sparks fly out of it, and Strong Bad blames Strong Sad before Trogdor's roar is heard (which Strong Sad mistakes as a fan) before big beefy arms and green dragon legs sprout out of the arcade machine, which then chases Strong Sad around, much to Strong Bad's delight.

Head up to Strong Bad's room. Talk to The Cheat, and you'll find out that The Cheat has a copy of Gel-Arshie's Pro Fruitboarder for the Fun Machine, which leads to Strong Bad expressing his belief that licensed video games are never good. From here, get the Metal Detector. Compared to the other episodes, you'll be getting your hands on this bad boy at the start.

If you click on the pile of laundry, you'll find Homestar's cellphone, which will go into your inventory.

From here, head to the kitchen and keep going right. Strong Sad will tell you to bolt the doors. Go upstairs and go left into Strong Sad's room, then click on the bookcase to find the Carapl Tunnel Connie Good Graphicketeers card.

Go back downstairs and talk to Strong Sad. You'll find out that the mad arcade machine is gone after Strong Sad tosses his plant Charlemagne out the window after tricking the mad machine into thinking it was a peasant baby, and that you'll need a new logic board for the machine. From there, click on the logic board (the third option). Strong Sad will tell you that you've broken the 8-Bit Containment Field and that you'll have to call Videlectrix for a new logic board in order to get Trogdor back into the game safely. Strong Bad, on the other hand, wanted this to happen, but Strong Sad tells him that if he gets free, then the video game world and the real world will merge, which Strong Bad also wants to happen. After Strong Sad sings the same 8-bit tune over and over, Strong Bad finally decides to fix the machine.

If you ask Strong Sad about Strong Sad (the second option), Strong Sad will celebrate Charlemagne's death. If you ask about Trogdor (the first option), you'll find out that Trogdor is still outside.

Once you're done talking to Strong Sad, Strong Bad will mention that he needs to remember where he put the key to open the Trogdor machine before popping in a new logic board. Strong Sad will give him a case key, which goes into the inventory. Strong Sad will also mention that he kept it safe in case Strong Bad lost it.

From here, go through the door on the right. Trogdor will run away, and Strong Bad will go after him. From here, the machine will now be on the map. If you approach the machine, you'll get punched in the face. Homestar will shows up. Talk to him to unlock Strong Badia and find out that he lost his lucky video game quarter. Ask him about the quarter (the second option), and Homestar will mention that "Lucky George" has gotten him out of many a jam and that he has the feeling that the lucky quarter is in Strong Badia. Use the Black Metal Detector on Homestar to find out that he accidentally swallowed the quarter. Homestar will take the Black Metal Detector only to break it and get punched by Trogdor. You'll then get Lucky George, which has been knocked out of Homestar's insides. Give the lucky quarter to Homestar, and he will put Lucky George in the Trogdor machine and fight it.

GOOD GRAPHICKETEERS CARDS:
NEW! Carpal Tunnel Connie: Examine Strong Sad's bookcase.

Sunday, May 7, 2023

PrinceWatercress plays Sly Cooper: Thieves In Time - Part 44 of 48


Now it's time to hit up the rest of those maps. Guess what? This video is just as long as the last one.


In this and the previous video, I go for all of the maps in the game for the "Navigate Like Drake" Trophy. To get this trophy, you have to take a look at every single map in the game. You need not look around on the map with the analog sticks; you merely have to press Select to pull up the map in the first place. That's it.

I get the Bar Dynamite map in Episode 2 here; it's at the end of the video.

If you need a list for all the maps, you can find one here. 

Episode 4

Area: Hideout
Job: any
Note: This one is universal for all the episodes, but I'll add it for each episode, anyway.

Area: Hub Area
Job: any
Note: This one is universal for all the episodes, but I'll add it for each episode, anyway.

Area: Tavern
Job: Shopping Spree

Area: Bakery
Job: Shopping Spree

Area: Shoemaker
Job: Shopping Spree

Area: Circus
Job: Juggling Act

Area: Belly of the Beast
Job: Mechanical Menace

Area: 2nd Floor Bakery
Job: Short Supply

Area: Blacksmith Assembly Line
Job: Shell-Shocked Heart

Area: Castle
Job: Operation: Mouse Trap
Note: This is during the boss fight with Penelope.

Episode 5


Area: Hideout
Job: any
Note: This one is universal for all the episodes, but I'll add it for each episode, anyway.

Area: Hub Area
Job: any
Note: This one is universal for all the episodes, but I'll add it for each episode, anyway.

Area: Lazy Trunk Spa and Lounge
Job: any
Note: This is the secret area in the castle section to the north. There is a crawl space that leads to this area.

Area: Wise Monkey Lamps
Job: Lost and Found

Area: Honest Hassan's Carpets
Job: Rug Rats

Area: Caverns
Job: Rug Rats

Area: Tower
Job: Rug Rats

Area: In A Jiffy Yellow Cabs
Job: Copy Cats

Area: Crabby Guy Paperbacks
Job: Heavy Metal Meltdown

Area: The Underground Docking Bay
Job: All Rolled Up
Note: This is the area that comes after the Carmelita dance game.

Epilogue


Area: Hideout
Job: any
Note: This one is universal for all the episodes, but I'll add it for each episode, anyway.

Area: Le Blimp
Job: Deja Vu All Over Again!

Episode 2


Area: Bar Dynamite
Job: Saloon Bug
Note: I missed this one in the last episode. For that, it gets mentioned here.

Achievements


Navigate Like Drake: Take a look at every map in every episode in the game.

Controls:

Left analog stick: move
Right analog stick: move camera
X: Jump and double jump (hold X on second jump for hover jets as Bentley)
Square: attack
Circle: 
  • interact (usually with anything that has sparkles) (Sly)
  • steal from enemies (from behind) (Sly, Bentley, any of Sly's ancestors)
Triangle:
  • knock enemies upwards (from behind; press Square to slam enemies down for stealth slam) (Sly, any of Sly's ancestors)
    • press Circle after knocking enemy upward to perform Silent Obliteration (Sly; replaces Stealth Slam; must buy on ThiefNet)
    • press Square for Stealth Slam (any of Sly's ancestors)
  • spin attack (hold to charge) (Sly)
  • throw bombs (Bentley)
  • Thunder Flop (in mid-air) (Murray)
  • spin attack (hold to perform) (Murray)
    • control with left stick (must buy on ThiefNet)
  • Raging Inferno Flop (in air; Murray; must be bought on ThiefNet)

L1: 
  • bomb aim (Bentley)
  • smoke bomb/flash bomb (Sly; must buy on ThiefNet)
  • aim/strafe mode (Carmelita; must hold button down)
    • left analog stick: move
    • R1: shoot (can only shoot in strafe mode)
L2:
  • hold for costume select menu (Sly)
    • hold down to stay in menu; use D-Pad or left stick to make selection
  • hold for weapon select menu (Bentley)
    • hold down to stay in menu; use D-Pad or left stick to make selection
  • hold for fist select menu (Murray)
    • hold down to stay in menu; use D-Pad or left stick to make selection
  • hold for shot select menu (Carmelita)
    • hold down to stay in menu; use D-Pad or left stick to make selection

L3: activate compass
R1: run (hold while moving to perform)
  • Paraglide (Sly; in air; must buy on ThiefNet)
    • Square: Paraglide Dive Attack (during Paraglide; must buy on ThiefNet)
  • Adrenaline Burst (Bentley; double tap to activate; must buy on ThiefNet)
  • Clothesline (Murray; double tap and steer with left stick; must buy on ThiefNet)
  • Cane Push (Sly; double tap; must buy on ThiefNet)
R2:
  • Trigger Bomb (Bentley; must have bomb on field to detonate manually; must buy on ThiefNet)
  • Super Jump (Carmelita; hold and press X to perform; must buy on ThiefNet)

R3: Binocucom
  • Right analog stick: move
  • Left analog stick: zoom in and out
  • R1: take picture (when applicable) (Sly, Bentley)

Start: pause menu
Select: map
  • Left analog stick: zoom in and out, switch between map and status
  • Right analog stick: move map
  • Circle: back

Saturday, November 6, 2021

HCBailly plays Final Fantasy II AGAIN - Part 44 of 65


Fake walls! Jellies! Red Souls! Ghosts! What else is here?


There is a fake wall that leads to the Ice Bow (assuming you need it). There is another one that leads to those five chests just at the end.

The OgreKillr is obviously strong against Ogres and other Giant-type enemies.

The Yellow Jellies (Y.Jelly) are weak to Fire and Ice attacks.

Red Souls now show up as regular enemies here.

Enter the door in the center of the group of three near the end. You'll find a Phoenix Down, a Bell of Silence (which Mutes enemies) and another Gold Needle.

The Ghosts have a lot of HP. You're better off using Life on them, as Fire isn't going to kill them in one shot unless it's really powerful or single-targeted. Killing them quickly is crucial, as they can cast Scourge 16. Ghosts are also strong against Ice and Poison.

Tuesday, February 16, 2021

PrinceWatercress plays Sly 2: Band of Thieves - Part 44 of 49


We've got all the clue bottles. Now to see what's going on with all the Clockwerk parts and...oh, dear.

Blimp HQ Recon


Now that we've got all the clue bottles, it's time to play as Sly once more and start doing recon.

Bentley has detected large magnetic waves in a nearby blimp, which means that Clockwerk's parts are nearby. It's time to do some recon. Climb up the nearby rope, then Paraglide to the wing of the blimp. From there, climb your way to the air vent, break it open and go on in.

Once you're inside the blimp, you'll find out Clockwerk's body is complete, but not activated. From here, you'll need to take some pictures. Go down and look opposite of where you start for the picture of the mech eggs. For the electro-platforms, stand on the top of teh arch near the start and get the picture from there. The arch on the opposite end will not only give you a picture of Clockwerk's head, but a good look at Neyla with Arpeggio. Once you're done with the first three pictures, you can get pictures of both of them, too.

With Neyla and Arpeggio conspiring to rebuild Clockwerk, Sly asks Bentley for a quick plan of attack. Bentley will tell Sly to reverse the polarity of the magnetic inducers in an attempt to make everything fall apart. Unfortunately, the inducer speed control station is locked down, and you'll need to pickpocket the guards to get the keys for it before you can reverse the polarity of the inducers.

Deal with the guards one at a time, and try not to get spotted. When you pickpocket a guard of their key, get rid of them with Silent Obliteration to make this part easier. (Had you attacked a guard before this part, you'd fail the recon part of the mission.) From there, you can get to the speed control station and unlock. This will slow down the electro-platforms of the magnetic inducer, allowing you to get on them. Climb to the roof from Clockwerk, Paraglide to the platforms when they are right-side up, then press Circle at the consoles to deactivate them.

Clockwerk's body will go down, then Neyla and Arpeggio will see what is going on. Unfortunately, our efforts have done the opposite of the intended effect and locked Clockwerk's parts in place, fully rebuilding Clockwerk. Sly confronts Neyla and Arpeggio, the latter of whom wants to join himself to Clockwerk to be born anew and achieve immortality as he views the other members of the Klaww Gang as short-sighted, expendable and only out for themselves. As for the hatred that kept Clockwerk alive all these years, that is where the spice trade carried out by some of the Klaww Gang's members came into play, and with spice consumption making people vulnerable to aggression and hypnosis, Arpeggio could use his blimp with help from The Contessa's talents to make his blimp a massive transmitter of precise light frequencies than would turn normal people into hate-ridden beings. The only source of light that could help him with that is the Northern Lights, and he collected its energy in order to hypnotize the world with a hypnotic light show of hate, starting with Paris, France, where Dimitri managed to fool everyone into consuming food seasoned with illegal spice. As Arpeggio proceeds to join himself with Clockwerk, Neyla double-crosses him and joins herself with Clockwerk to become Clock-La. Clock-La squashes Arpeggio, killing him, then flies through the window and out into the outside world around the blimp.

This starts the second leg of the episode. There is still a chance of beating Clock-La, despite her being unleashed on the world. Clock-La will have to draw energy from the engines of the ship in order to build up power, and if the engines are destroyed, she will be in a state weak enough to be attacked. The engines must be disabled in order to power Clock-La down.

Controls

D-Pad/Left Analog Stick: move
Right Analog Stick: move camera
X: jump and double jump
Square: Horizontal Attack
  • horizontal attack (as Sly)
  • slam enemies launched into the air from behind (as Sly)
  • hook punches (as Murray)
  • Thunderflop (as Murray; in mid-air only)
  • crossbow swipe (as Bentley)
Triangle: Vertical Attack
  • vertical attack (as Sly; used to knock enemies into the air)
  • downward dive (as Sly; in mid-air only)
  • uppercut (as Murray)
  • drop bomb (as Bentley)
Circle: Action button (near blue/green/purple sparkles and character icons)
  • pickpocket (as Sly)
  • stomp (as Murray; use Square to throw object/enemy)
R1: hold to run

Select: Gadget Grid
  • Control Pad: highlight gadget
  • X button: confirm gadget
  • L1, L2, R2: assign gadget to button pressed

L1, L2, R2: use gadgets assigned to button pressed

Start: pause menu
  • Control Pad: select menu choice
  • X button: confirm choice
  • Start: un-pause game

L3 (press the left analog stick): locate beacons for mission objectives

R3 (press the right analog stick): Enter and exit Binocucom for first-person view
  • Left analog stick: look around
  • Right analog stick: zoom in and out (with up and down on right stick)
R1: 
    • take pictures with spy camera (as Sly; when applicable)
    • shoot sleep dart (as Bentley)

Hacking mini-game controls:
  • Left analog stick: move
  • Right analog stick: aim and fire gun

Sunday, July 12, 2020

PrinceWatercress plays Terranigma - Part 44 of 50


It's time to find the Starstones if we are to have any hope in saving the world.

Lhasa


Let's save our game before we head out.

Go to any town, head to the Fortune Teller in the town and talk to her. She tells you that what you seek are in a dream, sand, ice, mountain and ruins.


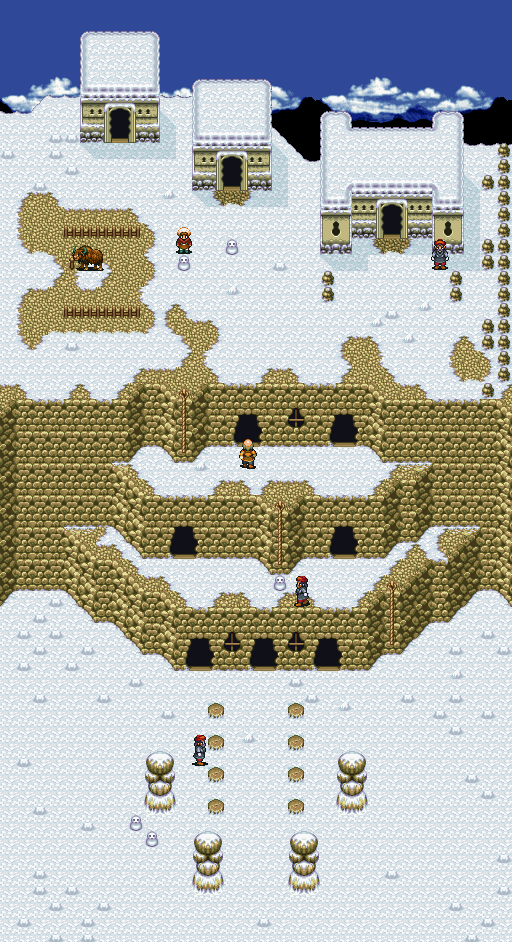
Your first stop is South America. Head to the stopover near the mountains to the south and tell the bird to give you a ride. This will take you to Greenland, and the stopover bird is the only way to get into Greenland as rocks line the entire perimeter of the land.

To the west of the stopover area is a cave. Inside is a chest containing 961 Gems.

To the south of the stopover area is Penginea, a town of nothing but penguins. You won't be able to talk to any of them very well, even though they're smart enough to wear hats, make sleds, hang fish, go fishing, own and use their own furniture, use a kettle, sleep in a bed and even have a seal pull one of their sleds along.

There are six igloos, three on the left side and three on the right side, and you can only go into them if you crawl into them. If you enter the lower-left igloo, you'll find Magirock #84.

Once you get the Magirock, equip the Pretty Flower. Be sure you have nine of them, and use them on the penguin near the lower-right igloo. You'll exchange one of them for the first Starstone.

You're done here. Head back to the stopover and fly back to South America. From there, sail to the west coast. Go north, and you'll find Astarica. Interact wtih the pots, and a voice will tell you to take the goblet on the avatar. Ark will drink from it, then eventually black out.

Four ghosts will surround you. They will tell you that Astarica is a holy land that observes the growth of humans. Upon awakening, you shall be witness to an odd vision.

When you wake up, the temple will be lit up, and you'll meet Meilin and Perel...sorry, Meilia and Pela. They are priests seving Lord Meila. Pela will tell you to go hear what Lord Meila has to say. Lord Meila will be just in front of the entrance, and he looks like Meihou.

Meila will tell you that a holy ceremony is held yearly as per Astarica's custom. Night dew collects in the six goblets on the altar for a year, and one of them is said to bring the drinker closer to the gods. All the drinker does is drink one of the goblets and spends a year without food or drink. The wrong goblet means death, but the right goblet means that a god has been born within the tribe. It has been one year since the last ritual. Two priests have gone to inspect everything, but have not returned. He asks you to go look for them.

Go up to the statue at the north end of the temple and push it to the side to reveal a secret passage. Push the statues to the north and push them into the gaps in the wall at the north end. This opens a door. Go in.

The path here is very linear. Destroy the spiders as you go along. You'll find a chest containing the Holy Suit near the start, but it's not that good compared to what you have now. Don't forgot to face away from the flying eye monsters so you can use the jump attack to defeat them.

You'll also find Magirock #85 as you go along. Thankfully, it's very easy to get to.

When you reach the end, you'll see Royd, Fyda and Princess Elle, who are Roy, Fyla and...Elle. Turns out, Roy and Fyla are the priests, and Elle was the one who drank the right goblet and became a god. The year felt like centuries, but she knows now the true significance of a god. She then says that Humans are pathetic creatures driven by desires and living in misery, and that a ritual like this is only for gaining power over other tribes. She has had enough of people, and if they all disappeared, everything would be peaceful. Elle then uses her powers to kill Roy and Fyla and make them gods of death. Roy shows Fyla a human quality known as love, and Roy and Fyla embrace before they are killed.

Talk to Elle. She will ask if you come seeking an immortal body. Ark comes to the conclusion that people have two faces: the external soul and the internal soul, and that the goblet just brings out the internal soul. Elle will tell you to drink from the goblet. Interact with the one that was behind her in the cutscene. She will say that the end of the human race is trite. After that, you'll be out of the dream and back in Astarica.

There will be a chest in the room that wasn't there before. Inside is the second Starstone.

Head to the Sahara Desert in Western Africa. Head to a point that takes you to a desert. Nearby is a skeleton. Interact with it, and Yomi tells you to look at the skeleton's neck. It's the stone Leim found in the canyon, and Ark wonders why it's here. Yomi says that a human probably stole it from a lion's den. This is the third Starstone.

Saturday, May 18, 2019

HCBailly plays Final Fantasy IV (Super Famicom) - Part 44 of 70


We finally find out what happened to Edge's parents, then the final Fiend shows up.


At this point, Edge's level should be in the mid-30s while everyone else's should be near the low-40s.

The door to the right of the save point leads to the last floor, and in the center of the room is Rubicante. Head to the west before you go there to get 82,000 gil that can be very easy to miss. Before you face Rubicante, equip the IceBrand on Cecil and equip the Ice Claw on Edge

When you reach the center of the room, the Queen and King of Eblana show up, but they have been changed into monsters. Just like in the Paladin battle, do nothing. Edge will wonder what has happened to his parents, and the battle will eventually be over. The Queen and King will eventually regain their consciousnesses long enough to tell Edge that they have become monsters, do not want to live like this, and that they must die while they are still sane. The two of them eventually die, then Rubicante shows up.

You'll learn from Rubicante that Lugeie experimented on the king and queen of Eblana, then Edge confronts Rubicante. Rubicante explains that this was all Lugeie's own doing and that he had nothing to do with it, and that he wants to fight fairly. Edge does not buy it, but Rubicante tells him that humans will never attain true power as long as they are tangled up in emotions. Edge's rage unlocks two new spells: Suiton and Raijin. Rubicante notices how anger gives humans strength, then declares that not even ice will penetrate his cloak of flames. He heals the party fully, then the battle begins.

Use a Bacchus' Wine on Edge, and have Kain use Jump. Wait until Rubicante opens his cape to start blasting him with Ice 3 from Rydia. Even if it is closed however, any physical attacks with an ice elemental attached to it will still go through and do damage. The one attack to watch out for is the Flame Dragon attack, which will hit one party member for immense damage. Be ready to heal if Rubicante casts it.

After beating Rubicante, Rubicante realizes that your teamwork is what made Cecil and company powerful and allowed them to beat Golbez, then salutes them as he dies. Edge finally avenges his parents, then the Chamberlain of Eblana and his men show up only to find out the battle is over. Edge then gets up to speed on what Cecil and company has been through so far, then realizes that Rubicante was just a lowly pawn. The Chamberlain reminds Edge of his royal duties, but Edge explains that the whole world is in danger, not just Eblana. The Chamberlain lets him go, and tells the party to watch over him and make sure he doesn't get himself killed. The Chamberlain and his men then leave, then Edge joins the party for real.

To the north is a Crystal room, but as soon as you enter, you'll fall into a pit. It's not over yet.

Thursday, June 7, 2018

HCBailly plays Terranigma - Part 44 of 75


It's time to explore the new continent...


World map by Tropicon. Freedom port and town maps by Amir Azadur.


Gotta love the Final Fantasy IV intro at the beginning.

Anyway, to beat the ship ghost, equip the Light Rod and attack the ghost. The ghost makes three copies of itself, and you won't be able to tell which one is real until you attack one of them. Thankfully, this battle isn't very hard at all. Use your standing strike and not your dashing one so you won't risk passing through the ghost without doing any damage.

When you beat the sea spirit, talk to Elle. She'll finally speak to you, and tell you that since she is no longer a princess, you have nothing to gain by being with her. When she asks why you came, tell her it's because she looks like Elle in Crysta. Ark tells her about the Elle from underground, and when Elle asks about the difference in personalities, you'll have a choice between "Different" and "Could be close." If you say "Different," Elle will tell you that you have no sense of delicacy, but she thanks you nonetheless. After this, head back to bed.

Freedom


When morning breaks, you'll finally arrive at the new continent. You'll be woken up by Yomi as the ship docks at port. Talk to the sailor near the boat when you get out, and you'll get a Royal Letter. When you read it, you'll get a message from Elle saying that she can no longer be a burden to you. She also admits that she killed the King of Loire, and that she has a secret vested in her by her parents, and that the King destroyed her village and adopted her to find that secret. She then writes that the marriage proposal was a sham to get her to spill the secret, and when she regained her past memories, she had no choice but to kill the king before the secret was out. She also says that Fyda got her out of Loire when they came to the castle, and that she cannot involve others in whatever it is she's trying to do. She then tells you in a post-script to take care of Elle in Crysta.

In the lower-right corner of the port is a shack with a Magirock in it. This is Magirock #55. Go ahead and take it. The soldier here will tell you about armor made by mermaids which is better than anything made by man.

Go ahead and leave the port. There's nothing else to do here. To the north is the town of Freedom.


When you come to Freedom, you'll see that there are not only people and modern buildings here, but people of different races. The woman near the entrance will tell you about this.

The building to the left of the entrance is the inn. The left room is where Keinz is staying. Keinz will tell you that new talented people are emerging here, and that they will influence the growth and creativity of this culture. If you want to stay, it'll be 10 Gems, but at least you don't have to stay in order to save your game, as the ink well and diary is right on the counter.

Don't forget to equip the camera and take a picture of the town.

The building to the right of the entrance is the merchant and Magishop for the town.

To the north of the shops is a pub. The guy behind you tells you that the pub has nothing but bourbon and that you'll just have to deal with it. The woman to the left of the counter will tell you that she prefers a smoother, refreshing drink if you talk to her. If you equip the Wine and use it on her, she'll ask for a sip. Say yes, and she'll taste it, like it and tell her friends.

If you talk to the guy in front of the counter, another woman will show up and drag him away.

The guy near the pub will tell you that the Colorado River is to the west of Freedom, and that they haven't had much luck building a bridge over it due to its raging waters.

To the west of the pub is the town square. You'll have to talk to the kid on the skateboard in order to advance the plot. The woman nearby will tell you about the town of Liotto on the southern continent and how it has a carnival going every day. We won't be able to go there yet. 

There is a plant sap salesman in the square who will sell a glass of plant sap for 10 Gems. It doesn't do anything, but it actually tastes good. If you buy, the guy will tell you to see his cousin in Nirlake to see what he 's up to.

There is a lottery on the square, where you can get random items. For 20 gems, you can draw a random number for a chance to win a prize. You can either grab from the bottom, the top, or mix and grab. There are 64 numbers, and prizes range from nothing, an S.Bulb, M.Bulb or L.Bulb, a Pretty Flower, or a really good item. The higher the number, the better the prize. If you can't carry any more of a certain prize, you'll get your 20 Gems back.

If you've maxed out on all bulbs and Pretty Flowers, you can play this until you get Number 1 without fear of running out of money.

Monday, March 5, 2018

skorch82 plays Brave Fencer Musashi - Part 44 of 70


Now that Mayor Govern is well again, it's time to head back onto our adventure.

Now that you've put out all of the flames, head to the Mayor's house and knock on the door. Mayor Govern will be over his cold, and thanks you with a Calender. You can't get rid of it, and it will come in handy later. Mrs. Govern will also gives you the Rocksalt.

Now that your temporary mayoral position is over, head back to the forest. There is a road with a sign and two walls near it. This leads to a path blocked by a rock that looks like a slug. Use the Rocksalt on it, and you'll find out it really is a slug.

Continue down the path. You'll quickly find a Bincho Field. Break it to rescue Artisan Teebone. If you return to the Palace later, he can temper your sword.

If the tide is too high for you to drop down to the platforms, come back later in the day. Use the Water Scroll to walk to the Water Crest, and use it there to drain all the water. Make your way down and you'll find the Fire Crest. Strike it with your sword to get it. The Fire Scroll will let you shoot fire and melt ice, and also light some objects.

After getting the Fire Scroll, Kojiro shows up...and he's got Princess Fillet! Musashi has no choice but to duel with Kojiro to save the Princess.

Saturday, May 20, 2017

HCBailly plays Final Fantasy III - Part 44 of 44


Ever wanted to see the Onion Armor? Now's your chance!


Ever wanted to see the Onion Armor in action? Now you can!

There are five things: The Onion Sword, The Onion Helmet, The Onion Armor and the Onion Gloves. They're the best equipment in the game, and they can only be equipped on the Onion Kid (Bare) job class.

With this equipment, Zande can be destroyed in one round as the Onion Swords are as powerful as the Shurikens. At least you don't have to re-equip them every turn.

You still can't hit the Dark Cloud the first time around, but at least Flare Wave can only do as little as 500 HP.

The Dark Crystal bosses still vary in difficulty. The Two-Headed Dragon can still deal major damage, but even then you can finish it off very quickly with the Onion Swords.

The second and last encounter with the Dark Cloud is unbelievably easier (and faster) with the Onion Swords.

That's basically all you need to know about the Onion equipment. They're powerful, they're really hard to get (1 in 64 item drop chance) and they're worth using if you can somehow get your hands on the entire set.


Monday, February 20, 2017

Chilean Retrogamer plays Wario Land 2 - Part 44 of 57


Yet another giant spear man...

Final Chapter: Mysterious Factory!

Story 1: Defeat the giant spear man


0:44 - Run around collecting coins as you head to the second basement floor (stand on the elevators and get off of them in order go to down) and clear out all the boxes with your tackle. Remember that the orange coins are the fake ones that act as lures by the fisherman fish. (Yep, they return here.)

1:46 - Go all the way to the right and tackle the wall to get some hidden coins, then take the top road to get everything else.

2:58 - Head to the fifth basement floor to go...

4:19 - ...here. There are some coins below, but you'll have to go all the way back to the beginning and deal with both birds and spikes if you go down there. Making it to the other side takes you...

5:30 - ...here. Move straight across the elevators so you can avoid the spikes; it's your best bet.

5:46 - Avoid the extending spikes as you cross the conveyor belts to the other side of the room.

6:07 - There are four elevators to the right. The last one leads to the treasure room, where you can win a miniature computer. Hell if I know. From there, take the third elevator to the next door.

7:20 - Let's put this guy out of his misery for the zillionth time.

7:50 - Another picture piece. Judging by where it's positioned, I'm guessing this is meant to be the last arc you're supposed to do.

Tuesday, December 8, 2015

HCBailly plays Final Fantasy II - Part 44 of 44


The final entry and the final battle. Can you believe it?


The Emperor


Talk to the Emperor to trigger the final battle.

If you have Blood Swords, use them. They drain a percentage of HP from enemies based on how much HP they have, and you'll be draining quite a bit from him. 3000+ HP damage on the first blow? Works for me!

Ribbons and Gold Hairpins make the best headgear here. Ribbons protect from all status ailments, while the Gold Hairpins raise Agility by 10.

The elemental shields as well as the Gold Shield are the best shields for this battle.

The Masamune should be used as an item in this battle, as it can caste Haste 11 on the entire party, and you want to do as much damage on the Emperor as possible before he can strike. Cast Berserk on everyone as well, since it'll definitely help with the Blood Sword damage.

The Emperor can Curse you. He can also cast Meteos, but it's not going to do much damage.

When you take down the Emperor, you've done it! The world can now be rebuilt!


Thursday, December 5, 2013

brickroadbrickroad and SovanJedi play Secret of Evermore - Part 44 of 88


We're finally halfway through the LP, and it's on to the pyramid.

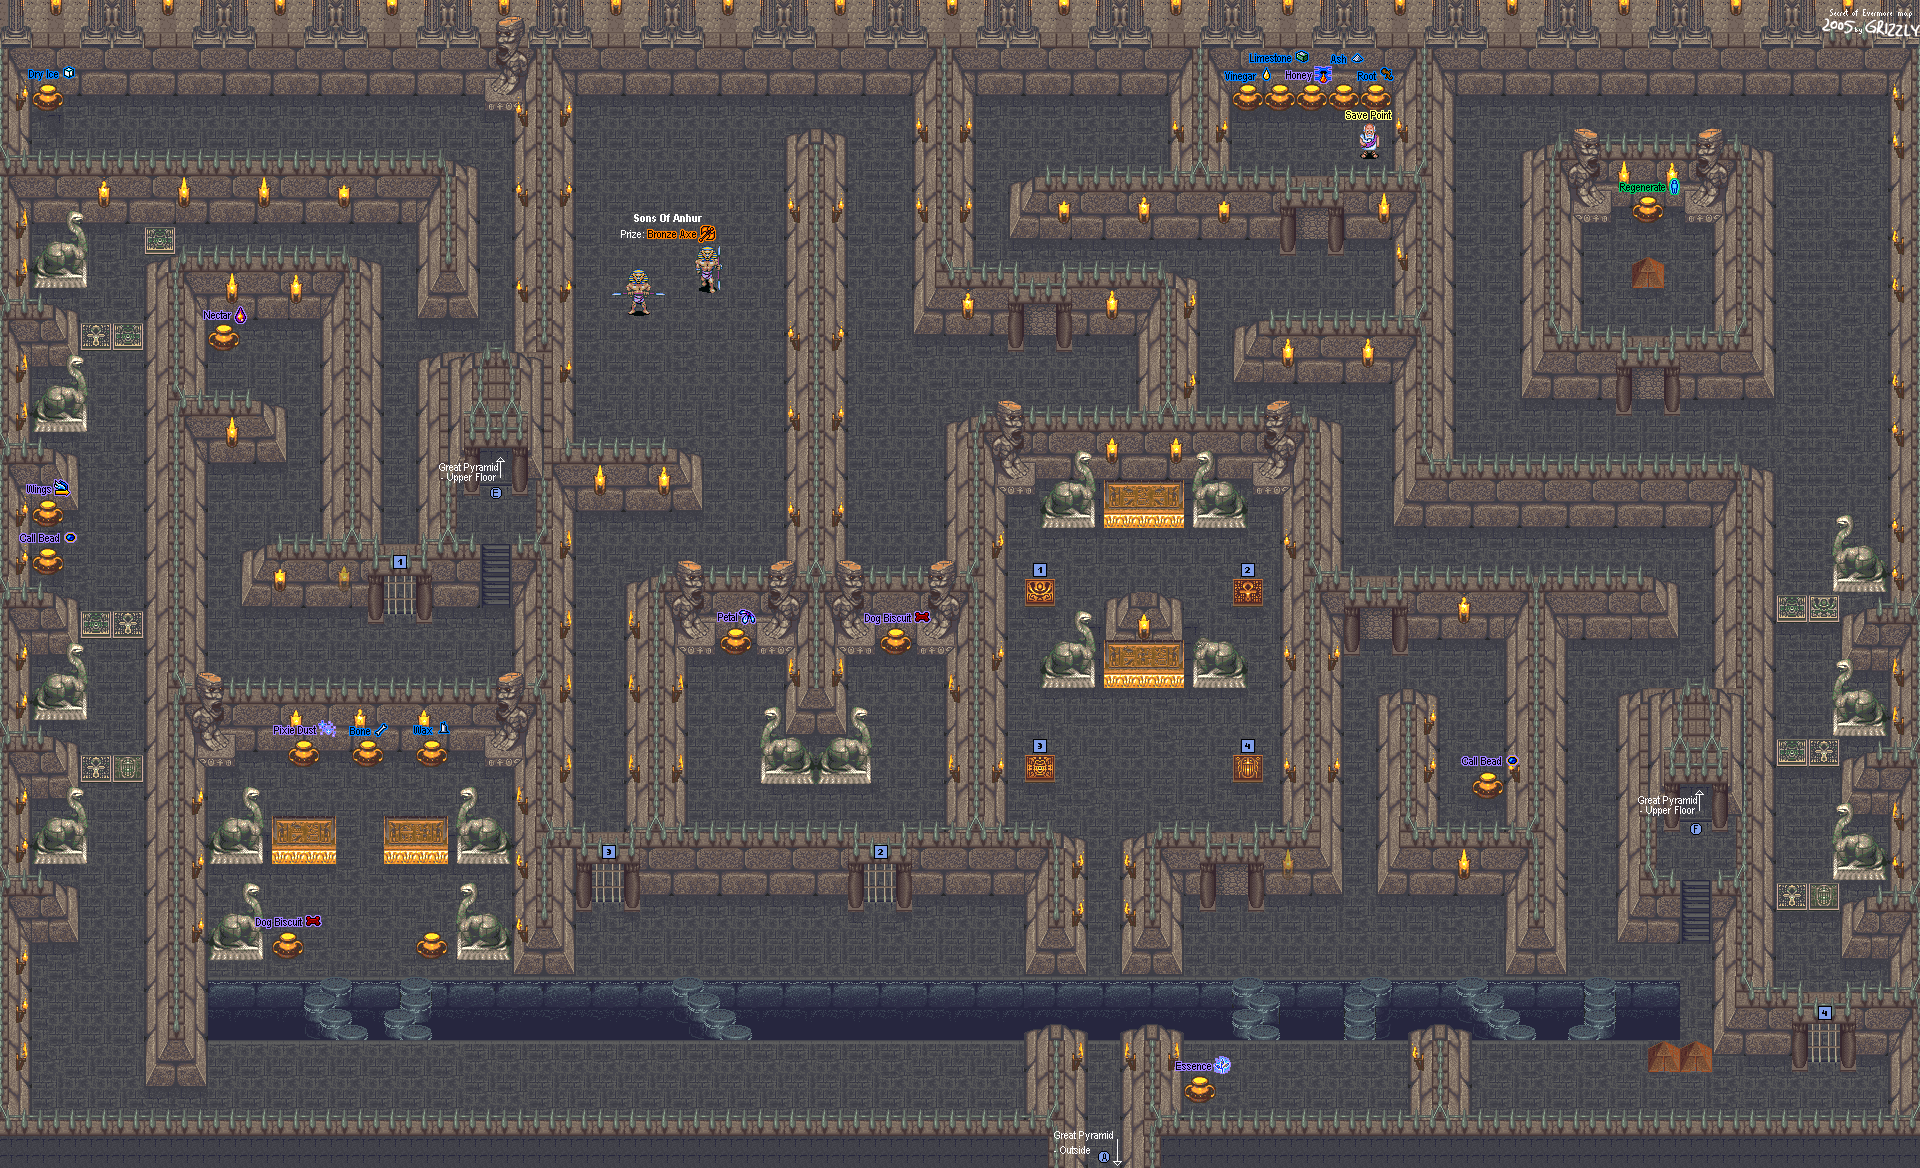
This area will be the hardest thing thus far, and you'll be switching between The Boy and The Dog, walking around, hitting switches and smashing enemies just to get through this place and find everything. Are you ready?

All maps by Grizzly.

Right Bank Forest


Go all the way south, then go west. Use the Revealer formula to get across the pit.

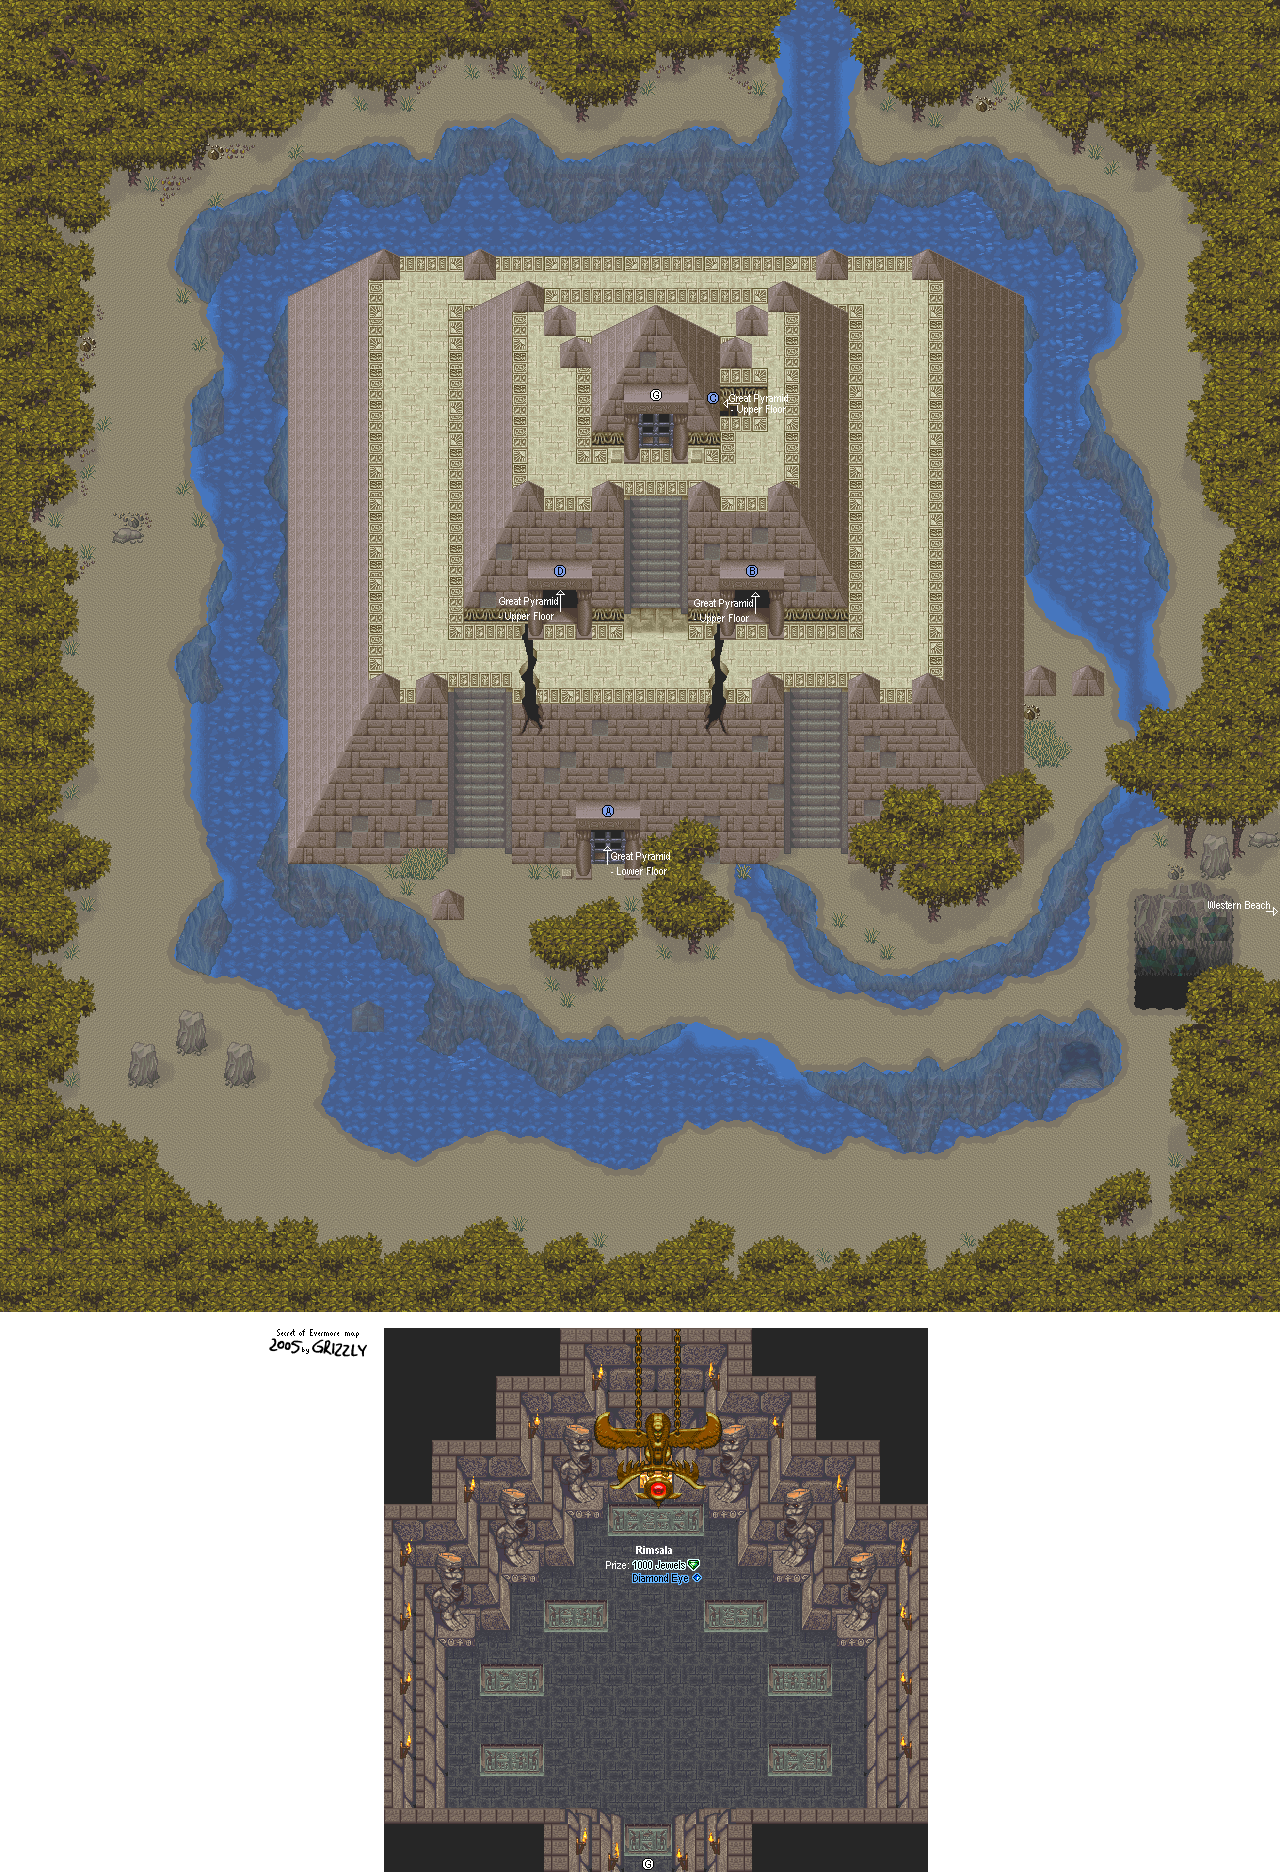
Pyramid - Outside


Just like the Mad Monks, the asp-faced Sons of Set have staves that can still do some massive damage and status ailment problems, particularly Plague. On the other hand, they're slow and can't attack from a distance, so you should be able to use them as target practice for Crush or your new Fireball spell.

The door at the bottom can only be accessed by The Dog. Keep The Boy on the switch, then switch to The Dog and have him go in. From there, have him leap across the water with the run button. The Dog is now in the switch room. The four floor switches will activate four specific doors that The Boy cannot open himself. Press Select and you'll be able to switch back to The Boy. As the Boy, climb up the stairs and move your way around. You'll find an entrance on the roof.

Pyramid


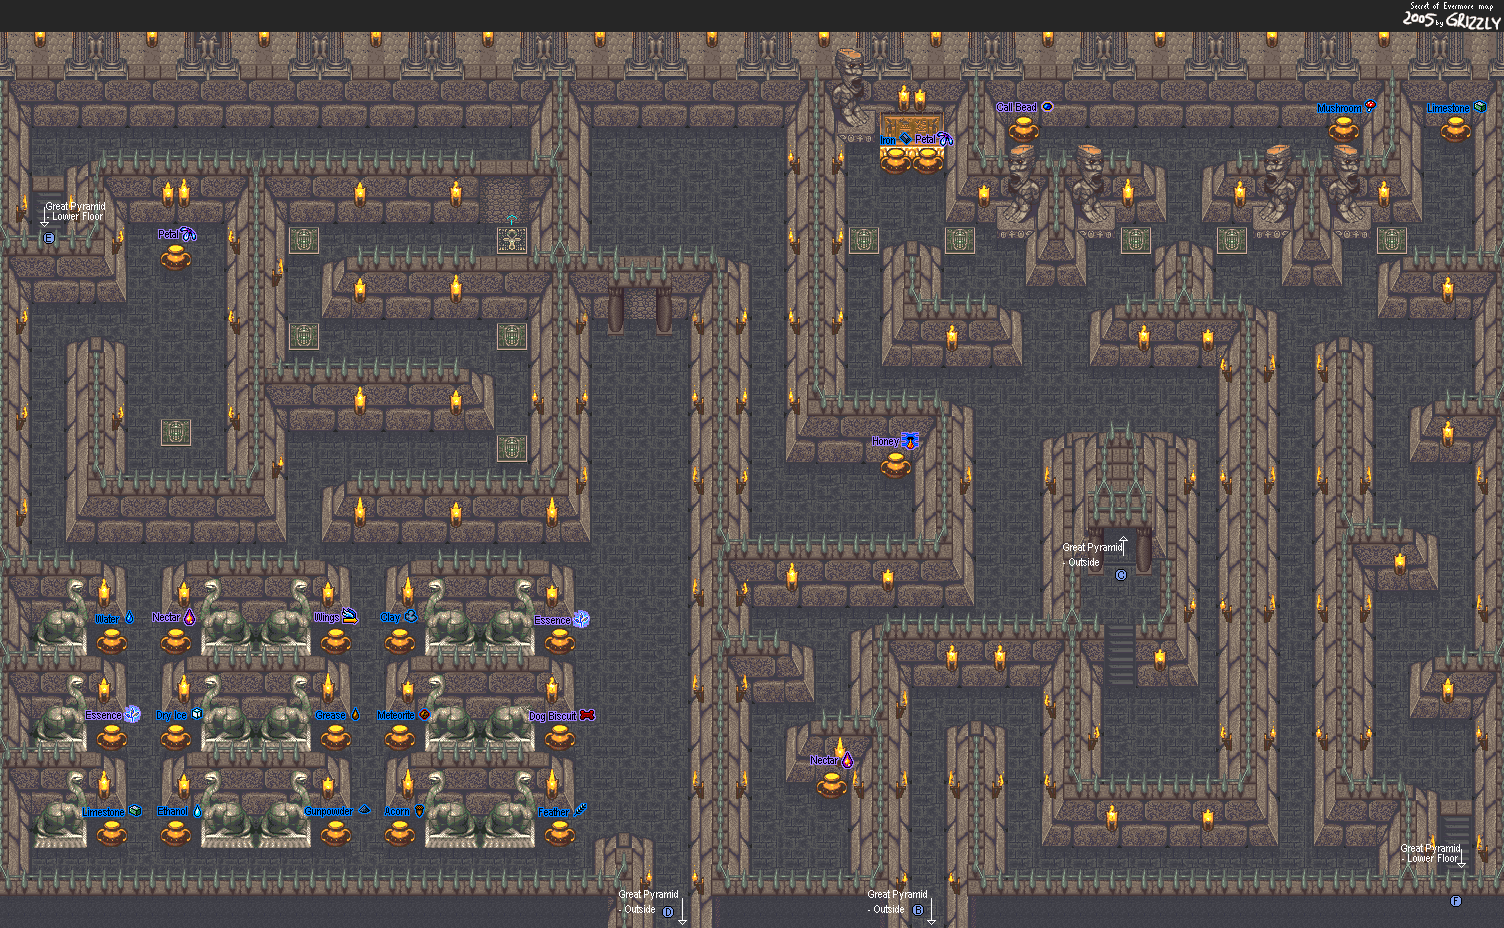
Lower Level Map

Make your way around, and watch out for those Bone Buzzards. If you've leveled up the Bronze Spear to at least Level 2, you'll stand a better chance against them and you'll be able to get them out of your hair much more easily.

From the fork in the road, go south. The other forks lead to Mummified Cats and items.

Once you go down the stairs, you'll find yourself with some more choices to make. You'll be near the switch room, but you won't be able to free The Dog yet. Instead, take down all the enemies, then switch to The Dog. The lower right switch on the floor should open the door to the Stone Cobras hallway. Be sure to stand on the Ankh symbols for the first two, and the right symbol for the last one. Otherwise, the Stone Cobras will come to life...and they hurt like hell, with the ability to take down a good fraction of your HP in addition to Poisoning you.

Friday, June 21, 2013

Eexecute plays Turok 2: Seeds of Evil - Part 44 of 51


 More running around...does this level ever stop?

3:07 - After endless running around, we find another ion capacitor.

4:41 - The son of turret fail.

7:06 - Pipes! Yay!

7:38 - "Wait, I think I missed a pathFFFFFUUUUUUUUUUUU--"

8:08 - More pipes! Yay!