Showing posts with label part 40. Show all posts

Tuesday, February 24, 2026

PrinceWatercress plays Super Mario Odyssey - Part 40 of 92


We almost get the edge against the Cookatiel, but the Cookatiel has other plans.


Big Pot on the Volcano: Dive In!


From where you get Power Moon #2, it's time to do some more exploring. On the way to the Meat Plateau, we also find...the Mushroom Kingdom? Yeah, we'll eventually head there, but not until after we finish the main game! You'll get a sneak peak at the place for now.

Near where you got Power Moon #2, there is a series of slopes that leads to a path that takes you directly to the Meat Plateau. At the end of the plateau is...well...meat. Throw your hat at the red circle on top of the meat, then keep pressing B to twitch. You'll twitch enough to get all the salt off of you and get dropped into a stew pot. Jump from diced vegetable to diced vegetable to get Power Moon #3...only to get blown off by the Cookatiel's powerful wings. You'll have to get to the Cookatiel some other way.

Power Moons

Luncheon Kingdom


3. Big Pot in the Volcano: Dive In! - When you take control of the big slab of meat at the top of the Meat Plateau and press B to twitch, you'll eventually get the Cookatiel's attention and you'll be dropped in a stew pot. You'll then have to platform from one diced vegetable to another to get this Multi-Moon.

14. Light the Lantern on the Small Island - On the path to the Meat Plateau, there is a lantern at the center of an island. You can either capture a Podaboo (which is called a Lava Bubble in this game, I just now found out) and jump at the torch like I did, or you can capture a Fire Bro elsewhere in the level and light the lantern to get this Power Moon.

17. Golden Turnip Recipe 3 - There is a golden turnip under a big cheese block near the Hat Door on the way to the Meat Plateau. Use a Hammer Bro to break the block, as well as to open a path leading up to the switch that let you get Power Moon #2. This will give you a shortcut back to the village, where you can throw the golden turnip into the blue stewpot to get this Power Moon.

21. Beneath the Rolling Vegetables - There is an 8-bit area in the Remote Island in the Lava. Take down the Hammer Brothers and avoid the Podaboos to get the Power Moon at the end.

22. All the Cracks Are Fixed - At the Remote Island in the Lava where you find Power Moon #23 (see below), there is a Volbonan who will tell you that all of the cracks in the island need to be flattened. Unfortunately, there are vegetables rolling around that will flatten you if they run into you. Flatten them all with a ground pound while avoiding the rolling vegetables, and you'll reveal this Power Moon when you get them all.

23. Taking Notes: Swimming in Magma - Near the ring of six Regional Coins in the lava, there is a treble clef. You'll obviously need a Lava Bubble for this. Swim through the long line of notes and you'll find a Power Moon on the island you come across.

39. Magma Narrow Path - On the way to the Meat Plateau, there is a hat door you can open. Take control of a Lava Bubble, then ford the narrow maze-like path of Pepto Bismol lava (yes, I'm calling it that) to get the Power Moon at the end of the area.

40. Crossing to the Magma - Shortly after the beginning of the Hat Door area on the way to the Meat Plateau, take out the two tomatoes and use them to get a Lava Bubble across the land to some isolated lava. Go up the lava for this Power Moon.

45. Spinning Athletics End Goal - There is a small island near the Remote Island in the Lava with a scarecrow. Throw your hat at the scarecrow to open the door, then get ready to jump your way over a bunch of small platforms that rotate 45 degrees at regular intervals. I made this look easier than it can usually be. You'll find a Power Moon at the end.

46. Spinning Athletics - As you go for Power Moon #45, there is a light green spinning platform. Get the notes nearby first, then grab onto the edge of the light green spinning platform to get the rest of the notes before time runs out so this Power Moon can be yours.

Mushroom Kingdom


39. Secret Path to Peach's Castle! - At the Remote Island in the Lava, there is a painting you can enter. This takes you to Yoshi's House, which is separated from the rest of the Mushroom Kingdom. Throw your hat at the fire in the fireplace, then wall jump up the chimney to get a Power Star, which acts as the Power Moon for this kingdom.

Regional Coins


Sunday, March 9, 2025

PrinceWatercress plays Wario Land II - Part 40 of 51


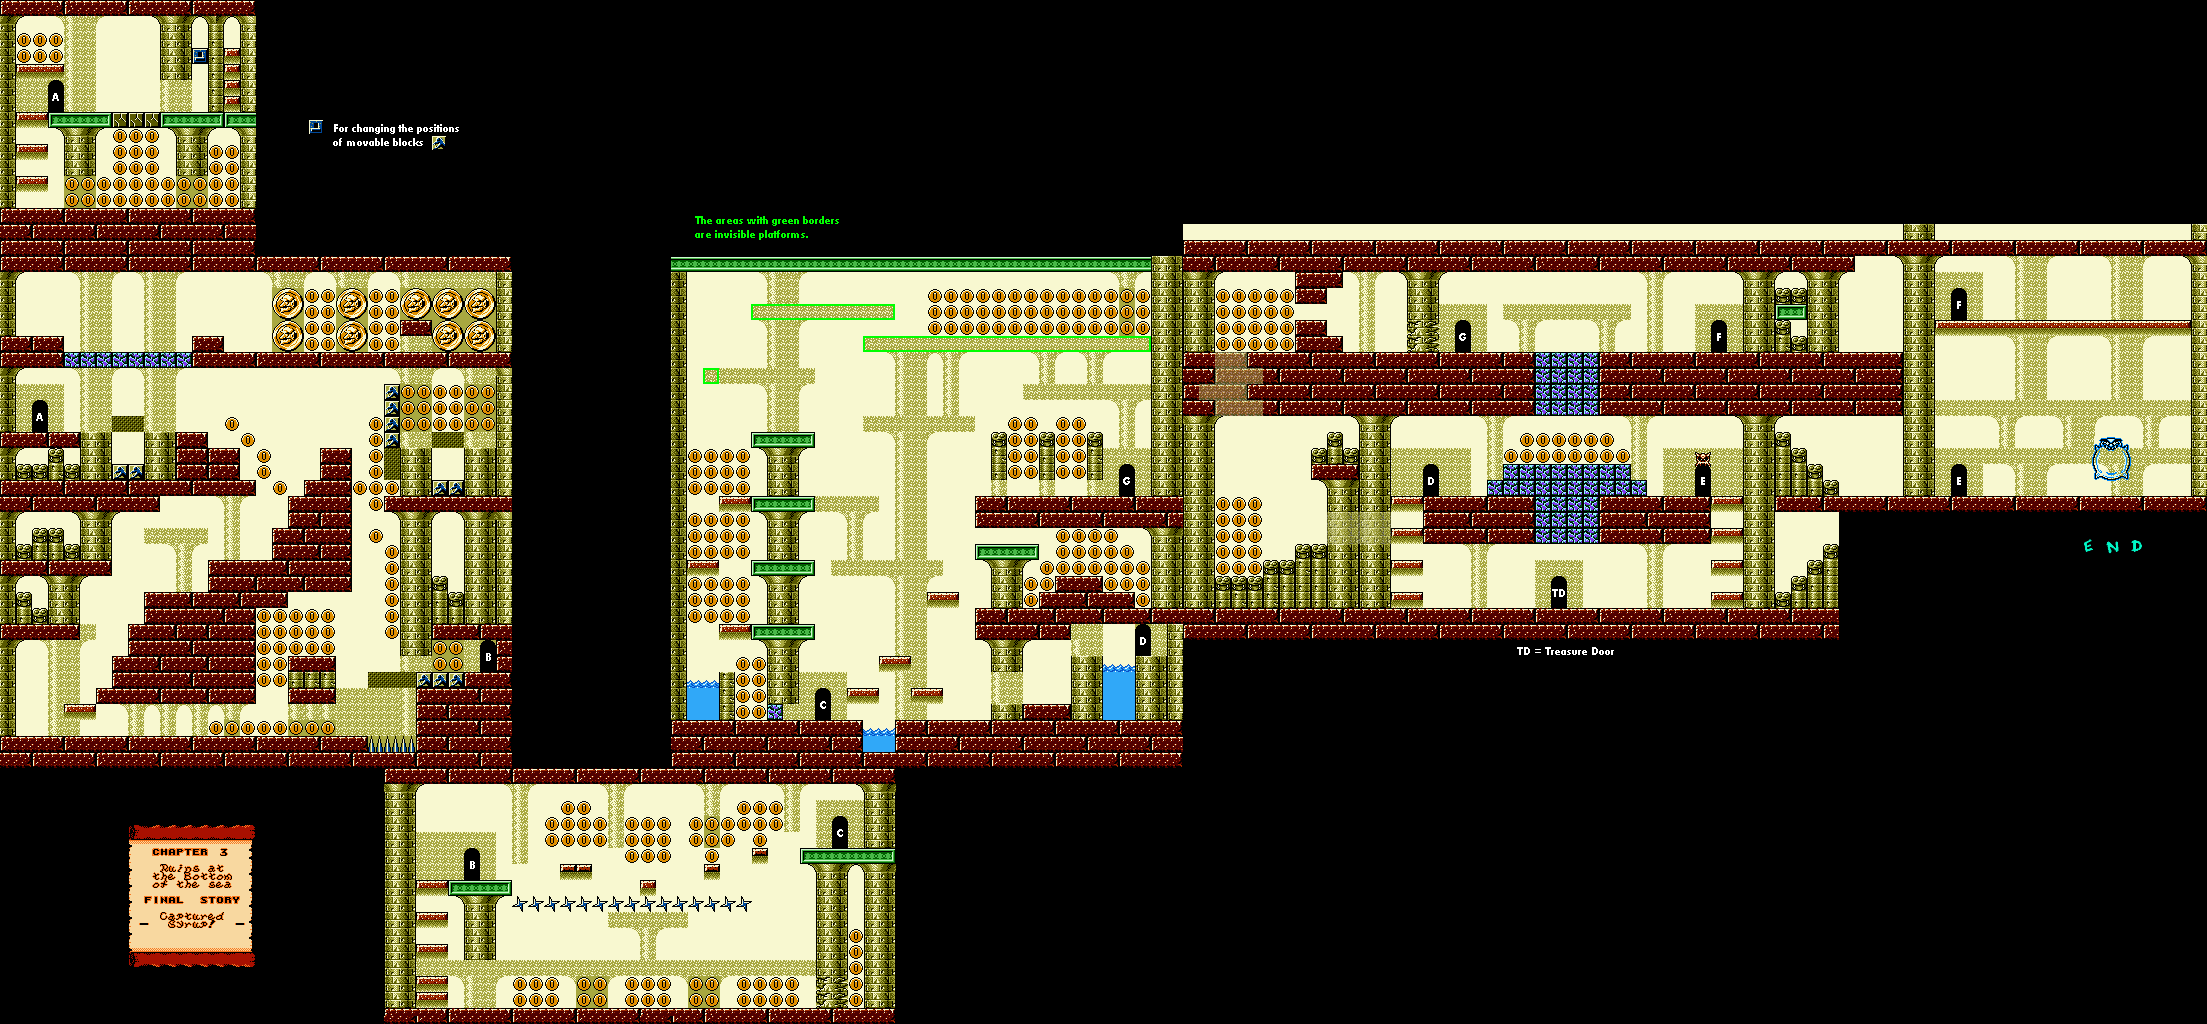
In this entry, we get introduced to the Wizard Goon, who can turn us into Small Wario for some platforming antics.


Chapter 3: Ruins at the Bottom of the sea

Final Story: Captured Syrup!


Watch out for the pelicans as you go up to the upper-left corner at the start. Hitting the switch there will allow you to move the tiles and allow you to continue through the level. Make sure you get all the coins, including the ones hidden above some breakable blocks at the upper-left corner. After some careful platforming that involved avoiding those spinning spike blades, you'll be ready for the rest of the level.

The wizard's shrinking power allow you to make some wicked wraparound jumps to some invisible platforms as well as a ton of coins. After this, you'll reach the boss. Let the boss touch you so you can reach even more coins and retracting spikes. The treasure room is below where the boss room is; just butt stomp through the blocks so you can win a whale figurine.

The boss here is a bubble ghost. Jump on his head when he is at floor level. When you hit him, he creates a floating flashing version; only the solid version will capture you if it touches you, and if that happens, you get sent to the top of the room where you are forced to start the battle over. After three hits, you'll beat the ghost and save Captain Syrup, but there's the matter of getting your treasure back. Wario takes down Syrup and the goons, then gets his treasure back, swims to the surface and heads back home as we roll credits again. We're now 80% done with the game!

Tuesday, October 8, 2024

PrinceWatercress plays Chrono Trigger (Super NES) - Part 40 of 70


In this entry, we finally restore the land around Fiona's Villa...then we get a chance to change some history.


If you go back to Medina Village now, the meek will finally inherit the village. Ozzie VIII and the Diablos will be the ones cleaning the Elder's house, while all the people running stuff are imps. The inn will be 10G a night, and you can buy the stuff at the store, even if it's not the best equipment anymore.

Also, you can now go to the Forest Ruins north of Medina. With the pendant powered up, you can get one of two treasures from Balthasar, the Guru of Reason. The one on the left is the Safe Helm, which casts Auto-Protect on the wearer and cuts all physical defense taken by one-third. The one on the right is the Swallow, which is a powerful sword for Crono and is wonderful in case you don't have the Slasher 2. I get the Swallow.

Our next side quest is the Sunken Desert near Fiona's Villa in 600 A.D. To do this one, you must have told the woman with the sapling in Zeal Palace in 12,000 B.C. to secretly plant the sapling instead of burning it. Only then will you be able to get this side quest.

When you approach the place and press A, you'll need to go inside the dark spot in the center to enter. When you do, you'll be inside a cavern where the sand will push you around. You'll need to hold B to run to get around in this strange area.

You'll face two enemies here: the Hexapod and the Mohavar. They fight much like the enemies from the Sewer Access area (Krawlie and Nereid, respectively), but hitting them with water will soften the sand as well as their defenses and the Movahar can attack with a sand whirl attack. Thankfully, the battles here are one-time only. If you need to retreat and heal up for whatever reason, there are stairs to the north.

The chests here contain come pretty good stuff, such as Elixirs and Aeon Armor (which you're probably not going to need), but there is also the Memory Cap (which prevents Lock) and the Muscle Ring.

At the end, you'll also fight a Zombor re-color with a core known as the Retinite, which is responsible for the desertification of the nearby land. You'll need to defeat it to slowly restore the land here. Take out the core first so it the upper half doesn't absorb HP from it to sustain itself, then take out the legs, as the legs have an attack that can eat a party member and absorb some of their HP. The upper half can attack the party (and use Laser Spin!) and absorb HP, but it's not as bad as the legs, which can destroy one of your party members quickly. Keep using Ice 2 or Water 2 to keep the Retinite's defense down, and use powerful attacks to take the legs down before working on the upper half. The Retinite has a pretty high speed and can attack quickly, so hit hard, keep its defense low and watch your HP and MP.

Make sure you have everything before you head out and talk to Fiona at Fiona's Villa. There will be a Power Tab on the left side of the first room after you defeat the Retinite; don't forget it.

Once you defeat the Retinite, go back to Fiona's Villa and talk to Fiona. If you have Robo in your party, Robo will volunteer to stay behind and toil the land; let him.

Return to 1000 A.D. There is now a forest and a cathedral where the desert (and Fiona's Villa) used to be. The guy mentioning Fiona in the Snail Stop in Porre Village to the north will have different dialogue, due to Robo bringing the forest back. If you go in, you can buy Sight Caps, Memory Caps, Time Hat (which prevent Stop) and Vigil Hat (which protects status). At the north end of the cathedral, and if you talk to him, you'll pull him out, then the party will spend the night in the nearby forest.

The party will have a conversation that is not just about why they are stopping Lavos, but also the possibility of some higher power (or something of that nature) creating the Gates wanting them to do it, as Robo has realized that Lavos may not be responsible for the creation of the Gates. After this, everyone turns in for the night.

Late in the night, Lucca hears a nearby Gate and wakes up. If you walk to the east, you'll find a Gate. Enter it, and you'll be taken to Lucca's bedroom, ten years into Lucca's past. There is a diary entry about Taban blowing off a hiking trip to do more work, much to Lucca's chagrin. Go downstairs and enter the door to find a note on the table saying that the password for the machine is the name of Taban's lovely wife.

When you go south from the room with the stairways and the door, you'll see the moment where Lara was disabled and left unable to walk by one of Taban's machines...but this time, you can stop it. Go up to the sparkle at the machine, hold Right and press A, and when the machine asks for the password, press L, A, R and A, in that order. (You'll need the shoulder buttons for this, obviously.) If you don't do it in time, Lara stays unable to walk. If you pull it off in time, Lara is able to walk in the present day. You only have one chance to do it, so make it count.

Afterwards, you'll be back in Lucca's bedroom. There will be another diary entry where Lucca is inspired to get into machinery so that there will be no more accidents, shaping her into who she is now. Go back through the gate. You'll be welcomed back by Robo. Talk to him, and he will produce a piece of amber that he has made with some tree sap in the last 400 years: the GreenDream. This is an accessory that will auto-revive whoever has it equipped during battle once.

Tuesday, July 2, 2024

PrinceWatercress plays Ratchet and Clank: Going Commando - Part 40 of 54


Not much for this video, amazingly, but at least we're able to get a little more ready for what's to come.

First | Previous | Next | End

2:01 - Now that we have the Box Breaker, we can head back to Maktar Nebula and destroy everything until we get a Skill Point for it.

11:38 - Back on Joba, we complete the Timed Limited Weapon Challenge with the Lancer. Once again, tap the button instead of holding it to preserve ammo.

Skill Points:

Vandalize: Destroy everything with the Box Breaker in the Maktar Nebula.

Controls:

As Ratchet:

Control Pad/Left Analog Stick: move
Right analog stick: move camera

X:
  • Jump and double jump (hold button after double jump to use Heli-Pack or Thruster Pack)
  • Wall jump (near certain walls)
Square: strike with wrench
Circle: pull out/shoot currently equipped gun
Triangle: 
  • quick select (hold and use in conjunction with Control Pad or left stick to switch guns; menu can be customized in Quick Select on the pause menu
  • double tap to switch between two most recently equipped weapons/items
  • interrupt on-screen messages

Select: open map
Start: Pause menu
  • Control Pad: select option
  • X: confirm option choice

L1:
  • center camera behind Ratchet (tap button to center)
  • first-person view (hold button and use left stick or D-Pad to look around; let go of L1 to move camera back behind Ratchet)
  • Square: wrench boomerang
  • Circle: fire gun
  • R1/R2: zoom in and out (Pulse Rifle only)
L2/R2: strafe (hold while moving)
L3: see health and Bolt totals
R1/R2: crouch (hold down)
  • Square: wrench boomerang
  • X: high jump
    • long jump (hold crouch button and jump while running to perform)
R3: open map

In water:
  • Square: dive and descend
  • X: surface and ascend
  • R1: accelerate with Hydro-Pack

As Clank:

Control Pad/Left Analog Stick: move
Right analog stick: move camera

When hanging off platforms:
  • Control Pad/Left Analog Stick: move
  • Forward+X: vault up
  • Back+X: drop down

Square: punch
X: Jump (press and hold in the middle of a jump to glide with Heli-Pack)
Triangle: command menu (hold and use in conjunction with Control Pad or left analog stick to choose commands)

Thursday, May 30, 2024

DeceasedCrab plays Earthbound - Part 40 of 53


In this entry, we explore the secret Stonehenge base and somehow manage to get the Sword of Kings.


The Starman Super is a golden, more powerful version of the Starman. There is a 1 in 128 chance that it will drop the Sword of Kings, which increases Poo's offense by 30 and is the only weapon Poo can equip. You'll want to get it before you are done with this place. It can summon Starmen (Starmans?) into the battle and fire a beam like a good amount of the robotic enemies here, but it can also guard against attacks to receive half damage and it can cast Shield Beta and Healing Omega, which can heal status ailments and also revive dead enemies.

The Broken Harmonica turns into the Baddest Beam when fixed. It is Jeff's second-strongest weapon, and he will be able to turn the Broken Harmonica into that when his IQ is at 55.

There is a room inside the base proper where there are Exit Mice. Feel free to take an Exit Mouse, especially if you're trying to farm for a Sword of Kings. The maze afterwards is barely lit and slowly flashes at regular intervals. That's totally not eerie at all.

The Broken Trumpet is a Defense Shower, which is the same as a Defense Spray but can be used to increase the defense of the entire party and can also be used an unlimited amount of times. Jeff will need an IQ of 40 to fix the Broken Trumpet.

In one room, there will be tubes were people such as Apple Kid, a Mr. Saturn, Dr. Andonuts and other people who have gone missing will be trapped in. You'll need to enter the room to the right and fight the next boss to free them.

Paula will learn Defense Down Omega at Level 54.

The Military Octobot can fire a beam, immobilize a party member by coining around it, and can also steal something from a party member much like the crow enemies from the beginning of the game.

The Meteotite can be sold for $2000 if you can get one.

Sunday, November 5, 2023

Jerry Martin plays Strong Bad's Cool Game For Attractive People - Part 40 of 53


This entry sends us on a seemingly endless chase with Sultry Buttons 


From here, head to Venice. Sultry Buttons will be there, but she gets away when you show up.

Go to the right and use the branch on the river to get the Killingyouguy Lunch Box.

From here, go to the Informant (Strong Sad). Or rather, use the Nunchuck Gun on him, then use the blueprints on him. He will tell you that Perducci's whereabouts are currently unknown, but that his plans originated in Ireland due to the plans' whiskey stains. You'll unlock Ireland for the map. Place it and go there.

You'll get in there just in time for Sultry Buttons to get away again. Ironically, the geography for Ireland is the same as Venice due to Stone Bridge being the backdrop for both of them. Click on the picture stashed underneath the bridge to find the picture Perducci had when you played cards with him.

From here, go across the bridge and click on the pedestal to find where the Rare Four-Leaf Thousand Dollar Bill used to be, which has now been stolen by Sultry Buttons. Talk to the Informant (also Strong Sad), then ask about the pedestal (the second option) to get an outtake. Ask about Perducci (the third option) and you'll find out that Perducci tried to sell him a painting, but he sent him away as he does not deal in stolen goods, and mentions that he may be trying to sell the painting in Cairo. Ask about the painting (the fifth option), and you'll find out it was stolen from the Mummy's Tomb in 1963.

Cairo will be unlocked on the map. Place it and go there. You'll miss Sultry Buttons as she steals something again. And once again, you're at Stone Bridge. Talk to the Informant (again, Strong Sad), then ask him about Perducci (the second option). He will tell you that he knows Perducci and that he is in Tokyo to move some counterfeit movie tie-in merchandise. Ask about the painting (the fourth option), and you'll get the same info that you got about it in Ireland, except that he stole it in the fall of 1962.

Tokyo will be unlocked on the map. Place it and go there. Sultry Buttons gets away again, and you'll need to talk to the Informant (Strong Sad for a fourth time) again. Ask about Perducci (the second option), and you'll find out he was here not long ago and that he is heading to a safe house in Paris. Ask about the painting (the fourth option), and you'll find out he helped Perducci steal it from an ancient temple in Japan.

Paris will be unlocked on the map. Place it and go there. Sultry Buttons gets away yet again, and...well...you know what to do. Something something Informant (Strong Bad), something something Perducci (the second option), something something painting (the fourth option). At least the Informant knows Dangeresque well. He tells you that Perducci will try to blend into the crowd of where he is going next, which Dangeresque thinks is Ireland. As for the painting, he mentions an old case file he wrote about it in 1963.

CELEBRITY NAME DROPS:
- Sam and Max: Use the phone in Dangeresque's office.
- The Lorax: Look at the Stickanee Tree before taking the flower.
- Tri-Lambda: Use the Evil option while talking to Baron Darin Diamonocle.
- Burt Bacharach: Talk to Perducci at the Old Club.

CHARACTERS NUNCHUCKED:
- Renaldo: Do this in Dangeresque's office after you answer the door at the beginning.
- Dangeresque, Too?: Do this in Dangeresque's office after you answer the door at the beginning.
- Cutesy Buttons: Do this in Dangeresque's office after letting her in.
- Professor Experimento: Do this in Professor Experimento's lab when you first head here.
- Baron Darin Diamonocle: Do this when you unlock Brainblow Prison and go there for the first time.
- Killingyouguy: Do this when you enter the Old Club for the first time.
- Perducci: Do this when you enter the Old Club for the first time.
- Dadgeresque: Do this when you enter Venice for the first time.
- Monster: Do this when you solve the tile puzzle at the start of the Catacombs.
- Kidnapping Victim: Do this after you defeat the monster in the Catacombs.
NEW! Informant: Do this when you get to Venice after finding out Perducci has the launch codes disk.

SPACE CIRCUS MANUAL PAGES:
- Performers Page: Click on one of the flaps on the ruby powered rocket at the lab.
- Cover: Check the center hole after extracting the full heart in the Catacombs.
- Secret Weapon Page: Use the Dangeresque and Sultry Buttons photo on the computer at the lab.
- Space Map Page: Use the large knife on the bushes at Strongborneo.

DANGERESQUE 3 MERCHANDISE:
- Renaldo Sheets: Use the Nunchuck Gun on the rightmost Brainblow limits sign.
- Renald-O's: Use the Formula on the Stickanee tree.
- Dangeresque Figurine: Use the rock on the bottles in the Old Club.
NEW! Killingyougy Lunch Box: Use the Branch on the river at Stone Bridge.

OUT & SPIT TAKES:
- Use the safety scissors on Cutesy buttons before distracting her.
- At Cutesy Button's place, walk towards her until she calls you "Strong Bad."
NEW! Check the pedestal and ask Informant about the pedestal in Ireland.

OUTFITS:
- Monocle: In the tuft of grass next to Brainblow State Prison.
- Fedora: Hanging on the wall of the Old Club.
- Top Hat: Use the rock, then the nunchuck gun, on the Whale.
- Boots: In one of the fallen boxes in the Catacombs.

PERSONALIZED BULLETS:
- Killingyouguy Bullet: Use the Black Metal Detector in Brainblow behind Dangecaresque (the car).
- Diamonocle Bullet: Use the Black Metal Detector in Strongborneo near the quicksand.
- Sultry Buttons Bullet: Use the Black Metal Detector in Cutesy's yard near the flowers.

- Score 15,000 points on Space Circus Catastrophe.

Wednesday, May 3, 2023

PrinceWatercress plays Sly Cooper: Thieves In Time - Part 40 of 48


Now that the treasure hunting is over, it's time to go for an easier achievement.


For this video, I head back to Episode 4 to get the "Lunch Money" Trophy. To get this one, you just have to grab 100 enemies from behind, then slam them down with Triangle. I did a few before this video, but here, I get the Trophy.

Achievements:


Lunch Money: Grab 100 enemies from behind and slam them with Murray. For more fun, shake them up for cash beforehand.

Controls:


Left analog stick: move
Right analog stick: move camera
X: Jump and double jump (hold X on second jump for hover jets as Bentley)
Square: attack
Circle: 
  • interact (usually with anything that has sparkles) (Sly)
  • steal from enemies (from behind) (Sly, Bentley, any of Sly's ancestors)
Triangle:
  • knock enemies upwards (from behind; press Square to slam enemies down for stealth slam) (Sly, any of Sly's ancestors)
    • press Circle after knocking enemy upward to perform Silent Obliteration (Sly; replaces Stealth Slam; must buy on ThiefNet)
    • press Square for Stealth Slam (any of Sly's ancestors)
  • spin attack (hold to charge) (Sly)
  • throw bombs (Bentley)
  • Thunder Flop (in mid-air) (Murray)
  • spin attack (hold to perform) (Murray)
    • control with left stick (must buy on ThiefNet)
  • Raging Inferno Flop (in air; Murray; must be bought on ThiefNet)

L1: 
  • bomb aim (Bentley)
  • smoke bomb/flash bomb (Sly; must buy on ThiefNet)
  • aim/strafe mode (Carmelita; must hold button down)
    • left analog stick: move
    • R1: shoot (can only shoot in strafe mode)
L2:
  • hold for costume select menu (Sly)
    • hold down to stay in menu; use D-Pad or left stick to make selection
  • hold for weapon select menu (Bentley)
    • hold down to stay in menu; use D-Pad or left stick to make selection
  • hold for fist select menu (Murray)
    • hold down to stay in menu; use D-Pad or left stick to make selection
  • hold for shot select menu (Carmelita)
    • hold down to stay in menu; use D-Pad or left stick to make selection

L3: activate compass
R1: run (hold while moving to perform)
  • Paraglide (Sly; in air; must buy on ThiefNet)
    • Square: Paraglide Dive Attack (during Paraglide; must buy on ThiefNet)
  • Adrenaline Burst (Bentley; double tap to activate; must buy on ThiefNet)
  • Clothesline (Murray; double tap and steer with left stick; must buy on ThiefNet)
  • Cane Push (Sly; double tap; must buy on ThiefNet)
R2:
  • Trigger Bomb (Bentley; must have bomb on field to detonate manually; must buy on ThiefNet)
  • Super Jump (Carmelita; hold and press X to perform; must buy on ThiefNet)

R3: Binocucom
  • Right analog stick: move
  • Left analog stick: zoom in and out
  • R1: take picture (when applicable) (Sly, Bentley)

Start: pause menu
Select: map
  • Left analog stick: zoom in and out, switch between map and status
  • Right analog stick: move map
  • Circle: back

Tuesday, March 14, 2023

PrinceWatercress plays Blood Omen: Legacy of Kain - Part 40 of 41


In this entry, we find out that a good amount of our quest has been a farce thanks to Moebius.


When you make your way out of the fort, you'll see some of the same enemies from the past as well as some new ones. Strangely, the enemies here look more like Also, a lot of the traps will be gone. If you go back to where Secret #99 is, you'll find four Hearts of Darkness.

4:11 - In this room, go north and go through the hole in the wall for a shortcut back to the entrance.

6:08 - This time, however, you'll have to go through the sewer you skipped in order to get out.

6:49 - Use the mist form to make your way south and end up...

8:02 - ...here. Now you can leave. Don't forget to save! When you are back outside, you'll hear a commotion coming from the direction of Willendorf.

10:37 - Before you do that, you'll have to go into the full moon cave and trigger the secret inside one more time. This is Secret #100 (see below).

15:03 - The tents are gone, and the houses are here in the present day.

18:19 - The statue is destroyed. However, the townspeople are now in a frenzy and want to kill us. Meanwhile, there are now more houses to the south, but it becomes apparent that people are being publicly executed in Willendorf, as you approach and then go through the forest.

27:03 - When you approach the portcullis, you'll find out that there is a public execution happening in town. Guess who's being executed? Vorador. After Vorador is executed, Moebius - who is heading the executions - sics the townspeople on Kain.

27:58 - Kill all the enemies. If you don't get a voice clip as soon as you get back into gameplay, enter the map and then leave once you defeat the enemies in order to get it to work. You'll need to hear that voice clip of Moebius in order to continue on. As it turns out, Moebius was also the Oracle of Nosgoth, and that he tricked us into doing his dirty work.

32:12 - There are more enemies here. Keep killing them all and keep casting Repel. Once you defeat them, approach Mobius to get to the next area. Eventually, Mobius himself will go after you. Strike him once with your weapon and you'll get a cutscene where Kain decapitates him. From there, you can grab his hourglass, then Mortanius will congratulate Kain before telling him to come back to the Pillars of Nosgoth to get his vengeance.

Secrets

100. - Before you do that, you'll have to go into the full moon cave and trigger the secret inside one more time. This is Secret #100.

Sunday, December 26, 2021

HCBailly and JB play Secret of Mana - Part 40 of 41


After a brief preview of the end, we make our way even further into the Mana Fortress and finally go face-to-face with Thanatos.


The Master Ninjas are even more powerul versions of the Dark Stalker. They can cast Exploder and Stone Saber. They can also drop a Boomerang's Orb. The Ninja's Trump is the best boomerang in the game.

The Terminators are more powerful versions of the Dark Knight and can drop the Whip's Orb. They can also protect themselves from physical damage with Lucid Barrier. The Gigas Flail is the best whip in the game.

At the end, you'll meet Thanatos, who has Dyluck. Thanatos will tell you that he has been searching for a human with the power to conquer the world who was born in the shadow of darkness and raised in the light of Mana. He says that Dyluck is the one, then tries to transfer himself into Dyluck's body and take the Mana Fortress. Purim defends Dyluck from Thanatos by hitting and supposedly killing Thanatos, but Thanatos succeeds in transferring himself into Dyluck's body. Unfortunately for Thanatos, Dyluck resists. He tells the party that Thanatos is an ancient sorcerer who sold his heart to the underworld, and although his life force is eternal, he does not have a body. He also tells you that Thanatos feeds on hatred and destruction and that his life force is growing darker. Dyluck sacrifices himself to draw Thanatos out, and from here, you have another boss battle with the Dark Lich.

Dark Lich has a ton of attacks: Freeze Beam (for frostying your party), Balloon Ring (for casting Balloon), Confuse Hoops (for casting Silence), Petify Beam (for petrifying your party), Dispel Magic, Sleep Gas (for putting your party to sleep), Pygmus Glare (for shrinking your party) and Thunder Beam. He can also cast Evil Gate, Dark Force, Freeze and Energy Absorb. Lumina's Lucent Beam will do a ton of damage to him if you've powered Lumina to Level 8. Dark Lich can teleport away, then try to hit you with energy waves out of his fists when they stick out of the floor. You can still hit him with magic in this form, however. Also, this boss battle has its own music that is very much worth listening to.

Once you beat Dark Lich, the seal of Dryad's Mana Magic spell is gone, giving Dryad a saber spell. Afterwards, it will be apparent that Dyluck is gone, then the Mana Fortress will be attacked. When you head out, you'll be on the roof of the Mana Fortress, where a Mana Beast will be attacking the fortress.

Wednesday, December 8, 2021

PrinceWatercress plays Sly 3: Honor Among Thieves - Part 40 of 42


The second half of the game has fewer challenges than the first half. It's not going to get any easier, though. For instance, you'll be facing both of the General Tsao battles again.


Episode 4: A Cold Alliance

Big Air In China

For the first challenge, you'll be back in ball form as Murray. You only have three waypoints to bounce your way to, but you don't have that much time. Remember to press X right when you hit the ground to maintain altitude, and remember that pressing L3 constantly to look for the waypoints is essential. As long as you can remember these two things, you'll do fine.

Sharpshooter

Remember the job where Murray had to pull the van and you had to shoot all those goons that tried to kill him as he dragged the van back to the safehouse? Well, it's back, and Murray has half health now, making this one much harder. Pay attention to the two roads leading to the van where enemies can come from: the one to the side, and the one that's dead ahead of Murray. Most of the enemies will be coming out from the south where Murray is going, but the side path will start giving you enemies about halfway through. It takes two shots to completely kill an enemy unless you manage to knock one into a pit with your lasers, so pay attention to where the enemies land on knockback. Also, watch your gun temperature gauge so you don't overheat, and whatever you do...don't hit Murray!

Treetop Tangle

The third challenge is the first half of the General Tsao duel midway through the episode. Once again, you have to use your double jump to go from one bamboo pole to another. As you do this, you'll have to avoid the fireballs while also floating towards General Tsao whenever he floats and hit him without getting hit yourself. It's easy enough before you bringing him down to half health, but after that, you really have to watch him closely, as he can jump from one bamboo pole to another before finally doing that long-range float that you need. Speaking of half health, you have it, and that makes this one especially tough because just two hits can do you in. And before you ask, just like in the main game, you have to hear that line about how the Tsao legacy is superior every time you die AND YOU CAN'T SKIP IT.

Tsao Showdown

Oh, look, it's the second half of the General Tsao duel. What, you thought you weren't going to escape it? And guess what? You have half health on this one, too. Handle this one just like you did in the main game: stay close but not too close, and keep hitting General Tsao with the shove attack. Watch where he goes when you push him back, and if you can get him to a wall, do your best to keep him there and hit him with a push attack when he gets back up and before he can do anything. That way, you don't have to keep hearing about black magic over and over. That's assuming you don't luck out and accidentally hit him with Silent Obliteration, which I didn't know you could do.

China Treasure Hunt

At the start, go to Murray's van, which is near the safehouse and is to the southeast. From here, go southwest for 13 paces down the road that Murray carried the van during that one job. From here, look for the towering pagoda. It will be to the west, where you will need to move 18 paces. From here, move 14 paces to the north towards the statue of General Tsao. Now you'll need to move away from the safehouse again. Move 14 paces west. To find the arch the next clue mentions, you'll need to face northwest and go 9 paces in that direction. After that, move 7 paces to the north to where Jing King was held. Finally, face the path to the west and go 24 paces.

Thursday, November 4, 2021

HCBailly plays Final Fantasy II AGAIN - Part 40 of 65


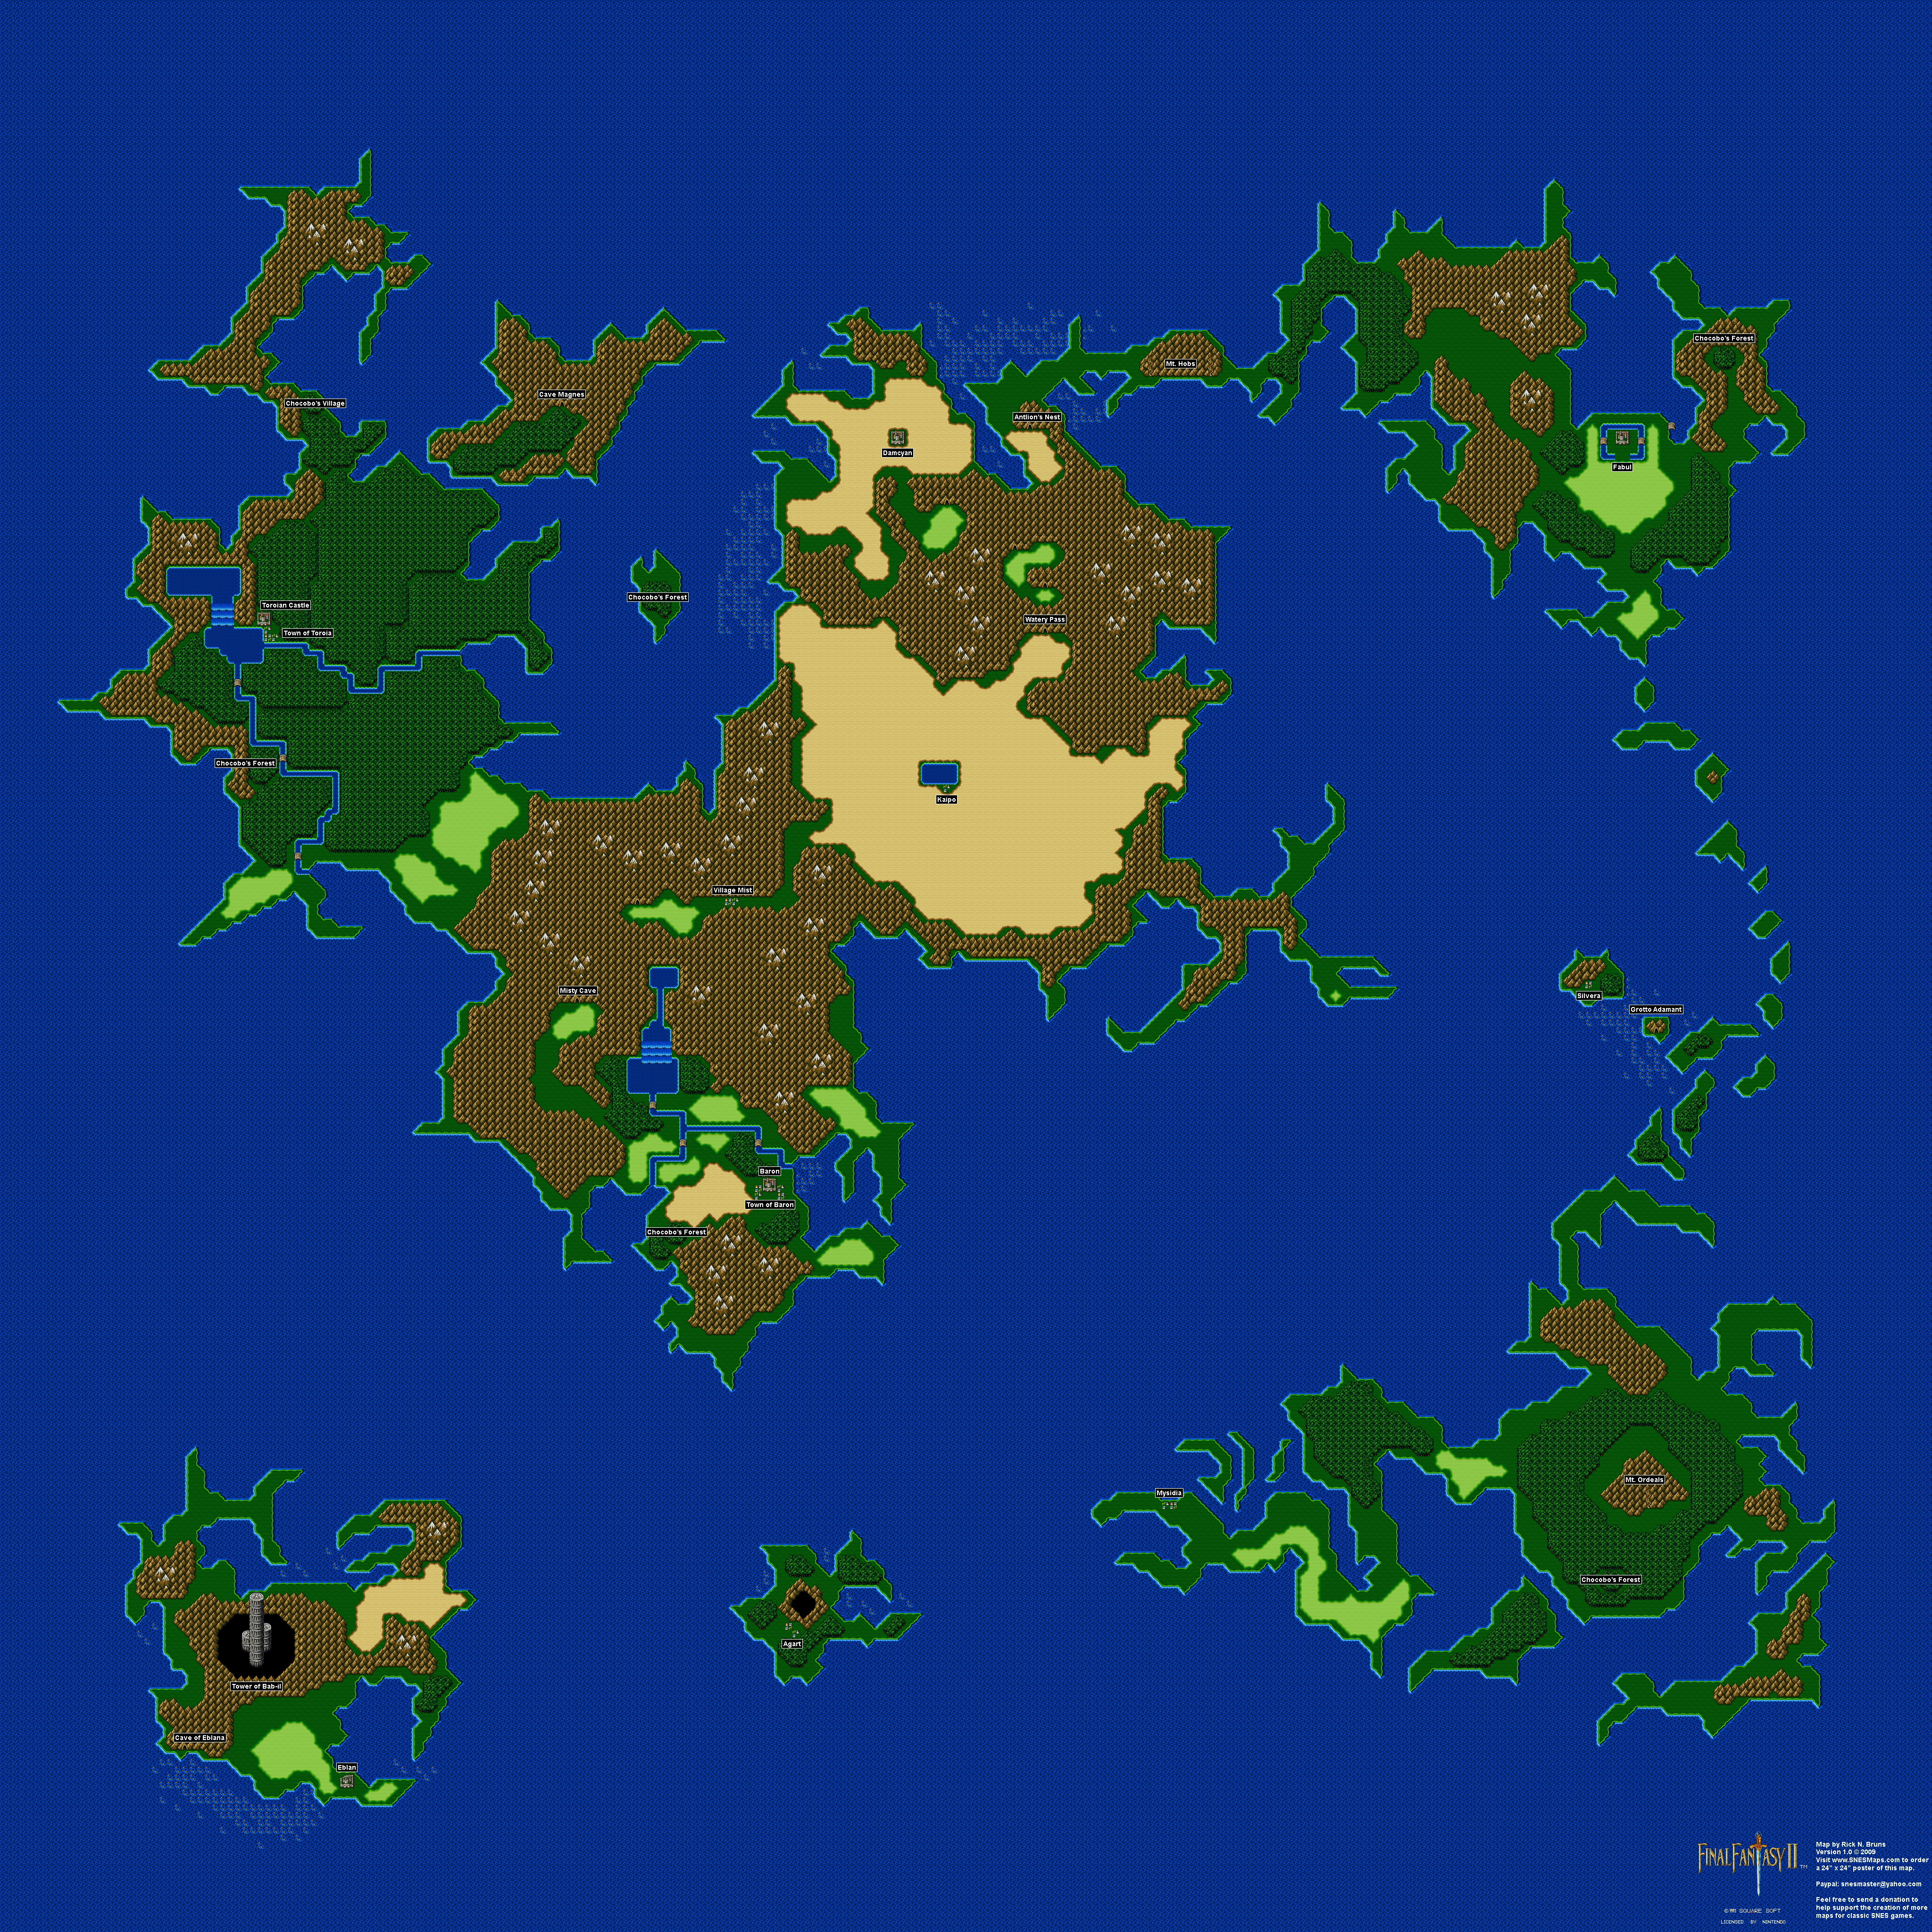
In this entry, we get some backstory on quite a few things, including the Airship, Mythril, the Dragoons and the White and Black Masks.


Mysidia


Buy Mallets, as the enemies coming up will hit you with Amnesia, which is the permanent version of Silence. The Gold Needles will cure the Petrify status, so you'll probably need those too if your Esuna spell isn't strong enough.

The staircase in the ground takes you to the Goddess Statue. You won't be able to do anything with it, however.

There is a bookcase in the house in the lower-left corner of the town. If you go to it and use some of your keywords, you'll get some nice background information on the game, including why Ultima was sealed. By choosing Mythril, you'll find out that Mythril is strong and easy to forge and responsive to magic. Choosing Airship will reveal that technological advances produced the Airship and that technology could one day replace magic. If you pick Sunfire, you'll find out about the legendary origin of it: a star fell to what became Kashuan and a man took flame from the star and built an altar for it. Picking Goddess' Bell will reveal that long, a king asked for an indestructible lock and key; three were made, but the first two were broken in two days, but the third key remained unbroken was hidden by the king in a snowy cavern. That key was the Goddess' bell. Piking Dragoon will reveal that Desit was the home of the Wyverns and that Haan, the first Dragoon, spent 30 years alongside them. Picking Wyvern will explain the Wyverns: the Wyvern was trained to fly with Dragoons. Though smaller than dragons, a Wyvern can carry up to five people. Picking Mysidia will reveal that the town was founded so that mages could remain secluded, as they were too powerful. Picking Ultima Tome will reveal how eons ago, Pandaemonium, the palace from Hell, emerged in the human world, and that the mages conjured a mighty spell and banished it. Fearing the power of Ultima, they then sealed it within a tower.

If you pick Mask, you'll learn that you will need to give the White Mask to the Goddess underground. "If thou art pure of heart, the doppelganger will cease to move. Fit the Black Mask upon him, then he and his defiled heart shall fade." Both Masks will lead you to the Crystal Rod, which you need in conjunction with the Masks to break the seal on Mysidia Tower. It is guarded by the Goddess Statue enshrined near the town.

The weapons in the Weapon Shop are pretty powerful. If you're mastering a certain weapon type, buy it.

The Thief Gloves in the Armor Shop boost Agility as well as Defense.

There's a lot of magic to buy in the Magic Shop. Change is pretty good (and breaks the game) when you've leveled it up enough. 

Werewolf is a Werebeast-type enemy, and it does not have an elemental weakness.

From here, return to Fynn and head to the castle basement. If you've opened it up before, just press A at the wall to re-open it.

Friday, February 12, 2021

PrinceWatercress plays Sly 2: Band of Thieves - Part 40 of 49


In this entry, we do things with the battery. First, we make sure no more power builds up in it, then we suck out all the power so we can hide in it once we get the Clockwerk Talons.

Lighthouse Break In


You'll need to play as Sly to access this mission.

The lighthouse is the conduit for powering the Northern Lights Battery, and it must be shut down or else the battery will continue to fill with energy and make for a bad hiding spot. The entire gang will have to get into the lighthouse, and Sly is the only who can climb to the top, sneak to the ground floor and sneak the rest of the gang in.

Climb to the top of the lighthouse, then press Circle at the Sly icon on the hatch to open it and get inside. You won't be able to flip the switch, so go down the stairs, taking out all the enemies and avoiding all the traps as you do. Don't drop down the center, or else those red pulsating energy waves will kill you and you'll have to start the descent all over.

Once you reach the door at the bottom, press Circle at the Sly icon on the chair. You'll let Bentley and Murray in, From here, you'll have to go all the way up until you reach a gap in the stairs. When you get there, jump on the spinning part of the platform and climb up the ropes. If you reach a dead end on a rope, or if you see a red energy wave appear on the bottom of the rope you are on, jump and switch to another rope. When you reach the top, go to the switch. It isn't frying with electricity anymore, so you can now shut the power off with it and overload the collection mechanism. 

Boat Hack


You'll need to play as Bentley to start this mission.

The Reduction Bomb is a special weapon for Bentley. When thrown, it shrinks enemies in the area, making them weaker and easier to beat up.

It is now time to drain the battery. By attaching a boat's grappling hook to the top of the silo, the battery's energy should be siphoned off and depleted. To get on the boats, you'll need to find Murray (use L3) and jump into him and press Circle so Murray catches Bentley. From there, use the left analog stick or D-Pad to aim and X to throw. Once you get on a boat, press Circle at the terminal to play a hacking mini-game. Once you have hacked a boat, you'll take it to the lighthouse where Sly is waiting. Shoot the grappling hook to Sly. Once Sly catches it, it's on to another boat. You'll be doing everything from the Murray turtle toss to the grappling hook shooting with three boats, and as you progress through this job, the hacking missions will get harder. Once you're done with the third grappling hook, it's on to the next job.

It should be mentioned that on the way to the third boat, you'll have to toss Bentley onto an iceberg. That iceberg is the wooly mammoth that jumped into the icy waters and got re-frozen earlier. Poor thing.

Controls

D-Pad/Left Analog Stick: move
Right Analog Stick: move camera
X: jump and double jump
Square: Horizontal Attack
  • horizontal attack (as Sly)
  • slam enemies launched into the air from behind (as Sly)
  • hook punches (as Murray)
  • Thunderflop (as Murray; in mid-air only)
  • crossbow swipe (as Bentley)
Triangle: Vertical Attack
  • vertical attack (as Sly; used to knock enemies into the air)
  • downward dive (as Sly; in mid-air only)
  • uppercut (as Murray)
  • drop bomb (as Bentley)
Circle: Action button (near blue/green/purple sparkles and character icons)
  • pickpocket (as Sly)
  • stomp (as Murray; use Square to throw object/enemy)
R1: hold to run

Select: Gadget Grid
  • Control Pad: highlight gadget
  • X button: confirm gadget
  • L1, L2, R2: assign gadget to button pressed

L1, L2, R2: use gadgets assigned to button pressed

Start: pause menu
  • Control Pad: select menu choice
  • X button: confirm choice
  • Start: un-pause game

L3 (press the left analog stick): locate beacons for mission objectives

R3 (press the right analog stick): Enter and exit Binocucom for first-person view
  • Left analog stick: look around
  • Right analog stick: zoom in and out (with up and down on right stick)
R1: 
    • take pictures with spy camera (as Sly; when applicable)
    • shoot sleep dart (as Bentley)

Hacking mini-game controls:
  • Left analog stick: move
  • Right analog stick: aim and fire gun

Friday, July 10, 2020

PrinceWatercress plays Terranigma - Part 40 of 50


We head down to Dragoon Castle to find out why the price of sheet metal has skyrocketed...and we get more than we bargained for!

Dragoon Castle


Normally, you wouldn't be able to get past the guard, but now that Perel has joined in on the fun, he'll distract him so you can make your way in.

From here, you'll have more guards to deal with. If you run into their flashlights, they'll see you and toss you back to the entrance. The guards can be hard to deal with, as their movements can be random. Some of them may move, and some may not.

From the entrance, go all the way to the north. From there, jump over the pit and follow the path. If you have the Speed Shoes, you're in luck. If not, go get them. Equip them and run into the center of the north wall to open up a new door.

From here, go all the way to the north and make your way to the upper-left corner. Enter the door here, then go downstairs. You'll be in a dungeon. Explore the area and you'll eventually find Elle - your world's Elle and not Princess Elle - tied to chains situated above a pit. When Ark approaches her, she disappears. Go south, and you'll find out that you're trapped thanks to Meilin, who wants revenge for not having feelings for her. Also, she works for Mr. Wong and was ordered to trap you. What is up with this girl, anyway?

After Yomi makes a snarky comment, Ark sits there and sulks.

As Ark sulks back in the cell, we see Princess Elle being met by Mr. Wong and Royd. Turns out Elle knows that Mr. Wong killed her parents and everyone in the village so that King Henri would collect information for him. Mr. Wong doesn't care that he's killed innocent people for his own end, and says the day when only necessary people will live forever is close at hand.

Mr. Wong won't tell Elle why he wants the treasure of Storkolm, and he just tells her to shut up before commanding Royd to keep guard over her. Turns out Royd is only doing the job for the money and that he's just a drifter looking for a fistful of Gems.

The game then cuts back to Ark and Yomi in the cell. Ark hears a sound in the cell. Head to the pit, but don't go down it. Fyda is finally back and in good health, and she drops a chain for you climb up on. Make a running jump to the chain and climb up, and you'll meet Fyda.

When Fyda asks what happened, tell her about Meilin. Then, tell her you came here for airplane parts. Fyda has a feeling the Princess being brought here and the buying up of parts seem to be related, and heads to the castle's east side.

Leave the room, then head west and go back to the dungeon. If you go all the way to the south, you can get Magirock #80. From there, head back to the entry room.

You'll now want to head to the east. Take the stairs that you see, and make your way furhter to  the east and enter the doorway. Make your way to the north and enter the doorway, then make your way east again by jumping from platform to platform. Take the southern road and jump your way east again, and you'll find Magirock #81.

Head west, then take the northern road. You'll find a chest containing 200 Gems. Go back to the beginning and head north, and you'll meet Elle from Crysta again. She'll tell you Princess Elle is held in the room to the north, and tells you to help her.

Go into the room to the north, then make your way through the maze of tables, chairs and open treasure chests to the upper-right corner. Go in the door there. At the other end of the next room, you'll meet Princess Elle...not! It's another trap by Meilin. You'll see both Elles, and Ark will be asked which Elle he likes. Ark, thankfully, breaks out of the illusion thanks to Fyda. Fyda then tells Meilin to show herself, and she does. Turns out Meilin wants Ark to suffer in return for hurting her feelings, and Fyda responds by slapping Meilin in the face and calling her out on her crap. Meilin cries and says that Mr. Wong can easily get rid of the both of them, then runs away.

Fyda joins you at this point. Head back to the beginning of the previous room, and you'll find out that the room has been sealed off. Mr. Wong shows up and says that Meilin has done her necessary job and that she too will be eliminated. Meilin doesn't understand, and Fyda has to tell her that he's basically playing master manipulator. Meilin cries, realizing how she has hurt Ark and her grandfather, but thankfully Perel breaks the doorway down and unseals the room and tells you to go find Mr. Wong. Fyda then leaves the room. If you talk to Meilin, she'll tell you to check the wall opposite the unpaired statue, as behind that wall will be the room where Princess Elle is held before apologizing for everything she ever put you through.

Thursday, May 16, 2019

HCBailly plays Final Fantasy IV (Super Famicom) - Part 40 of 70


Our heroes are forced to regroup...for now...


Outside of the control room, Yang will tell the party to tell his wife to live for him, then sacrifice himself to destroy the Giant Gun controls. From here, the door will be broken and unable to open.

Head back down to the first floor. When you reach the entrance again, you'll be met by Golbez, who is itching for a fight. The bridge will be destroyed, and Cecil and company are forced to fall. Thankfully, Cid manages to catch you with the Enterprise, which is now fixed and operational. Cid gets up to speed on Yang's fate, and is introduced to Rydia, but that is short-lived as one of the Red Wings' ships have caught up to them.

Cid tells Cecil to take the wheel, and plans to bomb the entrance back to the upper world shut so that the Red Wings will be trapped. He also tells Rosa to talk to his apprentices at Baron Castle, then leaps off and seals the entrance into the underworld. Cecil and company manage to make it out in time.

Back in the upper world, Cecil makes up his mind to head to Baron, which will thankfully be nearby.

Baron Castle


Back at Baron Castle, go inside and head into the east wing of the castle, and talk to the guys in blue in the corner outside. One of them will tell you that Cid has told them to hook something to the Enterprise. You'll see them upgrade the Enterprise, and you'll finally be able to pick up the Hovercraft by flying directly over it and pressing A. By dong this, you'll be able to go to the cave of Eblana by the Tower of Bab-il. Cecil tries to explain what has happened to Cid, but his apprentices are convinced that he will not die that easily.

The hovercraft will be more than likely in front of Mt. Ordeals, so head there if you have to find it. From there, you can take the hovercraft close to the Tower of Bab-il. There is a destroyed castle nearby. Enter it.

Eblana Castle


There is quite a bit of treasure in this deserted, destroyed castle. To the sides of the throne room are hidden walls leading to staircases leading to other things. Some of the treasure chests also have monsters. Be ready to equip Cecil and Kain's old flame armor, since they will be useful here.

The Unicorn Corn heals the status of everyone in the party, while the Alarm Clock will wake up everyone in the party who is suffering from the Sleep ailment.

Tuesday, June 5, 2018

HCBailly plays Terranigma - Part 40 of 75


It's time to make some real headway into Sylvain Castle and find the jewels for that portrait puzzle.


Sylvain Castle by xyzbiliu.

Sylvain Castle


Head back to the entrance of the castle. Head back to the portraits, and this time head to the east and go through the door. You'll come across a dead end with a suit of armor. This is the body of the soul that was tagging along with you, and when the soul enters it, you'll have to take it down. Hit it with a dashing attack, then run away. Keep doing this to avoid the morning star and to hit it until it dies, which will then open up a bridge to the right. When you hit, he brings up his shield while striking at you with the morning star. Go back to the ground level of the entrance and go all the way to the east, then go north and enter the door. You'll be able to cross to the other side in the next room.

In the next room, you'll fight off some more Chakras. Go down the stairs to the north and follow the path. Yomi will get your attention after you take the second flight of stairs down. From here, you'll see a combination lock of sorts. You can turn the dials by kicking it while shoving the wall. To turn the numbers, you'll have to position yourself away from the numbers, then push the wall to the north until the desired numbers are achieved.

The left dial has 2, 3 and 7. The middle dial has 1, 5 and 8. The right dial has 1, 4 and 6. When you see the number you want pop up, immediately stop. The combination here is "286." By getting the combination right, you'll trigger something somewhere. This lowers the chandeliers we saw earlier.

Go back up to the room with the Chakras and take the path to the left. This leads to the Storage room, which contains an Icepick (which you'll want to equip right now) and the Tower Key. This room has the armor enemy you fought earlier, and the same strategies apply. It's just considered a normal enemy now. If you want, you can keep leaving and entering the room to farm experience from it, since you can get a few levels in a couple of minutes.

From here, leave the left path and take the right path. When you enter the Kitchen, go into the crawlspace. At the other end, you'll find the Black Opal. This will be needed for the portrait puzzle.

Head back out of the crawlspace, then head south. You'll be back out of the castle. Follow the path to the north, then go east at the fork and you'll make it to the tower door. Use the Tower Key to unlock it, then enter the door.

Fight the skeletons and go down the stairs, then fight off the armor. This opens the door here. From here, you'll be in the sewers. Follow the path, and take a detour to the east shortly after getting in to find Magirock #53. At the first fork, head to the east and head south to find a DEF potion.

From there, head back to the fork and go north. You'll come across three serpent statues. Put your hand in it to trigger a switch that gets rid of all the purple acid and turns it back into water.

Head back to the fork you encountered on the way to the right tower. Go west this time and follow the path. You'll reach the left tower. Unlock the door with the Tower Key, and you'll enter a maze with some armor enemies. Making your way through here is easy, for the most part.

From here, follow the path, and you'll eventually be at the top of the left tower. At the right end is a place you can look at the rest of the tower from. Go there, and you'll see the other tower, where there is a statue of a dragon with a pink eye on it. That pink eye is glowing, so it has to be a jewel of some sort. But how to get to it? Well, that's easy: Yomi pushes you all the way to the other side and you'll jump to the other tower. From there, climb down the vine to the left to get the Topaz. From there, drop down. You'll be at the right tower door.

Go back to the entrance and return to the fountain. Jump in and you'll find the Sapphire. Now go back to the portraits and go down the stairs to the west. Now that the chandeliers are down, go to the one on the far right and travel across it to find the Ruby. You now have all four jewels. The other chest contains an L.Bulb.

Saturday, March 3, 2018

skorch82 plays Brave Fencer Musashi - Part 40 of 70


Now that we've drained the well caves, there are some things that we can do.

Now that part of the well area is drained, you can get some stuff. You'll find the UsedBoot in a chest, and you'll finally be able to reach the Minku here. The UsedBoot will be A-Boots, which are useless and should be sold to the Appraiser for money.

There is also a cave that you couldn't enter before activating the Water Crest. Avoid being bitten by the bats as you make your way through this area. The chest in this area contains Armor. It's just a LargePot. Sell it to Connors the Appraiser.

There is a Fire Crest here, but you won't be able to use it for some time. You could climb the wall, but it leads nowhere, so this won't be an exit to any place in particular just yet. Instead, just take the exit that leads through the mine back to the village.

Head to the Mayor's House. Mrs. Govern will tell you that the Mayor has caught a cold and asks if you want to be Mayor. Pick the second option instead of the first.

Friday, September 1, 2017

Dilandau3000 plays King's Quest VI: Heir Today, Gone Tomorrow - Part 40 of 43


We've found the secret passage! Now it's time to do some damage to the Vizier's plans!

All maps by Dan_.


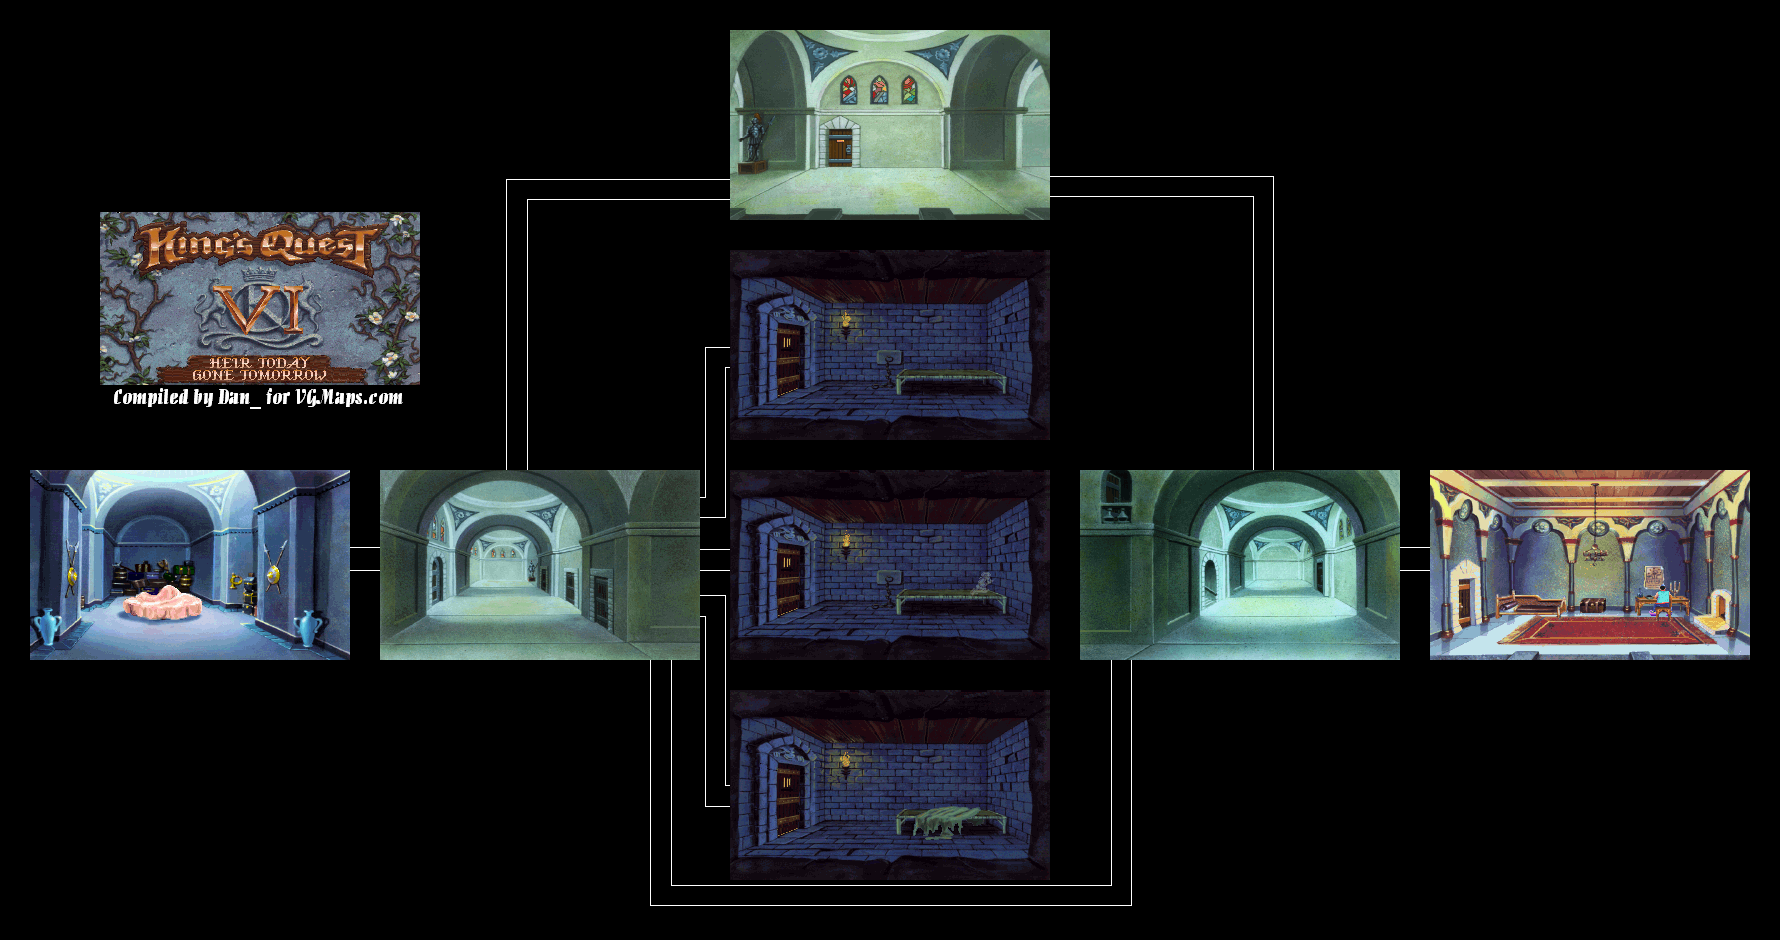
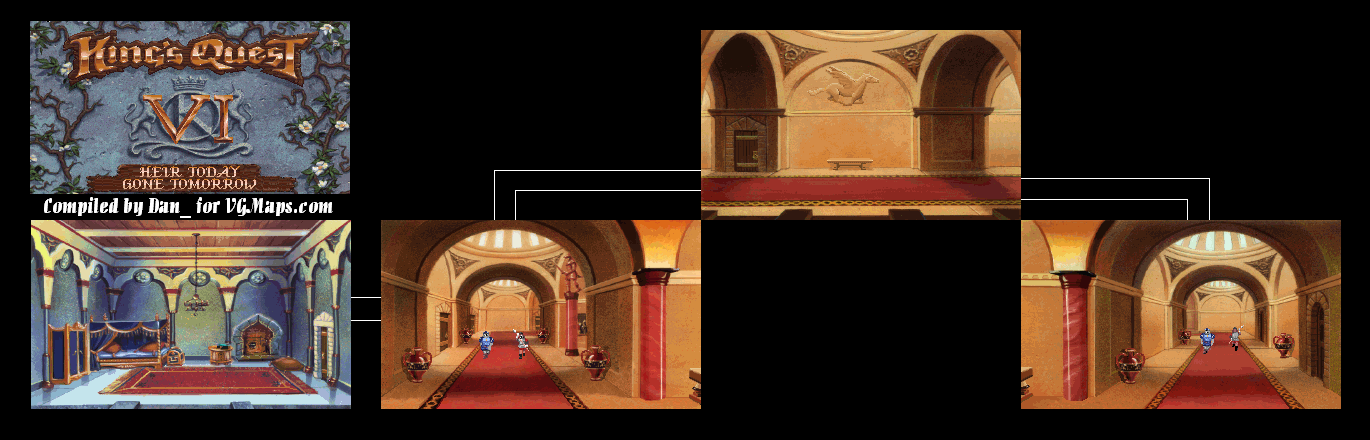
In the guard room hallway is a suit of armor. Use the hand icon on the right arm of the "man of iron" and you'll find a secret passage. Alexander automatically goes in.


Use the eye on the chink in the wall. You'll overhear one of the guards talking to Captain Saladin. It is said that Cassima is pounding on her bedroom door, wanting to be let out. Saladin tells him that al-Hazred is aware of a foreign intruder trying to assassinate Cassima, and that Cassima should be left under lock and key until the wedding. Even Saladin has his doubts about the Vizier.

You'll also hear about a door that the Vizier has enchanted with some sort of magic, and magic words are required to open it (the first word being "Ali"). From there, you can stop peering through the hole in the wall and go upstairs.

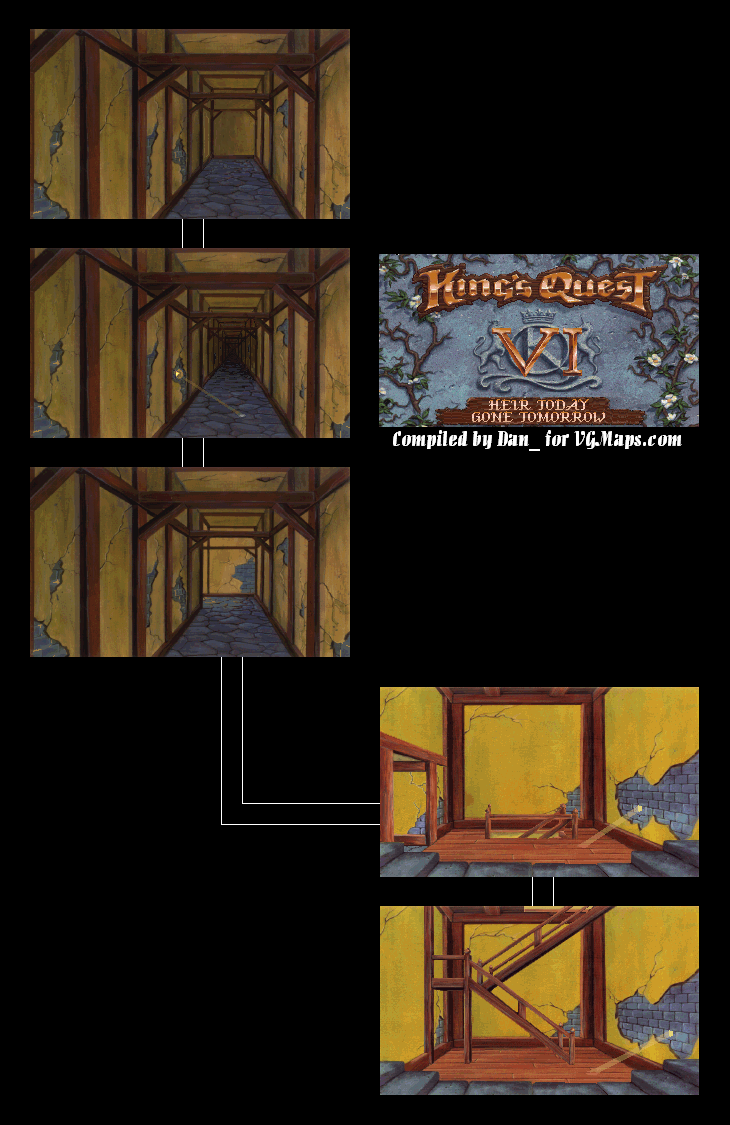
There's another chink in the wall when you make your way up. You'll hear a girl crying. Go to the left and keep going through the hidden passage. On the second screen, you'll hear the sound of scratching. There is another hole in the wall to the left. It's the Vizier!

The Vizier writes a letter to Shadrack. He plans to kill Cassima so she doesn't alert the guards to the treason, and that he plans to stage another "accident."

Go north one more screen. It may seem like a dead end, but a vague outline of what looks like a door is on the left wall near the dead end. Inside is a hallway leading to Vizier al-Hazred's bedroom!


Once again, open up the trunk at the foot of the bed. Since you don't have the nail this time, use the Skeleton Key. Take the letter from the chest just like you did last time.

Be sure to look at the ebony box on the table. Read the piece of paper. It has the word "ZEBU" on it. Ali Zebu? Is that the password for the enchanted door?

If you look through the keyhole, you'll find that the guard dogs are there. If you open the door, you'll be caught. Instead, open up the wardrobe and go back into the secret passage to get out of here.

Thursday, May 18, 2017

HCBailly plays Final Fantasy III - Part 40 of 44


We're at the end...now it's time to finish this once and for all.

Once you're caught in the curse, you'll face Dorga. Dorga tells you the only thing that can break the curse of the Demon Dragons is the five hearts of Light. He has to find them, while you try to endure the curse.

Dorga contacts people you've helped in the game previously. He recurits Princess Sara, Cid...and Desh?!? Yep, Desh didn't die when he threw himself into the fire of the Tower of Owen, as he pulls himself right back out and agrees to help Dorga without any hesitation. He also recruits Prince Allus and...the four old men from earlier?!? Well, one of them anyway. They appear magically, and you'll be able to reach the next room, which is the portal to the Dark World.

You'll finally meet Zande...and you'll have to fight him. Hammer pants and all.

Zande can easily be defeated with the Megaflare from the Bahamut summon and Shurikens. This can save you from the really nasty spells he has, such as Meteo.

When you beat Zande, you'll meet the Dark Cloud, who plans to bring everything back into the Void. There's nothing you can do in this battle, so you're just going to be annihilated. Everyone summoned for the Dark Dragon curse crisis shows up, alongside Dorga and Unne, whose spirits show up to tell you to get a move on so the world doesn't get destroyed thanks to Zande's handiwork and the Dark Cloud.


The enemies here are nothing special.

The four chests here contain Ribbons. These chests also contain Zande Clones, which are just easier versions of Zande with only 10000 HP. You can even use Toad and Brak2 on them.

With each section of the Dark World, there is a Dark Crystal for each of the four elements. They'll send bosses after you when you approach them. The Cerberus, which just casts Thunder repeatedly, is spawned from the Dark Wind Crystal and is rather weak.

When you beat one of the Dark Crystal bosses, approach the Crystal and you'll free one of the Dark Warriors. Now you know what happened to them...they were trapped in the Crystal.

Saturday, February 18, 2017

Chilean Retrogamer plays Wario Land 2 - Part 40 of 57


Whee. Yay.

Chapter 3: Ruins at the Bottom of the sea

Story 3: Inside the ruins!


0:07 - Whee!

0:55 - The door at the top takes you here. By getting fat, you can take care of the the blobs my moving into them.

1:31 - More whee. Whee!

2:48 - The door here is the treasure room. Win yourself some coral here!

3:53 - Okay, we're done.

4:23 - Another puzzle piece.

Friday, June 10, 2016

angryponcho plays Spyro 3: Year of the Dragon - Part 40 of 41


THE END

Also, yes, the video works.


Super Bonus Round


When you collect all the gems in the stage, you'll have 20000 gems total. This will open the last door.

Inside is the final battle with the Sorceress. Ah, so this is the true end of the game and not just something extra, huh? I'm more than okay with this!

For this battle, you'll be riding on a saucer again just like you did in the first battle. There's really not much to this, but this is a bit harder as the Sorceress takes a lot of damage before she finally goes down, this time for good. Shoot at her as she flies away, and when she stops, fly straight up just before she fires. If you do it right, the fireball she shoots at you will miss. Keep firing at her and getting shots in, and keep on dodging. Eventually you'll get the fireball dodging to a science.

When she's down to half health, she'll start flying around at a higher altitude. When she fires, descend. It seems you descend more quickly than you can ascend, so be careful not to ram the saucer directly into the lava.

If you can keep a certain distance away from her and keep on going in a circle, you can make it so that the Sorceress won't stop. If you can distance yourself just right, you can fire the shots so that she runs into them, which can make this easier.

When you beat the Sorceress, her saucer will explode and she'll fall in the lava. She won't be coming back this time. You'll also get the final Dragon Egg of the game: a dragon named Yin Yang...or rather, two. This is the only egg to have an animation where twins come out.

You'll get the final cutscene after this. There's not much to it, interestingly, as it's just the baby dragons in the Dragon World, Spyro and one of the bigger dragons. It's nice to know that the baby dragons are safe and everything, but I expected more than this.

Tune in next episode, where we see all the Skill Points that angryponcho didn't get as well as a recap of all 20 skill points in the games.