Showing posts with label part 36. Show all posts

Friday, February 20, 2026

PrinceWatercress plays Super Mario Odyssey - Part 36 of 92


Now that we're free to do more in the Seaside Kingdom, let's do just that and get some more Moons.


Near the giant glass where the waters of the fountains gather, there is a chest containing a Life Up Heart. Get it if you need it.

Power Moons


8. Ocean-Bottom Maze: Treasure - This Power Moon is in the center of the 8-bit area for this kingdom. You'll need to hit some invisible blocks in the lower-left corner of this area to ensure access to this Power Moon.

9. Ocean-Bottom Maze: Hidden Room - There is a block in a wall in the 8-bit area for this kingdom, and if you break it with a Koopa shell, run towards the hole and duck when you get close enough to it, you'll be able to slide into a hidden area with a Power Moon.

10. Underwater Highway Tunnel - Northwest of the lighthouse, you can find a short tunnel with bricks in the floor. If you attack all of the bricks with a Cheep Cheep, you can go down the tunnel underneath to find this Power Moon.

11. Shh! It's a Shortcut! - Near the Ocean Trench East checkpoint, there is a tunnel closer to the surface of the water that leads to a Power Moon.

12. Gap in the Ocean Trench - Near the Ocean Trench East checkpoint, there is a hole in the wall that you will need a Cheep-Cheep to enter. Once inside, go further, then go down for a Power Moon. (A crack in the wall nearby will hint at the location of this Power Moon.)

13. Slip Through the Nesting Spot - In the Hot Spring Island area, there is a cave to the Northeast. If you get close enough, an eel will pop out. Wait for him to back away, then go inside and enter the hole to the side to find this Power Moon.

14. Merci, Dorrie! - Underneath the purple Dorrie that serves as the Crazy Cap store for Regional Coins, you can find a Power Moon.

15. Bonjour, Dorrie! - This Power Moon is above the yellow Dorrie that serves as the Crazy Cap store for regular coins. You'll need to possess a Gushen to get it.

16. Under a Dangerous Ceiling - Near the Ocean Trench East checkpoint, there is a glowing mound underneath a low ceiling. Ground pound the mound to get the Power Moon, but watch out for the nearby enemies.

21. Glass Palace Treasure Chest - Underneath the Glass Palace, there is an undersea tunnel; in the wall, there is a nook with a chest in it containing a Power Moon.

23. Sea Gardening: Inlet Seed - This is from the flower at the Beach House that blooms from the seed from the inlet area, which can be found here. You may have to use a Gushen to get it.

25. Sea Gardening: Hot-Spring Seed - This is from the flower at the Beach House that blooms from the seed from the Hot Springs area, which can be found here.

28. Seaside Kingdom Timer Challenge 2 - Near the Glass Palace, there is a scarecrow underwater. Throw your hat at it, then press ZL and Y simultaneously to perform the Quick Swim option. You'll need to use it to get to the Power Moon in time.

40. The Sphynx's Underwater Vault - Below where the Crazy Cap store for Regional Coins is, you'll find the Sphinx. The name of this land is Bubblaine. This will allow the Sphinx to move aside and reveal a staircase going downwards. Hit the chest with your hat to get this Power Moon.  

Regional Coins


Wednesday, March 5, 2025

PrinceWatercress plays Wario Land II - Part 36 of 51


It's time for our third side story, and in order to start it, we need to make the S.S. Tea Cup sink.


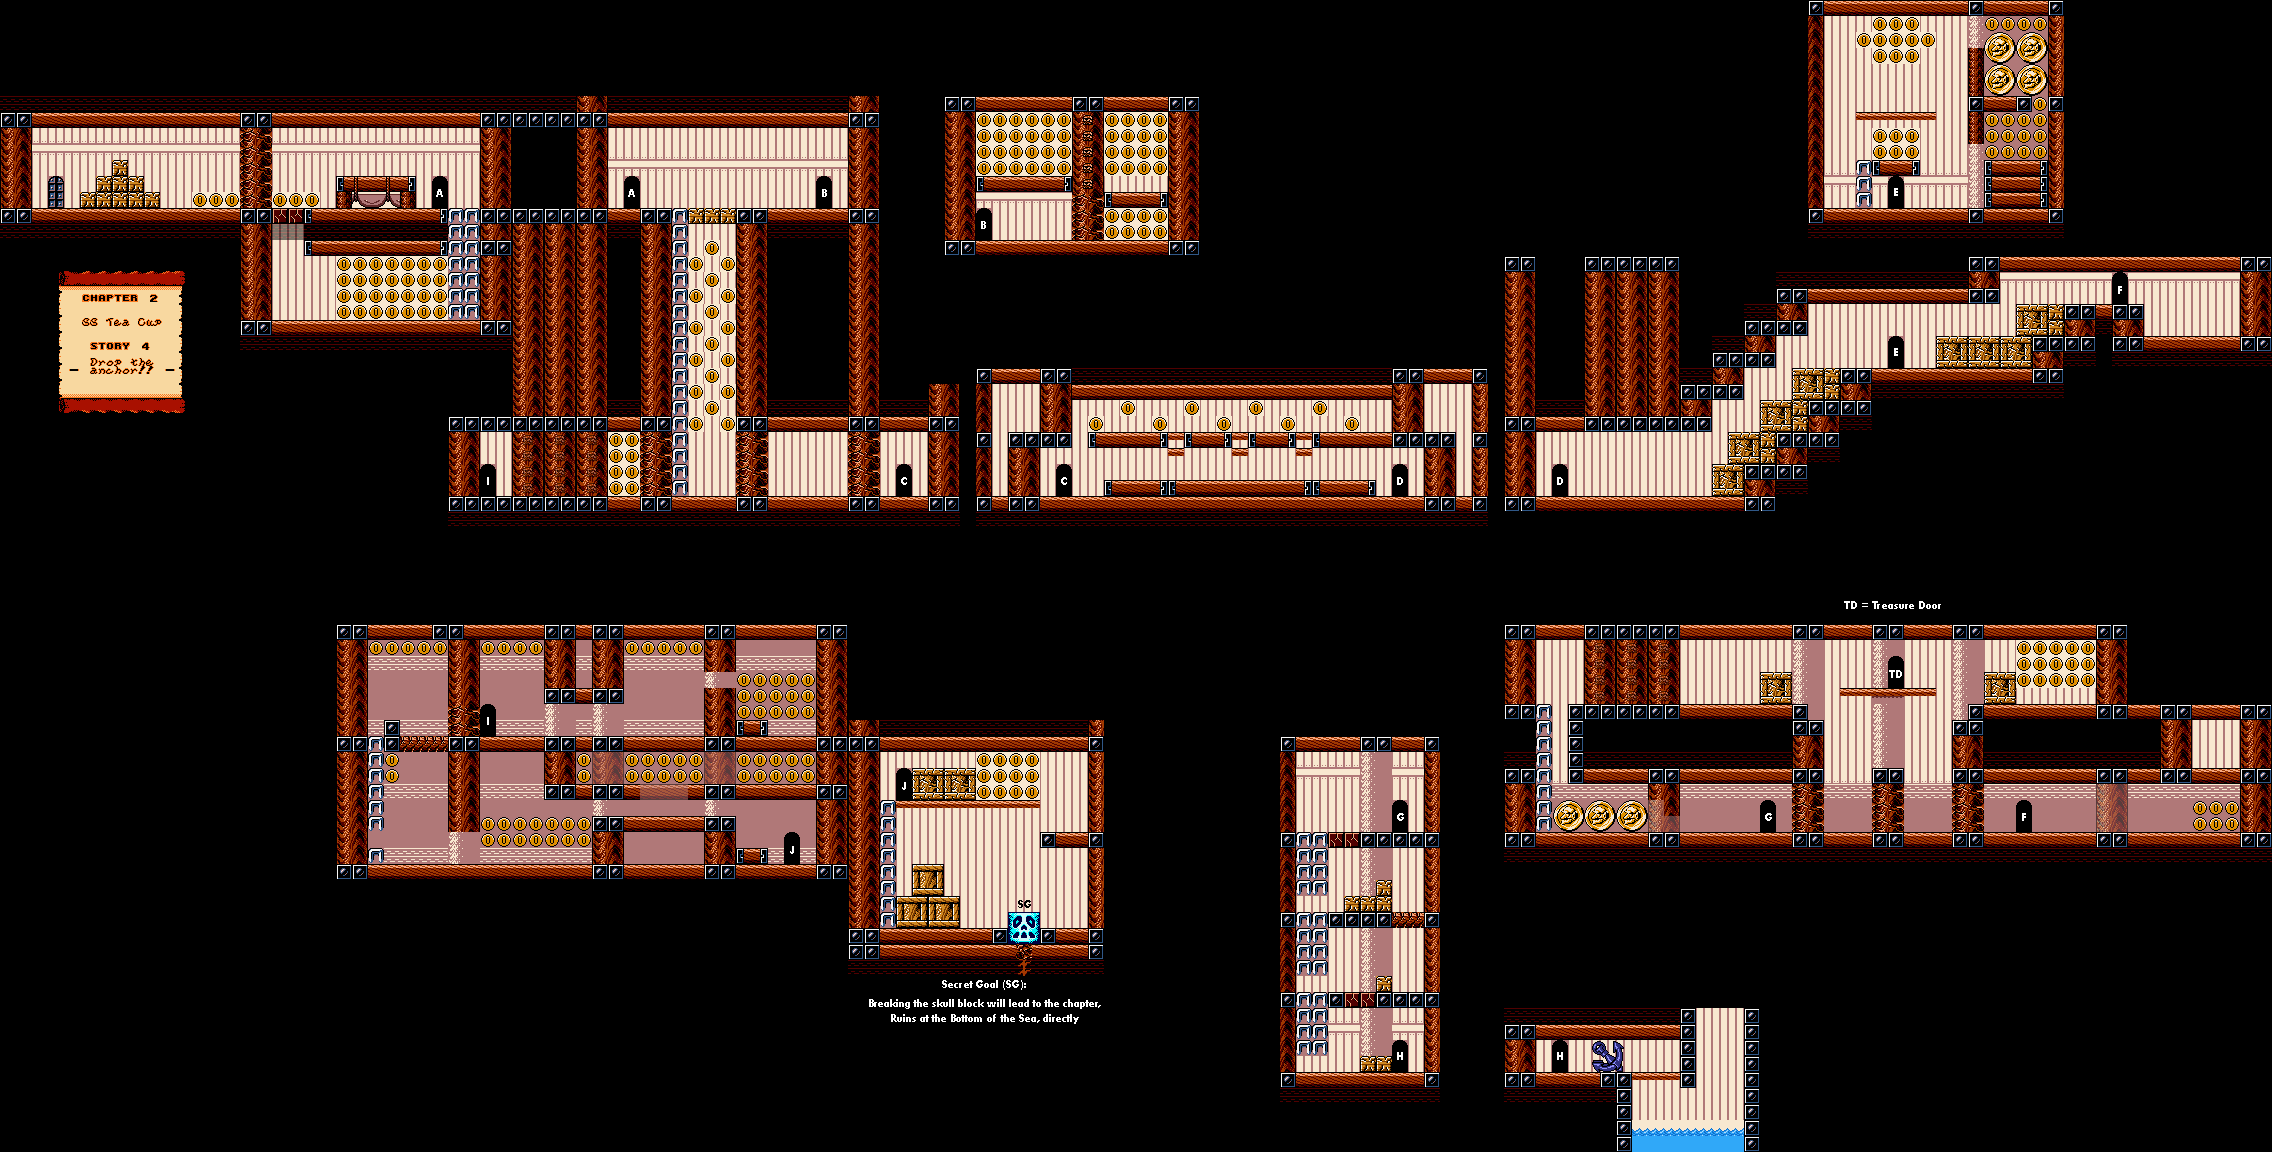
Chapter 2: S.S. Tea Cup

Story 4: Drop the Anchor!


For the next side-story, you'll need to find the alternate exit. To find it, you'll need to throw an enemy through the wall in the lower-left corner of the room where the duck pirate enemy is. This will reveal a path to a door where you can move a furnace and break some walls for coins as well as a path to another door. In the next room, you'll find out there is a cork plugging a leak. Tackle the cork to spring the link and sink the S.S. Tea Cup.

While you're playing through this level again, pay attention to the level layout. It'll be important later, because...

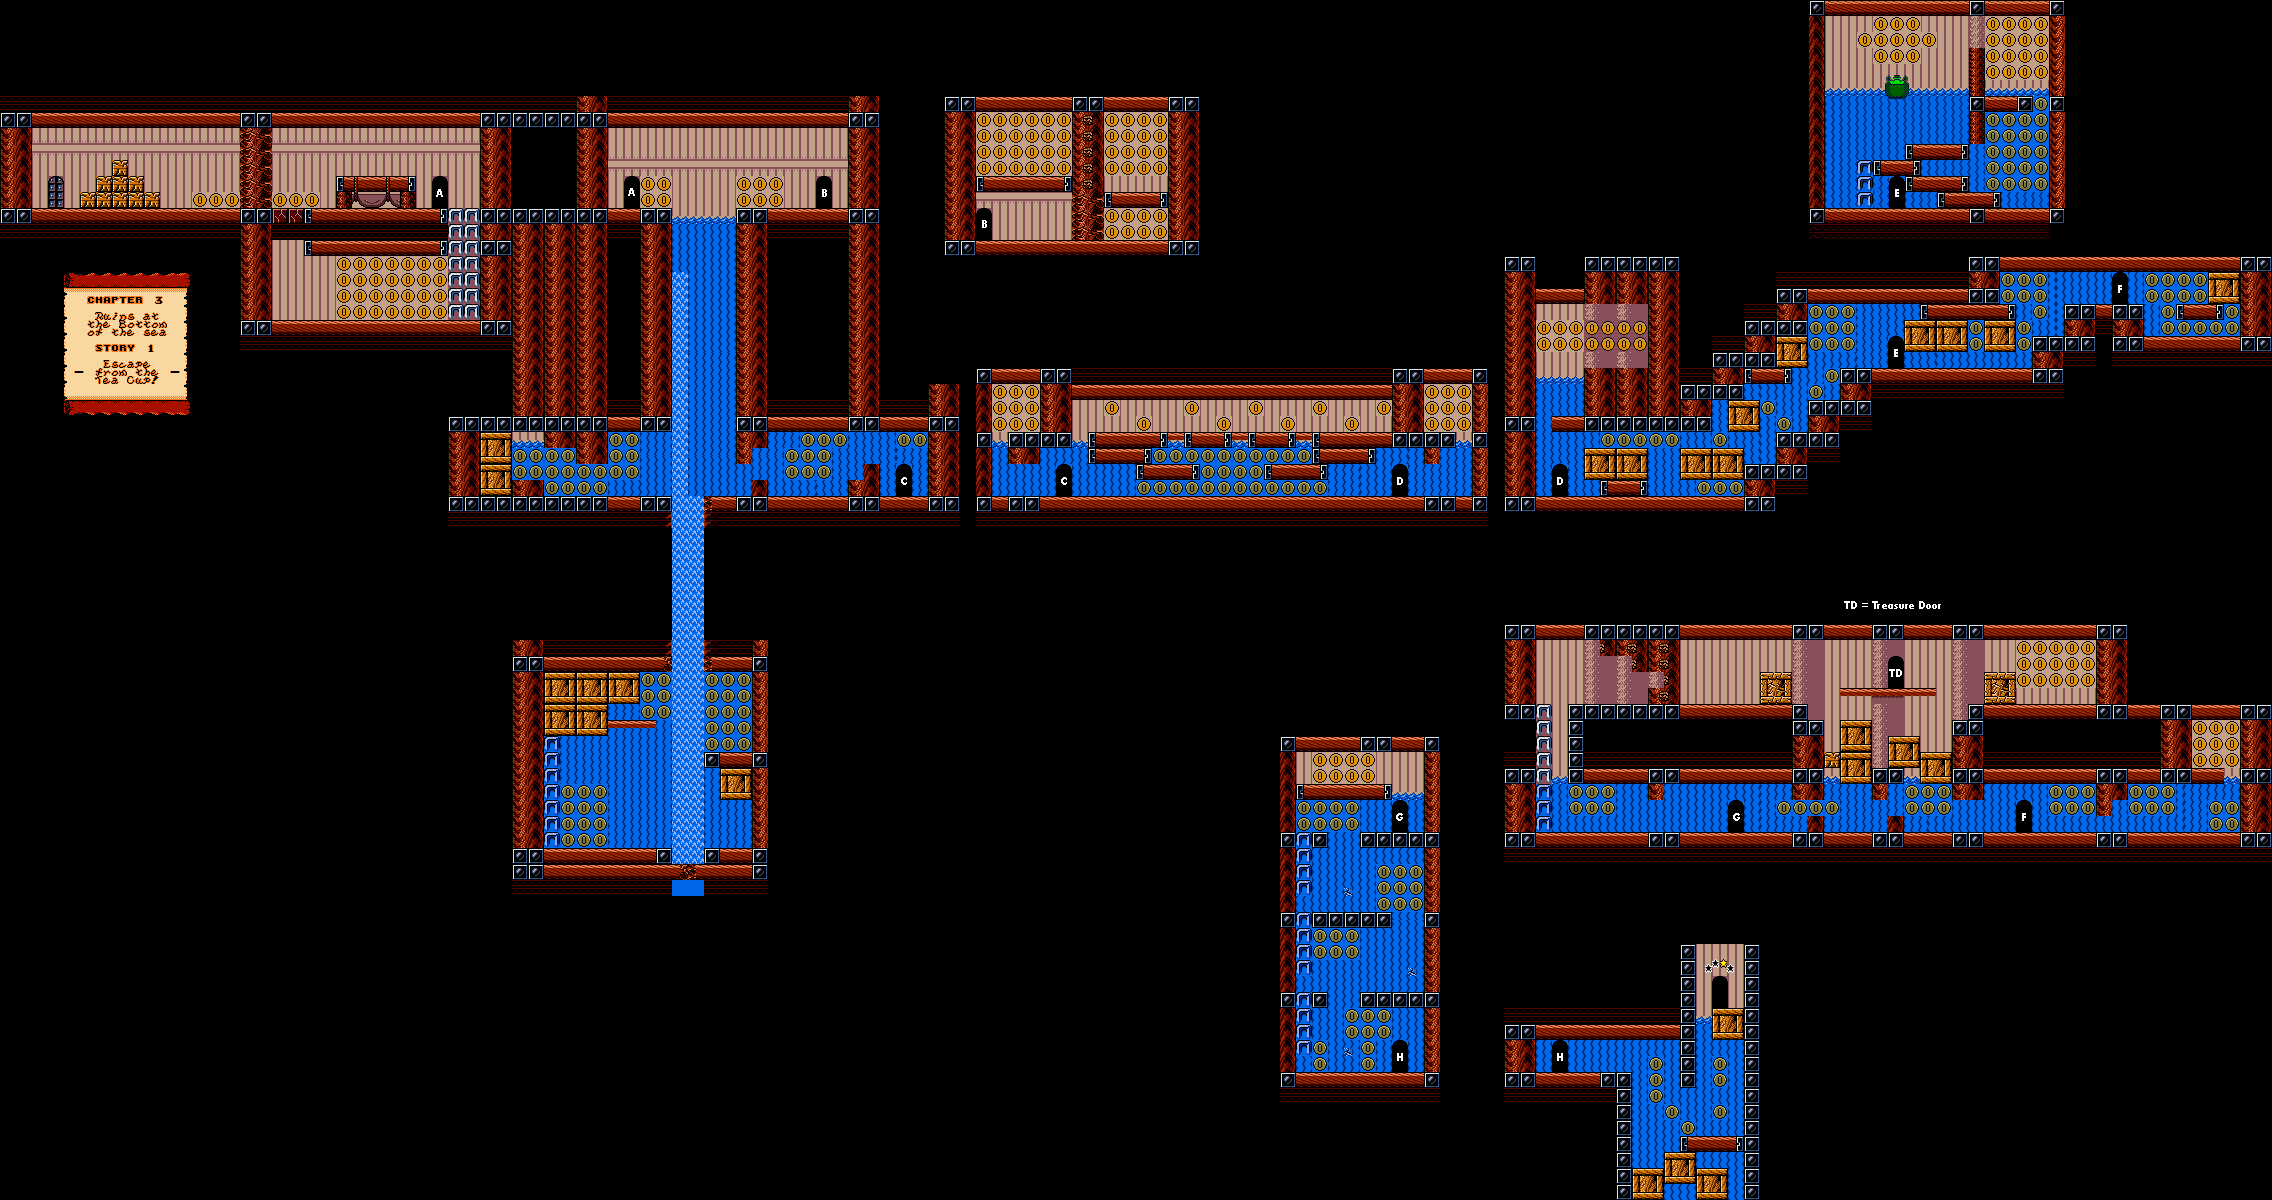
Chapter 3: Ruins at the Bottom of the sea

Story 1: Escape from the Tea Cup!


...you'll have to go through the same level, now underwater!

Now that the ship has sunk and Captain Syrup and her goons have escaped into some nearby ruins with Wario's treasure, it's time to get off the ship and go after them.

You'll start out from where the leak originated, then swim around and feel you way around the ship from there. The original starting point takes you nowhere, even though it still exists.

To control the pot at the surface of the water, just move into it. Moving into it from underneath can help move it away from the wall if you need to. Walking off the edge rotates it, and you can rotate the pot a full 360 degrees by moving into the corners of it.

The treasure room is in the same place as it was in the non-sunken version of the level, and you can get some sort of orb for winning it.

The anchor room is the exit. Watch out for the fish, as it will swim towards you and chomp at you if it sees you.

Friday, October 4, 2024

PrinceWatercress plays Chrono Trigger (Super NES) - Part 36 of 70


In this entry, we look for Crono...and we get some help from an unlikely ally.


If you told the woman with the sapling in Zeal Palace to save the sapling instead of burn it and head back to the Commons now, you'll see her with the plant again. This time, the sapling will be a plant. Also, Alfador, the purple cat who followed Janus around, will follow one of the kids around.

By talking to the people in the Commons, you'll find out that someone was looking for you and was last seen at the North Cape. Since you're stuck here in 12,000 B.C. until you advance the plot, you have no choice but to go there.

When you head to North Cape, there will be a sparkle at the north end. If you walk up to it and press A, Magus will show up. Magus will mention Zeal Kingdom sinking to the bottom of the sea in the events at the Ocean Palace, then reveal what was probably known all along: that he was originally from 12,000 B.C. and that his name was originally Janus.

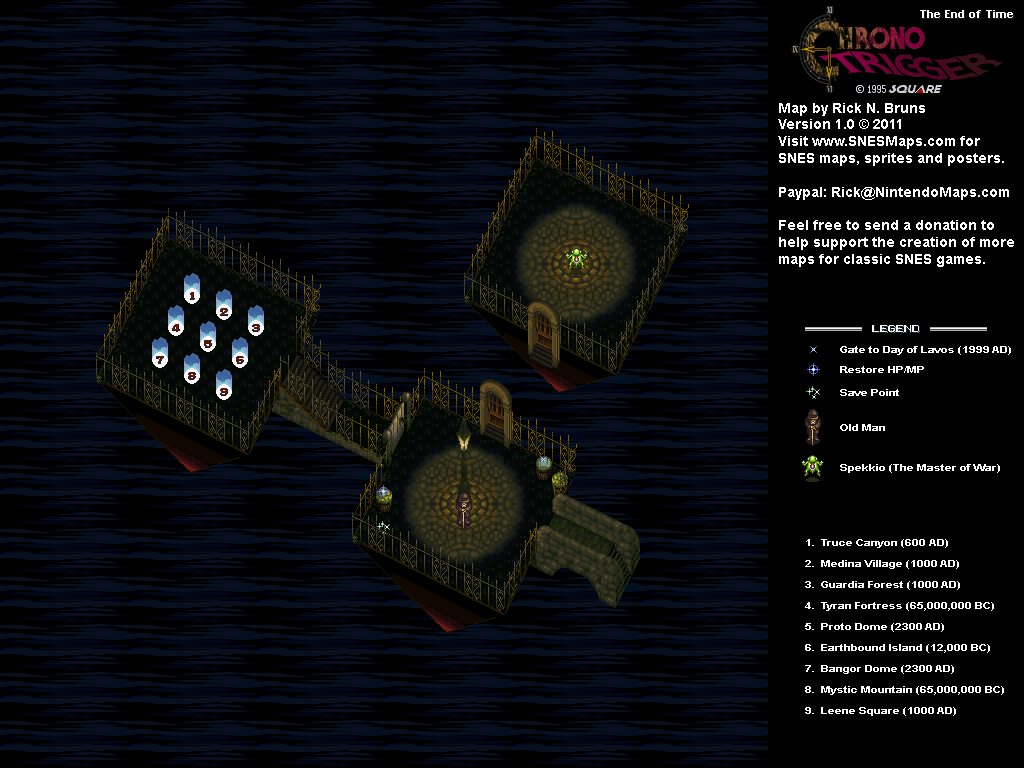
You then see a cutscene explaining how he, Melchior, Balthasar and Gaspar were all sent to other eras. At the Ocean Palace, Lavos opened gates that flung the four of them into different time period, with Queen Zeal not even giving a care about what was happening to any of them, especially Janus. Janus was thrown into the medieval era and was more or less adopted by Ozzie for their war against the humans, Melchior was thrown to the present day where he ended up in Medina Village, Belthasar was thrown into the far future where Lavos had already decimated the world, and Gaspar was thrown into The End of Time, revealing him to be the old man we have been talking to the whole time.

Magus then explains that it was his modus operandi to destroy Lavos as revenge for throwing him into the medieval era all along, even as the Mystics wanted him to help them destroy the humans, and reveals that when we stopped him as he was summoning Lavos, he was thrown back to his own era to a time before all the events that made him into Magus happened, and he pretended to be a prophet in order to get close enough to Lavos and destroy it. Meanwhile, we were thrown into the prehistoric era, and our time there taking on Azala and Black Tyrano to help the humans beat the Reptites gave him enough time to start making moves.

He brings up Crono's death, calling him a fool for even daring to take on Lavos before mocking the rest of the party for even trying. This causes things to get really heated between the two parties, and you get the choice to either fight him or not. For the purposes of this Let's Play, we're going to not fight him. By picking this option, your party leader comes to the conclusion that defeating Magus will not bring Crono back. After that, you can head back towards the world map, and when you do, Magus stops you and tells you that there is a way to revive Crono, and in order to do that, you'll need to talk to Gaspar, the old man at the End of Time.

From here, Magus will also join your party. Magus is a very, very optional character who attacks with a scythe just like he did when you battled him in 600 A.D. He starts off with an Amulet for an accessory, which negates all status ailments from being inflicted on him. While he starts with Lightning 2, Fire 2 and Ice 2, he can learn some more magical Techs, up to and including Dark Triangle, which he also used in the 600 A.D. battle and does massive Shadow-based magic damage.

Back at the store, talk to the Nu, then wait. If you wait long enough, the Nu walks away, and you can get the Magic Tab that was behind it.

If you go into the Commons with Magus, Alfador will start following Magus around and start meowing endlessly. If you talk to the kid who was playing with Alfador, he will ask if the cat belongs to Magus. (Sadly, Alfador can't come with you. Would have been nice, though.)

There's nothing more to do here, so hop into the Epoch. When you do, a strange floating vessel shows up in the sky. This is the Black Omen, which is the Ocean Palace in an airborne form. Don't even think about going there yet; just head to The End of Time. You're just going to get destroyed over in the Black Omen, anyway. 


At The End of Time, talk to Gaspar. He will ask where Crono is, then says that he wishes he could help with Crono's death. From here, walk away from Gaspar, and he will get your attention. Talk to him again, and he will tell give you the Chrono Trigger: a time egg with magical properties. He will tell you that it is pure potential, and that the chances of its magic working are directly related to how much effort you put into getting Crono back, and even then, there is no guarantee. He then tells you that there is a way to replace lost and misplaced time streams, and to do that, you'll have to talk to Belthasar in the Keeper's Dome in 2300 A.D.

Up until this point, this part of the game was akin to the World of Balance in Final Fantasy 6, in that something apocalyptic had not happened yet and you were forced to advance the plot in a singular storyline. When you get the Chrono Trigger, the game opens up big time, much like in Final Fantasy 6's World of Ruin. You can fight Lavos if you want, but good luck beating him at this point in the game. You can get Crono back, but even then, it is completely optional, and you can even beat the game without him in your party. If you know where the post-Ocean Palace side quests are, you can also do them now, and all of those are completely optional. You can even go to the Black Omen at this time, if you wish, although you may want to level up a bunch before taking on Lavos or the Black Omen. At this point, the choice is yours.

Friday, June 28, 2024

PrinceWatercress plays Ratchet and Clank: Going Commando - Part 36 of 54


In this entry, we head to Smolg and take a path leading to something other than our main objective. Somehow, the Protopet has already been unleashed.

First | Previous | Next | End

4:30 - The platforms here fall when you land on them, so be ready to use the Swingshot. Also, the Sheepinator will help with the crab enemies on the other side, as well as a lot of the small enemies on the planet.

6:41 - Believe it or not, there is a Platinum Bot above this Levitator pad. It will take multiple tries to get this one, though, as it can be hard to gauge where you are in position to the platform.

16:10 - Approaching this Levitator pad will show you where to go next.

18:15 - You'll need to go back here to find the Levitator pad and get over these boxes. You may also need what's on the boxes, too.

20:56 - Unlike the other enemies, this one particular individual is more intelligent and refined. If you can give him 40,000 bolts for food, you'll get the coordinates for planet Damosel, where the Protopets are running amok.

Controls:

As Ratchet:

Control Pad/Left Analog Stick: move
Right analog stick: move camera

X:
  • Jump and double jump (hold button after double jump to use Heli-Pack or Thruster Pack)
  • Wall jump (near certain walls)
Square: strike with wrench
Circle: pull out/shoot currently equipped gun
Triangle: 
  • quick select (hold and use in conjunction with Control Pad or left stick to switch guns; menu can be customized in Quick Select on the pause menu
  • double tap to switch between two most recently equipped weapons/items
  • interrupt on-screen messages

Select: open map
Start: Pause menu
  • Control Pad: select option
  • X: confirm option choice

L1:
  • center camera behind Ratchet (tap button to center)
  • first-person view (hold button and use left stick or D-Pad to look around; let go of L1 to move camera back behind Ratchet)
  • Square: wrench boomerang
  • Circle: fire gun
  • R1/R2: zoom in and out (Pulse Rifle only)
L2/R2: strafe (hold while moving)
L3: see health and Bolt totals
R1/R2: crouch (hold down)
  • Square: wrench boomerang
  • X: high jump
    • long jump (hold crouch button and jump while running to perform)
R3: open map

In water:
  • Square: dive and descend
  • X: surface and ascend
  • R1: accelerate with Hydro-Pack

As Clank:

Control Pad/Left Analog Stick: move
Right analog stick: move camera

When hanging off platforms:
  • Control Pad/Left Analog Stick: move
  • Forward+X: vault up
  • Back+X: drop down

Square: punch
X: Jump (press and hold in the middle of a jump to glide with Heli-Pack)
Triangle: command menu (hold and use in conjunction with Control Pad or left analog stick to choose commands)

Monday, May 27, 2024

DeceasedCrab plays Earthbound - Part 36 of 53


In this entry, we take the trek through Dungeon Man himself.


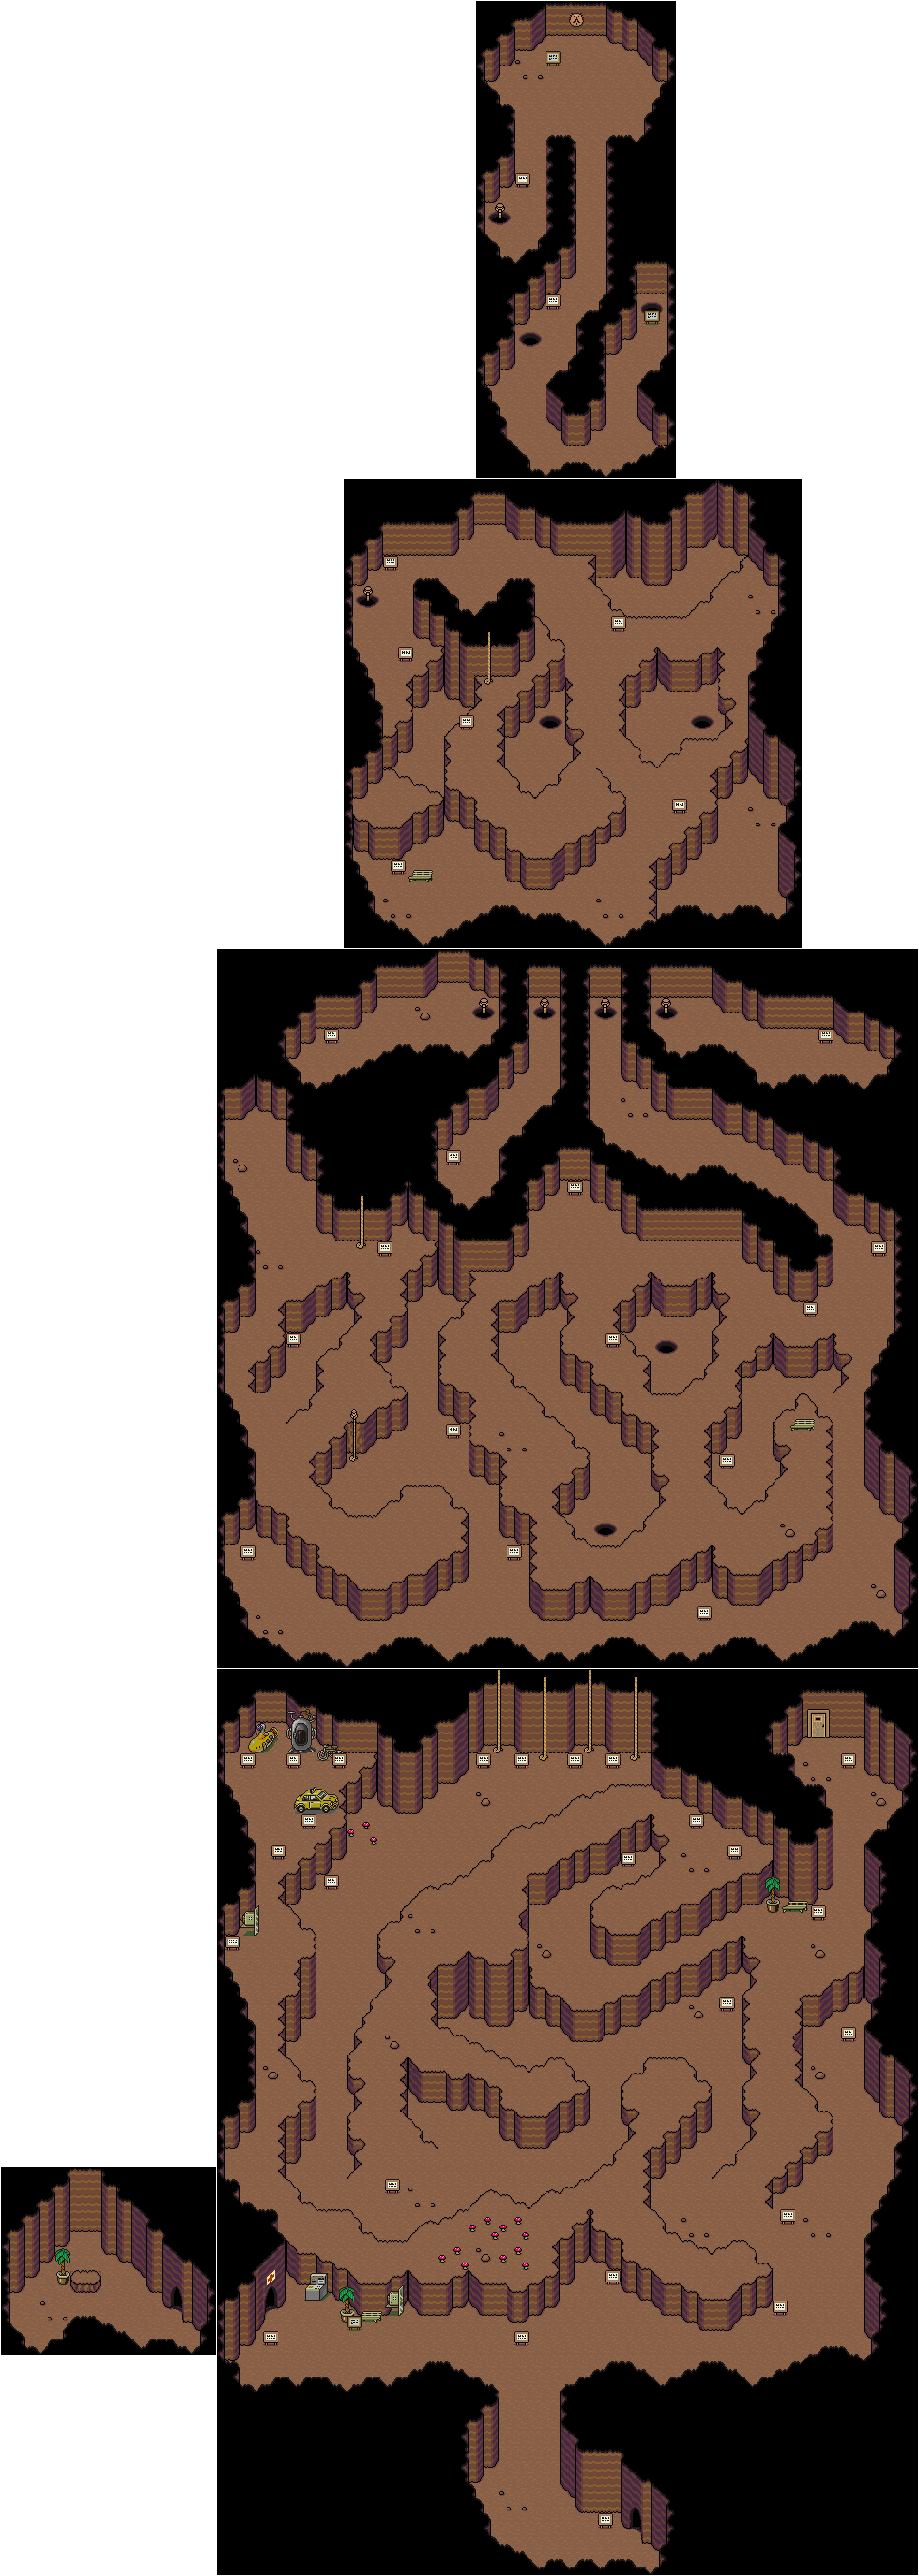
In order to enter Dungeon Man's Dungeon, you'll need to use the Key To The Tower, which you got earlier. This will let you in.


All of the enemies here will be enemies that you have met before. The only difference between then and now is that you are much more powerful, and it's possible to get the green swirl from time to time..

The signs are written by Dungeon Man themselves, and provide rather witty banter. West of the entrance is an ATM, a pay phone and a bench, and the nearby cave leads to a hospital. The bench is used as a free inn.

Despite what DeceasedCrab says, if Poo has the Hawk Eye in his inventory when he leaves the party to learn Starstorm, Escargo Express will call and tell you that somebody put the Hawk Eye in your inventory. Just call them to get the item, as you'll need it here.

DeceasedCrab finally gets the Heavy Bazooka. That's a good thing, as it's a very powerful weapon.

The Super Plush Bear takes more damage and abuse than the Teddy Bear. You can buy it in Summers if you can afford it.

The wooden door is a restroom that you cannot access. Also, there is a bench near it that you can use to heal.

Some of the treasures are useful, while others are not. One of them contains five dollars. Yes. Five dollars. A drop in the bucket compared to what's probably in your in-game bank account at this point.

Of the four ropes, you'll want to climb the third one (second from right). This takes you to the second floor while the others lead to dead ends. There is also a bench on the second floor to recover your health and PP at.

The Spectrum Beam is a little more powerful than the Heavy Bazooka, but it's worth getting.

The Lesser Mook can be encountered in Winters, but it can be encountered here. It can do a lot of damage with Freeze Alpha and Freeze Beta, and can put a party member to sleep in addition to being able to Diamondizing them, which is the game's version of petrification. You'll need to use a healer to cure the Diamond status if you don't have a Cup of Lifenoodles or a Secret Herb.

At the third floor, the Gruff Goats, Mad Ducks and Slimy Little Piles are for display only and cannot be interacted with. There is also a bench to rest on in the southwest corner.

At the top floor, you'll find Brick Road's head in a wall. He will tell you that Dr. Andonuts made him Dungeon Man, and he will follow you for a while. He will tell you to head to the Return Hole, which is to the south of Brick Road's head. The other hole will be blocked...for now. Once you go through the Return Hole, go through each hole as you see them. Don't forget to get the IQ Capsule for Jeff before you return to the entry level, and don't forget to get money out of the ATM before you leave, as you'll be back at the store south of where you came in before you know it!

Friday, November 3, 2023

Jerry Martin plays Strong Bad's Cool Game For Attractive People - Part 36 of 53


In this episode, we finally get the formula, meet Diamonocle in prison, and start tracking down Dadgeresque.


Head back to the Secret Lab and give the Yellow Hair and the Fancy Flower to Dr. Experimento. With all three ingredients for the formula in hand, Dr. Experimento will finally be able to make the formula for you, which Dangeresque will take.

Head back to the Stickanee Tree and use the Formula on it. You'll get the Perducci-O's, which you'll need for one of the in-game achievements.

Head back to the Office. Renaldo will find out that Cutesy Buttons is gone (after briefly forgetting his line), and Dangeresque thinks there may be a clue in the office somewhere. Click on the VCR and you'll find a video by a mysterious person (Homestar), who proclaims that he has kidnapped Cutesy Buttons and that he knows what you also have the formula before demanding the formula so he can destroy it, the world's weapons stockpile, a million dollars, a pony and a large melonade with no ice. Dangeresque thinks that this person is familiar, then decides to find the mystery man's hideout and break in. Renaldo says there is one person who can help, but it is his former enemy, Baron Darin Diamonocle, who is serving time in Brainblow State Prison after Dangeresque framed him for endangered puppy trafficking and the murder of several presidents in response to being forced to eat three-month-old, stale, moldy, ranch flavored potato chips. From here, Brainblow State Prison will be unlocked, so place it on the map and go there.

From here, you'll be in front of the prison, which is Bubs' Convenience Stand, and Baron Darin Diamonocle (Bubs) will be there. If you click on the tuft on grass on the lower-left corner of Brainblow State Prison, you'll get the Monocle for the photo booth. Also, use the Nunchuck Gun on Diamonocle for the Characters Nunchucked achievement.

Talk to Diamonocle. You'll find out that Diamonocle has been reformed after being shivved repeatedly. From here, pick the Diamonocle option. Dangeresque will want to know Diamonocle's secrets to breaking into a hideout, and when Diamoncle asks why he would want to do that, pick the Evil option to threaten to transfer him to Tri-Lambda Penitentiary (this is a reference to Revenge of the Nerds and goes towards an achievement). Diamonocle will mention that he never did anything and that he always hired people to do stuff for him, and if one wants to break into a kidnapper's hideout and rescue the hostage, they will need the two best minds in the business. Diamonocle says they are two people from Dangeresque's past: one is an expert kidnapping solver, and the other is the man with the plan.

Pick the first silhouette to ask who "the man with the plan" is. You'll find out that the "plan" is the floor plans for the hideout, and the man is Perducci, Dangeresque's long-time arch-enemy who has set up shoop in an abandoned night club on the edge of Brainblow City. This will unlock the Old Club.

Pick the remaining silhouette to ask who the expert kidnapping solver is. Diamonocle will mention that the expert was the best until he got mixed up in a case that he could not solve and was driven mad, and that Renaldo will know where to find the guy. Pick the Renaldo option, and Dangeresque will say that it is a good thing that Renaldo is not here right now, as he hates to see hardened criminals go all soft serve, as he has no respect for tough guys who turn out to be wimps (even though Renaldo is in the background).

When you stop talking to Diamonocle, Dangeresque will demand to know from Renaldo who the expert kidnapping solver is. It turns out that it is none other than Dadgeresque, and that he left Dangeresque because he went mad and is of no use to the case. Renaldo mentions that he was last seen wandering around Venice, and Dangeresque decides to head to Italy. Venice will be unlocked.

CELEBRITY NAME DROPS:
- Sam and Max: Use the phone in Dangeresque's office.
- The Lorax: Look at the Stickanee Tree before taking the flower.
NEW! Tri-Lambda: Use the Evil option while talking to Baron Darin Diamonocle.

CHARACTERS NUNCHUCKED:
- Renaldo: Do this in Dangeresque's office after you answer the door at the beginning.
- Dangeresque, Too?: Do this in Dangeresque's office after you answer the door at the beginning.
- Cutesy Buttons: Do this in Dangeresque's office after letting her in.
- Professor Experimento: Do this in Professor Experimento's lab when you first head here.
NEW! Baron Darin Diamonocle: Do this when you unlock Brainblow Prison and go there for the first time.

SPACE CIRCUS MANUAL PAGES:
- Performers Page: Click on one of the flaps on the ruby powered rocket at the lab.

DANGERESQUE 3 MERCHANDISE:
- Renaldo Sheets: Use the Nunchuck Gun on the rightmost Brainblow limits sign.
NEW! Renald-O's: Use the Formula on the Stickanee tree.

OUT & SPIT TAKES:
- Use the safety scissors on Cutesy buttons before distracting her.

OUTFITS:
NEW! Monocle: In the tuft of grass next to Brainblow State Prison.

- Score 15,000 points on Space Circus Catastrophe.

Saturday, April 29, 2023

PrinceWatercress plays Sly Cooper: Thieves In Time - Part 36 of 48


Eight treasures in one video!


The treasures in this game work much like they do in Sly 2: they will be in certain locations in the episodes, and you'll have to go out of your way to find them, interact with them to grab them, and bring them back to the hideout without getting hurt by the enemies. Sadly, there is no way to get them show up on the Select screen map. Unlike that game, where some items were on timers and others were not, all of the treasures are on timers and you'll have a certain amount of time to get a treasure back to the hideout. The amount of time that you get depends on the treasure.

Each episode - not counting the Paris prologue and epilogue - has 12 treasures in all, leading to a total of 60. There are also a few Trophies for going for all the treasures along the way.

I also create some rules of my own for the treasure collection videos as well.

1. There are no practice runs. Everything that is done is done on the fly.

2. You will need all of the costumes before even attempting to get all of these.

3. There is a total of twenty (20) minutes to collect treasures per video. Whether any more time is needed to get one more treasure is a matter of discretion.

4. The timer only starts after exiting the hideout and gameplay begins.

5. In case a return to the hideout is needed to get away from enemies or to switch episodes, the timer is suspended. The timer is only restarted once the hideout is exited again and gameplay begins again.

6. After the twenty (20) minutes are up, we get to read the treasure descriptions and rotate the treasures.

GamesRadar made for some pretty good notes on how to find everything; you can find them here.

Episode 4: Of Mice and mechs


1. Brass Spyglass


This is behind the big tent in the circus area. Thankfully, this isn't too far away.

2. Rolling Pin


This is above the dunking booth in the circus area. This also isn't too far away.

3. Golden Arrow


On the north end of the castle area, there is a spot where you can launch yourself over a pit with the Sabertooth Costume. There will be an Ancestor Door for the Thief Costume on the other side, inside will be the treasure. Spire jump onto the switch near the catapult, then slow down time with the Thief Costume and use the catapult to get to the door. Thankfully, you can sprint to the hideout from there.

4. Medieval Metal Man


There is another Ancestor Door, this time for the Samurai Costume, in the northeast corner of the village area. Deflect a fireball at the door to open it, then grab the treasure and run back to the hideout. Interestingly, the treasure is Clank from the Ratchet and Clank series in a suit of armor.

5. Archer's Handbook


Near the pulled-up wooden drawbridge far to the north is a target for the Archer Costume and some dummies for the Sabertooth Costume. Use both costumes to cross the gaps to get to the Ancestor Door on the other side, which will require the Sabertooth Costume to open. You'll need the Sabertooth Costume to get back, then you'll need to rush to the hideout.

6. Coin Purse


Opposite of the path to the Archer's Handbook is the Coin Purse. You'll need the Archer Costume to get to the treasure. If you're able to get the Archer's Handbook back to the hideout, you should have no problem with this one.

7. Jeweled Shoe


We opened this one earlier in the Let's Play. This one requires the Jailbird Costume to open the Ancestor Door guarding the treasure, and you'll also need a catapult to get to this treasure. Use the nearby trampoline to get back on the main roads, then run to the hideout.

8. Bell Tower


This is on a balcony overlooking the water on the northern edge of town, and is just east of the Ancestor Door for the Jeweled Shoe was. Thankfully, you can Paraglide to the trampoline near the Jeweled Shoe and get to the hideout from there.

Controls:

Left analog stick: move
Right analog stick: move camera
X: Jump and double jump (hold X on second jump for hover jets as Bentley)
Square: attack
Circle: 
  • interact (usually with anything that has sparkles) (Sly)
  • steal from enemies (from behind) (Sly, Bentley, any of Sly's ancestors)
Triangle:
  • knock enemies upwards (from behind; press Square to slam enemies down for stealth slam) (Sly, any of Sly's ancestors)
    • press Circle after knocking enemy upward to perform Silent Obliteration (Sly; replaces Stealth Slam; must buy on ThiefNet)
    • press Square for Stealth Slam (any of Sly's ancestors)
  • spin attack (hold to charge) (Sly)
  • throw bombs (Bentley)
  • Thunder Flop (in mid-air) (Murray)
  • spin attack (hold to perform) (Murray)
    • control with left stick (must buy on ThiefNet)
  • Raging Inferno Flop (in air; Murray; must be bought on ThiefNet)

L1: 
  • bomb aim (Bentley)
  • smoke bomb/flash bomb (Sly; must buy on ThiefNet)
  • aim/strafe mode (Carmelita; must hold button down)
    • left analog stick: move
    • R1: shoot (can only shoot in strafe mode)
L2:
  • hold for costume select menu (Sly)
    • hold down to stay in menu; use D-Pad or left stick to make selection
  • hold for weapon select menu (Bentley)
    • hold down to stay in menu; use D-Pad or left stick to make selection
  • hold for fist select menu (Murray)
    • hold down to stay in menu; use D-Pad or left stick to make selection
  • hold for shot select menu (Carmelita)
    • hold down to stay in menu; use D-Pad or left stick to make selection

L3: activate compass
R1: run (hold while moving to perform)
  • Paraglide (Sly; in air; must buy on ThiefNet)
    • Square: Paraglide Dive Attack (during Paraglide; must buy on ThiefNet)
  • Adrenaline Burst (Bentley; double tap to activate; must buy on ThiefNet)
  • Clothesline (Murray; double tap and steer with left stick; must buy on ThiefNet)
  • Cane Push (Sly; double tap; must buy on ThiefNet)
R2:
  • Trigger Bomb (Bentley; must have bomb on field to detonate manually; must buy on ThiefNet)
  • Super Jump (Carmelita; hold and press X to perform; must buy on ThiefNet)
R3: Binocucom
  • Right analog stick: move
  • Left analog stick: zoom in and out
  • R1: take picture (when applicable) (Sly, Bentley)

Start: pause menu
Select: map
  • Left analog stick: zoom in and out, switch between map and status
  • Right analog stick: move map
  • Circle: back

Friday, March 10, 2023

PrinceWatercress plays Blood Omen: Legacy of Kain - Part 36 of 41


Now that we've made it to where Elzevir hides, let's go and kick Elzevir's butt.


0:09 - To enter Elzevir's mansion, shoot Spirit Wrack across the gate, then move the doll up to the switch. Use the Flame Sword to get rid of the shadow dolls.

1:11 - By getting on this island of ice, you can unlock a secret (see below).

1:31 - There is another secret just south of the island where you can find some pick-ups (see below).

1:41 - Going east leads to another nook which has another secret (see below).

1:53 - When you go as far west as you can go, go north for pick-ups and one more secret (see below).

3:14 - We're all set, so let's enter Elzevir's Mansion. I equip Energy Bolt and Natural Light, then enter the door to the left.

4:02 - At the barrels, use Spirit Wrack on the singular non-bear enemy to hit the switch. (It's easier if everything there dies, but it's just as frustrating.) If you couldn't tell, those are explosive teddy bears. Nice touch. From there, avoid the spiked balls and other traps on the path, and use Repel if you need to.

7:07 - Go through the door to the right. Follow the path and hit the switch, then use Mist to avoid the wall spikes. At the spike pit, throw Spirit Wrack at the enemy between the two teddy bears. Move south to get the rune triangle and hit the switch that opens the door behind you. At the spike pit near the icy floor, use Energy Bolt to hit the switch. Hit the switch at the end.

9:42 - Go through the door in the middle. Get the blood vial, then use the Wolf Form to jump across the barrels and shelf while avoiding the spiked balls. I leave to get a magic orb before continuing with this part.

11:47 - You may not need it, but I equipped and used Magical Light, because it can get pretty dark here. Use the wolf form to get to the floor panel behind the barrel, then make your way around the room with the mist form to avoid the traps. The room with the enemies you can feed off of leads to a save spire. You're almost at Elzevir. 

14:23 - Here's Elzevir. To beat him, cast Repel, then equip the Soul Reaver. Keep hitting Elzevir while the minions keep hitting you. At least he doesn't teleport like a coward. When Elzevir is dead, go north to get the doll with King Ottmar's daughter's soul. From here, I feed off the humans, then we leave the fortress. At this point, we are at endgame, and if we continue with the story by returning the doll to Willendorf, we will trigger a no-turning-back point

22:01 - The gates just past the giant statue are open now. If you go north to the next screen, then go up the ramp and go west, you'll find a full moon cave. This is the spirit forge for the Pentalich of Tarot, which has no backdoor unlike the other spirit forges. You'll have to go through it not once, not twice, but three times to get all the secrets in the game.

Secrets

93. - By getting on this island of ice, you can unlock a secret.

94. - There is another secret just south of the island where you can find some pick-ups.

95. - Going east leads to another nook which has another secret.

96. - When you go as far west as you can go, go north for pick-ups and one more secret.

Friday, December 24, 2021

HCBailly and JB play Secret of Mana - Part 36 of 41


In this entry, we head to the Pure Land to revive the Mana Sword.


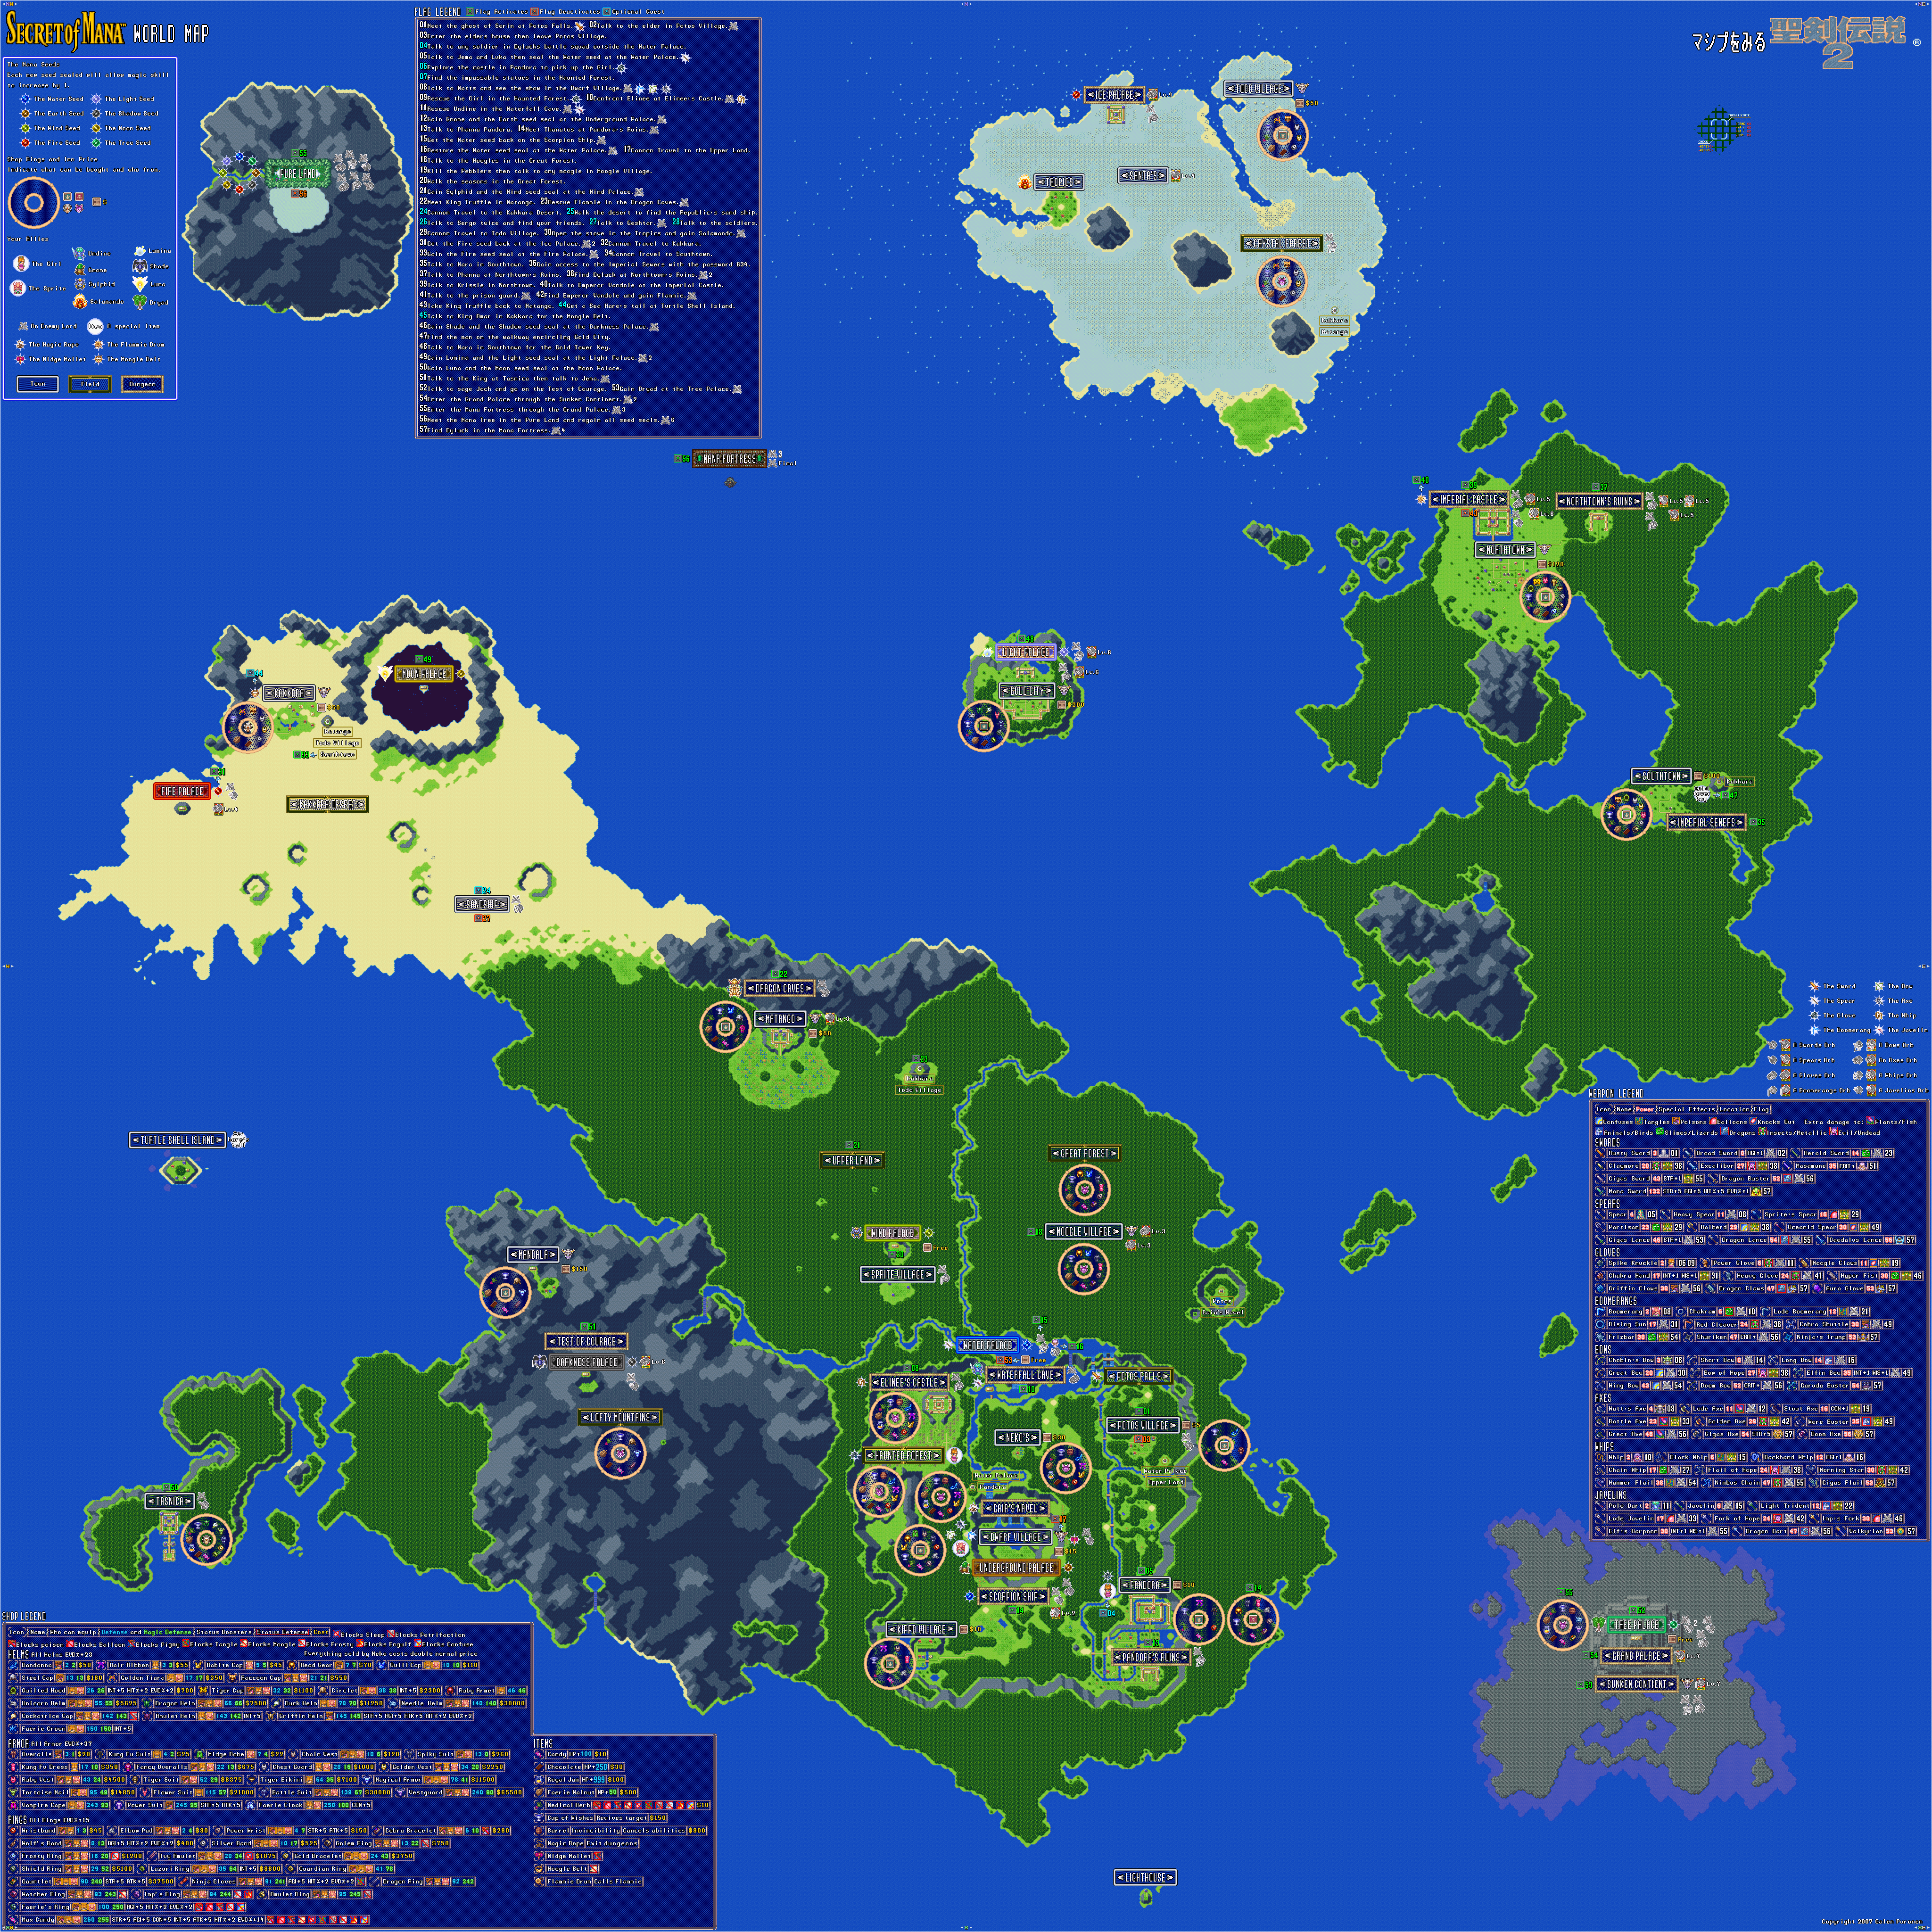
If you approach the Mana Fortress and stay in one spot when Flammie ascends near it, you'll enter the Mana Fortress. Unfortunately, you won't be able to do anything here due to the barrier, so you'll be bounced off it and back onto Flammie.

It is now that you'll need to find a huge mountain with a light blue and light green center. This is the Pure Land. Had you tried to go here earlier in the game, the game wouldn't let you, but now, you can go here.

Pure Land

The Needlions are palette swaps of the Pebblers. They can cast Earth Slide and Defender and can also petrify you with their physical attacks, so be careful. The Griffin hands can grab at you, but thankfully, they cannot cast magic. They can drop Griffin Helms, which only Randi can equipped, but it's a rare drop for the most powerful helmet he can get.

The Mushglooms are palette swaps of the Mushbooms and can cast Wall on themselves. The Ice Thugs are palette swaps of the Water Thugs and can cast Acid Storm and Curew Water. The Ice Thugs can drop Dragon Rings, which are marginally better than the Gauntlet but also increase your Strength a little bit.

You'll eventually find a cave where you'll fight the Dragon Worm. Much like the worm from where you looked for Flammie, you'll want to zap this boss with Slyphid's music. Don't forget to cast Lucid Barrier on your party and give Moon Energy to whoever needs it, and keep the Moogle Belt and Midge Mallet ready in case anyone gets Moogled or shrunken, respectively. The Dragon Worm can also cast Earth Slide, Balloon Ring and Petrify Gaze.

By beating the Dragon Worm, you'll get the Axe's Orb. The Gigas Axe increases Strength by five points.

If you see a staircase leading to an archway, you can save your progress there. Of course, if you do, you'll have to go to the area to the side to continue on.

You'll soon be fighting the Snow Dragon. This boss can cast Freeze, Breath Wing and Balloon Wing. Use Salamando to do a lot of damage to this boss. If you need to use physical attack, aim for the lower part of its body (the tail is considered the hitbox). Sometimes the Snow Dragon will disappear for a while. If this happens, you'll have to wait for the Snow Dragon to come back. Beating the Snow Dragon will give you a Bow's Orb. The Doom Bow raises the chance of critical hits.

The Eggplant Man can cast Lucid Barrier on themselves and can spawn Needlions. If you can smash them before they cast Lucid Barrier, you may be able to destroy them in one hit if you're strong enough.

The Ghosts are stronger palette swaps of the Specter and can cast a stronger version of Freeze.

The next boss on the hit parade is the Axe Beak, which fights like the Spring Beak from the Upper Land. This boss can cast Sleep Gas, Sonic Pulse and Fireball. Hit this thing with magic more often much like you did with the Spring Beak, and use Freeze if you want to deal the most damage. Beating the Axe Beak gives you a Javelin's Orb. The Dragon Dart is effective against dragon-type enemies.

Saturday, December 4, 2021

PrinceWatercress plays Sly 3: Honor Among Thieves - Part 36 of 42


The final battle between Sly and Dr. M occurs...and after the story is done, we're not done yet. We still have the Master Thief Challenges!


Final Legacy

Sly is now in the inner sanctum...and so is Dr. M, who now has a metal, spider-like apparatus on his head. This leads to one last battle where the fate of the Cooper Vault lies in the balance.

When Dr. M. flies around, you'll need to latch on to the bottom of Dr. M with your cane while avoiding the laser blasts that he shoots out. This will pull him down to the center of the arena. If you have to slide on the laser ropes to get to him, so be it.

Once he's in the arena, a vehicle will appear from beneath the floor. You'll need to hide under it to avoid the laser that Dr. M fires. From here, you'll need to use your more powerful versions of the push attack in order to damage him. As you do this, you want to avoid being jumped on, shot or hit by Dr. M. Your best bet is to be aggressive with Dr. M, just like you did when you fought General Tsao on the ground in Episode 4. When you bring down a third of Dr. M's health, you'll have to latch on to him from below with your cane again.

Each third of Dr. M's health meter is one phase of the battle. For the first battle, Dr. M will shoot out balls of water that will follow Sly around and keep him in place if they touch him. You'll need to mash the buttons to break out. For the second phase, the balls of water are placed with balls of electricity that will shock Sly, and his jump attack also has an area of effect (AOE) attack that also sets Sly on fire if he's too close. For the third phase, Dr. M shoots fireballs.

When Dr. M is close to death, Carmelita shows up. Dr. M shoots Carmelita, but Sly takes the laser blast for her and is knocked unconscious. From here, you'll be playing as Carmelita. Just move back and forth to avoid the laser blasts and keep shooting Dr. M. This part of the battle is an absolute joke compared to Sly's part and it will be over in seconds.

After this, Carmelita finds Sly, who now suffers from amnesia. When Sly asks who he is, Carmelita lies to him and tells him that he is her partner, Constable Cooper. The two of them escape from the exploding Cooper Vault, as Dr. M was apparently a load-bearing boss. Bentley makes it into the inner sanctum somehow, but Sly and Carmelita are gone by then.

The final cutscene of the game is narrated by Bentley instead of Sly. Dr. M refuses to leave the vault as it comes down, and is presumed dead. Bentley gets the rest of the Cooper Gang out as the Cooper Vault finally blows, and as it seems that the contents of the vault are locked away forever, the gang finds Cooper's cane along with his Binocucom pack and his calling card...and the seemingly uncountable riches of the Cooper Vault.

Months later, Sly Cooper is still missing, but presumed alive. With Sly gone, Bentley and Murray chased their own pursuits. Murray completed his training with The Guru, and eventually attempted to break into the racing circuit in the stock van class while also somehow managing to walk away from crashes that would kill anyone else. Bentley and Penelope have a more serious relationship now despite Penelope still living in Holland, and have secured the Cooper Vault in the Cooper Gang's hideout. With everyone going their separate ways for now, Bentley considers this the start of a new adventure, both figuratively and literally, as he has built a time machine. This sets the stage for the fourth game, Sly Cooper: Thieves in Time, which came out after an eight-year-long wait.

With that, we have another cliff-hanger, and we have a fourth game on PlayStation 3 on our hands. As the credits roll, we find out what happened to Dimitri, the Panda King and The Guru, then we find out that Sly is still in a serious relationship with Carmelita as Bentley looks through his binocucom. Sly then looks in Bentley's direction and winks, signifying that he has been faking his amnesia the entire time.

And now, we have the Master Thief Challenges to attend to. We'll tackle those next time...

Controls:

D-Pad/left analog stick: Move
X: jump/double jump
Square: attack
Circle: use to interact with sparkles, steal from enemies (from behind; with Sly), grab objects and stunned enemies (with Murray; press Circle afterwards to grab enemy out of air and press again to shake them, or press Square to throw them)
Triangle:
  • charge up cane, knock enemies into the air (from behind; with Sly, use Square afterwards to slam enemy down/use Silent Obliteration)
  • drop bombs (Bentley)
  • uppercut (Murray; press Circle afterwards to grab enemy out of air and press again while holding enemy to shake them, or press Square afterwards to knock enemy out while in mid-air)

Select: access Gadget Grid
  • D-Pad/Left analog stick: select gadget/ability
  • L1, L2, and R2 buttons: assign gadget to button pressed; gadget can then be used with that button

Start: Pause/unpause
  • D-Pad/left analog stick: choose options
  • X: confirm choice
  • Triangle: back out of choice

L3: bring up waypoint

R3: use Binocucom
  • Left analog stick/D-Pad: look around
  • Right analog stick: move in and out
  • R1: take picture

R1: run (hold down)
  • use Paraglide (as Sly; hold down to use, must purchase first)

Right analog stick: move camera

As Carmelita:

  • Left analog stick/D-Pad: move
  • Right analog stick/D-Pad: move camera/aim
  • Triangle: toggle between strafe mode and free movement
  • Square: kick
  • Circle: mega jump
  • X: jump and double jump
  • R1: shoot

As The Guru:

  • L1 (hold): transform
  • Circle (in mid-air, behind an enemy): mind control
    • Left analog stick/D-Pad: steer enemy
    • X: jump off enemy and launch enemy forward
    • Square: attack

Grapple cam controls:

  • D-Pad/Left Analog Stick: aim camera
  • X: shoot/grapple with hook
  • Circle: distract enemies
  • Square: self-destruct (hold down)
  • R1: Fire turret

Hacking mini-game controls:

  • Left analog stick: move
  • Right analog stick: aim and fire gun

As The Panda King:

  • Square: flame chop
  • L1: hold to load fireworks, release to attack with stored fireworks
    • Right analog stick: sweep over multiple targets

Tuesday, November 2, 2021

HCBailly plays Final Fantasy II AGAIN - Part 36 of 65


In this entry, we have to fight a whole bunch of monsters to get Hilda back. Not surprisingly, the Empire have their own underhanded tactics.


Now that Gordon is back, you can equip the Mage Staff and use it as an item in battle to cast Thunder 5 on all enemies when necessary.

Anyway, head to the Chocobo Grove south of Kashuon again. Catch a Chocobo so you can go south to Kashuon without being caught off guard by a bunch of monsters. From there, head east to find the Arena.

You can also go through the desert on foot and fight new enemies. The Antlion can Paralyze you with its physical attacks, as can the Land Ray. They are also weak to Ice as well as Poison.

Coliseum


When you approach the Emperor, your path will be blocked and you'll have to fight a monster in order to get Hilda back.

You definitely want to Curse the Behemoth as quickly as possible if you can. If you have Bsrk powered up enough, you'll be able to do some major damage to it. Otherwise, hit the Behemoth with the best that you have.

When you beat the Behemoth, the Emperor will have you come forward to claim your prize. When you do, you'll be surrounded by the Dark Knight and three Captains. They'll lock you in a jail cell.

Press A on the steel bars only to find out you won't be able to break the bars. Paul the Ninja will show up. He'll distract the guard and kill him as soon as he turns his back, then he'll let you free.

The Stalagmites (Stlgmite) are Rank 4 and have no elemental weakness, only have physical attacks and have strong physical defense, but Mind-elemental spells have no effect on them.

There is an invisible wall just west of the chest with the Antidote, which lets you reach the treasure room with ease.

The Death Flower (DthFlower) can Confuse you with physical attacks and are immune to Mind elemental attacks, although they are weak to Fire and Ice spells.

Agility gains are partly based on the current character's evasion percentage divided by 4 and rounded down. The higher the number the higher the chance.

When your reach the other jail cells, you'll find the real Princess Hilda. Firion will tell Gordon to take Hilda and run. Leave the Arena and head back to Altair.

Monday, July 26, 2021

PrinceWatercress plays Bio Menace - Part 36 of 37


The last regular level in the game is the hardest, and if you can get through it, you really know how to play this game.

Circle of Death

The level starts with two circle of those indestructible flying robots around a ladder who will insta-kill you upon contact. Get all the keys, stay away from the flame jets and utilize that gap in the robots to make your way up.

Also, I say "indestructible." Thanks to Dosgamert, I found out that you actually can destroy them, but it takes a fair amount.

Also, there's a bonus level in the ceiling below where you find RoboPal. It's a room with five extra lives. Once again, Dosgamert knows about things being in the most unintuitive of places.

You'll also start seeing clear platforms when you make it up. Go all the way to the right and open all the doors on the way there; you'll get the blue shard. From here, get the stuff around the blue shard go back to those platforms that phase in and out and insert the blue shard. Take out the robot, then go through the barrier you just deactivated, then go up and take out the robots. Leave the health just past the barrier until they take your health down to just one hit, then go back down to get it if necessary.

After the second continue beacon, wait for the platforms to start re-appearing and disappearing. Leap from one platform to the next, and you'll reach the third beacon. The cyan shard will be on the door to the left below where you need to insert it. Get the shard and make your way back to where you need to insert it. Insert the cyan shard to rescue the hostage.

Go back to the beginning and go to the right now that you have the chip from the hostage. Keep going right and take out the THREE giant robots that will try to take you out one at a time. After that, you'll need to watch the floor spikes and the flame jets so you don't get scorched or skewered. It won't be long until the final fight.

Wednesday, June 23, 2021

PrinceWatercress plays Ratchet and Clank - Part 36 of 38


We've reached endgame. It's time to get the last of the things we have yet to get in order to suit up and face Drek himself.

Robot Factory - Quartu

Remember the arena-like area where you fought everything as Giant Clank? Once you complete all the missions, you can come back here, transform into Giant Clank, go all the way to that area, and walk off the bridge into the pit. If you re-spawn near that area, you've done it right, and you'll have invincibility in front of the arena. Go into the arena, destroy all the enemies, walk a whole lap, walk off the bridge, re-spawn near the arena, and do this again. If you know what you're doing, you can get 40-50 thousand Bolts per hour. This is also a glitch and something you're not expected to do.

Also, there is a door you could not open earlier near the size increase pad that you could not open. If you got the Codebot from Drek's Fleet, however, you can. Inside is a Gold Bolt.

Kogor Refinery - Orxon

Now that we have enough Bolts, we can go back to the vending machine and spend 30,000 Bolts for the Ultra Nanotech. This gives us eight hit points.

Gemlik Base - Oltanis Orbit

It's time to get the rest of the Gold Weapons.

The Gold Bomb Glove has increased range and a deadlier explosion.

The Gold Pyrocitor has a green flame, more range and more power.

The Gold Blaser has ricocheting shots, more range, more power and a faster firing rate.

The Gold Suck Cannon has a higher carrying capacity and more power.

Blackwater City - Rilgar

Remember the guy with the R.Y.N.O.? We're buying it now. This thing shoots a lot of powerful homing rockets, and the ammo can only be refilled at Gadgetron Vendors, as the ammo boxes will not carry it.

Also, the cutscene where you get the R.Y.N.O. is hilarious.

Controls

As Ratchet: 

Control Pad/Left Analog Stick: move
Right analog stick: move camera

When hanging off platforms:
  • Control Pad/Left Analog Stick: move
  • Forward+X: vault up
  • Back+X: drop down

X: Jump and double jump
  • R1: stomp (must have Thruster-Pack)
Square: strike with wrench
Circle: pull out/shoot currently equipped gun/use gadget
Triangle:
  • quick select (hold and use in conjunction with Control Pad or left stick to switch guns; menu can be customized in Quick Select on the pause menu
  • double tap to switch between two most recently used Circle button weapons/gadgets

Select: Map
  • Left stick/D-Pad: move map
  • Right stick: Zoom in/out
  • X: view missions
  • Circle: play Infobot for planet
  • L1: previous map
  • R1: next map
  • Triangle: Exit
Start: Pause menu
  • Control Pad: select option
  • X: confirm option choice

L1: tap to quickly center camera; hold for first-person view (hold button and use left stick or D-Pad to look around; let go of L1 to move camera back behind Ratchet)
  • Square: wrench boomerang
  • Circle: fire gun
L3: see health and Bolt totals
R1/R2: crouch (hold down)
  • Square: wrench boomerang
  • Left+X or Right+X: side somersault
  • Down+X: backflip
  • X (while running): long jump (must have Heli-Pack/Thruster-Pack)
  • X: high jump (must have Heli-Pack/Thruster-Pack)
  • Double tap: hover (must have Thruster-Pack equipped)
    • L2: strafe left (while hovering)
    • R2: strafe right (while hovering)
    • X: exit hover mode (while hovering)

In water:
  • Square: dive and descend
  • X: surface and ascend
  • R1: turbojets (must have Hydro-Pack)

Trespasser:
D-Pad or Left Analog Stick:
  • Up and Down: switch rings
  • Left and Right: rotate rings
Triangle: leave Invinco-Lock screen

As Clank:

Control Pad/Left Analog Stick: move
Right analog stick: move camera

When hanging off platforms:
  • Control Pad/Left Analog Stick: move
  • Forward+X: vault up
  • Back+X: drop down

Square: punch
X: Jump (press and hold in the middle of a jump to glide with Heli-Pack)
Triangle: command menu (hold and use in conjunction with Control Pad or left analog stick to choose commands)

Monday, February 8, 2021

PrinceWatercress plays Sly 2: Band of Thieves - Part 36 of 49


In this entry, we pull off what is the heist of all heists to date by grabbing the second Clockwerk Lung and the Clockwerk Stomach.

Theft on the Rails


You'll need to play as Sly to start and play this job. You'll need to get on top of the caboose of the nearby train, then press Circle at the Sly icon.

Once you're on the train, equip the Music Box and use it to distract the guards and put them to sleep, so you can wipe them all out with Silent Obliteration. All the while, you'll still need to watch out for lasers and spotlights, so you'll have to move carefully to avoid them. As for the enemies on top of the train cars, you can knock them off the edge.

Once you reach the head of the train, the second Clockwerk Lung is yours.

It's time for Operation: Choo-Choo. To get on Iron Horse #3 and get the Clockwerk Stomach, you'll need the handcart. Murray will push it to the train so that Sly can get inside while Bentley takes care of everything on the outside. 

Operation: Choo-Choo


You'll need to play as Murray for the final job of this episode.

Get to the handcart. Once you do, everyone will jump aboard, and Sly will make his way inside. Once again, distract the guards and put them to sleep, and watch out for the lasers and spotlights. Jean Bison will be pacing around on a train car, but he will not notice you before you make it past him...at which point you'll see Neyla again.

This is where Bentley comes in. Once again, you'll be controlling the RC copter. Avoid the bullets and planes as you constantly shoot at Neyla's plane, and you'll take her out. 

From here, you're Sly again. Watch out for the eagles, and be ready to crawl under a train on a pipe and jump from one hook to another on the side. After two more guards, you'll get the Clockwerk Stomach...almost. You'll have to shoot down Neyla with the RC Copter again. This time, Neyla will have new bullet patterns, and she will also get underneath you and shoot missiles at you, but she is still beatable as long as you watch where all those red projectiles go. Once you shoot down Neyla a second time, you'll get the Stomach. 

The episode ends with three more Clockwerk parts in the Cooper Gang's possession as well as the Klaww Gang's spice distribution throughout North America shut down. Sly also helps Carmelita get away from Neyla's forces.

Controls

D-Pad/Left Analog Stick: move
Right Analog Stick: move camera
X: jump and double jump
Square: Horizontal Attack
  • horizontal attack (as Sly)
  • slam enemies launched into the air from behind (as Sly)
  • hook punches (as Murray)
  • Thunderflop (as Murray; in mid-air only)
  • crossbow swipe (as Bentley)
Triangle: Vertical Attack
  • vertical attack (as Sly; used to knock enemies into the air)
  • downward dive (as Sly; in mid-air only)
  • uppercut (as Murray)
  • drop bomb (as Bentley)
Circle: Action button (near blue/green/purple sparkles and character icons)
  • pickpocket (as Sly)
  • stomp (as Murray; use Square to throw object/enemy)
R1: hold to run

Select: Gadget Grid
  • Control Pad: highlight gadget
  • X button: confirm gadget
  • L1, L2, R2: assign gadget to button pressed

L1, L2, R2: use gadgets assigned to button pressed

Start: pause menu
  • Control Pad: select menu choice
  • X button: confirm choice
  • Start: un-pause game

L3 (press the left analog stick): locate beacons for mission objectives

R3 (press the right analog stick): Enter and exit Binocucom for first-person view
  • Left analog stick: look around
  • Right analog stick: zoom in and out (with up and down on right stick)
R1: 
    • take pictures with spy camera (as Sly; when applicable)
    • shoot sleep dart (as Bentley)

Hacking mini-game controls:
  • Left analog stick: move
  • Right analog stick: aim and fire gun

Wednesday, July 8, 2020

PrinceWatercress plays Terranigma - Part 36 of 50


It's time to expand Loire again...and also Litz!


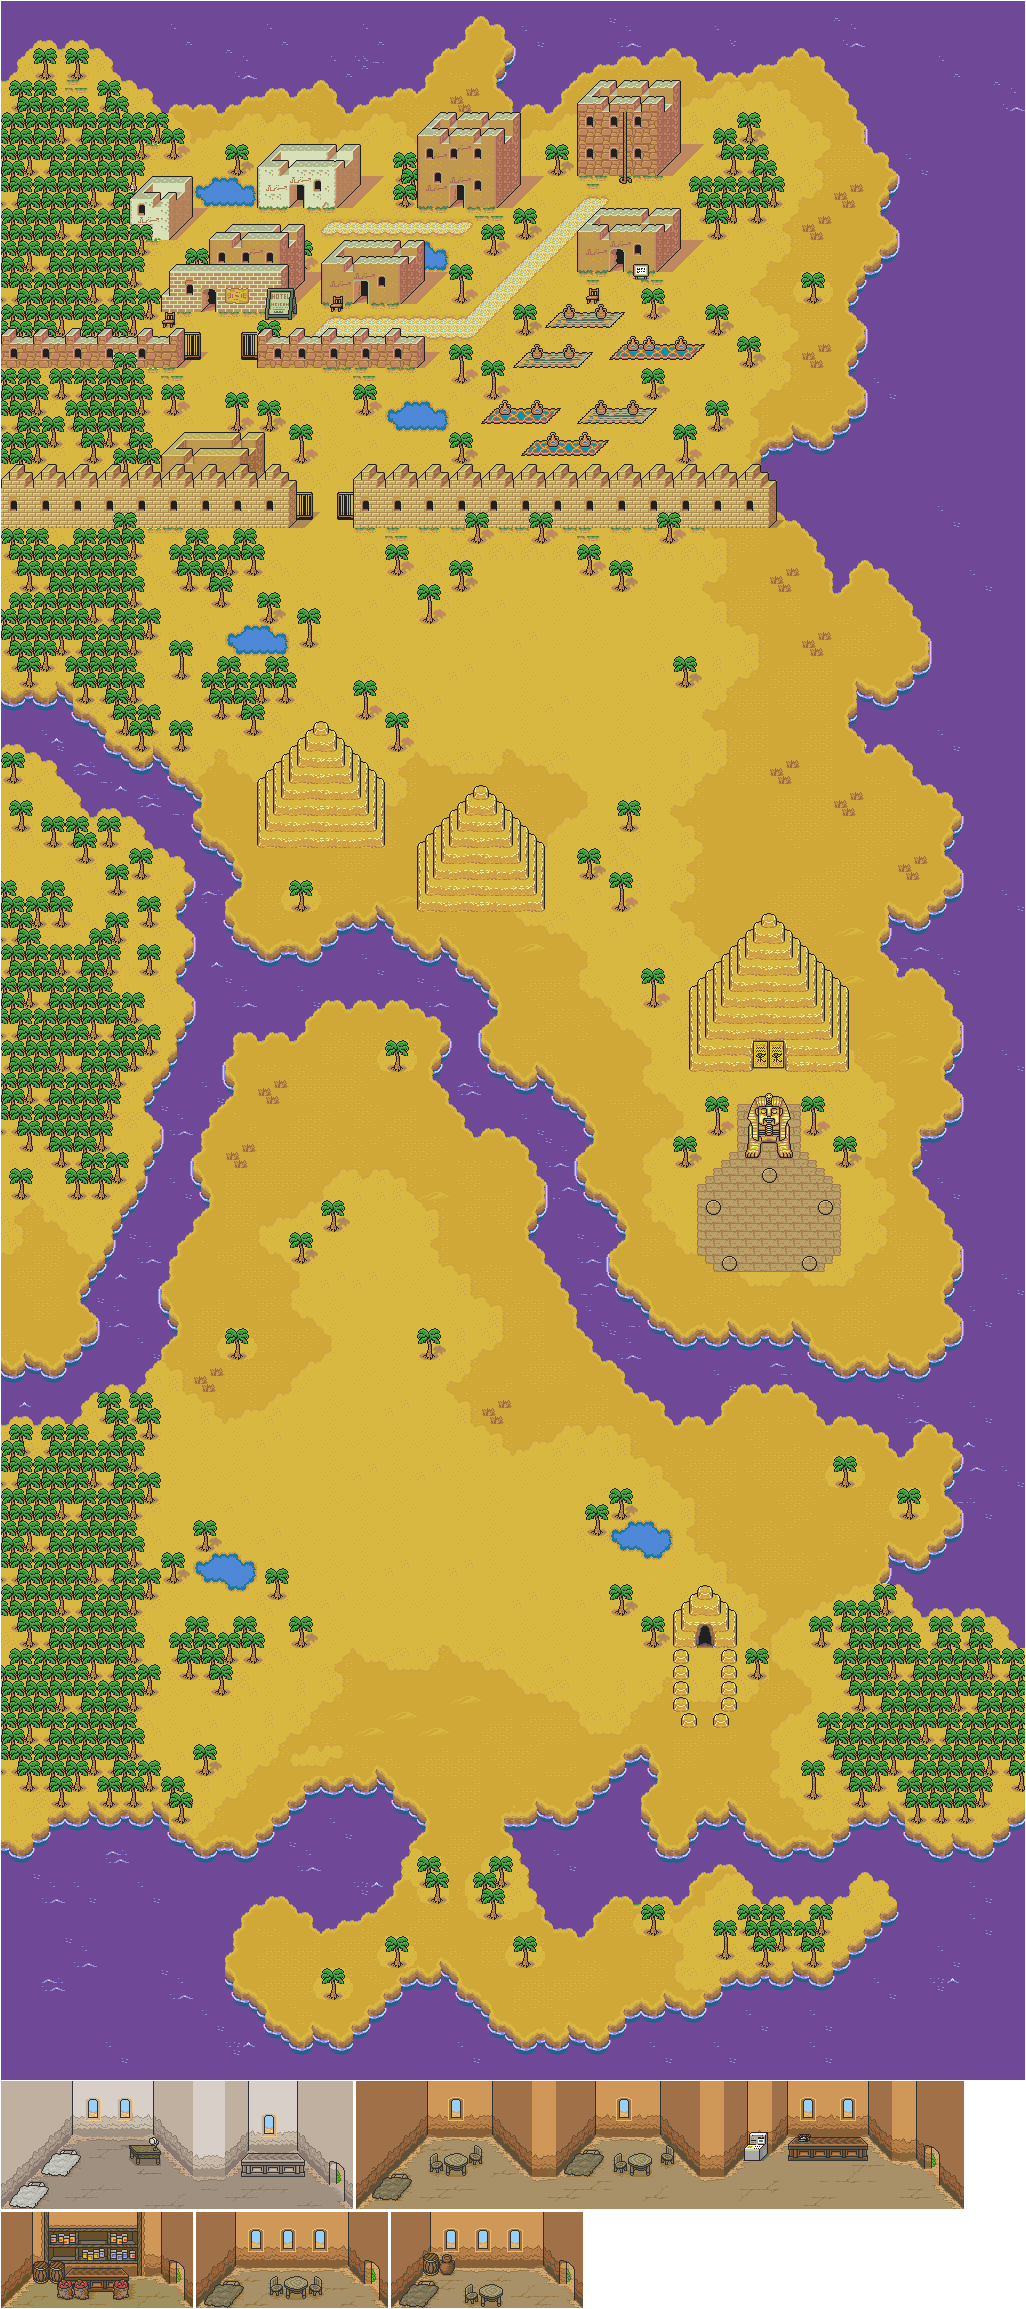
There's a secret area next to the mountains north of the oasis in Africa. Just stay near them and move around in the desert area to find it. You'll find a ton of gems in the two chests here.

Our next stop is to the north of Loire and Litz. It's the island of Britain, and in the north end is Rich's house. This is the house of a man named Rich, who is a self-centered super wealthy magnate and known for his generosity. Go in and talk to Rich, and he'll tell you that he wishes to decorate his house. Only thing is, he can't find anything worthwhile to do it with. He'll ask you to help solve his problem, and he'll tell you that money is no object when it comes to solving it. Give him the painting that you got from Matis in Loire. When he asks if he can have it, say yes. He'll thank you with 1,000 Gems, and if you talk to him, he'll ask you to inform Matis that he will amply support his artistic efforts.

North of Scandia is a lone island with a cave. It's a bit dark, and you'll have to scale some narrow ropes to get around in the cave located. At the other side is Magirock #70.

Head back to Loire.

Loire


Be sure to head to the tourism office and show your new photos while you're here to help the other cities expand, if you haven't already.

From there, head to Litz.

Litz


Head to the Crafts building and hand the guy there the Crystal. You'll have to check with him later.

The house west of the Crafts building is the guy needing something to pack the sardines in. Give him the Tin Sheet, and he'll have a way of packing sardines. Talk to the man again, leave, go back and talk to him again. He'll give you the Tinned Sardines. Talk to him again; this ensures that Litz will expand.

Freedom


Head to Stoma's house and give him the Tasty Meat you got from Suncoast. Let him sample it when he asks to have it. Stoma will like it and give it his vote of confidence, and reward you with 100 Gems.

From there, give him the Tinned Sardines. He'll give it a vote of confidence and give you 100 Gems for that as well.

Head back to Litz and talk to the sardines guy again after you give the Tinned Sardines to Stoma. From there, head to the port of Litz and get on the boat. If you don't talk to the sardines guy, the Litz expansion will not trigger as soon as you get on the boat.

Litz


This place is a little different from before the expansion...which is the only one that the town has.

The hospital is near the original entrance, and when you enter, you'll see that the inside looks a lot nicer. If you talk to the doctor, he'll tell you he got more patients when the town expanded.

You'll learn that the church has stained glass and that it is one of Litz's specialties along with tinned sardines if you talk to the townspeople.

At the upper-right corner of the town is the inn. If you enter the room to the right, you can eat some sardines.

The upper-left most house next to the church houses a sailor who spoke with Columbus, and learned about the village of Storkolm in Norfest (one can assume).

Believe it or not, you can walk to the west past all the northern-most buildings to get Magirock #71. You may have to move a little bit to the south as you do so to get in there.

The church is near where you got the Magirock, and can be distinguished from the rest of the town by its stained glass windows. You'll learn that the church has gotten bigger thanks to the town expansion. If you go into the room to the left, you'll also learn that Litz has invented compulsory education.

Further to the west of the church is another house. This is the Crafts building. Pick up the gray pots and toss them out of the way to get Magirock #72, then go to the room in the lower left. You'll find out that the guy making all these pots now has apprentices thanks to the town expansion.

You'll also see a coffee booth. For ten Gems, you can try some coffee.

The Cannery is in the house to the west of the hospital. Thanks to you and the town expansion, business is booming and the guy selling the sardines is now enlisting his neighbors' help to keep up with all the orders. Keinz will also be standing near the door here.

There's also an exit out of the town to the south.

From here, head to Loire and talk to the four people in the town who gave you items and asked you to take them around the world - Matis, Marilly, Pierre and the bartender at the winery. Once you do, leave the town, go to another region, come back, and Loire will be expanded for a second and final time.

Tuesday, May 14, 2019

HCBailly plays Final Fantasy IV (Super Famicom) - Part 36 of 70


As we get access to parts of the Dwarves' Castle, we stumble upon...the developers' room?


If you cast Dejon/Warp in the throne room, you'll get the Crystal of Darkness - which you're supposed to get in the Sealed Cave - and break the game. You're not meant to do this!

Now that you have permission to enter certain areas, you can finally access the weapon and armor shops in the castle. Get the Flame Spear and Flame Mail for Kain, equip the Fairy Claw back on Yang, get a Priest Hat for Rosa to increase her Will by five and a Rune Ring to increase her Wisdom and Will by three each and protect her against Silence. Equip the Apparition Rod and Gold Band on Rydia to increase her Wisdom by five and ten, respectively. Also, get her the Priest Rod and Rune Ring for the same reasons as Rosa.

Between the weapon and armor shops is a pub. There is a hidden passage to the east that takes you to the developers' room, which was taken out of the original Western version, and see messages by the developers of the game. You can also fight H. Nakada, who is a Lamia, in a joke battle for whatever reason.

In the Upper Room, you can interact with the bookcase and find a Playboy magazine. (This is the reason that the developers' room was axed from the original Western release.) If you use it, the screen will turn pink and Cecil will say that he will go blind. Also, that room is a mess.

To the right of the weapon and armor shops, you can get more treasure. You can find a Dwarf Axe as well as a Bacchus' Wine (hidden in a pot), a Power Wrist (which increases your strength by five) for Yang, an Ether, an Elixir, and a Silver Hourglass.

South of where you found the Dwarf Axe is the entrance to the outside area of the castle, which looks much like an underground version of Baron Castle. You'll eventually be able to enter the other tower, where you can find Bacchus' Wine (hidden in a pot), a Hi-Potion, a Black Belt Robe (that increases Strength and Vitality by five) for Yang, an Elixir and an Ether. You'll also find Namingway.

Sunday, June 3, 2018

HCBailly plays Terranigma - Part 36 of 75


After exploring Neotokio, we head back to Loire, where progress has changed the town for the better.

Loire and Neotokio maps by Amir Azadur. 

Neotokio


The building to the left of the Quintet building is the News building. You can get a tour of the city on the second floor.

If you go over there and talk to the woman on the far left, you'll hear about Dr. Beruga, the genius scientist of Mosque. Looks like we have the name of one of the geniuses we're supposed to resurrect. Of course, since it's a hot scoop, she won't tell you. The man on the upper-right will mention that Beruga has a ton of followers who believe he can give them eternal life. The man on the lower-right tells you that he is supposedly missing.

Well, some tour that was.

The building to the left of the News building is the police station. If you go upstairs, you'll see a man trying to interrogate a penguin. There's nothing of interest here.

If you're wondering what the neon sign to the right of the town entrance means, it's an advertisement for Dragon Quest VI, which explains the Roman numeral and the pictures of the Slimes.

There's nothing else to do here, so head back to Loire.

Loire


When you come back to town after exploring another region, you'll find out that Loire has changed...big time.

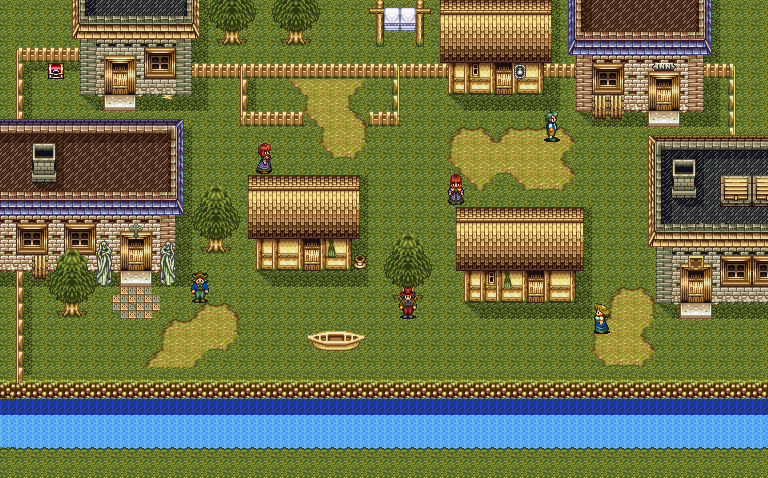
The first screen will be known as 1st Avenue. By talking around, you'll learn that the castle is now open to everyone after the death of the king, and that they're holding a speed-eating contest there. You won't be able to do it until later, though.

The house to the far left has two doors. The door to the left is Matis' house. Talk to him, and he will ask you a favor: he wants to know if his art will be accepted by people for outside of Loire. Say yes when he asks if you want to help, and he will hand you one of his paintings to show to someone.

The door to the right is Pierre's house. He is 18 years old and loves tinkering with machines. Say yes when he asks if you want to see his invention, and he'll tell you about it: a camera. When he tries it, however, you get electrocuted. Go back in and see the invention again. This time you'll be set on fire. Leave, come back and see the invention a third time. This time, nothing happens to Ark and his image is finally on paper. He then gives you a Camera for your efforts. If you want, you can equip the Camera and use it to take a picture of the town anywhere. Ark will take scenery photos. The scenery photos will come into play for another side quest later on. Be sure to do this with all the towns you go to.

The building next to Matis' and Pierre's homes is the General Store and Magishop.

The flower girl is standing next to the entrance to the inn on the right side of 1st Avenue. You can still buy flowers from her if you need to. To the right of the inn is the fortune teller.

If you go into the inn, you'll find out it's been renovated and that there are four rooms instead of two. If you enter the room on the left where the woman behind the counter is, the man will make a reference to the flower girl by asking you "Why a little girl and a penguin?" when you talk to him.

The other two rooms are down the stairs to the north. One of them is occupied by a sailor who, if you talk to him, tells you about a rich guy on the island to the north.

Keinz is near the entrance to the second screen, which is called 2nd Avenue. The guy with blue hair near the entrance will tell you that the rich guy on the island to the north has a keen interest in the arts. Remember that for later.

The house on the lower right corner of 2nd Avenue is Jean's house. In the first room is Louis, who is now helping Jean out and is no longer the town drunk. Behind the door is Jean, who asks what you think of the new Loire before saying that there is still a lot of progress to go. The stairs lead to the bedroom, where you can't really do anything.

Thursday, March 1, 2018

skorch82 plays Brave Fencer Musashi - Part 36 of 70


Now that we have the Water Scroll, there is some backtracking that we can now do!

There is yet another person you can rescue.

Now that you have the Water Scroll, you can cross the Water and find some stairs that lead to the area to the left of the path to Hell's Valley. There, you'll find a chest with 200 Drans.

Head back to the three poles leading to the actual mountain. Use the Water Scroll to head to the left and find another Bincho Field. Here, you'll free Doctor Tung. He'll heal you if you meet him at the castle.

Further to the left is another spot where you can find a Minku.

Head back to the area of the forest close to Steamwood and follow the stream of water with the Water Scroll. You'll find another Minku.