Showing posts with label part 50. Show all posts

Friday, March 6, 2026

PrinceWatercress plays Super Mario Odyssey - Part 50 of 92


We're almost there. It's time to head to the Moon Kingdom and get everything before we face Bowser.


There's nothing left to do in Bowser's Kingdom, so it's now time to head to the Moon Kingdom.

Bowser's Moon Wedding


Now that you're in the Moon Kingdom, remember that you are on the moon, and as a result, gravity will be reduced. Your jumps will go higher as a result, much like in the Space Zone of Super Mario Land 2: Six Golden Coins.

The floating octopus enemies are much like Mollusque-Lanceur, the boss from the Seaside Kingdom; jump so you're above them, ground pound them on the head. That'll get rid of them.

The rotating rock columns are also back from the Seaside Kingdom. You'll want to jump over them to avoid them.

The Sphinx is right here. He will ask you if you should be answering questions right now. The correct answer is "No." You get nothing for this...yet.

You'll eventually enter a cave that leads to an underground cavern area inside the moon full of molten lava and metal platforms. From here, you'll be possessing Dry Paratroopas to fly over the lava as well as the occasional Sherm to shoot something down. You'll also need to avoid the lava plumes that shoot out of the lava.

The ground pound switch activates a moving platform. Get on the platform and take control of a Hammer Brother to get rid of a walls, then grab a Tropical Wiggler to get past the second platform section. You'll then meet a huge Bullet Bill. Possess it and fly forwards to dry land. From there, ground pound the switch here and use the Moe-Eye to get past the invisible platforms before time runs out and the platforms disappear.

After another spark pylon, you'll meet a familiar foe: the Chargin' Chuck! Hit him twice with your cap to knock his helmet off and eventually possess him, then hold Y to charge up his tackle attack and release Y to unleash it. While you're tackling, you can not only destroy the constant barrage of boulders rolling towards you, but you can break blocks to reveal hidden stuff.

You'll then face Madame Broode again. Thankfully, the fight against her is the same as the one in the Cascade Kingdom, so the strategies from there still apply...to a point. This time, you have to throw your hat at the golden Chain-Chomp to remove the top hats from its head before you can possess it and send it back at Madam Broode. Once again, three hits will seal the deal, and once you beat here, you'll be able to leave the underground caverns and head to the Ever-After Hill checkpoint. You'll want to trigger this checkpoint so that you can skip this cavern (unless you've missed something).

There is a ground pound symbol on a panel on the top of the Odyssey; if you ground pound it, you'll enter the Odyssey from the roof.

Power Moons


1. Shining Above the Moon - There is a crater near the Odyssey. There are some hidden blocks directly above the shadow of the Power Moon above. Jump up from the shadow for the first one, then get on the hidden block to reveal another. There are three in all, and you'll need them to reach this Power Moon.

2. Along the Cliff Face - There is a platform off to the side near the Odyssey area; you may have to pan the camera downwards to find it. This platform also leads to an 8-Bit area; run to the left and avoid the Black Fuzzies to get to the Power Moon here.

4. Rolling Rock on the Moon - One of the large craters in the Moon Kingdom contains a rock that flashes when moved into. Keep moving into it and kicking it to reveal this Power Moon.

5. Caught Hopping on the Moon! - There is a rabbit on the southeast side of the kingdom; run into it to catch it and grab this Power Moon. The rabbit will take advantage of the low gravity...so use your hat!

6. Cliffside Treasure Chest - Near the Ringing-Bells Plateau checkpoint, there is a Rocket Flower you can grab to leap to a far-off platform. This platform has a chest that contains a Power Moon.

7. Moon Kingdom Timer Challenge 1 - There is a platform off to the side past the slope past the Odyssey. Throw you hat at the scarecrow here, then long jump your way to the Power Moon and jump to it.

8. Taking Notes: On the Moon's Surface - Near the Ringing-Bells Plateau checkpoint, there is a large cliff with an octopus and a treble clef. Grab the treble clef and use your long jump to grab all the notes and nab this Power Moon.

9. Under the Bowser Statue - There is a green capture ball near this Bowser statue at the beginning of the underground cavern. Throw your hat at this ball to move the Bowser statue and reveal a Power Moon.

10. In a Hole in the Magma - At the spark pylon shortly after the start of the underground cavern area, take control of a Dry Paratroopa in order to enter a nearby hole in the lava. You'll find a key inside. This will unlock a Power Moon back at that pylon that you can collect.

Regional Coins


Wednesday, March 19, 2025

PrinceWatercress plays Wario Land II - Part 50 of 51


We finally get 100% of everything in the game, but we have one thing left to do...


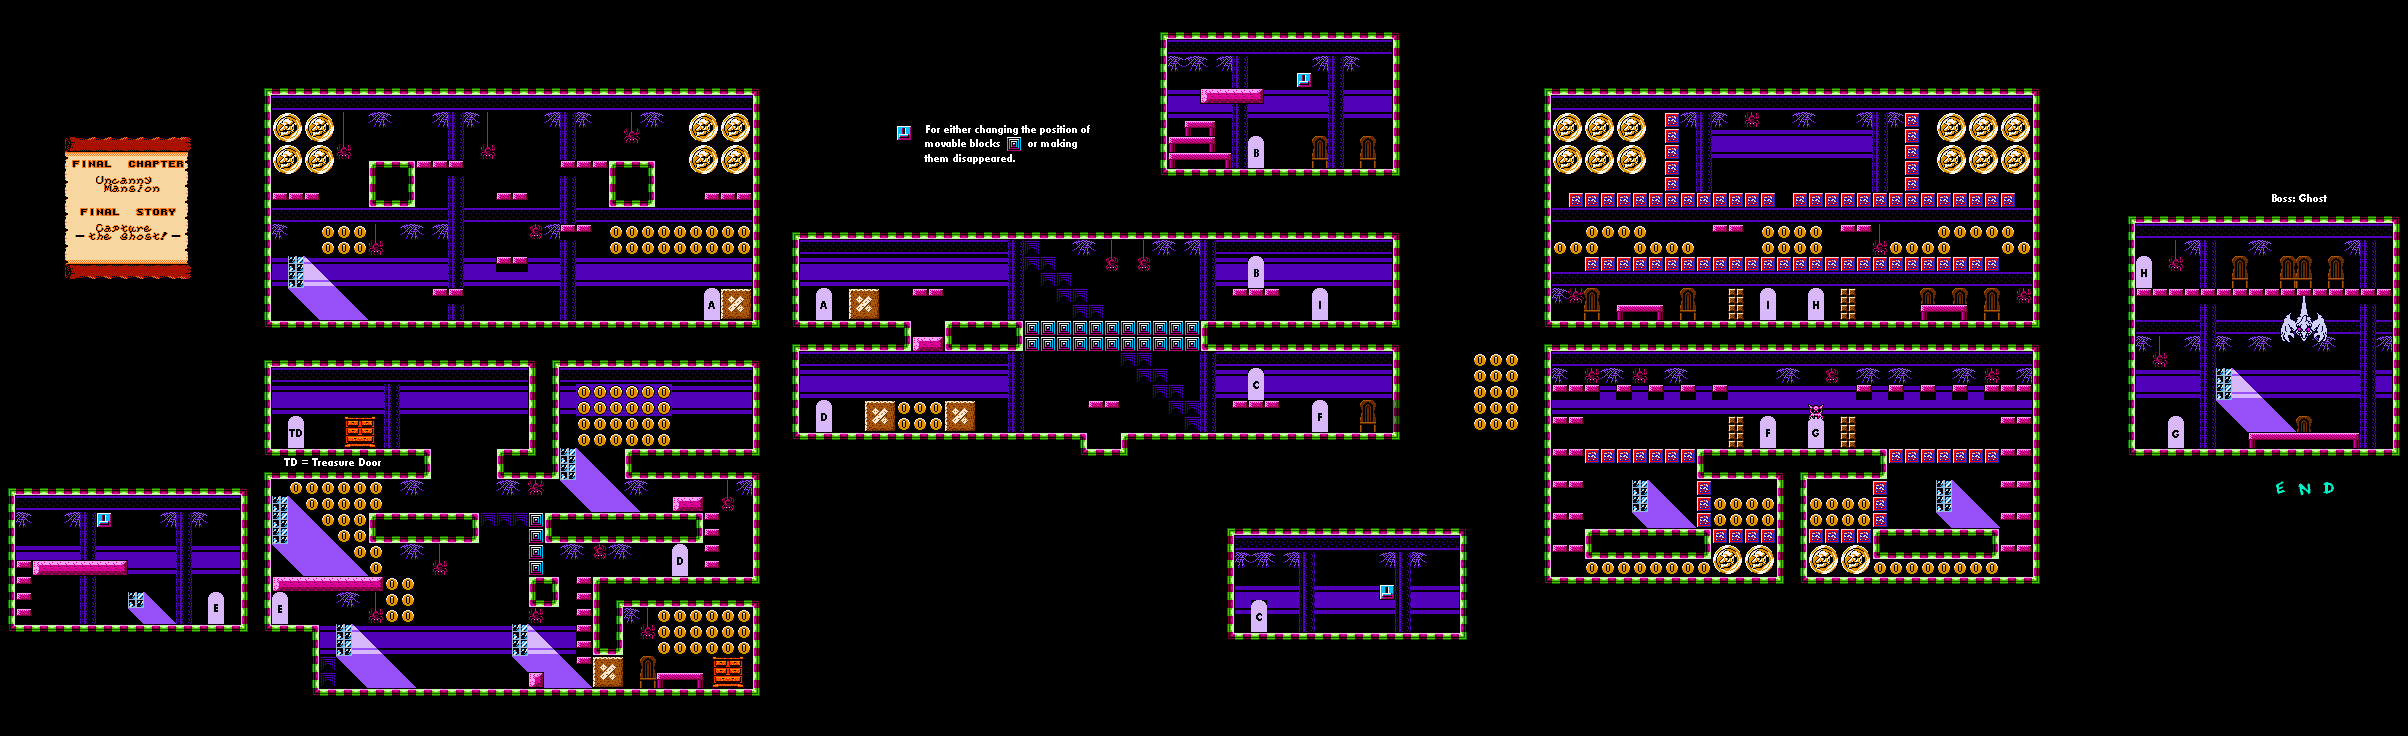
Final Chapter: Uncanny Mansion

Final Story: Capture the ghost!


Be ready to avoid ghosts and grab coins as you start the level. From here, you'll have a series of doors. The one on the far right leads to coins, but you'd better be ready to strategically throw enemies into the blocks to break them all and get the coins.

From here, leave the room and enter the room to the left. Move the furnace by tackling it, then hit the switch. This will open a staircase downstairs leading to the boss. Get all the coins, then enter the door to the right, hit the switch, take care of the enemies and go all the way to the left.

Go all the way to the bottom and get the coins, but do not tackle the dresser. Get all the coins up top, then push the furnace in the middle of the room to the left to get to another door with a switch. Take out the zombie enemy and hit the switch. Push the furnace to the left again and watch out for the ghost so you can more coins. The treasure room will be in the upper-left corner, behind the treasure. Play this to win a skull. You now have all the treasures in the game.

Go back to the switch you just hit and hit it again. Get back to the boss door and go in.

To beat the ghost that has captured Captain Syrup, stay on the ground and do not get on the table. Stay between the center of the side, and stay ducked down so you don't get grabbed and carted off to the top of the room, forcing you to start the whole boss battle over again. The ghost will come out from the top of the screen and try to grab you, and he'll either go straight down or down and to the side. Wait for him to do the latter, which is more likely to happen if you're crawling around, before hitting him with a jumping tackle. After three tackles, the boss goes down and you're done with this story.

When you get all the picture panels, you'll get a hint as to where the final treasure is. We have 100% of everything, but there's one more level to go...

For this ending, Wario will take out Captain Syrup and the ghost and get his treasure back, then fall through a trap door. It turns out that this was a nightmare all along. The credits show Captain Syrup and her goons flying to Wario's Castle, where the game's events are about to truly begin.

Friday, October 18, 2024

PrinceWatercress plays Chrono Trigger (Super NES) - Part 50 of 70


In this entry, we finally head to the Black Omen. It'll take us a while to get through it.


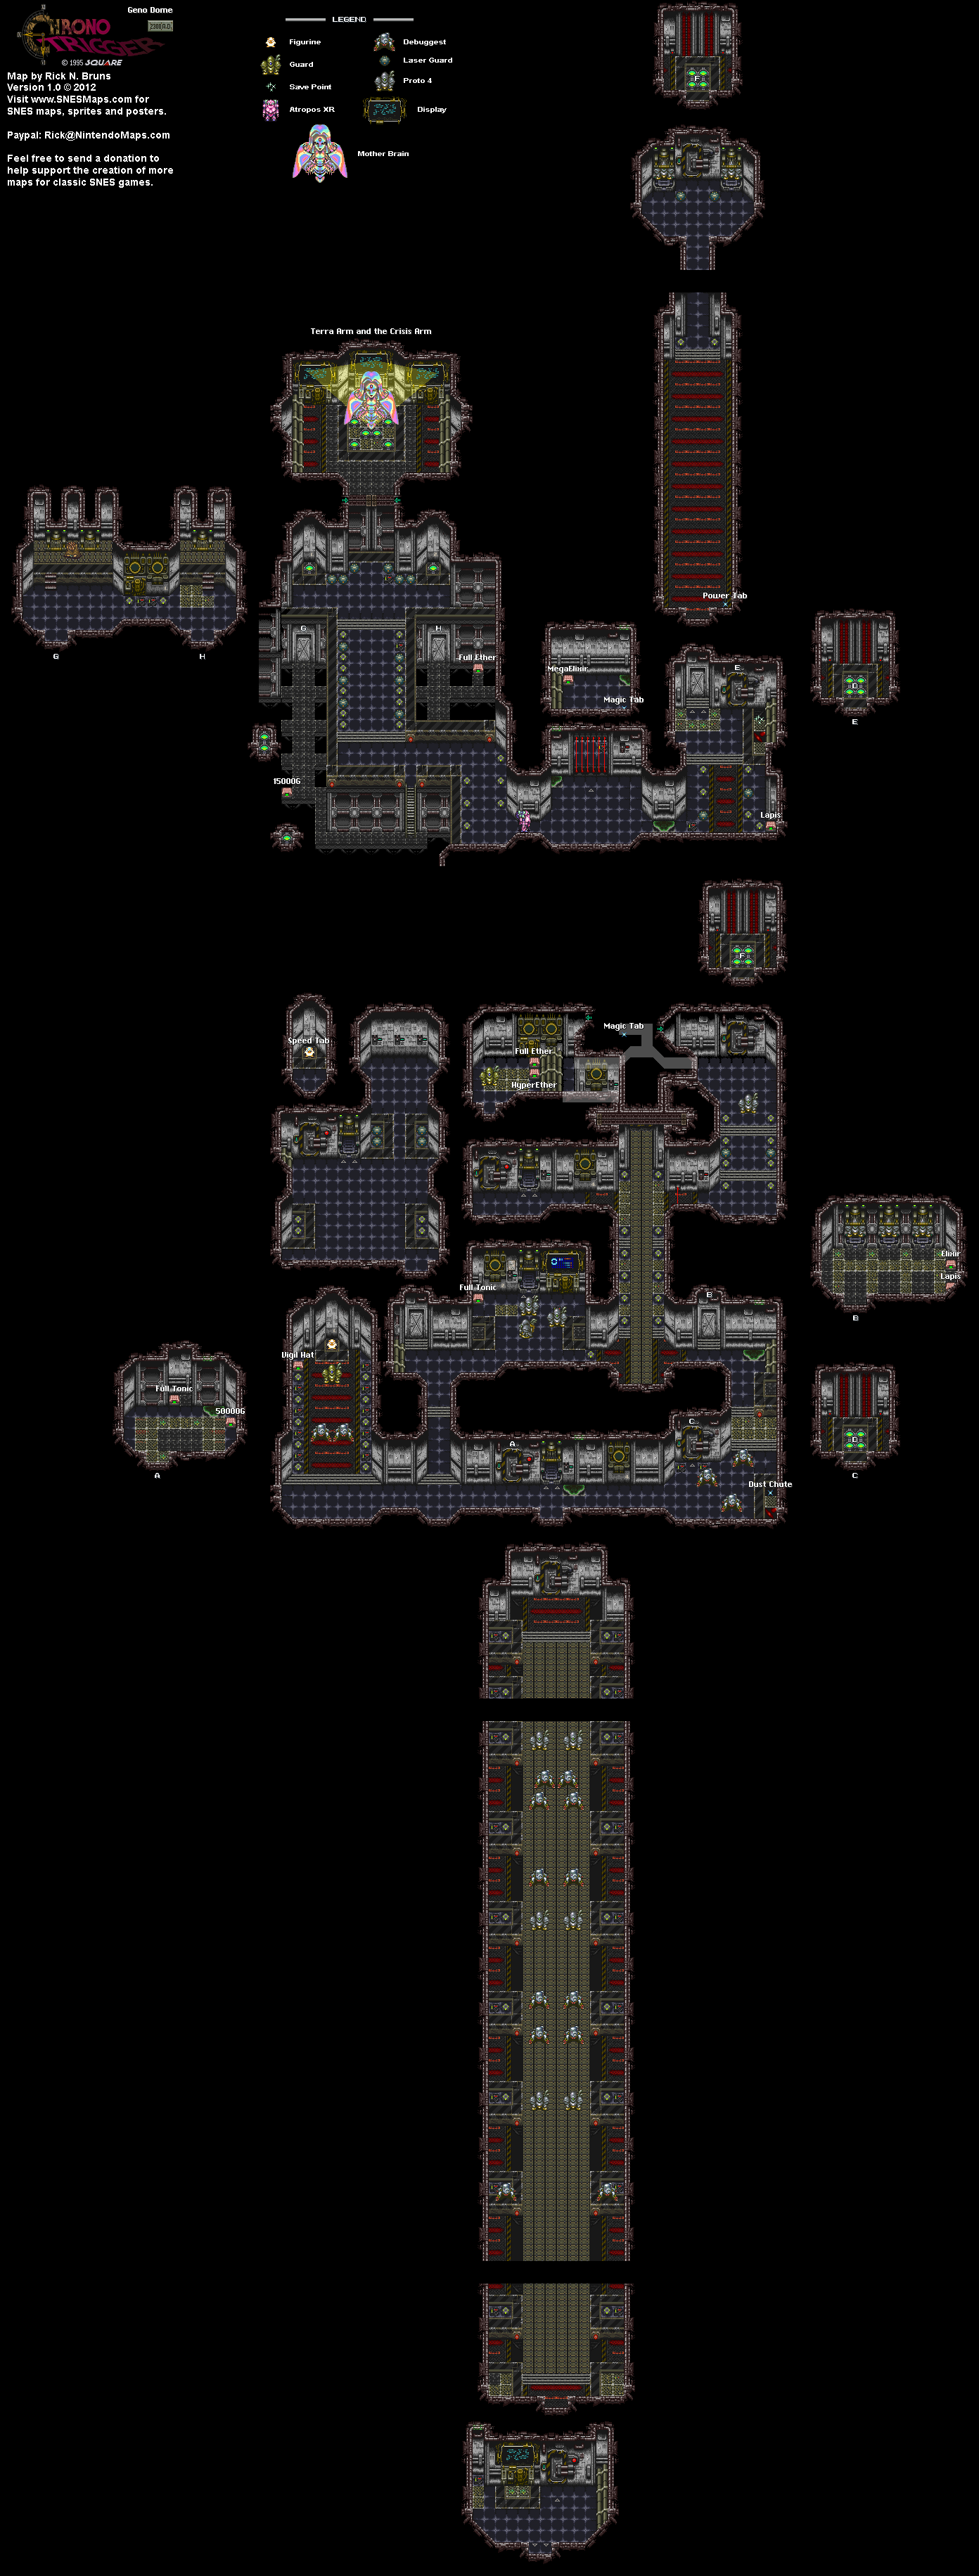
I start the video by showing the Speed Tab and Magic Tab from the Geno Dome that I never found in-game.


With that over with, it's time to head to the Black Omen. As soon as you head to any era besides 65,000,000 B.C. or 1999 A.D. on the Epoch, you'll end up right near it.

If you try to enter it in 2300 A.D., the door will be locked due to Lavos having ravaged the world. You can still fight the Laser Guards one time only at the entrance if you haven't already, but that is about it.

From here, you can enter the Black Omen in 12,000 B.C., 600 A.D. or 1000 A.D. For best results, enter it in 1000 A.D. so the Black Omen can exist in the other eras, then 600 A.D., then 12,000 B.C.

After you enter the Black Omen, Zeal will tell you that the Day of Lavos will soon be coming, then you will face the Mega Mutant. The Mega Mutant can inflict Sleep, Blind, Chaos and Poison on your party in addition to absorbing HP from your party to heal itself, but you should have stuff like the Nova Armor and the Prism Helms at this point. Charming the upper half will give you an Elixir, while the lower half will net you a Vigil Hat. The upper hlaf has slightly more HP than the lower half, but you can easily tear it apart with strong magic attacks as well as physical attacks to the upper half. Once you beat the Mega Mutant, you won't have to face it again.

The Incognito enemies are much like the Blue Shield enemies from the Guardia Castle prison in 1000 A.D. and are vulnerable when they peer out of their shields, but they can also cast Lock on you if given the chance.

The Martellos are turret-type enemies, and Charming them can give you HyperEthers. Firing Lasers is all they can do.

The Goons have plenty of powerful attacks, including The Drop, which cuts the targeted party member's HP by half just like the Iron Orb attack. Charming them will net you Nova Armors, which you'll need for your party to nullify status ailments.

The Synchrites have laser and missiles attacks, and they can also cast Time Stop and MP Buster if given the chance. Charming them can net you HyperEthers, but there is also a chance you can get a Gold Earring.

The Panels are one-time only battles, and the Panels can only fire missiles. If you can charm them, you can get Speed Tabs for your party, which makes bringing Ayla in to fight them absolutely essential. 

The Boss Orbs will cast Lock All on your entire party, but that's it. The Side Kicks that accompany it do nothing. At this rate, it's a race to see if you can defeat the Boss Orb (which is easy) and the Side Kicks (which is not) to get extra money from the Side Kicks.

The Metal Mute can absorb HP like the regular Mutants from early on in the game, but Charming it can net you a HyperEther. The Flyclops is prehaps the weakest of the enemies on the Black Omen, only being able to absorb MP, and will give you Gold Studs if you charm them.

Eventually, you'll have to take an elevator and fight some enemies, and you'll face some new ones on the way down. The Cybots are blue versions of the Gato enemy and can inflict Chaos on the party in addition to attacking with Iron Orb. Charming it gives you the Power Meal, which is almost completely useless.

The Ruminators are much like the Gnashers, but they are grey and have two heads. You'll usually see them in groups of four, and they will bite and attack each other before one remains to focus entirely on you. Charming them will net you MegaElixirs, which refill the HP and MP of the entire party, and is definitely recommended.

The Magic Seal increases Magic and Magic Defense by five when equipped.

You'll eventually come across two Nus. One of them will run a shop where you can buy healing items, including HyperEthers, which can be rather expensive. The other will allow you to instantly exit the Black Omen halfway through if you decide to "Wake Up" from the dream that is the Black Omen rather than stay, and if you do that, the Underling and Boss Frogs show up to provide a seat that takes you back to the front door.

Friday, July 12, 2024

PrinceWatercress plays Ratchet and Clank: Going Commando - Part 50 of 54


We finally get the Quark figurine to that guy in Todano, then get the one Skill Point in Dobbo that we have yet to achieve.

First | Previous | Next | End

5:45 - Giving the Quark figurine to the Armory Employee in Todano will net you the Armor Magnetizer, which increases the range you can pick up bolts from. Compared to the first game, we got this one relatively late.

8:39 - The hunt begins. By destroying all of the enemies on Dobbo with only the weapons from the first game - the Tesla Glove, Bomb Glove, Walloper, Visibomb, Decoy Glove and the wrench - you can get a Skill Point and more additions to Slim Cognito's shop. It's better to do this later in the game when you have a fully powered-up wrench, good armor and a ton of health and bolts.

Skill Points:


Old School: Defeat all the enemies on Dobbo with only the weapons from the first game: the Tesla Glove, Bomb Glove, Walloper, Visibomb, Decoy Glove and the wrench.

Controls:


As Ratchet:

Control Pad/Left Analog Stick: move
Right analog stick: move camera

X:
  • Jump and double jump (hold button after double jump to use Heli-Pack or Thruster Pack)
  • Wall jump (near certain walls)
Square: strike with wrench
Circle: pull out/shoot currently equipped gun
Triangle: 
  • quick select (hold and use in conjunction with Control Pad or left stick to switch guns; menu can be customized in Quick Select on the pause menu
  • double tap to switch between two most recently equipped weapons/items
  • interrupt on-screen messages

Select: open map
Start: Pause menu
  • Control Pad: select option
  • X: confirm option choice

L1:
  • center camera behind Ratchet (tap button to center)
  • first-person view (hold button and use left stick or D-Pad to look around; let go of L1 to move camera back behind Ratchet)
  • Square: wrench boomerang
  • Circle: fire gun
  • R1/R2: zoom in and out (Pulse Rifle only)
L2/R2: strafe (hold while moving)
L3: see health and Bolt totals
R1/R2: crouch (hold down)
  • Square: wrench boomerang
  • X: high jump
  • long jump (hold crouch button and jump while running to perform)
R3: open map

In water:
  • Square: dive and descend
  • X: surface and ascend
  • R1: accelerate with Hydro-Pack

As Clank:

Control Pad/Left Analog Stick: move
Right analog stick: move camera

When hanging off platforms:
  • Control Pad/Left Analog Stick: move
  • Forward+X: vault up
  • Back+X: drop down

Square: punch
X: Jump (press and hold in the middle of a jump to glide with Heli-Pack)
Triangle: command menu (hold and use in conjunction with Control Pad or left analog stick to choose commands)

Tuesday, June 4, 2024

DeceasedCrab plays Earthbound - Part 50 of 53


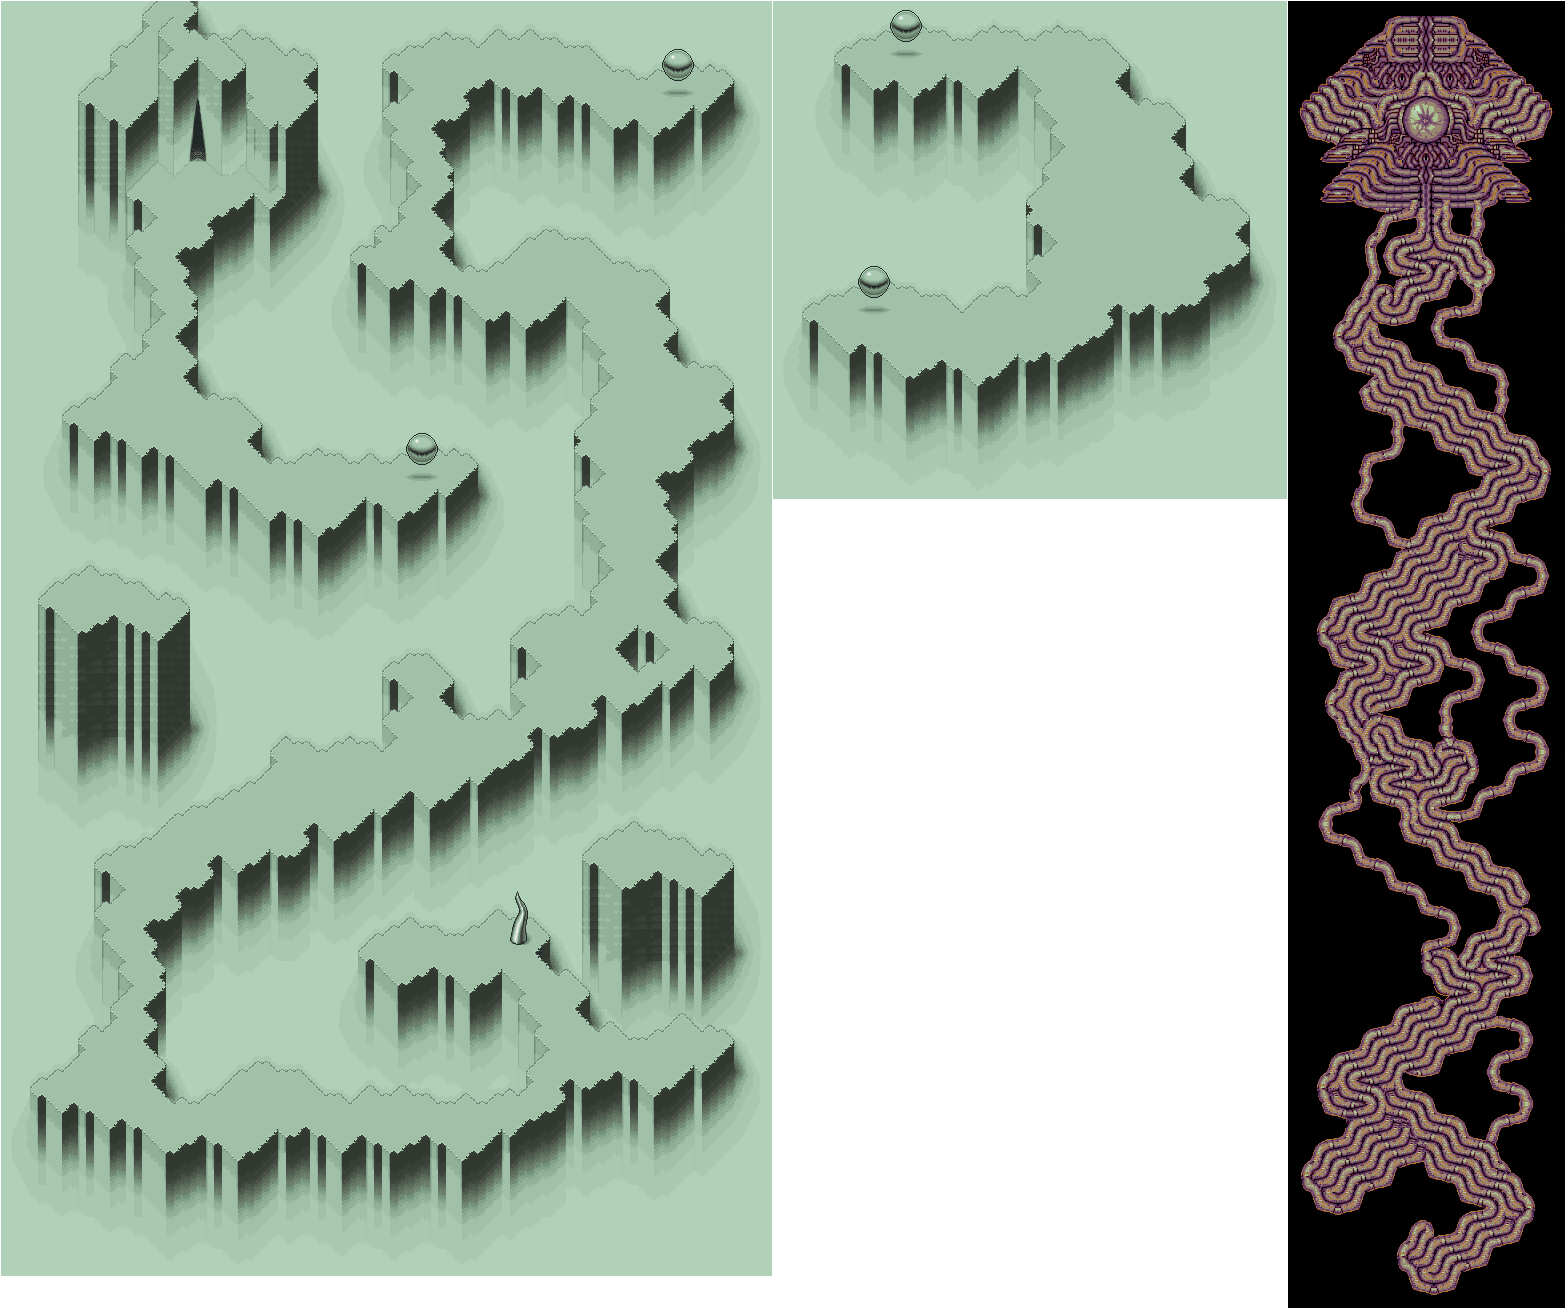
At last: the fight against Giygas.


The Bionic Kraken is the hardest enemy to find. It can breathe fire (which is basically Fire Gamma), emit a pale green light that debuffs everyone, use a Crashing Boom Bang attack (which is basically Thunder Beta, which does a bit of damage to two party members), and hit the entire party with a tornado. There is a 1 in 128 chance that it will drop a Gutsy Bat. While it is slightly less powerful than the Legendary Bat, it brings Ness' Guts to the roof.

Once you enter the gap in the wall, you'll encounter Giygas, who produces a head similar to Ness', at the end. You'll also see Pokey, who is wants to make sure that Giygas wins, as Giygas is now the embodiment of evil, which Giygas cannot handle on his own. 

You'll then face Giygas and Heavily Armed Pokey. Amazingly, both of them are susceptible to Brainshock Omega. Giygas can cast Rockin Alpha and Beta, and also has a shield that reflects all attacks and cannot be removed. Use Shield Alpha and Omega on the party; in case Giygas attacks, it will bounce off and hit him without triggering the shield (the other shields will not work). As for Heavily Armed Pokey, he can disharge a stinky gas that can lower the party's offense and defense, and he can do a lot of damage to one party by either charging forward or tearing into the target.

You'll want to take out Pokey, as this is how you advance the battle. You'll want to hit him with powerful spells as well as Multi Bottle Rockets. Pokey wll turn off the Devil's Machine and show the true form of Giygas, who cannot think rationally anymore and 

For the next form of Giygas, you'll want to pelt him with powerful magical attacks, especially Starstorm Omega. Brainshock, amazingly, still works. Rockin as well as Multi-Bottle Rockets will not work, amazingly. Be sure to cast Shield Omega on everyone, as well.

Pokey will eventually return, and he will tell Ness to use telepathy to call for help in vain while he laughs at the entire party. At this point, you'll need to keep Praying with Paula, and you'll need to Pray nine times in all. As you keep praying, multiple people from the game, including the player whom you've had two chance to name, will lend their power to the party, and Giygas will keep taking damage.

During this time, you'll also want to keep the party alive, as Giygas has three incomprehensible attacks. One is more or less Thunder Beta, another is basically Flash Omega, and another is a set of powerful physical attacks that can also solidify a party member. Once again, using Shield Omega really helps here.

When the background imagery for the fight becomes even more demented, the prayers soon get absorbed by the darkness before it reaches the game player themselves. When the player starts praying, Giygas starts taking staggering amounts of damage before it is ultimately wiped out. Pokey will show up and run away to another era, and soon everything becomes static. 

The war against Giygas is over.

Friday, November 10, 2023

Jerry Martin plays Strong Bad's Cool Game For Attractive People - Part 50 of 53


In this entry: fun with scorpions!


At the mainframe, go to Halfathlon. When you arrive, Strong Bad will get Coach Z's attention only for Coach Z to be killed by scorpions from Pitfall! From here, you're in control, and Halfathlon will be unlocked on the map.

If you click on the checkpoint, the game will keep track of what you are carrying.

At the lava, click on the vine to swing to the other side. From here, head to the right, then click on the penguins to get past the ice. Click on the trophy to get it. From here, you can click on the penguins again, then click on the vine again to get back.

If you use Gel-Arshie on the lava, you'll get the Subtlefuge Cheat Commando action figure.

If you use the trophy on Strong Mad, you'll add him to your party.

Use the Medkit on Coach Z to refill his HP. Coach Z will then get rid of his scorpion food and throw it onto the race track.

Use Strong Mad on the checkpoint to throw it to the other side, then click on the vine, head right, and click on the penguin to get to the scorpion food. Click on the scorpion food, then click on the checkpoint to save it to your inventory in case the scorpions kill you. Use Strong Mad on the checkpoint, then use the penguins to get back to the scorpions. The scorpions will kill Strong Bad, but he will return to the checkpoint and to the other side with the scorpion food. Strong Bad will automatically leave the game after this and head back to the Mainframe.

At the Mainframe, head back to Peasant's Quest. Head back to the inn area and talk to Strong Sad to find out he is blocking is your path as the evil wizard Sluushfuund after suddenly ending up in Peasant's Quest. From here, click on the Strong Sad picture (the first option) to make fun of Strong Sad and his pink wizard hat as he tells you he is here to guard Trogdor's lair and give out quests, then click on the cube (the third option). Strong Sad/Sluushfuund will task you with going into the forbidden forest and retrieving the Amulet of Ancient Summoning from the ravenous Munchox. Give Sluushfund/Strong Sad the Scorpion Food, and Strong Sad will declare the quest item recovered before The (Scorpion) King of Town attacks him.

From here, go back to the lake and talk to Rather Dashing. When asked about the short pants, Rather Dashing will mention that they are incredibly comfortable compared to long pants. From here, click on Trogdor (the first option) so that Strong Bad can ask where he can find a weapon to slay him. Rather Dashing will mention that Trogdor is indestructible and that not even the mighty Trog-Sword can smite him. He then mentions that it is rumored that Trogdor has a weak spot, but he has not heard of any.

GOOD GRAPHICKETEERS CARDS:
- Carpal Tunnel Connie: Examine Strong Sad's bookcase.
- Trick Card 1: Use Gel-Arshie on Strong Bad's mailbox.
- Trick Card 2: Take a picture of the ghost to the left of the photo booth.
- Anti-Social Angus: Underneath the box in Peasantry Inn.

PARTY MEMBERS:
- The Algebros: Talk to The Algebros on the brick wall.
- Snake Boxer: Talk to the Snake Boxer in the Crates area and talk to him.
- Performing Bear: Click on the Space Circus Catastrophe game in the Mainframe.
- Gel-Arshie: Get the killscreen in Gel-Arshie's Fruitboarder.
- Innkeeper: Talk to the Innkeeper about repairing Limozeen's Spaceship.
- Mista Fixit: Use ??? on the bucket in the Crates area.
- Limozeen: Use the Innkeeper on Limozeen's Spaceship.
NEW! Strong Mad: Grab the trophy and use it on Strong Mad.

OUTFITS:
- EGA Hat: Smash the crate near Bubs with Snake Boxer.
- Stinkoman Boots: Take a picture of the ghost in the Strong House bathroom.
- Stinkoman Gloves: Use Gel-Arshie on Bubs' Concession Stand.
- Trogdor Shirt: Line up Trogdor with Cottage on the code wheel and use Gel-Arshie on it. (You need to do this before going to Peasant's Quest.)
- Elf Boots: Underneath the box in Peasantry Forest.
- Mista Fixit: Use Mista Fixit on the Cool Car.
- Stinkoman Hair: Use Mista Fixit on the leftmost broken ladder in Stinkoman 20X6.

GAME BOXES:
- Halfathon Box: After obtaining the Light Musket, return and destroy the crate again.
- Lady Crate Ape Box: Underneath then box in Strong Bad's front yard.
- Fruitboarder Box: Use Gel-Arshie on the Brick Wall.
- Spirits of '76: Take a picture of the ghost to the left of the scorpion cave in Peasantry.

GHOSTS TO FREE:
- John Hancock: Give the feather quill to him in Strong Mad's Room.
- Samuel Adams: Give the tea bag to him near the stairs leading to the basement.
- Paul Revere: Give the lantern to him in the TV Room.
- Benjamin Franklin: Give the key to him in the computer room.
- ???: In the picture in the right side of the TV room.
- ???: In the picture in the bathroom near the tub.
- ???: In the picture near the left side of the photo booth.
- ???: In the picture in Peasantry Forest, left of the cave.

CHEAT COMMANDOS FIGURINES:
- Swampslash: Take a picture of the ghost in the TV Room.
- Dryghost: Use the Quest Item on the Munchox before using the Scorpion Food.
NEW! Subtlefuge: Use Gel-Arshie on the lava pool in Halfathlon.

PEASANTS BURNED:
- Use the Innkeeper on Limozeen's Spaceship.

Tuesday, November 9, 2021

HCBailly plays Final Fantasy II AGAIN - Part 50 of 65


Sometimes I wonder if the three Gigas bosses in Secret of Mana is a reference of sorts to this game. Probably not, but it still makes you wonder.


The HermeShoe casts Haste 8 on one party member and has a 10% Break chance.

Some of the doors lead to dead ends with very high encounter rates, so be careful where you go.

The Thunder Gigas (ThnGigas) can be beaten in the same way as the Ice Gigas. It should also be mentioned that the Thunder Gigas is weak to Poison, so Scourge can do wonders here. Heh, Secret of Mana wasn't the only Square game to do a Fire, Ice and Thunder Gigas all in the same game...

The Gottos is a Rank 6 enemy. There isn't really anything extraordinary about it.

The Hourglass casts Stop on your enemies during battle.

The Cross cures the Curse status ailment.

The Betrayal Fang (BtrayFang) casts Charm 16.

The chest with the Black Robe (BlckRobe) contains a White Dragon (W.Dragon). As hard as it is, if you can cast Toad or Mini on it successfully, it's over. Otherwise, Curse it and use Osmose to drain its MP so it can't cast Snowstorm 16 on the entire party for massive damage. The White Dragon is also strong against Ice. The BlckRobe increases the wearer's Intellect by 10 when equipped, has a very low weight and magic penalty, and protects against Fire, Ice, Thunder and Poison-elemental attacks.

Wednesday, July 15, 2020

PrinceWatercress plays Terranigma - Part 50 of 50


Enjoy the ending.

Once Ark goes to bed, Darkside Elle tells you she tried to kill you as a baby in Storkolm because the Elder's word is absolute, but she understood from watching Ark grow up that we are all individuals. She knows Crysta is disappearing, but if she and Ark are bound by fate, they will meet again after being reincarnated. She then says goodbye to Ark, if only for a little while.

Ark then goes into a deep sleep and dreams of becoming a bird, flying around and seeing the surface world's future. From there, we see the dream of Ark flying around as a bird, traveling alongside both a train and a plane while looking at the future of the world before landing in a forest...all while the credits roll.

After the credits, somebody knocks on a door somewhere in Storkolm. Lightside Elle answers the door, then goes outside. The game never reveals who was at the door, and the game ends.

Tuesday, May 21, 2019

HCBailly plays Final Fantasy IV (Super Famicom) - Part 50 of 70


Who would have though that the Phantom Beasts would have their own town?!? Believe it or not, there's a little bit you can do around here.


At this point, you'll want Edge's level to be in the low 40s and everyone else's in the high 40s. Rydia should have Bolt 3 at this point.

At the shops, you'll want to buy two Aegis Shields - one for Kain and one for Cecil. Be sure to give Kain the Defender, as it is stronger than the Blizzard Spear and increases Vitality by 15. For Rosa, get the Energy Staff, which increases her Will by 10, to replace the bow and arrows. Buy two Light Robes, one for Rosa and one for Rydia, as they increase Wisdom and Will by 5. Save the Yoichi Bow and the Fairy Rod for later. Do the same for the claws.

At the library between the shops, you'll meet Namingway, but you'll also learn about some of the summons in the game. You'll also learn that the Monster Dictionary shows the true nature of monsters that Libra does not work on, there used to be only one moon, and that there is a Phantom Beast God who surpasses even the King who can only be harmed by casting his power back onto himself. Another book will mention that a great ship came from the moon to the Earth, but not sleeps deep in the belly of a dragon.

The warp tile in the library leads to the King and Queen's room. By talking to Queen Ashura, you'll be able to test your strength to see if you are worthy of her health.

To beat Ashura, have Rosa cast Reflect on Ashura to keep Ashura from casting healing spells on herself. Have Rydia summon Titan, and have Edge throw the Blood Spear. Both actions will cause massive damage. Keep having Kain Jump every round as well. She may be able to deal some good physical damage, but yours will be even better and she won't be able to heal herself as long as you keep the battle quick.

By beating Ashura, Rydia will learn the Ashura summon. Heal your party, equip the Thunder Claw on Edge, then talk to the King. You'll be able to battle him.

To beat King Leviathan, keep having Kain jump and use a Bacchus' Wine on Edge. Cast Rydia's Bolt 3, and have Rosa cure everyone with Cure 4. Big Tsunami will do a lot of damage, but as long as everyone receives Cure 4, you should be fine. By beating Leviathan, Rydia will be able to summon him in battle.

At this point, you can leave the room, and while you're at it, you can cast Teleport to get all the way out of the cave.

Sunday, June 10, 2018

HCBailly plays Terranigma - Part 50 of 75


Now that we have a boat, let's go exploring!

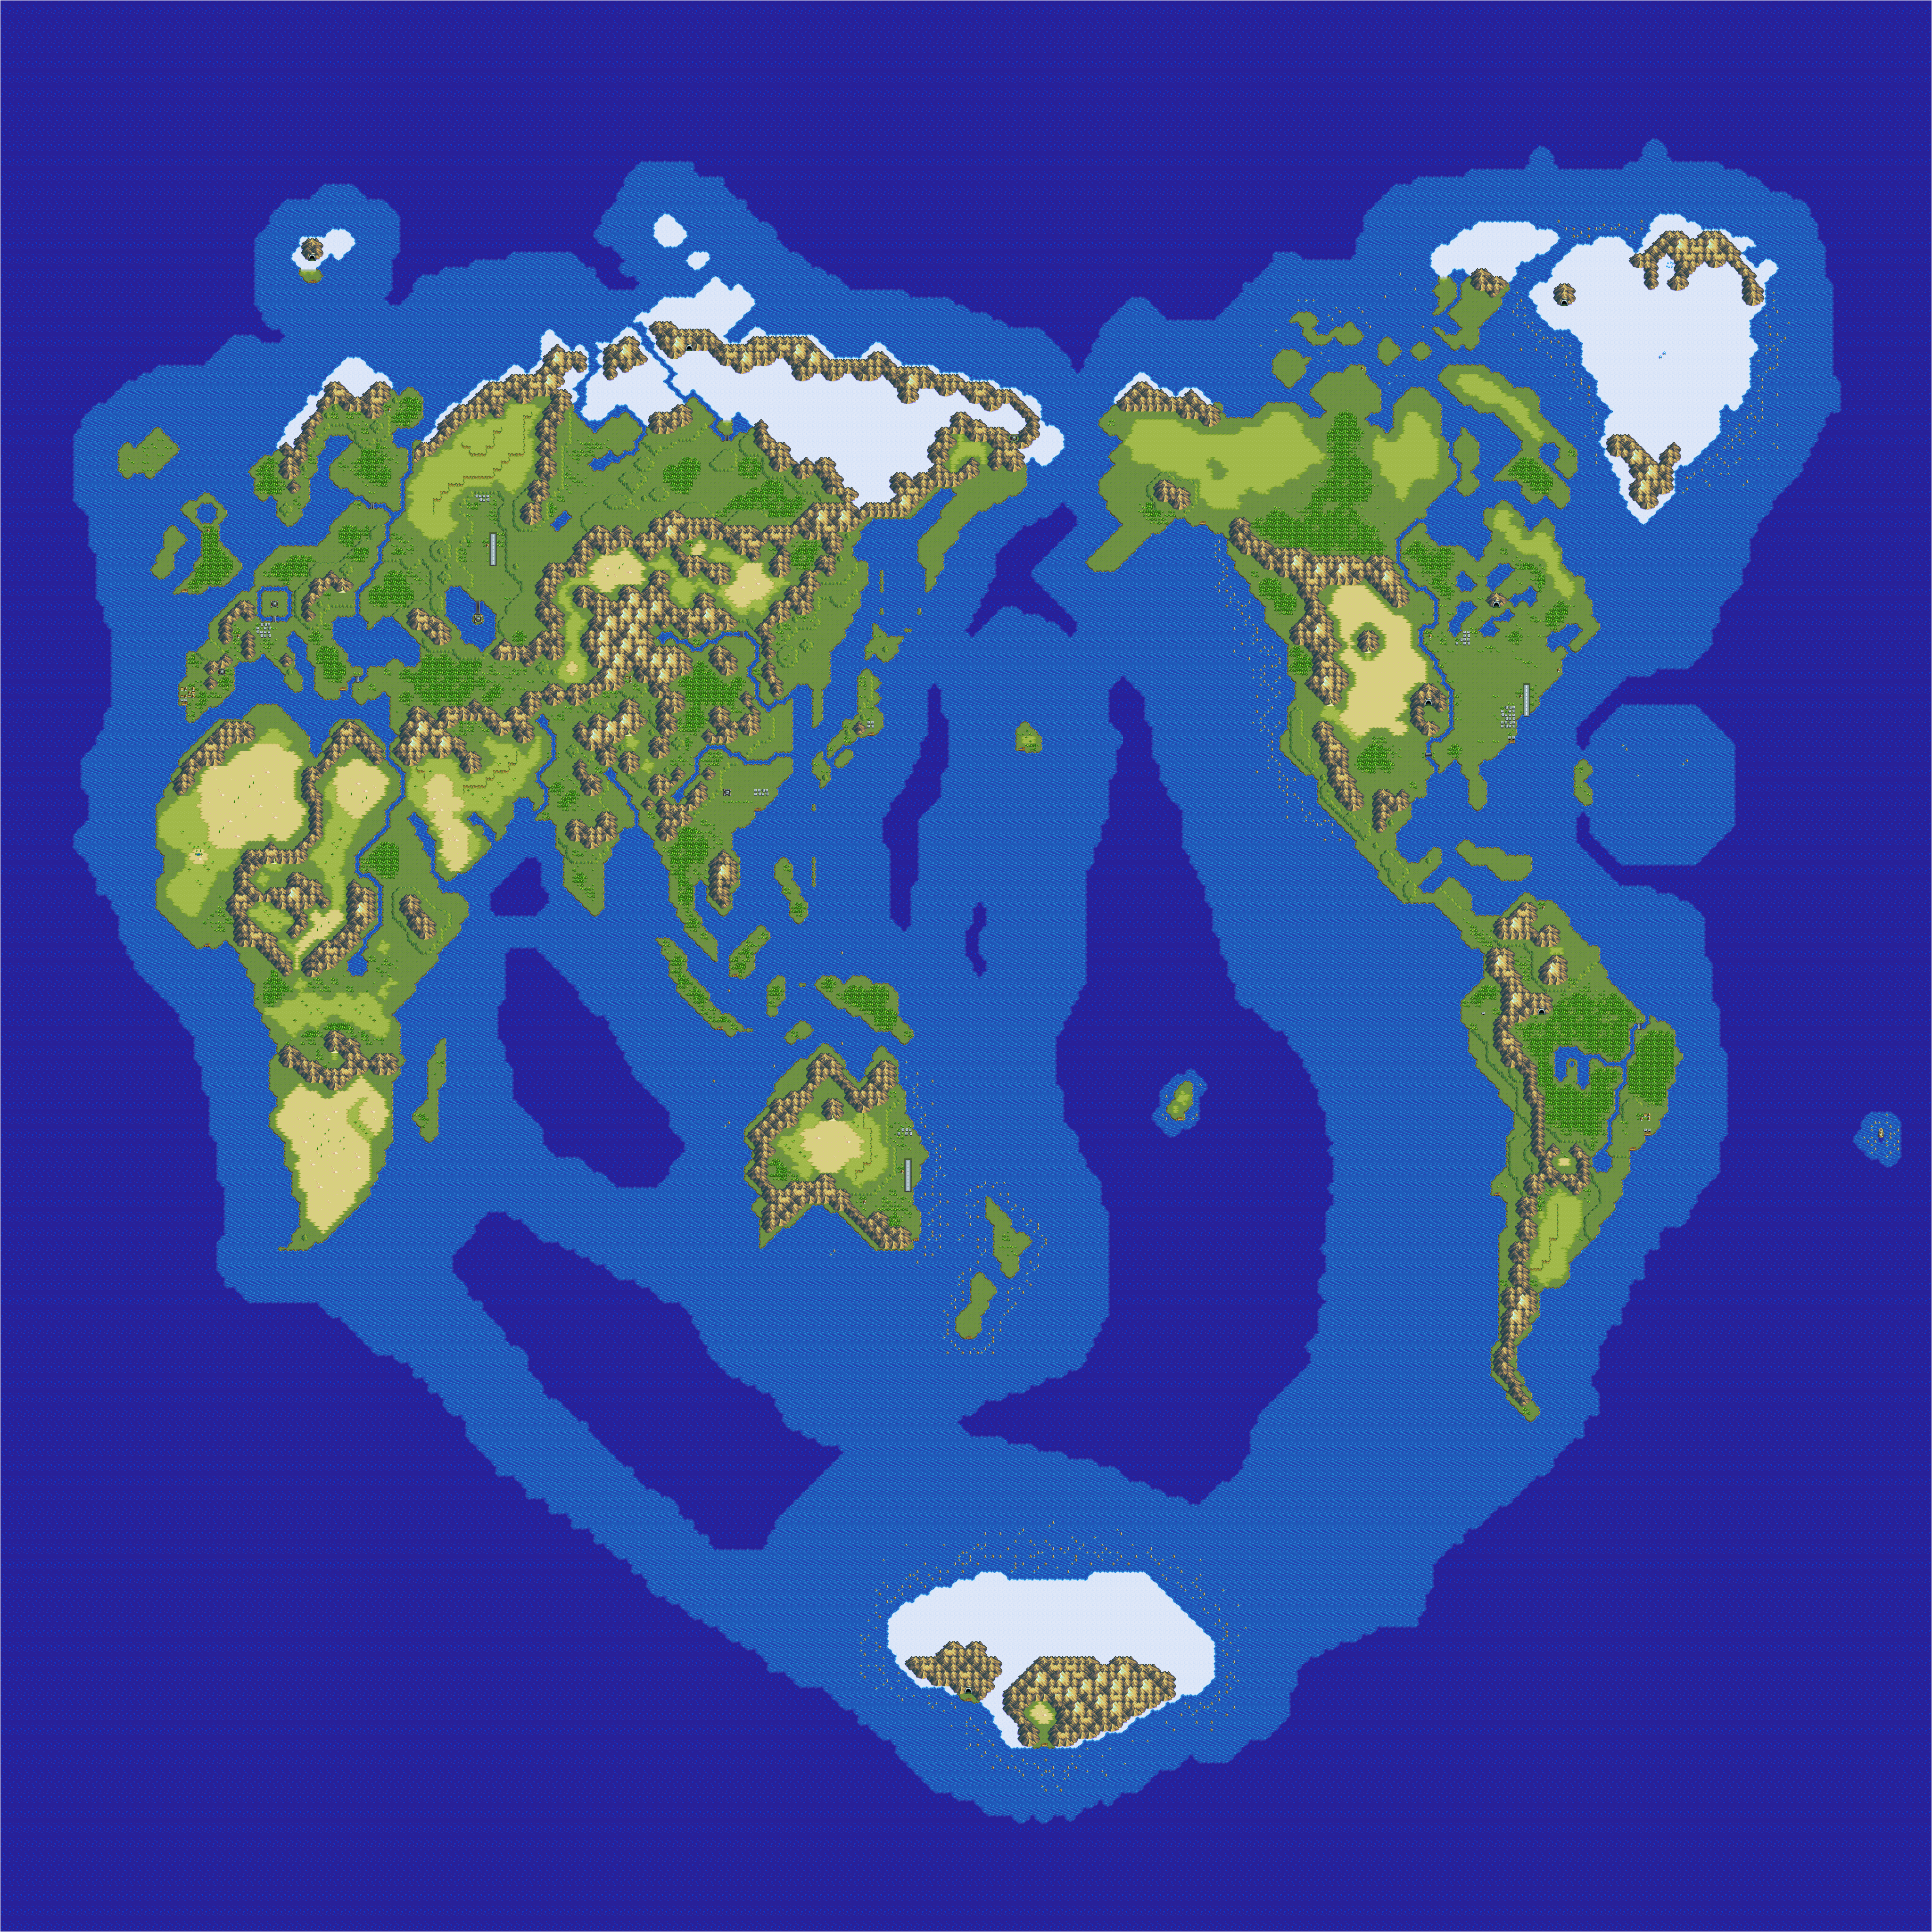
World map by Tropicon. Liotto map by Amir Azadur.


The mermaid near the top stairs will tell you that the treasure of the mermaids is located in the sixth continent, which is covered in ice. She will tell you to take is as thanks for helping them.

The mermaids at the stairs will give you the WaterPin, which makes you invincible for a short while when used. You'll also get six Magirocks as a result of getting this pin, which should bring your total Magirocks to 68 should you have not missed one at this point.

Liotto


After getting the WaterPin, you'll be able to leave. You'll instantly return to the port of Liotto once you make it back to the entrance, and the captain will give you the boat. Simply press Down when you are at a pier and you'll be able to sail into the ocean. To land, just find a pier and press Up.

Now that you have the boat, it's time to head to the "sixth continent": Antarctica, which is called S. Pole in the game. There doesn't seem to be any place that you can get to at first, unless you head to the southeast coast. There will be a cave. Go in, and follow the path to find two things: the Sea Mail and a Life Potion. The Sea Mail is one of the special armors, and it will really bring your defense up, so equip it when you get it.

Get out of the cave and head to Alaska. It's that northwest portion of the Americas. At the northwestern tip, there will be a few trees in an otherwise green plain. Walk into them and you'll get one of the stopovers, which takes you to Australia.

Head to the forest to the east. There will be a hidden area in a small spot that does not have any trees. This leads to a hidden desert area, where you can find a STR Potion.

To the north of that area is a lone tent. The man there will tell you he studies migratory birds, and that these birds have different flight paths. You'll basically learn where the Stopovers take you to and from, but since you have the ship, you won't be using those anymore.

In the middle of the sea between Asia and North America, there will be two islands that we unlocked in the beginning and are basically optional...and assuming you DID resurrect them, of course. The first one is Polynese, where the space with the two palm trees is a blank spot where a man and his dog is just relaxing, as well as a girl near two tanning beds when you can rest for free. If you take the nap, you'll get a comedic scene where Ark gets sunburned.

Southeast of Polynese is Mu, the other optional island. Here, you can find some rewards that are well worth getting that the game never tells you about. The first is a DEF Potion, but the second is the Enbu Pike, one of the four special weapons. It will not only increase your attack even if you have the Thunder Spear this early in the game, but it also converts defense into strength. It decreases your defense a little bit but increases your strength to compensate for it.

Believe it or not, you can enter New Zealand. Just find that hole in the rock barrier in the northwest corner. There is a spot on the south island where you can find Magirock #69 in the upper-right corner of the area.

Next stop: Australia...

Thursday, March 8, 2018

skorch82 plays Brave Fencer Musashi - Part 50 of 70


It appears the clones have an ability of their own. Let's use that!

The Musashi clone enemies give you Clone if you assimilate them. These lets you create a punching bag with Musashi's image on it, and the enemies will go after it instead of you. It'll be a big mistake for them, as it will explode and cause massive damage. You'll need it for this very maze, so go get it.

The lower-left corner of the maze has an ice wall that you can double jump onto. Use this to double jump from wall to wall and get to the Bincho Field in the upper-right, which contains Musician Al Forte. Besides the usual benefit of an additional 5 BP, you'll add more music to the background music when you head back to the castle.

Moving on the top of these walls will take you to the GreenEye door, which is in the lower half of the maze. Head to the lower-right door to take on another Yeti. For this one, "May the clone have victory." Kill this thing with the Clone ability. It'll go down in one shot, and you'll get the treasure chest containing the GreenEye. Now you can head back to the GreenEye door and open it.

From there, follow the path. You'll be at the right side of the lower floor of the entrance. Head up the frozen stairs and you'll see a huge door. Unfreeze it with the Fire Scroll, then insert the three Eyes.

The treasure chest behind the frozen stairway in the next room contains T-Hanky (Topo's Hanky). Double ew.

There is a Memory Box at the top of the stairway.

Thursday, February 23, 2017

Chilean Retrogamer plays Wario Land 2 - Part 50 of 57


By George, how many giant spear men do they have?

This time around, Captain Syrup and her goons flee into a haunted mansion. Oh, those guys. Always fleeing to somewhere that they can easily trap themselves and make it easier for Wario to find them. Of course, this is a haunted mansion, so I can kinda give them the benefit of the doubt here. 

Final Chapter: Uncanny Mansion

Story 1: Defeat the giant spear man


0:43 - To the right is a door with a picture of a chicken above it. Enter that room first.

0:46 - Well, that's no good. Let's turn back.

0:59 - WHAT IS A CHICKEN DOING HERE?!? Well, at least we know what the chicken picture stands for. Go through the door, come back out, and chickens show up. Oh, and there's a crawlspace to the right of that door you can tackle into and enter for some coins. Notice the enemy block. We'll need to open access to this crawlspace to get here, anyway.

Anyway, stun the chicken and use it to break the enemy blocks to the left. From there, enter the door to the left. This is the electric beetle room.

1:29 - Tackle the zombies to get rid of them temporarily, so you can get all the coins. Also, don't worry about the spiders. They're part of the background and won't hurt you.

1:46 - When you leave this room, electric beetles will be in the main hall. Go up and to the left, then enter the door.

1:52 - Avoid the ghosts. Otherwise, you'll turn into Zombie Mario and you'll have to walk into sunlight in order to turn back to normal. If you go up and to the left, then tackle the dresser, a ghost will come out.

To the right of all that is a door. If you tackle the block to the right and tackle jump to the other side of the upper portion of this part of the room, you'll get some coins.

2:23 - You're in the upper portion of the main hallway. Since a picture of a spear goon is above the door, there will be Spear Goons here. Enter the door to the right of this one.

2:32 - Not much to this room. Enter the door on the other side.

2:38 - Avoid the ghosts and hit the switch at the top of this room.

2:57 - The lights are now on when you go back out. You can now take the platforms to the upper portion of this room and get some more coins.

3:31 - The monkeys that throw the spiked balls will appear when you come back to the main hallway of doors. Go back to the chicken room.

3:42 - Since the lights are on, you can go to the right and use the platforms to enter the upper portion of the chicken room. 

4:04 - More ghosts. More coins. Return to the main hallway, and enter the electric beetle room.

4:40 - There are now platforms directly above you now that the lights are on here. Avoid the zombie and you'll be able to enter the treasure room, where you can win a wall clock. From there, head back to the main hallway.

5:58 - Enter the upper-left (pelican) room. Guess what? Below the gap in the bridge beyond that door in the upper portion of the room is...another door. Enter that door.

6:38 - Avoid the ghost circling around the platforms carefully so you don't have to keep returning to that one part over and over again. When you make it, you'll be able to enter the door at the upper-right corner of the room.

9:13 - All that for a giant spear man.

9:34 - Well, we're getting close to completing this thing now. Just four to go.

Sunday, December 8, 2013

brickroadbrickroad and SovanJedi play Secret of Evermore - Part 50 of 88


In this episode, we find out the Sacred Dog is...something else.

Boss: Aegis


Aegis sends out three creatures - Bad Dawgs (evil clones of your dog from Prehistoria), Will-o-the-Wisps, and Skullclaws. Those will be the source of most attacks, but Aegis can cast Lightning Storm and Confuse on you, as well.

When you take him down, you'll get 1200 Jewels.

Town Square


When you defeat Aegis, he'll leave some sort of power core behind. The real Horace Highwater shows up and summons Tiny to throw it somewhere...which he does with relative ease. It will explode north of the camp, emptying the river that flows near the Pyramid and exposing a hidden tunnel. Horace asks you to explore this tunnel as it may be your only hope of returning to Podunk.

If you have five or more Call Beads in your inventory, Horace will also give you the Staff of Life. It increases your ability to defend against enemy attacks.

Nobilia Marketplace


Well, I didn't believe it, folks. Apparently, you can do this.

If you keep buying pots, there's a slim chance you'll find the Chocobo Egg instead of the usual ten Jewels. If you do, keep it, as it increases your maximum HP. Also, don't trade it for the Magic Gourd. The Magic Gourd is absolutely useless.

Monday, June 24, 2013

Eexecute plays Turok 2: Seeds of Evil - Part 50 of 51


One more to go...

1:15 - Now that we have the Eye of Truth talisman, we can access this path and get the Primagen Key at the end.

6:46 - When you put the last Primagen Key in, you get a cutscene. Get ready!