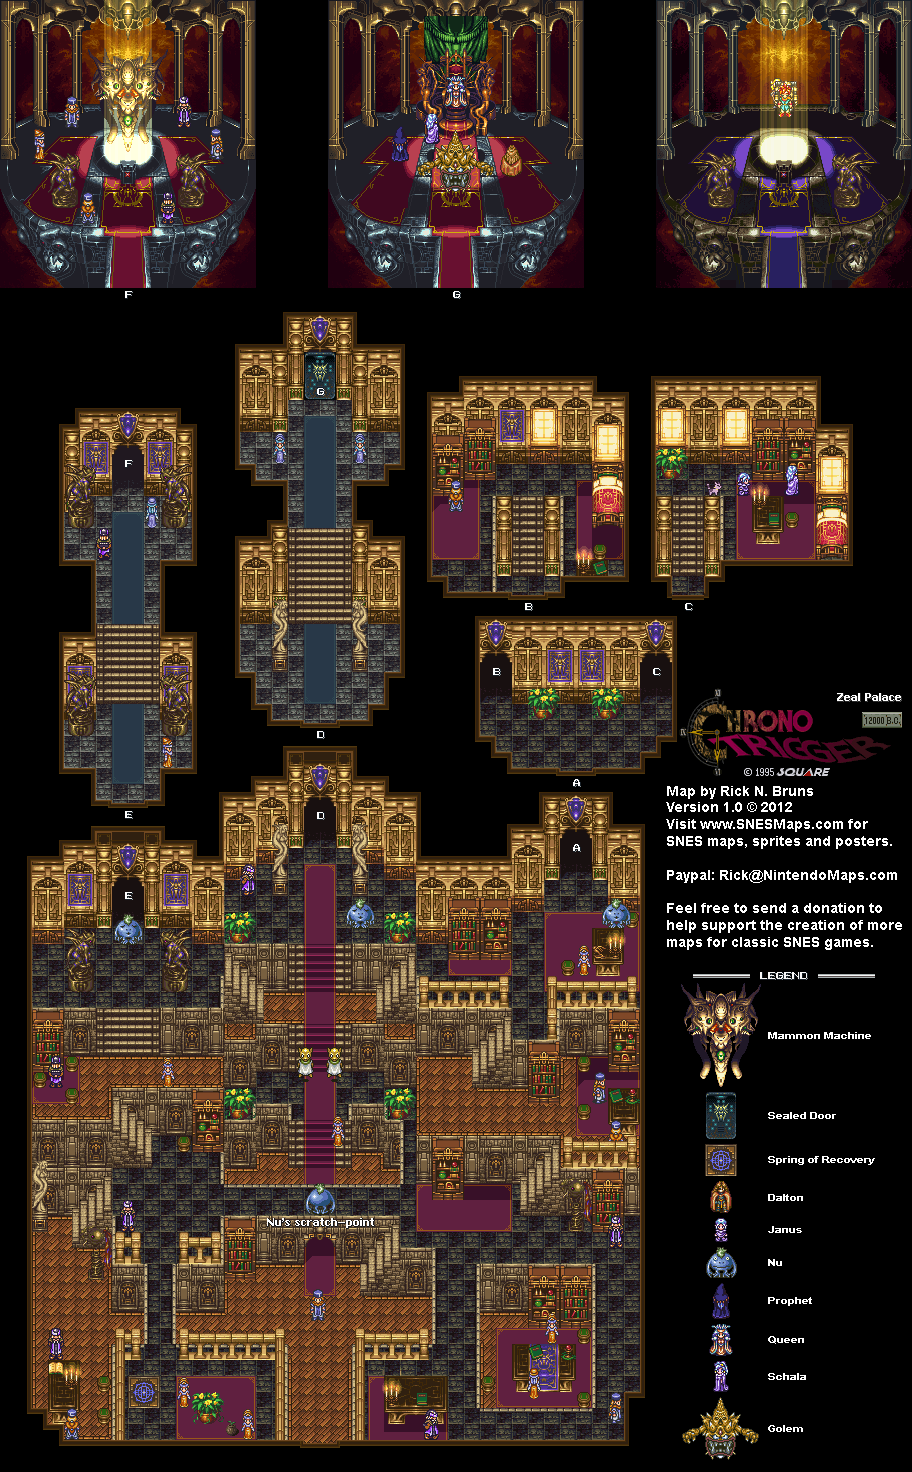
In this entry, we start making our way to the Mammon Machine in our attempt to stop Queen Zeal.
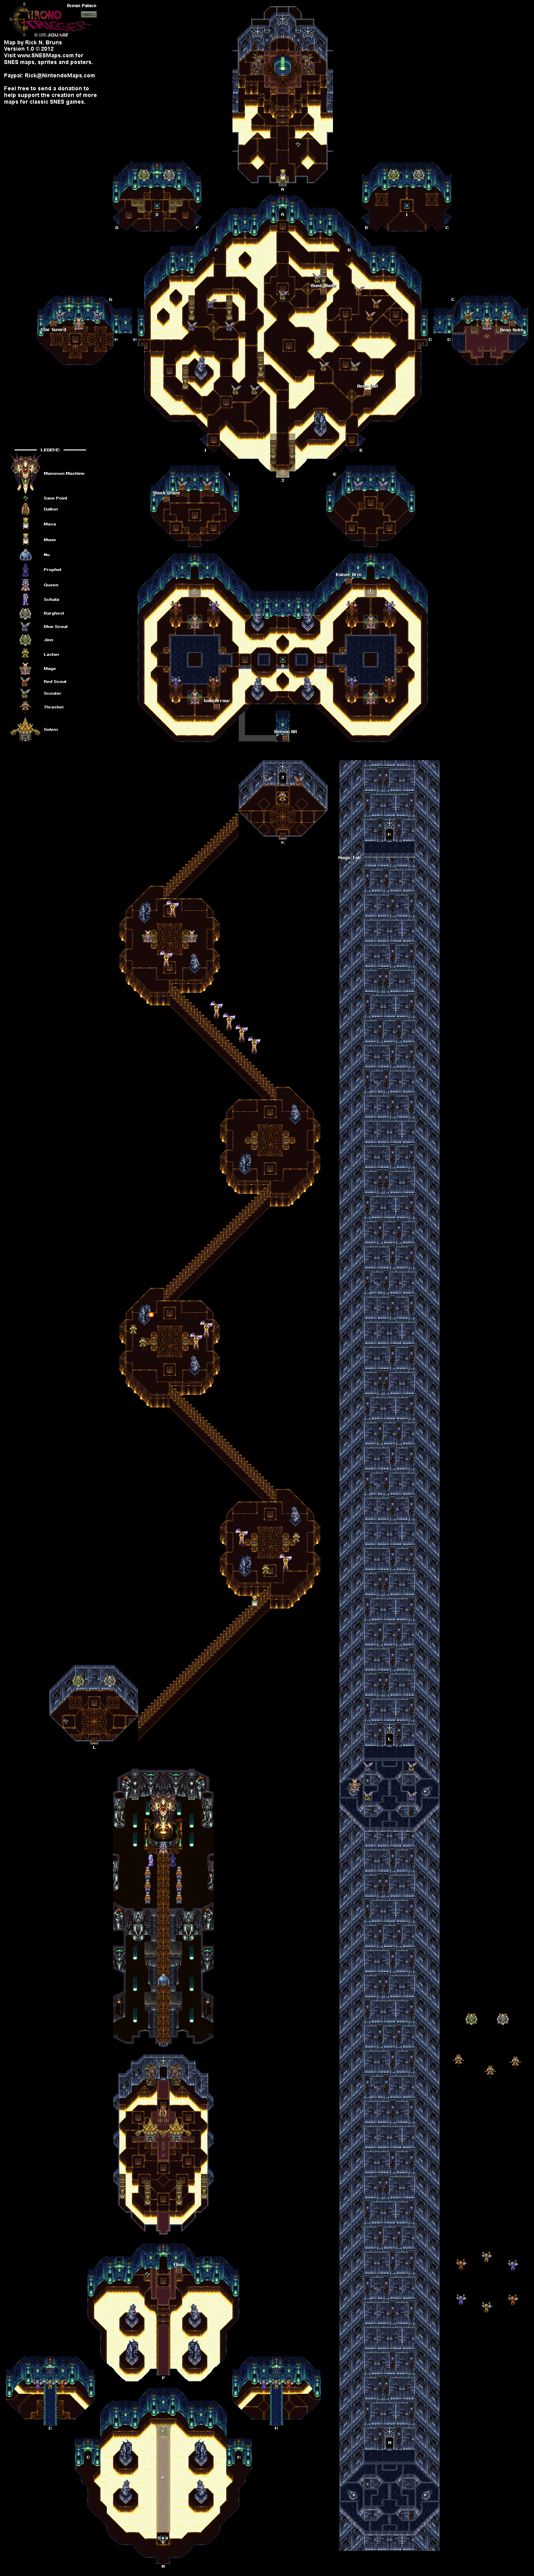
Once you go through the portal leading to the Ocean Palace, you'll be met with some of the best music in the game. You'll also run into Mune, who tells you that Lavos is waking up due to Queen Zeal's use of the Mammon Machine. You'll then see Queen Zeal commanding Schala to raise the power of the Mammon Machine to its limit, not even caring if this brings great pain to Schala herself.
In the next room, you'll have to enter the rooms to the sides in order to open up a path leading to more of the Ocean Palace. Not only will you have to hit two buttons to raise two platforms in the next room to the south.
You'll meet plenty of enemies while you're doing this. Jinn and Barghest will always face you as a team. Take out Barghest first, then hit Jinn to lower its shield so you can defeat it once and for all. Not only can they both create an explosion that does damage to your party, but Jinn can also absorb Barghest into itself to replenish its HP despite losing its shield in the process.
The Scouters come in three colors: yellow (Scouter), red (Red Scout) and blue (Blue Scout). Yellow casts Lightning spells, Red casts Fire spells and Blue casts Water spells in the form of Ice. Yellow can also put one party member to sleep with the 10,000 Hz attack. Use their own magic against them by using the same magic on the ones that cast it: Lighting on Yellow, Fire on Red and Water/Ice on Blue. Doing otherwise will heal them.
The Mages can not only punch you, but they can cast Lock on one party member, stopping them from using magic. Thankfully, you can use a Heal or a Power Meal to get rid of the Lock status ailment.
In the first room, you'll be able to find some good weapons and Armor. Not only can you find an Aeon Helm and an Aeon Suit, you'll also be able to get a Rune Blade for Frog and a Star Sword for Crono, which is more powerful than what you got in Mt. Woe and the new weapons sale in Enhasa.
The diagonal doorways on the south side (the southeast and southwest exits) lead to a third button that will open up another area in the first room after the entrance, but you'll have to fight your way through some enemies to not only reach the button, but to open all the chests in the area. In this area, you can find a Kaiser Arm for Robo, a Sonic Arrow for Marle and a Shock Wave for Lucca; be sure to equip them both. South of the button is a hidden wall leading to the Demon Hit, which is another weapon for Frog. Both the Rune Blade and the Demon Hit have the same attack power, but the Demon Hit does 50% more damage to magic-based enemies.
Once you hit the third button and raise the platform to the south exit in the first room, you'll find a doorway leading to an elevator platform (and a Magic Tab, which you'll have to put in some effort to get), and a stairway leading down. Since the elevator is not in the next room and you'll need to go downstairs to use it, you'll have to take the stairs.
When you do, you'll face two new enemies: the Thrashers (yellow and purple with staves) and the Lashers (yellow and black with knives). Both of them can be nasty, as multiple Thrashers can hit the entire party with a powerful wind-based attack while multiple Lashers can hit X Strike on one of your party members. Both of those attacks are counterattacks that they will pull off if you don't do enough damage to kill them. The third platform on the way down can be a pain, as the statue will shoot fireballs at you that can stun you just briefly enough for the enemies to run into you and trigger a battle.
At the bottom of the stairway, you'll face another Jinn and Barghest, then you'll be able to save your game.
No comments:
Post a Comment