Showing posts with label part 33. Show all posts

Tuesday, February 17, 2026

PrinceWatercress plays Super Mario Odyssey - Part 33 of 92


In this entry, we get the last of the Power Moons we can get in the Snow Kingdom. Next stop, Seaside Kingdom...


13. Snow Kingdom Timer Challenge 1 - There is a scarecrow near the Corner of the Freezing Sea checkpoint. Throw your hat at the scarecrow, then be ready to long jump onto the circular platforms and quickly jump to the Power Moon before time runs out.

20. I'm Not Cold! - There is a certain Shiverian in Shiveria who you can talk to who tells you that the official racing uniform is nothing but underwear. If you wear the Boxer Shorts when you talk to this guy, he will give you a Power Moon.

23. Snowline Circut Class S - After completing the first race, there is another race you can take part in: Snowline Circuit Class S. Take control of the timid racer with your cap. This time, he will be standing next to the elder, and you can talk to the elder to take part in a second race. The course is the same as before, but the opponents are a little more crafty. Your best best is to take the lead early, and keep your bounds low, because bounding too high can cost you momentum and speed. Winning this race will net you a second Power Moon.

29. Moon Shards in the Cold Room - On the upper floor of where you enter Shiveria, there is a padlocked door that requires the Snow Hood and the Snow Suit to enter. You'll need to buy these with the Regional Coins that you find in the Snow Kingdom. Once you have both of these things, equip them, then talk to the Shiverian near the door. You'll be able to enter a room with an 8-bit area. Avoid the Spinys, jump on and kick the red Koopa to get rid of the Spinys, and collect the five Moon Shards here to get a Power Moon.

30. Slip Behind the Ice - In the padlocked room, there is an area leading upwards above the pipe leading in and out of the 8-bit area. Jump around to find two invisible blocks, and use them to go upwards and find this easy-to-miss Power Moon.

34. Found with Snow Kingdom Art - You'll need to find the Hint Art here, then head to the Lost Kingdom for this one. Thankfully, you won't have to deal with the cap-stealing vulture a third time. The Power Moon will be inside the roots of one of the trees in the lava.

Wednesday, December 24, 2025

PrinceWatercress plays Brave Fencer Musashi - Part 33 of 33


...and now, the finale. We rescue the Princess, we defeat the Thirstquencher Empire, and we find everything that the game has to offer.


In the next section, you'll see Capricciola on an elevator with Princess Fillet. Go up the spiral stairway. Thankfully there are not enemies in this area. When you reach the end, you'll come across a huge purple tower and you'll immediately start floating as if you were using the Sky Scroll. Turns out the Sky Scroll activated itself, and you'll keep floating during this entire battle.

Crest Guardian

Tower of Death


Hold X to ascend, and release it to descend. You'll need to fly around and stay away from the walls as you look for the flashing green eye. When you find it, approach it, face the eye and hit it with Lumina before it closes. Each eye on the tower will only flash once, and once you hit it, it will never flash again. You will have to hit every eye in order to beat the Tower of Death.

After you hit a few eyes, the walls will start producing electric force fields that alternate between the top and bottom of the tower. You'll want to steer clear of those.

When the Tower of Death is down to half health, the walls will retract and some of the eyes will open up to fire lasers at you. You'll want to stay away from the lasers and keep a good elevation while looking for the glowing green eye. After this, the rows on the tower of death will spin in the opposite directions.

You'll then deal with one last attack where all the eyes open and pay attention to your location. Keep flying around, and when the eyes close, you'll want to look for a safe spot where some of the eyes don't re-open. The ones that do will fire some sort of red laser that you can't avoid unless you're in the safe zone.

When you beat the Tower of Death, you'll liberate the Sky Scroll and find the Sky Crest in the base of the Tower.

When you step on the Sky Scroll, you'll encounter Fuhrer Flatski, Princess Fillet and Capriciolla. When Flatski tells Capriciolla to take Lumina, Capriciolla turns on Flatski. Turns out it's Jon, and he was in disguise the whole time. Turns out Jon is the Prince and true heir of the Thirstquencher Empire, and that Flatski murdered his parents, who were the King and Queen. When Jon tries to shoot him, Rootrick shows up from behind and shoots him. Yes, Rootrick is somehow still alive from being knocked off the edge of a cliff (or being squashed by a boulder, depending on how you beat him last time). Also, Rootrick is Flatski's son.

Musashi surrenders Lumina to Flatski, and Flatski pushes Princess Fillet. When Flatski uses Lumina on the Sky Crest, instead of getting special powers or taking over the world, Flatski unleashes a large demon. This is Dark Lumina, the Wizard of Darkness. When Flatski commands Dark Lumina to kill the Princess, Musashi and Jon, Flatski is instantly flattened by Dark Lumina's foot.

A fatally wounded Jon explains that Dark Lumina was not sealed by Lumina, but within it, which explains why the Musashi of legend had Crest Guardians protect the Scrolls. Jon tells Musashi to take care of Leno before he is crushed and killed by Dark Lumina, and Musashi and Princess Fillet escapes. Before Musashi can high-tail it out of there, the sword Lumina returns to him. Musashi is bewildered by the whole thing.

The Wizard of Darkness

Dark Lumina


You'll be in control as soon as you start escaping. Head to the left and don't get caught on the bridge segments or platforms when they're dropping down. When you make it to the end, you'll meet Kojiro, who's kidnapped the Princess again and is more preoccupied with a duel than the current situation at hand. Dark Lumina catches up and absorbs Kojiro, and the Princess is knocked into the sky to land somewhere far away. Dark Lumina then transforms into a deadlier green, lizard-like form.

You'll be doing some more bridge and platform hopping, and this time it'll be in 3D. You'll then be jumping from one platform to the next on the side of the tower, and you'll want to be careful when you double jump from one platform to another, as it can be all too easy to slide off the edge and fall to your death. You'll also want to be fast too, as Dark Lumina will try to smash himself into the side of the tower and destroy the platforms that are around him. If you see a light green shadow, you know he's coming.

At the end, you'll find Princess Fillet. She's fine, and Musashi heads onto a block platform for the final battle.

Dark Lumina

Part Two


Jump over Dark Lumina when he spins around and swipes his tail, and jump straight up to avoid his grab attack. If Dark Lumina grabs you, he'll toss you away and he may toss you off the top of the tower. Use a jumping Lumina slash or Rumparoni-SP to hit the orb on Dark Lumina's head until it turns red. When that happens, step back a bit from him and stay away from the fireballs. After a few fireballs, Dark Lumina will be tired. Whack the orb on his head with Lumina in order to damage Dark Lumina.

Dark Lumina has another attack where he will stomp the ground and produce shockwaves. Double-jump over them to avoid being knocked off the edge of the tower. In case you do fall off, it's not instant death, but you will take some damage.

When you beat Dark Lumina, a bright white core will be in his place, sucking away everything except Musashi. Lumina will then be a fluorescent white being with two red eyes and a red jewel on his forehead.

Dark Lumina

Finale


Dark Lumina's attacks in his final form are based on the Scrolls. He'll glow a certain color depending on which attack he's using. Red will be fire.

Whenever Dark Lumina becomes white again after performing an attack, he'll return to the center and stand still for a few seconds. When that happens, Assimilate him and fill up the Lumina gauge. When you fully Assimilate him, Dark Lumina will turn into a white core for a brief amount of time. You'll want to hit him with Lumina while he is a core in order to deal damage. Once you hit him, he will try to suck you towards him. Keep running away from him so he doesn't get you, and he'll turn back into his humanoid form after a few seconds.

Here's all of Dark Lumina's attacks, and they always occur in this order:

When Dark Lumina glows red and the screen turns red with him, he will send a red starburst into the air. Stay on the move so that the fireballs don't hit you.

When Dark Lumina glows pink, you'll want to move around him in a circle and stay a fair distance away so that the two projectiles - the trail of fire and the flying wave - don't hit you. That also keeps you from being slashed by Dark Lumina's sword arm.

When Dark Lumina glows green, equip the Wind Scroll and use it to keep yourself from being blown off the side of the tower.

When Dark Lumina glows light blue, he'll make five copies of himself. Stay on the move so they don't all damage you. 

When Dark Lumina glows yellow, jump over the shockwaves that he creates.

When Dark Lumina glows dark blue and the screen turns blue with him, stay on the move so the water droplets don't hit you. It's the same as the red screen fire attack, except the water doesn't stay on the ground.

When you beat Dark Lumina, you'll beat him for real this time. Dark Lumina is sealed within Lumina again, Princess Fillet will be safe, and the new legend of Brave Fencer Musashi must be told if Dark Lumina is never to be freed again.

You'll finally meet Princess Fillet's parents, King and Queen Allucaneet. Fillet and Ribson hide the fact that the Thirstquencher Empire tried to take over the world away from them. We also see Musashi speak one last time at the end, and this time we see his mouth move with the speech very, very well for a PS1 game. After that, the credit finally roll, complete with hand-drawn art of certain parts of the game. You'll also see Musashi return Lumina to Spiral Tower before being teleported back home.

After the credits roll, you can save the game again. Do so, as you'll be able to start the game again with all your stats and everything you had, minus the Sky Scroll, which you'll have to earn again. Use this as your opportunity to get all the things you missed...which is what we're going to do here.

Here is how to get all of the Special action figures:

Fillet - You'll need to rescue everyone on the rescue list who has been trapped in Binchotite. You can get this one as early as Chapter 5 if you're on the ball with everything.

Jon&Leno - For this one, you'll need to open every treasure box containing an item in the game. This includes all of the treasure chests that contain items that must be appraised by and sold to Conners, all of the (surprisingly few) chests in the game that contain free money, and all of the chests that contain healing items in Soda Fountain. Memory Boxes do not count towards this; you can leave those alone and using them is totally optional. This is the hardest one to get, and amazingly, this one was the hardest one to figure out for ages, 

MomMinku - Beat the Mother Minku in the Meandering Forest once you've found and caught all thirteen Minku.

Kojiro - Knock on Farmer Lacter's door and talk to Farmer Lacter in the village in Chapter 6. This is hinted at in Chapter 5 if you talk to the villagers or if you talk to Farmer Lacter then.

DLumina1 - Beat the game.

DLumina2 - Beat the game at no less than Level 28 and have all five pieces of the Legendary Armor. It does not matter what you chose between the Legendary Quilt or the Legendary Gloves; both count towards the action figure. 

DLumina3 - Unlock all of the other Special action figures to unlock this one. Once you buy the first six, leave the item purchase menu, come back, and this will be available.

Sunday, March 2, 2025

PrinceWatercress plays Wario Land II - Part 33 of 51


Why does Wario have a train, other than because he can?


Chapter 2: Go To The Cellar

Story 3: Stop that train!


Watch out for the retracting spikes on the first section.

If you duck at the top of the train on either train stage, you won't get pushed you back. Interesting. Also, be sure to give yourself some room to tackle the enemies throwing the spiked balls at you.

When it comes to the monsters that get aggressive when you go on the attack, tackle the middle one, then use the high jump to avoid the other two.

The treasure room in this dreadfull short is below the next to last drop on the top of the train. The door between the spikes will lead to another door that leads to the treasure game. The treasure is some sort of moon with a stone in it.

Tackling the switch at the head of the train from the left stops the train and ends the stage.

Tuesday, October 1, 2024

PrinceWatercress plays Chrono Trigger (Super NES) - Part 33 of 70


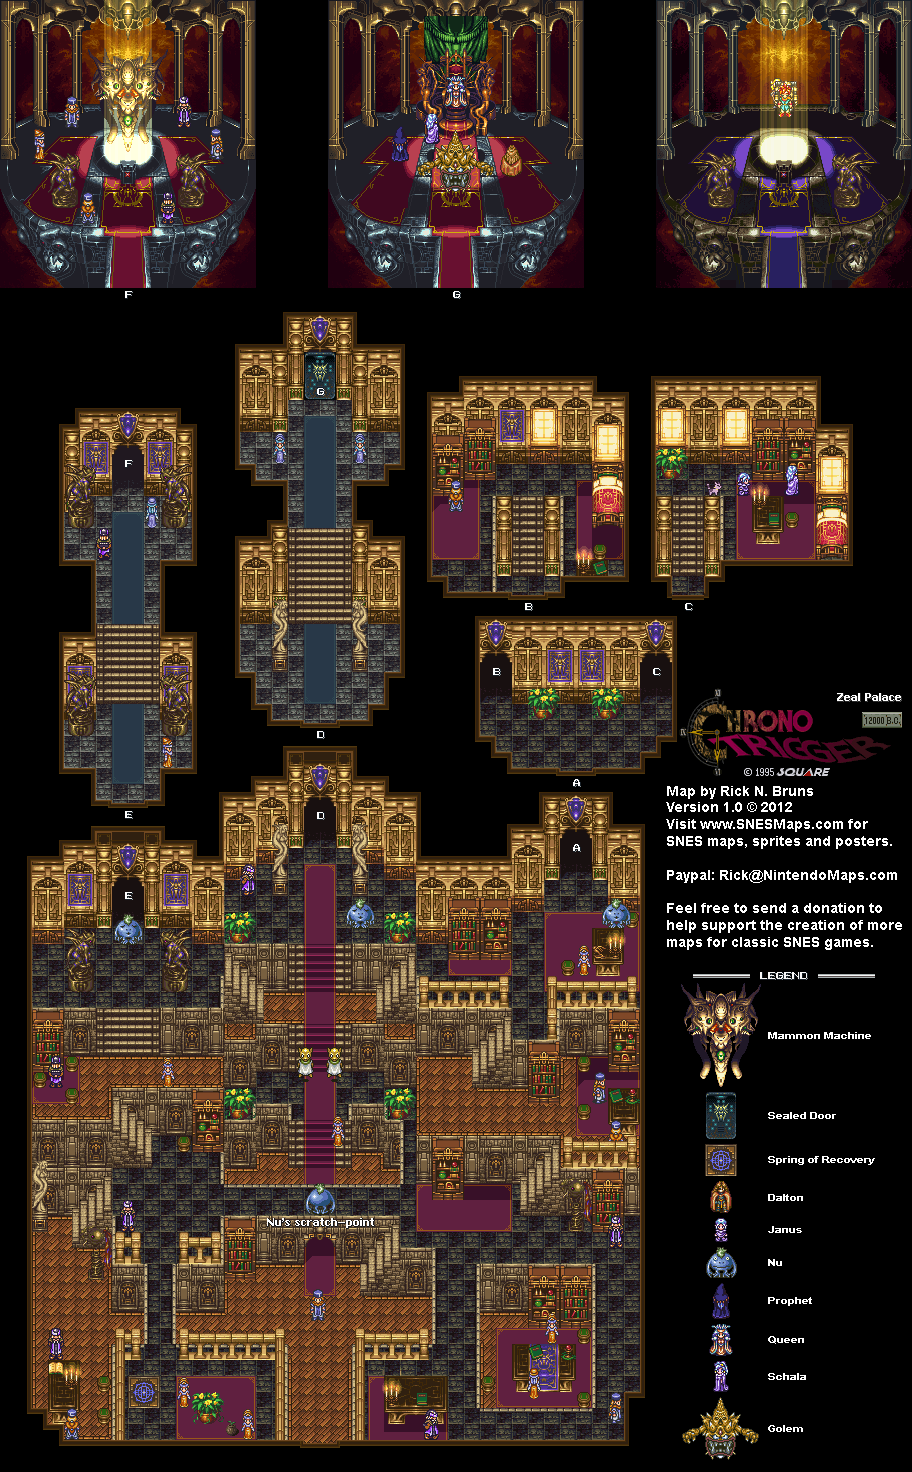
In this entry, we start making our way to the Mammon Machine in our attempt to stop Queen Zeal.


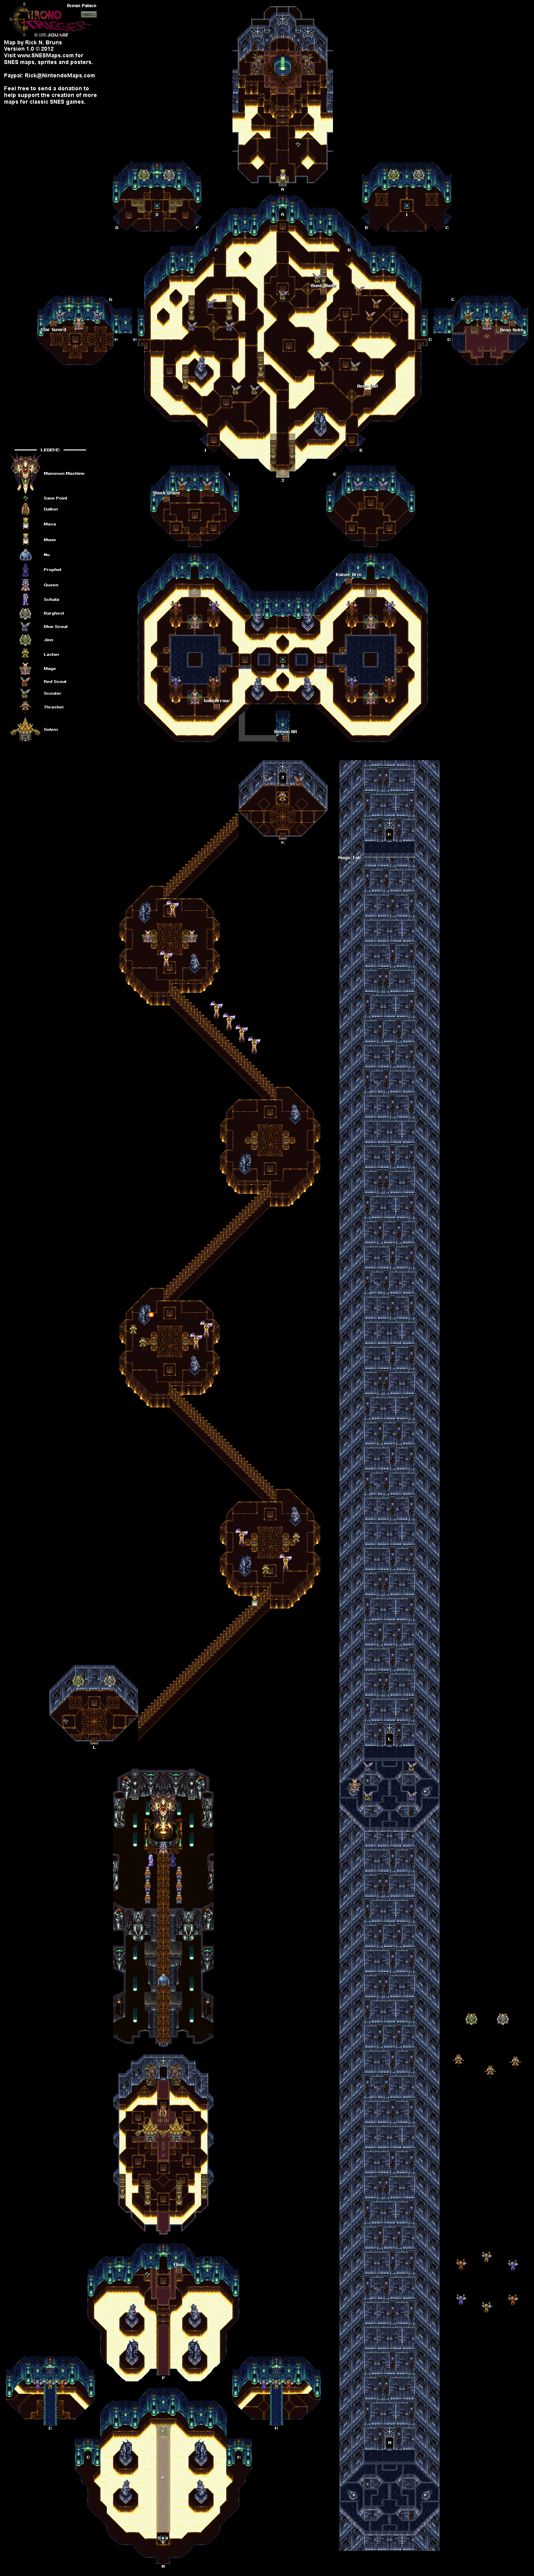
Once you go through the portal leading to the Ocean Palace, you'll be met with some of the best music in the game. You'll also run into Mune, who tells you that Lavos is waking up due to Queen Zeal's use of the Mammon Machine. You'll then see Queen Zeal commanding Schala to raise the power of the Mammon Machine to its limit, not even caring if this brings great pain to Schala herself.

In the next room, you'll have to enter the rooms to the sides in order to open up a path leading to more of the Ocean Palace. Not only will you have to hit two buttons to raise two platforms in the next room to the south.

You'll meet plenty of enemies while you're doing this. Jinn and Barghest will always face you as a team. Take out Barghest first, then hit Jinn to lower its shield so you can defeat it once and for all. Not only can they both create an explosion that does damage to your party, but Jinn can also absorb Barghest into itself to replenish its HP despite losing its shield in the process.

The Scouters come in three colors: yellow (Scouter), red (Red Scout) and blue (Blue Scout). Yellow casts Lightning spells, Red casts Fire spells and Blue casts Water spells in the form of Ice. Yellow can also put one party member to sleep with the 10,000 Hz attack. Use their own magic against them by using the same magic on the ones that cast it: Lighting on Yellow, Fire on Red and Water/Ice on Blue. Doing otherwise will heal them.

The Mages can not only punch you, but they can cast Lock on one party member, stopping them from using magic. Thankfully, you can use a Heal or a Power Meal to get rid of the Lock status ailment.

In the first room, you'll be able to find some good weapons and Armor. Not only can you find an Aeon Helm and an Aeon Suit, you'll also be able to get a Rune Blade for Frog and a Star Sword for Crono, which is more powerful than what you got in Mt. Woe and the new weapons sale in Enhasa.

The diagonal doorways on the south side (the southeast and southwest exits) lead to a third button that will open up another area in the first room after the entrance, but you'll have to fight your way through some enemies to not only reach the button, but to open all the chests in the area. In this area, you can find a Kaiser Arm for Robo, a Sonic Arrow for Marle and a Shock Wave for Lucca; be sure to equip them both. South of the button is a hidden wall leading to the Demon Hit, which is another weapon for Frog. Both the Rune Blade and the Demon Hit have the same attack power, but the Demon Hit does 50% more damage to magic-based enemies.

Once you hit the third button and raise the platform to the south exit in the first room, you'll find a doorway leading to an elevator platform (and a Magic Tab, which you'll have to put in some effort to get), and a stairway leading down. Since the elevator is not in the next room and you'll need to go downstairs to use it, you'll have to take the stairs.

When you do, you'll face two new enemies: the Thrashers (yellow and purple with staves) and the Lashers (yellow and black with knives). Both of them can be nasty, as multiple Thrashers can hit the entire party with a powerful wind-based attack while multiple Lashers can hit X Strike on one of your party members. Both of those attacks are counterattacks that they will pull off if you don't do enough damage to kill them. The third platform on the way down can be a pain, as the statue will shoot fireballs at you that can stun you just briefly enough for the enemies to run into you and trigger a battle.

At the bottom of the stairway, you'll face another Jinn and Barghest, then you'll be able to save your game. 

Tuesday, June 25, 2024

PrinceWatercress plays Ratchet and Clank: Going Commando - Part 33 of 54


In today's episode, we head for Gorn to take the fight to Thugs-4-Less, then head back to Joba and see if we can conquer The Impossible Challenge.

First | Previous | Next | End

1:52 - As soon as they arrive on Gorn, Ratchet and Clank are under attack from the Thugs-4-Less fleet. 

2:38 - In the first challenge on Gorn, you'll be shooting down the Thugs-4-Less fleet. There are two big ships, and you'll need to aim at the biggest part of the ships in order to take them down.

4:01 - After the battle, you'll find out that Angela is not here and you'll get a message from the leader of Thugs-4-Less. The monitor behind him shows his exact location, and Clank makes note of this. You now have coordinates for planet Snivelak.

9:22 - We head back to the battle arena on Joba and go for The Impossible Challenge. This is 60 straight rounds of enemy fighting, and there are a few rounds where you will be fighting on the walls above the arena, with the lava rocks not showing up until just past halfway, at round 36. Once that happens, stay on the move, get enemies to stand directly across from you, and let the lava rocks do the work instead of your guns.

Use the wrench on the creatures that charge towards you and hit them with the jump strike for double damage, and use the ammo crates whenever you see them to keep your ammo high. Watching your ammunition and knowing when to use your guns definitely helps, and fighting the enemies from a distance in a way that mitigates any potential damage also works wonders.

While it makes sense to come in here with maximum health, you don't necessarily need to do so, as having enough experience to gain another hit point and getting the health replenishment and the full-screen enemy wipeout that come with it can be a very big help.

You'll face the Megapede at the 60th and final round. You'll want to have a high amount of health and plenty of heavy weaponry when you finally take it on. I don't win this time, but I come dreadfully close, and the bolts and experience that come from playing this challenge are a big help.

Controls:

As Ratchet:

Control Pad/Left Analog Stick: move
Right analog stick: move camera

X:
  • Jump and double jump (hold button after double jump to use Heli-Pack or Thruster Pack)
  • Wall jump (near certain walls)
Square: strike with wrench
Circle: pull out/shoot currently equipped gun
Triangle: 
  • quick select (hold and use in conjunction with Control Pad or left stick to switch guns; menu can be customized in Quick Select on the pause menu
  • double tap to switch between two most recently equipped weapons/items
  • interrupt on-screen messages

Select: open map
Start: Pause menu
  • Control Pad: select option
  • X: confirm option choice

L1:
  • center camera behind Ratchet (tap button to center)
  • first-person view (hold button and use left stick or D-Pad to look around; let go of L1 to move camera back behind Ratchet)
  • Square: wrench boomerang
  • Circle: fire gun
  • R1/R2: zoom in and out (Pulse Rifle only)
L2/R2: strafe (hold while moving)
L3: see health and Bolt totals
R1/R2: crouch (hold down)
  • Square: wrench boomerang
  • X: high jump
    • long jump (hold crouch button and jump while running to perform)
R3: open map

In water:
  • Square: dive and descend
  • X: surface and ascend
  • R1: accelerate with Hydro-Pack

As Clank:

Control Pad/Left Analog Stick: move
Right analog stick: move camera

When hanging off platforms:
  • Control Pad/Left Analog Stick: move
  • Forward+X: vault up
  • Back+X: drop down

Square: punch
X: Jump (press and hold in the middle of a jump to glide with Heli-Pack)
Triangle: command menu (hold and use in conjunction with Control Pad or left analog stick to choose commands)

Sunday, May 26, 2024

DeceasedCrab plays Earthbound - Part 33 of 53


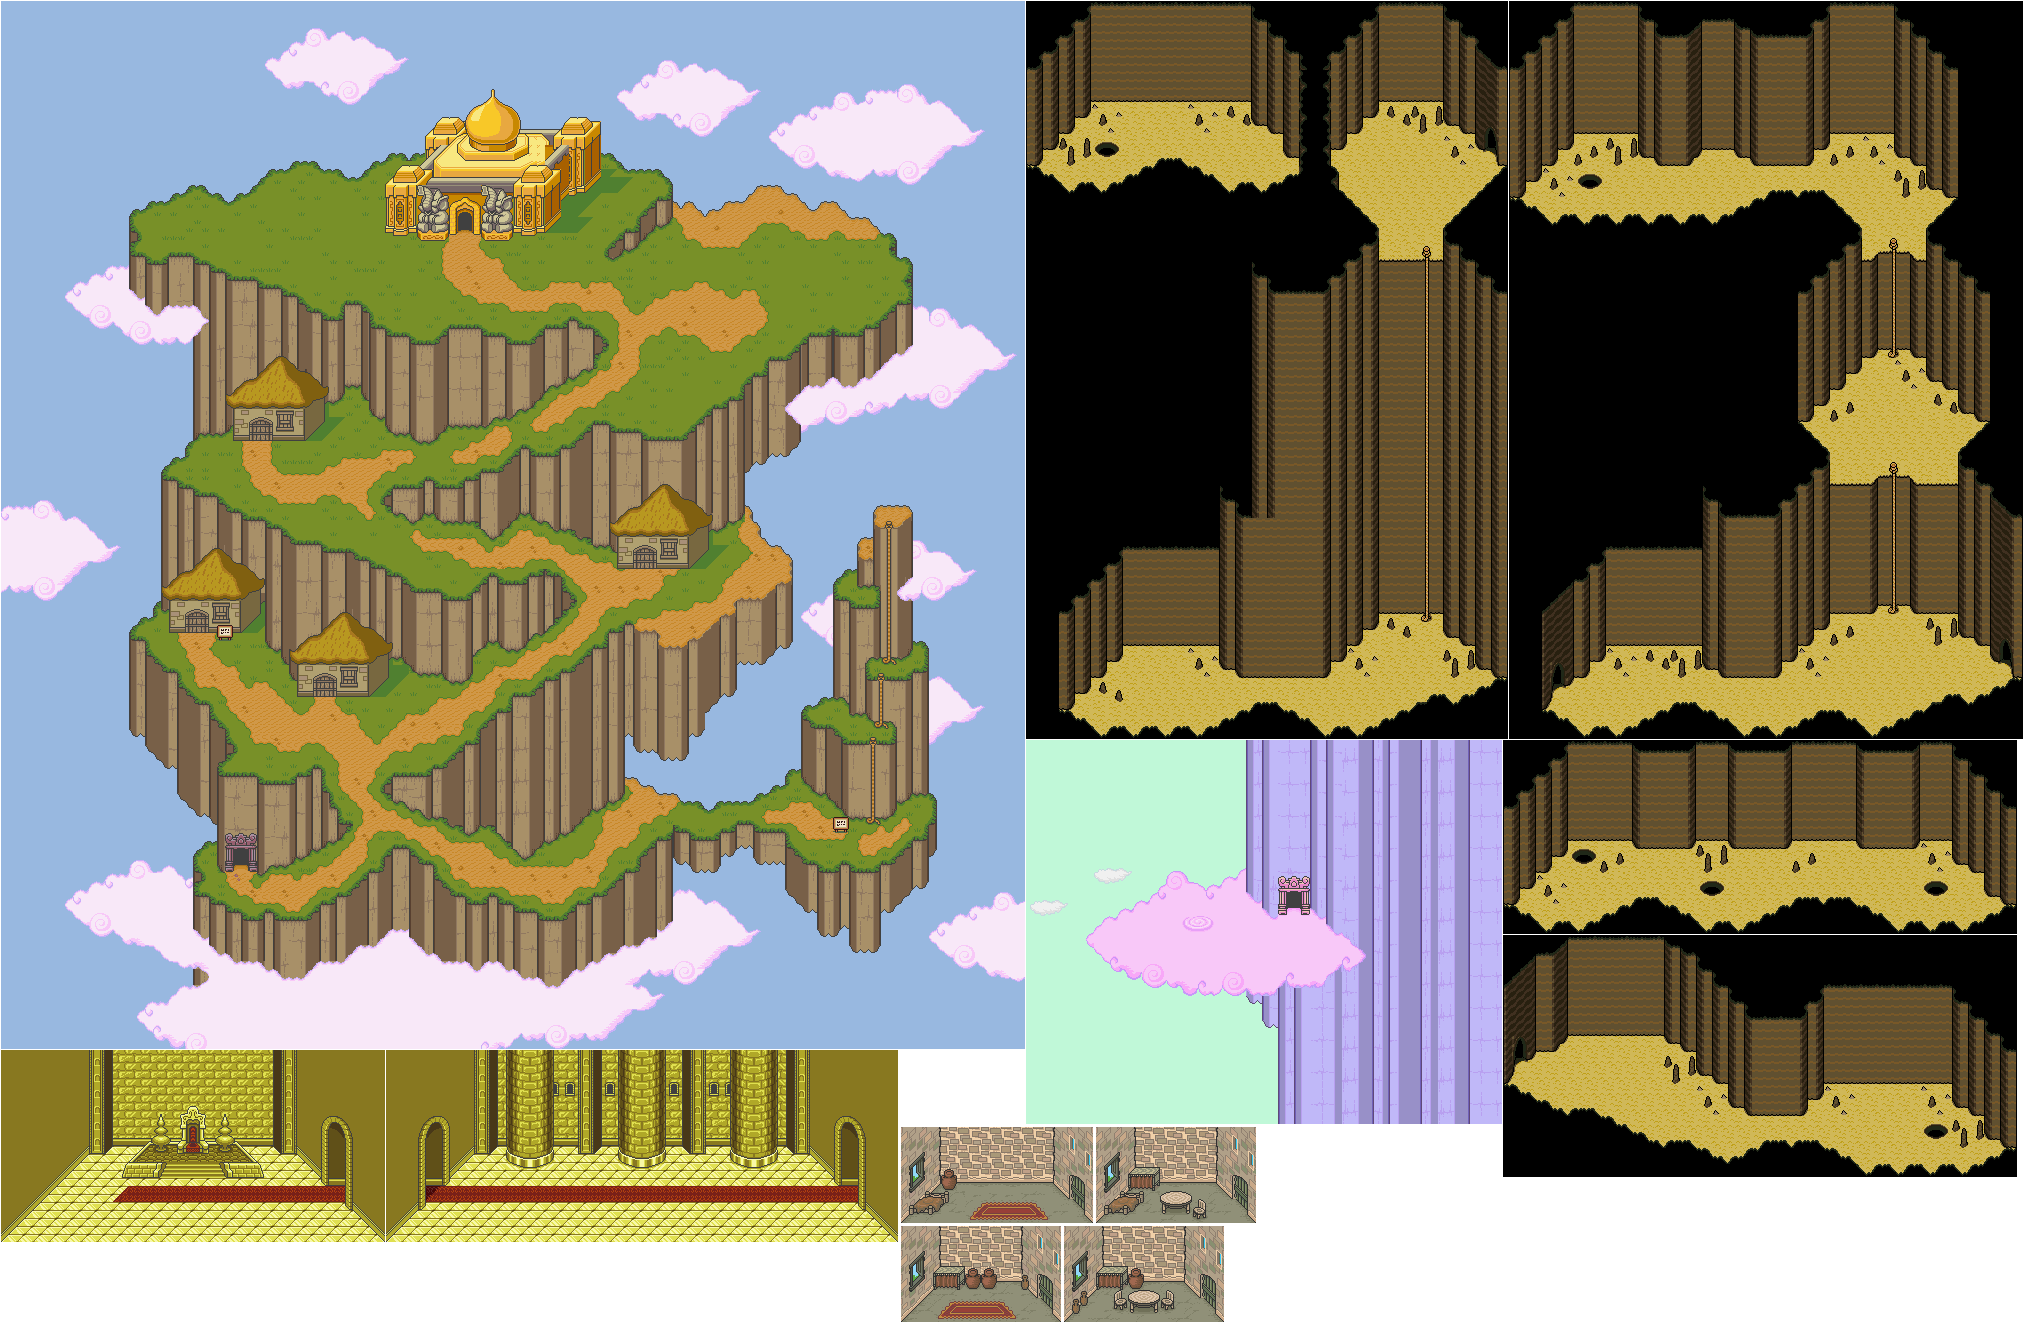
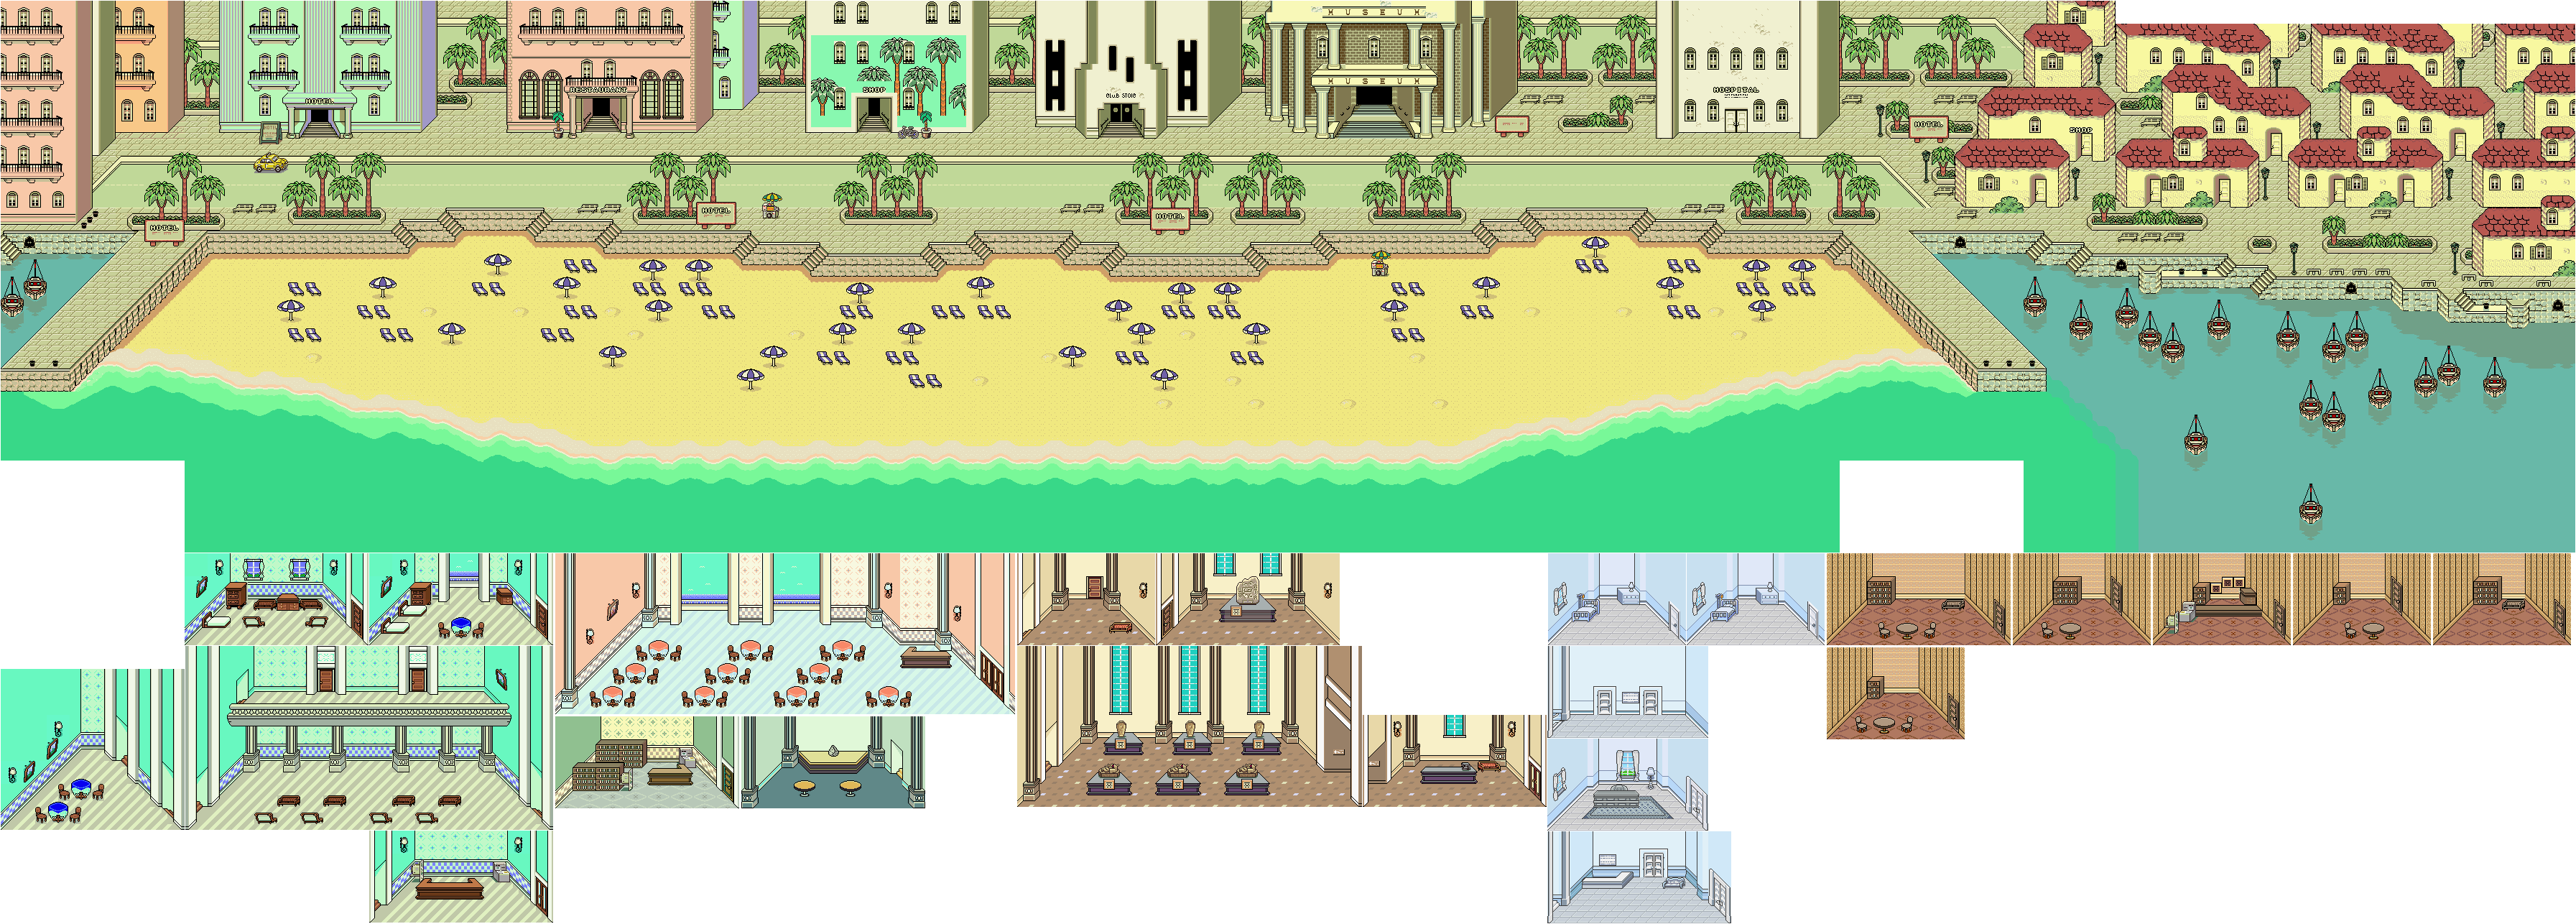
In this entry, we finally head back to Dalaam and reach the sixth "Your Sanctuary" location.


Teleport to Dalaam. When you approach the royal palace, the photographer will show up. He also shows up near Poo's father in the throne room.

At the royal palace, talk to Poo's father, who stands near the throne. He will heal you.

In Dalaam, head down the hill and use the Carrot Key to make the Rabbit Statues disappear. This leads to another dungeon with a "Your Sanctuary" location.

The Thunder Mite will hit you with lightning attacks, but the Franklin Badge can protect you from that. Freezing them with Freeze Beta can do a lot of damage and even kill them.

The Tangoo can poison you and put you to sleep in addition to hitting you. 

The Snake does very minimal damage, with a chance of poisoning an enemy. It's not very 

Poo will learn Freeze Theta at Level 33 and Healing Theta at Level 36. Healing Theta has a chance of reviving a dead party member, but it does not always work. Paula learns Offense Up Omega at Level 40.

When you climb up the two ropes that lead to the hole, drop down the hole. Skip the first hole as you go left, and enter the second one. You'll find a Rock Candy, which increases a random stat by one point for whoever uses it.

The Conducting Menace can cause quite a few status ailments in addition to hitting you with Thunder and Flash Spells. The Thunder spells can hurt!

The sixth "Your Sanctuary" location is blocked by Thunder and Storm. Hit them hard with Big Bottle Rockets and powerful spells, and solidify them with Freeze spells so they can't attack. Once you beat them, you'll be able to head to the Pink Cloud and get the melody there alongside the free healing. From here, leave manually; do not use an Exit Mouse. This dungeon's pretty short, anyway. You'll be able to get the Bracer of Kings on the way back. This is one of the four items that Poo can equip, and it increases his defense by 30 while also increasing Luck and protecting from Hypnosis.

The Kiss of Death can poison one party member, but that is the worst it can do.

Once you leave the Dungeon, head left of the royal temple and teleport back to Summers.


The photographer will land on a nearby boat and take your picture if you approach the guy in blue who mentioned his wife. You'll need to talk to that guy.

Wednesday, November 1, 2023

Jerry Martin plays Strong Bad's Cool Game For Attractive People - Part 33 of 53


We're on Episode Four now, and this is where we start seeing Strong Bad at his coolest.


Episode 4: Dangeresque 3: The Criminal Projective

The episode begins in Strong Bad's/Dangeresque's office. Dangeresque grabs his Nunchuck Gun as the door opens, and Dangeresque points the Nunchuck Gun at his greatest enemy, who is played by Homestar. Dangeresque, Too? says that he has the diamond, but Dangeresque is the one who suddenly produces it from behind his desk. The scene then goes into the title card for Dangeresque 3: The Criminal Projective followed by the title sequence.

We then get brought back to reality, where Strong Bad has fallen asleep at the Lappy 486. Strong Bad wakes up and writes an e-mail where he announces that he has finished Dangeresque 3: The Criminal Projective and that it is a critical and commercial success thanks to people who are willing to pay him $100 to see it. Strong Bad then grabs his video tape containing the new film and heads to the premiere, which is a basement viewing with the cast of Homestar Runner in Strong Bad's house. From here, you play as Dangeresque, and you'll start in Dangeresque's office. There will be a constant knocking on the office door.

If you click on the phone, you'll get a Sam & Max reference.

Near the door is a table with the Nunchuck Gun on it. Take the Nunchuck Gun and the trinket, because you're going to need them.

When you answer the door, you'll be introduced to Coach Z/Ronaldo and Dangeresque, Too?/Ronaldo. Ronaldo tells Dangeresque about his upcoming retirement party before heading off to Sidekick Island (where nothing can possibly kill you off) while Dangeresque, Too? mentions that he brought cake.

From here, use the Nunchuck Gun on both Renaldo and Dangeresque, Too? to get some reactions from them and add to your game completion.

When Renaldo showed up, he brought in a can of Diet Brown. Click on the can of Diet Brown to add it to your inventory.

If you click on the door again, you'l be met by Marzipan/Cutesy Buttons. Cutesy Buttons will bring in Credenza the potted plant as she tells Dangeresque that she needs his help to save a ton of rainforest trees, as she has discovered the location of a secret formula that will save the rainforest. However, it is located deep in the jungle of StrongBorneo. Strong Bad proposes one last case between himself, Dangeresque, Too? and Renaldo. Renaldo is in, asking what could possibly go wrong, but Dangeresque, Too? says he has something else to keep his eye on. Dangeresque thinks this is suspicious. You'll then unlock StrongBorneo on the map.

From here, you can pick up Credenza and put it in your inventory, with Cutesy Buttons/Marzipan agreeing that Credenza needs some sunlight. Also, use the Nunchuck Gun on Cutesy Buttons.  After that, open the map and add StrongBorneo to the map wherever you want it, then head there.

In StrongBorneo (which is in Strong Badia), Dangeresque and Ronaldo will be in a box/boat on an imaginary river. They soon get out of the boat. The formula should be around here somewhere.

If you use the Nunchuck Gun on the Strong Badia population sign, you'll shoot it down. This will reveal a hole in the fence.

CELEBRITY NAME DROPS:
NEW! Sam and Max: Use the phone in Dangeresque's office.

CHARACTERS NUNCHUCKED:
NEW! Renaldo: Do this in Dangeresque's office after you answer the door at the beginning.
NEW! Dangeresque, Too?: Do this in Dangeresque's office after you answer the door at the beginning.
NEW! Cutesy Buttons: Do this in Dangeresque's office after letting her in.

Wednesday, April 26, 2023

PrinceWatercress plays Sly Cooper: Thieves In Time - Part 33 of 48


In this one, I just go around shooting penguins with Carmelita until I get an achievement. Tune in next time for new treasures!


In this video, I take a break from collecting treasures to go for the "Waddle Waddle" achievement. For this one, you need to run around Episode 3 as Carmelita and shoot down 40 penguins (or until the achievement pops up, I guess). That's more or less it for this video, I guess. Join me next time where I go back to grabbing treasures.

Achievements:


Waddle Waddle: Shoot down 40 penguins with Carmelita.

Controls:

Left analog stick: move
Right analog stick: move camera
X: Jump and double jump (hold X on second jump for hover jets as Bentley)
Square: attack
Circle: 
  • interact (usually with anything that has sparkles) (Sly)
  • steal from enemies (from behind) (Sly, Bentley, any of Sly's ancestors)
Triangle:
  • knock enemies upwards (from behind; press Square to slam enemies down for stealth slam) (Sly, any of Sly's ancestors)
    • press Circle after knocking enemy upward to perform Silent Obliteration (Sly; replaces Stealth Slam; must buy on ThiefNet)
    • press Square for Stealth Slam (any of Sly's ancestors)
  • spin attack (hold to charge) (Sly)
  • throw bombs (Bentley)
  • Thunder Flop (in mid-air) (Murray)
  • spin attack (hold to perform) (Murray)
    • control with left stick (must buy on ThiefNet)
  • Raging Inferno Flop (in air; Murray; must be bought on ThiefNet)

L1: 
  • bomb aim (Bentley)
  • smoke bomb/flash bomb (Sly; must buy on ThiefNet)
  • aim/strafe mode (Carmelita; must hold button down)
    • left analog stick: move
    • R1: shoot (can only shoot in strafe mode)
L2:
  • hold for costume select menu (Sly)
    • hold down to stay in menu; use D-Pad or left stick to make selection
  • hold for weapon select menu (Bentley)
    • hold down to stay in menu; use D-Pad or left stick to make selection
  • hold for fist select menu (Murray)
    • hold down to stay in menu; use D-Pad or left stick to make selection
  • hold for shot select menu (Carmelita)
    • hold down to stay in menu; use D-Pad or left stick to make selection

L3: activate compass
R1: run (hold while moving to perform)
  • Paraglide (Sly; in air; must buy on ThiefNet)
    • Square: Paraglide Dive Attack (during Paraglide; must buy on ThiefNet)
  • Adrenaline Burst (Bentley; double tap to activate; must buy on ThiefNet)
  • Clothesline (Murray; double tap and steer with left stick; must buy on ThiefNet)
  • Cane Push (Sly; double tap; must buy on ThiefNet)
R2:
  • Trigger Bomb (Bentley; must have bomb on field to detonate manually; must buy on ThiefNet)
  • Super Jump (Carmelita; hold and press X to perform; must buy on ThiefNet)
R3: Binocucom
  • Right analog stick: move
  • Left analog stick: zoom in and out
  • R1: take picture (when applicable) (Sly, Bentley)

Start: pause menu
Select: map
  • Left analog stick: zoom in and out, switch between map and status
  • Right analog stick: move map
  • Circle: back

Tuesday, March 7, 2023

PrinceWatercress plays Blood Omen: Legacy of Kain - Part 33 of 41


In this entry, we take a tour through Willendorf and find a few secrets along the way.


The beginning of this video is me returning to Willendorf through the mines that we went through last video.

5:38 - Kain's description of Willendorf.

While you're here, look out for soldiers as you enter the few houses you can get into for pick-ups.

11:09 - West of the village is a castle. If you go south from the screen west of the bridge with the mist form, you can find four Hearts of Darkness, a magic orb and a secret (see below).

12:43 - There is a house north of the bridge, and inside is two secrets: a backdoor to the Slow Time spirit forge, and the entrance to the spirit forge itself (see below).

Secrets

90. - West of the village is a castle. If you go south from the screen west of the bridge with the mist form, you can find four Hearts of Darkness, a magic orb and a secret.

91 and 92. - There is a house north of the bridge, and inside is two secrets: a backdoor to the Slow Time spirit forge, and the entrance to the spirit forge itself. As for the front door, it's that full moon cave in the southwestern corner of the map.

Wednesday, December 22, 2021

HCBailly and JB play Secret of Mana - Part 33 of 41


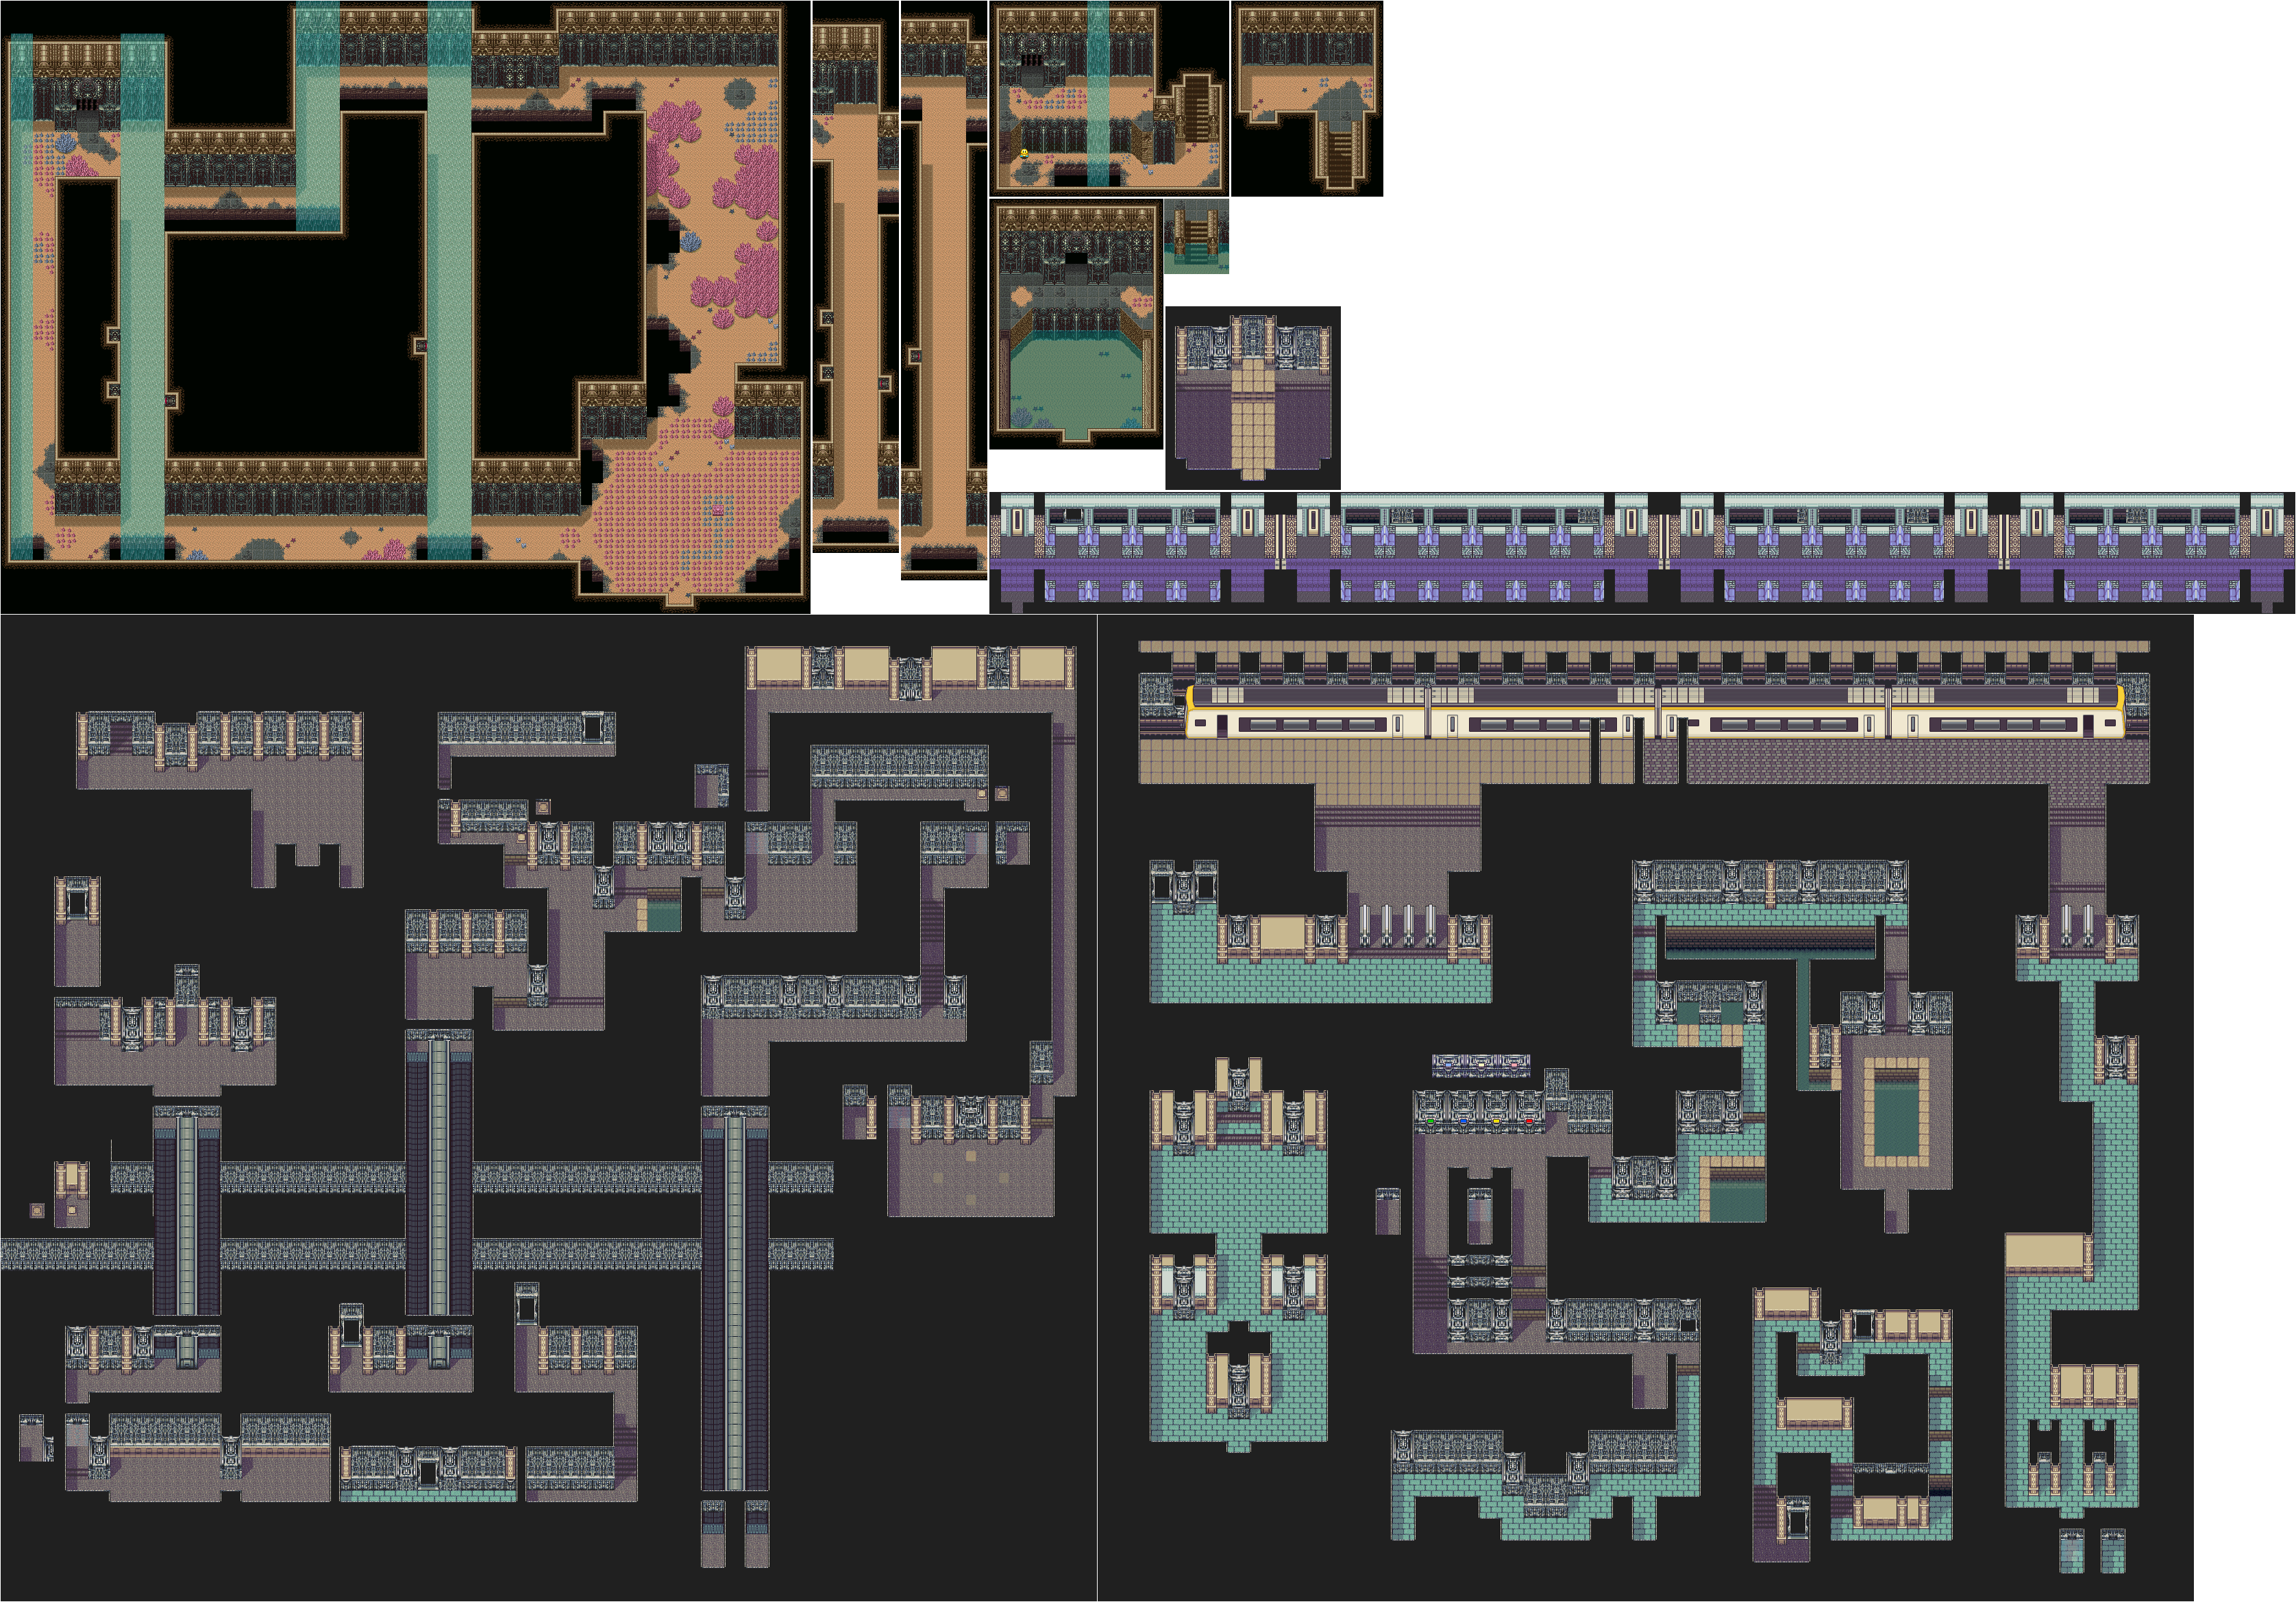
After having made our way into the Grand Palace, we make our way even deeper into something more fortress-like and even take a...subway train?


When you head north from where you fought Hydra, you'll be in a more fortress-looking area. You'll find conveyor belts, and the first one you see has a hidden wall to the west that you can walk through to find a switch. In one room, you'll find Watts as well as the Resistance. Krissie can heal you, while Watts can forge your weapons as always.

There is another room in this area, and if you enter it, you'll find a solder who mentions "Red-blue-yellow-green" before asking what it means. Remember that for later.

If you see another brick patterns, those are drop-off points. When you walk past them, you won't be able to return.

You'll eventually have to hit another switch to open up some barriers blocking certain archways, which will allow you to continue in this area. For the area with the four brown tiles, stand between all four of them. You'll open a door.

When you see the four colored rights, hit red, blue, yellow then green with the B button. You'll open up another barrier. Go down the stairs and step on the switch along the path to open up another door to the west, which is near a switch you stepped on earlier.

This will allow you to head towards a subway. Yes, there is a subway here. Go through the open door and get to the end of the subway, but watch out for all the Ghouls. When you get off, you'll be in another area. Head south. There is a hidden switch near the end; just walk between the pair of walls on the right to step on it and open up the nearby barrier.

You'll then meet the Scorpion Army for the first time since much earlier in the game. They will send another robot named Kettle Kin to take the Mana Sword from you so they can sell it for money. Keep hitting it with spells, as Kettle Kin will use Lucid Barrier to protect itself from physical attacks, and don't stay close to it so you don't get smashed by its spinning hammer attack. Beating Kettle Kin will net you the Bow's Orb. The Wing Bow confuses enemies. Afterwards, the Scorpion Army leaves, and you'll be back outside. Head west to get to the door of the Grand Palace. It's not over yet...

Wednesday, December 1, 2021

PrinceWatercress plays Sly 3: Honor Among Thieves - Part 33 of 42


Sly may be concussed, but the action continues for the rest of the Cooper Gang as Dimitri tries to get the cane back and Penelope destroys the radar tower matrix.


The Dark Current

Now that Sly's cane has fallen into the water, Dimitri will have to dive into the ocean to retrieve it. When he does, however, Dr. M's creatures are already gunning for it, and Dimitri will have to go through a tunnel to find Sly's cane on the other side.

In order to get to it, however, you'll need to use the face buttons - Triangle, Square, Circle and X - to strafe up, left, right and down respectively to avoid all of the claws that clamp down, or else you're taking damage. All the while, you'll need to hold L1 down to use the power stroke to evade all the walls quickly, or else you're not going to make it. Watch your health meter, and remember that if Dimitri grunts for whatever reason, you took damage. The game doesn't do much in the way of feedback to tell you that you've taken damage, which can make this even harder.

When you make it to the other side, you'll fight a giant fish that Dr. M is riding on. Dr. M is inside a red barrier, and you'll need to shoot at him with the spear gun every chance you get to damage the boss. Use the face button to avoid the blast radius of the jellyfish. If the jellyfish is vertical before it blows up, you'll need to swim to the side; if it is vertical, you'll need to be below the blast. Eventually, the fish will such you in, and you'll need to fire the spear gun at Dr. M - who is inside a red barrier - multiple times to destroy his personal shield and deal damage as well as save yourself from going into the fish's jaws for a good amount of damage. At least you'll come back to this battle if you lose all your health here.

When the tentacles extend outward, you'll have to stay on the move to avoid having them hit you, as they will hurt. When the guns are pulled out and the laser sights are active, you'll want to use the power stroke to avoid the lasers touching you when they turn green, as the lasers will hurt you then.

When you beat the giant fish boss, Dr. M will take the cane.

Bump-Charge-Jump

After Dimitri surfaces, Sly wakes up and - without his cane recovered - realizes that the Cooper Gang has to move fast. Bentley says it is impossible with the radar towers in the air being linked to the missile turrets, then comes up with the idea of launching Penelope's RC car into a drone patrol pipe with Panda King's fireworks so that Penelope can smash the drones, siphon their power and fry the towers' matrix.

Once the RC car is on the track, you'll need to drive forward through the drone patrol pipes. Since you don't have the turret anymore, you'll need to use L2 and R2 to push the punchers out and knock the drones off the track. When you punch a drone from the side, you'll knock it out and leave some power orbs behind. You'll need to pick these up to recover health as well as open up the ramp to the next tube. By hitting the ramps, you'll also take out the radar towers.

Be careful approaching the drones. They shoot lasers out from the back to hit you if you're chasing after them, so you'll need to make it a priority to never line yourself up with them. Also, if you hit a big ramp, let go of the accelerator so you land with all four wheels flat on the ground and don't end up upside down. Also, watch out near the walls, as you can end up flipping off them and ending up upside-down for a few seconds if you get too close to them and move forward. Finally, the pipes with the steam coming out of them are just for show; they don't damage you.

Once you take out the three radar towers, it's on to the next job.

Controls:

D-Pad/left analog stick: Move
X: jump/double jump
Square: attack
Circle: use to interact with sparkles, steal from enemies (from behind; with Sly), grab objects and stunned enemies (with Murray; press Circle afterwards to grab enemy out of air and press again to shake them, or press Square to throw them)
Triangle:
  • charge up cane, knock enemies into the air (from behind; with Sly, use Square afterwards to slam enemy down/use Silent Obliteration)
  • drop bombs (Bentley)
  • uppercut (Murray; press Circle afterwards to grab enemy out of air and press again while holding enemy to shake them, or press Square afterwards to knock enemy out while in mid-air)

Select: access Gadget Grid
  • D-Pad/Left analog stick: select gadget/ability
  • L1, L2, and R2 buttons: assign gadget to button pressed; gadget can then be used with that button

Start: Pause/unpause
  • D-Pad/left analog stick: choose options
  • X: confirm choice
  • Triangle: back out of choice

L3: bring up waypoint

R3: use Binocucom
  • Left analog stick/D-Pad: look around
  • Right analog stick: move in and out
  • R1: take picture

R1: run (hold down)
  • use Paraglide (as Sly; hold down to use, must purchase first)

Right analog stick: move camera

As Carmelita:

  • Left analog stick/D-Pad: move
  • Right analog stick/D-Pad: move camera/aim
  • Triangle: toggle between strafe mode and free movement
  • Square: kick
  • Circle: mega jump
  • X: jump and double jump
  • R1: shoot

As The Guru:

  • L1 (hold): transform
  • Circle (in mid-air, behind an enemy): mind control
    • Left analog stick/D-Pad: steer enemy
    • X: jump off enemy and launch enemy forward
    • Square: attack

Grapple cam controls:

  • D-Pad/Left Analog Stick: aim camera
  • X: shoot/grapple with hook
  • Circle: distract enemies
  • Square: self-destruct (hold down)
  • R1: Fire turret

Hacking mini-game controls:

  • Left analog stick: move
  • Right analog stick: aim and fire gun

As The Panda King:

  • Square: flame chop
  • L1: hold to load fireworks, release to attack with stored fireworks
    • Right analog stick: sweep over multiple targets

Sunday, October 31, 2021

HCBailly plays Final Fantasy II AGAIN - Part 33 of 65


Our adventures in the Cave of Deist continue with a couple of new monsters and items.


The Revenants are the nastiest undead creatures you'll meet at this point in the game. With 240 HP, it'll take a little bit of work to take them down. A powerful Fire attack on all of them at once does help, though, as does a well-powered Life spell. Just don't let them strike you, as they'll leech HP out of you.

The chest with the Mage's Staff in it contains Green Souls (G. Soul). All these guys do is cast Cure 6 on you. Weird. I guess it helps if you've somehow managed to survive taking down two HillGigases at one time. They are Rank 4, and considered Magic Best and Spellcaster-type enemies.

Anyway, the Mage's Staff is the most powerful Cane weapon you'll find yet, and it can cast Thunder 5 when used as an Item in battle. It also has a smaller Magic Penalty than the WereBuster, which is pretty nice.

There is a bug in the Famicom version where if your entire party gets hit with a multi-targeting spell, it counts as Firion casting a White magic spell and counts towards Spirit rather than Magic Resistance.

The MthMirror casts the Wall spell on your party when used as an item. It can block Black magic all the way up to the level that the Wall spell is at; however, there is a bug where it only works on the party member who used it on down. If anyone other than the party leader uses it, they don't get covered by the Wall spell; also, if the third person in the party uses it, only they and the fourth person in the party are covered.

If you see a small gap in the bridge and you walk into it, you'll fall down to the level below. However, if you use the Warp spell, you can go back up and continue on as if nothing happened.

The chest with the Knights Armor spawns a battle with multiple Adamantoises. Get your magic ready and be sure to Curse them before they can do some real damage in!

Sunday, July 25, 2021

PrinceWatercress plays Bio Menace - Part 33 of 37


You thought the last level was bad enough? This one's even nastier.

Robots Attack

Get on top of the entrance and shoot down the robot above, then duck down and take down that giant robot that approaches you before it annihilates you. After that, get all the power-ups that are dead ahead, as you'll definitely need the super gun for the enemies up ahead and the grenades for the mines and leaping bombs.

Once you make it to the far right, be ready to use Page Up and Page Down to look for enemies ahead of time. Also, save the super gun for as many enemies as you can, and go back for the plasma bolts (and the health) when you need them.

Once you clear the level of enemies, the area becomes easier. Don't forget to climb up the ladder near the exit for a key. The blue shard needed for the hostage - who tells you that there is a ton of radiation in the next area - is in the door all the way to the left on the top floor.

Sunday, June 20, 2021

PrinceWatercress plays Ratchet and Clank - Part 33 of 38


In this entry, we finish up our business in Kalebo III before heading back to Quartu.


This time around, I take the path to the right once I'm able to go indoors. 

Taking out the robots that come out of the walls is simple if you have the Glove of Doom and plenty of ammo for it. The robots will have different attacks in each of these sections you fight them in, but if you keep your distance and keep your Glove of Doom ammo topped up, this isn't too bad.

Along the way, you'll also be using the Slingshot to get around, and you can go to lower areas to beat down some enemies and use the Metal Detector to snag some free Bolts. You'll also need to shoot some targets to power down some electric barriers and get through some doorways.

Near the end of this path, you'll finally be able to shoot down the ship that spawns the bounty hunters once and for all with the Visibomb Gun.

At the end, you'll find an agent who is looking for a new star, and if you can beat his test-bots in a race, he will award you with a Hologuise, allowing you to enter the factory in Quartu. For this race, you'll definitely need the Zoomerator to convert stunts into turbo, and you'll need to practice this course to get know it better and win a little more easily.

The yellow walls can be moved on, provided you stay on the bottom of them. Also, the three arches near the end open up a shortcut near the finish line that can help you get the jump on the test-bots if you're nearing first place. Doing this race very well will allow you to win the Hologuise...and also learn that Clank is far more eloquent than Ratchet at a moment's notice.

If you score 4500 points or more in the hoverboard race on this planet, you'll get a Skill Point. I do this in the next video. Speaking of Skill Points, the rest of this video is spent getting the Skill Point for completing the rail grind to Gadgetron Inc. without getting hit.

Controls

As Ratchet: 

Control Pad/Left Analog Stick: move
Right analog stick: move camera

When hanging off platforms:
  • Control Pad/Left Analog Stick: move
  • Forward+X: vault up
  • Back+X: drop down

X: Jump and double jump
  • R1: stomp (must have Thruster-Pack)
Square: strike with wrench
Circle: pull out/shoot currently equipped gun/use gadget
Triangle:
  • quick select (hold and use in conjunction with Control Pad or left stick to switch guns; menu can be customized in Quick Select on the pause menu
  • double tap to switch between two most recently used Circle button weapons/gadgets

Select: Map
  • Left stick/D-Pad: move map
  • Right stick: Zoom in/out
  • X: view missions
  • Circle: play Infobot for planet
  • L1: previous map
  • R1: next map
  • Triangle: Exit
Start: Pause menu
  • Control Pad: select option
  • X: confirm option choice

L1: tap to quickly center camera; hold for first-person view (hold button and use left stick or D-Pad to look around; let go of L1 to move camera back behind Ratchet)
  • Square: wrench boomerang
  • Circle: fire gun
L3: see health and Bolt totals
R1/R2: crouch (hold down)
  • Square: wrench boomerang
  • Left+X or Right+X: side somersault
  • Down+X: backflip
  • X (while running): long jump (must have Heli-Pack/Thruster-Pack)
  • X: high jump (must have Heli-Pack/Thruster-Pack)
  • Double tap: hover (must have Thruster-Pack equipped)
    • L2: strafe left (while hovering)
    • R2: strafe right (while hovering)
    • X: exit hover mode (while hovering)

In water:
  • Square: dive and descend
  • X: surface and ascend
  • R1: turbojets (must have Hydro-Pack)

Trespasser:
D-Pad or Left Analog Stick:
  • Up and Down: switch rings
  • Left and Right: rotate rings
Triangle: leave Invinco-Lock screen

As Clank:

Control Pad/Left Analog Stick: move
Right analog stick: move camera

When hanging off platforms:
  • Control Pad/Left Analog Stick: move
  • Forward+X: vault up
  • Back+X: drop down

Square: punch
X: Jump (press and hold in the middle of a jump to glide with Heli-Pack)
Triangle: command menu (hold and use in conjunction with Control Pad or left analog stick to choose commands)

Friday, February 5, 2021

PrinceWatercress plays Sly 2: Band of Thieves - Part 33 of 49


In this entry, the plan to derail Jean Bison's plans gets underway. We start by taking pictures of three blueprints split between the three cabins in the area.


I forgot to mention the bear traps in the last area. They're more prominent here, so I'll mention them now. It should be obvious not to jump into them. They hurt. There, I said it.

Treasure Of The Video

Alabaster Chalice - This one is near a log cabin. Thankfully, the train tracks make it a bit simpler to get to the safe house before this thing explodes. Be ready to run...you only have 45 seconds!

Cabin Crimes


For the first job in the episode, you'll need to go to Jean Bison's cabin and photograph the maps of the train routes.

The game tells you how to use the handholds on the rock. Just grab on with Circle, then hold the direction opposite the one Sly is facing to rear back. From there, jump and press Circle to get to the next handhold if necessary. 

As for Jean Bison, hide underneath the tables so Jean Bison doesn't see you. There will be crates in a corner; jump up them to get to the steel beams and take pictures of all three maps from here. Also, enjoy the speakerphone discussion between Jean Bison and Arpeggio.

Once you get the photos, go up to the fish, press Circle, and get the plans. From here, get out without getting spotted.

You're not done yet, though. You'll have to head to the two remaining cabins and go up to the fireplace mantle fish in those cabins much like you did the first one for more blueprints. Thankfully, there is usually something to climb up in a corner to get to the metal ceiling frames.

In one of the cabins, Sly may or may not jump towards the hook, if he does, be ready to press Circle immediately. Also, one of the cabins has the Vault, which contains the music box. It acts just like the Alarm Clock, but it puts any enemies it gets the attention of to sleep once they get close.

Once you get all the plans, head to the of the mountain and get to the satellite dish. From there, press Circle at the console to get total access to the trains' GPS system.

Now for the second leg of the episode. To get two Clockwerk Lungs and the Clockwerk Stomach, they will have to be ripped from the trains that the parts allow to run endlessly. Unfortunately, the trains are locked down, and the locks need to go.

Spice gas will need to be collected from the balloons above town and used to blow up the locks. From there, Bentley will suit up and get into one of the trains to get one of the Clockwerk Lungs.

Controls

D-Pad/Left Analog Stick: move
Right Analog Stick: move camera
X: jump and double jump
Square: Horizontal Attack
  • horizontal attack (as Sly)
  • slam enemies launched into the air from behind (as Sly)
  • hook punches (as Murray)
  • Thunderflop (as Murray; in mid-air only)
  • crossbow swipe (as Bentley)
Triangle: Vertical Attack
  • vertical attack (as Sly; used to knock enemies into the air)
  • downward dive (as Sly; in mid-air only)
  • uppercut (as Murray)
  • drop bomb (as Bentley)
Circle: Action button (near blue/green/purple sparkles and character icons)
  • pickpocket (as Sly)
  • stomp (as Murray; use Square to throw object/enemy)
R1: hold to run

Select: Gadget Grid
  • Control Pad: highlight gadget
  • X button: confirm gadget
  • L1, L2, R2: assign gadget to button pressed

L1, L2, R2: use gadgets assigned to button pressed

Start: pause menu
  • Control Pad: select menu choice
  • X button: confirm choice
  • Start: un-pause game

L3 (press the left analog stick): locate beacons for mission objectives

R3 (press the right analog stick): Enter and exit Binocucom for first-person view
  • Left analog stick: look around
  • Right analog stick: zoom in and out (with up and down on right stick)
R1: 
    • take pictures with spy camera (as Sly; when applicable)
    • shoot sleep dart (as Bentley)

Hacking mini-game controls:
  • Left analog stick: move
  • Right analog stick: aim and fire gun

Monday, July 6, 2020

PrinceWatercress plays Terranigma - Part 33 of 50


In this entry, we check out the town of Liotto, we throw balls at wooden cats and Meilin starts acting weird.


Now that you've gone to the west, you've finally gone full circle. 

Leave Sancutar and head to South America. You'll come across Guiana on your way south. Since you moved the Quatros from Litz, they'll be in the northern coast past Guiana. Once again, you can talk to the dancer in the upper-right tent and do the massage thing again for a few Gems. 

There is a bridge near the east coast, and if you go south down it, you'll reach the town of Liotto. However, there are some other areas of interest to go to, such as a set of trees next to the mountains near the southern end of South America. This is the stopover that will take you to Greenland. Further south is another forest area near the coast where if you enter it, you'll find a mushroom maze. Talk to the mouse (yes, you can somehow talk to the mouse and it will talk back in human language, which isn't supposed to work anymore) to start the challenge. You'll have to get through the maze as quickly as possible for a prize.

From the mouse, go straight north, then go west - removing any cacti in your way if necessary. You'll come across a log tunnel that goes south. You'll want to go through this log by crawling through it, then pick up the cacti to the west and swim all the way to the end. If you get there in time, you'll get Magirock #59. You can leave from the other end to head back to the world map.

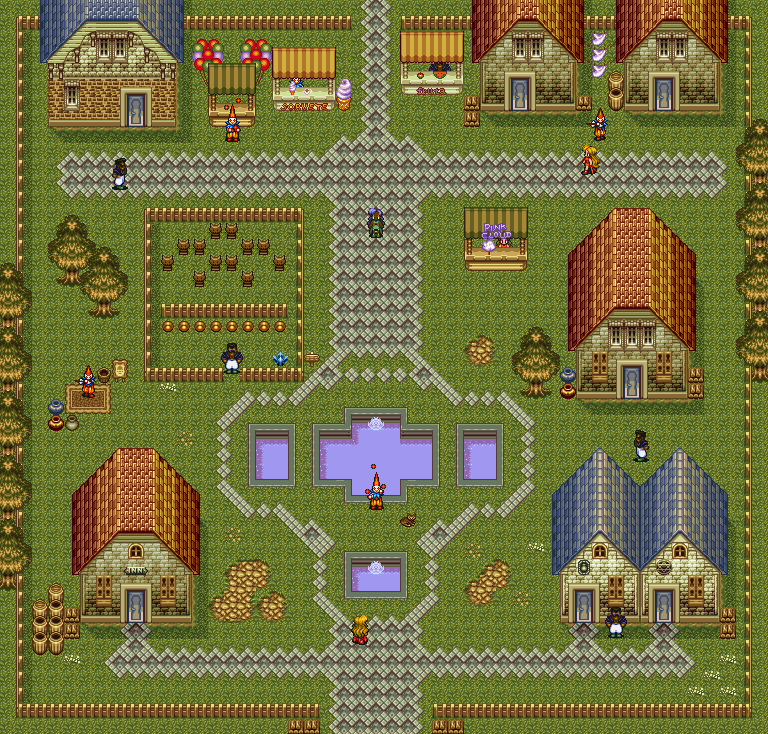
Now it's time to check out Liotto. Let's head to the port first.

Liotto


You'll learn about Mermaid Tower in the east, which has been populated with monsters. Due to the tower's sudden appearance, people who have set sail from here have since started disappearing mysteriously.

Now it's time to head into the town.


Love the music here. Quite a few of the people here are fun-lovers, obviously.

The building to the left is the inn, and the innkeeper's young daughter is running the desk until her mom gets back. She lets you stay for free.

There is a guy standing in front of the building to the right of the fountain, which houses the item shop and Magishop. He'll tell you that weapons named "something Staff" have special effects and are worth equipping.

The building behind the store is another house. Apparently the kid living here is a big soccer fan. I'm guessing the Pelo poster above the bed is a Pele reference.

There is a Magirock in the fenced-in area northwest of the fountain. There is where you can play "Cream-A-Cat" to get it. You'll be throwing balls at wooden cats. Use your running throw to hit all the cats, and throw the balls straight north of where you find them. If you have two next to each other, center yourself between the two cats and throw the ball with a running throw straight to the north. If the two cats next to each other fall simultaneously, you did it right. You'll have to do this technique in order to hit all the cats with all the balls, which you will need. As a reward for hitting all the wooden cats, you'll get Magirock #60.

The clown with the flute will tell you that Corcobet Hill is to the north, and it's where lovers declare their love to each other and find happiness.

The building in the upper-left corner is where you can try some Brazilian food for 10 Gems a piece. What you really want, though, is Magirock #61 in the room behind the door.

The "Sorvete" booth to the north sells ice cream cones and coffee for 10 Gems each. I'm guessing that supposed to read "Sorbet."

Also, Corcobet Hill is really a town square with a miniature Christ the Redeemer statue. You can tell that Liotto is based off Rio de Janiero.

To the right of the entrance to Corcobet Hill is a fruit stand. Here, you can eat an apple or a watermelon.

To the right of the fruit stand is a woman with a dancing monkey. Okay. To the right of that house is a woman who will tell you about the Mermaid Tower. If you toss the wastebasket near the bed and hit the monkey with it, the woman will get mad at you and the monkey will stop dancing.

The Pink Cloud booth is where you can buy some cotton candy for 10 Gems. You'll also meet Meilin here. How she managed to get all the way to the Americas is never explained, but when you talk to her, she'll tell you she's decided not to leave your side again. Regardless of your decision, she'll ask to go look at the carnival. Meilin will join you again.

Near the Pink Cloud booth is a woman with blue hair. She'll tell you a a sailor has claimed that Astarica is behind the mountains in the northwest, and that the people there held rituals to get closer to God. We won't be able to go over there until later in the game. 

Head to Corcobet Hill. She'll tell you that she wants to believe that if lovers do meet at Corcobet Hill, they will remain happy. She then asks if it would be odd if she got to like someone...even if that someone was you. She tells you that she will be back at Corcobet Hill later tonight and that she wants you to return to tell her how you feel about her. She then tells you right out of the blue that she loves you.

You have a girlfriend in Elle underground. What.

Head to the inn and enter the room to the left. Sleep in the bed, and it will be night when you leave the inn. Head back to Corcobet Hill. You'll then see Elle from Crysta, who tells you she came here with the Elder's permission. She then tells you that the sights of Crysta were beautiful because she was with you, and that tshe knew for the first time how lonley she was without you. Elle then declares she wants to be with you like back then...then she disappears.

Meilin shows up from behind the statue, and tells you that you saw the person in your heart...and that it wasn't her. She then hates your guts again.

When you leave Corcobet Hill, it will be daylight again. You're done here.

Monday, September 30, 2019

PrinceWatercress plays Secret of Evermore - Part 33 of 35


At last, we meet the Professor...and we also get a way to go to and from the space station whenever we want!

All maps by Grizzly.


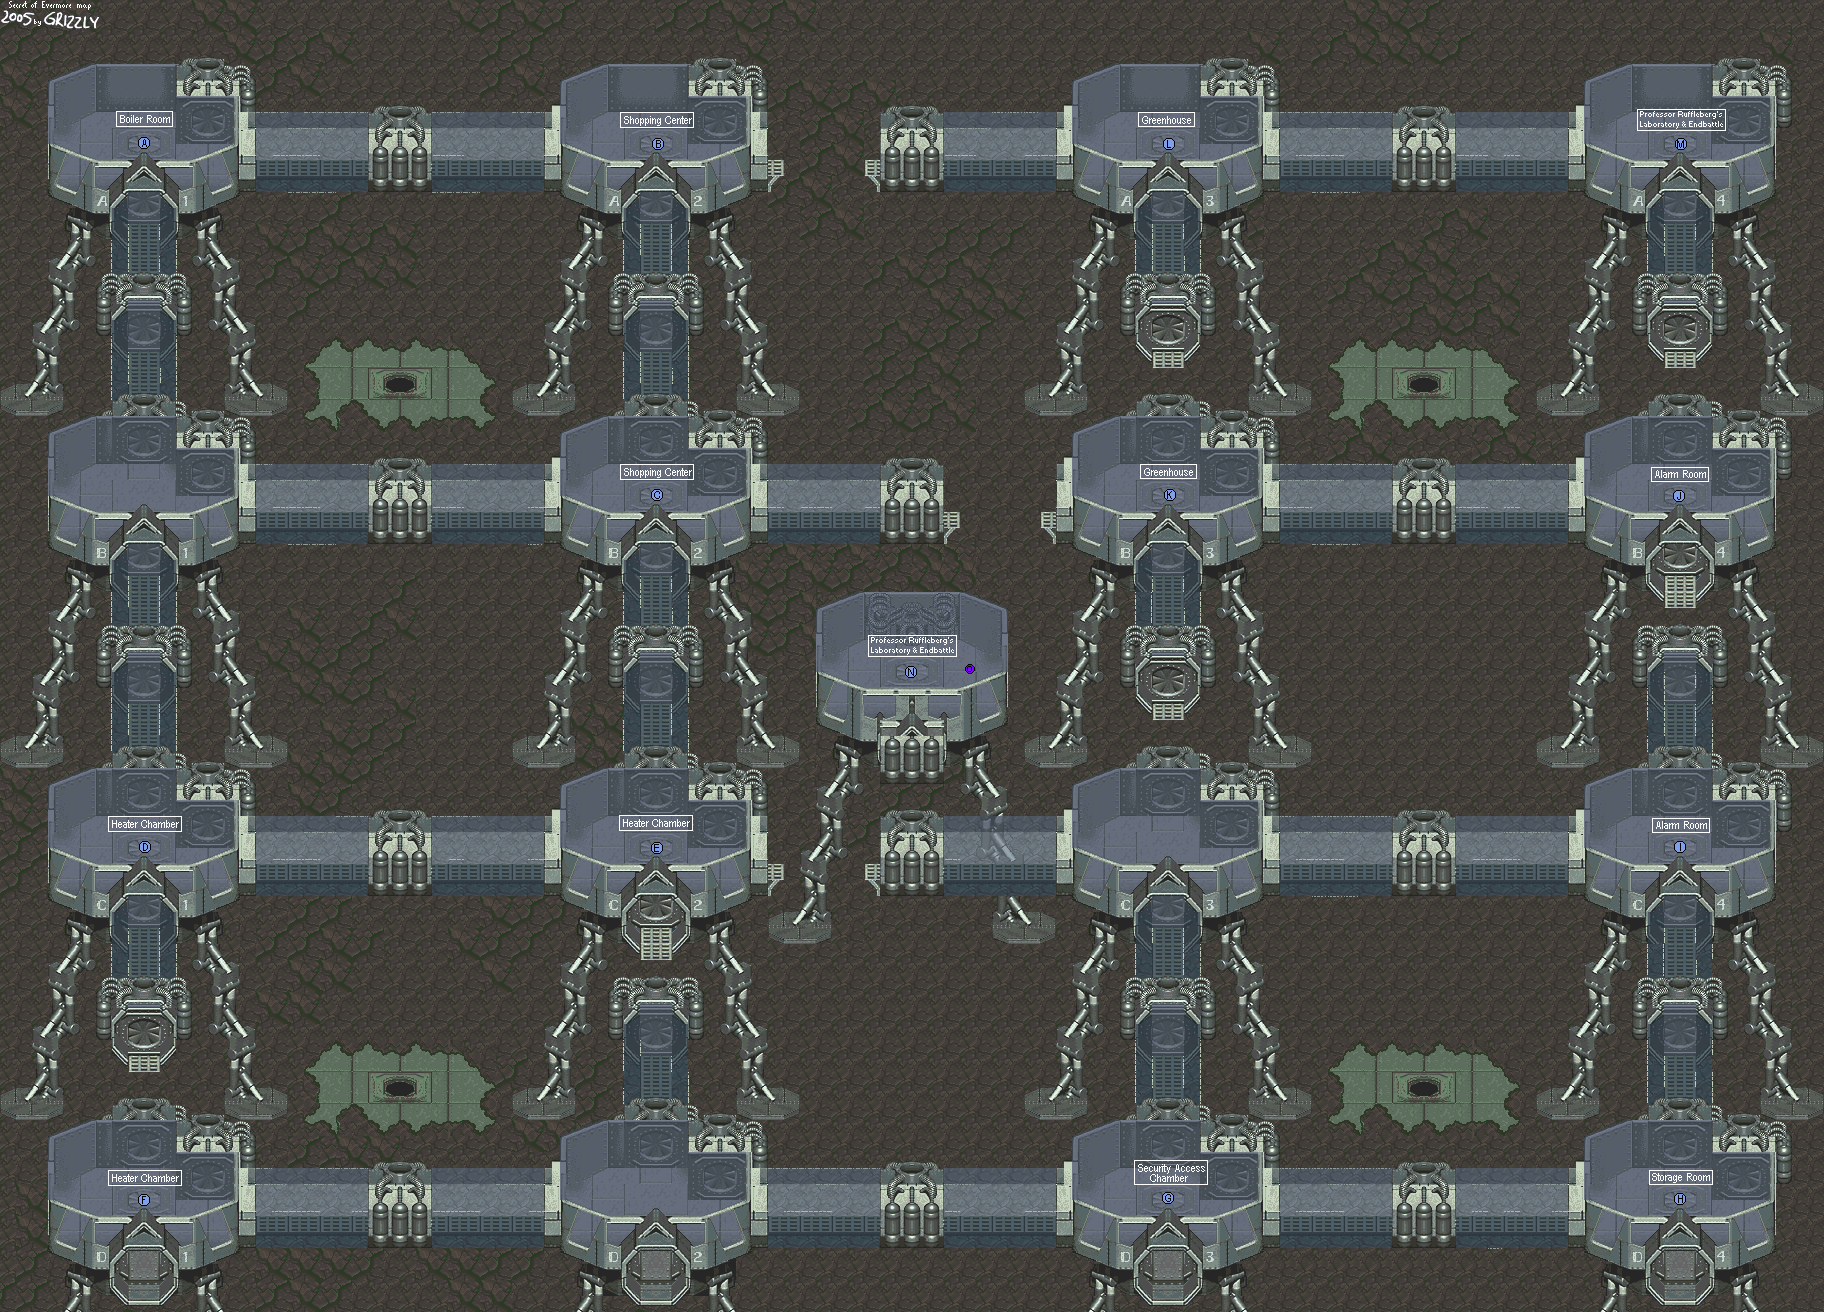
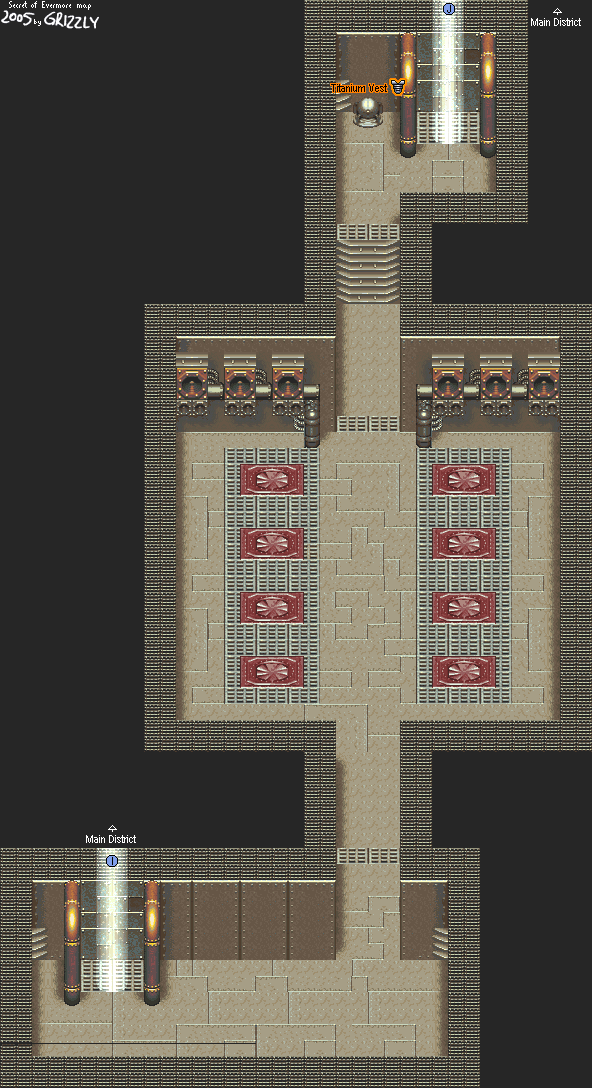
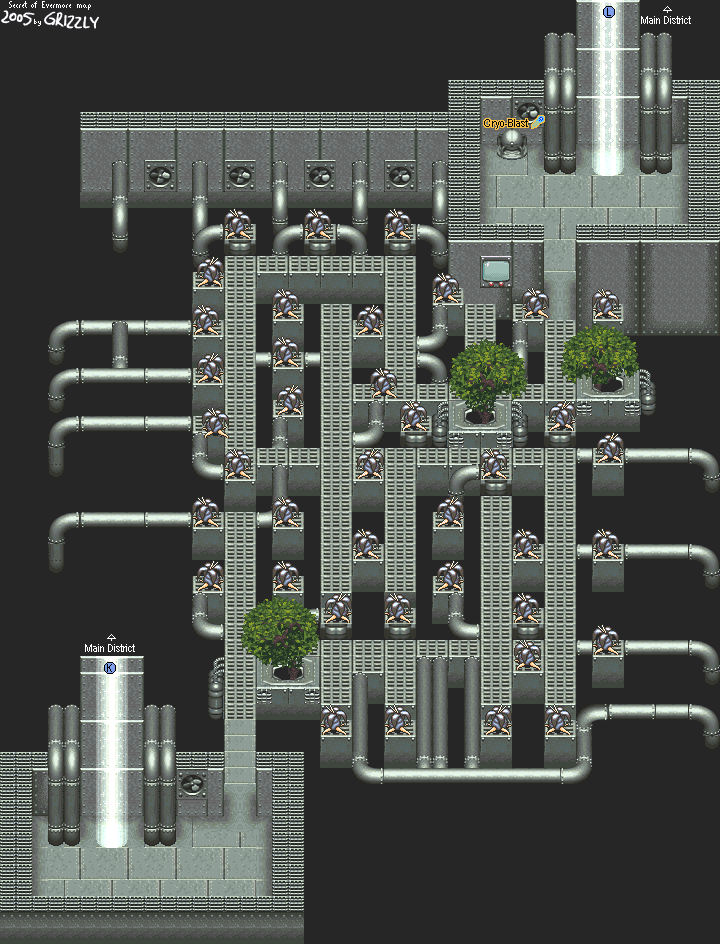
You start off in the "first section" of the Main District, which consists A-1, A-2, B-1, B-2, C-1 and C-2. You'll have to get through the heater maze to get to the "second section."

Heater Chamber


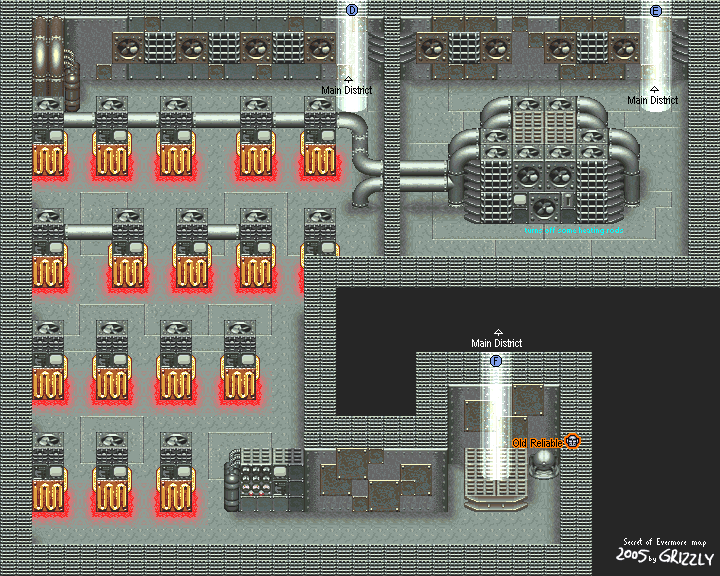
C-1 leads to a bunch of heaters. If you touch them, however, you will take damage. In order to get to the other side of these things, you'll have to turn the switch off that controls some of these. To do this, you'll have to go to C-2, flick the switch, then return to C-1. When you do, some of them will be turned off and you'll be able to get to the other side without a problem.

Be sure to open the little bubble next to the teleporter when you reach the other side, too. It contains Old Reliable, which is stronger than what you can get in the Shopping Center.

Once you go into there, you'll get access to the "second section" of the Main District maze which consists of the entire D row as well as C-3 and C-4.

Security Access Chamber


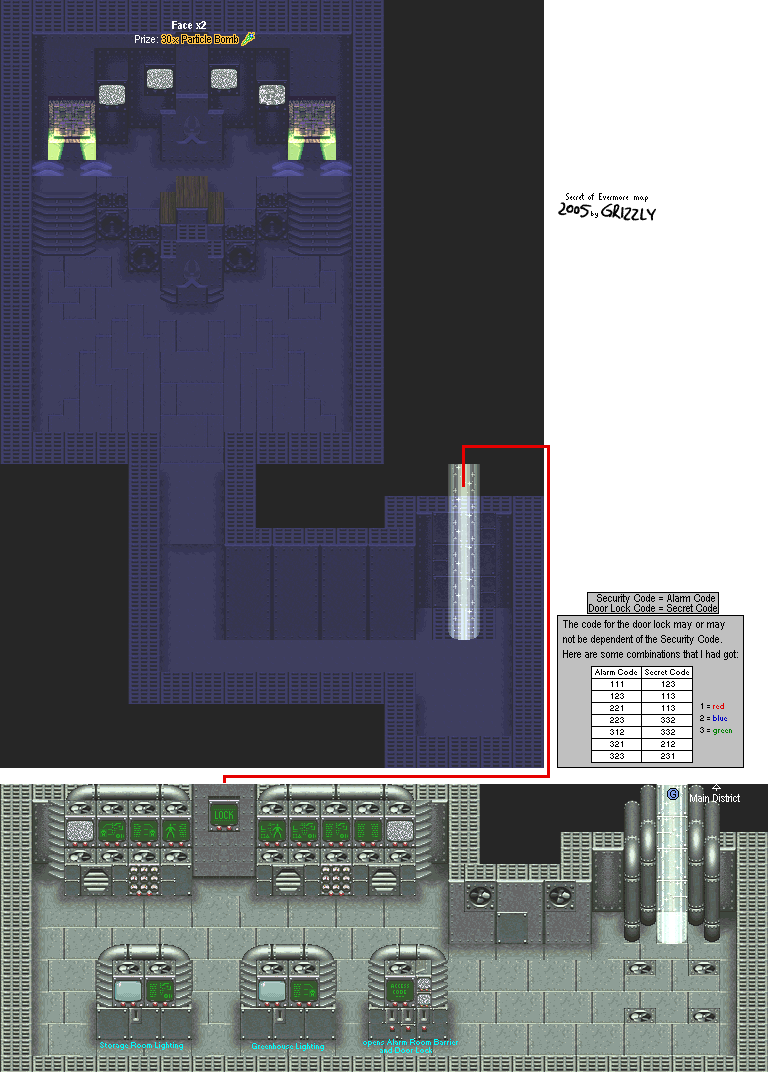
D-3 leads to the Security Access Chamber. When you come down the transporter beam, take down all the fans that come out of the floor. They may look like they're powerful, but they're not. Now you can do stuff around here without being very slightly hassled.

The console in the middle is the greenhouse lighting switch, and to the left of that is the storage room lighting off. Both of them are connected, and if you turn one on, you do the same to the other.

If you don't flick the storage room lighting, you'll have to fight some monsters if you go into it.

The console on the right controls the alarm. If you used this before you went into the alarm room and used the code for it, you won't have to fight the eight Guardbots (which aren't very hard, anyway) in the Alarm Room.

Storage Room


D-4 leads here.

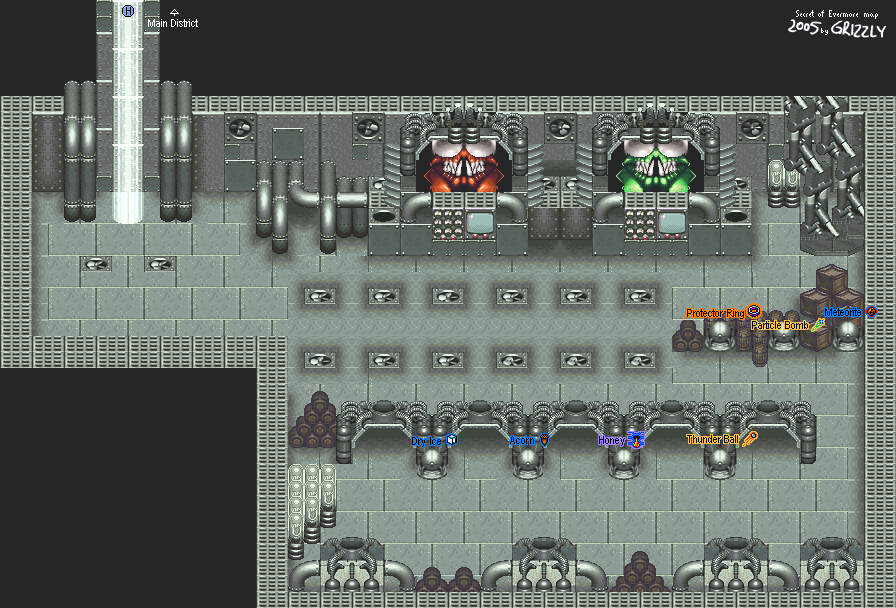
If you don't turn on the lights here, you'll trip an alarm and you'll have to face more enemies. What's up with the red and green Thraxx heads, anyway?

You can find the Protector Ring here, along with a few alchemy ingredients, healing items and some Bazooka ammo. For some reason, the alchemy ingredient and healing item chests are glitched. You can open the chests, but the game takes forever to tell you you got something and give it to you.

Alarm Room


C-4 leads here.

There is a switch that turns the alarm in the Alarm Room off somewhere in Omnitopia.

If you don't turn off the alarm in the security access chamber, you'll have to fight off eight Guardbots before you can continue on. Hope you got the more powerful Bazooka Ammo before you got here.

The little bubble here gives you the Titanium Vest when you get to the transporter beam on the other side. Sweet! From here, you'll be able to go from B-4 to B-3, which leads to the greenhouse.

If you go back to the security access room after fighting the Guardbots, the alarm code machine will tell you what the code was when you see it.

Greenhouse


If you come in here while the lights are on, you'll get the Prehistoria jungle music and some of the flowers will try to attack you as soon as you come near them. These flowers are called Flowering Death, and if one lands a successful attack on you, it instantly causes a 999 HP which puts The Boy out for the count via an insta-kill. Unless you use Pixie Dust and you have six of those things, I wouldn't even recommend going in here while the greenhouse lights are on. Instead, you'll have to turn them off, and to do that, you'll have to go to the Security Access Chamber and turn the greenhouse lighting off.

When it's dark, you can actually do some stuff. Head to the transporter beam on the other side of the maze. Open the treasure bubble to get some Cryo-Blast ammo, which is even more powerful than the Particle Bomb.

All you'll have to worry about in the maze now are the grey mosquitos that show up near the north end of the maze. They're just like the ones in Prehistoria, so trust me when I say that they aren't that powerful.

You'll come out through A-3. Go right to A-4...and you'll finally meet Professor Ruffleberg!

Professor Ruffleberg's Laboratory


When you meet Professor Ruffleberg, he'll tell you how all this started:

It was all a scheme by his household robot servant, Carltron (the guy who sent you into the room with the two Guardbots at the very beginning of the game). The AI that he had from being programmed into a very good chess player also gave him free will. Carltron got tired of being the Professor's household servant and sabotaged the Evermore experiment. He then schemed throughout the years, which led to the creation of the robot body doubles and all the problems going on in Evermore. Now the Professor needs your help to stop him.

TL;DR: The butler did it.

He'll then tell you about the Energy Core that's located at the base of the Chessboard in Gothica. He will then open the door to it so you can get. You'll be able to use the spaceship (which actually works this time) in order to head down there and get it. He'll also give you Call Up, which uses the super-rare Meteorite ingredient (there's only about 14 of them in the entire game). It lets you create Call Beads. He'll also give you his Call Bead spells as well.

Call Up
1 Meteorite, 1 Dry Ice

Disrupt: Casts Confound on enemies.

Restore: Brings The Boy and The Dog to maximum health.

Electra-Bolt: A powerful lightning attack.

The switch that the Professor was standing at will give you the most powerful armor in the game. Go buy it. You'll need it for the final battle.

Sunday, May 12, 2019

HCBailly plays Final Fantasy IV (Super Famicom) - Part 33 of 70


Here's the preview...


...and here's the video.


Cecil hands the Crystal of Earth in exchange for Rosa. Don't touch 'em.

Golbez pretends to not know who Rosa is, and Tellah proceeds to hit Golbez with spells, including Meteo, despite warnings from the rest of the party that he will not survive after the casting. The spells have little, if any, effect on Golbez. Meteo seems to work on Golbez, but guess what? It doesn't.

Golbez retreats, with Meteo haven broken the spell on Kain. Cecil goes after Golbez, but Golbez knocks him into the wall with a lightning bolt. Golbez is about to finish Cecil off, but suddenly his head hurts and he retreats.

Sadly, Tellah dies, regretting that his efforts were both in vain and fueled by hatred. From here, talk to Kain. Kain will wake up and finally be snapped out of Golbez's control, and mention that Rosa is above them. Kain and Cecil get through the door, and Cecil barely saves Rosa in time from being sliced in half by a guillotine. (In the Western version released prior to the PS1 re-release, it was a giant ball that would have crushed Rosa to death, proving that quite a bit of the censorship in the game was really unnecessary.) Rosa and Cecil embrace, much to the delight of Cid, then Kain admits he wanted to be closer to Rosa. He asks for forgiveness, then Cid realizes that maybe this conversation should be continued later. Rosa and Kain then re-join the party.

Give Cecil the Light Shield so you can equip the Flame Shield on Kain. Replace Yang's Fire Claw with the Fairy Claw, and give Rosa the equipment that Tellah had. (Thankfully, you have a chance to take off all of Tellah's equipment before he dies during the crystal exchange.)

When you try to leave the old-fashioned way, you'll be confronted by Barbariccia, the Empress of Wind. This triggers a boss battle.

Have Kain Jump right away, as this is the only way you'll be able to attack Barbariccia while she is in her tornado form. Make sure to Jump at the right time so you can take her out of that form as soon as she gets in it.

The Fingertap induces a slow Petrify effect that will slowly Petrify whoever is hit by it. Thankfully, Esuna will help.

As a Paladin, Cecil has the ability to automatically Cover anyone with low HP, allowing him to take a bullet for anyone with low HP. As long as Cecil's HP is high, you can keep doing this for a while and keep healing him with Cure 3 while everyone else hits Barbariccia with everything they've got.

Tornado will hit your party member so hard that it will knock their HP into the single digits, but it will never outright kill them.

Wednesday, July 25, 2018

HCBailly plays Soul Blazer - Part 33 of 33


Enjoy your ending.

The game ends with the sun setting and everyone in the world takes the time to admire it. A light ray shot into the sky, but nobody notices. (This is implied to be Blazer.) We then see Lisa one more time, standing all by herself, admiring the sunset. The credits then roll.

After the credits, a year passes. The Master realizes that Blazer still has feelings for Lisa, and sends him down to Earth to live as a human being, and loses all memory as soon as he touches down. Lisa shows him around the village in an attempt to make new memories with him, and the game ends.