Showing posts with label part 25. Show all posts

Wednesday, July 22, 2026

PrinceWatercress plays Space Station Silicon Valley - Part 25 of 32


This level is shorter than the previous one. Don't get zapped by the scorpions.


Hot Cross Buns


Dan's not happy right now. It's really hot, the music is annoying, and he's not in the mood to deal with everyone. Not only do you finally get to destroy the speakers pumping out the music, but you get to destroy a bunch of spinning foxes and turn all the noughts to crosses...whatever that last one means.

You start out as a camel with a cannon on its back. The cannon will always face forward...unless you change direction and don't stop, or if you rotate the camera and don't move. When that happens, the cannon will be facing the last direction you faced (for changing direction) or whatever the camera considers "forward" (for rotating the camera). This can be used to your advantage to take out the spinning foxes near the start. Of course, once you stop moving again, the camera re-centers itself to face forward like you are. I usually just carefully approach them, then mash the A button in range to fire the cannon shots and take them out in seconds. As for the B button, that is a short-range teleport dash similar to the racing fox's speed boost from the Euro levels. That takes care of that second mission immediately.

Aside from the speaker near the start, there is also a vulture you'll want to defeat. You'll definitely want to do that, as you will need the vulture right now. Take control of the vulture, grab the camel, and then continue to the next section of the level with the camel in your talons. This will help you (and the camel) get over the pit of spikes that is instant death if you touch it. You'll also want to take one of the non-armed desert foxes to the next area as well. 

At the columns, get the Power Cell, destroy the speaker and hit the switch. This raises up a panel with a circle on it, or a "nought." Take control of the camel again, then go down the stairs. Scorpions will crawl out of the bunkers in the sand, and you'll need to destroy them all as quickly as possible, as their lightning attacks pack a punch. Destroy all four of them, then take control of one of the scorpions and go through the bunkers to find some Power Cells as well as the switch for the second panel for the noughts/crosses mission.

By exploring this area, you'll find another speaker to destroy and another scorpion. You'll want to destroy it, then get the vulture. Grab a scorpion, then fly around and look for a floor switch. Hitting the floor switch activates the third noughts/crosses panel. Place the scorpion on the floor switch to keep the panel up.

There is one last speaker near the exit teleporter. Carry the camel over there with the vulture, then shoot the speaker down as the camel. Then, take the desert fox into the next section and jump from one noughts/crosses panel to the next. You'll need to do this quickly to turn the noughts into crosses and make sure that they stay crosses, and you'll want to make sure that you are near the edge of these platforms to ensure you jump into the next one without falling into the water below. Since the desert fox has very bad water resistance that causes the water to eat away at its health, you'll want to be careful.

As the vulture, you'll want to grab all the scorpions and drop them in to the nearby vortex, including the one you left on the floor switch. Doing this will cause each scorpion you dropped to turn silver. When you have seven silver scorpion, fly into all seven of them to get a gold scorpion to pop out of the vortex. That's the trophy. Pick it up.

With all this done, you're clear to get out of this place. Just fly to the exit teleporter across from the noughts/crosses platforms.

Cannon Camel


Type: Cannon Camel
Environment: Desert
Skill A: Hot Shots
Skill B: Mirage
Water Resistance: OK
Mass: Heavy
Armour: Light
Strength: Strong
Traction: Good
Fall Distance: Medium
Production: Long
Engine: Fusion
Intelligence: High

Desert Fox


Type: Desert Fox
Environment: Desert
Skill A: Jump
Skill B: Spin Attack
Water Resistance: Poor
Mass: Light
Armour: Light
Strength: Weak
Traction: Good
Fall Distance: Medium
Production: Short
Engine: Electric
Intelligence: High

Scorpion


Type: Scorpion
Environment: Desert
Skill A: Claw Attack
Skill B: Lightning Attack
Water Resistance: Very Bad
Mass: Tiny
Armour: Light
Strength: Medium
Traction: Good
Fall Distance: Medium
Production: Very Short
Engine: Nuclear
Intelligence: Very High

Power Cells


Monday, February 9, 2026

PrinceWatercress plays Super Mario Odyssey - Part 25 of 92


Now that the Mecha-Wiggler is defeated, it's time to get some Power Moons...and there's a ton of 'em.

First | Previous | Next | End

A Fresh Start For New Donk City


Now that the Mecha-Wiggler has been defeated, you can explore Metro Kingdom at your leisure. 

You can hit the crossing signal signs from below for coins like they're ? Blocks.

By talking to Pauline, who is now standing in front of New Donk City Hall, you'll find out that Pauline wants to throw a celebration for your victory against the Mecha-Wiggler. You'll need to find four back-up musicians for the upcoming festival that she is about to hold in your honor. Thankfully, they're easy to find...if you know where to look. As you find more musicians, you'll see more people inside New Donk City Hall as well as her the background music come together more and more. 

If you ground pound the dumpster near where you find Captain Toad (see below), you can find a free Life Up Heart.

There is a taxi cab blocking a manhole near the Outdoor Café checkpoint. Remember that for later.

The dumpster next to New Donk City Hall will give you 50 coins if you ground pound it.

After you find the four back-up musicians (see #2-#5 below), Pauline will tell you that the underground power plant seems to be out of commission, and that you'll have to power it back on in order to get the festival going. At this point, the manhole near the Outdoor Café checkpoint will be unblocked. 

Power Moons


2. Drummer on Board - After talking to Pauline at New Donk City Hall and being tasked with looking for four back-up musicians, you'll find the drummer nearby. Talk to him to get him to join and get a Power Moon.

3. Guitarist on Board! - After talking to Pauline at New Donk City Hall and being tasked with looking for four back-up musicians, you'll find the guitarist in the park near the Main Street Entrance checkpoint. Talk to him to add to the band and get a Power Moon.

4. Bassist on Board! - After talking to Pauline at New Donk City Hall and being tasked with looking for four back-up musicians, you'll find the bassist at the The Mayor Pauline Commemorative Park, which is east of New Donk City Hall. Talk to him to bring him into the band a get a Power Moon.

5. Trumpeter on Board! - After talking to Pauline at New Donk City Hall and being tasked with looking for four back-up musicians, you'll find the trumpeter at the top of the triangle-shaped building near New Donk City Hall. To get to him, you'll need to teleport to the New Donk City Hall Rooftop checkpoint, then go down a level, travel up the power wire, and then long jump to the rooftop of the triangle-shaped building. This is the easiest way to reach this guy. Talk to the trumpeter to make him part of the band and earn a Power Moon.

10. Girder Sandwich - On the east side of the city near the Mayor Pauline Commemorative Parker, there is a girder area hanging off the edge. There are two walls you can wall jump up, and at the top, you can find a Power Moon.

13. Secret Girder Tunnel - Near the Odyssey, there is a girder with a Power Moon inside. If you look around the girder, you'll eventually find the entrance to the inside of the girder and be able to get the Power Moon.

14. Who Piled Garbage on This? - Near the Main Street Entrance checkpoint, there are some buildings you can reach with either some bouncy platforms or a spark pylon. (I use the spark pylon shortly after 6:42.) In one of the corners is a pile of garbage bags with a shimmering light below it. Clear the garbage bags out with your hat, then ground pound the light to find a Power Moon.

15. Hidden in the Scrap - At the Mayor Pauline Commemorative Park, there is a piece of the Mecha-Wiggler on the ground. If you jump onto it and ground pound it, you'll find a Power Moon.

24. How You Doin', Captain Toad? - You'll find Captain Toad at the edge of a girder on the northern edge of town. Talk to him for a Power Moon.

26. Bench Friends - Near the Crazy Cap Shop, there is a guy sitting at the bench. If you jump onto the bench, face the street and then stand on the bench, Mario will sit next to him. The man on the bench will thank you with a Power Moon.

28. Metro Kingdom Slots - On the west side of the kingdom, there is a building with some Sand Kingdom-style color ad flair on the exterior. If you go inside, you'll find another slot machine game just like in the Sand Kingdom. This time, you'll need to line up four moon icons and not three to get a Power Moon, but the rules remain the same.

31. Remotely Captured Car - By throwing your hat at the guy at the RC car course near the Main Street Entrance checkpoint, you can control him and control the RC car. Up and Down on the left stick moves forward and backwards, while Left and Right on the right stick allows you to steer. Get the car into the hole in the cage to get the Power Moon, and use the course to get a grip on how to control the RC car, because you're going to need it for a few more Power Moons.

33. Taking Notes: In the Private Room - On the left side of Main Street, you'll find a building you can enter. Here, you'll need to go between the regular zone and the 8-bit zone to collect all of the notes. For the third set of notes, throw your hat to get all the notes on the regular zone as quickly as possible before entering the 8-bit zone to finish the job. Collecting all three sets of notes will net you a Power Moon.

37. Pushing Through the Crowd - Hit the switch you see when you enter the small open building near the Outdoor Café checkpoint, then long jump your way through the crowd and get the Power Moon on the other side before it disappears.

43. Inside the Rotating Maze - Throw your hat at the manhole cover near the RC car course to find a hidden underground area. Here, you'll find a maze. Hit the walls with your hat to get around and find the five Moon Fragments. Once you find all five fragments, you'll get a Power Moon at the exit.

45. Hanging from a High-Rise - After exiting the area with the moving people near the Outdoor Café checkpoint through the pipe on the other side, you'll find a rocket that will take you to another area. Here, you'll need to swing from pole to pole in order to reach the end and get a Power Moon. But...

46. Vaulting up a High-Rise - ...you'll soon notice near the end that one of the moving pole is moving upwards, midway through. If you take it upwards and jump off the wall to the top, you'll find another Power Moon!

49. Motor Scooter: Escape! - Time to play on the scooter! Y accelerates while B jumps. ZL dismounts. You'll be moving towards the camera as you speed away from a dinosaur. You'll get a Power Moon on the other side.

50. Big Jump: Escape! - Along the way, there is a set of crates on the left you can jump on. Thankfully, the yellow "no parking zone" diagonally painted lines will help you line up with a lot of things once you get the course here down. Jumping on it, then jumping again at the lone crate on top will net you this Power Moon. 

Regional Coins


Tuesday, December 16, 2025

PrinceWatercress plays Brave Fencer Musashi - Part 25 of 33


In this entry, we finally defeat the Ice Dragon and liberate our fourth crest...but 


The highest level you can reach in Chapter 4 is Level 22.

The treasure chest behind the frozen stairway in the next room contains T-Hanky (Topo's Hanky). Double ew.

There is a Memory Box at the top of the stairway.

Equip the Fire Scroll, then jump up and light the torches with it.

You'll enter a room with a fresco on the ceiling. Go up to the statue and strike the crystal there with Lumina. You'll drop down a trap door. Use the Fire Scroll to melt the spikes and continue. You'll eventually meet the next boss: Frost Dragon.

Crest Guardian

Frost Dragon


Whatever you do, do not let this beast touch you unless you are currently using the Fire Shield. He'll freeze you if you're not.

After some time, you'll be able to head further down the path. Use the Fire Scroll to melt the ice spikes, and double jump over them when they're low enough. You'll have to be quick so the dragon doesn't destroy the path while you're crossing it.

When the dragon comes out of the ground, avoid his face slam attack. Move around to avoid the ice breath projectiles, then run to the other side of the room to avoid the ice beam. After firing it, he'll be tired out. Use the Fire Scroll to weaken him as he lays down, and eventually he'll rise up and drop back down again with his core exposed. Whack the core with Lumina.

As long as you watch where the head goes - and faces - when it comes to the face slam and ice beam attacks, you can easily tell where the dragon is going to go, and you can move accordingly.

After two hits, he'll sweep the floor with his body and then fly up before going back down into the hole. After three, he's destroyed and the Fire Crest will be liberated. You'll teleport back to the lobby of the fortress. There's nothing more to do here, so head out of here.

When you leave the castle, you have a choice of going back in or heading back to the village. Go back to the village.

You'll get a cutscene where Colonel Capricciolla talks to Ed and Ben. Gingerelle and Bubbles are now going to deal with Musashi, and depending on how well Topo does, their plans may have to change accordingly. Also, it looks like the Colonel can't stand either of these two guys.

Chapter 5: The One That Nests Underground


When you head back to town, the music is different...again. The Mayor tells you something is away up, but to get more info you'll have to head to the shops and talk to people.

Better yet, head to the castle. Steward Ribson will tell you that the Princess has disappeared. He asks that you report back if you learn anything.

When you talk to the storekeepers, you'll find out that the Princess has stolen all their money from them as she escaped.

Head back to the castle and talk to Steward Ribson. Not only will Steward Ribson find out what's going on, but you'll also find out form him that you can take the gondola as it is now fixed. You can now select it when you're outside the castle to go straight to the village. You'll need to do this, as the game forces you to use it.

When you return to the village via gondola, you'll find out that steam is traveling around in the air again...which means Steamwood has gone berserk AGAIN. *sigh*

Friday, November 14, 2025

PrinceWatercress plays Legacy of Kain: Soul Reaver - Part 25 of 28


We grab the last of the pick-ups before heading back to the final area.


2:18 - After running around the bridge controls clockwise, we head to another puzzle room where we need to push some blocks. You'll need to use the raised area in the center to create a stack three blocks high, then high jump and glide to get an eldritch energy extension for our runes.

7:25 - We're done here. We need to go back underwater for some more eldritch energy. With this, we have all the magic energy in the game!

10:10 - Back at the boat, shift back to the spiritual realm, then go up and go through the door when you're able to shift back.  You'll find a door that only be opened with a projectile. Platform your way across the water, and you'll reach another door. Go in and use the fire rune to take out the two enemies. Follow the path. You may remember this place. Run clockwise around the column now that you have Constriction. You'll drain the water below. Pull the blocks out to find some magic refills as well as the last health extension pick-up. You are now at max health!

15:15 - Now it's time to go back. Get back over the nearby wall, then go through the underwater path. By taking the correct path, we'll end up back near the beginning of the game and we can teleport to the final area. You'll need to shift to the spiritual realm to open up the slit in the wall. When you do, you'll have a whole new area to deal with on the other side.

Saturday, February 22, 2025

PrinceWatercress plays Wario Land II - Part 25 of 51


While writing this blog entry, not only did my modem reset and I had to wait two minutes, but my microwave suddenly died right in front of me after putting a pizza in the oven before watching SmackDown. I had to wait for the pizza to get done before pressing the reset switch on the nearby outlet to get it working again so I wouldn't have to plunk down another $60-$80 on a microwave. Just my luck, right?

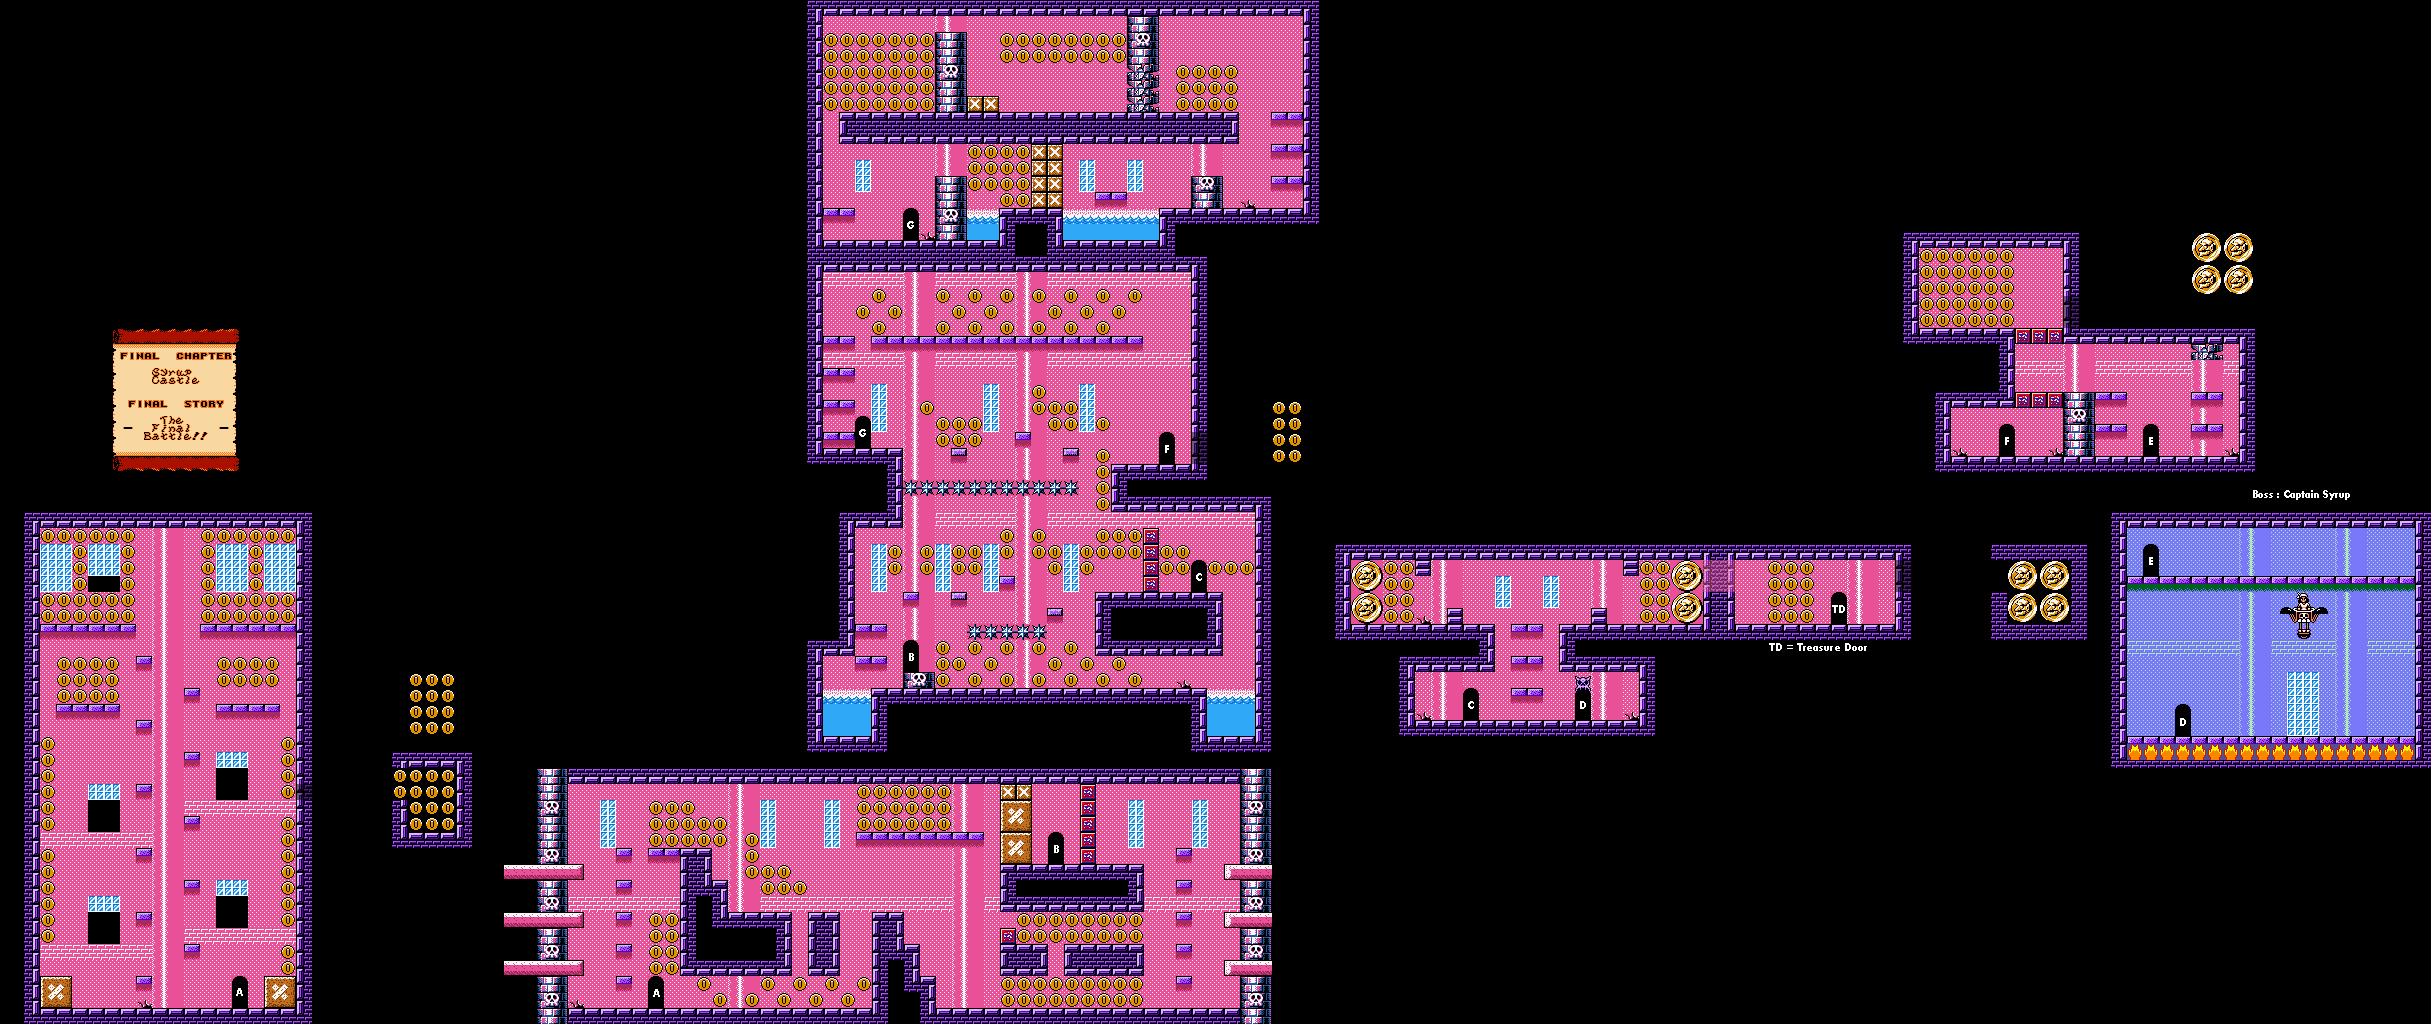
Anyway, we're finally at the home stretch of Syrup Castle. Watch as I have a harder time beating Captain Syrup than I should and almost forget that I have a treasure room to find and win the treasure from in the process!


Final Chapter: Syrup Castle

Final Story: The Final Battle!!


The guys who throw bottles out of windows will be present at the start of the level. Keep that in mind as you make your way up at the start of the level. Also, there is a gap in the coins on the right side at the beginning, and if you tackle the wall there, you can open up a small gap that you can drop down into from a higher place in a crouching position to find a small chamber of coins. To the left of the chamber, you can high jump up to the top of the small chamber to find even more coins! Sadly, the same is not true of the left wall.

In the next section, take out the snowmen, but save one on the other side for the enemy wall you can break for more coins. The same is true with the next section, where you'll need to throw one of the penguins who will try to get you drunk into an enemy wall to get to the next area.

The spikes that move in and out of the floors and ceilings are back in the next section, so watch out for those and anticipate their rhythm. Remember that you can get under the ones in the floor when they are up. Be sure to tackle the walls on the ends for more coins, especially a few big ones.

The boss room is next, but don't fight Captain Syrup just yet. Instead, let the flames carry you upwards, as this will actually take you to a brand new area. Use the Spear Goons to open up the upper area first, and tackle the wall in the area to the right for more coins. You'll also want to enter the lower area to find another area with spikes and penguins that want you to drunk. The door on the other side of the spikes leads to a room with Wizard Goons. Let them turn you small in order to get all the coins in the room. If you need more, just jump into the Wizard Goons from above or below.

The treasure room is in the upper-right corner of the room with the floor and ceiling spikes. Winning this will net you a crown. I almost forgot to get this!

To beat Captain Syrup, you'll want to jump on the Goons that she sends down at you, then grab them, jump up and throw them upwards onto Captain Syrup herself. As you do this, you'll also want to avoid the fire columns that rise up from underneath the floor, as they will send you out of the battle and force you to make the trek back to the boss room, forcing the final boss battle to restart from the very beginning.

After enough hits, she'll then send bombs down at you. You'll want to catch the bombs out of the air, then throw the bombs at the fire columns when they come up from underneath the floor so that they rise even higher. You'll want the fire column to hit Captain Syrup this way. If the bombs explode at floor level, they will send two fire columns across both sides of the screen, and they can also send you up to the top of the room and force a restart. You only need to hit Captain Syrup twice in this phase, but it can be frustrating. Once you land the second hit, the battle is over, and you'll get the number guessing game like you always do before you roll credits. 

Here, you'll get your first of five endings.Wario will get his treasure back from Captain Syrup and her goons, then he will take his treasure back home to his castle by land and by air. After this, you'll find out that you've only completed half the game, collected only half of the treasures and revealed only half of the picture panel! You'll then see all the treasures and picture panels you've gotten, then you'll see the route map for the game. To get the other half, you're going to have to power off or reset (in case you're playing on Super Game Boy) and go through all four of the alternate routes! 

Tuesday, December 3, 2024

PrinceWatercress plays Great Greed - Part 25 of 28


Once you enter Bio-Haz's castle, there's no turning back!


As soon as you enter the castle, the door will lock behind you.

Witch can cast Flame 4 and Speed as well as Push. It gives 516 Experience and 94 Gold, and has a chance of dropping a Med 3-15 Scroll.

Cutter is strong against Bolt magic and can cast Bolt 2. It gives 528 Experience and 78 Gold.

In the second room, Gum Drop will set up a barrier to get through the barriers in a considerably damaged zone. If you take the wrong path, you'll lose half your HP for each step you take, and the game will make it known to you. If you take the right path, you'll get through it without taking damage. It will take some trial and error to get through here without getting hurt too much. When you reach the end, Gum Drop's barrier will fail, and you'll have to travel the rest of the castle without her.

Mealmush is weak against Freeze magic and strong against Flame magic. It will award you 540 Experience and an astonish 5800 Gold.

In the next section, there is a door that restores HP and MP behind the pot. Don't bother going back for Gum Drop: a rock will fall blocking the stairs. As for the other door, you won't be able to open it...yet.

Knocker has 820 HP and can pack a punch. He is weak against Freeze magic and can cast Power. Beating Knocker gives 715 Experience and 590 Gold, and gives a chance at a Duramet Helmet drop, which is the best helmet in the game.

After a series of spiral staircases, you'll meet Noknight, who is about to kill Candy. Noknight has 1500 HP and can cast Freeze 4 and Heal 2, but he is also weak to Freeze magic. Use Power as well as Freeze 4 to do as much damage as you can, and be prepared to heal yourself. Noknight gives 800 Experience and 25 Gold, and has a chance of dropping a Fix.

After beating Noknight, you'll rescue Candy, who will make a necklace out of the jewels that the princesses gave you. This will give you 5000 Experience right off the bat. Bio-Haz will then suddenly show up at last, and tell you that he has left the path to the top that you could not enter earlier open for you, so you'll need to go back to the room after the Gum Drop section and enter the door to the right.

The three dark, shadowy figures will sell you powerful as well as necessary spells as well as some healing items, so talk to them if you need Regain 2's or Med 3 scrolls. 

Monday, September 23, 2024

PrinceWatercress plays Chrono Trigger (Super NES) - Part 25 of 70


In this entry, we fight Magus, but we end up with more questions than answers.


The video starts with me showing off the Magic Tab you can find in the drop-off area where you fall into a pit made by Ozzie.

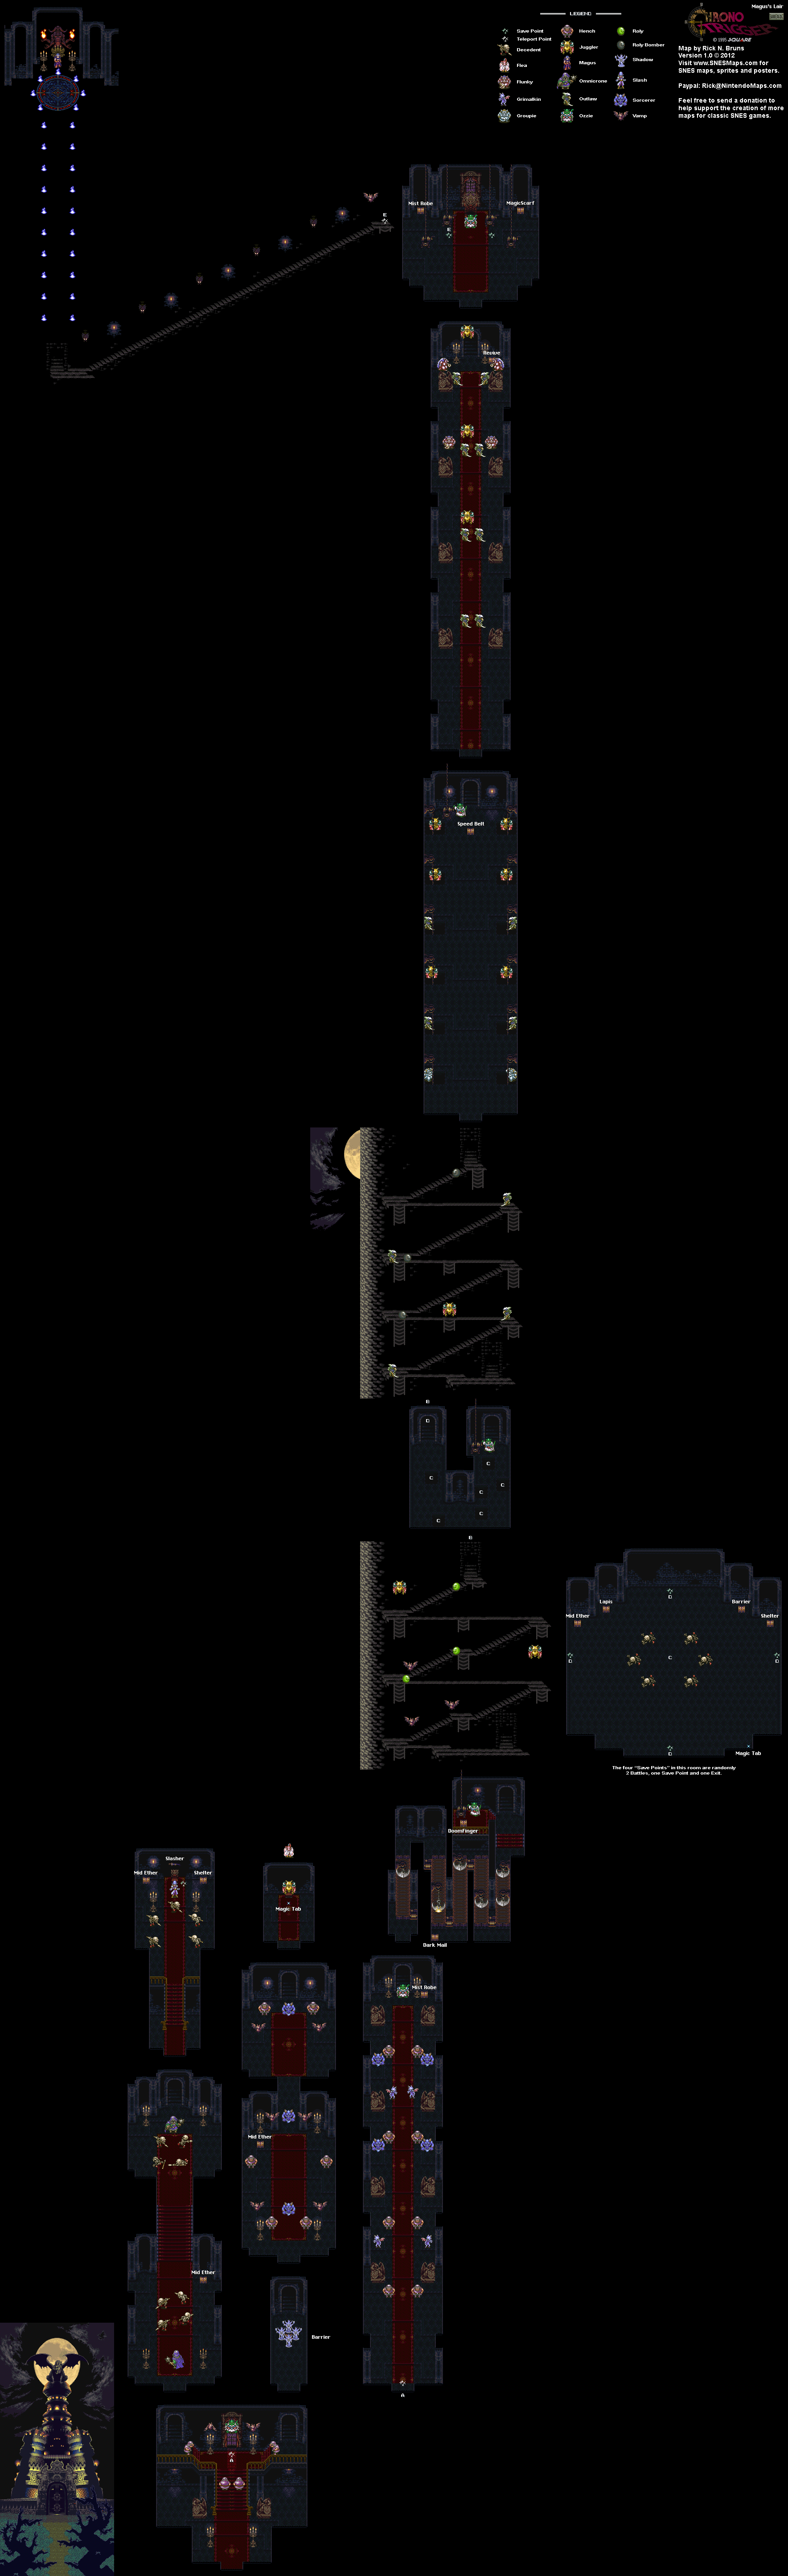
When you take the teleporter leading to Magus, you'll go down some stairs, and six Vamps will descend upon you as you go down. If you touch any of them, you'll trigger a battle with them.

Afterwards, you'll face Magus, who is not exactly thrilled to see you. Not surprisingly, you'll have to fight him.

Magus has exactly 6,666 HP. You'll be using magic to do most of your damage on him, and whenever you hit him, he will cast a spell. It will either be Lighting2, Ice 2, Fire 2 or Dark Bomb, which are Lightning, Water, Fire and Shadow, respectively. The first three are multi-target, but Dark Bomb is only single-target. Whatever type of magic he casts is the one you want to hit him with, as the other magic types will heal him, so pay attention to what he attacks with.

If Frog hits Magus with the Masamune, it will decrease Magus' magic defense. This will cause Magus to counter-attack with magic like anything else will, but it can help with the battle.

When Magus' HP is down to half, you'll get the message "Magus risks casting a spell." When that happens, you can hit him with everything you've got. Make sure you keep your party's HP high at this point, as Magus will keep switching between doing that and hitting the whole party with Dark Matter, which really hurts.

When you beat Magus, you'll find out that Magus did not create Lavos, but only merely summoned him, as he lives inside the earth and grows ever stronger. A massive portal will then pop up and suck everyone in.


After a weird dream sequence involving Crono being marrier to Marle, everyone wakes up in prehistoric times. You'll be greeted by Ayla, and Magus will be nowhere to be seen. Ayla, who has found you in the Mystic Mountains and has brought you to the Chief's Hut, will tell you to rest. You'll then be woken up by Kino, who tells you Ayla is looking for the Laruba village. Another caveman will show up and mention that Laruba Village to the north has been set on fire.

From here, you can head north to Laruba Village, but before you do, head to the trading hut. You can get new weapons with the Petals, Fangs, Horns and Feathers you've picked up. Here are the new combinations:

Petal + Fang = Dream Gun (Lucca)
Petal + Horn = Dream Bow (Marle)
Petal + Feather = Magma Hand (Robo)
Fang + Horn = Aeon Blade (Crono)

You can still get the Ruby Vest and the Rock Helm here.

Thankfully, our time more recently spent in the Reptite Lair getting the rest of the treasure made it so getting the new weapons was no problem.

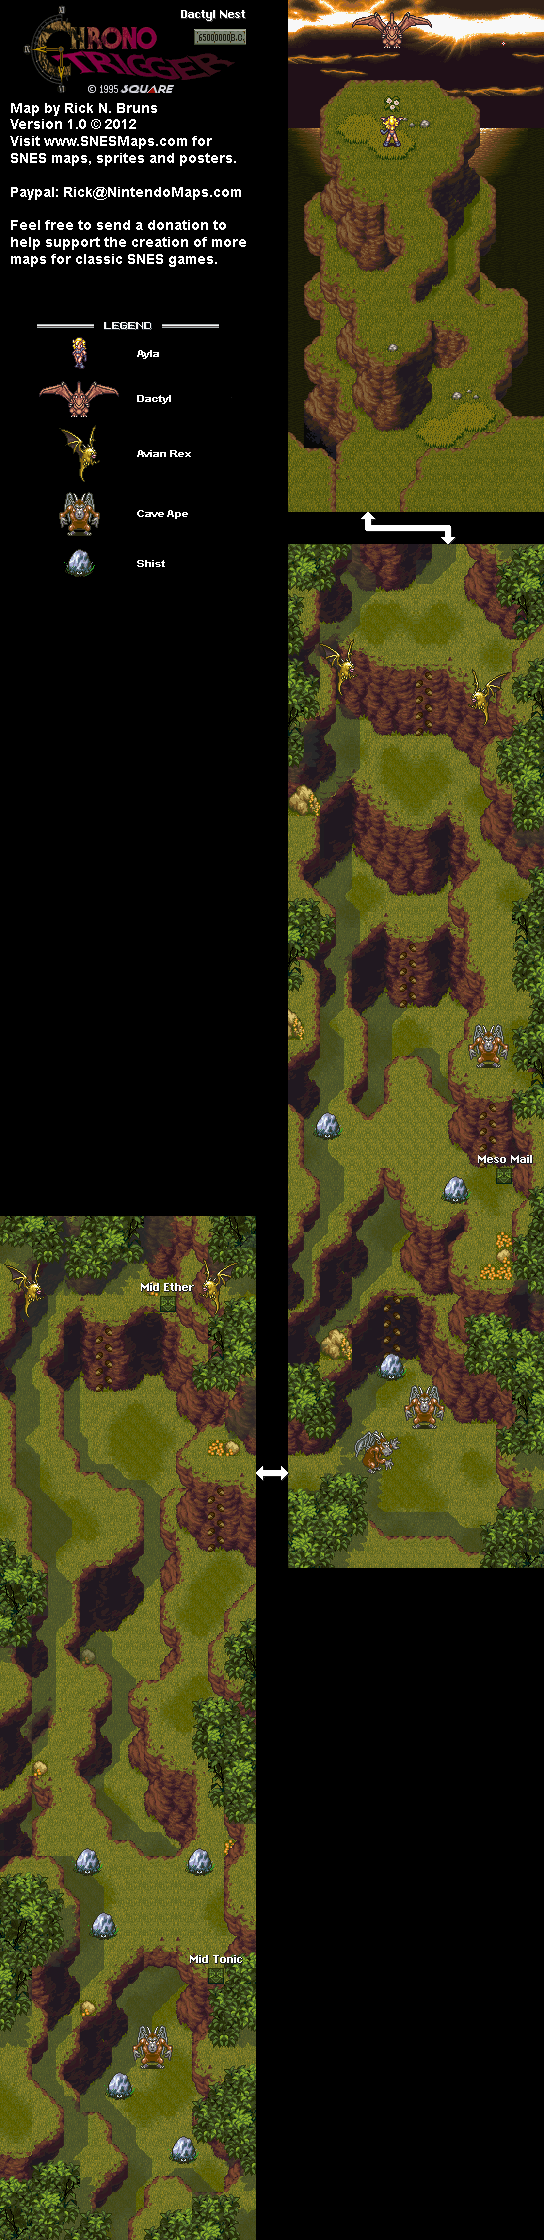
Now that we have new weapons, head to the new area in the forest northwest of the northern huts. When you make your way north, you'll see Ayla talking to the Laruba Village chief. He will blame Ayla for the Reptites setting the village on fire, but Ayla says that they have to fight or else the Reptites will beat the humans before asking for some pterodactyls to ride to the Tyrano Lair with. The village chief reluctantly gives her the pterodactyls, and from here, you'll need to follow Ayla all the way to the Dactyl Nest.


Thanks to our having been here before, we don't need to collect any more treasures. Also, the enemies should no longer give us any problems, should we have to fight them.

When you reach the end of the Dactyl Nest area, Ayla will be calling a pterodactyl. When you approach her, Crono and company will help her out in return for her help getting the Gate Key back earlier in the game. Ayla will take the second slot in the party, and from here, you can fly southeast to the Tyrano Lair (which is easy to find, as it is surrounded by lava). The D-Pad lets you fly around in four directions, while A lets you land anywhere that your party can walk. Press A while standing where the pterodactyls are to fly around again.

Monday, June 17, 2024

PrinceWatercress plays Ratchet and Clank: Going Commando - Part 25 of 54


In this video, we start alternating between advancing the plot and going back to earlier areas to collect some stuff that we couldn't before.

First | Previous | Next | End

2:47 - As soon as we head to the Hrugis Cloud to meet Mr. Fizzwidget, we are under attack. We'll have to defeat the disposal facility's defenses.

3:31 - We'll have to destroy these six spinning turret discs that act as the defenses for this place in order to get out of this jam. Unfortunately, there's a repair droid that will repair these things, and our lasers aren't good enough. If you retry, the game reminds you that Slim Cognito's Ship Shack exists.

5:42 - Buy the Fusion Laser Cannons at Slim Cognito's. You're going to need them.

6:38 - This time, these turrets get destroyed. Afterwards, you'll find out from Fizzwidget that he could not make it and that he was at Megacorp's weapons facility. You'll then get the coordinates for Todano.

19:09 - That guy is just goin'.

20:03 - Remember that elevator shaft from Dobbo? Drop a Spiderbot in there to open a door with a Platinum Bolt behind it. 

Controls:

As Ratchet:

Control Pad/Left Analog Stick: move
Right analog stick: move camera

X:
  • Jump and double jump (hold button after double jump to use Heli-Pack or Thruster Pack)
  • Wall jump (near certain walls)
Square: strike with wrench
Circle: pull out/shoot currently equipped gun
Triangle: 
  • quick select (hold and use in conjunction with Control Pad or left stick to switch guns; menu can be customized in Quick Select on the pause menu
  • double tap to switch between two most recently equipped weapons/items
  • interrupt on-screen messages

Select: open map
Start: Pause menu
  • Control Pad: select option
  • X: confirm option choice

L1:
  • center camera behind Ratchet (tap button to center)
  • first-person view (hold button and use left stick or D-Pad to look around; let go of L1 to move camera back behind Ratchet)
  • Square: wrench boomerang
  • Circle: fire gun
  • R1/R2: zoom in and out (Pulse Rifle only)
L2/R2: strafe (hold while moving)
L3: see health and Bolt totals
R1/R2: crouch (hold down)
  • Square: wrench boomerang
  • X: high jump
    • long jump (hold crouch button and jump while running to perform)
R3: open map

In water:
  • Square: dive and descend
  • X: surface and ascend
  • R1: accelerate with Hydro-Pack

As Clank:

Control Pad/Left Analog Stick: move
Right analog stick: move camera

When hanging off platforms:
  • Control Pad/Left Analog Stick: move
  • Forward+X: vault up
  • Back+X: drop down

Square: punch
X: Jump (press and hold in the middle of a jump to glide with Heli-Pack)
Triangle: command menu (hold and use in conjunction with Control Pad or left analog stick to choose commands)

Tuesday, May 21, 2024

DeceasedCrab plays Earthbound - Part 25 of 53

Just when we think Paula is safe, we have to go through a weird world to ensure that we get her back.


When you reach the office, you'll talk to an alien. You'll also have to fight it. The Dept. Store Spook can do a lot of damage, but it can also go down in two Big Bottle Rockets.

After you beat the Dept. Store Spook, you'll find out that Monotoli has Paula. When you leave the room, the department store lights will come back on.

If you approach the robot near the toy store, the photographer will show up.

The door on the right side of the third floor contains absolutely nothing.

If Paula had the Pencil Eraser in her inventory prior to her getting kidnapped, you'll get a call from Tracy, Ness' sister, telling you that a friend of yours had asked her to hold onto the Pencil Eraser, which will no longer be in your inventory, as soon as you leave the Department Store. Also, if for some reason you never got access to Escargot Express (and if you're trying to get through this game, why wouldn't you?), you can finally call Escargot Express at any phone and get the Pencil Eraser back, provided you have the money to cover the delivery fee. (thanks Swagger Blonde)

The Broken Pipe can become the Shield Killer. This can be used to break enemy shields, but it doesn't work all the time, sadly.

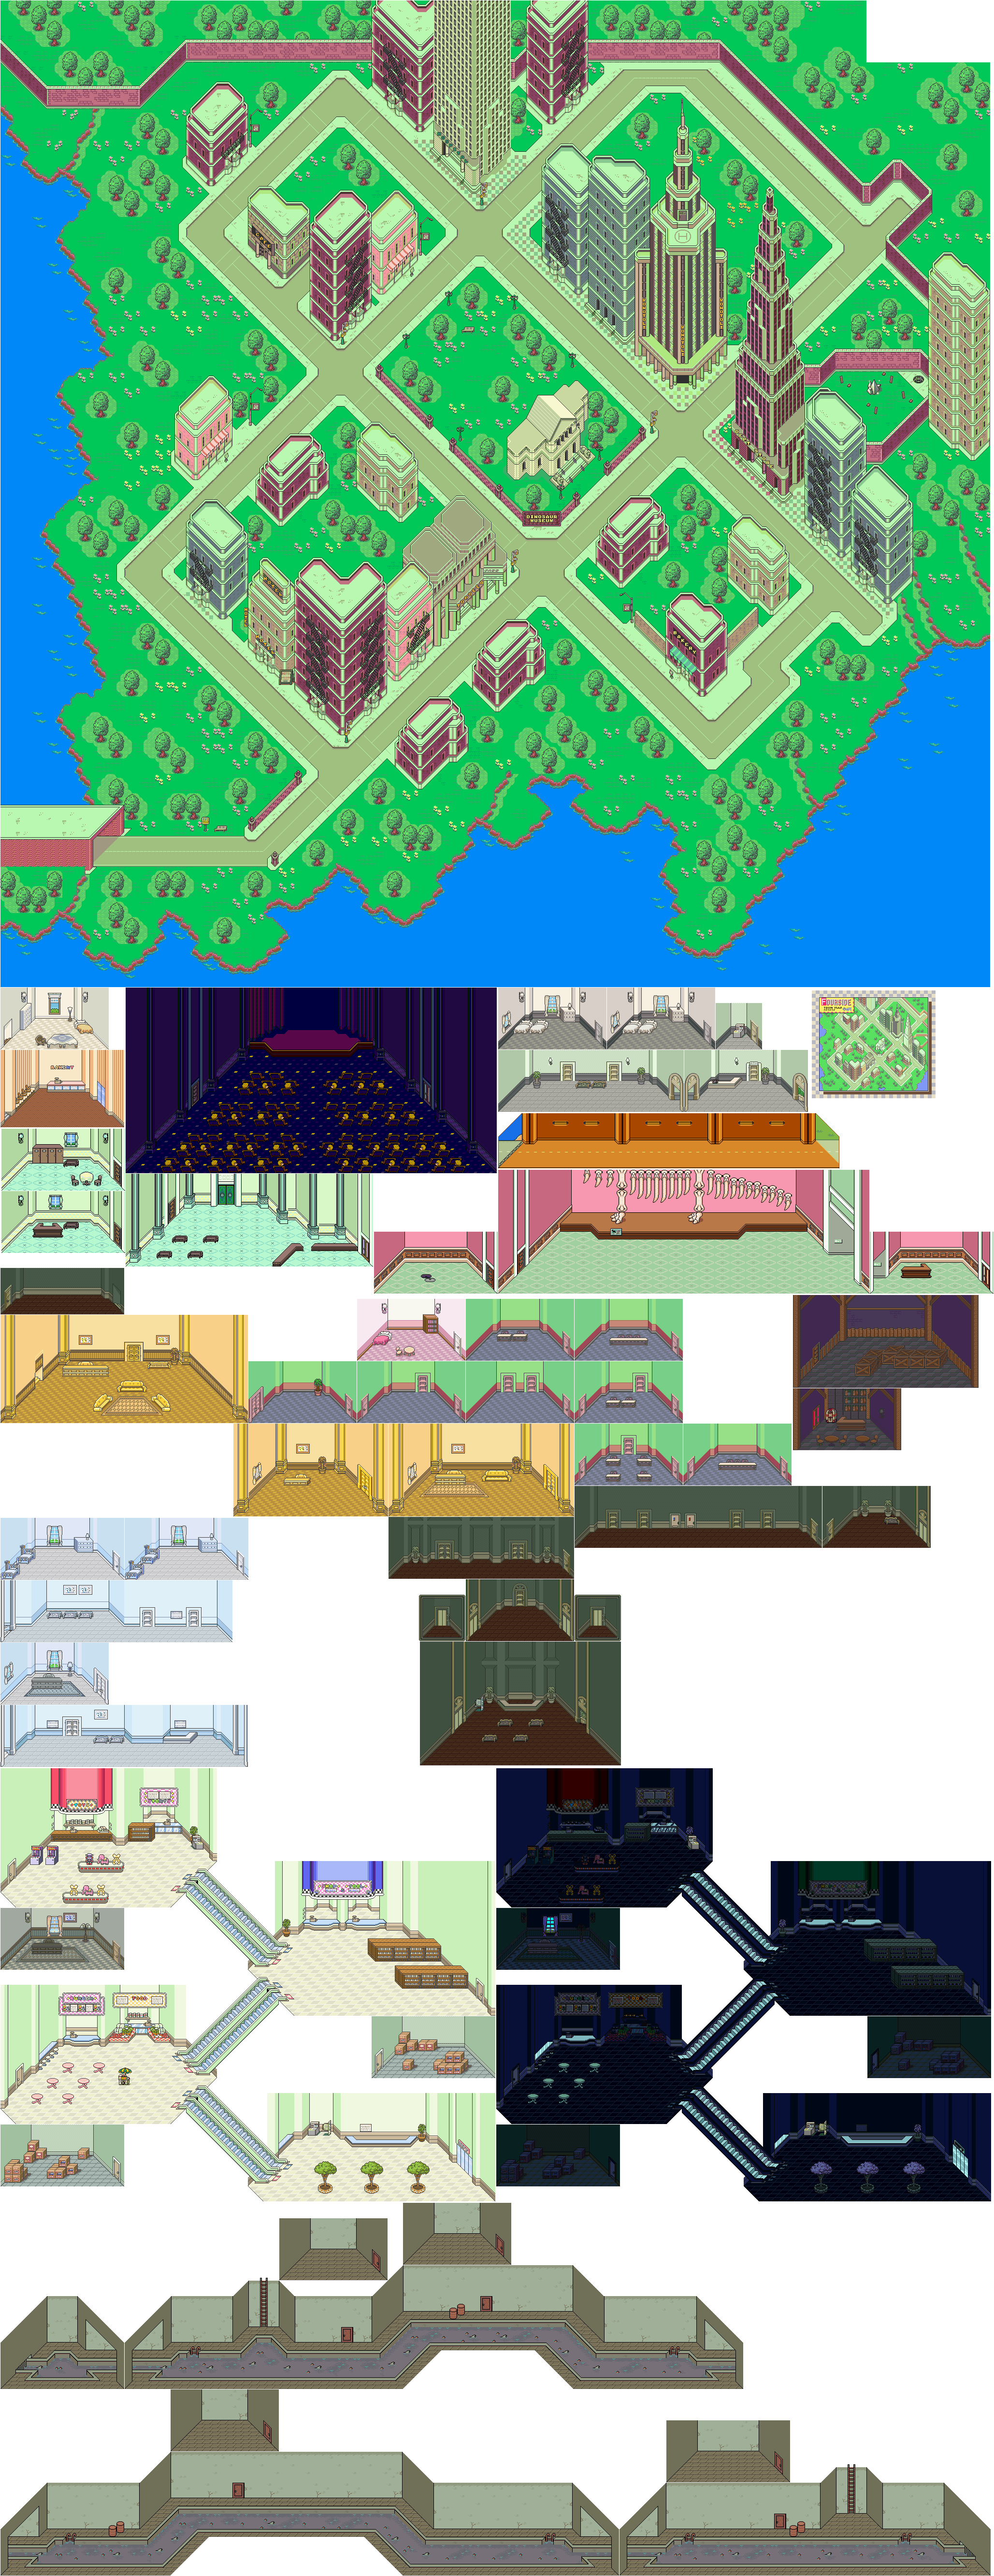
At the cafe, if you talk to the woman who says that kids shouldn't be drinking expressos, you'll find out people are nearby. To the right of the cafe will be a bunch of people surrounding a laid out Everdred, and if you talk to the person in the gray on the far right and give him an item (preferably something useless, like a Cookie from the nearby bakery), you can get past him and talk to Everdred.

Everdred will tell you that he stole the Mani Mani statue - the same statue from Happy Happy Village - to sell it in the big city only to get attacked by Monotoli, who knew the secret of the statue and knew that it would give him power. He will tell you to check behind the counter in the cafe, then says a haiku before he suddenly gets up and slowly walks away.

At the cafe, look up at the northeastern corner and press A. You'll be in Moonside.


By talking to the people, you'll find out that "No" means "Yes" and "Yes" means "No." Also, everything is neon.

The fire can be one of a few enemies. One of them is a Robo-pump, which will countdown from three. When it hits zero, it will unleash a powerful attack. The Enraged Fire Plug will attack you with water. 

The painting is an Abstract Art, yet another enemy that you can find. 

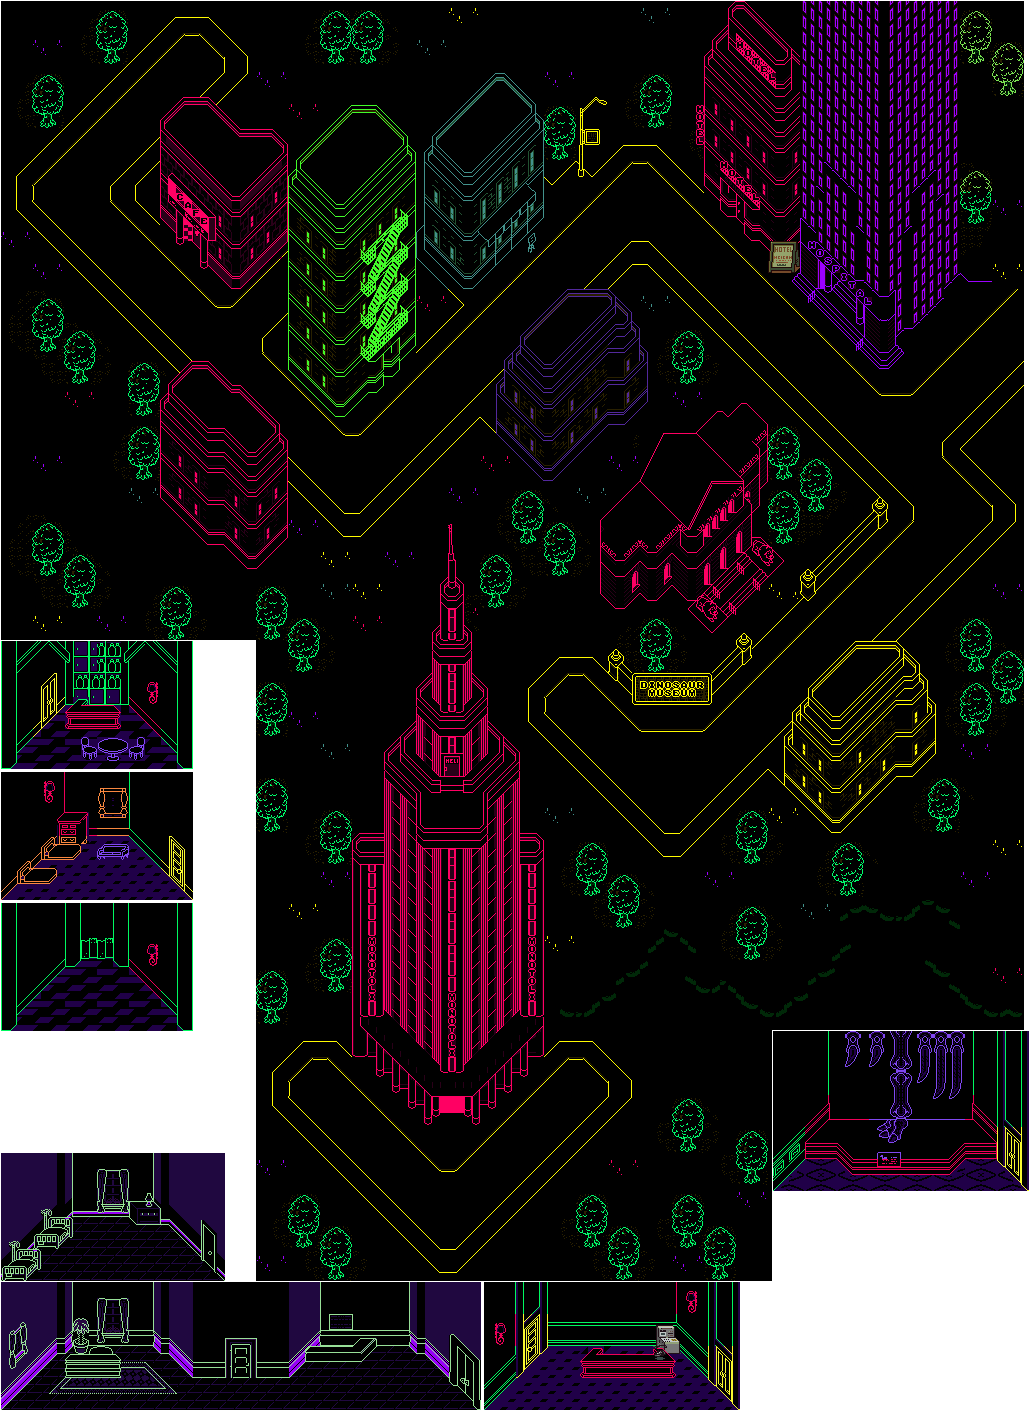
If you talk to the men in the Hawaiian shirts and the sunglasses, they'll whisk you to the Mani Mani statue near the Monotoli Building, in addition to other places that you usually can't get to by walking around. There, a sailor will tell you that the Mani Mani Statue is up ahead and that unless you are guy whose eyebrows are connected and has a gold tooth, you're not getting past him. Remember him for later.

The people here will have very weird dialogue. 

The guy in the suit and sunglasses near the Dinosaur Museum will send you to the hospital if you talk to him. 

The melty clock is known as a Dali's Clock, and is much like the melting clock in Salvadori Dali's painting "La Persistence de Memoir." They have a funny ability in which they stop time to damage, and when that happens, the music stops, then restarts when time is normal again.

Wednesday, May 15, 2024

PrinceWatercress plays Drill Dozer - Part 25 of 28


Now that we're fully upgraded, getting everything else here will be much easier.


Area 3-1: Kuru Ruins


4:00 - Now that you can break metal blocks, you can go through here and brave the spear traps to get the Jellyfish Bone.

8:59 - More metal blocks block a path leading to the Footdust.

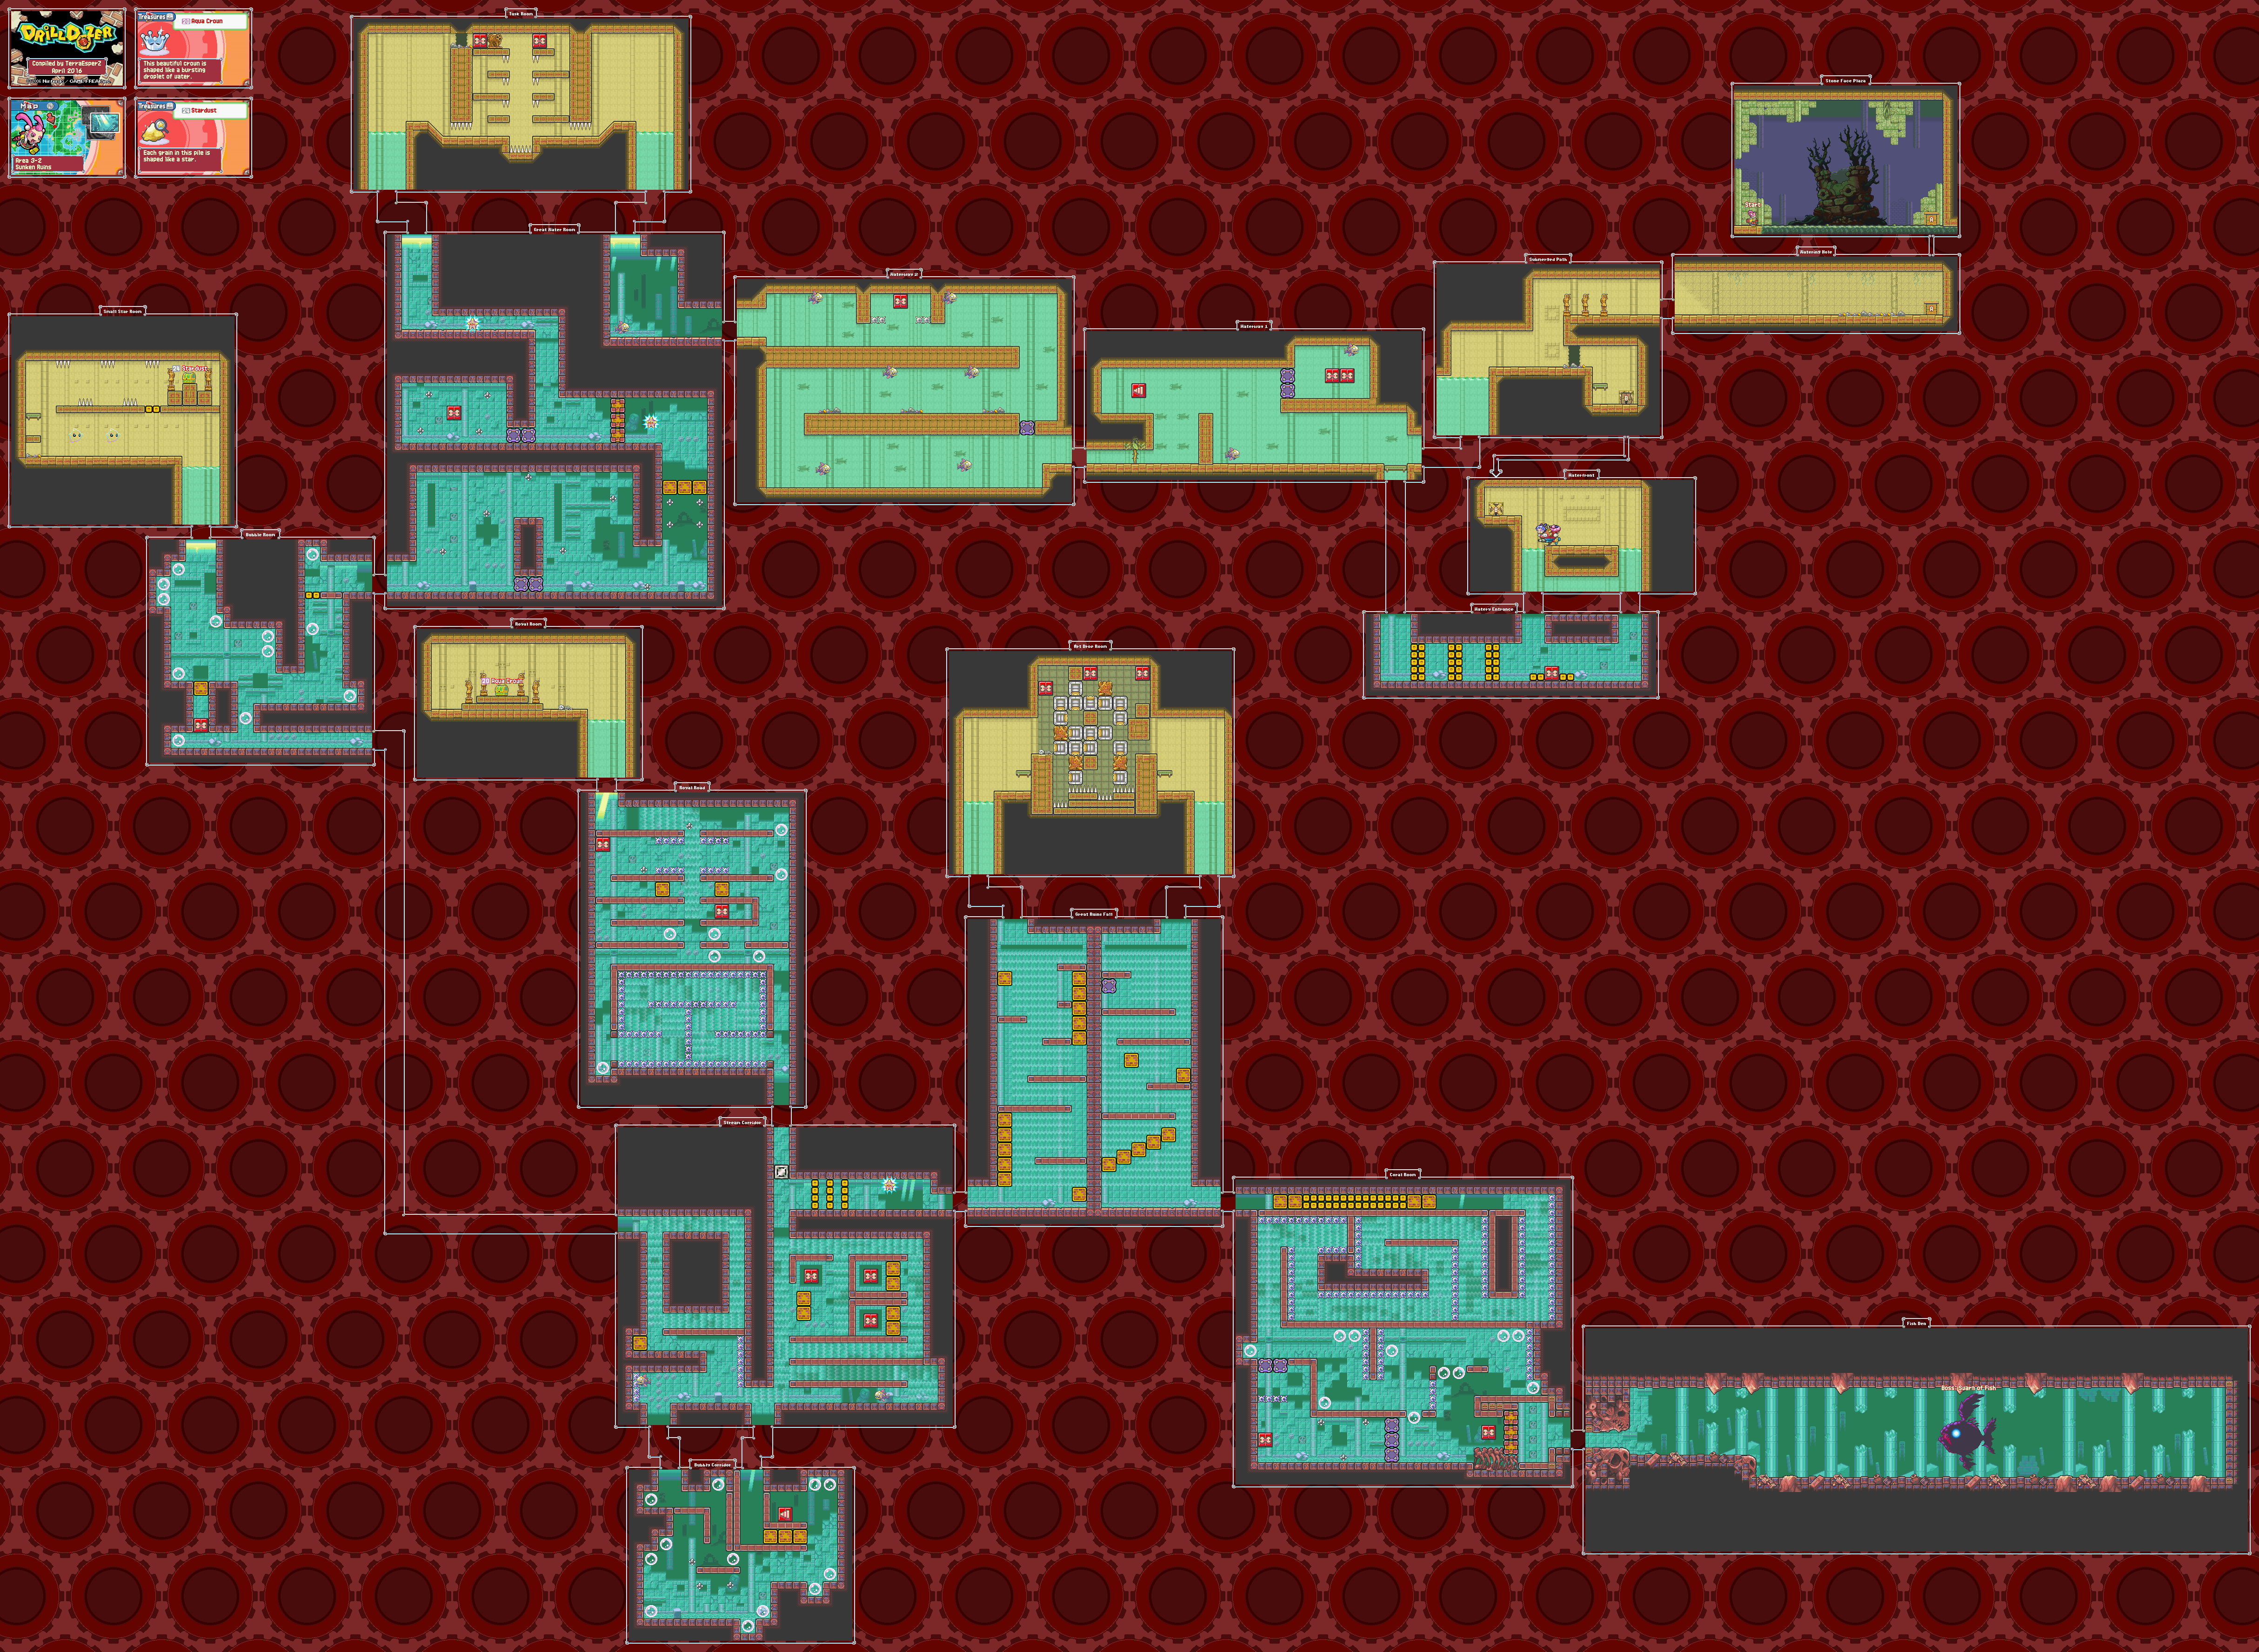
Area 3-2: Sunken Ruins


19:05 - By breaking this metal box, you'll be fighting the currents and launching yourself across the room with the bubbles to get to the surface. Once you do, however, you'll be able to get the Aqua Crown.

Friday, March 22, 2024

PrinceWatercress plays Ka-Blooey - Part 25 of 25


The final level of the game is the nastiest of all, but if you can beat it, you beat the game.


Level 126

Enter the "right" teleporter. Enter the next teleporter. Place the small bomb on the center left tile, the medium bomb on the center tile and the bomb on the center right tile. Go across the ice to detonate the lone small bomb, then go back. Detonate the small bomb on the slot tiles and move left. Enter the teleporter. Go to the switch and hit it. Go to the small bomb in the lower left corner and detonate it, then move back up. Detonate the small bomb between the swell bomb and the mine when the swell bomb is at medium, then move right. Go right and detonate the small bomb at the cracked tiles when the swell bomb is at medium, then move up. Hit the switch, move left, detonate the small bomb and move right. Move up, detonate the small bomb when the swell bomb is small, then enter the teleporter. Detonate the small bombs and hit the switch on the way to the "left" teleporter. Enter the "left" teleporter. Move the medium bomb on the slot tiles to the left tile. Hit the nearby switch. Detonate the lone small bomb near the teleporter, then move up. Detonate the medium bomb near the teleporter and enter the teleporter. Move down, then hit the switch twice. Detonate the two small bombs on the loop before the cracked tile, then move the small bomb on the slot tiles up. Detonate that small when the swell bomb is at medium and move left. Move left across the ice. Detonate the small bombs on the left side of the loop, then detonate the small bomb on the rivet tile at the far right. Hit the switch, then detonate the other small bomb on the rivet tile. Move right, hit the newly-spawned switch to the left near the start, then detonate the small bomb.

Level 127

Hit the switch south of where you start. Hear the newly-spawned switch afterward. Detonate the nearby small bomb, then move left. Hit the first switch, then enter the teleporter. Go back to the small bomb near the teleporter, detonate it, then enter the teleporter. Move right to the switch and hit it, then place the newly-spawned large bomb on the top center slot tile. Go to and hit the switch further to the right, then place the newly-spawned small bomb on the top right slot tile. Detonate the small bomb and move left. Detonate the small bomb near the mine that has just detonated, then loop back to the bombs at the left and detonate the right-most small bomb. Move down, then right across the ice. Detonate the small bomb bear the mine. Take the upper road to the right, then hit the switch. Move the medium bomb on the slot tiles to the left, detonate the upper small bomb, then move left. Detonate the small bomb, then move up, left, then down, and go to and hit the switch. Go right and detonate the small bomb, then go right to the slot tiles. Place the large bomb on the top center tile, move right, place the large bomb on the top tile, move right, then place the medium bomb on the top tile and the small bomb south of it. Detonate the small bomb and move down. Go right to the small bomb, detonate it, then move up, left and then up. Detonate the small bomb, then go to the switch and hit it so the first enemy is destroyed. Hit the next switch, detonate the small bomb, hit the third switch, and be quick to get rid of the ball enemy. Detonate the small bomb north of the third switch. Detonate the small bomb south of the mine, then move down. Detonate the remaining small bomb.

Level 128

Go far to the right and enter the far right teleporter. Go left, detonate the small bomb, then hit the switch and move up into the nearby teleporter. Detonate the small bomb and go left. Go right, hit the upper switch, and go to the slot tiles. Move the medium bombs to the bottom-most tile, the lower left tile on the "square," and the upper left tile on the "square." Hit the nearby switch. Hit the new switch back at the start, send the red guy to the mine. Hit the switch at the start again, then send the red guy to the small bomb on the slot tiles. Hit the start switch, then take the red guy right to the lower switch, hit the switch and enter the teleporter. Send the red guy into the small bomb when he re-appears. Enter the teleporter at the start, then hit the nearby switch and enter the nearby teleporter. Hit the start switch and send the red guy into the teleporter at the start, then send the red guy into the mine to the right near the switch. Detonate both of the medium bombs north of the switch with red guys; detonate the one on the right first followed by the one on the left. Hit the switch at the start, then send the red guy into the start teleporter and then into the left-most medium bomb at the slot tiles further to the south. Hit the start switch, then send the red guy into the starting teleporter and into the lone mine. Hit the start switch and send the red guy through the starting teleporter and across the ice to the small bomb. Hit the start switch, then send the red guy into the starting teleporter and into the nearby bomb. Hit the starting switch, then send the red guy into the nearby medium bomb.

Level 129

Detonate the medium bomb at the start, then enter the nearby teleporter. Move the small bomb all the way to the right to the lower right tile, with a medium bomb to the lower left tile in the "square" and a large bomb in the upper right tile. Back at the "square" to the left, there should be a medium bomb in the upper left tile and a small bomb in the upper right tile. Detonate the "left square's" small bomb, then move right, place the medium across from the mine and place a small bomb to the right to it. Detonate the small bomb and move right. Place the large bomb in the lower right tile of the "square," detonate it and enter the teleporter. Get to the red guy and send the red guy to the mine at the left. Detonate the small bomb where the mine was. Hit the nearby switch, then hit the first and second switches at the right. Detonate the small bomb near the second switch, then hit the second and third switches at the right. Take the cracked tile path to the left, then detonate the small bomb to the right of the ice. (It's the one to the left of the medium bomb.) Move left, detonate the small bomb, move down to and hit the nearby switch, detonate the small bomb, then loop around on the ice, move up on the cracked tile and enter the teleporter. Move right and enter the teleporter. Move up, then left, then to the slot tiles. Place the medium bomb on the bottom tile and the small bomb north of it, then detonate the small bomb, move left and loop around from the left. Go to the slot tiles on the right. Place the medium bomb on the top tile and small bomb south of it. Detonate the small bomb, move down, then loop around from the right. Detonate the small bomb near the mine at the bottom and move up. Detonate the small bomb in the right bomb pile, then detonate the small bomb in the left bomb pile. Go to the teleporter to the north across from the cracked tile. Hit the third switch, then move downwards to the loop. Detonate the bombs anti/counter-clockwise from the upper left tile. Go back to and enter the nearby teleporter. Detonate the small aerial bombs, then enter the nearby teleporter. Detonate the right small bomb in the pair of small bombs, then move right across the cracked and ice tiles. After this, you can go nuts with the switch and the red and destroy all of the mines. (Just be careful doing it, as this is the last time you'll have fun before the game becomes anything but.)

Level 130

This is the worst level in the game. You'll need a very good route and some good speed if you want to destroy all 42 bombs (some are mines) in this level. This isn't the perfect route, nor it is the only route. It is, however, a route. Special thanks to Taramoor Plays for figuring this out so I didn't have to. This took two tries for me, and once you beat this level, you beat the game. Here is the route from the start:

Right, down, down, left, detonate. (40 bombs left)

Right, up, up, left, down, down, right, down, left, down, right, up, left, detonate. (38 bombs left.)

Right, up, right, detonate. (36 bombs left)

Left, down, down, right, down, down, left, up, detonate. (34 bombs left)

Down, right, up, up, left, left, up, right, up, left, up, up, right, down, down, down, down, left, down, right, up, detonate. (32 bombs left)

Down, left, up, right, up, right, right, right, right, detonate. (30 bombs left)

Left, left, up, left, up, up, right, detonate. (28 bombs left)

Left, left, down, right, up, right, down, down, left, detonate. (26 bombs left)

Right, up, up, left, down, left, up, right, down, right, down, right, detonate. (24 bombs left)

Left, up, left, down, right, right, up, right, up, detonate. (22 bombs left)

Down, left, down, left, left, up, up, left, down, right up, right, down, down, right, right, down, right, down, right, down, detonate. (21 bombs left)

Up, up, left, detonate. (19 bombs left)

Right, down, left, up, left, up, left, left, up, up, left, down, left, up right, down, down, right, right, up, right, down, left, detonate. (17 bombs left)

Right, detonate. (15 bombs left)

Up, left, down, left, down, right, down, right, right, up, up, detonate. (13 bombs left)

Down, down, left, left, up, left, up, right, up, right, right, right, up, left, detonate. (11 bombs left)

Right, right, up, left, left, detonate. (10 bombs left)

Right, down, detonate. (8 bombs left)

Up, right, down, left, down, left, left, left, down, left, left, up, up, left, down, right, up, right, down, down, right, right, tight, up, left, down, down, right, up, right, down, detonate. (6 bombs left)

Up, left, down, down, left, detonate. (5 bombs left)

Right, up, left, up, up, right, down, left, down, right, down, down, left, up, detonate. (3 bombs left)

Down, right, right, up, detonate. (2 bombs left)

Down, left, up, up, left, up, left, left, up up, left, down, left, down, right, down, left, down, right, right, down, right, right, detonate. (1 bomb left)

Left, left, up, left, left, up, right, up, left, up, up, right, down, down, down, down, down, right, fight, down, right, up, left. Detonate. Move right. (level complete)

You just beat the hardest level in the game, and you just beat Ka-Blooey for Super NES!

Saturday, October 28, 2023

Jerry Martin plays Strong Bad's Cool Game For Attractive People - Part 25 of 53


In this entry, we try to create the coolest album cover ever and get some celebrity judges.


At the top floor of Strong Bad's house, go left and get the camera and the bat hutch. Go left, enter the bathroom and take the fake sword. Go further left to talk to Strong Mad, then mention himself. Strong Mad will mention Cool Tapes and that Marzipan brings snacks. You'll then unlock Marzipan's house, which you can place on the map. From here, go to Marzipan's house.

At Marzipan's house, use the Black Metal Detector near the Zen garden to find the Gary Palaroncini shot glass. At the Zen garden, take the rock. 

Enter Marzipan's house. You'll find Cool Tapes rehearsing. Use the fake sword on Marzipan, and Marzipan will smack Strong Bad with her guitar. If you use the fake sword on The Cheat, he'll do the album cover picture that Strong Bad will want Marzipan to do, which is holding a sword while wearing a bikini and standing on top of a flaming car.

Go back to Strong Bad's house. Go back to Strong Mad's room, open the closet and click on the Poodonkis to take it after a brief, hilarious description.

Go back to the car. The Cheat will be standing on top of it with the fake sword. Put the starfish light on the car to put it on the antenna, then use the Poodonkis on the car to put it at the front of the shot. Use the lighter on the oil spill around the car to create a fire around the car, then use the instant camera on the car to make a photo for an awesome album cover. The bats will show up and fly around The Cheat as Strong Bad takes the picture, and we get a nice over-exaggeration of the photo that shows what it all looks like in Strong Bad's head.

Head back to Strong Bad's house and put the photo in the mailbox to send it in as the contest entry. A few seconds later, Strong Bad is the winner of the album cover contest.

Head back to Bubs' Concession Stand and talk to Bubs. Mention Limozeen, and Bubs will mention that he will make millions off of hairspray and scarves before telling you that you've gotten your celebrity judges. It's now time to start signing some acts for the battle of the bands, and hands you some entry forms before telling you that entry fees from three bands will be enough to cover the cost of fixing the Fun Machine. Meanwhile, Bubs will start building some stages. Bubs will then tell you that Cool Tapes is over at Marzipan's house and that Pom-Pom is over at the club, then Strong Bad will mention the band that Bubs used to be in with Coach Z. Bubs calls Coach Z "a big green sellout" and walk off. You'll unlock the club and the track afterwards.

OUTFITS:
- Sloshy Shirt: Use mic in downstairs laundry room.
- Leopard Print Pants: Examine couch in downstairs TV room.
- Head Band: Use mic near brick wall to the right of Bubs.
- Hollywood Boulevard Boots: Use the Black Metal Detector near the picket fence.

STRONG BAD ABUSE:
- Examine the microwave in the kitchen.
- Examine the Lappy Plug in Strong Bad's computer room.
NEW! Use the fake sword on Marzipan.

LIMOZEEN SHOT GLASSES:
- Larry Shot Glass: Examine Luxa-Lounger.
- Perry Shot Glass: Use mic near Strong Bad's mailbox.
NEW! Gary Shot Glass: Use the Black Metal Detector next to Marzipan's Zen Garden.

LIMOZEEN MANUAL PAGES:
- Cover: Use the Ordinary Light Switch in Strong Bad's computer room.

RARE BAND POSTERS:
- Two-o-Duo: Use the Black Metal Detector on the right side of Bubs' Concession Stand.

EXPRESSION OF AFFECTION:
- Talk to Strong Sad about bats twice.
- Talk to Bubs about the Fun Machine.

Tuesday, April 18, 2023

PrinceWatercress plays Sly Cooper: Thieves In Time - Part 25 of 48


In this entry, we rescue Salim's third and last associate before messing directly with Miss Decibel.


Copy Cats

You'll need to play as Murray to start this job.

"The Tiger" is held inside the taxi shop. Once you make it to the job marker, you'll enter a whole new area with Sly. As they make their way to the tiger, they unintentionally trip a trap and end up in an underground tunnel. Both of them end up separated, and Bentley cannot contact either of them.

Here, you'll have to switch between Murray and Sly to get out of here. Go up to the switch with Murray and pull up and down on the left stick like you did with Salim. When you reach the swirling blades, you'll play as Sly.

You'll eventually have to use the time slowing ability of the Thief Costume not just to get into the next area, but also to jump around on the objects in the raging water to get to the other side for a couple of rooms. If you see any barrels with blinking lights, that is dynamite that will explode on contact. Stay on the higher spire jump points to avoid accidentally setting them off. When you reach the gears, smash them with the sword. You'll switch back to Murray.

As Murray, the spinning blades will stop, and Murray can punch through them. Stay out of the water as jump on the platforms afterwards, then pull the next switch. You'll accidentally trigger a cannon trap, and Murray fires back with his own cannon. The left stick aims, while R1 shoots. Watch the gauge at the bottom of the screen, as the cannon can overheat if you fire it too much. Take out the projectiles as you shoot at the cannons so they don't hit you. Once you take the cannons out, you can pull on the wheel-like lever to pull up a big ship.

At the next set of spinning blades, you'll switch to Sly. After some more platform jumping with slowed time as well as a Sly Mask (see Collectibles), you'll come across a large treasure trove. Stay off the coins, as they will alert the guards. You won't be able to take it with you without changing history, anyway, as Bentley will tell you that within is Sinbad's legendary goblet and that Henrietta "One-Eyed" Cooper took the goblet in 1616. As for the stacks of coins, you'll have to spire jump across them. For the guards afterwards, slow down time with the Thief Costume, and don't run. Break the gears with the sword.

It's back to Murray. Smash everything on the way forward and avoid the sharks. You'll eventually have to shoot down four cannons. If you can take out of the cannons super quickly at the beginning, this gets easier. Pulling the switch afterwards will lead to a direct path to The Tiger, but you'll have to get on an unstable pirate ship and slow down time to climb up the ship and get to Salim's last associate. It is possible to get up the ship without it, but it is difficult.

Once you get to The Tiger, you get a reference to the second game before you get to go to the terminal for another tank section. Keep in mind that if the laser touches any laser trails you make with the blue tank, the laser trails will be nullified. Also, the portal of doom that sucks you in and eats at your health comes back. Once you complete it, you'll free The Tiger and finish the job.

Heavy Metal Meltdown

You'll need to play as Salim to get this job started.

In this job, Salim and Bentley will have to get into Miss Decibel's private study. It's that giant window we saw while getting all the clue bottles. Once you interact with it, you'll go inside and Salim will help Bentley inside. From here, Salim will have to place transmitters around Miss Decibel's study.

There are three places to put the transmitters, and one of them leads to a Sly Mask (see Collectibles). There are stacks of books, and if one has a gold Bentley medallion on top of it, that stack will tilt as you move around on it. When you get to a job marker, you'll be able to place a transmitter. As long as you keep pressing L3, you'll find out where you need to go.

Once you place the transmitters, you'll play as Bentley. You'll be blowing up some walls while shooting darts at the transmitters to activate them. Strangely, the Bentley medallions also show where Bentley needs to stand to shoot some of the darts. Be careful when blowing up the coil chandeliers, as detonating bombs on them will alert Miss Decibel.

Once you hit the three transmitters with darts, the transmitters will play rock 'n roll. You'll need to platform your way across the ceiling and avoid being spotted by Miss Decibel to plant a bug in the form of a statuette of Cyril de Paradox, who is apparently also Miss Decibel's boyfriend. Once you do this, you'll finish the job.

Abilities:

Cuffs of Confusion (Murray): This fist type will temporarily confuse an enemy once punched.

Meter Recharger (Murray): This will refill Murray's Gadget Meter in the blink of an eye.

Collectibles:

Sly Mask #50 - By going with the flotsam platforms in "Copy Cats," you can get to a Sly Mask.

Sly Mask #51 - With one of the transmitters in "Heavy Metal Meltdown," you'll see a purple rope on the way back. Climb up it to find a Sly Mask.

Controls:

Left analog stick: move
Right analog stick: move camera
X: Jump and double jump (hold X on second jump for hover jets as Bentley)
Square: attack
Circle: 
  • interact (usually with anything that has sparkles) (Sly)
  • steal from enemies (from behind) (Sly, Bentley, any of Sly's ancestors)
Triangle:
  • knock enemies upwards (from behind; press Square to slam enemies down for stealth slam) (Sly, any of Sly's ancestors)
    • press Circle after knocking enemy upward to perform Silent Obliteration (Sly; replaces Stealth Slam; must buy on ThiefNet)
    • press Square for Stealth Slam (any of Sly's ancestors)
  • spin attack (hold to charge) (Sly)
  • throw bombs (Bentley)
  • Thunder Flop (in mid-air) (Murray)
  • spin attack (hold to perform) (Murray)
    • control with left stick (must buy on ThiefNet)
  • Raging Inferno Flop (in air; Murray; must be bought on ThiefNet)

L1: 
  • bomb aim (Bentley)
  • smoke bomb/flash bomb (Sly; must buy on ThiefNet)
  • aim/strafe mode (Carmelita; must hold button down)
    • left analog stick: move
    • R1: shoot (can only shoot in strafe mode)
L2:
  • hold for costume select menu (Sly)
    • hold down to stay in menu; use D-Pad or left stick to make selection
  • hold for weapon select menu (Bentley)
    • hold down to stay in menu; use D-Pad or left stick to make selection
  • hold for fist select menu (Murray)
    • hold down to stay in menu; use D-Pad or left stick to make selection
  • hold for shot select menu (Carmelita)
    • hold down to stay in menu; use D-Pad or left stick to make selection

L3: activate compass
R1: run (hold while moving to perform)
  • Paraglide (Sly; in air; must buy on ThiefNet)
    • Square: Paraglide Dive Attack (during Paraglide; must buy on ThiefNet)
  • Adrenaline Burst (Bentley; double tap to activate; must buy on ThiefNet)
  • Clothesline (Murray; double tap and steer with left stick; must buy on ThiefNet)
  • Cane Push (Sly; double tap; must buy on ThiefNet)
R2:
  • Trigger Bomb (Bentley; must have bomb on field to detonate manually; must buy on ThiefNet)
  • Fast Climb (Salim; must be on rope, hold to perform)
R3: Binocucom
  • Right analog stick: move
  • Left analog stick: zoom in and out
  • R1: take picture (when applicable) (Sly, Bentley)

Start: pause menu
Select: map
  • Left analog stick: zoom in and out, switch between map and status
  • Right analog stick: move map
  • Circle: back

Monday, February 27, 2023

PrinceWatercress plays Blood Omen: Legacy of Kain - Part 25 of 41


Now that we're done with Dark Eden, it's time to head to Abernus. Guess what? It's just as bad over there as it was in Dark Eden, if not worse.


2:22 - Now that our business in Dark Eden is complete, we can go through this opening, which no longer has a door blocking it.

3:51 - This cave has a few pick-ups worth grabbing.

6:34 - There is this gate near this beacon. You'll only be able to go through the gate when the moon is full. The rune language here mentions a full moon and something about calling death from the sky. 

7:43 - There's Abernus. It's on fire.

8:13 - Be careful going through here. Thankfully, the Flame Sword will make quick work of the zombies here. You'll also have to equip the axes every 

11:15 - There is another beacon here. It won't be long until you get Kain's description of Abernus as well as the entrance to Abernus itself. Sadly, with all the carnage going on, this town is a maze.

12:24 - Enter the house to the right to save your game; you're gonna need it. The Chaos Armor makes the soldiers here a little easier to deal with. Also, enter whatever houses you can for pick-ups.

17:00 - This house is where you need to go. Going downstairs leads into a sewer maze. Use Repel to take out the enemies as you follow the path and get back upstairs to enter a new part of the town.

19:10 - At this point, we'll be facing more powerful demons. This guy in particular throws energy bolts that pack a punch.

24:19 - We'll be going here in the next video.

Tuesday, January 31, 2023

PrinceWatercress plays The Bugs Bunny Crazy Castle 4 - Part 25 of 27


At least these three levels aren't as bad as the first three.


Stage 12-4

Once again, there's three or four Daffy clones running around the level, and you'll have to deal with them (and maybe shoot down one of them). 

Stage 12-5

Any level in Stage 12 where you can get invincibility from the carrots is a good one, as it makes dealing with enemies - and the levels - easier.

Have a balloon ready for the narrow section that is nothing but doors, as there will be a good sporting chance that one of the Wile E. Coyotes in the stage will be in that area.

Stage 12-6

It will be pretty easy to run into a dead end while you're here. Let me guess, the level design is only going to get more annoying from here.

At least I'm not swamped by enemies here as much as I was in previous levels.

Saturday, December 18, 2021

HCBailly and JB play Secret of Mana - Part 25 of 41


In this entry, the Empire wants to call a truce, but when we get to it, we find out it's a trap.


Go back to Northtown and enter the coffee shop/Resistance base. Krissie will be at the counter, and she will tell you that the Emperor wants a truce. The Resistance, ecstatic by the news, head to the castle to the north, not even thinking about the possibility that this could be a trap. This castle, of course, will be your next destination.

Imperial Castle


When you reach the castle, there will no longer be a barrier between you and the front door, so you can just go right on in.

Once you go in, the path is made straightforward thanks to the soldiers that keep you from going where you shouldn't. You'll soon meet Emperor Vandole, and when you talk to him, it will all be revealed to be a trap. You'll be thrown in a cell along with the Resistance.

Once in the cell, talk to the guard. You'll be let out, but you'll soon be pushed into a pit where you'll have to fight the Metal Mantis. The Metal Mantis is a more powerful version of the Mantis Ant that can cast Lunar Boost on itself and shoot Fire Beams at you to Engulf you, but it should be easy to fight given how easy it was to face the Mantis Ant. When you beat the Metal Mantis, you'll get the Glove's Orb. The Heavy Glove inflicts damage on insects and other similar creatures. Unfortunately, you won't be able to leave and forge your weapons...yet.

After you beat the Metal Mantis, stand on the black-and-white checkerboard tile. You'll be in another part of the castle. The yellow creature that bounce you around from the road to Pandora makes a return appearance here.

The Emberman can cast Lava Wave and can also split into three in addition to trying to clap you to death.

From here, you can hit the switch near the cell and free the Resistance. From here, you have complete control of where to go in the castle. You'll want to go outside the castle from the cell first, but keep in mind that you won't be able to leave the same way you came in.

The Armored Men will hit you with maces, and there are in statue form unless you touch them. Thankfully, they're pretty easy to defeat, even if they cast Defender.

If you go outside then go up the stairs to the right, you'll eventually find the Whip's Orb and the Axe's Orb in chests. Make sure you get these orbs, because once you leave this area, you can't come back. The Hammer Flail will slow enemies down, while the Golden Axe inflicts damage on insects and other creatures much like the Heavy Glove. Once again, you'll have to get out of here first to forge weapons. Watch out for the Armored Men who will spawn out of thin air in this room.

From here, you'll want to go through the front door again. The Dark Ninjas can cast Burst and use Flame Saber, but they give quite a bit of experience and gold for this point in the game.

Tuesday, November 23, 2021

PrinceWatercress plays Sly 3: Honor Among Thieves - Part 25 of 42


In this episode, we steal General Tsao's treasure and ruin his wedding...even if things don't go exactly as planned.


Operation: Wedding Crasher

You'll have to play as Sly to start the mission.

Once you make it to the waypoint, everyone will be in position. Sly will sneak into the vault from a rooftop opening, and from here, you'll need to go up to the door and press Circle to let Murray and Penelope in. Once you do, you'll need to get to the security computer underneath the dragon statue on the far side of the room. You'll have to get there with the RC car and without hitting any of the blue security beams . Some of them will move in a pattern to give you some headway, while others will remain static and force you to move around them. Also, you cannot run into or shoot down any of the sensors or windows.

You will eventually find the path leading to the computer, which you will want to line up perfectly with and shoot down. When you do this, however, things will stop going according to plan, as Penelope soon realizes that there is a back-up security system that will boot up and alert General Tsao unless all of the security sensors are destroyed. From here, you'll need to drive all over the room and destroy all thirty security nodes before time runs out. Make sure to destroy windows to make it easier to get to all of them. Once they're down, the red security lasers will go away.

Enter the room with Murray and head to the dragon statue on the far side of the room. After pressing two buttons simultaneously with Penelope (yep, that comes back), you'll find the opening to the vault. Penelope just drops in, but Murray Thunderflops in despite the foundation of the room being rotted out. 

You then go back to the moment where Sly leaves the treasure room. Head to the waypoint - which is the door - with the Paraglide. You'll be at the vases again. The Panda King will tell Sly that the tunnel that he and the Guru are digging will cause vibrations in the earth that will cause the vases to tip over, and if any of them break, it will trip an alarm. You will need to watch the vases, and if any of them move, run up to it and press Circle to stop it from moving. For best results, hold R1 at all times; there are ten vases here. Thankfully, this part isn't very long.

You'll then play as Bentley. You'll need to use the Grapple-Cam to get Carmelita's attention and get her to the door. Carmelita will be at the safe house; you'll need her to get to the other waypoint, which is the front door to the palace. When you get her attention, get away from her immediately; if she sees the Grapple-Cam, she will shoot it down and you'll have to get another one.

Once you get Carmelita to the door, the Panda King will rescue Jing King just in time for Carmelita to show up. Sly disguises himself as General Tsao and heads to the rendezvous point, and Carmelita hides where Jing King was. The real Tsao shows up, none the wiser.

Tsao heads to the vault just as Murray shakes down the vault floor, destroying the vault in the process and in full view of General Tsao, who summons a dragon that immediately kidnaps Penelope. From here, you'll have to face the dragon to save Penelope.

You'll need to find a firework - marked by a waypoint - to get to the dragon and spire jump across the dragon's body and avoid its fire breath until you reach the head. From here, you'll need to smack the dragon in the head while jumping over its flaming tongue and its hand clap attack. Eventually, the dragon will force you off its body, and you'll have to rocket your way back up to the dragon again. In between trips to the dragon, fight off enemies to refill your health.

After three trips' worth of damage to the dragon, you'll beat the dragon and save Penelope. General Tsao has the wedding, only the bride is Carmelita, who shocks General Tsao with her shock pistol and puts him in custody. Jing King is delivered to her aunt, and the Panda King joins the Cooper Gang to pay off his debt to the gang.

Controls:

D-Pad/left analog stick: Move
X: jump/double jump
Square: attack
Circle: use to interact with sparkles, steal from enemies (from behind; with Sly), grab objects and stunned enemies (with Murray; press Circle afterwards to grab enemy out of air and press again to shake them, or press Square to throw them)
Triangle:
  • charge up cane, knock enemies into the air (from behind; with Sly, use Square afterwards to slam enemy down/use Silent Obliteration)
  • drop bombs (Bentley)
  • uppercut (Murray; press Circle afterwards to grab enemy out of air and press again while holding enemy to shake them, or press Square afterwards to knock enemy out while in mid-air)

Select: access Gadget Grid
  • D-Pad/Left analog stick: select gadget/ability
  • L1, L2, and R2 buttons: assign gadget to button pressed; gadget can then be used with that button

Start: Pause/unpause
  • D-Pad/left analog stick: choose options
  • X: confirm choice
  • Triangle: back out of choice

L3: bring up waypoint

R3: use Binocucom
  • Left analog stick/D-Pad: look around
  • Right analog stick: move in and out
  • R1: take picture

R1: run (hold down)
  • use Paraglide (as Sly; hold down to use, must purchase first)

Right analog stick: move camera

As Carmelita:

  • Left analog stick/D-Pad: move
  • Right analog stick/D-Pad: move camera/aim
  • Triangle: toggle between strafe mode and free movement
  • Square: kick
  • Circle: mega jump
  • X: jump and double jump
  • R1: shoot

As The Guru:

  • L1 (hold): transform
  • Circle (in mid-air, behind an enemy): mind control
    • Left analog stick/D-Pad: steer enemy
    • X: jump off enemy and launch enemy forward
    • Square: attack

Grapple cam controls:

  • D-Pad/Left Analog Stick: aim camera
  • X: shoot/grapple with hook
  • Circle: distract enemies
  • Square: self-destruct (hold down)

Hacking mini-game controls:

  • Left analog stick: move
  • Right analog stick: aim and fire gun

As The Panda King:

  • Square: flame chop
  • L1: hold to load fireworks, release to attack with stored fireworks
    • Right analog stick: sweep over multiple targets

Tuesday, October 26, 2021

HCBailly plays Final Fantasy II AGAIN - Part 25 of 65


In this entry, we traverse further into the Dreadnought and take on the Hill Gigas.


Use an Ether if anybody's MP falls below 40.

The Trident is stronger than the Mythril Spear, so if you're needing a good spear weapon, here it is. HCBailly saves this for the next guest character.

The M.Gouche increases your Evade by 5% when equipped (and is the only weapon to do so), and has a low magic penalty.

The Giant Helm increases your Strength by 10 when equipped; however, it weighs quite a bit.

To beat the HillGigas inside the chest with the Ice Shield, hit him with the Ancient Sword first. If you can Curse him, you'll be able to stand a much better chance. From there, you can use Bsrk on your physical-attack based characters. Be sure to keep everybody alive!