Showing posts with label part 26. Show all posts

Thursday, July 23, 2026

PrinceWatercress plays Space Station Silicon Valley - Part 26 of 32


At this point, you start with Animal A, get Animal B, use Animal B to get Animal C, and so on until you get to the goal, more or less. At least the levels are creative and expansive, and you get to explore them a little bit for Power Cells, too.


Sting in the Tail

The other animals have been forced into the mountains by the scorpions, and you'll need to get yourself a kangaroo and a vulture in order to beat them at their own game.

You start off as a desert fox. You'll need to take one of the scorpions and take them out. If you jump at the right time, you won't get zapped by the scorpion's lightning attack. You'll want to get the timing on this down, as you'll be forced to fight one of them at close range. Once you can take control of a scorpion, destroy the other. There is energy at the start; take advantage of the two energy pick-ups to ensure you don't die as soon as you started.

In this level, energy pick-ups will have different colors. The light blue ones you've seen so far will give you the most energy, but there are more purple versions of the energy pick-ups that give out less energy, with a fully purple pick-up giving you the least.

You'll need to take control of the desert fox again, this time to walk left around the perimeter of the level to access new areas. You'll be able to get a few Power Cells and get a free tour from the camera. Just be ready to jump across the metal platforms.

Go back and take control of the scorpion. This time, you'll want to go to the right instead of going left like you did with the desert fox. To take out the scorpions effectively, you'll want to either keep zapping them from a higher elevation or zap them three times and hit them with the claw attack afterwards if they come at you. The scorpions go after you if you zap them enough time, so be ready for close combat. The zap attack only kicks in if you're close enough to an enemy; if you're too far away, you won't be able to do it.

As you continue to explore with the scorpion, you'll eventually find two kangaroos. Take out the scorpions in the area with the scorpion, then return to the air with the kangaroos with the desert fox. This is going to be a bit of a trek, but it can be done. The desert fox can jump from column to column to get to the kangaroos, and once you get to the kangaroos' level, you'll want to attack them without getting attacked yourself. The more energy you have available for this, the better, even if you have to leave the area and take a bit of a journey to get it and come back. Whatever you do, make sure the kangaroos aren't looking your way. Once you take down a kangaroo, take control of it immediately. Not only will you have a big jump, but you'll be able to get in the water and go just about anywhere (something you couldn't do with the desert fox or the scorpion due to their terrible water resistances). If you have any energy that needs to be picked up, go ahead and get it now. The worst is over; don't risk dying at this point of the level.

Destroying all the scorpions will net you the trophy for this level. You'll need to get the kangaroo or the vulture later to grab it.

From here, there's only one place left to go to: the metal mountain in the center. The only way to get there is with the kangaroo. You'll need to jump on a few platforms, then jump your way to the top on the flat parts. There are two vultures here, and you can easily take out both of them by punching them, running away until they land back on the ground, and hitting them again. Repeat this until both vultures are down, then take control of one of them. With the vulture, you can get everything else that you've missed - including the remaining two Power Cells under the small, narrow, metal bridge - then get to the exit.

There's a problem: you can't get into the teleporter! There's a "no kangaroos" sign nearby, and the vulture won't fit, either. You'll need to bring the desert fox all the way to the exit with the vulture, then switch to the desert fox to get into the tiny area with the exit teleporter and get out of here.

Boxing Kangaroo

Type: Boxing Kangaroo
Environment: Desert
Skill A: Jump
Skill B: Punch
Water Resistance: OK
Mass: Heavy
Armour: Light
Strength: Medium
Traction: Good
Fall Distance: Medium
Production: Long
Engine: Nuclear
Intelligence: Medium

Power Cells


1 | 2 | 3 | 4 | 5-6 | 7-8 | 9-11 (and the trophy) | 12 | 13 | 14-15

Tuesday, February 10, 2026

PrinceWatercress plays Super Mario Odyssey - Part 26 of 92


Compared to the last video, we don't do as much here due to advancing the game's plot. Nevertheless, we get some work done in the Metro Kingdom.


Powering Up the Station


Head back to the Outdoor Café checkpoint and throw your hat at the nearby manhole cover to possess it and move it with the left analog stick. Drop down the hole, and you'll end up in the underground power plant. Throw your hat at the green platforms to spin them around, but keep in mind that you don't need to spin all of them. Keep in mind that they will start spinning more slowly over time and will eventually stop, and when that happens, you'll need to hit them with your hat again.

Once you make your way through the sewers, you'll face two poison-spitting Piranha Plants. Throw your hat to clear the poison as well as stun the Piranha Plants so you can jump on their heads to get a Power Moon. After that, the glass dome on the switch will break; jump up to the switch and ground pound it to power up the city again and kick off the festival.

From here, you'll be back in City Hall with Pauline. When Pauline asks if you want to take part in the festival, say yes.

A Traditional Festival!


Once you're back at the Odyssey, enter the pipe shortly after the start to enter a huge 8-bit area. In this area, you'll be avoiding flaming oil barrels, dodging barrels, going upside down and even facing Donkey Kong himself.

Keep holding Y and left to run up the curved wall during the middle of the 8-bit area.

To defeat Donkey Kong, just hit the four ? Blocks below him. That will get rid of him. Once you beat him, you'll reach the rooftop. Talk to Pauline, and you'll get a Multi-Moon.

Power Moons


6. Powering Up the Station - Defeat the two poison-spitting Piranha Plants in the Underground Power Plant to get this Power Moon.

7. Festival in New Donk City - Get through the 8-bit area at the festival and talk to Pauline at the rooftop for this Power Moon.

35. Sewer Treasure - In the sewers leading up to the Underground Power Plant, there is a big vertical platform you'll need to hit with your hat. Wait for it to start losing speed after spinning, then get to the top of it as it gets completely vertical to jump your way to a hard-to-reach platform. You'll find a Power Moon here.

Regional Coins


Wednesday, December 17, 2025

PrinceWatercress plays Brave Fencer Musashi - Part 26 of 33


If you thought the first time in Steamwood was bad, just wait until you see the second.


Climb up and take the shortcut to Steamwood. Fores is down. Talk to him and he'll give you Handle #0 and tell you he locked the Princess in Steamwood. She ordered him to take her to Steamwood, then beat him up. As revenge, he locked her in. Now Steamwood's gone berserk, and as soon as you stop taking to him, you have a 24-hour timer.

In case you didn't get that last part: YOU HAVE TO DO THIS AGAIN. It's the same pressure gauge as last time, so if you remember how you did it here, you'll be able to do it again the second time around.

When you go in, you'll see the Princess talking to herself. Her voice is clearly different. When Musashi confronts her, he finds out she has a tail and pulls on it. It's Topo from Leader's Force of the Thirstquencher Empire, who was behind this all along. She teleports out, leaving a bag. Inside is the profits from the village shops.

This time around, you'll have to look around the place for some of the handles in addition to turning off the valves. After all, Valves 1, 4 and 8 are missing, and how are you going to turn the valves off if the handles aren't there?!? At least the geography of the place as well as the location of all eight valves hasn't changed.

Handle #1 will be to the right of where you start. From here, make sure you go two levels on the lift, then drop down to the level below so you can get to the first three valves. 

Handle #4 will be to the left of Valve #4. Be careful with your jumps so you can grab it and then get back to the valve.

Handle #8 will be to the right of Valve #8. Be ready to double jump past the steam blocking it from the side to get to it, then double jump your way back.

Some valves will be harder to get to than others. If you need to, use your double jump to get past some of the steam, and pay attention to any pipes that you can use as platforms. 

Once you turn all eight valves again, you will never have to deal with this Steamwood stuff ever again.

When you exit Steamwood, you'll meet the Mayor, who now knows what's going on with the whole fake Princess deal. Musashi will also give the profits back to the mayor.

The rest of this video is me doing some more things in the town as well as buying toys at the toy store and playing with them at the castle...and there's quite a few of them at this rate.

Heading back to the castle to talk to people will lead to Musashi telling Steward Ribson about what has happened.

If you talk to Mayor Govern after returning to town, you can get a reward. If you accept the reward, you'll get 600 Drans.

If you talk to Chef Julienne (Chef), he will wish he had some rice. Talk to Cook Mary-Nade at this point, and you'll be able to get Rice Balls at the Grocery. The Rice Ball is worth 320 Drans and will restore HP and BP by 150 each. Buy one, then talk to Chef Julienne to unlock some rice dishes at the grocery (which you apparently can't get).

Talking to Alchemist Leanman (Alchemist) will restore your BP by ten points via an alchemic tart, should you choose to take this recovery.

Saturday, November 15, 2025

PrinceWatercress plays Legacy of Kain: Soul Reaver - Part 26 of 28


Before we can catch up to Kain, we need to complete a few more puzzles...


0:44 - If you take the staff out of this enemy, the enemy will revive and attack. If you phase into the spiritual realm and destroy the wraith that stands in its place, then phase back into the material realm, the enemy will be gone.

1:40 - From here, you'll have some block moving to do. The symbols above the spaces in the wall indicate which gates they will control. The pedestal at the start can be spun around with the Constriction skill, and this will open and close the other pair of doors so you can more easily get around, push the blocks and move them to the "Z" and "O" slots to open the big door leading to the rest of the area.

10:03 - For the next area, you can use the Constriction pedestals to open some doors and refill magic, among other things. Shifting to the spiritual realm will get rid of an enemy in the material realm in the area when you need to push the blocks out from the side and then slot them into the wall with your projectile. There will be an enemy behind the door that opens; hit him with a projectile first, then throw the staff at him.

14:30 - After taking out the enemy in the next room, run around the columns so that the light brown parts face the center of the room. This opens the next door. The slit in the room leads to a magic refill. You'll need to head back to the beginning.

16:52 - Open up the path to the slit in the wall with Constriction again, then go back. The door that was previously closed will now be open; entering it leads to the Oracle's Cave. The cauldron belongs to "The Oracle," who was really Moebius in disguise tricking Kain into doing everything that he did in the first game that lead to the canonical bad ending. Raziel will realize that Kain was here. If you use the Constrict spell on the cauldron, this will open up a path leading to a new area. You can also use the fire here to give the Soul Reaver fire powers, if you need to.

Sunday, February 23, 2025

PrinceWatercress plays Wario Land II - Part 26 of 51


Now that we've completed the main game, it's time to take on the side stories!


Once you've played through the main game, you can access the treasure map to replay any level that you've already beaten. This not only allows you to collect more coins, get another chance at getting treasures from treasure rooms and grant you another chance at winning picture panels, but you can re-explore levels to find alternate exits.

The squares represent the levels, while the tiny rectangular panels to the left of them indicate whether or not you've gotten the picture panel for that level. If the square panel shows a treasure chest, that means you have not gotten the treasure for it yet. If you've gotten the treasure for it, you'll get the white square as well as the picture of the treasure from that level. If the panel is black, you have not accessed that level yet. As for the rectangular panel, a white panel means you've gotten the picture panel; a black panel means you haven't.

Aside from powering on and off, you can press A, B, Select and Start simultaneously to soft reset and go back to the title screen to get back to your game.

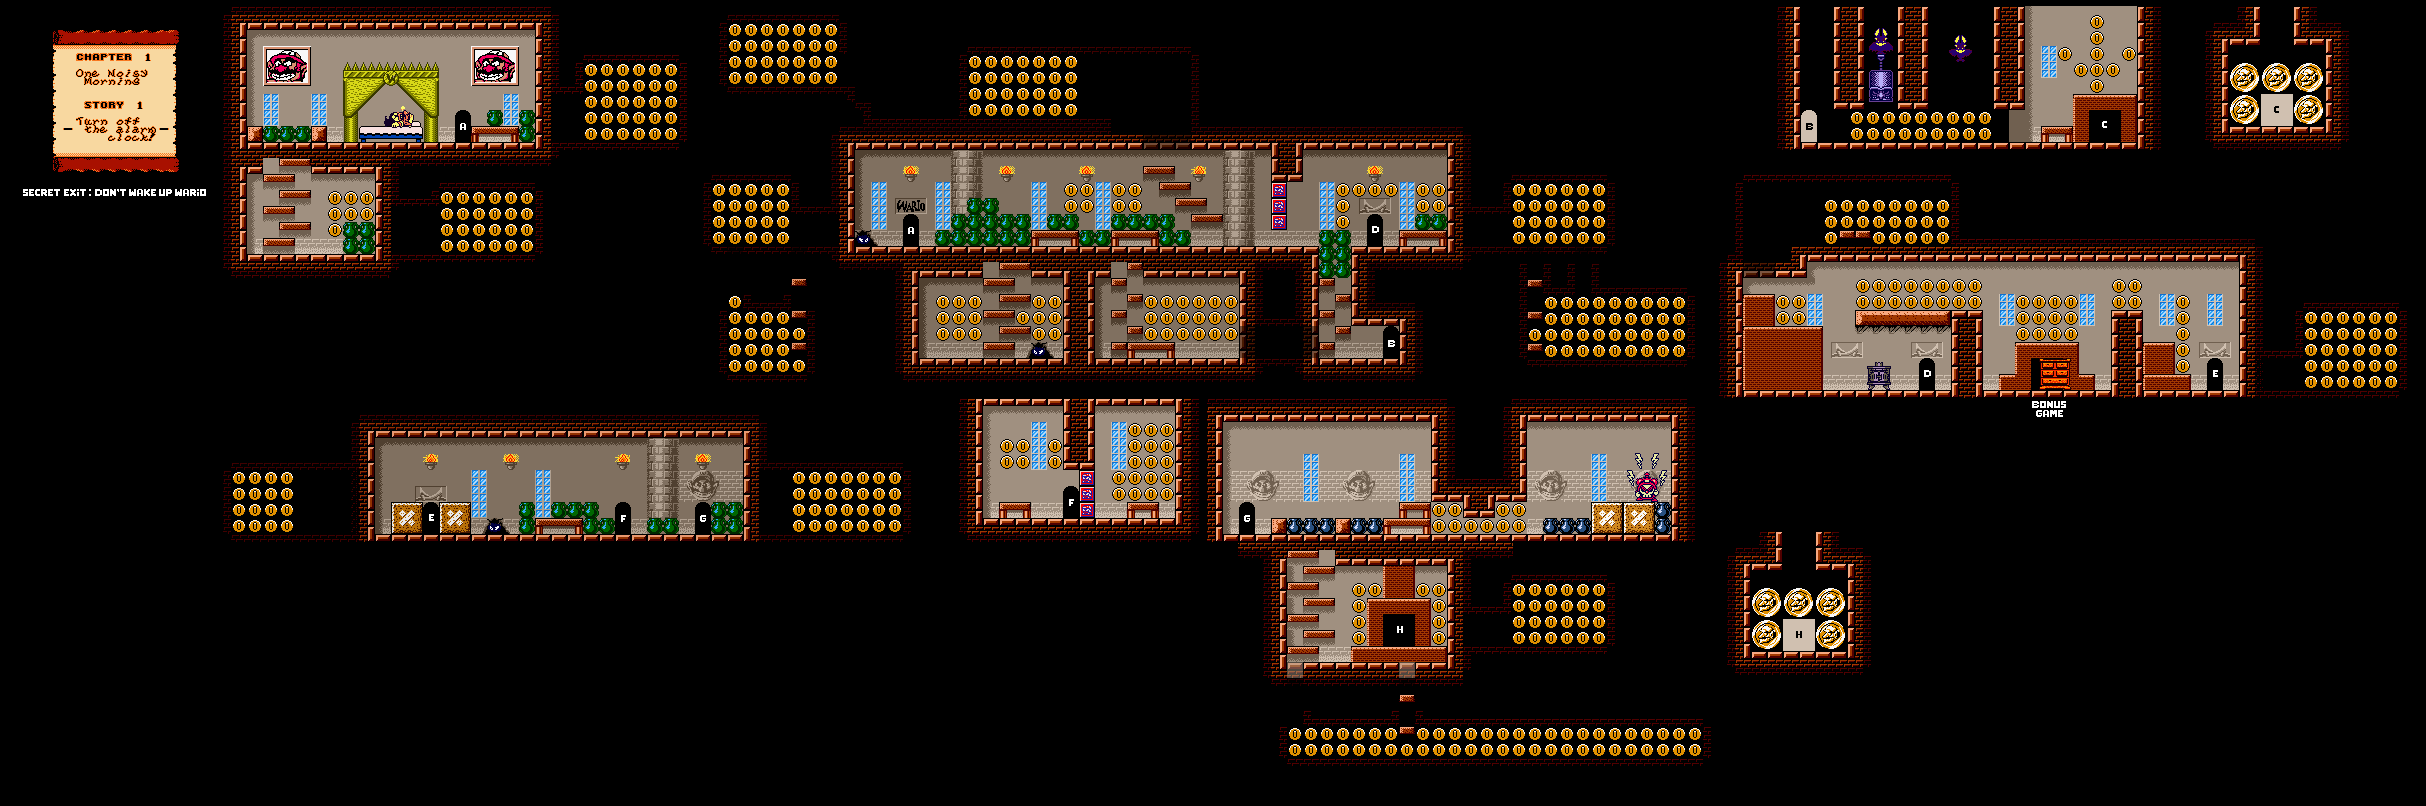
Chapter 1: One Noisy Morning

Story 1: Turn off the alarm clock!


As soon as the level starts, don't do anything. Just let Wario sleep. The music will soon change to tell you that you've cleared the stage. Afterwards, Captain Syrup's goons will show up and pull Wario off his bed and throw him out of the castle. Wario will soon wake up and find out that Captain Syrup has invaded his castle!

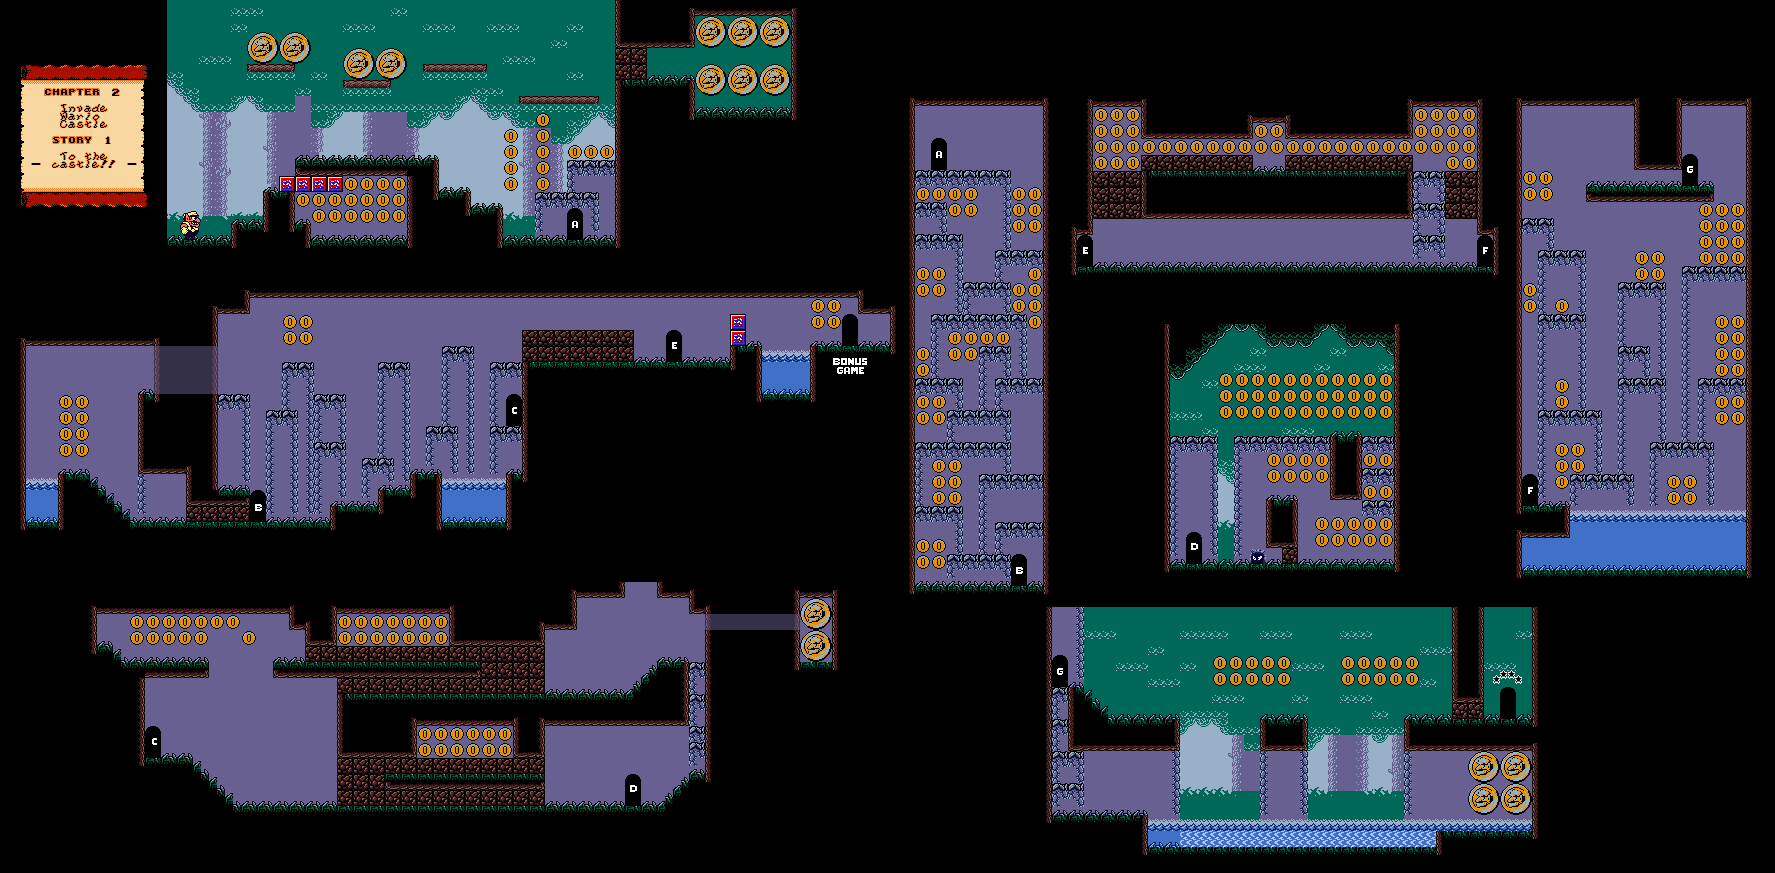
Chapter 2: Invade Wario Castle

Story 1: To the castle!!


Hold and release B with a Spear Goon with your hand at the start to get to the small nook full of coins. You can also do a high jump off a Spear Goon at the far right to get to a bunch of big coins.

After a downward drop where you will have to avoid being stung by wasps while picking coins up, you'll be in a room with a couple of penguins who will get you drunk. You'll have to get a penguin to the door to the upper right to access the treasure room, where you can get a Dr. Mario pill. As for the blocks to the left of where you came in from, you'll need to go up and to the left, tackle the wall, and then drop down and roll down the slope to get . Remember: to roll down slopes, you simply need to crouch while on a slope, and let Wario take care of the rest. Remember that you can jump while rolling, because you're going to have to do that in one of the rooms you'll have to explore to get all the coins around here.

One of the exits out of the room leads to a room with a couple of slopes you'll have to roll down to break all of the blocks. The hardest is the tiny slope in the upper-left corner that you'll have to roll down and jump into a certain part of the wall to get a few big coins. The door in here leads to an area where you'll have to high jump off a mouse to get all the coins.

Another room leads to some monsters that get angry when you attack one of them, a couple of Spear Goons and some coins. Going further from here leads to another area where you'll have to leap on a bunch of rock platforms on the wall while dealing with penguins who want Wario drunk. (Apparently Drunk Wario is called "Crazy Wario" in the West, because Nintendo still wanted to avoid alcohol references even with the ESRB in effect in the late 1990s. Go figure.) This area leads to the exit, and you'll have to roll down the slope to open the path to it. Watch out for the flying spiked skull in case you fall down, and make sure you have the treasure before you leave!

From this point forward in the game, the subgame where you get the picture panel will change slightly. The game will flip panels on the board at 50 coins each until you tell the game to stop with the B button, so you can get through these games slightly more quickly. Make sure you know for certain what the number is before guessing, as usual.

Wednesday, December 4, 2024

PrinceWatercress plays Great Greed - Part 26 of 28


It's time for the final stretch of the game. 


You'll start seeing some new enemies once you go down the stairs past the newly-opened door.

Cloaker is weak against Bolt magic and can cast Shove. It has 1280 HP, and gives 810 Experience and 103 Gold. It has a chance of dropping a Hacker sword, which is useless at this point in the game.

Crumb can cast Freeze 4, Bolt 4 and Flash. It has 1185 HP and will give 715 Experience and 116 Gold upon defeat. It also has a chance of dropping Regain 1. Make sure your HP is never under 200 while facing one.

Gruelguy gives 800 Experience and 106 Gold upon defeat and is a pretty vanilla enemy. He can still pack a punch, though.

Whinner can cast Thunder 2 and Poison 2. It has 1058 HP and gives 724 Experience and 93 Gold upon defeat, and has a chance of dropping the Duramet Armor, which is the best armor in the game. Cast Power when fighting Whinner; it really helps. It helps to have your HP above 300 at all times while facing one.

Midway through this path, you'll meet a guy who sells Med 3 and Med 4 scrolls as well as all three Regains. Hope you have a lot of money, as you're going to need to stock up to survive here.

You'll know that you're in the last room before Bio-Haz when you approach the door and you see the message saying "Enter." Before you go in, fight the enemies around here until you have 8000 Experience or less needed for the next level. Once you do that, refill your HP and MP and go in. If you have the Platinum or Duramet Sword equipped, replace it with the Knights Sword, as it is the only weapon that will even damage Bio-Haz.

Tuesday, September 24, 2024

PrinceWatercress plays Chrono Trigger (Super NES) - Part 26 of 70


In this entry, we head to the Tyrano Lair and tear stuff up as we look for Azala.


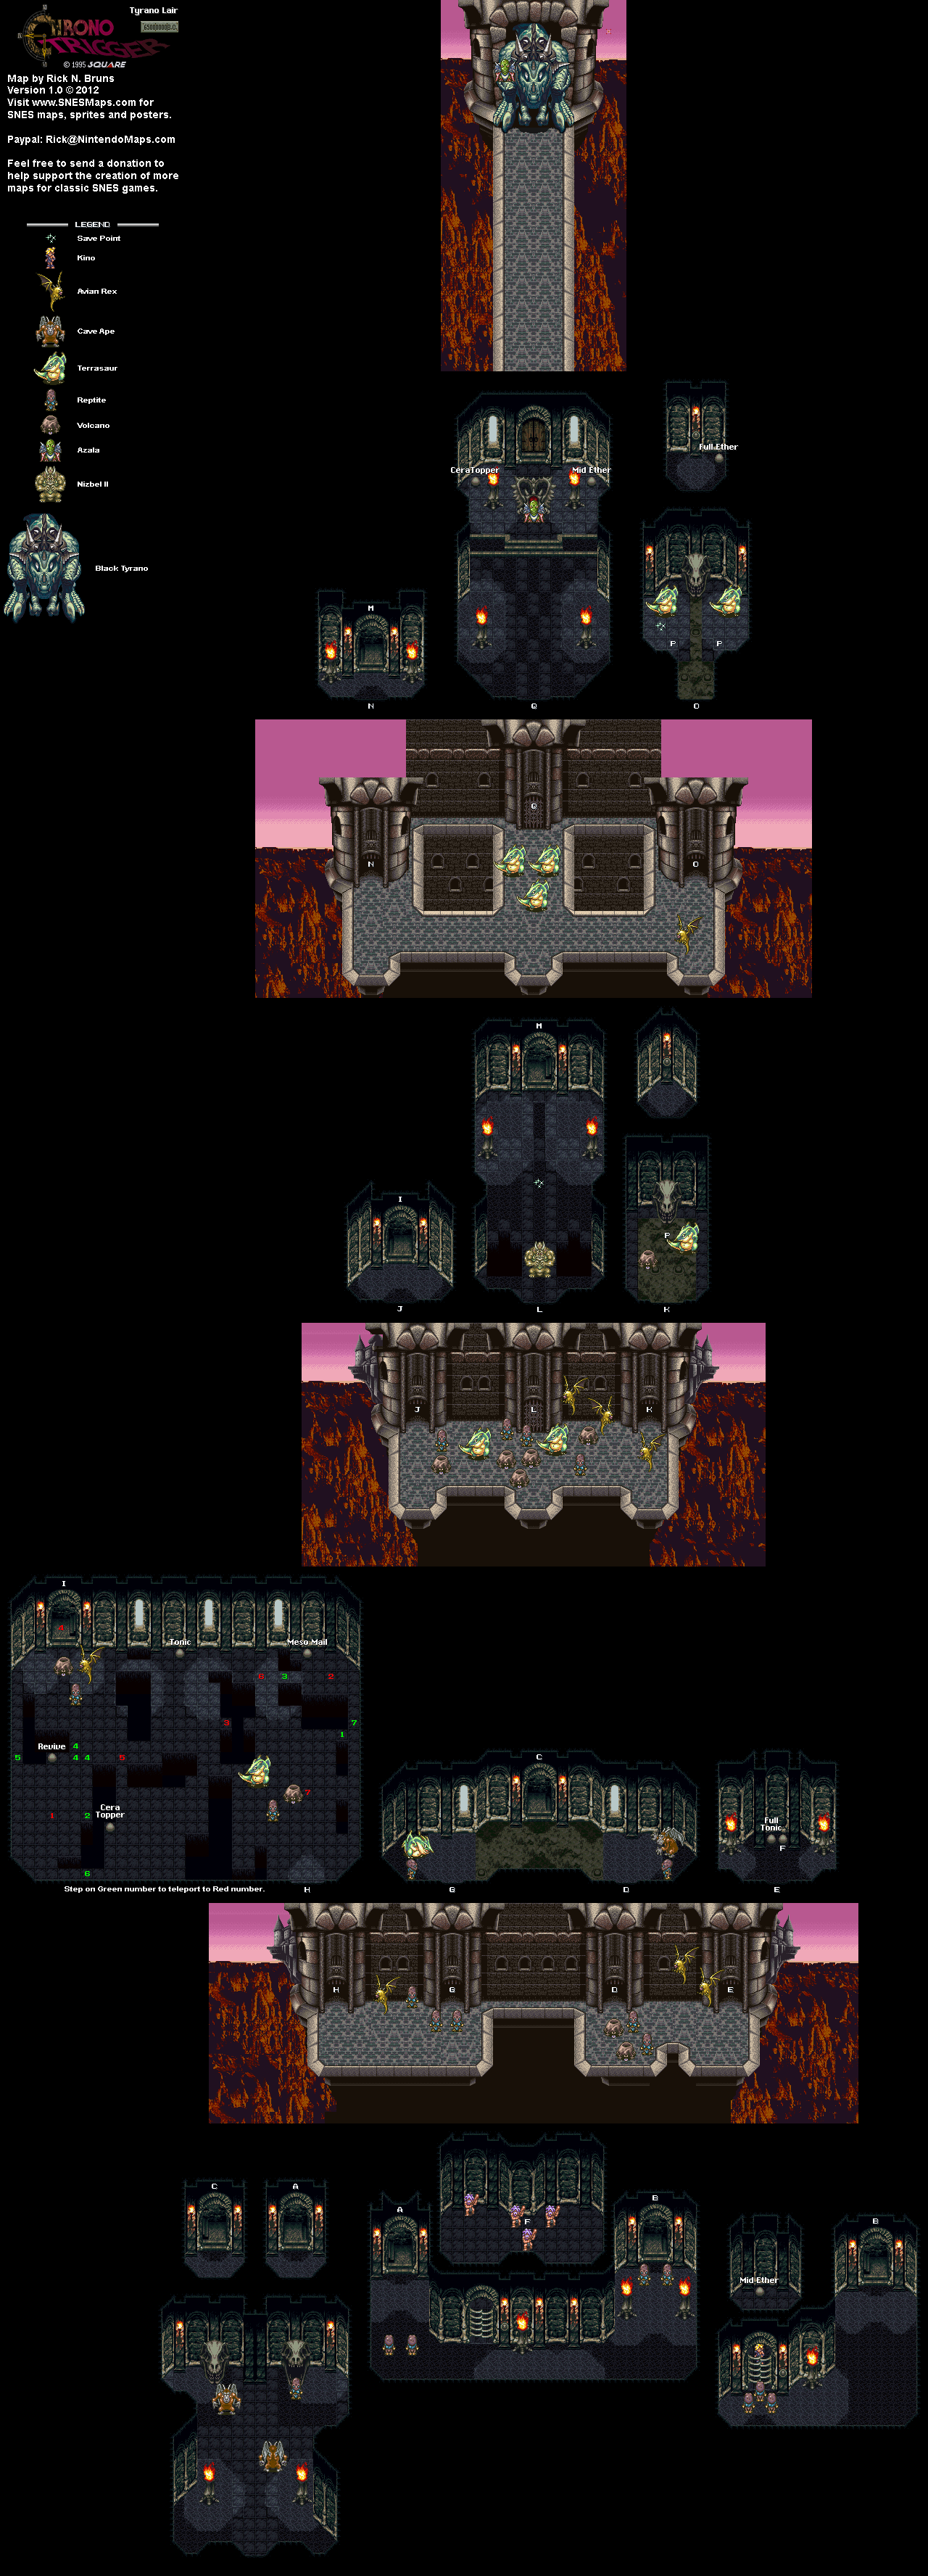
When you enter the Tyrano Lair, you can only enter the passage to the right at the start. When you do, you'll be able to go into the basement of the lair and face some brown Reptites. Believe it or not, the brown Reptites are stronger than the green ones that we faced in the Reptite Lair. Be sure to open the cell with the four cavemen in it to let them out, then continue further down to find out that Kino has been kidnapped. Beat up the three Reptites near the cave, then go up to the cell door and press A. Ayla will climb in and eventually bust Kino out, and Kino will repay you by opening up the left path in the entry room.

As you get through the outside parts of the castle, you'll face enemies such as the Arian Rex from the Dactyl Nest as well as the Volcano. Unlike the Shist/Pahoehoe, attacking the Volcano will cause it to attack all the other monsters on the battlefield, including itself. You'll also face the Terrasaur, which is a more powerful version of the Megasaur from the Reptite Lair. Just like with the Megasaur, you can shock it to take it out.

The buttons near the monsters will drop them into the cell that the four cavemen were in, so you don't have to fight them unless you want to. The nearby room with the fake treasure chest as well as the real one containing the Full Tonic will drop you into the cell, where you will have to fight any enemies you dropped into it. If that happens, any enemies you fought on the way to the Full Tonic room will re-spawn.

You'll soon come across a maze-like area where there are multiple treasure chests, but when you enter certain areas, the screen will fade to black and you'll be warped from one area to another. By walking around in all the areas where you can, you can find out where all the warps are where they can take you, and by scoping every tile of the area, you'll eventually be able to get even the Meso Mail in the northeast corner that you can't just walk up to and take.

After this, there will be a closed doorway, and you'll need to hit the switch in the next room to open it. You'll need to step on one of two floor buttons to open up the room with the switch you need to hit, but one of them will also unleash a Volcano and a Terrasaur.

Once you open that gate, you'll face Nizbel II. Be sure to use the save point behind him before fighting him. When you fight Nizbel II, hit him with Lighting three times, but no more. Keep hitting him with strong attacks the rest of the time. When Nizbel II releases his stored electrical energy and attacks the whole party with it, heal up. (Frog and Ayla's Slurp Kiss is really good for this, since it's only 1 MP from both characters and heals everyone for 300 HP or more.) After that, hit Nizbel with Lightning three times again, keep smacking him around again and heal up big time when necessary. Nizbel II will have the same attacks as last time; he'll just be more powerful.

Tuesday, June 18, 2024

PrinceWatercress plays Ratchet and Clank: Going Commando - Part 26 of 54


Now that we have the Gravity Boots, let's head back to Tabora and get some Raritanium.

First | Previous | Next | End

Now that we have the Gravity Boots, we can walk up metallic walkways. The first one we'll be walking up is in Tabora, and it leads to a mining machine! Triangle enters and exits, X accelerates, Circle reverses, Square drills, and L2 and R2 strafe.

Use the orange arrow at the top center, the map in the upper-left and the distance meter in the lower right to find out where all the Raritanium is. When the orange arrow goes somewhere and points down someplace, go there and hold Square to drill the Raritanium out. Use the gauge on the lower-right to see the Raritanium get pulled up. If you've destroyed all the enemies beforehand, this is a lot easier. Once you dig up all the Raritanium on the planet, you're done here, as the Raritanium here does not re-spawn.

There is also an energy bar on the bottom center in case enemies attack it. It doesn't come much into play for me very much here, since I've destroyed all of the enemies.

Also, the Chopper evolves into the Multi-Star in this video. When used, it splits into two smaller stars and does more damage when it hits an enemy.

Controls:

As Ratchet:

Control Pad/Left Analog Stick: move
Right analog stick: move camera

X:
  • Jump and double jump (hold button after double jump to use Heli-Pack or Thruster Pack)
  • Wall jump (near certain walls)
Square: strike with wrench
Circle: pull out/shoot currently equipped gun
Triangle: 
  • quick select (hold and use in conjunction with Control Pad or left stick to switch guns; menu can be customized in Quick Select on the pause menu
  • double tap to switch between two most recently equipped weapons/items
  • interrupt on-screen messages

Select: open map
Start: Pause menu
  • Control Pad: select option
  • X: confirm option choice

L1:
  • center camera behind Ratchet (tap button to center)
  • first-person view (hold button and use left stick or D-Pad to look around; let go of L1 to move camera back behind Ratchet)
  • Square: wrench boomerang
  • Circle: fire gun
  • R1/R2: zoom in and out (Pulse Rifle only)
L2/R2: strafe (hold while moving)
L3: see health and Bolt totals
R1/R2: crouch (hold down)
  • Square: wrench boomerang
  • X: high jump
    • long jump (hold crouch button and jump while running to perform)
R3: open map

In water:
  • Square: dive and descend
  • X: surface and ascend
  • R1: accelerate with Hydro-Pack

As Clank:

Control Pad/Left Analog Stick: move
Right analog stick: move camera

When hanging off platforms:
  • Control Pad/Left Analog Stick: move
  • Forward+X: vault up
  • Back+X: drop down

Square: punch
X: Jump (press and hold in the middle of a jump to glide with Heli-Pack)
Triangle: command menu (hold and use in conjunction with Control Pad or left analog stick to choose commands)

Wednesday, May 22, 2024

DeceasedCrab plays Earthbound - Part 26 of 53


In this entry, we get Paula back, Escargot Express fails to come through in the clutch, and we get a summons from Talah Rama back in the desert.


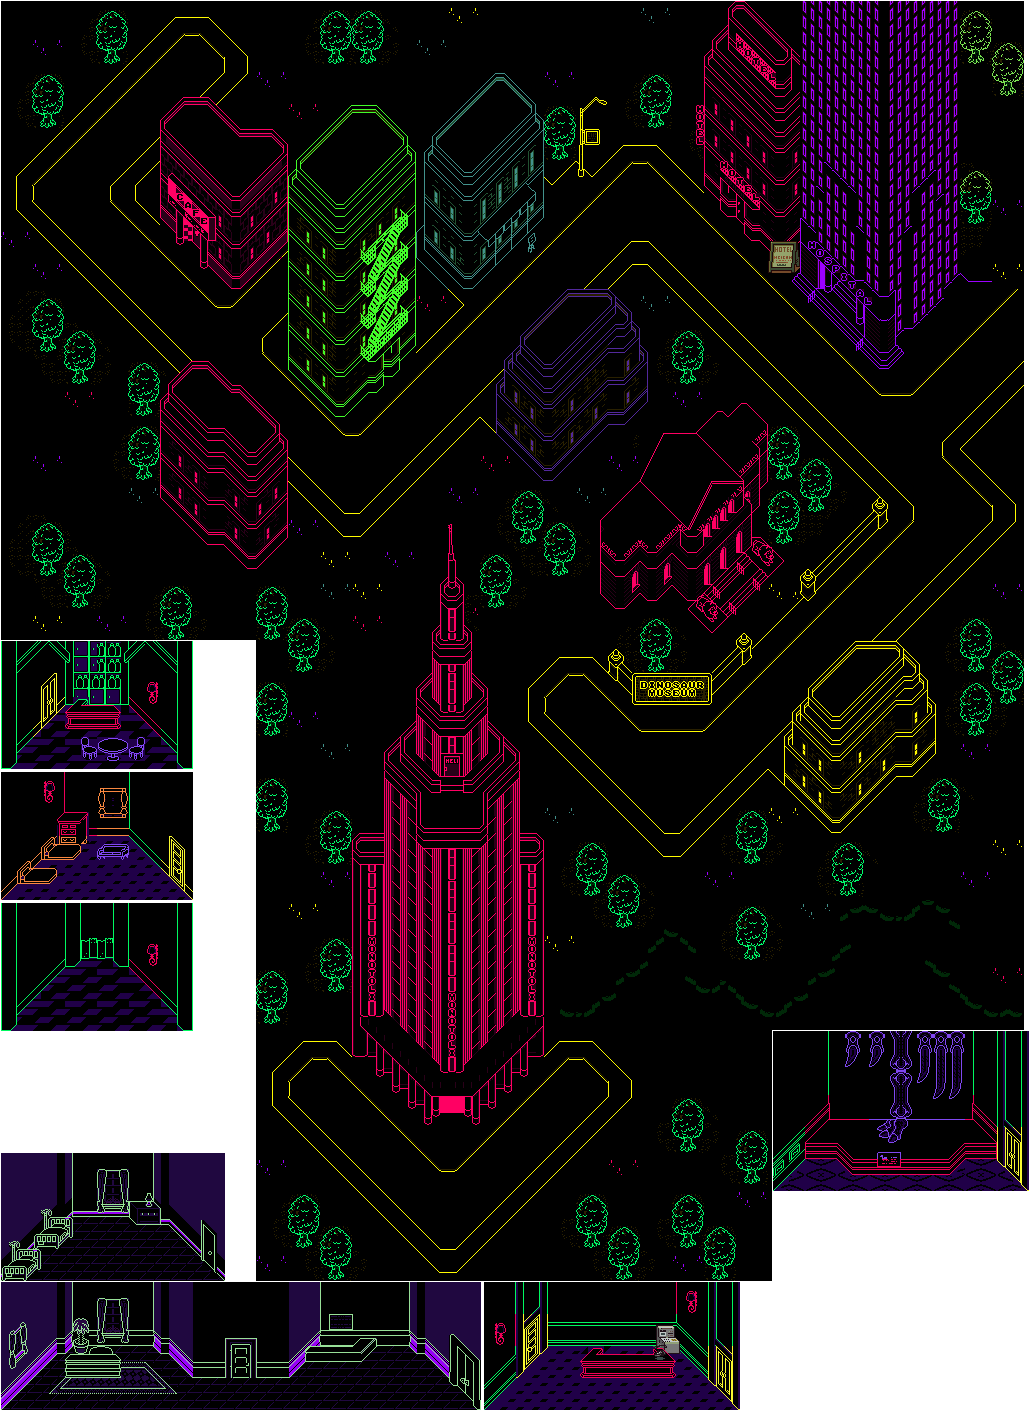
One of the men in the Hawaiian shirts and the sunglasses will take you to the Night Pendant, which will be better than any of the pendants that you currently have. It also protects from Flash. The corner areas can only be accessed by the men in Hawaiian shirts and sunglasses, so seek them all out. 

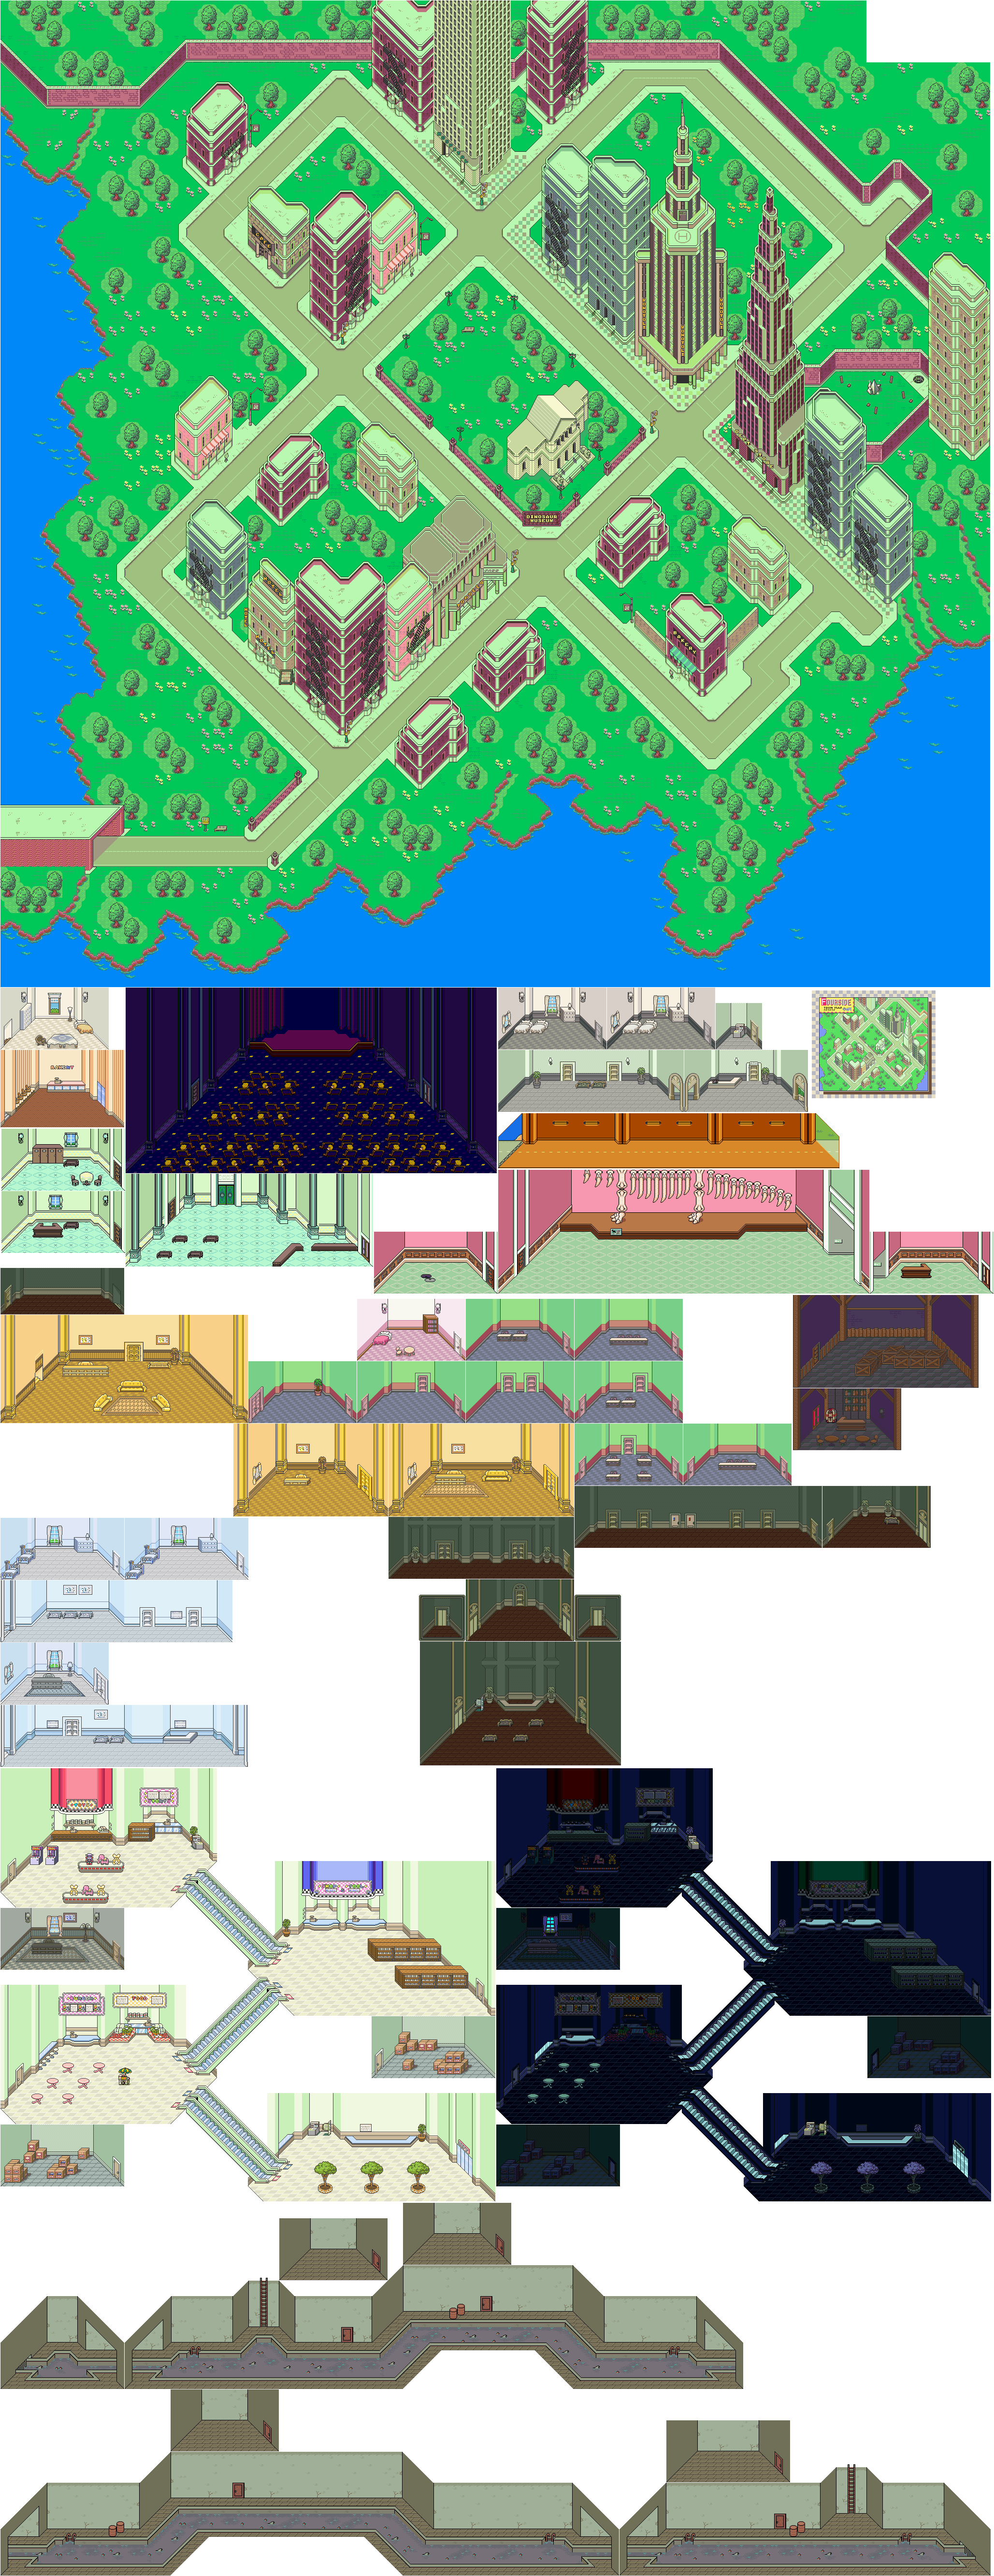
You'll need one of them to get northwest of the Monotoli Building. In that corner, you will find a man in a suit and glasses. If you talk to him, you'll be teleported into a building. One of the two people in the room are all black, and the other person is clearly visible. If you talk to the guy who is clearly visible, you'll be taken to the room in the hotel. There will be an invisible man who will block your path, and when you talk to him, he will join your party. He will mention his connected eyebrows and gold teeth as you explore. You'll need to take him to the guy dressed like a sailor who is blocking the path to the Mani-Mani Statue in order to get to it. The invisible man and the sailor will leave to get drinks, leaving you free to approach the Mani Mani Statue.

When you approach the old man near the statue, you will find out he is not Monotoli. The old man will then disappear, and you will be able to interact with the Mani-Mani Statue and fight it.

The Evil Mani-Mani does not have a physical shield, although it does have a magical one. It can past Paralysis Alpha, and it can neutralize PSI buffs with a blowing green light in addition to other things. Fire Big Bottle Rockets at it to do massive damage and defeat it quickly.

Ness will learn Flash Beta at Level 38. This will also allow you to cast Flash on multiple enemies.

When you defeat the Evil Mani-Mani, you'll be out of Moonside and inside a warehouse behind the cafe. As it turns out, Moonside was just an illusion created by the statue. The nearby mouse will ask you if you were daydreaming due to the vacant look in your eyes.


When you leave the room, you'll be back near the counter. You'll get a call from the Apple Kid about a new invention he has created called the "Gourmet Yogurt Machine," which can make different types of yogurt but can only make trout-flavored yogurt at the moment for some reason. He will send it to you via Escargo Express' "Neglected Class" shipping, which means that no care will be taken with the shipping of the item.

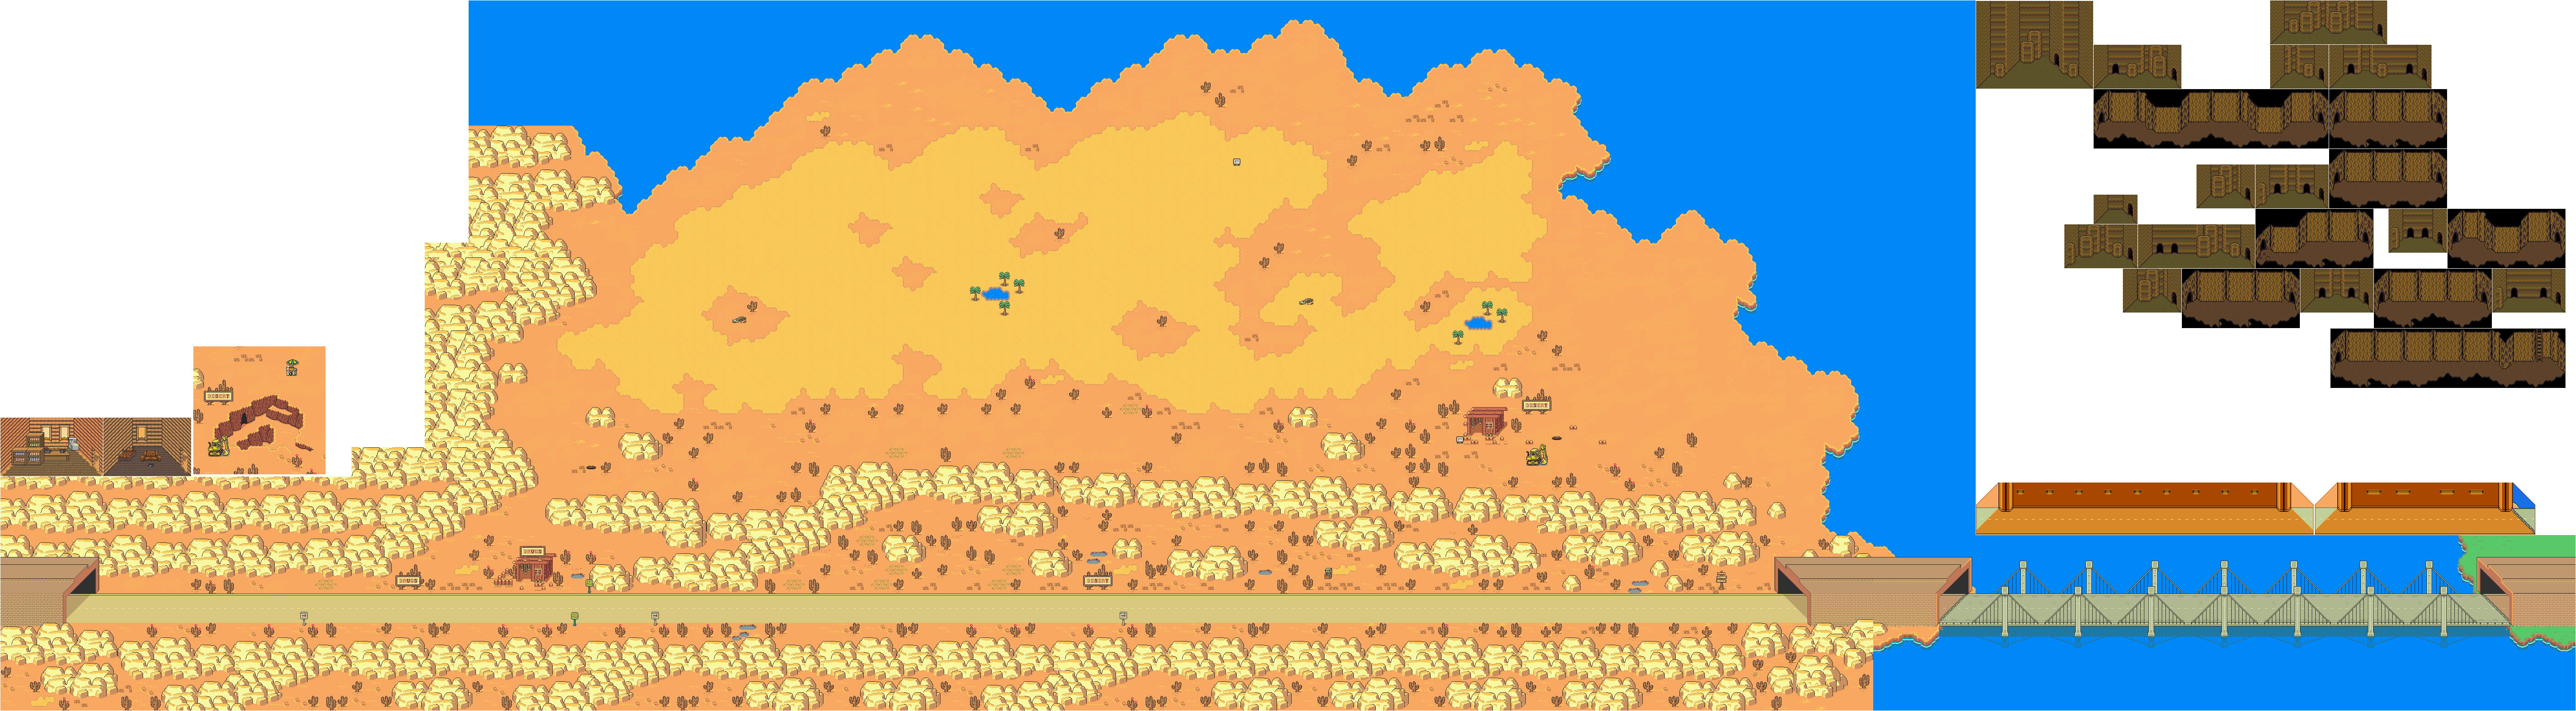
When you leave the cafe, you'll meet a monkey who is trying to teleport. Talk to the monkey, and he will tell you that Talah Rama is done fasting and wants to talk to you. You'll need to head back to the desert maze in the west end of the Dusty Desert in order to talk to him. 

After the monkey leaves, the Escargo Express Neglected Class delivery man will tell you that he lost the package containing the Gourmet Yogurt Machine in the desert and tells you to go get it.

After the delivery man leaves, Monotoli's maid, having overheard your discussion about the Gourmet Yogurt Machine. She will show interest in the machine before leaving. 

The Mad Taxi will try to run you over as an attack.


It's time to head to the desert maze. Bring a Skip Sandwich and a Picnic Lunch, and leave yourself as much inventory space as possible. You'll also need the Pencil Eraser to erase a pencil near the end. Thankfully, you can buy a Picnic Lunch and a Skip Sandwich from the old woman at the store on the west end of the desert.

Thursday, May 16, 2024

PrinceWatercress plays Drill Dozer - Part 26 of 28


Yet another one I could have gotten during the play through the story! Thankfully, that's the second and last.


Area 4-1: Metal City


2:21 - Breaking this metal blocks will open a path leading to the Rough Coin.

11:14 - After this set of timed blocks, drop down. You'll find the Drill Fossil, which can be picked up without the need of special drill bits and therefore could have been picked up during my play through the main game.

Area 4-2: Metal City Flight


18:10 - On the fifth screen, there are some metal blocks to the right at the start. Break through them and head right. Be ready to fight another one of those laser shooters, this time with propellor controls. (Yes, I forgot how to strafe. To be fair, you only have these controls for one stage.) Once you beat the laser shooter, you can head further to the right, drop down and get the Old Juice.

Saturday, October 28, 2023

Jerry Martin plays Strong Bad's Cool Game For Attractive People - Part 26 of 53


In this episode, we find out that Coach Z has a thing for Marzipan.


Put The Track on the locker room, then head there. Click on the wire hanger in the shower to take it, then talk to Coach Z. Talk to him about Marzipan, and Coach Z will more or less imply that he is into her. Ask about Marzipan again, and Coach Z says he is afraid she will reject him and wishes she would give him a sign when Strong Bad asks him why he can't just tell Marzipan how he feels.

If you click on the first locker in the set of lockers, you'll get a Cool Tapes poster.

Head to Marzipan's house and look at the glamour shots near the front door to take one. From there, offer The Cheat an entry form, and Marzipan will mention that the last time The Cheat signed something, they had to do some promotional thing with Marshie the Marshmallow, and tells you to run it by her first. If you offer The Cheat an entry form again, Marzipan will sing at Strong Bad. If you offer Strong Mad an entry form, Marzipan will sing at Strong Bad again.

If you give the glamour shot to Marzipan, you can get her to sign. Get her to make it out to Strong Bad himself and you can het a nice joke out of it. You can take another glamour shot if you want and get her to sign it as well, and if you do that, ask Marzipan to sign it for Coach Z. Marzipan will mention Coach Z sending some creepy fan mail lately, then sign it for Coach Z reluctantly.

Go back to The Track and hand the glamour shot meant for Coach Z to Coach Z. Coach Z takes this as a sign that Marzipan likes him back and says this constituate a legal marriage in some shady countries before leaving. From here, take some toilet paper from the bench, then check the second locker for a bottle of bleach you'll want to take.

Head back to Marzipan's house. You'll find Coach Z, who asks what he should do next. Click on the boom box to tell Coach Z to hold one over his head for a few days only to find out it did not go so well. Click on the poetry to convince Coach Z to try some poetry to bad results. From here, place the rock on the gravel near the toppled aquarium tank, then tell Coach Z to throw a pebble at her window like in the movies. Coach Z will throw the rock instead, and break the window. Marzipan will yell at Coach Z, and you'll find out that Marzipan has a restraining order before Bubs shows up and talks about old times before leaving. After that, Coach Z will leave.

Head back to Strong Bad's house. From here, use the bat hutch on the washer, then use the bleach bottle.

OUTFITS:
- Sloshy Shirt: Use mic in downstairs laundry room.
- Leopard Print Pants: Examine couch in downstairs TV room.
- Head Band: Use mic near brick wall to the right of Bubs.
- Hollywood Boulevard Boots: Use the Black Metal Detector near the picket fence.

STRONG BAD ABUSE:
- Examine the microwave in the kitchen.
- Examine the Lappy Plug in Strong Bad's computer room.
- Use the fake sword on Marzipan.

LIMOZEEN SHOT GLASSES:
- Larry Shot Glass: Examine Luxa-Lounger.
- Perry Shot Glass: Use mic near Strong Bad's mailbox.
- Gary Shot Glass: Use the Black Metal Detector next to Marzipan's Zen Garden.

LIMOZEEN MANUAL PAGES:
- Cover: Use the Ordinary Light Switch in Strong Bad's computer room.

RARE BAND POSTERS:
- Two-o-Duo: Use the Black Metal Detector on the right side of Bubs' Concession Stand.
NEW! Cool Tapes: Check the first locker on the left in the Locker Room.

EXPRESSION OF AFFECTION:
- Talk to Strong Sad about bats twice.
- Talk to Bubs about the Fun Machine.
NEW! Talk to Coach Z about Marzipan twice (before he leaves Locker Room).
NEW! Use Cool Tapes Photo on Marzipan and make out to Strong Bad.
NEW! Use Cool Tapes Photo on Marzipan and make out to Coach Z.
NEW! Talk to Coach Z about Poetry at Marzipan's House.

MUSICAL MOMENTS:
NEW! Offer The Cheat an entry form.
NEW! Offer The Cheat an entry form twice.
NEW! Offer Strong Mad an entry form.
NEW! Talk to Coach Z about the Boom Box at Marzipan's House.

Wednesday, April 19, 2023

PrinceWatercress plays Sly Cooper: Thieves In Time - Part 26 of 48


In this entry, we defeat Miss Decibel once and for all, then it's on to the present day where we face Cyril de Paradox himself.


All Rolled Up

You'll need to play as Sly to get this job started.

At the beginning of this, I show off all of the remaining abilities as well as Carmelita's guns and super jump, as well as the Ultimate Murray and Ultimate Carmelita costumes.

When you get to the job marker, the scene is set for the ultimate confrontation with Miss Decibel, who has been forging some documents in order to give Cyril de Paradox a fake royal family history that will make him an esteemed member of royalty in the present day and also untouchable. In order to stop him, we will have to go through the security door that we saw very early in Episode 5 and divert the guards in order to not get spotted. In order to divert the guards, Carmelita will have to wear a belly dancer's outfit and distract them. 

Once you find the door you're supposed to enter, Carmelita will distract the guards by belly dancing. Not surprisingly, this leads to rhythm-based button pressing mini-game, and when the game tells you to shake, shake the controller. As you progress through the game, more and more of the gang will try to open the door. Eventually, you'll get it open, and everyone will make their way inside...except Salim, who says that he has passed his greatest wisdom onto Sly and that someone needs to watch after Carmelita once they get inside. 

Once inside, the gang finds Cyril de Paradox's underground docking station and blimp. In order to distract the guard, Bentley busts out the RC car, which is now disguised as a mouse with the leftover materials from what became Carmelita's belly dancing outfit. Use the compass (and L3) to find out where to go, and when you run into the guards, use the compass (and L3) to get to the next area. As long as you keep moving and don't stop, the guards will never hit the RC car.

Once you're through the door, drive through the path while avoiding lasers and shooting down the scorpions. If you shoot down any bottles, you'll get coins out of them. Don't forget to boost with L1 to get past some of the laser traps. At the end, you'll break into the control room, where you'll have to play another game of Spark Chaser in order to hack through the other laser barrier. Murray and Sly will go through only for the security fail-safe to kick in, and the two of them will have to fight a gauntlet of enemies. As Murray, stomp the enemies and throw them into the laser beams that are creating the gas barrier that is blocking the path.

Cyril de Paradox will show up on his blimp, as will Miss Decibel, who is carrying a beaten-down Salim. Cyril will mention that he already has Salim's cane. Before Miss Decibel can get aboard the ship, Cyril leaves without her. From here, approach Miss Decibel, and you'll finally fight her.

For the first phase, slow time with the Thief Costume to get across the platforms, then jump over the shockwave. When Miss Decibel is down to one knee, run up to her and smack her around with the Square button. From here, you'll have to follow her to the next platform by running on the purple energy chords while jumping over the balls of energy.

For the second phase, run around the room to avoid the musical blast, then jump over the shockwave and smack Miss Decibel around again when she is down to one knee. From here, you'll need to slash the chains with the sword on the Thief Costume to break the chains, but before breaking the second chain, you'll find a place to spire jump to that has Sly Mask #52.

For the third phase, you'll have to get across the glass platforms with time slowed down again. When you reach Miss Decibel, she will perform the same attacks from the second phase, but she will also look up and shoot three homing projectiles. You'll need to run around the platform in order to avoid them, but if you slow down time, you can get more of a lead and outrun them further. When Miss Decibel stomps to create the shockwave, jump over the shockwave and smack Miss Decibel around. After this, it's more energy chord running before taking on the fourth phase.

For the fourth phase, Miss Decibel will stomp after you. Run away from the note blasts in a circle like you always have, then switch to the Thief Costume and slow down time when she stomps around so you can more easily jump over the shockwave. From here, you can smack her around. Once you smack Miss Decibel around, you'll want to go to one of the satellites at the edge of the arena and wait for her to charge at you. You'll want to get out of the way before you get hit so she hits the satellite and destroys it instead. If you slow down time with the Thief Costume, this part is easier. From here, Miss Decibel will continue to perform attacks from past phases - same strategies apply - but you'll want to look for the triple bounce so you can jump over the shockwave and smack her around before tricking her into charging into one of the satellites. Once the three satellites are destroyed, Miss Decibel is defeated, and Cyril de Paradox tosses her to the side before revealing that he has Carmelita as a hostage before travelling through time to the present day.

In the present day, Cyril de Paradox's influence has already covered Paris. Bentley digs up some information on Cyril and finds out that he is from a long line of thieves much like Sly, and that Cyril de Paradox wants revenge on Sly because Sly's father put his father in jail as his father tried to steal the world's largest diamond - which became Sly's father's claim to fame - before Sly's father could do it. It is also revealed that Cyril himself was a failed thief who wound up in prison, received a real criminal education, and became a law-abiding citizen on the surface while also forming his own crime syndicate through his prison contacts while masquerading as a billionaire art collector and smuggling fine art. Not surprisingly, he blamed the Cooper family for his own and his own family's past misfortunes, and wanted to wipe out the Cooper family name much like Clockwerk did. It's up to the gang to rescue Carmelita and beat Cyril de Paradox at his own game.

Abilities:

Silent Sprint (Sly): Makes it so that enemies can no longer hear you when you run with R1.

Air Smash (Sly): This is the diving cane attack from the previous games. Press Triangle while in mid-air to perform the downward spinning cane attack.

Mega Stomp (Murray): Allows you to stomp an enemy and pick them up from anywhere, not just from behind.

El Drop'o a lo Macho (Murray): Press Square in mid-air for an elbow drop with some area-of-effect damage.

Homing Darts (Bentley): Fires heat-seeking darts regardless of which type of dart is equipped.

Meter Recharger (Bentley): Recharges Bentley's Gadget Meter in the blink of an eye.

Adrenaline Burst Plus (Bentley): A faster version of the Adrenaline Burst move.

Moving Pickpocket (Bentley): Allows Bentley to move while pickpocketing enemies, much like with Sly.

Super Jump (Carmelita): Allows Carmelita to perform her signature high-reaching super jump by holding R2 and pressing X. Why the game makes you unlock it near the end of the game, I have no idea. Also, holding a button and pressing another to do this? C'mon, game.

Achievements:

Hero Tech: When you get 50 Sly Masks, you can change the wrench into Ratchet's Wrench from the Ratchet and Clank series in the Unlockables menu. If you defeat an enemy with it, you'll get this trophy. (Also, the coins will turn into gears, springs and bolts.)

PayDay: Buy every ability in ThiefNet.

Hubba Hubba: Complete the belly-dancing mini-game without missing a button press.

Home Sick: Defeat Miss Decibel.

Collectibles: 

Sly Mask #52: After the second phase of the Miss Decibel battle, there is a spire jump point off to the side near the second chain that has a Sly Mask.

Controls:

Left analog stick: move
Right analog stick: move camera
X: Jump and double jump (hold X on second jump for hover jets as Bentley)
Square: attack
Circle: 
  • interact (usually with anything that has sparkles) (Sly)
  • steal from enemies (from behind) (Sly, Bentley, any of Sly's ancestors)
Triangle:
  • knock enemies upwards (from behind; press Square to slam enemies down for stealth slam) (Sly, any of Sly's ancestors)
    • press Circle after knocking enemy upward to perform Silent Obliteration (Sly; replaces Stealth Slam; must buy on ThiefNet)
    • press Square for Stealth Slam (any of Sly's ancestors)
  • spin attack (hold to charge) (Sly)
  • throw bombs (Bentley)
  • Thunder Flop (in mid-air) (Murray)
  • spin attack (hold to perform) (Murray)
    • control with left stick (must buy on ThiefNet)
  • Raging Inferno Flop (in air; Murray; must be bought on ThiefNet)

L1: 
  • bomb aim (Bentley)
  • smoke bomb/flash bomb (Sly; must buy on ThiefNet)
  • aim/strafe mode (Carmelita; must hold button down)
    • left analog stick: move
    • R1: shoot (can only shoot in strafe mode)
L2:
  • hold for costume select menu (Sly)
    • hold down to stay in menu; use D-Pad or left stick to make selection
  • hold for weapon select menu (Bentley)
    • hold down to stay in menu; use D-Pad or left stick to make selection
  • hold for fist select menu (Murray)
    • hold down to stay in menu; use D-Pad or left stick to make selection
  • hold for shot select menu (Carmelita)
    • hold down to stay in menu; use D-Pad or left stick to make selection

L3: activate compass
R1: run (hold while moving to perform)
  • Paraglide (Sly; in air; must buy on ThiefNet)
    • Square: Paraglide Dive Attack (during Paraglide; must buy on ThiefNet)
  • Adrenaline Burst (Bentley; double tap to activate; must buy on ThiefNet)
  • Clothesline (Murray; double tap and steer with left stick; must buy on ThiefNet)
  • Cane Push (Sly; double tap; must buy on ThiefNet)
R2:
  • Trigger Bomb (Bentley; must have bomb on field to detonate manually; must buy on ThiefNet)
  • Fast Climb (Salim; must be on rope, hold to perform)
  • Super Jump (Carmelita; hold and press X to perform; must buy on ThiefNet)
R3: Binocucom
  • Right analog stick: move
  • Left analog stick: zoom in and out
  • R1: take picture (when applicable) (Sly, Bentley)

Start: pause menu
Select: map
  • Left analog stick: zoom in and out, switch between map and status
  • Right analog stick: move map
  • Circle: back

Tuesday, February 28, 2023

PrinceWatercress plays Blood Omen: Legacy of Kain - Part 26 of 41


In this entry, we explore more of the maze that is (was?) the town of Abernus.


We start out by entering the building with the torn-up front entrance in front of us in mist form.

1:03 - The time slowdown pick-up is a secret (see below). Make sure to kill the demons before. From here, enter the crack in the southeast corner with your mist form, then go south to enter the sewers.

2:08 - From here, you'll need to make your way to the stairs in the northeast corner of the map. Use your mist form and power your way past all the monsters. When you get upstairs, enter the crack in the east wall with Mist Form.

3:18 - Time to kill more demons. The Energy Bank hides a secret. If you're playing the PAL release of the game, you'll need to grab the nearby antidote first before you grab the Energy Bank in order for the secret to count (see below).

From here, get back to the sewers, and go all the way south until you find a doorway. Before you go in, however, go east and get the Heart of Darkness. This hides a secret (see below).

4:59 - From here, you'll need to get to the southeast corner and go up the stairs. Be sure to touch the area where the time slowdown pick-up is on the way; this activates a secret (see below). Watch out for the big red demon near the end, and once you're up the stairs, enter the crack in the east wall.

6:40 - Use Imploders on the big red demon. The time slowdown pick-up in the room to the north is another secret (see below). From here, go south to exit outside.

9:38 - From here, enter the house to the north for humans to feed on for health. The rest of the house leads to other pick-ups and an exit leading to the back of the cathedral. While this path looks like it could lead to something, it actually doesn't.

13:57 - The entrance to the Abernus cathedral, and Pentalich of Tarot in action. But the full moon is up...!

Secrets

78. - The time slowdown pick-up here is a secret.

79. - he Energy Bank hides a secret. If you're playing the PAL release of the game, you'll need to grab the nearby antidote first before you grab the Energy Bank in order for the secret to count.

80. - This Heart of Darkness is a secret.

81. - This time slowdown pick-up is a secret.

82. - The time slowdown pick-up in this room is yet another secret.

Wednesday, February 1, 2023

PrinceWatercress plays The Bugs Bunny Crazy Castle 4 - Part 26 of 27


Nothing like dying in two consecutive stages.


Stage 12-7

Once again, the game wants to flood you with enemies. Guess what? They're Gossamers again. Whee.

Stage 12-8

Of course this one would give me trouble, due to the colors making everything confusing and hard to spot. Yes, let's make the springboards that launch you into the air very similar to that of the ground.

Saturday, December 18, 2021

HCBailly and JB play Secret of Mana - Part 26 of 41


In this entry, we somehow escape the Emperor's castle, then we get a chance to fly all over the world to do all sorts of things. This is where the game really gets fun.


After the room with the beds, you won't be able to head north. Head east and follow the path that way. You'll teleport elsewhere in the current area. Hit the switch near the second teleporter to head to the front door.

You'll then meet Emperor Vandole and his men. Geshtar asks for one more shot at defeating your party, and is instantly granted it. You'll then face Mach Rider again, this time on the roof and with less room to maneuver. You're stronger here, however, so fight him like you did before, make sure you're not completely lined up with him and use Speed Down to make him slower. Keep in mind that Mach Rider can shoot missiles at you even when off-screen, and that Mach Rider can also hit you with Wave Cannon. When you beat Mach Rider a second time, you'll get a Javelin's Orb. The Imp's Fork can Balloon enemies.

After the battle, Geshtar will try to burn the place up in one last desperation attempt to destroy you. Suddenly, King Truffle of Matango flies in. Find him, and he will tell you that Flammie is big enough to ride on and fly around the world with. Since Flammie thinks you are his parents, he will want to be with you from now on. You'll get the Flammie Drum, which will allow you to fly anywhere in the world on Flammie. 

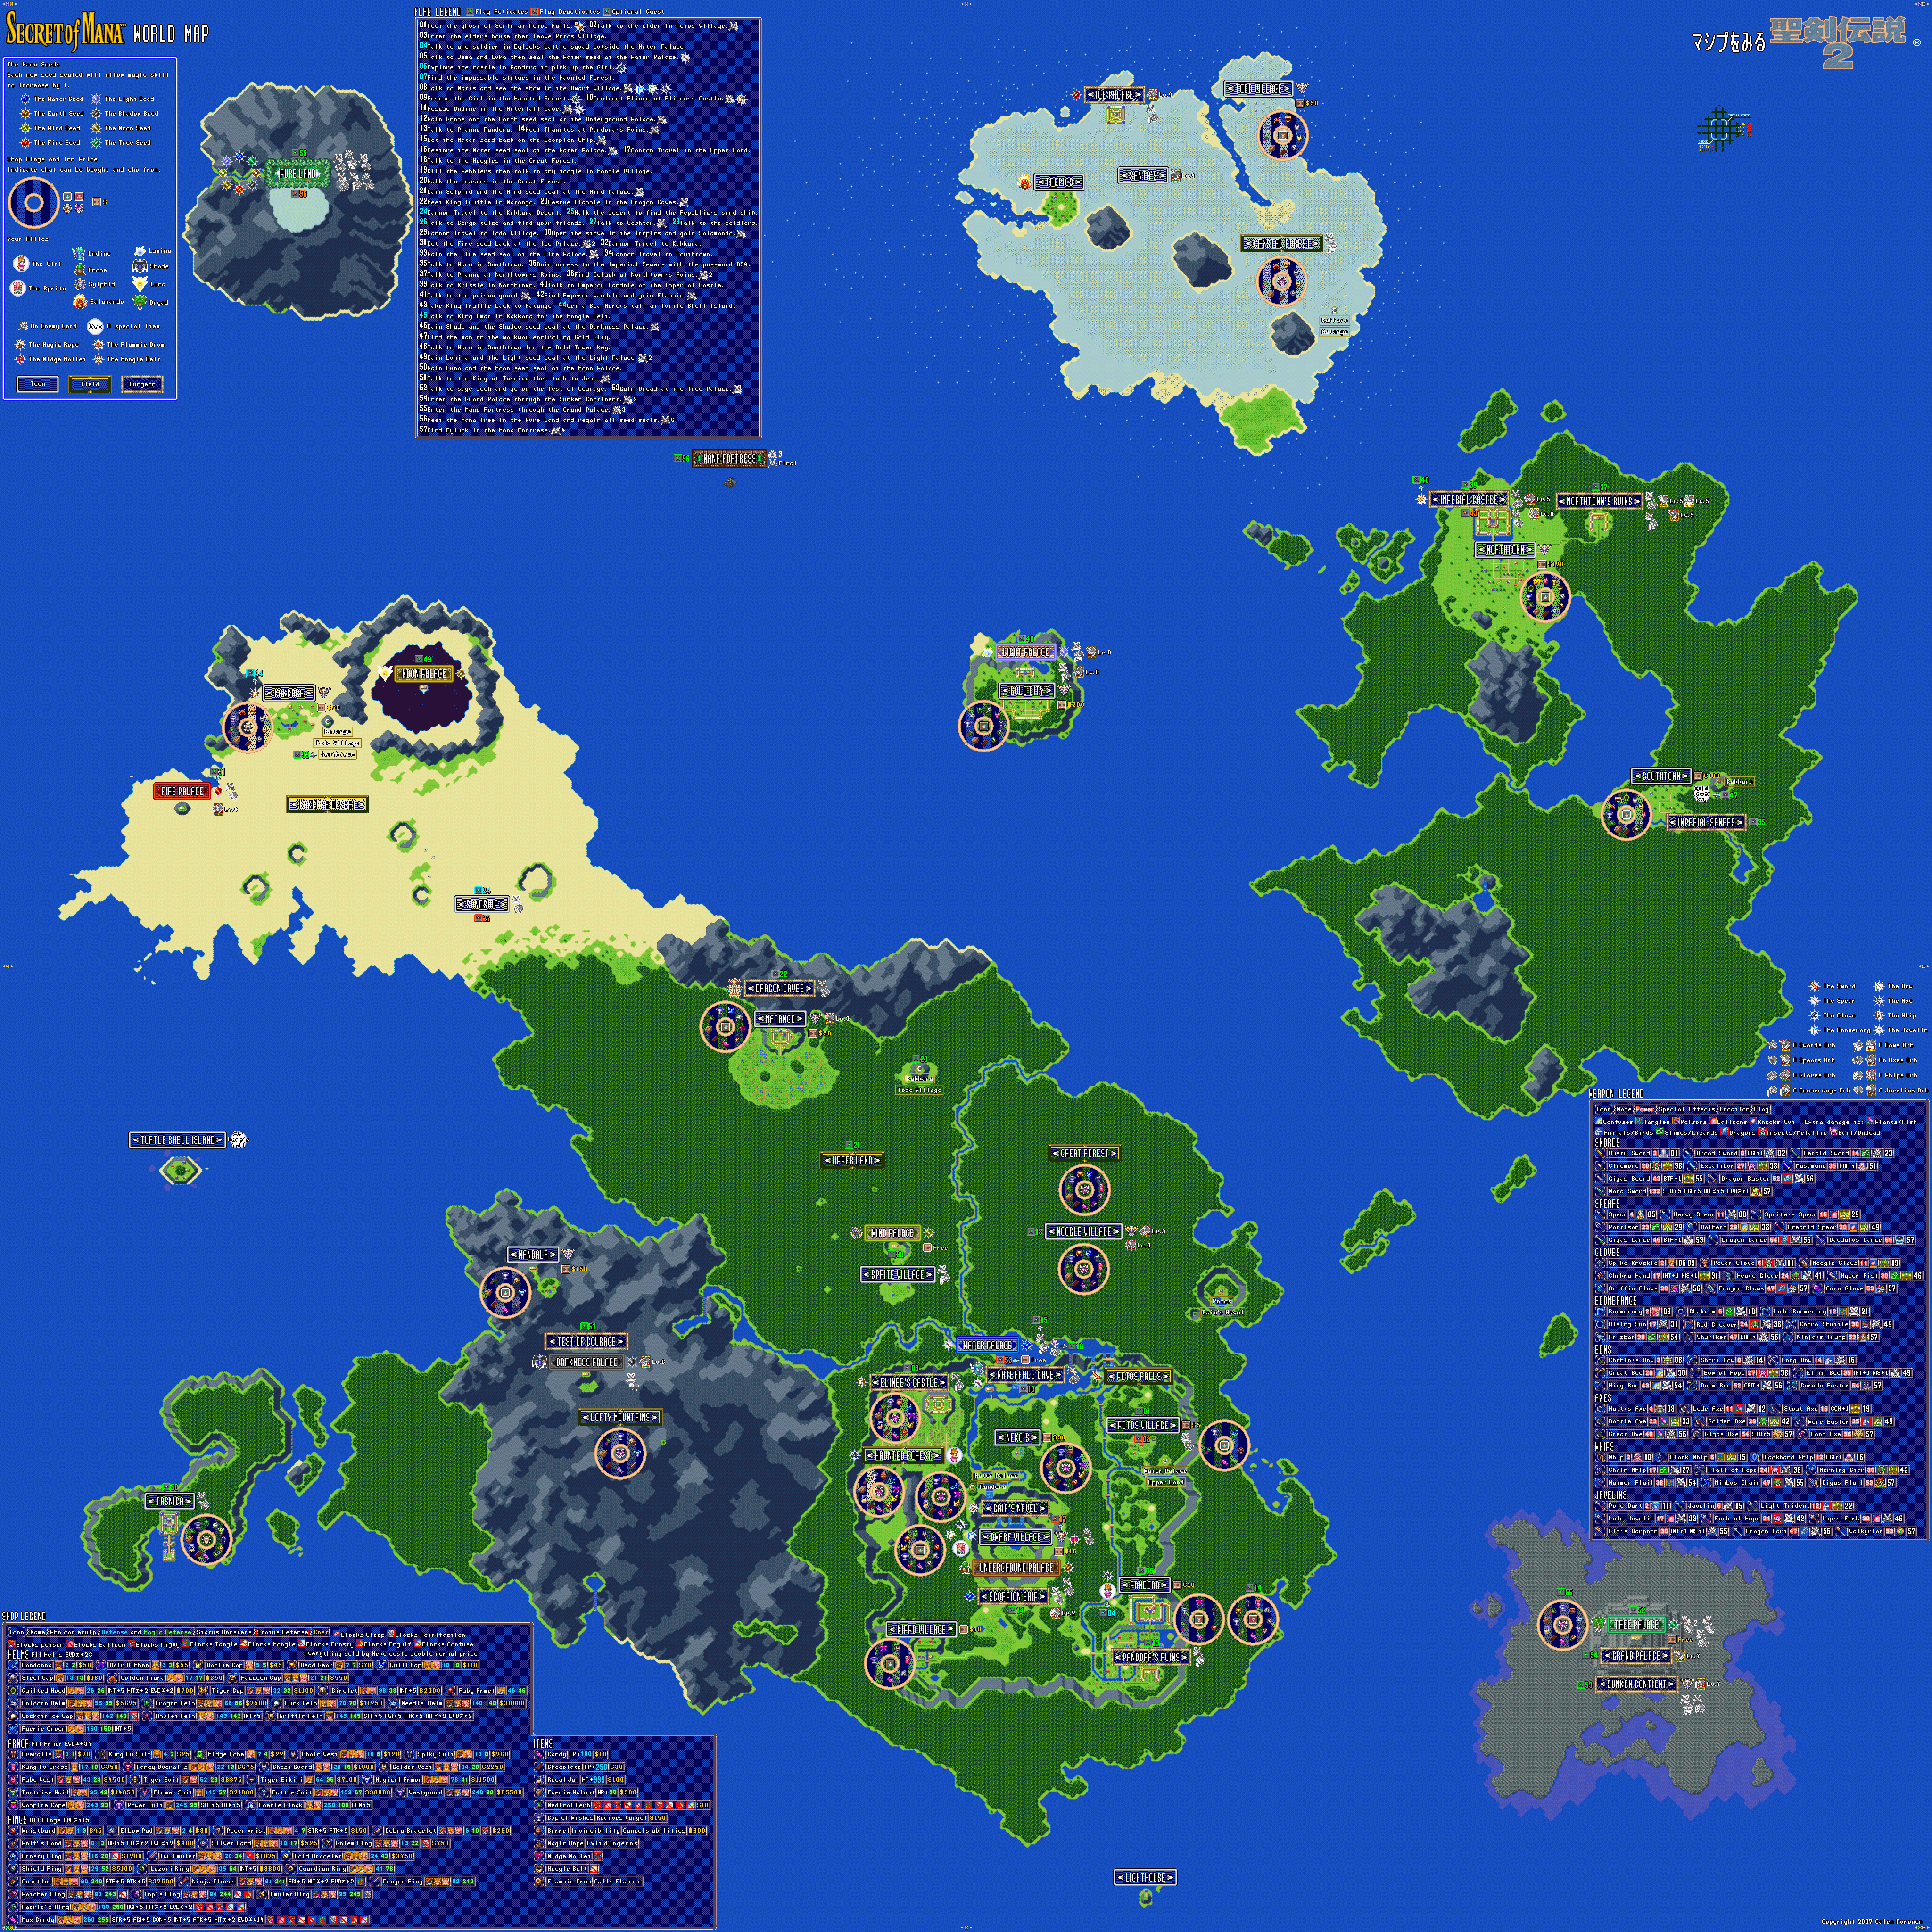
While on Flammie, you can rotate and turn with Left and Right. Down lets you move in reverse, while Up lets move forward. B lets you descend, while A lets you ascend. You can use L and R to switch between a behind-the-back perspective and an overhead perspective. Pressing Start gives you a map. If you're near a town or place where Flammie will land when you descend close enough to it, you will land there.

The Flammie Drum can only be used outside. If you try to use it in caves, buildings or other indoor-like areas, Flammie won't be able to hear you and will not be able to summon him. 

You'll use the Flammie Drum automatically after King Truffle tells you to take him back to Matango, which is to the southwest. From here, you'll be able to. Thankfully, as long as you use the compass directions at the top of the screen in the behind-the-back perspective, you can easily get him there.


HCBailly and JB head elsewhere before going to Matango, though. First, we head to the Gold City. This is west of Northtown and Southtown.


You won't be able to do much here...at least, not yet.

The whole place is made out of gold. Interestingly, if you talk to the NPC's here, they will tell you that the place is sinking under the weight of the gold. 

Interestingly, Watts has his own shop.

Get the Dragon Helm for Randy, the Duck Helms for Purim and Popoie and the Battle Suit and Lazuri Ring for everyone. Of course, you're going to find a more powerful ring for your armor pretty soon, but these will do if you're desperately in need for armor.


Now he head to Matango. Once you land there, King Truffle will be in the front of the castle. Talk to him and he will tell you about the map and the perspective changes before telling you to head ot the Lofty Mountains to the southwest, as what you seek will be there. He will then head back to the castle.

From here, call Flammie. It's flying time.

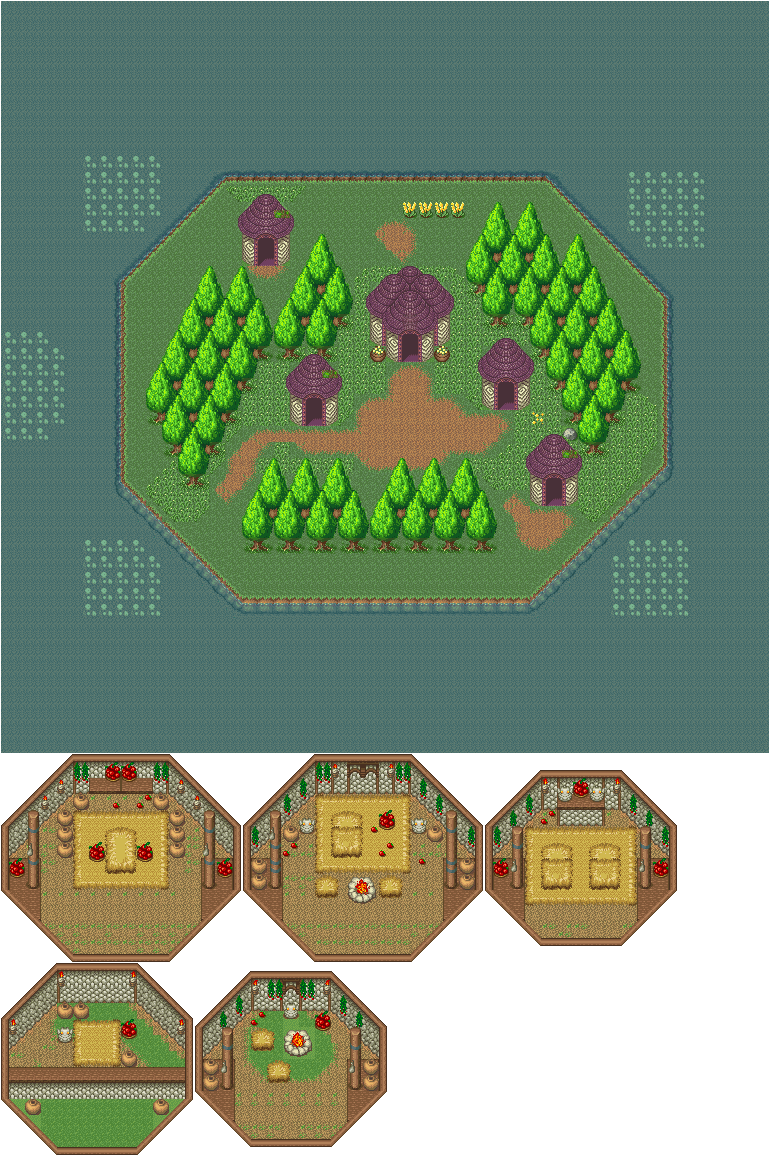
Before heading southwest to the Lofty Mountains, HCBailly and JB head to a hexagon-shaped island south of the Kakkara desert and land there.


The place to go to is the big hut in the center. The shopkeeper has nothing but Sea Hare's Tails. You'll get one for free. Head north to the town of Kakkara and take it there.


Talk to Mayor Amar (the dancing guy) with the Sea Hare's Tail in your possession. You'll fill the pond with water, and in return, you'll get the Moogle Belt, which can transform in and out of Moogle status. Yes, you can turn yourself into a Moogle in this game.

From here, we head to the Lofty Mountains. As Truffle mentioned, it is southwest of Matango and is the rather large mountain range on the map. There is a town there that you'll need to land, as you'll have to cross the mountains by foot. 

Wednesday, November 24, 2021

PrinceWatercress plays Sly 3: Honor Among Thieves - Part 26 of 42


In this entry, we start the fifth episode of the game. Hope you're able to get a lot of gold for the last few abilities of the game, because you're going to need them, especially in this perilous area.


Episode 5: Dead Men Tell No Tales

Late one Saturday night, Dimitri calls in to the Cooper Gang for the favor owed back in Holland. The favor? A trip to Blood Bath Bay, one of the most lawless places on earth run by the descendants of pirates. It is here that we learn more about Dimitri: that his grandfather Remy Lousteau was a deep sea driver who made his fortune diving for treasure in underground wrecks. Unfortunately, a young pirate by the name of Black Spot Pete took his diving gear as well as his riches, forcing Remy to retire from treasure hunting a broken man to raise a family. Dimitri, growing up on his grandfather's stories, dreamed of one day recovering the diving gear. This is where the Cooper Gang comes in, and if they can do it, Dimitri might join the team.

When you start the episode, you'll get a slew of new abilities. Sly's Jump Attack Level 3 is the same as the Level 1 and 2 versions, except you just have to press Triangle three times before you can execute it.

The flashlight guards have cannons, and they can be pretty loud. Also, if you walk into any of the sleeping guards, they will wake up and come after you. You can steal from the sleeping guards, though.

The Talk of Pirates

You'll need to play as Sly to start this mission.

When you reach the waypoint, you'll find out that Black Spot Pete is still alive, albeit an old man. When you approach him, Black Spot Pete will not trust you, for you are an outsider. He then mentions that he only spoke of treasure with his partner Cantankerous Tim. Since Tim was mutinied on by his crew to the point that both his treasure and his pirate outfit was split between them, we will have to find the three pieces of the outfit and disguise ourselves as Cantankerous Tim.

The first person you'll have to deal with is Stone Jake, who has the eyepatch. You'll need to find him, then smack the palm trees and keep smacking them to lure him towards a trap on the end of the beach. When Jake is under the anchor at the ramp leading up to the winch, activate the winch to drop the anchor on him. You'll get the eyepatch.

From here, use L3 to find the second lieutenant, who is surrounded by a pair of guards. Wait for them to get into position behind him, then take them out one by one with Silent Obliteration before sneaking up on the lieutenant and stealing from him to get the peg leg.

Use L3 to find Twitchy Ned, who will be in the crow's nest on a ship in the harbor. Unfortunately, when you approach, he will see you coming. You'll need to chase after him much like you chased after Neyla in the second game: hold R1 ant all times, avoid the traps and keep him in your sights at all times. You'll be chasing Ned for quite a distance, and you'll corner him in a corner of the beach, where you'll get the hat.

From here, you'll have the Pirate Disguise. Equip it and head back to Black Spot Pete, and use the disguise before you talk to him. From here, you'll take part in an insult competition between yourself and Black Spot Pete. Just go through the dialogue options and make your own insults. (It's not Monkey Island, but it gets the job done.) The only rule to follow is not to repeat any part of any insult that has already been said, but if you pay attention, you should have no trouble following that rule. After trading enough insults, you'll find out that Remy Lousteau's diving gear is in Dagger Isle, and that for years, Pete has kept the map to the treasure hidden. Unfortunately, he no longer has his ship, and the map was stolen by Captain LeFwee, one of the smartest pirates on the seven seas. He lives in the castle not far from here, and Pete will not be able to help you as his seafaring days are long gone.

From here, you'll get the slide show for Day One. Unfortunately, to get to Dagger Isle, you'll need to steal a pirate ship from the harbor. To do that, you'll have get on a jolly boat and blow the rudders off the other ships as well as take out the harbor patrol. Meanwhile, Bentley and Penelope will break into LeFwee's keep to steal the map. Once both tasks are done, they can steal a ship and use the map to get to Dagger Isle.

Controls:

D-Pad/left analog stick: Move
X: jump/double jump
Square: attack
Circle: use to interact with sparkles, steal from enemies (from behind; with Sly), grab objects and stunned enemies (with Murray; press Circle afterwards to grab enemy out of air and press again to shake them, or press Square to throw them)
Triangle:
  • charge up cane, knock enemies into the air (from behind; with Sly, use Square afterwards to slam enemy down/use Silent Obliteration)
  • drop bombs (Bentley)
  • uppercut (Murray; press Circle afterwards to grab enemy out of air and press again while holding enemy to shake them, or press Square afterwards to knock enemy out while in mid-air)

Select: access Gadget Grid
  • D-Pad/Left analog stick: select gadget/ability
  • L1, L2, and R2 buttons: assign gadget to button pressed; gadget can then be used with that button

Start: Pause/unpause
  • D-Pad/left analog stick: choose options
  • X: confirm choice
  • Triangle: back out of choice

L3: bring up waypoint

R3: use Binocucom
  • Left analog stick/D-Pad: look around
  • Right analog stick: move in and out
  • R1: take picture

R1: run (hold down)
  • use Paraglide (as Sly; hold down to use, must purchase first)

Right analog stick: move camera

As Carmelita:

  • Left analog stick/D-Pad: move
  • Right analog stick/D-Pad: move camera/aim
  • Triangle: toggle between strafe mode and free movement
  • Square: kick
  • Circle: mega jump
  • X: jump and double jump
  • R1: shoot

As The Guru:

  • L1 (hold): transform
  • Circle (in mid-air, behind an enemy): mind control
    • Left analog stick/D-Pad: steer enemy
    • X: jump off enemy and launch enemy forward
    • Square: attack

Grapple cam controls:

  • D-Pad/Left Analog Stick: aim camera
  • X: shoot/grapple with hook
  • Circle: distract enemies
  • Square: self-destruct (hold down)

Hacking mini-game controls:

  • Left analog stick: move
  • Right analog stick: aim and fire gun

As The Panda King:

  • Square: flame chop
  • L1: hold to load fireworks, release to attack with stored fireworks
  • Right analog stick: sweep over multiple targets

Wednesday, October 27, 2021

HCBailly plays Final Fantasy II AGAIN - Part 26 of 65


In this entry, we destroy the Dreadnought, then go on a journey to find the Dragoons and get their help against the Empire.


The maze leads you to the engine room, and it is crawling with soldiers that you do not want to interact with. Use the Sunfire on the engine to throw it in and the Dark Knight will show up. Maria will notice that he sounds like her brother before you escape back to Altair.

Altair


If you go to Hilda's bedroom, you'll find out that Hilda is hysterical.

Go to the King's room. The King will make Gordon the Commander in Chief of the Rebel Army, effectively removing Gordon from the party. He'll ask Minwu to lift the seal that binds Ultima, and Minwu obliges.

The King will ask you to find the Dragoons. The Dragoons may have been claimed to be destroyed by the Empire, but there may be a few survivors. He then passes away.

Wednesday, July 21, 2021

PrinceWatercress plays Bio Menace - Part 26 of 37


Using the coordinates on the electronic chip he recovered from the steel head of the Enforcer on his last mission, Snake jumps in a recon helicopter and sets out for the next lab. "How many labs can there be? How long before I find Cain?" Snake questions to himself. Clearing a nearby mountaintop, the pilot exclaims, "Look! A building! Looks like those coordinates have paid off, Snake. Ready for your next mission?"

Sliding the bolt closed on his pulse rifle and cinching the straps on his utility pack, Snake responds with grim resolve, "Ready as ever! Wish me luck!"

"Luck?", the pilot retorts, "You're not careful enough for luck to be of ANY help to you! Just get in there and kick butt, Logan!"

At that moment, the chopper sets down. "Roger that!" I'm outta here! Save me a cold one back at base." Snake jumps out and starts directly for the fortress ahead. The helicopter lifts off and heads back to base, leaving Snake to whatever fate awaits him.

Barricade

Welcome to Episode Three. This is the most difficult of them all, and if you can somehow beat this episode, your gaming skills are pretty good.

When you start, keep jumping to the right, as there are mines hidden in the ground and there is no way of knowing where they are. When you reach the building, jump over the mine before the beacon and touch that beacon!

The gray guys carrying the bombs are new enemies, and if they run into you, they will blow themselves up in an attempt to take you with them. If you can, take them out with a grenade from a distance.

This level is hard! There is no health to speak of, there is a fake exit that leads to an instant, radiation-laden death, and the real path to the exit has turrets on the ceiling that fire at one of three random angles which cannot be destroyed. You are forced to run through this just to get to the real exit.

The ladders above the instant-death electric barrier just take you to three doors containing items that give you points. That's it.

Sunday, June 13, 2021

PrinceWatercress plays Ratchet and Clank - Part 26 of 38


The Hydro-Pack may not help us go back and get much, but it's nice to get these things out of the way, anyway.

Tobruk Crater - Novalis

You may remember a part of the stream around the beginning of the planet that had a strong current that would push you back if you tried to swim against it. Now that you have the Hydro-Pack upgrade, you can now hold R1 to propel yourself further. Go left at the fork in the stream. You'll eventually enter a cave area that you couldn't go to originally. By exploring this cave, destroying the enemies that are here and finding a ladder that takes you upwards, you can find a Gold Bolt.

Jowai Resort - Pokitaru

Now that you have the Raritanium, you can head back into the sewers and give it to him for the Persuader, which gives you discounts on guns and gadgets at the Gadgetron Vendor.

You can do the following without the Hydro-Foil, but the Hydrofoil makes it much faster. Deep in the waters of the planet, there are exploding crates on the ground. By running into them, you can make them explode and also take out any metal crates near them. By destroying all the crates in the water, you'll get a Skill Point.

At the point where the first of two boats used to be, dive down and enter a tunnel. Once you surface at the other side and make your way up, you'll find a whole new area to explore. Stomp the switch to open up a bridge, and be careful as you explore and destroy all the enemies to make it easier to get around. When you reach the waterfall, you'll get another Gold Bolt.

Controls

As Ratchet:

Control Pad/Left Analog Stick: move
Right analog stick: move camera

When hanging off platforms:
  • Control Pad/Left Analog Stick: move
  • Forward+X: vault up
  • Back+X: drop down

X: Jump and double jump
  • R1: stomp (must have Thruster-Pack)
Square: strike with wrench
Circle: pull out/shoot currently equipped gun/use gadget
Triangle:
  • quick select (hold and use in conjunction with Control Pad or left stick to switch guns; menu can be customized in Quick Select on the pause menu
  • double tap to switch between two most recently used Circle button weapons/gadgets

Select: Map
  • Left stick/D-Pad: move map
  • Right stick: Zoom in/out
  • X: view missions
  • Circle: play Infobot for planet
  • L1: previous map
  • R1: next map
  • Triangle: Exit
Start: Pause menu
  • Control Pad: select option
  • X: confirm option choice
L1: tap to quickly center camera; hold for first-person view (hold button and use left stick or D-Pad to look around; let go of L1 to move camera back behind Ratchet)
  • Square: wrench boomerang
  • Circle: fire gun
L3: see health and Bolt totals
R1/R2: crouch (hold down)
  • Square: wrench boomerang
  • Left+X or Right+X: side somersault
  • Down+X: backflip
  • X (while running): long jump (must have Heli-Pack/Thruster-Pack)
  • X: high jump (must have Heli-Pack/Thruster-Pack)
  • Double tap: hover (must have Thruster-Pack equipped)
    • L2: strafe left (while hovering)
    • R2: strafe right (while hovering)
    • X: exit hover mode (while hovering)

In water:
  • Square: dive and descend
  • X: surface and ascend
  • R1: turbojets (must have Hydro-Pack)

Trespasser:
D-Pad or Left Analog Stick:
  • Up and Down: switch rings
  • Left and Right: rotate rings
Triangle: leave Invinco-Lock screen

As Clank:

Control Pad/Left Analog Stick: move
Right analog stick: move camera

When hanging off platforms:
  • Control Pad/Left Analog Stick: move
  • Forward+X: vault up
  • Back+X: drop down

Square: punch
X: Jump (press and hold in the middle of a jump to glide with Heli-Pack)
Triangle: command menu (hold and use in conjunction with Control Pad or left analog stick to choose commands)

Sunday, March 28, 2021

PrinceWatercress plays Gex 3: Deep Cover Gecko - Part 26 of 32


I really should practice run stuff. Besides making videos more informative, it also makes them BETTER.


1:11 - The third and fourth pawprint coins. The thing that looks like a window is really an opening to the secret level.

4:35 - By breaking everything you can as a superhero, you can get six extra lives.

6:00 - The fifth, sixth and seventh pawprint coins. You'll need to get even higher for the seventh.

6:42 - The eighth pawprint coin and a bonus area.

7:24 - The ninth pawprint coin.

10:52 - The tenth and final pawprint coin.

12:43 - The cutscene for "Burn Five Bundles of Funny Money."

13:00 - Be ready to start hitting pigeons, safes, rats and men who throw crates for fly coins. The crate throwers actually re-spawn, much like the skeletons from Untold Mythstories.

19:17 - The guys with the tommy guns who hide in the garbage cans can be defeated by aiming and shooting with the fire power-up, which is littered throughout this stage. Destroying the locks works the same way.

22:44 - The first pile of funny money.

23:39 - The first barrel. Break them all for a remote.

28:44 - The machine gun is back in action. Use it to waste those mobsters!

30:14 - The first pawprint coin in My Three Goons/Gangster TV.

30:37 - The second pawprint coin.