Showing posts with label part 29. Show all posts

Sunday, July 26, 2026

PrinceWatercress plays Space Station Silicon Valley - Part 29 of 32


The game saves one of its most creative levels for last here.


Shifting Sands


We need to get something big and bouncy and get a flappy thing to complete the level. In other words, we need to get a kangaroo and a vulture...again. Unlike the other levels, however, this level is a bit...peculiar. The level is very small, and is probably even smaller than Smashing Start, but it has a unique gimmick to it and I commend how it was programmed and handled.

You start off as the desert fox. Go back up the steps near the beginning to get a Power Cell that is easy to miss, then start jumping from platform to platform and from crate to crate at the river. Try to land in the water as little as possible as you do this. On the crate that moves, be ready to jump for another Power Cell at the beginning, as you only have one shot at it. You'll soon have to go down the waterfall, which is not far from here. This is where the fun begins.

Step on the platforms in the sand near the center to make some of the columns smaller, then go into the nearby tent. When you do, the screen rumbles, the camera zooms in extremely on your character, and you won't be able to leave until the quaking movement stops. When it does, the area will be a little different than when you entered. Sand will have been blown around, and you'll be able to get to other areas.

When you enter the tent the first time, there will be a pit with a cloud of sand popping out of it. Stand in the could and another one will appear. Keep standing in each cloud of sand, and after standing in all three, you'll get the trophy. You'll also be able to stand on one of the columns you shrunk down earlier, and standing on it causes it to sink into the ground while another column in the center rises.

Head back into the tent and let the level change again. This time, you'll be able to stand on the other column you shrunk, making it sink so another column in the center rises. You can now jump from one platform to another in the center of the area, and this time, there will be sand that allows you to get the Power Cell on the way. On the other side of these platforms are two kangaroos...on pogo sticks! Spin into them repeatedly as the desert fox, and stay close to them without getting jumped on. They have a boomerang attack that travels counter-clockwise in addition to a pogo jump, so be careful.

As the pogo kangaroo, you can bounce pretty high. If you stand still long enough, the next few jumps you make while holding the A button will be even higher, and you'll be able to reach stuff that you probably thought you couldn't. As a matter of fact, you have to hold the A button in order to get around as the pogo kangaroo, anyway. You'll have to jump into the tent with the kangaroo in tow in order to get one more sandstorm, then get back to the desert fox and take a path that only the desert fox can go through due to its size to reach the vulture. Jump up to hit the vulture when it is at its lowest point. If it falls into the sand below, it will stop moving and you can just go on and destroy it with ease.

Take control of the vulture and take the desert fox with you past where you faced the vulture. You'll find the goal. You'll need to take both the vulture and the desert fox to the exit teleporter, then enter the exit teleporter as the desert fox to complete the level.

Pogo Kangaroo


Type: Pogo Kangaroo
Environment: Desert
Skill A: Jump
Skill B: Boomerang
Water Resistance: OK
Mass: Heavy
Armour: Light
Strength: Medium
Traction: Good
Fall Distance: Medium
Production: Long
Engine: Spring
Intelligence: Medium

Power Cells


Friday, February 13, 2026

PrinceWatercress plays Super Mario Odyssey - Part 29 of 92


Finding those last three Regional Coins took WAY too long.


When you leave the Metro Kingdom, you'll reach the second fork in the road of the game. You'll have a choice between going to the Snow Kingdom or the Seaside Kingdom first. I pick the Snow Kingdom. 

Regional Moons

Lake Kingdom

26. Secret Path to Lake Lamode! - It's another painting Moon, and there are three ways to do it which depend on your choice in the first and second forks in the road the game throws at you.

If you go to the Wooded Kingdom first (which I did), you'll find the painting leading to this on a ledge hidden near the Odyssey in the Metro Kingdom. Unlike the "Lake Kingdom first" path, you won't have to wait until the second fork to get this one, and you can get it now. I lucked out here.

If you go to the Lake Kingdom first, then pick the Snow Kingdom on the second fork, you'll find the painting leading here on a high cliff ledge at the north end of the starting area in the Snow Kingdom.

If you go to the Lake Kingdom first, then pick the Seaside Kingdom on the second fork, you'll find the painting leading here in the Crystal Palace in the center of the Seaside Kingdom.

Metro Kingdom


21. City Gardening: Building Planter - This is the Power Moon you get for planting the seed in the Flower Pot on the rooftop in the southwestern corner of the level near the RC car area. The seed was planted in the last video here.

44. Outside the Rotating Maze - Back in the underground maze, you can backflip onto the roof and travel to a hard-to-find platform for a Power Moon that is easy to miss.

47. Bullet Building - There is a doorway in a dead-end near the New Donk City Hall plaza, and if you enter it, you'll enter another athletic area. Going through it as intended by grabbing and jumping from one moving pole platform to another leads to this Power Moon.

48. One Man's Trash... - In the same area where you find Power Moon #47, you'll need to capture a Bullet Bill from the first Bill Blaster and use it to fly across to an out-of-the-way platform with a dumpster. Hit the dumpster with your hat to find this Power Moon.

53. Found with Metro Kingdom Art - You'll need the hint art in the Metro Kingdom that shows Poochie in the Lake Kingdom, which was found here two videos ago. You'll need to find that spot at the top of the Water Place and ground pound it to find this Power Moon.

Regional Coins


Saturday, December 20, 2025

PrinceWatercress plays Brave Fencer Musashi - Part 29 of 33


In this video, we liberate the Wind Crest. Our adventure is coming to an end...


There is a chest in the area with all the poison mushrooms, and you'll need to jump to some platforms off to the side at the start to get it. It contains the LrgTool, which is really a Pickaxe. Sell it to Conners.

From here, head back to the area after the dead ant at the start of the mine. Go all the way to the bottom and head right to enter another area. You'll find a chest on the way; this contains the OddBone, which is really a Baton that should be sold to Conners. (I forgot to get this, and I end up heading back here post-game to get it for one of the action figures.)

From here, keep heading to the right. There will be a light, and it will be green. Had you not turned the fan on earlier; this light would not be on and you would not be able to use the mine cart, but now, you can. In order to continue with this area, you'll have to ride the mine cart.

Use the D-Pad to swing left or right to avoid obstacles. The cart will break after four hits, so try not to run into any ants or rocks. At least you'll hear the ants coming. The steel grates will take you by surprise if you're not paying attention, as will the rocks (though those are less likely to do so as you can still see those coming), so pay attention to the on-screen action! If your hand-eye coordination isn't the best, this will definitely take a few tries.

There are two checkpoints marked with the numbers "2" and "3" on the decorations on the walls. When you reach these areas, you'll go back to these points rather than the beginning of this section if your mine cart gets completely wrecked.

When you make it to end, you'll find a bunch of health pick-ups as well as a Memory Box. Use the Wind Scroll on the broken earth here to take on the fourth and final Crest Guardian...the Queen Ant.

Crest Guardian

Queen Ant


Jump over the claw swipes. When the queen leans forward, strike her in the face with Lumina. Once she is stunned long enough, use the Wind Scroll to destroy the crystal that appears within the poison-tipped tail. Keep moving towards the queen so that you don't get blown off the edge and take damage, taking you back to the queen's body.

Destroy the larva, and avoid the spikes and the poison cloud at the tip of the proboscis. When segments of the queen shake a little bit, jump off of them so that you don't get hit by the spikes.

Stand between the four fireballs that come down when the green fireballs show up. Avoid the non-scythe arms when they try to grab you by double-jumping over them or away from them when they close in on you. If they grab you, you'll be dragged into the spiky cavity in the Queen's chest.

Some of the larva will carry herbs that you can pick up if you're Poisoned. These can be used to cure you of the Poison status ailment in case you suffer from it during the battle.

As you do more damage to the core of the Queen Ant whenever it pops up, the faster the spike attacks will launch out from the Queen's body.

After three Wind Scroll strikes to the core, you've won. Use the Wind Scroll on the Wind Crest to head out of the mine. This starts the final chapter.

You'll reach the rank of Brave Fencer at Level 28.

Chapter 6: The Sword of Luminescence


You'll be outside of the mine and in the forest after this. Leno (remember Leno?) will wake you up, and you'll meet Jon for the first time in a while. Jon will give you clues on how to find the Sky Scroll: a pillar of wind...day of the sky...tears of God fall on the forest...prodigious tree.

Now that Jon has done his job, he says goodbye. He warns you that once you get the Sky Scroll, there's no turning back. Keep this in mind, because he's not kidding. Musashi notices something about Jon as he leaves.

If you knock on Farmer Lacter's door at this point in the game, you'll get the Kojiro action figure.

The Princess Fillet action figure is available if you rescue everyone trapped in the Bincho Fields.

The MomMinku action figure is available when you beat the Mother Minku, which happened in the last video.

We got the RiceBall and NeatBall earlier, and they are now available in the grocery store. Both restore HP and BP by 150 and 300, respectively.

Wednesday, February 26, 2025

PrinceWatercress plays Wario Land II - Part 29 of 51


Well, at least the rooms here are a little more vast. They don't call it the grand hall for nothin'.


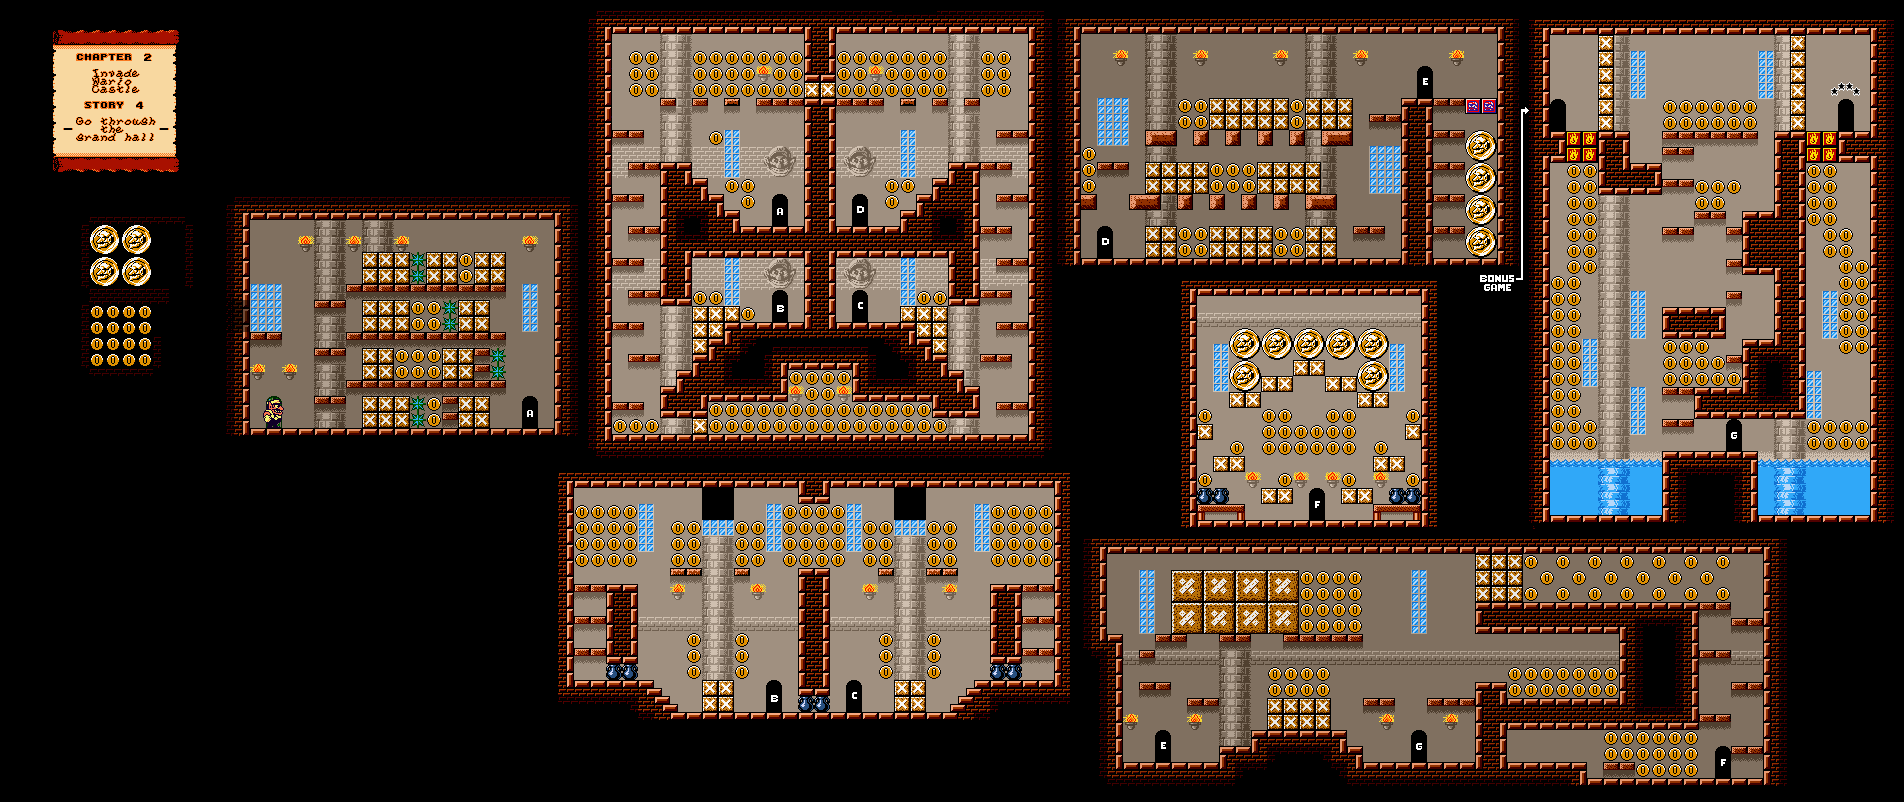
Chapter 2: Invade Wario Castle

Story 4: Go through the grand hall


Compared to the last level, this one is pretty open. There is a breakable wall to the left above where you start that leads to some coins, and you can high jump midway through the hidden passage for four big coins. Be careful with the breakable blocks before the next door so that you don't run into spikes or the spear from a Spear Goon.

The next room has quite a few flying spiked skulls as well as a couple of doors. You'll need to go through each one to look for coins as well as to find the treasure room and the exit. The first room on the way will have you rolling down slopes and dealing with bottle throwers to collect all the coins and get to the other side.

Bring a Spear Goon to the enemy blocks in the next new room that you enter to get some big coins, then break all the blocks and destroy the Spear Goons in the room with reckless abandon.

After this, you'll need to watch out for the snowmen as you explore the room and get more coins. There will also be a room where you'll have to go up top for some big coins before you can take out the pelicans and smash all the blocks and vases to clean the room out.

The room with the water also has fire blocks, fire foxes, the treasure room (where you can win a paintbrush) and the exit. It is very much possible to break the fire blocks on both sides if you know how to take advantage of your environment so that you get on the side that you want to be on before you burst into flame. 

Friday, September 27, 2024

PrinceWatercress plays Chrono Trigger (Super NES) - Part 29 of 70


Our adventures in the kingdom in the sky continue...and they don't end all that well.


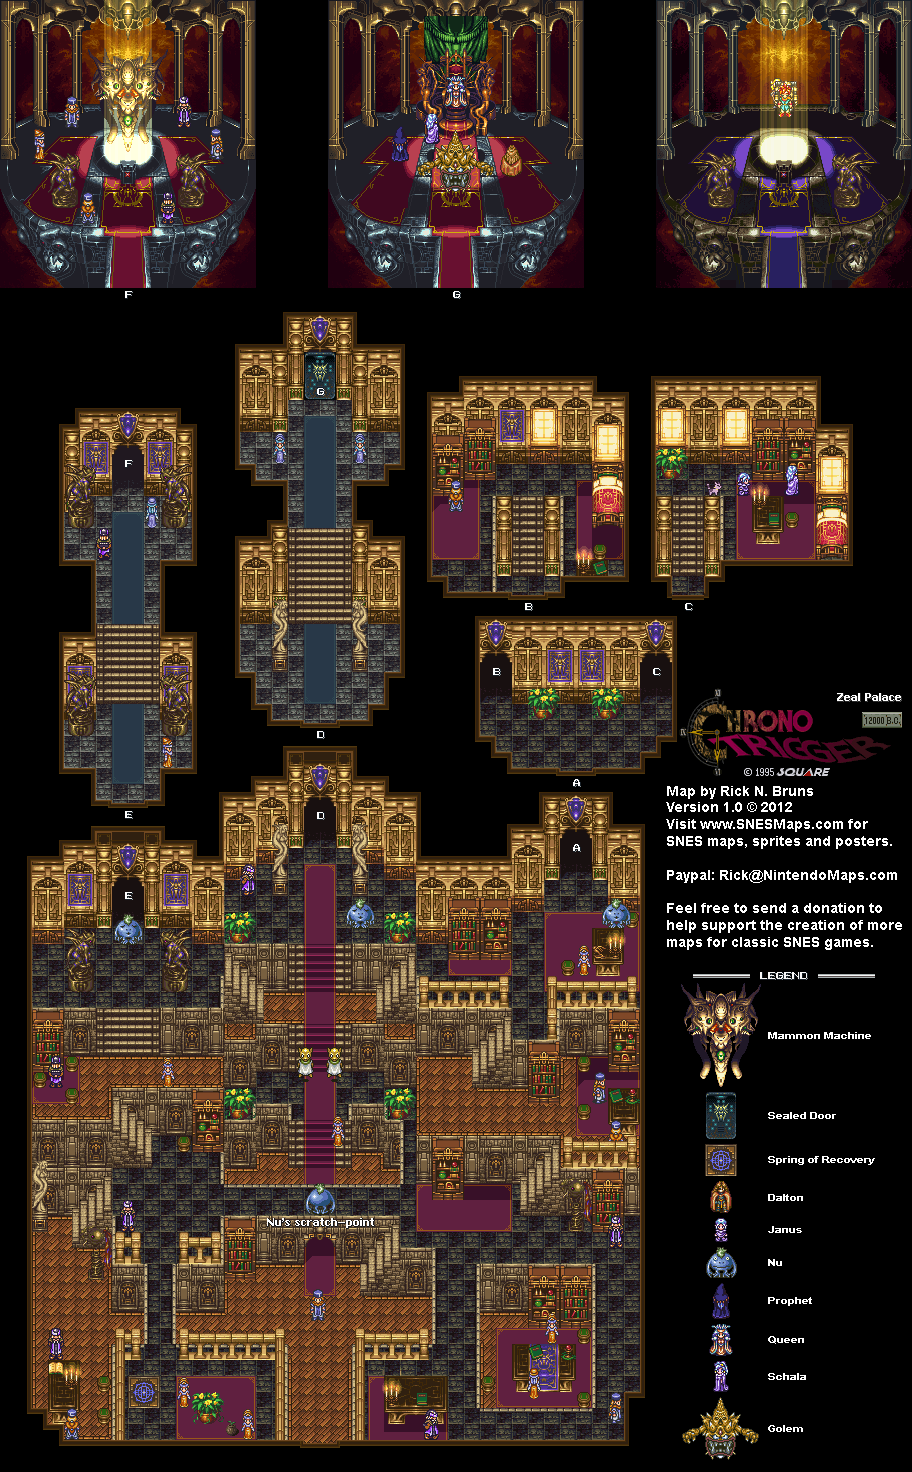
The caves in the mountains in Zeal Kingdom lead to Zeal Palace.

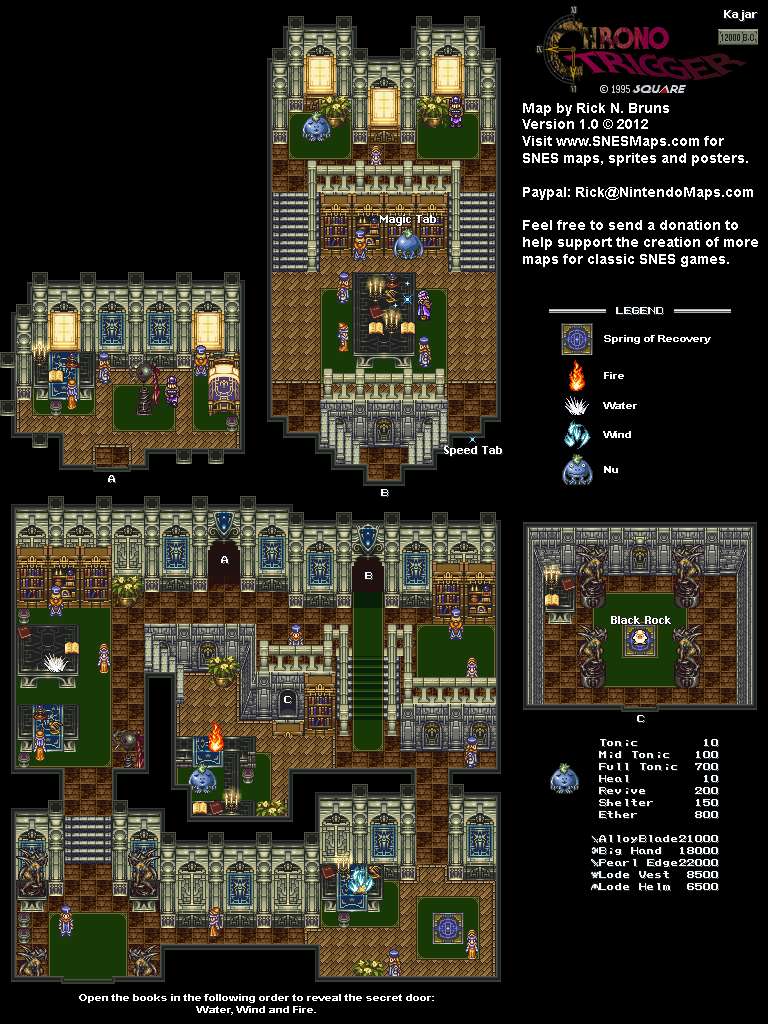
Unlike Enhasa and Kajar, there are no books to open, so you don't have to worry about looking for a secret area somewhere.

By talking to the people here, you'll find out that Queen Zeal has been using the power of Lavos to power the kingdom and keep it airborne. We finally find out what is powering the kingdom, and it's not the best thing or the best idea. You'll also find out that the undersea Ocean Palace, which is currently under construction, will be the future home of the Mammon Machine, which is being used to draw out Lavos' power and convert it to magical energy.

As you talk to the people in the floating continent, you'll also find out about two places you won't be able to access at all: the blue pyramid on the island to the east (which is similar to the one in Medina Village in 1000 A.D.) and the white-and-gold domed building to the southwest known as the Sun Keep, which houses the Sun Stone. You'll also find out about a prophet who has suddenly shown up and has warned the queen about things that will happen in the near future...and has also been pretty accurate about his predictions.

There will be a woman with a sapling in a jar somewhere in the palace. If you talk to her, she will tell you that the sapling was given to her by Melchior, and that Zeal has told her to burn it. She will then ask you what she should do, and you have a choice of burning it or secretly planting it. Tell her to secretly plant it, and she will go against Zeal's wishes and plant it. You only have one chance to make the right choice, so don't blow it.

You'll also learn some more things: that the queen has two children, Schala and Janus, and that Schala's pendant has magical powers. Keep that latter thing in mind for later.

The Nu walking back and forth will ask you to scratch his back if you talk to him. If you say yes, you'll scratch his back and you'll be able to learn the Nu's secret scratch-point. If you go back to Enhasa and talk to the Nu near the bookcase, you can get him to cough up a Magic Tab.

There are three areas at the north end you can enter, and you'll need to talk to the Nu at the west doorway to get him to move out of the way. The west door leads to the Mammon Machine, which is being used to draw out Lavos' power and use it to power the kingdom and all of magic. The center doorway leads to the queen's throne room, which is sealed by a door just like the ones that you have seen in 2300 AD. The eastern doorway leads to the royalty's private chambers. The left room is empty, but the right one contains both Janus and Schala - the queen's son and daughter, with the former being the boy we saw earlier) - and advances the plot.

When you meet Janus and Schala, you'll find out that sinister things are going on. For one, the queen's demeanor has changed for the worse ever since she discovered Lavos as a power source. Unfortunately, Schala will be summoned to the Ocean Palace by the queen. You can talk to Janus, but you won't get anything out of it.

If you try to leave Zeal Palace at this point, the doorway will be blocked by a human and two Nus, so you'll have to do what must be done to advance the storyline at this point.

Head to the central doorway and follow Schala to the door leading to the throne room. You'll see Schala use her pendant to open the door, which then closes behind her. If you use Marle's pendant on it, it will not open. In order to fix this, head back to the Mammon Machine in the west doorway, go up to the Mammon Machine and press A to place Marle's pendant in the machine briefly and power it up. From here on out, you can not only open the sealed doors in 2300 A.D., you can also open the sealed treasure boxes in 600 A.D. and 1000 A.D. as well. From here, head back to the throne room and open the door. The door will open successfully.

When you enter the throne room, you'll catch up with Schala, but you'll also meet Dalton, the Prophet and Queen Zeal. As it turns out, Queen Zeal is not a nice person, and having been warned of your arrival by the prophet, considers Crono and company to be pests. Dalton will then summon Golem to get rid of you.

At the start of the battle, hit Golem with magic immediately so that Golem does not hit you with Iron Orb - which cuts one target's HP by half - and energy balls that will more than likely kill who they hit. This will weaken Golem considerably and cause him to attack the party with weaker attacks. Heal after that. Fire is the best magic to use for this battle, as the fire ring attack that the Golem will use will not be very strong.

Whatever you do, do not attack Golem with physical attacks (unless it is on counter-attack from the Rage Band). This will cause Golem to go back to using Iron Orb and the energy balls of death, so don't do it.

This is one battle other than Spekkio that you can lose and not get a game over from, but if you beat Golem, Golem will hit the party with a burp attack before dying.

Regardless of whether you win or lose this battle, your party will be caught in a magical trap by Queen Zeal and placed in a magical holding cell. You'll be freed by Schala and Janus, and Schala will tell you to head to the Mountain of Woe and free Melchior. The Prophet will then show up, and you'll be forced back to 65,000,000 B.C. before Schala seals the Gate shut on both sides. 


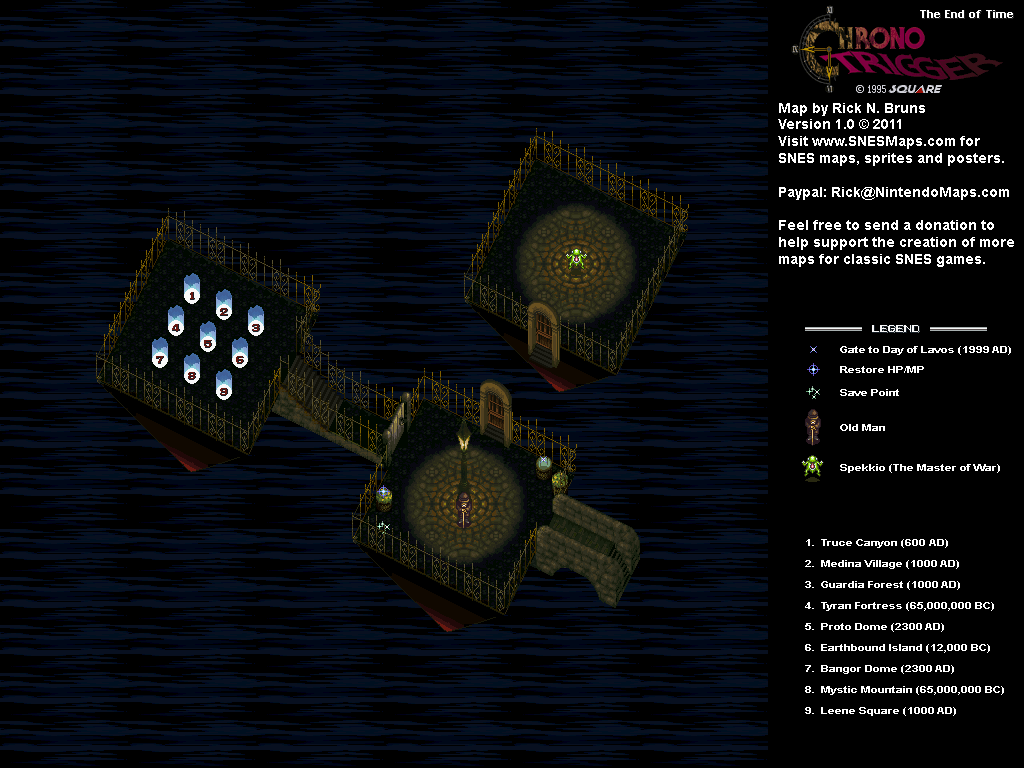
From here, Crono and company will figure out what to do. Even if you haven't been there at all, the game will basically tell you to head to the Keeper's Dome in 2300 A.D. (The game expects you to head through Sewer Access and enter the Keeper's Dome early in the game.) If you head back to The End of Time, the old man there will also tell you to head to The Keeper's Dome.

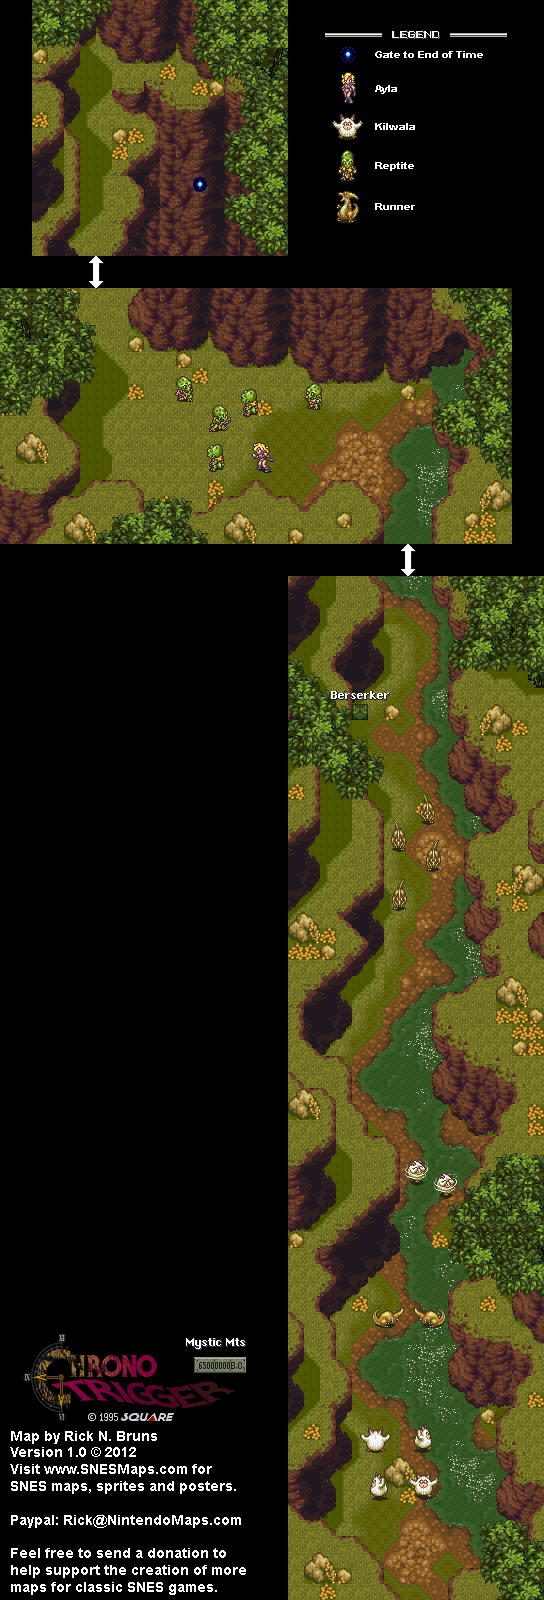
On the way back through the Mystic Mountains to The End of Time, you'll notice that there are fewer monsters due to the impending ice age. At this point, the game is making it easier to get around in 65,000,000 B.C.

Friday, June 21, 2024

PrinceWatercress plays Ratchet and Clank: Going Commando - Part 29 of 54


This one ends up being shorter - and looking a lot easier - following minutes of recording and a bunch of videos. If you're going to do these challenges, prepare to be shot down...a lot.

First | Previous | Next | End

In this video, we head back to Barlow and complete the last two Hoverbike races.

Challenge 4 is the Assault Circuit. Unlike the first three Challenges, the enemies can actually attack you with the same weapons you've used against them, and it can really put a damper on your progress through the races unless you're in the top three. Prepare to be shot at a lot if you're going to complete these races in addition to placing first in both of them. Much like in Challenge 3, which Challenge 4 is very similar to, get the lead early, use all the boosts, and make sure you have the homing missile, which is the red weapon, so in case anybody gets in your way, you can get them out of it.

Challenge 5 is the Expert Circuit. It's much like Challenge 4, and you'll want to play this like you did that challenge. Just keep in mind that the enemies will be even more cutthroat. 

Controls:

As Ratchet:

Control Pad/Left Analog Stick: move
Right analog stick: move camera

X:
  • Jump and double jump (hold button after double jump to use Heli-Pack or Thruster Pack)
  • Wall jump (near certain walls)
Square: strike with wrench
Circle: pull out/shoot currently equipped gun
Triangle: 
  • quick select (hold and use in conjunction with Control Pad or left stick to switch guns; menu can be customized in Quick Select on the pause menu
  • double tap to switch between two most recently equipped weapons/items
  • interrupt on-screen messages

Select: open map
Start: Pause menu
  • Control Pad: select option
  • X: confirm option choice

L1:
  • center camera behind Ratchet (tap button to center)
  • first-person view (hold button and use left stick or D-Pad to look around; let go of L1 to move camera back behind Ratchet)
  • Square: wrench boomerang
  • Circle: fire gun
  • R1/R2: zoom in and out (Pulse Rifle only)
L2/R2: strafe (hold while moving)
L3: see health and Bolt totals
R1/R2: crouch (hold down)
  • Square: wrench boomerang
  • X: high jump
    • long jump (hold crouch button and jump while running to perform)
R3: open map

In water:
  • Square: dive and descend
  • X: surface and ascend
  • R1: accelerate with Hydro-Pack

As Clank:

Control Pad/Left Analog Stick: move
Right analog stick: move camera

When hanging off platforms:
  • Control Pad/Left Analog Stick: move
  • Forward+X: vault up
  • Back+X: drop down

Square: punch
X: Jump (press and hold in the middle of a jump to glide with Heli-Pack)
Triangle: command menu (hold and use in conjunction with Control Pad or left analog stick to choose commands)

Friday, May 24, 2024

DeceasedCrab plays Earthbound - Part 29 of 53


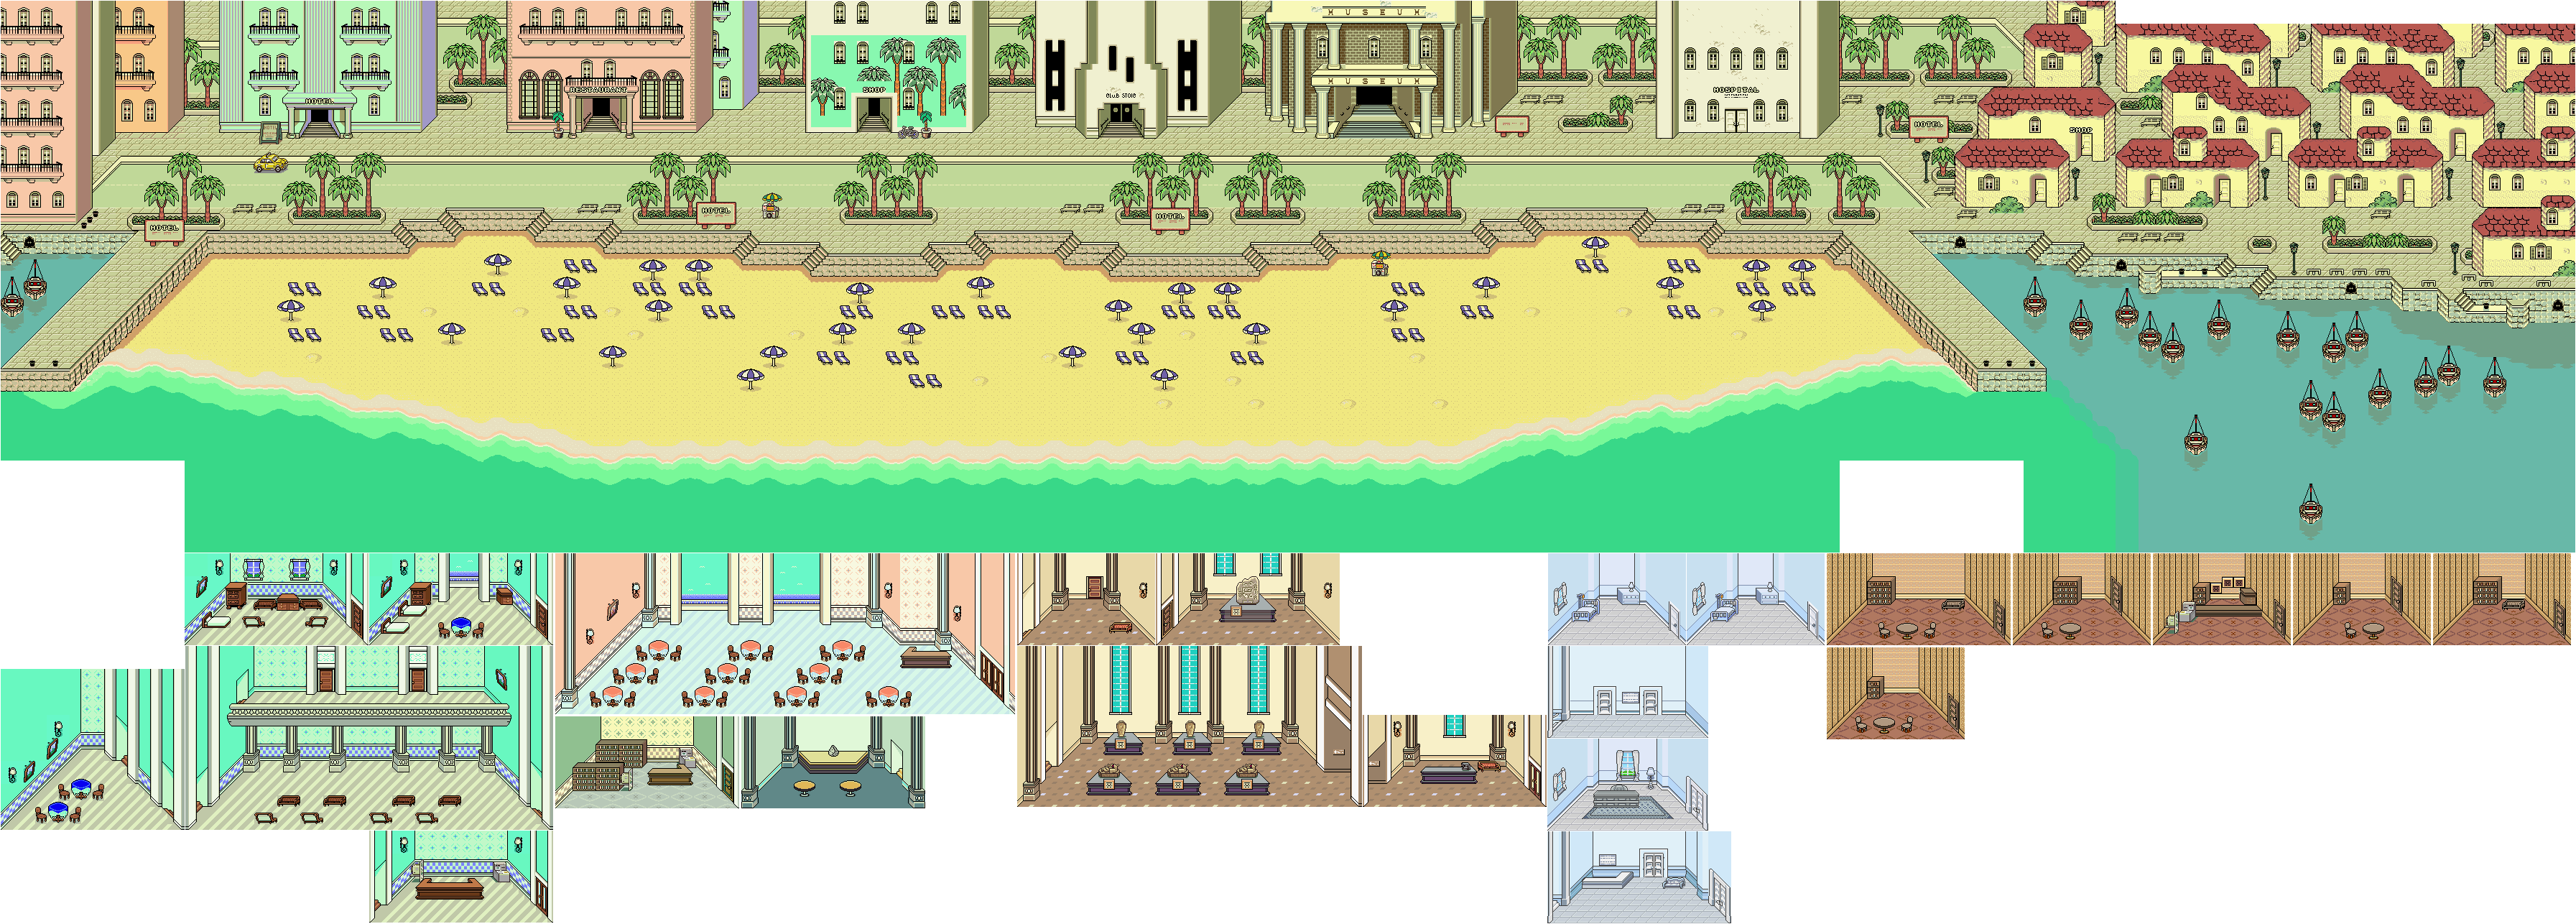
In this entry, we head to Summers. It's an odd place, Summers.


You can buy healing items from the nearby caveman in Dr. Andonuts' lab, if you need to. Also, be sure to use the Instant Revitalizing Device to restore all HP and PP if you need to.

Head back into the cave north of Stonehenge and head east to fight Shrooom!. Shrooom! can hit you with spores to Mushroom or Poison you, so what your status in addition to your HP as you hit Shrooom! with powerful spells like Rockin' Beta. Once you beat Shrooom!, you'll be able to enter the Rainy Circle and get your fourth set of notes in addition to full healing.

After heading to Rainy Circle, go back to Dr. Andonuts' lab, heal up with the revitalizer and talk to Dr. Andonuts. The Sky Runner will be fully repaired, and you can head to Summers.


When you reach Summers, the Sky Runner will crash onto the beach. No more Sky Runner for you!

The shop on the beach only has Gelato de Resort. It only restores 30 HP. That's it.

The hotel sign east of the beach near the port town of Toto contains graffiti written by Pokey calling Ness a loser.

The Scaraba Cultural Museum costs $3 per person to enter. You'll want to go in here to look at the exhibits. One of the people will mention that Mr. Spoon has something important going on. Another person will tell you that Pokey has been here.

Going up the stairs will tell you to a room being remodeled. If you can get the man blocking the door some jewelry, you can go inside. Remember this for later.

The Mad Taxi and Crazed Sign enemies from Fourside return here, so be careful if you're walking down the road.

The Club Stoic doors have a sign telling you that the building is not Club Stoic. Remember this place for later.

At the store, you'll find out that there is a monster between Scaraba and the sea. Also, get the Big League Bat for Ness and the Chef's Fry Pan for Paula. If you need to, get Lucky Coins and Diamond Bands for anyone who needs them.

The first three items at the restaurant are pretty good, especially the Kraken Soup, which heals all HP when eaten. Also, the guy drinking iced coffee is really drinking alcohol. Also, there is a trigger point near that guy that causes the photographer to show up.

There is another trigger near the hotel that causes the photographer to show up. Speaking of the hotel, talking to the bellhop you see when you enter will reveal that the bellhop knows your name and that Pokey has been here. Be ready to head here with money, as the hotel is $150 per person.

Monday, October 30, 2023

Jerry Martin plays Strong Bad's Cool Game For Attractive People - Part 29 of 53


Two-O-Duo breaking up live on stage is probably one of the funniest things this whole episode.


If you examine the dead fish after pouring the bleach into the pond, you'll get the Mary Shot Glass and complete the shot glass collection.

Use the instant camera on the Limozeen stand to frame Limozeen for pouring bleach into the pond. You'll need this for later.

From here, head to the Two-O-Duo stage and click on the box of records. Strong Bad will see what is inside. Replace "Slide To The Right" with the "3 O'Clock Twist," replace "Doin' The Wiggle" with "Hugo Left Me..." After that, arrange the songs so that one of the "Left" songs is first, then "The 3 O'Clock Twist", then the other "Left" song, and finally "Roll Wit' 'Da Punches". Coach Z will keep punching Bubs in the face, and you'll break up Two-O-Duo after Bubs says he will never work with Coach Z again and Coach Z tries horribly to salvage what's left.

From here, head to the PomStar stage. You'll notice that Homestar is wearing headphones as he is singing, and Strong Bad will think something is fishy.

If you talk to Strong Sad here, he will hit you with a tazer.

Talk to Coach Z as soon as you get here. Coach Z will say that Bubs will be back, as he both loves and hates him like a brother.

Talk to The Whale twice. This will annoy the all of two people in the crowd. From here, use the hanger antenna on The Whale. This will cause sparks to come out of the whale. Click on the antenna so that it is pointing left towards Strong Bad, then click on The Whale. Click on the antenna again, click on The Whale to get him to say something and Homestar to repeat it. Everyone will start booing Homestar, and PomStar will be sabotaged.

Head to the Cool Tapes stage. It's time to sabotage. Head to the left and click on the billy club, and Strong Sad will somehow allow you to take it after saying he prefers to keep the peace through rational discourse...and a tazer, which he hits you with. Strong Bad then hits Strong Sad with the billy club.

Head back to the PomStar stage. Use the billy club on the Limozeen stand to whack the webcam before handing it to the stand. Use the instant camera on the Limozeen stand to make it look like Limozeen is attacking the whale. Hand both of the photos you have of the Limozeen to Marzipan to get her angry.

If you use the mic in front of the Cool Tapes stage, you'll reveal a box containing the Lyrics Sheet from the Limozeen game manual.

From here, head to the Two-o-Duo stage.

OUTFITS:
- Sloshy Shirt: Use mic in downstairs laundry room.
- Leopard Print Pants: Examine couch in downstairs TV room.
- Head Band: Use mic near brick wall to the right of Bubs.
- Hollywood Boulevard Boots: Use the Black Metal Detector near the picket fence.

STRONG BAD ABUSE:
- Examine the microwave in the kitchen.
- Examine the Lappy Plug in Strong Bad's computer room.
- Use the fake sword on Marzipan.
- Use the bleach on the pond at the Two-o-Duo stage.
NEW! Talk to Strong Sad at the Pomstar stage.

LIMOZEEN SHOT GLASSES:
- Larry Shot Glass: Examine Luxa-Lounger.
- Perry Shot Glass: Use mic near Strong Bad's mailbox.
- Gary Shot Glass: Use the Black Metal Detector next to Marzipan's Zen Garden.
NEW! Mary Shot Glass: Examine the dead fish at the Two-O-Duo stage after using the bleach on the lake.

LIMOZEEN MANUAL PAGES:
- Cover: Use the Ordinary Light Switch in Strong Bad's computer room.
- Dedication Page: Use the Black Metal Detector in front of the Two-o-Duo Stage.
NEW! Lyrics Sheet: Use the Mic in front of the Cool Tapes stage.

RARE BAND POSTERS:
- Two-o-Duo: Use the Black Metal Detector on the right side of Bubs' Concession Stand.
- Cool Tapes: Check the first locker on the left in the Locker Room.
- Pom Pom: Use the microphone at Club TC.
- DOI: Use the Black Metal Detector in front of the DOI stage.

EXPRESSION OF AFFECTION:
- Talk to Strong Sad about bats twice.
- Talk to Bubs about the Fun Machine.
- Talk to Coach Z about Marzipan twice (before he leaves Locker Room).
- Use Cool Tapes Photo on Marzipan and make out to Strong Bad.
- Use Cool Tapes Photo on Marzipan and make out to Coach Z.
- Talk to Coach Z about Poetry at Marzipan's House.
- Talk to Limozeen about Two-o-Duo at the Two-o-Duo stage.
NEW! Talk to Coach Z at Pomstar (after breaking up Two-O-Duo and before sabotaging Pomstar).
NEW! Talk to the Whale at the Pomstar stage twice.

MUSICAL MOMENTS:
- Offer The Cheat an entry form.
- Offer The Cheat an entry form twice.
- Offer Strong Mad an entry form.
- Talk to Coach Z about the Boom Box at Marzipan's House.

Saturday, April 22, 2023

PrinceWatercress plays Sly Cooper: Thieves In Time - Part 29 of 48


In this entry, we wrap up the Episode 1 treasure hunt, then get Episode 2 started.


The treasures in this game work much like they do in Sly 2: they will be in certain locations in the episodes, and you'll have to go out of your way to find them, interact with them to grab them, and bring them back to the hideout without getting hurt by the enemies. Sadly, there is no way to get them show up on the Select screen map. Unlike that game, where some items were on timers and others were not, all of the treasures are on timers and you'll have a certain amount of time to get a treasure back to the hideout. The amount of time that you get depends on the treasure.

Each episode - not counting the Paris prologue and epilogue - has 12 treasures in all, leading to a total of 60. There are also a few Trophies for going for all the treasures along the way.

I also create some rules of my own for the treasure collection videos as well.

1. There are no practice runs. Everything that is done is done on the fly.

2. You will need all of the costumes before even attempting to get all of these.

3. There is a total of twenty (20) minutes to collect treasures per video. Whether any more time is needed to get one more treasure is a matter of discretion.

4. The timer only starts after exiting the hideout and gameplay begins.

5. In case a return to the hideout is needed to get away from enemies or to switch episodes, the timer is suspended. The timer is only restarted once the hideout is exited again and gameplay begins again.

6. After the twenty (20) minutes are up, we get to read the treasure descriptions and rotate the treasures.

GamesRadar made for some pretty good notes on how to find everything; you can find them here.

6. Lucky Neko


This is located on a tall pillar just south of the hideout. Getting to the hideout with the Paraglide shouldn't be hard at all.

7. Jade Samurai Helmet


This is on top of a crate behind the Geisha House; you've probably seen it once or twice while I've played this game.

8. Tales of a Samurai Hippo Comic


This is hidden in an Ancestor Door to the south. To reach it, you'll need to fire a rope arrow from the roof of the sushi shop, then you'll need to get on the switch with the Thief Costume and slow down time to get inside before the door closes. Once you get it, run back north.

9. Jade Peach


This is on top of a crate behind the building south of the sushi shop. 

10. Samurai Warrior


There are some low platforms south of the hideout. Drop down to them, then equip the Jailbird costume to knock the crates out of the way. Beyond the crates is an Ancestor Door. 

11. Ninja Cookbook


This is on a boat on the eastern part of the map. You may have seen this one once or twice during the Let's Play.

12. Golden Teapot


This is on a low platform north of the hideout.

Episode 2: Go West Young Raccoon

1. Bag of Cash


This is underneath the hideout. Get to ground level and look for some crates that can be pushed with the Jailbird costume, then open the door with the Samurai Armor's deflection attack. Getting back is easy if you know where the rope leading all the way back up to the hideout is. 

2. Fake Mustache


This treasure is southwest of the hideout and involves another Ancestor Door. Use the Sabertooth Costume to get over the gaps, and keep the costume on standby to break the Ancestor Door. As far as getting the treasure goes, use the rail slide to get to the hideout more quickly.

Achievements:


Arcade Operator: Collect all the treasures for one episode to unlock the arcade machine within it.

Controls:


Left analog stick: move
Right analog stick: move camera
X: Jump and double jump (hold X on second jump for hover jets as Bentley)
Square: attack
Circle: 
  • interact (usually with anything that has sparkles) (Sly)
  • steal from enemies (from behind) (Sly, Bentley, any of Sly's ancestors)
Triangle:
  • knock enemies upwards (from behind; press Square to slam enemies down for stealth slam) (Sly, any of Sly's ancestors)
    • press Circle after knocking enemy upward to perform Silent Obliteration (Sly; replaces Stealth Slam; must buy on ThiefNet)
    • press Square for Stealth Slam (any of Sly's ancestors)
  • spin attack (hold to charge) (Sly)
  • throw bombs (Bentley)
  • Thunder Flop (in mid-air) (Murray)
  • spin attack (hold to perform) (Murray)
    • control with left stick (must buy on ThiefNet)
  • Raging Inferno Flop (in air; Murray; must be bought on ThiefNet)

L1: 
  • bomb aim (Bentley)
  • smoke bomb/flash bomb (Sly; must buy on ThiefNet)
  • aim/strafe mode (Carmelita; must hold button down)
    • left analog stick: move
    • R1: shoot (can only shoot in strafe mode)
L2:
  • hold for costume select menu (Sly)
    • hold down to stay in menu; use D-Pad or left stick to make selection
  • hold for weapon select menu (Bentley)
    • hold down to stay in menu; use D-Pad or left stick to make selection
  • hold for fist select menu (Murray)
    • hold down to stay in menu; use D-Pad or left stick to make selection
  • hold for shot select menu (Carmelita)
    • hold down to stay in menu; use D-Pad or left stick to make selection

L3: activate compass
R1: run (hold while moving to perform)
  • Paraglide (Sly; in air; must buy on ThiefNet)
    • Square: Paraglide Dive Attack (during Paraglide; must buy on ThiefNet)
  • Adrenaline Burst (Bentley; double tap to activate; must buy on ThiefNet)
  • Clothesline (Murray; double tap and steer with left stick; must buy on ThiefNet)
  • Cane Push (Sly; double tap; must buy on ThiefNet)
R2:
  • Trigger Bomb (Bentley; must have bomb on field to detonate manually; must buy on ThiefNet)
  • Super Jump (Carmelita; hold and press X to perform; must buy on ThiefNet)
R3: Binocucom
  • Right analog stick: move
  • Left analog stick: zoom in and out
  • R1: take picture (when applicable) (Sly, Bentley)

Start: pause menu
Select: map
  • Left analog stick: zoom in and out, switch between map and status
  • Right analog stick: move map
  • Circle: back

Friday, March 3, 2023

PrinceWatercress plays Blood Omen: Legacy of Kain - Part 29 of 41


Now that we have the Soul Reaver, it's time to go deeper into the cathedral.


1:40 - The Soul Reaver in action. Sadly, it uses your magic whenever you strike enemies with it. Also, the door to the northeast of the pulpit/altar is now open.

2:51 - Get Repel ready against the enemies, and be ready to use Energy Bolts to hit switches from a distance. 

4:20 - As you move through these paths, look around for anything glowing; if it's not glowing red, it's a switch.

5:19 - Also, if you haven't gotten the Flame Sword equipped, do it now. You can use it against the red skeletons that pull themselves back together so they can't come back.

6:29 - Be ready to fight some demons on this path.

8:40 - You'll see some shade summoners on this path.

9:46 - Watch out with the switch here. It's a bit easy to accidentally turn on or off. Thankfully, all it does is let your leave to the south.

10:40 - The purple demons that summon their own orange counterparts are here.

12:27 - Use Repel against the first enemy here, as the stronger demons from the town are back. Don't forget the blood vial.

14:06 - Same with this path, too.

15:08 - And this path.

16:21 - We've found Malek's body! We also find the Wraith Armor, which divides damage between your health and your magic. Also, due to the supernatural nature of the armor, you'll fade in and out as you wear it. As useful as this can be, I stick to the Chaos Armor.

From here, you can finally go through the double doors that are glowing red behind the altar.

18:39 - You can now enter the left door beyond the stained glass relief of Vorador fighting Malek. Inside the room is a save spire.

19:48 - You'll finally meet Azimuth the Plainer.

Monday, December 20, 2021

HCBailly and JB play Secret of Mana - Part 29 of 41


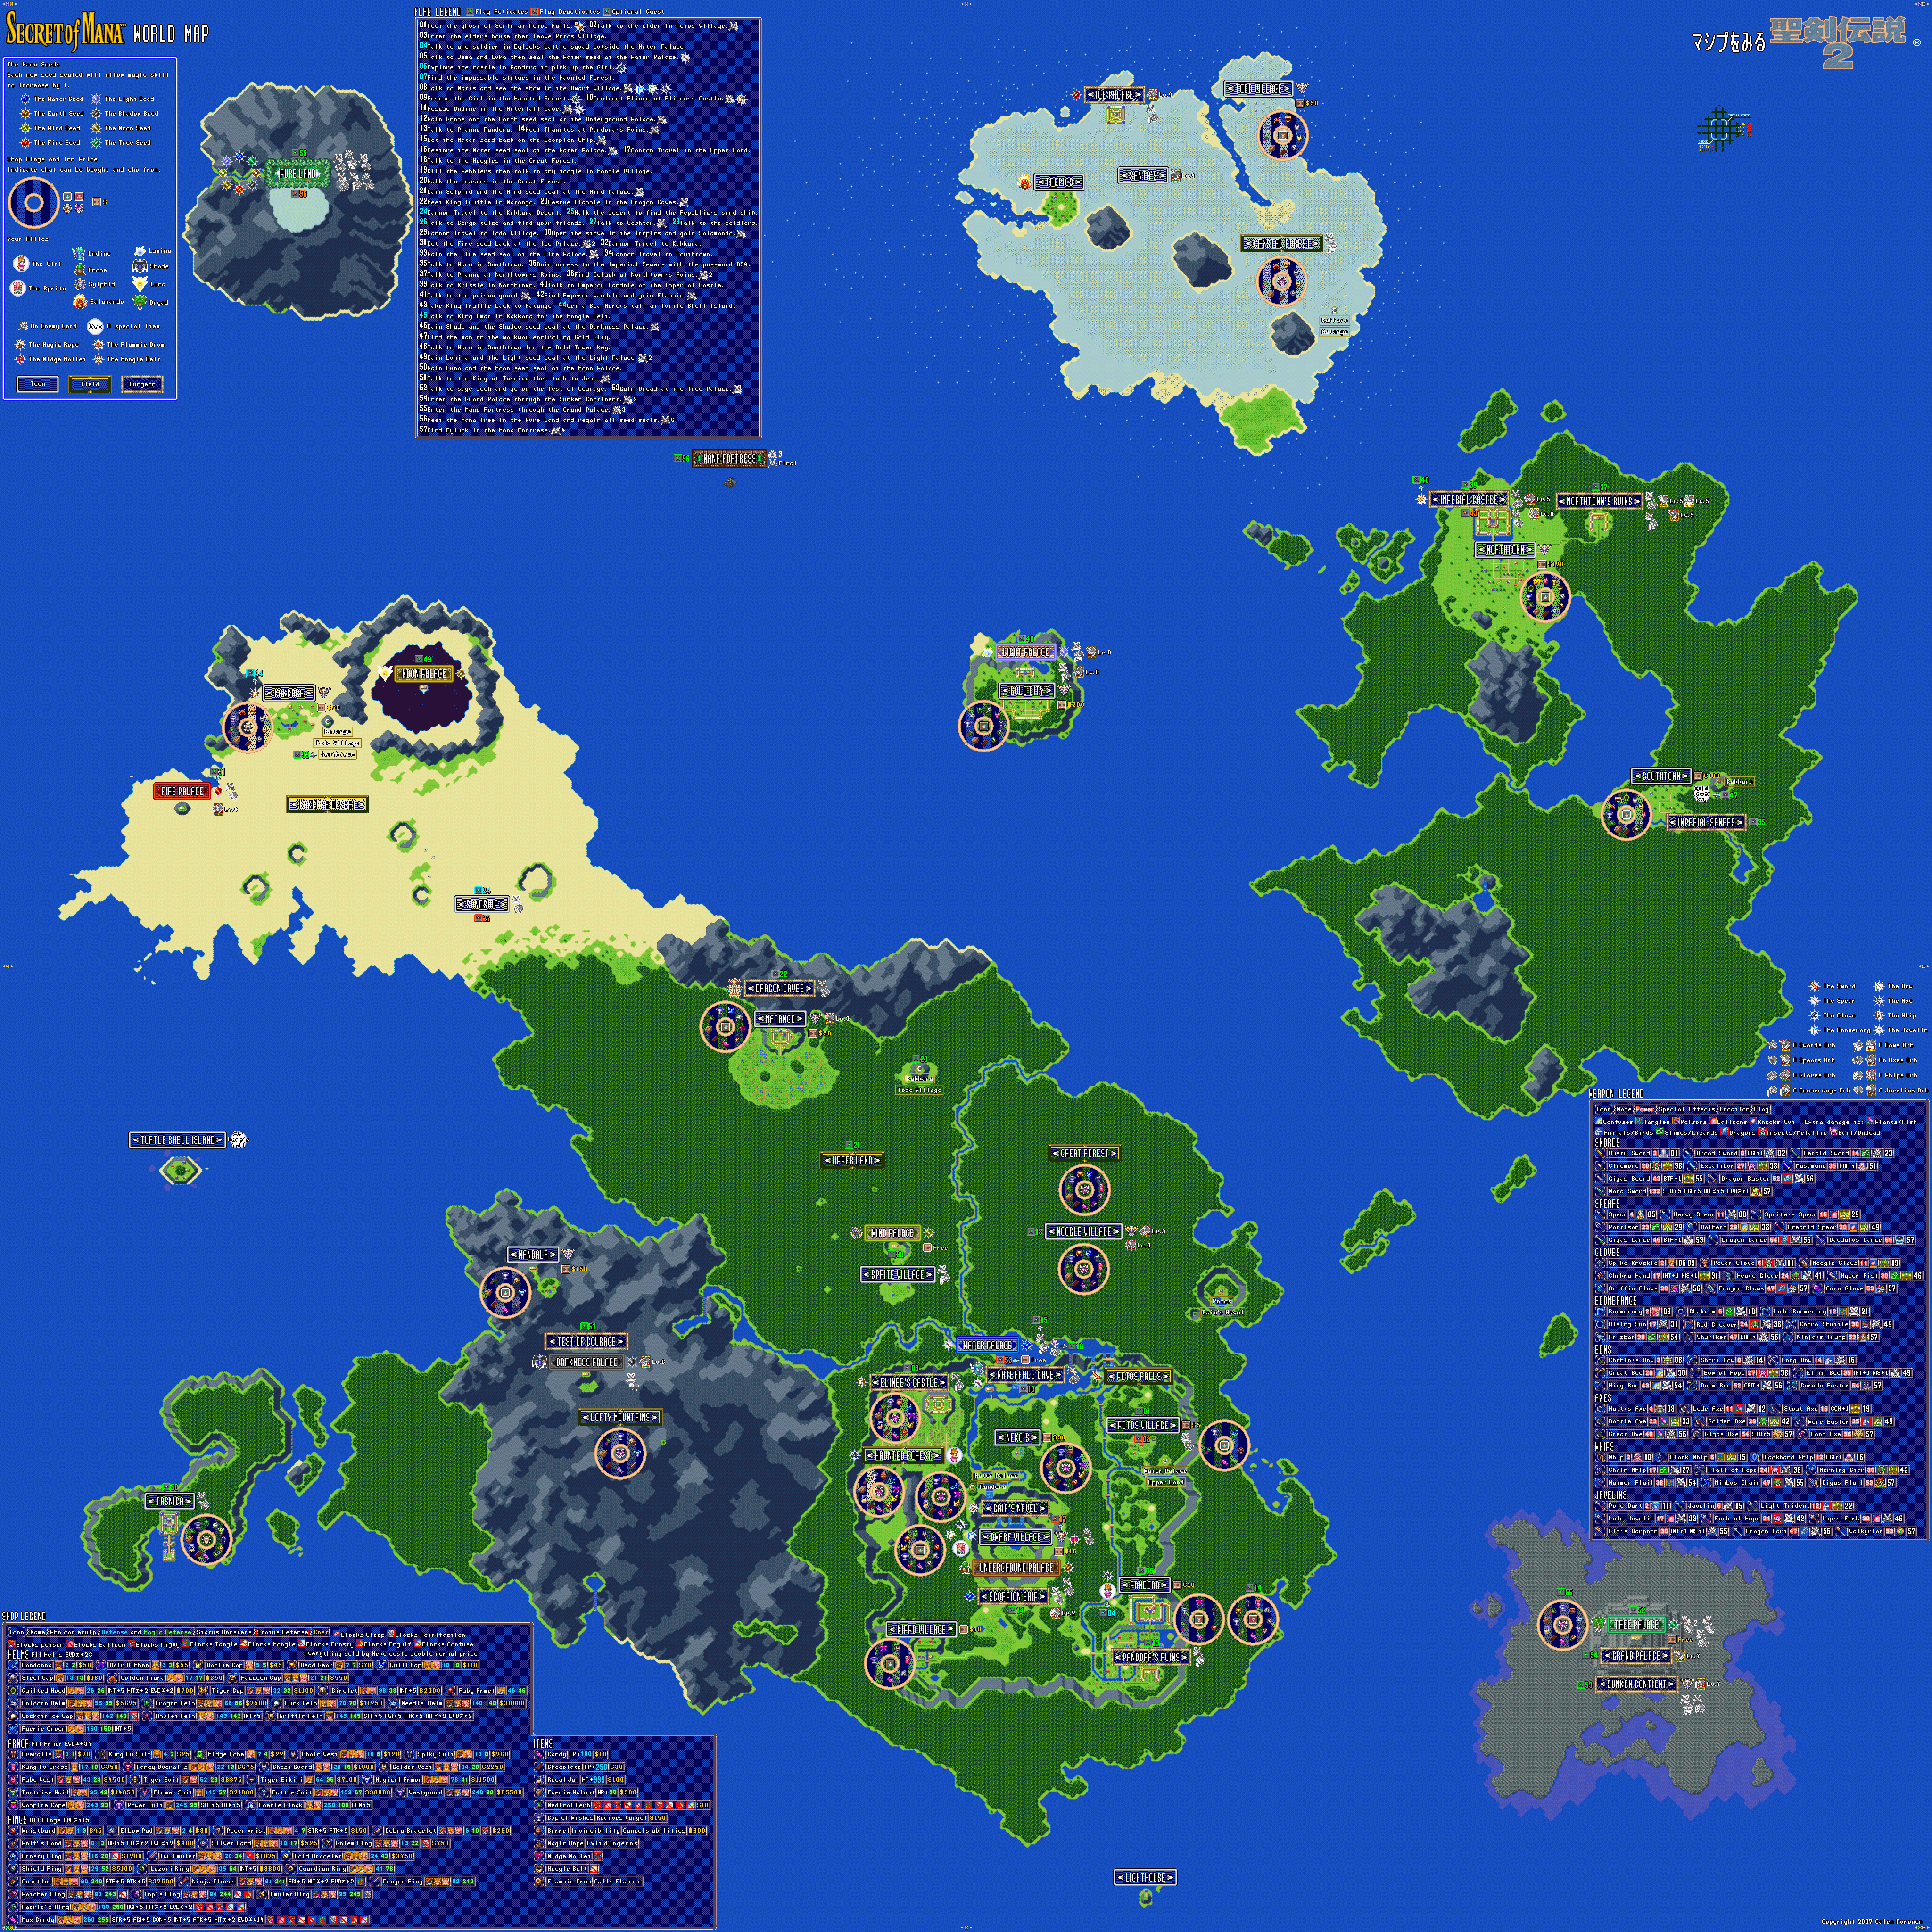
In this entry, we get the key for the Light Palace in our quest to seal the Mana Seeds and increase our Mana Power.


Head back to Southtown and talk to Mara. She will tell you that her husband stole the key to the Gold Tower in Gold City, and lets you have it. From here, head back to Gold City. It's west from here.


Light Palace


The Beast Zombies are red recolors of the Howlers, and they only appear here. They will cast Speed Down on your party, so watch out.

The first that you see will contain a Spear's Orb. The Oceanid Spear has a chance of putting enemies to sleep if it connects.

The second floor is a battle with the Blue Spike, a recolor of the Spiky Tiger. This time around, you have a lot of room here to maneuver, much like you did with the Spring Beak near the Wind Palace. It's still pretty dangerous, however, as it can turn you into a Moogle with Moogle Glare, hit you with Acid Bubbles, and also cast Fireball. Earth Slide is a very powerful spell to use against it. Beating it gives you the Boomerang's Orb. The Cobra Shuttle has a chance of poisoning enemies.

There is a chance that you can cut the Blue Spike's head off, but when it explodes, it will suddenly come back. Yeah, that happens.

Upstairs, you'll find an Axe's Orb in a chest. The Were-Buster is useful against animals, birds and beasts.

The next boss is the Gorgon Bull, a recolor of the Minotaur. It will cast Defender on itself and also hit you with Earth Slide, but much like the Minotaur, if you have Sylphid at the highest level for Popoie, you can destroy it with Thunderbolt. Just watch out for the Petrify Gas, and remember that he can produce claws and quickly lunge at you with them! Beating the Gorgon Bull gives you the Bow's Orb. The Elfin Bow raises intelligence and wisdom. 

After this, you'll meet Lumina, who will tell you that King Manmon robbed them of their power to turn the island into gold, and that you should be using their power, not the king. Lumina will grant their powers to Purim, then you can press B at the seed to bring your Mana Power to 6.

Purim's Lumina spells are as follows:

Light Saber: Hit enemies with the power of light (5 MP)

Lucid Barrier: Protects against physical attack. (4 MP)

Lucent Beam: Hits enemies with a light beam. (8 MP)

You're done here. Head back to Jehk.


When you talk to Jehk, he will tell you to head to the Moon Palace, which floats eerily in the Sea of Wonders at the end of the Kakkara Desert.

Saturday, November 27, 2021

PrinceWatercress plays Sly 3: Honor Among Thieves - Part 29 of 42


In this entry, our high seas adventures truly begin as we get the Red Sail Sea Dog's sea charts before finding some cannon blast amplification collars for the ship.


From here on out, you'll be playing as Sly. If you ever load your game from this point, you'll have no choice but to play as him, and once you go on the high seas by pressing Circle, you can't return to the safe house screen unless you save and load.

Also, when you run into ships or press Circle when nearby, you will have to fight them, and this time, the ships will fight back. Also, there is no way to stop the ship (although you probably figured that out already), so be careful where you're going.

Battle on the High Seas

When you get to the red X for this mission, you'll come across one of the members of the Red Sail Sea Dog Clan. Blow the ship to smithereens, and once you have the chance to sink it or fight the enemy captain, fight the captain. Once you beat the captain, you'll get the Red Sail charts. 

Whenever you survive an enemy skirmish, you'll see the battle results, how much money you got off each ship, your current rank, and the number of ships you've sunk and captured.

Once you get the Red Sail Charts, use the treasure map and get to the red X. You'll have to face three ships at once, so you'd better be ready to move and aim accurately at the ships in order to destroy them. In case you fight multiple ships, you can only capture the last ship you destroy; the other ones will be sunk.

From here, get to the next Red X. You'll face four ships at once this time, but if you were good at moving the ship and aiming accurately with three ships, you can do it with four. Once you win this battle, you're done with this job.

Deep Sea Danger

For this mission, you'll play as Dimitri, who will be wearing the diving suit. Bentley is looking for some cannon blast amplification collars, and you'll find enough of them for the ship where Dimitri is going. All Dimitri has to do is find them and place in a barrel suspended from above from the ship.

Triangle, Square, Circle, and X let you move forward, left, right and backwards respectively. and R1 fires the spear gun. The left analog stick or D-Pad will allow you to aim and turn around to make navigation easier.

There is a cave that you'll have to swim into, and here is where you'll find the amplification collars as well as sharks. Just watch out for the jellyfish on the way there.

To grab a collar, just move up to it and Dimitri will take it. From there, get close to the top of the basket to put the collar in the basket. You can shoot the sharks with the spear gun, but if you need to, use Square and Circle to strafe out of the way.

There are five collars, and they will be glowing red and yellow to make them easier to spot. Once you get them all in the basket, you'll need to fortify the gun with ground hammerhead shark bone, and to do that, you'll need to capture some yellow dartfish, which the sharks are attracted to. You'll need to go further down into the ground to find the fish, and once you run into two of them, you'll complete this part of the job.

Hold L1 while swimming to move even faster with the power stroke. The power stroke has a red meter on the far left side of the screen, and it will quickly empty as you use the power stroke, so use your burst of speed carefully and let it recharge. You'll still have to contend with the sharks and the jellyfish, so be careful.

Speaking of the sharks, once you get the two yellow dartfish, you'll need to find five hammerhead sharks. These sharks take three hits from the spear gun, but you'll need to sidestep the sharks' charge attacks between shots. Once you defeat five hammerhead sharks, the job is done.

Controls:

D-Pad/left analog stick: Move
X: jump/double jump
Square: attack
Circle: use to interact with sparkles, steal from enemies (from behind; with Sly), grab objects and stunned enemies (with Murray; press Circle afterwards to grab enemy out of air and press again to shake them, or press Square to throw them)
Triangle:
  • charge up cane, knock enemies into the air (from behind; with Sly, use Square afterwards to slam enemy down/use Silent Obliteration)
  • drop bombs (Bentley)
  • uppercut (Murray; press Circle afterwards to grab enemy out of air and press again while holding enemy to shake them, or press Square afterwards to knock enemy out while in mid-air)

Select: access Gadget Grid
  • D-Pad/Left analog stick: select gadget/ability
  • L1, L2, and R2 buttons: assign gadget to button pressed; gadget can then be used with that button

Start: Pause/unpause
  • D-Pad/left analog stick: choose options
  • X: confirm choice
  • Triangle: back out of choice

L3: bring up waypoint

R3: use Binocucom
  • Left analog stick/D-Pad: look around
  • Right analog stick: move in and out
  • R1: take picture

R1: run (hold down)
  • use Paraglide (as Sly; hold down to use, must purchase first)

Right analog stick: move camera

As Carmelita:

  • Left analog stick/D-Pad: move
  • Right analog stick/D-Pad: move camera/aim
  • Triangle: toggle between strafe mode and free movement
  • Square: kick
  • Circle: mega jump
  • X: jump and double jump
  • R1: shoot

As The Guru:

  • L1 (hold): transform
  • Circle (in mid-air, behind an enemy): mind control
    • Left analog stick/D-Pad: steer enemy
    • X: jump off enemy and launch enemy forward
    • Square: attack

Grapple cam controls:

  • D-Pad/Left Analog Stick: aim camera
  • X: shoot/grapple with hook
  • Circle: distract enemies
  • Square: self-destruct (hold down)
  • R1: Fire turret

Hacking mini-game controls:

  • Left analog stick: move
  • Right analog stick: aim and fire gun

As The Panda King:

  • Square: flame chop
  • L1: hold to load fireworks, release to attack with stored fireworks
    • Right analog stick: sweep over multiple targets

Friday, October 29, 2021

HCBailly plays Final Fantasy II AGAIN - Part 29 of 65


It's enemy fights aplenty as we explore the Cave of Deist.


Cave of Deist


The R. Mousse (Red Mousse) have a high physical defense. Try to Curse them, and remember that they are strong against Ice and Poison, but weak against Thunder. They can also Envenom you, too.

The Y. Jelly (Yellow Jelly) is weak to Fire and Ice.

The Souls are even weaker than the Red Souls. They're really easy to kill.

DualHead can be seen as early as the Snow Cavern and can be a bit powerful, while DualDead is much more powerful and are Undead-type enemies. DualDead is also weak to fire.

Friday, July 23, 2021

PrinceWatercress plays Bio Menace - Part 29 of 37


There's a lot of robots here, and one of them is the type that flies around in a certain pattern and kills you on contact. Get used to seeing these robots and how annoying they are in Episode Three.

Cyborg Trouble

There is plenty to say about this level other than that it's full of cyborgs.

You'll want to make your way up at the beginning of the level. The meanest enemies you can destroy are the cyborg enemies in the camouflage pants. If they see you, they will nail you unless you duck their bullets.

The meanest enemies of all, however, are the flying robots that have electricity going through them. You cannot destroy them, and if they touch you, it is instant death. Wait for a gap between them before moving on.

The hostage will tell you not to approach the next boss right away and to find something to help you first.

Wednesday, June 16, 2021

PrinceWatercress plays Ratchet and Clank - Part 29 of 38


In this entry, we land on Oltanis. Unfortunately, the constant thunder and lightning makes Clank a conductor for electricity, so we have to trek without him here.

Gorda City Ruins - Oltanis

When you land on Oltanis for the first time, Clank will be zapped by the constant thunderstorms emanating from the sky. Because of this, Clank will unable to go with Ratchet, leaving you without the Heli-Pack or Thruster-Pack. That means no gliding, high jump, and that also means no long jump, either. Unfortunately, there's no way to fix this, so you'll just have to get used to it while you're here.

You can buy the Tesla Claw on this planet. This is the last weapon and/or gadget you can get from the Gadgetron Vendor; the rest you'll have to get some other way. If you have the Persuader, you can get it for 30,000 Bolts instead of 40,000.

When you get on the elevator platform, you'll have to pick from one of three routes. One goes up, one goes down and one uses the Magneboots. We're taking the route that goes down first.

The robots that drop down and try to zap you up close are from Eudora, but the robot enemies that come out of the hatches in the floor are new. Use the Glove of Doom to take them out from a distance, and remember to jump over their machine gun fire.

Use the Visibomb on the yellow ships in the air that will fire at you, as it will take three shots with the Devastator.

[url=https://youtu.be/6jMa0YHisgk?t=7m56s]7:56 - Use the Swingshot here to get to a Gold Bolt. This can be surprisingly easy to miss if you're not paying attention. Also, you can use the Sonic Summoner to get a Sand Mouse here for the enemies up ahead.

At the end, you'll be grinding on rails. Leap between them so the robots behind you don't zap you, and avoid the electric barriers. At the end, you'll meet a man whose hearing has gone to pot due to the constant noise brought upon by the destruction that has rained on the planet. If you have 2,000 Bolts, you'll be able to buy an Infobot from him. This Infobot will allow you to go to Planet Quartu.

Now for the Magneboots path. Get on the light on the platform at the end to go to an area with ice physics. The wind will blow you in one direction very powerfully, so you will want to be careful and watch both your speed and your surroundings as you jump over electric barriers while on the ice, as you won't be able to hover with the . Also, hold R1 and press Square to take out the mines that move around the Magneboots path in a circle.

21:43 - Another easy to miss Gold Bolt. Also, go slow with the Metal Detector here.

23:45 - Hang off this wall and shimmy to the end to get another Gold Bolt.

At the end of the Magneboots path, you'll have to jump over four electric barriers quickly. When you get to the end, you'll meet Captain Qwark at a fake Gadgetron Vendor that reminds me of Lucy's psychiatric help stand from the Peanuts comics. Qwark pretends his name is Steve, and tries to sell you the Gadgetron PDA (Personal Digital Assistant) for 1,000 bolts. This lets you buy ammo without having to go to a Gadgetron Vendor cube, but here's the catch: everything is more expensive if you do it this way. After this, Qwark wishes you a Qwarktastic day and just disappears. You also can't buy any weapons that are available at the Vendor cubes this way, either.

[url=https://youtu.be/6jMa0YHisgk?t=28m5s]28:05 - If you blow three ships with the Visibomb Gun, you can get a Skill Point.

Controls

As Ratchet: 

Control Pad/Left Analog Stick: move
Right analog stick: move camera

When hanging off platforms:
  • Control Pad/Left Analog Stick: move
  • Forward+X: vault up
  • Back+X: drop down

X: Jump and double jump
  • R1: stomp (must have Thruster-Pack)
Square: strike with wrench
Circle: pull out/shoot currently equipped gun/use gadget
Triangle:
  • quick select (hold and use in conjunction with Control Pad or left stick to switch guns; menu can be customized in Quick Select on the pause menu
  • double tap to switch between two most recently used Circle button weapons/gadgets

Select: Map
  • Left stick/D-Pad: move map
  • Right stick: Zoom in/out
  • X: view missions
  • Circle: play Infobot for planet
  • L1: previous map
  • R1: next map
  • Triangle: Exit
Start: Pause menu
  • Control Pad: select option
  • X: confirm option choice

L1: tap to quickly center camera; hold for first-person view (hold button and use left stick or D-Pad to look around; let go of L1 to move camera back behind Ratchet)
  • Square: wrench boomerang
  • Circle: fire gun
L3: see health and Bolt totals
R1/R2: crouch (hold down)
  • Square: wrench boomerang
  • Left+X or Right+X: side somersault
  • Down+X: backflip
  • X (while running): long jump (must have Heli-Pack/Thruster-Pack)
  • X: high jump (must have Heli-Pack/Thruster-Pack)
  • Double tap: hover (must have Thruster-Pack equipped)
    • L2: strafe left (while hovering)
    • R2: strafe right (while hovering)
    • X: exit hover mode (while hovering)

In water:
  • Square: dive and descend
  • X: surface and ascend
  • R1: turbojets (must have Hydro-Pack)

Trespasser:
D-Pad or Left Analog Stick:
  • Up and Down: switch rings
  • Left and Right: rotate rings
Triangle: leave Invinco-Lock screen

As Clank:

Control Pad/Left Analog Stick: move
Right analog stick: move camera

When hanging off platforms:
  • Control Pad/Left Analog Stick: move
  • Forward+X: vault up
  • Back+X: drop down

Square: punch
X: Jump (press and hold in the middle of a jump to glide with Heli-Pack)
Triangle: command menu (hold and use in conjunction with Control Pad or left analog stick to choose commands)

Monday, March 29, 2021

PrinceWatercress plays Gex 3: Deep Cover Gecko - Part 29 of 32


It's time to play one last level before we end this game. Once we get everything here, it's on to Channel Z.


0:53 - Marsupial Madness is played for the third and last time. X, Diamond, Star, Triangle, Triangle, Circle gives you the Secret Patton Tape when input at The Vault.

2:38 - Showing off Cheesy Rider as Cuz. This apparently has nothing related to Easy Rider in it. The oil slicks will make you slide forward in the direction you walk into them, so be careful. Beating this one will net you the last symbol.

7:27 - The cutscene for "Find The Three Stray Cats." It's time to take on Superhero Show/Superzeroes, the final level of the game. 

8:33 - The first stray cat.

9:05 - The superhero suit costume is back here, and you'll need it to break the cracked columns to make it easier to get around here.

9:34 - The second stray cat.

9:55 - You'll have to take a leap of faith onto these awnings and bounce off them to continue...almost. You'll need to be a superhero to break the statues blocking your path, and you'll be forced to use a rooftop fan to turn back.

13:00 - You must be a superhero to break the safe. Here is the first pawprint coin!

15:30 - The third stray cat. (I could have gotten this one first, but I wanted to get the other two before this one.) The remote will be near Alfred.

16:06 - The final Agent Xtra cutscene from getting a remote in a new level.

Monday, February 1, 2021

PrinceWatercress plays Sly 2: Band of Thieves - Part 29 of 49


For the first time in a while, Murray gets a job! Also, we get to trick Neyla's mercenary forces from this point forward.

Treasure of the Video

Crystal Vase - Showing off the exact moment I nail the jump to this. You'll need the Paraglider for this one. Thankfully, this does not have a timer, and the route to the safehouse is pretty straightforward.

Kidnap the General


The Raging Inferno Flop is an ability for Murray that creates a wall of flame on impact when you perform the Thunderflop, but you have to assign it to a button, as it is its only ability that uses special weapon energy. Speaking of Murray, you'll need to play as him to start this mission as well as complete it, which is something I haven't typed in a while. Poor guy gets the short end of the stick when it comes to jobs compared to Sly and Bentley; he didn't have any jobs at all in Episode 4, period. That's a shame; I like knocking people into the air and smacking them into oblivion a second later.

For this mission, you'll need to find General Clawfoot with the L3 button. Just knock him out and carry him with the Circle button. As long as you don't throw him out of bounds (or into any body of water) or set him on fire, you won't fail this mission. You can even throw him into enemies and it will not hurt him. Just get him to the safe house and Bentley will get the security codes for the castle gates through tickle torture.

Now that we're done with the second Sly will need to steal a voice modulator from the castle and install it underneath Neyla's headquarters so that Bentley can give orders to Neyla's orders undetected. Meanwhile, Murray will need to hotwire a tank and take out of some of the mercenaries to make things a little simpler, and Bentley will have to go back into the crypts to power up the old terminal in the re-education tower to save Carmelita. Bentley also mentions getting the Paraglider. Good thing I got it early! 

Stealing Voices


You'll need to play as Sly to start this one.

The Contessa has a voice modulation device that she plans to use to fool Neyla's mercenaries into doing her own bidding with, and to use it, it will need to be installed to the satellite link underneath Neyla's HQ. Unfortunately for The Contessa, Bentley knows about it, and now Sly is going to steal it out from under her nose.

You'll need to pick a few of the guard's pockets for keys, then you'll need to steal the wire tap from out of the castle. Stealing the keys is the hard part, as the flashlight enemies' spotlights make it harder to get close to them and they like to huddle close together. Use the L3 button to find where the wire tap is, then take out the enemies and get the wire tap. Also, the vault is here, and inside is the Rage Bomb, which confuses enemies it hits into attacking each other.

When you are at the castle rooftops, watch out for the planes, as they will blow you up. If you see a shadow with a red dot in the center, that is where a bomb will drop if a plane notices you.

When you leave, you'll have to rob two more guards of their keys, and once again, you'll need to be very good on your timing when it comes to getting behind the guards, as their patrol routes are very limited. After that, head to the front of the estate. Use the Alarm Clock to distract the guards so you can get the voice modulator.

You'll now need two more keys for the doors to the sewers, as if you didn't already find enough keys. Like always, you'll need to get to the guillotine near the castle and rob the guards there blind. If you need to, crawl underneath the well to stop yourself from getting spotted. After that, you'll need to crawl through a run-off drain underneath the bridge near the safehouse and get to the door on the other end. Slide down the ropes and avoid the tentacles as you move around. You'll be able to splice the wire tap into the wires on the other end of the area. From there, Bentley will be able to trick Neyla's mercenary forces.

Controls

D-Pad/Left Analog Stick: move
Right Analog Stick: move camera
X: jump and double jump
Square: Horizontal Attack
  • horizontal attack (as Sly)
  • slam enemies launched into the air from behind (as Sly)
  • hook punches (as Murray)
  • Thunderflop (as Murray; in mid-air only)
  • crossbow swipe (as Bentley)
Triangle: Vertical Attack
  • vertical attack (as Sly; used to knock enemies into the air)
  • downward dive (as Sly; in mid-air only)
  • uppercut (as Murray)
  • drop bomb (as Bentley)
Circle: Action button (near blue/green/purple sparkles and character icons)
  • pickpocket (as Sly)
  • stomp (as Murray; use Square to throw object/enemy)
R1: hold to run

Select: Gadget Grid
  • Control Pad: highlight gadget
  • X button: confirm gadget
  • L1, L2, R2: assign gadget to button pressed

L1, L2, R2: use gadgets assigned to button pressed

Start: pause menu
  • Control Pad: select menu choice
  • X button: confirm choice
  • Start: un-pause game

L3 (press the left analog stick): locate beacons for mission objectives

R3 (press the right analog stick): Enter and exit Binocucom for first-person view
  • Left analog stick: look around
  • Right analog stick: zoom in and out (with up and down on right stick)
R1: 
    • take pictures with spy camera (as Sly; when applicable)
    • shoot sleep dart (as Bentley)

Hacking mini-game controls:
  • Left analog stick: move
  • Right analog stick: aim and fire gun

Saturday, July 4, 2020

PrinceWatercress plays Terranigma - Part 29 of 50


We finally beat the queen and rescue Columbus to ensure passage to the New World, but soon after that, the ex-Princess Elle runs off again.

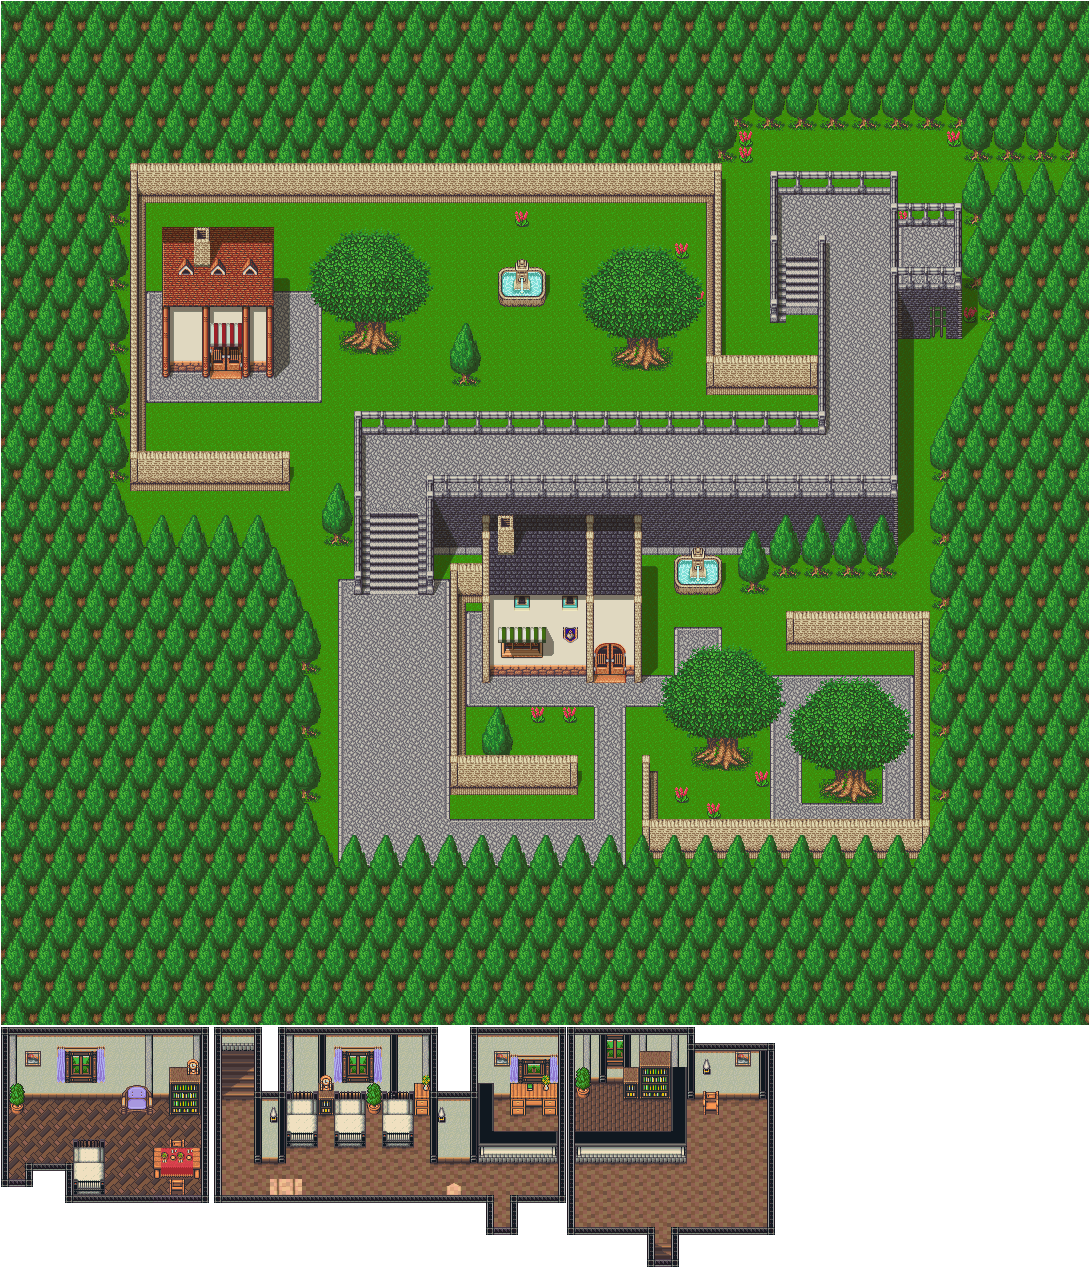
Sylvain Castle


You'll then face what looks like four girls in pink dresses. Here, stand still and strike the one behind you when they come to a stop. If you need to, face the south wall and strike the one to the north when they all stop to ensure you get past that battle.

From there, go to the upper-right corner. When you talk to the guy there, you'll enter another room. You'll play a game of Simon Says. Do as the girl there says, and when you finally get to her, strike her. You'll be teleported to another room. It's boss time.

You'll fight against Bloody Mary. Stay away from here and use ElecRings until she falls. Hope you brought nine of them, or you're going to have a hard time. It is recommended that you be Level 23 for this battle.

Once you take down Bloody Mary, you'll finally be back near the man you tried to talk to. This is Columbus, and he has been tortured by the queen. When he asks why you rescued him, pick the first option. Columbus will then tell Ark why he was being tortured: because the three Sylvain Princes died on his voyage, but he feels he took the torture to atone for his own sins, even though he feels he cannot tell you the real reason. He says that royalty are all the same, much like Loire's King Henri and Sylvain's Queen. He plans to reveal his secret when the real hero shows up.

He says that when he discovered the new continent, he was convinced that everyone isn't that different, and he intends to spread his knowledge of navigation. He heads back to Litz, and you automatically head back there with him.

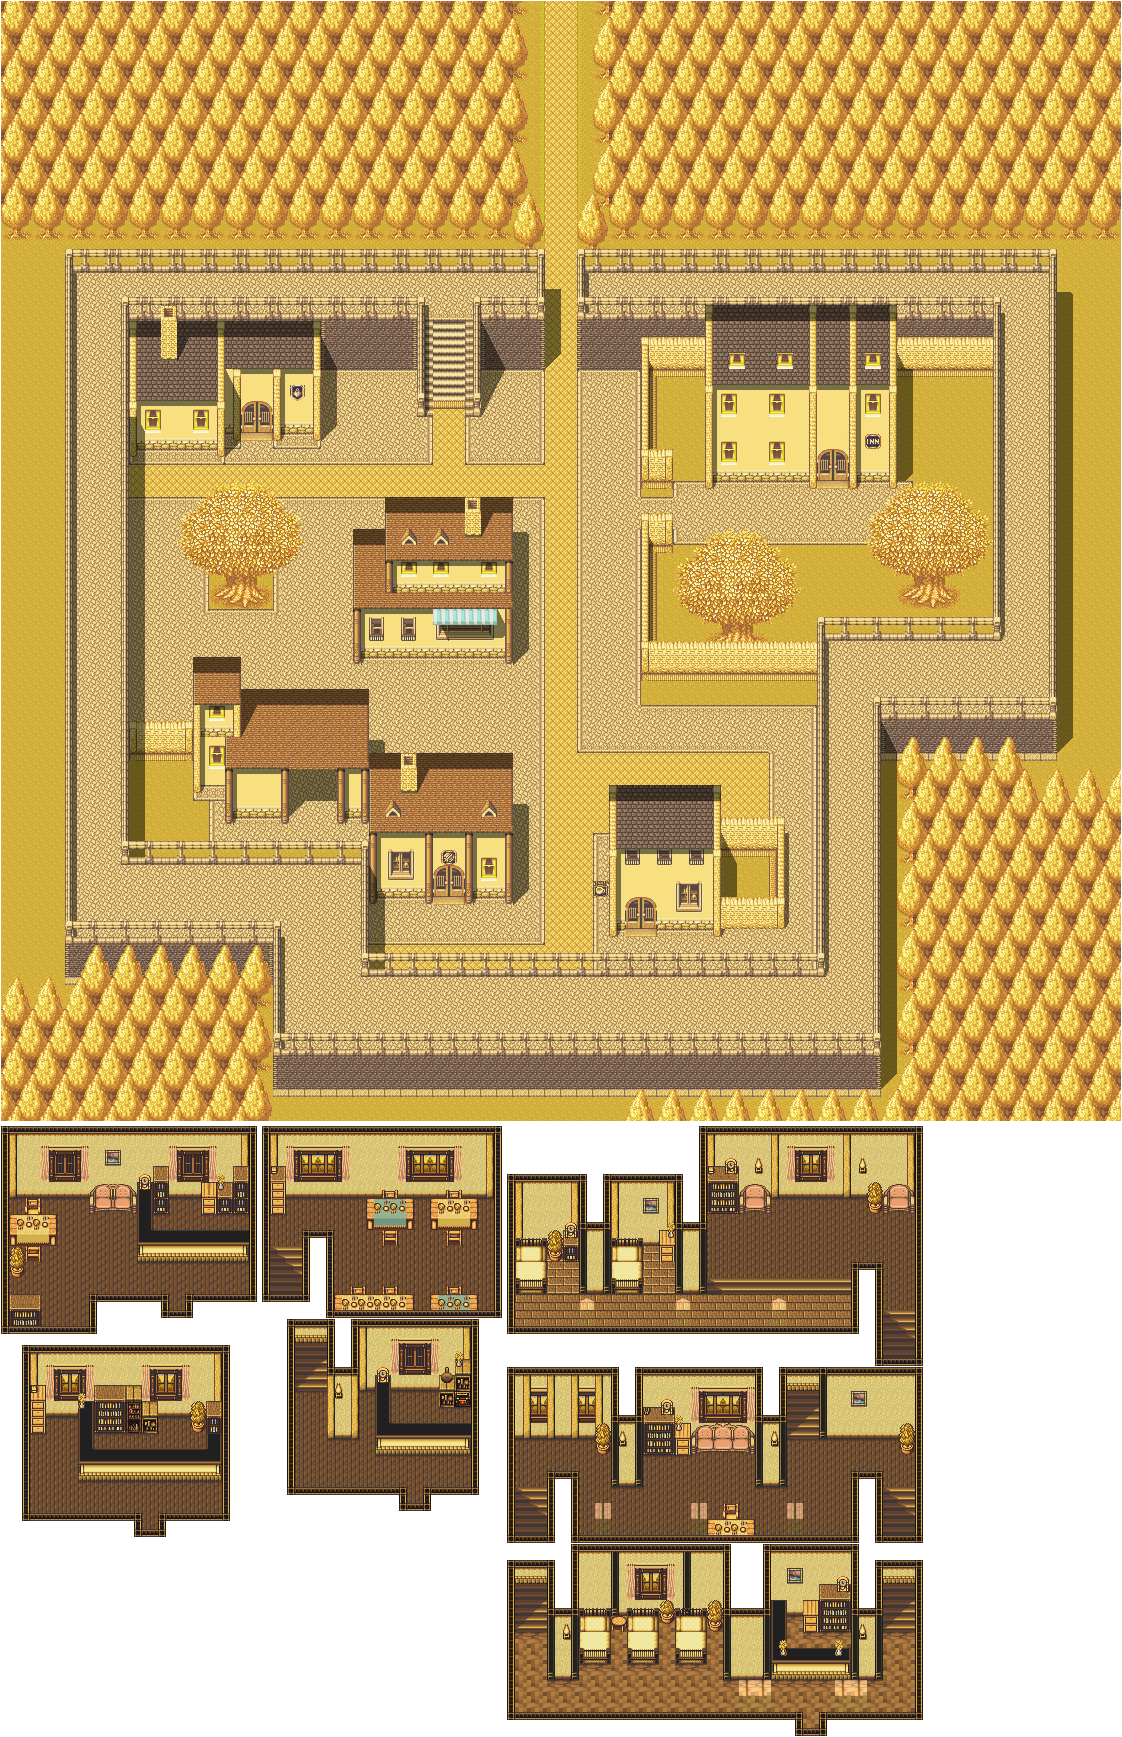
When you head back to Litz, you'll be at the hospital. Columbus will have taught all the sailors at the port his navigation techniques, so you should be able to travel to the Americas. He then goes to sleep.

Litz


Go back to the girl at the counter at the hospital. When she asks if you want fever medicine, say yes. You'll get the Fever Medicine, which Emilio has now completed. If you talk to Emilio, he'll tell you that Columbus is totally exhausted and that he will be resting here for a while.

If you haven't done it yet, get the maximum amount of bulbs and Pretty Flowers before you go to the new continent.


Loire


Head back to Loire Castle. The speed eating contest is now being held in the old throne room where King Henri and Princess Elle used to be. Talk to the guy blocking the Magirock, and you'll be told that you have 60 seconds to eat as much as you can. Some dishes are poisoned (or as the game says, they contain bad medicine), so watch out.

Eat the apples in the upper-right corner of the throne room for three easy points. Everything on the tables is worth one point. You have to eat 20 points worth of things in order to win Magirock #54. If Ark goes to sleep, then the food contains "bad medicine" and you'll be stopped for a second or two. You may also get burned as if you ate a fireball or something. Nevertheless, if you eat the apples in the upper-right corner, you'll have an easier time getting the Magirock.

Head to the port. Now that Columbus has taught all the sailors to navigate, they'll be able to head to the new continent tomorrow. Talk to the guy on the ship, and say yes when he asks if you want to go. He'll tell you that this is a test voyage, so civilians can't go, and there's no knowing when the next voyage will happen.

Head to the town of Litz. From there, go to the inn and stay there for the night. If you haven't saved yet, be sure to save your game.

As you sleep, you'll be approached by Fyda, who wakes you up. She'll tell you that Princess Elle is in danger and that someone is out to get her, and she must be taken far away from Europe. Ell will also need an escort as Fyda pursues whoever is going after her. When Fyda asks if you can escort the princess, say "Leave it to me." She'll then ask you to join her in Litz tomorrow morning. After a brief conversation with Yomi, Ark goes back to bed.