Showing posts with label part 24. Show all posts

Tuesday, July 21, 2026

PrinceWatercress plays Space Station Silicon Valley - Part 24 of 32


It's time to take on the desert levels, and if you were expecting something even harder, well...it actually doesn't happen. The sailing is a little smoother from here on in.


Fun in the Sun


Welcome to the desert levels! After completing three of the jungle levels, we're able to start playing these levels. After having to go through absolute madness with Evo's Escape, this part is going to be a breeze. For some reason, the desert levels are the easiest ones to get through, and it's not exactly established why. Maybe these were actually meant to be "cool down" levels after everything you've been through. Maybe the development team were running out of time and money to make the game. Maybe they were meant to be the first set of levels, although that's probably not the case due to how the beginning of the "Euro" levels got the game started on the right foot. Nevertheless, this is where the game eases up, and sometimes, gets a little creative.

For Fun in the Sun, you'll need to restart the oil pump and open the fuel line valves in order to restart the machine that produces the station's fuel supply.

You'll start out as an armed desert fox. With the B button, you'll have a three-way pistol shot, and use you can use that to lay waste to enemies from a distance. There will be a camel to the right of where you start, and you'll want to blow it away immediately. Just be ready to keep your distance when the camel approaches when you shoot at it enough times, as it will run at you and spit water at you.

Once you take out the camel, don't take control of it just yet. You're still going to need the armed desert fox and its ability to jump in addition to shooting. Make sure not to take out the speaker will progressing past the start, or else you won't be able to clear the gap and you'll be forced to restart.

There is an oasis just past the start. If you wade into it with the armed desert fox, the water will actually damage you and kill you due to poor water resistance. Instead, you'll want to get close to the corner of the oasis across from the two camels in the distance and shoot tt the camels instead. The bullets from the Armed Desert Fox's hot shots actually travel downwards after a short period of time, and if you're standing in the right spot, you can rain down mortor shots on the one near the pyramid. To take out the other one, however, you'll need to find a mound of sand near a wall, jump to the cliff side and then travel towards the pyramid before getting close to the camel. Doing this can let you chase the camel back to where you have to jump before you get to the pyramid, and you can more easily hit the camel there if you keep moving back and forth near the edge.

The camel will be used to push a block near the door leading to the next area. Once you've pushed the block, you'll still want to be the Armed Desert Fox for what's up ahead. You'll also want the camel to get the Power Cell that is blocked by the oasis.

In the next area, there are a few other armed desert foxes, and they will shoot you on sight. Keep your distance and pay attention to where they patrol so that they don't fire back at you. You may have to close to them and fire mercilessly on them and kill them before they kill you. Thankfully, there's plenty of energy in the earlier areas. You'll see a switch near the big brown pipe; jump on it to turn on the oil pump.

By looking around the perimeter of this section, you'll find another hill of dirt that you can go up to explore more of the level with. Once again, keep your distance and figure out where your hot shots will work best when blasting at enemies.

Shooting down all of the armed desert foxes will net you the trophy. You'll need to get to the vulture platform to get it.

At the oil switch, you'll see two squares moving up and down. You'll need to jump on one of them, then jump to a switch to activate it and turn on an elevator. This will allow you to make your way to the exit teleporter. Before you can activate it, you'll need to jump across the three nearby platforms. Make sure that you can jump from one to the next without being burned by fire.

On the other end is the aforementioned vulture platform where the trophy will be. There will be a vulture that you need to shoot down as well as a Power Cell. Shoot down the vulture, then take control of it. From here, you can get the final Power Cell, fly to the valves at the nearby fuel line, drain the oil, and get to the exit.

As the vulture, you can press the B button while on top of another animal to take it wherever you need to go. Press B again to let go of whatever you've grabbed with your talons to lob it. Remember that for later.

Armed Desert Fox


Type: Armed Desert Fox
Environment: Desert
Skill A: Jump
Skill B: Hot Shots
Water Resistance: Poor
Mass: Light
Armour: Light
Strength: Weak
Traction: Very Good
Fall Distance: Medium
Production: Short
Engine: Electric
Intelligence: High

Camel


Type: Camel
Environment: Desert
Skill A: Jump
Skill B: Spit Attack
Water Resistance: OK
Mass: Heavy
Armour: Light
Strength: Strong
Traction: Good
Fall Distance: Medium
Production: Long
Engine: Bio
Intelligence: High

Vulture


Type: Vulture
Environment: Desert
Skill A: Flight
Skill B: Grab 'n' Lob
Water Resistance: Excellent
Mass: Medium
Armour: Light
Strength: Little Lift
Traction: Average
Fall Distance: High
Production: Medium
Engine: Kerosene
Intelligence: Medium

Power Cells


Sunday, February 8, 2026

PrinceWatercress plays Super Mario Odyssey - Part 24 of 92


...and now for one of my favorite Kingdoms in the game.


Metro Kingdom

Scourge on the Skyscraper


After taking care of some loose ends in Cloud and Lost Kingdom, it's finally time to head to the Metro Kingdom. When we head down there, it will be dark and rainy. When you talk to the people near where you land, they will mention the Mecha-Wiggler and the Broodals' ship at the top of the Metro Kingdom's tallest building, New Donk City Hall. Also, Pauline - yes, that Pauline from Donkey Kong - is the mayor of the kingdom, and she is concerned about not only the Mecha-Wiggler, but also the tacky advertisements for Bowser's wedding to Princess Peach. You'll have to make your way to the top and take the Mecha-Wiggler out so that it doesn't suck all of the kingdom's electricity dry. Fortunately for you, getting around the Metro Kingdom at this point is pretty straightforward if you look around.

The Regional Coins actually look like coins for once. They have a picture of Pauline on the heads side and a picture of New Donk City, the capital of the Metro Kingdom, on the tails side.

The larva will turn into flies that will divebomb you, but you can easily defeat them with your hat. 

As you explore the Metro Kingdom, you'll find references to Donkey Kong everywhere. Even the street signs are named after characters from the [i]Donkey Kong Country[/i] games! 

The Sherms can be used to shoot down not just enemies, but also Bowser's wedding posters (for coins) and the taxis that are lying about to uncover Hearts and other power-ups.

You can enter the Crazy Cap, which is so big that the gold coin shop is one side and the Regional Coin shop is on the other. At the gold coin shop, you can buy a Power Moon.

Watch out with the girders that twist back and forth in place. You can fall off of them if you're not careful.

If you see a checkpoint, hit it. You'll not only need these checkpoints for later, but you'll also have some place to start from in case something happens.

You'll eventually have to go up some stairs and enter a building. When you do, you'll have to do a lot of platforming and jumping to get to the top. The wooden platforms break, but they do re-spawn. The metal platforms that move around are a little more permanent.

You'll eventually make it to the rooftop. Once you approach the Mecha-Wiggler, you'll trigger a boss battle.

To beat the Mecha-Wiggler, you'll need to possess a Sherm. After that, you'll need to shoot at the bright blue parts of the body. Once you do, the Mecha-Wiggler will be stunned, and you'll need to shoot it multiple times in order to do damage. When it glows orange, avoid it until it stops glowing. If you see portals and a line of light, back away from the lights so you don't get trampled. It will also shoot out fireballs that you'll need to avoid when it gets back onto the building.

The Mecha-Wiggler will then be bright pink. Shoot at it, and when it turns orange, be ready to evade fireballs again when it teleports. When the Mecha-Wiggler goes from pink to completely black, shoot it multiple time again. This time, the Mecha-Wiggler goes down for good, and you'll get Power Moon #1 (see below).

It will then be daylight, and the rain will stop. The Broodals will get away, but you've won...for now.

Power Moons 


1. New Donk City's Pest Problem - Defeat the Mecha-Wiggler (see above).

8. Inside an Iron Girder - Along the path to the Mecha-Wiggler, you'll find some wooden crates in front of a steel girder. Break the crates with your hat or with a Sherm, then go inside the girder. You'll find a Power Moon at the end.

9. Swaying in the Breeze - On the way to the Mecha-Wiggler, you'll see a Power Moon in mid-air near a swinging iron girder. Get to the end of the girder and jump when you're under the Power Moon to get it.

27. Shopping in New Donk City - Buy the Power Moon at the Crazy Cap Shop in the Metro Kingdom. Thankfully, the building for the shop is very visibly distinct.

34. City Hall Lost & Found - Inside the building, there is a pole above another pole. If you can make your way onto the higher pole and climb up, you'll eventually find a treasure chest. Open the chest with your hat to find this Power Moon.

Regional Coins


1-3 | 4-5 | 6-8 | 9-11 | 12-14 | 15-16 | 17-19 | 20-21 | 22-24 | 25-27 

Monday, December 15, 2025

PrinceWatercress plays Brave Fencer Musashi - Part 24 of 33


In this entry, we get the remainder of the Eyes. It won't be long until we're finished here.


The clone dolls carry their own little version of Fusion. They'll copy your moves like a mirror's reflection, but there's one thing they can't mimic at all: Lumina Rotation. Use that to kill them. Assimilating them will give you Clone. For 16 BP, you can press Circle to summon a decoy that will attract the enemies, and if you press Circle again, the decoy will explode.

The spikes in the next room are a bit faint, but they're there. You can melt them with the Fire Scroll. The chest in this room contains a BigStraw. Sell it to Connors.

In the next room, let the big white hulk of an enemy throw you upwards near the tall wall. You'll be able to enter the doorway there.

When you're finally up there, you'll be in an ice maze. Despite the close distance of the camera, it's easy to feel your way through and memorize your way through the area. There will be some coins and enemies that will act as landmarks.

Watch for the shadows on the floor in the maze. These indicate the locations of stone golems that will drop down and try to crush you like the Thwomps in the Mario games. If you can Assimilate them, you'll get Steel, which allows you to turn metal and destroy the spikes in this area by simply running into them.

The lower-left corner of the maze contains a Bincho Field. Break it to free Alchemist Leanman.

To beat the Musashi clones here, use Lumina Rotation. Not only will they be unable to perform the move, you'll meet the criteria of "May the unhurt have victory!" both quickly and easily. You can also use the Fire Scroll, assuming you're careful. You'll get the BlueEye for your efforts.

Now that you've got the BlueEye, it's time to make your way back through the maze. This time, however, you'll want to head to the door in the lower-left corner with the Steel ability. Use it to get past the spikes in the path. Follow the path from here and you'll be able to rescue Butcher Chops.

Head back down to the lower level and enter the right-hand door on the left side of the lower level. Use the BlueEye on the locked door here. You'll find Janitor Sloppy-Joe.

From here, double jump onto the stairs and stay on the upper level. You'll find the RedShoes, which happen to be the L-Shoes (Legendary Shoes). You can now walk on the slippery slopes here.

Head back into the right-hand door on the right side of the lower level. Now that you can walk up the slippery slope in here, you can open the chest at the other end. This contains a RedCloth which turns out to be E-Undies...Ed's undies. Ew. Give those to Connor at the pawn shop.

Head to the right from here. You'll enter another maze much like the one you had to go through earlier. If you see any discolored spots on the floor, those are the shadows of those monsters that will crush you.

There is a Bincho Field in the upper-right corner of the maze, which contains Musician Al Forte. Besides the usual benefit of an additional 5 BP, you'll add more music to the background music when you head back to the castle.

Head to the door in the lower-right corner of the maze.

There is a treasure chest in this maze, and it's B-Undies. It's Ben's Undies. Sell them to Connors.

The GreenEye door is in the lower-left corner of the maze. Head to the lower-right door to take on another Yeti. For this one, "May the clone have victory." Kill this thing with the Clone ability. It'll go down in one shot, and you'll get the treasure chest containing the GreenEye. Now you can head back to the GreenEye door and open it.

From there, follow the path. You'll be at the right side of the lower floor of the entrance. Head up the frozen stairs and you'll see a huge door. Unfreeze it with the Fire Scroll, then insert the three Eyes.

Thursday, November 13, 2025

PrinceWatercress plays Legacy of Kain: Soul Reaver - Part 24 of 28


Now that we have a brand new ability thanks to Dumah...let's use it!


1:26 - There is a statue past the bridge. Now that you have the Constriction ability, you can run around the statue and turn it. Doing this will allow you to open the door that the statue faces. If you see a circular trail around an object, you can use your Constriction ability on it.

3:36 - I use the Fire Rune to get rid of the enemies here, then get the Fire Reaver. From here, you'll need to run around the statue again to open...

4:38 - ...this room. Use the Fire Rune to take out the enemies here and get the health extension pick-up.

5:41 - Now for the fourth and final room. Take out the enemies here, too. Once again, I use the Fire Rune...if I can get close enough, that is.

It is possible to run around in the other direction and open these doors in reverse order.

7:10 - We're done here, so let's head back and get out of here.

9:07 - When you get out, you'll find a cutscene. You'll find out that you can finally face Kain. Drop down and head left, and take out the enemies as you go. When you reach the sundial, run around it three times so that the door opens.

13:01 - Be ready to take out more enemies when you get in. Go through the gate, and you'll find a door as well as a gash in the wall. There is also a teleporter nearby; make sure you go in there and activate it. From there, go back to the beginning of the game where you reached the Lake of the Dead from.

18:28 - You can run around the statue here and hit the switch to bring down different drawbridges. One of them leads to a hidden health extension pick-up!

Friday, February 21, 2025

PrinceWatercress plays Wario Land II - Part 24 of 51


This level is at least 90% level destruction.


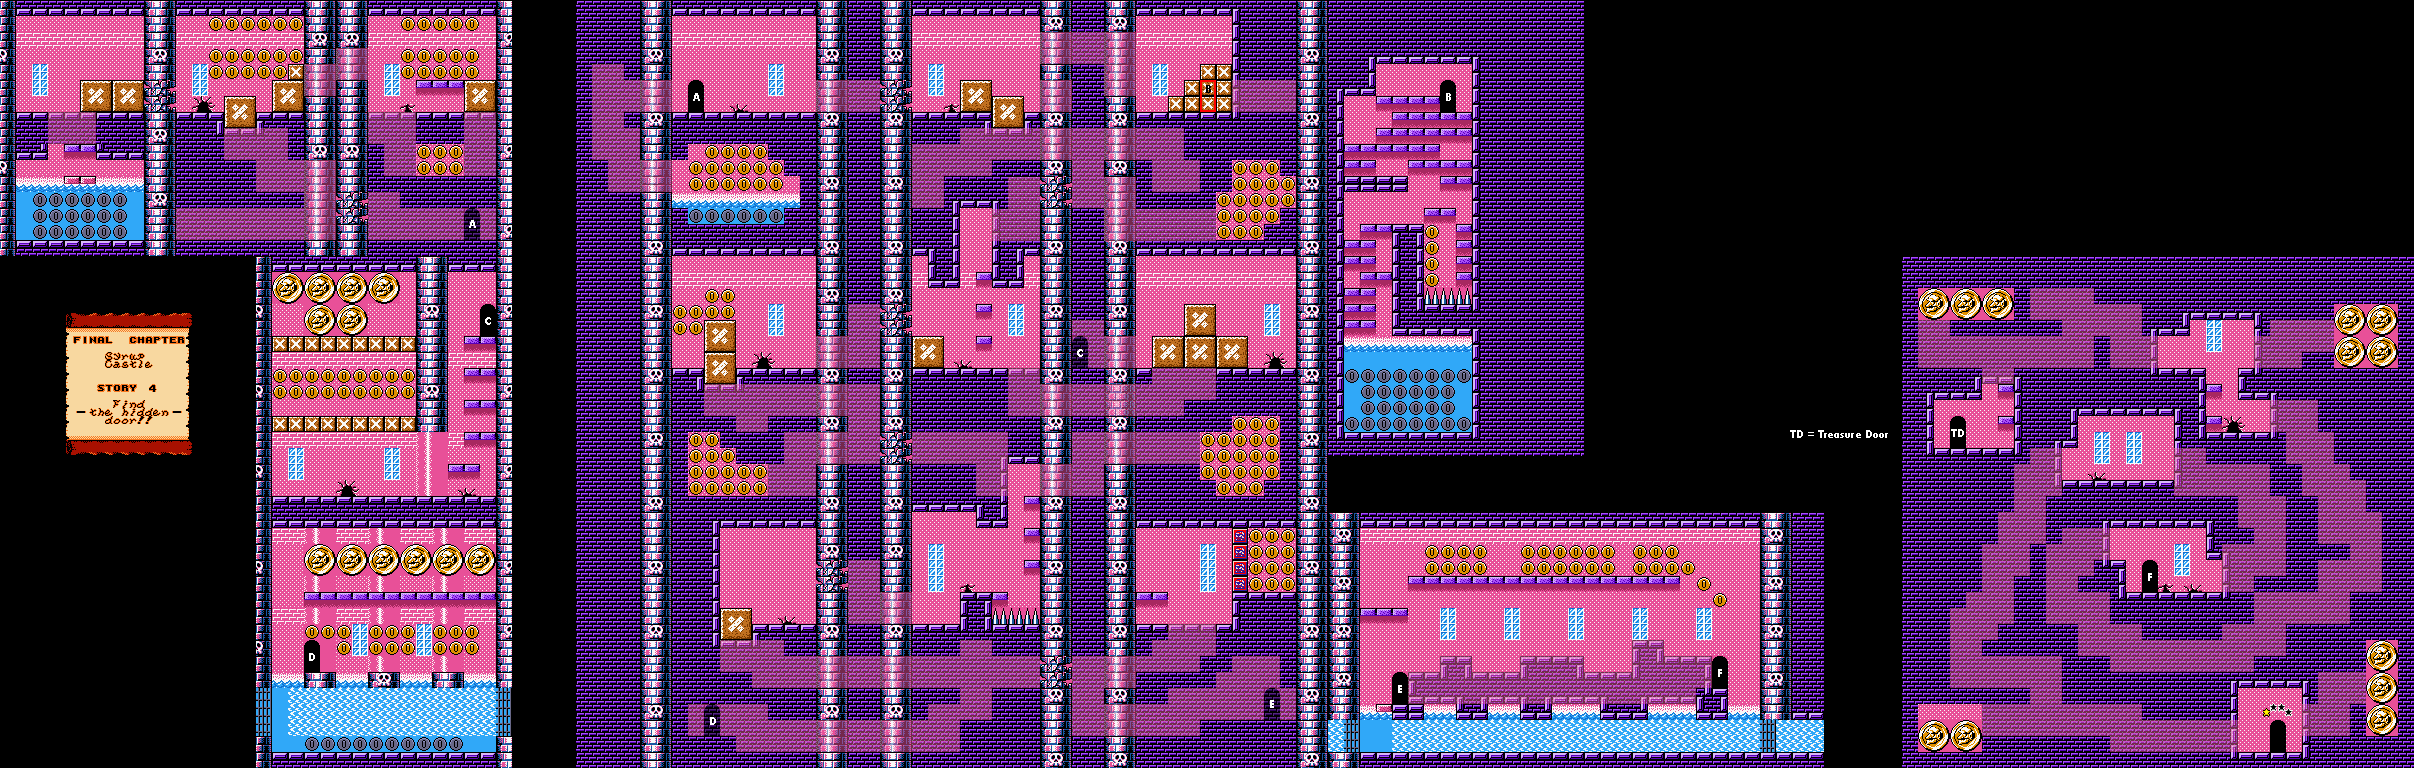
Final Chapter: Syrup Castle

Story 4: Find the hidden door!!


Be ready to butt stomp floors, tackle walls and jump into ceilings...a lot. You'll have to do that to find not just coins, but the rest of the level and a path to the exit, hence the name of the story.

There is one room with a guy with a hammer and a bunch of breakable blocks. Be ready to break some blocks and launch yourself above the rest in the Spring Wario form so you can get some big coins.

The treasure room, where you can win a cracked shield, is in the same maze as the exit. This maze will reveal itself to be a spiral-like path as you break your way through it. Be sure to get to the corners of this maze to get all the big coins in it.

Monday, December 2, 2024

PrinceWatercress plays Great Greed - Part 24 of 28


We're almost at endgame. Next stop: Bio-Haz's castle.


South of Burger is the Flower Field. Head there. Enter the building and talk to the man blocking the door with the Knights equipment equipped. He will let you through. Head north at the royal garden to come out through the other side on the overworld map.

From here, head east to Bio-Haz's village, which is the final village in the game. When you talk to the people, you'll find out that they are all fans of Bio-Haz and it is only because they have been sedated with "medicine" into compliance by Bio-Haz himself. Some of the houses are unenterable, as well. There is a large building to the far north as well as a warehouse in the southwest corner, but you won't be able to enter either of them...yet.

Enter the house to the west in the center of the village. The woman there will tell you that a child is sleeping in the next room. Enter the next room, and you'll meet Cup Cake. Despite her health being affected by the pollution in the area, Truffle has invented a device that will help with fighting Bio-Haz. To get it, we'll have to enter the warehouse south of town, which we will automatically enter.

You'll meet Truffle, who has found the essence of purity in Crater Lake, which will allow any weapon coated in it  to destroy Bio-Haz. Truffle will coat the Knights Sword in the essence (although the game doesn't completely tell you this), then she will tell you that Bio-Haz's castle in in the cave area north of town. Cup Cake will get dizzy and go back to bed, and you'll be left to head to Bio-Haz's castle alone.

Talk to Truffle again, and you'll find out that to get to Bio-Haz's castle, you'll need to enter the sewage treatment plant on the north end of town. You'll need to head in there next. Truffle will then join your party. You can open the chests in this room to get some really good healing items: A Fix, a Regain 3 and a Med 3-10. When you enter the northern building with Truffle, she will be able to open the door by de-rusting it.

The sewage treatment plant is fairly straightforward, and you'll also meet some new enemies. The Pincher has 1240 HP and is weak against Bolt magic, but it can cast Freeze 3 and Flame 4. It gives 521 Experience and only 17 Gold. Be sure to use Power if necessary, as Pincher will start defending when its health gets low.

Zapper is weak against Bolt magic and strong against Flame magic, and can cast Slip and Heal 3. Being a mermaid enemy, Zapper is topless in the Japanese version, but was covered up with armor when the game was brought to the West. She can also hit you with her tail, and she also cries when defeated. The Zapper gives 437 Experience and 130 Gold, and has a chance of dropping a Carbon Shield, which is useless at this point.

At the north end, you'll find a guard blocking the entrance to the sewers. This triggers a fight with another Dicey, but he is easily defeated. Once you stand where one stood, Truffle will be ready to help you enter, and you'll have a choice as to whether you want to enter or not. Once you select "Yes," there's no turning back, so be ready to save before doing this.

In the sewers, stay in the center of the room and just let the water and keep going south. The odd areas in the floor lead further down the sewers. Be on the lookout for chests, which will contain powerful healing items.

Froglegs attacks a lot, and while weak against Bolt magic, it is strong against Flame magic. At 1200 HP, you'll be fighting one of these things for a while. Defeating Froglegs gives 455 Experience and only 7 Gold, and a potential drop of a Chrome Shield, which you're not going to need. 

You'll soon reach the area leading to Bio-Haz's Castle, which also has new enemies. In this area, you'll want to keep heading east while moving around the thick dark lines to get to the castle. Along the way, Gum Drop will catch up with you and tell you that Candy has been captured and in need to rescue. After meeing Gum Drop, you'll soon find the castle.

Drak is powerful and can cast Fire 2, and it gives 610 Experience and 106 Gold upon defeat. It has the potential to drop a Duramet Shield, which is the best shield in the game.

Juggler is weak against Flame magic and strong against Bolt magic, and cast Speed on itself as well as fry you with Thunder 2. It gives 455 Experience and 478 Gold, making it one of the best monsters to face in the area if you need more experience and gold.

Sunday, September 22, 2024

PrinceWatercress plays Chrono Trigger (Super NES) - Part 24 of 70


Now that Slash and Flea have been defeated, it's time to chase after Ozzie...


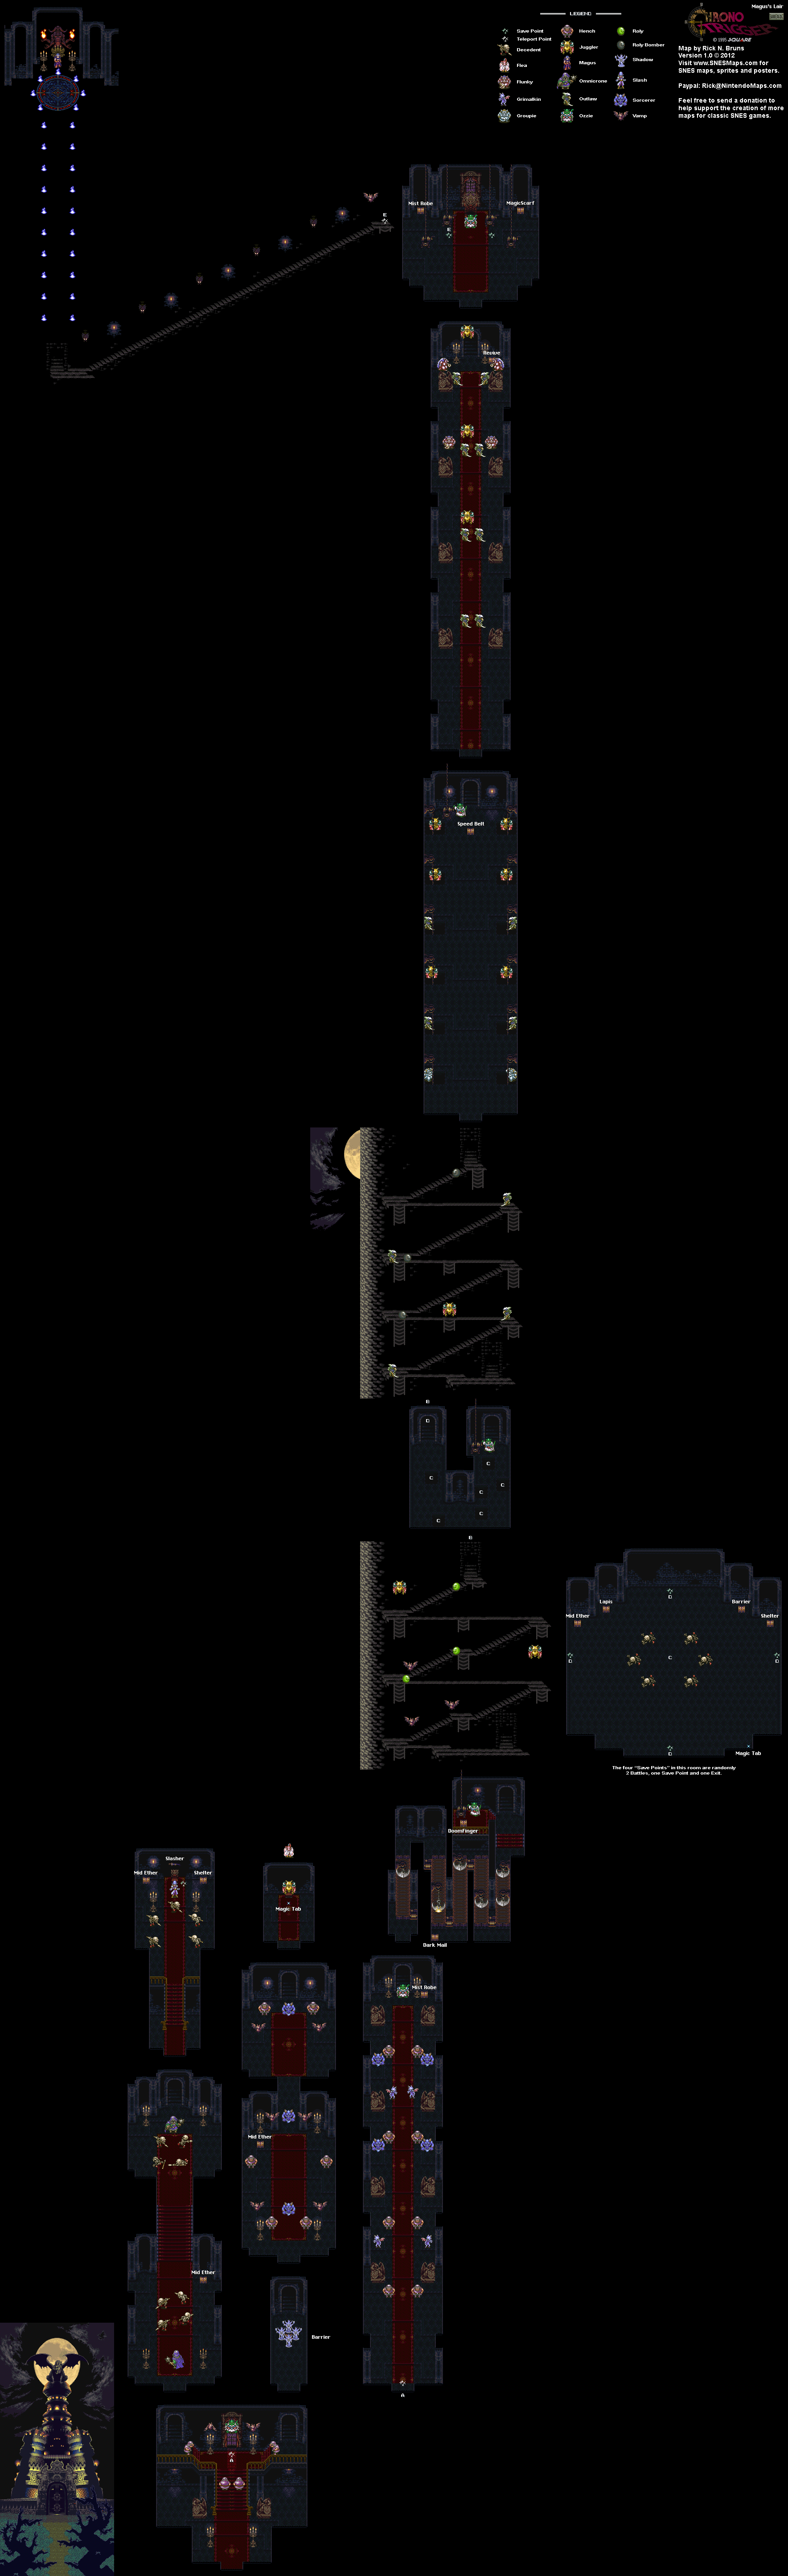
When you enter the save point in the entry room, you'll be taken to another area. Thankfully, you can go back if you need to leave Magus' Lair for any reason.

Throughout this first hallway, you'll be fighting Henches and Sorcerers, but you'll also be facing the Grimalkin, which are just a stronger version of the Diablos.

You'll then find yourself in a room full of conveyor belts and guillotine-like blades that move up and down. Ozzie will be on the other side of the room rotating a crank to make all of this run, and you'll need to move in the opposite direction of the conveyor belts just in case you want to avoid the blades, which will do quite a bit of damage if they hit you. Along the way, you'll get a Dark Mail for one of your main characters. When you reach Ozzie, Ozzie will run away, and you can get the DoomFinger, a more powerful weapon for Robo.

You'll then enter your first "Donkey Kong" section. Running into the Rolys will trigger a battle that involves any other nearby enemies. You'll also meet the Juggler for the first proper time here, having served as the fake Flea before. The Juggler is the enemy that switches between high physical defense and high magic defense, and when you attack it, you'll find out which defense is on. From there, you'll want to use the opposite kind of attack to take it out easily.

You'll then find another hallway with Ozzie at a crank. If you move into certain spots, you'll fall into a hole. The first time you do this, you'll have to fight six Deceased, but you can easily wipe them out with Lighting 2 or any powerful magic spell that does a lot of damage to all on-screen enemies. This battle is thankfully a one-time-only battle.

From here, there are four chests you can open for a Mid-Ether, a Lapis (which heals 200 HP for all party members), a Barrier and a Shelter, and there are four save points. Two of them are battles against fake save points that do absolutely nothing, another one is an actual save point, and the fourth is a teleporter that takes you back to the hallway where Ozzie is waiting for you. In the lower-right corner of this drop-off point is a Magic Tab, which I forget to pick it up. (I'll show if off in the next video.) All of the items can be collected only once.

When you catch up with Ozzie, he runs away again. You'll get another "Donkey Kong" section, this time with Outlaws (a stronger version of the Free Lancer), Jugglers and Roly Bombers. The Roly Bombers explode and do damage to all party members upon defeat, and if you don't kill the Outlaws, they will counterattack. If a Juggler is on-screen when that happens, they will both attack with Fire Whirl.

You'll then enter two more long hallways full of battles. The Groupies will attack you with swords and can also use Cyclone on you for more damage, while the Flunkies will shoot at you with crossbows. 

You'll then face Ozzie himself. If you want, be sure to open the chests with the Mist Robe and another Magic Scarf before talking to Ozzie to trigger the battle. Ozzie will shield himself with a protective barrier, and if you attack him, there will be consequences, so don't do it. Instead of attacking Ozzie, you'll want to hit the cranks. The first three will just open random holes in the floor, but the fourth will send him falling to his doom. From here, you'll get a save point as well as another teleporter...

Sunday, June 16, 2024

PrinceWatercress plays Ratchet and Clank: Going Commando - Part 24 of 54


It's time to take part in more of the Megacorp Games, evolve the Seeker Gun and get a Skill Point early.

First | Previous | Next | End

8:30 - The Amateur Circuit, the first of five hoverbike races in Joba and the easiest one. Watch out for the walls that dictate where you will be going at the beginning, and be careful with the boosts, as it an be easy to crash on this course.

I restart here a few times just to get a really good run. 

Winning this course will net you the Charge Boots, but if you can win in 2:27.0 or less, you can get the "How Fast Was That?" Skill Point, which is barely get in this video.

Double-tap R1 with the Charge Boots equipped to quickly dash for as long as you hold R1. You don't exactly stop on a dime with these, so be careful.

17:21 - From here, I start replaying some battles I've already . Here, I start busting out the Synthenoids and some other guns to destroy to get some experience.

22:16 - The Arachnoid Battle. Here, I bust out the Megaturret Glove and the Synthenoids to cause some heavy damage and win this battle fairly quickly.

Also, the Seeker Gun becomes the HK22 gun. This shoots three homing missiles instead of one.

Skill Points:

How Fast Was That?: Finish a race on the hoverbike course on Joba in 2:27.0 or less. You can get it in Challenge 3, but it is possible to get it in Challenge 1 if you know what you're doing.

Controls:

As Ratchet:

Control Pad/Left Analog Stick: move
Right analog stick: move camera

X:
  • Jump and double jump (hold button after double jump to use Heli-Pack or Thruster Pack)
  • Wall jump (near certain walls)
Square: strike with wrench
Circle: pull out/shoot currently equipped gun
Triangle: 
  • quick select (hold and use in conjunction with Control Pad or left stick to switch guns; menu can be customized in Quick Select on the pause menu
  • double tap to switch between two most recently equipped weapons/items
  • interrupt on-screen messages

Select: open map
Start: Pause menu
  • Control Pad: select option
  • X: confirm option choice

L1:
  • center camera behind Ratchet (tap button to center)
  • first-person view (hold button and use left stick or D-Pad to look around; let go of L1 to move camera back behind Ratchet)
  • Square: wrench boomerang
  • Circle: fire gun
  • R1/R2: zoom in and out (Pulse Rifle only)
L2/R2: strafe (hold while moving)
L3: see health and Bolt totals
R1/R2: crouch (hold down)
  • Square: wrench boomerang
  • X: high jump
    • long jump (hold crouch button and jump while running to perform)
R3: open map

In water:
  • Square: dive and descend
  • X: surface and ascend
  • R1: accelerate with Hydro-Pack

As Clank:

Control Pad/Left Analog Stick: move
Right analog stick: move camera

When hanging off platforms:
  • Control Pad/Left Analog Stick: move
  • Forward+X: vault up
  • Back+X: drop down

Square: punch
X: Jump (press and hold in the middle of a jump to glide with Heli-Pack)
Triangle: command menu (hold and use in conjunction with Control Pad or left analog stick to choose commands)

Tuesday, May 21, 2024

DeceasedCrab plays Earthbound - Part 24 of 53


In this entry, we help The Runaway Five out a second time, then suddenly find out that the department store has been taken over by aliens.


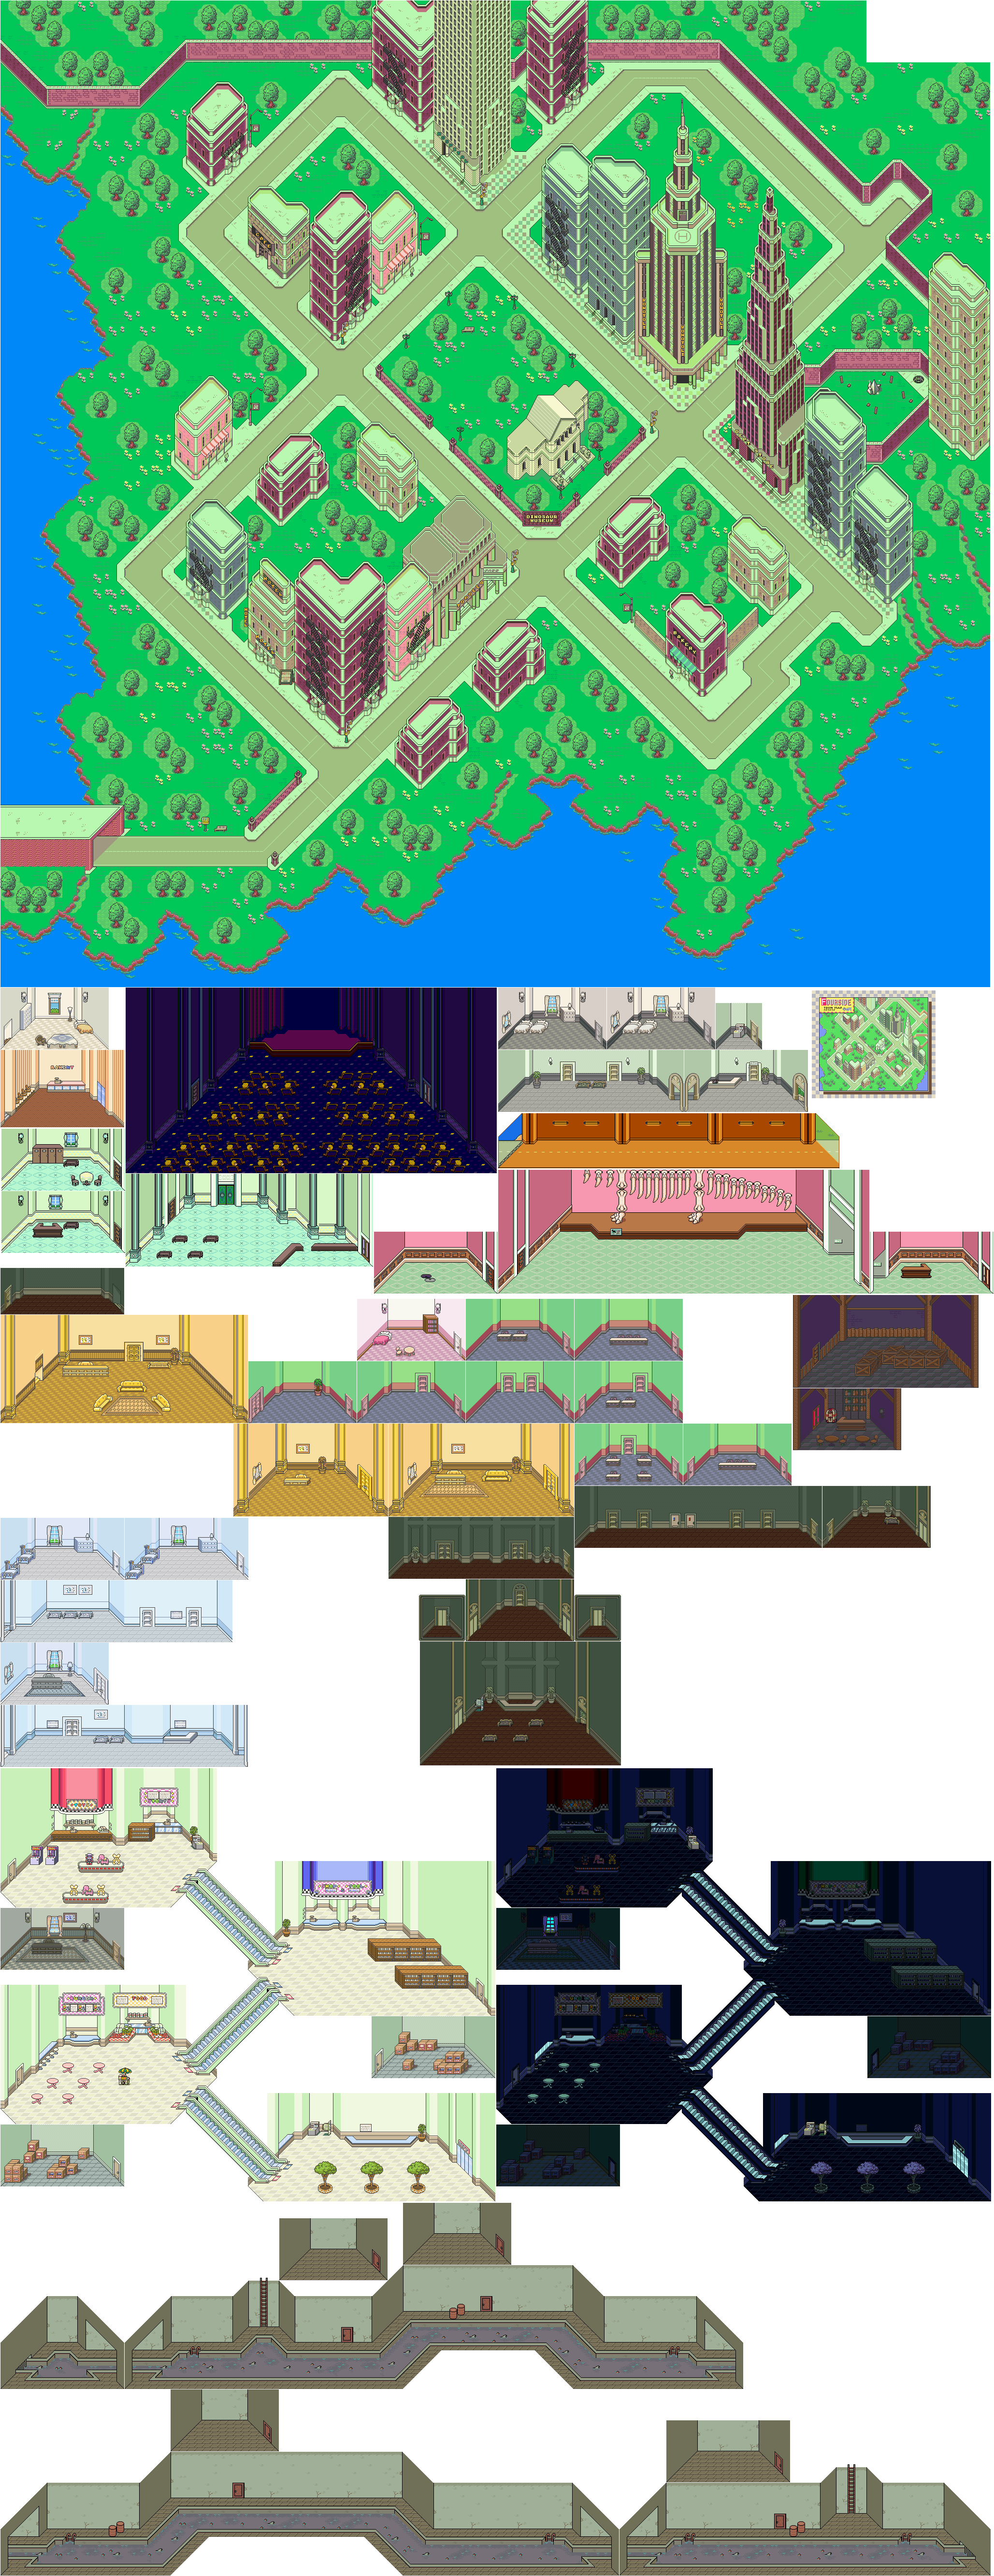
Now that you have the Diamond, head back to the Topolla Theater, talk to the owner of the theater and use the Diamond from behind her to pay The Runaway Five's debt and tear up their contract. The Runaway Five will once again thank you, then you'll be able to see their farewell performance. This time around, they perform with Venus, then the tour bus appears on the stage and carries the two singers and Venus away.

When you leave the Topolla Theater, one of the nearby NPC's will tell you that the department store is reopened. You'll need to head there next. 

The mouse on the entry level has the feeling that the lights will suddenly go out. Remember that for later. There is also a payphone and an ATM here, so you can call Escargo Express here if you need to.

Here, you can buy tons of items for healing as well as weapons and armor. There is a secret shop in the storage room on the second floor, west of the burger shop, where you can buy Bottle Rockets and Big Bottle Rockets.

On the third floor, you can get weapons and armor. Get the Chef's Fry Pan for Paula, and get the Gold Bracelet for anyone who still has the Silver Bracelet.

The fourth floor is the toys, arcade and sport sections. You can get Defense Ribbons as well as the two coins of Slumber and Defense here. One of the kids near the arcade machine wants to work as a programmer for APE. You can also find an ATM here. There is also an office here, but it is empty.

When you try to leave the department store, aliens will kidnap Paula and the lights will go out. You'll need to head to the office on the fourth floor, but you'll have to deal with enemies on the way there.

The Mystical Record can do a lot of damage with its charging attack. The Musica can put one of your party members to sleep, and can do a lot of damage with its electric shock attack. 

As long as you don't explore the floors around here, you won't have to deal with the enemies here very much.

When you reach the third floor, the aliens will try to contact you, telling you to head to the office on the fourth floor again. They'll also do it when you're near the office. Notice the "aaaugh" sounds; they're from the sign from when the department store was closed.

Tuesday, May 14, 2024

PrinceWatercress plays Drill Dozer - Part 24 of 28


It's now time to get the rest of the treasures in Area 2. I can't believe I originally missed that last one.


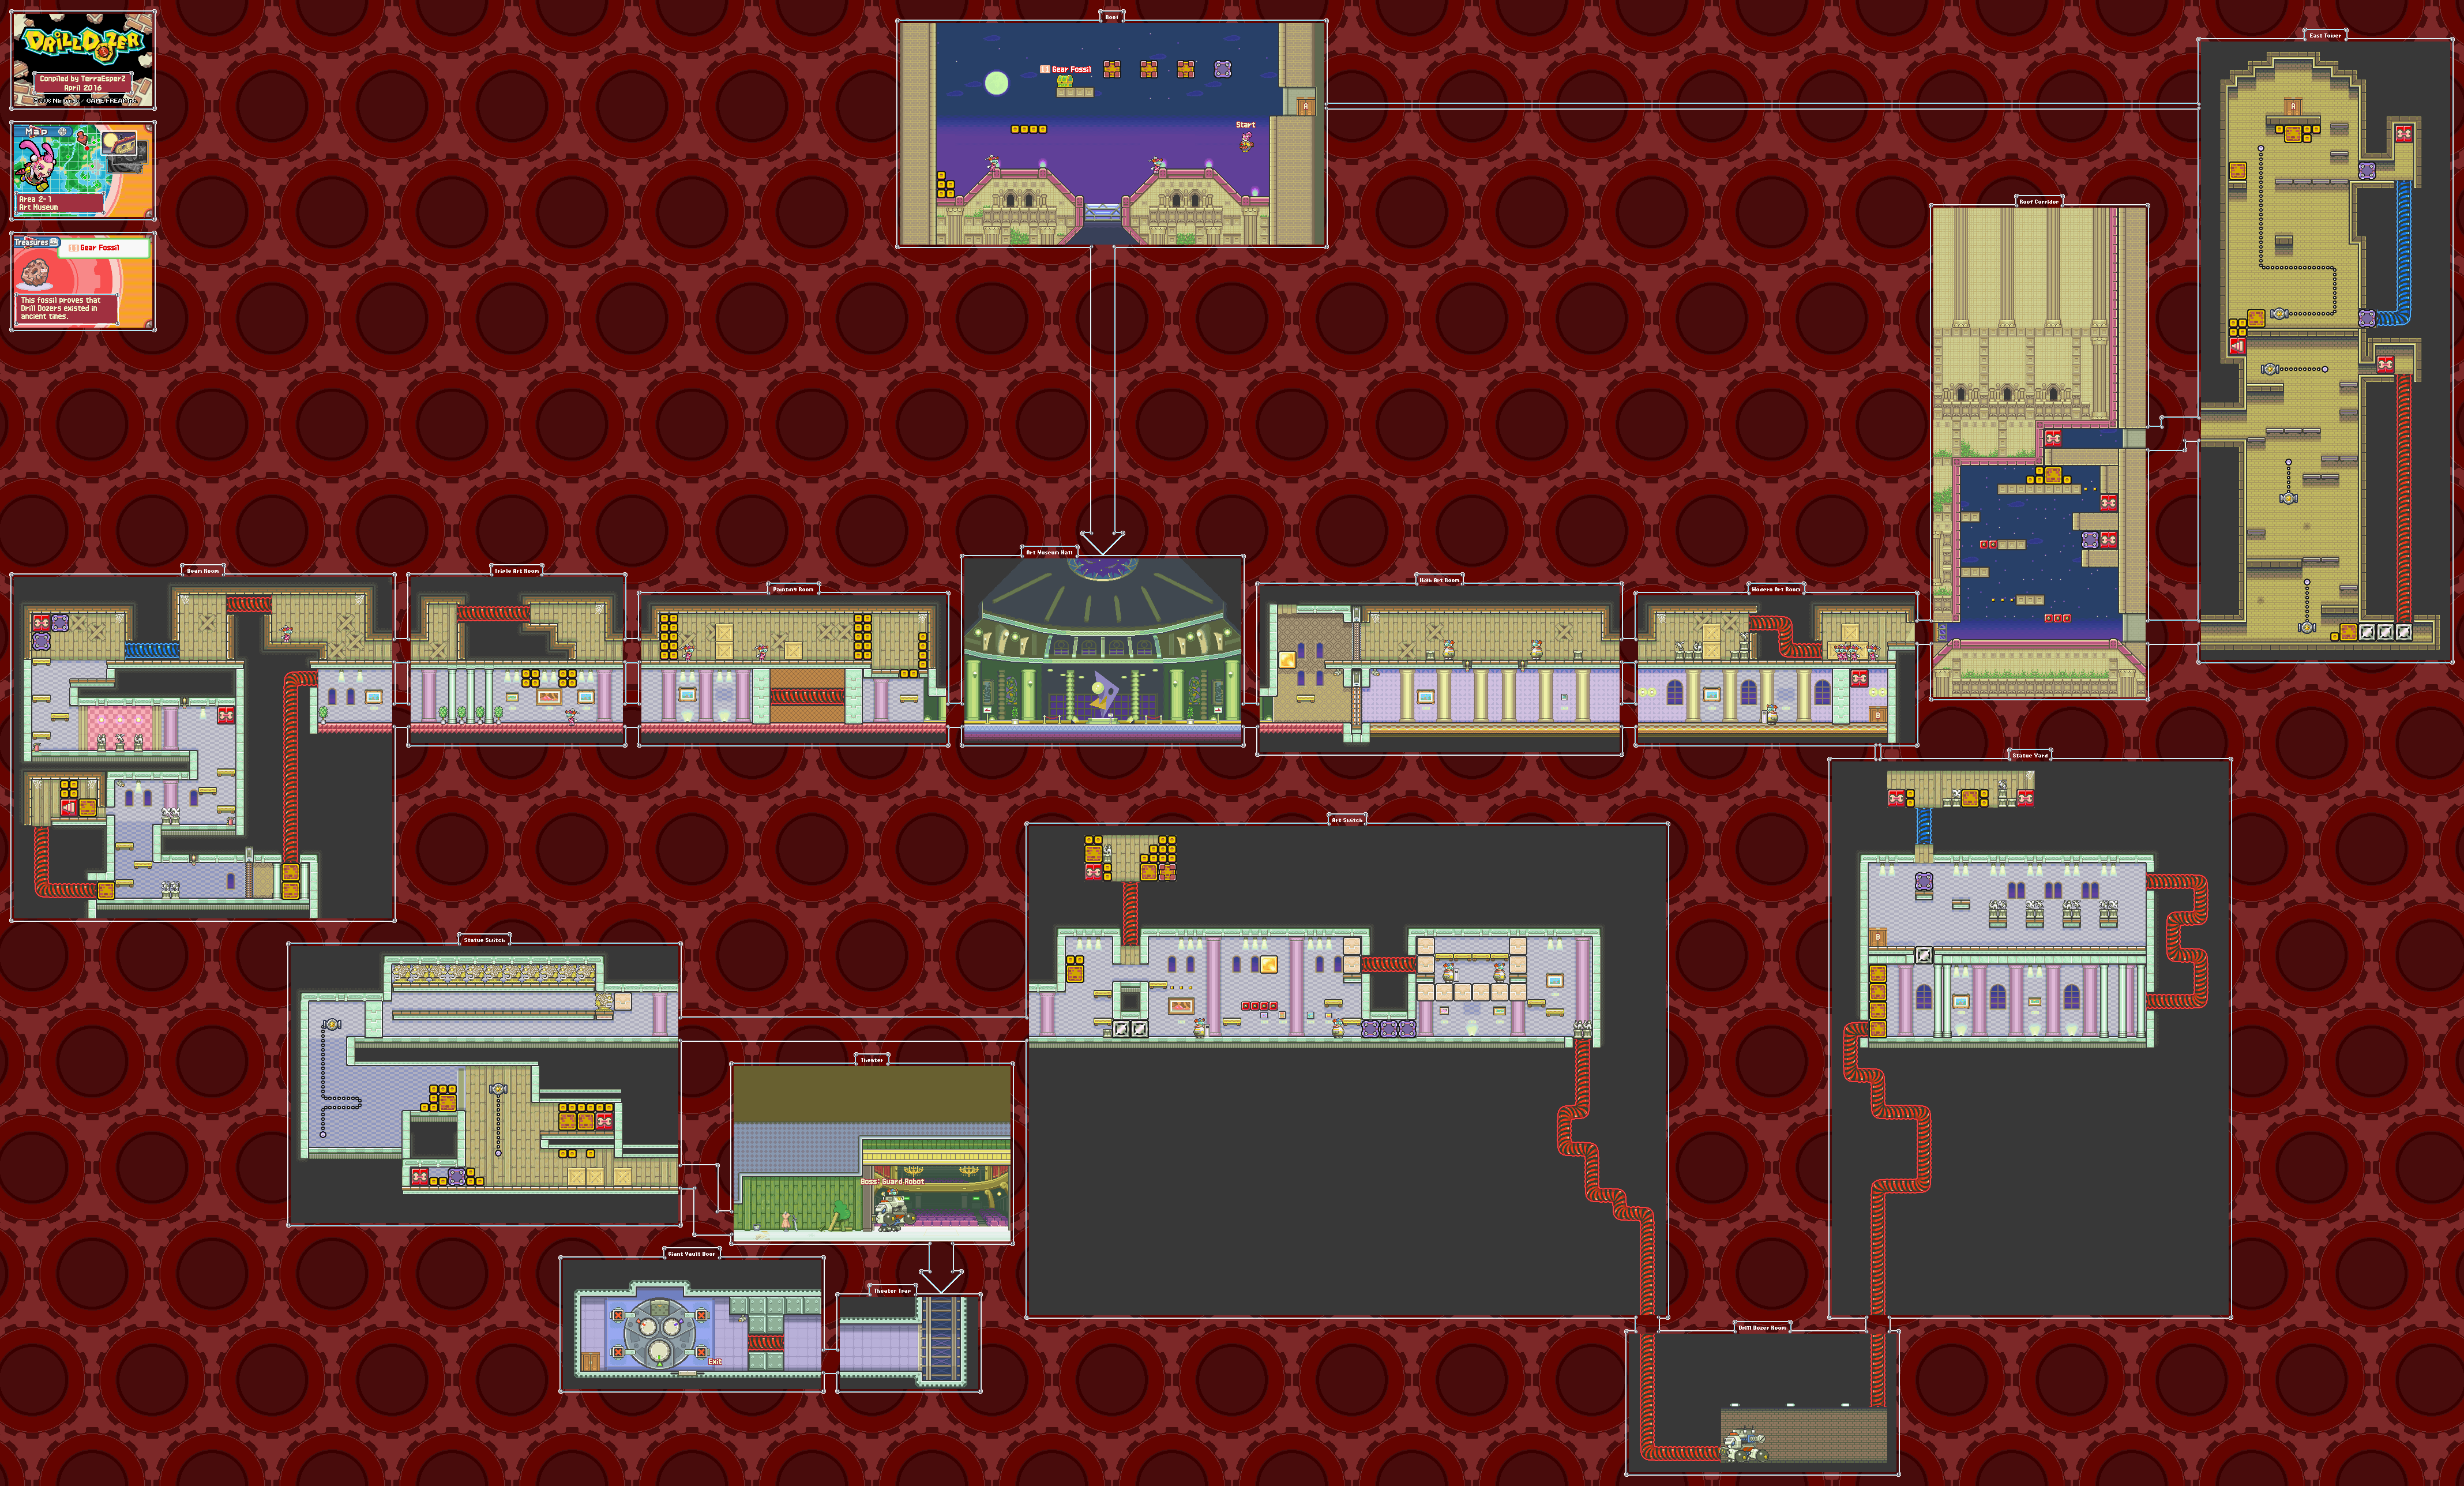
Area 2-1: Art Museum


5:41 - With the Drill Dozer fully upgraded, we can take this mid-air path and get the Gear Fossil.

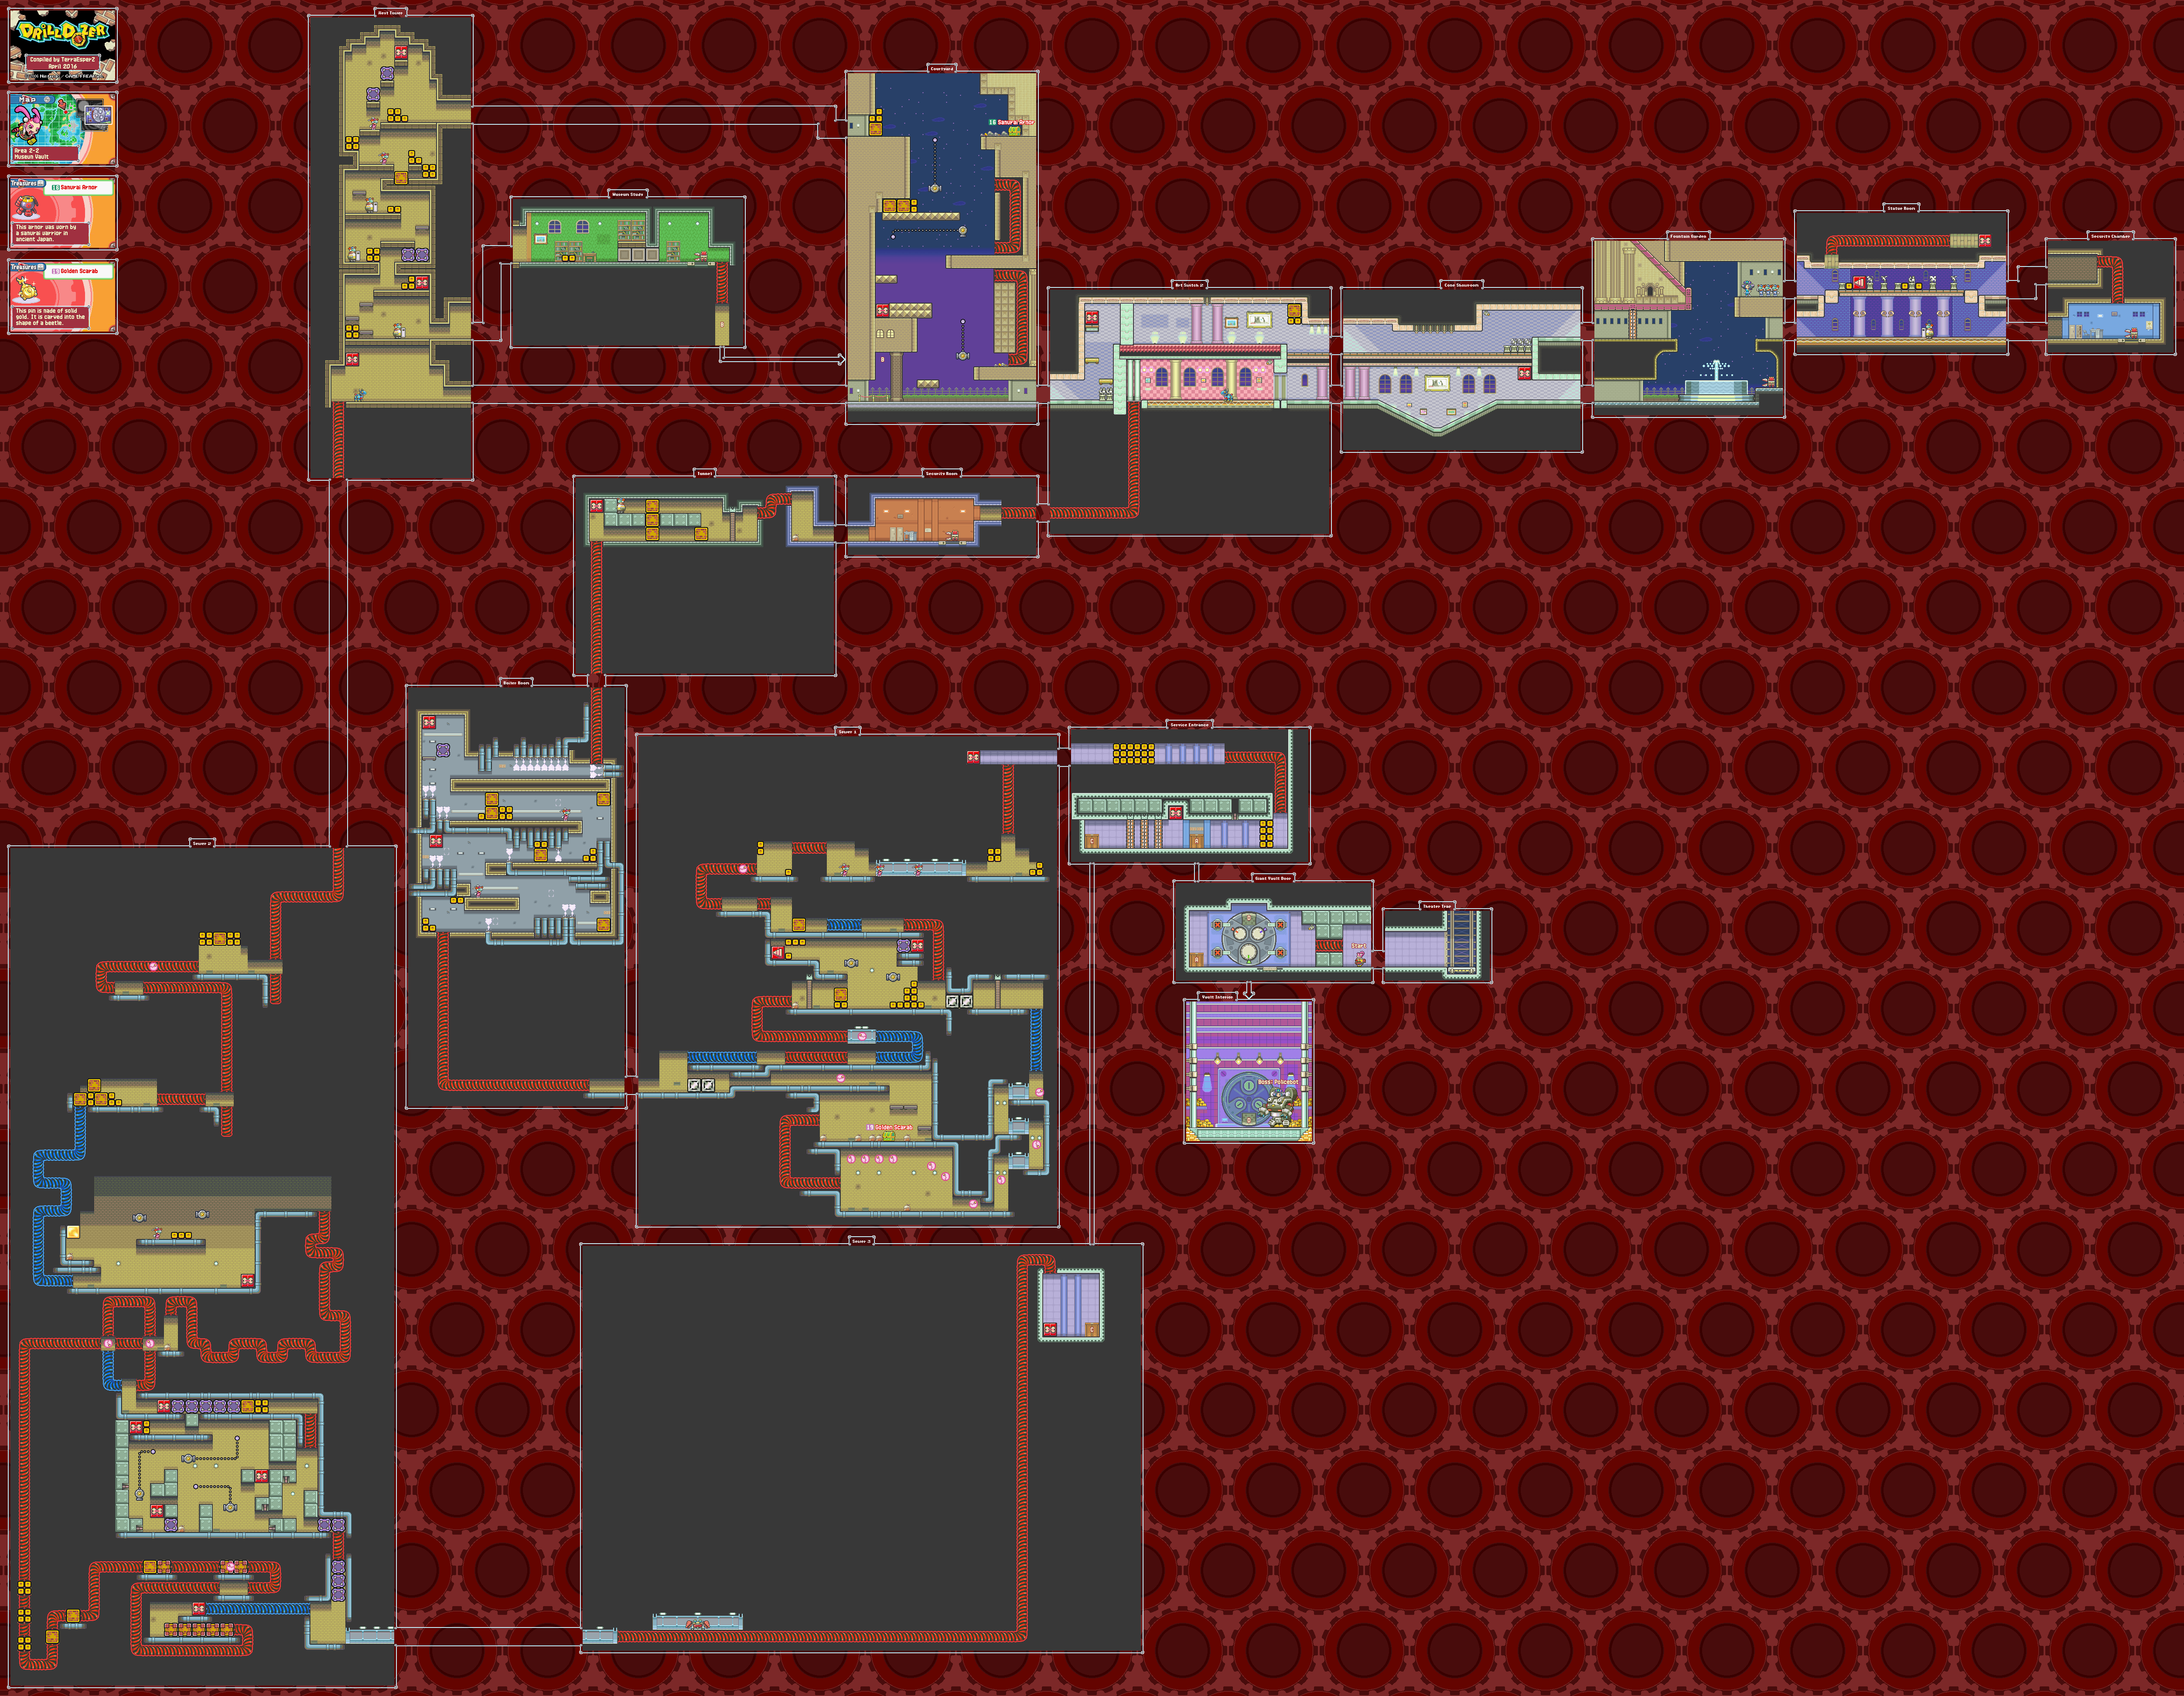
Area 2-2: Museum Vault


7:38 - Get second gear before taking the metal box path. From here, get ready to avoid those pink Pac-Man enemies to reach the Golden Scarab.

17:10 - I mentioned this cracked wall earlier in the Let's Play, but this time, I know it exists and I finally break it. Inside the wall is the Samurai Armor.

Thursday, March 21, 2024

PrinceWatercress plays Ka-Blooey - Part 24 of 25


After this, there's just five more levels to go.


Level 121

Move the medium bombs on the east slot tiles up one. Move the medium bomb on the north slot tiles right one. Move the medium bomb on the west slot tiles down one. Move the small bombs on sout slot tiles right one. (Step on the cracked tiles as you do this.) Detonate the small bomb on middle tile, then move down. Enter the teleporter. Move the medium bomb on slot tiles to the lower left corner, place the small bomb right of the medium bomb. Move the red guy to the small mine east of the slot tiles. Detonate the small bomb on the slot tiles. Detonate the medium bomb near the temple, then move down. Go to the slot tiles near the ice. Place the small bomb on the north tile, them place the medium bomb south of the small bomb. Detonate the small bomb, loop around to where the mine was. Hit both switches. Send the red guy to "south" mine. Hit the "north" switch. Send the red guy to the "west" mine. Hit the "north" switch and the "south" switch, then send the red guy to the switch near the medium aerial bomb. Hit the switch. Send the red guy into the water. Hit the "north" and "south" switches again, then detonate the small bomb near the small aerial bomb and move down. Detonate the small aerial bomb, then move down. Enter the teleporter. Send the red guy to the slot tiles in the lower left corner and detonate the bombs. Go to the small bomb near the "north" switch and detonate it. Detonate the small bomb north of the medium bomb. Detonate the small bomb near the teleporter. Enter the teleporter. Detonate the small bomb and move left.

Level 122

Hit the switch on the far left. Detonate the small bomb in the upper left corner. Move the medium bombs to the top center, center and bottom-most slots. Detonate the small bomb and move left. Hit the far left switch. Hit the "south ice" switch (which is south of the pair of ice tiles). Go to the right switch. Move the large aerial bomb on the slot tiles to the top center slot. Go back to the small aerial bomb, detonate it and move left. Hit the "north ice" switch (which is north of the pair of ice tiles). Hit the right switch. Detonate the small bomb and move down. Take the lower path to the right, go down, detonate the small bomb, then go left and up. Head to the upper right corner and go to the lower right corner from there, detonate the small bomb and move up. Head back to the upper right corner, detonate the small bomb on the rivet tile and move left. Head back to the start, detonate the small bomb and move left. The tiles spell "LISA."

Level 123

Hit the switch at the start. Detonate the small bomb and move down or left. Hit the switch at the start again. Detonate the small bomb and move right. Head to the small aerial bomb surrounded by ice tiles, then move left. As you avoid enemies, detonate the small bomb to the south followed by the small bomb to the west. Head back to the small aerial bomb surrounded by ice tiles and detonate it, then move up. Hit the upper right switch to change the red guy to a blue guy. Take the blue guy to the mine to the south near the lower right corner. Re-summon the blue guy with the upper right switch, then hit the switch near the blue guy. Take the blue guy to the switch on the lower right corner and hit the switch, then take the blue guy to the mine in the lower left corner. Hit the "blue guy" switch again for a cracked tile. Detonate the nearby small bomb and move left. Move down across the ice, detonate the small bomb, then move left. Head to the small bomb in the lower right corner, detonate it and move left. Detonate the small bomb to the left and move left. Loop around to the final small bomb, detonate it and move up.

Level 124

Hit the switch near the start. Move the small bomb to the upper left slot tile, move the medium bomb to the lower left slot tile. Go north, move the small bomb on the slot tiles near the teleporter one tile up. Detonate the small bomb near the starting slot tiles and move down. Detonate the small bomb on upper left slot tile, then move left. Detonate the small bomb in lower left corner and move up. Detonate the small bomb near the teleporter, move up and hit the switch. Loop around, detonate the small bomb on the slot tiles and move left. Detonate the swell bomb when it is at medium, then enter the teleporter. Hit the lower right switch, the lower left switch and the upper right switch, in that order. Enter the nearby teleporter. Hit the switch to turn the nearby medium bomb into a small bomb. Detonate the small bomb near the swell bomb when the swell bomb is at medium, then move up. Hit both switches in the upper right corner. Move the small bomb on the slot tiles to "slot tile 4." Hit the switch near "slot tile 1," move the medium bomb to "slot tile 3." Hit the "slot tile 1" switch again, move the small bomb to "slot tile 2." Hit the "slot tile 1" switch again, and make sure the medium bomb is on "slot tile 1." Detonate the small bomb on "slot tile 2" and move down. Hit the "right" switch, then hit the "left" switch. Move the small bomb on slot tiles to the upper left slot tile, move the medium bomb to the upper right slot tile. Detonate the small bomb on the upper left tile, then move left. Move to the "right" switch, and move to and detonate the small bomb surrounded by ice tiles - without using the cracked tiles - and move down. Detonate the small bomb near the medium bomb and move down. Hit the "center" switch. Detonate the small bomb on the right, then move up.

Level 125

Detonate the bomb in the lower left corner. Go back to the upper left corner. Place the large bomb in the middle slot tile, head to the right and watch for enemies. At the next set of slot tiles, place the medium bomb in the middle tile. Place the medium bomb in the upper right slot tiles in the upper right corner. Hit the far right switch, then move one small bomb to the two small mines and move another small bomb to the bottom between the small mine and the ice tile. Detonate the "bottom" small bomb and get rid of the spinning enemy, then detonate the small bomb near the two mines and move to the left. Hit the switch left of the medium aerial bomb, then hit the switch right of that. Detonate the newly-spawned small bomb, then hit the nearby switch that is to the left. Go back to the start and go right across the ice, hit the nearby switch and go back, then travel across the cracked tiles to the switch on the other side and hit the switch. Move up to the small bomb on the rivet tile and detonate it, move down, move back up, then move right to the small bomb near the other bombs, move downward and hit the remaining switch that is in the "up" position. Detonate the newly-spawned small bomb near the medium aerial bomb and move up. Detonate the small bomb near the other bombs and move down. The tiles spell "CLAR."

Friday, October 27, 2023

Jerry Martin plays Strong Bad's Cool Game For Attractive People - Part 24 of 53


With no money to fix the Fun Machine with, Strong Bad comes up with a Battle of the Bands to come up with the funds.


Talk to Bubs and mention the Fun Machine. He will fix it for "one big sack of cash," as it will require buying some parts, hiring some skilled labor, going back to night school and taking some tap lessons. (Don't ask about the last two.) Strong Bad wonders where he will get one big sack of cash, and Bubs proposes Strong Bad get a job as his Apprentice Grime Taster. Strong Bad says there has to be a more convoluted way, and comes up with a Battle Royal of the Bands where people can pay to listen to music and the funds will go to fixing the Fun Machine. Bubs, having experience in putting on concerts, offers to help him out, as he loves little side projects and is even knitting a winder vest with his feet (which is implied but not explicitly shown). Before Strong Bad can get any acts, however, he will need two things: security and celebrity judges, as no one will bother to come without celebrity judges involved and security will be need to monitor the cold ones stand, the mist tent and the port-o-potties. Bubs then hands a deluxe security jacket to Strong Bad, then asks him to get some poor sap to wear the jacket and find some celebrity judges so they can be in illegitimate business.

From here, the story really begins. Go to the right side of the concession stand and take the security sign, then run to the left and use the microphone near the brick wall. Another box will pop up, and examining it will reveal the Head Band for the photo booth. Go further left to the stick so you can put the stick on the map, then keep going left to find a "Eat at Bub's" sign. Click on it to pick up the star and put it in your inventory. You can also go further left and go up to the whale to make it part of the map, then go left even further to find the white picket fence. If you use the Black Metal Detector near the picket fence, you'll find the Hollywood Boulevard Boots for the photo booth.

Further left is the photo booth, and left from there is the hot car. Be sure to go up to both of them to make them part of the map, then go further left to get to Strong Badia. Be sure to go up to that as well so it is part of the map as well, then put the security sign on the fence and use the aerosol cheese on it. Strong Sad shows up playing the role of a snooty rock journalist looking for the next thing to be pretentious about, and focuses on "Security." If you talk to Strong Bad and mention the security jacket, then use the Devil option. Strong Bad will lie to him and tell him it is a tour jacket for the how new indie band named "Security" band in order to rope him into being concert security. Strong Sad will put the jacket on and show it off to everyone, then walk to Bubs' Concession Stand and finds out what is really going on, then gets made into a security guard, much to Strong Sad's reluctance.

OUTFITS:
- Sloshy Shirt: Use mic in downstairs laundry room.
- Leopard Print Pants: Examine couch in downstairs TV room.
NEW! Head Band: Use mic near brick wall to the right of Bubs.
NEW! Hollywood Boulevard Boots: Use the Black Metal Detector near the picket fence.

STRONG BAD ABUSE:
- Examine the microwave in the kitchen.
- Examine the Lappy Plug in Strong Bad's computer room.

LIMOZEEN SHOT GLASSES:
- Larry Shot Glass: Examine Luxa-Lounger.
- Perry Shot Glass: Use mic near Strong Bad's mailbox.

LIMOZEEN MANUAL PAGES:
- Cover: Use the Ordinary Light Switch in Strong Bad's computer room.

RARE BAND POSTERS:
- Two-o-Duo: Use the Black Metal Detector on the right side of Bubs' Concession Stand.

EXPRESSION OF AFFECTION:
- Talk to Strong Sad about bats twice.
NEW! Talk to Bubs about the Fun Machine.

Monday, April 17, 2023

PrinceWatercress plays Sly Cooper: Thieves In Time - Part 24 of 48


In this entry, we start rescuing Salim's associates in what is left of the Forty Thieves.


Rug Rats

Salim finally has a job available, and you'll have to play as him to start this job.

Salim's Stealth Slam allows him to lock an enemy in a magic lamp.

For this job, you'll have to spring Salim's associates free, starting with "The Panther" in a nearby tower. Thankfully, there is a vent system on the side of the carpet shop, and from there, you can make your way through the shop and into the tower.

Once you're inside, you'll find out that Salim can climb up ropes at warp speed with the R2 button. As you progress, however, Bentley will find out that the layout of the carpet shop has changed, but finds that there is a weak spot in the floor that can be opened up by dropping a pallet of carpets from a great height. From here, make your way up the room and press Circle at the Sly icon to cut the rope and drop the carpets.

Salim will go down with the carpets and end up in an underground passage. The scorpion nests from Episode 3 are back, and you'll need to take out the nests as well as the scorpions. Pressing Triangle while striking with Square twice will shoot fire, and holding R1 in mid-air allows Salim to paraglide with a magic carpet.

Once you make it to the ropes, use R2 to climb straight up the ropes and up to the tower. Here, you'll have to deal with more scorpions and scorpion nests. When you interact with the lever in the center of the room, you'll have to move the left stick up and down to create a rope to climb on. From here, hide behind columns to avoid the searchlights, and hold R2 to go up the crystal ropes before they break and the cobra poles before you get attacked.

At the top of the tower, you'll find The Panther, but he is being hypnotized with a Victrola. To disable the device, you'll have to hack the nearby terminal and play a round of Spark Chaser. Once you get the spark tot he goal, you'll free The Panther and finish the job.

Up In Smoke

You'll need to play as Bentley to start this job.

For this mission, you'll need to use the RC Chopper in order to drop smoke bombs so that the turrets on some of the buildings cannot see Sly and Salim. 

The RC Chopper moves on its own, and you'll steer it with the left stick. L1 lets you get a short speed boost, while R1 drops the smoke bombs. Use the boost to get away from the bombs so they do not explore on you, and use the compass to find the nearest target and drop a smoke bomb on it.

On the first phase, you'll have six targets. On the second phase, you'll have seven. On the third phase, you'll have eight. Between phases, use the compass to et to where you need to go.

After the third phase, you'll find "The Lion" being hypnotized with a Victrola. Interact with the terminal for another round of Alter Ego. Once to complete it, you'll free The Lion and complete the job.

Collectibles:

Sly Mask #49 - In "Rug Rats," there is a section near the end with three guards next to each other. Take them out to get the Sly Mask they are guarding.

Controls:

Left analog stick: move
Right analog stick: move camera
X: Jump and double jump (hold X on second jump for hover jets as Bentley)
Square: attack
Circle: 
  • interact (usually with anything that has sparkles) (Sly)
  • steal from enemies (from behind) (Sly, Bentley, any of Sly's ancestors)
Triangle:
  • knock enemies upwards (from behind; press Square to slam enemies down for stealth slam) (Sly, any of Sly's ancestors)
    • press Circle after knocking enemy upward to perform Silent Obliteration (Sly; replaces Stealth Slam; must buy on ThiefNet)
    • press Square for Stealth Slam (any of Sly's ancestors)
  • spin attack (hold to charge) (Sly)
  • throw bombs (Bentley)
  • Thunder Flop (in mid-air) (Murray)
  • spin attack (hold to perform) (Murray)
    • control with left stick (must buy on ThiefNet)
  • Raging Inferno Flop (in air; Murray; must be bought on ThiefNet)

L1: 
  • bomb aim (Bentley)
  • smoke bomb/flash bomb (Sly; must buy on ThiefNet)
  • aim/strafe mode (Carmelita; must hold button down)
    • left analog stick: move
    • R1: shoot (can only shoot in strafe mode)
L2:
  • hold for costume select menu (Sly)
    • hold down to stay in menu; use D-Pad or left stick to make selection
  • hold for weapon select menu (Bentley)
    • hold down to stay in menu; use D-Pad or left stick to make selection
  • hold for fist select menu (Murray)
    •  hold down to stay in menu; use D-Pad or left stick to make selection
  • hold for shot select menu (Carmelita)
    • hold down to stay in menu; use D-Pad or left stick to make selection

L3: activate compass
R1: run (hold while moving to perform)
  • Paraglide (Sly; in air; must buy on ThiefNet)
    • Square: Paraglide Dive Attack (during Paraglide; must buy on ThiefNet)
  • Adrenaline Burst (Bentley; double tap to activate; must buy on ThiefNet)
  • Clothesline (Murray; double tap and steer with left stick; must buy on ThiefNet)
  • Cane Push (Sly; double tap; must buy on ThiefNet)
R2:
  • Trigger Bomb (Bentley; must have bomb on field to detonate manually; must buy on ThiefNet)
  • Fast Climb (Salim; must be on rope, hold to perform)
R3: Binocucom
  • Right analog stick: move
  • Left analog stick: zoom in and out
  • R1: take picture (when applicable) (Sly, Bentley)

Start: pause menu
Select: map
  • Left analog stick: zoom in and out, switch between map and status
  • Right analog stick: move map
  • Circle: back

Sunday, February 26, 2023

PrinceWatercress plays Blood Omen: Legacy of Kain - Part 24 of 41


In this video, we explore Dark Eden and face some more members of the Circle of Nine.


1:15 - Use Repel as you go through this area; it will really help. There is a blood vial that you can get on the path. Once you're done here, you'll have the door to the east opened up.

4:26 - This feels like a mirror image of where we were earlier, albeit with different enemies.

6:22 - You can now go north once you go through the second teleporter. 

6:39 - I enter the left door first. When the enemies come at you, start swinging. Use the Mist Form to get the blood vial and rune triangle here.

7:26 - Hit the switch, then go through the door on the right. Watch out for the giant wall spikes as you go through here and get the blood vial

8:36 - After going through the now-opened center door, watch the spikes and spiked balls as you hit the switches. Use Repel to get to the last switch and exit to the north.

9:51 - The left door takes us to the Flesh Armor. This armor allows you to absorb the blood of the enemies that you fight, even if their blood is green or black. I just stick to the Chaos Armor. There is a rune triangle at the end of this path.

13:37 - The right door takes you to Spirit Death, which is like Control Mind but works on non-human enemies. Use your magic to get through the first part. There is another rune triangle at the end.

16:02 - Here, you will face Bane, DeJoule, Anarcrothe and Malek. Vorador shows up and fights Malek while everyone runs away and Kain gives chase.

17:46 - To beat Bane and DeJoule, you'll need to use Repel while you chase after Bane as he runs around and digs holes full of water into the ground and hit him with the Flame Sword. He'll eventually go down, and you'll be able to get his deer antler helmet as proof that you killed him. As for DeJoule, use Energy Bolt while Repel is active and shoot it at DeJoule. You'll soon be able to kill her and get her cloak. When you beat Bane and DeJoule, head east to the teleporter. You'll find out that Malek has been slain by Vorador and that Malek's helmet is intact. When you pick it and leave the room, you'll head to the Pillars of Nosgoth, where you can restore three more pillars. Now you must find Azimuth the Plains in Averness, but to do that, we must rise and we must fall, according to Ariel.

Monday, January 30, 2023

PrinceWatercress plays The Bugs Bunny Crazy Castle 4 - Part 24 of 27


After two whole stages' worth of overly long levels, the levels get smaller in Stage 12. Unfortunately, the game wants to drown you with enemies and there's a ton of brown.


Stage 12-1

Stage 12 takes place inside of a castle, and there's a lot of brown. The springboards in the floor are a darker shade of brown, but they blend in with the floor a bit too well. This really becomes apparent in Stage 12-8.

There are portraits of Taz in the treasure room and Taz banners in the main levels, and you'll also see Taz statues every so often. Oh, look, Taz is the final boss!

Also, this level has way too many Gossamers. It doesn't help that all the weapons are in rooms with two chests and you're forced to take a 50-50 shot at getting any (the other chest will always be a heart, which we haven't seen in a while). 

Stage 12-2

Thankfully, this level is a little more fair with the weapons. This makes it easier to take care of the Gossamers.

Also, the levels are smaller after two whole stages worth of levels that go way longer than they should. At last!

Stage 12-3

I had an easier time with this level than the first two. Who would haven thought?!?

Friday, December 17, 2021

HCBailly and JB play Secret of Mana - Part 24 of 41


We face another wall boss before finding Dyluck - and Thanatos!


There is a short hallway with two doors. The one on the other end will lead to a switch, which you'll need to press. By stepping on it, you'll be able to lower some spikes that block another switch. By hitting that switch, you'll be able to open up another door. However, it also lowers the spikes on the nearby upper floor, and if you enter it, you'll find a Sword's Orb. The Excalibur is effective on evil/non-living enemies, so if you want, you can leave right now, go find Watts somewhere in Northtown, get the sword forged and give yourself more of an edge here.

The door near the lowered spikes will lead to a spike maze. You'll need to hit the switch at the end to lower the spikes and enter the nearby double doors, but watch out for the Imps.

You'll soon face the Doom's Wall and the Doom's Eye. This boss is much like the Wall Face, but a more powerful. It can cast Thunderbolt on your party, while the eyes can turn your allies to stone with Leaden Glare, Silence your party with Confuse Hoops and heal with Cure Water. Once again, hit the jewel in the center opening - particularly with Earth Slide or Gem Missile - when it is exposed.

There is an attack that the Doom Wall can do when both eyes are down where one of your party members will be surrounded by rocks, moved over to the wall and buried with rocks for a good amount of damage. (I've never actually seen this attack, since I just always went straight for the kill on the center jewel of the boss.) If one of your party members is hit with this, be ready to heal them.

Beating the Doom's Wall give you the Whip's Orb. The Flail of Hope is effective on evil/non-living enemies. You'll also be able to continue north.

Immediately after the battle with Doom's Wall, you'll find Dyluck, who will immediately kill Purim and say that Thanatos needs her help. Randy strikes Dyluck to snap him out of his trance, and Dyluck will tell you to go through the door to the north and help Purim. When you do, you'll meet Thanatos, who tries to use Purim's life force and freeze Randy and Popoie only for Dyluck to use his power to revive Purim and break the spell on Randy and Popoie. You'll then fight the Vampire. 

Use Gnome's offensive magic on this boss much like you did the Doom's Wall. The Vampire can put your party members to sleep with Sleep Ring as he flies around, and he can also grab a party member and gnaw on them. Vampire can also cast Freeze and Energy Absorb on your party. When he is not covered by his cape, he will jump around and become vulnerable to physical attacks.

Beating Vampire will net you a Boomerang's Orb. The Red Cleaver inflicts on insects and other creature-type enemies. Unfortunately, Dyluck will be gone again after the battle.

Monday, November 22, 2021

PrinceWatercress plays Sly 3: Honor Among Thieves - Part 24 of 42


Two more jobs, and we'll be ready to save Jing King. In order to pull them off, however, we'll have to risk life and limb, both figuratively and literally.


The Rage Bomb works like it does confuses all enemies in the area into attacking each other, and can be use a useful bomb-type attack for Bentley. This attack does use special weapon energy, but if you can use it effectively, it makes getting away from groups of enemies easier.

A Battery of Peril

You'll need to play as Bentley to start this job.

When Sly meets with Bentley about the van, Bentley will mention that the old battery has lost its core, and that Penelope's RC copter has found a new battery. Bentley will be the one to find the battery (with the L3 button), while Sly will be needed to help with charging it.

Once you find the waypoint, you'll find the battery. Bentley has an idea, and as he and Sly entertain it, Carmelita shows up. From here, you get to play as Carmelita once again, this time to shoot at Sly. Sly will do nothing but run around the level; it's the enemies you'll need to worry about on that front. Don't forget to use L3 to locate him, as he can be pretty fast. Also, just like in all the games, shocking Sly stuns him briefly, so keep that in mind whenever you shoot and hit him. It is possible to corner Sly, but you won't be able to do it for long as he will give you the slip.

Once you wear down Sly's health bar, Carmelita will request back-up for extracting Sly Cooper, and at this point, you'll take control of Sly, who is now back on his feet. Use L3 to find a place to stabilize the battery, and use the Paraglider when necessary to get the most distance away from Carmelita as possible in as fast a time as possible. When you stabilize the battery, you'll have to fight some enemies. Wait for Bentley to tell you that the battery is stabilized, then take it to the safe house, place in the stabilizing chamber near the van and get away from Carmelita immediately, since she'll probably be closer to you now than at the first stabilizing point. Once you get the battery to the van, though, the job is complete.

Down The Line

You'll need to play as Murray to start this mission.

The Raging Inferno Flop is a more dangerous version of the Thunderflop. Just press the assigned button while in mid-air, and you'll create a wall of fire that burns enemies in the immediate vicinity as soon as Murray hits the ground.

When you reach the waypoint, you'll find a strongbox that acts as a junction box for the phone lines. As Murray cracks it open so that Penelope can re-route the phone lines however, he gets hit with some knockout gas, gets captured and gets tied to fireworks that are connected to a fuse that is lit and about to reach the explosives at any moment. Penelope, feeling responsible, uses her RC car in an attempt to get to Bentley before the lit fuse does.

You don't really have to do this, but if you want to give yourself an extra second, fall into the water at the start until you lose health. Also, your driving will have to be nearly perfect if you want to make it before the fuse does, as you don't get to overtake the flame until near the end. There are parts of the environment such as certain walls and obstacles such as rocks that will either get in your way or make it harder to move, and you'll need to tread carefully in a few parts (especially those snowy walls!) to make it to Bentley first. Thankfully, you can shoot down the dragon heads, the rocks and the rest of the enemies. Also, the RC can bounce at certain points if you're not careful, and that can be enough to lose speed briefly, enough to either make it harder to catch up or easier to fail the mission entirely. Whatever you do, use the guns on the RC car sparingly, as they can still overheat.

If you can make it to Bentley first, you'll save him moments before the explosives Murray is tied to can go off, and you'll complete the job.

After all this, we're now at the final job, where Operation: Wedding Crasher commences. Two groups will have to work simultaneously for this. As Sly, Penelope and Murray steal from General Tsao's treasure vault, Bentley will be waiting to load it into the van. Meanwhile, The Guru and the Panda King will have to dig an underground tunnel underneath the palace and sneak Jing King out. As they do this, Sly will have to ensure the vases in the foyer do not hit the ground, or else the security system will alert Tsao. From there, Bentley will use the Grapple-Cam to lure Carmelita into the palace and get her to take Jing King's place while the Cooper Gang makes a run for it with Tsao's treasure.

Controls:

D-Pad/left analog stick: Move
X: jump/double jump
Square: attack
Circle: use to interact with sparkles, steal from enemies (from behind; with Sly), grab objects and stunned enemies (with Murray; press Circle afterwards to grab enemy out of air and press again to shake them, or press Square to throw them)
Triangle:
  • charge up cane, knock enemies into the air (from behind; with Sly, use Square afterwards to slam enemy down/use Silent Obliteration)
  • drop bombs (Bentley)
  • uppercut (Murray; press Circle afterwards to grab enemy out of air and press again while holding enemy to shake them, or press Square afterwards to knock enemy out while in mid-air)

Select: access Gadget Grid
  • D-Pad/Left analog stick: select gadget/ability
  • L1, L2, and R2 buttons: assign gadget to button pressed; gadget can then be used with that button

Start: Pause/unpause
  • D-Pad/left analog stick: choose options
  • X: confirm choice
  • Triangle: back out of choice

L3: bring up waypoint

R3: use Binocucom
  • Left analog stick/D-Pad: look around
  • Right analog stick: move in and out
  • R1: take picture

R1: run (hold down)
  • use Paraglide (as Sly; hold down to use, must purchase first)

Right analog stick: move camera

As Carmelita:

  • Left analog stick/D-Pad: move
  • Right analog stick/D-Pad: move camera/aim
  • Triangle: toggle between strafe mode and free movement
  • Square: kick
  • Circle: mega jump
  • X: jump and double jump
  • R1: shoot

As The Guru:

  • L1 (hold): transform
  • Circle (in mid-air, behind an enemy): mind control
    • Left analog stick/D-Pad: steer enemy
    • X: jump off enemy and launch enemy forward
    • Square: attack

Grapple cam controls:

  • D-Pad/Left Analog Stick: aim camera
  • X: shoot/grapple with hook
  • Circle: distract enemies
  • Square: self-destruct (hold down)

Hacking mini-game controls:

  • Left analog stick: move
  • Right analog stick: aim and fire gun

As The Panda King:

  • Square: flame chop
  • L1: hold to load fireworks, release to attack with stored fireworks
    • Right analog stick: sweep over multiple targets

Monday, October 25, 2021

HCBailly plays Final Fantasy II AGAIN - Part 24 of 65


In this entry, we rescue Cid and Hilda. From here, there's no turning back.


Dreadnought


The Werepanthers (Wrpanther) can inflict Envenom on your party, and they can be pretty strong too, so take them out as soon as possible. Keep in mind that they have some good physical defense, but that you can hit them with the Were Buster.

Once you've gotten the treasures at the start of the Dreadnought, leave and use your Cottage, as there is a "no turning back" point in the Dreadnought.

You won't be able to use the Teleport spell to get out of here.

With every point of Strength you gain in the game, your Accuracy will go up by one percent.

The Thief's Gloves have a huge magic penalty, but they are very light and also increase your Agility by 10. Give it to a party member that's more focused on physical attacks than magic.

In the Famicom version, if you have another item that increases a certain stat and one of your equipped items is already boosting that stat, you won't be able to boost it any more with that second item.

Just correspond with the bars of the prison cell like you would a person, and you'll crack straight through them. Talk to Cid, and he'll tell you to throw the Sunfire into the engine of the Dreadnought. He'll escape along with Hilda (who is wearing a pink dress now) to the Airship. Once you rescue them, you'll trigger that "no turning back" point.

The Dark Bow can inflict Blind, but it has a poor base Accuracy and is only as good as your Strength stat. You also can't hold a shield with it equipped, either.

Monday, September 13, 2021

PrinceWatercress plays Teenage Mutant Ninja Turtles 2: Battle Nexus (GBA) - Part 24 of 25


It's time for some more racing fun with Race Mode. Here, we play through seven tracks in about twenty minutes and get through the meat of the mode.

Map 6

The green track gives you temporary invincibility and a speed boost, which makes it easier to pass through the other racers, especially when they're attacking with the red fields. Aside from that, watch out on the ramps that make up the first half of the race. If you get hit there, you're going to be slowed down tremendously. Also, watch out for that one spike pit!

Map 7

The electrical fields will shock you and stun you, so jump over them when you see them. Thankfully, using a green field will let you zoom right through them.

Also, holding Down while jumping allows you to flip.

Map 8

This time, you'll have to jump up walls while going up slopes. Because of these two walls, this course may take some practice to get through and get first place on.

Map 9

Now you're going to have bounce panels on the floors, too! Thankfully, there are signs that tell you that you can be upside down and race on the ceiling in those sections.

Map 10

The course floors look a little bit different, but not by much. Once again, you may have to practice this one to get first place on it.

Map 11

After being absent for a few courses, the gray tracks come back. Also, using all those boost tracks is essential if you want to get the lead and maintain it.

Map 12

For this one, the bounce panels on the floor come back with a vengeance, and you'll have to bounce across them to get through this race. Thankfully, while you will lose speed on those bouncy floor sections, so will your opponents, so keep control of your hoverboard and you should be able to ge through this one.

Tuesday, July 20, 2021

PrinceWatercress plays Bio Menace - Part 24 of 37


Despite being the centerpiece of this level, you can easily avoid the caterpillars. Just get to the top, grab everything and leave.

Killer Pillers

Believe it or not, you don't want to fight these caterpillars! Despite their large size, they do fly in a pattern. This makes it easier to just avoid them, take the platforms to the key, go up to the door, get the keycard and explore the rest of the level to rescue the hostage and get out. You can destroy the caterpillars, but it is not recommended.