Part nostalgia-bomb, part note-taking and part FAQ, what started in GameTrailers as a video game blog is now on Blogger. This blog is a look back at video games, both popular and obscure, from the video game industry's infancy all the way to the previous console generation.
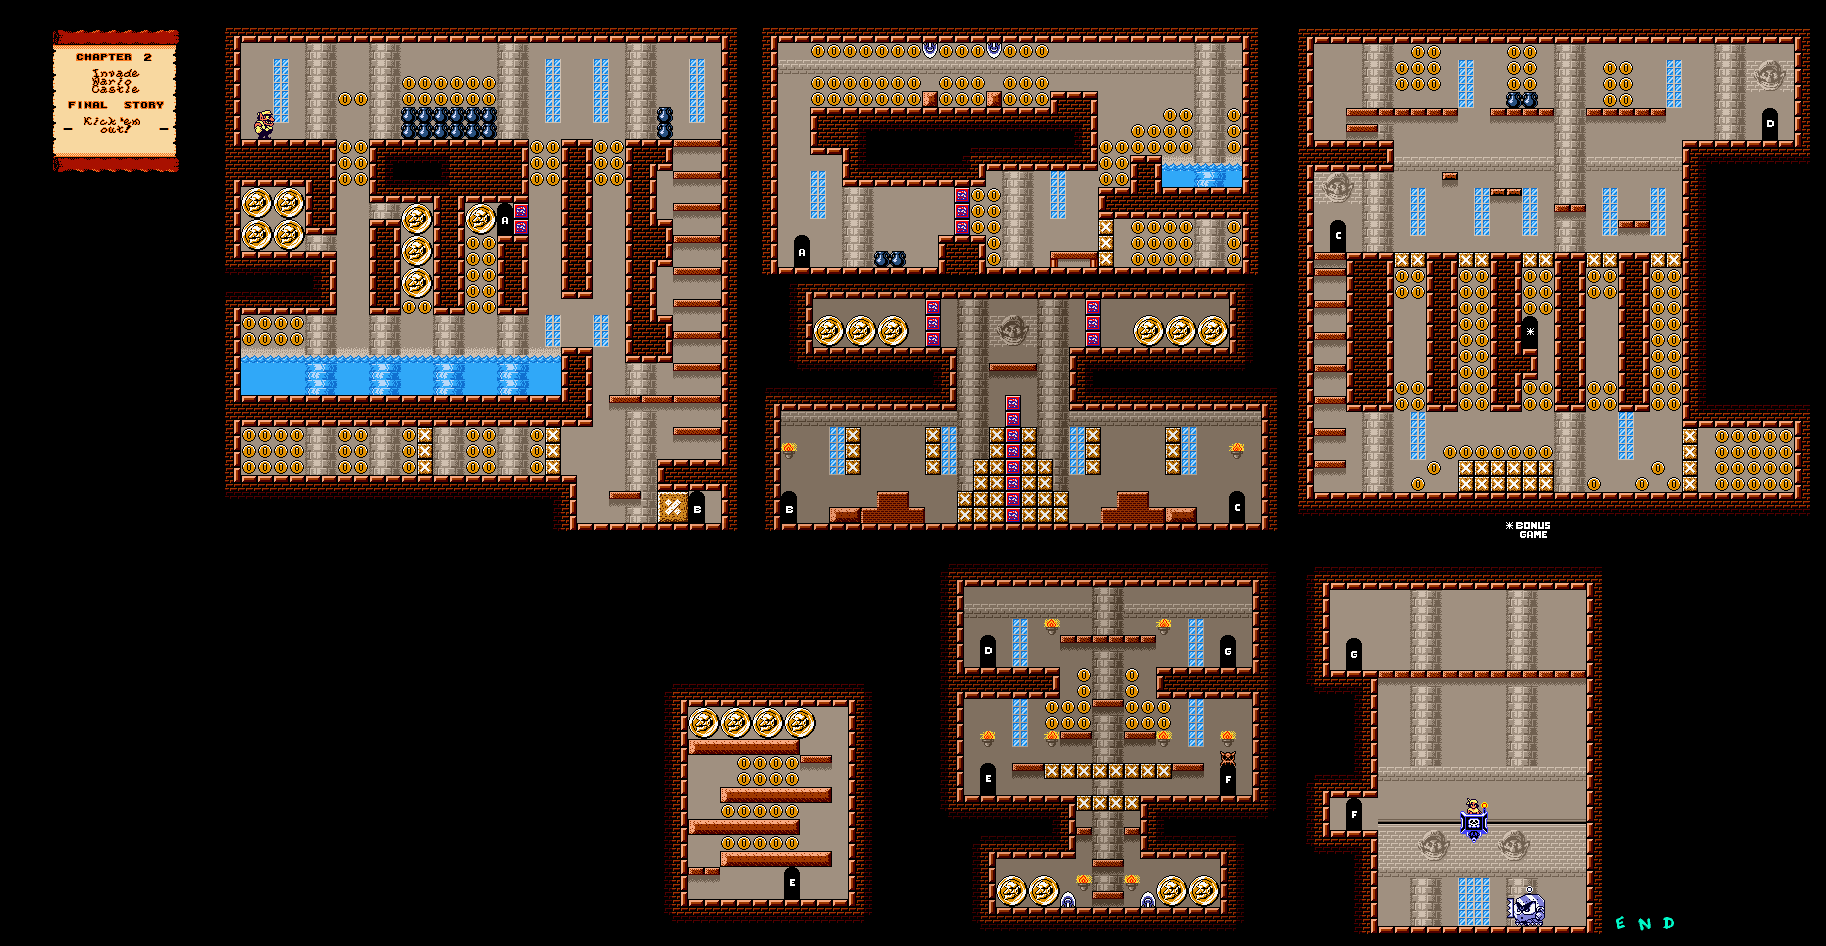
It's time for the fourth and final parts level of the game, and not only is this one much easier, but this one is a lot more fun due to beating things up as a kangaroo.
For the fourth and final part of Evo's final shell suit part - the legs - you'll need to take control of a kangaroo and beat up a few animals in boxing matches, complete with a "legally distinct" Rocky theme clone.
The first animal to beat up is a camel. Get behind him and punch away, and move and jump away when he turns around so you don't get spit on. You'll need to knock the camel out three times, and if it takes more than one round, it won't count against the total. Energy will pop up in the far right every so often; pick it up when you need it.
The second animal is a super camel, which is a camel with a cannon. The same strategies apply as with the regular camel, but you want to make sure the cannon isn't facing you so you don't get shot. Also, the camel will teleport; if you see the sand clouds forming around the camel, get away and move towards the camel's new location while taking care not to get destroyed. Three knockouts will do the super camel in.
The third and final animal is a kangaroo. You'll want to move around in a circle while jumping, get some shots in, and try to get behind the kangaroo as you punch it. The other kangaroo will always move around for a bit before coming after you, and when that happens, move and jump away to avoid getting punched. It helps to get a bit of distance and move and jump around a lot so you can see the other kangaroo coming. Trapping the kangaroo near a wall or a corner definitely helps with getting some extra damage. When you knock the other kangaroo out three times, you'll beat the level and get the legs.
If you've collected all of the Power Cells in the game, your shell suit will be gold instead of silver.
You'll need the Builder Helmet and Builder Outfit for one of the Power Moons in Metro Kingdom, and you'll need to spend Regional Coins to get them.
When you meet the Sand Kingdom tourist in the Cascade Kingdom, you'll get a clue where his next destination is where food is central to the experience. This is the Luncheon Kingdom, and you won't be able to head there until later.
Power Moons
Metro Kingdom
39. Rewiring the Neighborhood - There is a building near the Outdoor Café checkpoint guarded by one of the citizens. If you're wearing the Builder Helmet and Builder Outfit, you'll be able to get in. You'll need to find five Moon Shards by flying around the pylons near the end to get this Power Moon.
40. Off the Beaten Wire - In the same area where you get Power Moon #39, there is a building you will go over as you zoom across the pylons. If you get out of the pylon midway through at the top of the building, you'll find a few crates, and one of them will contain a Power Moon.
Cascade Kingdom
19. A Tourist in the Cascade Kingdom - You'll need to get the "A Tourist in the Metro Kingdom!" Power Moon first, then head to the Cascade Kingdom. Meet with the tourist from the Sand Kingdom
Level 30 takes you to Hero, which is the final rank. At Level 30, all of your stats will have blue bars and will be at maximum. From here, you won't be able to build Musashi up any further.
Farmer McRice is the guy with the tall hat, the scythe, the green shirt, the brown pants and the sandals. Talking to him will give you a clue: there is a part of the forest where it only rains on Skyday. Hmmmm...
Head to the part of the forest where all those pipes were. There is a climbable wall you made with the Earth Scroll that takes you a Wind Crest. Climb up that wall and head to the Wind Crest. At 7:00 on Skyday, use the Wind Scroll on the Wind Crest.
No turning back now.
You'll be at a beautiful sky fortress of sorts. This is the Tower of Sky. The water that drops down from the fountain at the bottom explains why it rains (maybe). Equip the Earth Scroll, then use it to hit the four Earth Scroll switches. You'll have to jump back to the spinning platform in order to reach all four of them.
After hitting all four Earth Scholl Switches, you'll open a door at the base. Use the Water Scroll to get into the door, then equip the Fire Scroll and light up the bases with the Fire Scroll symbol. At the top, you'll find the Sky Scroll, which allows you to fly in the air for a limited amount of time. (In Musashi's Book of the Five Rings, this was Air.)
After getting the Sky Scroll, you'll reach the Thirstquencher Empire's Soda Fountain. A pipe will latch on to the Tower of Sky, and you'll be greeted by Colonel Capricciola. The Colonel wants Lumina, but Musashi refuses to give it to him. Capricciola asks him if he'd rather lose either Lumina or Princess Fillet. He leaves as Musashi tries to go after him, and the pipe that latched on to the Tower of Sky sucks the Binchotite out of it, causing it to completely lose power and crash land in the forest. Musashi travels along the pipe to enter the inner workings of Soda Fountain.
Once you enter Soda Fountain, equip the Sky Scroll. The chest at the beginning is a Memory Box. Charge up the Sky Scroll, then press and hold X to float. You have until the charge meter runs out to get to the next piece of dry land before falling and hitting the electrified water below. For best results, you'll want to tap the direction you want to fly towards instead of holding the direction, as holding the direction will cause you to go too far into one direction and makes it a lot easier to slam into the electrified walls.
It won't be long until you have to avoid rotating spiked walls and electrified walls. You'll have to be quick as well as accurate to avoid taking damage and being knocked out of the air and make it to land.
The chests here only contain healing items. Even if you don't want or need the items, you're still going to need to open them and take the items inside to get credit for one of the Special action figures.
The next section is a rotating tunnel with spikes. The chest at the beginning contains a W-Gel. The first part isn't that hard, but it isn't until you meet the helicopter enemies and the spiked walls. Use the Sky Scroll when you need to, and make sure you don't get shot down.
You'll then meet Ben, one of the two bell thieves from earlier, who says that he is the leader of Leader's Force. Ben will fly around with the helicopter blade strapped to his back and throw bombs. There are a few safe spots, but you can also use the Sky Scroll or stay on the southern end of the room. Not only do the bombs land in the same place, you also get the same safe spots and the bombs explode in the same order every time.
After the bombs explode, he'll drop to the ground and throw shurikens and axes at you before going in for a dashing sword slash. Use your advanced techniques on him to do more damage, as Ben will be vulnerable when he is on the ground. Or you can just use Rumparoni-SP to do as much damage as possible in the least amount of time. That works, too. Get in a few hits, then back away and stay on the move to avoid each attack, then get one or two hits in with Lumina. When he returns to the air, his attack pattern will repeat.
Once you beat Ben, you'll be able to continue and save your game.
The first room has a couple of penguins and a bunch of coins to collect. You'll need one of the penguins to break the enemy blocks and reach a room with more coins. You'll need to be zapped by the Wizard Goon to become Small Wario so you can high jump and reach the easy-to-miss area to the left of the pool of water. Watch out for the retracting spikes!
Be careful in the room full of pelicans. While you'll need them to get rid of the enemy blocks at the top, you'll be dealing with pairs of pelicans at close range, and you will be spit on if you try to handle two at once. Open those up, then leave and re-enter so you're not losing a ton of coins.
There are some big coins under the room leading to the boss. Once again, watch out for the retracting spikes.
The treasure room is above the second set of breakable blocks in the room before the boss entrance. Beating it nets you what looks like a crown or a knight's helmet.
To beat Captain Syrup, you'll need to high jump over the robot Spear Goon. If it runs into you, you'll be launched upwards into the air above the boss battle, and you'll have to go back to the boss and start the whole battle over. It is fast at first, but it slows down over time. When it stops completely, its weapon will be up. Tackle it as Captain Syrup tries to recharge it. After this, it will stomp the ground. Be airborne when it hits the ground so you don't get stunned. You'll have to repeat the process twice. After the third hit, you can grab the robot Spear Goon and throw him at Captain Syrup, but it is anything but easy, as Captain Syrup will try to shoot down electrical balls that travel towards you in an attempt to shock you once they hit the ground. If you get hit, you'll have to face the Spear Goon again. At least you can take your time grabbing the robot Spear Goon, as it can be hard to pick up and it only revives if you miss Captain Syrup. Just one throw into Captain Syrup will do it, and you'll soon get your second ending, where Captain Syrup and her goons are booted out of the castle and Wario goes back to bed. At this point, you're 60% of the way through the game.
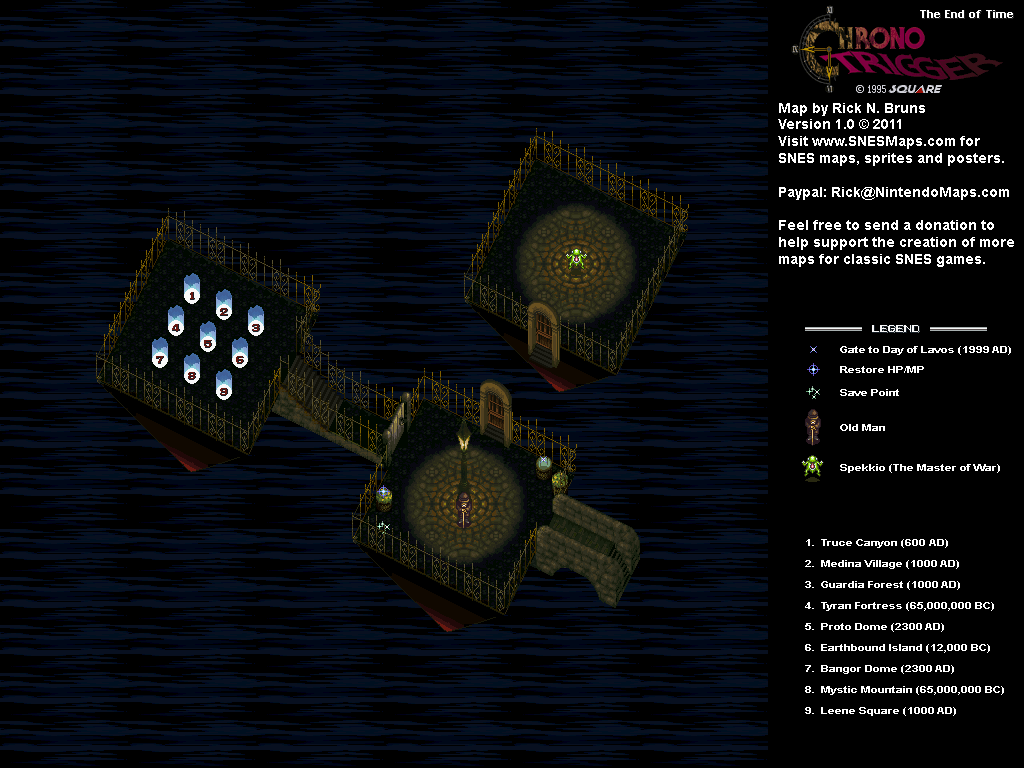
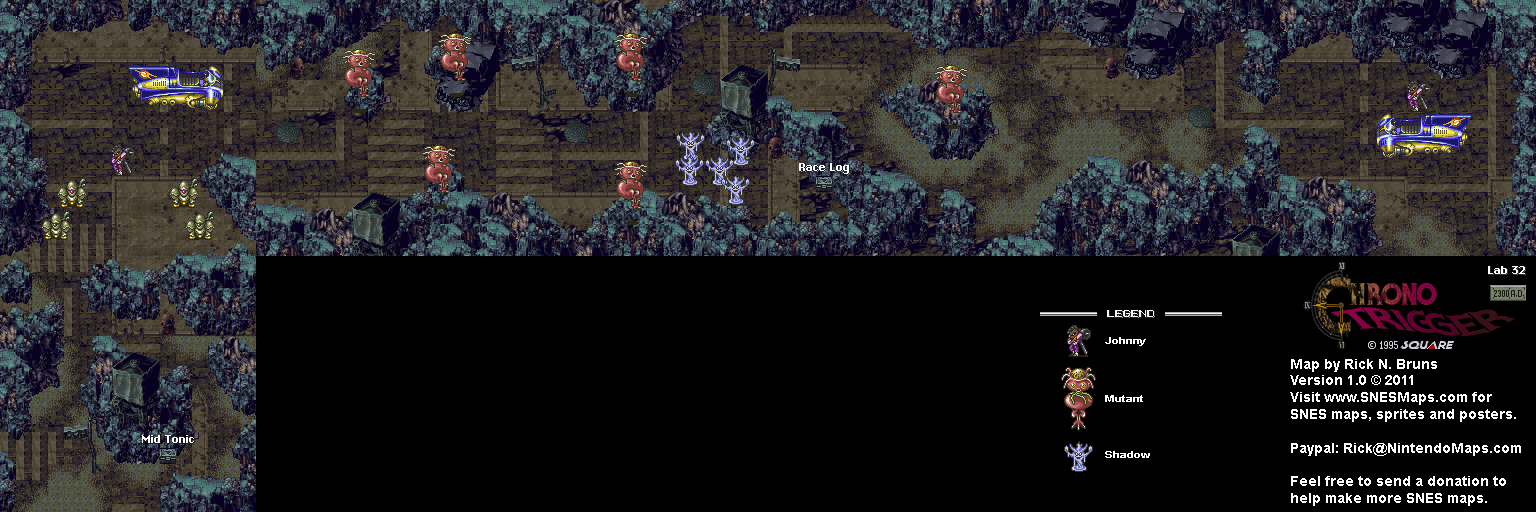
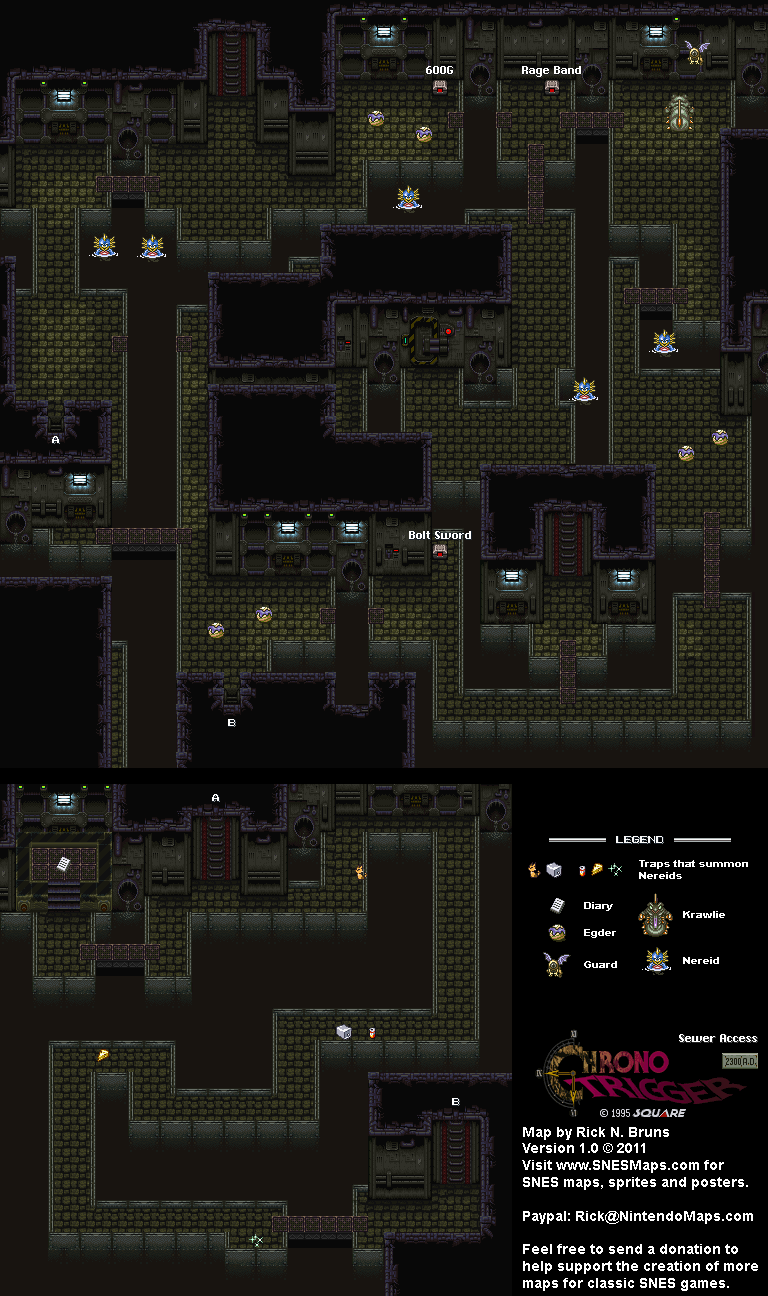
It's time to head 2300 A.D. Take the portal that takes you back to Proto Dome, then go back through Lab 32 and go through the Sewer Access area. If you've done this before, you can get out of here in seconds. If you haven't, this will be a lot easier now than it was when you were first in 2300 A.D. You'll then want to enter the Keeper's Dome.
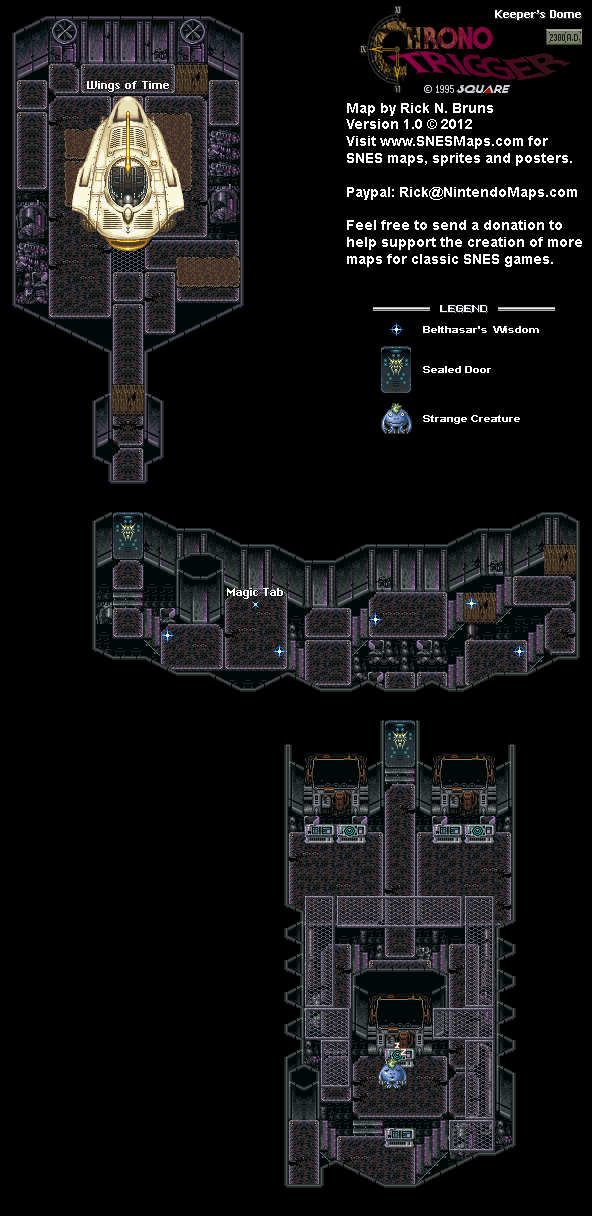
When you enter the Keeper's Dome, the being that Belthasar was programming earlier be standing in front of the computer near the entrance. Talk to the creature, and it will tell you to open the door in the room.
When you do, you'll go through a hallway with pearls of Belthasar's Wisdom. You'll find out the old man is Belthasar, the Guru of Reason, and that he used to live in the kingdom of Zeal in 12,000 B.C. until a disaster threw him into the future where Lavos has already devastated the Earth. He tells you what he knows about Lavos - Lavos' crash landing on the planet, his brief disappearance in 600 A.D. thanks to Magus, and how Lavos continues to consume the world and replicate. He tells you that he has gone mad in these trying times and that he has safeguarded his data before he finally loses it (which explains why he is not here and implies that he has passed on) and that by mastering time, you will be able to stand a chance against Lavos.
When you open the door, you will find Belthasar's last invention: the Wings of Time. By walking to the back of it, you'll trigger some dialogue, then you can attempt to leave the room only to see the creature from earlier come back and place a seat inside the Wings of Time. From here, the Wings of Time and you can even give it a name other than the default name of Epoch. From there, you can head back to 12,000 B.C., and when you do, you'll have to head into the cave to the northwest, as the skyways - and Zeal Kingdom - will be blocked to you.
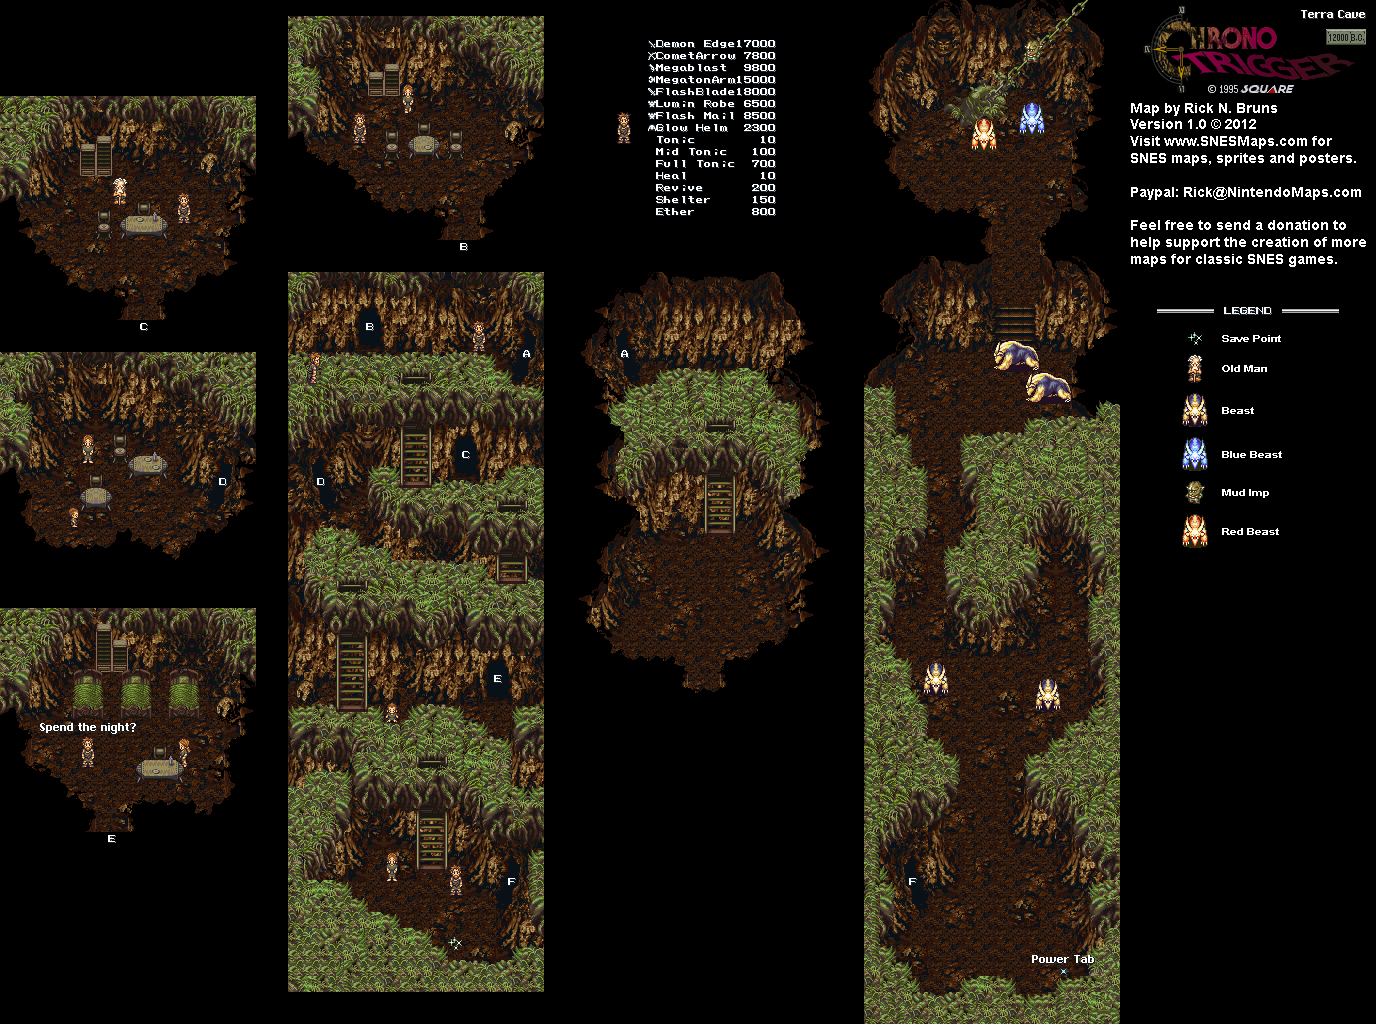
If you went here before, the ladder would not have been down and available to you, but now, you can climb right up and go right in.
By talking to the people here, you'll find out that the people here are known as the Earthbound Ones and are completely lacking in magic, and that they are not only cast down here by the Enlightened Ones, but are also being used as slave labor for the construction of the Ocean Palace. Interestingly, Schala and Janus are the only people here who don't turn their noses up at them and the only people who treat them like they are actual human beings. Go figure.
At the store, you'll see the armor and some of the weapons from the market at Medina Village in 1000 A.D. This time around, however, you can actually buy these. You could buy the weapons here as well as Glow Helms for your party members, but those will be a waste of money as you'll be able to get better weapons in the area coming up for free and the monsters you'll see as soon as you continue from here will carry helmets that are better than the Glow Helms, anyway. You do want to get the Flash Mails and Lumin Robes, though.
There is also an inn here, and it's free to use, making using Shelters at the nearby save point unnecessary.
East of the save point is the Beast's Lair. Attacking the Beasts will cause their offensive power to go up, and they have 900 HPs, so getting rid of them can be tough unless you use Dual Techs. If you use Charm on the Beasts, you can get Rainbow Helms (called R'Bow Helm in game), which are better than the Glow Helms and cut Lightning damage in half. They're also a good source of experience and tech points for this point in the game.
Going up the stairs in the Beasts' lair will trigger a boss battle, so don't go past the second set of Beasts until you're ready.
In the lower-right corner of the Beasts' lair is a Power Tab; don't forget to grab it.
1:24 - As soon as we head to Boldan, we find out that Megacorp is the higher bidder, and that they have been hired to protect Mr. Fizzwidget due to recent safety concerns regarding the man. Also, not surprisingly, they're coming after us.
2:51 - New weapon! The Hoverbomb Gun allows you to fire a single floating bomb with the Circle button, and if you press Circle again, it explodes and takes out anyone dumb enough to be near the explosion. As cool as it is, just wait until it's evolved.
3:57 - Fun with the Levitator. This will allow us to open up a shortcut leading back to our ship, but we're going up the stairs once we do that.
4:59 - The floor panels are protective against the enemies. The Bouncer is a pretty good weapon to use here. Also, the little red chomper robots split into two smaller clones when you do enough damage to them, and you'll have to get rid of the clones as well.
7:09 - Use the Spiderbot to hit the switch and get this Platinum Bolt.
9:12 - Don't forget to take the Nanotech Boost at the top of the fountain on the way there!
13:22 - Keep jumping and shooting on this elevator with the Bouncer in order to make getting rid of the enemies ahead easier. Afterward, use the cover to get to the next elevator.
17:12 - Two vendors! Here, you can buy the Duraplate Armor, which shields all the damage you take by 50%.
18:13 - You'll now be walking on the sides of buildings with the Gravity Boots while platforms open up revealing more enemies. The Synthenoids will be your friends here, especially when you get to the door leading to that trippy spiral floor you'll have to cross carefully.
19:35 - The Megaturret Glove will take care of the ground targets.
25:46 - At the end is an obvious robot Fizzwidget...and Thugs-4-Less, who use this to charge us fake charges of trying to assassinate the real Mr. Fizzwidget in order to send us to their own flying prison on Aranos.
27:31 - The female robot from earlier is back to help us escape. How she managed to get on the ship, one can only guess.
Controls:
As Ratchet:
Control Pad/Left Analog Stick: move
Right analog stick: move camera
X:
Jump and double jump (hold button after double jump to use Heli-Pack or Thruster Pack)
Wall jump (near certain walls)
Square: strike with wrench
Circle: pull out/shoot currently equipped gun
Triangle:
quick select (hold and use in conjunction with Control Pad or left stick to switch guns; menu can be customized in Quick Select on the pause menu
double tap to switch between two most recently equipped weapons/items
interrupt on-screen messages
Select: open map
Start: Pause menu
Control Pad: select option
X: confirm option choice
L1:
center camera behind Ratchet (tap button to center)
first-person view (hold button and use left stick or D-Pad to look around; let go of L1 to move camera back behind Ratchet)
Square: wrench boomerang
Circle: fire gun
R1/R2: zoom in and out (Pulse Rifle only)
L2/R2: strafe (hold while moving)
L3: see health and Bolt totals
R1/R2: crouch (hold down)
Square: wrench boomerang
X: high jump
long jump (hold crouch button and jump while running to perform)
R3: open map
In water:
Square: dive and descend
X: surface and ascend
R1: accelerate with Hydro-Pack
As Clank:
Control Pad/Left Analog Stick: move
Right analog stick: move camera
When hanging off platforms:
Control Pad/Left Analog Stick: move
Forward+X: vault up
Back+X: drop down
Square: punch
X: Jump (press and hold in the middle of a jump to glide with Heli-Pack)
Triangle: command menu (hold and use in conjunction with Control Pad or left analog stick to choose commands)
By exploring the port town to the east, you'll find out that you need to cross the sea to get to Scaraba, and that the Kraken will block your path if you try to head there.
The Coin of Defense is cheaper in the port town than in the beach area.
One of the people in the port town will tell you that you need to call a secret number to get into the Stoic Club. He will then give it to you. When you leave this house, you'll get a call from Tony from Winters, who is collecting players' names for a school project. You'll have quite a bit of room - 24 characters! - to put your name (or whatever you want in), and this name will be used later in the game. You'll get another change to change it a little later on.
Another person near the port will tell you that he is unable to go to sea, not because he is worried about the Kraken, but because he is worried about his wife, who is now hanging out in the Stoic Club if she is not at her Magic Cake business to the point that their marriage may be doomed.
Stuff at the store west of the Stoic Club is worth a lot, and you'll have to spend almost $10,000 just for a Diamond Band.
Once you're ready to enter the Stoic Club, call the Stoic Club, then make your way there. When you go inside, you'll find out that the Stoic Club is a very weird place. As people discuss the most complicated of things, you'll find out that the woman who makes the Magic Cake is right here in the Stoic Club, and that she is the woman in pink with the earrings near the entrance. If you talk to her afterwards, she will head outside and you'll be able to meet her to eat the Magic Cake. Her cart will be near all the steps leading down to the beach, and if you talk to her there, you'll be able to eat a Magic Cake, which will make everything look trippy.
You'll suddenly have a dream, and you'll end up in Dalaam, in the Far East. For this short part of the game, you'll be playing as Poo, the Crown Prince and the fourth and final playable character of the game. It is time for Poo to endure his final trial by going to the Place of Emptiness.
Unlike the other characters, most healing items will not heal Poo. More often than not, you will have to use PSI to heal him. If you give him bottled water, he will refill a lot of PP as opposed to just a little. There are some foods/healing items that he can eat, such as the Brain Food Lunch, but they are few and far between. He also cannot equip any weapons or armor that everyone else uses, and there are only four equipable things that end with the words "of Kings" that he can equip. You can beat the game without them, but if you can find them, you'll be doing a whole lot better.
The Brain Stone allows Poo to concentrate without using his brain, which allows him to constantly refill his PSI. Unfortunately, due to a coding mistake, the code that checks whether or not the party member does not appear; therefore, the Brain Stone does not serve its intended purpose and does nothing. Get rid of it via Escargo Express when you get Poo in the party. The Tiny Ruby will be used later. He does have some healing PSIs as well as attack PSIs.
As you head down to the southeastern area of Dalaam, talk to people and open the boxes to get the things inside.
The man with the telephone on his head is the telephone. Ness' Dad will think that Ness is sounding strange if you call him to save your game at this point.
The Jar of Delisauce can be used with any kind of food to make it work better.
The restaurant is one of the few places where you can buy a Brain Food Lunch.
You won't be able to get rid of the rabbit statues until later.
When you head all the way south, head east and talk to the guy nearby so you can climb up the ropes. When you reach the top, Poo will sit down to meditate. A girl will show up to tell you to stop meditating and come back under order of your master. Do not hit any button or else you will stand up, and you'll have to climb back down, then go back up and try this again.
As you meditate, you'll meet a spirit of your ancient lineage. He will offer to break your limbs, and when he does, say yes. Everything will soon become silent and dark, and the spirit will eventually take your mind. You'll eventually wake up, and you will have completed your training. Head back north to the palace and talk to the old man near the throne. Poo will find out about Giygas, and that he is only of four who can combat Giygas. He will also learn about Ness, Paula and Jeff. You'll level up and learn Shield Beta at Level 16, Teleport Alpha at Level 17 and Teleport Beta at Level 18. Teleport Beta lets the party travel in a circle instead of running in a straight line to teleport.
Poo will then teleport to Summers and introduce himself to the rest of the party, bringing the party to four people.
Make sure you've given both of the photos to Marzipan and gotten the coloring book. Also, don't color in the coloring book or play the Teen Girl Squad mini-game yet. At the Two-o-Duo stage, go to settings and set the "Give Hints" setting to "High!" From here, keep moving around until Strong Bad says "If only the Teen Girl Squad were here." You'll get the last thing for "Expressions of Affection."
From here, go to Strong Bad's house and enter Strong Bad's room. Click on the drawing table, and you'll find out all the notebook paper is gone. Use the coloring book on the drawing table, and you'll get a Teen Girl Squad-Limozeen crossover.
Go to the Pom-Star stage and give the Limozeen coloring book to Marzipan. Marzipan will ball up the coloring book for women being exploited in the media, and she will finally turn on Limozeen. After a song, everyone will turn on Limozeen, and DOI is moments away from first in the Battle of the Bands. In order to seal the deal, DOI has to perform, which they do.
On the DOI stage, grab the helmet on the coat rack on the left, then use the kaiser helmet on Homsar. Click on Homsar, and you can them move him around the pole and make some sort of noises with it like some sort of theremin. Eventually, the spiky point from Homsar's helmet will hit the power box above and electrocute himself, turning off the fan in the process and causing the bleached bats to fly towards the stage and fly around in the steam.
From here, click on The King of Town. He will accidentally knock the lobster out of the tub of butter as he plays the guitar. Click on the lobster.
OUTFITS:
- Sloshy Shirt: Use mic in downstairs laundry room.
- Leopard Print Pants: Examine couch in downstairs TV room.
- Head Band: Use mic near brick wall to the right of Bubs.
- Hollywood Boulevard Boots: Use the Black Metal Detector near the picket fence.
STRONG BAD ABUSE:
- Examine the microwave in the kitchen.
- Examine the Lappy Plug in Strong Bad's computer room.
- Use the fake sword on Marzipan.
- Use the bleach on the pond at the Two-o-Duo stage.
- Talk to Strong Sad at the Pomstar stage.
LIMOZEEN SHOT GLASSES:
- Larry Shot Glass: Examine Luxa-Lounger.
- Perry Shot Glass: Use mic near Strong Bad's mailbox.
- Gary Shot Glass: Use the Black Metal Detector next to Marzipan's Zen Garden.
- Mary Shot Glass: Examine the dead fish at the Two-O-Duo stage after using the bleach on the lake.
LIMOZEEN MANUAL PAGES:
- Cover: Use the Ordinary Light Switch in Strong Bad's computer room.
- Dedication Page: Use the Black Metal Detector in front of the Two-o-Duo Stage.
- Lyrics Sheet: Use the Mic in front of the Cool Tapes stage.
RARE BAND POSTERS:
- Two-o-Duo: Use the Black Metal Detector on the right side of Bubs' Concession Stand.
- Cool Tapes: Check the first locker on the left in the Locker Room.
- Pom Pom: Use the microphone at Club TC.
- DOI: Use the Black Metal Detector in front of the DOI stage.
EXPRESSION OF AFFECTION:
- Talk to Strong Sad about bats twice.
- Talk to Bubs about the Fun Machine.
- Talk to Coach Z about Marzipan twice (before he leaves Locker Room).
- Use Cool Tapes Photo on Marzipan and make out to Strong Bad.
- Use Cool Tapes Photo on Marzipan and make out to Coach Z.
- Talk to Coach Z about Poetry at Marzipan's House.
- Talk to Limozeen about Two-o-Duo at the Two-o-Duo stage.
- Talk to Coach Z at Pomstar (after breaking up Two-O-Duo and before sabotaging Pomstar).
- Talk to the Whale at the Pomstar stage twice.
NEW! Give both of the photos (whale and pond) to Marzipan and take the coloring book, then turn hints up to high and walk around the Two-O-Duo Stage (before coloring the coloring book and before playing the Teen Girl Squad ).
MUSICAL MOMENTS:
- Offer The Cheat an entry form.
- Offer The Cheat an entry form twice.
- Offer Strong Mad an entry form.
- Talk to Coach Z about the Boom Box at Marzipan's House.
The treasures in this game work much like they do in Sly 2: they will be in certain locations in the episodes, and you'll have to go out of your way to find them, interact with them to grab them, and bring them back to the hideout without getting hurt by the enemies. Sadly, there is no way to get them show up on the Select screen map. Unlike that game, where some items were on timers and others were not, all of the treasures are on timers and you'll have a certain amount of time to get a treasure back to the hideout. The amount of time that you get depends on the treasure.
Each episode - not counting the Paris prologue and epilogue - has 12 treasures in all, leading to a total of 60. There are also a few Trophies for going for all the treasures along the way.
I also create some rules of my own for the treasure collection videos as well.
1. There are no practice runs. Everything that is done is done on the fly.
2. You will need all of the costumes before even attempting to get all of these.
3. There is a total of twenty (20) minutes to collect treasures per video. Whether any more time is needed to get one more treasure is a matter of discretion.
4. The timer only starts after exiting the hideout and gameplay begins.
5. In case a return to the hideout is needed to get away from enemies or to switch episodes, the timer is suspended. The timer is only restarted once the hideout is exited again and gameplay begins again.
6. After the twenty (20) minutes are up, we get to read the treasure descriptions and rotate the treasures.
GamesRadar made for some pretty good notes on how to find everything; you can find them here.
Just off the beaten path from the railroad tracks, there is a path leading to some buildings and a rock formation. Thankfully, you can use the tracks to get back.
You'll have to ride the train to get on the rock formation with the wooden platform and jump on a drum to get this one. After shooting the rope bridge across, be ready to use the train tracks yet again to get this sucker home.
This one is on the southeastern part of the map and requires the Archer Costume to reach and the Thief Costume to access the Ancestor Door. You'll have a minute to get this back to the hideout, so be ready to run and also to use the railroad tracks again.
There is a low-lying area north of where you found the Golden Spike with some wooden platforms above the water. You'll find the Branding Iron there. You have a minute to get this back to the hideout, but using the railroad tracks can get it done rather quickly.
Controls:
Left analog stick: move
Right analog stick: move camera
X: Jump and double jump (hold X on second jump for hover jets as Bentley)
Square: attack
Circle:
interact (usually with anything that has sparkles) (Sly)
steal from enemies (from behind) (Sly, Bentley, any of Sly's ancestors)
Triangle:
knock enemies upwards (from behind; press Square to slam enemies down for stealth slam) (Sly, any of Sly's ancestors)
press Circle after knocking enemy upward to perform Silent Obliteration (Sly; replaces Stealth Slam; must buy on ThiefNet)
press Square for Stealth Slam (any of Sly's ancestors)
spin attack (hold to charge) (Sly)
throw bombs (Bentley)
Thunder Flop (in mid-air) (Murray)
spin attack (hold to perform) (Murray)
control with left stick (must buy on ThiefNet)
Raging Inferno Flop (in air; Murray; must be bought on ThiefNet)
L1:
bomb aim (Bentley)
smoke bomb/flash bomb (Sly; must buy on ThiefNet)
aim/strafe mode (Carmelita; must hold button down)
left analog stick: move
R1: shoot (can only shoot in strafe mode)
L2:
hold for costume select menu (Sly)
hold down to stay in menu; use D-Pad or left stick to make selection
hold for weapon select menu (Bentley)
hold down to stay in menu; use D-Pad or left stick to make selection
hold for fist select menu (Murray)
hold down to stay in menu; use D-Pad or left stick to make selection
hold for shot select menu (Carmelita)
hold down to stay in menu; use D-Pad or left stick to make selection
L3: activate compass
R1: run (hold while moving to perform)
Paraglide (Sly; in air; must buy on ThiefNet)
Square: Paraglide Dive Attack (during Paraglide; must buy on ThiefNet)
Adrenaline Burst (Bentley; double tap to activate; must buy on ThiefNet)
Clothesline (Murray; double tap and steer with left stick; must buy on ThiefNet)
Cane Push (Sly; double tap; must buy on ThiefNet)
R2:
Trigger Bomb (Bentley; must have bomb on field to detonate manually; must buy on ThiefNet)
Super Jump (Carmelita; hold and press X to perform; must buy on ThiefNet)
R3: Binocucom
Right analog stick: move
Left analog stick: zoom in and out
R1: take picture (when applicable) (Sly, Bentley)
Start: pause menu
Select: map
Left analog stick: zoom in and out, switch between map and status
0:32 - When you enter the next room, cast Repel, then switch to the Soul Reaver and attack Azimuth. Run away from the purple demons at all times. Whenever you approach her, she will teleport, and you'll have to run around the room to catch up with her and hit her before she teleports again. One hit is enough for her to go down, and from there, you can get Azimuth's Third Eye and get rid of the two demons.
Enter the next room to find a time stream device. Ariel will tell you that "It will deliver you...in time." From there, enter the teleporter, save your game, enter the next teleporter, and activate the beacon you appear in front of. Go through the gates at the south to head to the Pillars of Nosgoth automatically and deliver the eye. Thankfully, this is a one-time thing. Ariel will tell you to take care of the time streaming device and that you will have to take on The Nemesis, formerly William the Just, who must be stopped before he takes over Willendorf. You must rally Willendorf's forces in order to stop The Nemesis from taking over Nosgoth.
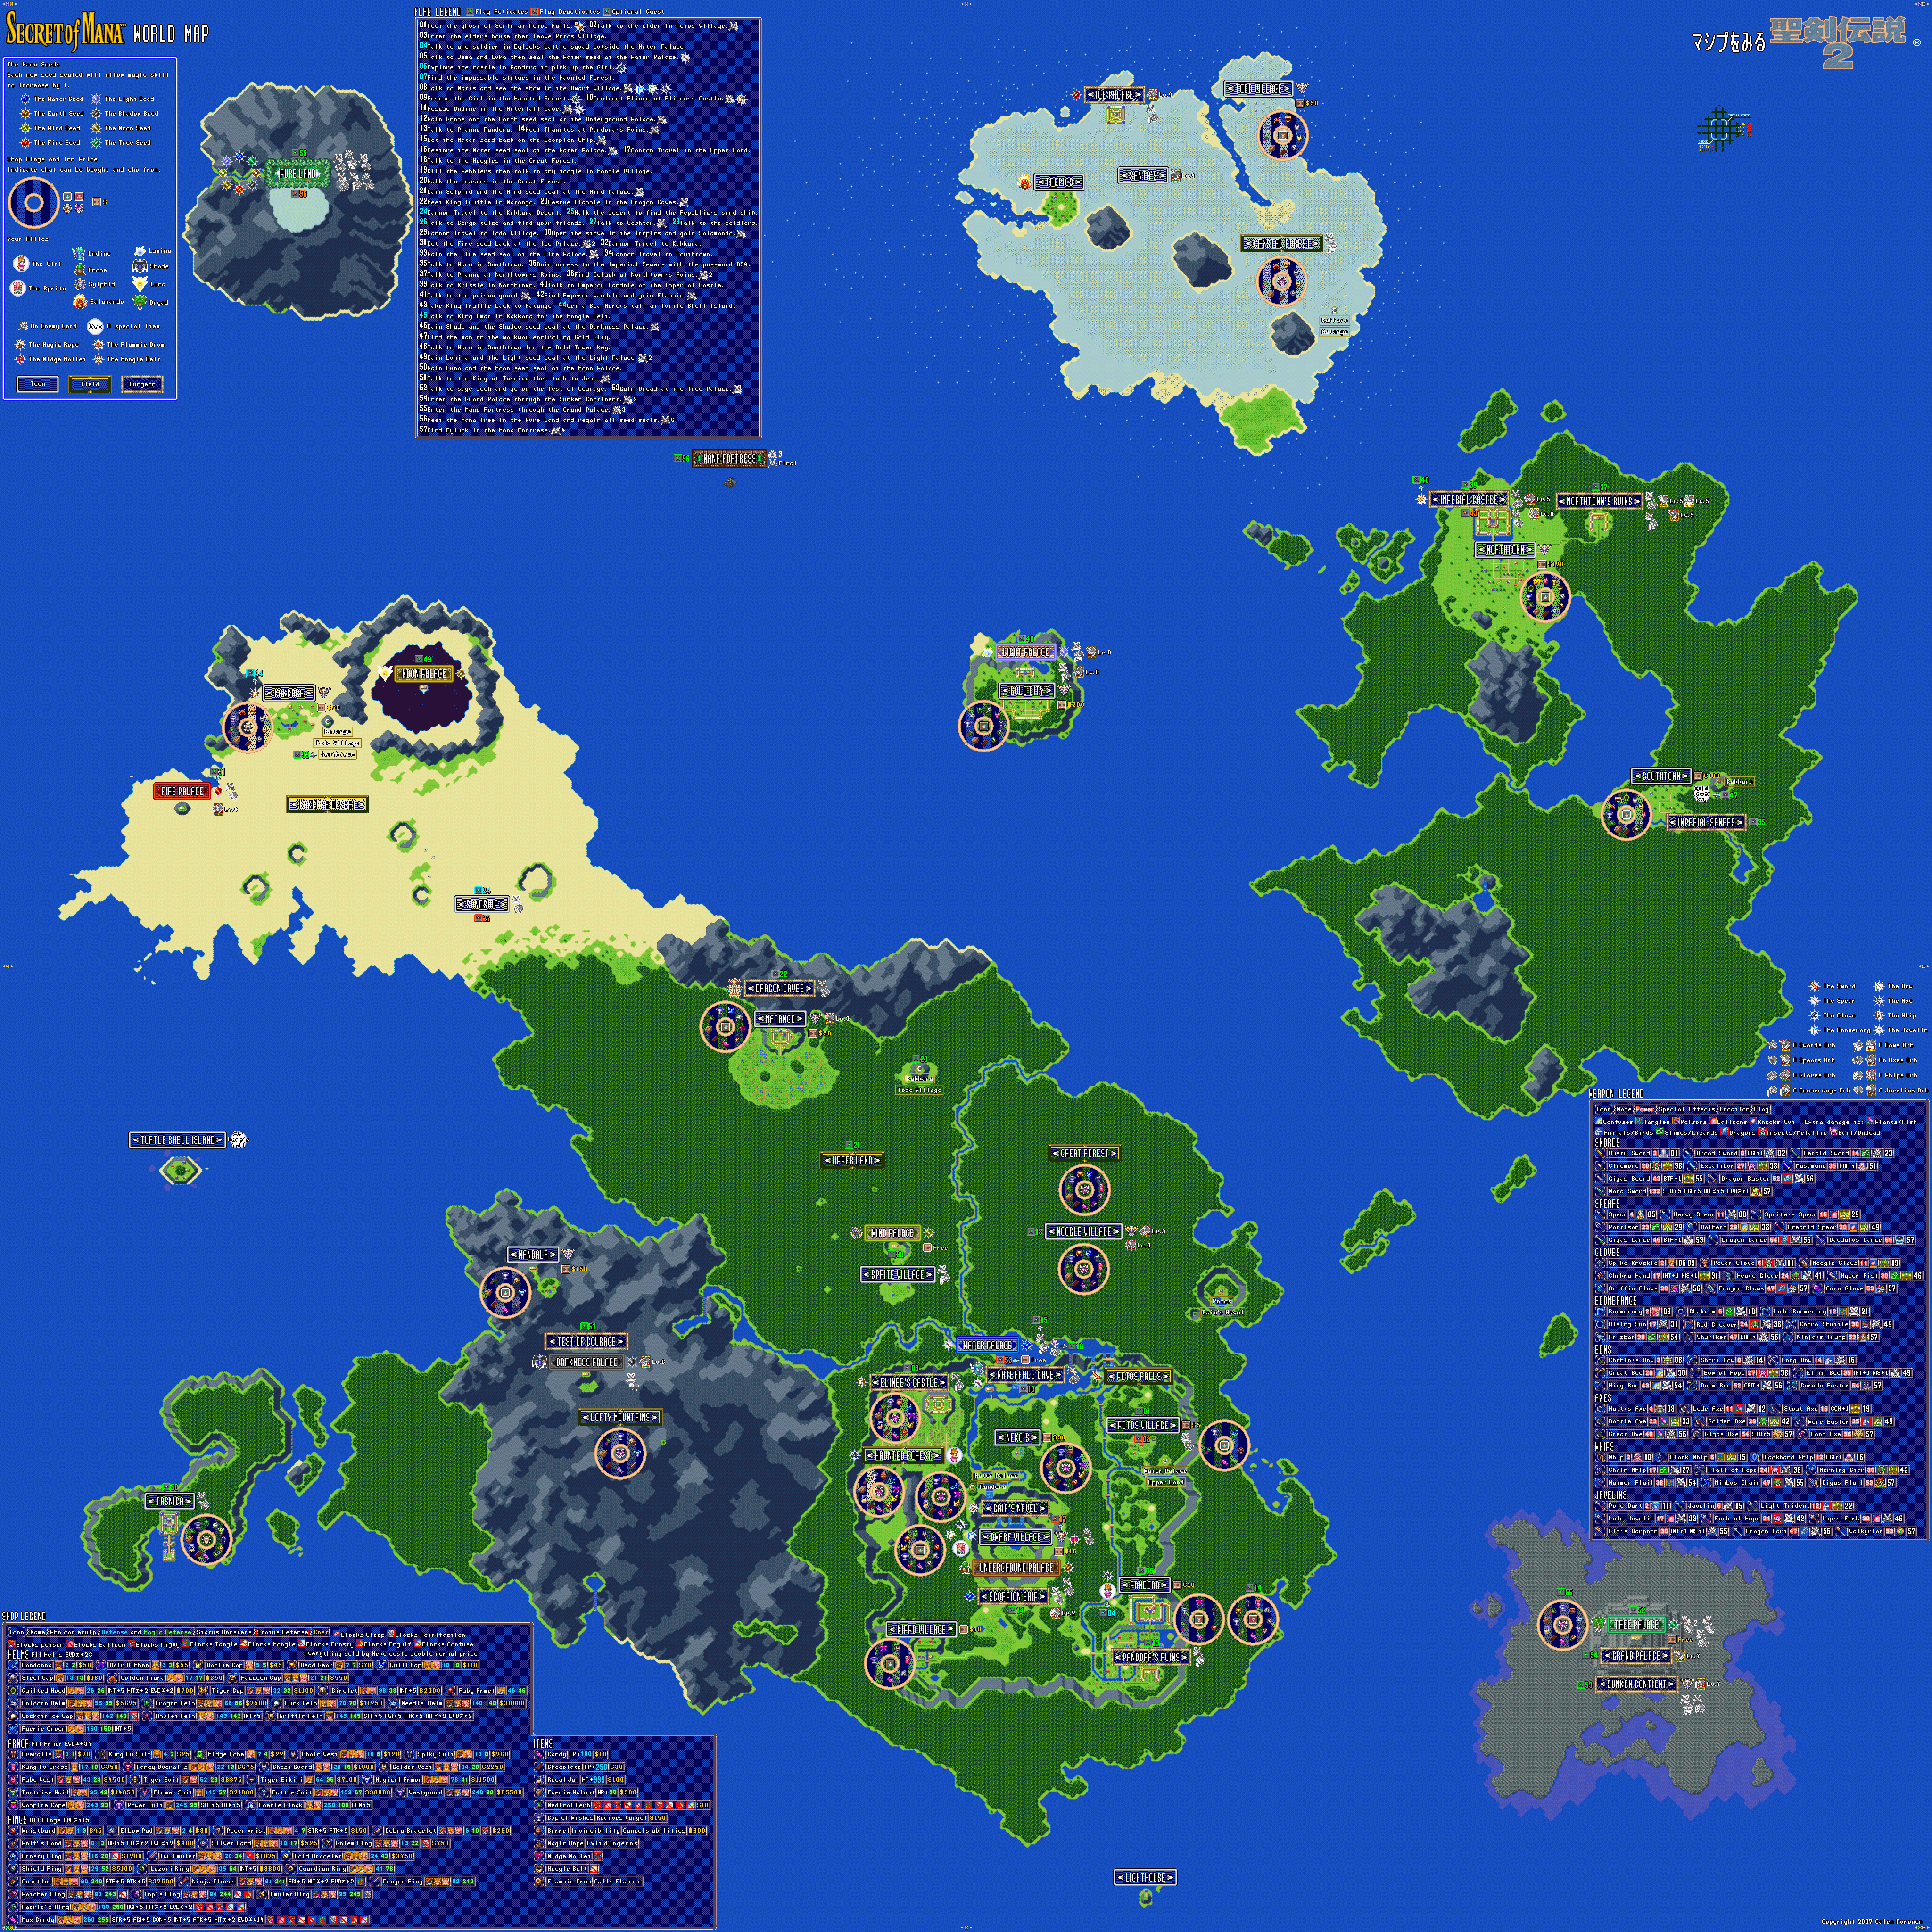
South of Pandora is a lighthouse. There is really no reason to go here other than just because you feel like it, and if you walk up to the top of the place, there is a guy spinning in place. If you talk to him, he will tell you that he is the caretaker and that there is a sunken continent underneath a coral reef to the northeast. He will tell you that the Mana Palace is really a switch that will re-float the continent, and that the power of the ancients must have been incredible. You could go there now, but a magic barrier will push you back.
There's not much else to do here, so head to Kakkara. There is a big black spot in the desert, and if you land in the sand near it, you'll land in an area of the desert that hasn't been seen yet that is littered with stars and a big, black night sky. Head north, and you'll find a ship.
On the ship is a Robin foot named Karon (this is a mistranslation of the name Charon...hey, Charon). The ferry boat will take you to the Moon Palace, which is your next destination. After a short ride, you'll be able to get off the pier and head north.
The Marmablue can cast Magic Absorb and take MP away from you, but they can't do anything else in terms of magic. You can easily smack them around
When you're in the void of space, go Southeast. There will be an orb. Cast Lucent Beam on it. You'll be in the Moon Palace. Go north and meet Luna, then you'll get her spells. From here, press B at the seed. You'll bring your Mana Power up to 7.
Purim's Luna spells are as follows:
Lunar Boost: Increases attack power, but decreases evade. (2 MP)
Moon Energy: Increases physical attack damage and your chance at a critical hit rate depending on the level. If the spell is at Level 7, the chance of your next seven successful physical attacks being a critical hit will be higher. (2 MP)
Moon Damage: Gives weapons the ability to absorb HP from enemies; the amount you get back is directly related to how much damage you do with your physical attack. Do not use this against the undead; you'll lose HP. (3 MP)
Popoie's Luna spells are as follows:
Magic Absorb: Same as Undine's Energy Absorb, but absorbs MP instead of HP and gives it to Popoie. Do not use against the undead; you'll lose MP. (1 MP)
Lunar Magic: This spell has completely random effects. You can do all sorts of status effects and ailments to either your party or the enemy, including healing and raising/lowering stats. (8 MP)
Change Form: Changes an enemy into a weaker monster. (5 MP)
You're done here, so leave the palace and go back to Karon's ferry. From here, head back to the Lofty Mountains and talk to Jehk.
If you came here earlier in the game, there would have been guards in your way and you wouldn't have been able to enter. At this point in the game, you can pass right on through.
When you enter the castle, you'll meet Jema for the first time since the Jabberwocky battle in the Water Palace. He will tell you to be careful, as there is an Imperial spy in the castle who is coming after the King of Tasnica.
If you enter the throne room, the King of Tasnica will accuse you of being spies, but he will give himself away as the real spy to the guards in doing so. This will trigger a mini-boss battle against the Dark Stalker, a re-color of the Dark Ninja. The Dark Stalker can cast Ice Saber and can also use Dispel Magic against you if you have any saber spells on your weapons. If you've powered up Lucent Beam to Level 6 or 7, you can kill him in one blow.
After the battle, talk to the King. He will snap out of his trance. Talk to Jema, and you'll get the king's appreciation for defeating the spy as well as a Sword's Orb. The Masamune raises your critical hit percentage. Jema will then tell you that you have yet to learn the meaning of true courage, and that the Empire almost has the Mana Fortress. He will then tell you to find Sage Joch and learn true courage. It's back to the Lofty Mountains from here.
One of the guards in the throne will tell you that Jema was the commander of the King's troops and fought alongside the hero Serin. When Serin fell in battle, Jema stepped down and never fought again. Jema is still the kingdom's finest warrior, however.
When you beat the Dark Stalker, you will now see common folk walking around near the entrance. This is because people actually live in the castle.
The shop in Tasnica will sell Royal Jams cheaper than you can get them for Neko. To find it, you'll need to find a secret passage southwest of where the dancing guy is. From here, you can feel your way through the passage and end up in the shop.
As you use the map to find this job, you'll see mist in the water. If you move into this mist, you'll start the job.
These misty waters are home to Crusher the Squid, whom you'll meet first-hand when he pulls out the masts. From here, you'll be playing as the Panda King, who will fight Crusher with his fireworks. Your fighting skills with the Panda King will be put to the test here, so use the right analog stick to look for the tentacles and unleash a lot of fireworks on it.
After enough damage, Crusher's head will shoot fiery rocks at you. You'll need to move around to avoid them while keeping a target reticle on the the head and firing away.
Eventually, multiple tentacles will latch on to the ship, and you'll need to look around with the right analog stick and shoot the maximum amount of fireworks at them in order to keep the ship from being dragged under. Load up on fireworks and target at least four tentacles. Once you target four, let loose. Be ready to rotate the camera in one direction with the right analog stick as you do all this; it makes it much easier to minimize the amount of tentacles on the ship.
Afterwards, you'll have multiple tentacles slapping the ship and the head of Crusher shooting rocks at you. Get the tentacles out of the way as you stay on the move, and unleash as many fireworks on the head as quickly as possible on the head before the tentacles come back.
Crusher will soon disappear, and Panda King will head below deck to craft more fireworks, leaving Sly in charge of what's going on topside. At this point, you'll actually find out that Crusher is a giant squid. This time around, Crusher will smack the ship with his tentacles. Watch the shadows, then smack the tentacles with Sly's cane to get them to stick to the ship. Once enough of them are stuck, Crusher will move in. This is your cue to hit him with a cannon. As the battle rages on, watch for the rocks as well as the tentacles. For the first phase, you'll need three tentacles; for the second phase, you'll need four, for the third phase, you'll need five.
After the third phase of this battle, you'll beat Crusher. The Guru will get into Crusher's mind and communicate with him, and Crusher will drag him under. This completes the job.
You'll then get another slideshow. It's now time for Operation: Reverse Double-Cross. Penelope is locked up in one of two secure locations: Captain LeFwee's keep or the brig of the Death's Head. Since the team is too small to attack both locations at the same time, some finagling will have to be done. You'll have to battle the Death's Head at sea, which makes for a better fight with the new upgrades. The Death's Head cannot be sunk due to Penelope potentially being there, so Sly will have to board it afterwards and promptly surrender. This will allow an audience with LeFwee and bypass the numbers of LeFwee's men. From here, Sly has to irritate LeFwee enough to get him to reveal Penelope's location. From here, one of two plans will be put underway.
Controls:
D-Pad/left analog stick: Move
X: jump/double jump
Square: attack
Circle: use to interact with sparkles, steal from enemies (from behind; with Sly), grab objects and stunned enemies (with Murray; press Circle afterwards to grab enemy out of air and press again to shake them, or press Square to throw them)
Triangle:
charge up cane, knock enemies into the air (from behind; with Sly, use Square afterwards to slam enemy down/use Silent Obliteration)
drop bombs (Bentley)
uppercut (Murray; press Circle afterwards to grab enemy out of air and press again while holding enemy to shake them, or press Square afterwards to knock enemy out while in mid-air)
Select: access Gadget Grid
D-Pad/Left analog stick: select gadget/ability
L1, L2, and R2 buttons: assign gadget to button pressed; gadget can then be used with that button
Start: Pause/unpause
D-Pad/left analog stick: choose options
X: confirm choice
Triangle: back out of choice
L3: bring up waypoint
R3: use Binocucom
Left analog stick/D-Pad: look around
Right analog stick: move in and out
R1: take picture
R1: run (hold down)
use Paraglide (as Sly; hold down to use, must purchase first)
Right analog stick: move camera
As Carmelita:
Left analog stick/D-Pad: move
Right analog stick/D-Pad: move camera/aim
Triangle: toggle between strafe mode and free movement
Square: kick
Circle: mega jump
X: jump and double jump
R1: shoot
As The Guru:
L1 (hold): transform
Circle (in mid-air, behind an enemy): mind control
Left analog stick/D-Pad: steer enemy
X: jump off enemy and launch enemy forward
Square: attack
Grapple cam controls:
D-Pad/Left Analog Stick: aim camera
X: shoot/grapple with hook
Circle: distract enemies
Square: self-destruct (hold down)
R1: Fire turret
Hacking mini-game controls:
Left analog stick: move
Right analog stick: aim and fire gun
As The Panda King:
Square: flame chop
L1: hold to load fireworks, release to attack with stored fireworks
SpidrSilk casts Slow on all enemies, but there is a bug with the Slow spell in the Famicom version of the game. The spell reduces the target's hit count so that it is equal to the number of levels of the Slow spell. However, it is possible to underflow the hit count and have the enemy instantly kill you in one hit.
SlpGrass puts enemies to sleep, of course.
The Poison Toads can Envenom you with their physical attacks. They are also weak to Ice. Aside from that, they're not really that difficult.
There is a stairway that leads into a forest. One of the men in the masks is a merchant. The Demon Spear and Demon Axe are good if you're using spears or axes, respectively. The Ruby Cuirass is a very good piece of armor. HCBailly ends up buying three. Keep this spot in mind for later, as the game tells you to come here later on. Some of the rest of the NPC's will tell you to stay away from the Black Mask at the bottom of the cave.
Hit the switch at the start, then get on the platform to the left when it drops down and get everything. Go all the way to the right and throw grenades through the platform onto the robot below. From there, you'll have to go back down and fight the super-huge robot from a distance. Don't do what I did; go all the way to the left and wait for enemies to show up, then shoot them down. Don't go face-to-face unless you absolutely have to. Once the Goliath is destroyed, you'll be able to exit.
Now for the hardest Skill Point and Gold Bolt in the game.
Also, sorry about the forced widescreen in 4:3; this happened because I picked "Fit to Screen" and not "Stretch To Screen" in OBS while switching from settings for a BBC Micro game to a PlayStation 2 game.
We still have one more Skill Point and one more Gold Bolt in Oltanis.
For the Skill Point, you'll want to shoot out all of the globes on the street lights. Interestingly, if you are near a street light when you shoot the globe out, you'll get some Bolts out of it. Most of them are near the start, while some more of them will be located in the upper city, which you can use the transporter to get to.
The grapple points above the moving platforms are the easiest to get to; if you hold the Circle button to latch on to one, you'll reach it no matter what.
To get past the one part with the four ships with the spotlights, run between the spotlights while going counter-clockwise around the room.
Near the end of this path, you'll find the Morpho-Ray atop a platform that you have to climb to the top of. This has infinite ammo and can turn any enemy you aim it at into a chicken, assuming you target an enemy and fire the beam at it for long enough. Not surprisingly, you'll be using it for a Skill Point or two. From here, you can go back to your ship, and this triggers a cutscene where a missile destroys the statue near the start, revealing a switch that activates a platform. This will take you to the last Gold Bolt.
Here, your Swingshot skills will be put to the ultimate test. You'll need to pay attention and look around for the Versa-Targets, as some of them will be underneath ships that fly around and you'll need to time stuff, be alert, and latch onto said ship Versa-Targets a second time just to ensure you make it to where you need to go. Along the way, you'll find more street lights, and you'll have to go through this Swingshot course to destroy all the globes on all the street lamps for that Skill Point. The fact that the game forces you to destroy the globes on the street lamps all over again if you die just once makes things especially frustrating.
Controls
As Ratchet:
Control Pad/Left Analog Stick: move
Right analog stick: move camera
When hanging off platforms:
Control Pad/Left Analog Stick: move
Forward+X: vault up
Back+X: drop down
X: Jump and double jump
R1: stomp (must have Thruster-Pack)
Square: strike with wrench
Circle: pull out/shoot currently equipped gun/use gadget
Triangle:
quick select (hold and use in conjunction with Control Pad or left stick to switch guns; menu can be customized in Quick Select on the pause menu
double tap to switch between two most recently used Circle button weapons/gadgets
Select: Map
Left stick/D-Pad: move map
Right stick: Zoom in/out
X: view missions
Circle: play Infobot for planet
L1: previous map
R1: next map
Triangle: Exit
Start: Pause menu
Control Pad: select option
X: confirm option choice
L1: tap to quickly center camera; hold for first-person view (hold button and use left stick or D-Pad to look around; let go of L1 to move camera back behind Ratchet)
Square: wrench boomerang
Circle: fire gun
L3: see health and Bolt totals
R1/R2: crouch (hold down)
Square: wrench boomerang
Left+X or Right+X: side somersault
Down+X: backflip
X (while running): long jump (must have Heli-Pack/Thruster-Pack)
X: high jump (must have Heli-Pack/Thruster-Pack)
Double tap: hover (must have Thruster-Pack equipped)
L2: strafe left (while hovering)
R2: strafe right (while hovering)
X: exit hover mode (while hovering)
In water:
Square: dive and descend
X: surface and ascend
R1: turbojets (must have Hydro-Pack)
Trespasser:
D-Pad or Left Analog Stick:
Up and Down: switch rings
Left and Right: rotate rings
Triangle: leave Invinco-Lock screen
As Clank:
Control Pad/Left Analog Stick: move
Right analog stick: move camera
When hanging off platforms:
Control Pad/Left Analog Stick: move
Forward+X: vault up
Back+X: drop down
Square: punch
X: Jump (press and hold in the middle of a jump to glide with Heli-Pack)
Triangle: command menu (hold and use in conjunction with Control Pad or left analog stick to choose commands)
2:30 - The spiders just move around randomly. Tail whip them.
3:30 - To break the water towers, you'll need to be a superhero. By breaking the water towers so they are lower, you can take some shortcuts throughout the level.
5:53 - This flashing green screen is not a health pick-up, it is a projectile that last for a limited time. Spit at the targets on the wooden window washer platforms ahead to make them go up and down.
10:10 - The lit windows have pawprints on them, signifying that you can climb on them. Be prepared to climb on a lot of these panels for fly coins.
12:27 - You'll need to use the Mad Bomber's own bombs against him.
12:56 - By beating all three of these guys, you'll open up this superhero costume booth that gives you a "chicken suit." This lasts for as long as you're in the level. Directly across from the booth is the second pawprint coin; just face away from it, jump off the edge and float forward like you did with previous costumes. Just keep in mind that if you get the super strength costume, you'll wear it over the "chicken suit" and you won't be able to glide until it runs out.
13:56 - The first inmate. You can tail whip them to kill them. Nearby is the third pawprint coin.
26:59 - The tenth pawprint coin. From here, you can climb up a nearby building, hit the water tower and face the mad bomber.
Stay near the edge, have the mad bomber throw a bomb at you, then get back and tail whip while standing right behind it to send it back at him in a straight line. Three bombs will do it and give you a remote. You'll also trigger an air current that will take you to a bunch of fly coins and the first (and usually unreachable) bonus coin.
28:51 - The second bonus coin! Let's go get it and GEX WHAT ARE YOU DOING
30:20 - The third bonus coin. You'll need the air current to get all these things.
33:48 - The last three fly coins. Also, if you pay attention as I look around. you can see a bunch of stars in the shape of Gex's head in the sky. (I didn't even notice this when I was playing.) Thankfully, you can float into the awnings with the "chicken suit" to get on top of them.
In this episode, we blow up some of Neyla's tanks with one we've nabbed ourselves, then hack into a terminal near where The Contessa is trying to brainwash Carmelita.
You'll need to be playing as Murray to start this job.
Here, you'll be controlling a tank. Moving the left analog stick forward moves the left tread forward, while moving the right analog stick forward moves the right tread forward. Both forward and both backwards let you move forward and in reverse, respectively. If you hold both sticks in different directions, you'll turn without moving, and the direction you rotate in will depend on which analog stick is being moved forward. If you've ever played Battlezone, that old Atari tank-shooting game from way back when, you'll know how this works. Press R1 to fire.
If you have a tank below your turret, press R1 to fire and you'll nail them. Don't forget that the speed you go is dictated by how far you move the sticks, unlike in Battlezone. Once you shoot down all six tanks - shoot them before they shoot you! - you'll complete the mission. At least you have a health meter, unlike in Battlezone.
For this one, you'll need to be Bentley to start. Once you reach the crypt, be ready to avoid the spikes by landing on the brown parts of the ground, jump over rolling spiked cylinders and look for the three terminals. Once again, wait for the pendulum blades to line up before jumping past them, and remember that the smaller cylinders on the edges of the larger spinning cylinder after that spin independently.
At the end, following platforms you'll have to quickly jump across, you'll find the acid battery as well as the first of three terminals you'll need to hack. You'll need to take out the barrier while also dealing with large groups of enemies. The second terminal will be halfway across the crypt and is easier to spot on the way back to the entrance, while the third is at the entrance itself. Once again, the hacking missions get progressive harder and have tougher enemies the further you get into this job (with a super-powerful ship near the end at the third terminal!), and as you hack the terminals, you'll activate the cylinders on the old terminal near where Carmelita is being held hostage.
Also, you'll want to make sure you don't take damage. Otherwise, you'll lose the acid battery and you'll have to do the current part of the job over again.
We're now at the last leg of the episode. It's time for Operation: High Road. Murray will take down the spotlight at the main gate with codes provided by the General, while Bentley will use the voice modulator to order Neyla's forces to attack. Sly will then glide over to the getaway center, get in the re-education tower and hopefully free Carmelita by blowing up The Contessa's machinery with the Bad Mojo Bomb.
Controls
D-Pad/Left Analog Stick: move
Right Analog Stick: move camera
X: jump and double jump
Square: Horizontal Attack
horizontal attack (as Sly)
slam enemies launched into the air from behind (as Sly)
hook punches (as Murray)
Thunderflop (as Murray; in mid-air only)
crossbow swipe (as Bentley)
Triangle: Vertical Attack
vertical attack (as Sly; used to knock enemies into the air)
downward dive (as Sly; in mid-air only)
uppercut (as Murray)
drop bomb (as Bentley)
Circle: Action button (near blue/green/purple sparkles and character icons)
pickpocket (as Sly)
stomp (as Murray; use Square to throw object/enemy)
R1: hold to run
Select: Gadget Grid
Control Pad: highlight gadget
X button: confirm gadget
L1, L2, R2: assign gadget to button pressed
L1, L2, R2: use gadgets assigned to button pressed
Start: pause menu
Control Pad: select menu choice
X button: confirm choice
Start: un-pause game
L3 (press the left analog stick): locate beacons for mission objectives
R3 (press the right analog stick): Enter and exit Binocucom for first-person view
Left analog stick: look around
Right analog stick: zoom in and out (with up and down on right stick)
R1:
take pictures with spy camera (as Sly; when applicable)
In this entry, we head back to North America and find out that the continent has changed big time thanks to human activity.
When the morning comes, head back to the port. If you talk to the soldiers here, they'll tell you that it's forbidden to use magic and other dangerous items on board. Head to the boat and talk to the man there, then talk to Fyda. From there, get on the boat.
As you head to the new continent, you'll see the World Map for the first time, which looks a lot like the world. You'll then go back to the boat, where Ark talks to Princess Elle. Talk to everyone, then enter the door on the side of the staircase on the right and sleep in the blue bed on the left. If you need an L.Bulb, there's one in a chest in the room to the right of the bed.
You'll be woken up by a scream. You'll then approach a sea spirit that is trying to attack Princess Elle, much like the ones one of the sailors on the ship mentioned. To beat the ship ghost, equip the Light Rod and attack the ghost. The ghost makes three copies of itself, and you won't be able to tell which one is real until you attack one of them. Thankfully, this battle isn't very hard at all. Use your standing strike and not your dashing one so you won't risk passing through the ghost without doing any damage.
When you beat the sea spirit, talk to Elle. She'll finally speak to you, and tell you that since she is no longer a princess, you have nothing to gain by being with her. When she asks why you came, tell her it's because she looks like Elle in Crysta. Ark tells her about the Elle from underground, and when Elle asks about the difference in personalities, you'll have a choice between "Different" and "Could be close." If you say "Different," Elle will tell you that you have no sense of delicacy, but she thanks you nonetheless. If you say "Could be close," Elle says that you may be displeased that she looks like Elle in Crysta before thanking you. After this, head back to bed.
When morning breaks, you'll finally arrive at the new continent. You'll be woken up by Yomi as the ship docks at port. Talk to the sailor near the boat when you get out, and you'll get a Royal Letter. When you read it, you'll get a message from Elle saying that she can no longer be a burden to you. She also admits that she killed the King of Loire, that she has a secret vested in her by her parents, and that the King destroyed her village and adopted her to find that secret. She then writes that the marriage proposal was a sham to get her to spill the secret, and when she regained her past memories, she had no choice but to kill the king before the secret was out. She also says that Fyda got her out of Loire when they came to the castle, and that she cannot involve others in whatever it is she's trying to do. She then tells you in a post-script to take care of Elle in Crysta.
In the lower-right corner of the port is a shack with a Magirock in it. This is Magirock #55. Go ahead and take it. The soldier here will tell you about armor made by mermaids which is better than anything made by man.
Go ahead and leave the port. There's nothing else to do here. To the north is the town of Freedom.
When you come to Freedom, you'll see that there are not only people and modern buildings here, but people of different races. The woman near the entrance will tell you about this.
The building to the left of the entrance is the inn. The left room is where Keinz is staying. Keinz will tell you that new talented people are emerging here, and that they will influence the growth and creativity of this culture. If you want to stay, it'll be 10 Gems, but at least you don't have to stay in order to save your game, as the ink well and diary is right on the counter.
Don't forget to equip the camera and take a picture of the town.
The building to the right of the entrance is the merchant and Magishop for the town.
To the north of the shops is a pub. The guy behind you tells you that the pub has nothing but bourbon and that you'll just have to deal with it. The woman to the left of the counter will tell you that she prefers a smoother, refreshing drink if you talk to her. If you equip the Wine and use it on her, she'll ask for a sip. Say yes, and she'll taste it, like it and tell her friends.
If you talk to the guy in front of the counter, another woman will show up and drag him away.
The guy near the pub will tell you that the Colorado River is to the west of Freedom, and that they haven't had much luck building a bridge over it due to its raging waters.
To the west of the pub is the town square. You'll have to talk to the kid on the skateboard in order to advance the plot. The woman nearby will tell you about the town of Liotto on the southern continent and how it has a carnival going every day. We won't be able to go there yet.
There is a plant sap salesman in the square who will sell a glass of plant sap for 10 Gems. It doesn't do anything, but it actually tastes good. If you buy, the guy will tell you to see his cousin in Nirlake to see what he 's up to.
There is a lottery on the square, where you can get random items. For 20 gems, you can draw a random number for a chance to win a prize. You can either grab from the bottom, the top, or mix and grab. There are 64 numbers, and prizes range from nothing, healing bulbs, a Pretty Flower, or a really good item. The higher the number, the better the prize. If you can't carry any more of a certain prize, you'll get your 20 Gems back. The best item you can get is the NiceSuit (which the lottery booth guy calls "Fancy Clothes"), but it has less defense than whatever armor you probably have at this point and is basically useless.
If you've maxed out on all bulbs and Pretty Flowers, you can play this until you get Number 1 without fear of running out of money.
Northwest of the town square is the 3 Girls' house. If you talk to them, you'll learn that they are very into fashion and want a new fashion style that excites them. If you got the Fancy Clothes from Marilly, give them to the girls. You'll get a kiss from one of the girls in return. If you head out and come back in, their dresses will be blue instead of red and that they love them.
To the left of the 3 Girls' house is Stoma's house. Stome is the town gourmet, and he asks you to bring food that delights him for a reward. We'll be coming back here later.
To the north is three more buildings. The woman with blue hair will tell you about a craftsman in town who makes odd things, yet has a recognizable talent. The woman nearby will ask if you're a newcomer at Kidsgart. Ask her what it is, and she'll apologize and say she jumped to conclusions. You'll learn that Kidsgart is like a last resort for orphan children, and says that while the kids aren't bad, they're noisy and behind in rent.
The house in the upper-right corner of town is Bell's house. When he asks if you can lend him an ear, say yes. He'll tell you that his girlfriend Amanda lives in Nirlake, and that he's been so busy that he's been unable to correspond with her. He'll ask you to go see her and ask how she is doing and tell her he still thinks about her. Bell will repay you if you do this.
To the left of Bell's house is Eddy's house. Talk to Eddy, and you'll find out he studies electricity. Say yes when he asks you to push his machine. Just push against the machine and keep pushing, and it'll eventually explode in your face. Eddy will have an idea to use heat from motion for electricity, and will thank you for helping him. Talk to him one more time afterwards.
To the left of Eddy's house is Kidsgart. You won't be able to enter right away, as the person behind the door will say that Perel will be mad if they let a strange person in. This is your cue to head back to the town square and talk to the kid on the skateboard.
Go back to the town square and talk to the kid on the skateboard, This is Perel, and when you talk to him, he'll ask why you're so glum before he shows you his moves. When he asks if you're feeling better, say you do. He'll then notice you've come here from Europe, and asks you to come to Kidsgart to tell him about the old continent. Say "Sure," and you'll be able to enter Kidsgart. Just follow him to it, and he'll eventually open the door when he gets there.
You'll be introduced to the kids of Kidsgart: Linda, Paul, and Harry. There's an older kid named Will who is supposed to be here, but he's not here right now. You'll also learn there's another kid named Anita who apparently hasn't made it back yet either, though according to Perel, she should by now, especially since she has very little money. Perel goes out and looks for her, and asks that nobody leave until he comes back. If you talk to the kids, you'll learn that Anita went to Nirlake to watch Will design a flying machine in Nirlake.

.png)
.png)
-DistCave.png)