In this entry, we put the Psychic Shock Wave to good use as we enter a pyramid before whisked away to another era by the Oxford Wonder World.
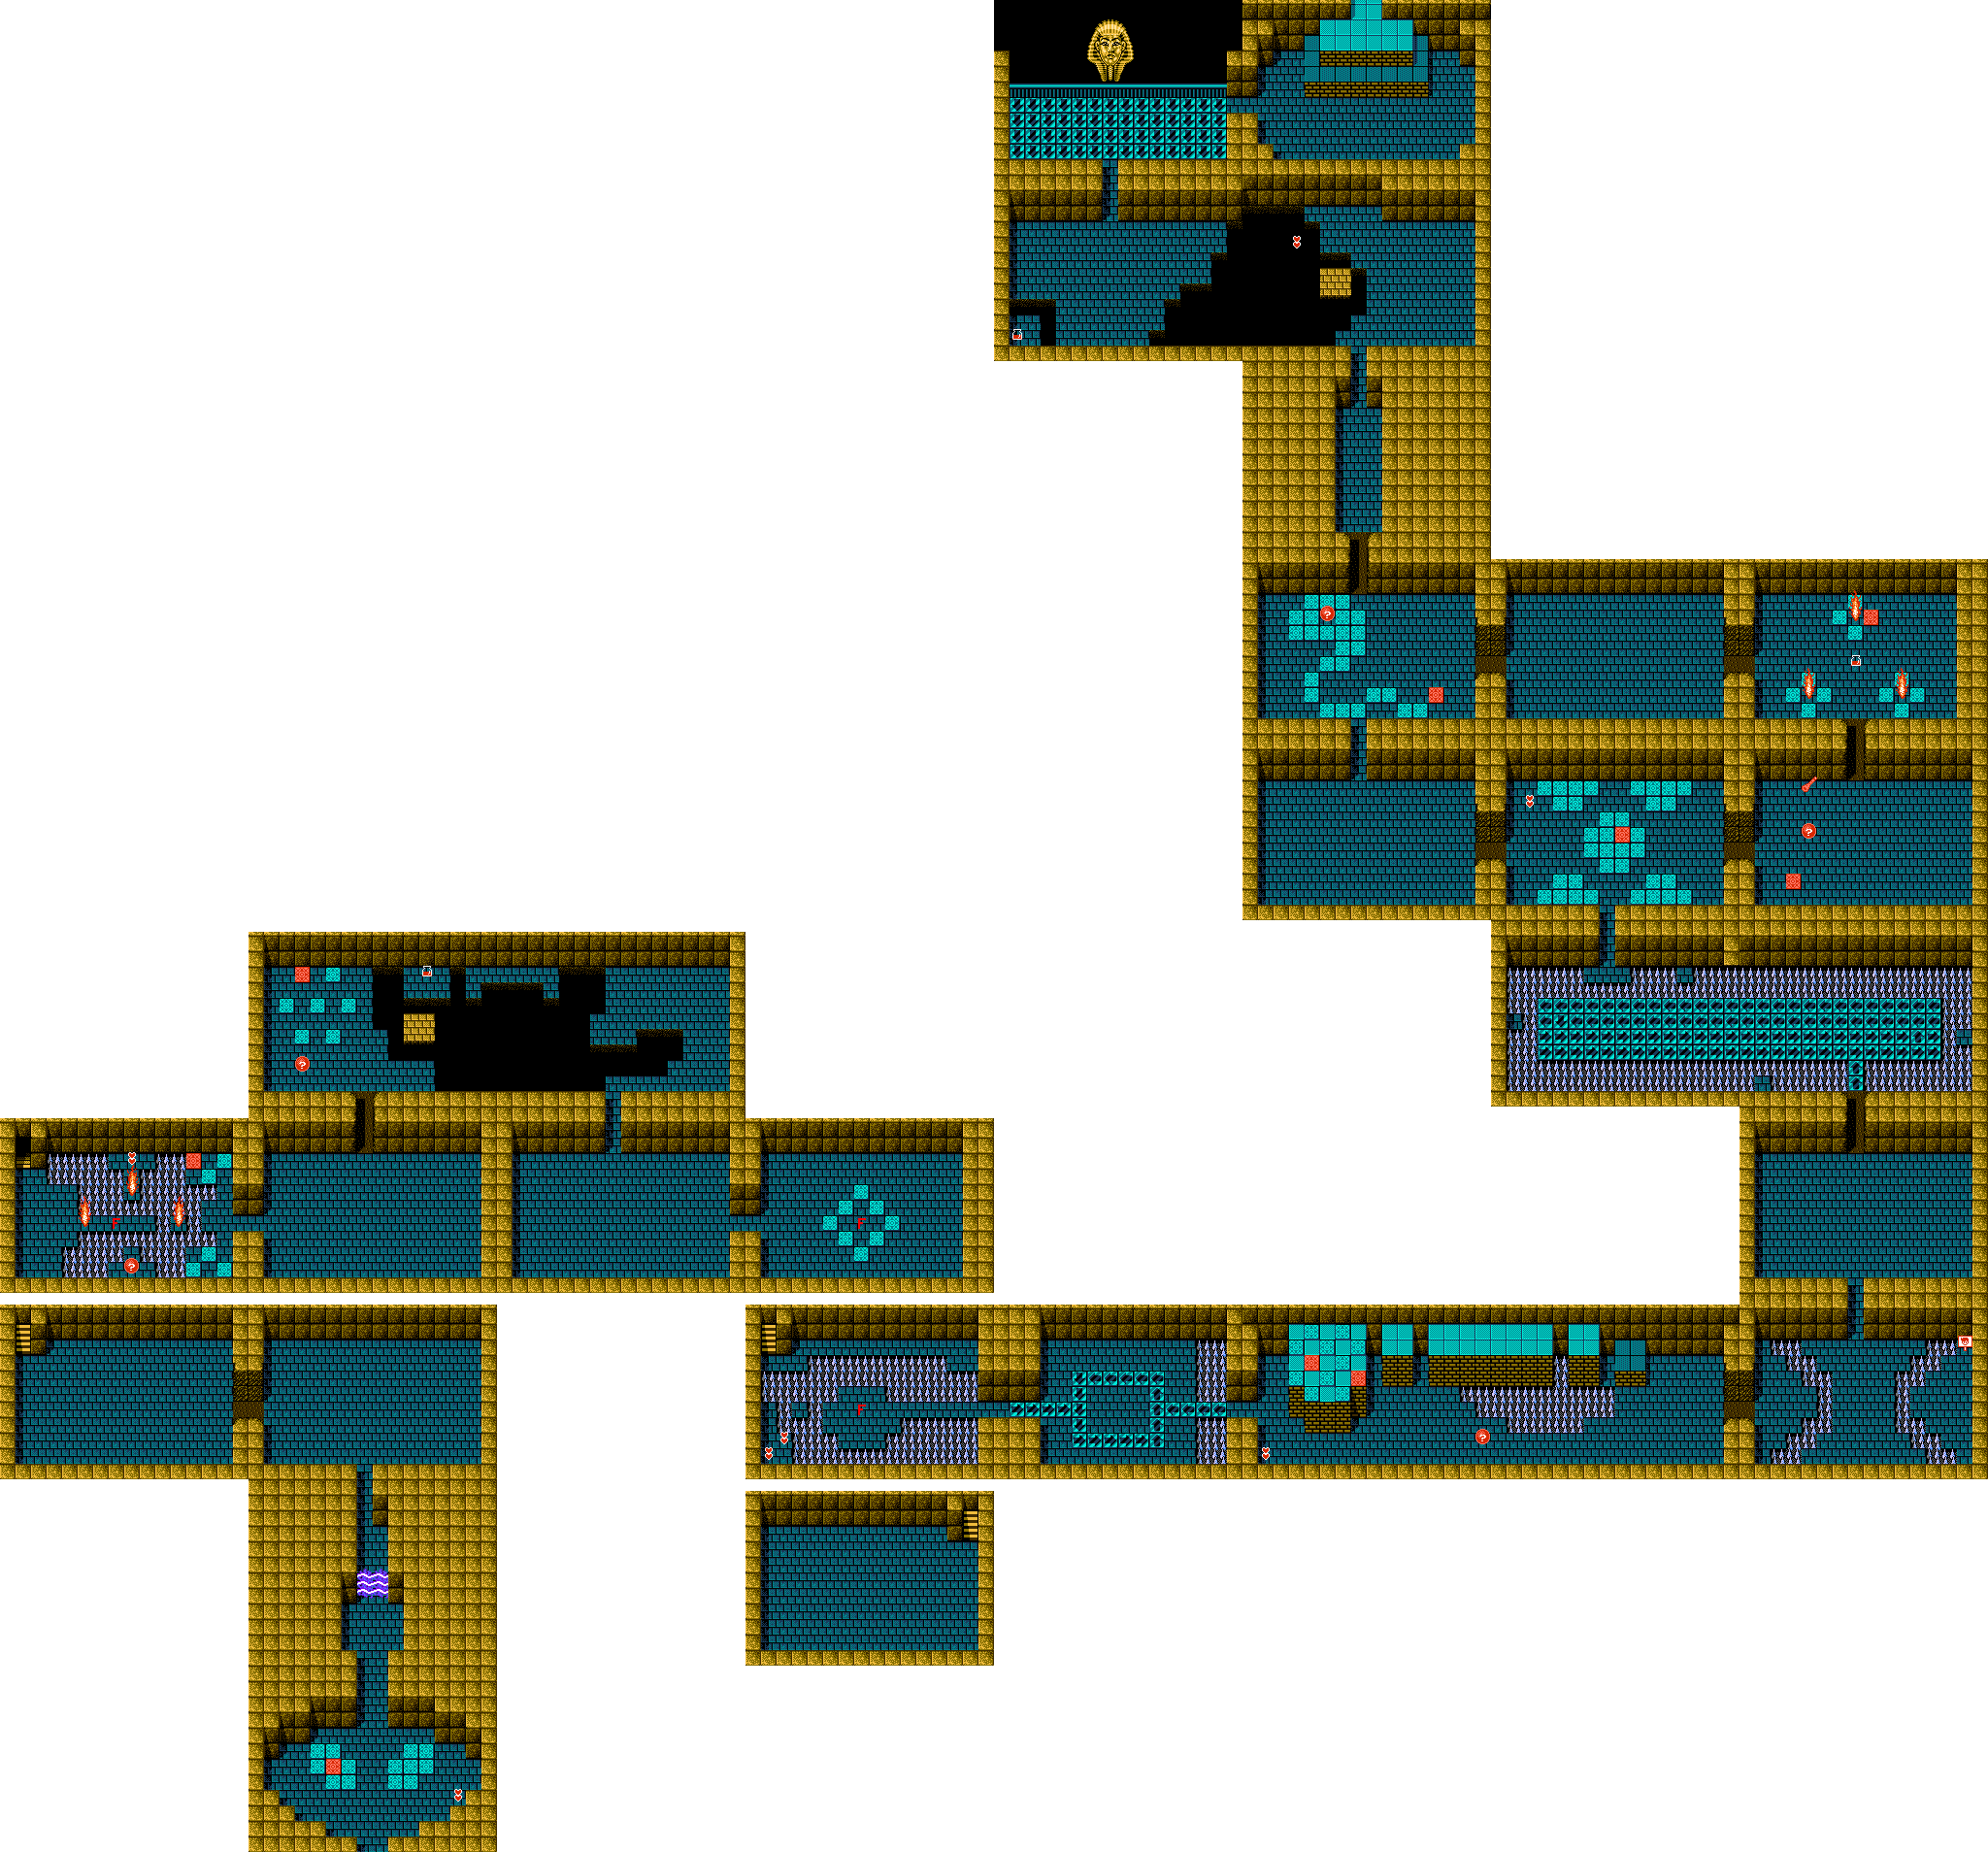
If you step on the center title of the left "eye" in the first room, you'll make two hearts pop up in case you need to heal up.
The Psychic Shock Wave has the same range as the dagger and is a little bit weaker, but it has a shorter cool-down period, and you can therefore fire it off more often. To get past the barrier, just it it with
The beetles with the skull heads go down rather easily, as they just move around randomly. They will charge at you if you are lined up with them vertically or horizontally, though.
The snakes move around in zig-zag patterns, and if you get touched by one, you'll take a lot of damage.
To get pass the flames in the spiky area, just wait for them to go down, then pass by. Remember that there is a pitfall to the left of the center of the narrow path leading east out of the room, and that you will have to jump over the tile. There are six tiles at the end of the room, and the left tile on the upper set
will reveal a red sphere with a question mark on it. This opens the door to the east. Also, yes, the spikes are instant death; thanks for asking.
The zombies can only be defeated with the Psychic Shock Wave, as the dagger will have no effect. They will quickly charge at you if you are horizontally or vertically lined up with them.
In the room with the big mummy and the little mummy (the former is quite slow and the latter is a bit fast), hit the upper-left tile of the seven. You'll open the chest and you can get a potion. Jumping onto the yellow platforms causes others to pop up, but you'll need to be quick.
The red guy with the bird head (who is either based on Horus or Thoth) will shoot projectiles at your current position, but the projectiles do not have a lot of range. The dagger works best.
In the room with the tiles in a diamond formation, walk into the center to fall down a pitfall. Hold Left, or else you'll fall down another pitfall and you'll have to take some stairs to get back up, forcing you to backtrack. This way, you'll be able to move around in the spike-laden room that you first come to. Get the hearts if you need them, then leap over the center of the room and head east while avoiding the metal ball that is moving around.
The tiles with the arrows act like conveyor belts, and slowly move you in the direction indicated.
The green skeletons crumble when you hit them, and cannot be permanently destroyed. At the tiles, hit the left tile in the center row to reveal another red ball with a question mark on it. This opens a path to the east.
The sign with Mike's head on it, just like in the first game, will either give you one extra life, give you two extra lives, or take one life away.
Be careful in the room with the green spiders and the conveyor belt tiles; you can be sent into the spikes that are all over the room near the end. In the next room, one of the upper-right tiles in the central tile pattern reveals two hearts.
In the room with the tiles in the shape of a snake, hit the tile on the tail end to reveal another red sphere with a question mark to go to the next room.
In the room with the three diamond-shaped tile formation and the Horus/Thoth enemy, hit the right tile on the center diamond to reveal a potion.
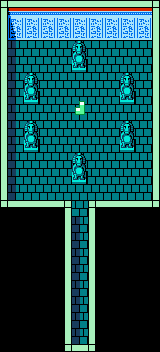
The flute is used in the room with the tiles in the shape of a snake. You'll have to loop back to it and use the flute to fight three snakes, and when you beat them, you'll open up another path leading north.
The boss here is a King Tutankhamun head. Stand one tile to the west of where you come in, keep jumping towards the head to keep from being pushed back by the conveyor belt tiles that are all around the room, and keep throwing daggers at it. When the face spins around to reveal a skull, stay off-center to avoid being hit by the lightning bolts that come out of it.
After the boss, follow the path. You'll find another Tetrad and earn another heart for your maximum health, then the Oxford Wonder World whisks you away again. (Sadly, we did not find Sly Cooper.)
No comments:
Post a Comment