We go for the second crystal in the game...and get a very, very useful item in the process.
Believe it or not, there is an old man sitting next to a sign near the desert in the Light World. If you grab the sign, he'll follow you around until you go to another nearby area.
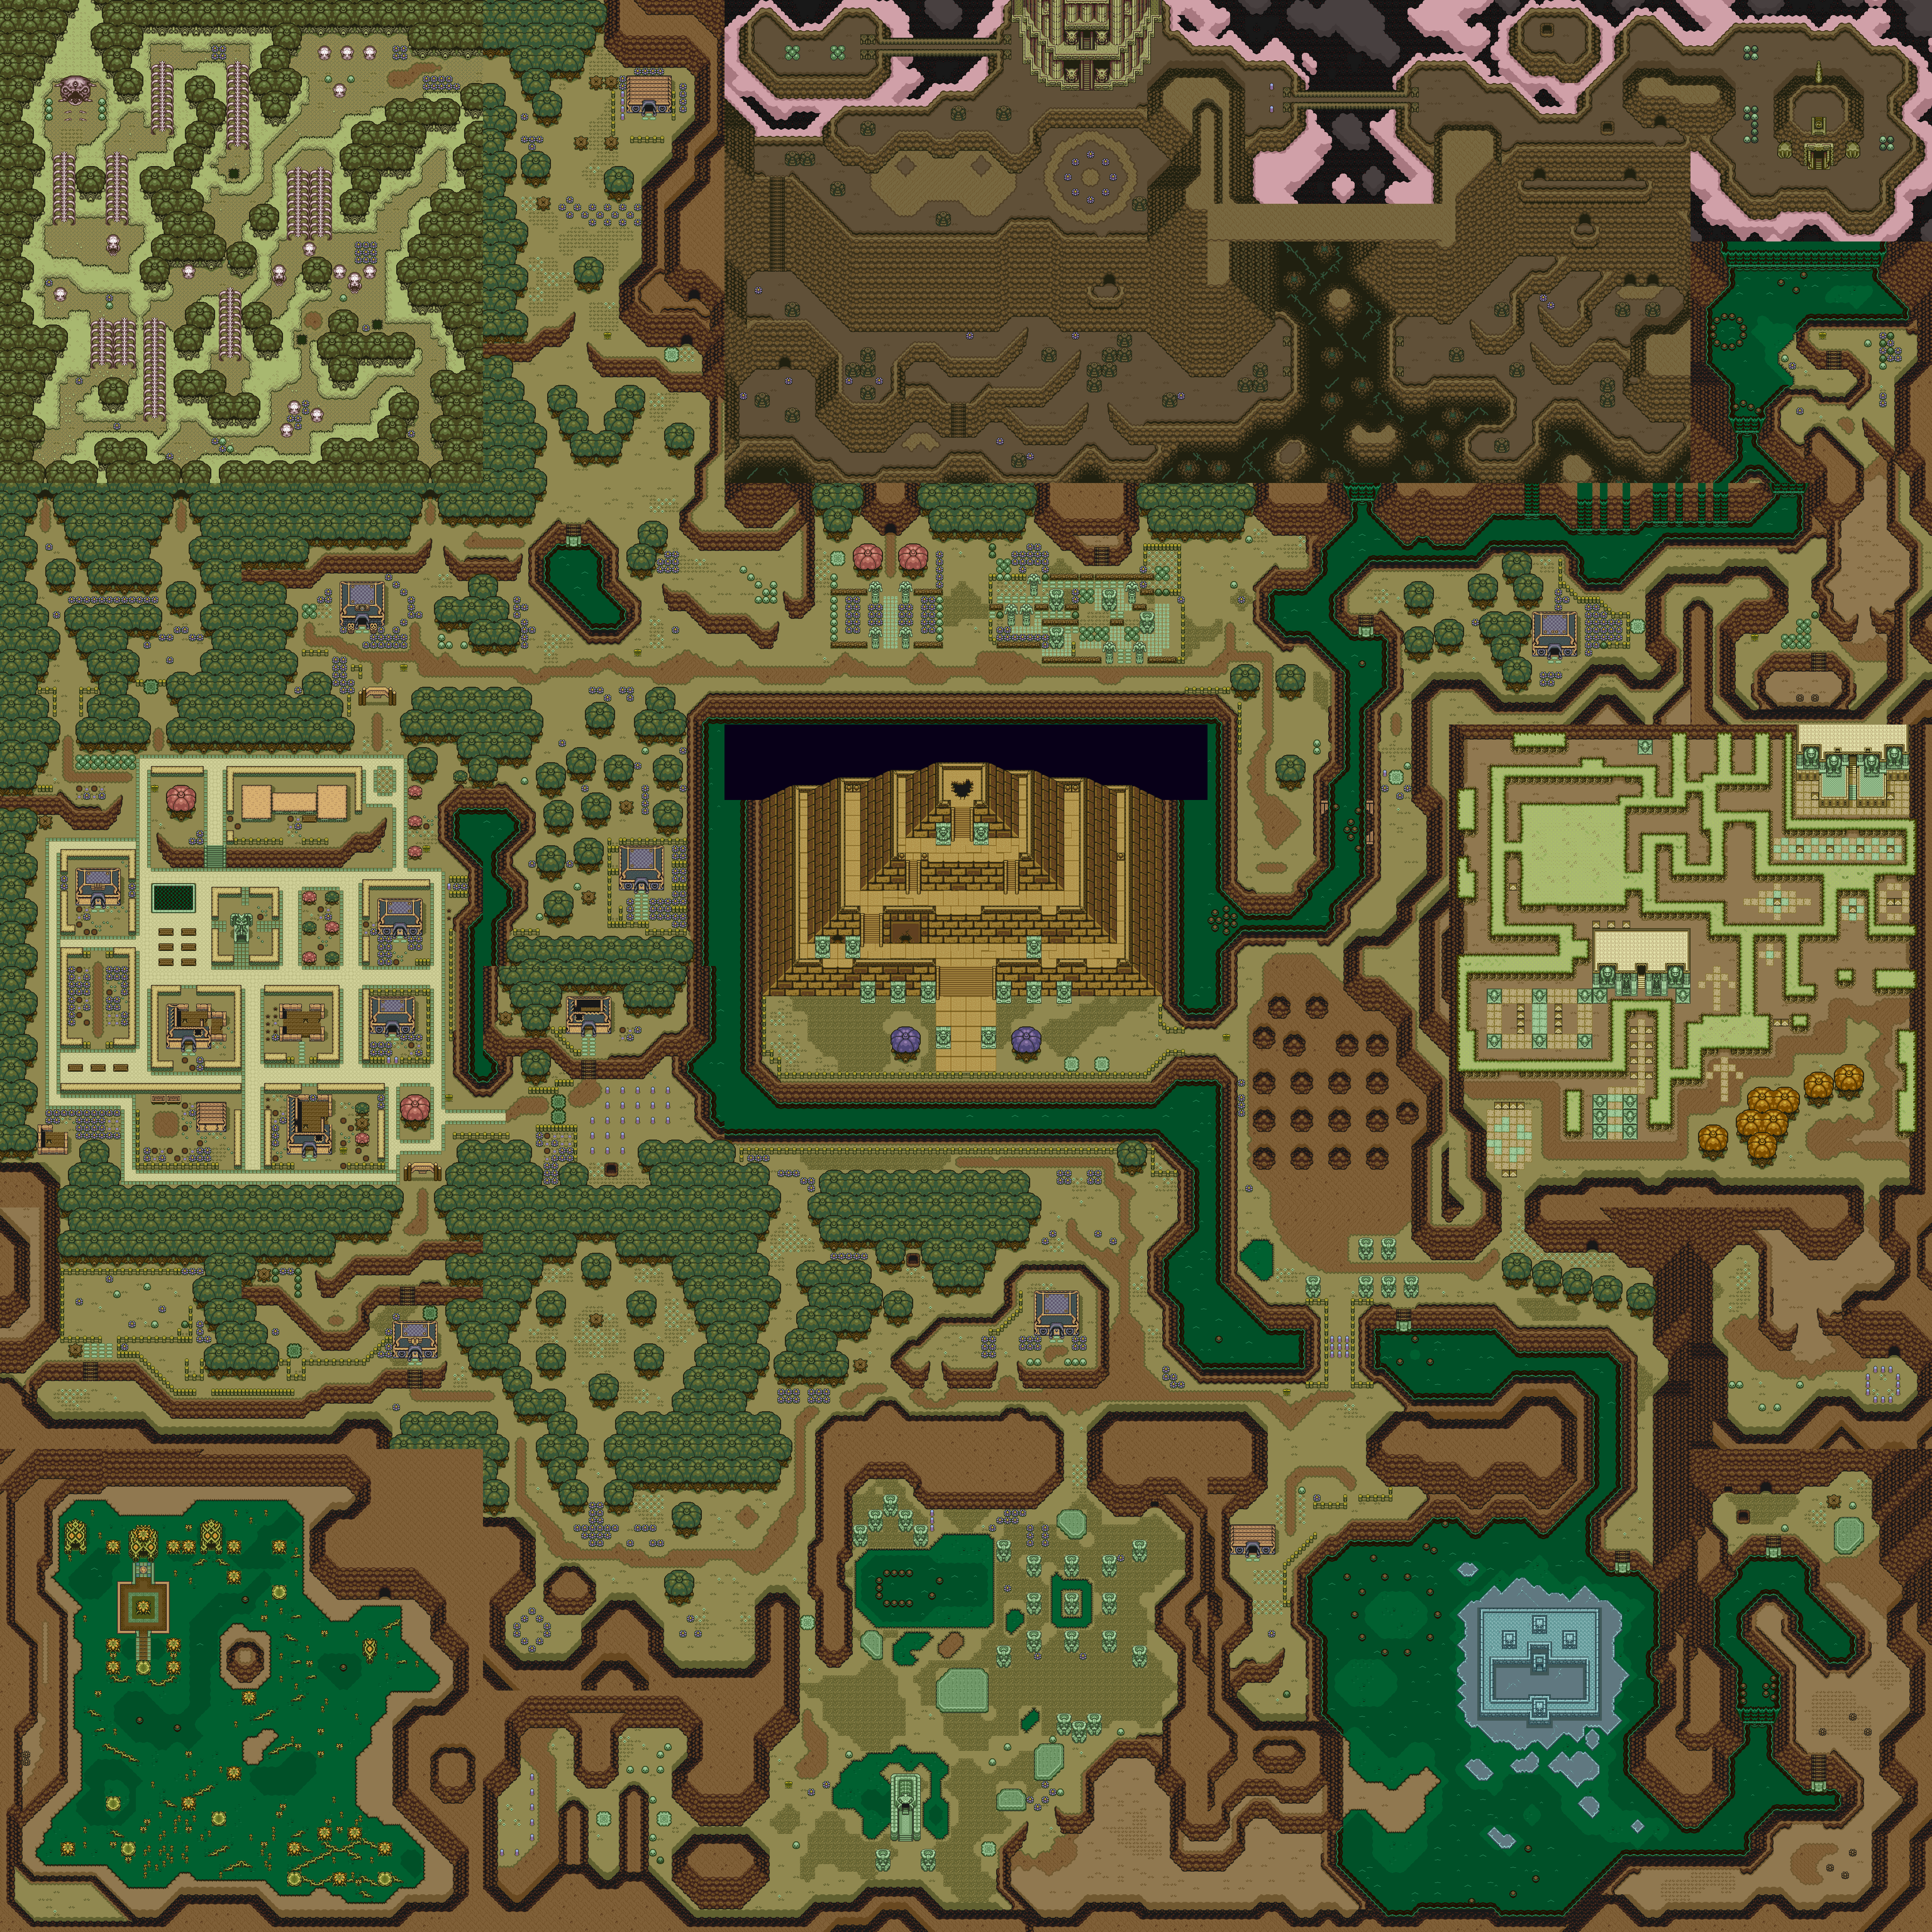
Back in the Dark World, there is a dead end where the entrance to the desert in the Light World is. However, if you use the Magic Mirror behind the stakes, you can go left and use the Book of Mudora at the stone slab to get the Bombos Medallion, which will set all on-screen enemies on fire.
Remember how you drained the lake in the swamp south of Link's House? Well, if you come to the location of where you did it in the Dark World, use the Magic Mirror in the Light World, drain the lake there and go back to the Dark World, the lake will be drained in the Dark World. With the lake drained, you'll be able to get around in the second Dark World dungeon of the game: the Swamp Palace.
Swamp Palace
.png)
.png)
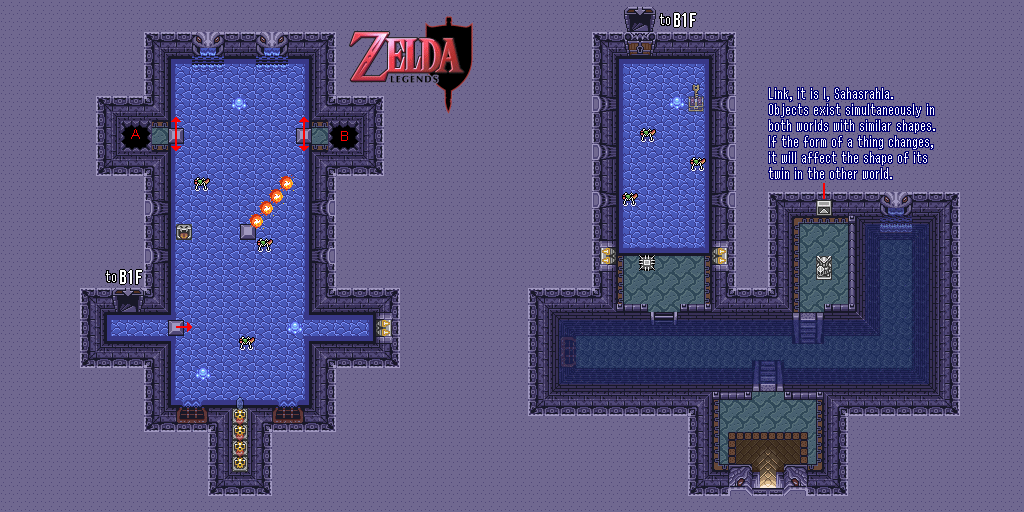
When you enter the dungeon, you'll find out that you won't be able to get anywhere in this dungeon. The only thing you can reach is a telepathic message tile. It's a message from Sahasrahla, telling you that objects exist in both world with similar shapes, and if you change something in one world, it'll change the same thing in the other.
Go back to the Light World with the Magic Mirror near the Swamp Palace, and enter the Swamp Palace there. Drain the water, and head back out. Go through the portal back to the Dark World that the Magic Mirror left, and the water will be drained in the Dark World as well. Go back into the Swamp Palace there and the chasm near the entrance will be filled with water, allowing you to swim to the ladder and explore the dungeon.
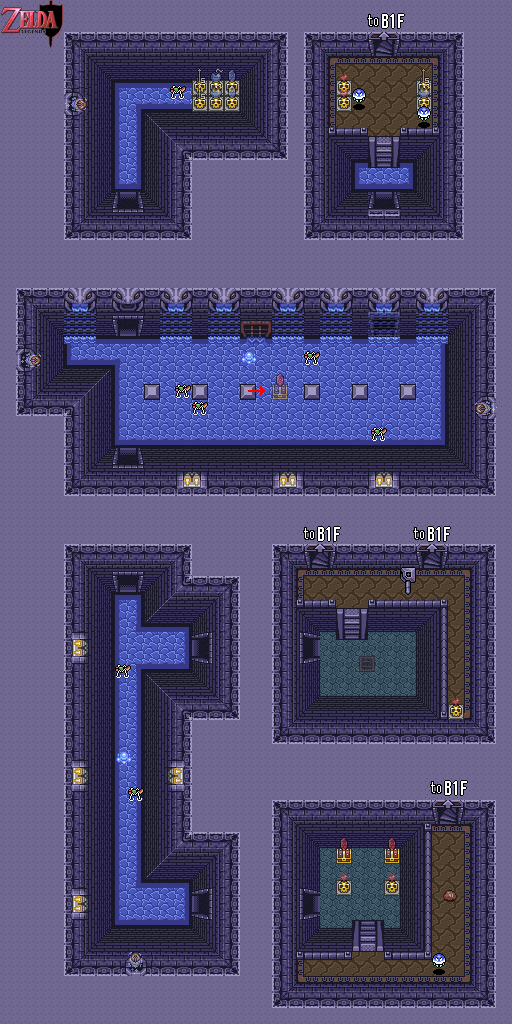
The ring-shaped monsters that look like they have green noses are easily destructible, but the blue monsters that almost blend in with the shallow water on the floor are something else. They're pretty fast and both travel and bounce off the walls at 45-degree angles. You'll be spending more of your time avoiding them than anything else. You can destroy them, but they just disappear when your sword hits them, and they keep re-spawning no matter what.
The brown square-like object with holes on each side shoot fireballs similar to what the Zoras spit at you whenever you swing your sword. The fireballs track you, but these brown things can't fire at you diagonally, so they're not much of a problem.
Those grey things that look like turnstiles are really the switches for the floodgate. Walk up to the right side and keep walking into the stick-like part of these switches to push them and activate the switch to release the floodgates.
The dark holes in the walls contain orange fish-like monsters that come out of the holes and swim around the room. Like the ring monsters, they're easily destructible.
You'll have to swing through the wall in order to hit the color switch behind the locked door and activate the nearby floodgate. Once you trigger the switch, raise the blue blocks up again. You'll need this for one of the pits on the first floor...and real soon, too, otherwise you'll have to go all the way back and do what you should have done before you left the room.
If you have the orange blocks down, then congratulations! You can get the Big Key!
The Big Chest contains the Hookshot, which makes its series debut in this game and has appeared in many Zelda games since. Use it to grapple onto pots, skulls and other things that can acts as hooks from a long distance and scale pits and gaps in a hurry!
One of the rooms has a couple of waterfalls. The waterfall second to the right is a door to another room, but unless you looked at your map, you wouldn't know this.
The boss of this dungeon is a bunch of clouds. Use the Hookshot to drag one of the clouds to you, and destroy it with your sword. When you destroy all the clouds, the flying one-eyed monster that the clouds were hiding will leap up and land on the ground before bouncing off the walls at 45-degree angles. If you have the Level 3 sword, you can defeat the boss with two whirlwind slashes and get the Heart Container and Crystal easily.
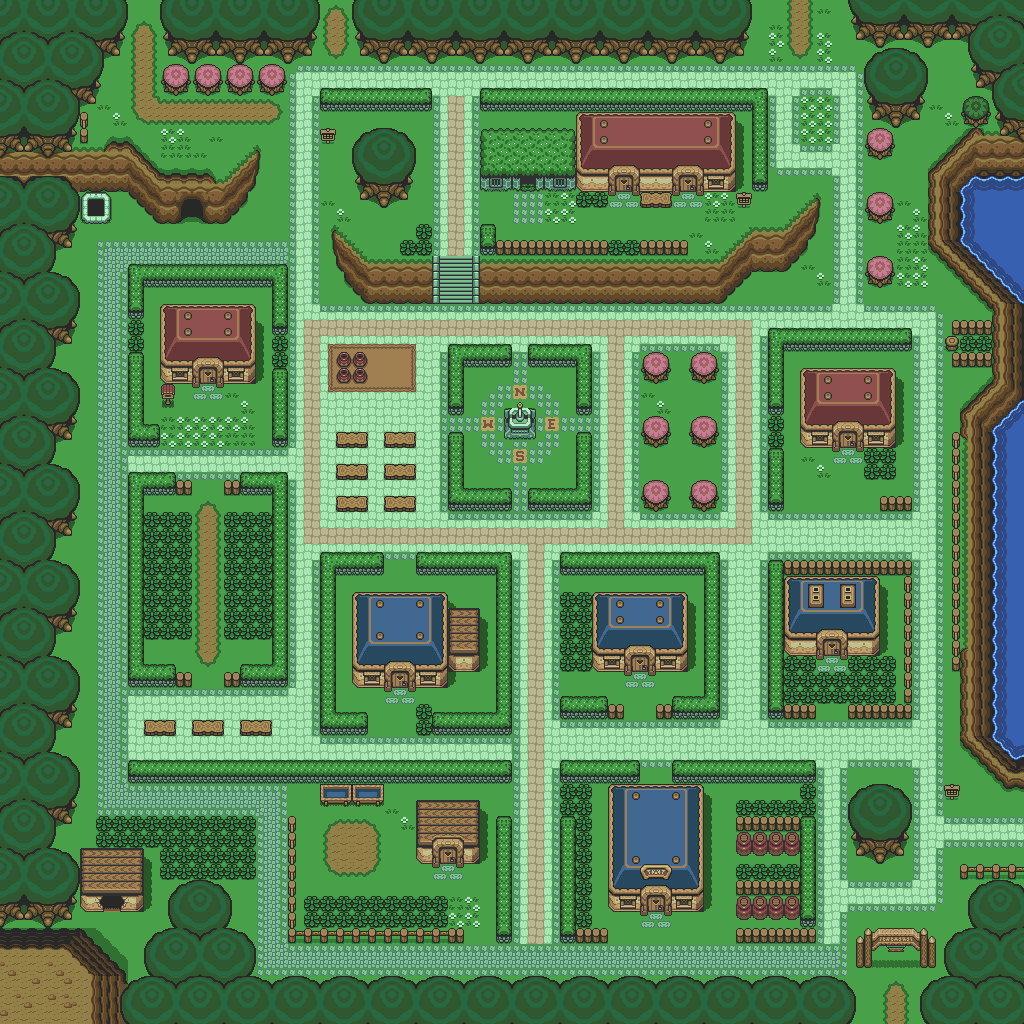
When you return to Kakariko Village, the village will be swarming with soldiers.
To the east of the village is the blacksmith's house. To the right of the village is the Smithy's House as well as another well. If you go inside and talk to the Smithy, you won't be able to do much as his partner has gone missing. Hit the stump next to the house with the Magic Hammer, then drop down into the well. Now that you have the Magic Hammer, you can use it to pound a wooden stake down and drop down the nearby well. Go north after you drop down to find some jade-colored statue of two hands holding a bowl with some sort of red liquid in it. Sprinkle Magic Powder on it, and you'll unleash a demon. He's ticked that you've woken him up, and he's going to curse you. This is actually curse you're going to want anyway, and you're going to get it whether you want it or not, as it cuts your Magic Power consumption by half! This is going to be very useful later on when it comes to using the Medallions and the Ice Rod. My only question is...what's with the bat when he speaks? It's like they predicted Fluttershy in My Little Pony: Friendship Is Magic almost twenty years beforehand and used her passive mannerisms as the basis for how the bat speaks.
No comments:
Post a Comment