We go exploring again in this video, and this time, we get flippers that allow us to swim to make things a bit easier later on before heading on to Death Mountain.
Exploring Again
Now that you have the Power Glove, you can grab the light-colored stones. You can walk around with the small ones over your head, but you're forced to stay in one spot with the big ones. At least you can look in one of four directions and throw it at an enemy if you need to.
Speaking of the big ones, let's do just that at the desert entrance. One of them contains an entrance to an underground cave, and inside is a guy who will tell you to check out Lake Hylia to find some interesting stuff. You can also keep entering and re-entering to stock up on Rupees - fifty at a time! - if you're ever low on cash.
One of the big rocks has a monster that will keep dropping green Rupees until you kill it or until it disappears.
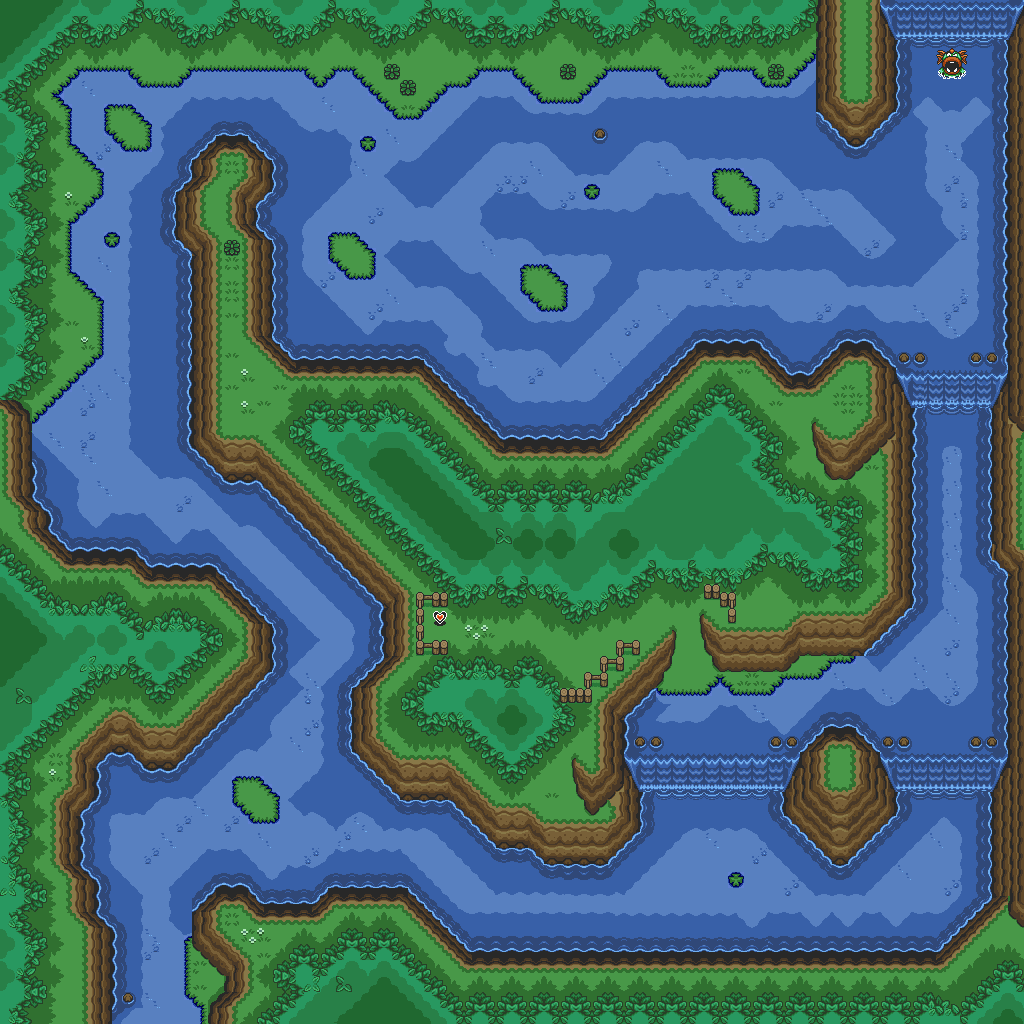
Go back to the Witch's House and grab the big light-colored rock. You'll be able to head east and head towards the Waterfall of Wishing. However, you won't be able to swim yet. Head north when you reach the water, and only step on the light blue area. This is Zorah's Domain.
You may have noticed the sea monsters that come out of the water and shoot fireballs at you. These are Zoras, and judging by what we know about Zoras from the in-game universe, these are most likely "River Zoras," as they are violent and shoot fire.
Go through the maze. You'll notice that some of these Zoras will surface and walk around when they pop up in the shallow waters, and they will come straight at you, making them easy game for your sword.
When you reach the end, a giant Zora will show up and give you a pair of flippers if you pay him 500 Rupees. These are the "Zora's Flippers," and they allow for Link to swim. He'll also give you the ability to use the whirlpools to warp around Hyrule. I usually get these when I'm done finding all three Pendants, but you can get it as soon as you get the Power Glove.
You can then swim south and take a shortcut that skips most of the maze, taking you almost immediately back to the start. When you jump down the first waterfall, though, go west before you do anything else. This gives you another Heart Piece - your ninth. From there, you can now leave and enter the Waterfall of Wishing, which is just west of the entrance to Zora's domain.
Throw an item in there. When the fairy shows up and asks you if you threw the item in there, say yes. (She'll know if you're lying.) She'll either give it back to you or upgrade it, but the upgrading only works with two items.
If you throw an empty magic bottle in there, it will be filled with the Green Potion.
If you throw the Boomerang in there, it'll become the red Magic Boomerang. This item not only leaves a sparkly trail when thrown, it also goes the length of the entire screen.
If you throw the small blue shield in there, you'll get a slightly bigger red shield. This allows you to defend against fireballs, making fighting against Zoras - and other enemies - easier.
If you bomb the crack in the wall to the east, you'll find four Faeries.
From here, head to Sanctuary.
.png)
There is a grave in the graveyard just east of the cemetery that allows you to go back to the hidden passage that leads to the Sanctuary (you know, the one that you took Zelda through earlier). You can now the crack in the wall that you couldn't before. You could use a Bomb to do this, but you can run into it with the Pegasus Boots. As long as it's that circular-style crack in the wall, you can do this. You'll be able to get more Bombs, 10 arrows and 300 Rupees here.
Sometimes, when you pick up a large rock, you'll find one of the little creatures that hides under rocks and bushes and runs away from you. When you get near him, he'll drop a bunch of Rupees. As you pick one up, he drops another. You can keep doing this until he disappears, which can lead to a small yet welcome unexpected windfall.
Near the northeast entrance to the Lost Woods entrance is a pair of lumberjacks. They'll be cutting a tree, and if you talk to the guy on the right he'll mention how funny the tree feels when they cut it. The guy on the left mentions the fog in the Lost Woods, which we've already noticed earlier.
From here, head back to the lumberjacks.
Death Mountain
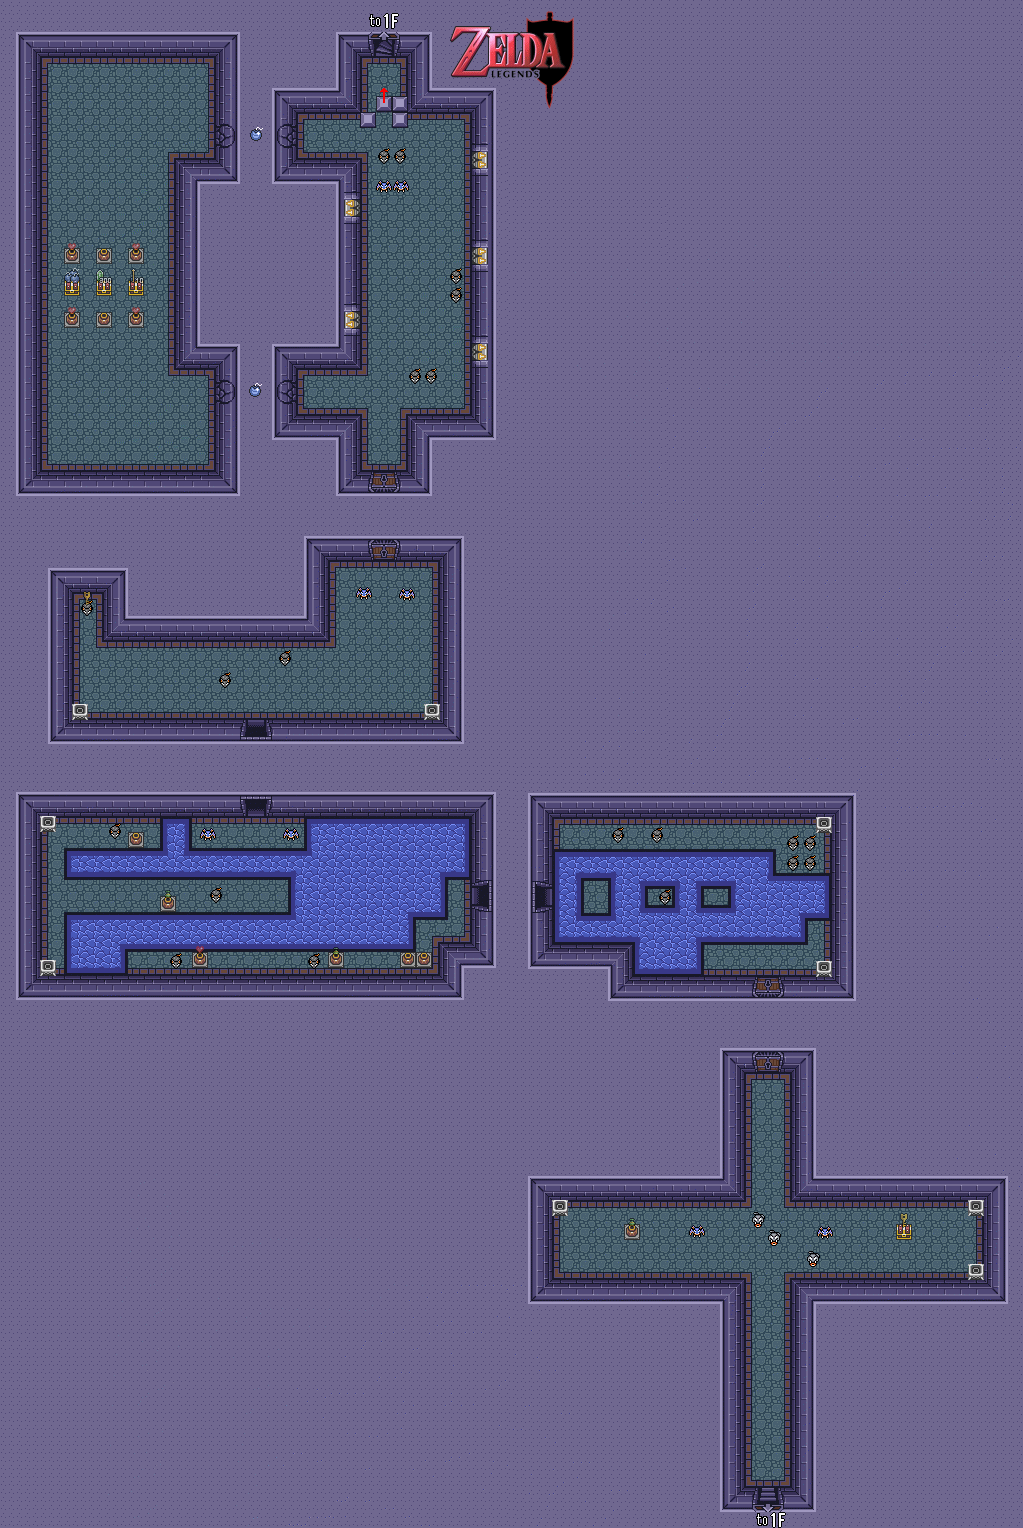
The cave to the south of the lumberjacks' house leads to Death Mountain. and now that you have the Power Glove, you can enter it. Go through the maze, and you'll eventually find an old man. He appears to have gotten lost and needs help making it back to his home in the mountains.
From here, go through the maze. The old man will tell you to turn right at specific parts of the maze. If you go in other directions and explore, you'll find the lone pot in this maze. The old man will tell you that there's a Heart underneath the pot...and there is! He also tells you that his granddaughter (who is probably the same age as Link) was also taken to the castle by the King and has not returned since, so the old man could quite possibly be a descendant of the Seven Wise Men, as is his granddaughter. He also knows about the wizard's plans to open up the Golden Land. The old man slows you down a little bit, as you'll go at normal walking speed if you're dashing with the Pegasus boots, but it's more than worth it.
.png)
.png)
When you make it outside, you'll be at the mountain. When you return the old man to his home, you'll be able to start at his home as opposed to Link's House or the Sanctuary when you save and quit. That's not all...you'll get the Magic Mirror. If you ever wander into a magical transporter, use the Magic Mirror to return to Hyrule.
Go inside the old man's house, while you're at it. The old man will tell you about the Moon Pearl, which you'll need if you have any hope to stop whatever evil is behind what's going on. You'll have to enter the mountain tower to find it. The old man will also completely heal you if you talk to him.
No comments:
Post a Comment