It's time to head to Ganon's Tower. Our adventure is almost at an end...
Ganon's Tower
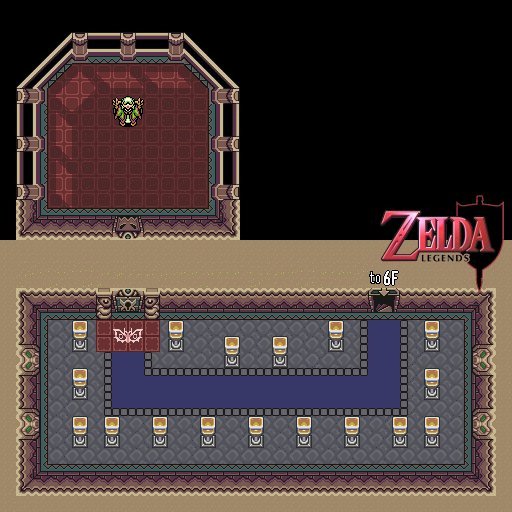
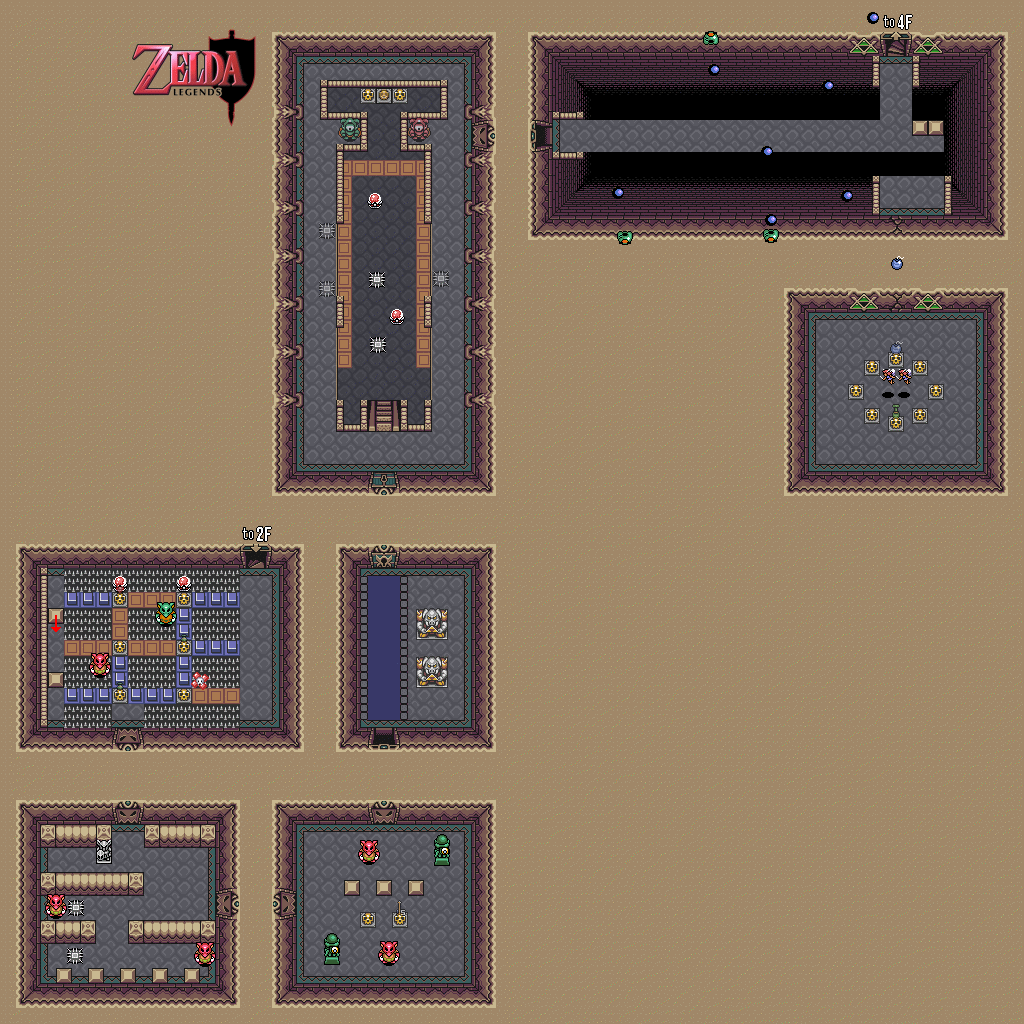
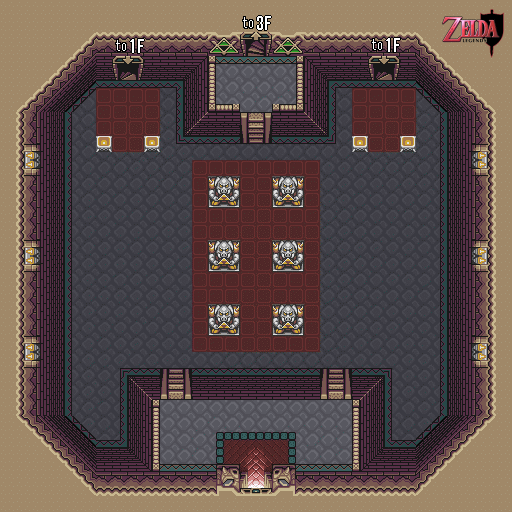
You'll enter at the second floor. Go down one of the side staircases first, as that takes you to the first and basement floors of the tower. These contains some good treasures, including the Big Key. You'll really need the Big Key here, since the Big Chest treasure is worth taking.
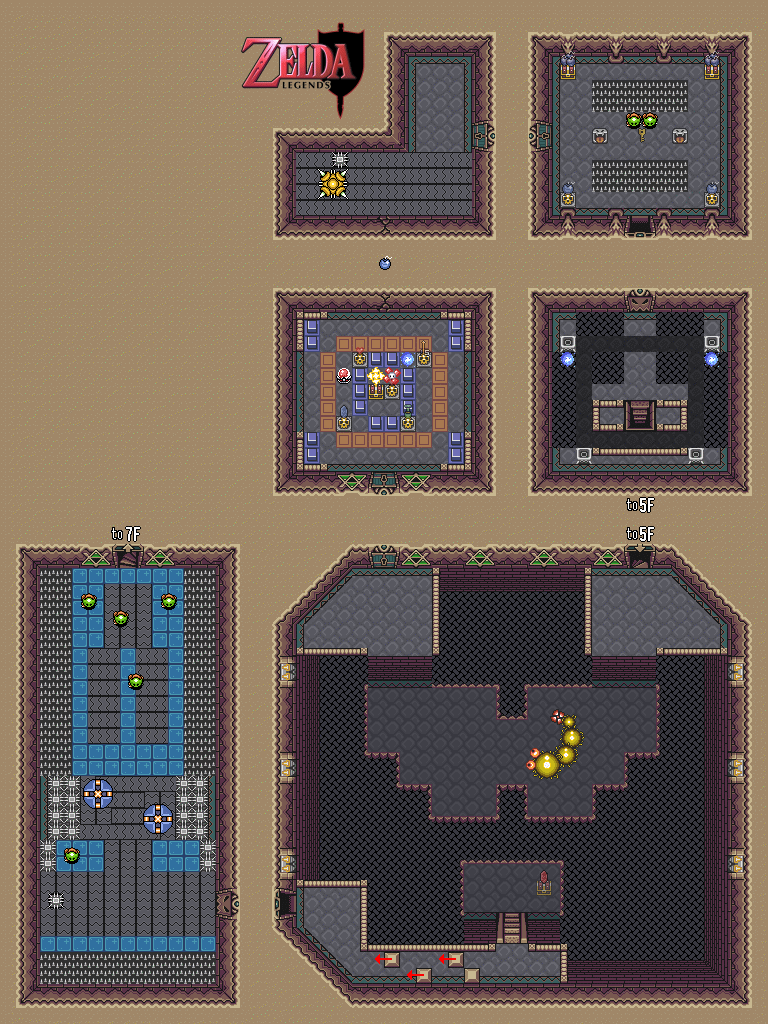
The teleporter maze is really easy, since all you have to do is step on one and you'll be able to plot your path just by going to the closest teleporter that takes you where you'd want to be in the other room.
There's another invisible path maze, but instead of using the Ether magic to light the way, just light the lantern to the right with the Fire Rod. This will automatically reveal the path until the lantern's light burns out.
This tower is also a boss rush of sorts, and you'll find the bosses from the Light Palace dungeons here. The giant Armos Knights from the Eastern Palace can be taken down with one hit each now that you have the Silver Arrows, so go ahead and use those. Not even the ice physics in the room can stop you now!
The door to the north of them contains the Big Key, and you'll find a shortcut to the Big Chest nearby. Inside the Big Chest is the Red Mail, which provides even more protection than the Blue Mail.
There's a switch on one of the walls in the first floor. It doesn't do anything you'd like it to do, so leave it alone.
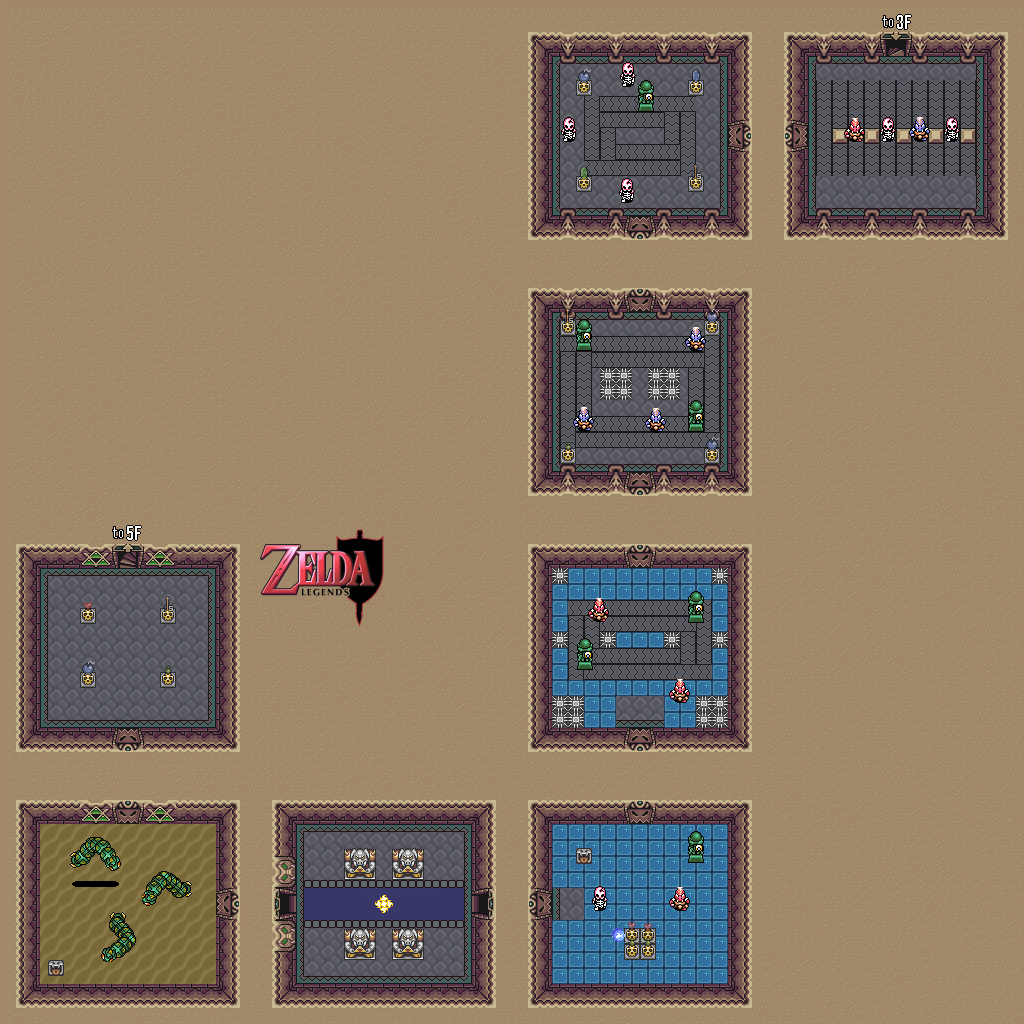
The room with the evil floor tiles also has a Ceilingmaster, so hiding in the doorway to avoid the tiles is a little harder this time. Since you have the Level 4 Sword, hide in the doorway and power up the Whirlwind Slash. When the Ceilingmaster is in range, smack it with the whirlwind slash to get rid of it!
To light the four lanterns in the next room up, you'll have to move a block out of the way near one of them and then light them from top to bottom. To hit the colored block switch afterward, you'll have to toss a Bomb to the conveyor belt that moves towards it as quickly as possible. There's no other way. From there, open the upper-left chest last. It contains the Compass and also opens up a bunch of pits in the floor when you get it.
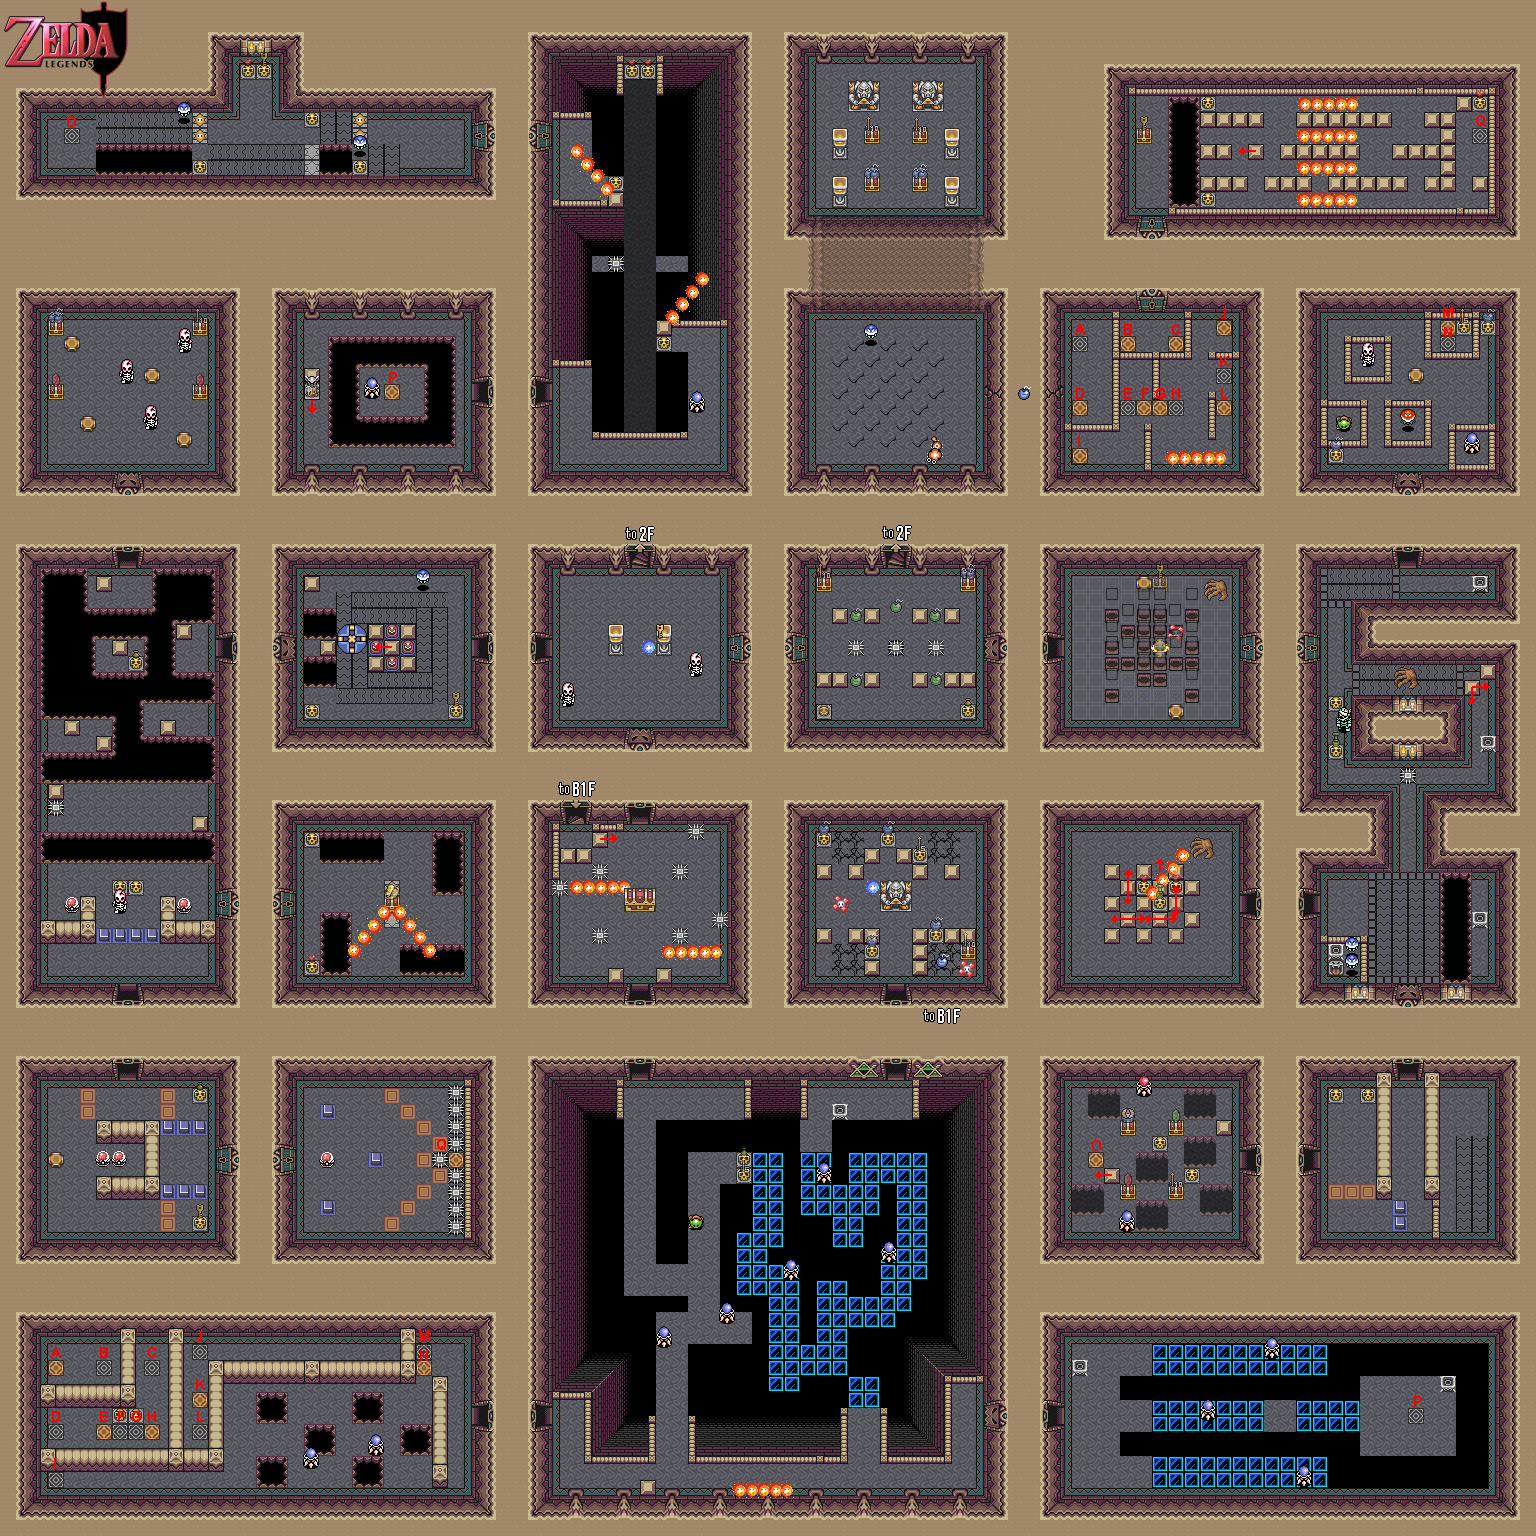
After the conveyor belts (which is self-explanatory; go get the key in the nook to the north wall), get to the other side of the bridge before the floor collapses with the help of the Magic Cape. In the next room, move the statue to find the secret pit-moving tile that allows you to touch the teleporter tile. You're now back to the big room near the Big Chest.
Trying to make it to the cracked wall near the chasm? Run into the blocks with the Pegasus Boots. When you're knocked back, you'll be sent to the other side before you hit the ground. You can refill your life and magic here.
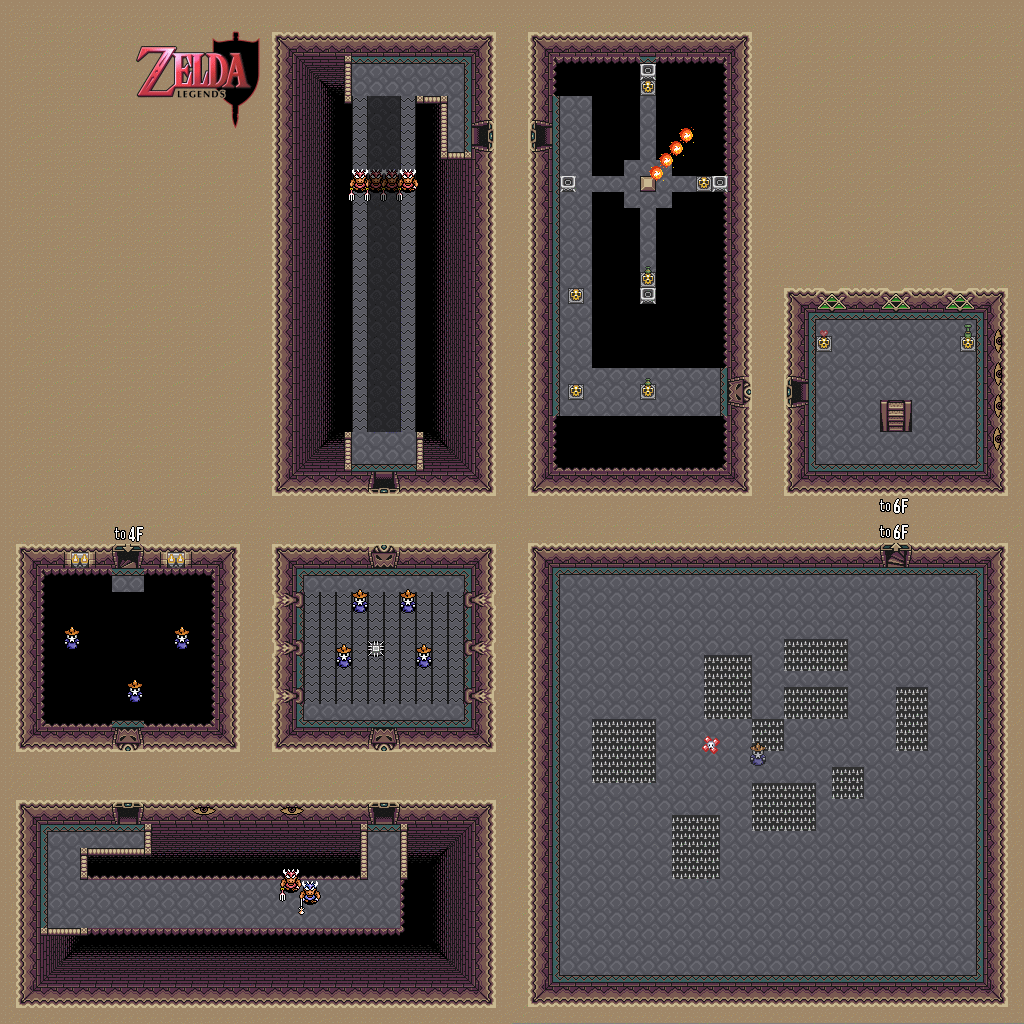
The laser-shooting statues will soon be on conveyor belts as you ascend the tower. Use the Bombos Medallion to take down all the enemies in these rooms so you can breeze through them.
You'll fight the desert worms from the Desert Palace again. The same tactics apply, but since you have the Level 4 sword, you can kill all three worms with two whirlwind slashes.
You'll be dealing with a few more lantern-lighting puzzles that require the Fire Rod, but there's really nothing to them.
You'll fight Moldorm from the Eastern Palace again. Stay near one of the walls and whack Moldorm in the tail with a whirlwind slash. Since you have the Level 4 Sword, this will kill him immediately.
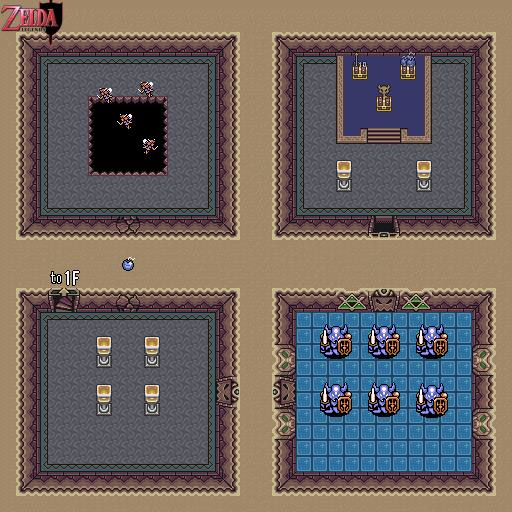
The boss is Agahnim. This time around, he splits into three and teleports around the room, sending a salvo of fireballs at you to send back at him. The clones are translucent and can't be damaged, while the real one is opaque and has a darker shadow than the other two. This allows you to hit Agahnim multiple times whenever possible. When you beat him, Agahnim will fall and a blue bat will pop out of his body. This is Ganon. Link will use the Ocarina and the Bird will drop him off at the top of the pyramid in the center of the Dark World, which is weird considering that the bird only appears in the Light World.
The bat will fall through the base of the pyramid and make a huge hole in the ground that you can fall through.
No comments:
Post a Comment