We may have rescued a baby dolphin, but now a storm has stranded us on some islands. Not surprisingly, the game starts to get harder.
Chapter 3: Storm and Calm
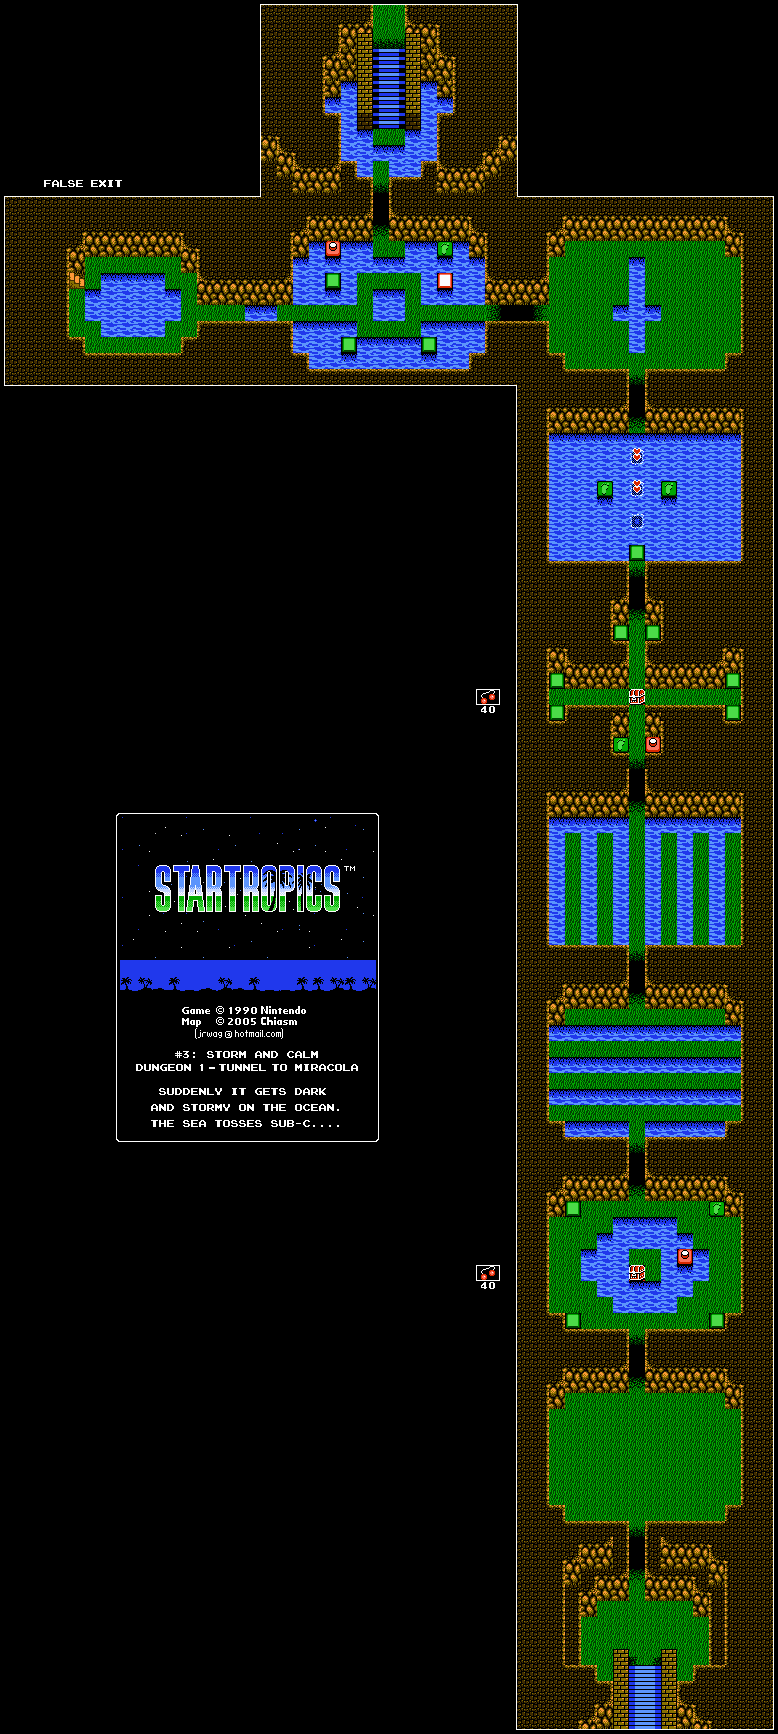
You'll eventually get caught in a storm and get marooned on a beach. You won't be able to reach Sub-C, which is currently wrecked in the rocks and unreachable. You'll have to head down the path to continue on.
You'll soon find a hut. If you go in, you can talk to the guy inside to drink some coconut milk and refill all of your health. The man will then tell you to head to Miracola. That will be further to the east, but you'll have to go through a dungeon to get there.
Fortunately, the dungeon is pretty short. Unfortunately, this is where the difficulty picks up.
The light blue birds will come at you when you're close enough to them. Be ready to strike when they do. They take two hits to kill.
The bolas are a throwable weapon that can do some good damage.
The flying monkeys jump around randomly. They also take two hits to kill; just make sure to pay attention and be ready to strike.
In the room with the three snakes, jump just before you get the bolas from the chest so the two snakes to the sides don't hurt you.
If you go to both sides of the "cross" with the sinking center platforms, you can refill up to four hearts of your health.
The skull birds speed up and follow you around when you get close enough. Thankfully, you're a bit faster than they are, and you should use your speed to get a few shots in with the yo-yo before running away again. The water gaps will slow them down a bit.
There will be rooms that turn pitch dark. When you go into them, recognize where tiles you can jump to and make your way to them so you can turn the lights back on and even find other things.
If you know what you're doing, you'll be out of this short dungeon before you know it. From there, you'll be able to go to Miracola.
At Miracola, be sure to talk to everybody before meeting the village chief. You'll learn that the village chief's daughter, Bananette, has been sick for so long and that her father is worried. There will also be another villager who will give you coconut milk in the east side of the village; be sure to take advantage of that before you leave.
When you enter the huge hut where the chief is, he will tell you how shooting stars and dreadful lightning appeared one year ago, and that Bananette has been sleeping ever since. He will tell you that a mountain hermit who knows some magic to help her lives nearby, and if you can get help from him, he can fix Sub-C.
Be sure to enter the chief's hut from the north side; you'll be able to check on Bananette that way.
When you're done, head to the northeast corner and talk to the guard to leave through the other side. It's time for another dungeon!
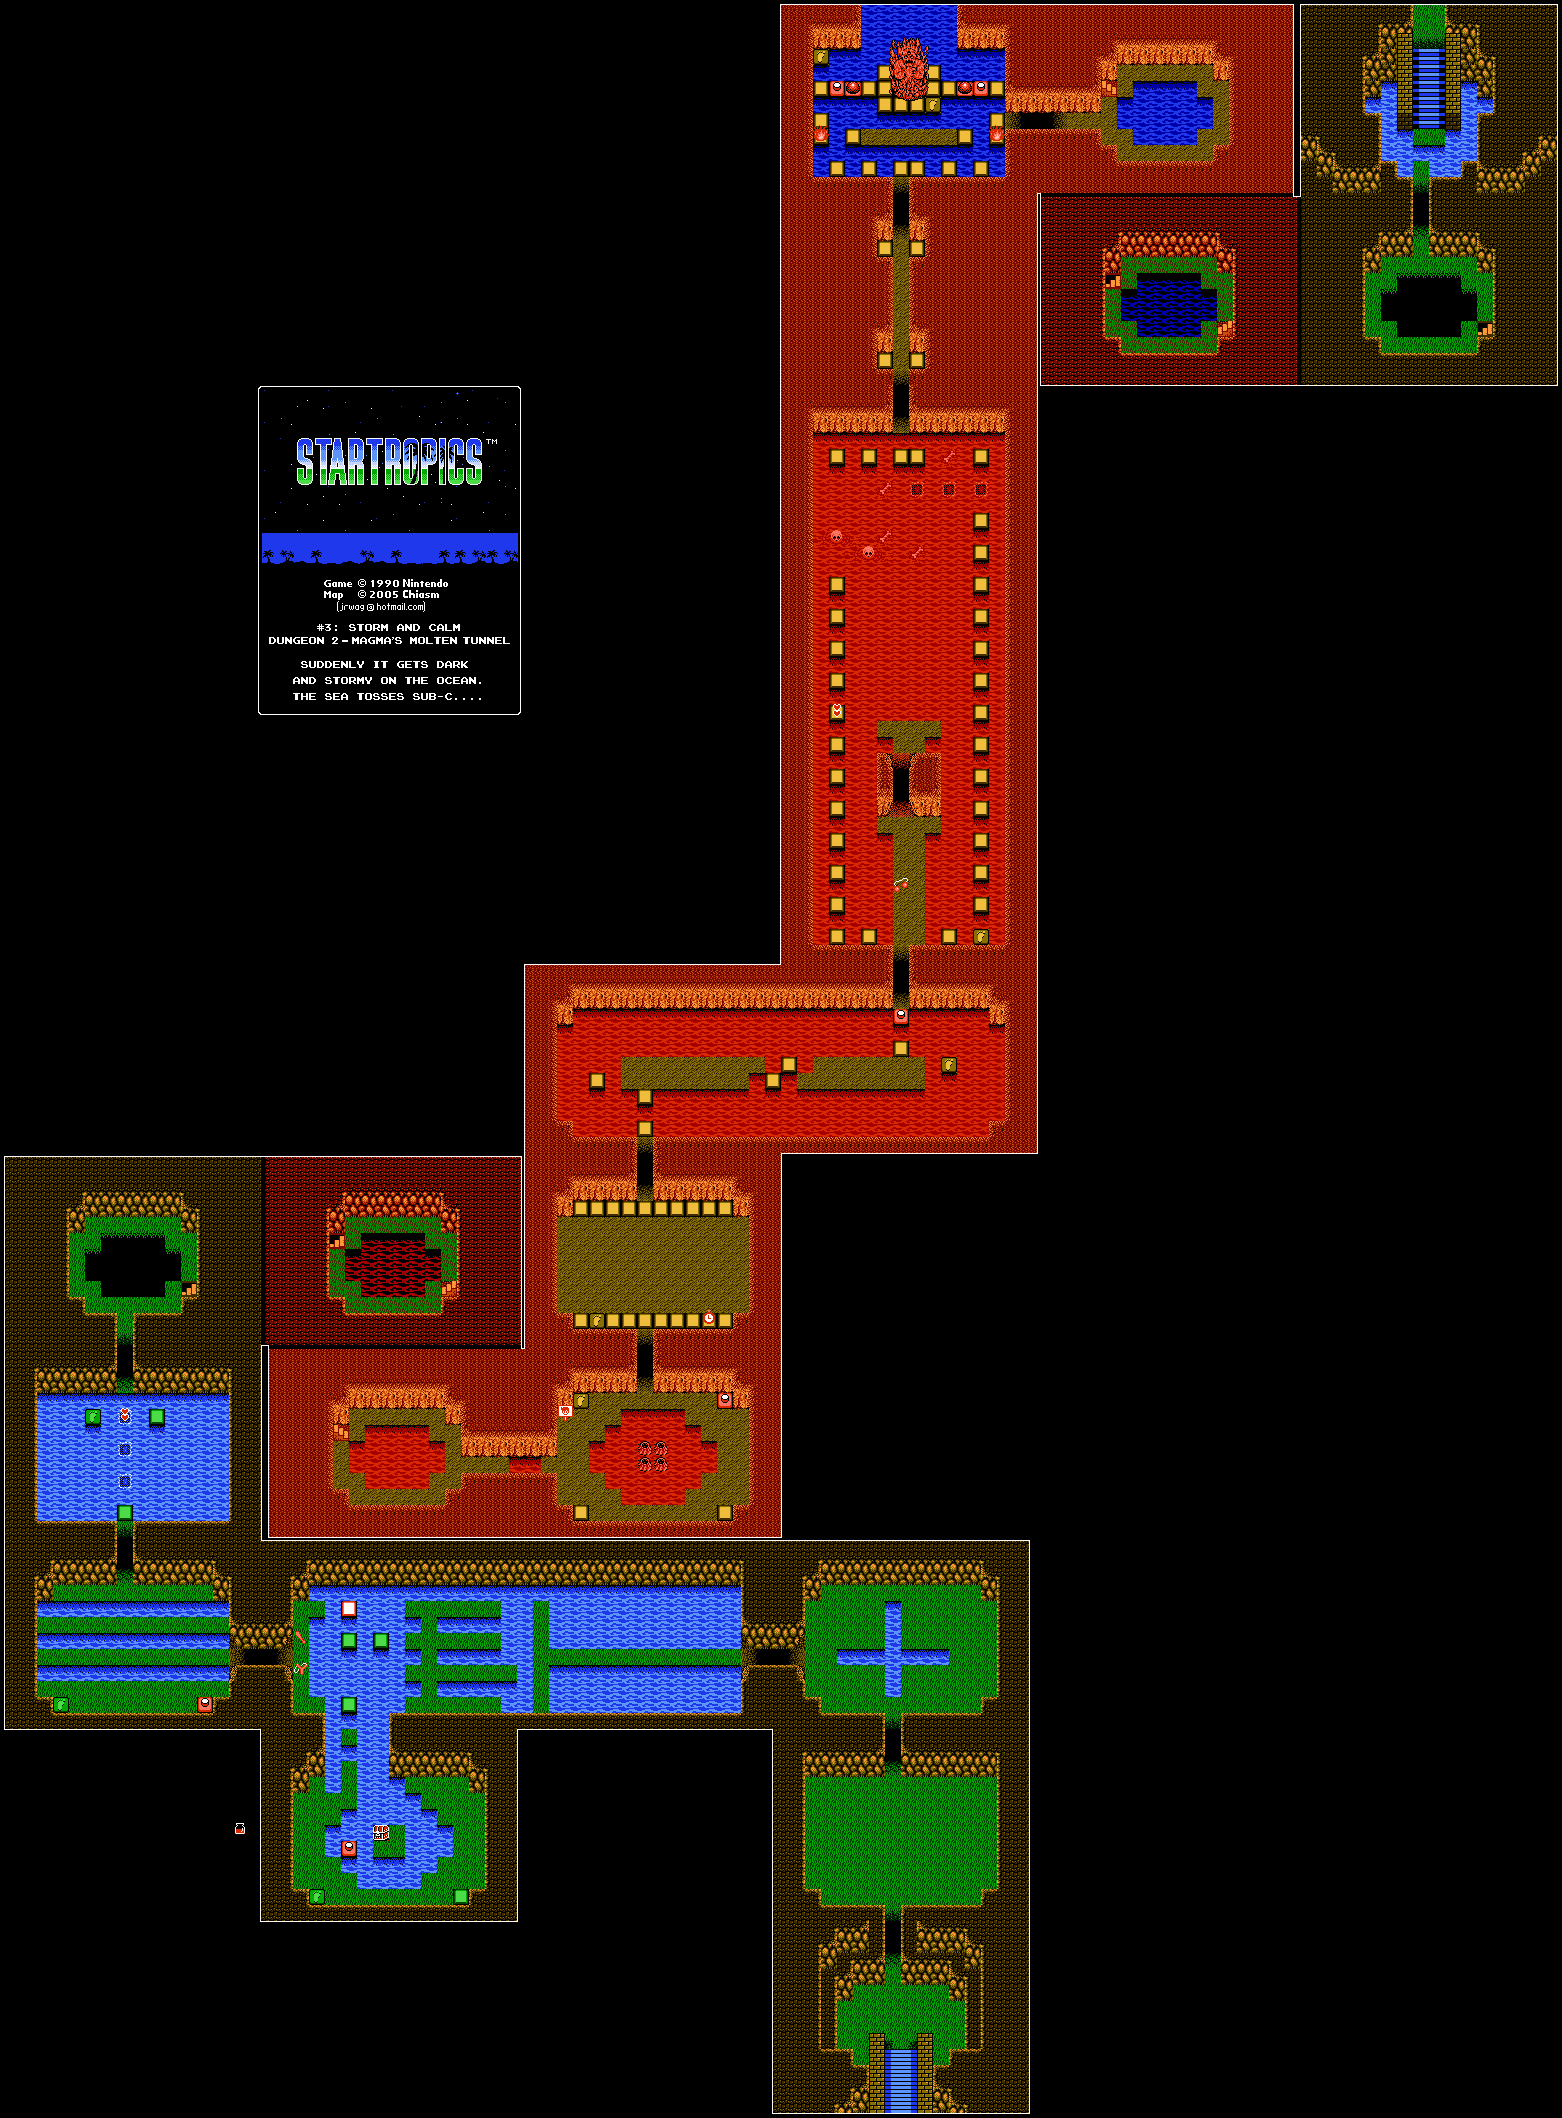
Use the same tactics you used in the room with the snakes and the bolas to get past the first room in the dungeon.
In the first dark room, the second snake from the bottom gets closer to you than the others. Line yourself up with it and jump left, then take all the snakes out. Pay attention to where the octopus is jumping, and leap on those spots to turn the lights back on. From there, you can jump your way south on the lone tile to find a potion. From there, you can safely make your way to the next room.
The flies will move randomly, but if you line up with them diagonally, they will start flying after diagonally. Sidestep them as they come at you, then hit them.
You'll eventually make your way deeper into the dungeon, and the area will get more and more red. This is a more volcanic area, so you'll want to watch out.
The sign with Mike's head on it will either give lives, or take them away. It's random as to what happens, so hope you gain lives if you grab it.
The mini-volcanoes shoot fireballs at you.
The stopwatch will slow down all enemies and turn them gray for a short time.
The lava monster pops in and out of the lava quickly, and will spit projectiles. He can be destroyed with the yo-yo, but if you can't get that luxury, stay on the move to avoid being spat on.
In the room where you have a choice between the set of left tiles and the set of right titles, take the left first, then go back after grabbing the two hearts and take the right path all the way to the end.
The boss battle is a fire monster. Here, you'll have to jump on tiles to activate switches. By jumping on the switches, you'll be able to get rid of support beams for the platform supporting the fire monster. When you get rid of both, the fire monster will fall into the water and die. From here, you can get out of this dungeon.
To the north of where you come out, there is the castle of Shecola. You won't be able to do much of anything here, since you cannot enter simply because you are not a girl. The man near the entrance will tell you to find help at the fortune teller's camp. That camp is all the way around the castle. Just go right and follow the path, and get behind the castle wall to find a fortune teller. She will tell you that she lost her crystal ball and that she dropped it in the nearby swamp to the north. From here, you'll have to leave the room and go east over the bridge to get back to the overworld, then head north through the mountains to get to the ghost town.
As you do this, there will be a stairway. Go down the stairs, and you'll find a Big Heart that will increase your health by one heart and completely refill your health. From here, leave and go all the way north, and follow the path to the north to find the ghost village.
No comments:
Post a Comment