Our adventure continues in the Desert Palace, where we pick up our second Pendant
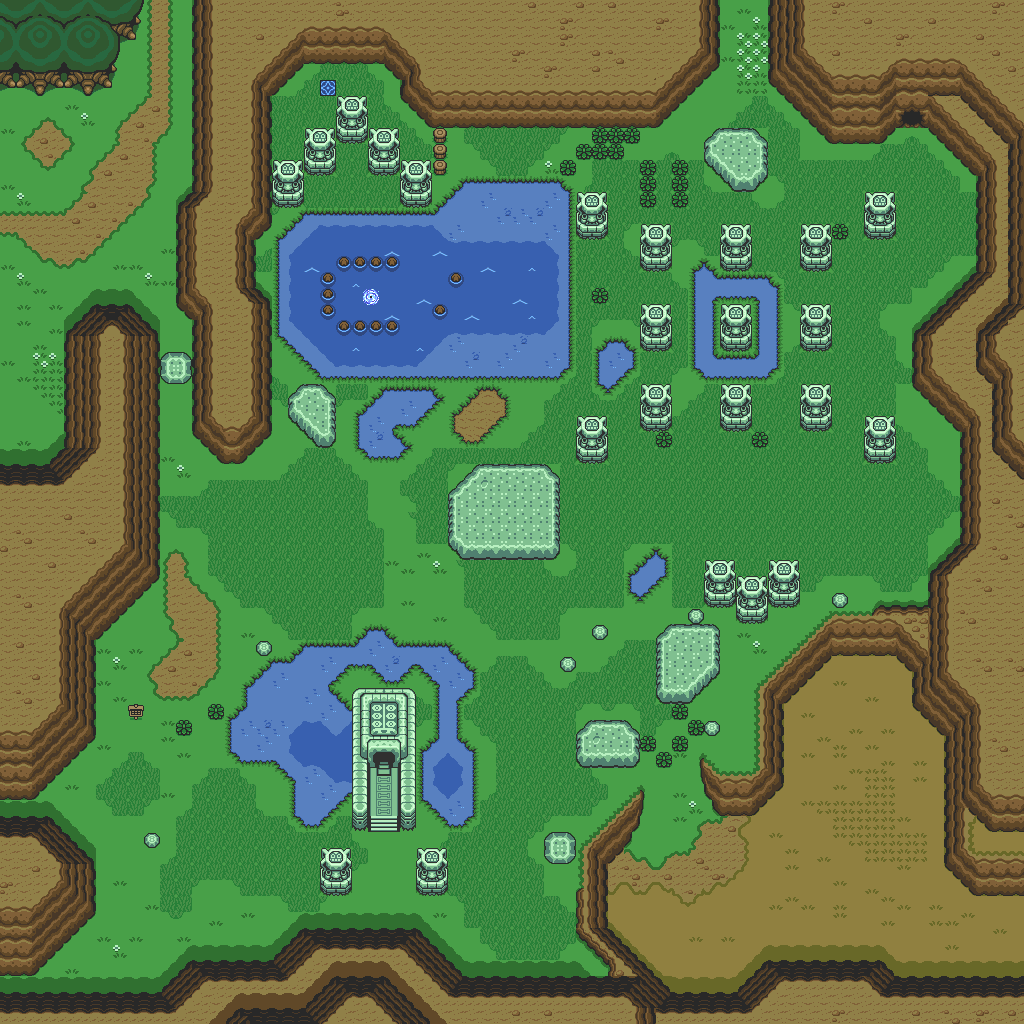
There is another cave one screen south of Link's House. The area here is known as the Great Swamp. Bomb the crack in the wall, and you'll find another site to refill all your health if necessary.
Just southwest of that cave is some sort of temple. You can move the blocks around to open the chest and get some more Bombs, but you'll have to leave and re-enter to move the blocks around so you can get to the door. Do that, and you'll choose between two switches. Don't pull the left switch, it'll cause bombs to drop from the ceiling. Instead, pull the one on the right to release the floodgates, then leave. The water surrounding this building will be gone, and you'll find another Heart Piece - the sixth in the game.
To the west is the desert entrance. There's a bunch of dirt in the ground that makes up the picture of an octopus. Weird. If you grab the sign, the guy standing next to it will follow you around until you off-screen the area. This will also probably be the first time you'll see spider-like enemies hiding in the rocks (they also hide in bushes, too). You can kill them with the boomerang. The cave on this screen has another Faerie that completely heals you. The birds will fly around if you get close enough to them, and they'll try to hit you before flying off.
One screen west is the desert itself. Whack the vultures if they get near you with the whirlwind slash. Watch out for the blue dots speckling the desert, because those are landmines that will explode if you step on them. Also, please don't touch the cacti. They hurt.
There is a cave in the north desert wall that you can easily get to. Just keep going, and bomb the crack in the south wall where the old man is. You'll find another Heart Piece - number seven. If you haven't gotten the Book of Mudora yet, the old man in this cave will tell you about it here.
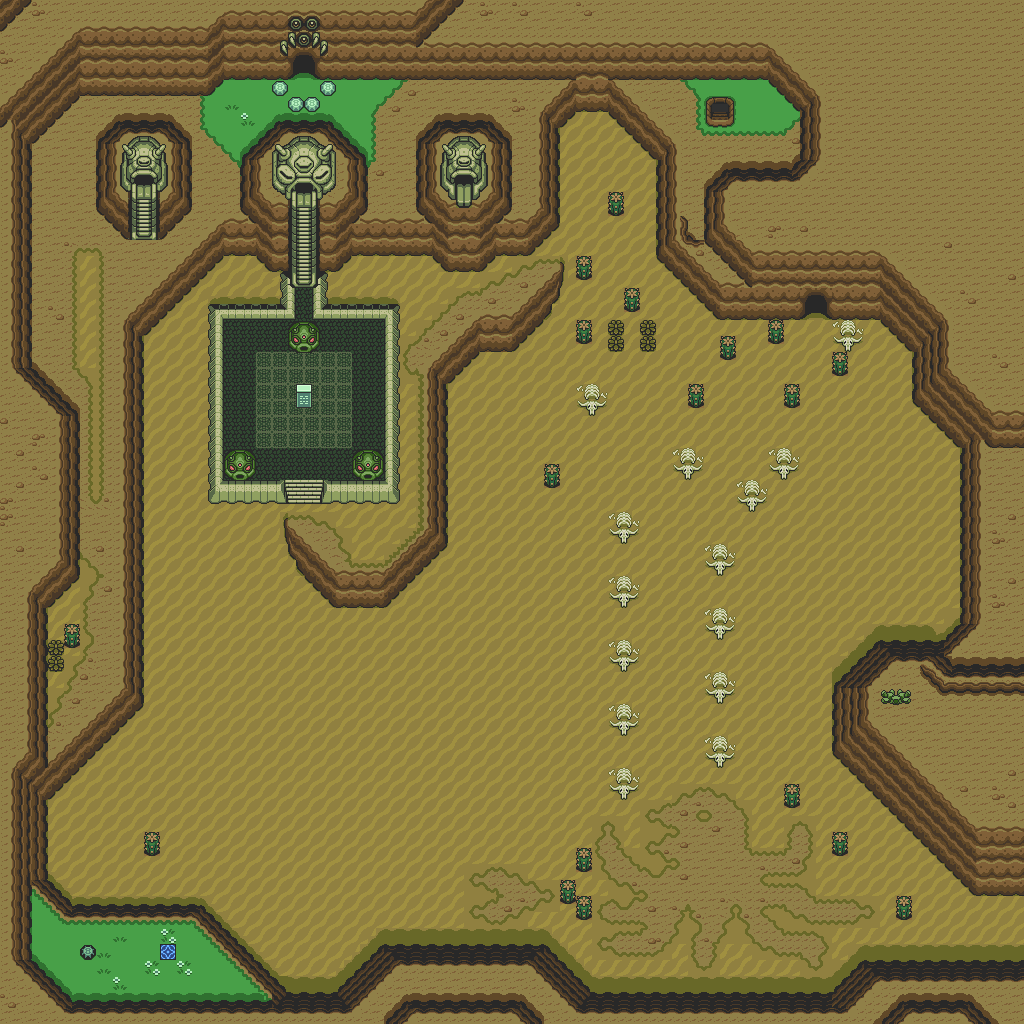
Now it's time to return to the desert. If you see any sand monsters pop out, hit them with the whirlwind slash. You'll eventually find the entrance to the Desert Palace. Use the Book of Mudora to translate the stone slab here, and you'll be able to enter the Palace.
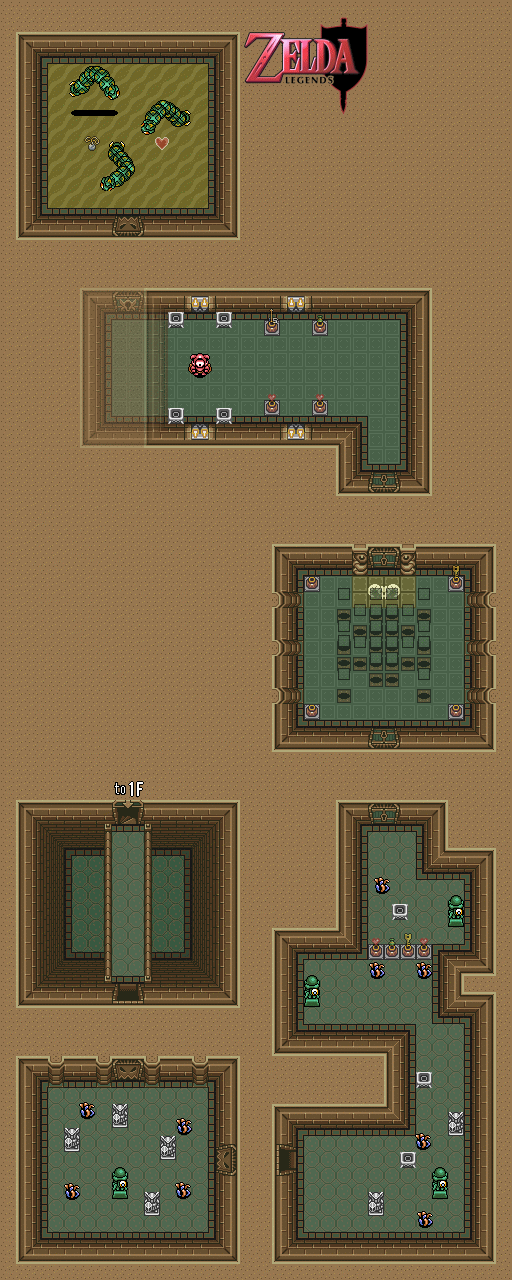
Desert Palace
The plant-like creatures that pop in and out of the sandy ground can easily be killed with the whirlwind slash. Ditto for the monsters that pop out and produce the circles of sand that draw you towards them if you get too close.
The statues with the eye circling around them will shoot lasers at you if they see you. If you're hiding behind something, you'll be safe. There's a trick to it, though: it has to be the same size as the statue or larger. Large torches and other statues? Okay. Pots? You're going to be zapped.
There's a key in the room with the telepathic hint tile, and you'll have to dash into the lit lamp with the Pegasus Shoes to get it.
To get past the statue heads moving across the walls that shoot the iron balls, dash with the Pegasus Boots. With these, you'll easily be able to get to the other side to get the Big Key for this dungeon.
The Big Chest contains the Power Glove. This glove allows you to grab the light-colored rocks much like you can bushes and signs. (You may have noticed some dark-colored rocks. You won't be able to pick these up until later in the game.)
There are actually three entrances. The other two on the sides are the huge statues to the sides of the main entrance. The right one does nothing, but the left one leads you outside. Go south from there to pick up your eighth Heart Container. You now have seven hearts to fight the next boss with. You'll also be able to pick up the rocks and enter the second floor, now that you have the Power Glove.
By pushing one of the blocks in the left entrance, you can open the door to the north to find two fairies. Contrary to what I say, you just need the fairy in the bottle in the first place in order to get an automatic re-spawn should you die.
When you enter the second room of the second floor, you'll be dealing with floor tiles that come out of the floor and fly directly at you. Grab the pot in the lower-left corner, get the key, and get out of there. For the second one, the key is in the upper-right corner. Later on, you'll have to survive the entire onslaught of tiles to get anywhere.
You'll reach what seems to be a dead end when you meet the red armored guy. Light up the four torches to get the wall to move and uncover the Big Key door.
The boss is a bunch of sandworms that jump in and out of the sandy ground. You could play it safe, use your whirlwind slash and take these guys down in mere hits...but here's a strategy that actually takes them down faster. It's called using the Ice Rod. The Ice Rod will take them down in a mere two hits. Just be careful with the magic power because it uses quite a bit. If you're accurate enough, you'll take them down in no time!
You'll get another Heart Container before getting the Pendant of Power.
No comments:
Post a Comment