Why this game mentions Rub-A-Doc and never mentions him again until near the end of the game without thinking that this will raise suspicions, I will never go.
All maps by zagato blackfist.
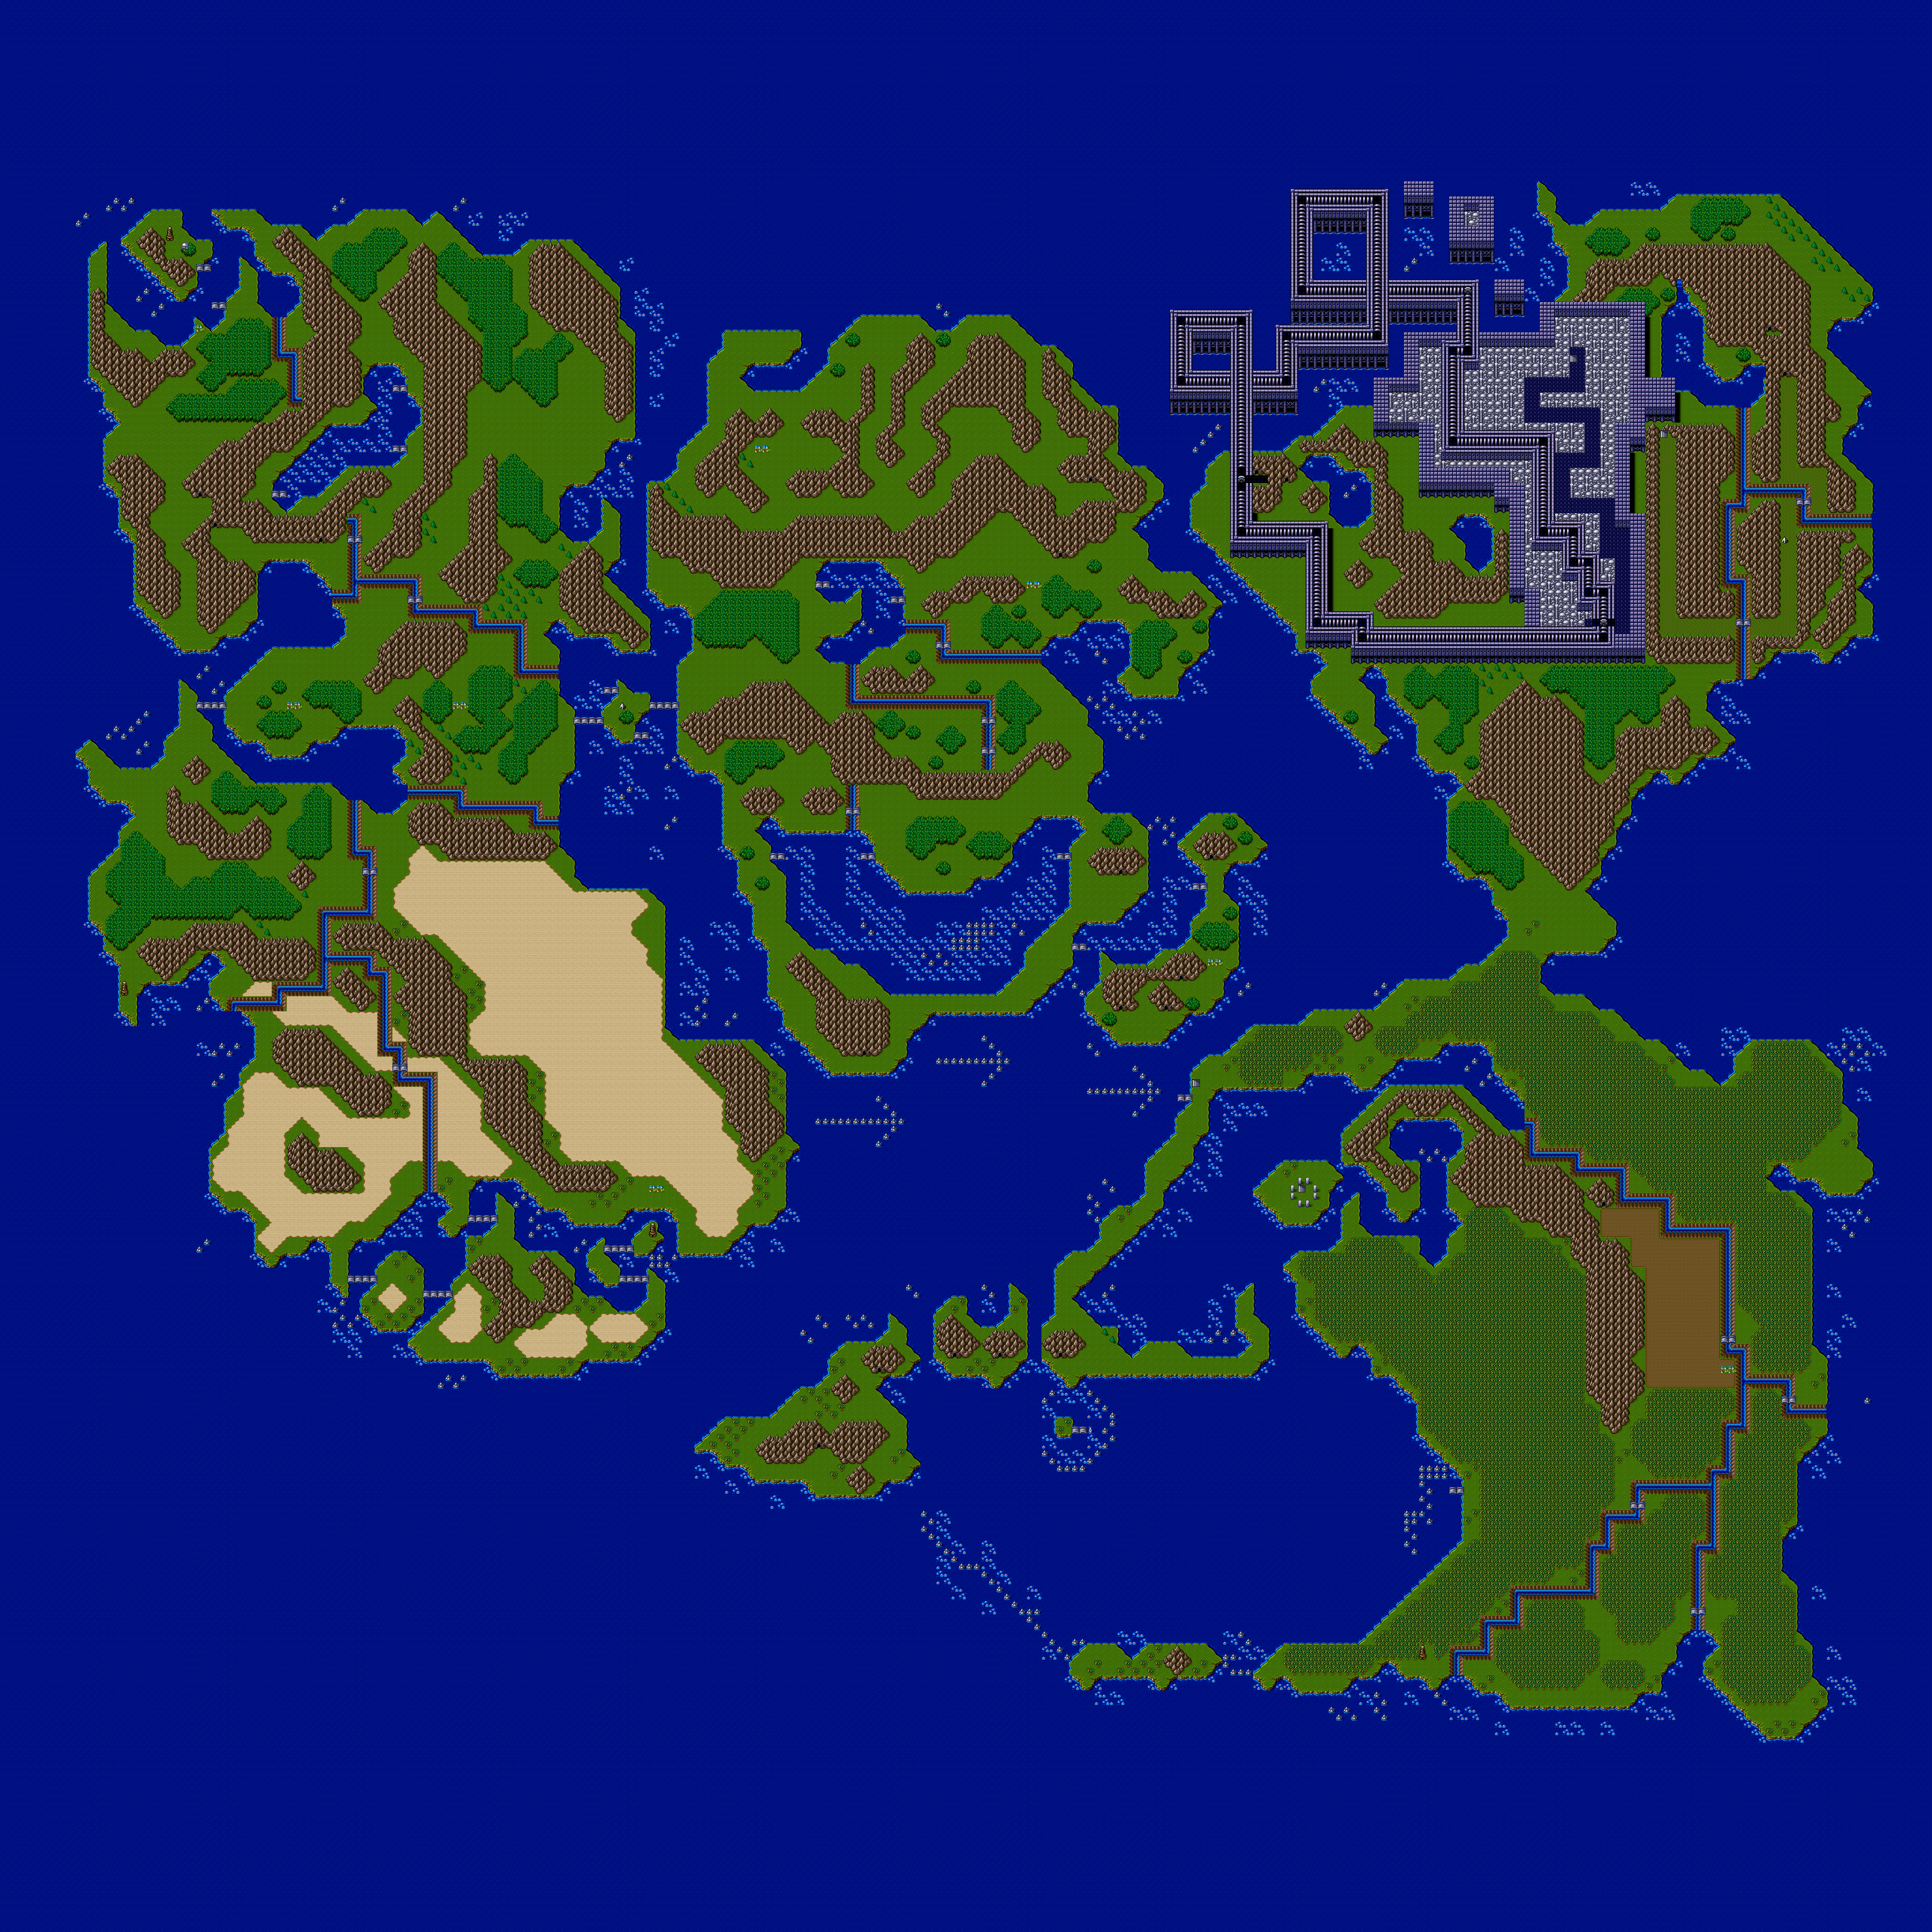
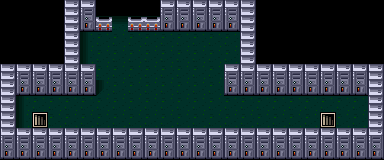
Monorail Station
Instead of going north, go right. This lets you continue on. Going left takes you to a dead end.
Sadly, you cannot land on the blue path with the ancient giant; you will have to make your way to it the hard way with the subway cars.
You'll meet new enemies in the form of men in futuristic armor carrying dart guns - which fire off short range attacks - as well as flying hornet robots that turn into a humanoid form with an arm cannon after you hit them.
At the end of the path, you will meet two ghosts. One is a dog, and the other is a monkey. Thankfully, these are friendly faces, and they will tell you that Galands are wreaking havoc in Grandopolis. They also tell you that the path ahead will take you to Cactus Village.
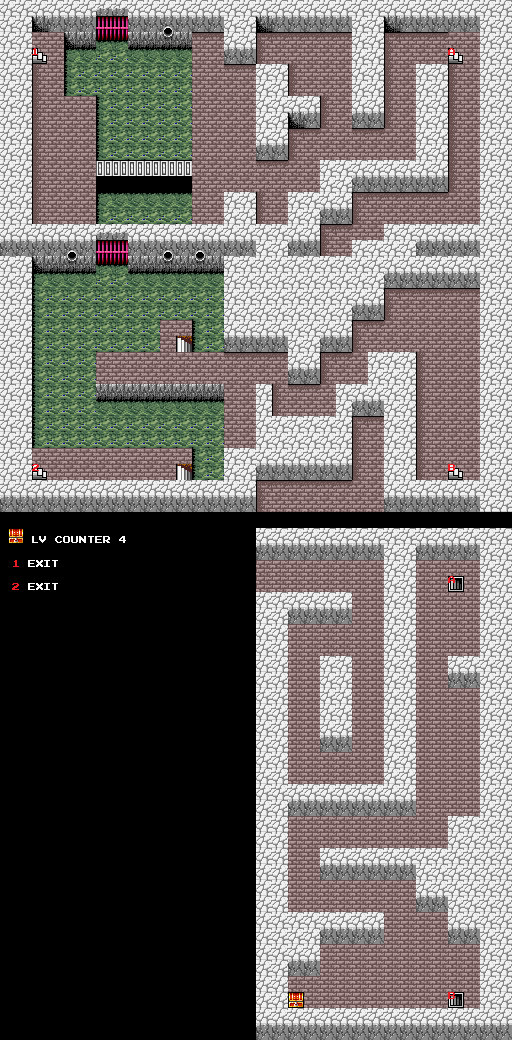
Grandopolis Sewers
When you go to the right, take the first set of stairs you see and go south. (If you go south past those stairs, you'll just find a dead end.) You'll find a chest that will give you Lv. Counter 4. Now you have info on all the enemies in the game!
The snake boxers can shoot fireballs from afar and move across the screen while flicking their tails. Thankfully, you only have to kill two of them.
When you come out of the sewers, you'll find a path to Cactus Village. You can also come across the red robot enemies, which are much like the robot enemies you've fought in the past. There is one big difference: they fire a gun at you. Sometimes they wait before shooting, but they can also fire without warning. If you take too long firing them, you'll fight a big red dragon. You can only hit it once to stun it and you cannot hit it while it is stunned, but if you can kill it, it is worth a lot of experience.
Oh, and don't get knocked down against robot enemies. You can get put in an infinite loop where they keep throwing you and you will never get back up unless you hit a wall and you're mashing the buttons.
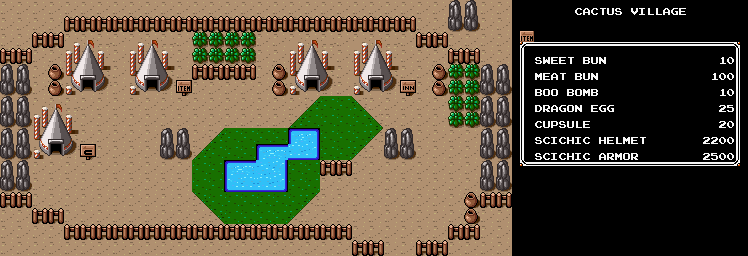
Cactus Village
Here, you can buy the "Scichic Armor" and "Scichic Helmet." It's obviously supposed to be spelled "Psychic," but I'm guessing that Culture Brain games have always had iffy translations when brought over to the West. Even Flying Dragon for Nintendo 64 had the odd misspelling here and there. Anyway, get them. They're the best armor you can get.
By talking around, you'll learn that Rub-A-Doc of U.P.M. came to the town and borrowed their treasure in order to save them. For the first time since the beginning of the game, Rub-A-Doc is finally mentioned again. You will also learn that Mr. A.B.C. is visiting, and that he is in a cave north of the village. If you pass his test, you can get a present.
You will want to talk with the Village Chief, who is to the left of the item shop. He will tell you that he left the Marvel Box with Rub-A-Doc, and now the Galands have kidnapped him. Soldiers in the village are heading north to pursue them, and he asks you to help find Rub-A-Doc and get the Marvel Box back.
If you don't have them yet, get the Thunder Punch and/or the Hypnoblow at Temple Bayon. They will help tremendously.
Mr. A.B.C.'s Room
Head into the door to the north. You'll meet Mr. A.B.C., who wants to give a lesson at Mt. Rocky.
He will first ask how to say "thank you" in Japanese. The correct answer is "Arigato." You'll get a subway token. You'll take a subway to the other end of the cave. When you take the stairs here, you'll enter an action sequence. Get on the mine cart and jump over the spikes when you see them, and watch out for bats and other enemies and obstacles.
When you make it to the end, you'll be traveling across a set of bridges with breakaway portions. You'll have to cling to some walks to avoid the spikes at this point.
You'll then enter yet another section with brown spiked balls that float back and forth. You'll have to be pretty patient on the narrow corridors, and also cling onto some ceilings to make sure that they pass you. Thankfully, you'll get out of there. Welcome to the final dungeon.
Final Dungeon
The first part of this area is pretty simple, but once you get out of the sewer area, you're going to be in a bit of a futuristic-looking maze.
Take the bridge to the south first. This will take you to a path to one of four items, which make up the last items you will find in the game: the Aura Equipment. These Aura items are the absolute strongest in the game, so make sure you grab them before you make your way to the end. Here, you'll get the Aura Helmet.
No comments:
Post a Comment