Showing posts with label newfiebangaa. Show all posts

Thursday, January 19, 2023

newfiebangaa plays Willow for NES - Part 6 of 6


In this episode, we finally defeat Bavmorda and end the quest.

First | Previous


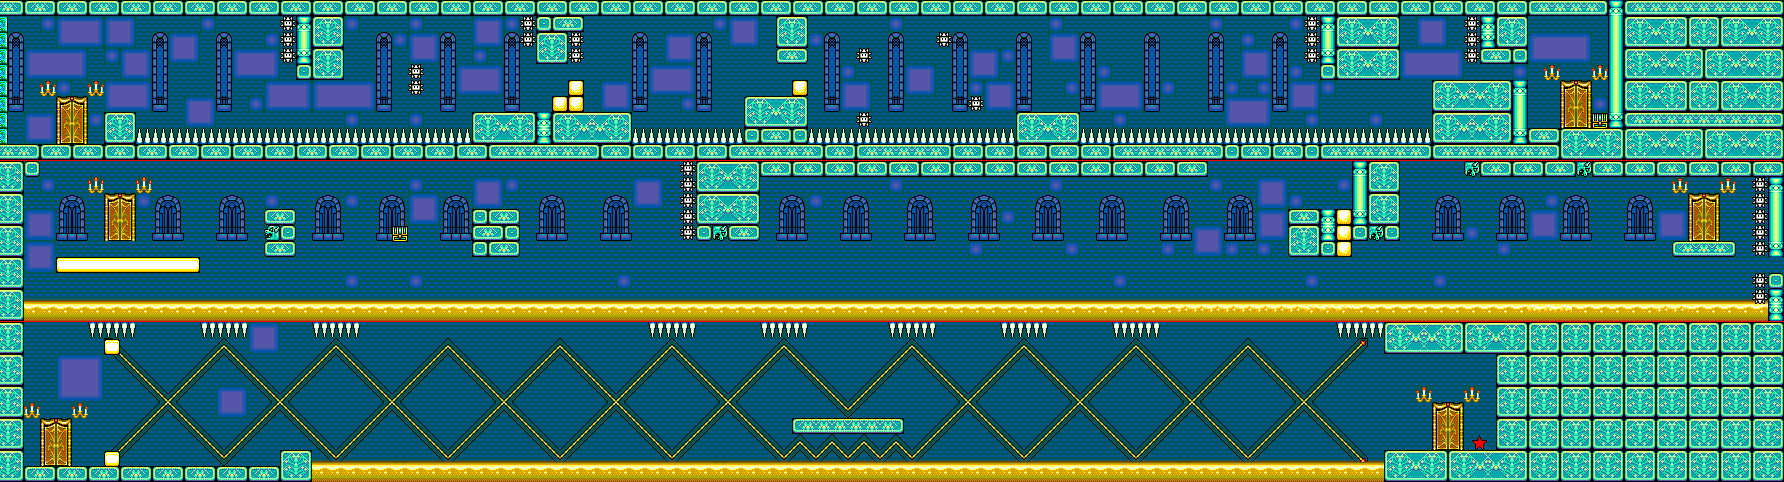
The door that Abang was standing in front of is a dead end. Instead, go north and east of that door and you'll be able to find the doorway that continues into the castle.

At the next floor, go north, then east when you can't go north anymore. Go through the door and enter the next floor. When you north and east again, you'll meet Sorsha and Madmartigan. Sorsha won't let you escape, but Willow throws the Powder of Unrequited Love/Dust of Broken Hearts at her. Sorsha dodges it, and just like in the movie, Madmartigan falls in love with Sorsha. Sorsha then has a change of heart and tells you that the Crest of the Spirits is in a treasure chest in a cave below the castle.

Go through the door that Sorsha and Madmartigan were standing in front of and continue. You'll meet General Kael (a reference to well-known movie critic Pauline Kael), and he's given the Crest of the Spirits to Bavmorda. He's really easy if you know what to do. Stay down and to the right of him, and stand still and swing the sword at him. Since his attacks do a lot of damage, be sure you're healed up. If you do it right, you'll be able to corner him and take him out very easily. If you're all the way to the side, General Kael will go berserk and you'll get absolutely destroyed.

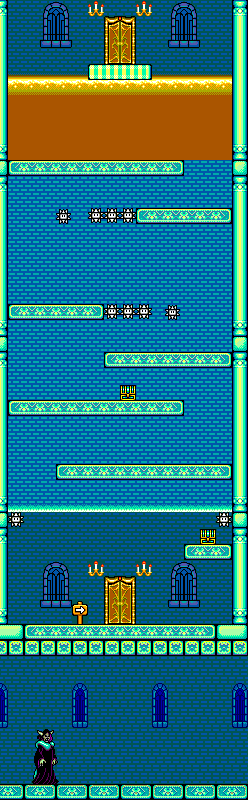
Enter the door to the north, cross the bridge, and then enter the door in the lower-left room. The rest of the path is fairly straightforward.

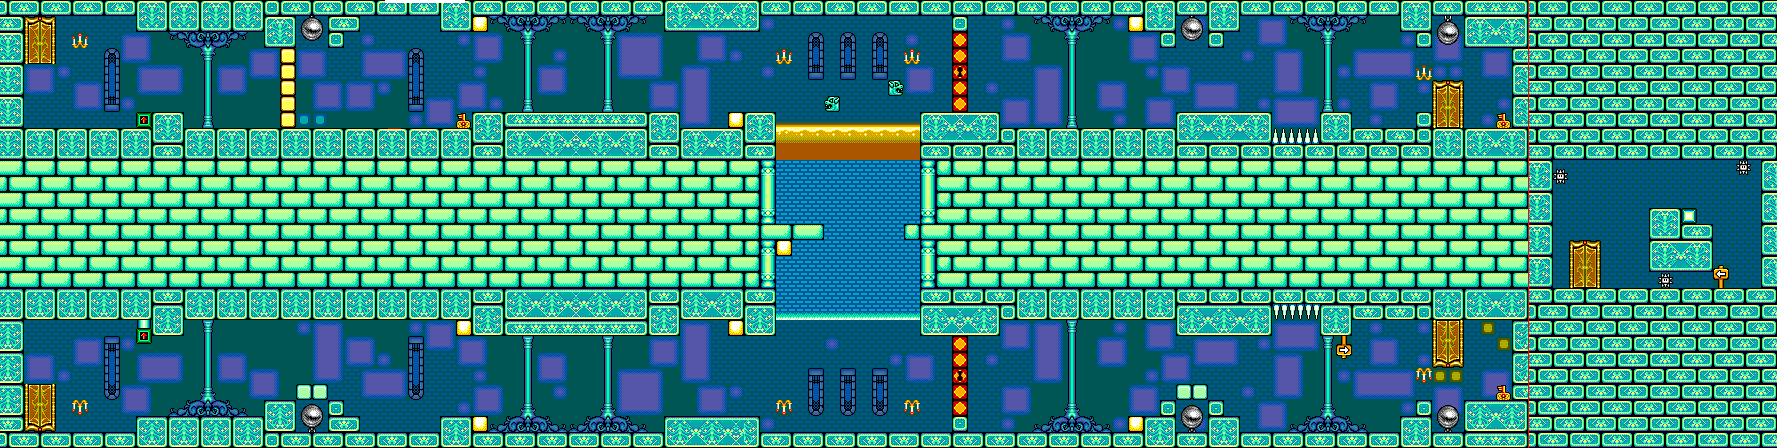
You'll then be in a square room with no visible exits. You'll finally meet Queen Bavmorda. She'll run around the room and leave flames behind. Equip the Magic Cane and fire it at her whenever she's close enough to you, so that you leave no margin of error between you and her when it comes to your shots. This cane obviously requires MP to use, and if you mess up here, you're done for.

When you beat her, you'll get the Crest of the Spirits back. You'll then fight Bavmorda again. If you were expecting this to be even more difficult, you're sadly mistaken. This time, she'll use the exact same tactics, but you can hit her with the sword. Just stand still and swing the sword repeatedly as soon as she comes towards you. Problem solved.

After the battle, Queen Bavmorda is struck by lightning and defeated, and your quest is over. Enjoy your ending!

Wednesday, January 18, 2023

newfiebangaa plays Willow for NES - Part 5 of 6


In this entry, we finally enter the castle in Tir Asleen, then make our way into Nockmaar.


Go back to Fin Raziel. If you're Level 13, you should be able to transform her back into her normal form. She'll channel her energy into the magic cane, allowing it to not only damage enemies, but also Queen Bavmorda. You'll want this before going back to the castle.

The armored men with the swords have no shields to defend themselves with, and they fight just like the skeletons. That's a recipe for disaster for them, since you can just chug away repeatedly at them.

Go east two rooms and south two rooms. Enter the door. Go up the stairs and into the next doorway. Go south and east until you reach the chest with the Battle Shield in it, and equip the Battle Shield when you get it.

From there, go north and then keep going west until you stop seeing three-way intersections. From there, go west again. You'll reach a three-way intersection on the next screen. Go south here, and explore this set of hallways. You'll find the Wonder Sword in the lower-left corner.

Go back to the northern hallway and go west. When you see a three-way intersection again, go south and enter the doorway. At this point, you'll be seeing the red-outline skeletons again. Go down the stairs, and you'll be back on the lower floor and in the lower-left portion of that area when you enter the doorway.

When you reach the room in the lower-left corner, you'll meet Airk of Tir Asleen. He'll tell you about Eborsisk in the next room. He's too weak to fight Eborsisk, and he gives you his sword, the Kaiser Sword.

First of all, why did we just get another sword? We just went all the way to the upper floor and got the Wonder Sword, which is more powerful than the Dragon Sword. Now we get the Kaiser Sword...and guess what? It's weaker than the Wonder Sword. What was the point?!?

Eborsisk is dead easy at this point in the game if you're Level 15. You have to be Level 14 to swing the Wonder Sword quickly, which seems to answer my question...but at this point in the game, you've probably just leveled all the way up to the penultimate level, which makes it rather moot to have the Kaiser Sword if you are. Anyway, just stand near the Eborsisk's face and just swing the sword repeatedly until it dies. That's it.

Oh, and Eborsisk is named after Siskel and Ebert. Nice one, George Lucas.

When you go through the door, you'll be in a cell. Kael, General of Nockmaar, taunts you as you're locked in. You've also lost the Crest of the Spirits, as Kael has taken it and given it to Bavmorda to be destroyed.

You'll also meet Madmartigan again. Talk to him and he'll tell you he's met Airk, and that he's told him of a secret cave connecting Tir Asleen to Nockmaar Castle.

If you stand on a specific tile at the south end of the cell, an opening will appear in the upper-right corner of the cell. Franjean and Rool have made an opening in the wall. They'll tell you to head out and find this secret cave. They'll give you the Powder of Unrequited Love (known in the movie as the Dust of Broken Hearts) for use as a magic item. It will give any being it touches a heart of justice. You'll then be able to leave the cell.

After a short corridor that leads back to the upper floor, you can just keep going north and exit the castle.

Head back to the entrance to Cave 7. You'll meet Franjean and Rool again.


The chest with nothing in it won't be blocking your path anymore.

Follow the path normally, and after the first two doorways, enter the first one you see immediately after. This leads to the Fury Shield. Be sure to equip it.

From there, you can just follow the path all the way to the end and take the exit there.

You're now at the other side of where the Healball chest was. If you hadn't already noticed, it blocked your path too. Just go north and follow the path. You'll be able to reach Nockmaar.

If you go back to the house where you learned Thunder from (which is the screen south of here), you'll find out Sorsha has the Crest of the Spirits.


Well, we've done just about everything in the game. Next up, we head towards Nockmaar.

There will be a guard near the entrance. He won't let you in, but if you use the Monster's Bone and turn into a monster, you'll be able to scare the guard away and enter Nockmaar.


The red zombies are nasty. You'll have to wait for them to shoot 16 bubbles before you can change back from the pig form.

The room in the lower-left corner of the entry area houses Abang. Since Adik has given you Abang's sword and asked you to return it, he'll be able to put his strength behind his sword. You'll need a key to get further into the castle, and that the old woman Adik rescued has it. Turns out, the old woman was on the cliff near Nockmaar castle, and you can talk to her to get the key...except she's not there anymore and you'll need to look for her elsewhere.

Check out the Wing Sword. Instead of being the weakest sword in the game, it is now the strongest. Equip it before you do anything else.


Before you head out, be sure to use the Ocarina to call Po, and teleport to the Tavern of the Traveler.

Go back to Tir Asleen, and go back to the house on the path left of the castle entrance. This house is usually locked, and if you go to where you first met her, she's gone. Turns out, this is where you're supposed to meet her...and the game doesn't tell you to go over here at all. She'll give you the key to Nockmaar Castle.

All the loose ends are tied up, so you can now go to Nockmaar without having to do anything else.

newfiebangaa plays Willow for NES - Part 4 of 6


In this entry, we head to Tir Asleen and try to get into the nearby castle.


To Tir Asleen


Levelled up yet? It takes a while to go up a few more levels (tens of thousands of experience points' worth of fighting) but it makes a difference. For starters, you'll be able to better swing the Devil Eye when you're standing still.

Now that you've done everything you can do at the towers, there's only one place left to go: back to where Sorsha was north of the entrance to the fourth cave. When you get there, Sorsha and the soldier accompanying her are gone. You can now pass.

As you go east, be careful as the rocks can hurt you. (At least they won't kill you in one hit like they did shortly after the beginning.) You'll also see red palette swaps of the fly enemies, gray wasps and dirt-brown versions of the floating skulls.

When you reach the first intersection, go south then keep going east. You'll eventually be able to go north and get the Monster's Bone. By wearing it on your head and uttering Spectre's magic word, you can transform into a monster and disguise yourself as the enemy.

Return to the intersection before the Monster's Bone and go south two screens, then follow the path and keep going east at the first intersection you see. (For those of you not using a map, hugging the left wall even as it U-turns at the dead end and becomes the right wall - in a way - works very well. And if you are using that strategy, don't go up the stairs.) You'll see large, projectile-spitting faces show up in the rock walls. Just carry on.

The house you'll see on the way will have an old man who will tell you he's never heard of Nockmaar Castle (even though he lives near it). He also teaches you the Thunder spell, which is the most powerful magic in the game. You can also heal here, too. Go north from the house and you'll find a chest that contains the Heal Ball.

Go back to the house, then go east. When you reach the four-way intersection, go north until you reach another four-way intersection. Go east to get the Tail Shield. Equip it when you get it. You can talk alternate paths to get to the Tail Shield chest. If the rock faces give you a hard time, you can kill them off with the Thunder spell, but be warned that it uses a lot of MP. At least the face enemies give you 200 experience points each.

The brown enemies that spit fireballs can be easily killed with Thunder, and they also drop balls of MP that will both refill the cost of a Thunder casting.

You'll eventually head back to the four-way intersection that you saw shortly after going east from the house where you learned Thunder. If you hit that area (and you probably will if you returned differently than when you went in), go north, then east. The next part of the path goes in a circle, so go west and you'll eventually find a new path...and trees.

You'll want to use the Monster's Bone here. The holes in the ground are actually mouths that try to eat at you, but if you've transformed into a monster, they won't even bother you. It won't last forever, so you'd better step it up to the other side.


This one is pretty easy. The first opening you see is the house of an old man, who will tell you about Tir Asleen. Tir Asleen is the future castle of the future Queen, Elora Danan.

Go east until you see a four-way intersection, then go south and follow the path to the east. You're done here.

Follow the path (which has a lot of falling rocks) and you'll eventually come across an intersection. Both paths lead to the cave, but you'll want to go east as this leads to Tir Asleen. Unfortunately, when you try to cross the bridge, you won't be able to move past the cave. You'll have no choose but to go into the cave.

If an enemy drops a white bubble, pick it up. It will restore some of your HP.

Refer back to the map with Cave 5, because it also contains the equally short Cave 6. The upper-right corner of the cave houses Adik of the Eagle Clan, who is an original character made for the game. He gives you the Wing Sword and asks you to return it to his brother Abang if you see him. You can equip it, but it's the weakest sword in the game, so why bother?

The path south of Adik will run in a circle. You'll find a cave here with an old woman. The old woman will tell you that the bridge to Tir Asleen is cursed, and that nobody can go near the town. Unfortunately, that's all this old woman can do for you. To the south is the other exit out of the cave. You'll have to take it in order to find an alternate path into Tir Asleen.

Head back to Cave 5 and talk to the old man there. He'll give you the witch's shoes, which allow you to cross the bridge to Tir Asleen.

When you reach Tir Asleen, you'll find out that nobody is in the town. If you go all the way to the left after entering the town, there will be a house with a woman in it. The woman will tell you that she knows nothing and that if Bavmorda knew someone was living here, she would attack again. She also asks you to go to the rocky mountain east of the castle and find the old woman there. She will tell you that the old woman was taken from Tir Asleen by Bavmorda, but was saved by Airk, a warrior of this country.

The house in the upper corner gives you an opportunity to rest and recover your HP and MP. Your next mission is to go to the castle north of the town, but you'll still have to get some stuff done before you can get inside. The path to the right of the castle forks into two directions, and if you go left, you'll see the last cave in the game.


Even here, you won't be able to do much. A chest blocks your path...and it contains nothing.

With that, you'll have to take the path to the right and go all the way to the north. You'll meet an old woman who tells you that she has been waiting for the warrior of the prophecy to appear. From here, you can head back to the castle, and the door will finally open.

Tuesday, January 17, 2023

newfiebangaa plays Willow for NES - Part 3 of 6


In this entry, we enter another cave to fight another of Bavmorda's demons, then get entrusted with the Crest of the Spirits, which must not fall into Bavmorda's hands.


To the east of the Tavern of the Traveler, you'll meet another old man. He'll tell you about two red towers standing side by side at the other side of the lake. Unfortunately, Bavmorda has closed off the road to them.

On the way to the staircase leading into the lake, you'll be attacked by what look like Koopa shells spinning endlessly. There are enemies under the shells that you can beat up, but at this point you can go without fighting them if you want to.

If you enter the Tavern of the Traveler again, you'll find out Madmartigan mumbled something about defeating Bavmorda before he left.

Now that you have the Wakka Seed, you can return to the staircase that takes you into the lake and walk to the other side without incident. At the other side is a cave. Enter the cave and you'll meet Fin Raziel. You'll use the Magic Cane to try to restore Fin Raziel back into human form, only to change her into a bird. Well, at least that's an improvement. (If you don't at this point, you're going to lose your HP as long as you're in the water and you're going to die before you can reach the other side.)


You're now in another part of the land. If you go any further north, you'll see another cave. Further north still is Sorsha, daughter of Queen Bavmorda. She'll ask if you've seen Madmartigan, totally unaware that you've helped him escape. You won't be able to go past her, so don't even try.

With that, there's nothing else to do but enter the cave north of Fin Raziel.

The Cave and The Ghost


You'll definitely want to have the Devil Eye ready, as some of these enemies (such as the flying grey wizard robe of a ghost as well as the faces we fought in the last video) require it.

There are enemies that look like floating bubbles. When they split into two, they'll take 10 MP away from you. You can kill the two bubbles created to get that back and more. You'd better be quick, or else they'll continue to split into two. If there's too many onscreen, they'll knock you back a screen. Oh, and those zombies that turn you into a pig? They're back, but the Devil Eye kills them in two hits at this point in the game. 

Soon after you progress from the entrance to this cave, you'll find a chest. Open it, because it contains the Fleet spell, which lets you instantly exit the cave when you cast it. No longer will you have to walk all the way back to the entrance when you're done!

When you go west and then north to the next part of the cave, you'll be able to take on the boss immediately. Don't even dare, because you won't be able to win just yet. Instead, go east of the first intersection and enter the first cave you see. You'll then be able to go to another cave, where you can find three things: the Demon's Feather, the Metal Shield, and the Book of Magic. The Book of Magic casts the Renew spell, which changes magic-based enemies into weaker ones. The Metal Shield brings your defense up a further 15 points compared to the Dragon Shield, and the Demon's Feather casts the magic of Terstorm, which creates a gust of wind. Be sure you have all of these things before you leave through the opening at the southeast corner, and be sure to equip the Metal Shield.

When you head east from here, you'll meet Zhena, the ghost of the woman who was waiting for her lover. She asks you to find her lover, and gives you her Cross Flute. Enter the cave nearby, and you'll be able to take a shortcut to the intersections that takes you to the boss. Go west, then go north two screens. You'll finally fight the boss, and he's dead easy. Walk up to him, stab him, then stand there as the the needles it shoots out bounce off your shield. Rinse and repeat until it's dead. The demon will turn into Muzh, Zhena's lover. Bavmorda turned him into a demon and commanded him to guard the door forever. The battle has left him half dead, but the Cross Flute plays and summons Zhena, who disappears with Muzh. Muzh leaves a note saying that Bavmorda fears the power of the spirits as well as just people. You'll also learn the Bombard spell from this note. From there, you can leave the cave from the door near the boss room.

The Two Towers


The path north leads to the two towers that you heard about earlier. When you first reach this area, go to the first doorway that you see, which is in between the two towers. Inside is a woman caring for Elora Danan, the sacred future queen that will overthrow Bavmorda. She wants you to call the Spirit of Earth down to the Sacred Tower, as the two spirits - the Spirit of Sky and the Spirit of Earth - are waiting for you at the top of the towers. When you summon them, change shall come.

To the right of Elora's caretaker is the first tower.


The path here is relatively straightforward, and the torches light up as you go. The fact that they also light up in the floor below you (which you can also see) is a pretty nice touch.

It may seem to take forever, but you'll eventually reach the top, where you'll meet the Spirit of the Sky. He has taken Bavmorda has made his voice inaudible, and has inhabited an old man's body to tell you what's going on. He then puts his power and essence into a blue crystal, which he gives you, before telling you to scale the west tower.

Since you've completed the east tower, you can now use the Fleet magic to get back to the bottom and enter the west tower. Be careful, as you will see monsters on the way up this time around, despite this being a palette-swapped mirror image of the tower you just left. You'll also need to keep the Devil Eye ready, as there are monsters here that require it.

Remember the bubble monsters that can only be killed with the Devil Eye sword? Well, you'll find them in the third floor. When you have four on the screen, you can keep killing two so that they can continue to split into four. Just make sure there's no more than four, or you're going to be pushed back. Since you get 180 experience points - 90 per bubble monster - every time they split, and they don't really attack you, this is the best way to grind for experience points if you really need them.

Just like last time, you'll reach the top, and you'll meet the Spirit of Earth. Talk to him. After talking about how Queen Bavmorda has confined the power of Fin Raziel, whom he has placed on the earth, he'll put his power and essence into the Red Crystal, which he gives to you. He then tells you to meet Elora Danan in the center tower. Go there and you will obtain the Crest of the Spirits. The Crest must not fall into evil hands, especially Bavmorda's, or else the power of the spirits will disappear and Bavmorda will live forever. You must head to Nockmaar, Bavmorda's castle, and destroy the evil once and for all!

Monday, January 16, 2023

newfiebangaa plays Willow for NES - Part 2 of 6


In this entry, we start meeting characters from the movie, and we also start getting equipment.


From the old man's home, go east and go east again at the fork in the road. Otherwise, you'll just be going in circles. Go east at the next fork in the road. Go north immediately afterward, and keep going in that direction. From there, making it to Cave 3 is a snap.

You'll be facing palette swaps of the gray flying enemies from earlier along the way.

When you take on the red guy with two heads, avoid the two sets of fireballs he shoots, as you won't be able to block them. Then rush in and stab the guy until he dies. You'll get 50 experience points every time you face him, so beating him is strongly advised.


At the intersection after the start, go south and west. You'll enter another cave that gives you the Gold Shield. Amazing how we have another shield so soon! This shield has a name on it, but the shield is too old to read the name on it.

Go back to the intersection you passed and keep going east. You'll find the Flame Sword here. If you're at Level 7, congratulations. You'll be able to swing the sword quickly while standing still.

The bats you'll meet on the way to the Flame Sword are a little more powerful, but they fight just like the bats in the first cave. Also, you may see the zombie from the first cave again. If you see him, go back and then return. He may or may not disappear. If he does, great.

Going all the way south from this intersection will take you to yet another chest. This chest contains the Dragon Scale, which you'll need to bring back to Dew.

Go back to where you found the Flame Sword, then head north and east. On the intersection to the north, you'll fight some skeletons, but thankfully you only have to fight the one that is blocking your path to the east (unless, of course, you want to fight the other ones). For best results, keep them away with the sword, and when they stop to strike, be ready to stab them immediately afterwards. It's better if you can stab them from a bit of an angle, though. Keep heading east until you find another cave. Enter and you'll find Po. Some of them will have blue outlines, but there are others will red outlines that will do even more damage...so be careful.

Since you've found shields other than the Wood Shield, you can now block the fireballs from the lizardman you'll have to face before you can rescue Po. His wings have been damaged by Matanda as a result of playing with Matanda's crystal ball, but since you have the Medicinal Herbs, he'll be alright. Po will give you the Magic Ocarina. Use it to call Po if you need him. He'll take you to a few places that you've already been.

Go back west to the intersection and then keep going south from there. You may have to take on some skeletons with red outlines, but you should know how to fight the skeletons by now. The cave at the end will take you to Matanga, who refuses to give you the Crystal Ball of Life. He will, however, give you a bracelet that a thief left behind if you leave him be, as Matanga needs the Crystal and can't fight.

When you make it to the end, the wall near the point where you first entered from will open up. If you head through the new area, you'll end up in a new area. You'll be in Lake Cheef. You won't be able to move here. After some really awesome music, you'll meet the fairy Cherlindrea. She'll give you a Magic Cane, and tells you to use it to its utmost to put an end to wicked beings. She then tells you to go north and find Fin Raziel, who has been turned into an opossum by Bavmorda.

The Journey North


Now that you're able to explore this new world, go north. Take the left route when you reach the fork in the road. Keep going and you'll find a chest. Open it to get the Devil Eye. It's a powerful sword, but it only works on certain enemies. Keep it unequipped for now.

North of here is Madmartigan, a warrior of the Daikini clan. He's sitting on the ground with his hands cuffed behind his back, and he'll tell you that the key is hidden somewhere in the forest. It's actually hidden in the maze to the right. You'll need to move to the left-most part of this area to find the key. As you do this, you'll have to take on more of those blue-outlined skeletons.

You'll come across some spinning face monsters that shoot out a shield of fireballs and also shoot unblockable fireballs at you. It turns out you can actually defeat them. Here's the thing...the Devil Eye you found earlier is a sword, and a very powerful one. The only drawback to it is that it can only hit the monsters the other swords won't. (In other words, switch back to the Dragon Sword when fighting the skeletons here as well as any other normal enemies, or else your attacks will have no effect.) It's still better than nothing, and if you stab them repeatedly, you'll take them out and find a flashing circle where they once stood. Picking these flashing circles up will replenish 10 MP. Don't swing while standing still with this sword as you use it, though, as your swing speed with this weapon will be slow for quite a while.

When you free Madmartigan, he'll give you his necklace. Go north and keep going. Enter the house you see. This is the Tavern of the Traveller. As you heal, you'll learn about a nearby cave where a ghost guards treasure and kills anyone who goes near it, and that the ghost was that of a woman whose lover went on a dangerous journey. When her lover made it back, he found that she has mysteriously disappeared.

You'll then find out that the guy talking about the cave isn't talking to you, but instead to Madmartigan! Apparently he's happy that he's free, then he thanks you for freeing him after someone named Sorsha took him prisoner. He tells you that you'll need a Wakka Seed in order to cross the lake. The only people who could possibly have one are the Nail clan. (They happen to be rabbit-like creatures with antlers. Ah, so that's what I was looking at.) Guess what? You'll have to back-track to get that, as you won't be able to progress further without one.

With this out of the way, head back to the third cave. If you need to, use the Ocarina to call Po and ask him to take you to his house. Keep in mind that is in the magic section in the inventory, and using the Ocarina to call Po also uses MP.

Head back to Dew. Talk to the Blacksmith, and he'll make not only a sword out of the Dragon Scale you've just found, but also a shield to go with it. You'll get the Dragon Sword and the Dragon Shield. Be sure to equip them.

Back in the new area past the dragon cave, go back to where you met Madmartigan, then keep going east until you can't anymore. From there, you'll have no choice but to head south. You'll meet Kchil again. Talk to him and he'll give you the Wakka Seed.

newfiebangaa plays Willow for NES - Part 1 of 6


Yep, this game again. I'll be preparing to play through this game and beat it myself soon, after having tried it out quite some time ago and having enjoyed what I played, so here we are.


Believe it or not, this was one of a few video game adaptations. Despite being made by Lucasfilm, the NES game was developed by Capcom, even though Lucasfilm Games (later LucasArts) was around at the time. I guess they were too busy making adventure games for IBM-compatibles at the time.

The Story So Far...


Tales of dreams and imagination.

There are two spirits watching over the world. One, the spirits of the skies, gives light and power to all beings. The other is the spirits of the Earth who give courage and hope. The two spirits each sent a messenger in order to bring peace to the world. And the beautiful messengers were given special power to protect the people's future.

That special power was.........magic. The people were living peacefully, protected by a great magic.

Bavmorda, the messenger of the skies, became greedy for power. In arrogance, she decided to conquer the world with her magic.

Fin Raziel, the messenger of the earth, realized her plot, and tried to persuade Bavmorda to return to the skies. But her magic was sealed and she was turned into an opossum by Bavmorda's wicked magic.

Bavmorda declared herself queen of the world, and started to build up her strength to rule the world.

Nelwyn


You'll play as a dwarf farmer, Willow Ufgood. Your mission is to take the infant Elora back to the human (or Daikini) homeland, and protect her from the evil Bavmorda. Elora is prophecized to be the one who will destroy Bavmorda and save the world for good.

The house you start at is your family's home. If you rest here, you'll be able to fully recharge your HP.

Your family will tell you to see the High Aldwin next door. Enter the house to the right to talk to him, and you'll learn the Acorn spell. For just 5 MP, this allows you to temporarily stun enemies by turning them to stone. You'll also get 17 MP to start the game with Returning to his house will fully recharge your MP.

The box in the upper-left corner is your basic stats. The number at the top is your level. The highest is 16. E is your experience points, and then you have your HP and MP (which are self-explanatory).

By talking to people, you'll learn about Vonkhar, the best swordsman in the village. You'll also learn that the village of Dew is north of Nelwyn.

The house in the upper-left corner of the town is Vonkhar's house. He will give you the Long Sword, which is your first weapon. He'll tell you that after a few fights, you'll eventually get used to the heavy weight of the weapon.

Since you have both a magic spell and a weapon, be sure to open up the menu screen with the Start button and equip them both. You can also use this screen to see much more experience you need to level up as well as see your strength, defense and agility. Just remember: B swings the sword and A casts magic, which is the reverse of The Legend of Zelda.

The Road to Dew


Well, you're as ready as you're going to be. Head north and you'll hit the road.

You have two ways to attack with the sword. Stand still to swing the sword, or swing while moving around to stab forward. The swing attack is slow at first, but as you level up, it gets faster and more reliable. As much as you'll want to stick to the stab, the swing will be useful at certain times even at the weakest experience level.

The music changes and the screen shows some wild action when monsters are on screen. Seriously, take a look at that grass. It just starts moving like heavy winds are blowing it around. Take out the slimes as they move around. They're pretty easy, for the most part, and you'll need the experience. Sometimes the slimes will split into smaller slimes, but if you swing your sword, you should be able to get them even at Level 1.

When you see the floating skull heads, stay in a corner and repeatedly swing the sword. You'll be able to dish out damage to more than one skull if you're lucky enough (which will happen somewhat often), and hopefully defeat more than one at a time. Again, you're gonna need the experience.

Dew


The house just south of the entrance will let you recharge your HP.

Go to the house in the bottom-left corner to receive the Wood Shield. Remember to equip it, because you'll need the defense it provides. As you get this shield, you'll learn that Bogarda is the father of the village chief, and that he was changed into a demon by Bavmorda's magic. He'll tell you to hear the story from the village chief.

I also strangely like what the guy says when he gives you the Wood Shield. "Yeah, the village chief's father was changed into a demon by Bavmorda. Oh, uh, hey, have a shield!" The only thing funnier than the fact that the game takes great liberties with the movie's plot is that everyone you meet just runs with said liberties.

Talking around will net you some info. To the west is a road that goes through the rock mountain. You'll find a cave with a weird voice inside if you go further along. I know what you're probably (not) thinking: "I hear voices in my head, they counsel me, they understand..."

You'll also find out that Bogarda is in the forest north of Dew.

The village elder is near the road to the north. After finding out it's true his father was a courageous and just man before being corrupted by Bavmorda's magic, you'll get the Magic Healmace, which lets you regain HP in return for 20 MP. You won't be able to use it yet, but you will after powering up for a while. By the time you reach your first boss, you should have the Healmace equipped when you need it.

When you reach Level 2, you'll be able to swing the sword a lot faster when you're standing still.

If you die, you'll start at the last visited village with your stuff unequipped, and you'll also drop down to the amount of experience points needed for the last level you reached. Equip all of your stuff and try again.

Leave Nelwyn through the west. Going west and up the stairs leads to another area where you won't be able to do much, so take the lower path near it leading to the path that goes further west. Watch out for the brown enemies - the trolls and stay away from them; you won't be able to fight them yet. You'll soon see a cave. Enter it.


This is a fairly short cave, and opening the chest at the end will award you the Small Shield. Equip it, because you're going to need the defense.

Once you're done here as well as with everything in Nelwyn, exit from the north side of the village. You'll have a choice between north and west. From here, you'll be in a bit of a maze.

The dogs will block your path and run into you as they leave the battlefield, but they can be easily cornered, and they can also get trapped in the grass-like walls. The snakemen, however, are the worst. When the snakemen advance towards you, stab them twice and avoid the fireballs that it spits out each time you land a hit. If you have the Small Shield, however, you can block these fireballs. Keep doing this until it dies. They're powerful now, but just you wait...

The skeletons give you 50 experience points, but they'll take a long time to kill. You have to stab the skeletons when they move their shields to the side as they attack. If you're at the proper distance when you plug away at them, you'll be able to hit them without taking damage.

Some of the floating skull heads here will have a blue outline to them instead of a grey one, and they'll be more powerful. Even with what you have equipped, these monsters can still rip you to shreds in just a few hits.

Turns out, you're not even supposed to be here even though the game lets you. You're supposed to go north, like the villagers say. Let's go ahead and do that.

You could go to the cave in this area, but you'll be turned away by the guard blocking the cave until you find a Gold Statue. You'll have to go west in this forest area, and then north to find a chest. This chest contains the Gold Statue.

Sometimes, when you pick up an item, you'll get a message saying "You have the Light of Life." When this happens, you'll be healed. You can only get this from a chest you haven't opened yet, and you can only get it from that chest once.

When you hit Level 3, you'll be able to swing even faster when standing still. At this point, you're at the fastest sword swing speed that the game will give you with your current sword.

The grey flying creatures are pretty fast, and they'll take quite a few hits before they go down. You won't see these guys unless you're near the cave, and fighting them isn't really worth it at this point.

Bring the Gold Statue back to the cave. Now you'll be able to go in.

The Forest Cave


At least we have maps, folks. This game is pretty easy to get lost in...but then again, what games have I covered that aren't easy to get lost in?

As you go deeper into the cave, you'll take on bats and cave zombies. The small bats can be destroyed just like the floating skulls. Some of them will sometimes turn into big bats if given enough time, but the big ones can be stabbed a few times before they die. The cave zombies, however, are not as easy. If they lift their arms and their hands turn pink, Willow will be transformed into a defenseless pig, which lasts until the game lets you leave the screen (which is usually after these guys throw four bubbles). When you're a pig, these guys will throw bubbles at you which do some damage despite turning you back into your normal form. To make matters worse, the sword will have no effect on them, and they have the tendency to turn you back into a pig if you don't escape fast enough after turning back into your dwarven self. If that happens, you'll have to dodge their attacks while still in pig form before you can get out of the area in human form.

You'll eventually find a chest in the center of the cave that contains the Battle Sword. It's much more powerful than the Long Sword, but when you equip and swing it while standing still, you'll have the slowest sword swing in the world once again. This will happen every single time you pick up a sword, and you'll have to level up a bit to be able to swing it at the fastest speed again.

Also, the wasps will tear you apart at this point much like the skulls and skeletons west of Dew. They just fly around wherever they want to go.

The ring increases your strength when you wear it. Since Willow wears it as soon as you get, you'll want to grab it before entering the big square room where the boss battle is.

The boss here is some green guy with a horn on his head. This is the village chief's father, Bogarda, and he wants the gold statue. Willow refuses to give him the gold statue, which triggers the first boss battle in the game.

Boss battles are a little different. The playfield is on the right, while the two energy gauges - P for the player and E for the enemy - are on the left along with your experience and MP.

You'll want to avoid this guy's boomerang and strike him once with the stab before running away. If you can get a standing swing on him, great. When you beat the boss, you'll gain about 700 experience points and your life will be restored.

You'll restore the village chief's father back to his human form, and he asks you to fight for peace. He teaches you the magic of Flowing Fire, which creates a circle of fire around you when you casts it. While enemies can still walk past the flames, the flames can still damage them on contact. He then tell you to see Cherlindrea, a fairy who lives in Lake Cheef to the west of Dew.

Of course, before you can do that, you'll have to leave the cave, because the game's not gonna do it for you!

Once you're in Dew, head back to the house that lets you restore your HP. The old man there will tell you about the Dragon Scales, proof of a battle between an adventurer and a vicious dragon named Matanda. The old man used to be a blacksmith, but would love to make a weapon out of those scales, and asks you to bring them to him if you find them.

With healing in town out of the way, we can now exit the village from the west side.


To The Lake!


The trolls will leap at you and also try to surround you. If you've levelled up a little bit since completing the first cave, you should be able to take them out in no time with the Battle Sword.

One of the best ways to level up is with the floating skulls with the blue outlines in the path just to the south of the western entrance to Dew. They give you 20 experience apiece, and 100 in all. You should be able to go up a few more levels and get to maximum swinging speed with the Battle Sword.

There is a fork in the road where you have four paths to choose from. There are two paths to the west. Take the lower one, as the rest just lead to nothing except more battles. You'll reach a bridge and meet Kchil of the Nail Clan. A spell has been cast by Bogarda on his village, making it impossible for them to get out. I'm guessing he's some sort of white dragon, even though he looks like a silver hedgehog in-game. Since you've made some progress here, Kchil's clan can now return home and you can now cross the bridge and head further west. You'll still have to fight some bees, but at least the spell that Bogarda cast on the bridge no longer works.

You'll meet Franjean and Rool of the Brownies. The Brownies stole baby Elora in the movie, but here they're just a slight nuisance. They'll tell you to go north into the Death Forest. There will be a cave where the dragon Matanda lives. You'll have to beat Matanda and give Franjean and Rool the Crystal Ball of Life.

Some of the bare trees will come alive and shoot projectiles at you. If you're just going through the maze normally and not taking time to double back, they won't be a problem. You can also block the projectiles with the Small Shield, so make sure you equipped it before you entered this area!

You'll soon come across a cave that acts as a home for an old man. You'll regain your HP and MP here, and find out that the old man's pet, Po, has gone missing. He asks you to bring him back. He'll give you Medicinal Herbs in case Po is hurt.

Friday, March 18, 2022

newfiebangaa plays Land of Illusion Starring Mickey Mouse - Part 7 of 7


Now...the thrilling conclusion!


At the bottom is the final boss: the Phantom (who is actually The Horned King from The Black Cauldron).

Butt bounce off the Phantom's head before he raises his arms. When he raises his arms, get right next to him and duck to avoid the fireballs. When he spins around the room, jump over him. If you butt bounce off him when he does this, you won't damage him, but you'll avoid taking damage yourself.

When the Phantom flies to the ceiling and starts spinning around there. When the Phantom stops and raises his arms, watch the ceiling and avoid the falling blocks. One block will stick around on the ground; grab it and throw it at the Phantom the next time he stops spinning. Repeat until you damage him twice.

He will then turn into a projectile that bounces around. Run right under him to avoid getting hit. When he is back in a more humanoid form, butt bounce off his head, then immediately get away to avoid being hit by the lightning bolts.

After three more hits, the Phantom will defeated and he will drop a crystal. Grab the crystal, and you'll beat the game.

Mickey will get a kiss from Princess Minnie. The cast of characters and credits roll, then you'll see how many power stars you got as well as your final score. Mickey wakes up on the couch with a book in his hands and lipstick prints on his cheek. You've just beaten Land of Illusion!

newfiebangaa plays Land of Illusion Starring Mickey Mouse - Part 6 of 7


In this entry, we head to the Sand Castle to save King Donald, then head to the Phantom's Castle for the final battle.


Sand Castle Stage


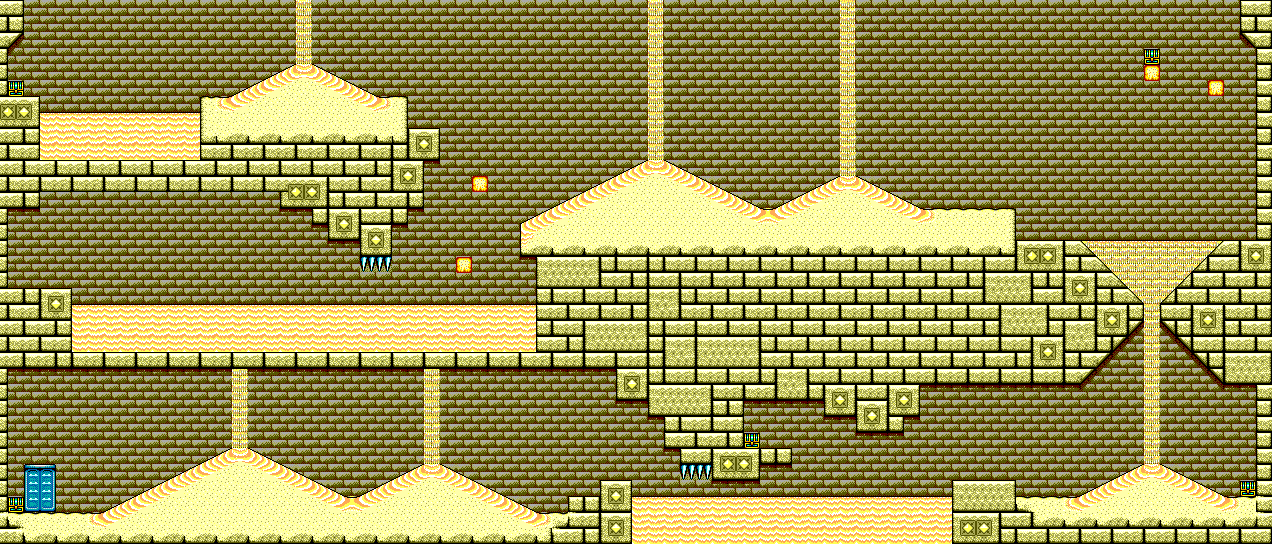
Keep jumping to save yourself from sinking into the quicksand. Watch out for hermit crabs that chase after you on the slopes, which push you around somewhat like a conveyor belt. When you reach the part where the sand collects and pours down like an hourglass, stay there to drop down and continue on.

Butt bouncing the crab only sinks it into the sand briefly, but you can use that to help yourself get away.


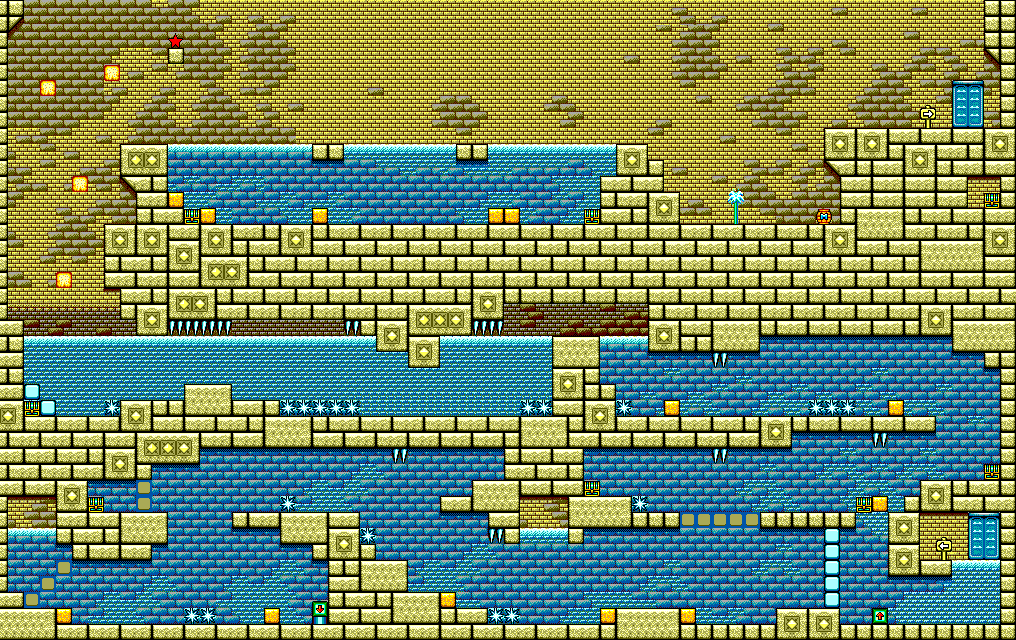
You'll be swimming again. Hit the sign to trigger the checkpoint, and avoid the fish and spikes and remember to surface at the pockets of air as you hit the switches to open up more of the maze.

Near the end, the water will rise and fall upwards. When you reach the wall at the end, climb all the way up with the Rope and jump across the sand blocks to get a Power Star.

Place the barrel on the geyser to get to the door at the end and face the boss.

The boss is a giant crab. Throw the barrel at the crab, and when it spins its arms, stay far away and near the surface to jump over the tornado it creates. You'll then need to grab the barrel and throw it at the crab as it moves around afterward. Thankfully, the crab goes down after only three hits, which is the saving grace of this battle in case you can't move fast enough to get a hit in on the boss.

When you beat the crab boss, you'll rescue King Donald. He'll tell you that this fortress was used to guard the harbor until it was turned to sand, then give you a ship from the harbor to reach the island.

Island Stage

By moving into the boat, you'll head to the island.


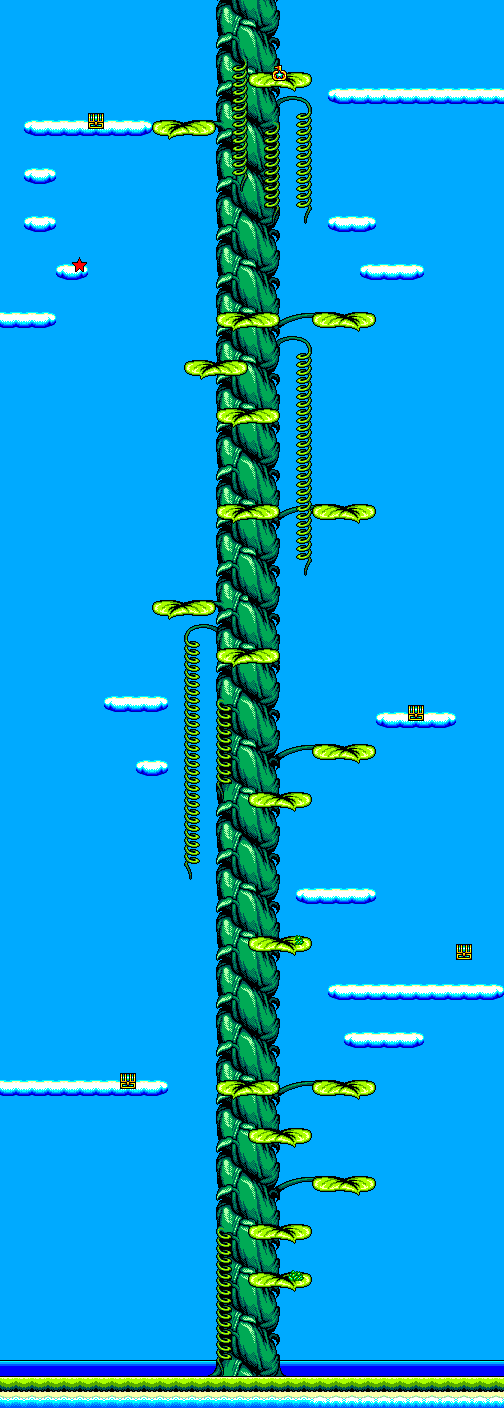
You'll need to throw the bean to get a beanstalk. If you throw it to the ground and it sinks downwards, you've found the magic spot. From here, a beanstalk will grow on the world map.


From here, you'll need to climb up the beanstalk. If you have the cloud shoes, you'll be able to walk on the clouds. Bounce off snakes, birds and spiders to get to other places when necessary. You may have to use the tornadoes to get to other places, too.

The key and the door is at the top. If you go left at the top and drop down, you'll find a Power Star.

Phantom's Castle Stage


The door you pick chooses which area you get next.


The left door has you climbing on a wall on the left side of the screen with the Rope to avoid the spikes below and in the air. You will also have to throw blocks out of your way, too. Use the Shrink potion to get to the exit.

The middle door has you riding a moving platform over a yellow liquid. Be ready to avoid projectiles from the dragon heads as well as spikes that line a few of the walls, and be ready to throw some blocks out of your way near the end.

The right door has you riding on platforms while avoiding flames and spikes. You'll have to switch between the two platforms in order to get to the end. Believe it or not, this is the door you want to take, as the final Power Star of the game is at the end of this section. (Pretty cheeky, game.)


Regardless of which room you go through, you'll end up here. Pulling the switch at the beginning gets the wall out of your way, but watch out for the ball and chain that drops down in an attempt to squash you when you get close. Grab the key and take it to the keyhole wall, then grab the key near the door, hit the checkpoint, pull the button above, then leave the room to turn the yellow water into better blue water and enter an upside-down version of this room below.

From here, go left, jump into the switch on the ceiling and go through the door, then get the key and take it back to the upside-down area. Take the key to the keyhole to the right, then go left and hit the switch upwards if you haven't alreadyt, trigger the checkpoint after passing by the ball and chains and enter the door.


Here, get the door to follow you around, then butt stomp it and enter the door when it lands on the ground. Go up and pull the switch up, then go into the translucent door to go back to the previous room and butt bounce on the door immediately once you get close to it to make it alive again.


Here, you'll need to swim past the spikes - with some of them moving around - on the way to the bottom. If you can make it to the chest at the end, you'll be able to heal yourself. Hit the checkpoint near the door before going in.

Thursday, March 17, 2022

newfiebangaa plays Land of Illusion Starring Mickey Mouse - Part 5 of 7


In this entry, we find the Cloud Shoes, meet the Good Princess, and find out how to get the Cloud Shoes after having found them.


Craggy Cliff Stage


For the first section, you'll need to climb to the top. If you use the Shrink Potion and bounce off the vulture at the start, you can find a Power Star.

You must have the Rope in order to climb up.

The vultures just fly around in circles. That's it.


In this area, you'll be dealing with floors that ascend and descend as the lights go in and out. Use the Shrink Potion before going any further and watch for spikes when the lights came back on. If you need to break a crate, turn big again.


You'll be climbing just a little bit more in the third and last section of this stage. Bounce off the vulture while small to grab the key and exit.

Desert Stage


The vultures will show up from out of nowhere and divebomb you here; be ready to butt stomp them. Also, butt stomp the mounds with the one eye that move back and forth across the sand. 

You can butt stomp the cactus enemies on the pyramid. 

Going all the way to the right takes you to an exit, but instead of doing that, you'll need to throw the blocks that are situated around the pyramid. Inside one of them is a door you can enter while small, and if you enter it and pull the block to the right to open a path to the door, you'll find a way into the pyramid.


Spikes will rush at you from the left when you enter. Be ready to climb up the wall and get going, and watch out for the spikes. Once you're away from the spikes, hurry right and grab the blocks to ensure passage to the right. When you reach the end, the spikes will disappear.


The rotating stone spheres can be stood on. Also, the brown platforms with the red triangles will move in the direction you are facing, allowing you to avoid the projectiles that drop down from the stone lion heads on the ceiling.

When you reach the key door, butt stomp the arrow block to get the key. Unlock the key door, but don't leave just yet. Instead, go back up to get another key, then drop it at the left side of the door. Jump onto the key, jump to the wall to the left, then head left through a fake wall to find a Power Star. Use the Rope to get out.

The boss here is an egg. You'll need to trick it into hitting the wall a few times by standing near the wall and jumping over it when it comes your way. After a few collisions with the wall, a snake will pop out; butt bounce on the snake.

Soon, the snake will leave the egg and bury itself in the sand. When the mound of sand comes your way with one eye sticking out, butt bounce the mound, then butt bounce the snake before it gets back into the sand. After three hits, you'll get the Cloud Walking Shoes, which allow you to walk on clouds. You'll also be able to exit.

Good Princess' Castle Stage

By going up from the Desert Stage, you can reach the Good Princess' Castle.


After a warning by the Good Princess to watch out for enemies, grab the key to get it out of your way. Take the spring to the right to continue on, and bounce off the enemies while small to keep on going. The path you take will dictate which path you will take next.


You'll have to deal with pits of purple water and spinning stone spheres on the top path, and a bunch of stone lion heads that spit projectiles. on the bottom path. Pick your poison.

If you take the top path, however, you'll get a Power Star at the end. Just use the Rope to get it.


Stack the Mickey Blocks to reach the platforms above you while keeping the moving spikes from hitting you. On the first level, take one with you to the second level. From here, you'll have to use the Rope to get to the door at the top.

You'll then be back in the first area. Shrink down and stand in the gaps between the spikes to avoid getting hit, and watch out for the big moving spikes that move up and down along the way. You'll need to jump to get over the columns with the spikes in between. The door will be at the end.

You'll then meet the Good Princess, who is indeed Minnie. She will tell you that if you plant the beans beneath the Phantom's Cloud Castle, a beanstalk will grow into the clouds. You'll find out that clouds have moved out to sea, so you'll have to plant the seeds on an island in the ocean so that the beanstalk will grow in the right place. She will then tell you that there is a stone pyramid in the desert, and you will find the Magic Cloud Shoes to help you walk on the clouds without falling through. Thankfully, we've already gotten those. The Good Princess promises to reward us with a kiss if we find the entrance.

Wednesday, March 16, 2022

newfiebangaa plays Land of Illusion Starring Mickey Mouse - Part 4 of 7


At this point, we start heading back to previous areas to find the Power Stars for a full clear.


Flower Field Stage

There is a Power Star here. To get it, you'll need to get past the second pit of piranha plants, make your way up, use the shrinking potion and bounce left off the butterfly until you see it.

Palace Ruins Stage


Bats will swoop at you at the start. They can be butt bounced on.

If you see any bouncing rocks, butt bounce them to stop them. The debris will destroy any destructible blocks. 

Watch out for the fireballs from the stone dragon heads.

The static brown boulders explode when you get near them, and the debris can destroy destructible blocks. You can butt bounce them near the blocks to speed up the process if need be.

You'll need to use the barrel with the blue M on it to get further up the first area.


You'll need to make your way down an quickly. While the white stars that create barriers of other white stars are fast, they don't outright kill you, but they can block your path and leave you no choice but to lose a life. Once you reach the checkpoint in the middle of the area, you'll have to deal with a rolling boulder.

When you reach the bottom, the boulder turns into a boss. Keep away from it. When the boulder hits a wall, it will drop a bouncing rock. Butt bounce on the bouncing rock and throw it at the boulder as it smiles. You can only have one bouncy, throwable rock on screen at the time. After four hits, you'll get the rope. The rope allows you to climb walls by simply moving towards them and pressing Up on the D-Pad. You'll then get a key to exit the level.

Forest Stage


Head back to the tree and enter the second door you see on the way up. Press Up at the wall, then jump mid-way up the wall to get to the Power Star.

Castle Ruins Stage


Head all the way to the left at the start and use the lanterns to get there. At the checkpoint, climb the wall to the left with the Rope to get the Power Star.

Tiny Cavern Stage

Climb up the left wall where the three climbable root vines are. You'll climb into a hidden area. One of the two chests instead contains an extra life. From here, use the Shrink Potion and head left. Jump straight up at the purple opening and hold Right on the D-Pad to get the Power Star. Thankfully, you can climb back up with the Rope if you miss it.

Palace Ruins Stage


At the second bouncing boulder, you'll need to climb up the ladder. Use the Rope to find the Power Star above.

newfiebangaa plays Land of Illusion Starring Mickey Mouse - Part 3 of 7


Now that we have the shrinking potion, we can get around in the tiny cavern. This will allow us to head to new frontiers in the game.


Tiny Cavern Stage


You'll need to use the shrinking potion to get around in here.

The pill bug enemies will roll towards you when you get close enough. Just approach, and jump straight up and butt bounce when they move.

The stag beetles will rise out of the ground and chomp away before going back into the ground; wait for them to descend before walking past them. 

Watch out for moving floors; they can crush you into the ceiling if you're not careful.


There is a background layer and a foreground layer to this stage; to switch between them, you'll have to find an opening with a purple background and enter it. Also, just walk past the spider on the way to the key, and don't jump near it.

Flower Field Stage


The worms just move back and forth; the bees will dive down at you. Wait for the bees to stop and move straight up before trying to butt bounce on them.

The yellow piranha plants will eat you if you land on them.

The drop of water that moves down across the leaves will hurt you if you touch it.

The white puffy dandelion produces seeds you can stand on and ride to get past the second set of piranha plants.

The butterflies just fly forwards.

The brambles are spikes; don't land in them.

Toy Workshop Stage


The cannons shoot mortar shots upwards; wait until after they fire to butt bounce them.

The orange blocks can be grabbed and thrown at enemies, but they can also be butt bounced on.

Just like in World of Illusion, put barrels on switches by picking them up and placing them with Button 1.

The water shooting out of the water pistols act like conveyor belts; watch how the fish move before butt bouncing on them.

If you see a door, either transparent or solid, press Up to enter it. At the piano keys, jump over the musical notes. Enter the door after the piano keys, go right to get a Power Star and open a shortcut back to the piano keys.

The decks of cards drop cards down; you can easily avoid the cards.

The ? block has a boxing glove inside. Avoid the boxing glove and use it when it punches downward to get to a new area.

To go up on the yo-yo, jump onto the yo-yo, then run to the right to get it moving upwards. Take care not to accidentally run your way into the ceiling spikes.

Throw an orange ball into the big orange ball in the ceiling to get the key.

From here, keep yourself lined up with the doors as you make your way down to get to the last part of this level, and use the shrinking potion to get to the second key. Use the key to get to the button, stand on the button, and stop it so the crane on the ceiling grabs the key and takes it to you. From there, use the key on the keyhole to enter another boss battle.

The boss here is a set of cards. Butt bounce on the cards when they are on the ground as they jump, then be ready to jump over the last card as it spins back and forth across the room. When the card stops, butt bounce on it, then be ready to dodge again. After three butt bounces, you'll save Goofy, who will tell you about the nearby cliff that you'll need the rope in the Palace Ruins to climb on. Goofy will then destroy the boulders blocking the ruins with a toy cannon.

Tuesday, March 15, 2022

newfiebangaa plays Land of Illusion Starring Mickey Mouse - Part 2 of 7


In this entry, we explore a castle and beat up a ghost.


Lake Stage


Now that the water is at a higher level, if you return to the lake, you can get to the exit instantly.

Castle Ruins Stage


The place will be dark, but if you grab the lantern, you will light the room up. If you put it down, it will be dark again.

The ghosts just move back and forth. If you bounce on them, they will come back after a few seconds. The jack-o-lanterns will fly towards you, but you can jump on them easily.

There is a power star the checkpoint, but you won't be able to get it yet.

The Mickey blocks are re-usable. You can use them to make a bridge across the spike pit, and you can also use them to get to the treasure chest at the end of the first section. Make sure not to accidentally bounce on them and break them.


The second section is an auto-scroller. The buttons will make the screen go in the opposite direction. Once you get the key at the end, you'll be able to use them to get back to the wall with the keyhole at the far left. Make sure you stand on a button to scroll enough of the screen back to the right so you can reveal the next button and get to it in time. As for those blocks stacked on each other that you couldn't get rid of, you'll need to put the key on the button, stand on the key, grab and throw the top block to get rid of it, then grab and throw the bottom one. From there, you can grab the key and get to the door with the keyhole.

The boss is a ghost. When the ghost dives at you, bounce on its head. The ghost will produce flames with every hit you deal, and you'll have to watch out for the flames as you bounce on the ghost. After three hits, you'll get the shrinking potion. While crouching, you can now press Button 1 to shrink in size. Doing that a second time will allow you to return to normal size.

newfiebangaa plays Land of Illusion Starring Mickey Mouse - Part 1 of 7


I've played two of the titles in the Illusion series (three if you count the Master System and the Genesis/Mega Drive versions of Castle as different games, which they are), but when I found out there was a little more to it than just "go to all these places, do these things and beat the main antagonist," I just had to look further into it. And here we are.


One evening, Mickey fell asleep while reading a book of fairy tales. When he woke up, he was no longer in his home, but in a strange and gloomy village.

"Gosh, it sure seems creepy around here."

"An evil phantom has stolen the magic crystal that protected everyone in the village. With the crystal gone, the good magic in this valley has disappeared. In its place, bad magic has changed everything. Now, rather than being a place of happiness, the valley is full of gloom. Can you help us?"

"Uh, did you say...phantom?"

"Yes, an evil phantom who lives in a castle in the clouds. A good princess in the north mountains can tell you the best way to get there."

"Swell! I'll do my best."


Once you press Start on the title screen, you'll be on the world map.  The first place you can go to is the Forest Stage.

Forest Stage


Much like in Castle of Illusion for Sega Master System, you have to press the jump button twice to butt bounce on enemies and defeat them. You also use the other button to pick up blocks and throw them at enemies, which also defeats them.

Enemies here include snakes, spiders that crawl across the webs and a bird that you'll only see if you keep going right instead of up at the start.

At the bottom is your heads-up display. Power indicates how many stars you have left, tries indicate how many lives you have left, score is your current amount of points earned, and time shows how much time you have left. If the time goes all the way down to zero, you'll lose a life.

If you go up from the start, you'll take the high road. You'll have no choice but to get there anyway. The spinning leaves are platforms that slowly move downwards before landing in the webs, and you can use them to jump to the other end.

Climb on the vines by jumping into them and holding Up or Down on the D-Pad. This will help you get past the whirlwinds which will blow you around.

Slices of cake will refill one unit of health, while whole cakes will refill three. To open chests, butt bounce on them.

Get into the whirlwind to get past the spikes, then use the D-Pad to grab the vine so you can stop being blown around.

To enter the opening in the background, walk up to it and press Up.


The second area has you going up a tree.

Sometimes, the arrow on a sign will change color. If that happens, you just touched a check point. You'll return there instead of the start of the level if you lose a try.

Coins give you points. Big points give more than small ones.

You can pick up the barrels to move them around and use them as platforms.

Oranges will drop down, so watch the skies. Thankfully, they always drop down from the same place every time.

The spiders here move up and down. Wait for them to come down before you butt bounce on them.

At the top of the tree is a snake. Grab the apple and throw it into the snake's mouth to continue to the key. Pick up the key, and you'll open up the exit to the level. It's now on to the Lake Stage.

Lake Stage


Unlike other games in the Illusion series, you have an air meter. If you run out of air, you'll lose a life. Use the D-Pad and the jump button to swim. If you need air, swim all the way to the surface and either jump out of the water or hold Up at the surface to get all your air back.

The water here rises and lowers, which can make you wait at times to get past certain hazards. Just stay near the surface and don't go anywhere until you have room, and you'll be all right.

Watch out for any and all enemies and hazards, such as the spikes, the green balls that float on the surface of the water and the fish that swim forward, 


Every once in a while, you'll be pushed back by the current. Use Up and Down to grab onto the vines if that happens. Once the current stops moving, you can continue forward. You'll want to be quick but cautious so you don't spend so much time in the water that you end up drowning and losing a life.

At the waterfall, watch for the fish that jump out from underneath, and butt bounce them if you want. At the pool of water, you'll need to watch out for the green ball that swims around in a circle and throw a block at it to get the key. Once you get the key, go up to find the exit.

Blacksmith's Castle Stage


When you start, be ready to run! The flame at the left will grow legs and follow your around, leaving a trail of fire in its wake. Thankfully, its two weaknesses are dead ends with no way out and water. Just keep going.


Dragons will come out of the lava and spit fireballs here, but if you're able to get through here pretty quickly, you won't have to deal with them very much.

Watch for platforms that move up and down above the lava.

Yes, the matches have limbs. If you go to the right with the help of the jumping board at the ladder, you'll get a big coin.

At the top of the ladder, use the jumping board to get to the flashing star to the right. This is a Power Star, and there are fourteen of them in the game. By picking one up, you'll get an extra hit point for your power. You can have up to five, but there are fourteen of them in all and getting them all will get you a 100% clear.

From here, head to the left. There will be fireballs that leap in and out of the water, and some of them will cause a little bit of fire to be in your path from hitting the underside of a platform.

At the exit door, you'll face a big red dragon. Throw blocks at it, and watch out for the fireballs that bounce around at 45 degree angles. After three hits, the big red dragon goes down, and you'll rescue a villager. He will tell you that the bad magic had him trapped in his own castle, and that you'll have to travel through a tiny cavern up ahead. However, you'll need to shrink in size to get in, and there is a shrinking potion in the castle ruins. Also, the fire in his castle has weakened, leading the water in the lake to rise and open a path to the castle ruins. He also hands you a flute that allows you to go back to previous areas.

Thursday, April 11, 2019

newfiebangaa plays Tom & Jerry (and Tuffy) - Part 3 of 3


And just like that, Jerry outsmarts Tom once again!

You can jump on the box at the beginning.

The giant marbles are mothballs, and they have a larger hitbox as well as increased damage power.

The key in the upper-left corner of the stage, while the exit is in the upper-right. You will need the key for the next stage.

World 5, Stage 3


Tom's face will pop out of the four black holes in the background. As you hit him in the face with marbles - and mothballs - watch out for the hand, which will throw fireworks that can sometimes change altitude after going off-screen.

After doing enough damage to Tom, you'll finally rescue Tuffy and beat the game! Congratulations!