In this episode, we get done with the Grass Valley Highlands and head to a new area where new things await us...
Grass Valley Highlands
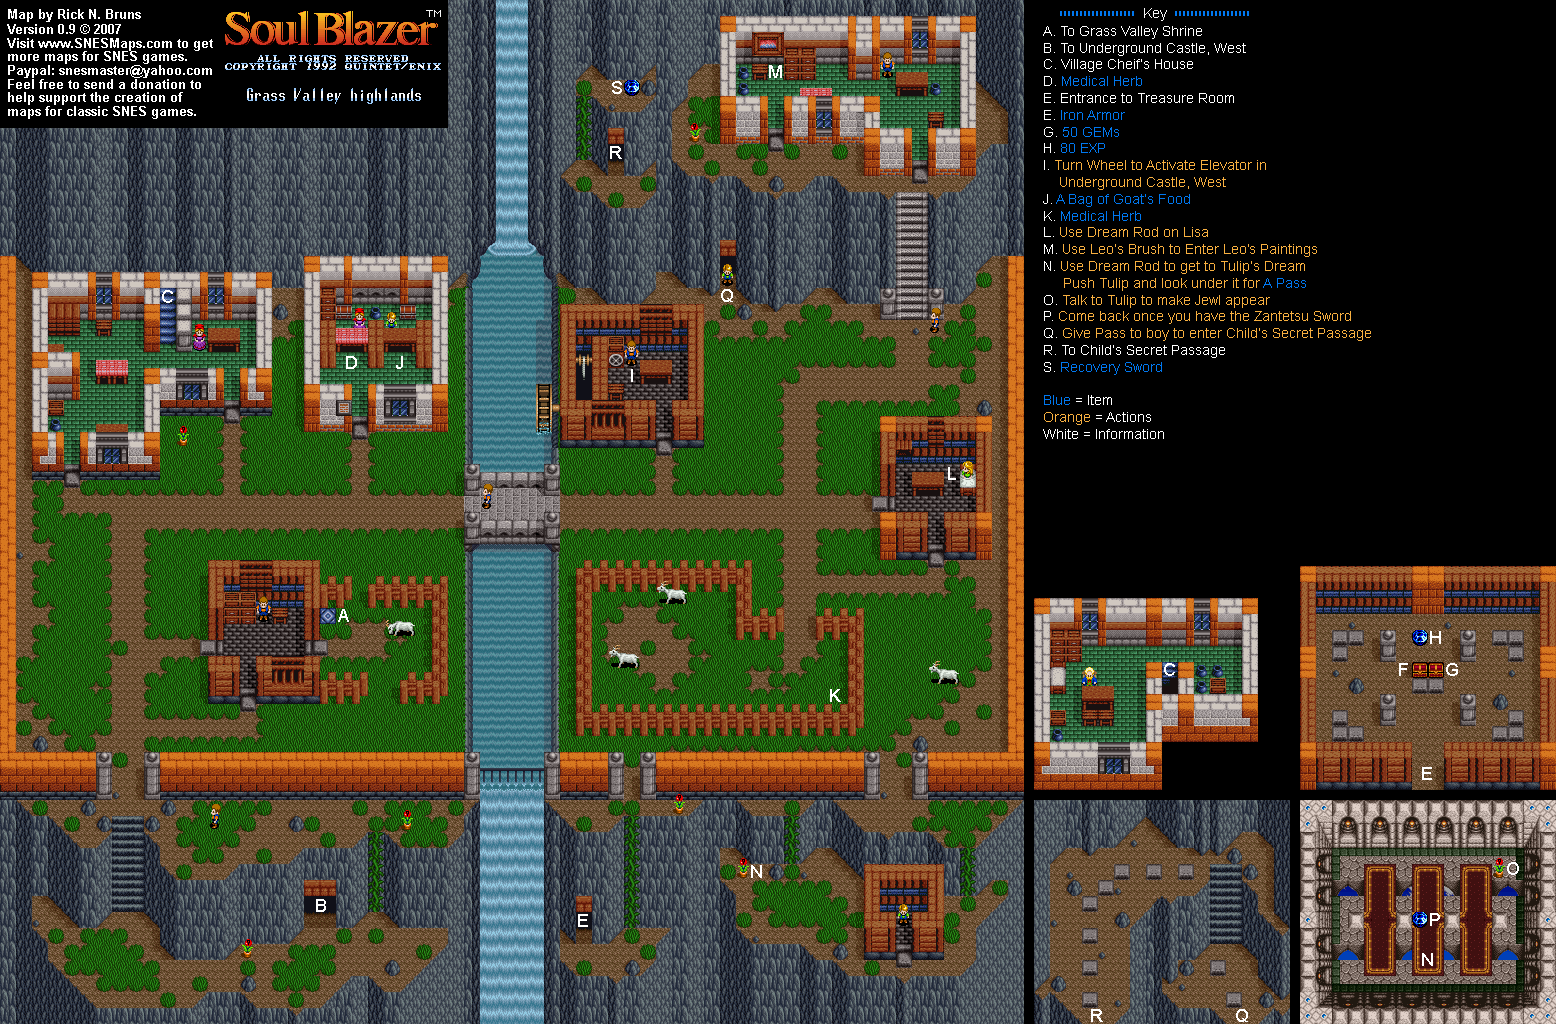
Now that you've talked to the two boys, when you walk away from the boy at the bottom, the boy will walk away towards a nearby tulip. When you catch up, the boy will refuse to tell you where the treasure is. Use the Dream Rod on the nearby tulip, as the tulip will be asleep when you talk to it. Talk to the tulip in the dream, and a blue jewel will be summoned, as the tulip can do anything in its dream.
Do so, and you'll learn from the fairy in the jewel that unless you have a special sword that can destroy metal, you won't be able to defeat all the monsters in Dr. Leo's paintings. The fairy will then ask you to return when you have it. From here, return to the Grass Valley Highlands.
From here, you'll be in front of the Underground Castle entrance. Head back to the bottom where the secret passage was, then push the nearby tulip to the left by walking into it. You'll find a pass. From here, go back into the building where the boy is, and the boy will let you have it.
Go back to the top where the other boy is, and talk to the boy to use the secret passage. The path will take you to nothing...for now.
Talking to the lonely goat will have the lonely goat asking you to follow it. The goat will give you a tour of the village where you'll learn what happened to Dr. Leo, find out about something on the ground near the corner of the fence where the goats are kept.
If you check the lower-right corner where the goats are kept, you'll find a Medical Herb. If you find a Medical Herb while you still have one in your inventory, you'll use the one you found to completely refill your health, as you can only have one Medical Herb in your inventory at any time.
Leo's Paintings
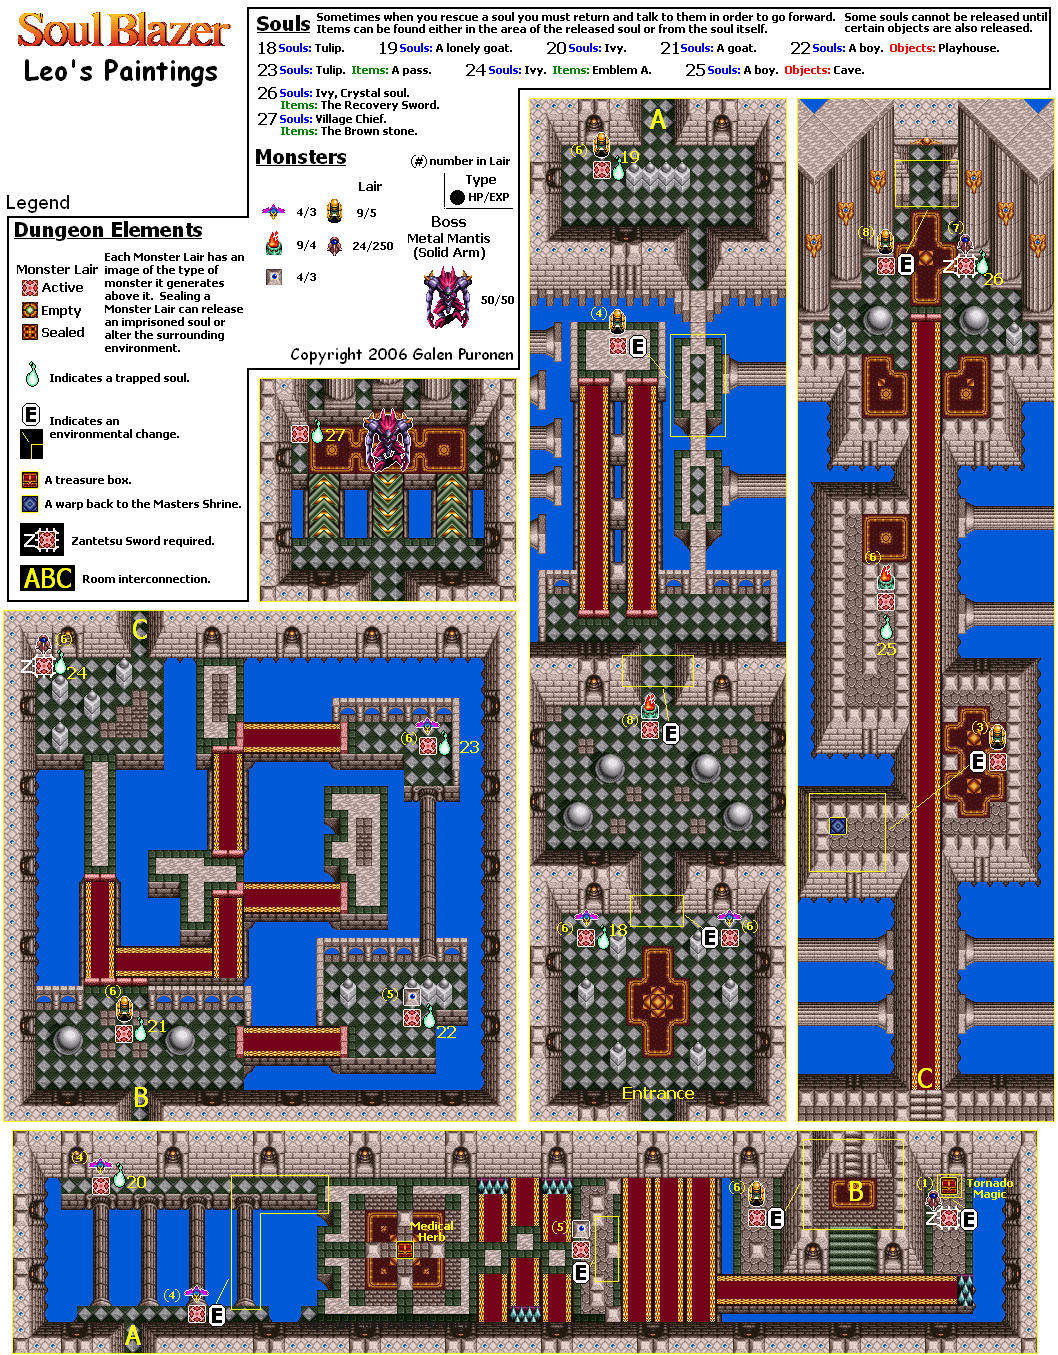
You're done here, so head back to the end of the Leo's Paintings dungeon and take on the boss.
Here, you'll take on the first boss of the game: Solid Arm. (This is the boss' name in Illusion of Gaia, actually, but the boss acts the same way in that game as well.) Use the conveyor belts and hold L or R while facing North. That way, you can do more damage in less time than you would just repeatedly swinging the sword. Be sure to avoid the fireballs, and kept moving from conveyor belt to conveyor belt to make avoiding fireballs easier and to get a little bit more damage in. Also, never approach the boss from his end of the room and attack from the side, or else you'll be cut to ribbons by the boss's arms and his fireballs.
By beating Solid Arm, you'll be able to use the monster lair pad on the upper-left corner to return to the village and release the soul of the village chief. The chief will thank you, and ask you to come back to his house.
From here, you'll have to return to the village on your own, since you won't be teleported out by the game.
Back To The Highlands
Talk to the village chief in his room int he house. He will tell you he feels as though he was surrounded by darkness, and in that darkness, he met Dr. Leo. Dr. Leo told him to give a Brown Stone to a person named Blazer, which happens to be you. He'll tell you he received this stone the day Dr. Leo disappeared, and he will give it to you.
The room will go dark, and the Master will tell you that the Brown Stone is a key to open the World of Evil, where Deathtoll lives. The Master will ask you to come back with the Stone. The village chief will then tell you that his wife will look after Lisa until Dr. Leo returns.
If you talk to Lisa, you'll find out the chief's wife is there. The theme of reincarnation is touched upon again here.
If you go back to the painting of "The World of Evil," the painting will be normal again.
When you return to the shrine and stand in the center, the Master will tell you the Brown Stone is one of six stones in the world, and when they are all gathered, the gate to the World of Evil will be opened.
.png)
The next stone is in GreenWood. That will be our next stop. To get there, step on the gold tile. You now have a new command: "Move." Select it, and you'll head to the World Map screen. Head to the dead-looking trees to the south of the highlands, and you'll be in a green shrine.
GreenWood
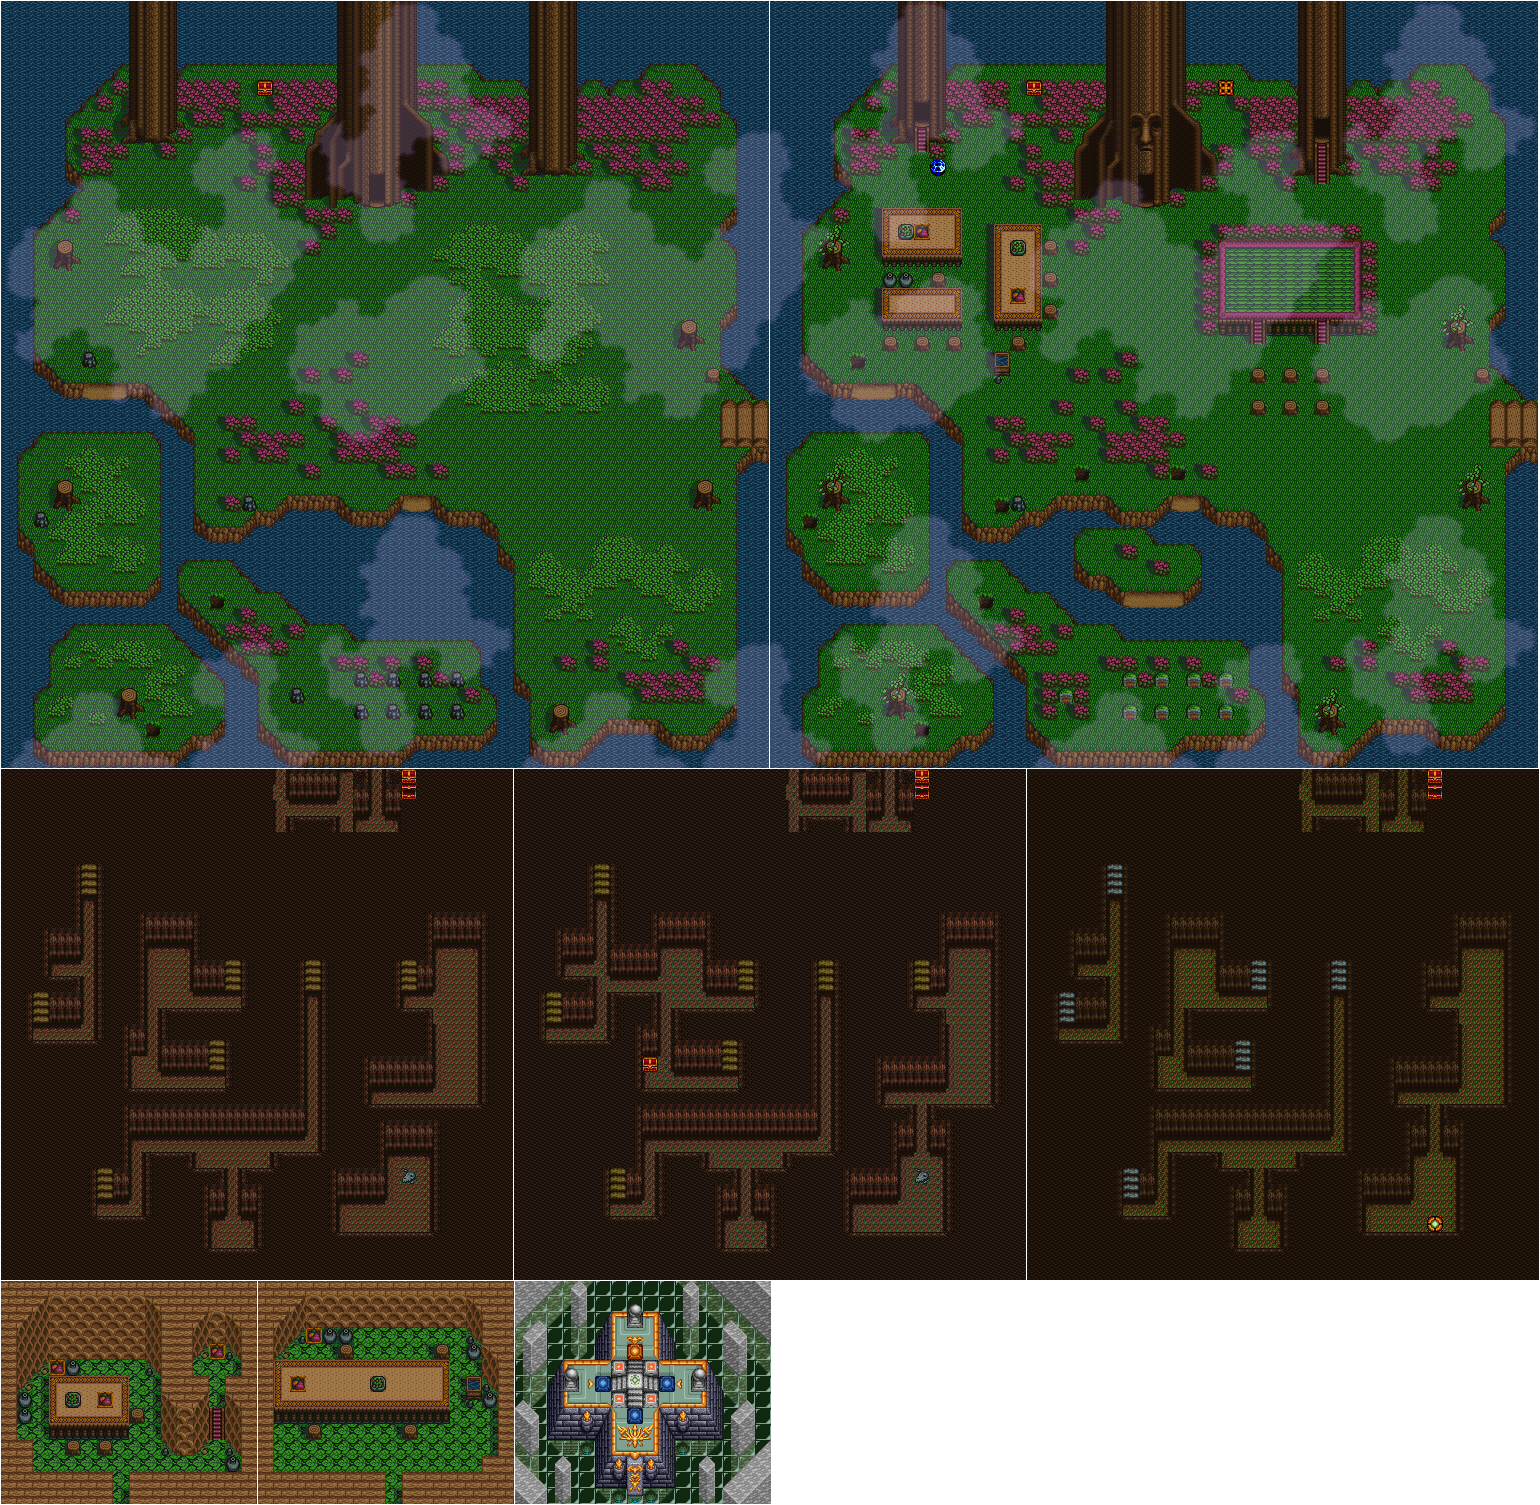
The blue tile to the south takes you to GreenWood. Head to the east to go to Lostside Marsh.
Lostside Marsh
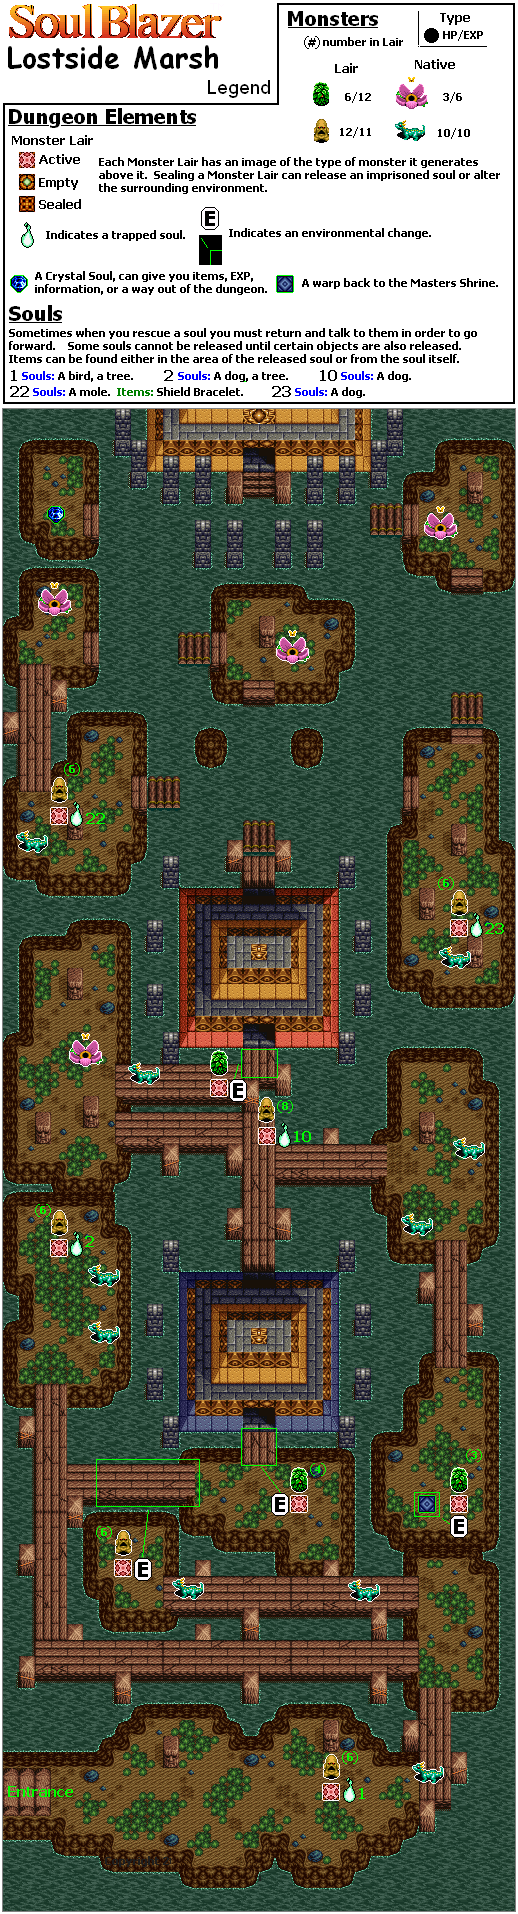
The little, slow-moving yellow blob guys can be hit at an angle just like the enemies in Leo's Paintings.
The first soul you're release will be that of a bird near the Lostside Marsh entrance. You'll also release a dog. You'll also open a path to the Water Shrine.
Fire-breathing lizards will pop out of the water and shoot fireballs, but they only face one direction and it's usally not towards you. Kill them and move on. Also, don't let them jump back into the water, or else their health will be completely restored. These lizards do not come from lairs and will respawn.
The bush monsters have a longer range attack that involves hitting you with a branch. Thankfully, you have a fireball spell.
Water Shrine
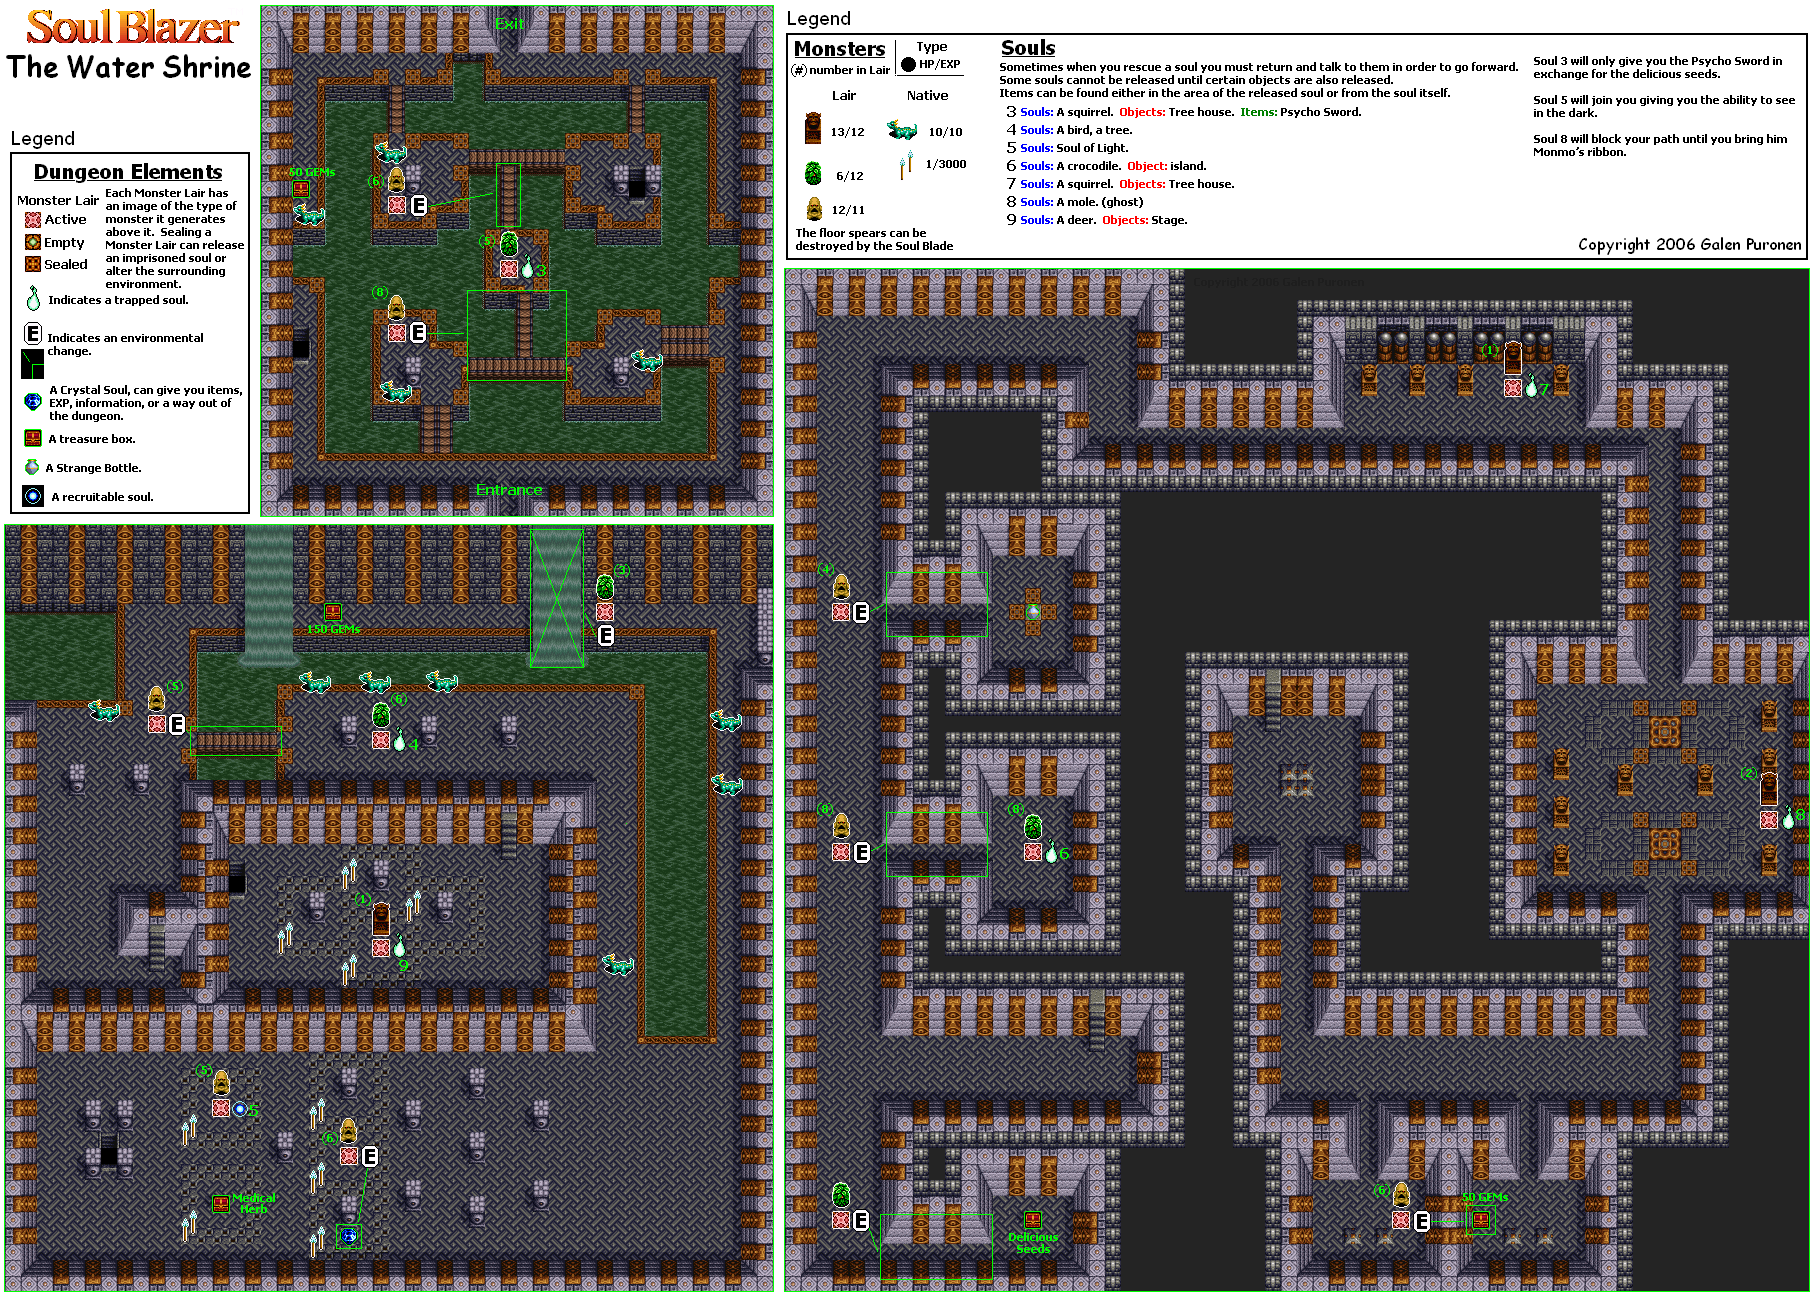
You'll meet the same enemies you met in the marsh. As always, you'll have to destroy monsters, to open up some bridges and make your way through the shrine.
Here, you'll release a hungry soul. If you can get the squirrel some food, you can get a powerful sword in exchange.
No comments:
Post a Comment